1. Project management
This week I worked on defining my final project idea and started to getting used to the documentation process.
Assignment checklist
- Signed the Fab Academy student agreement
- Documented final project idea, research, and timeline
- Set up personal documentation website on GitLab Pages
- Described version control and documentation workflow
- Included inspiration images and project sketches
Student Agreement
As part of enrolling in Fab Academy, I have read and signed the student agreement, which outlines the responsibilities of both the Fab Academy and its students.
Research
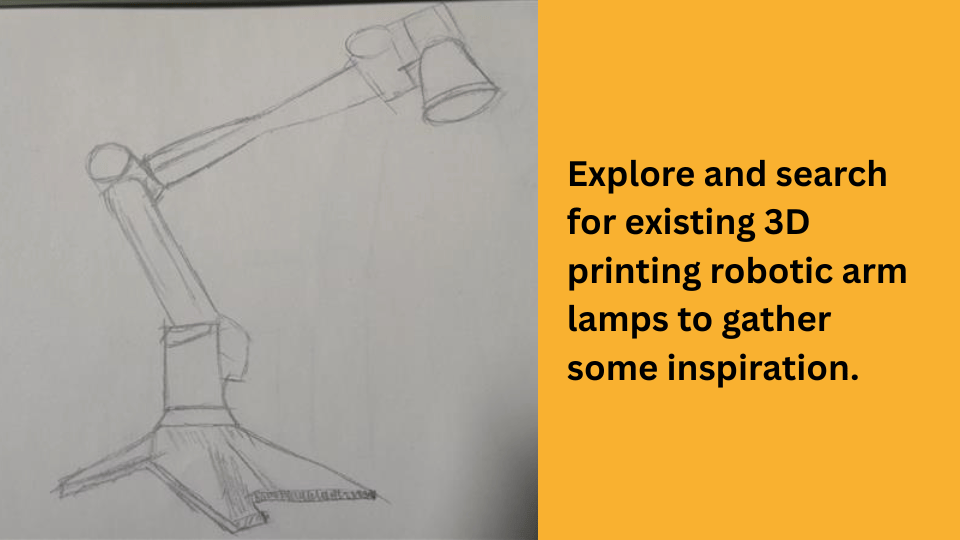
Explore and search for existing 3D printing robotic arm lamps to gather some inspiration.
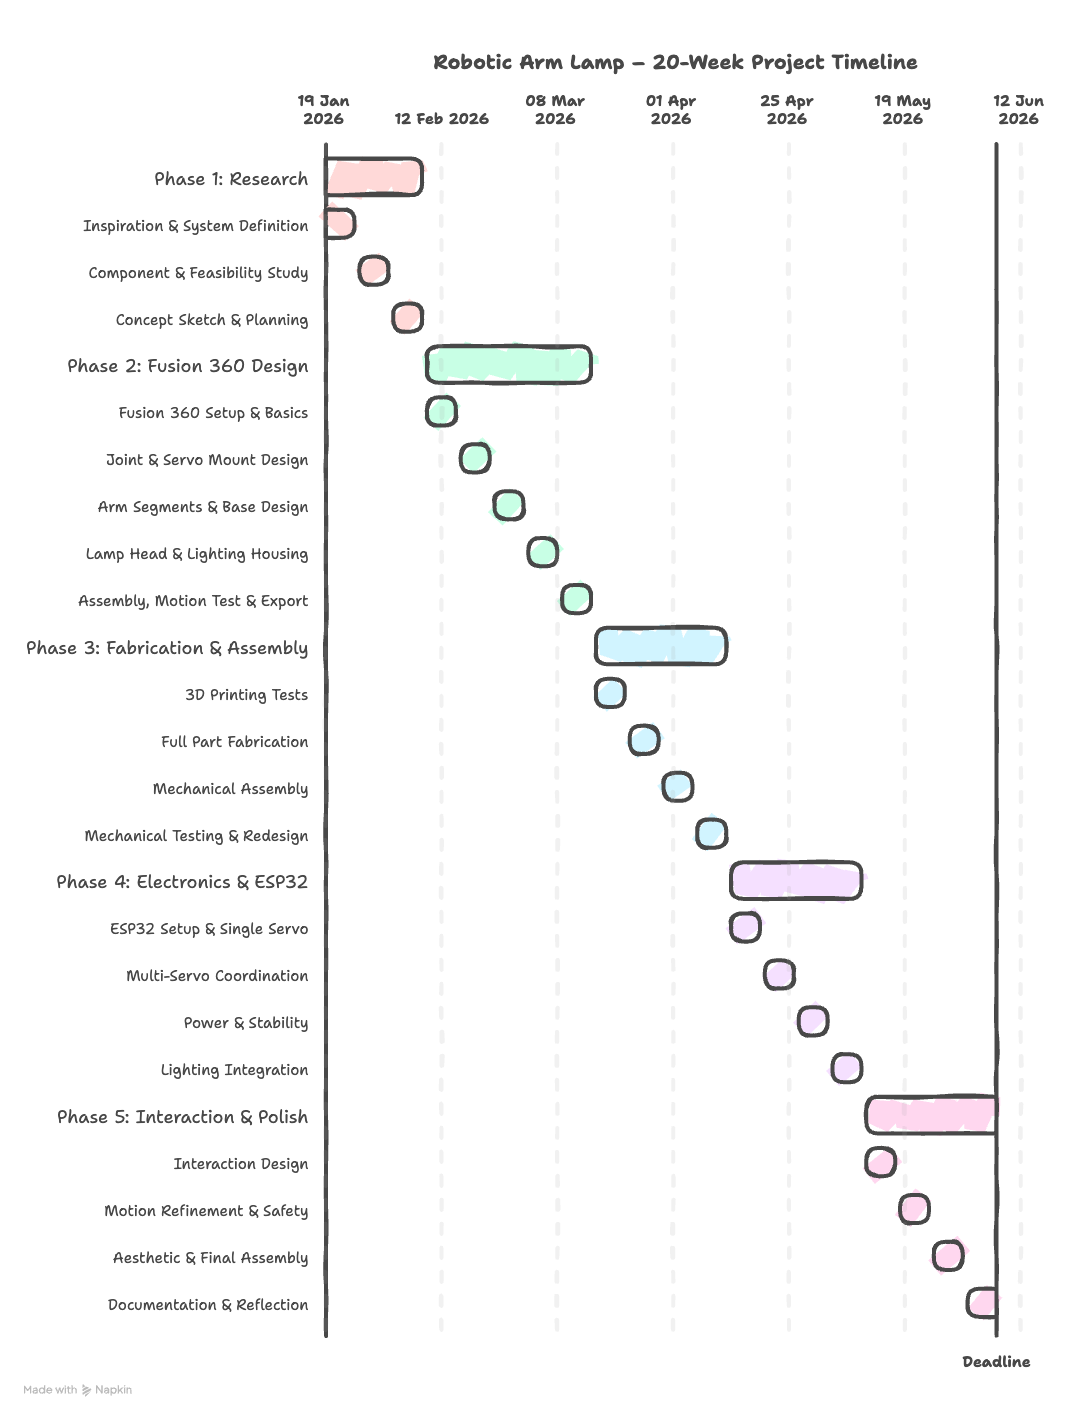
Project Timeline
Create a project timeline to help me stay on track and ensure I complete all the necessary steps.
Git Repository Setup & Version Control
Step 1 — Use Your Fab Academy GitLab Repository
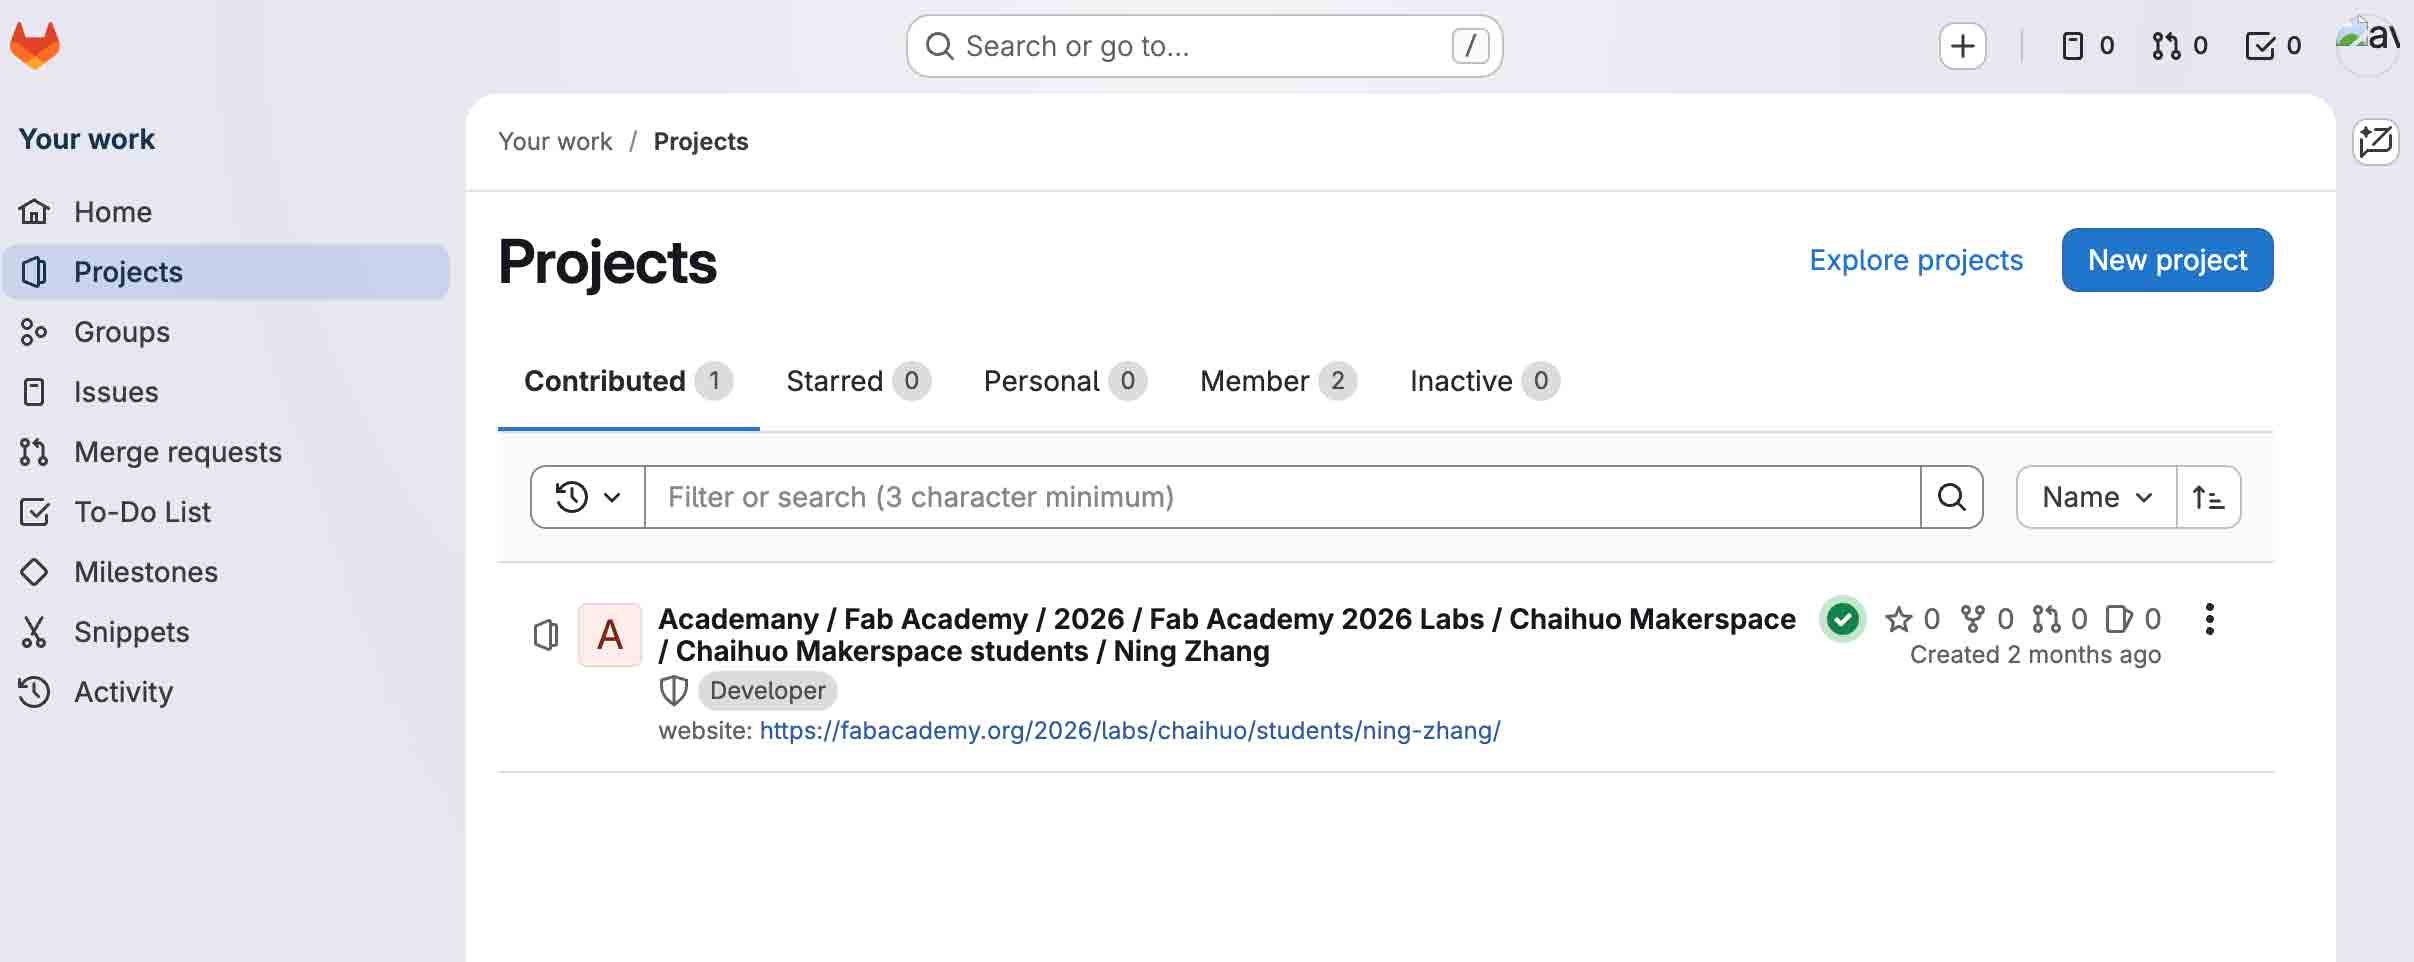
Fab Academy creates your student repository on GitLab — you do not create a new project. Open that repository and copy the code to your computer.
- Open your project on gitlab.fabcloud.org (your lab will share the exact link — mine is linked in the page footer).
- On the project home page, click Clone (above the file list or next to the project name).
- Either:
- Git (HTTPS): Copy the Clone with HTTPS URL, then in a terminal:
git clone <paste-the-HTTPS-URL>
- ZIP: Choose Download ZIP, extract it, then in Cursor use File → Open Folder… and pick that folder.
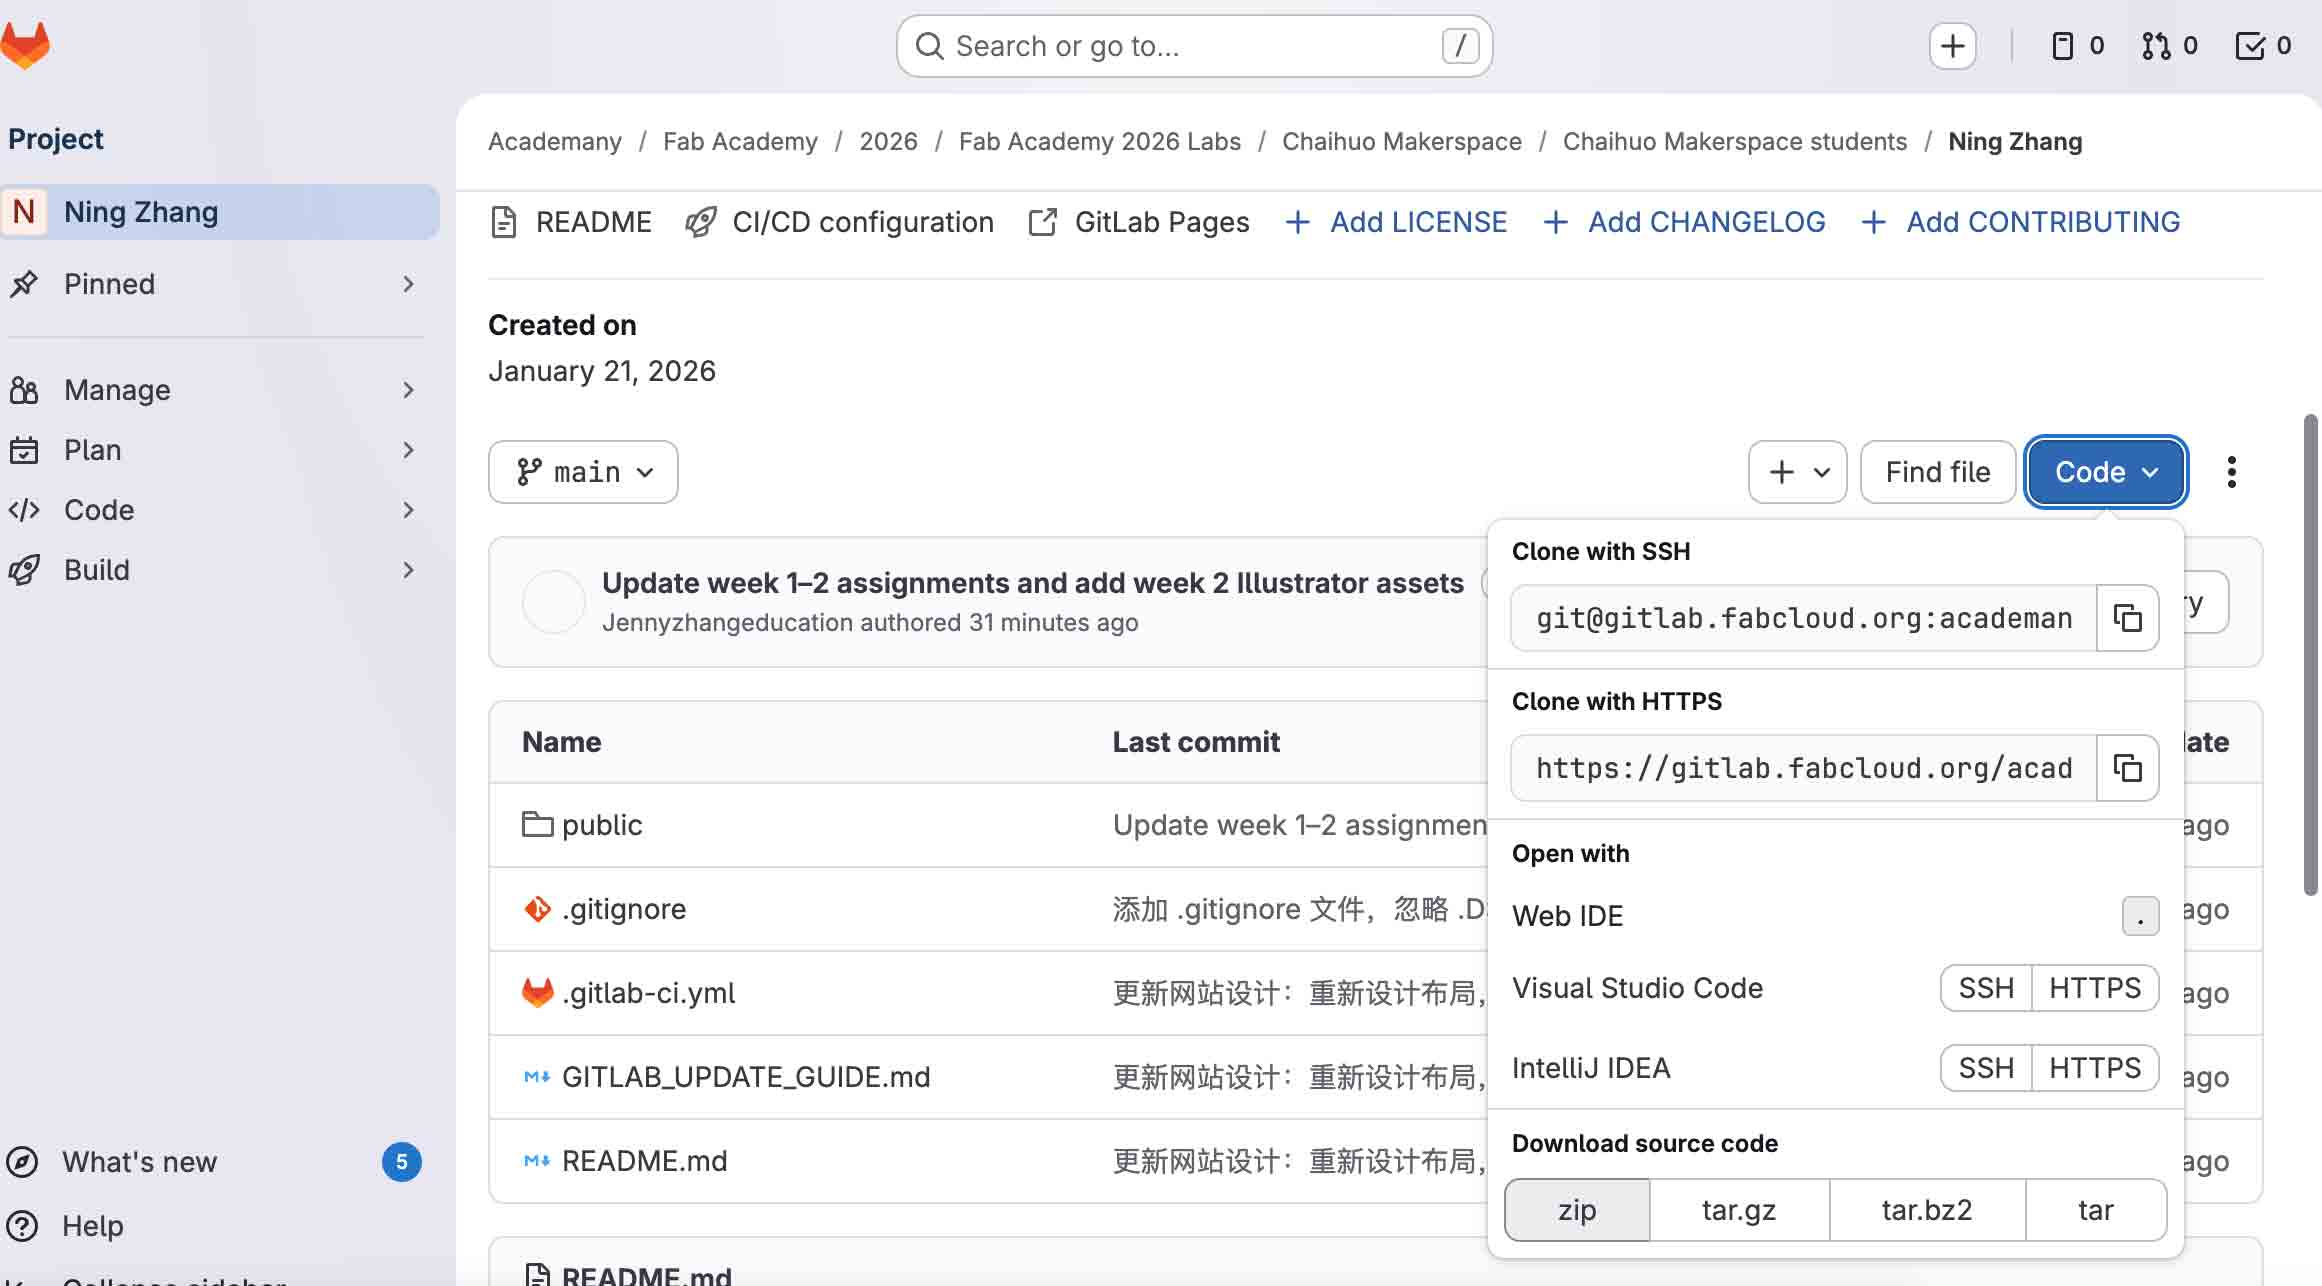
- Git (HTTPS): Copy the Clone with HTTPS URL, then in a terminal:
- If you cloned with Git, open the cloned folder in Cursor with File → Open Folder…
Step 2 — Generate a Personal Access Token (PAT)
A PAT lets you push/pull over HTTPS without typing your password every time, and is required if you have two-factor authentication enabled.
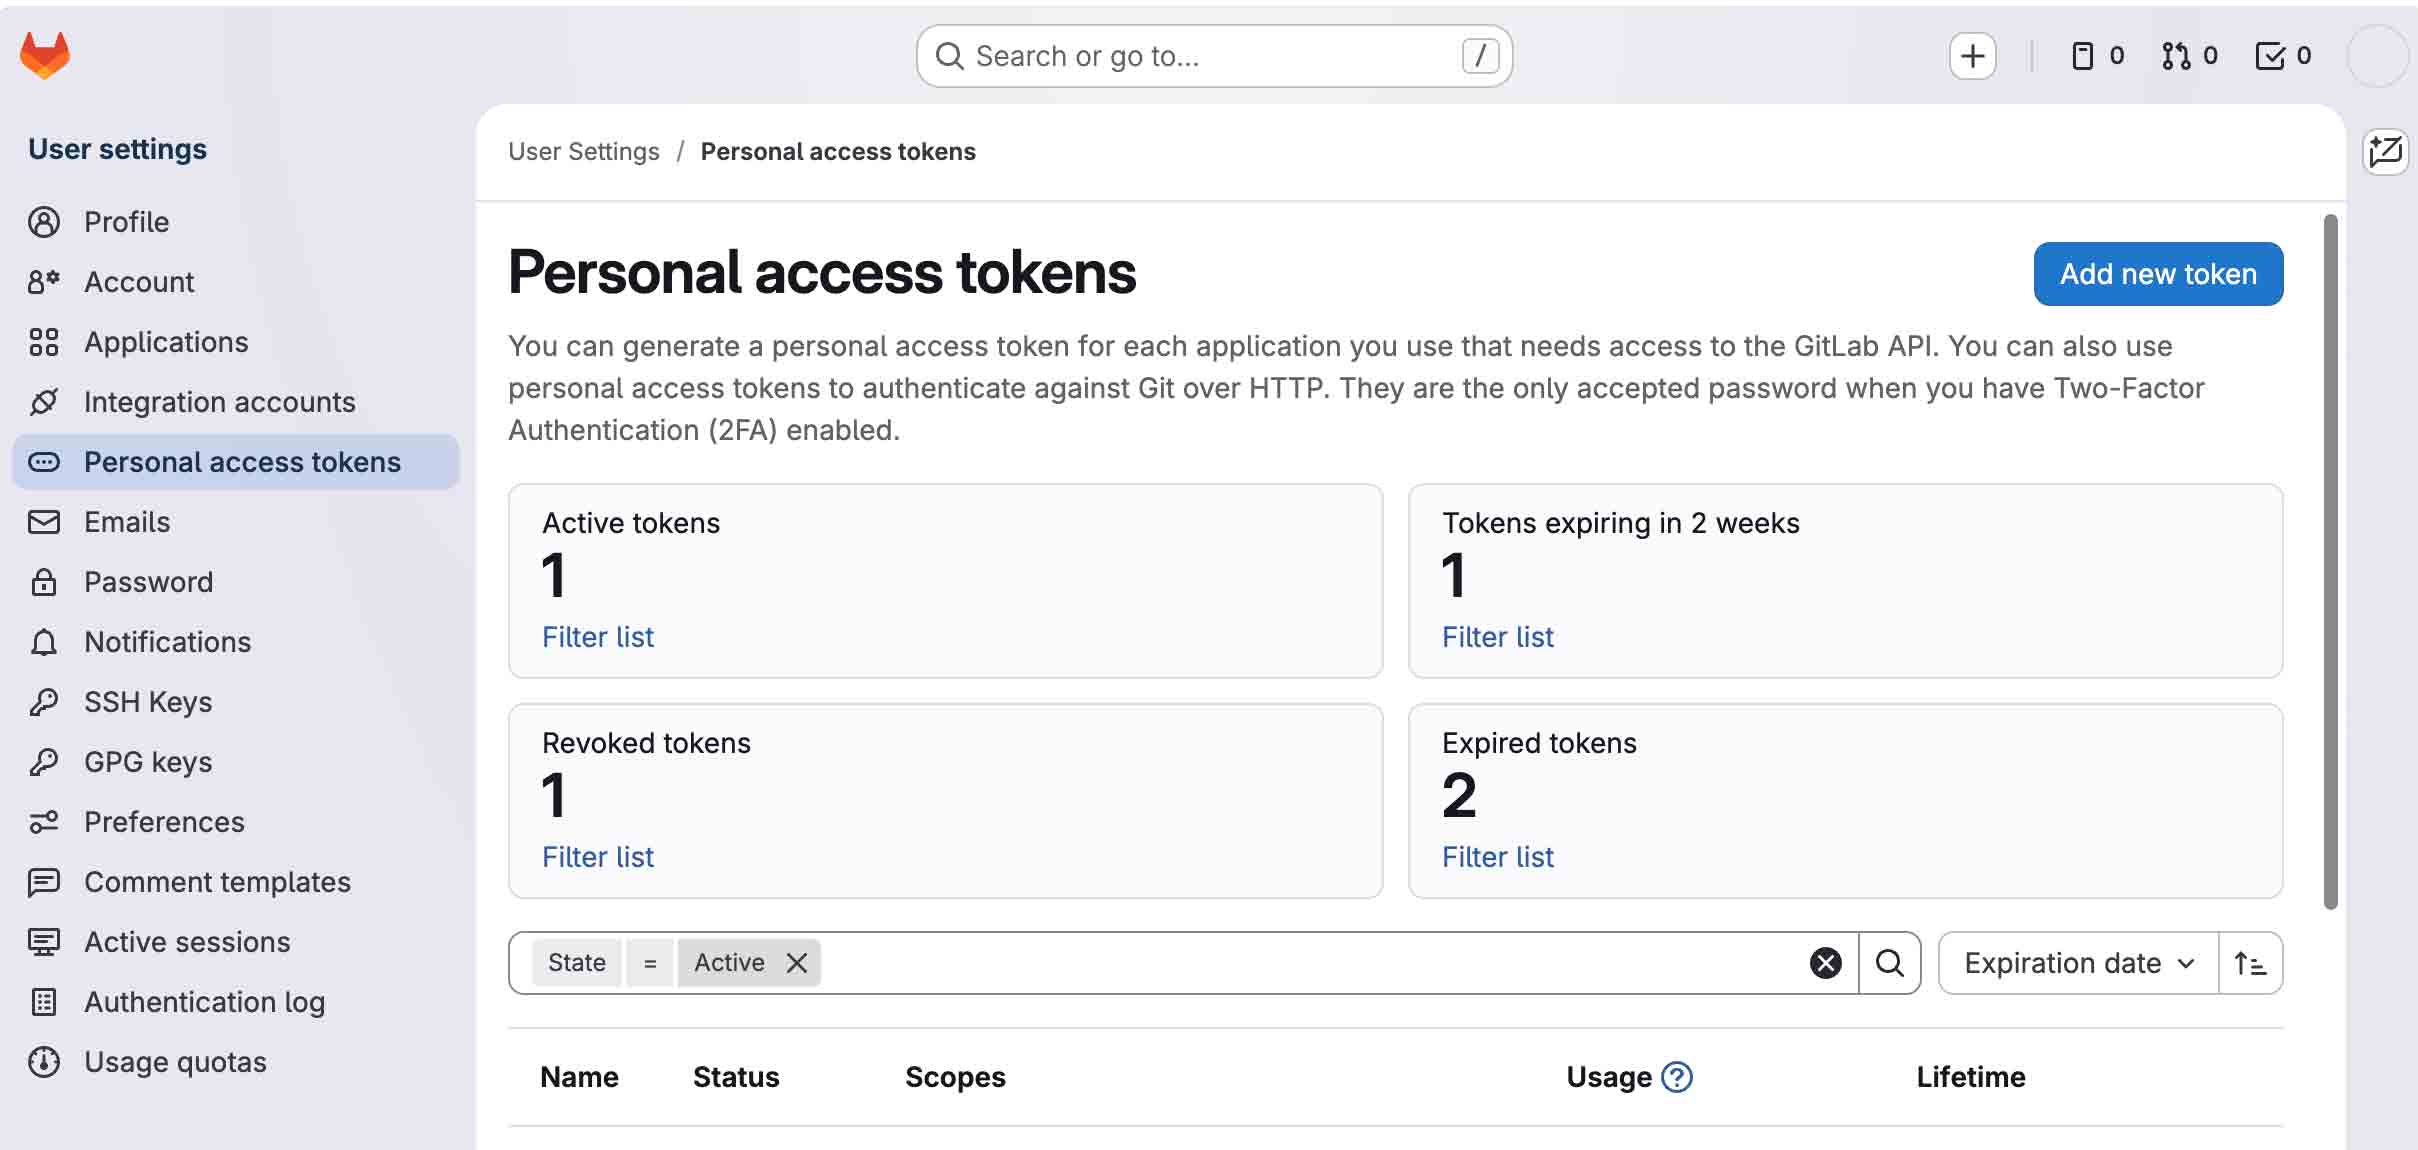
- In GitLab, click your avatar (top-right) → Edit profile.
- In the left sidebar choose Access Tokens.
- Click Add new token, give it a name (e.g.
fab-academy-2026), set an expiry date, and tick the write_repository (and optionally read_repository) scope. - Click Create personal access token and copy the token immediately — it will not be shown again.
- Store it in a safe place (e.g. your system keychain or a password manager).
Step 3 — Clone the Repository Locally
If you already downloaded a ZIP in Step 1, skip git clone and work inside that folder. Otherwise open a terminal and run:
git clone https://gitlab.fabcloud.org/<your-group>/<your-project>.git
cd <your-project>
Replace the URL with the HTTPS address you copied from your project’s Clone menu. When prompted for a username enter your GitLab username; for the password paste your PAT (not your GitLab password).
To avoid re-entering credentials each session you can cache them:
# macOS — store in the system Keychain
git config --global credential.helper osxkeychain

# Linux — cache for one hour
git config --global credential.helper 'cache --timeout=3600'
Step 4 — Basic Version Control Workflow
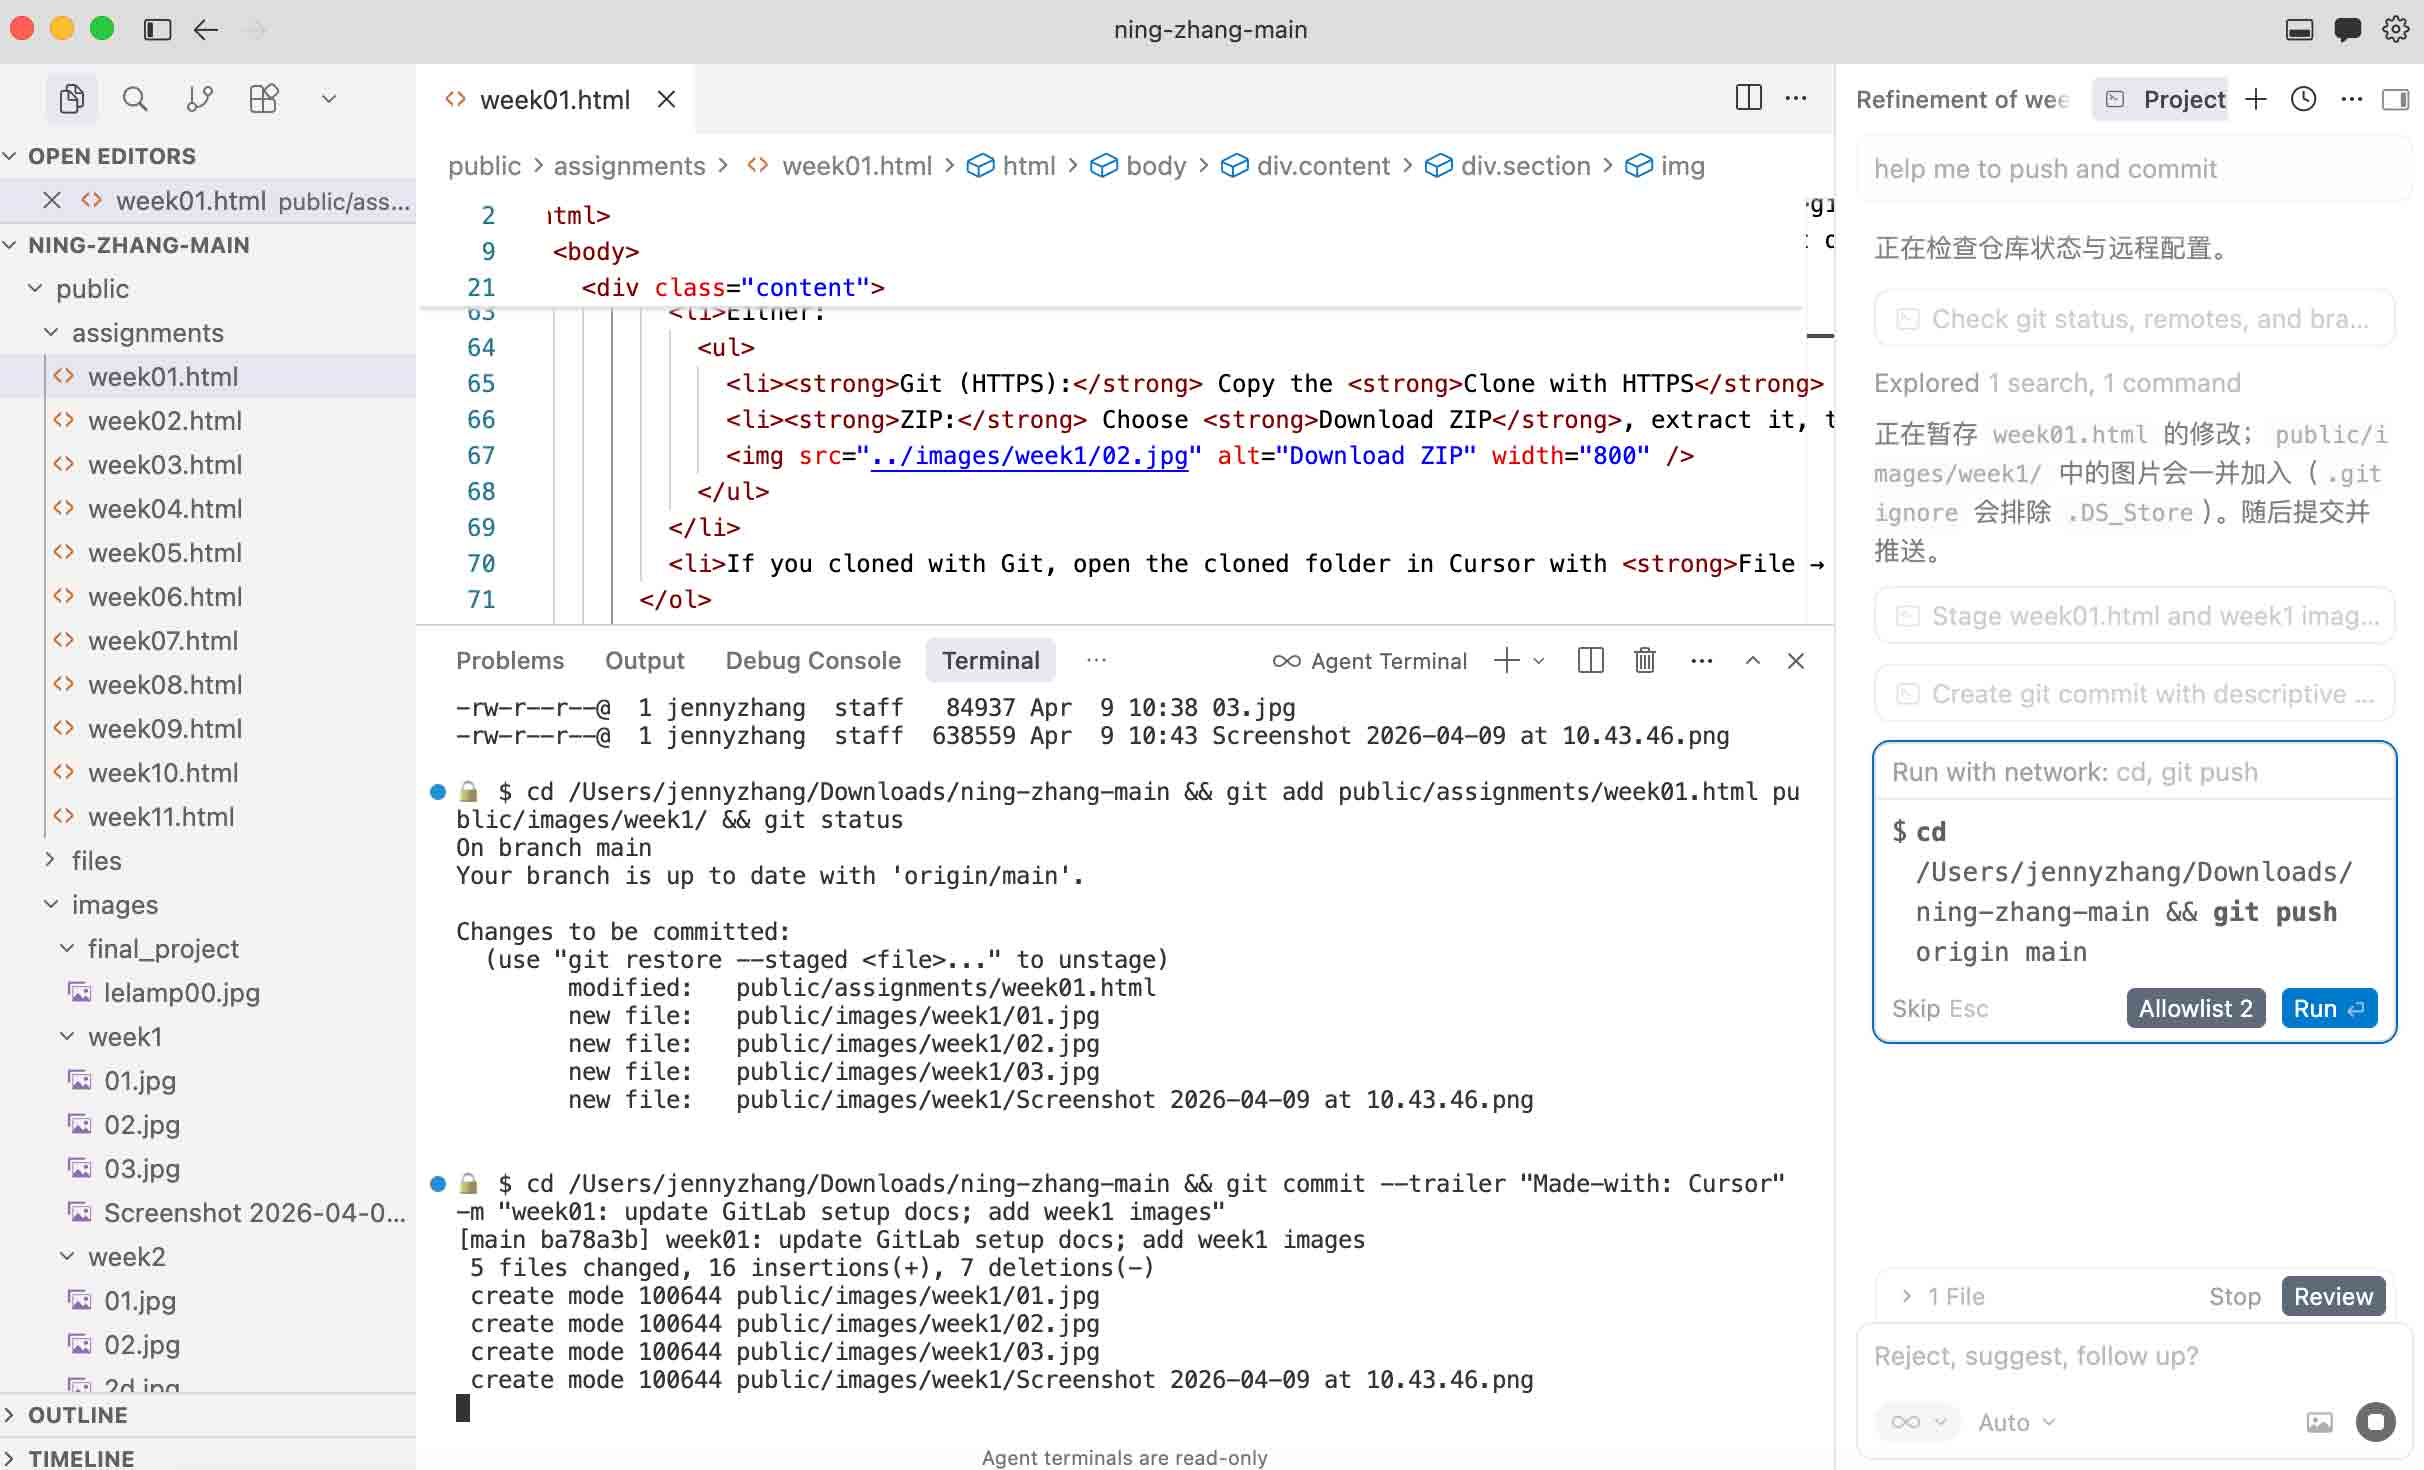
The everyday cycle for documenting your weekly work:
# 1. Pull the latest changes before you start working
git pull

# 2. Edit / add your files, then check what changed
git status
git diff

# 3. Stage the files you want to include in this commit
git add public/assignments/week01.html
git add public/images/my-photo.jpg
# …or stage everything at once:
git add .

# 4. Commit with a descriptive message
git commit -m "week01: add project management documentation"

# 5. Push to GitLab
git push
Good Commit-Message Habits
- Start with the week or topic:
week01:,week02:, etc. - Use the imperative mood: "add gallery images" not "added gallery images".
- Keep the first line under 72 characters.
- Commit often — small, focused commits are easier to review and revert.
Useful Git Commands Reference
| Command | Description |
|---|---|
git status |
Show modified / staged files |
git log --oneline |
Compact commit history |
git diff |
Show unstaged changes |
git checkout -- <file> |
Discard unstaged changes to a file |
git reset HEAD <file> |
Unstage a file (keep the changes) |
git revert <commit-hash> |
Safely undo a specific commit |
Website Design by Cursor
This documentation website was designed and built with the assistance of Cursor, an AI-powered code editor. Cursor integrates a large-language-model directly into the development environment, allowing me to describe layout ideas, generate HTML/CSS structures, and iterate on the visual design through natural-language prompts — all without leaving the editor. Instead of manually writing every tag and style rule from scratch, I could describe what I wanted ("a sticky navigation bar with a red accent colour", "a responsive two-column gallery", "a styled reference table for Git commands") and Cursor would propose the corresponding code, which I then reviewed, adjusted, and committed. This workflow dramatically reduced the time needed to go from a blank page to a fully structured, styled documentation site, and also helped me learn HTML/CSS patterns more quickly by studying the generated examples in context.
Natural-language prompts were used to generate HTML structure, CSS styles, and page layout components.
Design changes were applied and previewed instantly inside the editor, speeding up the design-review cycle.
Reviewing AI-generated code in context helped build familiarity with web-development best practices.