4. Embedded Programming
This week I developed my Git workflow and experimented with boards and toolchains.
Research
Prior to this week, I had little to no experience using CircuitPython; however, I did have experience with Arduino and the Arduino IDE software. I had previously used the Arduino IDE to run NeoPixel-powered projects, controlling 82 NeoPixels while adjusting their color and brightness individually. While I was familiar with the power circuits could provide, I had not fully understood how to use smaller boards that might be better suited for certain projects. The Raspberry Pi Pico is much smaller than the Arduino Uno board, which now feels somewhat outdated. I also wanted to explore the Seeed Xiao board, but I didn’t have time to do so.
This week, we experimented with group work and collaborated on various tasks. We also worked with boards and new toolchains to establish connectivity between the hardware and software, similar to how we maintained connection and collaboration with our teammates through the Git repository. We used the Arduino Uno and the Raspberry Pi Pico, along with the Arduino IDE and CircuitPython. I experimented with various code-writing software, toolchains, and boards. Additionally, I explored Wokwi to create my own circuits online and run simulations.
• • • Microcontrollers and Toolchains
In Week 4, our group worked on embedded programming and version control. We cloned our GitLab repository and programmed Arduino Uno and Raspberry Pi Pico boards using Arduino IDE and CircuitPython. I documented the setup process, wrote LED-blinking code, and troubleshot issues while exploring different toolchains.
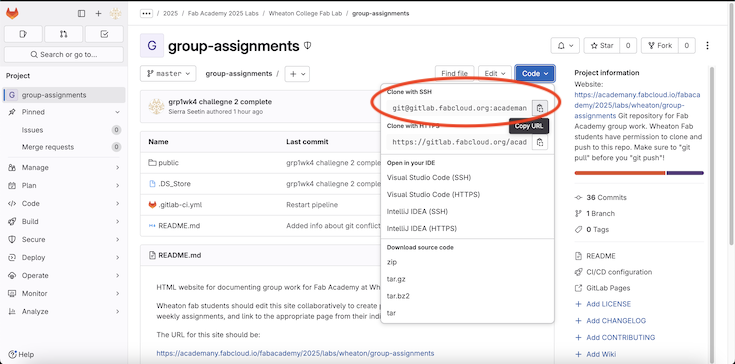
You can find our group documentation site here.
• • • Git Workflow
Challenges
Understanding how to use Git beyond personal work was definitely a challenge. Before Fab Academy, I had never used it for my own projects, and I had never coded before. The most collaborative cloud platforms I had used were G Suite and maybe Adobe, but those don’t synchronize as seamlessly across platforms or collaborators. It’s also a very different level of work and intricacy. Code isn’t as easy to understand at face value, whereas Google Docs makes it simple to see changes directly. Learning how to use Git for website development and group documentation was a challenge.
It was also challenging to have everyone working on different aspects of the project simultaneously on the same site. Our class has eight members, with four of us split into two groups, meaning we had two groups working on one main website. Each group had its own subpage, but sometimes the other group would accidentally make changes to our page, leading to confusion. We tried to communicate, but it was difficult for one person to keep up with seven others making small edits. It was also hard to remember to consistently pull and push updates to keep the website as current as possible. At times, we had to talk in person to resolve issues that Git couldn’t understand—but humans could. I guess it’s a reminder that AI and robots won’t be taking over our jobs anytime soon.
Clone Git Repo
I followed this git tutorial.
The first step was to clone the Git repository onto my local computer. A group documentation site already existed for all the groups, so each member of my group cloned the site onto their own computer to make edits and push changes to the Git repository. However, to do this, we first needed to set up the Git repository on our local devices.
To start, we had to copy the SSH key from the Git online site.
In close;
Then, I opened Terminal on my computer and navigated to the folder where I wanted the Git repository to be stored.
Then, I cloned the repo onto my local computer.
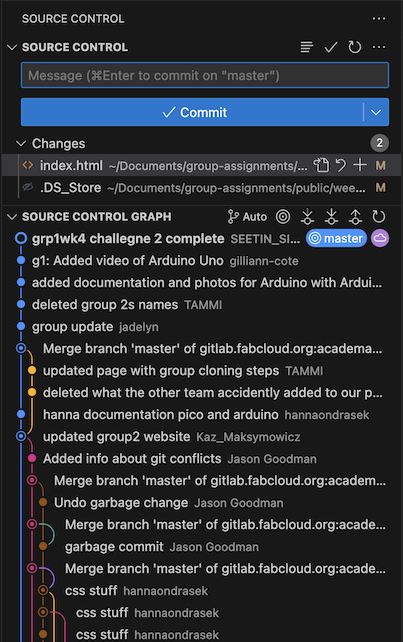
Now, the repo exsists on my local computer, in a place called group-assignments. I can make changes locally and push and pull them to the remote repo to communicate with my collaborators. When I perform these commands, my local folder will update with the changes made in the remote repo.

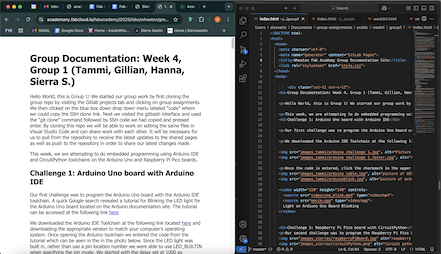
Local Changes
I am using Visual Studio Code to edit the webpages, just like I use to edit my personal documentation site. To experiment, I made a small change and just updated my name.
I saved the change I made in Visual Studio Code and onto my local computer. This means it is saved for anyone using my local computer but not for my collaborators on the remote repo. In essence, it doesn't exsist to anyone else.
Sync With Remote Repo
Ok, now that I've made my change, I instinctively want to commit my changes. But because I am working with many collaborators it's possible someone has made a change. To check this, I need to perform;
My Terminal responded that it was already up to date so I didn't need to worry about merging.
I am now clear to push my changes. I can do this as follows;
then,
and finally...
A divine sucess!
Merging with Other Collaborators
Not always will it be so easy. What if I forget and try to push before pulling? That means there will be conflicting changes in my local repo compared to the remote repo.
In this scenario, I have already used the git pull command. Terminal gives me an error and tells me that there are conflicting changes that have been made.
This typically happens when the same lines of code are edited both locally and remotely. In such cases, Git won’t be able to automatically merge the changes, and it will mark the conflicting sections in the files.
To resolve this, follow these steps:
- Identify the conflicts: Git will mark the conflicting sections with special markers (e.g.,
<head>and<//>). Open the conflicting files and review the marked sections. - Manually resolve the conflict: Edit the files to choose between your changes, the remote changes, or a combination of both. Remove the conflict markers after making your changes.
- Stage the resolved files: Once the conflicts are resolved, use
git addto stage the changes:git add <filename>. - Commit the merge: After staging the changes, commit the merge with
git commit. Git will prompt you to enter a commit message, typically noting that the conflict has been resolved. - Push the changes: Finally, push your changes to the remote repository using
git push.
If you're unsure or need to abort the merge process, you can use git merge --abort to stop the merge and return to the state before the merge was initiated.
Remember, communication with collaborators can help avoid these conflicts. Always try to git pull frequently to keep your local repo up to date.
• • • Simulate Microcontroller Operation
Materials are finite and during every project it's in everyone's best interest to reduce waste. This is why we test out circuts on breadboards first, and before you get to that step, it can be very helpful to practice making this circut virtually before bringing it to life. For this week, I wanted to control the Raspberry Pi Pico board.
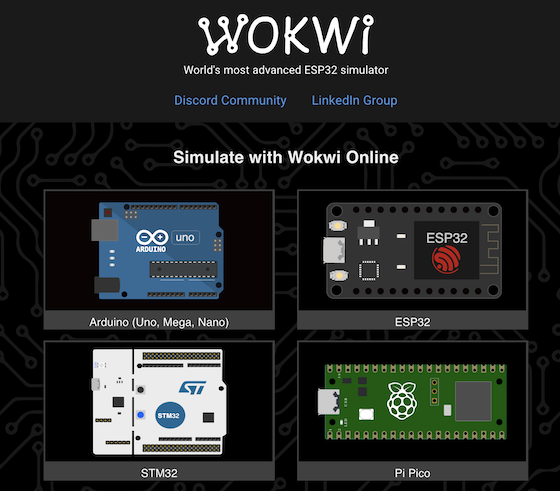
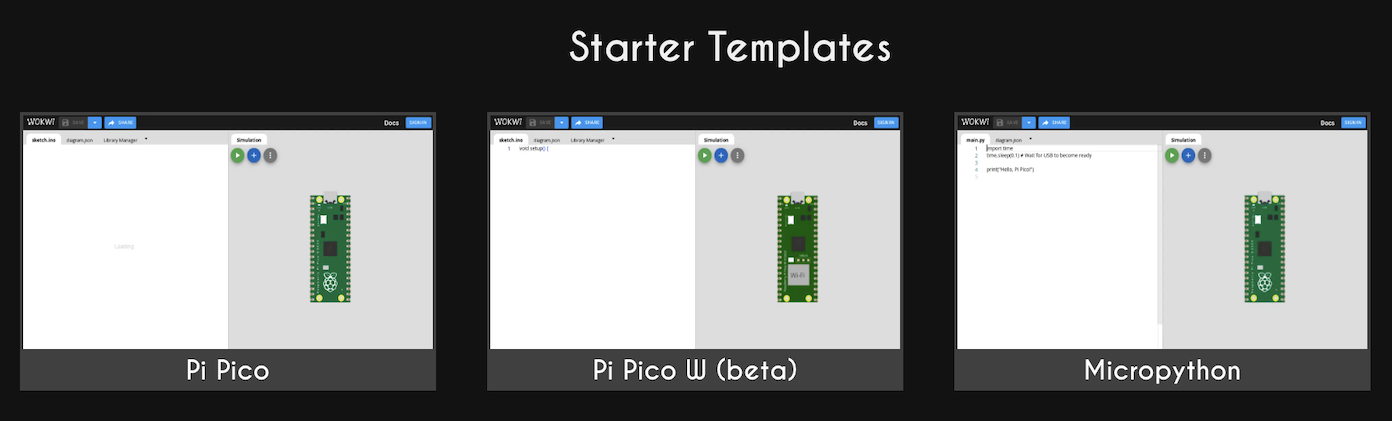
Set Up in Wowki
I am using Wowki to test out programming the microcontroller. I first selected the board I wanted to program, the Raspberry Pi Pico. I then navigated to find the starter templates and then selected the Pi Pico template.
Model Circut
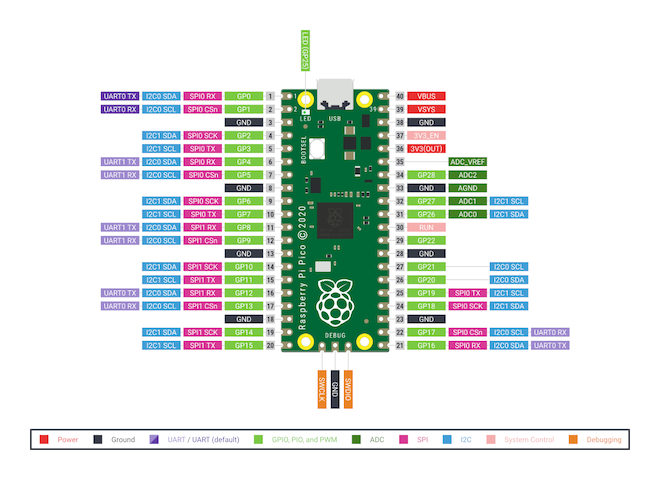
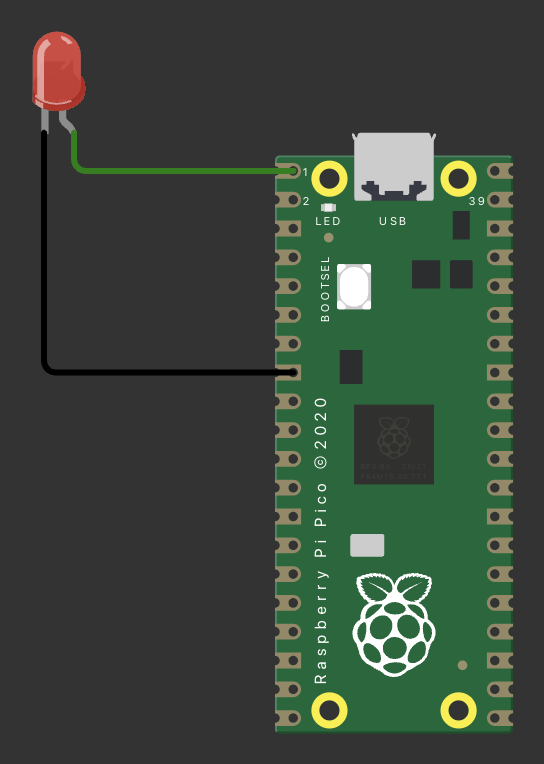
I wanted an LED to blink on and off repeatedly. In order to do this, I needed to have an LED in my circut as well as making sure it was connected to a power source, getting the right amount of power and making sure the power would go back to ground. I had never used this kind of board before, so I referred to this pin out layout to understand. It was super great to use Wowki because it's so interactive, I could hover over any pin and see what the pin was meant to do.
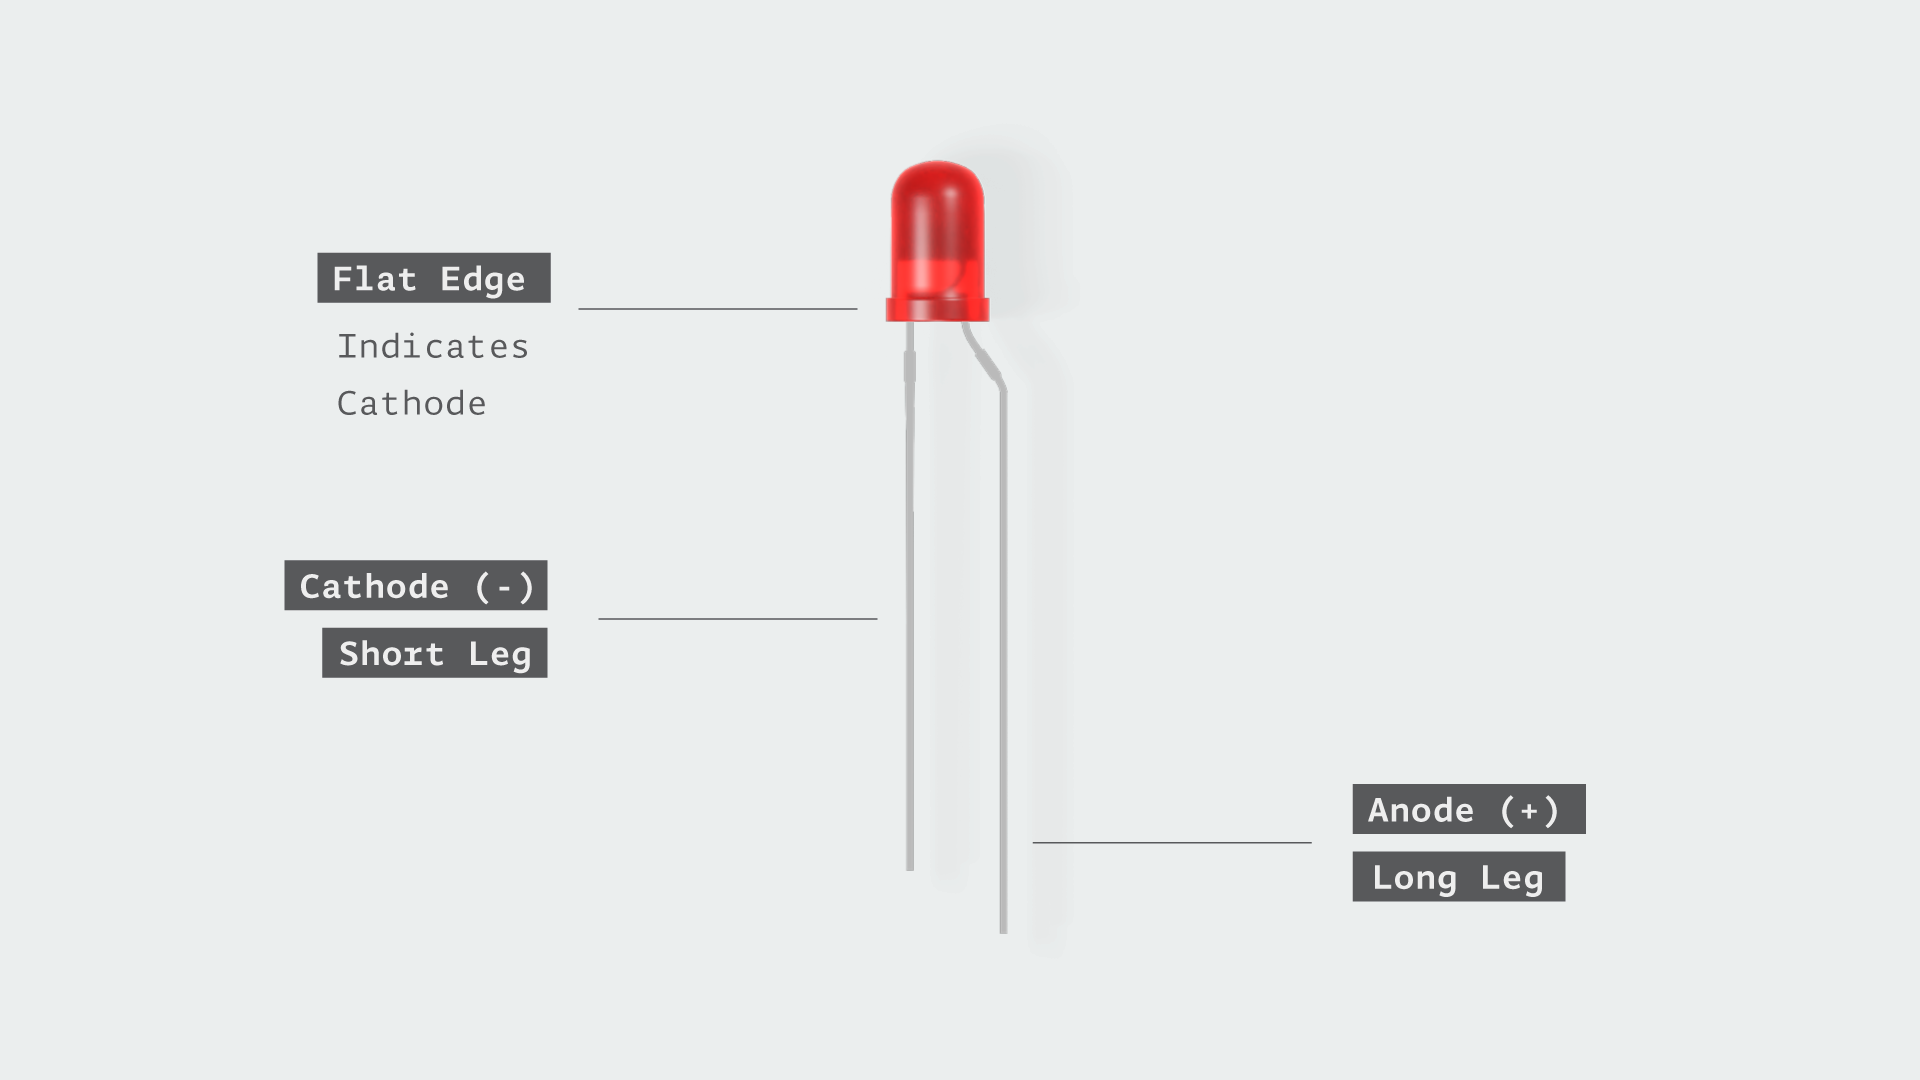
First, I brought in an LED and attached it to my board. LEDs have two legs; one long one and one short. The long leg represents the anode, and is positive. The short leg represents the cathode, which is negative. Thankfully, in Wowki this is very easy to see. However, in real life, mangled LEDs with missshapened legs can make it very hard to tell. It is better to think of the LED as a "U", one side will take power and it will drain out of the other side.
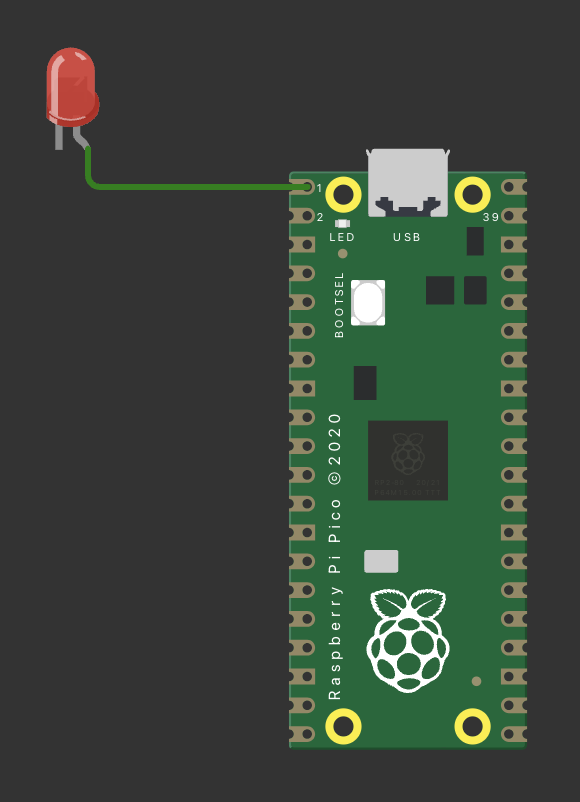
I attached the long leg (+) of my LED to GP1, meaning it was receiving power from here. I attached another wire from the short leg (-) to GND 2, which is where the power would return to the board.
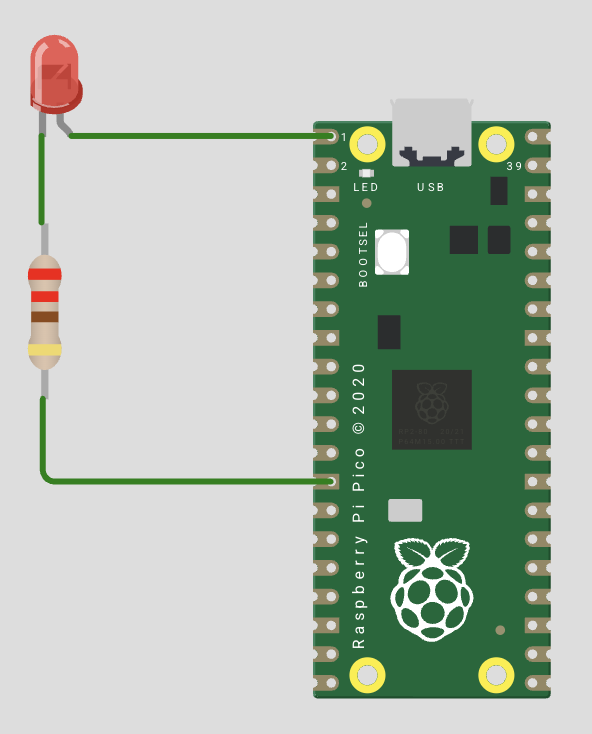
Now, I need to go back and add a resistor. The default resistor value is set to 1 kilo-ohm (1 kΩ), but this will restrict the current too much, resulting in a dim LED. Click on the resistor and change its value to 220 ohms (220 Ω, not 220 kΩ!).
And now I will use the code we were provided with during Lab. I want the LED to blink so I need to write code so the LED will go on and off.
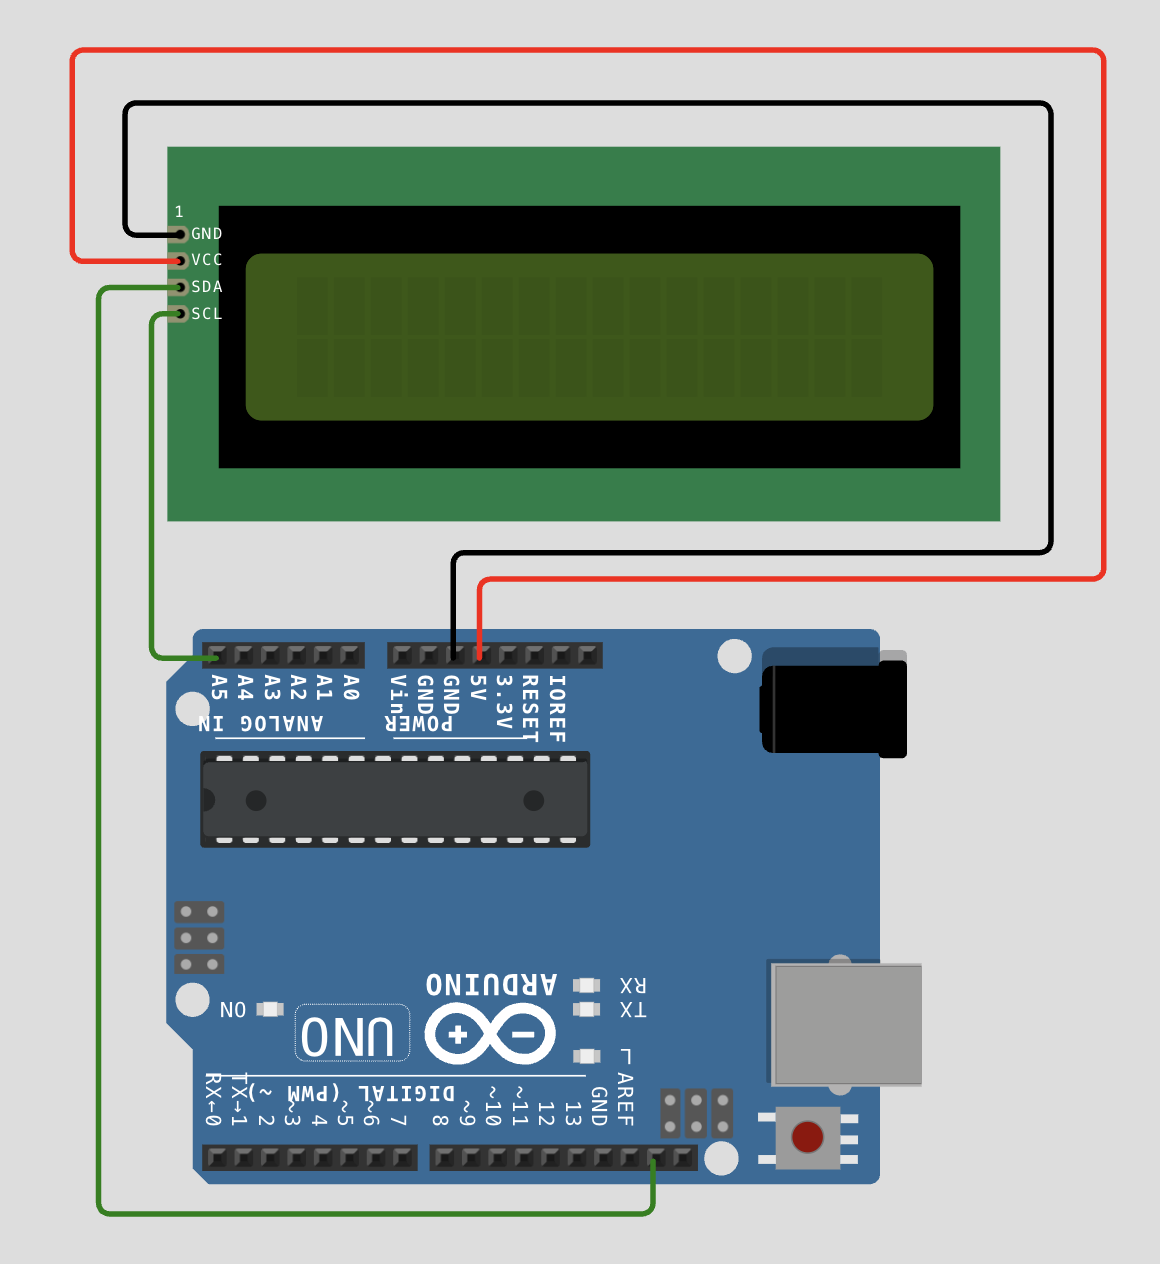
LCD Screen Running on Arduino Uno
This was a good start, but I wanted to create something more complex. I already had experience using Arduino Uno boards in real life, so I decided to bring that knowledge into WOWKi. I used a virtual Arduino Uno and a 16 by 2 LCD screen that had an I2C backpack adapter, which helps simplifies wiring.
Once I had both components added in WOWKi, I connected all the necessary pins, powering the screen through the 5V pin and connecting the SDA and SCL lines correctly. I had ChatGPT generate the base code for me, then I customized the message to display what I wanted, just like I would with the Arduino IDE.
I realized I needed to include the LiquidCrystal I2C library, since that is how the LCD processes commands through I2C. I was not sure if it was possible to use that library in WOWKi, but I was pleasantly surprised to see that it worked.
Final Circuit
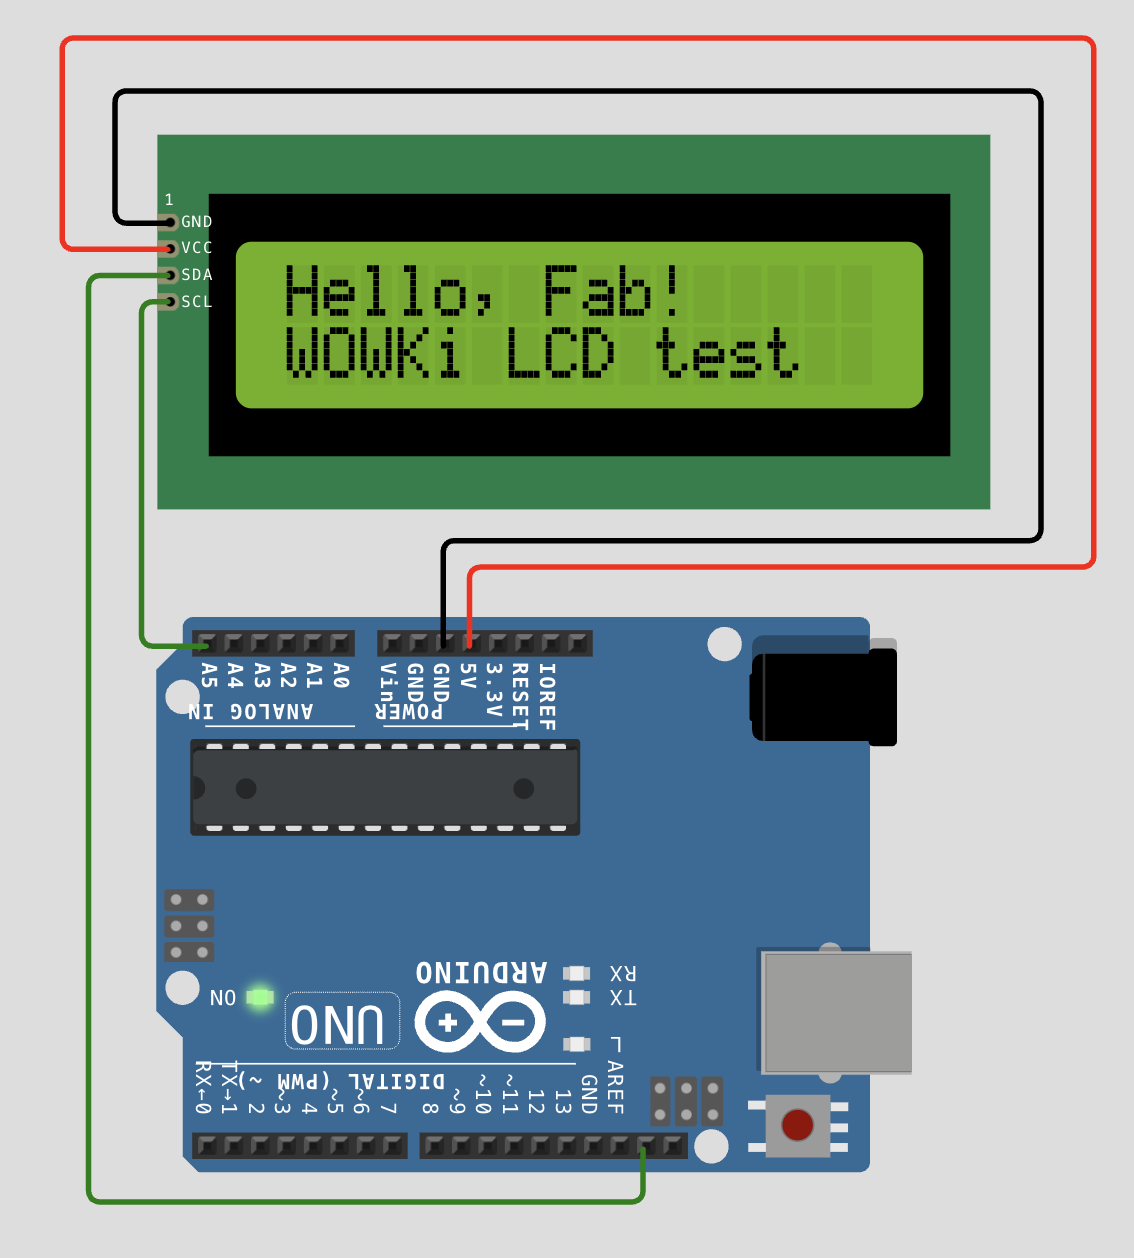
You can access my WOWKi project here.
Datasheet Information
| Feature | Raspberry Pi Pico | Arduino Uno (Rev3) |
|---|---|---|
| Processor | Dual core ARM Cortex M0+ | 8 bit AVR ATmega328P |
| Clock Speed | 133 MHz | 16 MHz |
| Flash Memory | 2 MB external QSPI flash | 32 KB (0.5 KB used by bootloader) |
| SRAM | 264 KB | 2 KB |
| USB Compatibility | USB 1.1 device and host (micro USB) | USB 2.0 device only (type B connector) |
| GPIO Pins | 26 usable GPIO (out of 30 total) | 14 digital I O, 6 analog inputs |
| I2C / SPI / UART | 2 I2C, 2 SPI, 2 UART (configurable) | 1 I2C, 1 SPI, 1 UART |
| Operating Voltage | 3.3V logic | 5V logic |
After browsing the datasheet, I found that the biggest difference between the Raspberry Pi Pico and the Arduino Uno is not just their physical size but also the voltage each board uses. The Raspberry Pi Pico is limited to 3.3 volts, which is a pretty common value, while the Arduino Uno can switch between 3.3 and 5 volts.
For my final project, since I am powering low power LEDs, I think the Raspberry Pi Pico should be sufficient. However, I plan to experiment with the Arduino as well, using its 3.3 volt pin as a test point before fully committing to soldering components.
USB compatibility with the Raspberry Pi Pico is not a major factor for my project, since I am not relying on fast communication. That makes the Pico a strong alternative. I also want to explore the Xiao Seeed RP2040 boards to see if they offer any additional benefits.