3. Computer Controlled Cutting
This week I developed my vinyl cutting and laser cutting abilities to be able to create decals and a parametric construction kit.
Research
This week, I worked with the laser cutter and vinyl cutter to create vinyl decals and a construction kit cut from cardboard. Having prior experience with the laser cutter and vinyl cutter from my previous class, I felt confident exploring the vinyl cutter to design a three-layer heat transfer hoodie design inspired by Takashi Murakami’s art. For my construction kit, I used Fusion 360 to design the pieces and Illustrator as a bridge between my computer and the cutting software. While I was comfortable with the fabrication process, the biggest challenge was managing multiple software programs for specific tasks and developing a cohesive project idea. Despite these challenges, I pushed my skills further and gained more confidence in using both the laser and vinyl cutter.
• • • Vinyl Cutting
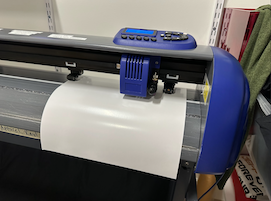
For this week’s project, I used the vinyl cutter to cut an intricate design from three different colors of vinyl, which were then pressed onto a hoodie. One important aspect of working with the vinyl cutter is that kerf is not as much of a concern because the blade is extremely thin and does not create significant material loss. Additionally, since the vinyl pieces lay flat against each other rather than fitting together or locking in place, kerf was not a critical factor in this process.
Inspiration
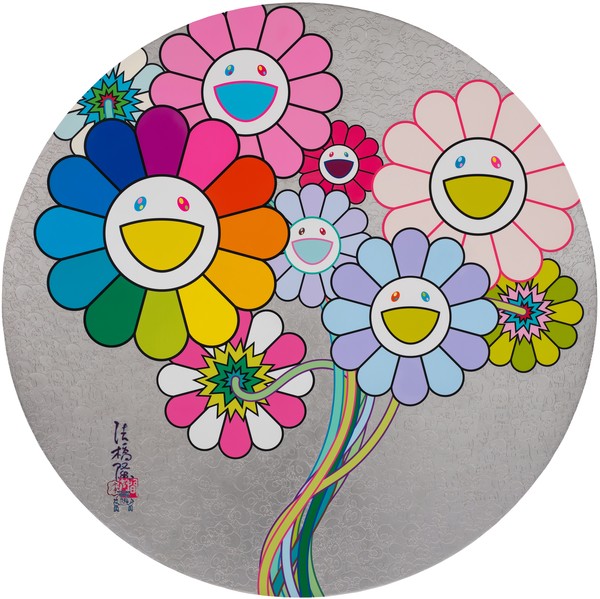
I was inspired by Takashi Murakami's artwork and I did not create this artwork myself, I just use photo editing software to adjust the colors of Murakami's design. Below is a piece titled Flowers for Algernon by Takashi Murakami in 2024.
Design in Adobe Illustrator
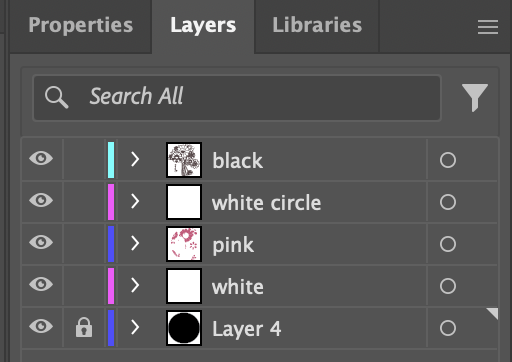
I used Adobe Illustrator to create a line drawing of the Takashi Murakami artwork. Since I wanted to use three colors of vinyl for this project, I designed three separate layers, each containing a different part of the design to be cut from a specific vinyl color. To ensure proper cutting, I set the stroke width of each layer to 0.01 mm, which the vinyl cutter reads as a cutting path. After finalizing the design, I exported it as an SVG and transferred it to the cutter for production.

Sending Design to Machine
Once the design was complete in Adobe Illustrator, I began the process of exporting. I exported the design 3 times, once for each layer that I wanted to be cut out of a different color. I exported them as .SVG files so that the software the vinyl cutter machine uses can read it.
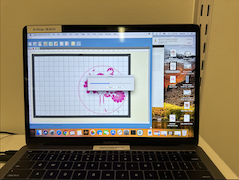
To get the .SVG file into Sure Cuts A Lot, I emailed and downloaded the file onto the lab computer. From there, I imported the .SVG and flipped it because the vinyl cutter cuts on the soft side of the vinyl sheet and I flip it to transfer onto the clothing.
Loading Vinyl
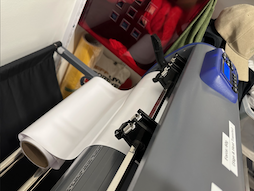
For this project, my design was comprised of 3 different colors, so I needed to load the vinyl 3 times. For the initial cut, which was done out of white vinyl, I loaded it onto the back of the machine making sure to place the roll on the metal bars. Heat transfer vinyl has an adhesive plastic backing, and it must be cut on the side without the plastic cover. Then I raised the lever on the side, fed the vinyl sheet through the back of the machine and made sure it was aligned with the rollers visible from the front.
Setting Origin
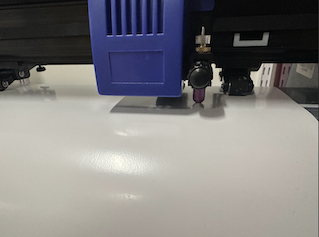
Once the vinyl is fed I lowered the clamp and used the menu to adjust the placement of the vinyl. Setting the origin is an important step when using the machine because it tells the cutter head where to start the design from so it stays on the vinyl. You can think of setting the origin like zeroing a scale. I pressed the "On/Off Line" button so the screen displayed a "Move XY" screen. From here, I used the Speed ↑ and ↓ button to roll the vinyl forward and backwards on the bed. To reduce material waste, I brought the edge of the vinyl as close as possible to the front of the head. I also wanted to bring the head as close as possible to the far right of the machine and into the corner as possible. I was able to move the cutter head horizontally using the Force ← and → button.
Settings Used
The vinyl cutter can cut heat transfer vinyl and sticker vinyl. While the material is similar, the vinyls are pasted onto different backings. The sticker vinyl is pasted onto a thick glossy paper backing while the heat tranfer vinyl is stuck to a clear plastic. The different thickness of the material's backing as well as the varying thickness of the material will determine what speed and force the vinyl cutter should use.
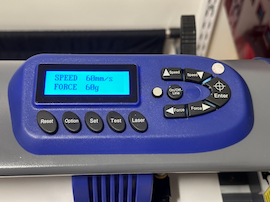
For the heat transfer vinyl, I followed the guidelines on the vinyl cutter to set for the machine. It suggested a force of 60g because the vinyl cutter should apply enough pressure to cut through the vinyl but not through the plastic backing. The force is how hard the knife on the vinyl cutter head will push onto the vinyl. For a thicker material more force should be used. Speed controls how fast the vinyl cutter head is moving. For a complicated design like mine, it was ideal for the cutter to move slowly as to make sure the head completely cuts through the plastic and cuts accurately. For a simple design with less jagged or intricate movements, like a circle or something with lots of straight lines it would be okay to have the vinyl cutter head move quickly because simple shapes are easier to cut. For this project, I set the speed to 60mm/s because the design I chose was very intricate and I wanted to make sure the machine would cut effectively. I used a force of 60g because that is the suggested force for heat transfer vinyl.
Applying Vinyl to Hoodie
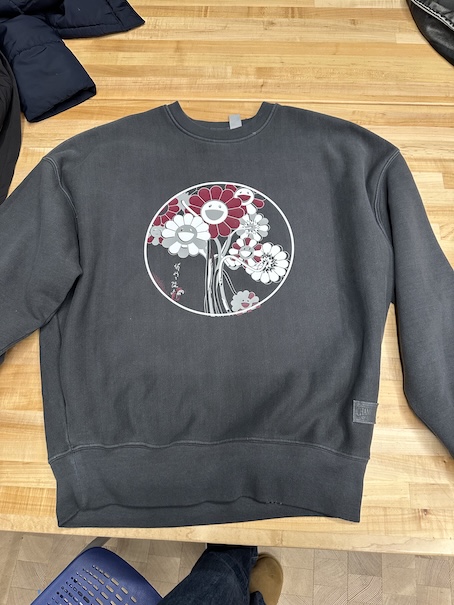
After cutting the design from three different vinyls, I began the post-processing steps to apply them to the sweatshirt. The first step was weeding, where I carefully removed the excess vinyl around the design to ensure only the intended elements remained. Next, I positioned the vinyl layers on the sweatshirt, aligning them precisely to create the multi-color design. Starting with the pink vinyl, I used a heat press set to 320°F, applying heat and pressure for 10 seconds to fasten the vinyl to the fabric. I repeated this process for each layer, second was gray and last was white, stacking them carefully to achieve the final vibrant design. I did white last because it was the layer that had the circle outline, which I wanted to cover the raw edges of the design.
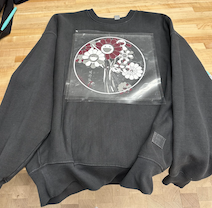
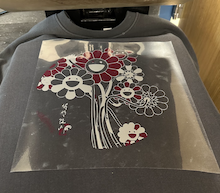
Final Vinyl Design
• • • Parametric Cardboard Construction Kit
For this week's assignment, we needed to create a parametric cardboard construction kit. I wanted to design something that not only incorporated parametric parts but also functioned as a modular building block itself. This led me to the idea of creating a smaller parametric block with customizable features. While the individual pieces in Fusion 360 were relatively small, the combined structure reached about five inches in height, allowing for a variety of configurations and creative possibilities.
I began the ideation process by researching real-world applications of parametric design. In India, parametric architecture has been used to create accessible and innovative structures, a concept that really resonated with me. One example of this is the parametric metal tent designed by andBlack Design Studio, which uses a ridge-paneled facade to create a dynamic multipurpose event space.
Inspired by this, I designed interlocking spherical components that could be assembled to form larger spaces. Additionally, I explored past Fab Academy projects and came across press-fit construction techniques. A great reference is this press-fit construction kit guide, which demonstrates how modular pieces can be designed for easy assembly without adhesives or fasteners.
Drawing from these insights, I refined my concept to ensure versatility and structural integrity, making my design both functional and engaging.
Design in Autodesk Fusion 360
I had little experience with parametric design before this project, but I was excited to learn and explore this area of design. I knew it would be especially useful for creating products that needed to be easily resized. Being able to set parameters and control the project from a broader perspective gave me more flexibility and precision in my design process.
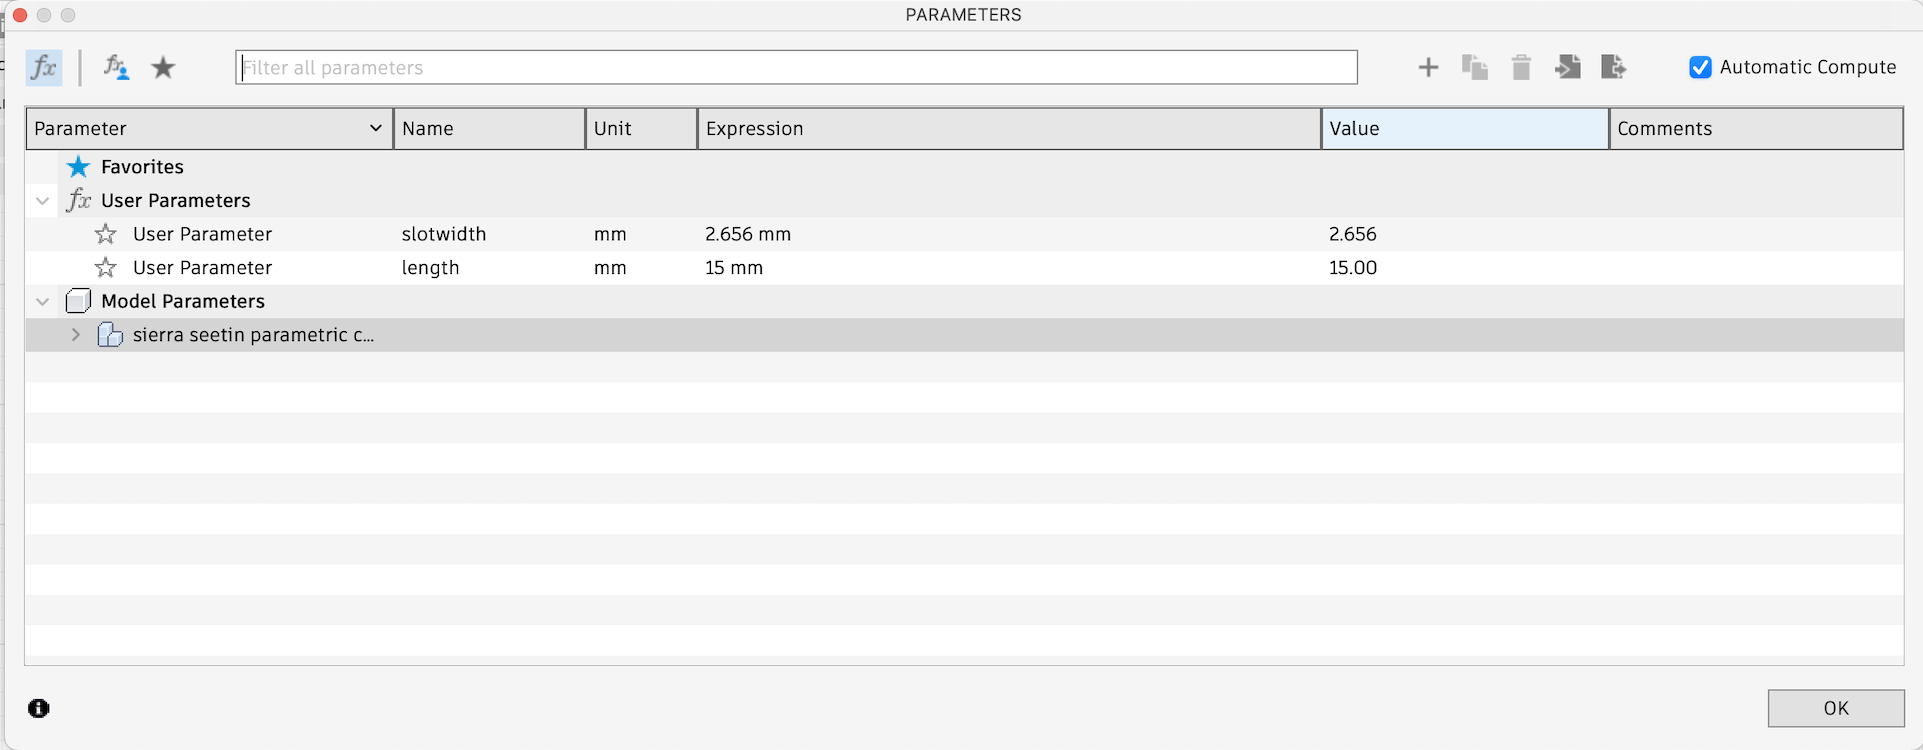
This was my first time using Autodesk Fusion 360 to fully tackle parametric design. I started by setting my parameters in the Modify → Create Parameters menu. Here, I added two key parameters: slot width and length.
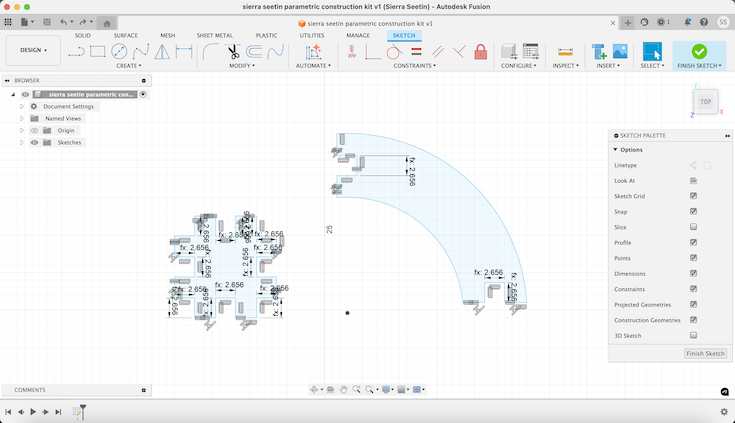
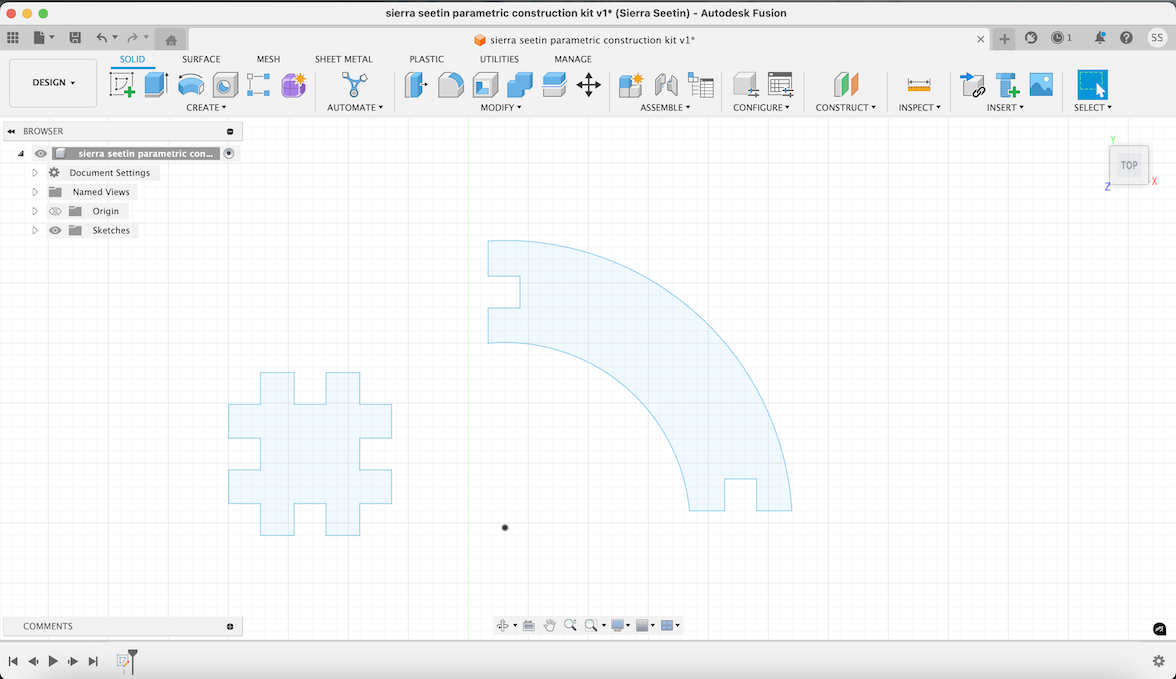
Accounting for kerf was crucial for this project because cutting the cardboard with a laser meant that the laser’s diameter would remove material from the slots. I needed to adjust my design in Fusion 360 to compensate for this. With the new laser settings, the kerf was measured to be 0.2 mm, and the cardboard had a width of 2.8 mm. By subtracting the kerf from the cardboard’s slot width, I determined that the slot should be 2.656 mm wide. I applied this slot width to both the small square piece and the curved piece. The length parameter was used to define the size of the square box, though I encountered some challenges integrating this measurement into my work. Creating the curved pieces was particularly difficult because the curves didn’t adhere neatly to the predefined dimensions.
After defining these parameters, I created a square and then added multiple smaller squares inside it. Initially, I didn’t focus too much on precise alignment because I knew I could refine the design later using parametric functions and constraints. I used the Equal constraint to ensure that the spaces between the squares on my small square piece were uniform. For the curved piece, I used the Collinear tool to align the edges where the arc transitioned into a flat surface on both ends.
Preparing Design for Cutting
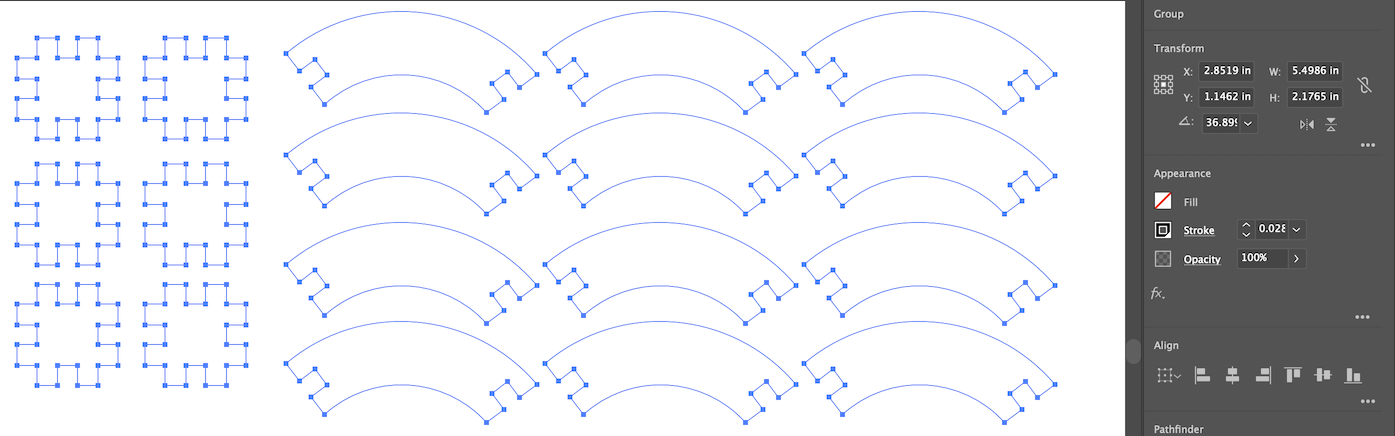
After creating my parametric design in Fusion 360, I needed to save my design as a DXF file and open it in Adobe Illustrator to prepare it for the laser cutter. I imported the design into Adobe Illustrator and set the stroke width to .01 mm (.028 pt), as this is a required constraint for our machine—lines with this width are recognized as cutting paths.
I experimented with different ball shapes and eventually determined that I needed 6 square pieces and 12 curved pieces for the final assembly. I prepared multiple sets of these components and arranged them efficiently to optimize the cutting process.
Once I finalized the design layout in Illustrator, I emailed the file to myself to access it on the laser cutter's computer. After logging into the laser cutter, I set up the machine, accessed my file, and downloaded it to begin the cutting process.
Laser Cutter Set-Up
Now it was time to use the laser cutter. The first step was to follow the guidelines for setting up the Epilog laser cutter. Since cardboard is an extremely flammable material, I needed to ensure that the air assist feature was turned on while cutting. Although I wasn’t engraving the cardboard—meaning there was a lower fire risk—I still needed the air assist on. My design contained small, intricate cuts placed close together, which increased the potential fire hazard.
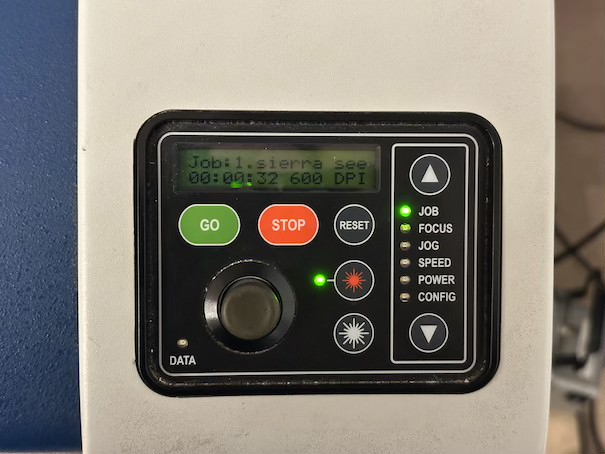
Once I finalized my design and imported it into the Epilog system, I carefully adjusted the settings for cutting cardboard. The optimal settings were:
- Speed: 75
- Power: 50
- Frequency: 10
- DPI (Dots Per Inch): 300
Setting the DPI to 300 ensured that the laser applied just the right amount of power without excessive cutting, reducing the risk of the cardboard catching fire. After confirming all settings and turning on the air assist, I was ready to proceed with the laser cutting process.
The air assist function I used in Epilog is extremely helpful in reducing the possibility of material catching on fire and causing damage. For this function to work the air compressor must be turned on prior to the cut. Also, when the laser head comes into contact with the material it can produce toxic fumes and the ventilator sucks it out and sends it far away.
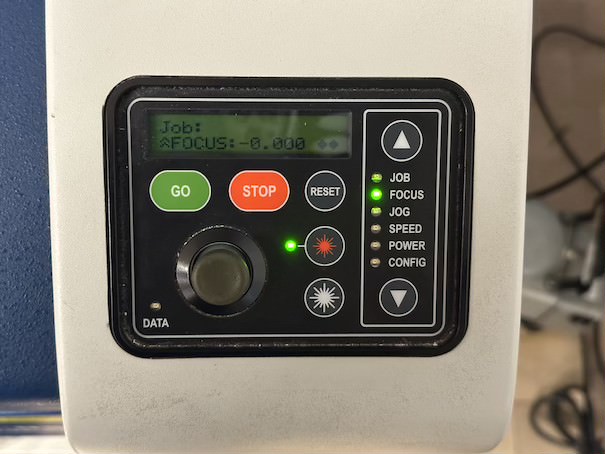
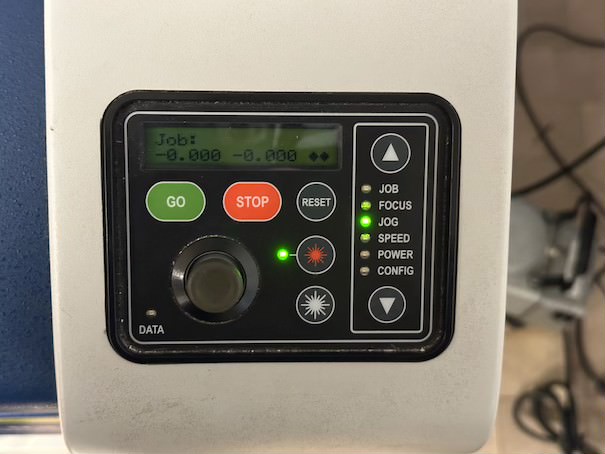
The purpose of focusing the machine is to make sure the design gets cut properly. It's similar to how a homing pigeon understands how to make it home and complete it's path regardless of where it starts. For this project, I focused the machine using the joystick controls as pictured above.
To focus the machine, I began by attaching a four-inch spacer to the laser cutter head. I raised the bed until the metal piece was snug against the acrylic bed, ensuring it stayed secure and positioned at the optimal distance for cutting. Once it was tightly in place, I jogged the laser cutter head to the upper-left corner of the material to maximize efficiency and minimize waste. Using the red light on the laser cutter head, I carefully aligned it with precision. Finally, I pressed the joystick to lock the head in place, ensuring stability for the cutting process.
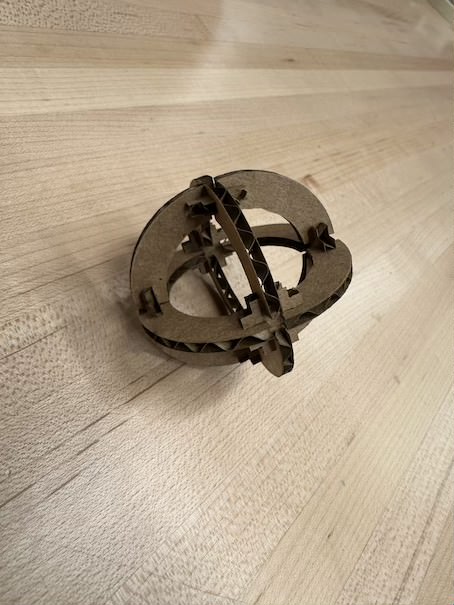
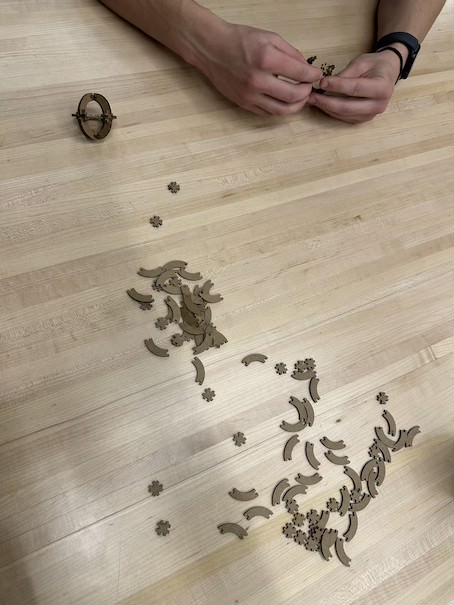
Constructing the Set
The cutting process was incredibly quick, taking only about two minutes since cardboard is so thin. However, retrieving the pieces from the machine proved to be a challenge. Some of the smaller components had fallen into the laser cutter’s bed, making them difficult to collect. Once I gathered all the pieces, I moved to the table to begin assembly.
For each shape, I used:
- Six square pieces
- Twelve curved pieces
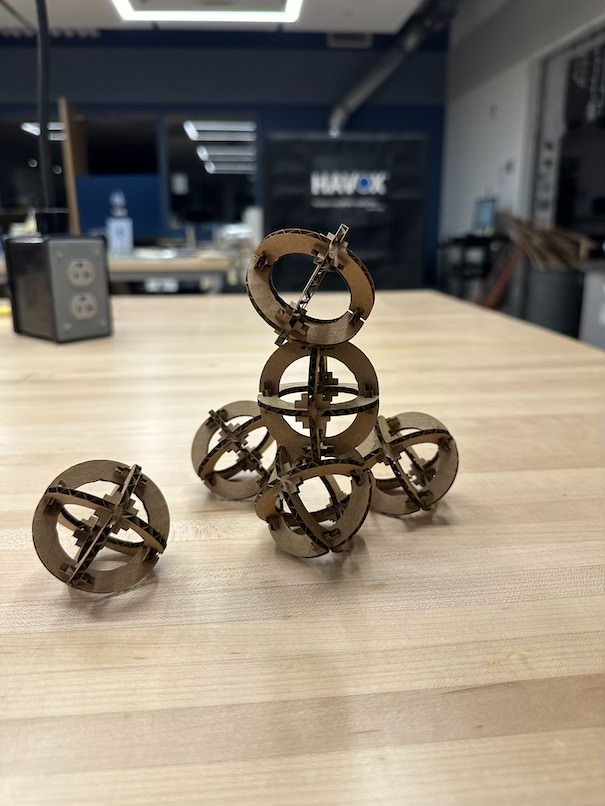
Through experimentation, I discovered an interesting effect—the corrugated texture of the cardboard created a semi-transparent, layered appearance. This texture also allowed the pieces to stack and interlock, enabling the creation of a tower-like structure. This unexpected characteristic enhanced the parametric nature of the design, adding another level of functionality and aesthetic appeal.
Download Illustrator File
Download .DXF
How to Recover After You've Been Rejected (Large Files Commit)
Diagnosing the Problem
For this week I had plentiful documentation and pictures that I wanted to include. I am somewhat of a procrastinator so of course I left this entire week to the last minute. That also means I left this week to do one big Git push. When I tried to push this week my terminal gave me an error:
It seemed as if though I had tried to commit too much at one time. I had an inkling this would be a problem because I was trying to do a large commit. From my basic knowledge, I knew the code itself didn't take up much space but I had images and videos that were very large.
Attempt 1. Smaller Git Push
In retrospect, I should form a habit of small compulsive git pushes. I know that git has a push limit of 10MB which can really sneak up on you if you're working with uncompressed files in your local repo that you've(me) have been accidently pushing.
So, I deleted half of my new code from Visual Studio and pasted into a different text document for safekeeping. I then tried to push the new html file with less code but I recieved the same error message in git.
Gah!
Attempt 2. Deleting Large Files Locally
Secondly, I tried to go back to the git repo on my computer, which is my local repo. I had uploaded the photos from my phone via AirDrop to my computer and dumped them all into this folder. Many of the photos were outtakes, videos and large uncompressed pictures I had no intention of using.
So I returned to Terminal and used this command to locate which files were the culprit.
*because I am documenting this process after the fact, I don't have the terminal response. I did a frantic Google search and a Stack Exchange post explains it is not possible to retrieve the Terminal repsonse to my commands, which I was able to retrive.
Here, Terminal gave me a list of the files that were very very large. I deleted them from the folder, which is my local repo, and tried to push again.
Sadly, this didn't work, and I recieved the same error message.
Attempt 3. Delete Large Files from History
I had no idea. I was at my wits end. Thankfully, I chose to consult ChatGPT to try and understand what was wrong with my code.
So graciously, ChatGPT explained to me that my large files, although no longer in my local repo, still exsisted in my git repo, or floating somewhere in the atmosphere. I would need to delete the previous commits in my history when I had tried to push before. ChatGPT provided me with the following command to clear the large files that were previously committed.
After applying the git filter-branch command to remove the large files from the git history, I ran into a situation where the files were still part of the commit history. This led to further complications when I tried pushing again. In Terminal, after running the previous command I had the option to clear the cache by pressing Enter which then ran a new command. ChatGPT helped me under the command's funcitons as such;
- git rm --cached: This removes files from the Git index without deleting them locally.
- --ignore-unmatch: This ensures that files not present in the commit history are ignored.
- --prune-empty: This option removes commits that become empty after the file deletions.
- --tag-name-filter cat: This ensures that any tags are preserved during the rewrite.
- --all: This applies the filter to all branches.
To make sure I was good to push again, I ran a git status command just to see what was going on.
Nothing was wrong so I was good to follow the typical proces of...
then,
and finally...
Like a gladiator raising his bloodied head to face the crowd I had finally pushed! Not that it was that dramatic. But it was? I've certainly learned my lesson. I'm Maxmius!