This week I worked on creating my 2d Construction Sketch. I will use Onshape to create the 2D SVG File, and the Epilog software to upload it to our laser cutter. Then I will use Autodesk Illustrator to create another SVG which I will upload to our vinyl cutter through the SirCutsALot software. I will then use the heat press to put the vinyl sticker on my favorite hoodie.
Research
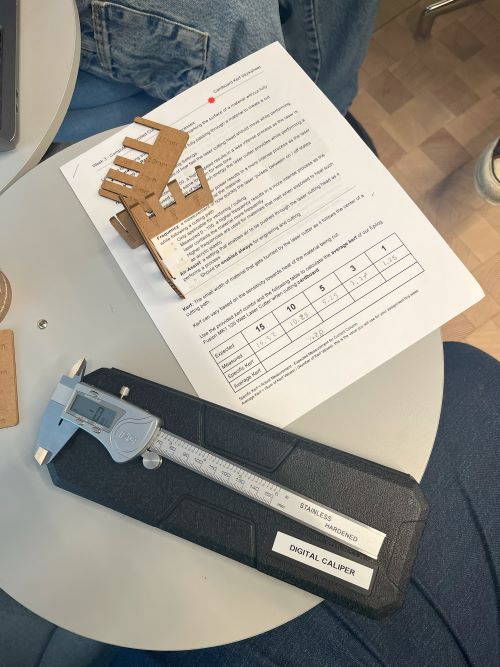
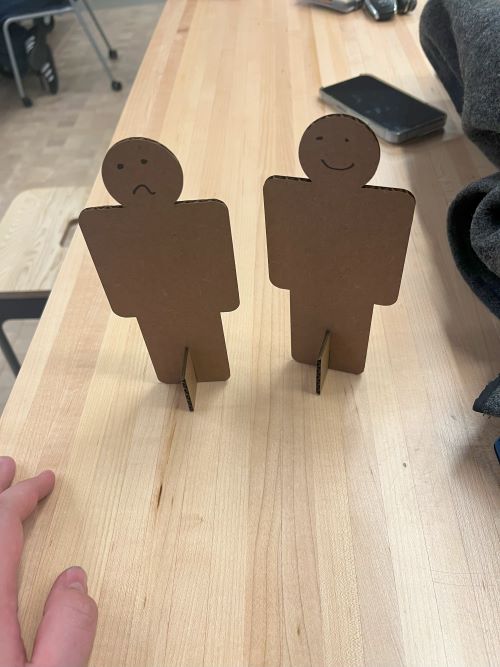
I already knew how to use the Onshape Software, so I did all my work in Onshape before transferring it to Adobe Illustrator and the Epilog Software. I did learn what Kerf was in our group session, which is the diameter of the laser itself. We created a test file to see how much the laser actually cuts, and then we used that information to create our Kerf variable. To do this, we made two figures, and named each one Kerfy #1 and Kerfy #2. Kerfy #1 is smiling because it's kerf was calculated well and has a base that fits nicely. Kerfy #2 is frowning because it's kerf was calculated poorly and has a base that doesn't fit well. We calculated this kerf by measuring assumed kerf with calipers and their actual width, then taking that average as the actual kerf. We then created small test fits to determine whether this kerf was accurate or not.
Safety
Both the laser cutter and the vinyl cutter are machines that require a certain awareness to operate. They both have a lot of moving parts, and the laser cutter has a very powerful laser that can cause serious burns if not handled properly, and even start a fire. The laser cutter also has a lot of fumes that are released when cutting, so it is important to have proper ventilation, and fire negation equipment like a fire extinguisher nearby. To prevent fires, the laser cutter has a built in air assist system that blasts the laser with air to cool it down and prevent it from igniting the material. The vinyl cutter has a blade that can cut through skin, so it is important to be careful when handling it. However, as long as you are careful and follow the safety protocols, you should be fine. The heat press is also a machine that requires caution, as it can cause painful burns if not handled properly.
Process for Construction Kit
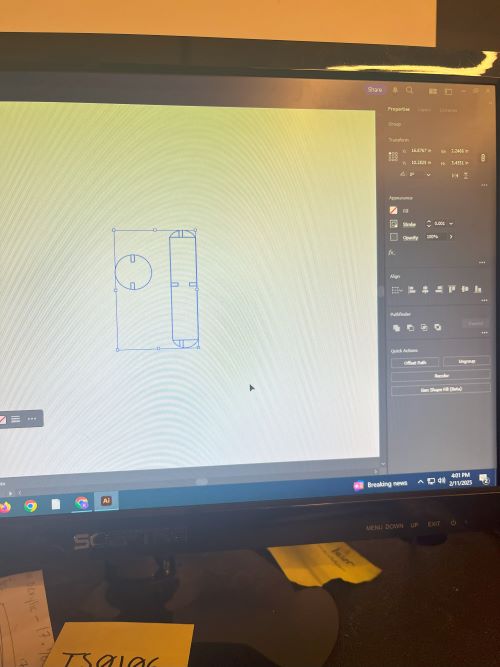
Link to the 2D Design. You will need an Onshape account to view it.I started by creating my variables.
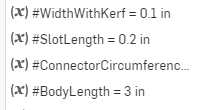
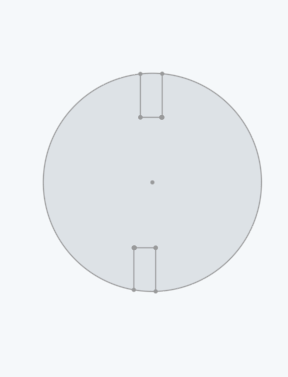
I then made a circle, and adding slots to it. I dimensioned each slot to the Kerf variable I set.
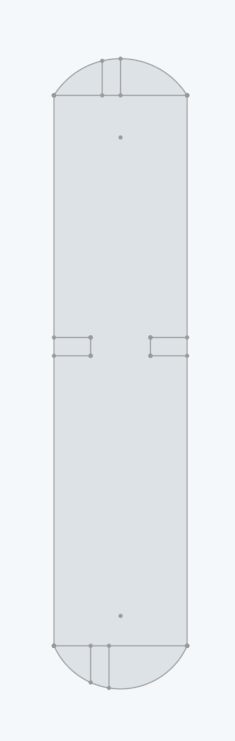
Then I created this rectangle with circular ends, and also gave it slots. You'll notice I actually made a mistake here, and I have lines on the circular sides that I forgot to remove and ended up getting cut! However, as one must do in Fab Academy, I adapted, by ignoring the mistake and calling it intentional.
With my sketches created, it was time to upload them to Adobe Illustrator. I exported them as a DXF file, and then imported them into Adobe Illustrator.
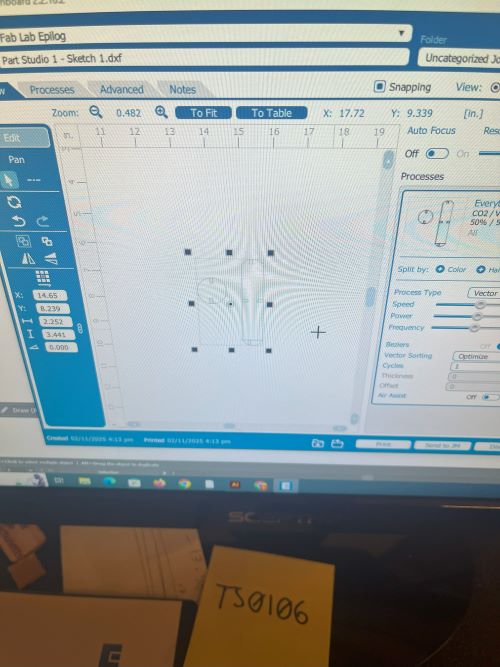
Once in Adobe Illustrator, I made sure to set the stroke to .001 inches, and the fill to none. I then sent the file to the Epilog Software and printed it out.
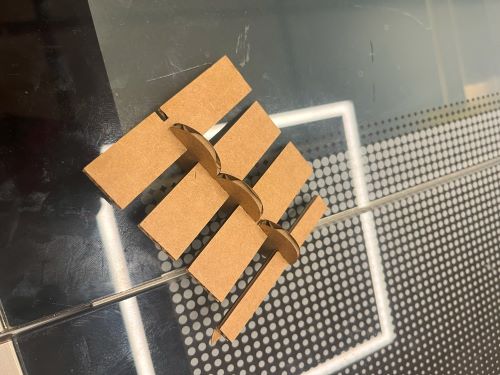
After printing, I had to remove the pieces from the board. Then, I put it all together
Process for Vinyl Sticker
I started by drawing a design I liked, and decided on this one
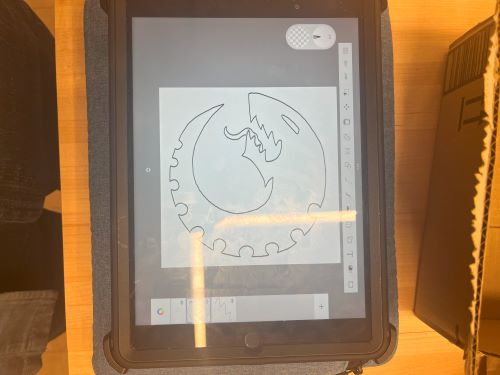
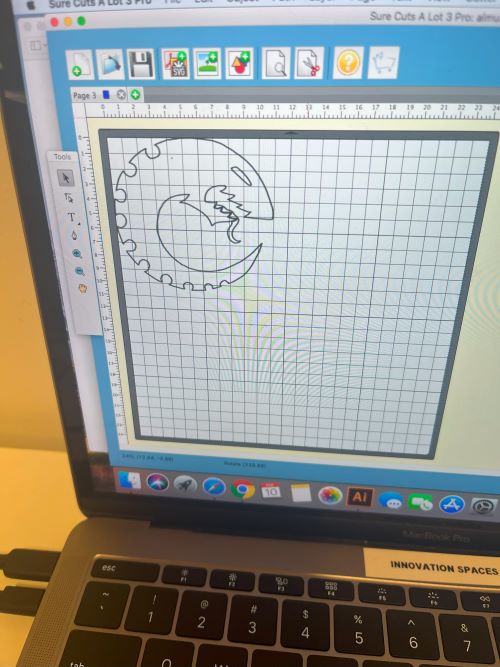
Then I uploaded it to SirCutsALot, our vinyl cutter software, which used an image trace tool to create a vector trace pathway for the vinyl cutter to work with.
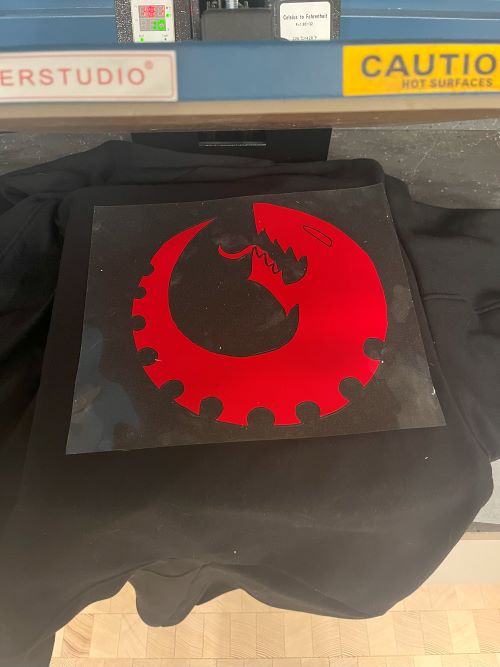
Then I sent it to the vinyl cutter, and cut it out, and placed it on the heat press to be used on my favorite hoodie
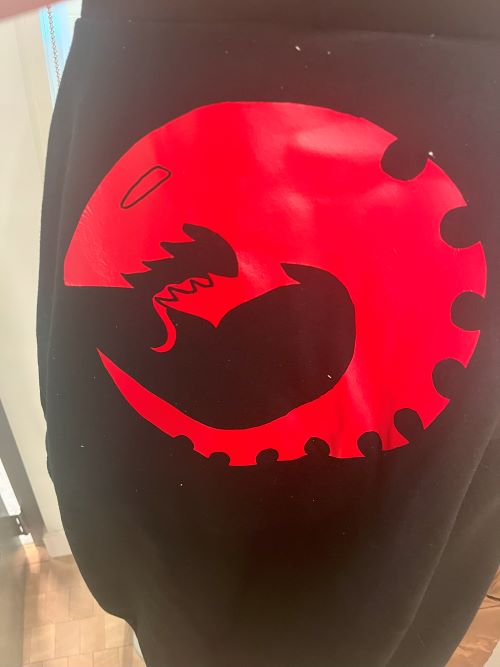
After pressing, I had my new hoodie!
Issues
I had several issues while doing Week03, primarily including my file sizes. In order to resolve the issue, I went back to my original file locations on my google drive, re-downloaded them, then I used my Photos app to resize the files to 500x677 pixels, which massively downsized the amount of kb from the thousands to the tens. After doing so, I re-uploaded them to my images folder, and changed my code to match. Then, I went into my Git Bash directory and used the "git reset --soft HEAD^" command 11 times to undo each commit that I had made with the images that were too long. If you have this issue, you can do the same by using "git status" to check how many commits ahead you are, then doing the "git reset --soft HEAD^" command for each commit you are ahead.