3D Scanning & Printing
Learning Experience
While working with 3D printing and scanning, I developed a deep understanding of the importance of accurate design, optimized slicing settings, and efficient post-processing methods. Producing high-quality prints demanded attention to scale, print orientation, and the strategic use of support structures. Likewise, successful 3D scanning relied on correct object positioning and well-controlled lighting conditions to ensure clear and complete captures.
Key Accomplishments
✅ Successfully designed and printed a 3D model using optimized print parameters.
✅ Gained in-depth understanding of how slicing software settings impact print quality, duration, and material efficiency.
✅ Gained hands-on experience in 3D scanning and accurately refining scanned models through post-processing.
Task: 3D scanning and printing
Group Assignment:
Test the design rules for your 3D printer(s)
Document your work on the group work page and reflect on your individual page what you learned about characteristics of your printer(s)
Individual project:
Design and 3D print an object (small, few cm3, limited by printer time) that could not be easily made subtractively
3D scan an object (and optionally print it)
3D Printing:
3D printing is a modern additive manufacturing process that creates physical objects layer by layer from a digital 3D model. It typically uses thermoplastic materials like PLA or ABS, which are fed into the printer in filament form. A widely used technique, known as Fused Deposition Modeling (FDM), operates by heating the filament through a nozzle and extruding it in fine lines to gradually build the object. This process allows for precise geometric control and can even support specialized patterns—such as circular or radial designs—using tools like a hexa cannon, depending on the specific requirements of the model.
Materials used
PLA
ABS,
PETG,
Nylon
Tool for 3D Printing
Design Tools - TinkerCAD, Fusion 360, Solidworks, Blender
Final Modification - Using Flashprint 5 (to convert to G-code)
Additive Manufacturing
Additive manufacturing, commonly referred to as 3D printing, is a technique that constructs objects by depositing material layer by layer. Unlike conventional manufacturing methods that involve cutting away material from a solid block, this approach builds components from the ground up.
This innovative method is particularly valuable for creating complex, detailed, and compact parts. It finds extensive use in product development, medical applications, and the aerospace sector. Common materials used include plastics, metals, ceramics, and composite materials.
One of the key advantages of additive manufacturing is its ability to produce intricate geometries that are difficult or impossible to achieve using traditional techniques. Additionally, it generates minimal material waste, making it an efficient and sustainable solution for custom, on-demand, and small-batch production.
Subtractive Manufacturing
Subtractive manufacturing is a conventional process in which material is removed from a solid block using tools such as CNC machines, lathes, or laser cutters. The final shape is achieved by cutting away excess material.
This method is widely used in industries such as automotive, aerospace, and precision tooling. It is ideal for manufacturing strong, large, and straightforward parts. Materials like metal, wood, and plastic are frequently used in this process.
While subtractive manufacturing typically generates more waste compared to additive methods, it offers high precision and smooth surface finishes. It is especially effective for mass production where strength, accuracy, and fast turnaround times are essential.

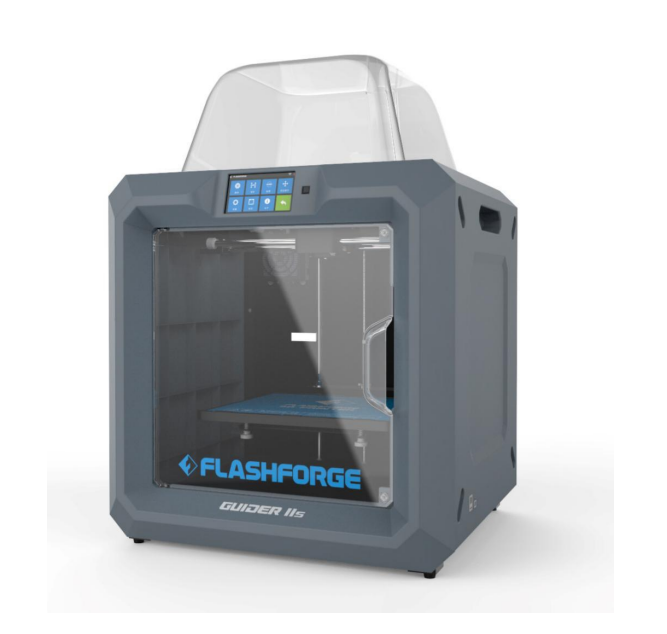
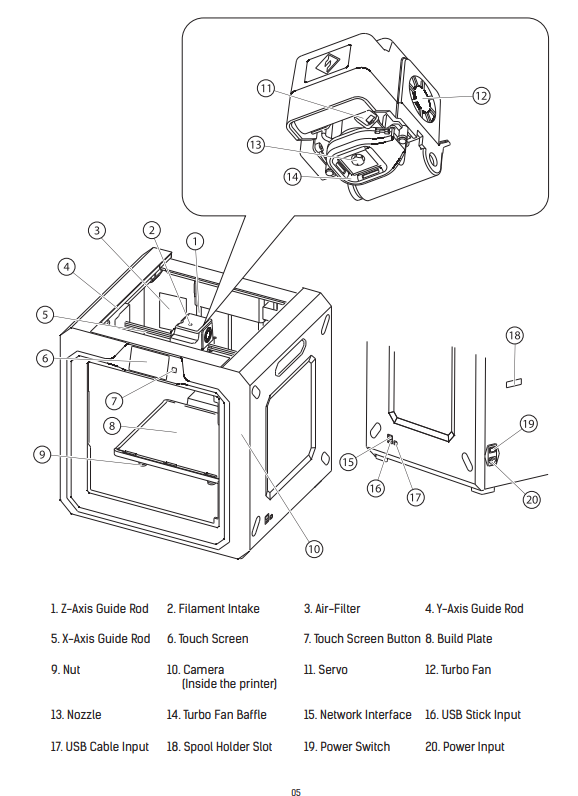
FlashForge Guider IIS 3D Printer
I carefully studied the 3D printer handbook and developed a strong understanding of its components, as illustrated in the attached images. After that, I successfully assembled the 3D printer and installed all the required software. To verify its functionality, I downloaded and set up FlashPrint 5 from the official website.
Reface Websitehttps://flashforge-germany.de/
Designing a 3D Model for Printing
To familiarize myself with the 3D printing workflow, I began by creating a simple digital model. This initial step helped me understand the complete process, from designing to preparing a printable file.
|
|
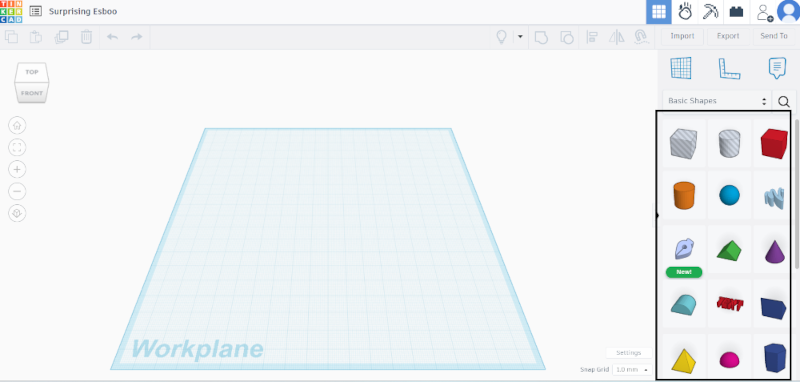
I initiated the process by opening Tinkercad, a user-friendly online platform, to begin creating a 3D model.
|
|
|
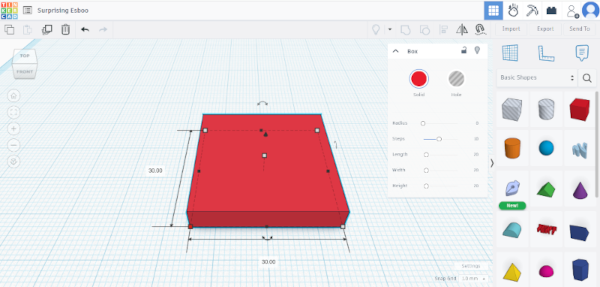
Using basic geometric shapes provided by the software, I constructed the object layer by layer with precision.
|
|
|
The final model was carefully designed while keeping the specific parameters of 3D printing in mind, such as structural strength, orientation, and support requirements.
|
|
|
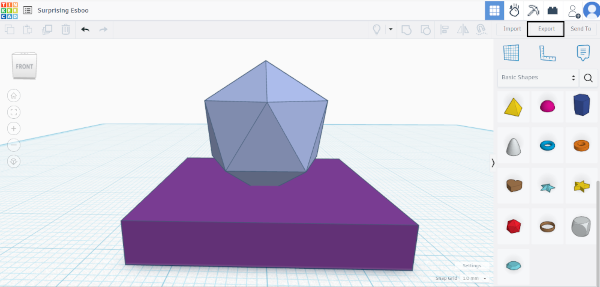
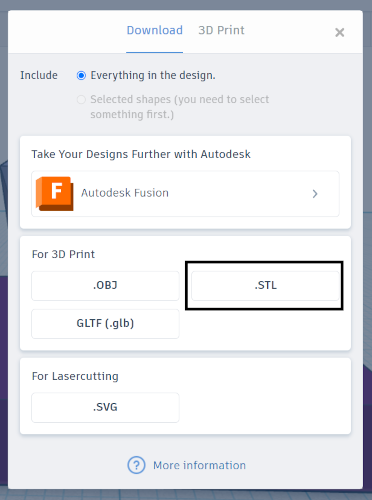
Once the design was complete, I exported the model in STL format, which is the standard file type used for 3D printing.
|
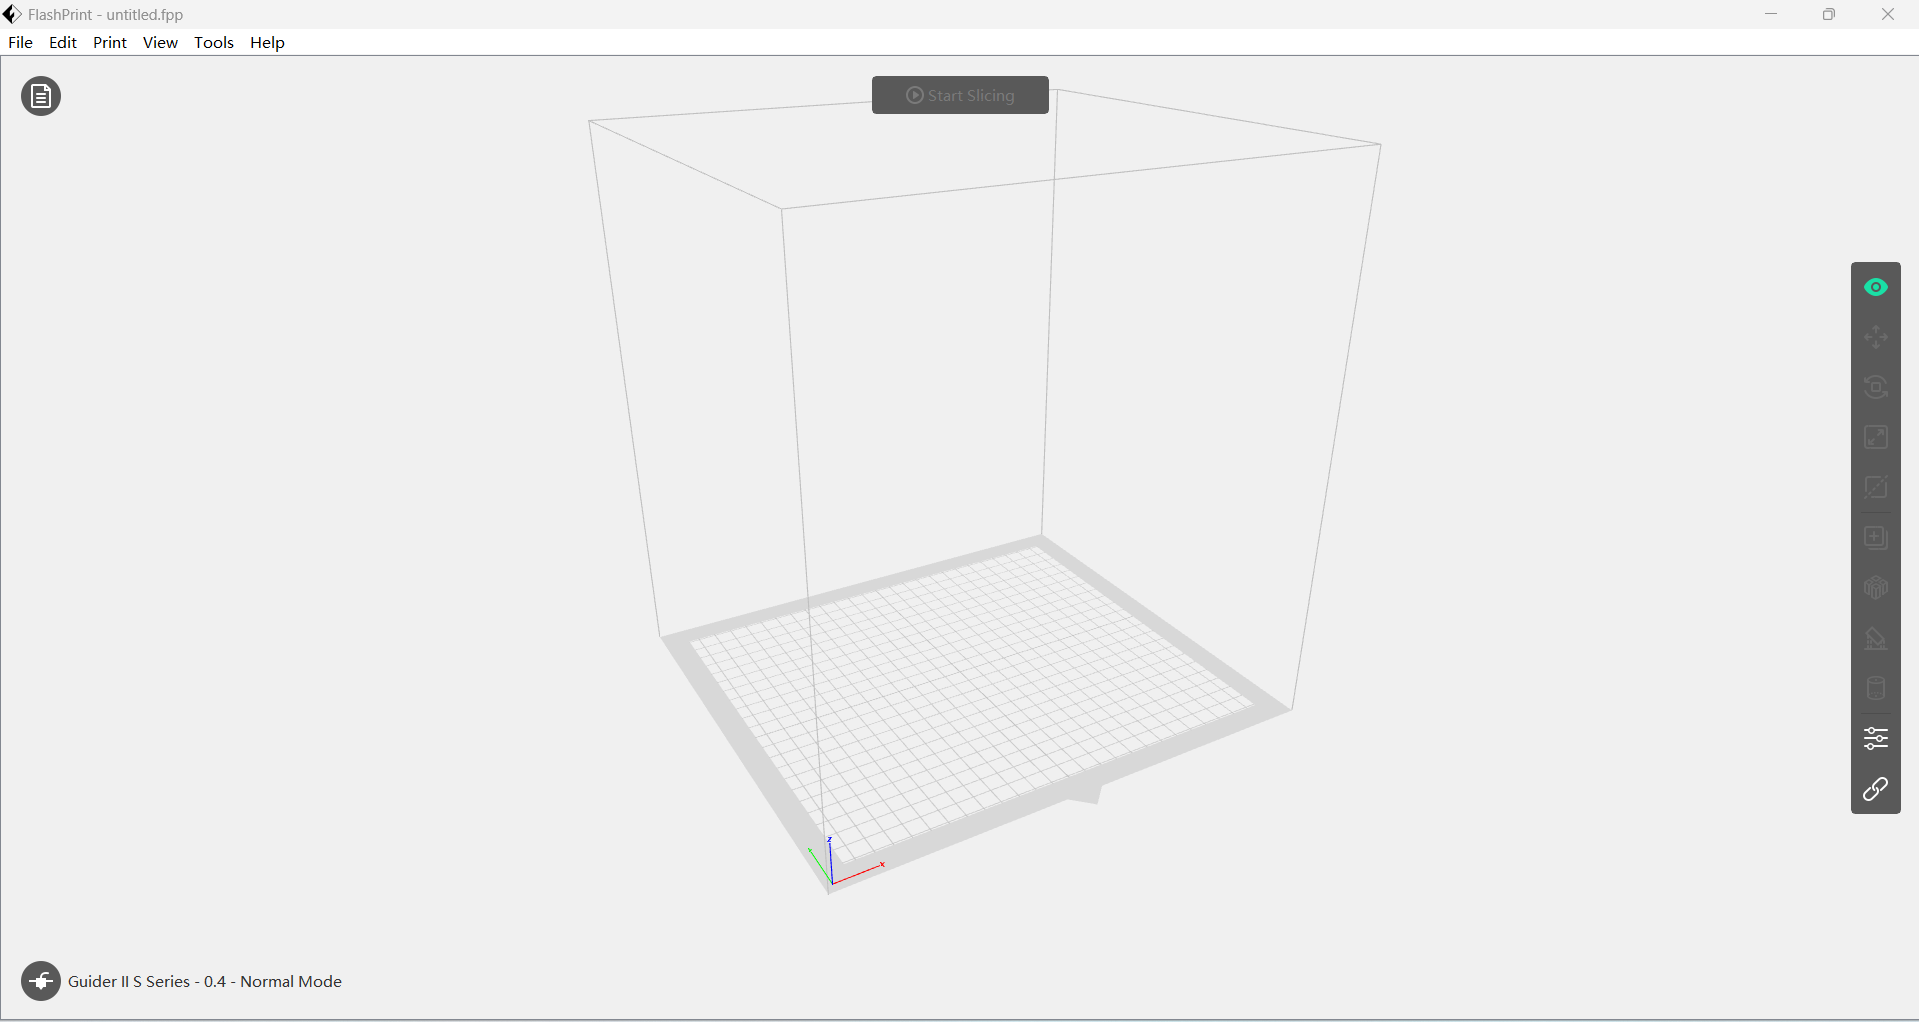
Preparing the G-Code Using FlashPrint 5
After designing the 3D model, the next step was to convert the STL file into G-code using FlashPrint 5, the slicing software compatible with my 3D printer. G-code is a language that the printer understands, instructing it how to build the object layer by layer.
|
|
|
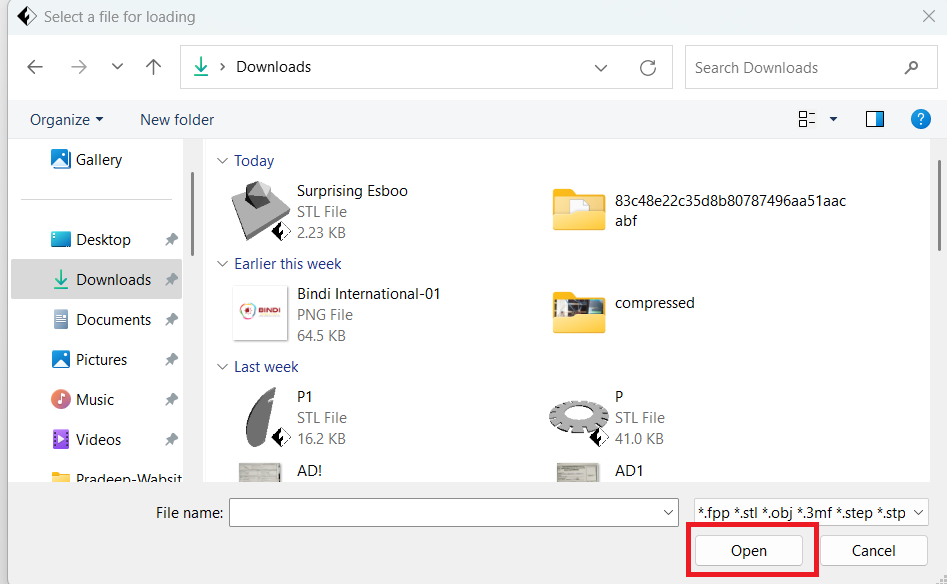
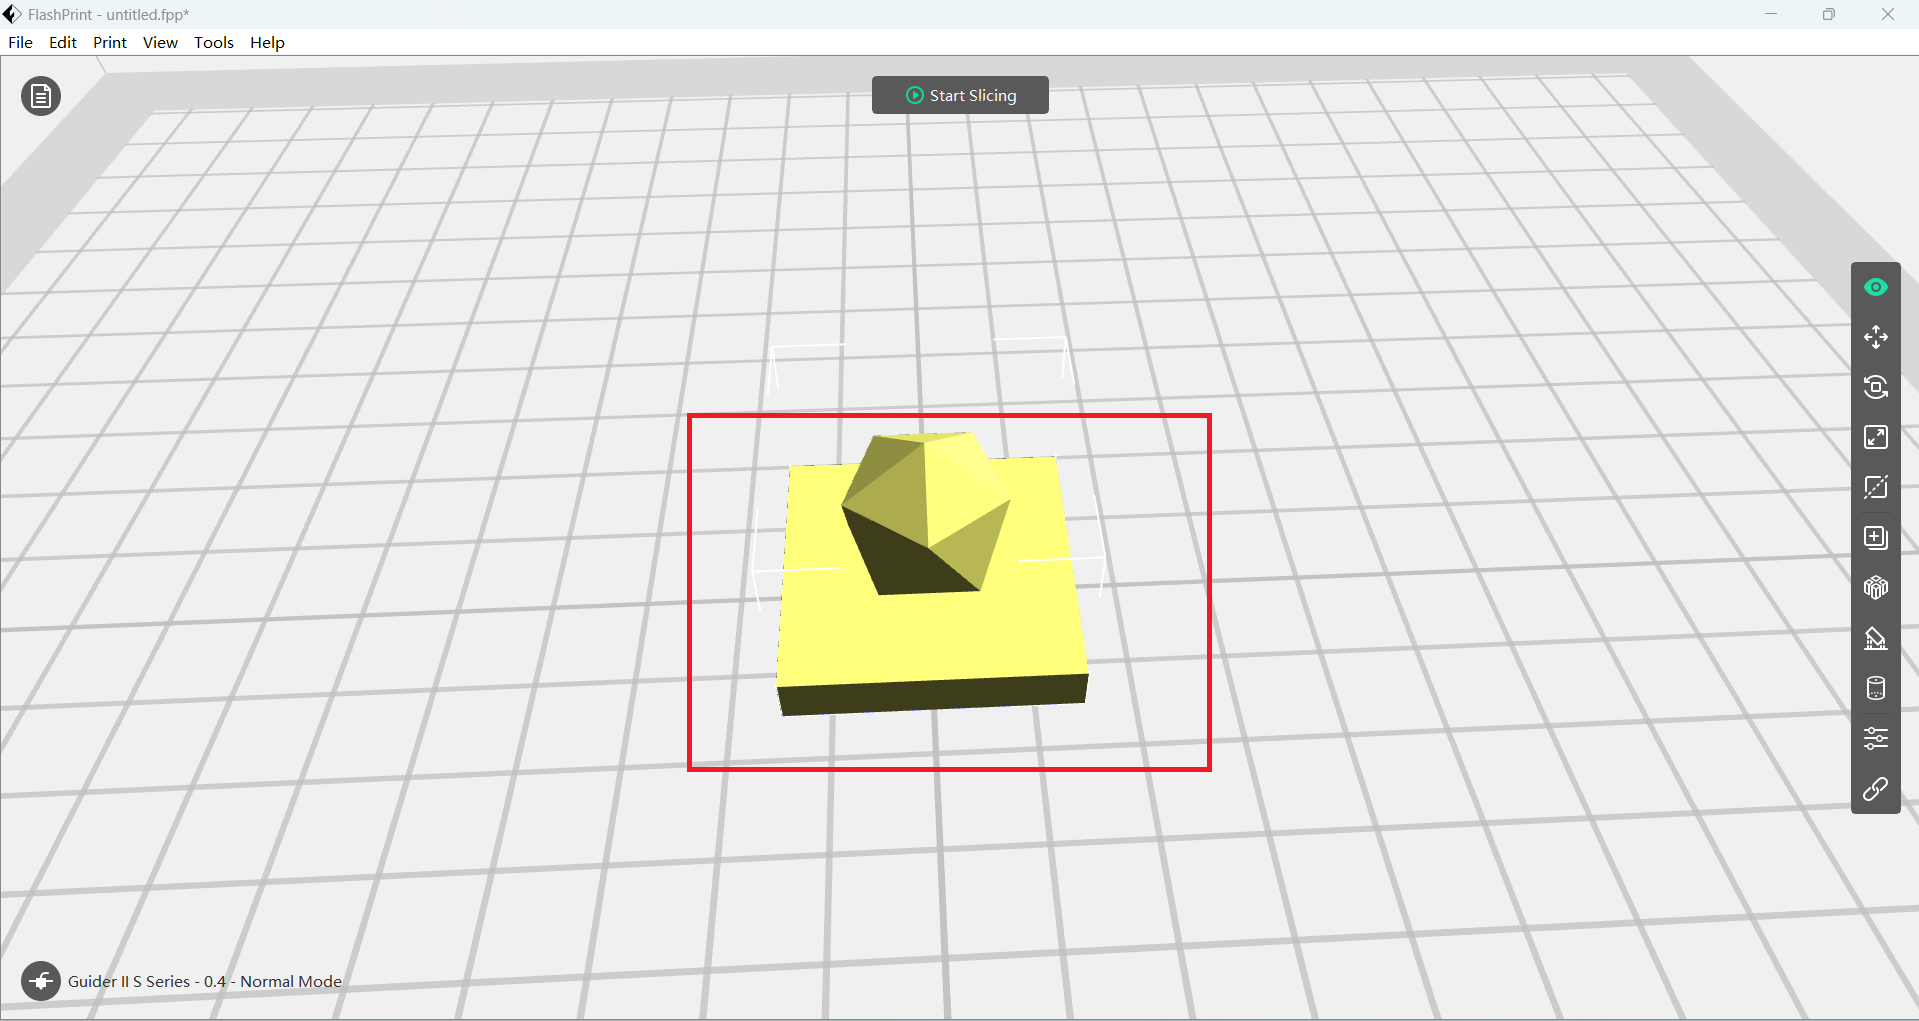
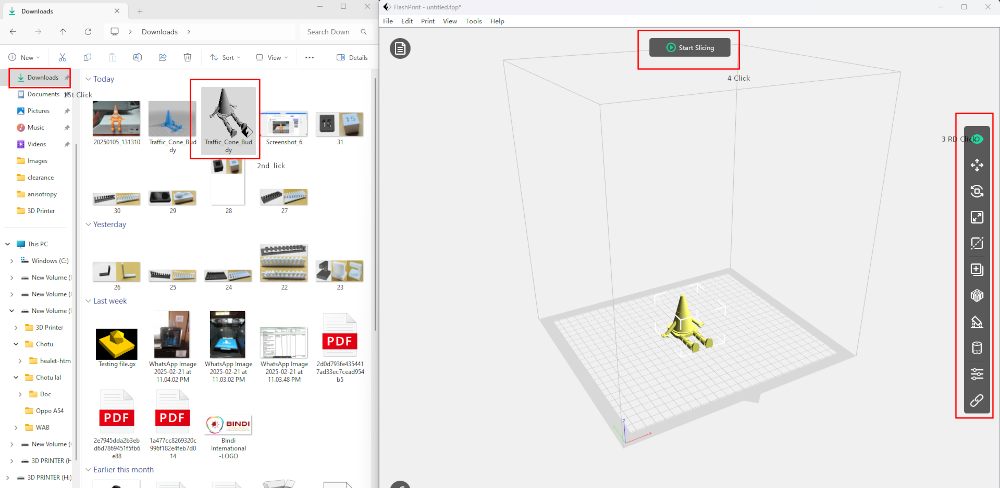
I started by importing the STL file into FlashPrint 5, which automatically displayed the model on the virtual print bed.
|
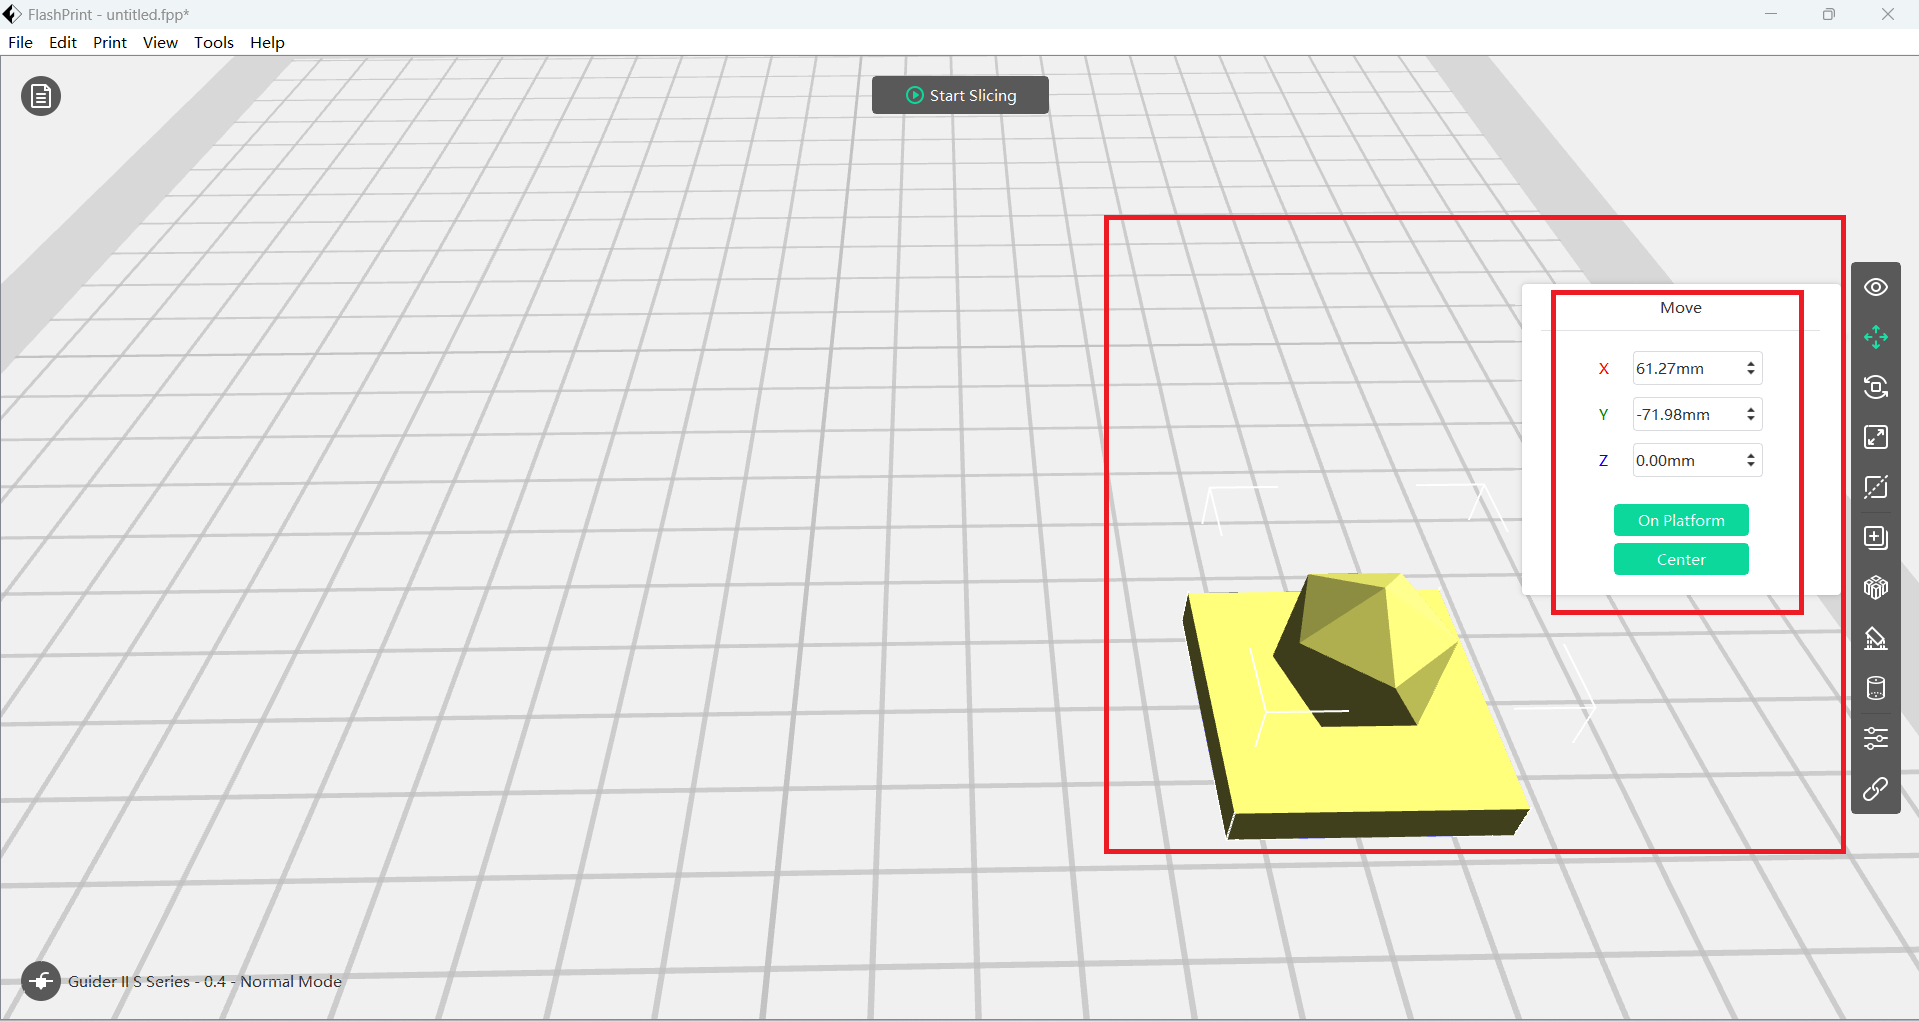
The 3D object appeared on the print bed interface, where I could visualize and fine-tune its position and orientation before printing.
|
|
|
|
I experimented with different placements—centering the model, aligning it to the left, right, and bottom—while also modifying the support structure to ensure optimal stability during printing.
|
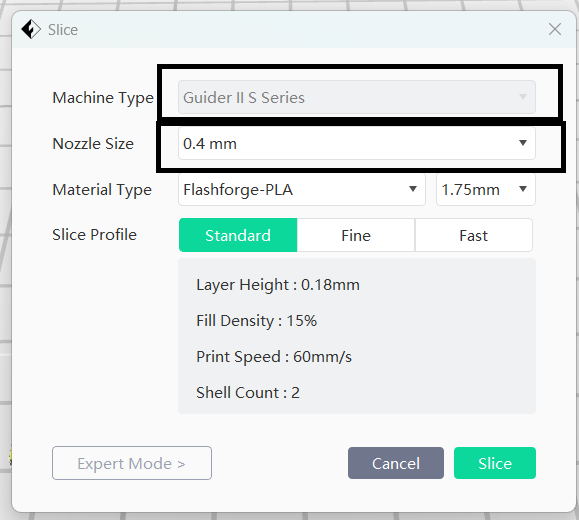
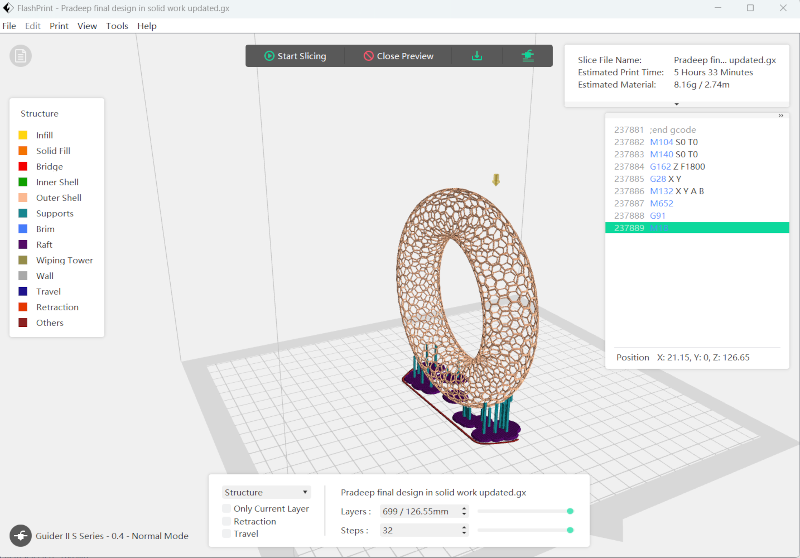
Printer settings were configured according to the specifications of my equipment: Machine Type was set to Guider II S, the nozzle diameter to 0.4mm, and PLA was selected as the filament material.
|
|
|
|
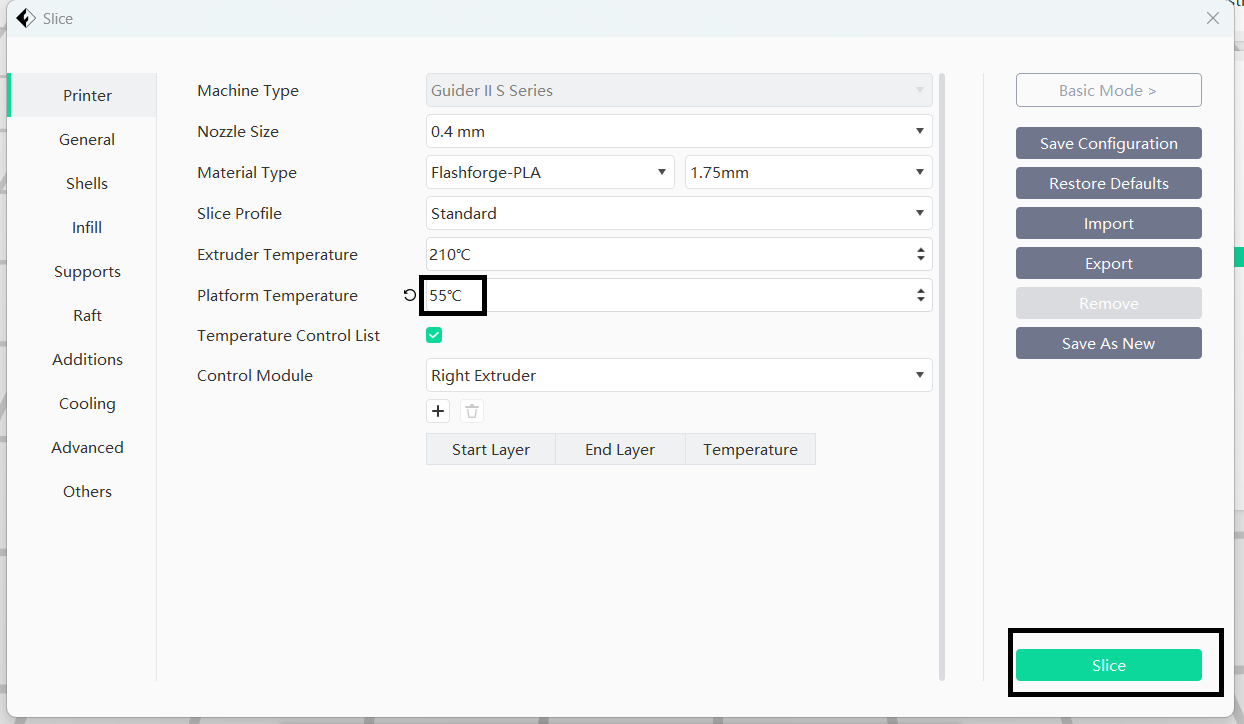
Before initiating the slicing process, I adjusted the platform temperature from the default 30°C to 55°C to improve adhesion of the first layer.
|
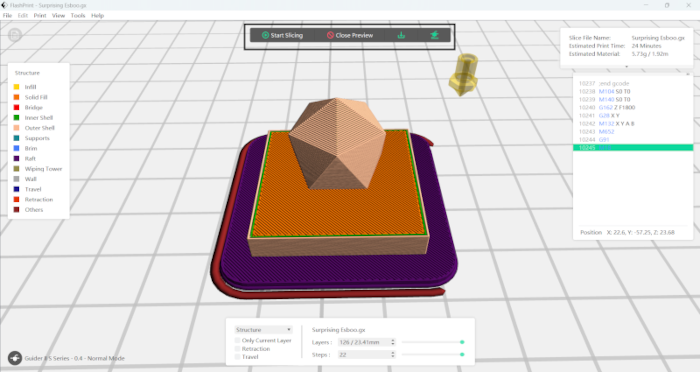
FlashPrint 5 calculated the total estimated print duration as 24 minutes and forecasted material usage to be 5.7 grams of PLA filament.
|
|
|
|
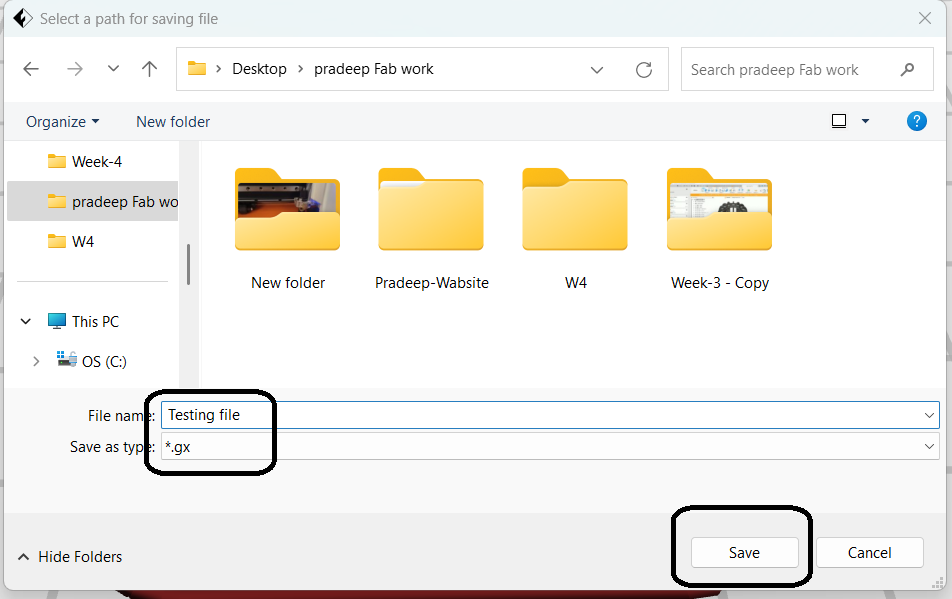
After finalizing the slice settings, I saved the file in GX format, which is a compatible version of G-code for my 3D printer.
|
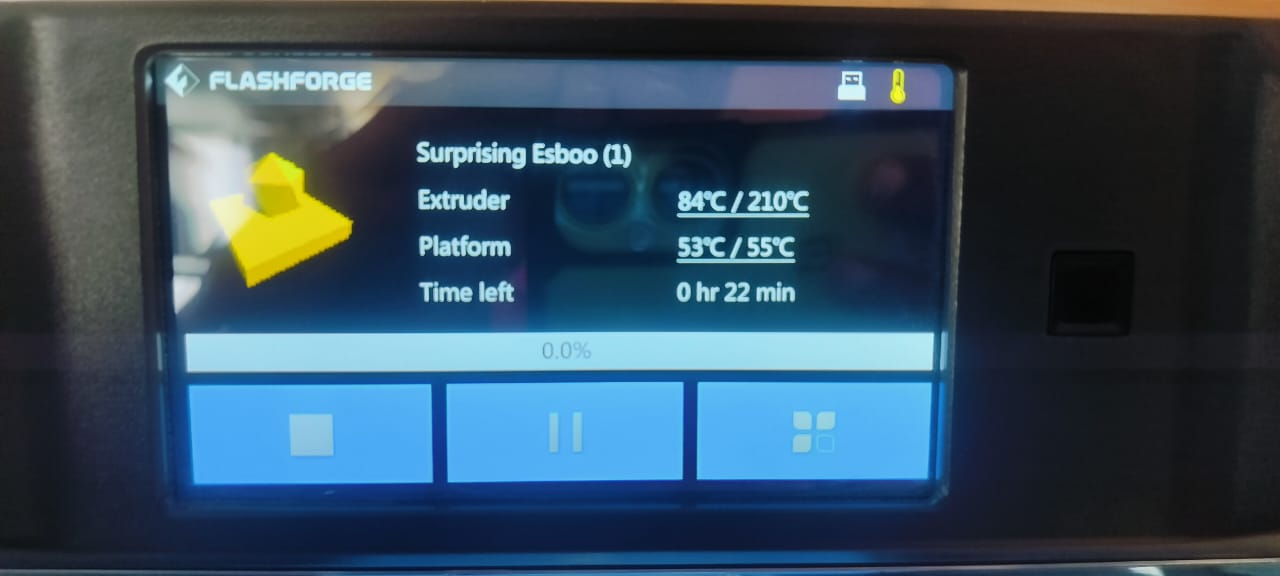
The GX file was transferred to a USB flash drive, which I then inserted into the 3D printer. From the printer’s interface, I selected the correct file to begin the print.
|
|

|
|
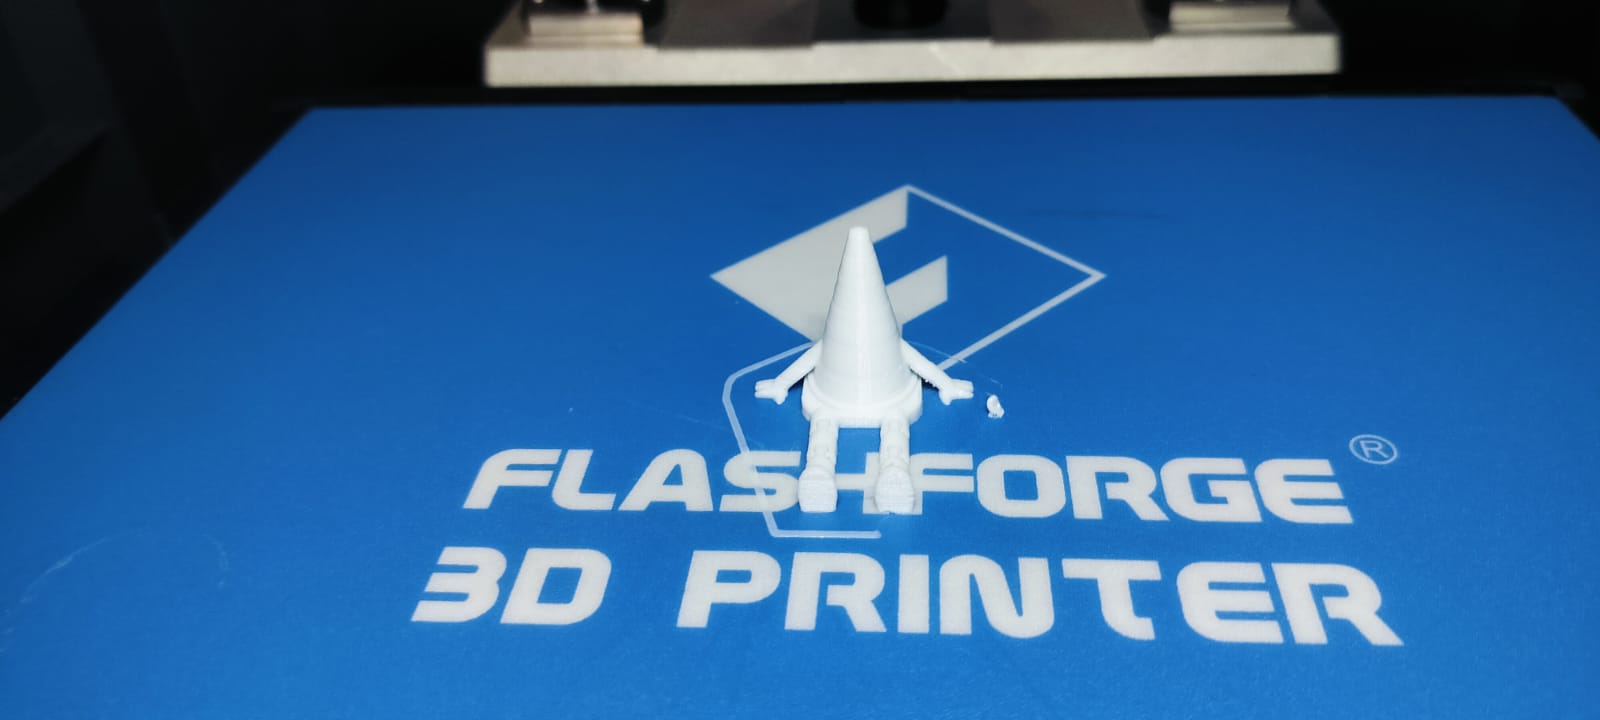
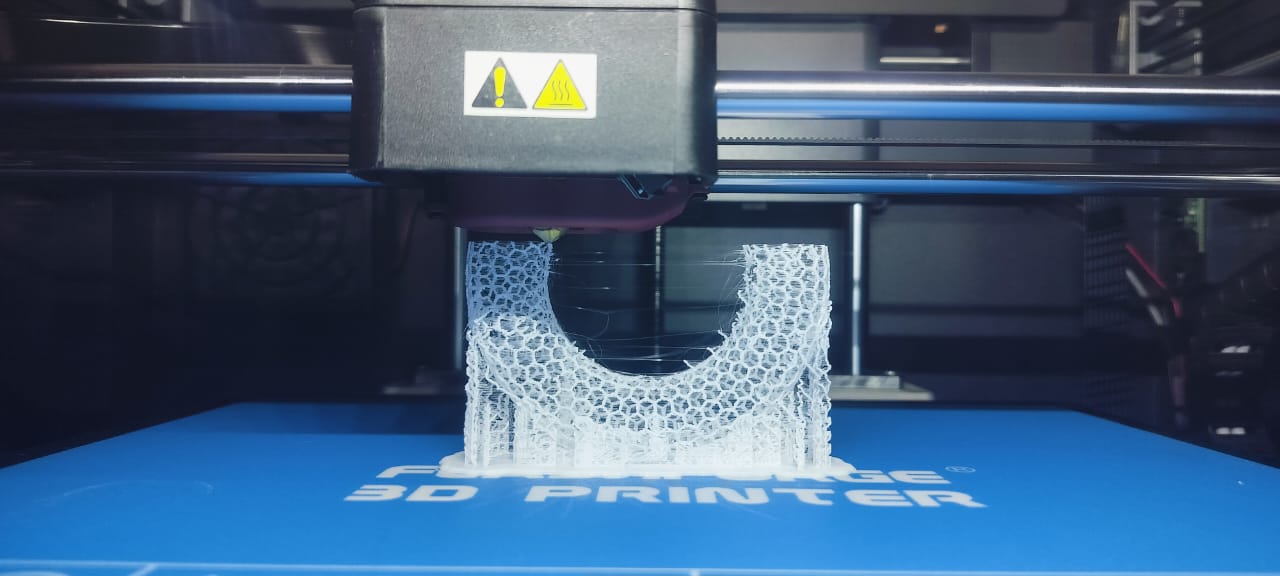
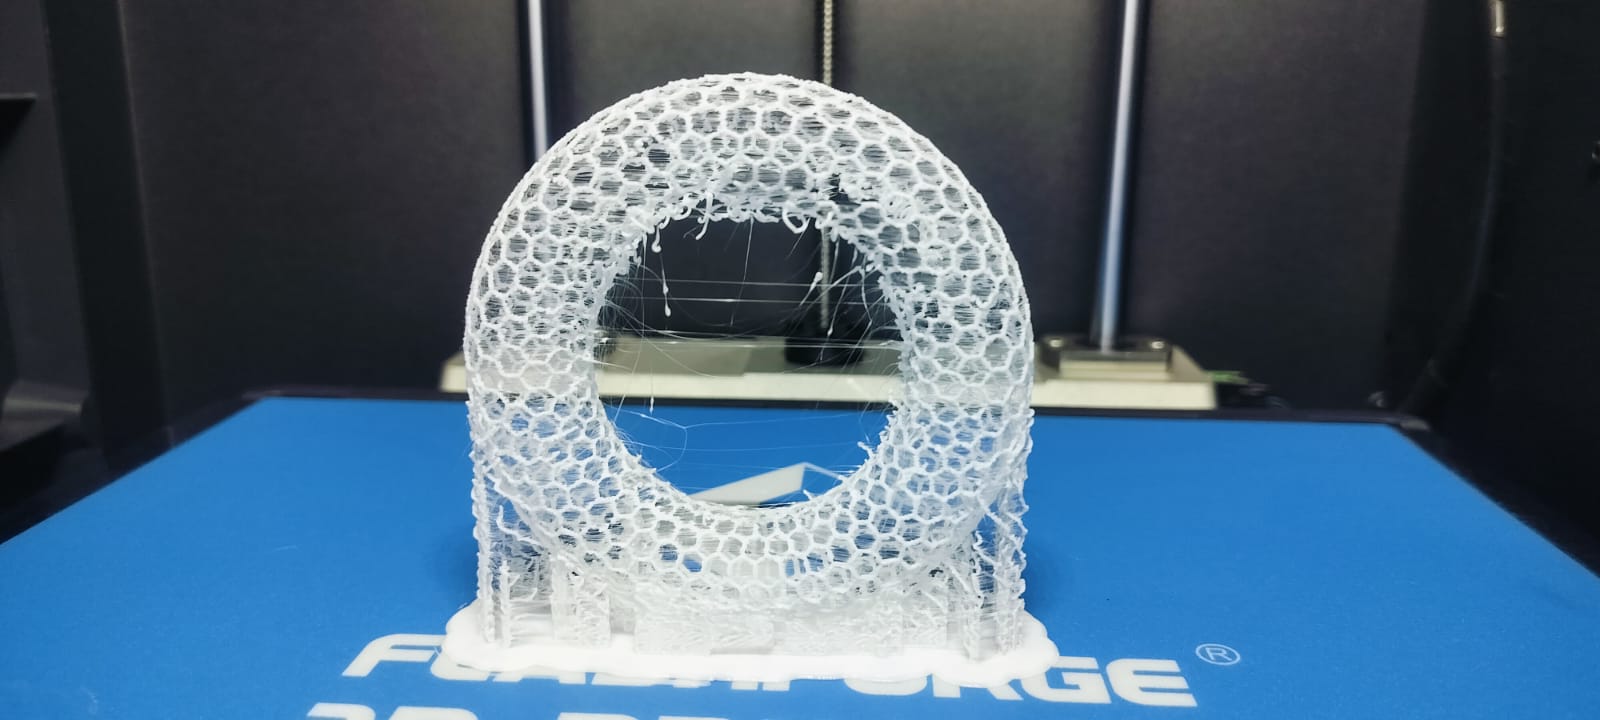
Once the printing process started, the printer followed the G-code instructions to create the object layer by layer. The print completed successfully within the estimated time.
|
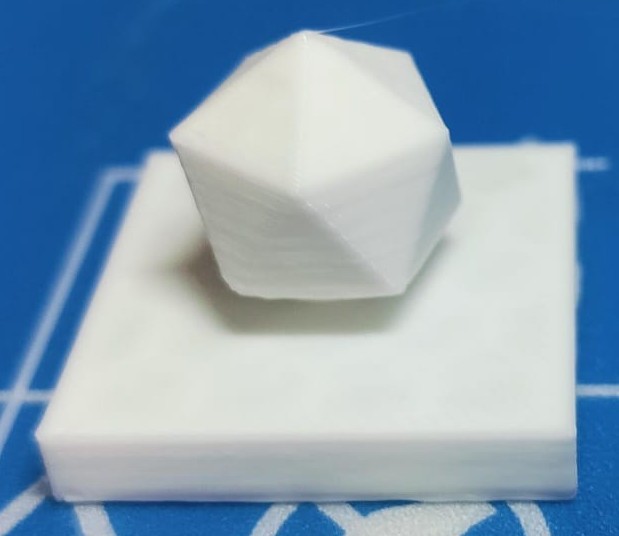
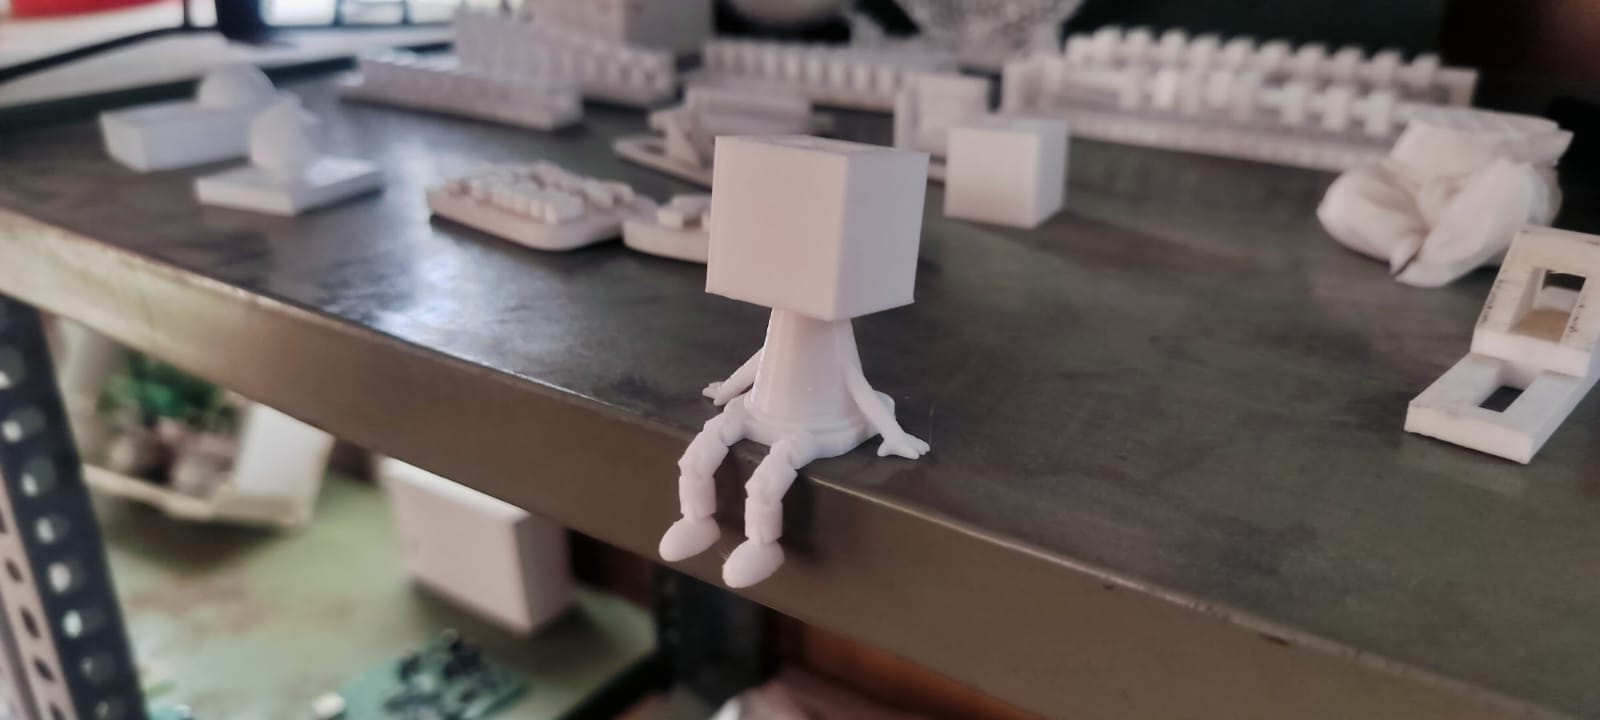
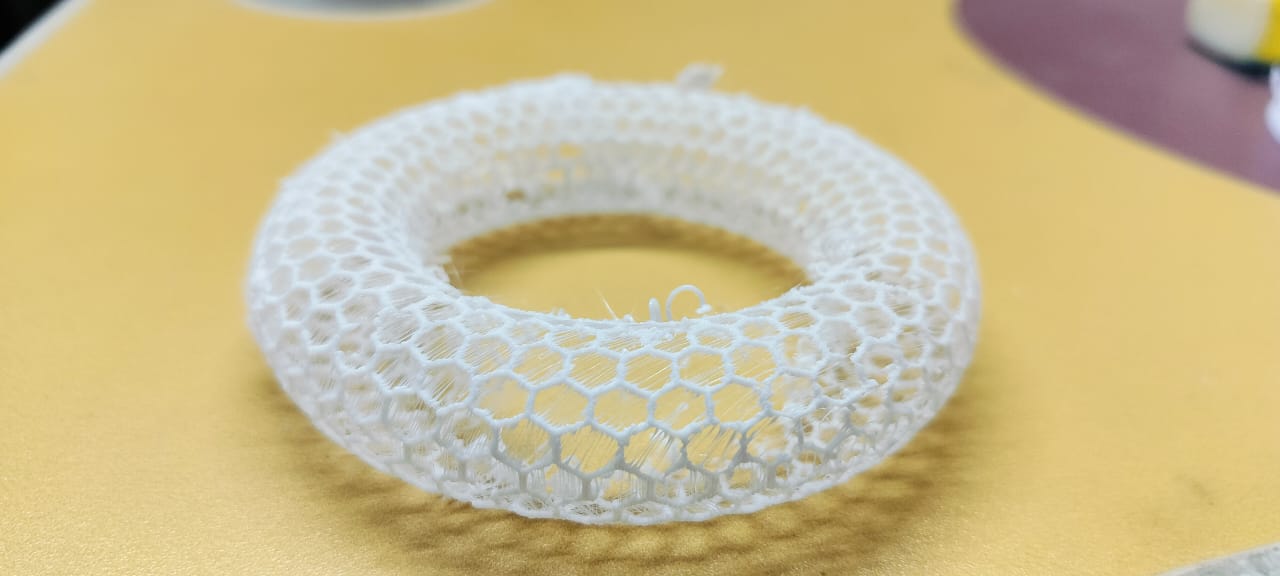
After the 3D print was completed, I captured a ‘hero shot’ of the final object to showcase the quality and details of the printed model.
|
Utilizing Thingiverse for 3D Printing
|
|
|
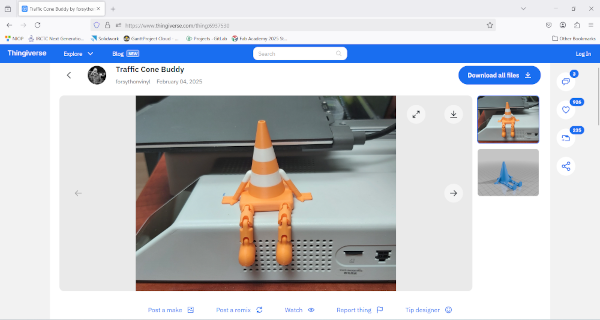
I registered on the Thingiverse platform and selected a suitable 3D model for my project, which I then downloaded for printing.
|
Next, I imported the downloaded design into FlashPrint 5 software to prepare it for printing by generating the appropriate G-code.
|
|
|
|
The image above showcases the final output after successful 3D printing.
|
This is the hero shot of the completed project, highlighting the printed object in its final form.
|
Explore more 3D designs at the official Thingiverse website.
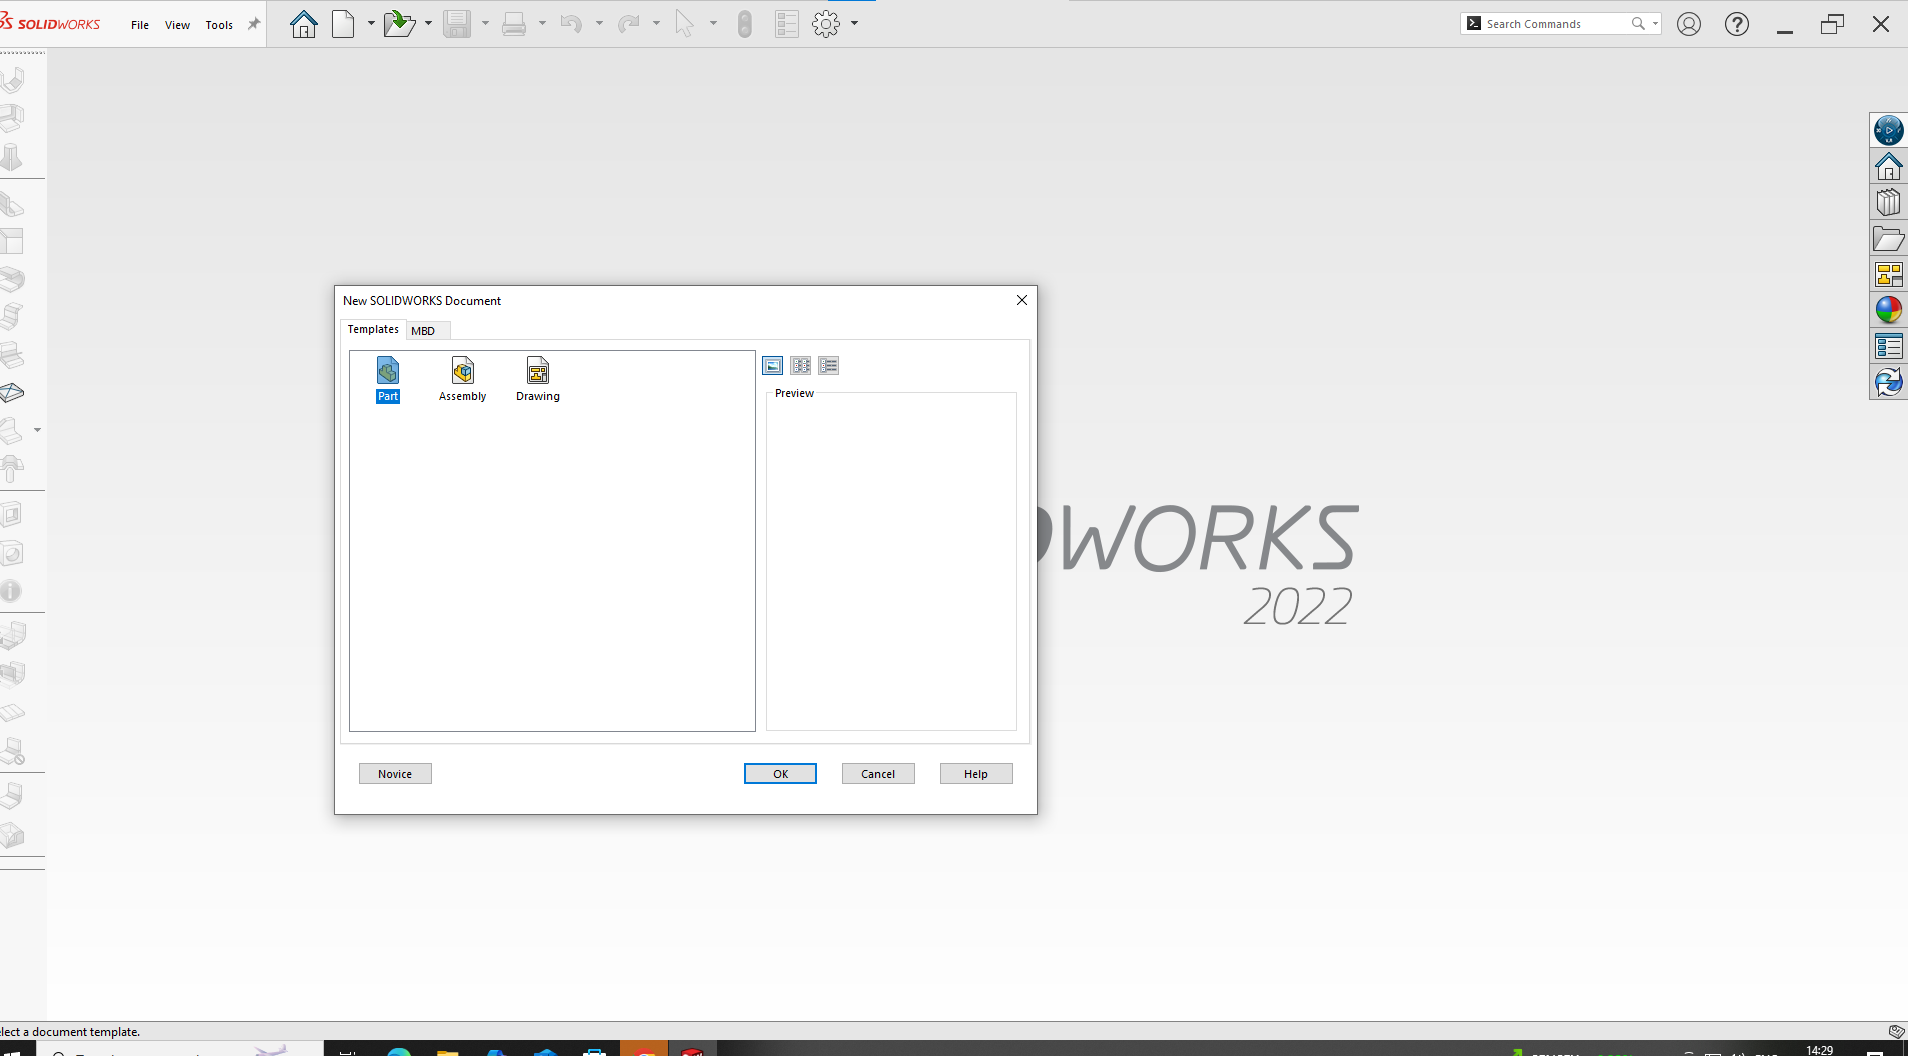
I used SolidWorks for the 3D Printing Process
|
|
|
I began by launching the SolidWorks software to initiate the 3D modeling process.
|
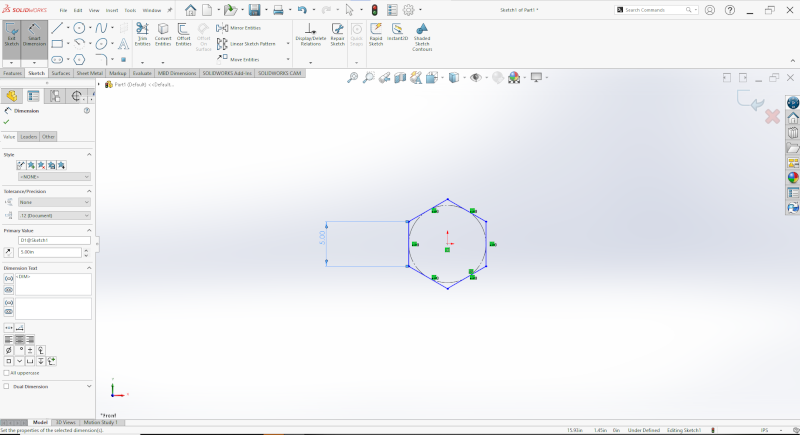
Using the sketch tool, I created a hexagonal shape as the base of my 3D model.
|
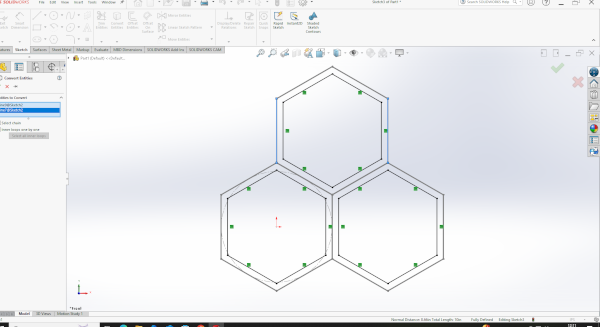
|
|
|
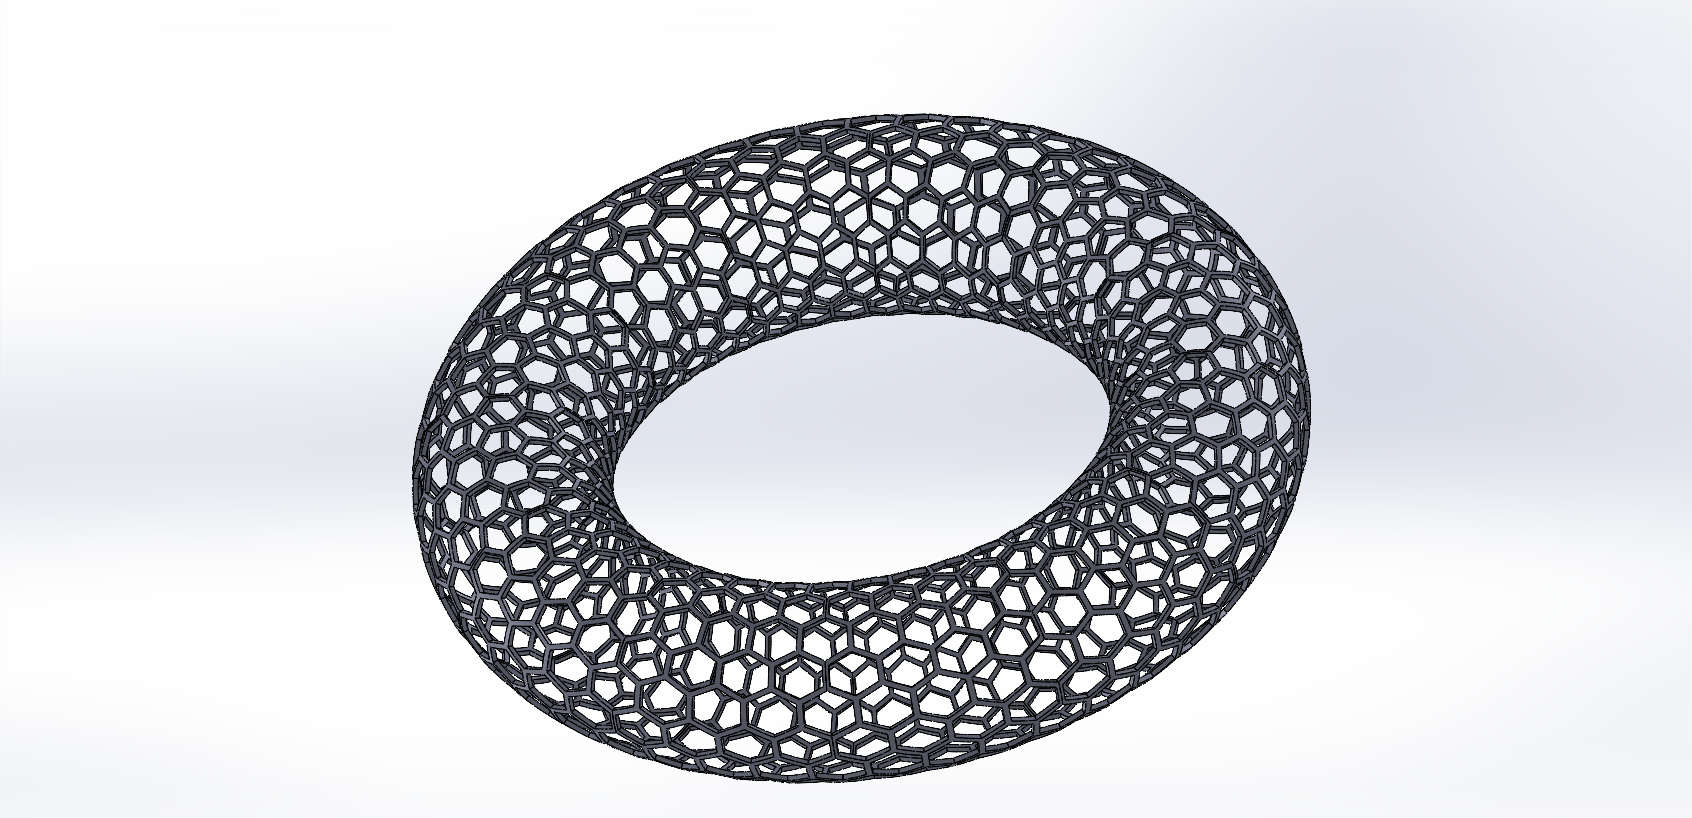
I applied the offset command and performed an extrusion to give the shape a 3D structure.
|
Once the model was complete, I converted it into a mesh and exported the design as an STL file for printing.
|
|
|
|
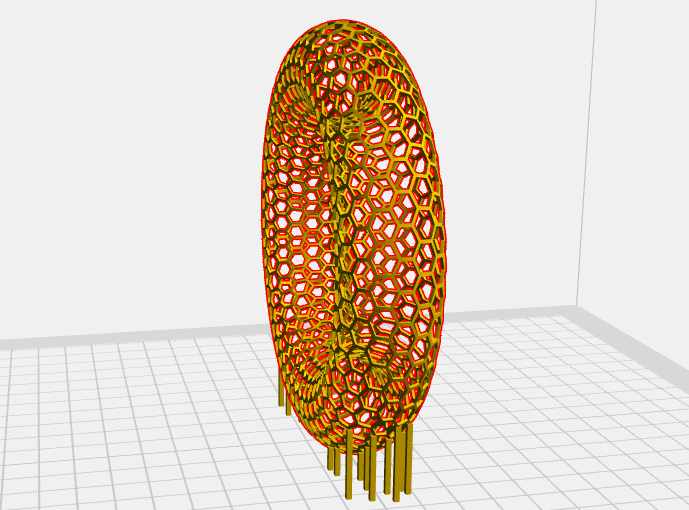
I then imported the STL file into FlashPrint 5 to prepare it for 3D printing.
|
In FlashPrint, I generated the G-code and configured the necessary support settings for a successful print.
|
|
|
|
After slicing the model, I saved the file in GX format, which is compatible with the 3D printer.
|
I sent the final print command to the 3D printer to start the printing process.
|
|
|
Once the printing was completed, I successfully obtained the final 3D printed object.
|
Reference Video
🖨️ 3D Printing Configuration and Parameters
| Category |
Parameter |
Value |
| Printer Settings |
Machine Type |
Guider II S Series |
| Nozzle Size |
0.4 mm |
| Material Type |
Flashforge-PLA (1.75mm) |
| Slice Profile |
Standard |
| Temperature |
Extruder Temperature |
210°C |
| Platform Temperature |
55°C |
| Scale & Position |
Model Scale (X × Y × Z) |
80.00 mm × 17.75 mm × 80.00 mm |
| Position (X, Y, Z) |
21.15 mm, 0 mm, 126.65 mm |
| Estimated Print Time |
5 Hours 33 Minutes |
| Layer & Speed |
Layer Height |
0.18 mm |
| First Layer Height |
0.27 mm |
| Base Print Speed |
60 mm/s |
| Travel Speed |
80 mm/s |
| First Layer Max Speed |
10 mm/s |
| Infill & Shell |
Fill Density |
50% |
| Fill Pattern |
Line |
| Top/Bottom Layers |
3 / 3 |
| Raft & Support |
Raft |
Enabled |
| Raft Margin |
3.0 mm |
| Space to Model (Z) |
0.15 mm |
| Support Type |
Manual |
| Material |
Estimated Material |
8.16 g / 2.74 m |
| Material Color |
White |
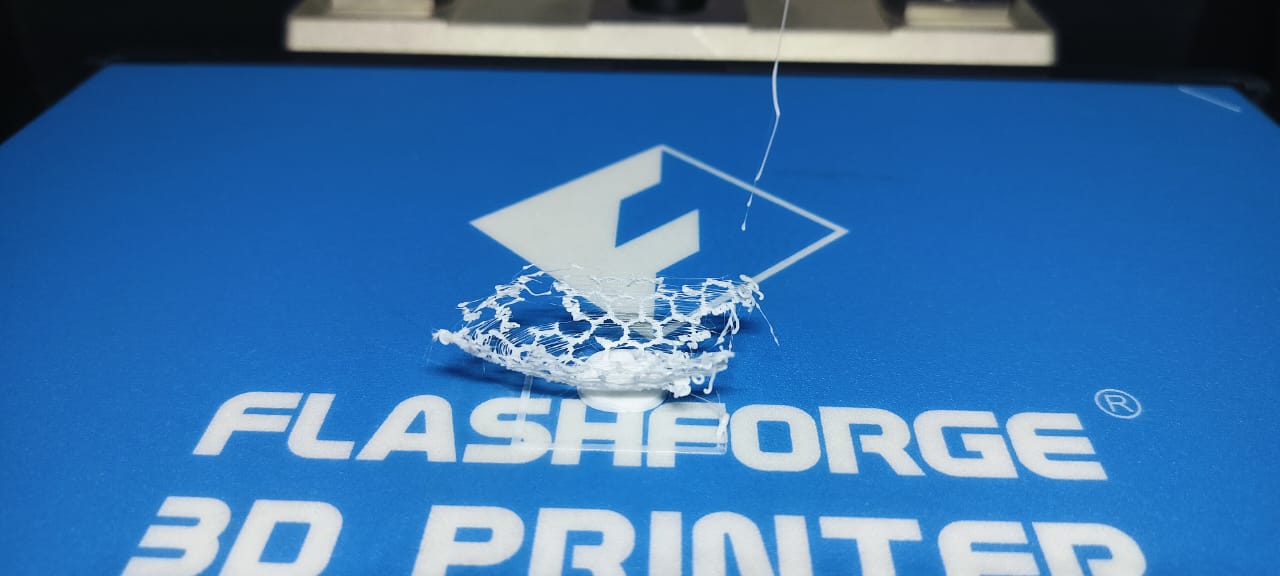
Testing and Learning from 3D Print Failures
|
I tested the design by printing the G-code without any support structures.
Additionally, I removed the raft during the printing process.
As a result, the final output was incomplete and structurally unstable.
This experience taught me that using appropriate support is crucial to maintain both the strength and quality of 3D prints.
|
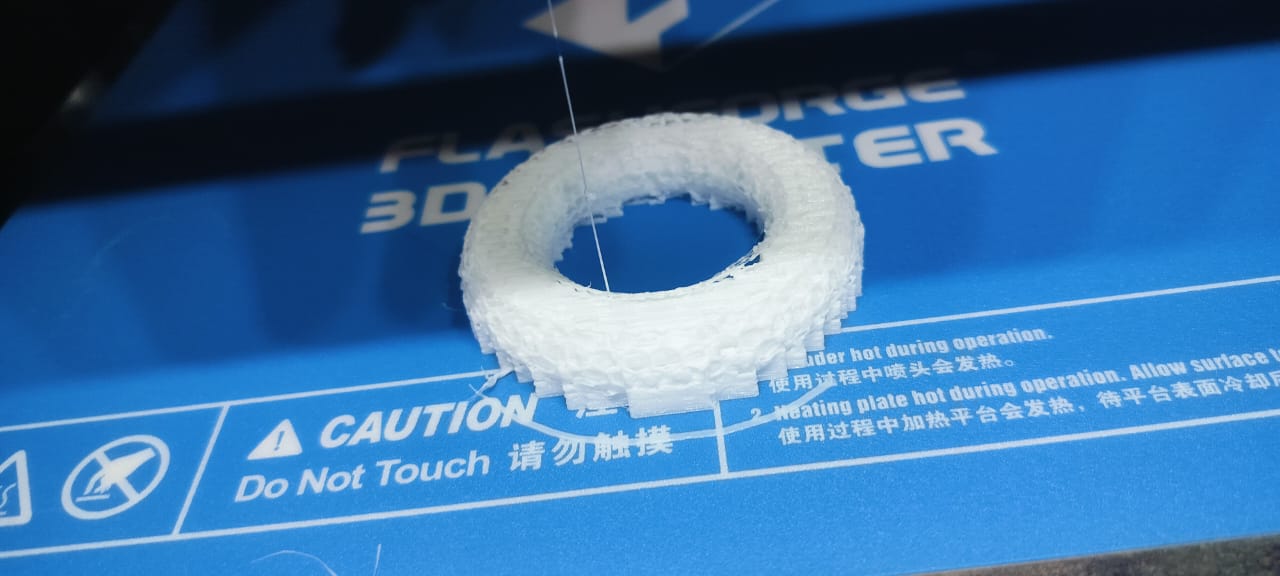
|
For this version, I enabled automatic support settings in the slicer.
While the supports were effective in holding the structure during printing, they were extremely difficult to remove afterward.
Attempting to forcefully remove them resulted in damage to the printed part.
I learned that supports should be carefully configured to appear only in critical areas to ensure both accuracy and ease of post-processing.
|
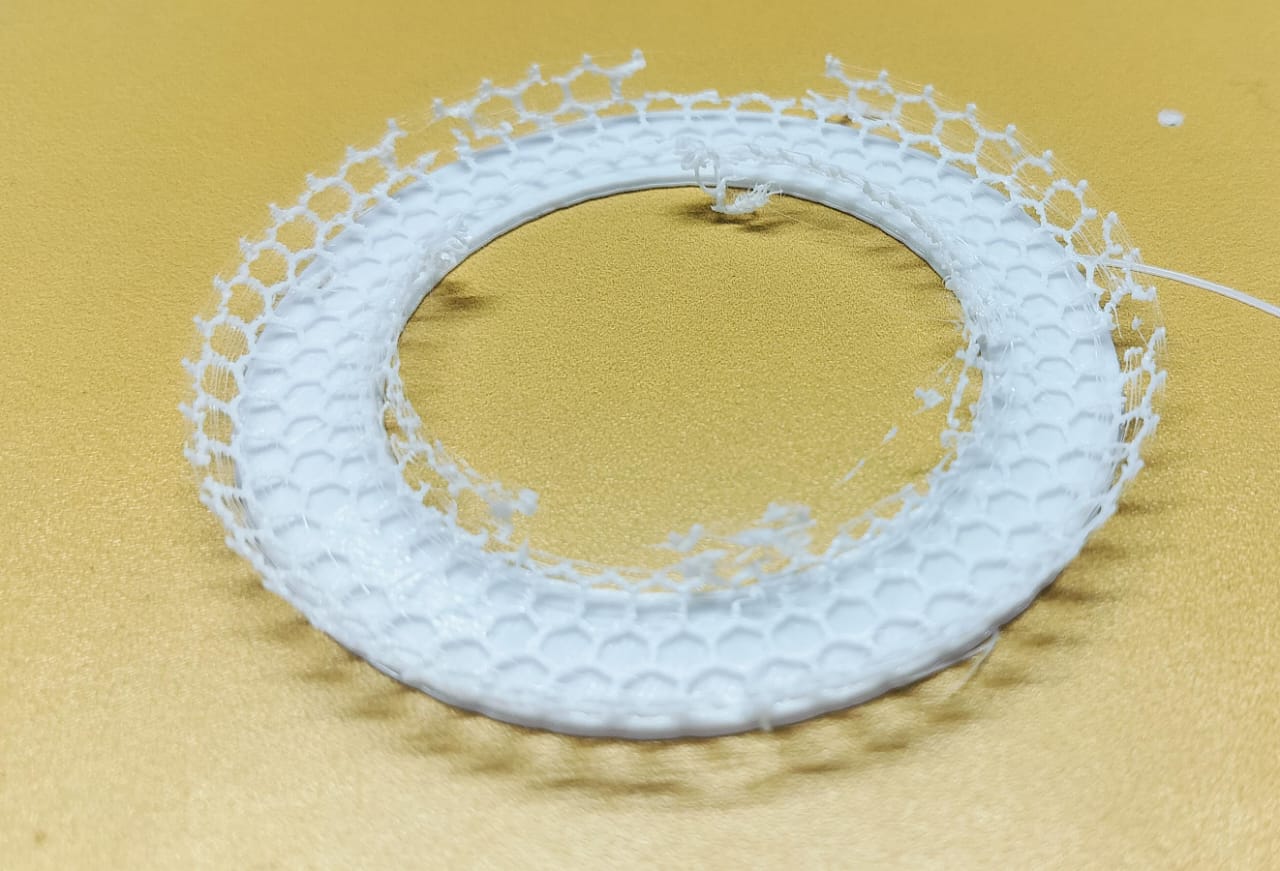
|
In this attempt, I rescaled the design and added a raft, hoping for improved results.
Despite the changes, the print still did not meet my expectations.
This attempt helped me understand that simply increasing the scale is not enough to resolve design issues.
Proper support placement and optimized print settings are essential for successful 3D printing.
|
Guided and supported by Chotu Lal Mali
3D Scanning :
3D scanning is a process that captures the shape and intricate details of real-world objects to create accurate digital 3D models. This technology employs various methods—such as laser scanning, structured light, and photogrammetry—to record both the geometry and surface texture of an object. By converting physical items into digital file formats like STL or OBJ, 3D scanning enables easy reproduction, modification, and integration into design and manufacturing workflows.
For the Scanning i am using the WIDAR application:
WIDAR is a 3D scanning and modeling application that lets users create high-quality 3D models using their smartphone camera. It turns real objects into digital 3D models using photogrammetry technology. WIDAR supports many file formats such as STL, OBJ, and GLB.
 Install the WIDAR application for 3D scanning and open it. |
 Start a new scan in the application. |
 Upload the item once it has been scanned, and the app will handle the scan. |
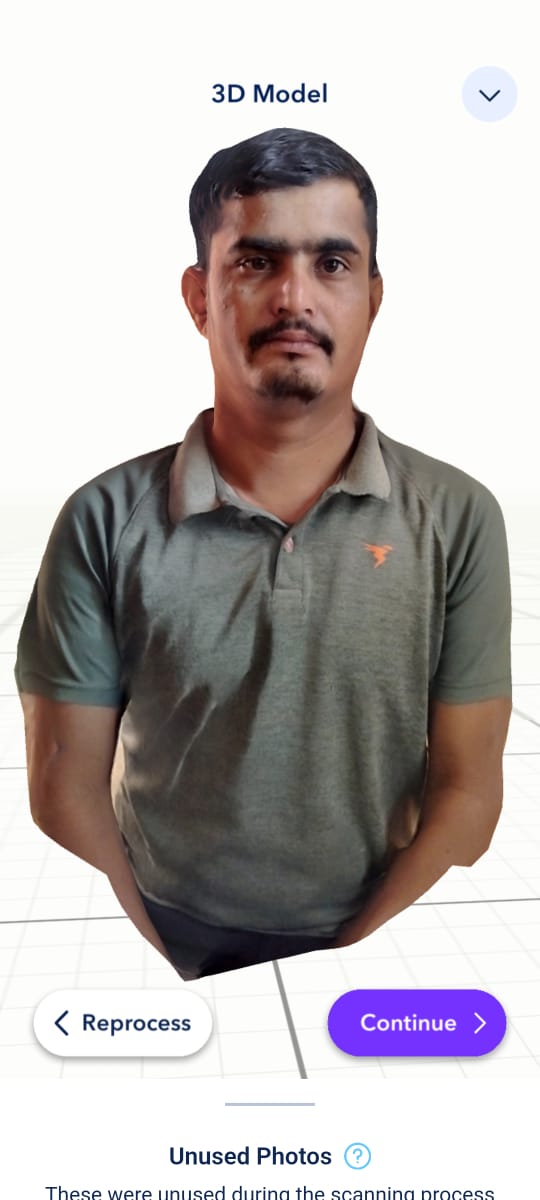 Once processing is complete, the 3D object will be displayed, allowing movement and adjustments. Click "Continue." |
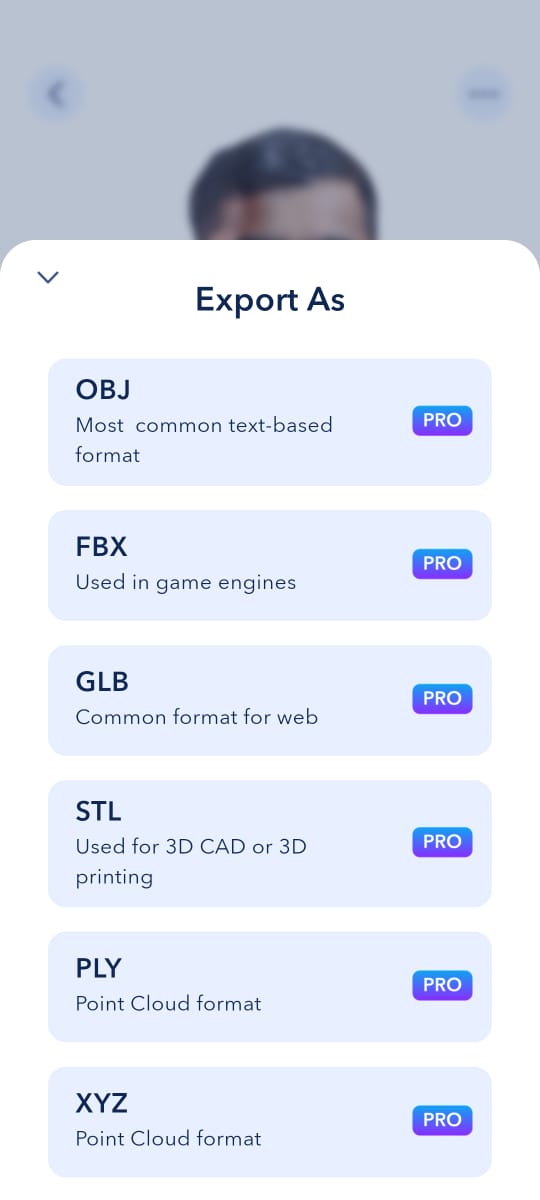 You can export the file in various formats, but exporting requires the paid version. |
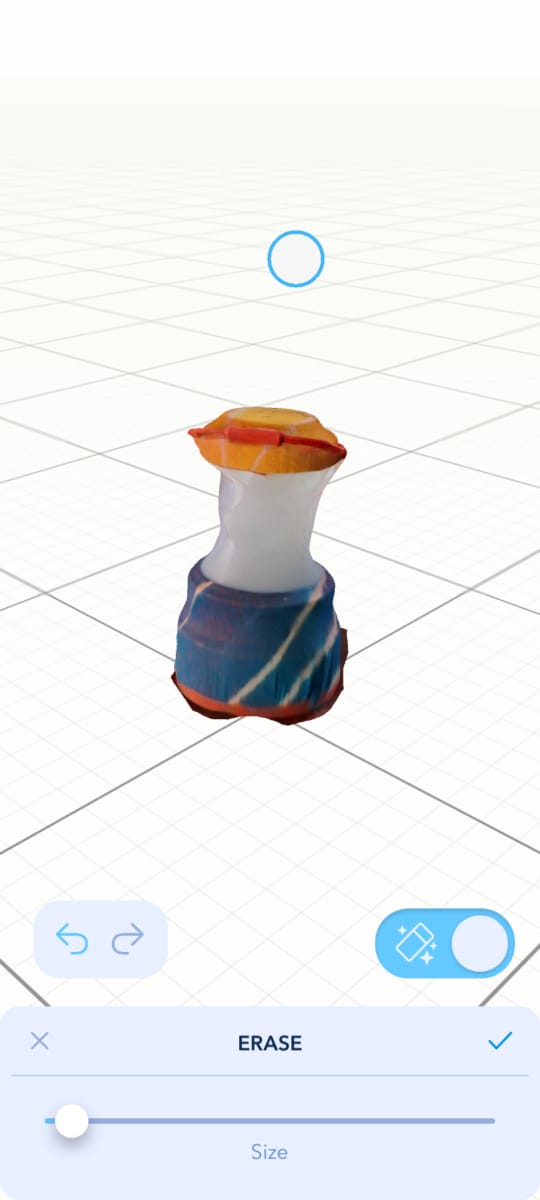 After that, I scanned a new object. |
Tools I Used
Design Tools: Tinkercad, SolidWorks
Slicing Software: FlashPrint 5
3D Printer: FlashForge Guider IIS
3D Scanning App: WIDAR
Concept by me structured by ChatGPT.