Week 16 - Wildcard Week
ASSIGNMENT
• Design and produce something with a digital process (incorporating computer aided design and manufacturing) not covered in another assignment, documenting the requirements that your assignment meets, and including everything necessary to reproduce it. Possibilities include but are not limited to wildcard week examples.
OVERVIEW
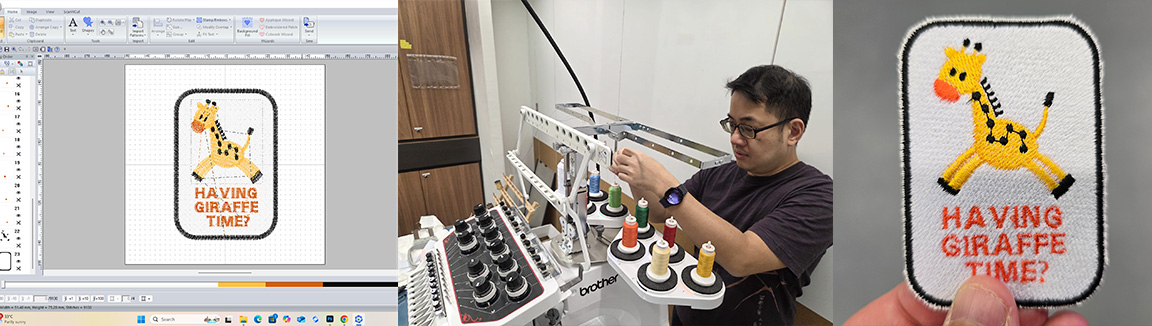
This week is wildcard week which means the Fab Academy students get to choose a topic that they want to explore. I chose to explore Embroidery and made a badge using the BROTHER Entrepreneur Pro Pr1050x 10-Needle Home Embroidery Machine.
INTRODUCTION TO EMBROIDERY
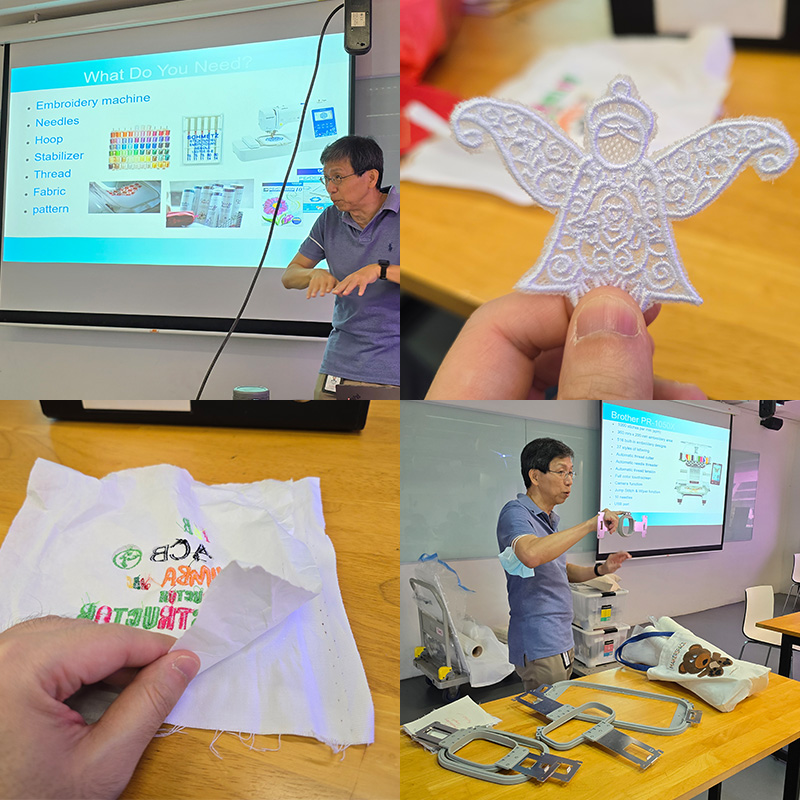
On the first day of our exploration our Instructor Steven introduced us to Embroidery. The introduction covered:
1. What you will need (for Embroidery) – Embroidery machine, needles, hoops, stabilizer, thread, fabric and pattern.
2. Looking at samples of different types of embroidery – We looked at different types of embroidery samples to get a sense of what was possible with embroidery.
3. Hooping and the different types of hoops for embroidery – There are different types of hoops for different purposes. There are even specialized hoops such as hoops for sleeves and caps.
4. The different types of needles for embroidery – Not the same as sewing machine needles. The eye of the needle is nearer to the point. Typical size is 75/11 for standard projects and 90/14 for thicker fabric.
5. Stabilizers – These are underlays to place beneath the fabric to ensure that the stitches intact and prevents the fabric from tearing.
6. Threads – Different threads for different purposes. 40-wt for general use, 80-wt for finer embroidery. The bobbin thread is different and is typically 60-wt.
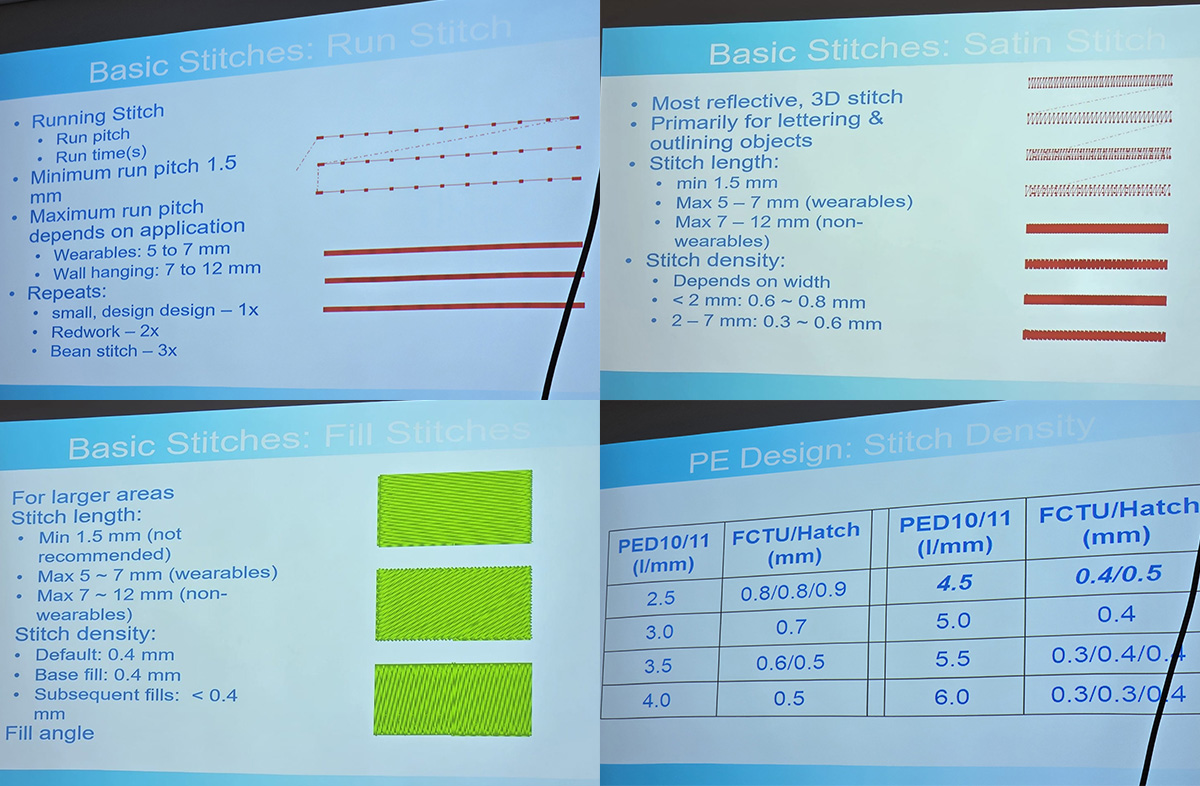
7. Different types of Stitches – Different types of stitches that fulfil different embroidery purposes (e.g. Fill stitches are used for larger areas, Satin stitches are used mainly for lettering and outlining objects. See image below for details:
8. Embroidery software and Embroidery machine file formats – For our Brother embroidery machine, we use PES.
9. Additional learning resources – We were introduced to additional learning resources such as OleensEmbroidery Youtube channel.
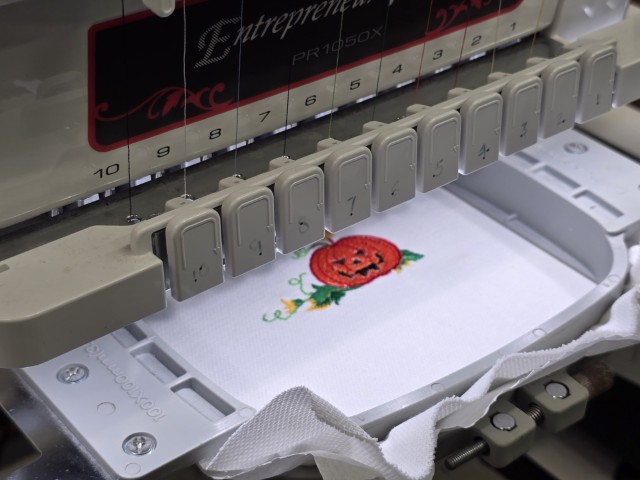
BROTHER ENTREPRENEUR PRO PR1050X 10-NEEDLE HOME EMBROIDERY MACHINE

The embroidery machine we have at our Fab Lab is the BROTHER ENTREPRENEUR PRO PR1050X 10-NEEDLE HOME EMBROIDERY MACHINE. I looked for information online about this machine from the manufacturer’s website here.
Some interesting things I found out about this machine from the website:
• It is a 10-needle embroidery machine with automatic needle threading
• This model has been discontinued
• It has a feature called ScanImation Scanning frame to scan line art or handwriting, with opportunity to convert into embroidery data. If I am reading this correctly, it can turn covert any writing or artwork in embroidery stitches
• It has a Large 10.1" built-in high-definition LCD display with large, more defined icons and scrolling menu.
• It has Smart stitch management with progress bar and direct stitch entry to pinpoint the exact stitch. We experienced using this feature when our embroidery job experienced an issue in the middle of stitching. We were able to stop the job, rectify the issue, and then continue from the exact point where we stopped for the issue.
HANDS ON – MAKING AN EMBROIDERY BADGE
For Wildcard Week, I decided to make an Embroidery Badge and document the process.
PE DESIGN 11
The software required to run our Fab Lab’s BROTHER Entrepreneur Pro Pr1050x 10-Needle Home Embroidery Machine is PE Design 11.
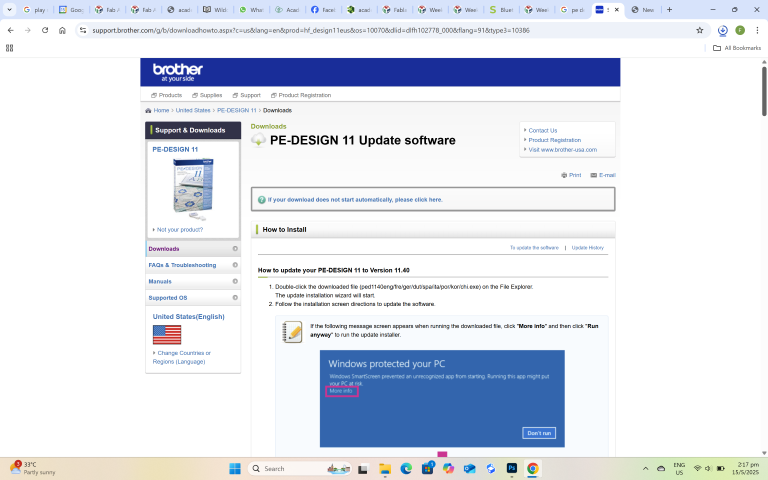
Installation
You can download the software from the manufacturer's website.
You cannot run PE Design 11 unless you have a dongle that contains the software key.
We have some dongles in our Fab Lab so I start up the software to get started.
Wizard
When I first start PE Design 11, a wizard appears to help through the process.
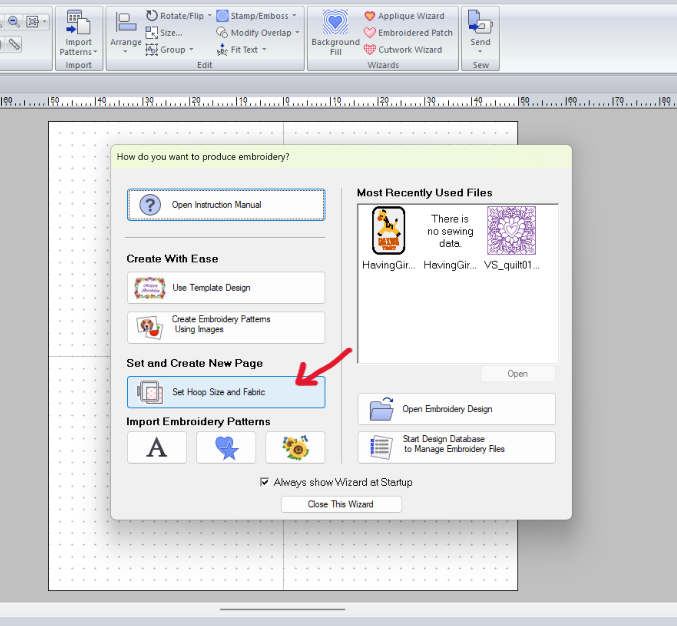
I select "Set Hoop and Fabric" which bring me to some settings. I made the following selections as shown below.
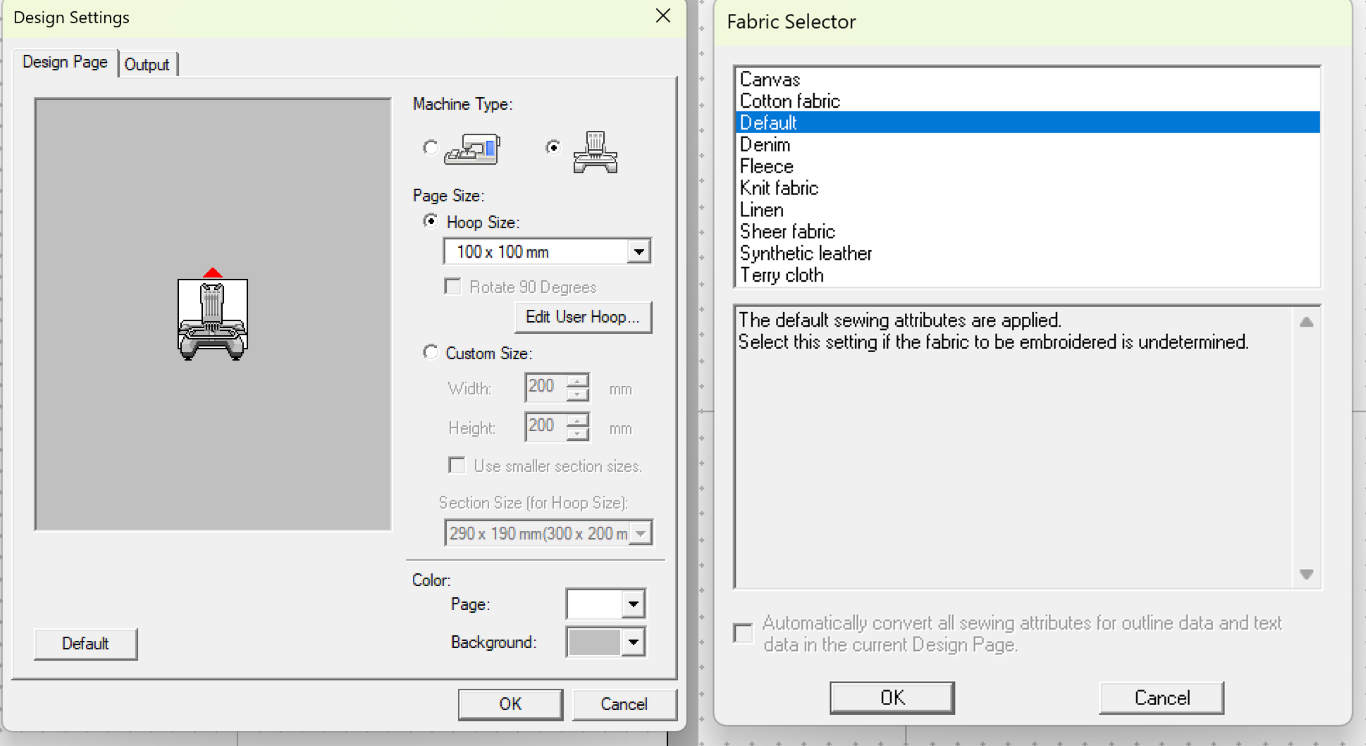
Once I have done this, the workspace is ready to use.
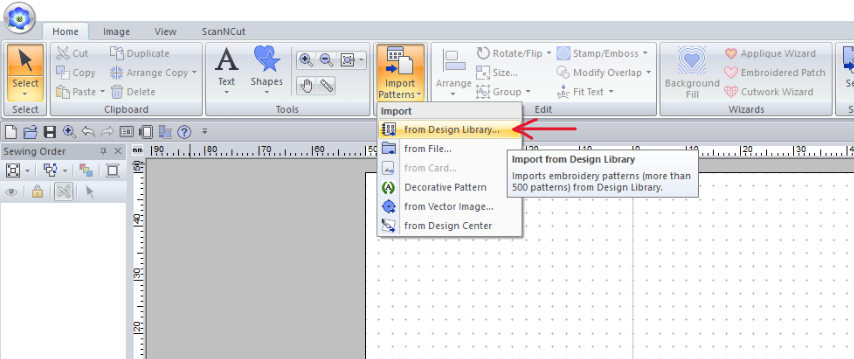
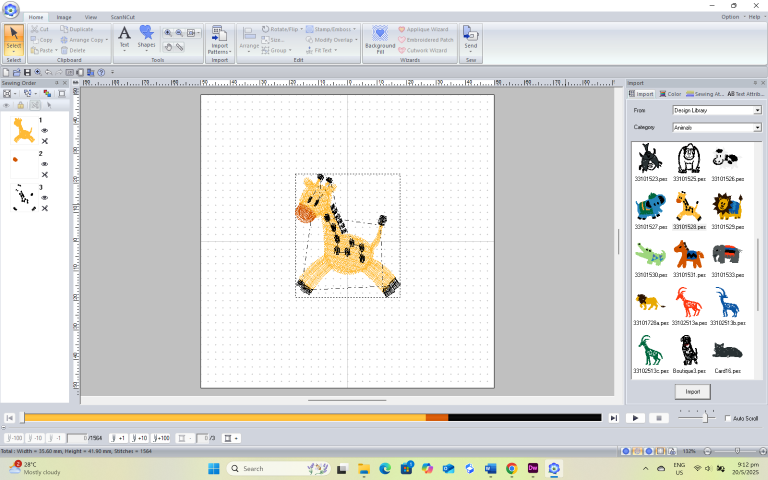
Design Library
I just wanted to make something quickly on the embroidery machine. PE Design 11 comes with a Design Library that you can find template designs to create with. I choose a cute giraffe from the Design Library and drag it into the workspace as my first element.
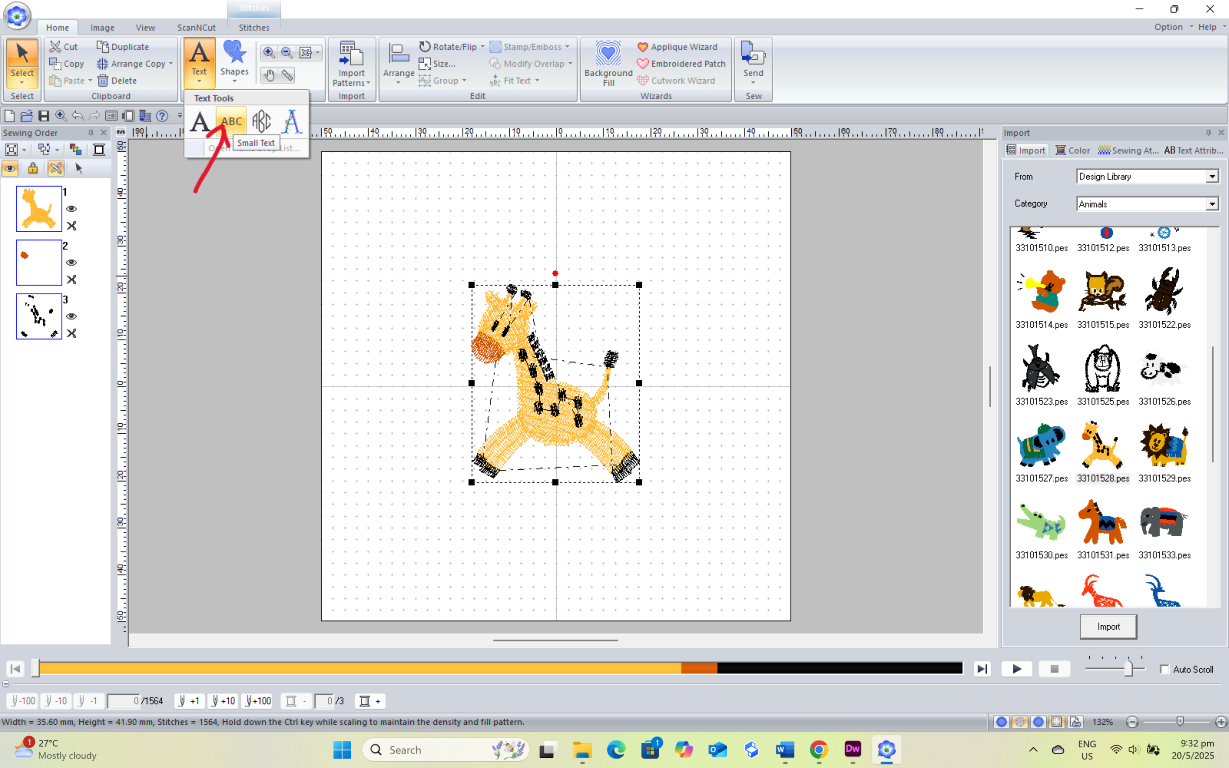
Text
Next, I lay down some text. I choose the small text option and start typing out the text I want.
Shapes
For my last design element, I lay down a rounded rectangle shape as the backing for my badge.

Sewing Order
The sewing order on the side panel shows the order of which the embroidery machine will stitch. If you have used Photoshop before, it looks the same as Photoshop Layers.
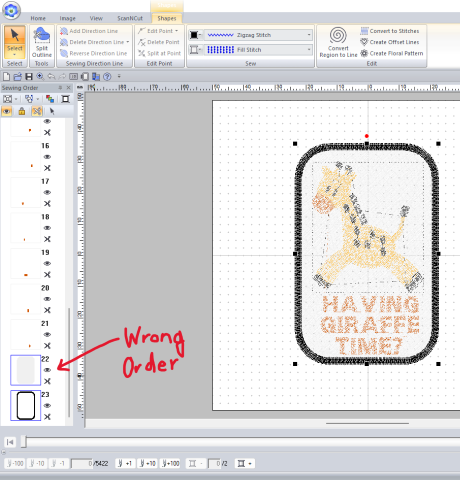
The sewing order is wrong in the image above. There is no point covering the key design elements (giraffe and text) with a white fill.
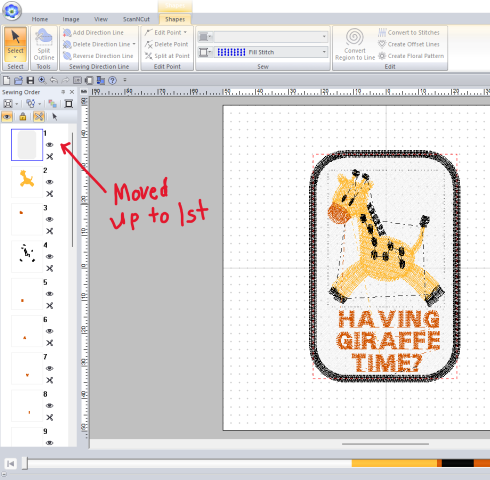
This is an easy fix – Just change the order and move the white fill layer up to be the first layer.
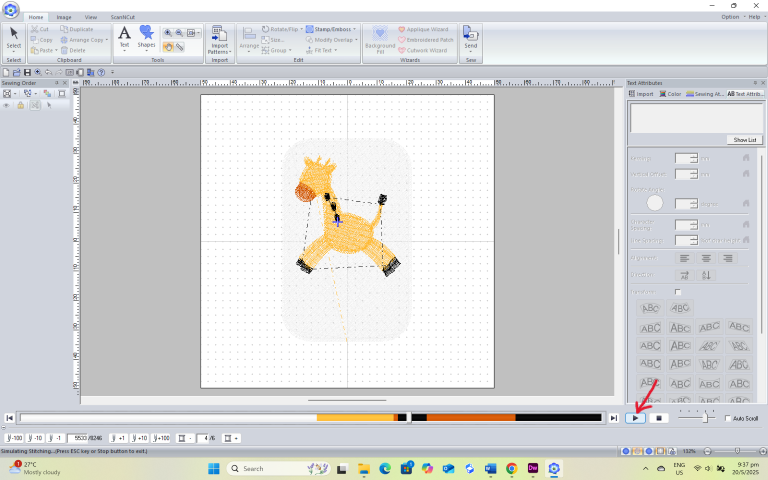
Preview Stitching
You can also preview the sequence of how the embroidery machine will stitch by using the simulation function. It plays like a video.
Save the file
When the design has been completed and I am happy with the simulation. I save the file (File > Save). Now I have a design file ready for my first embroidery project!
I found that the PE Design 11 software was easy to use. It is set up like image editing software like Adobe Photoshop and because I have been using Photoshop for a long time, it was not difficult to figure out. Of course, there are some other more advanced settings that you can tweak, but to get started, the default settings worked fine for me.
OPERATING THE MACHINE
Instructor's Demo
With the file I created in hand, I am eager to start my first embroidery project. My instructor Steven takes us through the process by demonstrating how to use the BROTHER Entrepreneur Pro Pr1050x 10-Needle Home Embroidery Machine with a project example.
Upper Threading
Steven showed us how to thread the embroidery machine. The threading path is shown below.

At step 5, the thread connects to the needle using the auto-threader in the process shown below.
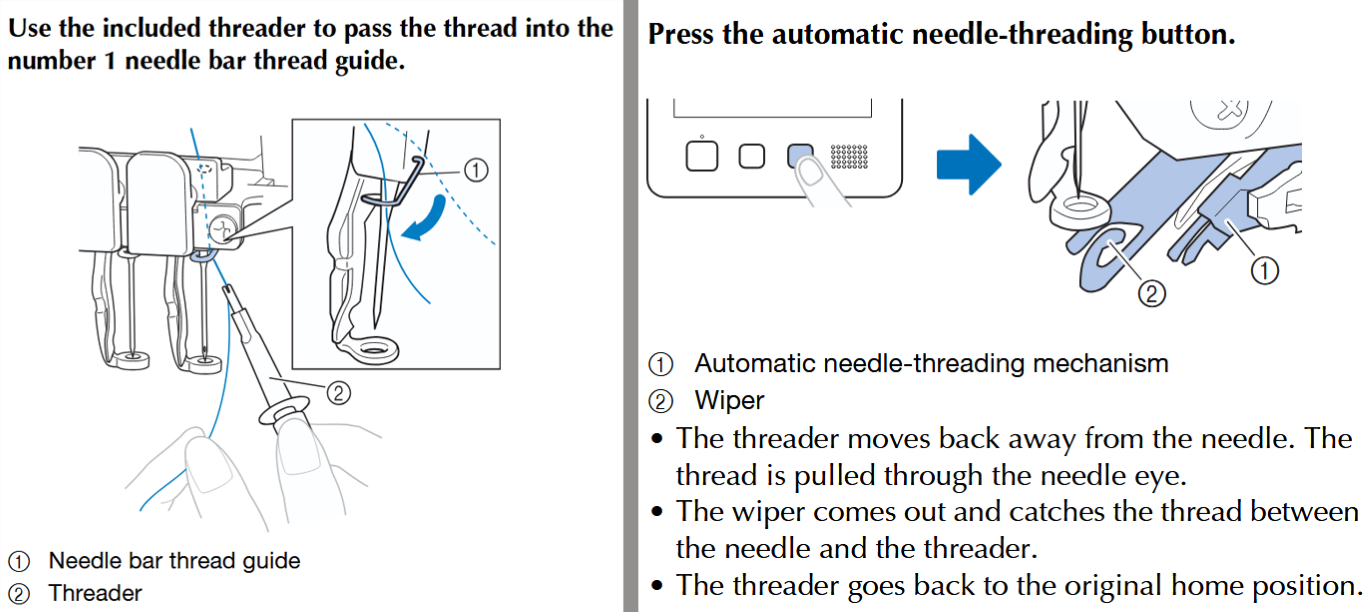
We took turns to thread all 10 threads of the embroidery machine.
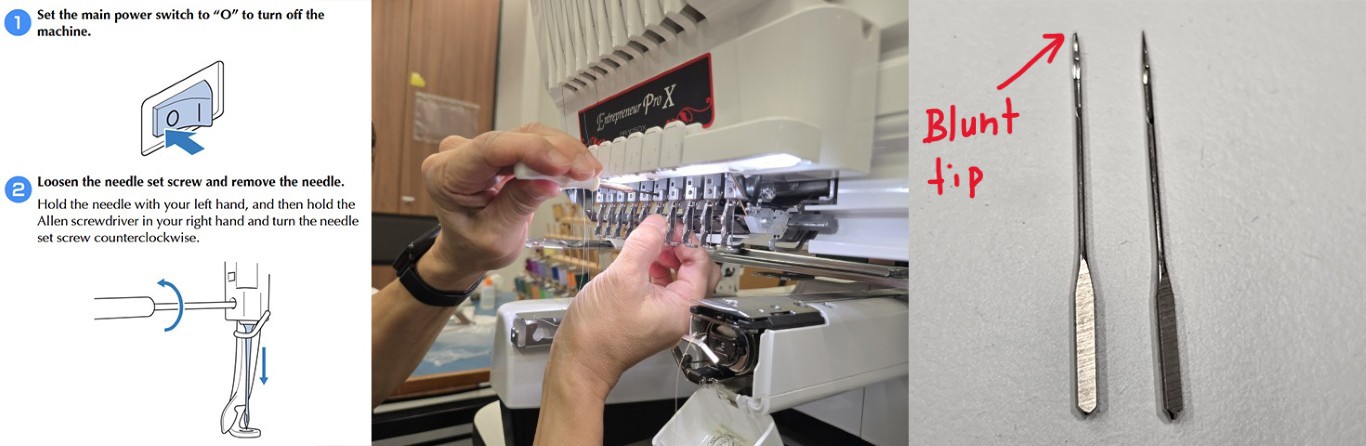
Changing the needle
Looking at the needles, we realize one of them was had a blunt tip and needed to be replaced. We used an Allen key to loosen the screw holding the needle and replaced it as shown in the process below.
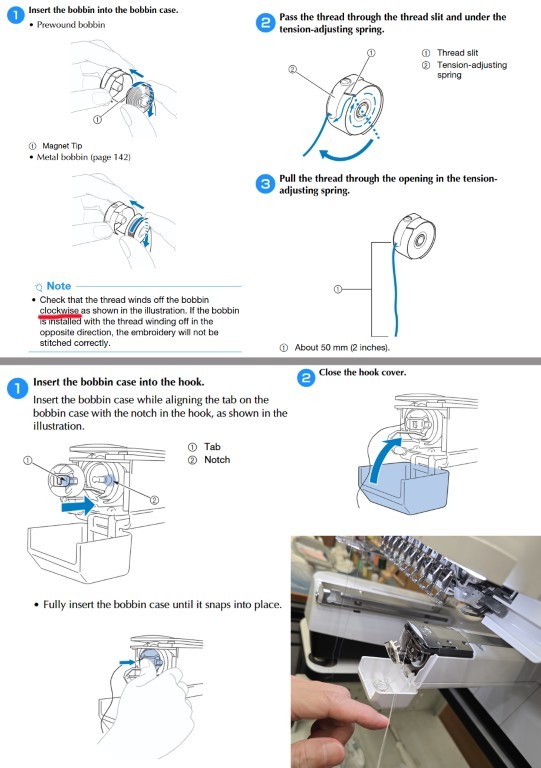
Replacing the bobbin thread
Next, we were shown how to replace the bobbin threads. The process is as follows, emphasizing that the thread winds off the bobbin clockwise.
If you think all these steps are too complicated to remember, do not worry, there is a handy video guide that you can call up to help you on the LCD screen.
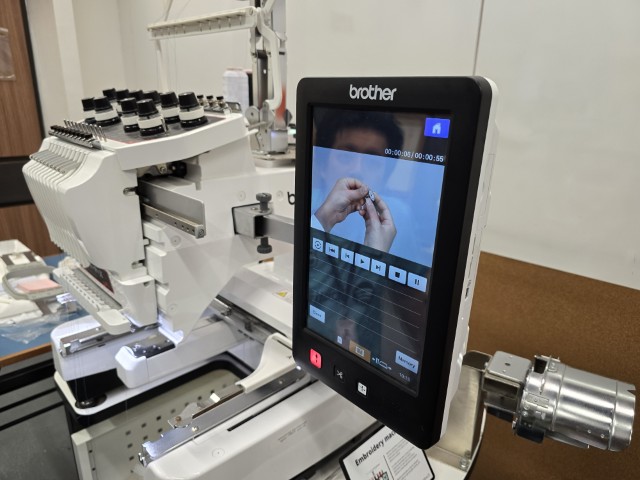
Note: These videos are also available for other processes. Not just for replacing the bobbin thread. The manufacturer has included “how-to” videos that can be easily referenced from the LCD control screen. I found this feature to be extremely useful, and I think this is a feature that all digital fabrication machines should have to reduce onboarding effort.
Hooping
Steven also demonstrated how to hoop the fabric properly. We need to place the fabric into the hoop with the stabilizer and ensure that the fabric is pulled taut.
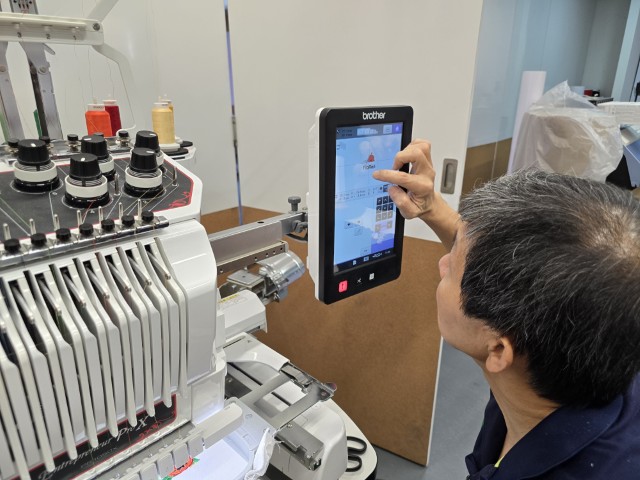
Designing on the machine
We learnt that you could design entirely on the machine itself without any external device via the LCD. Steven showed us how to create an embroidery design by selecting a pattern from the pattern list.
With that design, we started the embroidery job as shown in the video below.
Stoppages
As a learning moment, we experienced a machine stoppage while running this embroidery job. The stiches started to bunch up and Steven showed us how to:
1. Stop/pause the job
2. Remove the hoop
3. Unstitch the bunched-up stitches
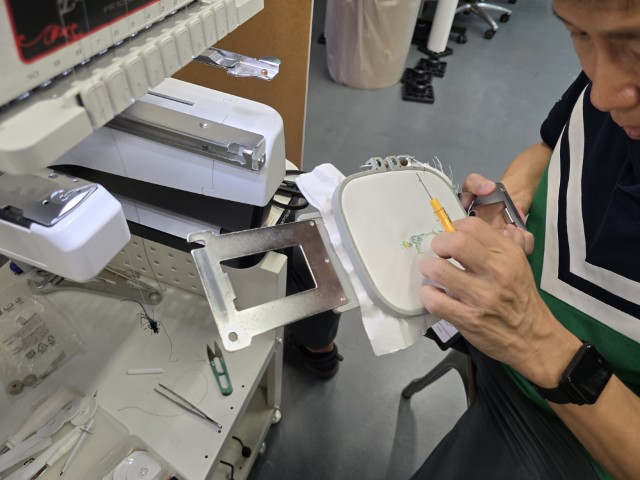
4. Rectify tension (too tight or loose) in the threading
Resuming Job
Once the bunched-up stitches were removed and the stoppages rectified. The great thing about our embroidery machine is that you can just resume from the point where the stitch failed and resume the job from there. We did that and completed the job.
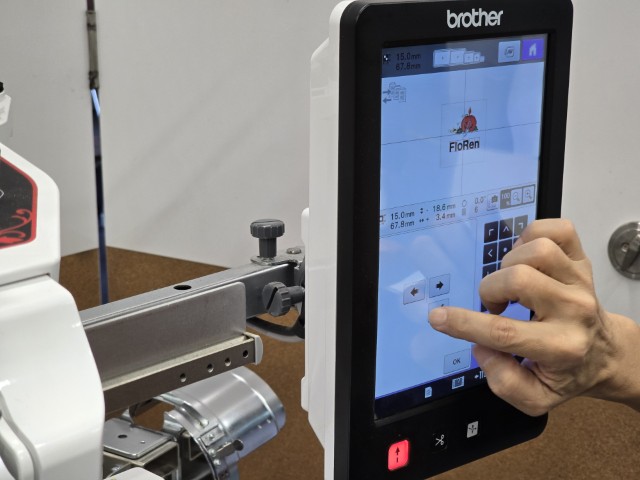
Adding text
Steven showed us that we can add and position text below our completed pattern. He also showed us that we can adjust the text attributes such as changing the text colour.
With the text added, we proceeded to run the job for the text.
Result
Here is our embroidery from our session with Steven.
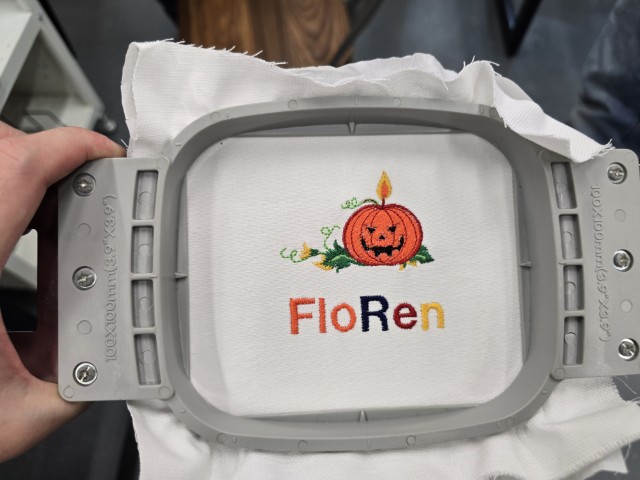
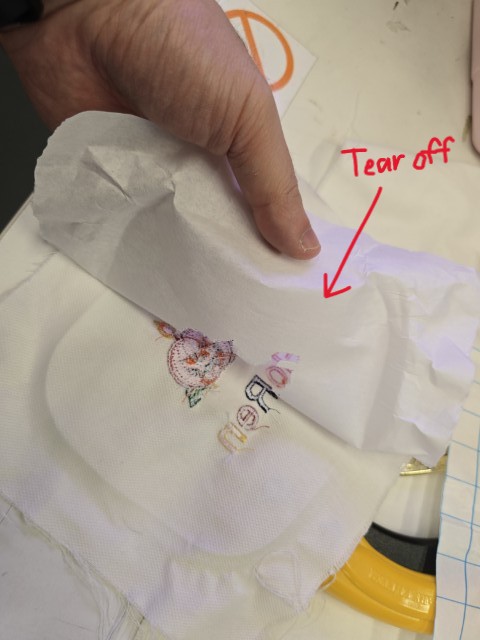
The last part is tearing off the tear-off stabilizer at the back and the project is done!
After this detailed demonstration, I am ready to start my first solo embroidery project.
My first solo Embroidery project
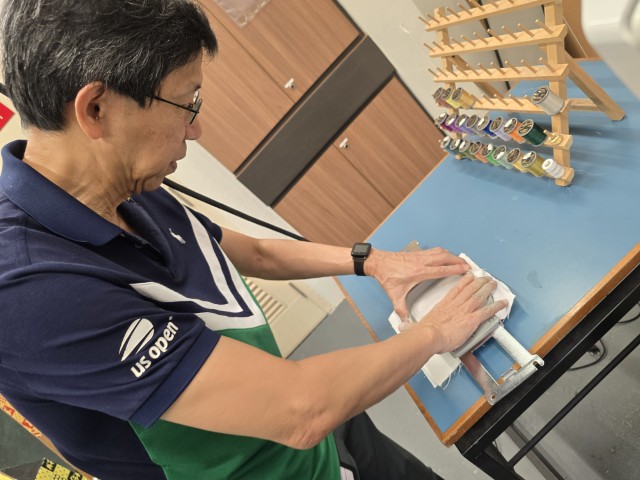
Preparing the hoop
I start by cutting out the fabric and then cutting out a piece of tear-off stabilizer of the same size.
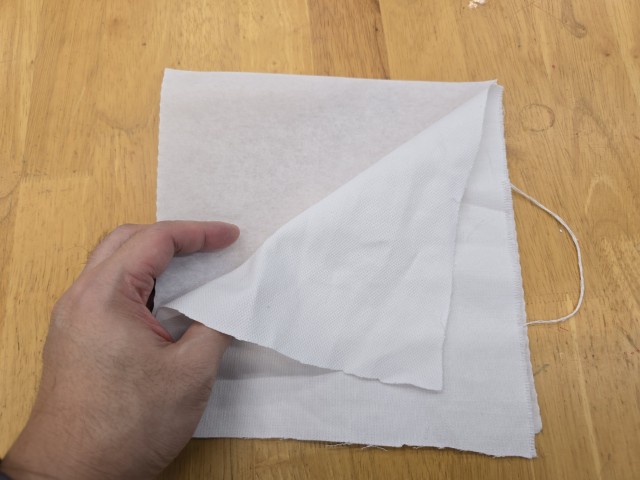
I place the fabric and stabilizer onto the hoop and pull on the edges until the surface of the fabric is firm and taut with no wrinkles.
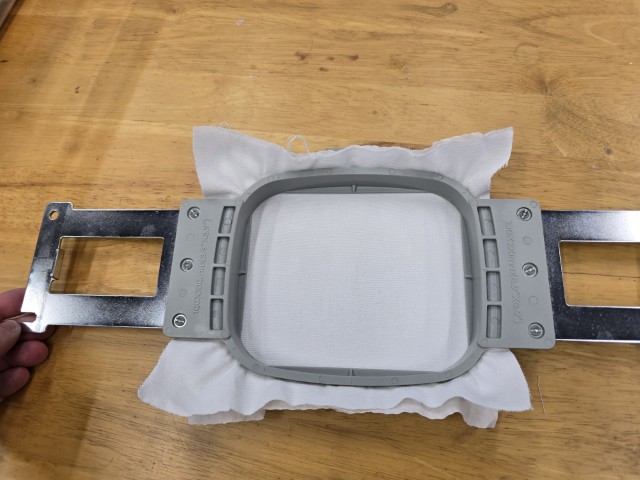
One thing to note is the stabilizer should be under the fabric when hooped. I had made the mistake of putting the fabric under the stabilizer and had to redo the hooping. Once the fabric and stabilizer has been placed in the hoop and secured onto the hoop frame on the embroidery machine, I can start configuring my embroidery job on the embroidery machine’s LCD.
Configuring the job
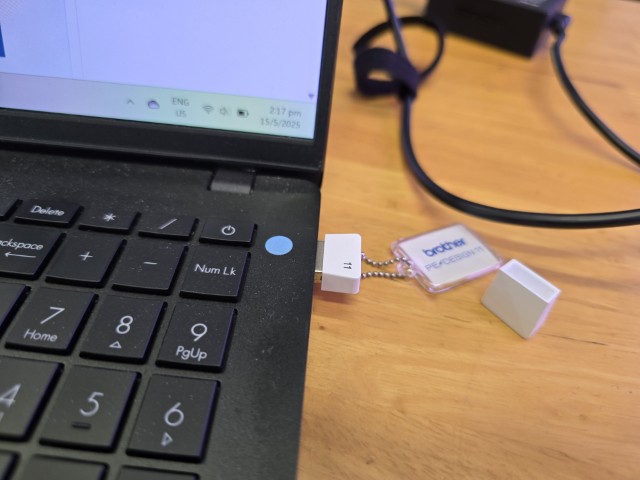
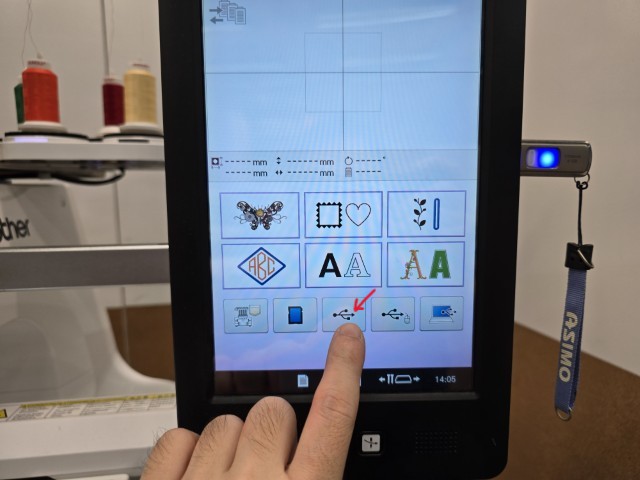
First, I bring the “Having Giraffe Time?” file from PE Design 11 from my USB thumb drive.

Select the USB icon to read the thumb drive.
Select the “Having Giraffe Time?” file that was previously created from PE Design 11.
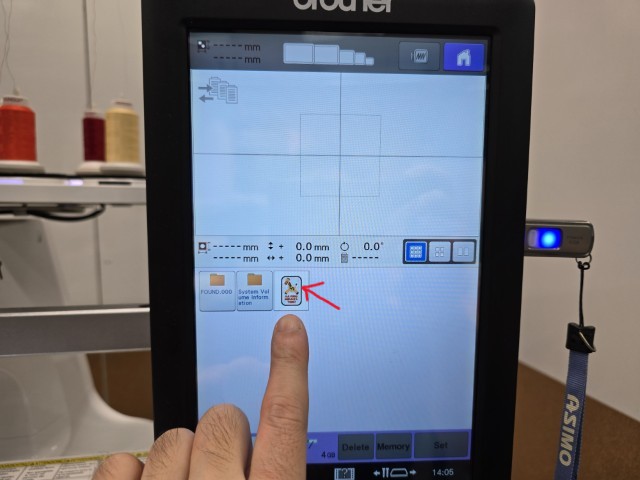
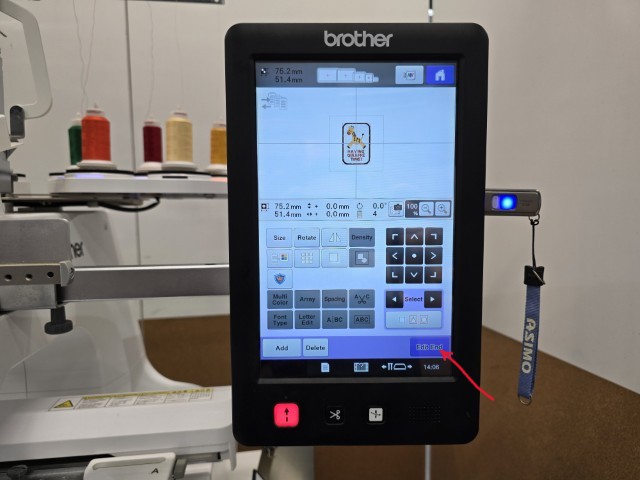
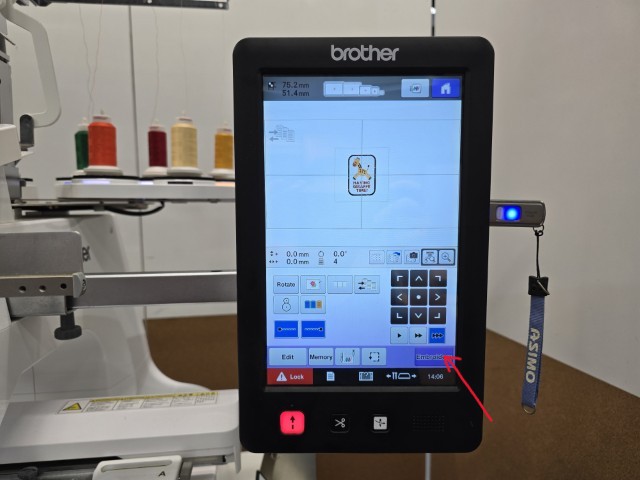
For the next 2 screens, I did not change any settings and simply clicked on the bottom right button to proceed.
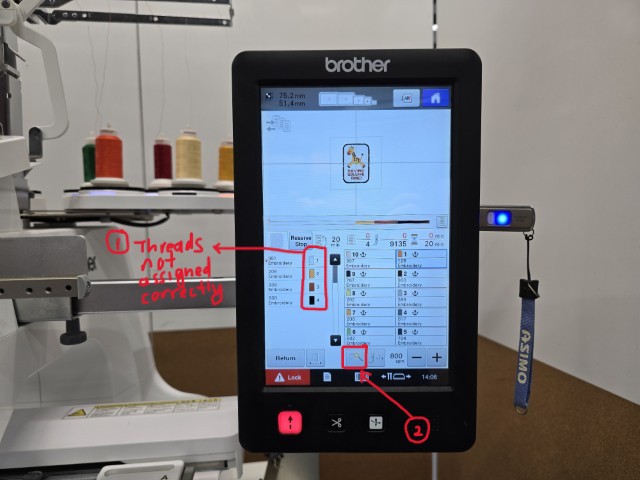
I reach the screen that tells me which of the thread colours have been assigned to each colour of the sewing order. The colours are all mismatched now. Click on the button on the bottom (middle) that looks like a thread spool and a wand.
Match the correct colour to the correct numbered thread spool.
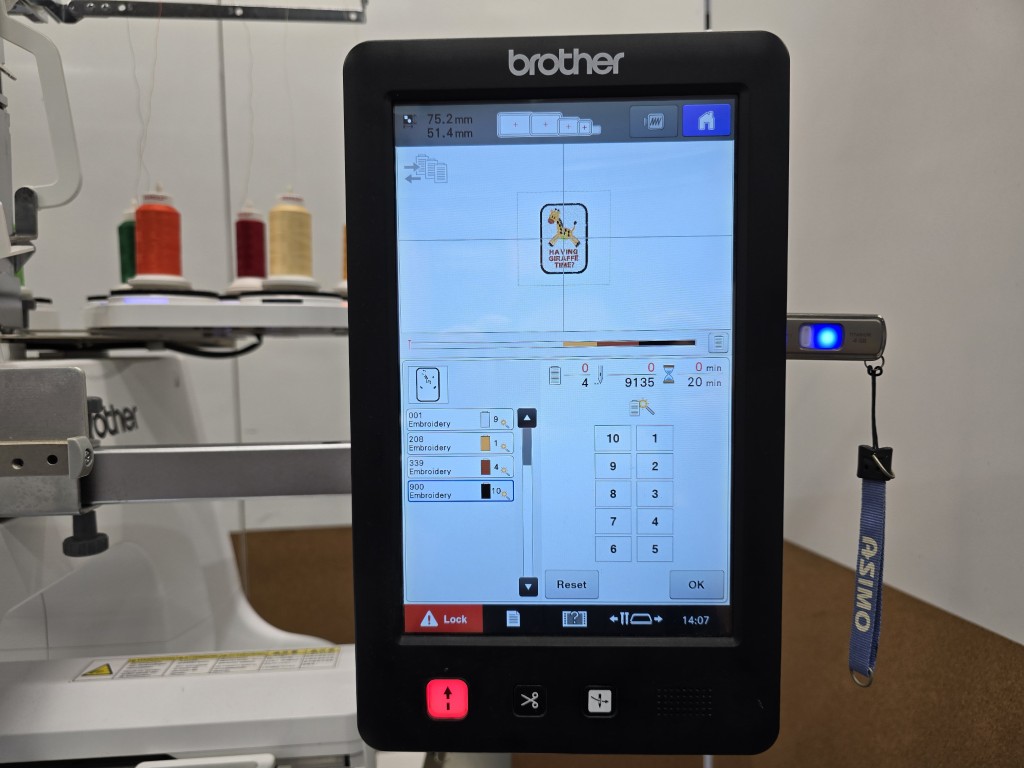
Once the colours have been matched correctly, push the button on the bottom left to start the embroidery job.
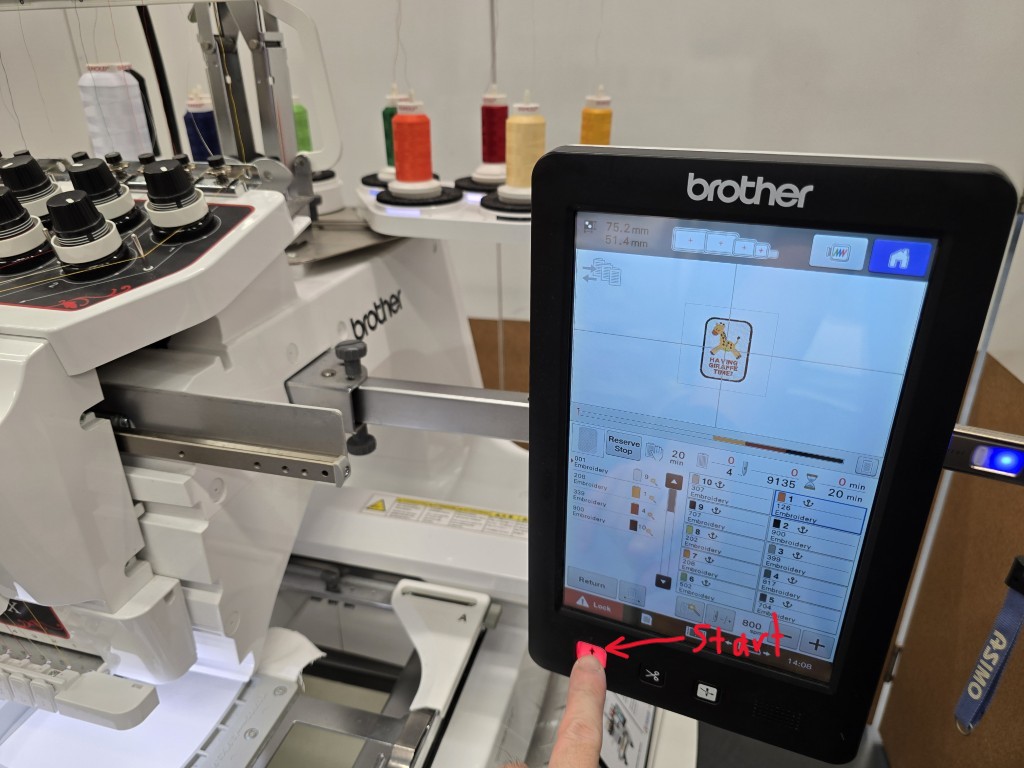
The embroidery does the stitches in the assigned order - White, Yellow, Orange and finally Black. You can see the embroidery machine doing the last layer here.
When the embroidery job has completed, I remove the fabric from the hoop.
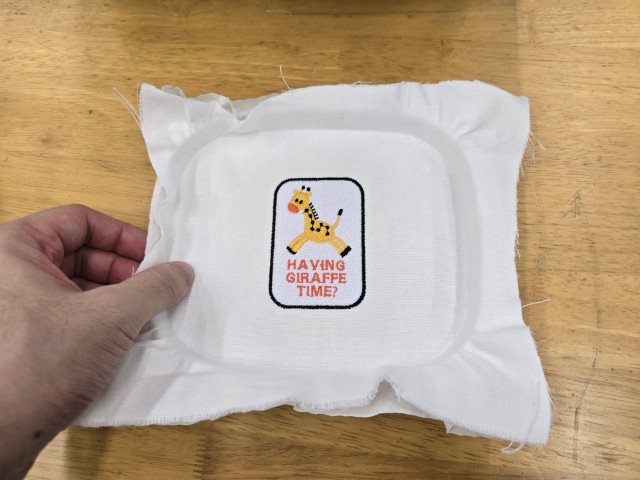
I tear off the stabilizer and trim off the excess fabric.
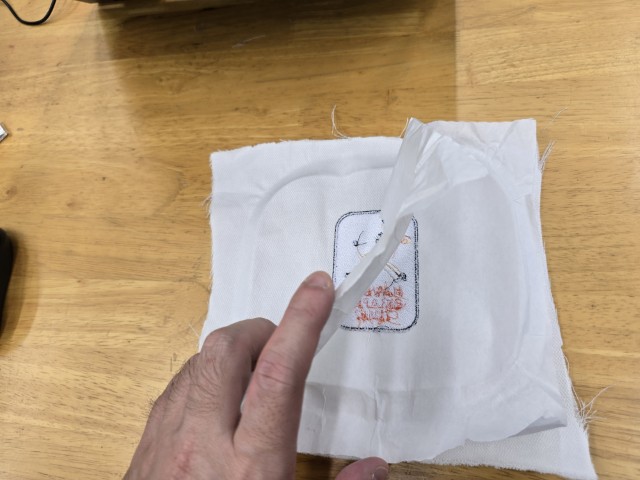
Here is my completed embroidery badge. =)

REFLECTION
This week’s assignment was a fun one for me. It felt more like a Group Assignment because for most of it, I was doing it with my instructor Steven and my Fab Academy buddy, Haw Ren. I was very happy to make my own badge.
As much as this week’s topic is interesting, I am mindful that I am heading into the last few weeks before the Final Project is due, and as much as I would like to explore a bit more of the topic, there are other more pressing tasks to take care of.
Perhaps when Fab Academy is over I will go back to make more " Having giraffe time?" badges and give them out to people who are having a rough time to cheer them up.
This concludes this week’s assignment.
FILES
Note: File cannot be opened unless you have a dongle that contains the software key.