Input Devices
- Probe an input device(s)'s analog levels and digital signals
- Document your work on the group work page and reflect on your individual page what you learned
- Measure something: add a sensor to a microcontroller board that you have designed and read it.
#.Group assignment:
The group assignment was exploring Input devices, both analog and digital.
Group Work Reflection
Input devices are typically sensors that help microcontrollers measure, detect, or interact with their surroundings by collecting data from the physical world and sending it to a microcontroller or computer for processing. It allows a system to detect changes in the environment, such as temperature, motion, light, or touch.
Analog input devices give continuous values, meaning they don’t just have two options (ON/OFF). Instead, they provide a range of values depending on the input they receive. For example, a temperature sensor gives different readings based on how hot or cold it is, not just “hot” or “cold.”
Digital input devices give only two possible values, usually represented as HIGH/LOW or 1/0. This means they can either be ON or OFF, with no in-between.
Here is the Group assignment(link)
#.Individual assignment
A Journey into Input Devices: Measuring the World Around Me
The Goal
I’ve always been curious about how sensors help us understand the world around us. This time, my goal was clear: add a sensor to a microcontroller board I designed and read data from it. Essentially, I wanted my microcontroller to "see" and "feel" something, just like how we use our senses to interact with our environment.
-min.jpeg)
This is the PCB we designed in the week8.
My Approach: Choosing the Right Sensors
After thinking about what I wanted to measure, I decided on two sensors:
- Soil Moisture Sensor (Analog Input): To help measure soil moisture levels—something useful for farming or smart irrigation systems.
- PIR Motion Sensor (Digital Input): To detect movement, a simple way to sense human presence.
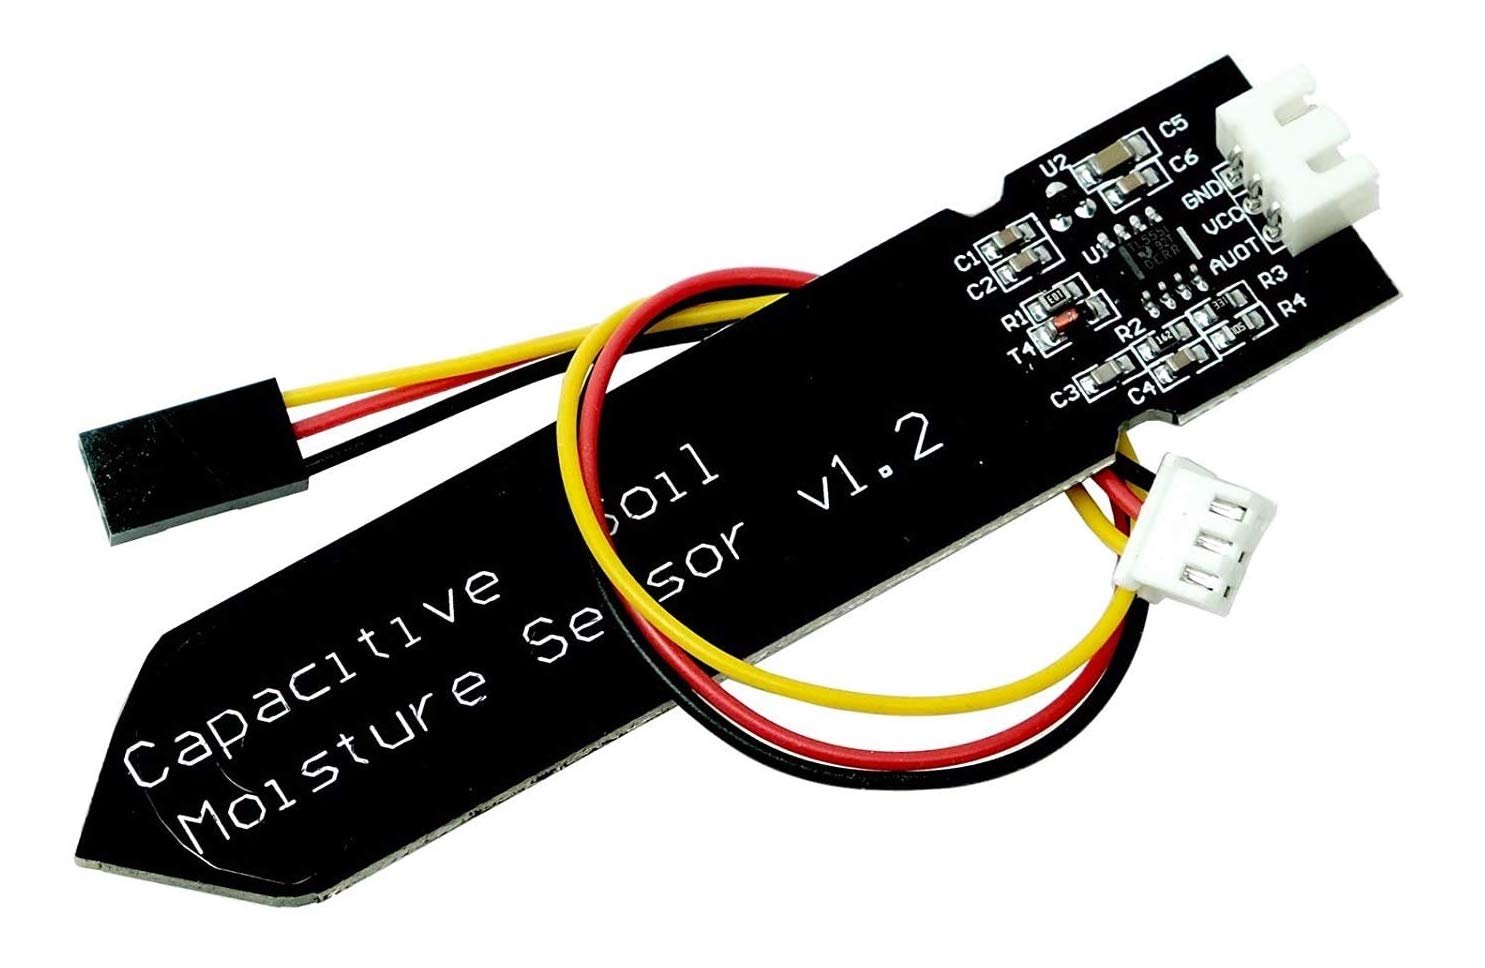
Moisture sensor.
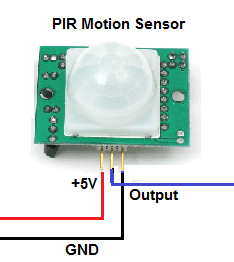
PIR motion sensor.
To make this work, I used the microcontroller development board I built in Week 8, which is based on the XIAO-RP2040 Module.
The Journey: Challenges, Decisions, and Results
Soil Moisture Sensor(Analog Input)
The soil moisture sensor works by measuring resistance or capacitance, which changes based on the amount of water in the soil. This gives us an analog value, meaning the output varies continuously based on moisture levels.
Here’s the code I used to read the sensor data:
                int sensorPin = A0; // Analog pin for soil moisture sensor
                int sensorValue;


                void setup() {
                 Serial.begin(9600);
                }


                void loop() {
                  sensorValue = analogRead(sensorPin); // Read analog value
                  Serial.print("Soil Moisture Value: ");
                  Serial.println(sensorValue);
                  delay(1000);
                }
moisture codes to read data

An image of moisture codes to read data
After uploading the code and testing it, I could see changing moisture levels in the Serial Monitor. When I inserted the sensor into dry air, the values were low, and when I put it in water, the values increased.
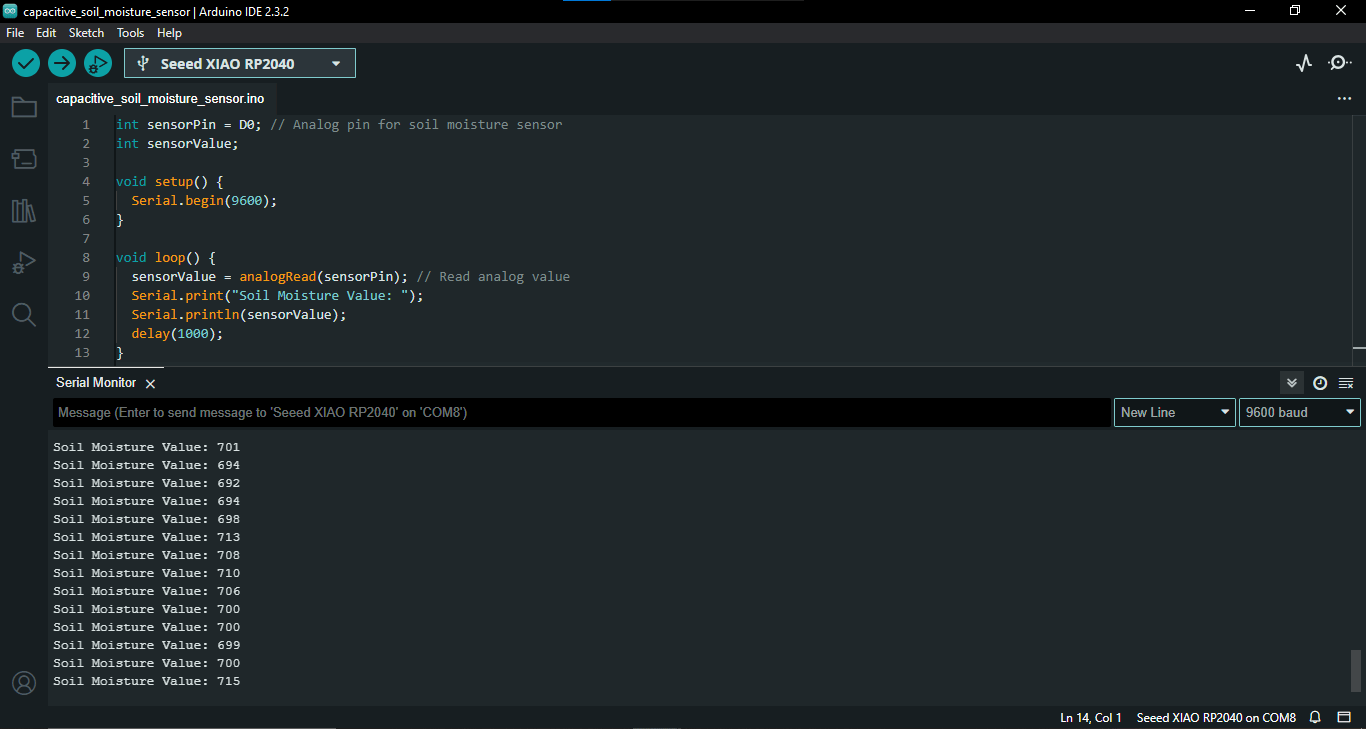
Reading the moisture data in serial monitor
video showing the Reading the moisture data in serial monitor
PIR Motion Sensor(Digital Input)
Next, I added the PIR motion sensor, which detects movement by sensing changes in infrared radiation. Unlike the soil moisture sensor, this one only gives two possible outputs—HIGH (motion detected) or LOW (no motion)—making it a digital input device.
Here’s the code I used:
 int pirPin = 2;  // PIR sensor digital output
                int pirState;


                void setup() {
                  Serial.begin(9600);
                  pinMode(pirPin, INPUT);
                }


                void loop() {
                  pirState = digitalRead(pirPin); // Read PIR sensor state


                  if (pirState == HIGH) {
                    Serial.println("Motion Detected!");
                  } else {
                    Serial.println("No Motion");
                  }


                  delay(500);
                }
PIR motion Sensor codes to read data

An image of PIR motion Sensor codes to read data
Once I connected the PIR sensor, it instantly detected movement when I waved my hand in front of it. When there was no movement, it printed "No Motion" in the Serial Monitor.
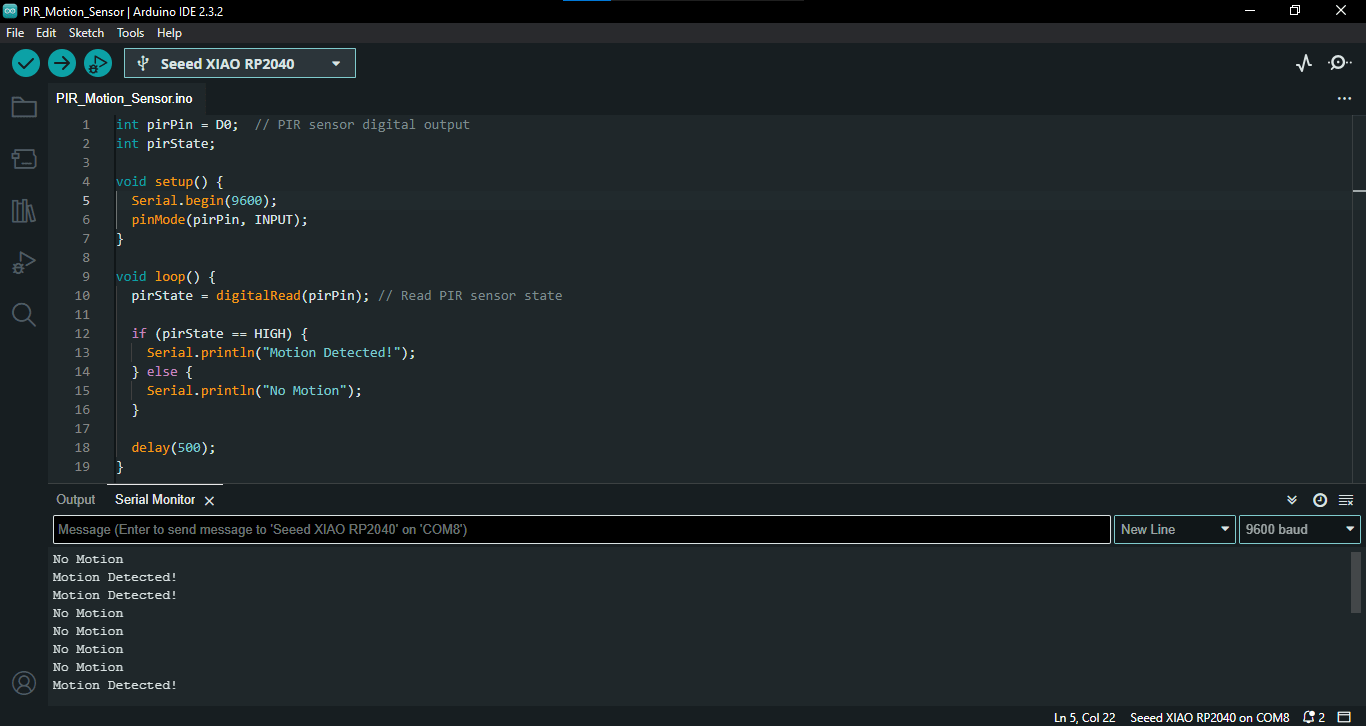
PIR motion sensor data running in serial monitor
Video of PIR motion sensor data running in serial monitor
Challenges and Decisions
Switching from the moisture sensor to the PIR sensor wasn't as smooth as I had hoped. As I was reconnecting the new sensor, one of my soldered pins broke off! 😩
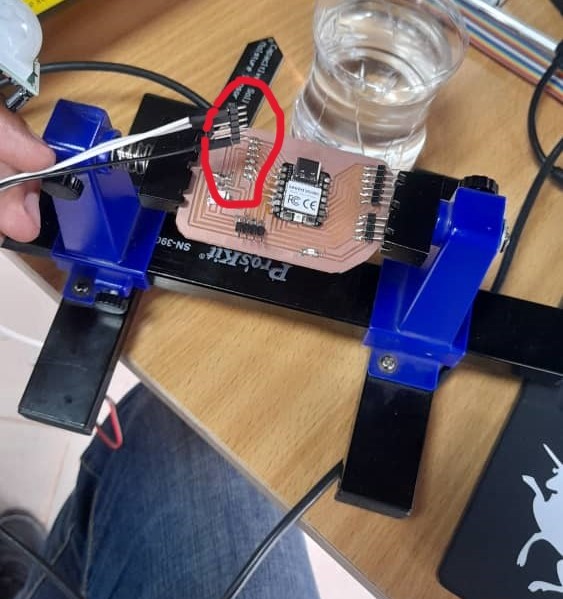
The pins that broke while i was connecting the motion sensor
This meant I had to resolder the connections, which took some time. It was frustrating, but it reminded me how important strong and clean soldering is when working with electronics.
Reflections and Takeaways
Through this experience, I gained a deeper understanding of input devices and how they work with microcontrollers. The process of testing and troubleshooting these sensors helped me appreciate the importance of careful wiring, debugging, and understanding sensor behavior.