Embedded Programming
- assignment: Demonstrate and compare the toolchains and development workflows for available embedded architectures
- Document your work to the group work page and reflect on your individual page what you learned
- Browse through the datasheet for your microcontroller
- Write a program for a microcontroller and simulate its operation to interact (with local input and/or output devices) and communicate (with remote wired or wireless connection)
#.Group assignment:
Embedded Architecture refers to the design and structure of an embedded system's hardware and software components. It includes the microcontroller/microprocessor, memory, input/output interfaces, and the software stack that runs on the hardware.
- A Toolchain is a set of programming tools used to create software applications for a specific platform. In the context of embedded systems, a toolchain typically includes a compiler, linker, assembler, and debugger. These tools work together to convert human-readable code into machine code that can be executed by the embedded device.
- Compiler: Converts code into machine language (e.g., ARM GCC, AVR-GCC).
- Debugger: Assists in testing and debugging (e.g., J-Link, AVR Dragon).
- IDE: Integrated Development Environment for code development (e.g., Keil uVision, Arduino IDE).
- A development workflow is a series of steps followed by developers to create, test, and deploy software. In embedded systems, this workflow usually involves writing code, compiling it into machine code, flashing it onto the microcontroller, and debugging any issues that arise.
- Requirements Analysis: Define the task and system requirements.
- System Design: Plan the hardware and software architecture.
- Code Development: Write code in languages like C/C++.
- Compilation: Use a compiler to convert code into machine language.
- Flashing: Upload the compiled code to the microcontroller.
- Testing and Debugging: Verify functionality and fix issues.
- Deployment: Integrate the embedded system into the final product.
Group Assignments link
#.Individual assignment
Important informations
This week I started by researching more about embedded programming and embedded systems using ChatGPT and some YouTube videos for more understanding on this week 4.
Embedded programming is the process of writing software for embedded systems, which are small computers built into larger devices to perform specific tasks. This type of programming focuses on efficiency, real-time performance, and direct control of hardware. link
- An embedded system is a specialized computer inside a device, designed to perform a dedicated function. It includes a microcontroller or microprocessor, memory, input/output interfaces, and software to control its operations. These systems are found in everyday technology, such as smart appliances, medical devices, and industrial machines, helping automate tasks and improve efficiency with limited power and resources. link
- A microcontroller is a compact chip with a CPU, memory, and peripherals, designed for specific tasks like controlling devices or sensors. It executes instructions stored in its built-in memory, processes inputs from sensors, and directly manages hardware using GPIOs, timers, and communication interfaces.
- A microprocessor is a standalone CPU that requires external memory and peripherals, used in general-purpose computing. It processes data by fetching instructions from external storage, performing complex computations, and communicating with other components via system buses, making it more powerful but hardware-dependent.
Week assignment
This week's assignment was to browse through the datasheet for our microcontroller, and I chose to use Arduino Uno R3.
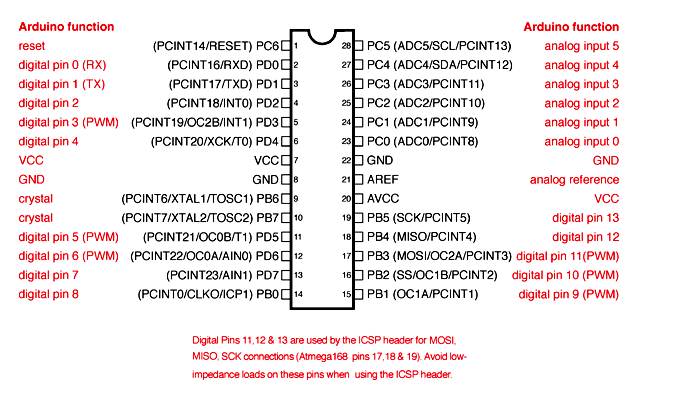
I went through the ATmega328P datasheet, which is the microcontroller used in the Arduino Uno R3, and here’s what I found.
A datasheet is basically a technical guide that explains everything about a component—its specifications, how it works, and how to use it properly in a circuit.
For the ATmega328P, the datasheet provides details on its 8-bit AVR architecture, operating voltage (1.8V–5.5V), and clock speed (16 MHz). It also outlines the memory structure, which includes 32 KB of Flash, 2 KB of SRAM, and 1 KB of EEPROM.
The datasheet also has a pin configuration section, which describes all 28 pins and their functions, like GPIOs, ADC, UART, SPI, I2C, and PWM.
I got these imformation on link
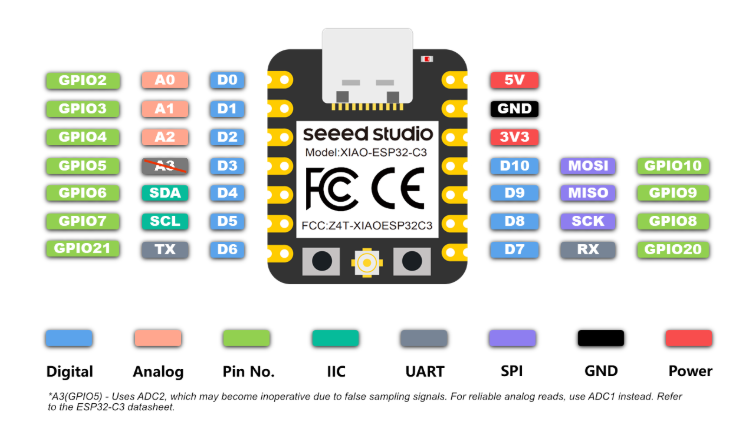
For the second datasheet i used Seeed Studio XIAO ESP32C3 as it is the simplified verson.
The Seeed Studio XIAO ESP32C3 has 14 pins which show how simplified it is copmrered to the ATmega328P above which have 28 pins, and i wanted to use it in the next Assignments that is why i searched for the it's datasheet(link)
Program a microcontroller
To program a microcontroller and simulate its operation, I started by exploring WOKWI. In the wokwi I needed to blink an LED and rotate a servo motor.
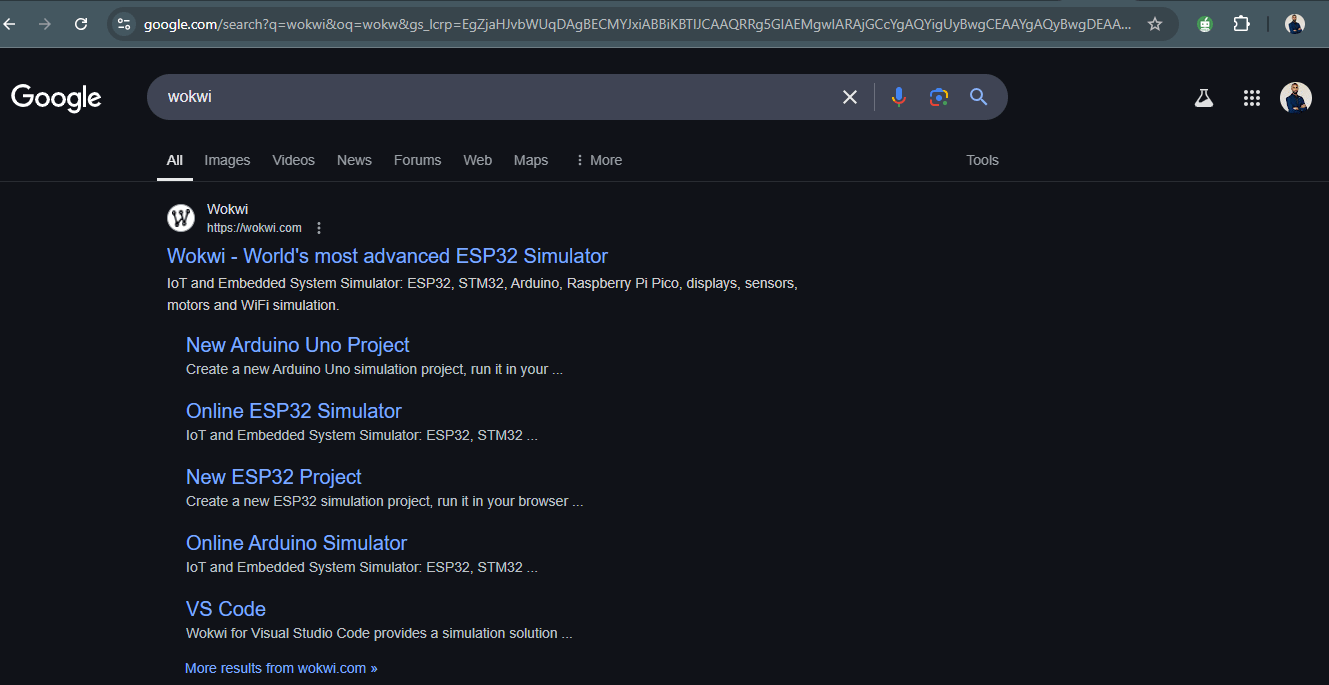
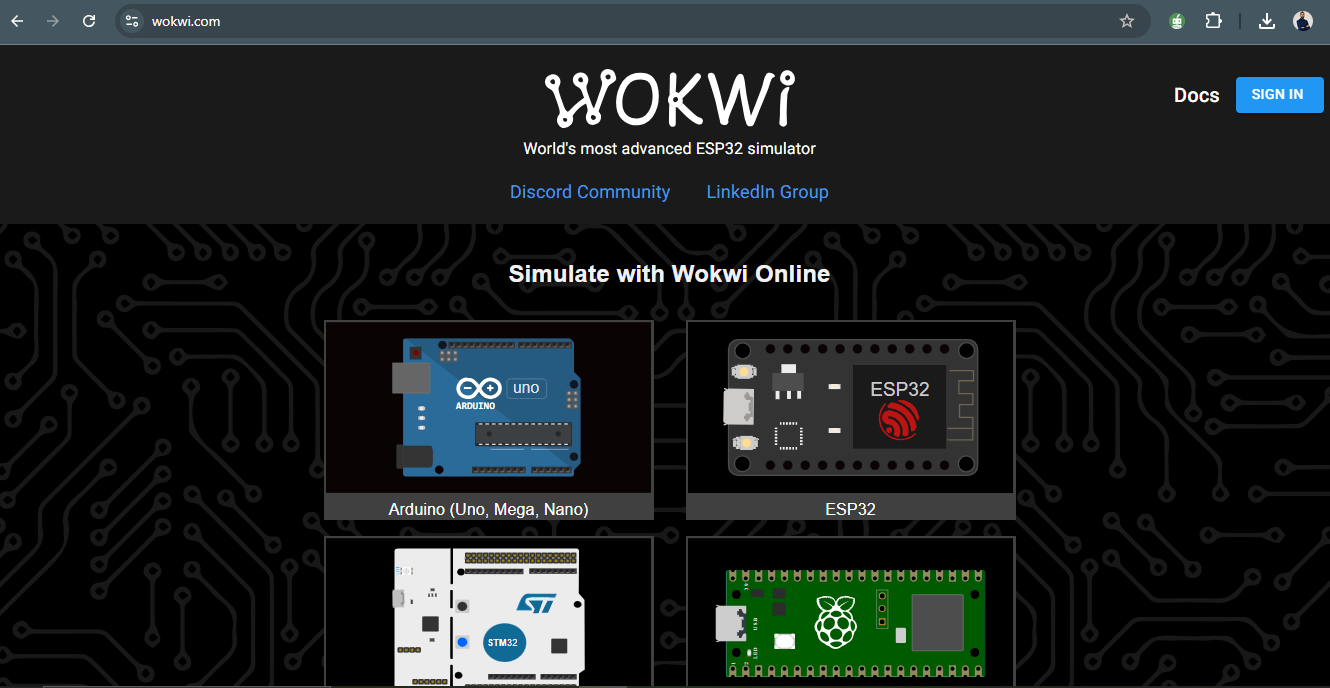
The first step was to browse WOKWI in my browser, then click on the first link.
Inside wokwi as shown on the picture above,I stated by signing in using my email then i start on the arduino.
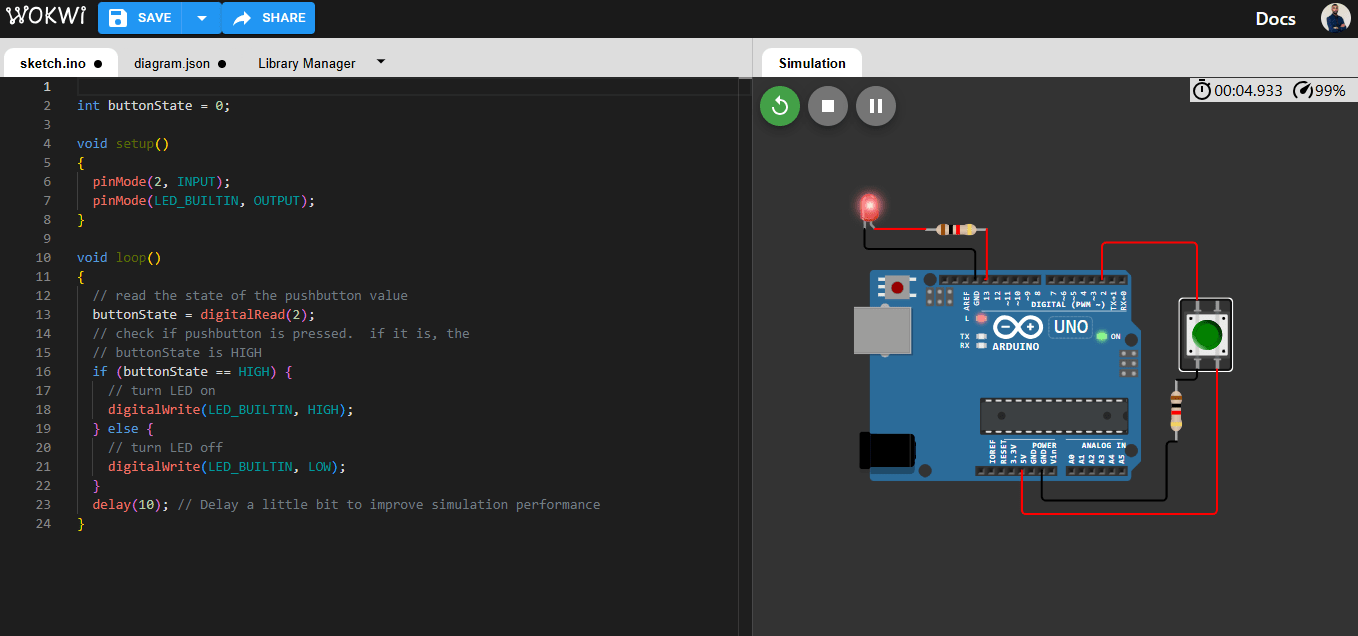
In the arduino i find some exercises where i chose the LED and the switch.
This is a video showing how it was working.
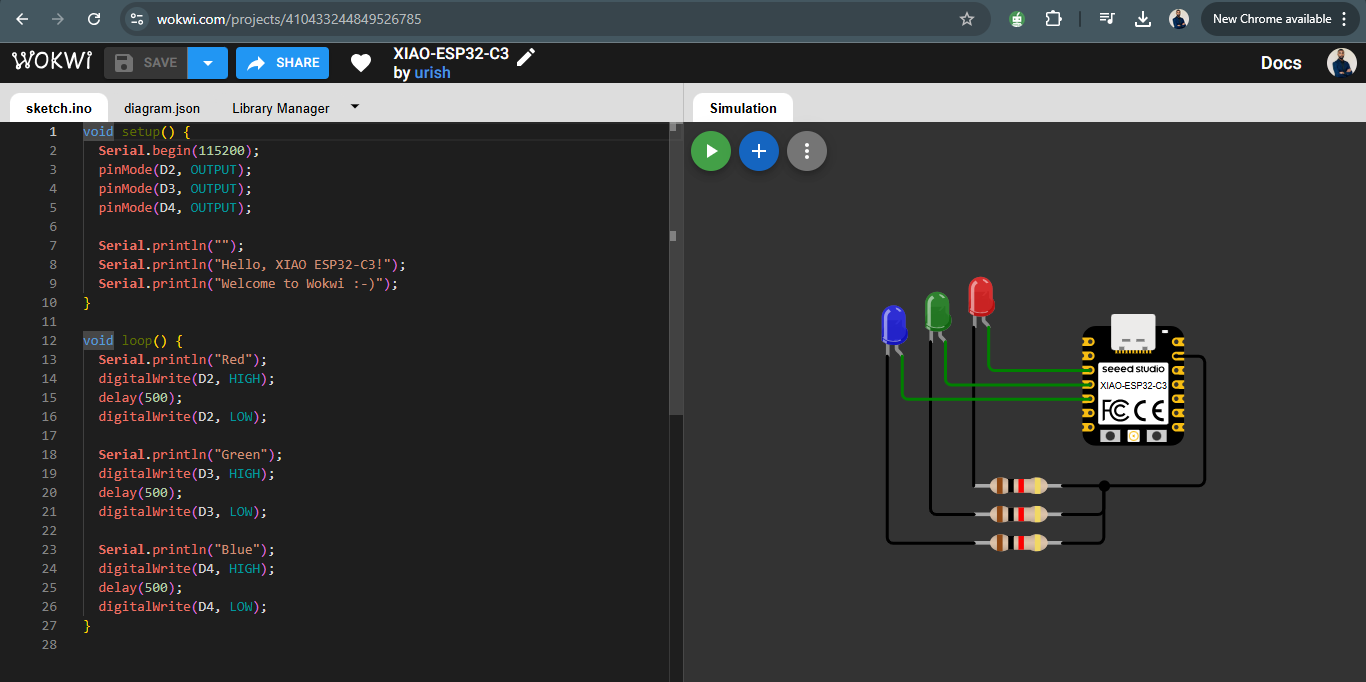
This code runs on an ESP32-C3 board and sets up pins D2, D3, and D4 as outputs (likely connected to red, green, and blue LEDs). In the setup() function, it starts serial communication at 115200 baud and prints a welcome message. In the loop(), it turns on each LED one at a time—first red (D2), then green (D3), then blue (D4)—each for 500 milliseconds, printing the color name to the Serial Monitor as it goes. After lighting each LED, it turns it off before moving to the next, creating a repeating red-green-blue blinking pattern.
This ESP32-C3 code lights up red, green, and blue LEDs one after the other. Each LED turns on for half a second while the color name is printed on the screen, then turns off before the next one lights up. It keeps repeating in a loop.

