Moulding and Casting
- Review the safety data sheets for each of your molding and casting materials
- Make and compare test casts with each of them
- Compare printing vs milling molds
- Design a mold around the process you'll be using, produce it with a smooth surface finish that does not show the production process, and use it to cast parts.
#.Group assignment:
Here is the Group assignment(link)
#.Individual assignment
Moulding and Casting: My First Journey into Creating a Chess Queen
The goal was clear: design a mold tailored to the process I would use, ensure the surface finish was smooth enough to hide signs of how it was made, and finally use it to cast parts. With no prior experience, I aimed to challenge myself by creating a finished piece that was clean, functional, and presentable.
1. My Approach
Since this was my first attempt at molding and casting, I decided to start simple but meaningful. I chose to make a queen chess piece symbolic, elegant, and symmetrical, which made the design easier to work with.
I used SolidWorks for designing and a 3D printer and/or silicone for creating the mold and planned to use silicone and/or wax for the casting process.
2. The Journey: Challenges, Decisions, and Results
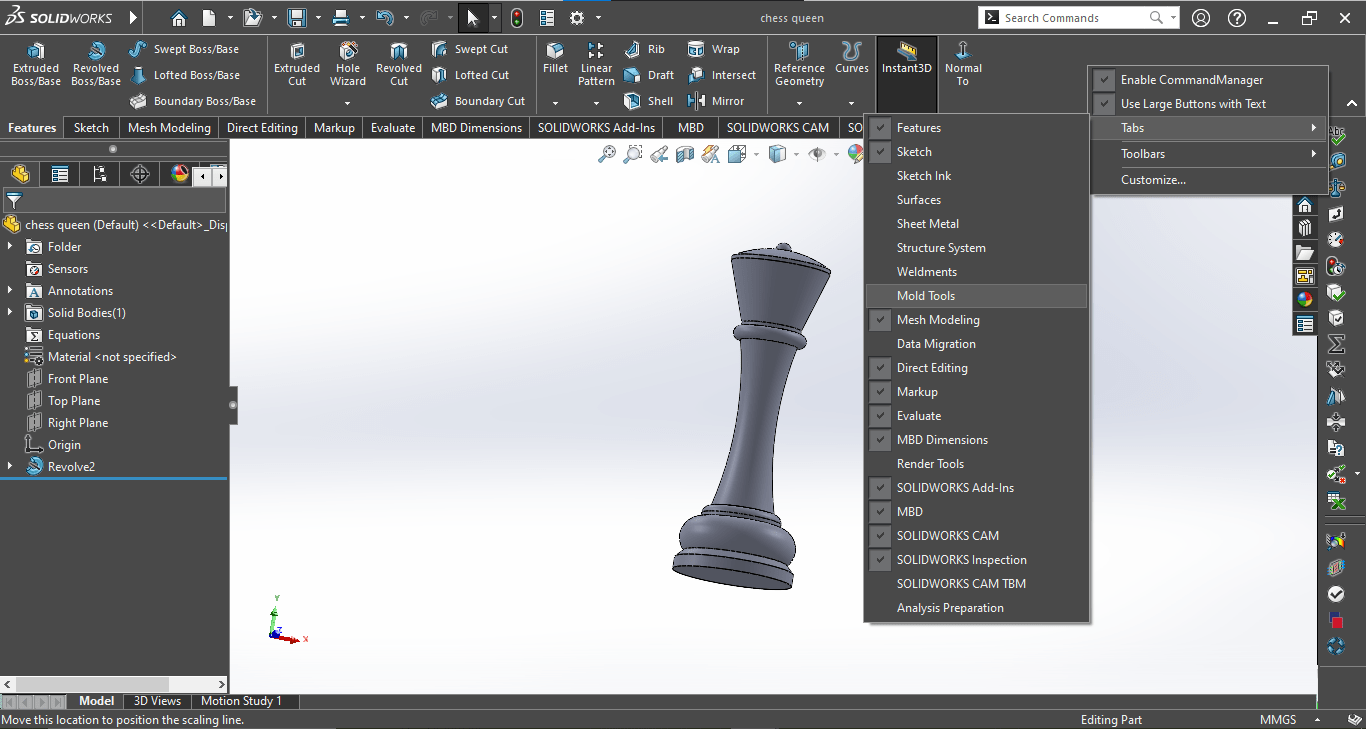
The journey began with research. I found a reference for the queen piece dimensions on Pinterest: link to reference . Using those as a guide, I created a 3D model in SolidWorks. The symmetry of the piece helped simplify the design.
-min.png)
In this image, I used a reference image of a queen chess piece found on Pinterest to guide my design. I modeled it in SolidWorks, focusing on maintaining symmetry and simplicity to make it suitable for a first time molding and casting project.
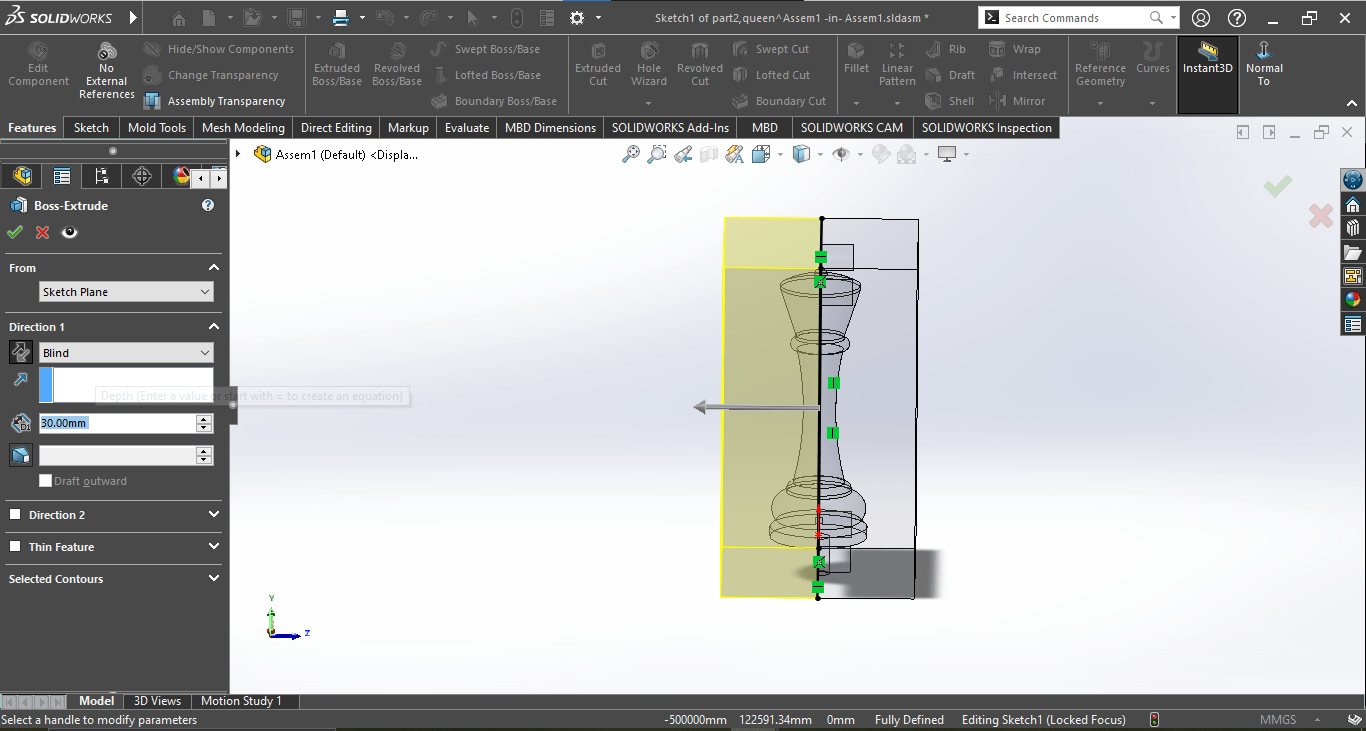
Initially, I tried to use SolidWorks' mold tools tab to generate the mold automatically. However, it didn’t work out as expected, possibly because it was my first time using that toolset.
Here, I was attempting to use the Mold Tools tab in SolidWorks for the first time. I explored features like parting lines and shut-off surfaces, but I ran into difficulties likely due to the complex curves on the chess piece.
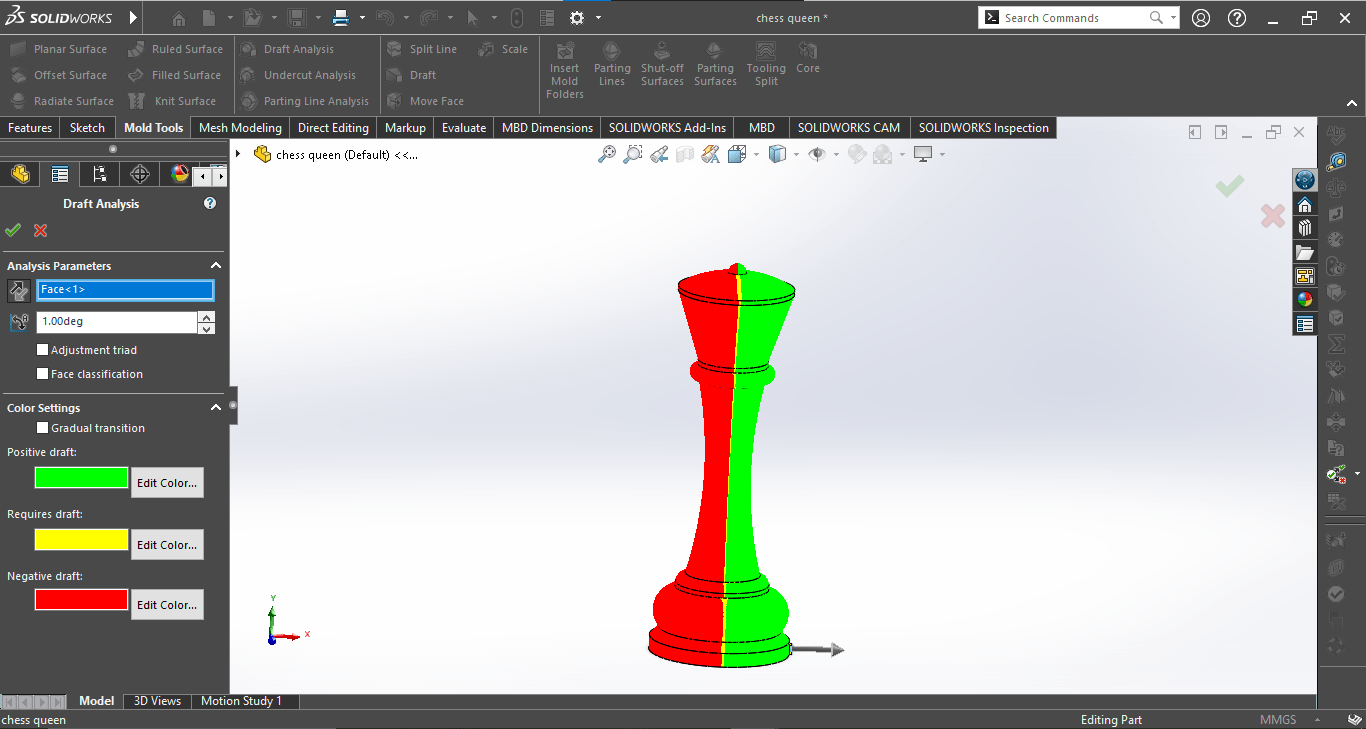
This image shows me performing a draft analysis to assess how the mold would separate from the part. The analysis didn’t go as planned, likely because of the multiple curves and undercuts in the design. That’s when I decided to change my approach
So I adapted. I imported the chess piece into an assembly, surrounded it with two blocks, and used the cavity feature to subtract the shape of the queen from the blocks. This gave me two parts with a negative space shaped like my queen piece, the mold I needed.
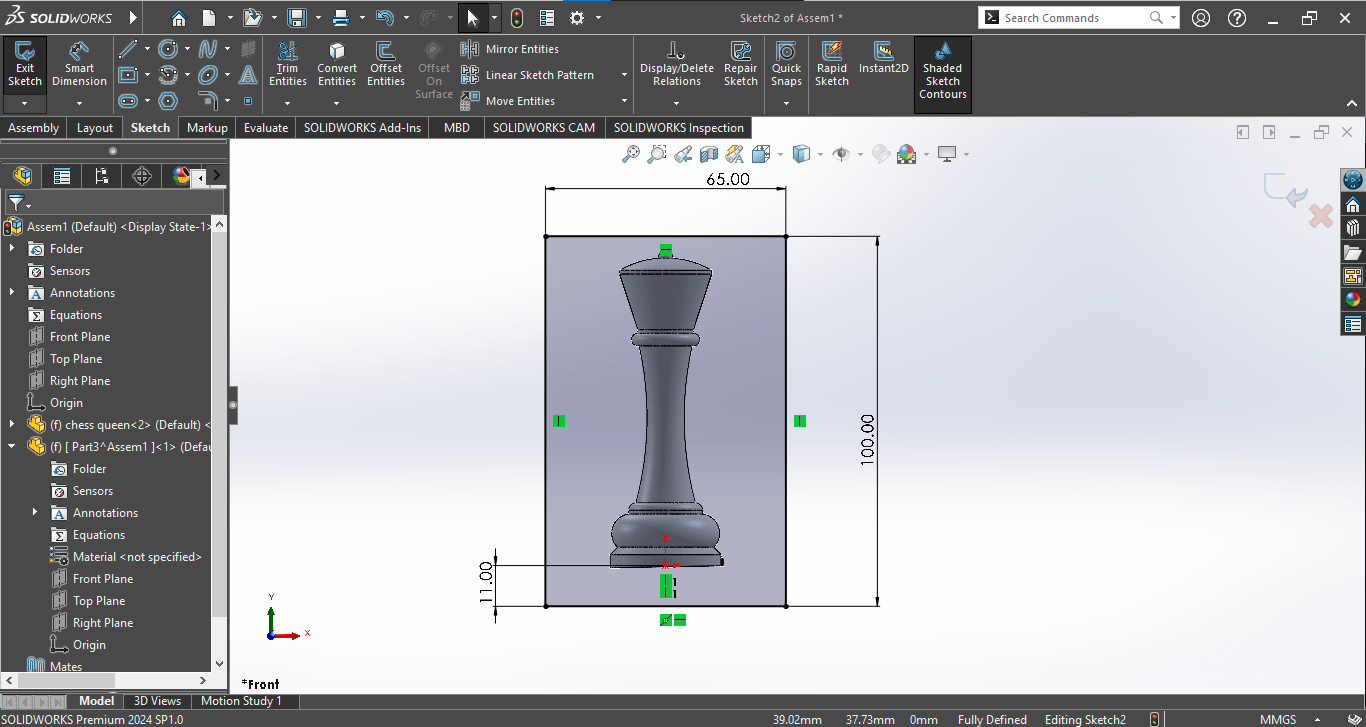
In this image, I began my second approach by creating an assembly in SolidWorks. I imported the chess piece and started building two mold blocks around it. This manual method gave me more control over the mold geometry.
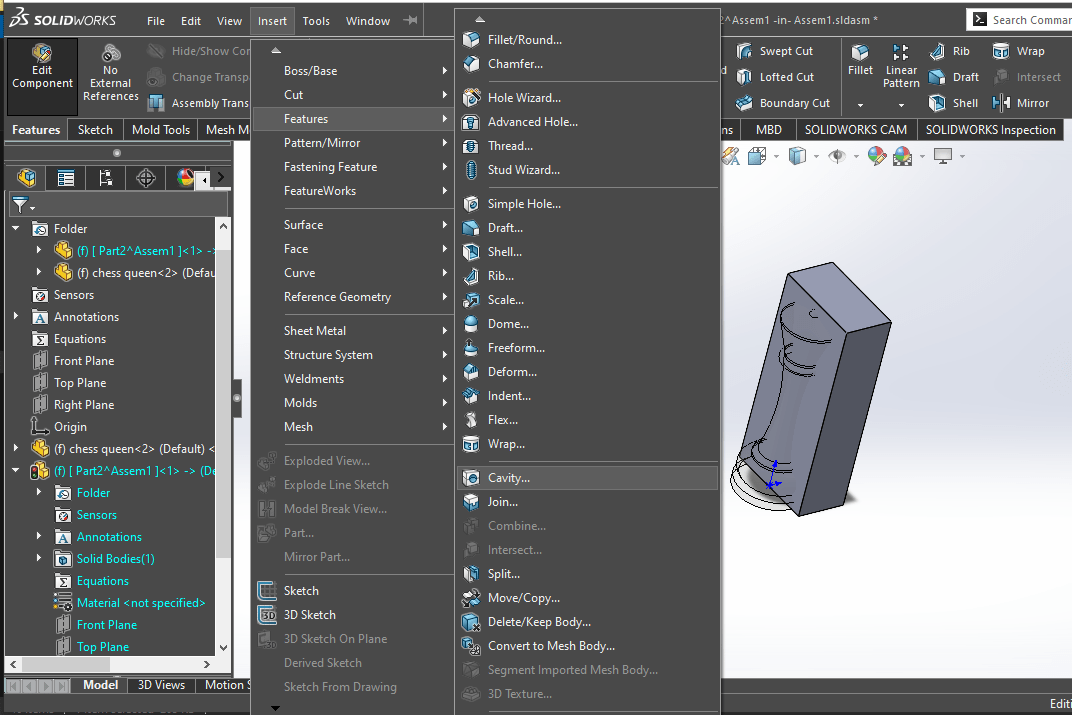
Here, I designed the first half of the mold block. It was aligned with the center of the chess piece, and I used the cavity feature to subtract the shape of the piece from this block, creating a negative form.
This image shows the second mold block on the opposite side. I carefully aligned it with the first block to ensure they would fit together seamlessly when assembled for casting.
I then sliced the mold and 3D printed it. To improve the surface quality, I sanded the print thoroughly.
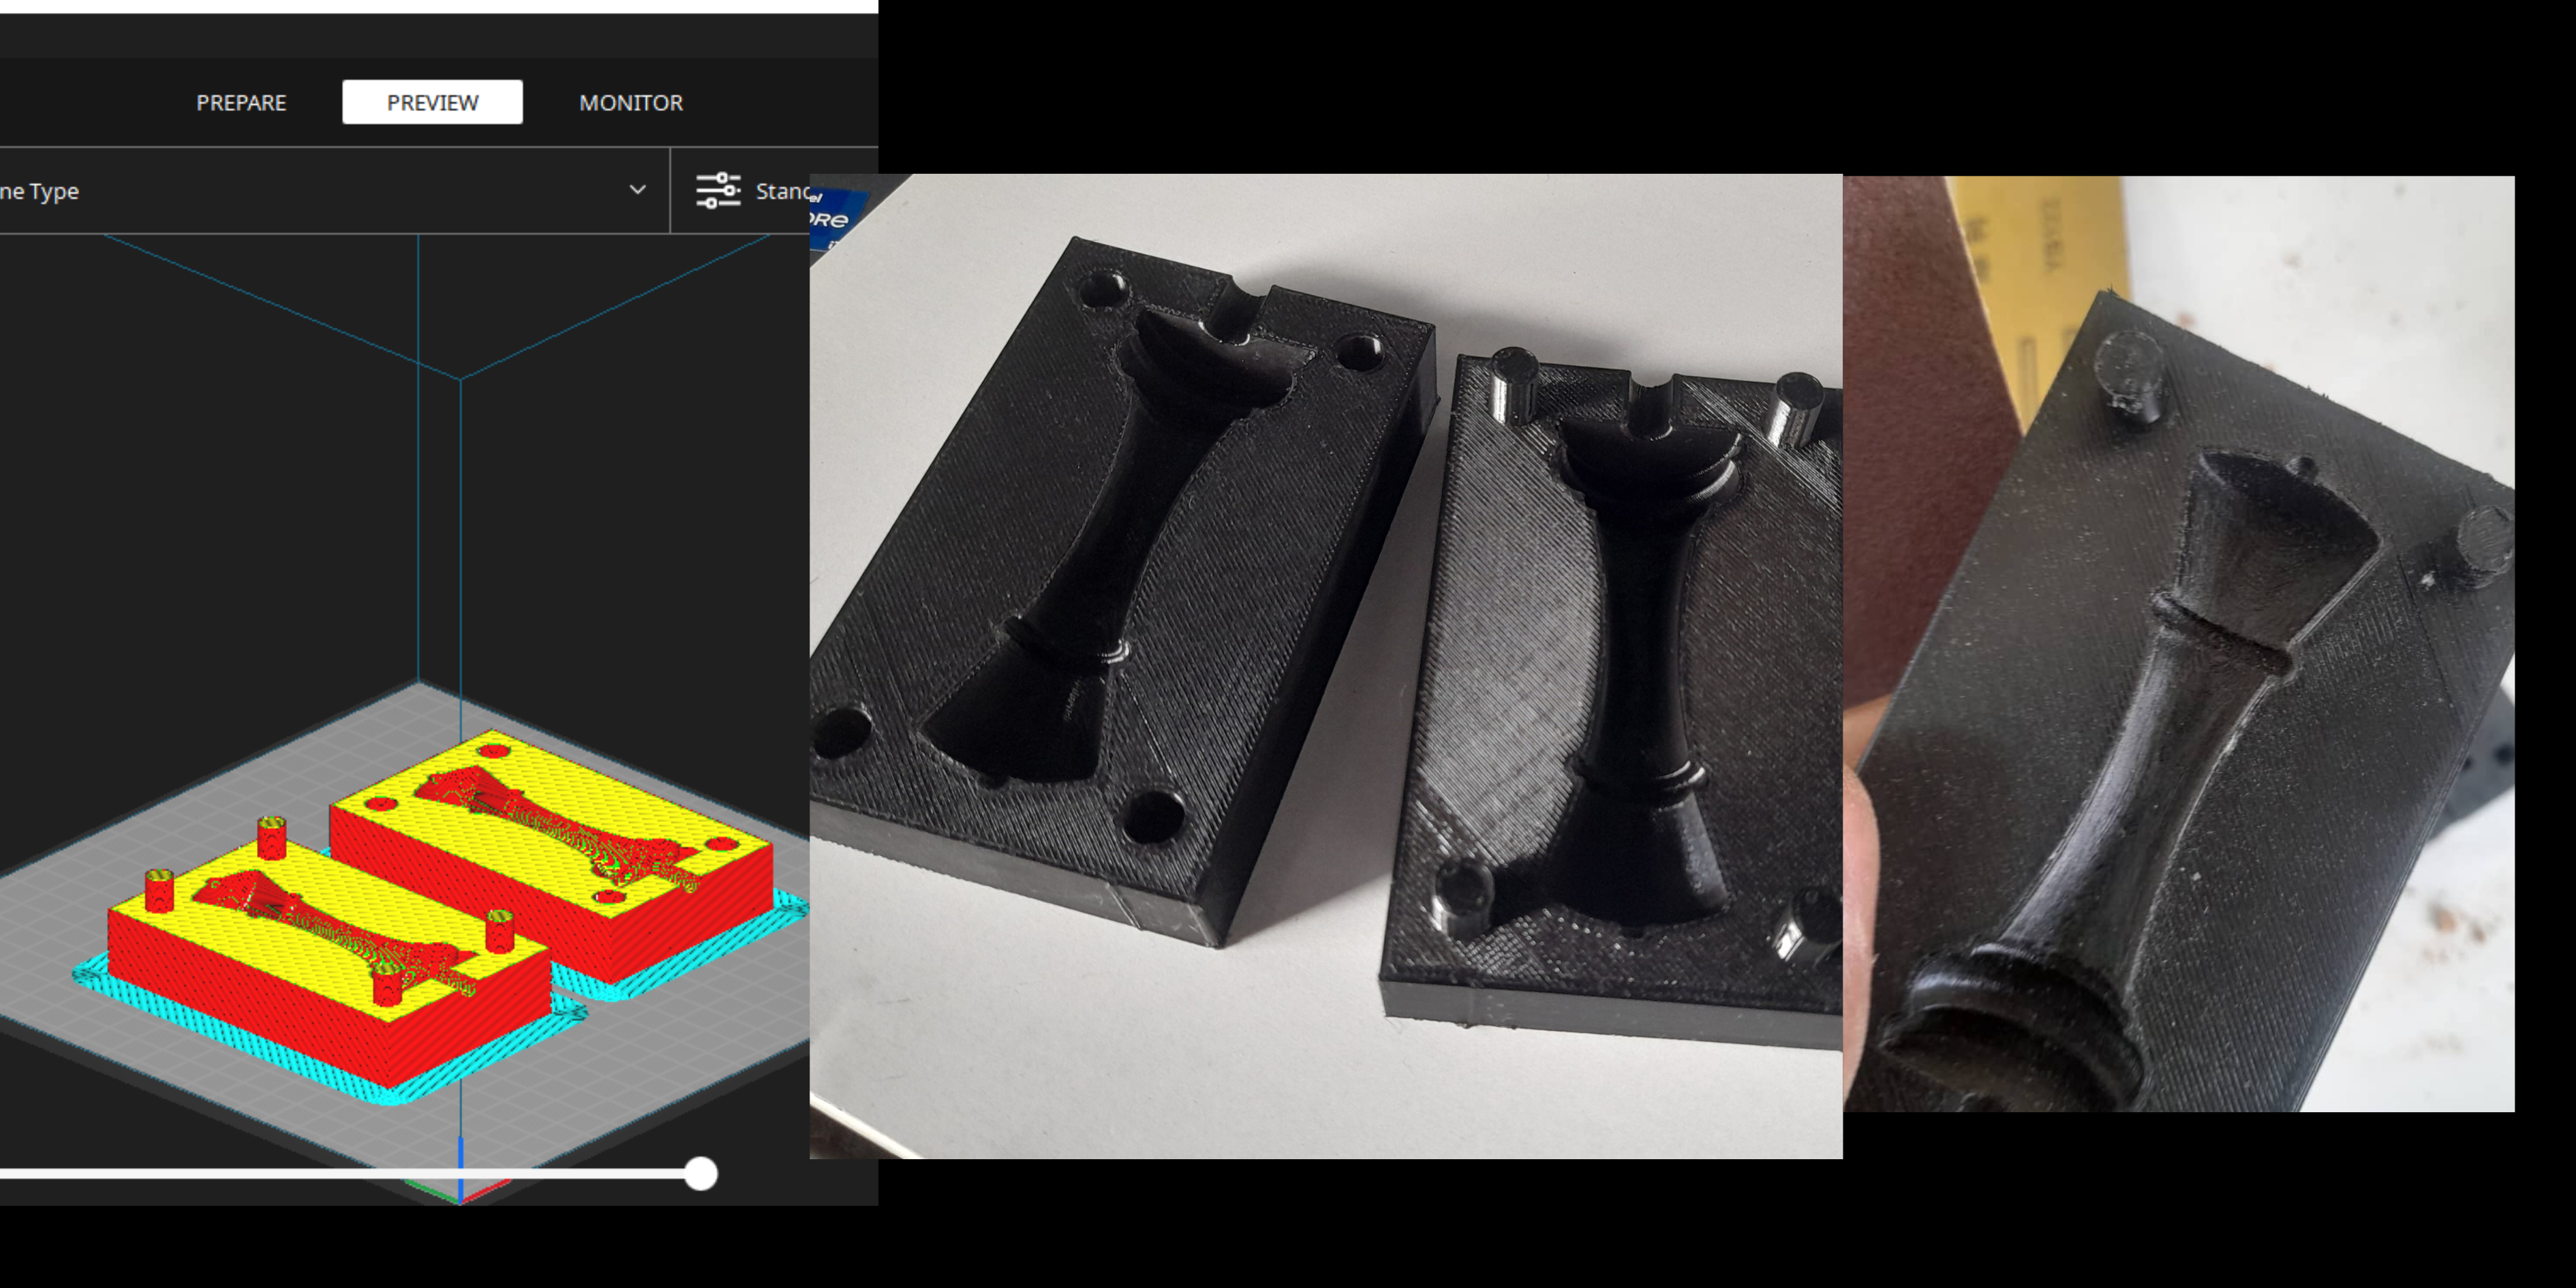
This image presents both completed mold blocks. I exported, sliced, and 3D printed them. On the right side of the image, you can see the physical prints of the mold,then sand it with a sand paper ready for use.
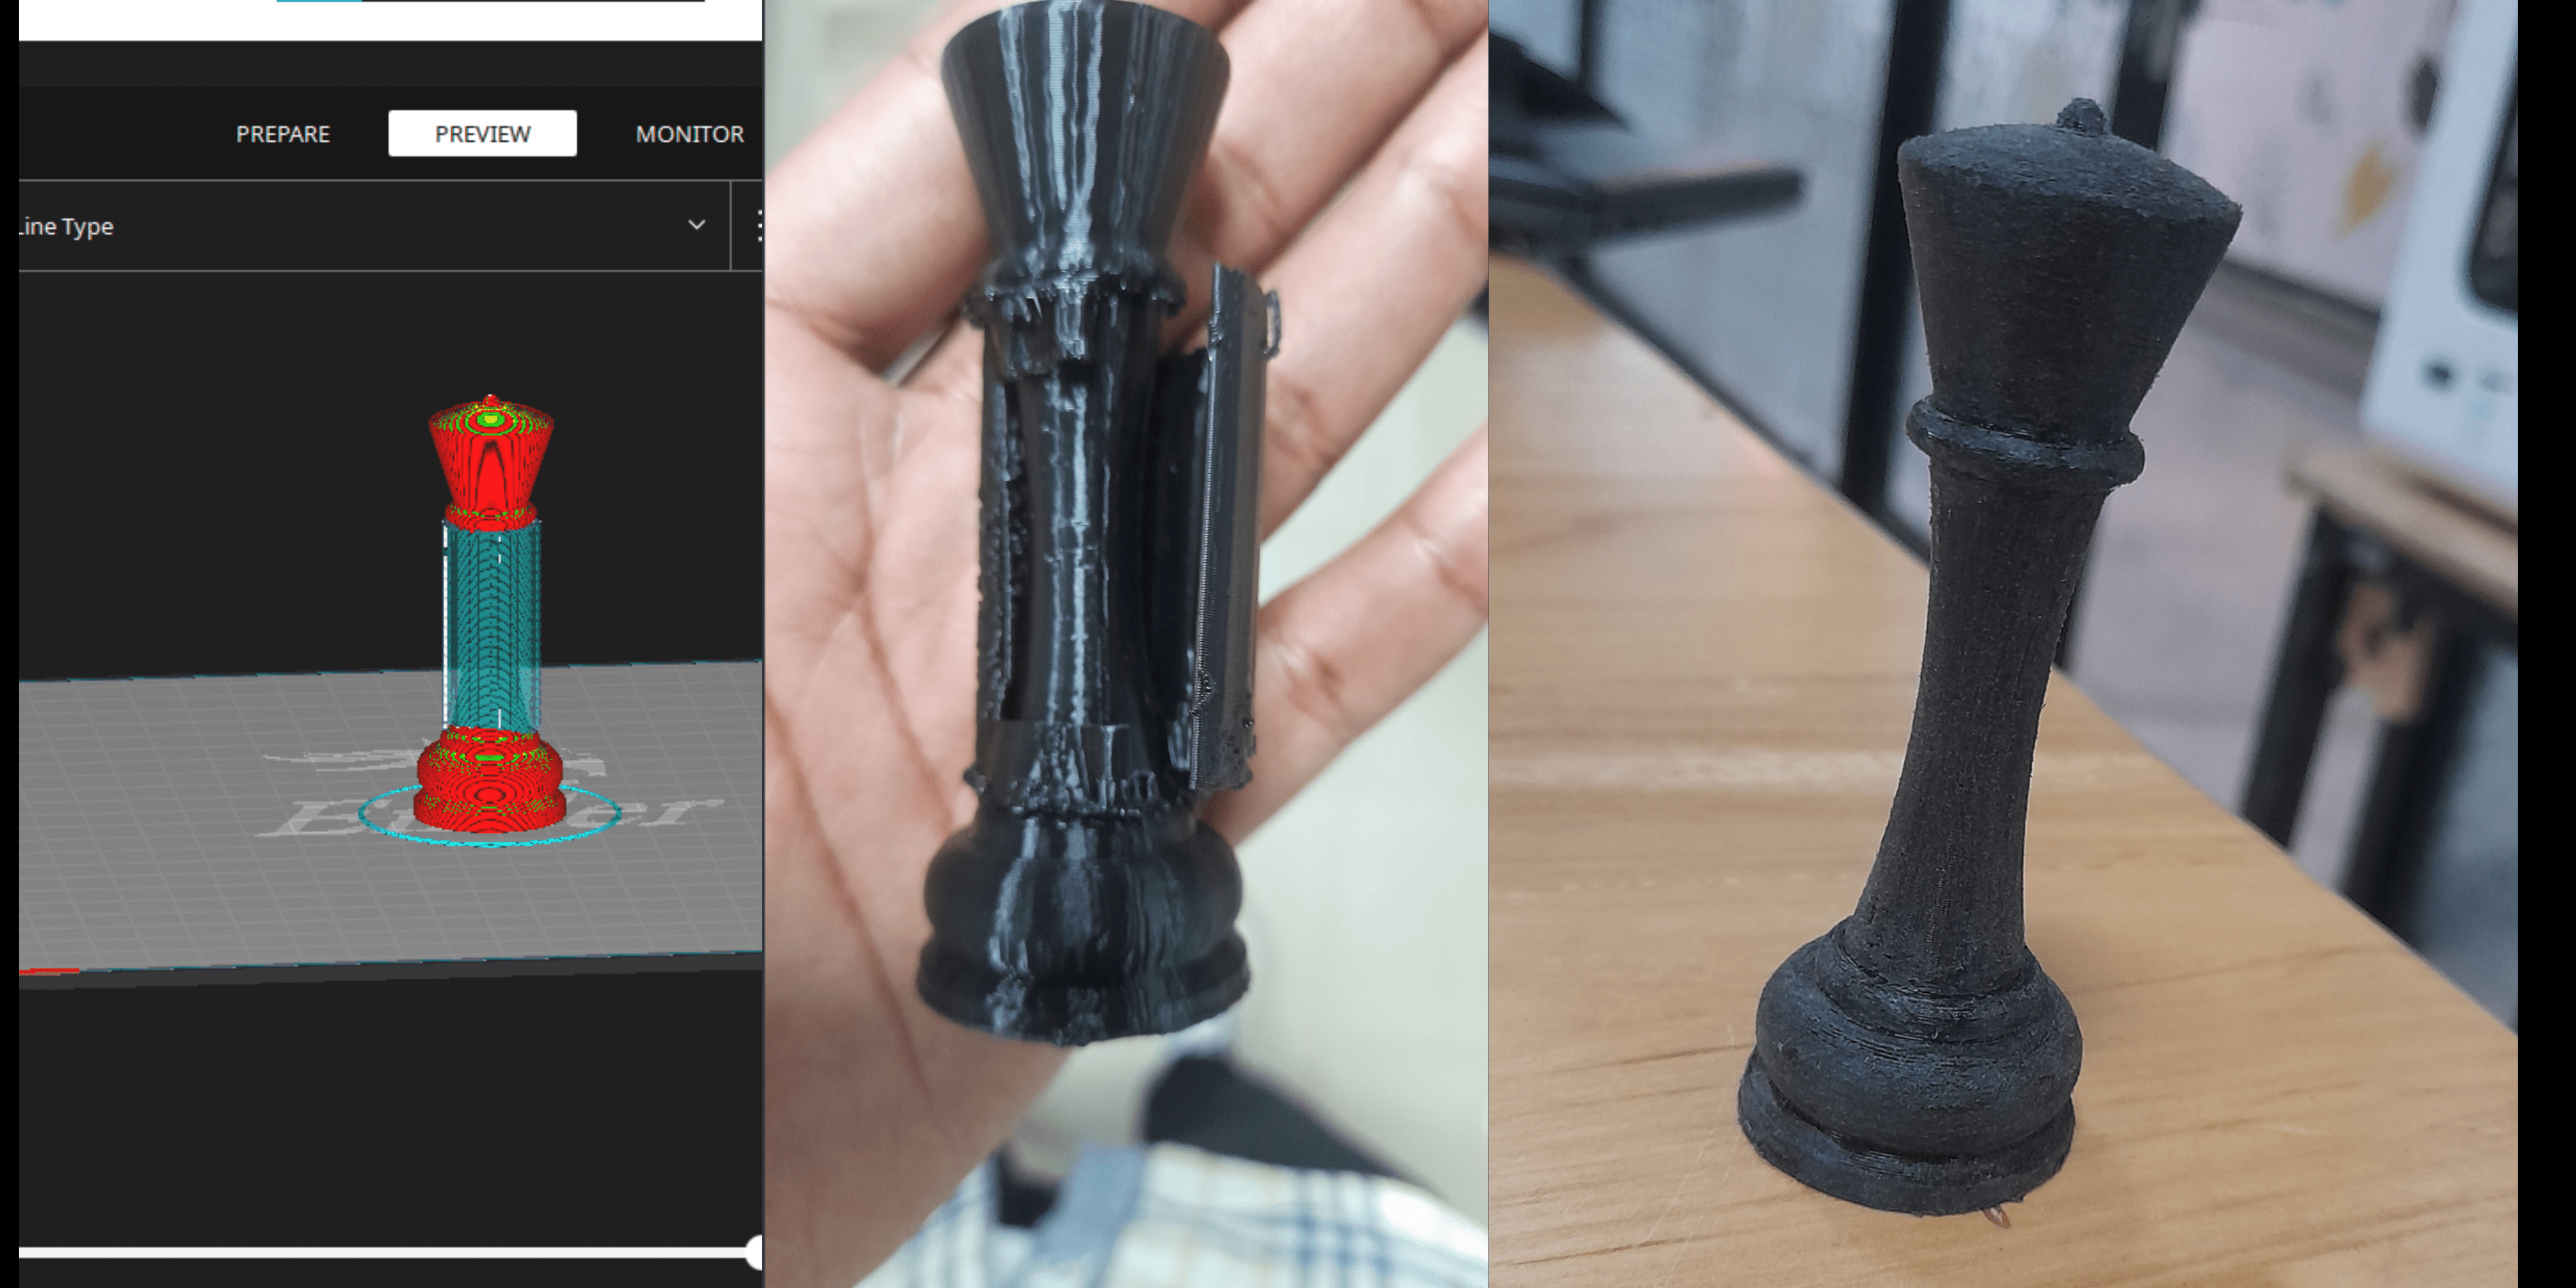
In this image, I also printed the chess piece itself and sanded it to improve the surface finish.
With the physical mold ready, I moved on to casting. I decided to use silicone to create the cast. I initially underestimated the complexity; the silicone was too viscous, and the hole I had designed for pouring was too small, making it hard for the material to fill the cavity smoothly.
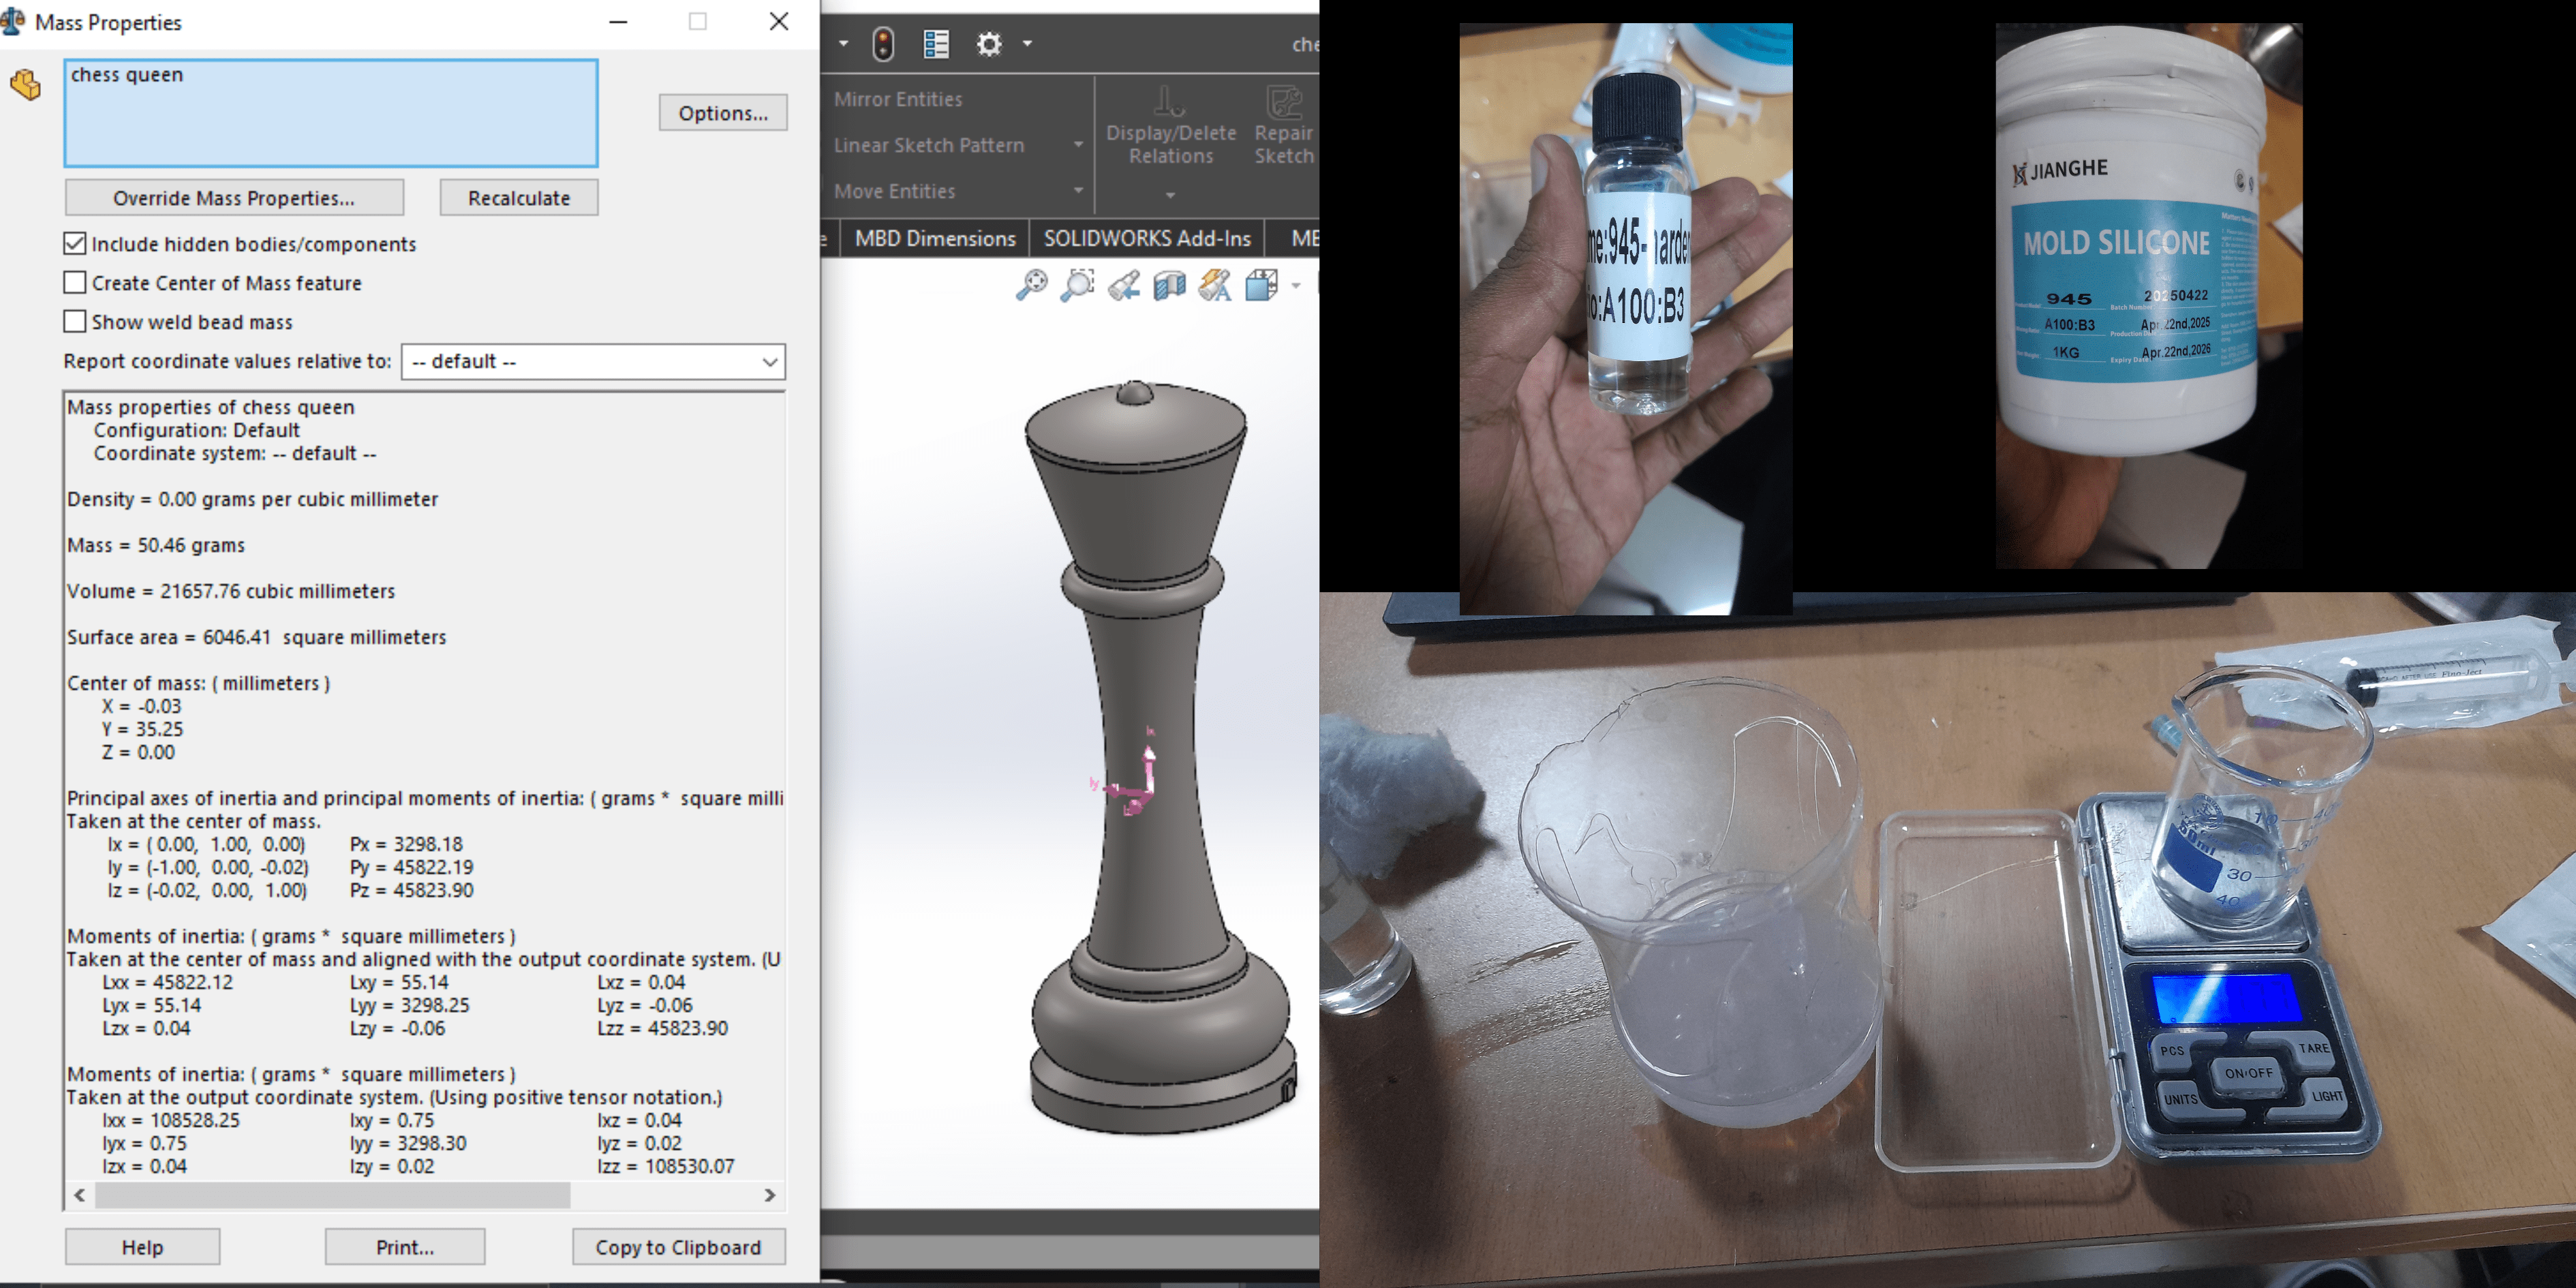
Here, I calculated the silicone mix ratio (A100:B3) using the volume of the chess piece from SolidWorks’ mass properties. This helped me measure the correct amount of silicone to use for the casting process.
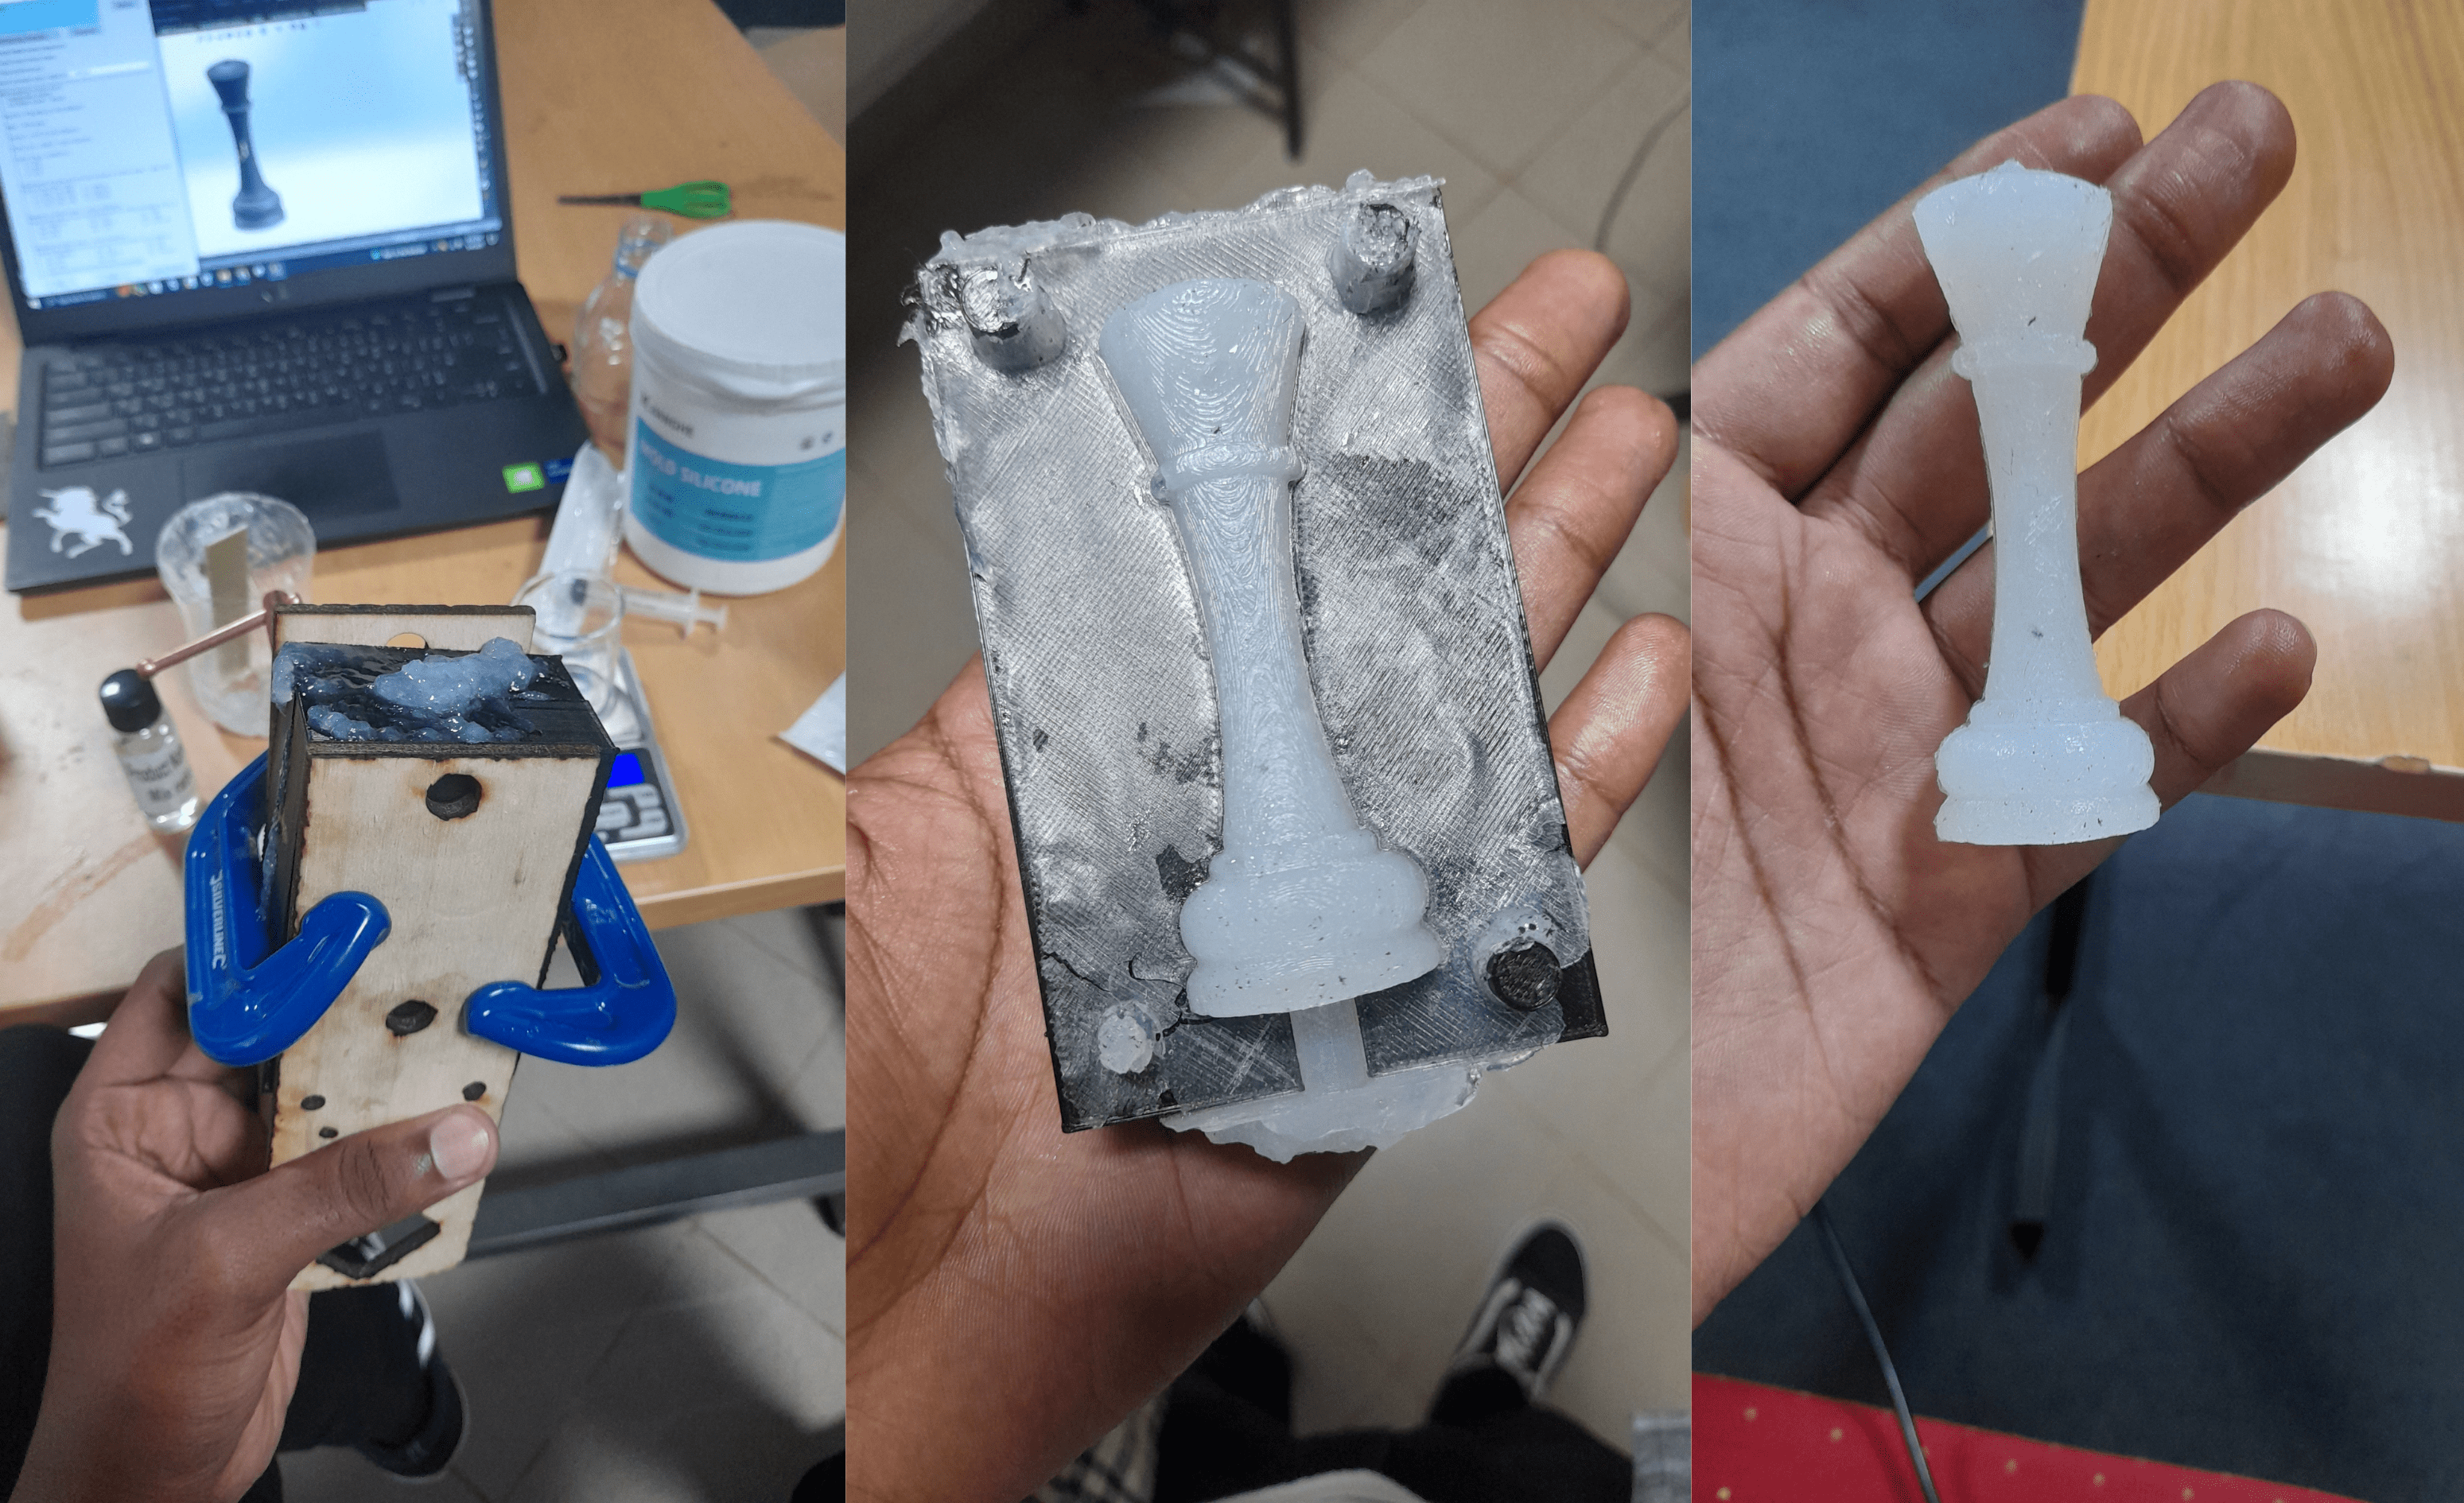
This image captures the casting process. After mixing the silicone, I poured it into the mold. In the middle, you can see the cast with some overflow and flash. On the right is the cleaned-up version of the cast after trimming excess material.
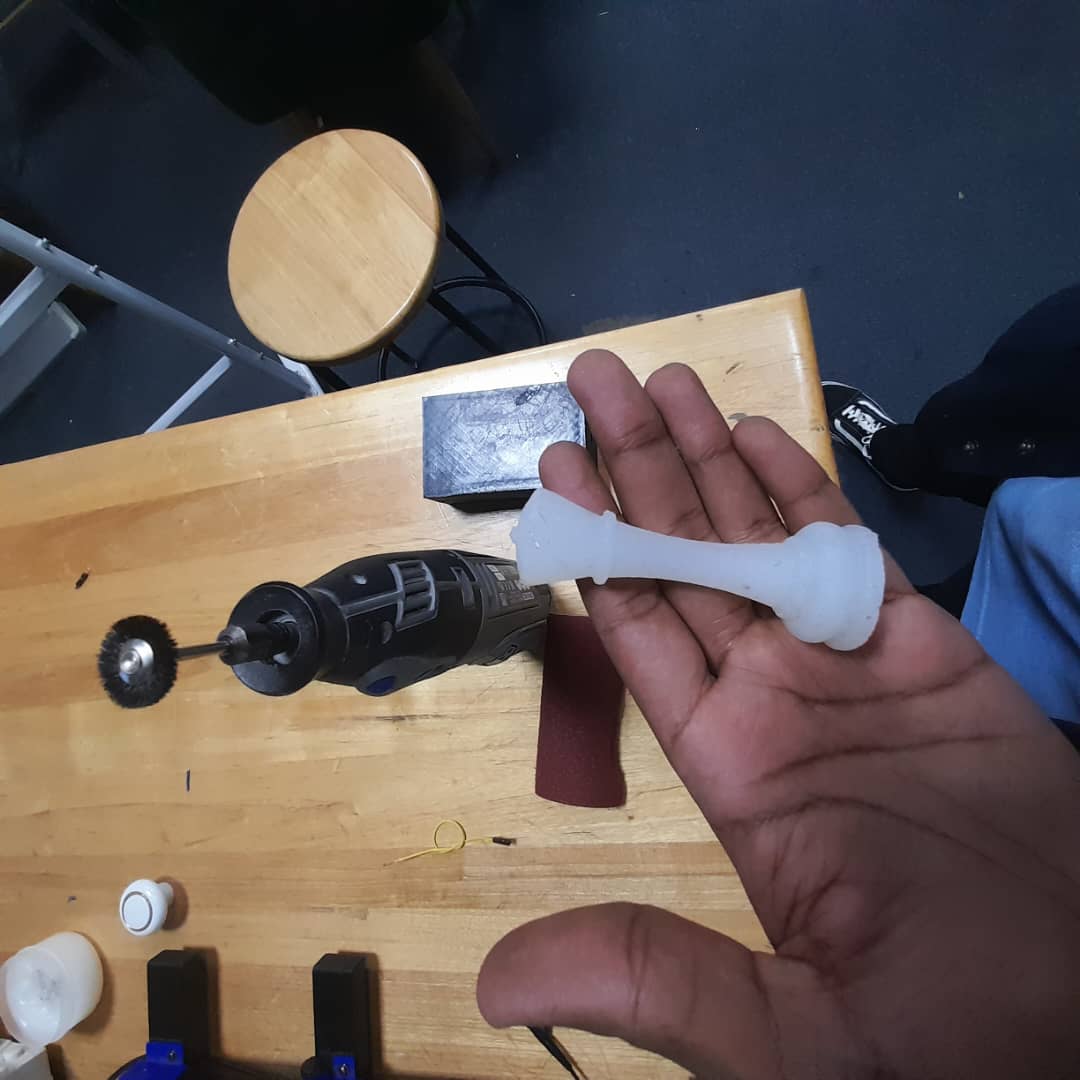
After sanding the cast
Despite these issues, I pushed through. I poured the silicone slowly and carefully. The final cast did not come out perfect, but it captured the overall shape, and I was proud of making it work, despite the setbacks.
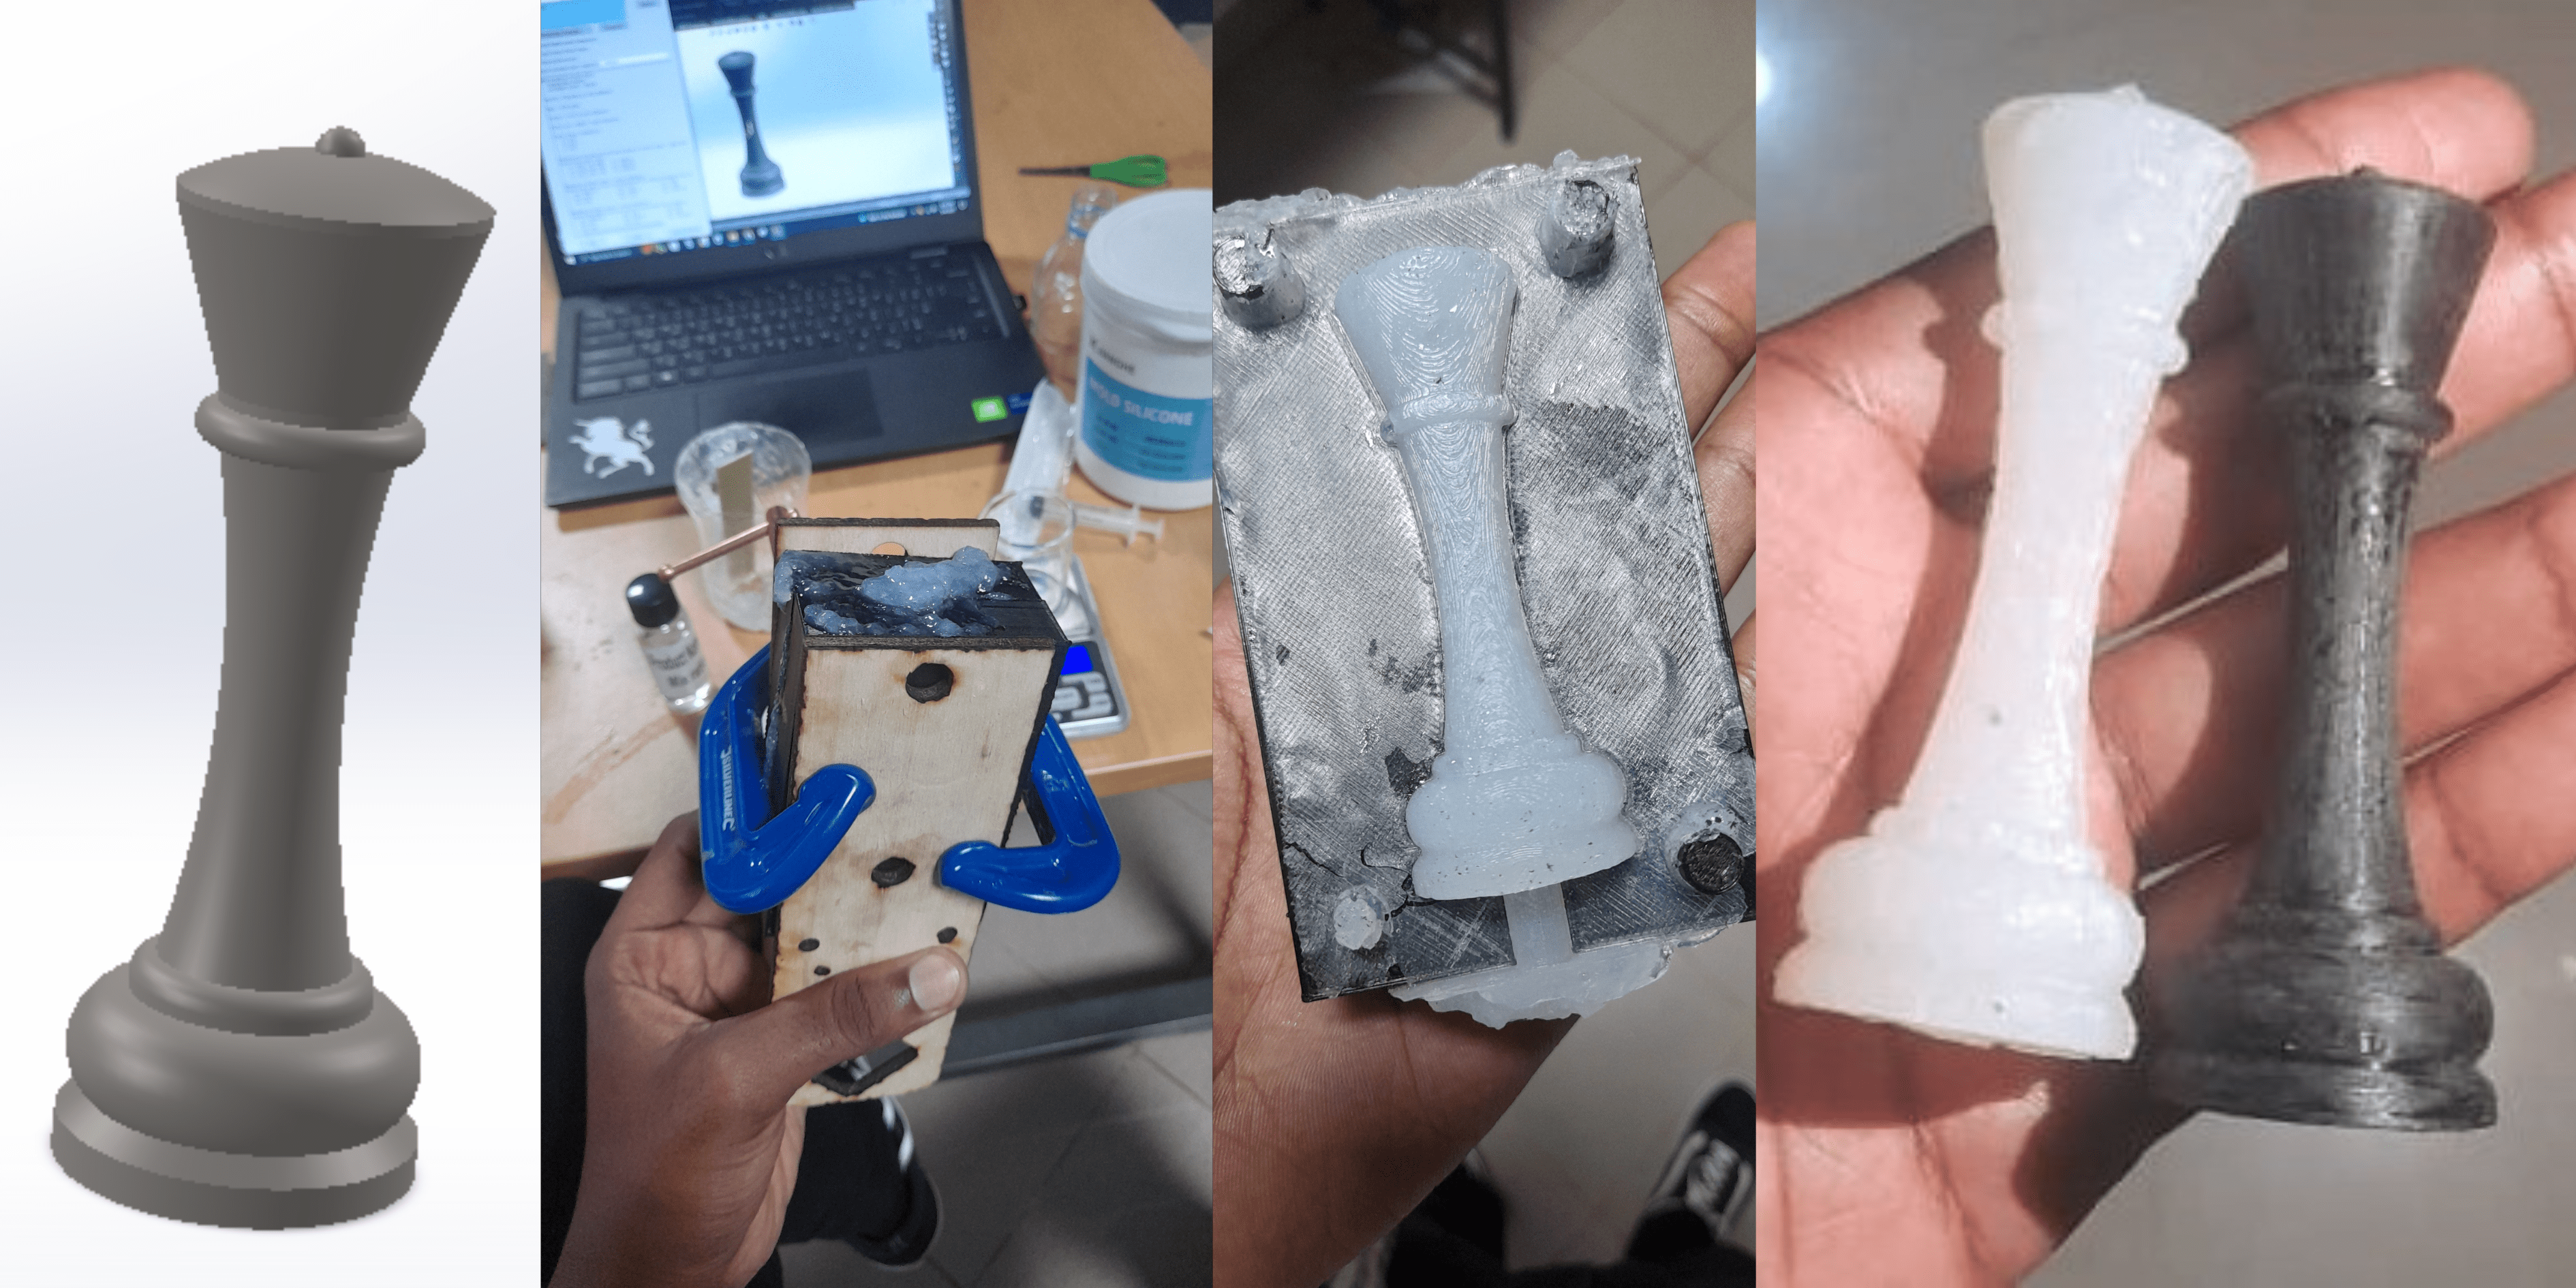
Finally, this image shows the complete outcome: the mold blocks, the silicone cast, and the original 3D printed queen piece. It reflects the entire journey from digital design to a physical cast marking the success of my first molding and casting experience.
3. Reflection and Takeaways
This experience taught me more than just molding and casting; it taught me to adapt when things don’t go as planned. I learned the importance of mold design and the pouring path and how even small details can affect the final result.
I also realized that starting with a simple design makes learning easier, and imperfections are part of the process. Using the cavity feature in SolidWorks helped me work around challenges, and overall, I gained confidence to try more complex projects in the future.