14. Interface and Application Programming
Task of Interface and Application Programming
Group assignment:
- Compare as many tool options as possible.
- Document your work on the group work page and reflect on your individual page what you learned.
Link to Group page of Interface and Application Programming
Individual assignment
- Write an application for the embedded board that you made. that interfaces a user with an input and/or output device(s)
Summary
The goal of my individual assignment was to design and build an application that interfaces with my custom microcontroller board using a user interface.
1. Hardware Setup
For this assignment, I used the board I designed and printed prevously and then connected an ultrasonic distance sensor.
I configured the pins as follows:
- LED: Pin D0
- Ultrasonic Trigger: Pin D1
- Ultrasonic Echo: Pin D2
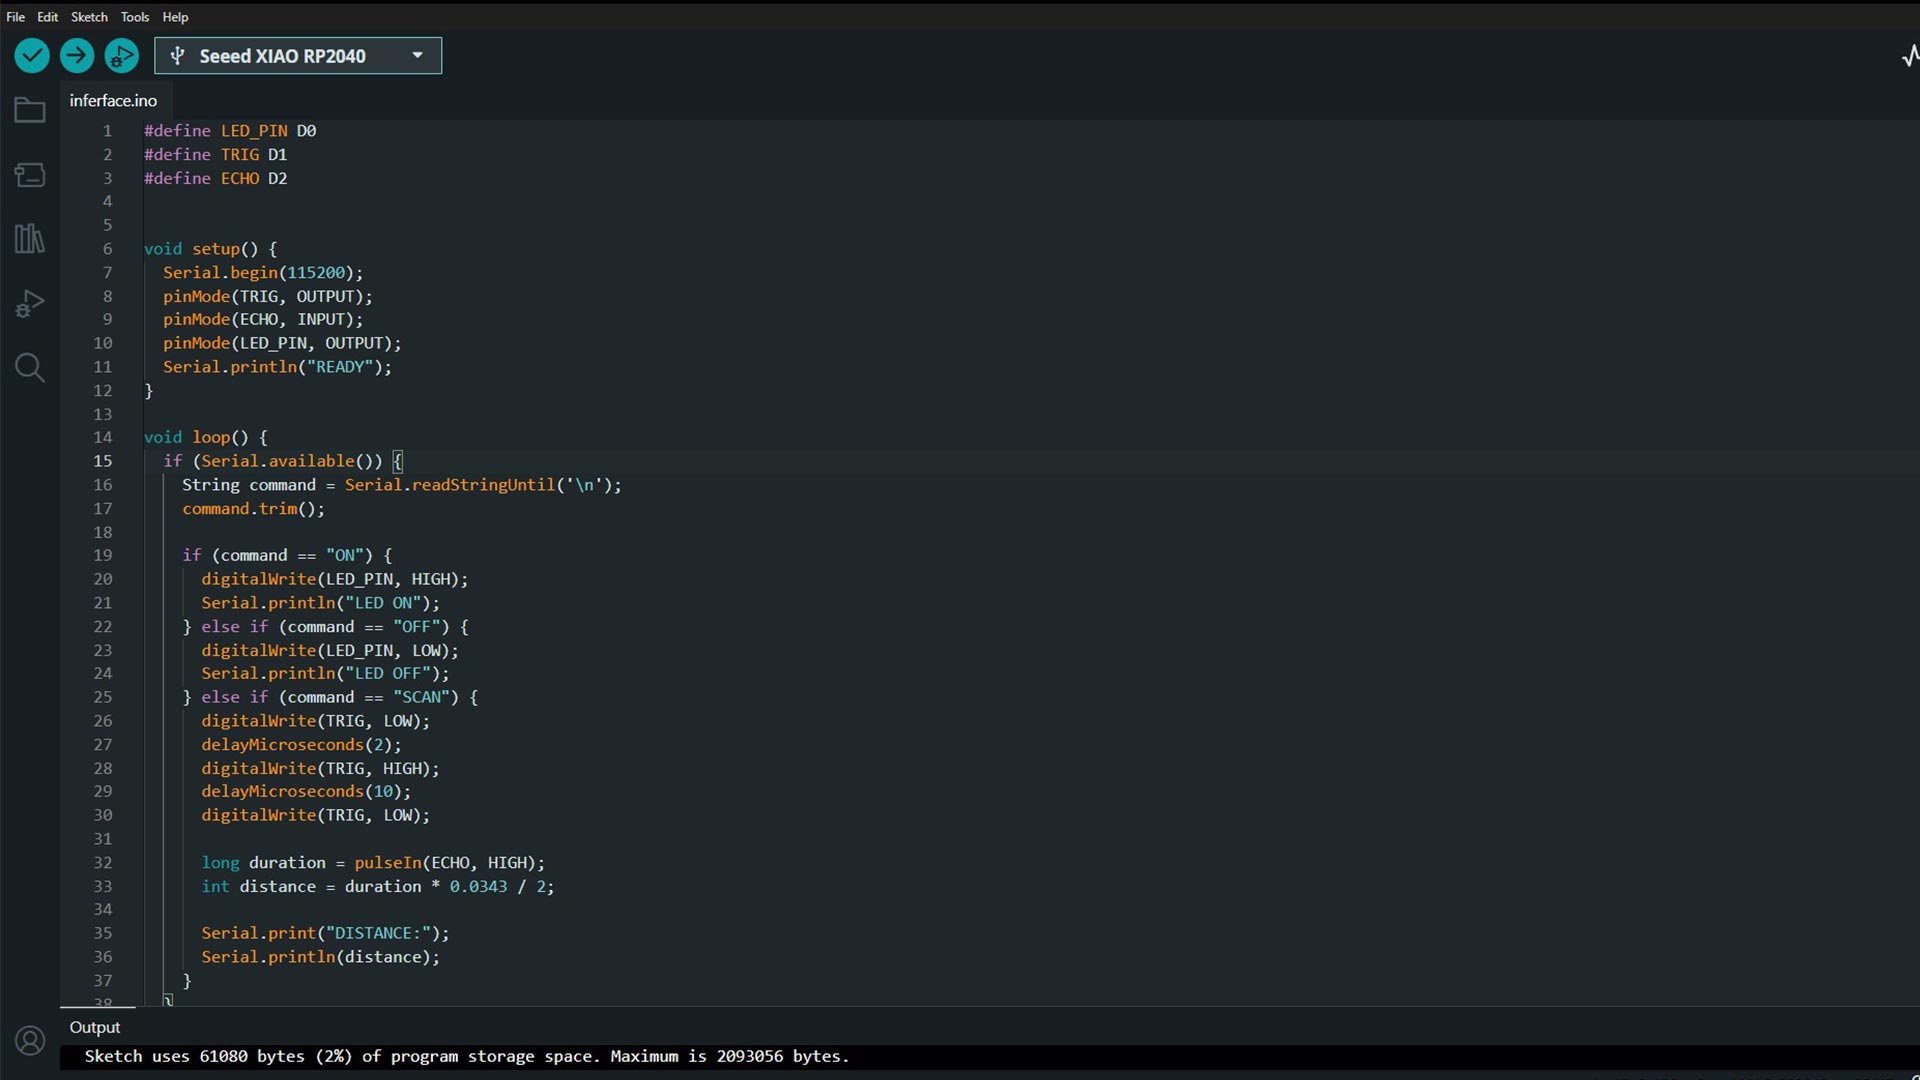
2. Arduino code
I wrote an Arduino sketch to listen for serial commands and control the board accordingly.
        #define LED_PIN D0
        #define TRIG    D1
        #define ECHO    D2

        void setup() {
          Serial.begin(115200);
          pinMode(TRIG, OUTPUT);
          pinMode(ECHO, INPUT);
          pinMode(LED_PIN, OUTPUT);
          Serial.println("READY");
        }
3. Serial Command Interface
In the loop, I used simple string commands sent via Serial to control the board:
- ON: Turns LED On
- OFF: Turns LED Off
- SCAN: Triggers the ultrasonic sensor and sends back the measured distance
      void loop() {
      if (Serial.available()) {
        String command = Serial.readStringUntil('\n');
        command.trim();

        if (command == "ON") {
          digitalWrite(LED_PIN, HIGH);
          Serial.println("LED ON");
        } else if (command == "OFF") {
          digitalWrite(LED_PIN, LOW);
          Serial.println("LED OFF");
        } else if (command == "SCAN") {
          digitalWrite(TRIG, LOW);
          delayMicroseconds(2);
          digitalWrite(TRIG, HIGH);
          delayMicroseconds(10);
          digitalWrite(TRIG, LOW);

          long duration = pulseIn(ECHO, HIGH);
          int distance = duration * 0.0343 / 2;

          Serial.print("DISTANCE:");
          Serial.println(distance);
        }
      }
    }
Combination of all codes
      #define LED_PIN D0
      #define TRIG D1
      #define ECHO D2


      void setup() {
        Serial.begin(115200);
        pinMode(TRIG, OUTPUT);
        pinMode(ECHO, INPUT);
        pinMode(LED_PIN, OUTPUT);
        Serial.println("READY");
      }

      void loop() {
        if (Serial.available()) {
          String command = Serial.readStringUntil('\n');
          command.trim();

          if (command == "ON") {
            digitalWrite(LED_PIN, HIGH);
            Serial.println("LED ON");
          } else if (command == "OFF") {
            digitalWrite(LED_PIN, LOW);
            Serial.println("LED OFF");
          } else if (command == "SCAN") {
            digitalWrite(TRIG, LOW);
            delayMicroseconds(2);
            digitalWrite(TRIG, HIGH);
            delayMicroseconds(10);
            digitalWrite(TRIG, LOW);

            long duration = pulseIn(ECHO, HIGH);
            int distance = duration * 0.0343 / 2;

            Serial.print("DISTANCE:");
            Serial.println(distance);
          }
        }
       }
4. Web Interface
To interact with the board directly, I created a simple web interface using HTML, CSS, and JavaScript. I used the Web Serial API to allow the browser to communicate directly with my board via USB cable
- Buttons added: ON, OFF and SCAN
- Serial connection: Established through browser prompts
- Output: Distance readings and LED status printed in real-time
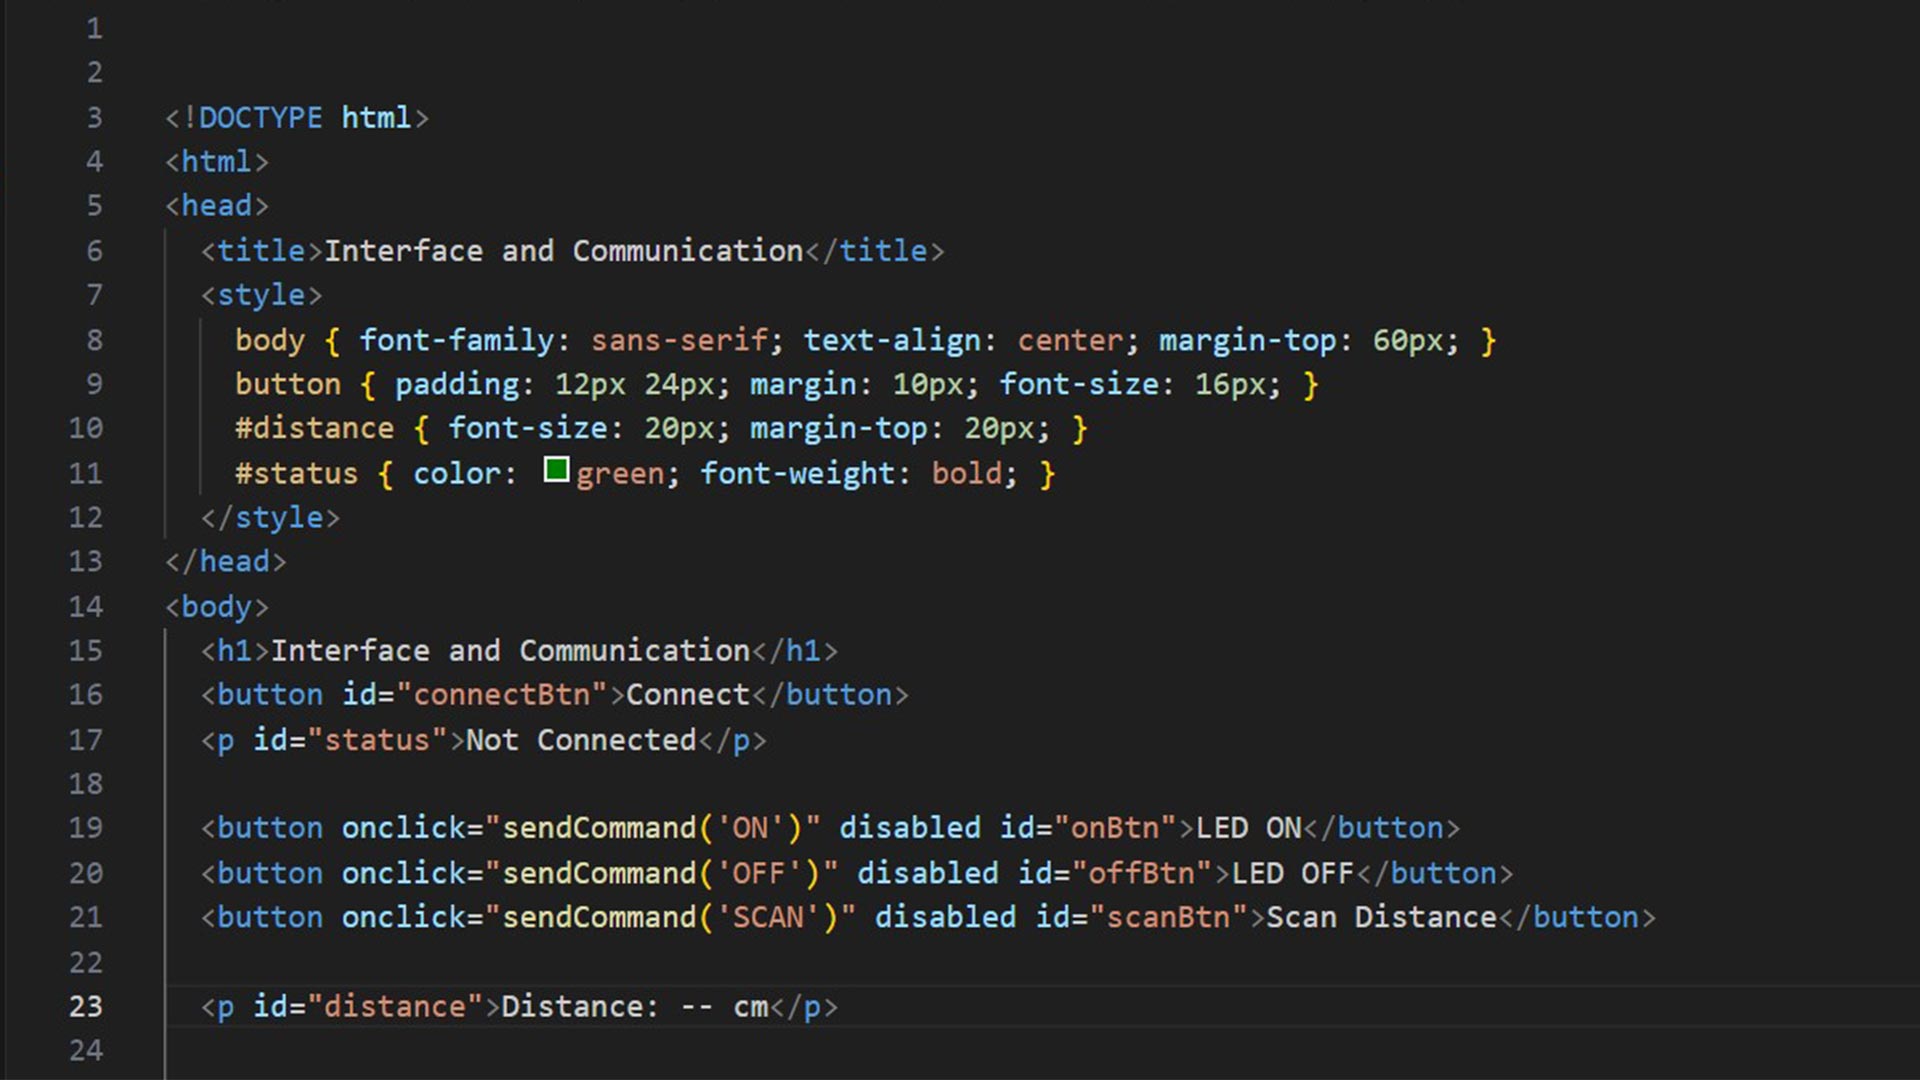
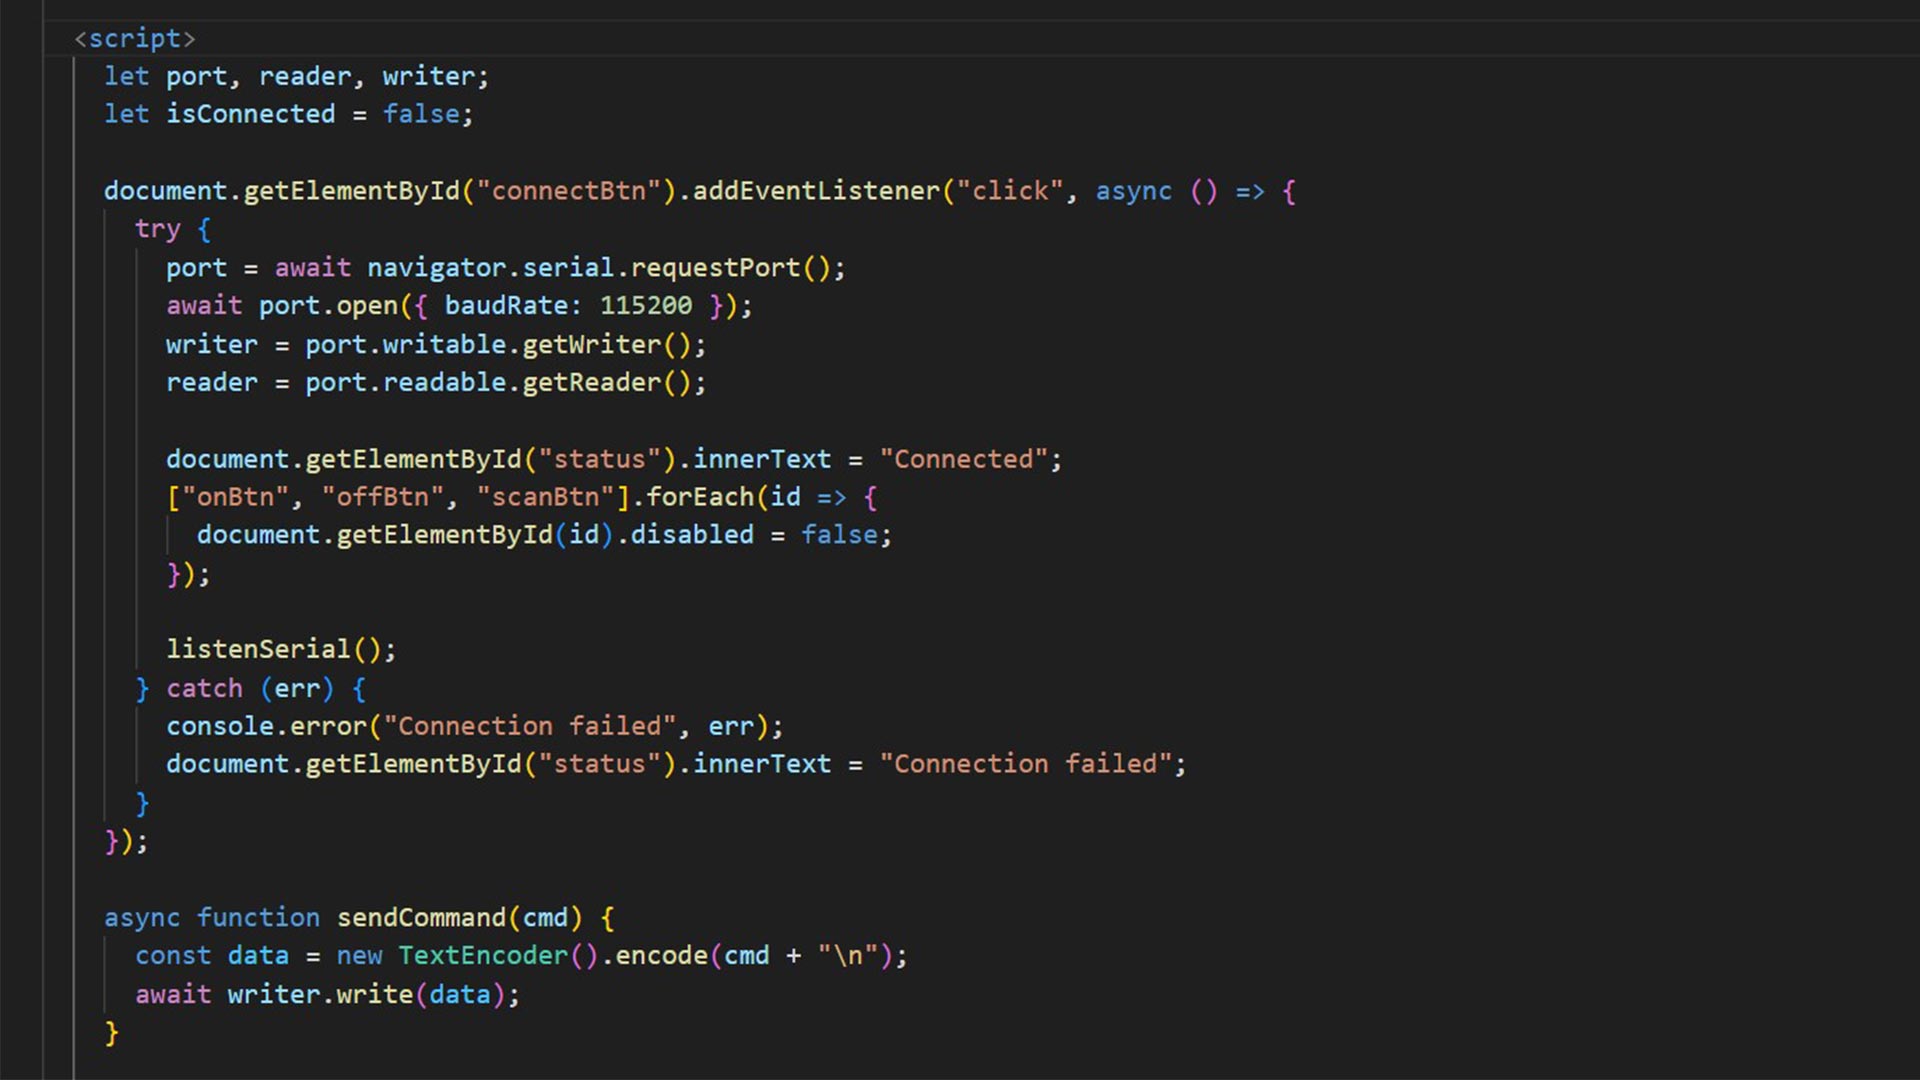
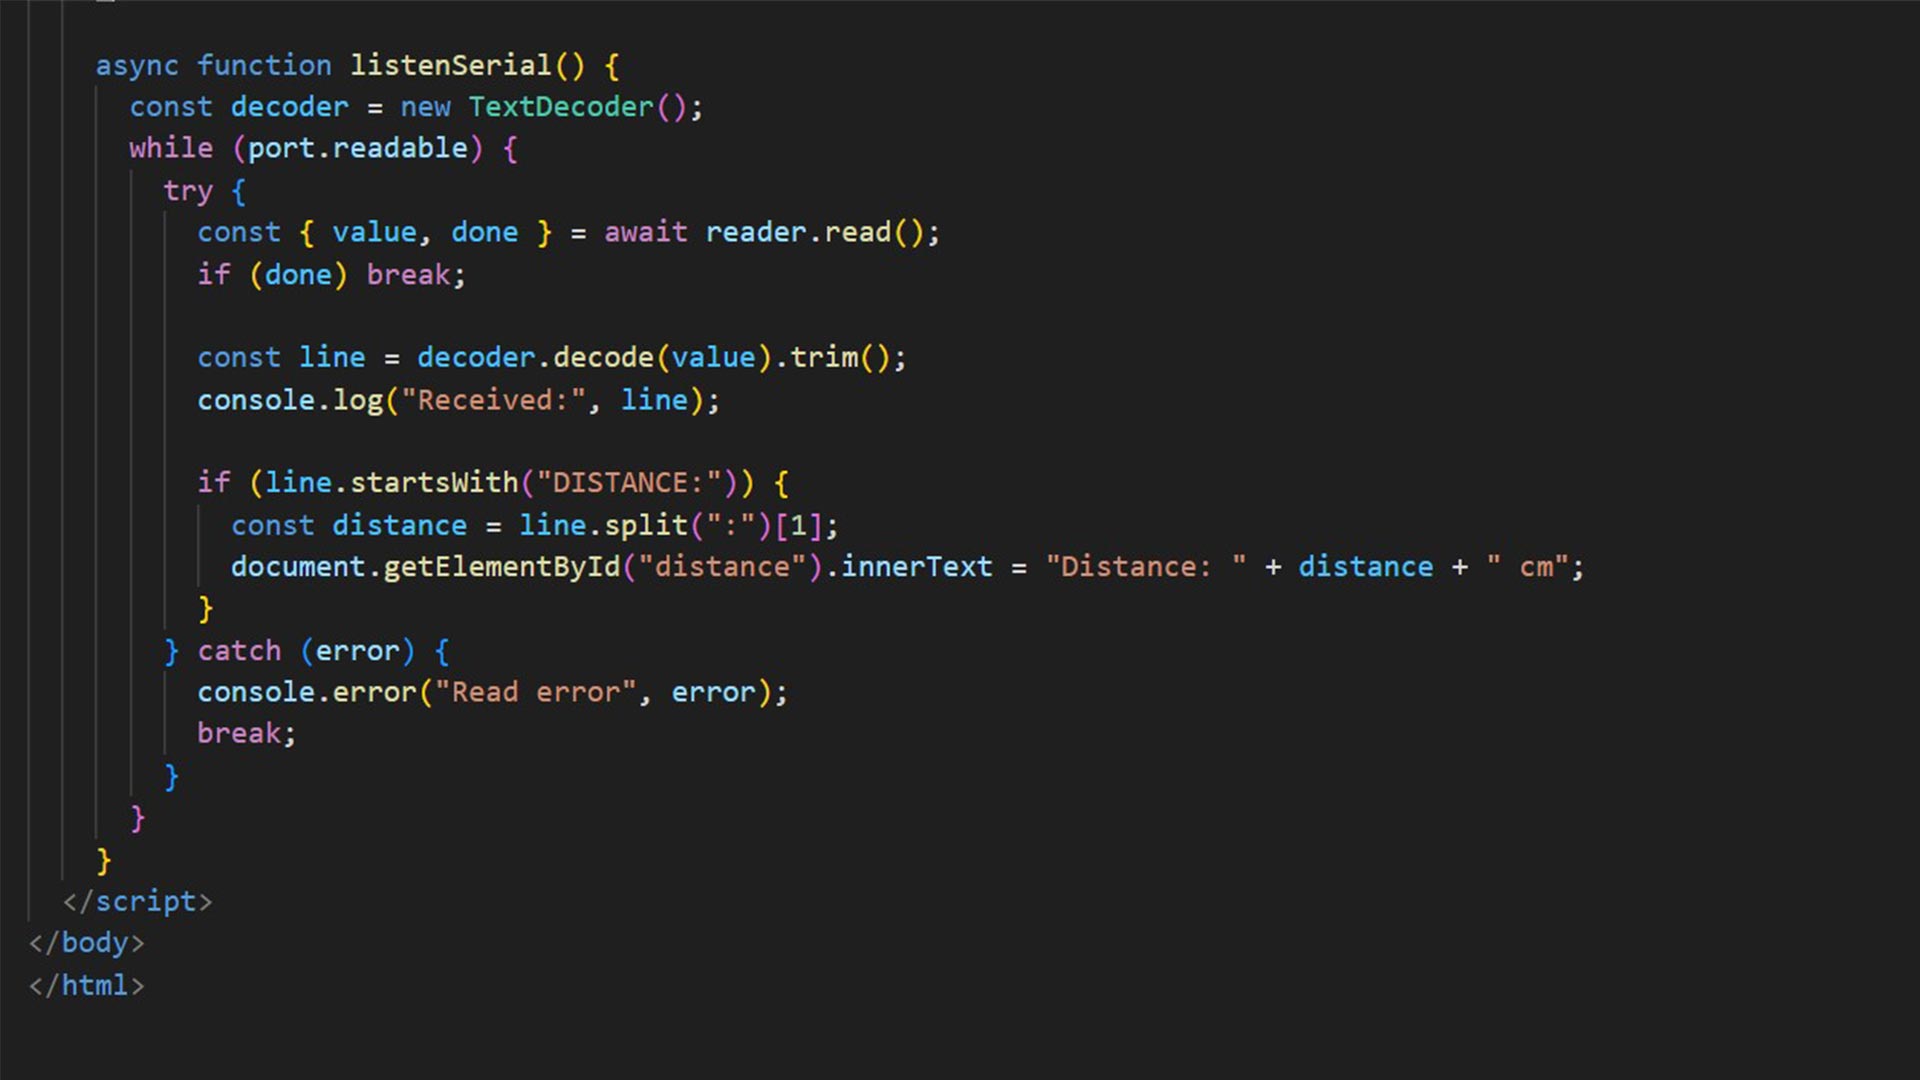
I structured the page so users can easily connect, send commands, and view responses dynamically.
Note: All files need to be in one folder for proper function.
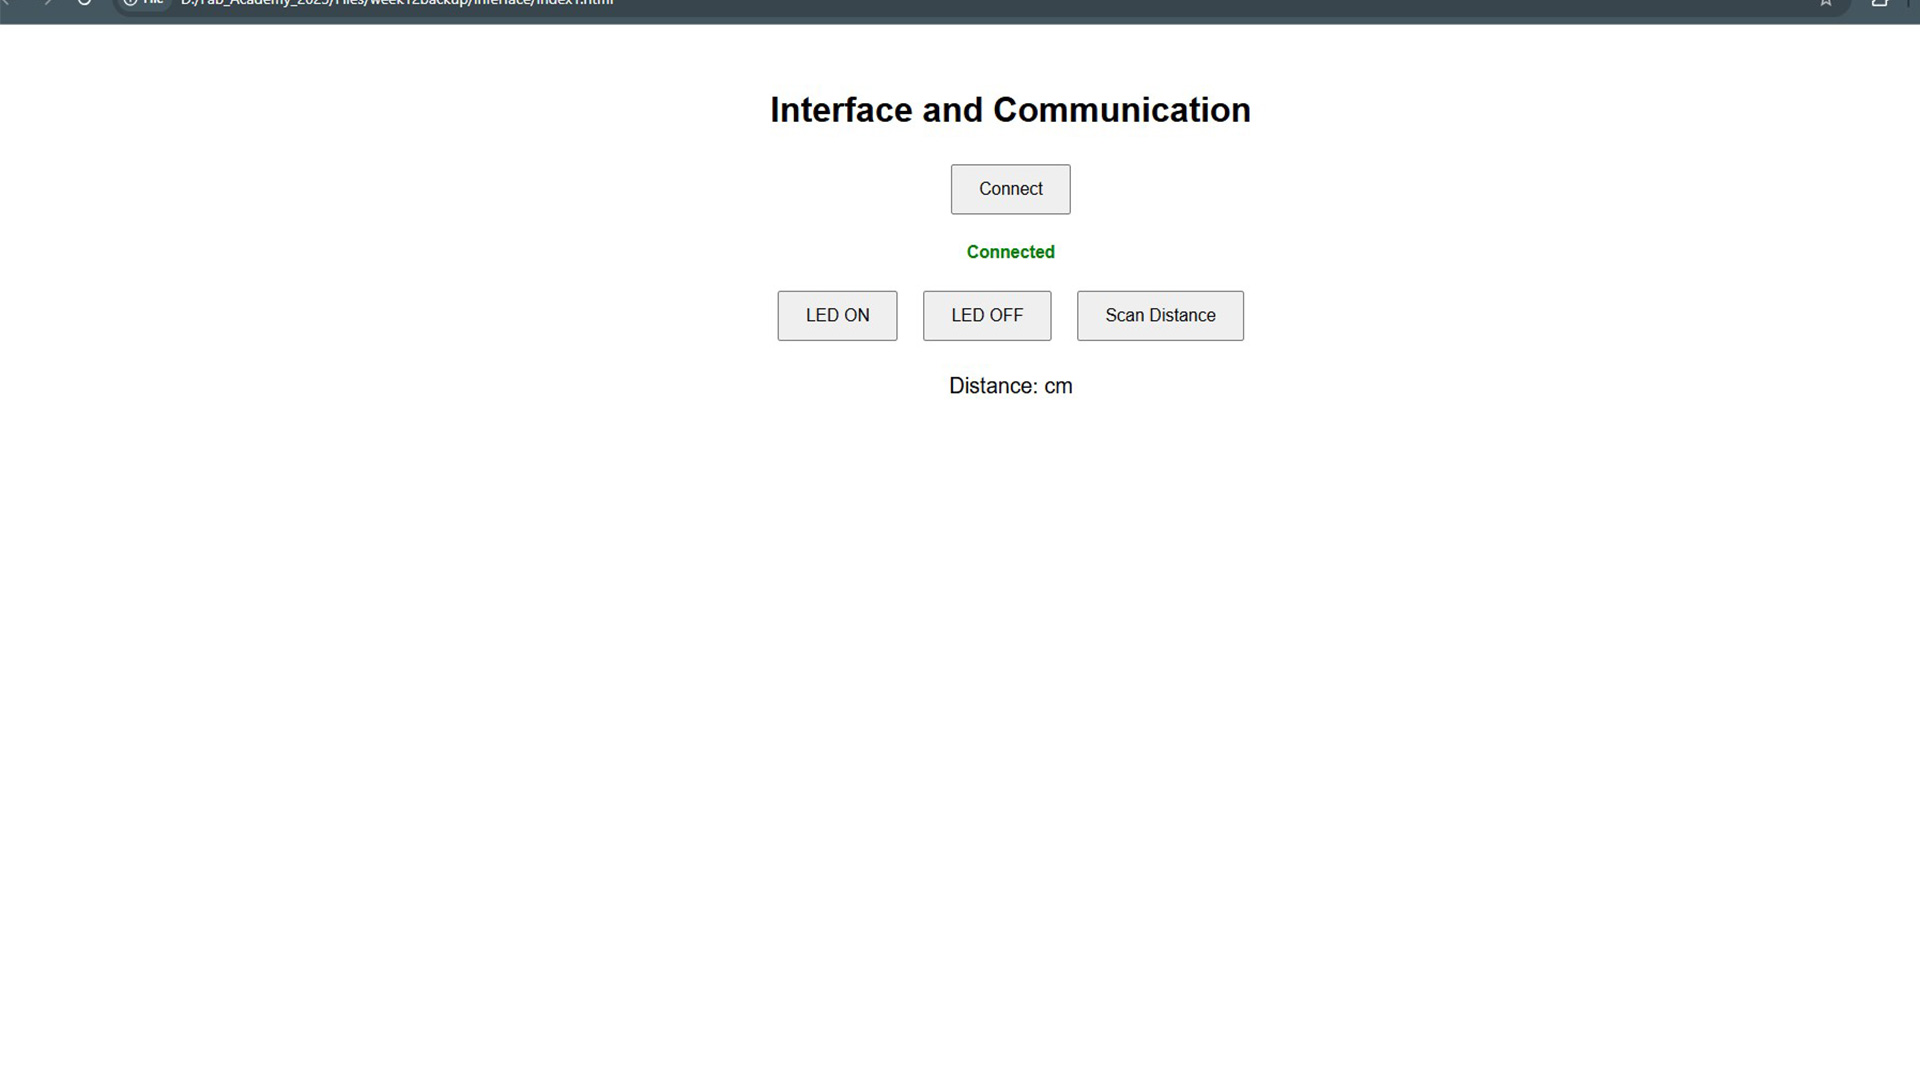
5. Result
6. Final results
This video shows how I measured the distance at which the object is located. And distance (result) is displayed on web interface.
Download files
Here are the source code files:
HTML, CSS and java code Arduino code