13. Moulding and Casting
- Group assignment:
- Review the safety data sheets for each of your Moulding and Casting materials
- Make and compare test casts with each of them
- Compare printing vs milling molds
- Individual assignment:
- Design a mold around the process you’ll be using, produce it with a smooth surface finish that does not show the production process, and use it to cast parts.
Link to a Group page of Moulding and Casting
For individual assignment, I decided to design and print mold for simple container.
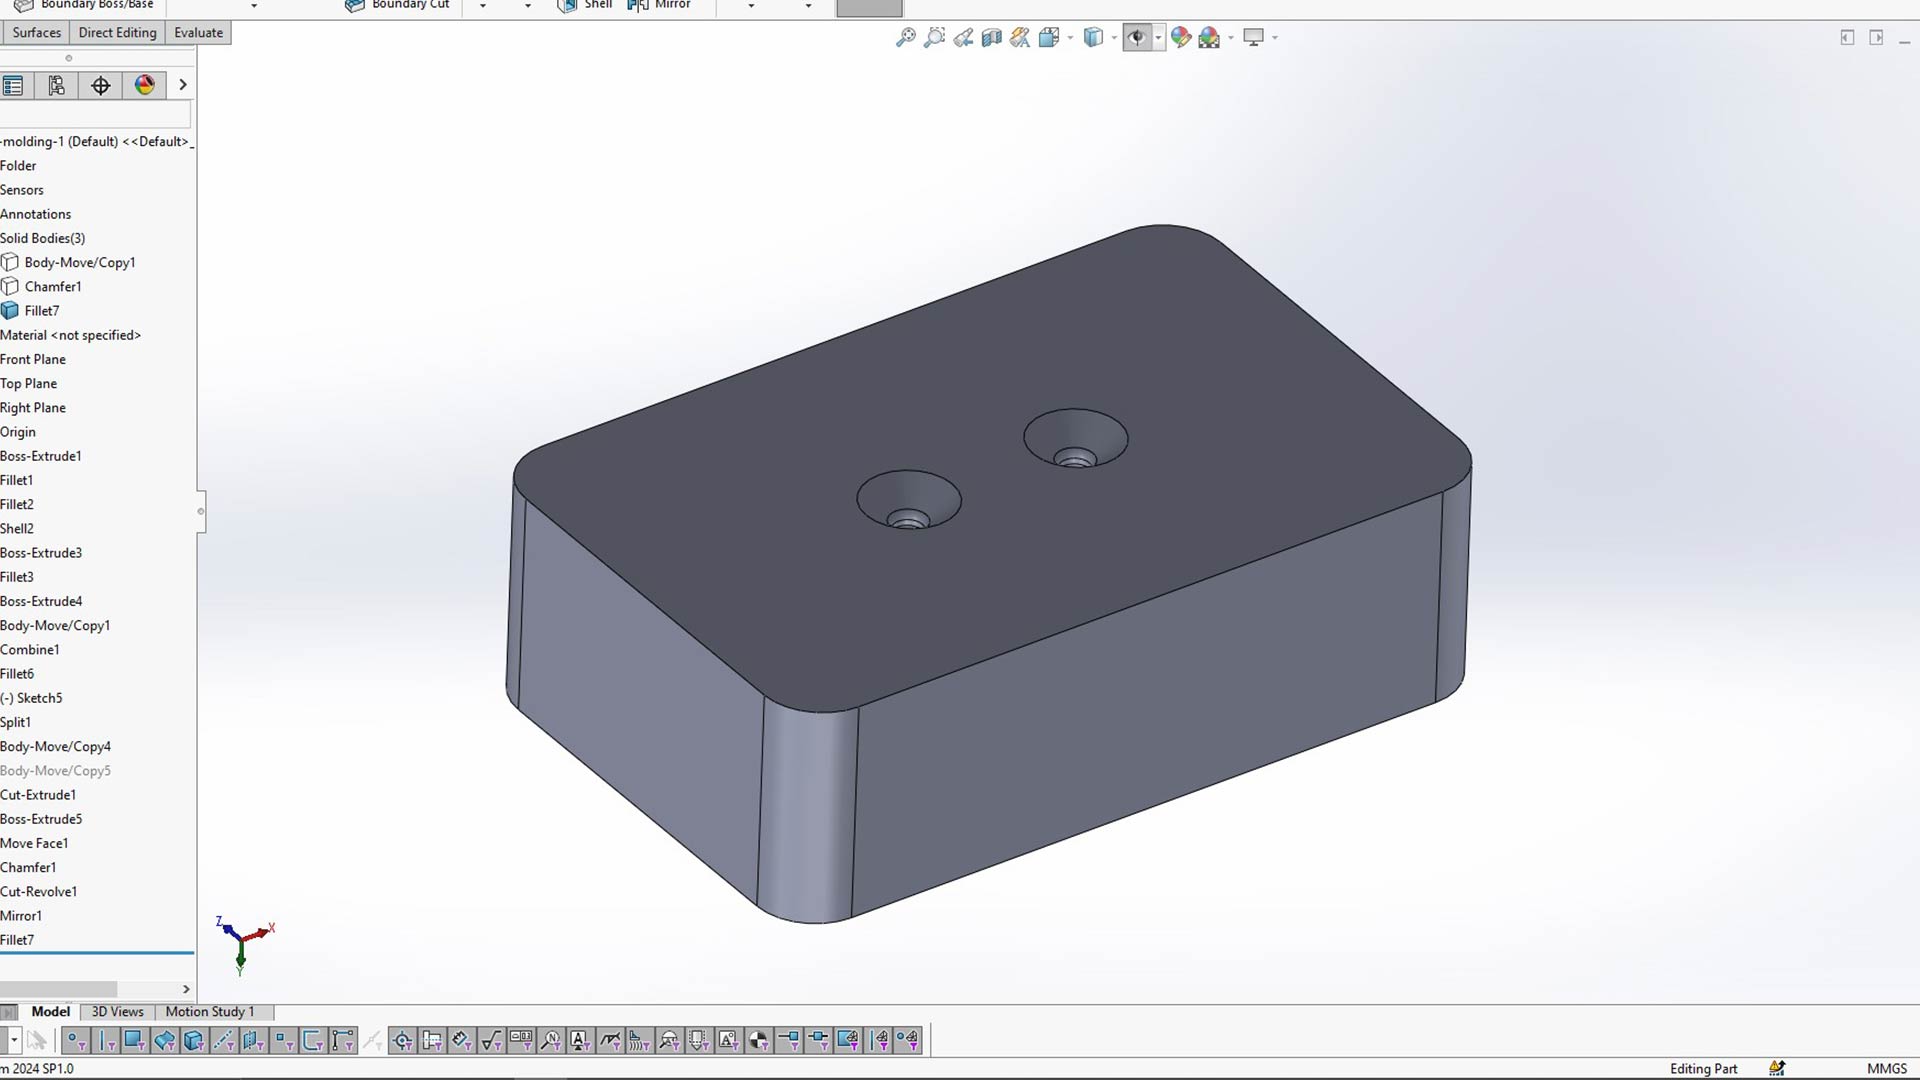
1. Mold design in SolidWorks
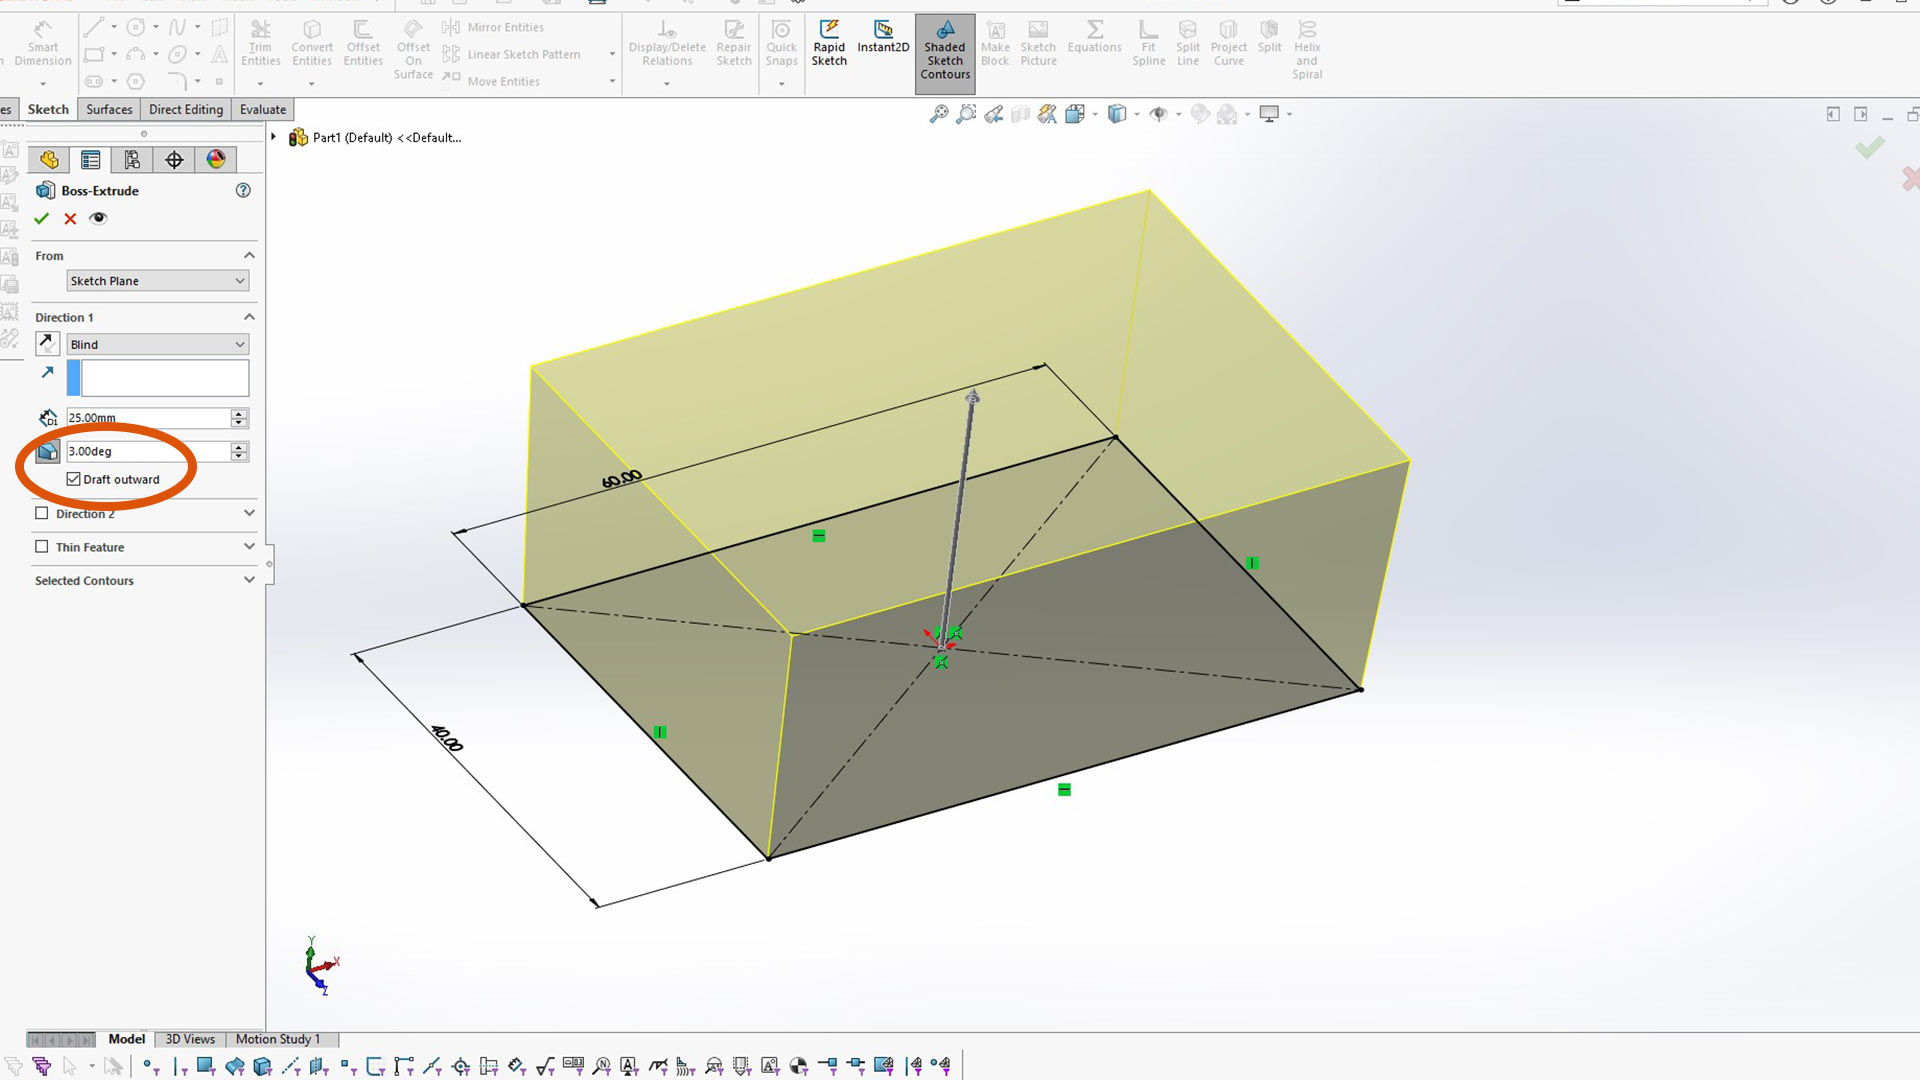
I started with SolidWorks by extruding a rectangle. I added draft angle of 3 degree. This angle is crucial since it is kept at 0 degree, mold release will be difficult.
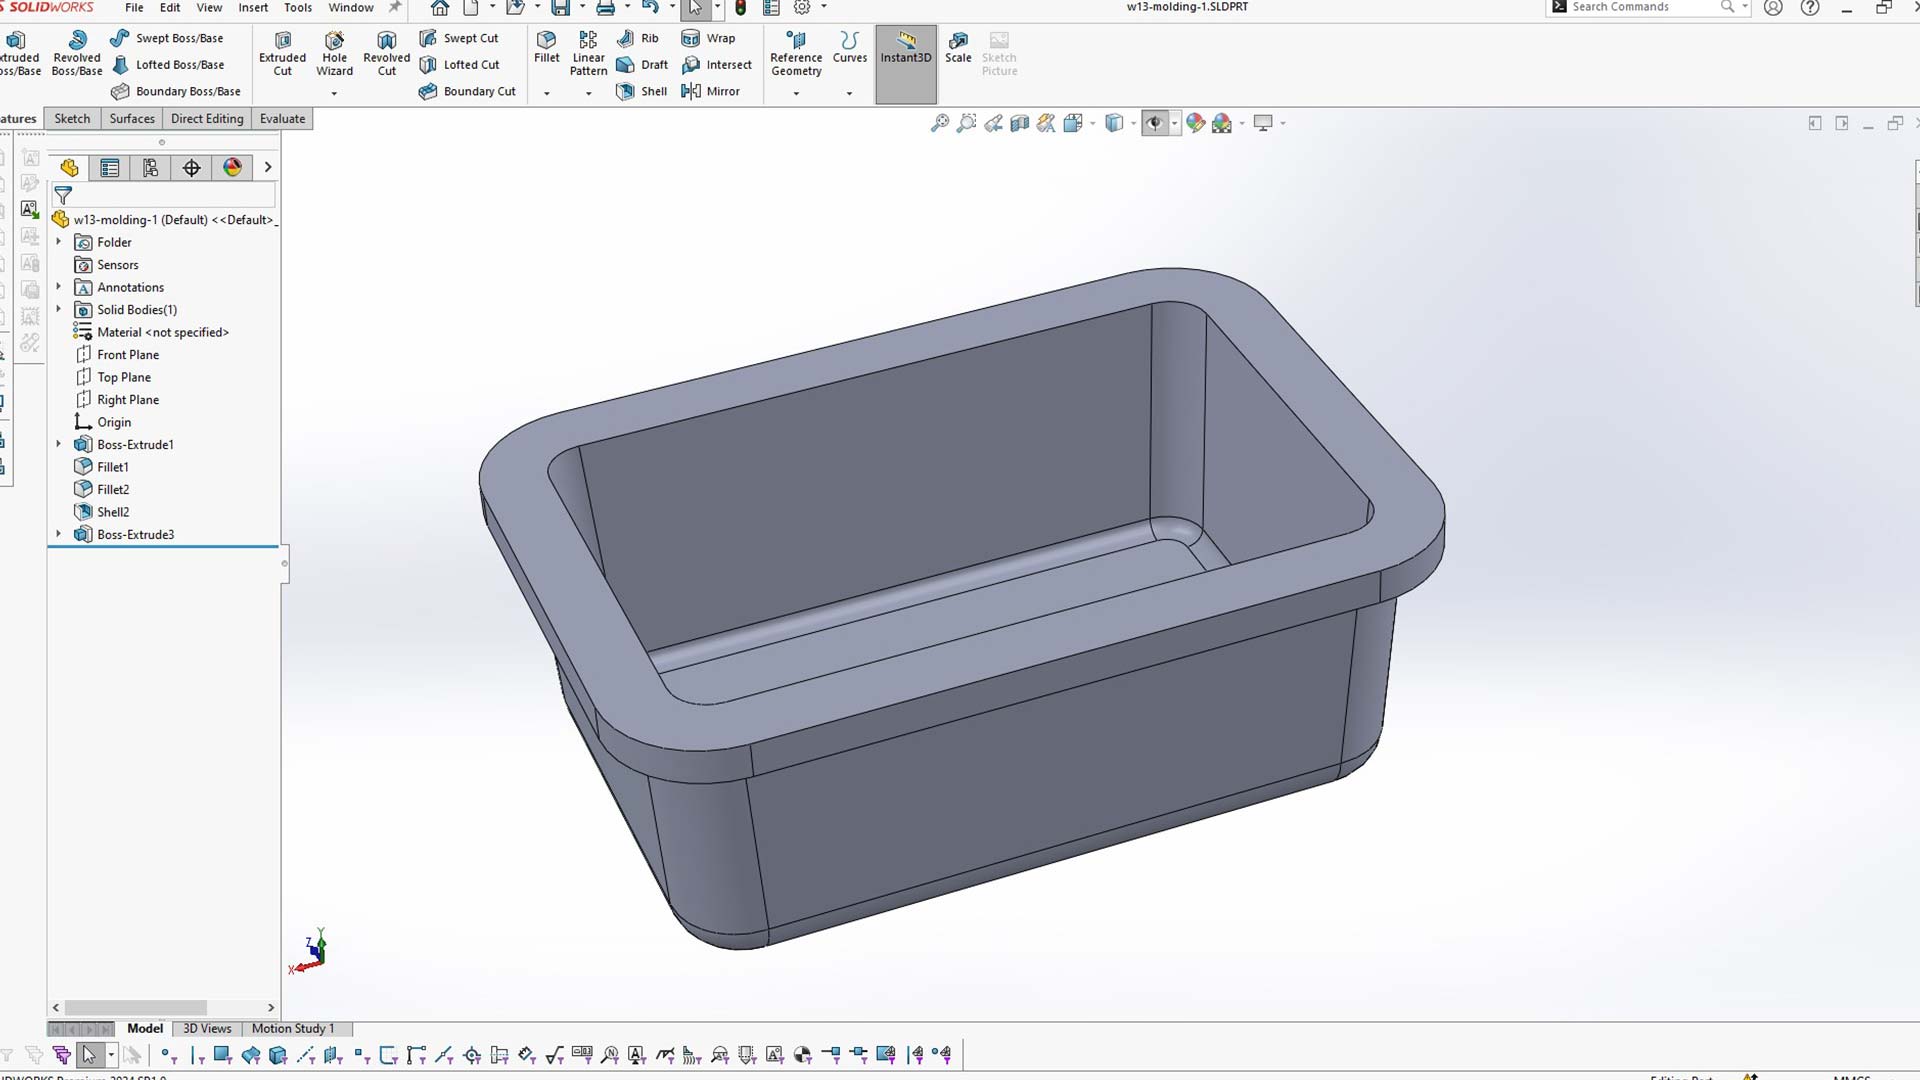
I added filled and then used shell feature to make the body hallow.
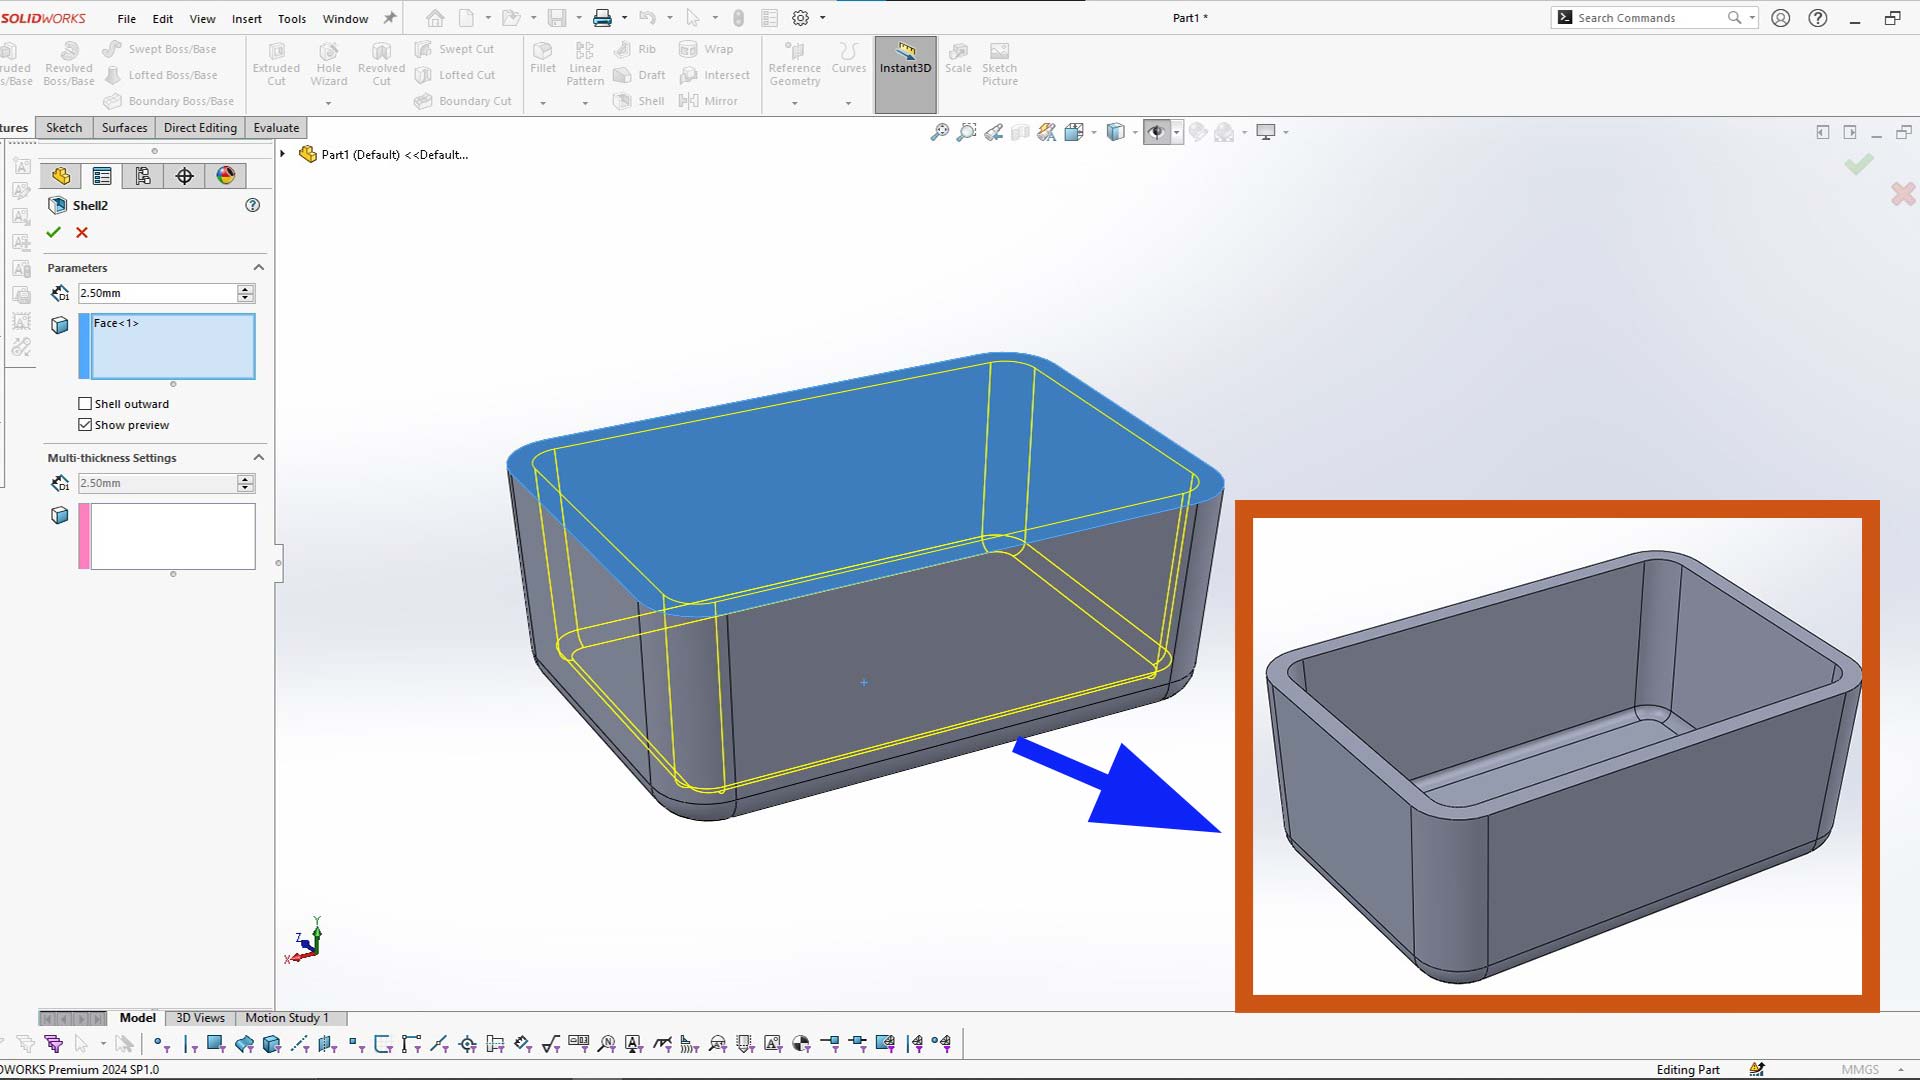
I then added top profile. This will just act as handle. It also icrease rigidity of the container.
I then made a body around the container. One key not is to make sure that the two bodies are not merged. Just uncheck merge box.

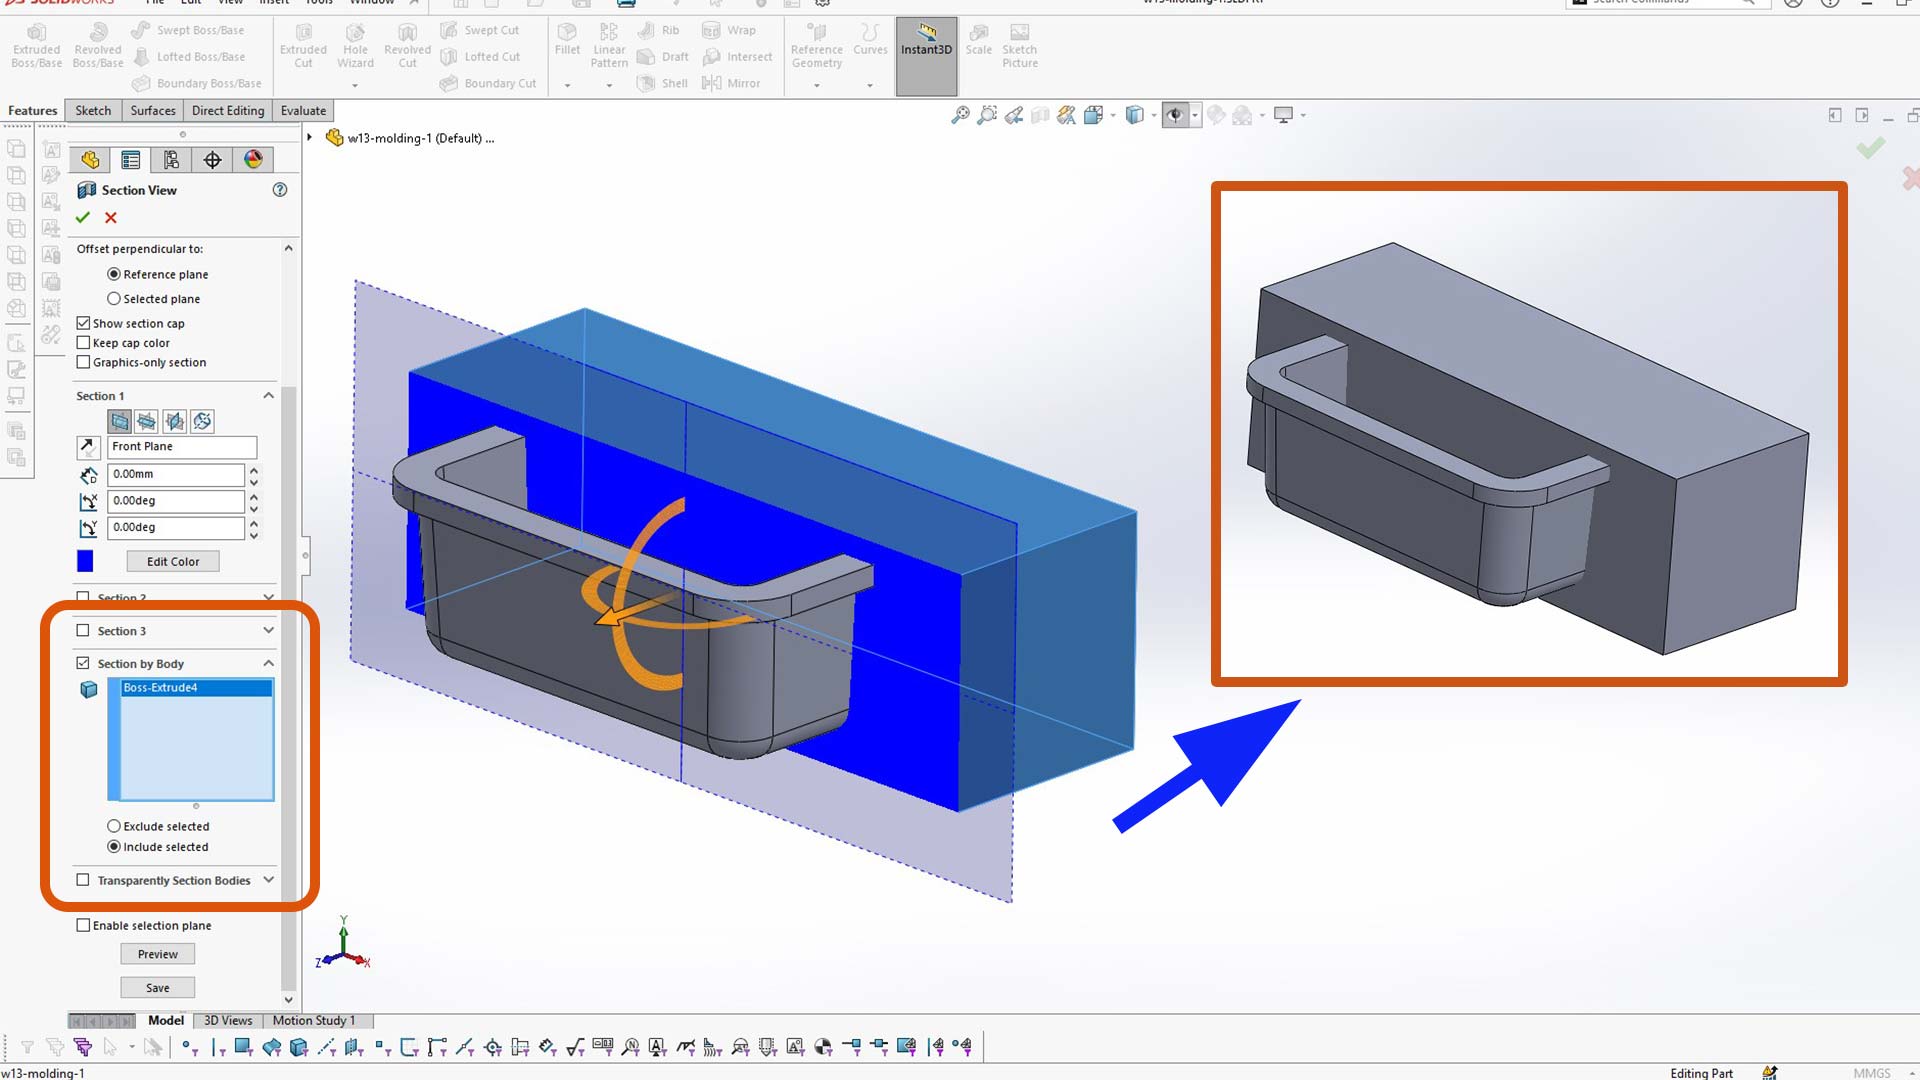
I used section to visualise the inside. I only included the outer body as shown below.
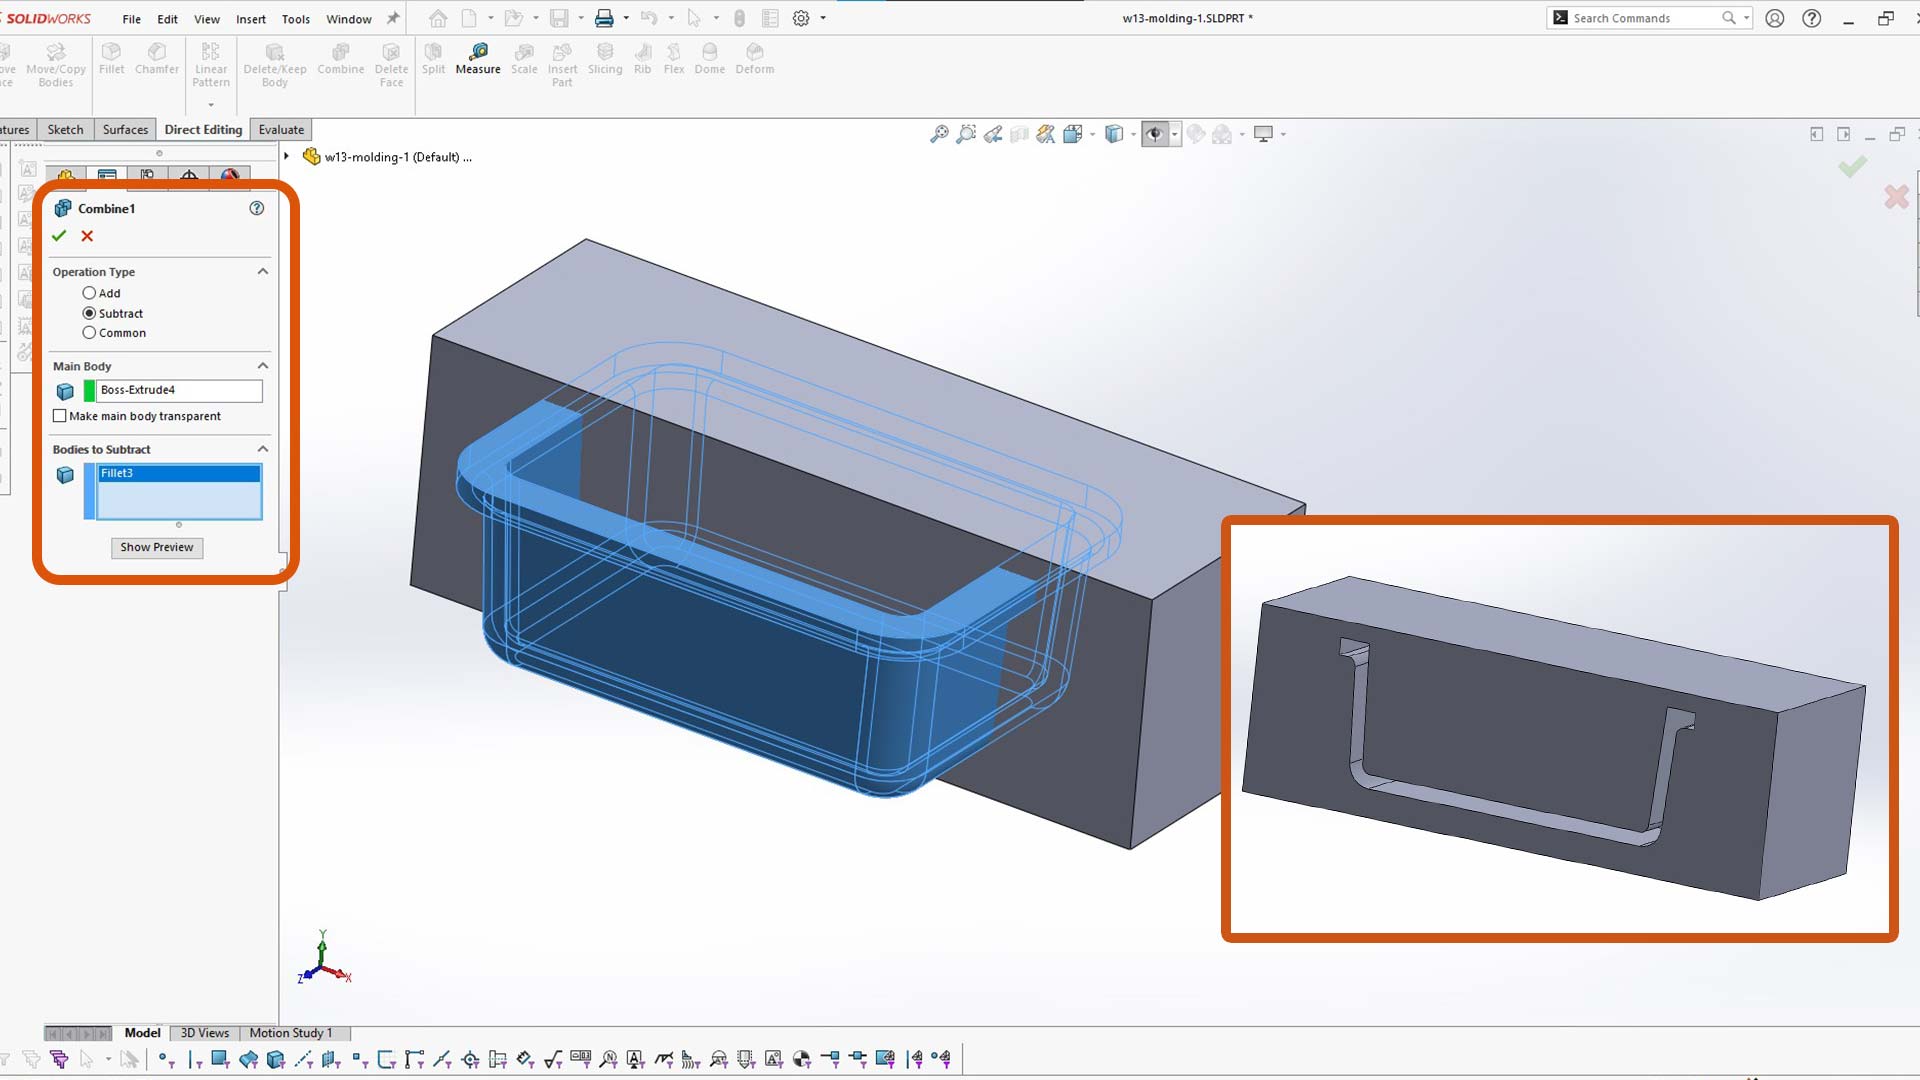
I used combine tool; (substract feature) to make cavity
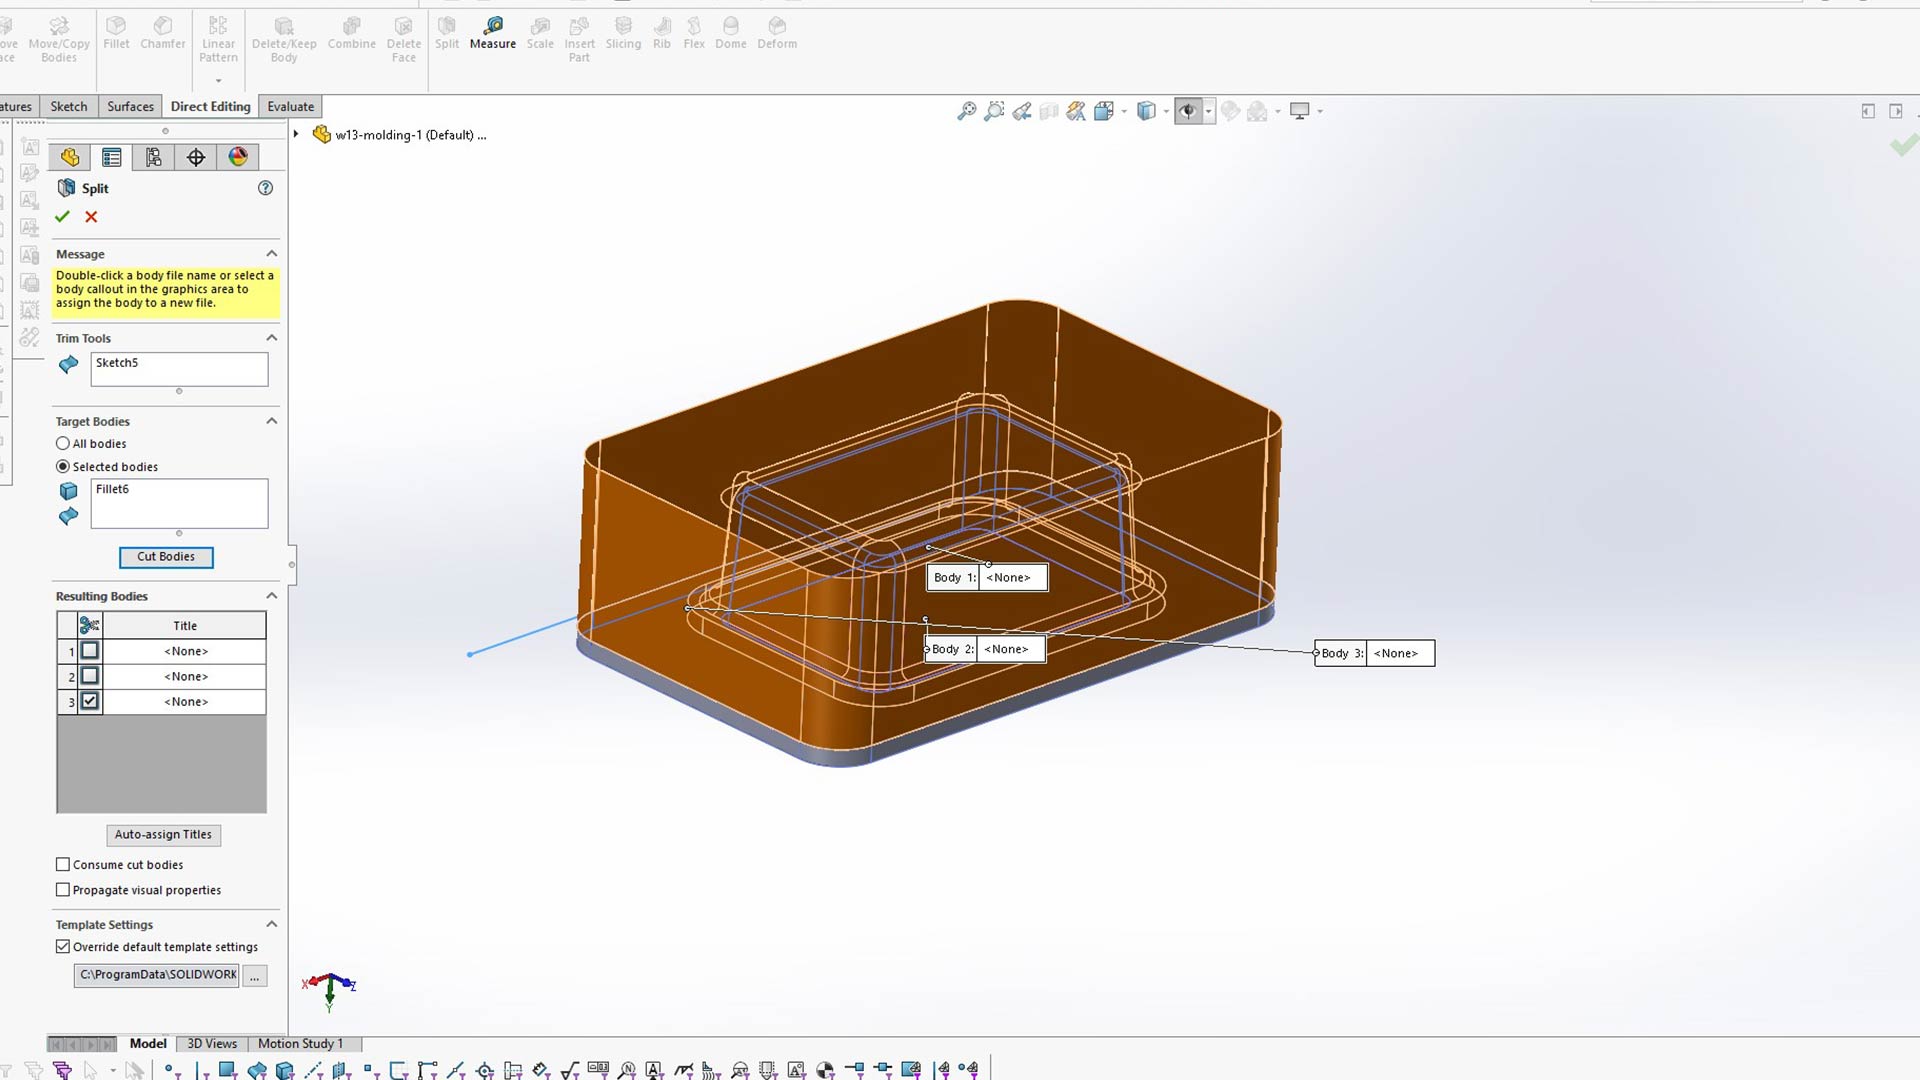
With split tool, I sliced it into two parts.
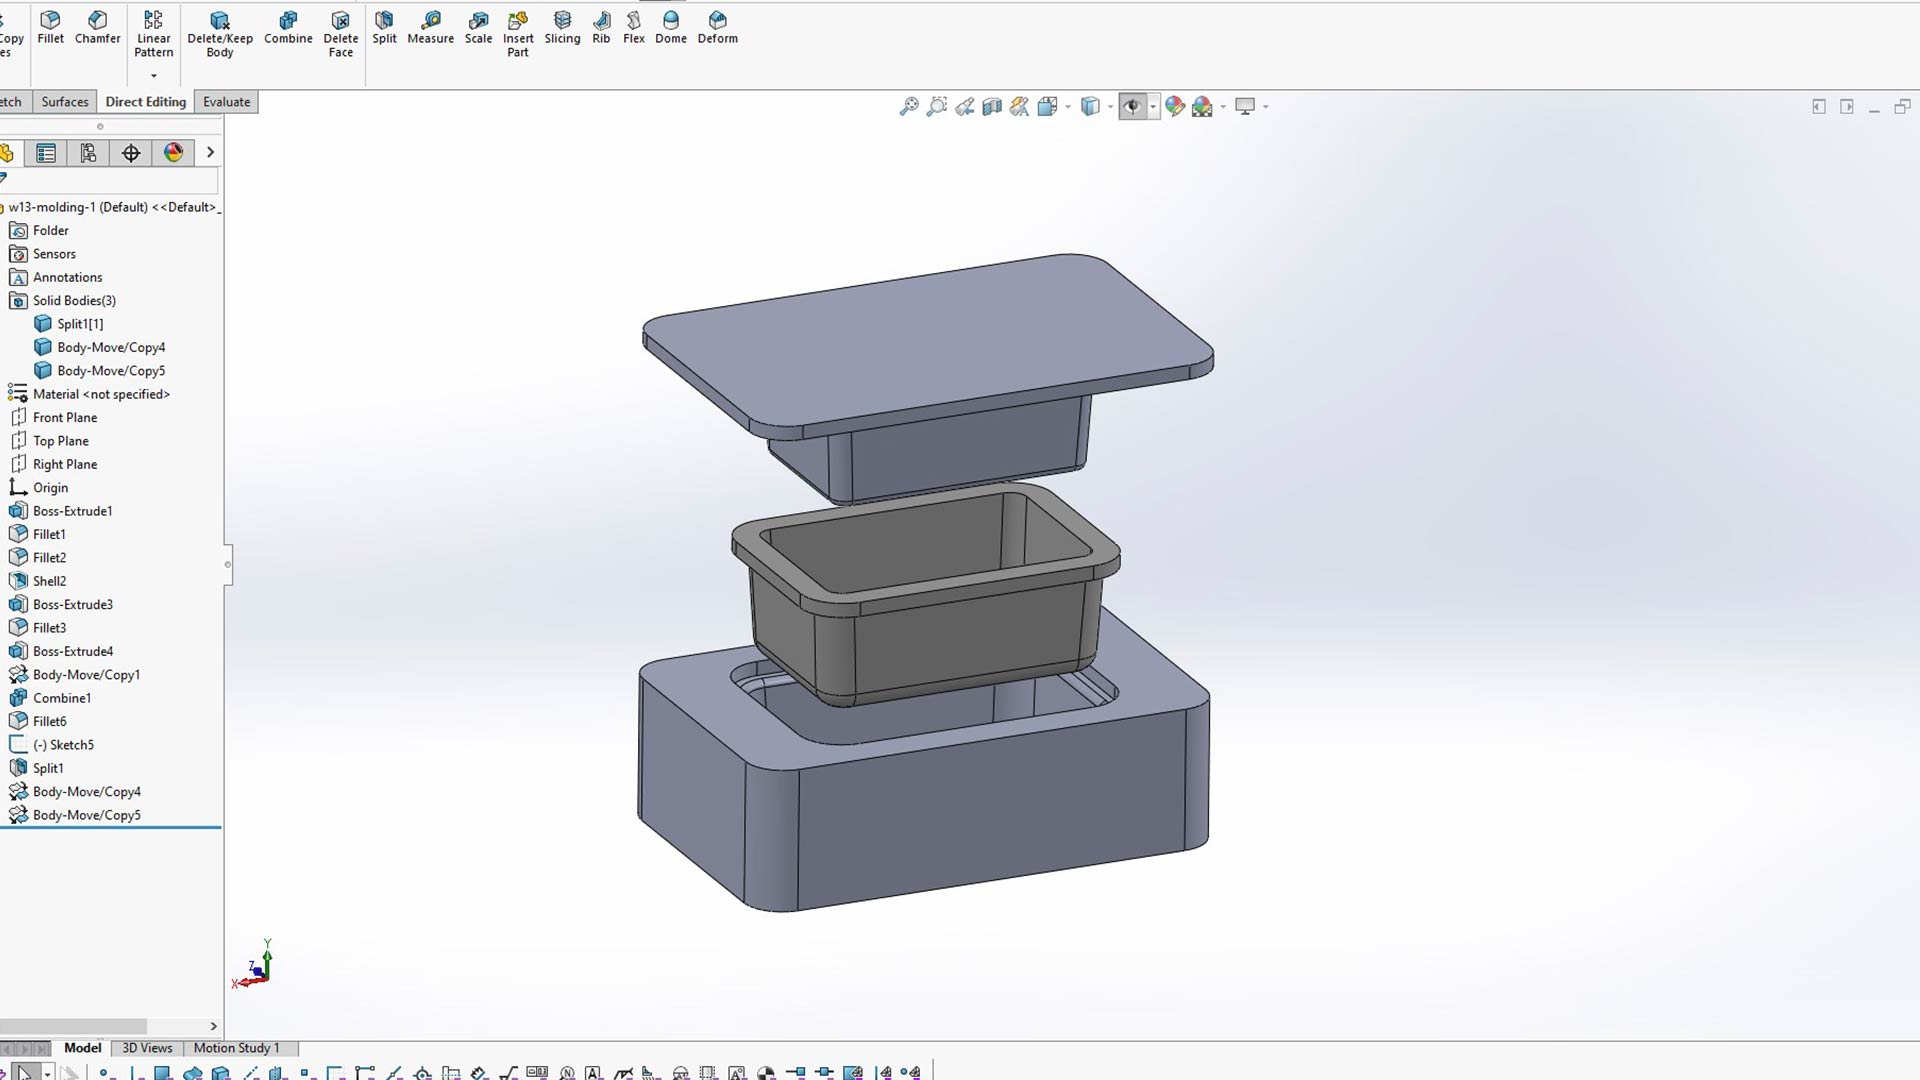
Using exploded view to visualise all parts.
Note: Before using combine tool, I duplicated the substraction part. Thus to make sure I still have original part after substraction.
I added two holes. This is where I will poul component (raw material).
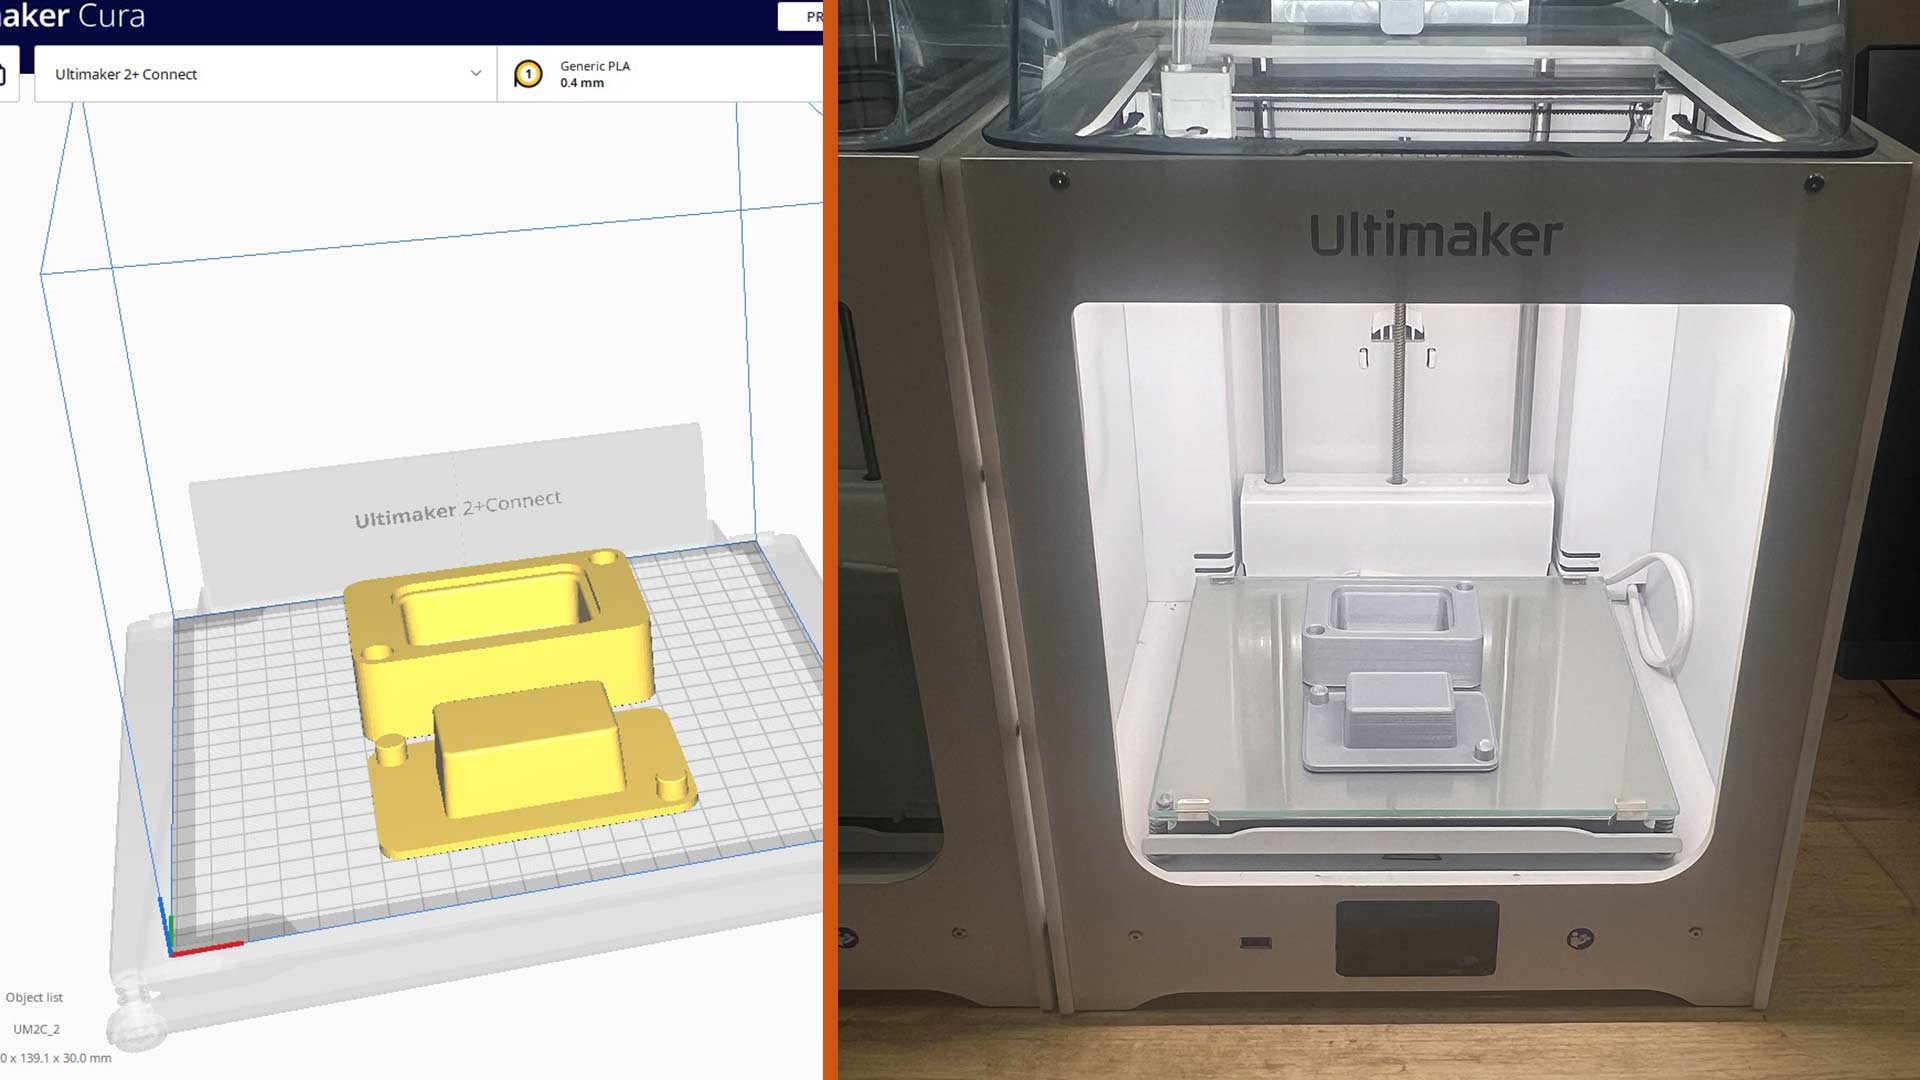
2. Printing of mold
I then printed the two parts with 3D printer.
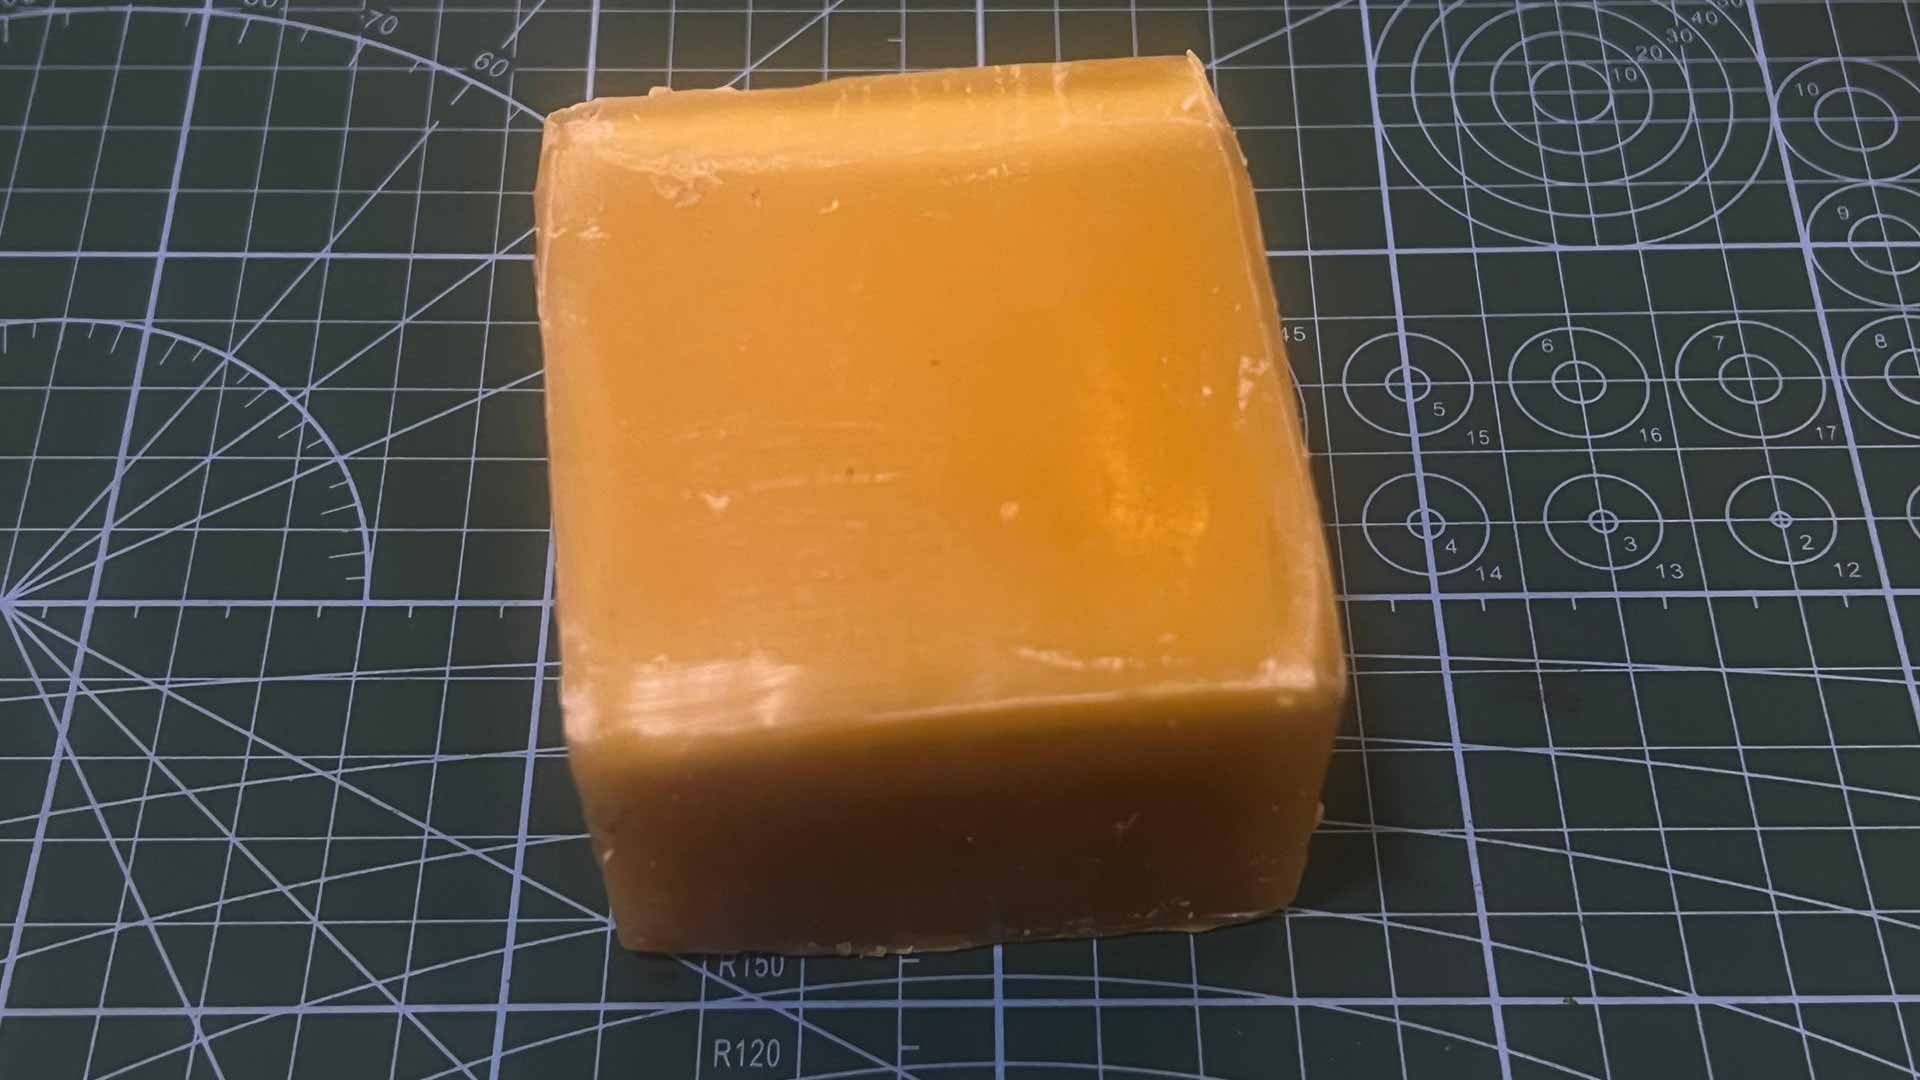
3. Heating bee wax.
This is a block of bee wax I used as raw material.
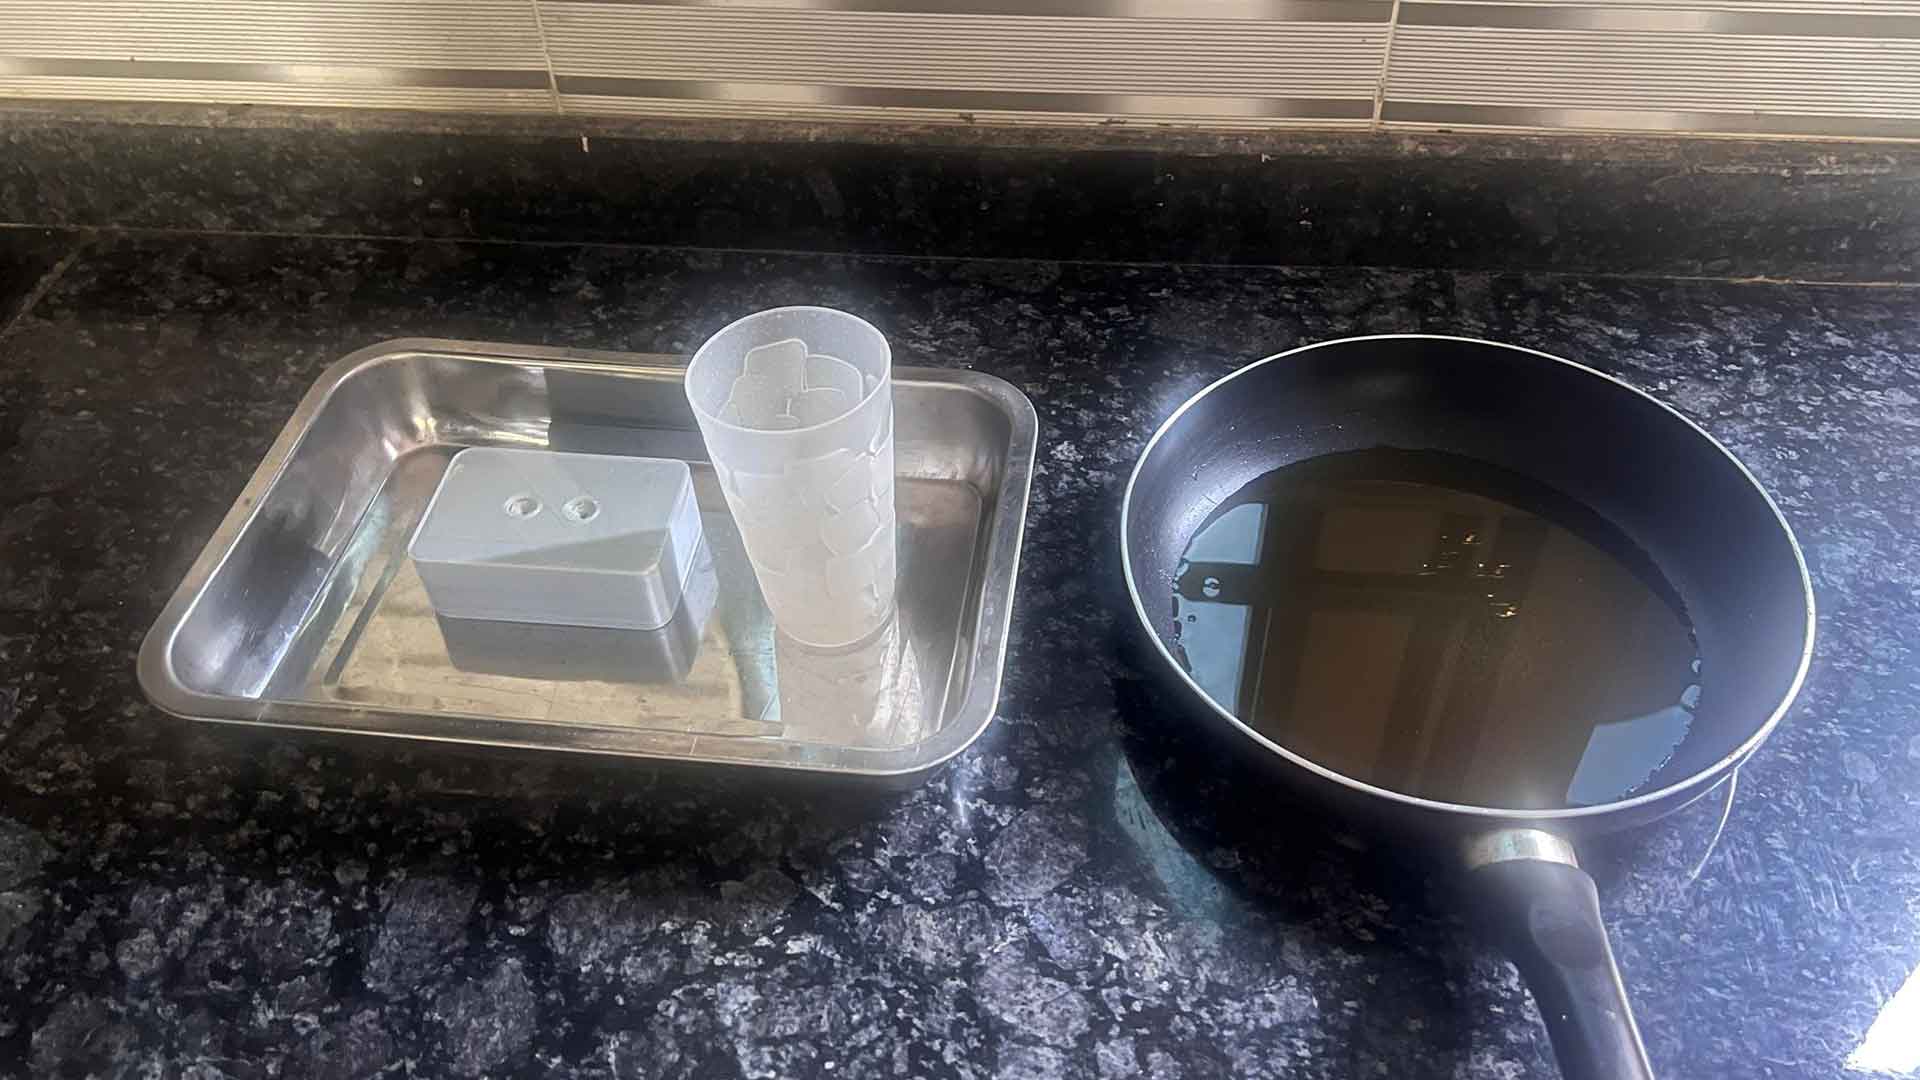
I melted it on flying pan.
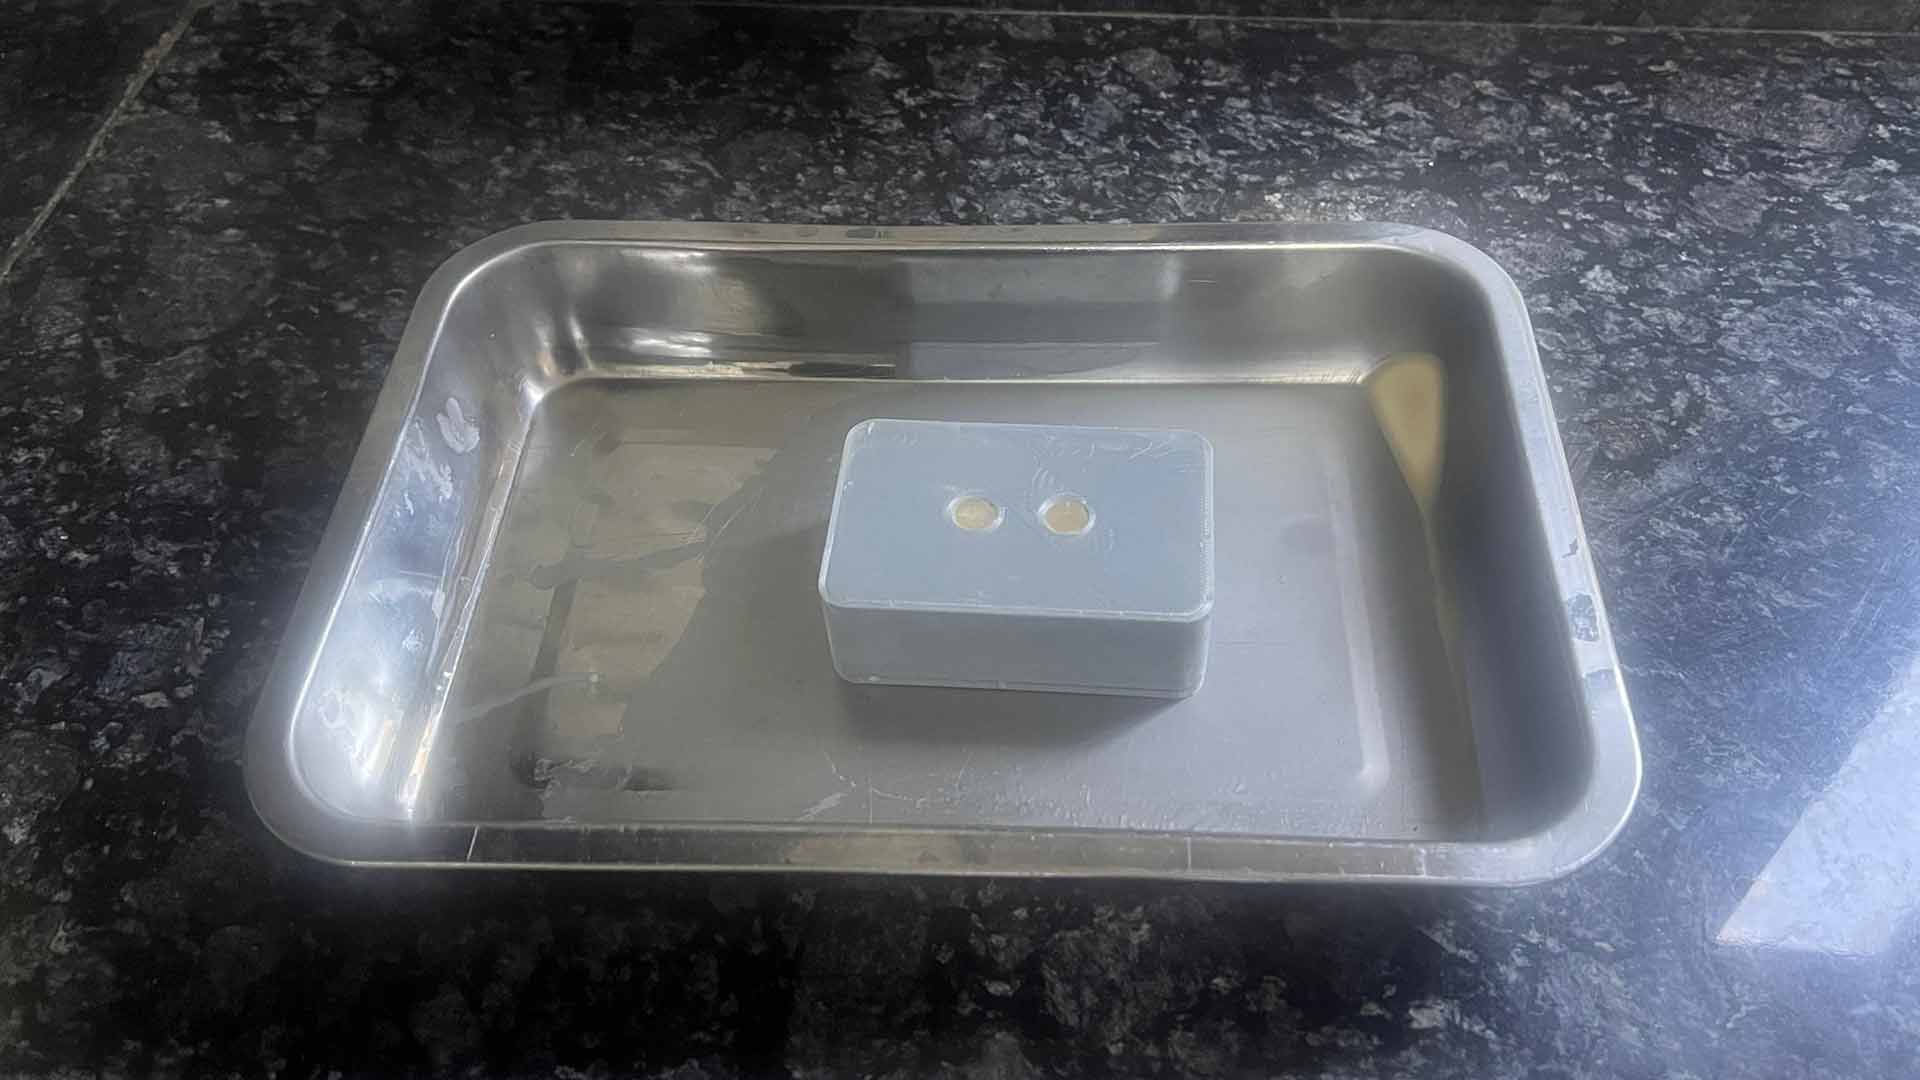
I used a small cup to facilitate the pouling into the mold. I preperated big container just in I overpouled to avoid mess.
I then let it to dry for 2 hours.
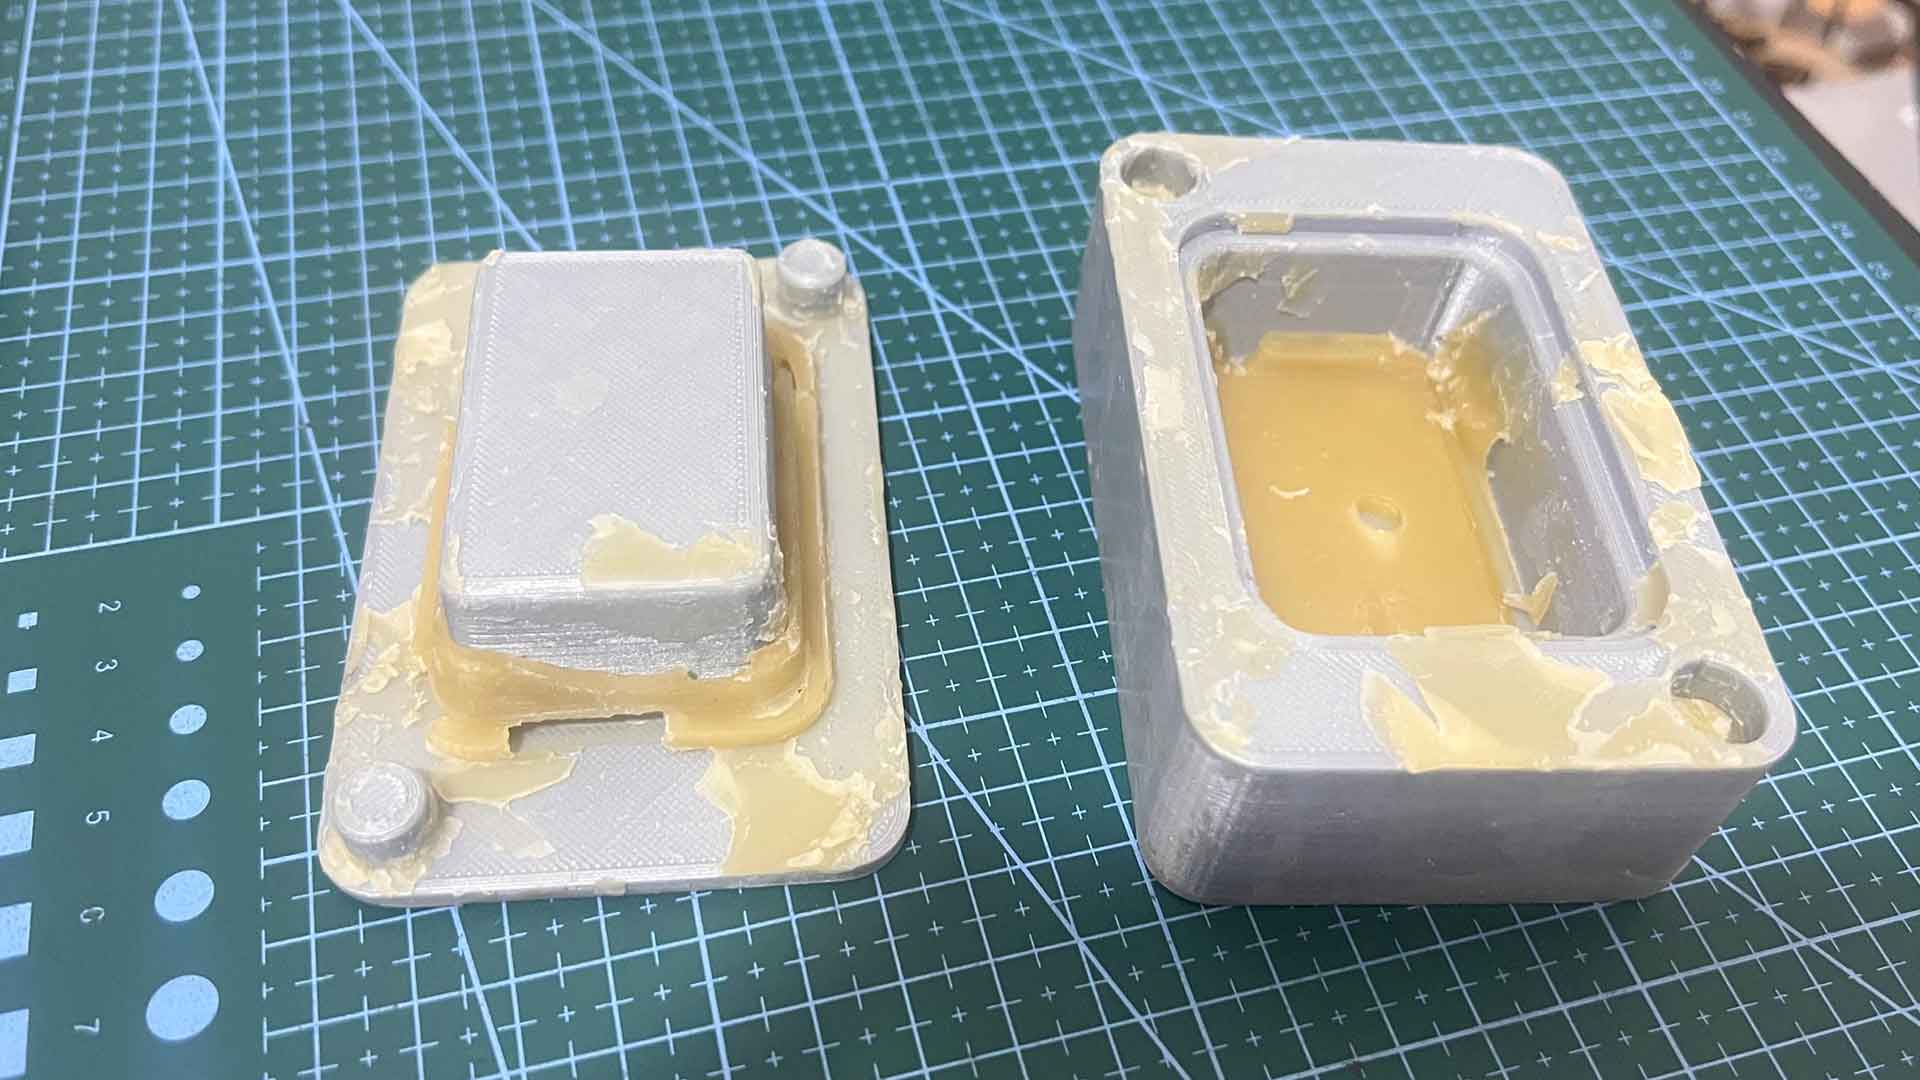
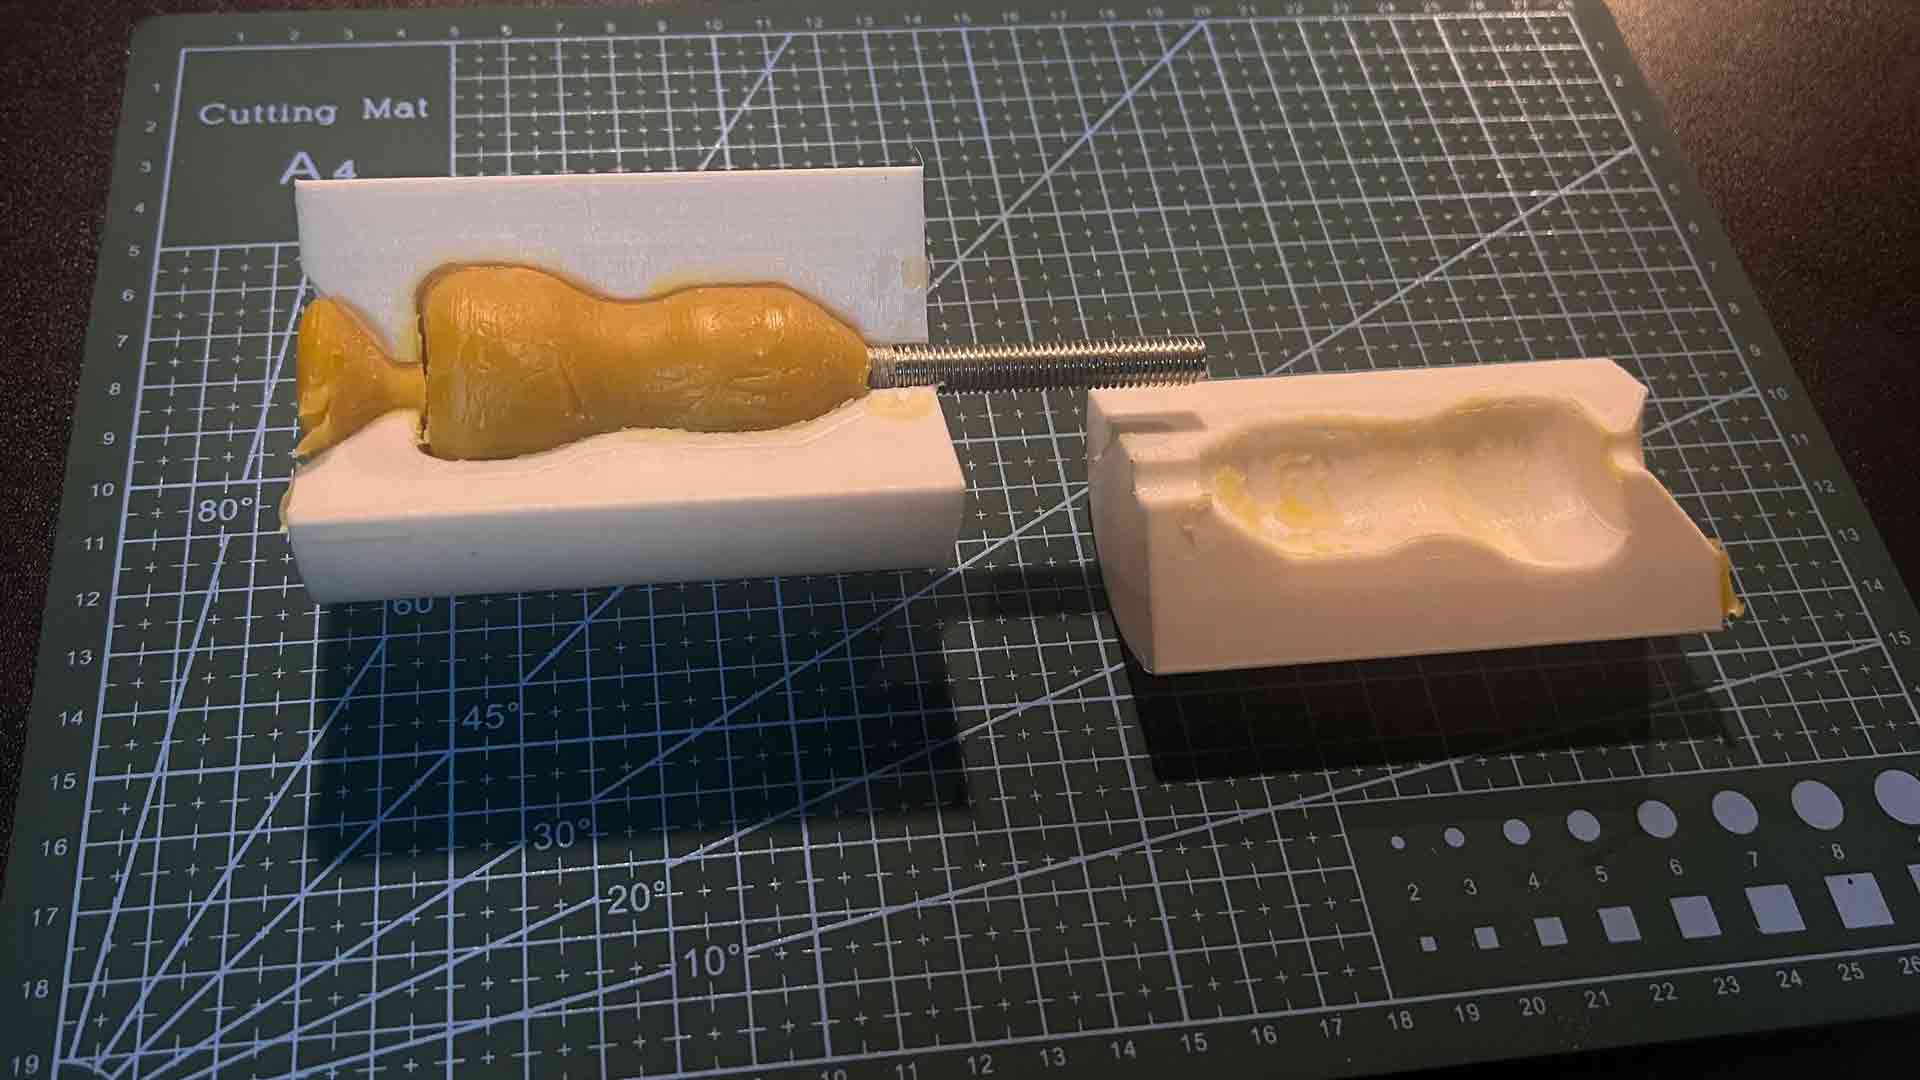
4. Mold separation
I separated the two mold parts. However wax stick to the mold too firmly.
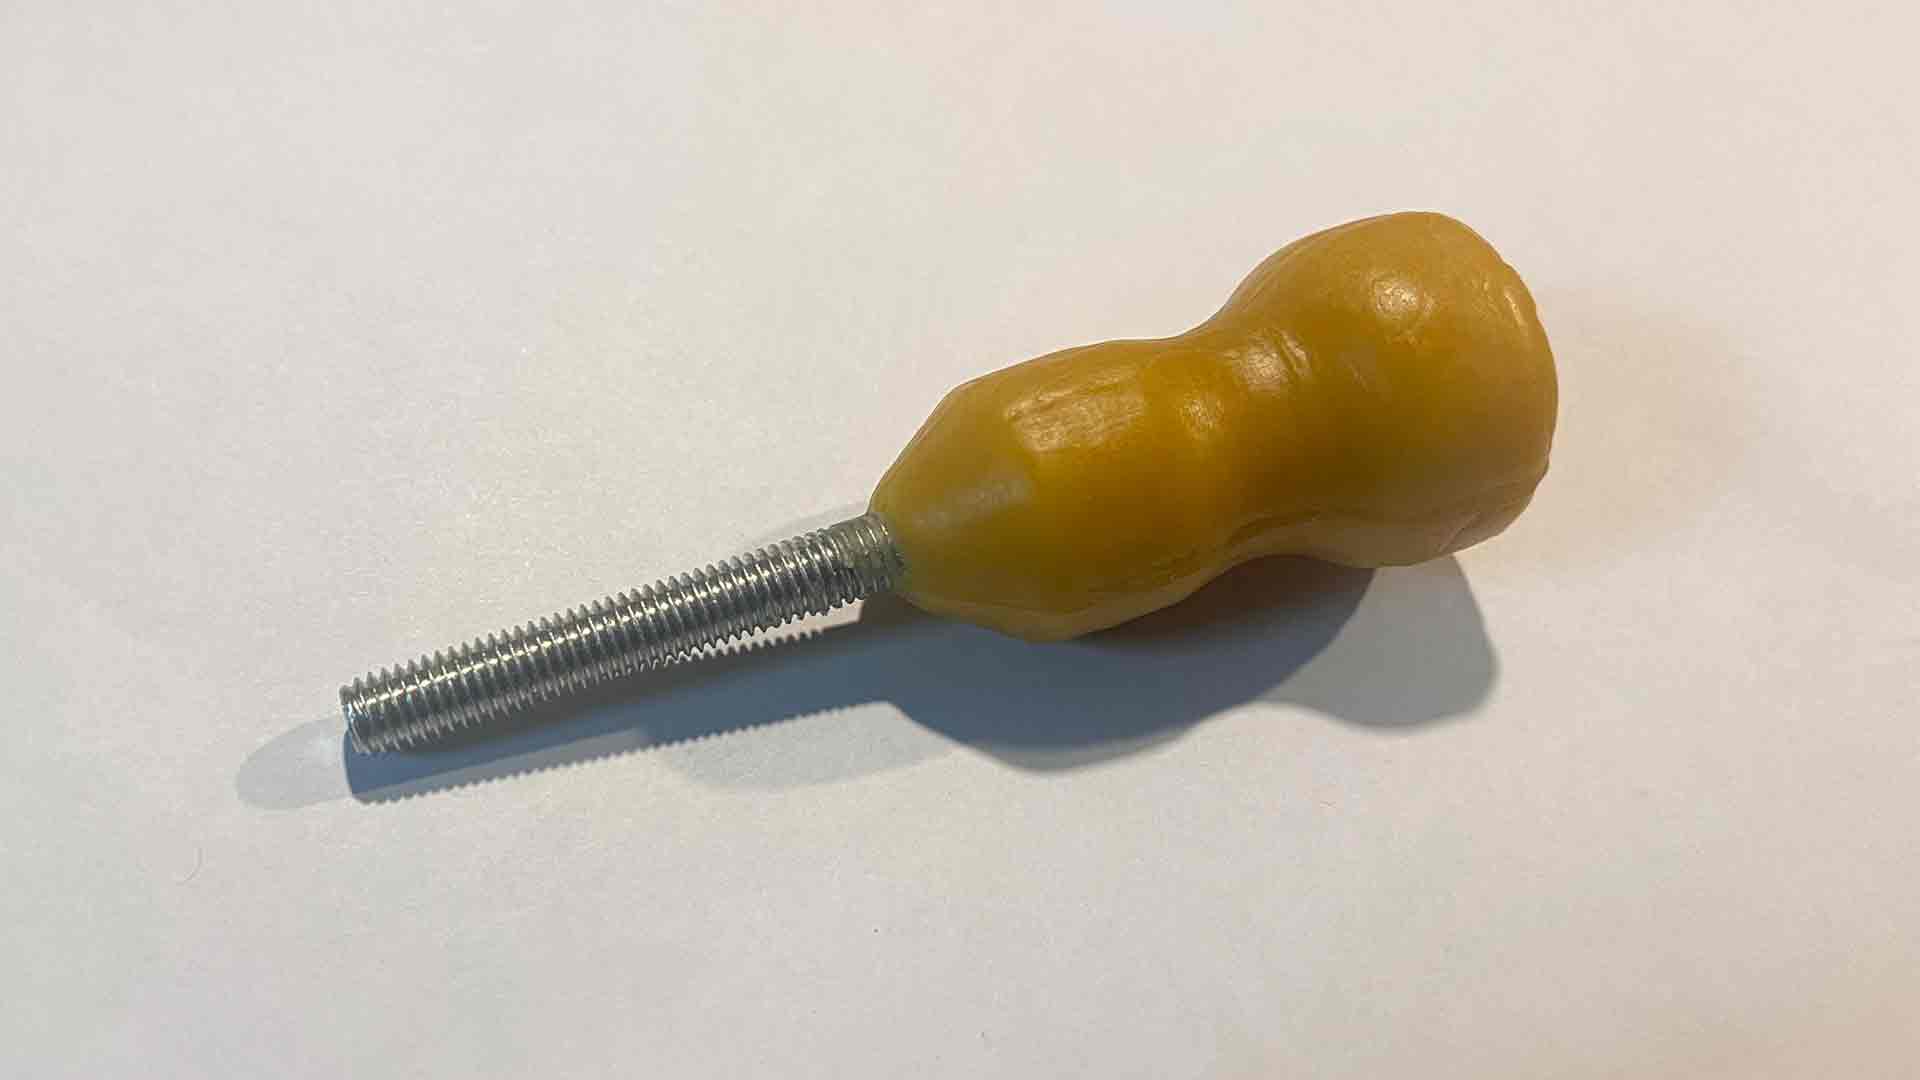
I then designed another mold, which is a handle for bolt.
5. Design of handle
I started by the design of bolt. I just made simplified version.
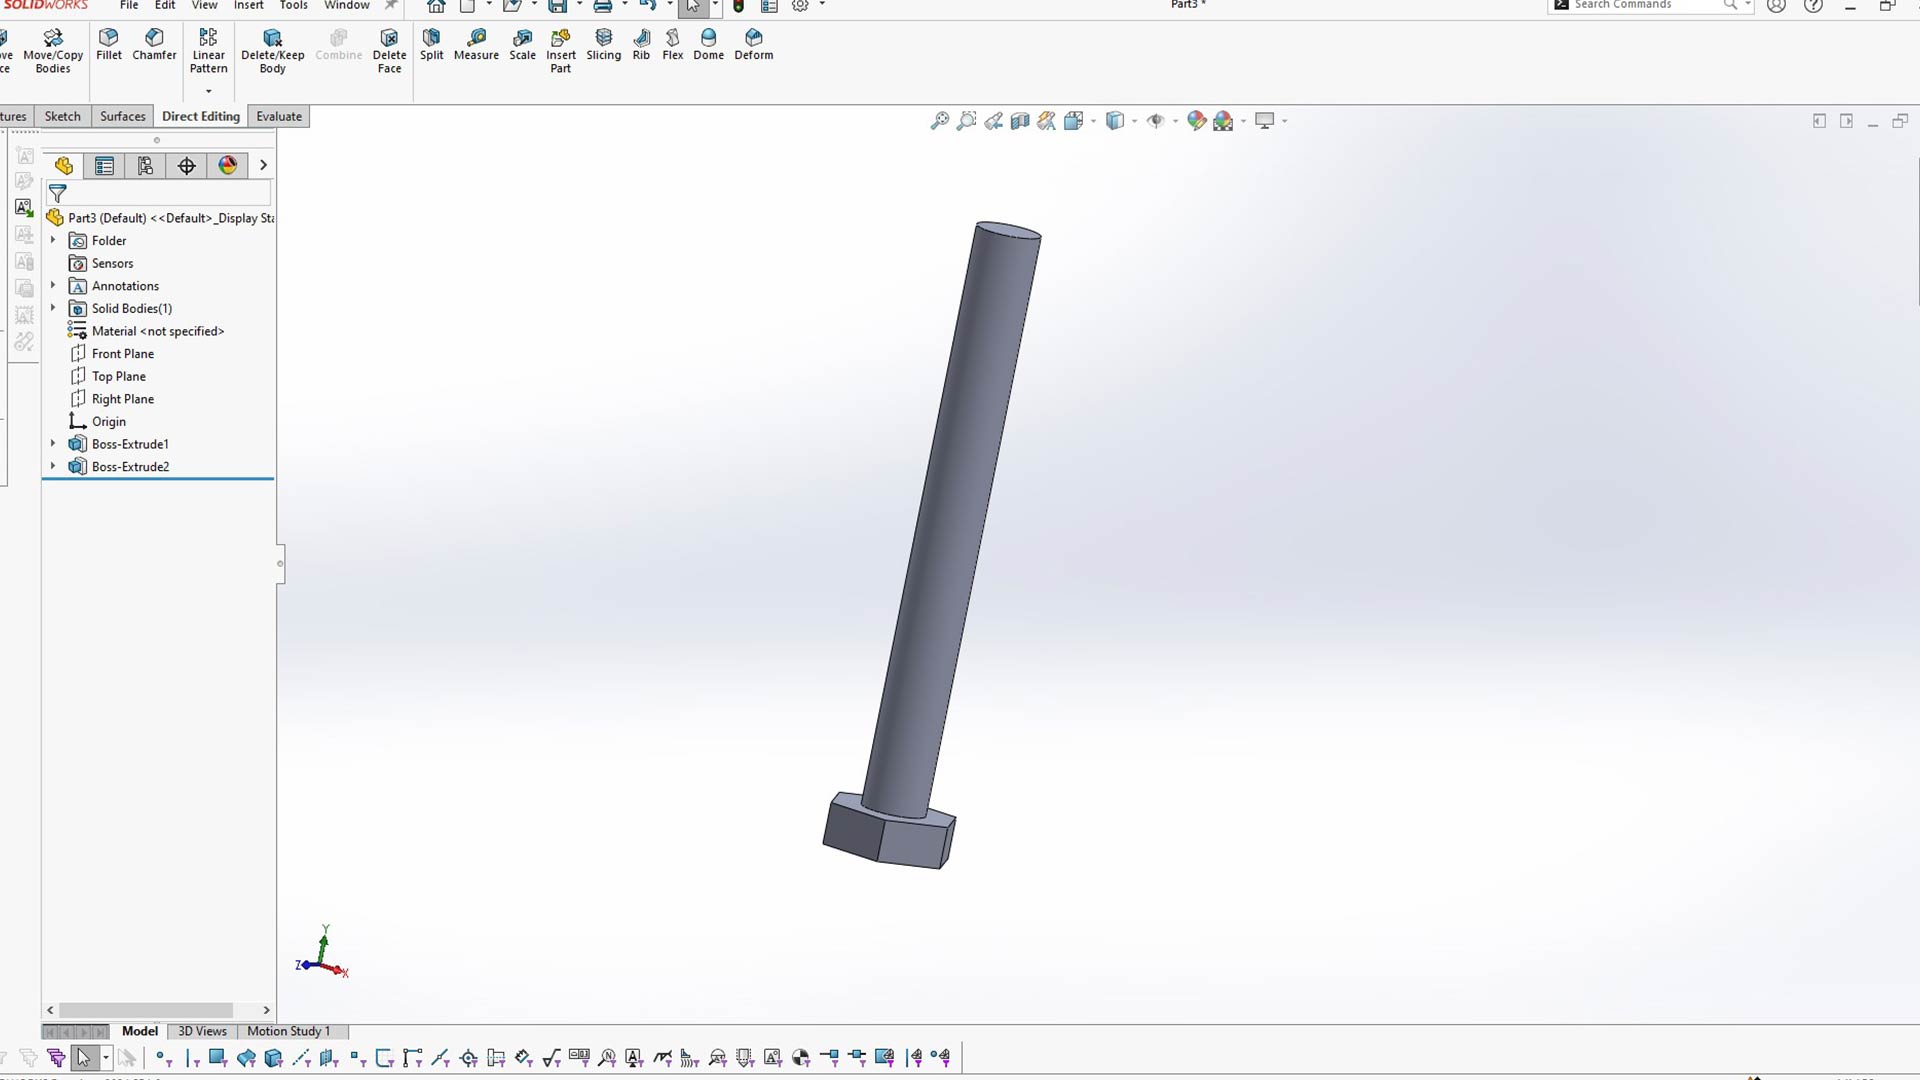
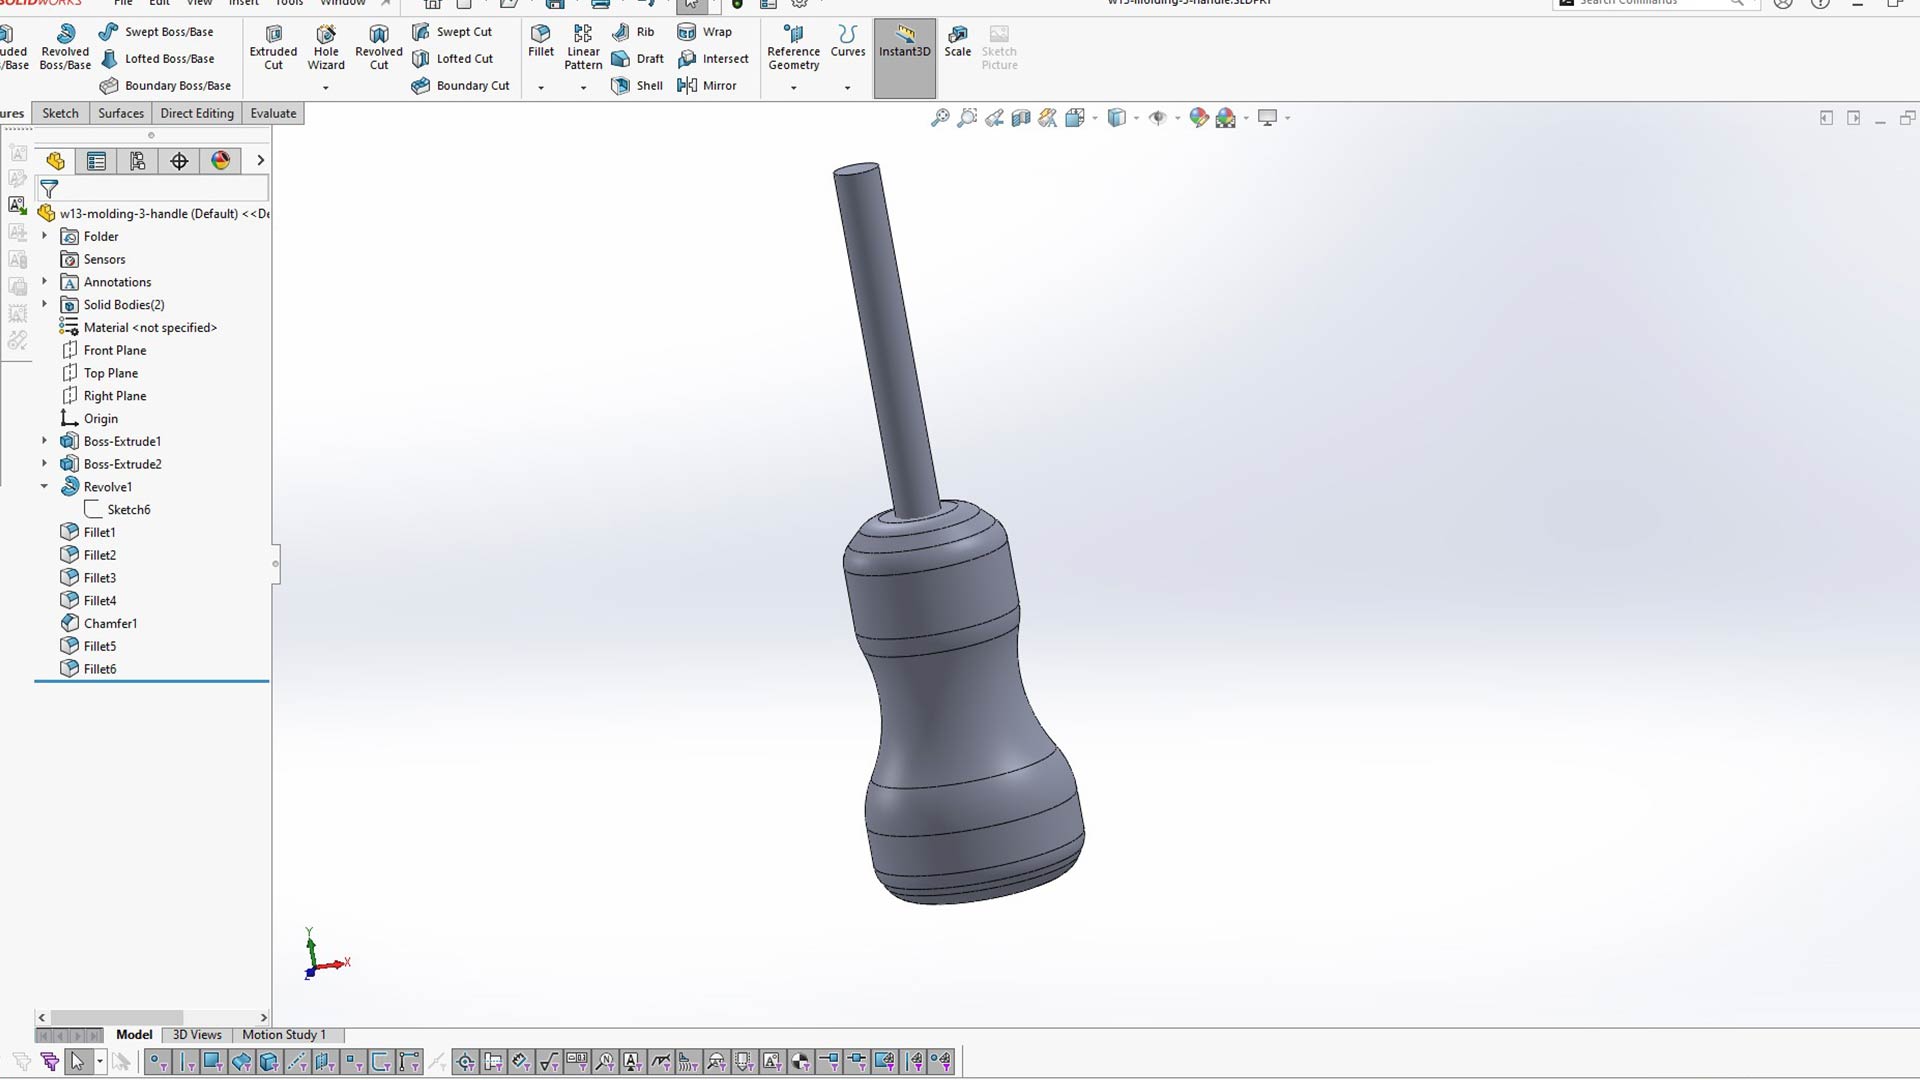
After I designed a hadle around the screw.
After, I extruded a cylinder around the mold and then used combine tool to make cavity.
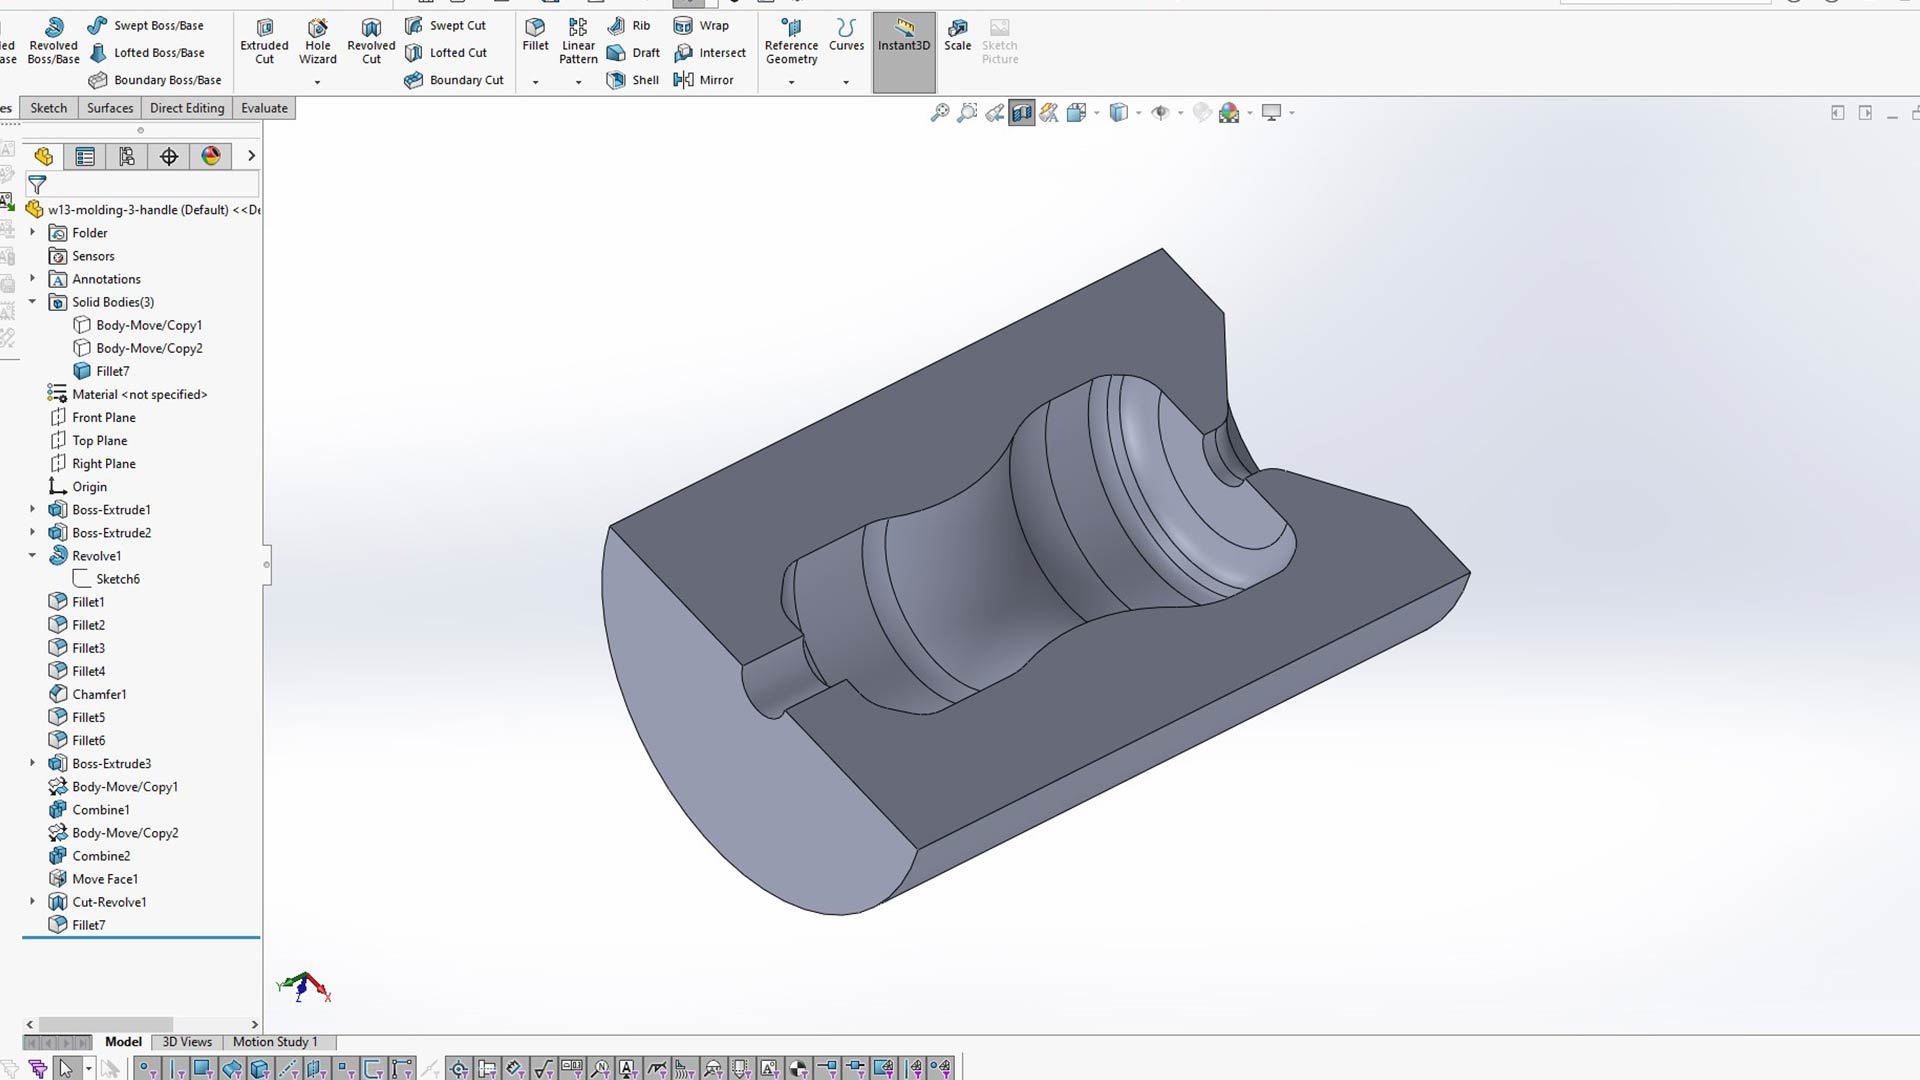
To increase the chance mold separating, I splitted the mold in three sections.

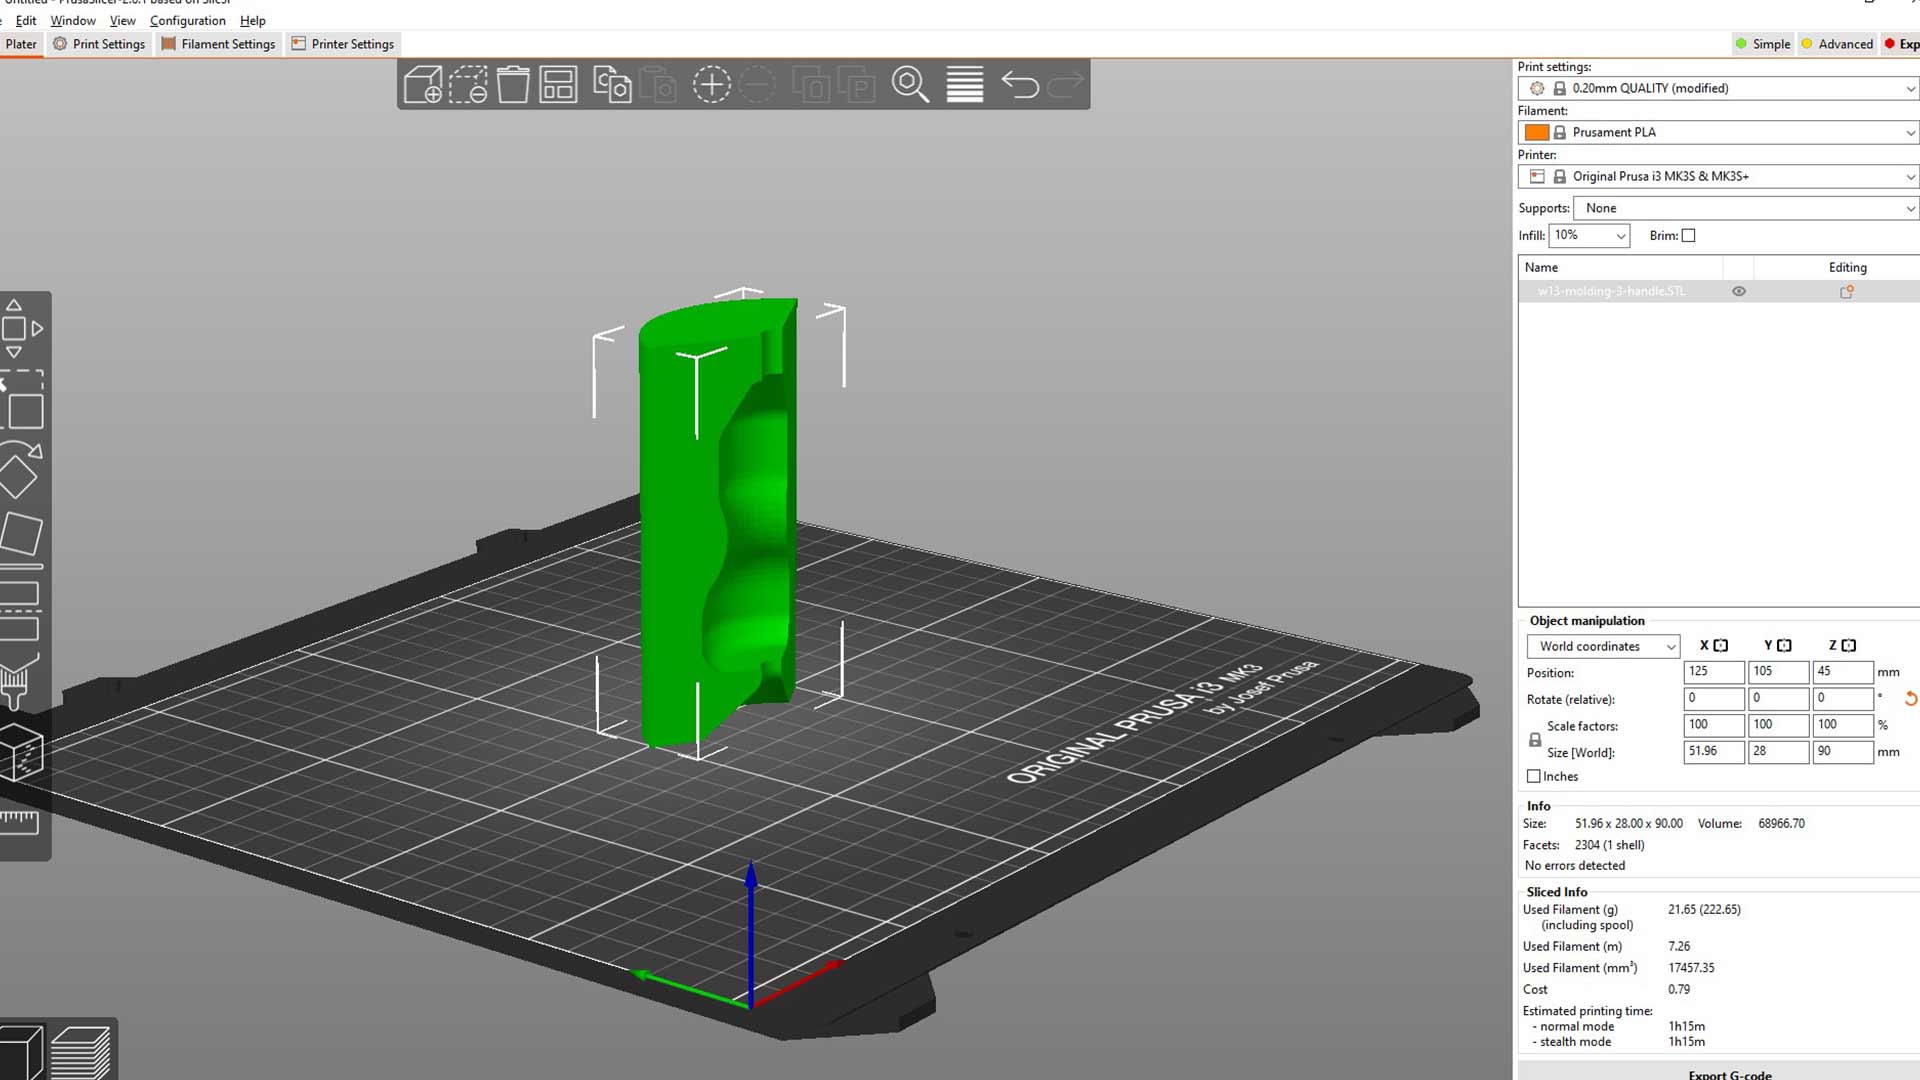
6. 3D printing of mold
I then printed the three parts. They are all the same. I just printed one at a time.
Printing done!. One key this time; I first smoothen the mold. Additionally, I applied oil on its surface before closing it. This will prevent wax to stick on the mold too firmly.
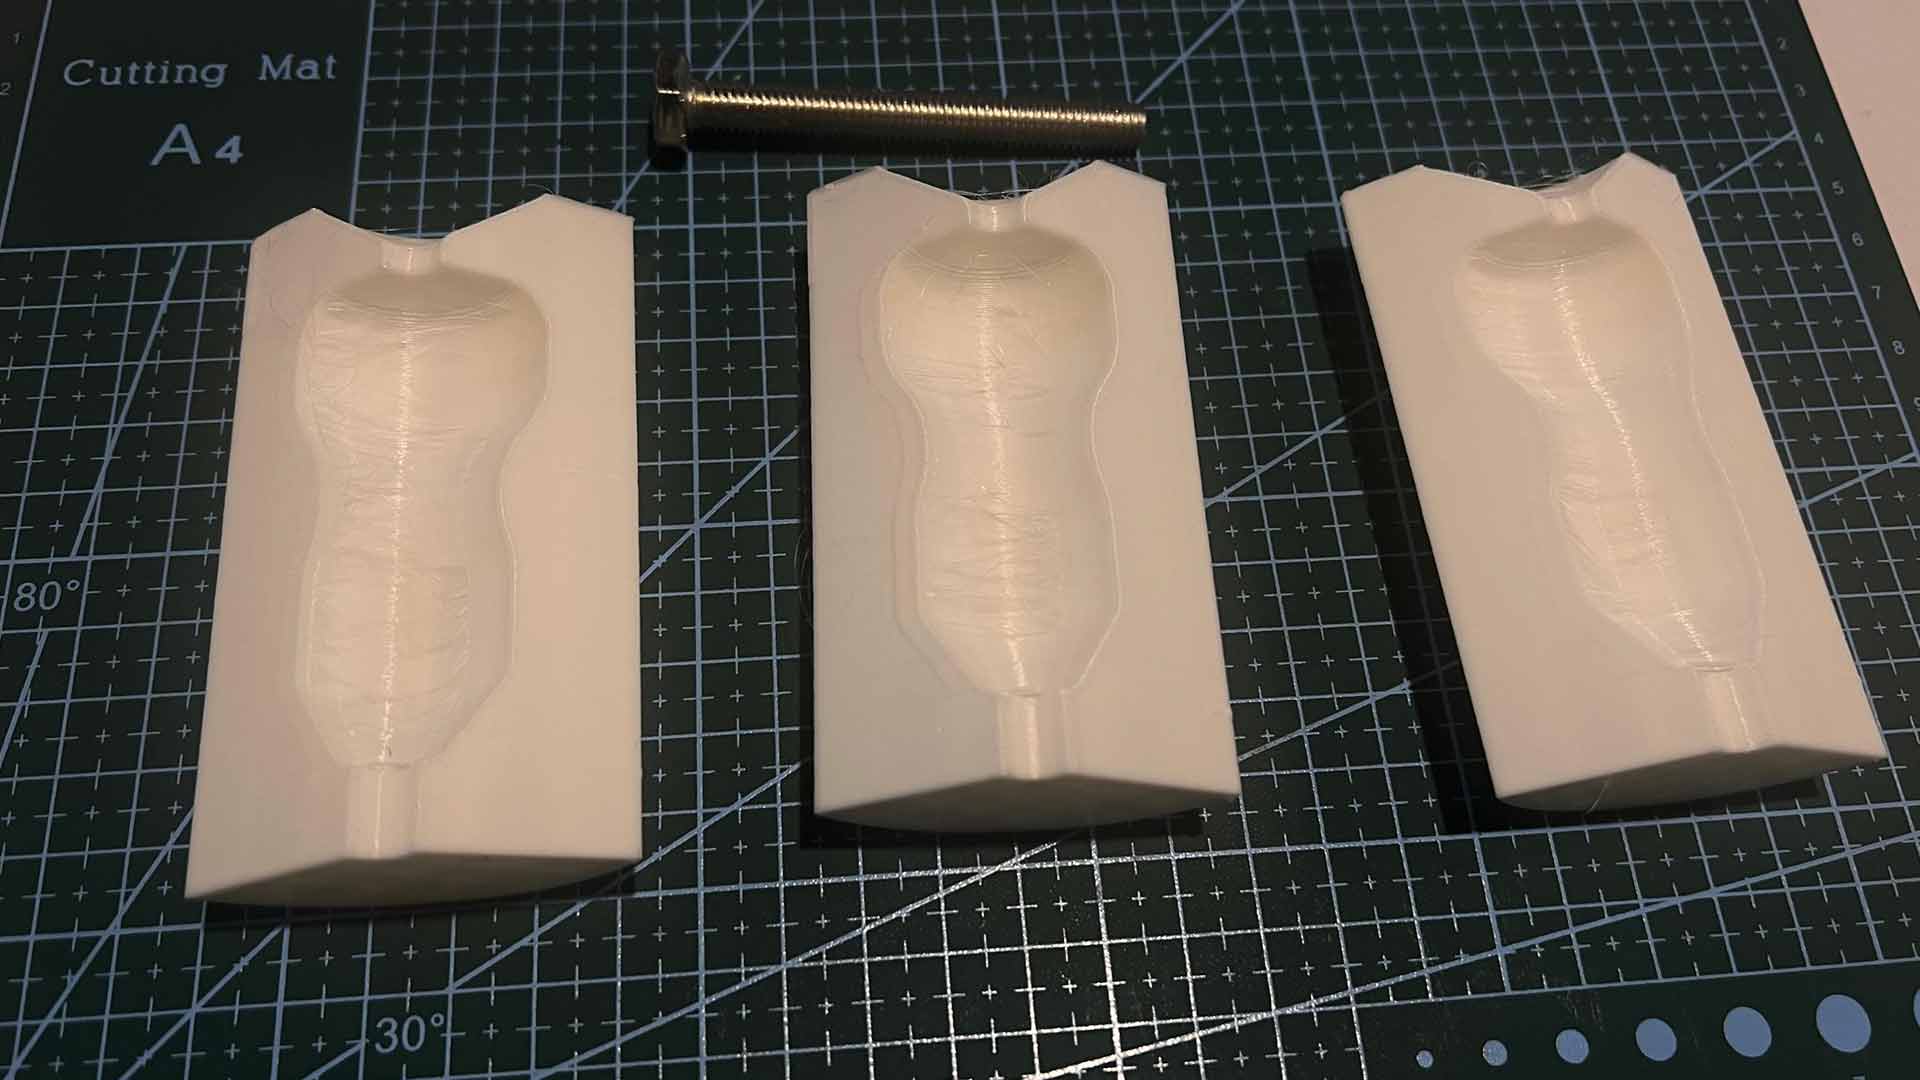
I then used scotch to attack all parts to combine the three halves
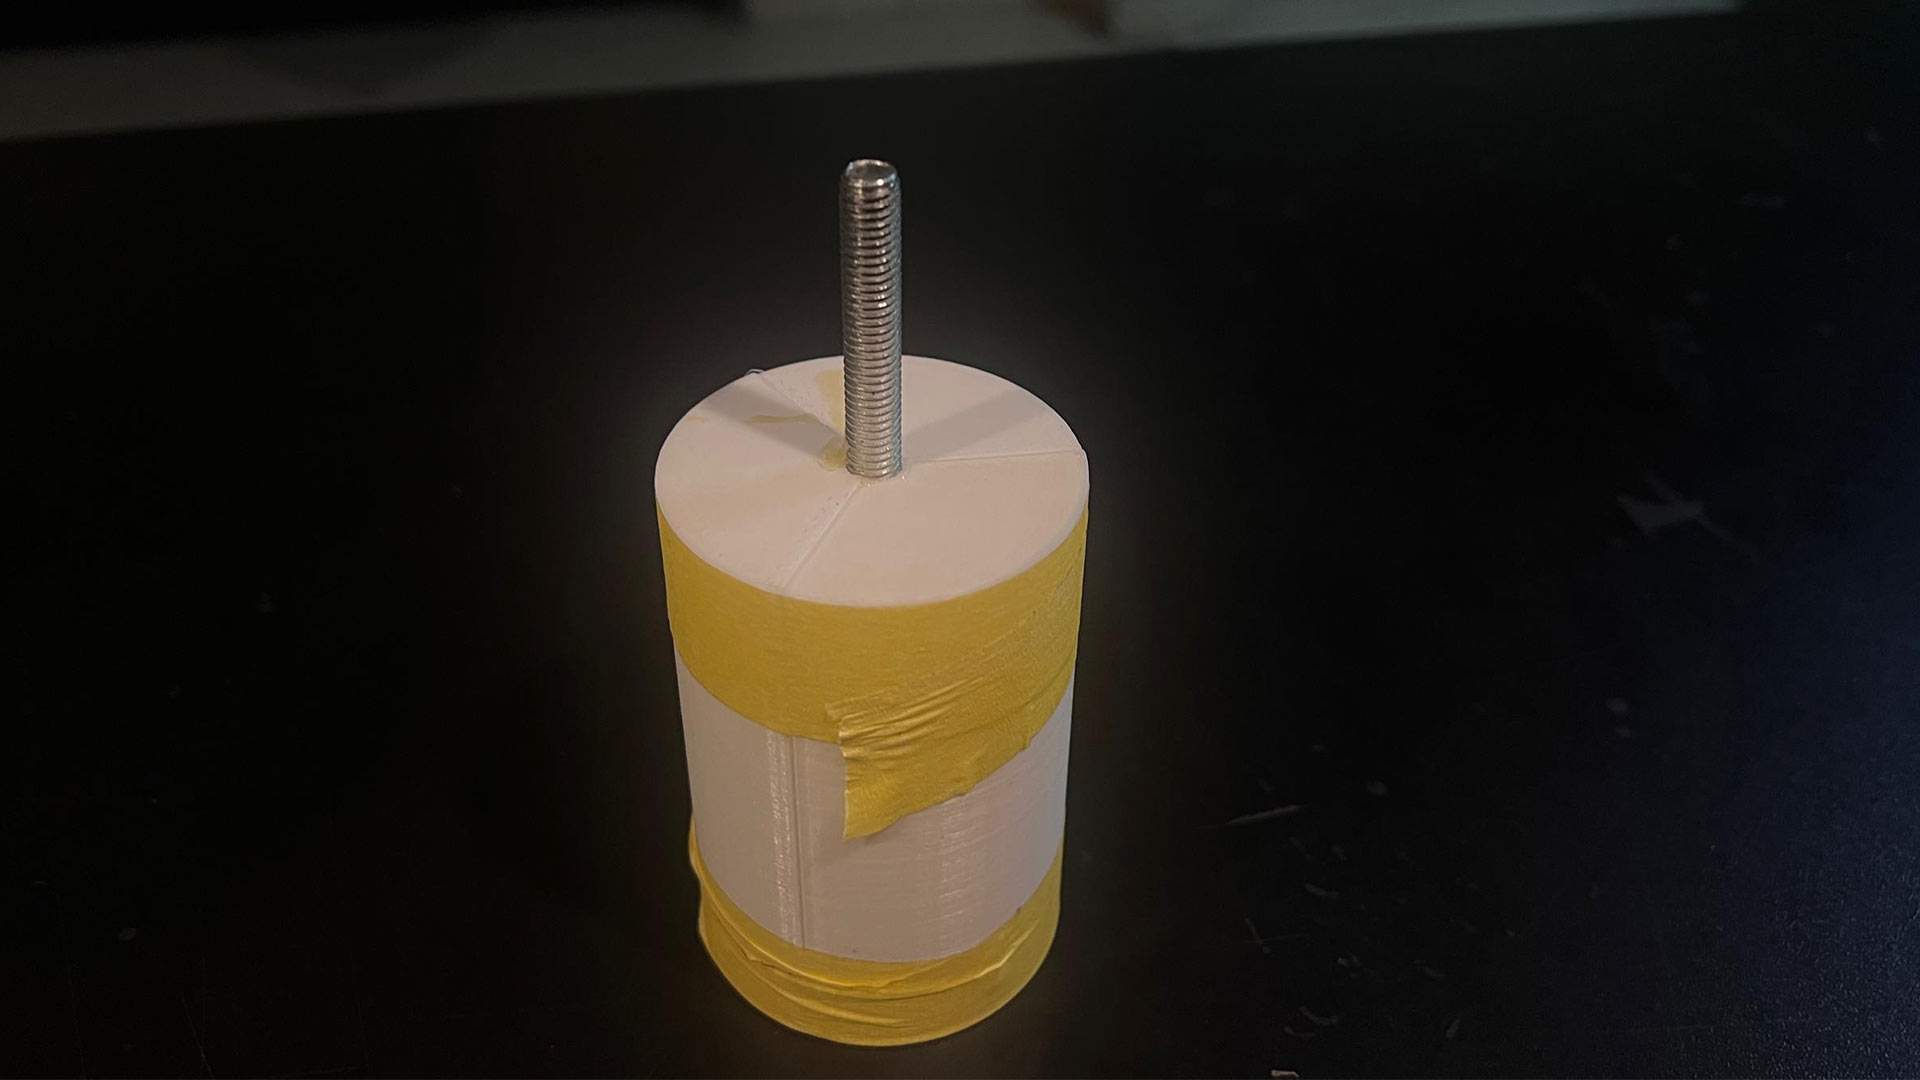
Finnaly, I succedded. The mold and hadle separated without any issue.
Final result!