11. Embedded Networking and Communications
- Group assignment:
- Send a message between two projects
- Document your work to the group work page and reflect on your individual page what you learned.
- Individual assignment:
- design, build and connect wired or wireless node(s) with network or bus addresses and a local input and/or output devices
Link to a Group page of Embedded Networking and Communications
Summary
For group assignment, we explored serial (UART) communication on two XIAO RP2040 boards together. We used serial communication (TX/RX), one board controlling LEDs on both boards when a button is pressed. We first had issues with baud rates not being compatible and wrong wiring (e.g., TX not crossing with RX), but through debugging, were able to get the system working: button press on one board turned on LEDs on both devices through UART.
For individual assignment, this week I explored networking and communications focusing on the I2C protocol, . I successfully established communication between XIAO RP2040 microcontroller and arduino uno. XIAO RP2040 acted as the master and Arduino uno as the slave. I was able to send messages from the master to the slave reliably.
Master: XIAO RP2040
Slave: Arduino Uno
Protocol: I2C
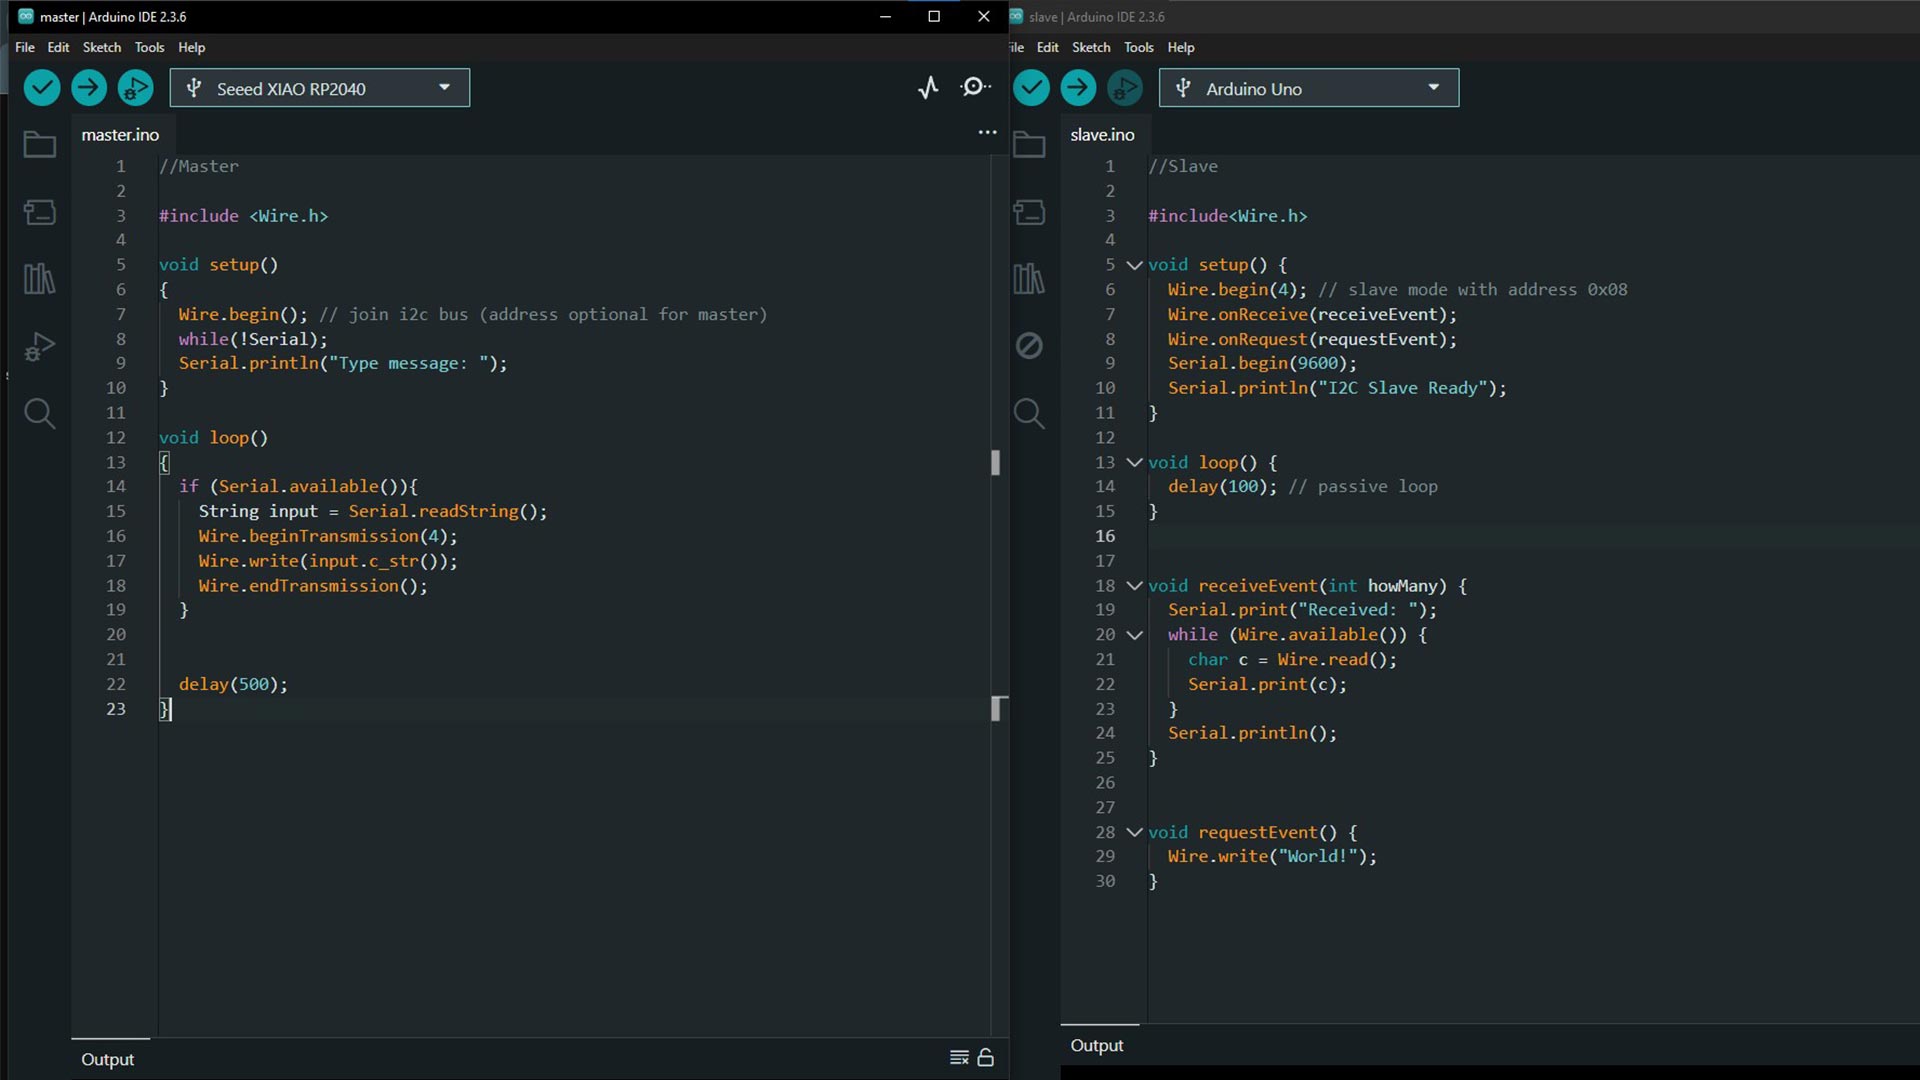
1. Code for master: Master (XIAO RP2040)
This program allows me to type a message into the Serial Monitor, which is then read and sent to the slave using the I²C protocol. The master initiates the communication and uses the Wire library’s functions to send the message, which the slave receives and prints.
         //Master

          #include

          void setup()
          {
            Wire.begin(); // join i2c bus (address optional for master)
            while(!Serial);
            Serial.println("Type message: ");
          }

          void loop()
          {
            if (Serial.available()){
              String input = Serial.readString();
              Wire.beginTransmission(4);
              Wire.write(input.c_str());
              Wire.endTransmission();
            }

            delay(500);
          }
I use Serial.readString() to capture the user's input, then transmit it to the slave device with address 4 using the Wire library.
2. Slave: Arduino Uno
This code establish an I²C slave device with address 4 so that it can get a message from an I²C master and respond when queried.
It listens for messages sent by the master. When the master sends a string, the slave reads and prints it to the Serial Monitor. If the master performs a read operation, the slave responds with the word "World!". This bidirectional capability illustrates how I2C supports both writing and reading, although the slave can only send data when asked.
          //Slave

            #include

            void setup() {
              Wire.begin(4); // slave mode with address 0x08
              Wire.onReceive(receiveEvent);
              Wire.onRequest(requestEvent);
              Serial.begin(9600);
              Serial.println("I2C Slave Ready");
            }

            void loop() {
              delay(100); // passive loop
            }

            void receiveEvent(int howMany) {
              Serial.print("Received: ");
              while (Wire.available()) {
                char c = Wire.read();
                Serial.print(c);
              }
              Serial.println();
            }

            void requestEvent() {
              Wire.write("World!");
            }
Master and slave code aside
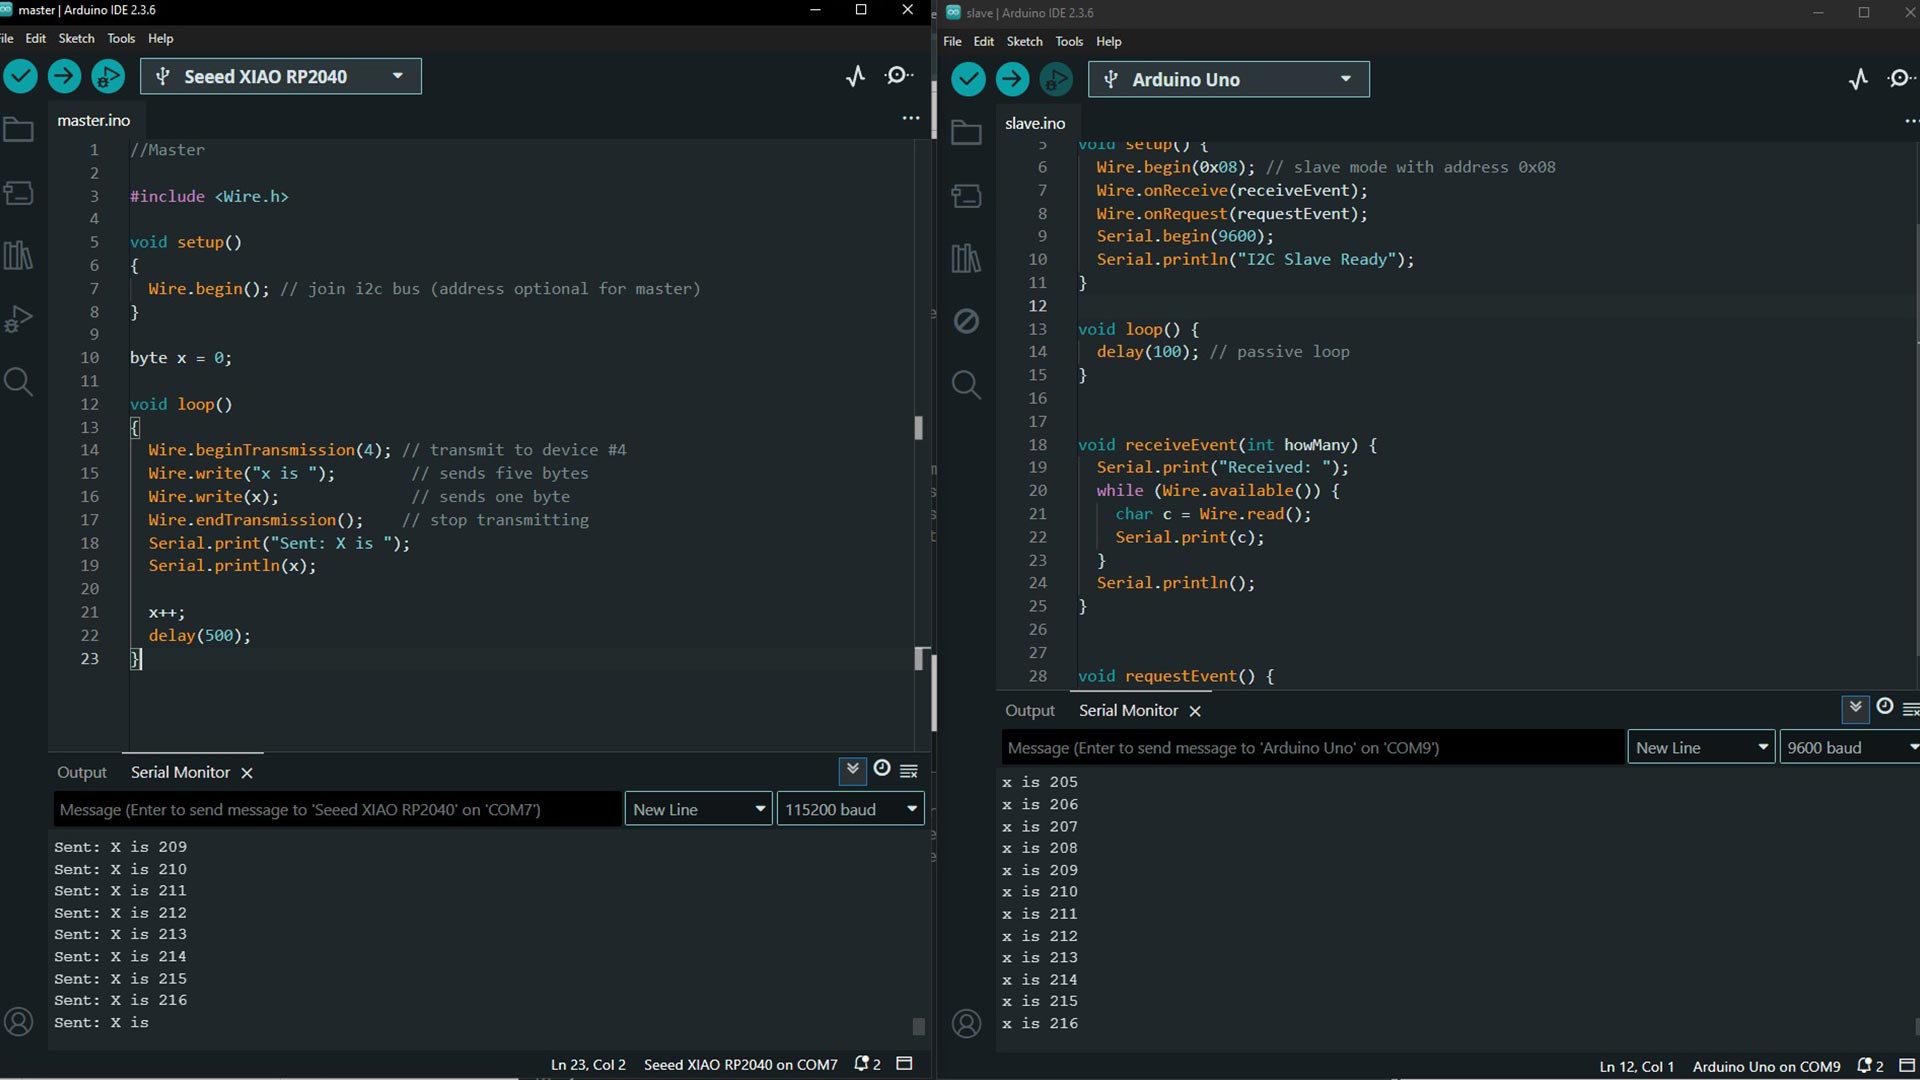
4. Testing Process & Results
I powered and connected both boards, then opened the Serial Monitor on the master (XIAO RP2040). Messageson on the master serial monitor is also displayed on that of the slave (Arduino Uno), proving that the transmission was successful.
At this time, I was able to send the message from master to slave. Every message on master serial monitor is doplayed on slave as well.
Video of the two, working together
Result
When I typed messages like “Hello!”, they appeared on the Serial Monitor of the slave (Arduino Uno), proving that the transmission was successful.
Conclusion
This was one of the most practically rewarding weeks. I gained hands-on experience I²C protocols and got a better understanding of how microcontrollers can talk to each other. These are real-world tools used in robotics, IoT systems, and industrial controllers.
Download files
Here is the arduino file for I²C protocols
Master Slave