5. 3D Scanning and printing
Group assigment:
This week, our group tested design rules of our machines. We tested several points especially:
- Bed leveling
- Slicing software
- Printing temperature of available filaments
- Overhang angle
- Document your work to the group work page and reflect on your individual page what you learned.
Link to Group page: 3D Scanning and Printing
Individual assignment
- Design and print (with 3D printer) an object that could not be easily made with substractive manufacturing
- Learn some slicing software
- 3D scan an object
Designing a box
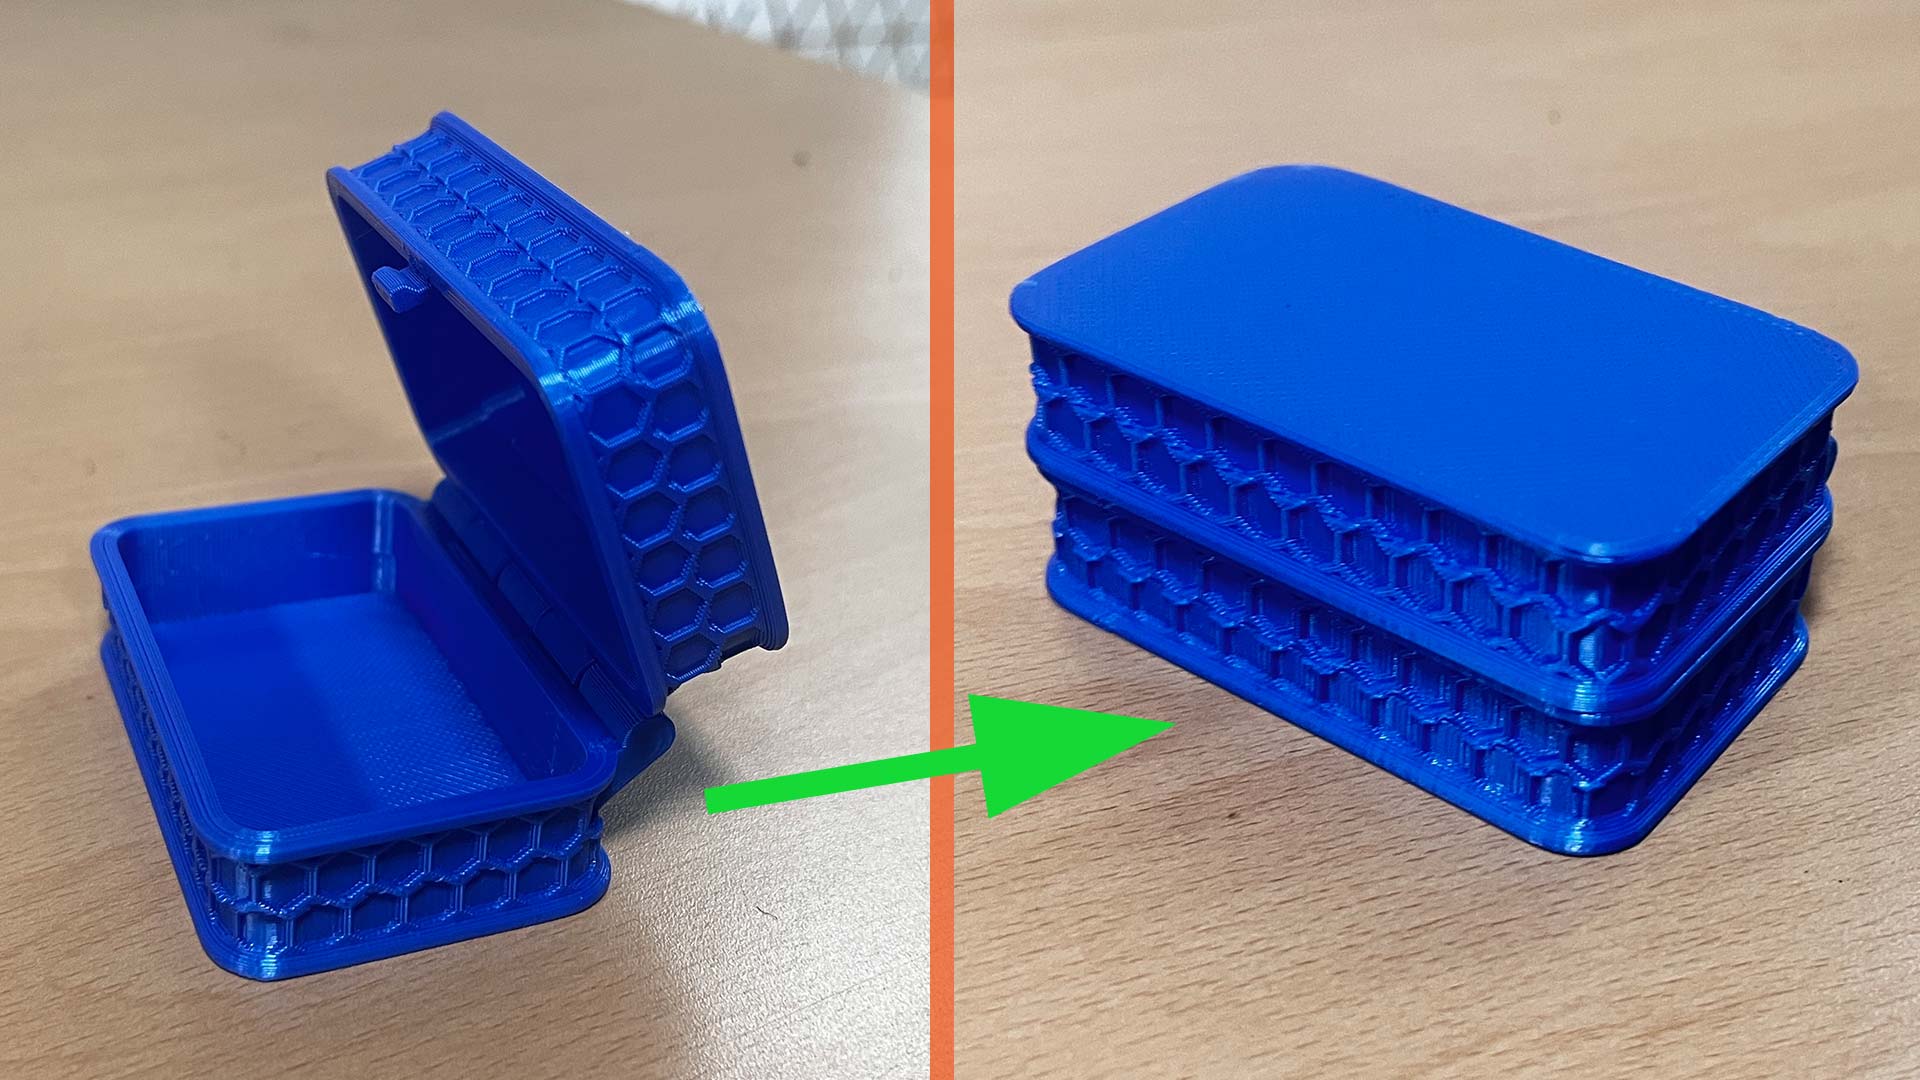
I wanted to design and 3D print a box/container. This box with its cover/lid will be printed combined. No assembly required after printing.
I started by skitching rectangle
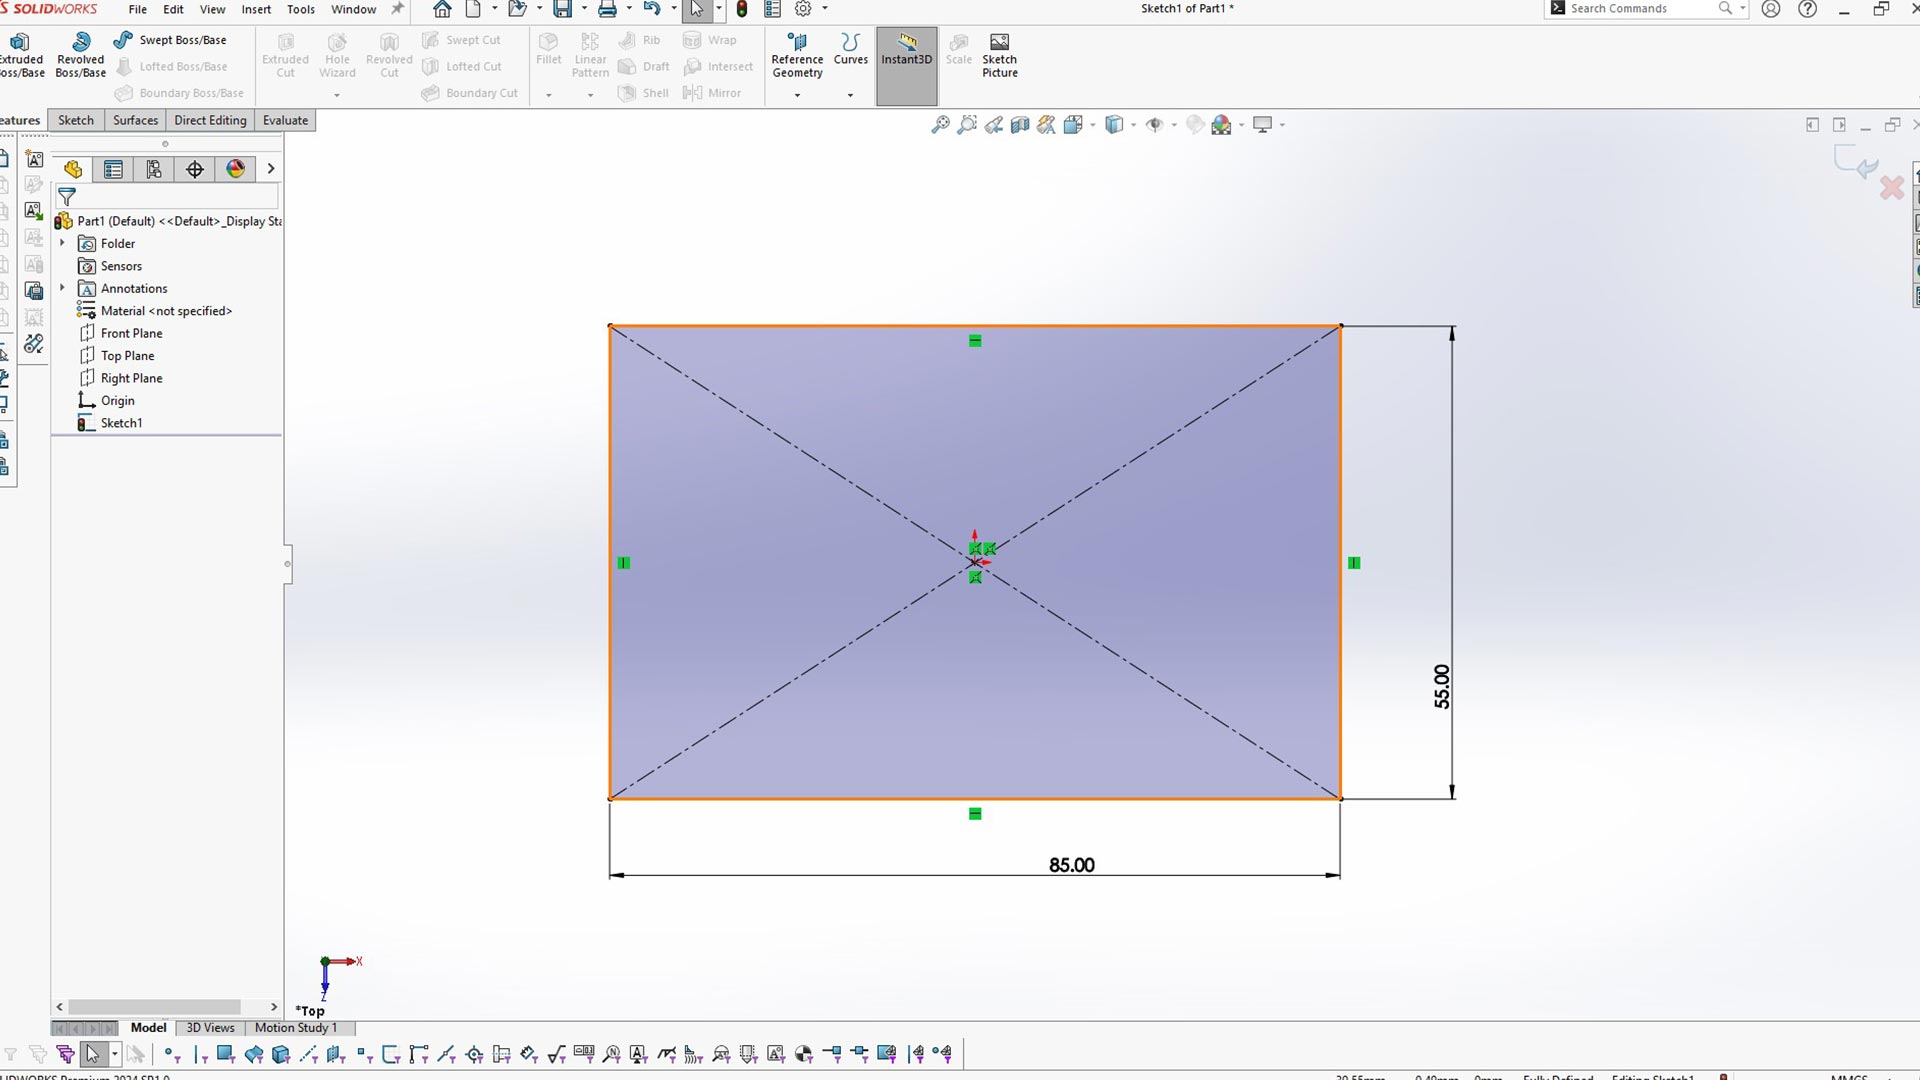
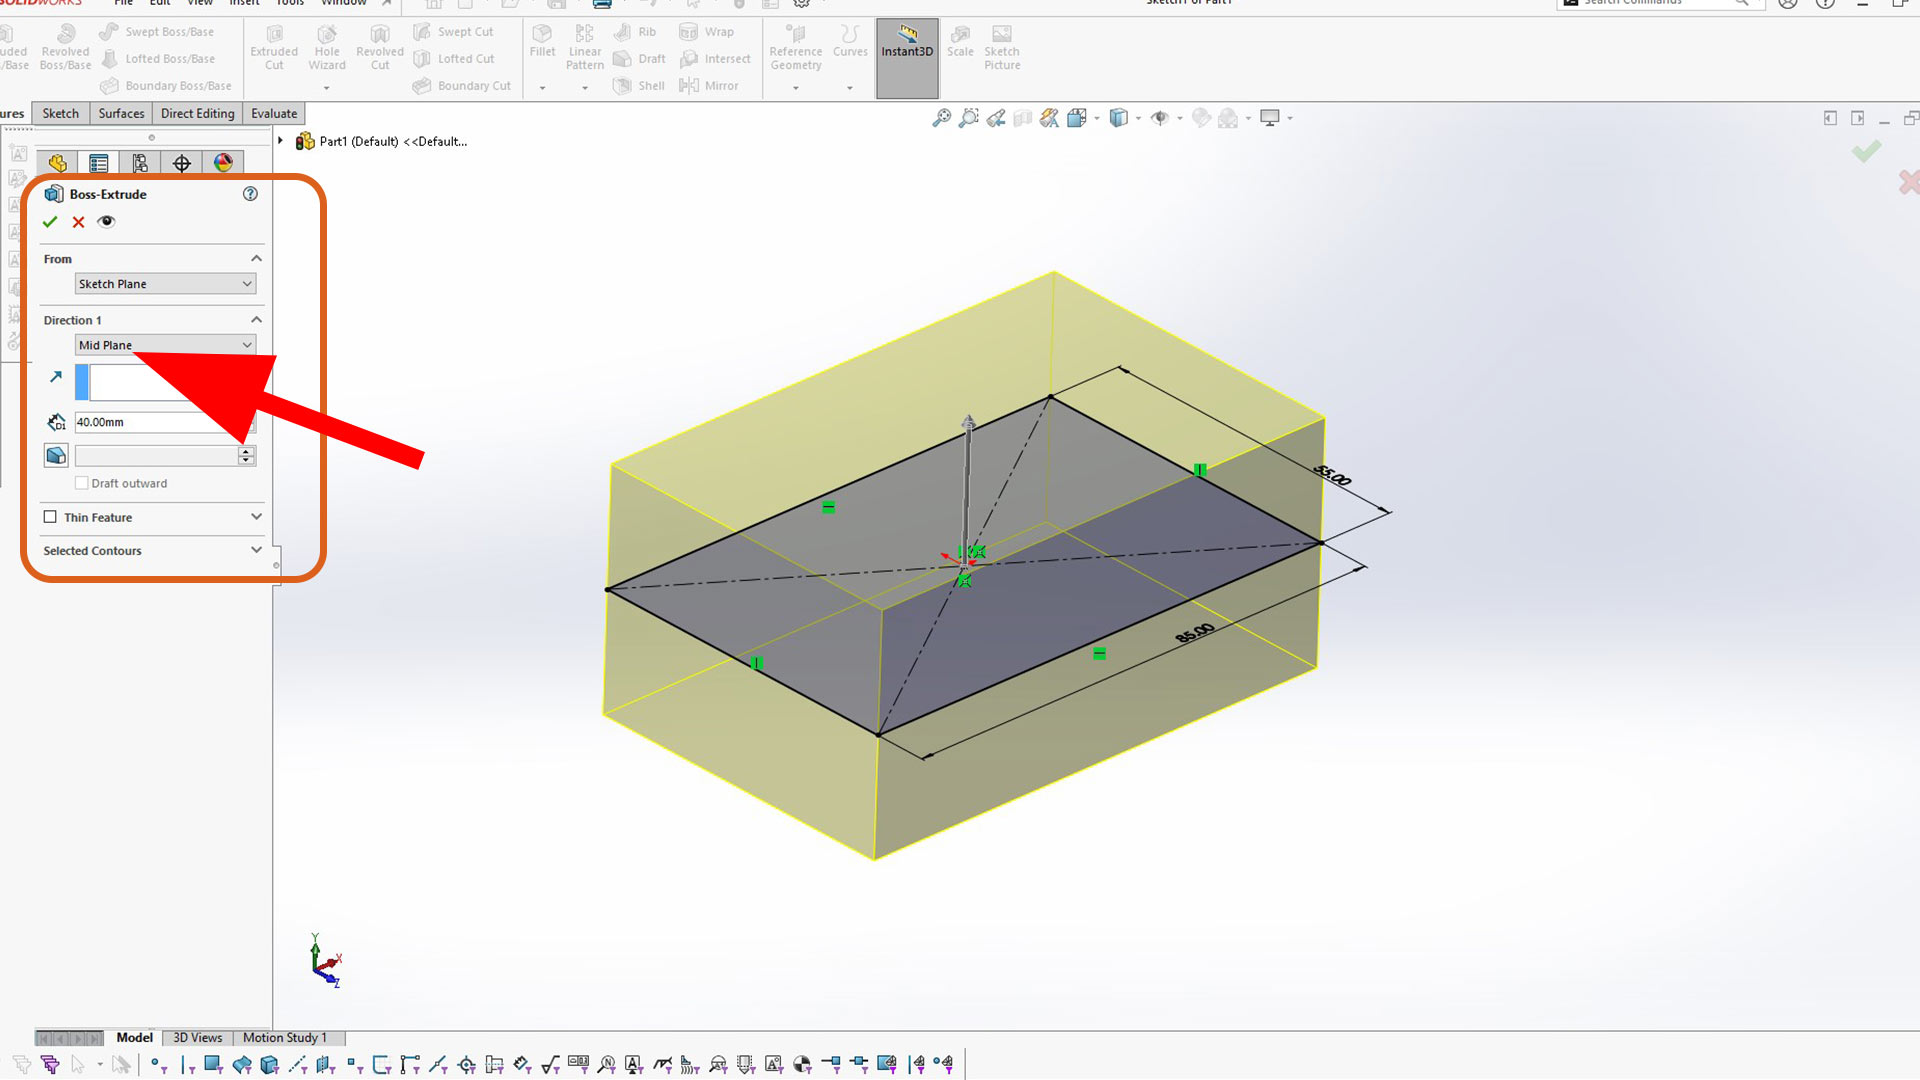
After, I extruded the rectangle using boss extrude tool. The depth hire is the thichness of the box and its lid combined. At this stage, direction is more important. I used midplane. This will come in hand afterward.
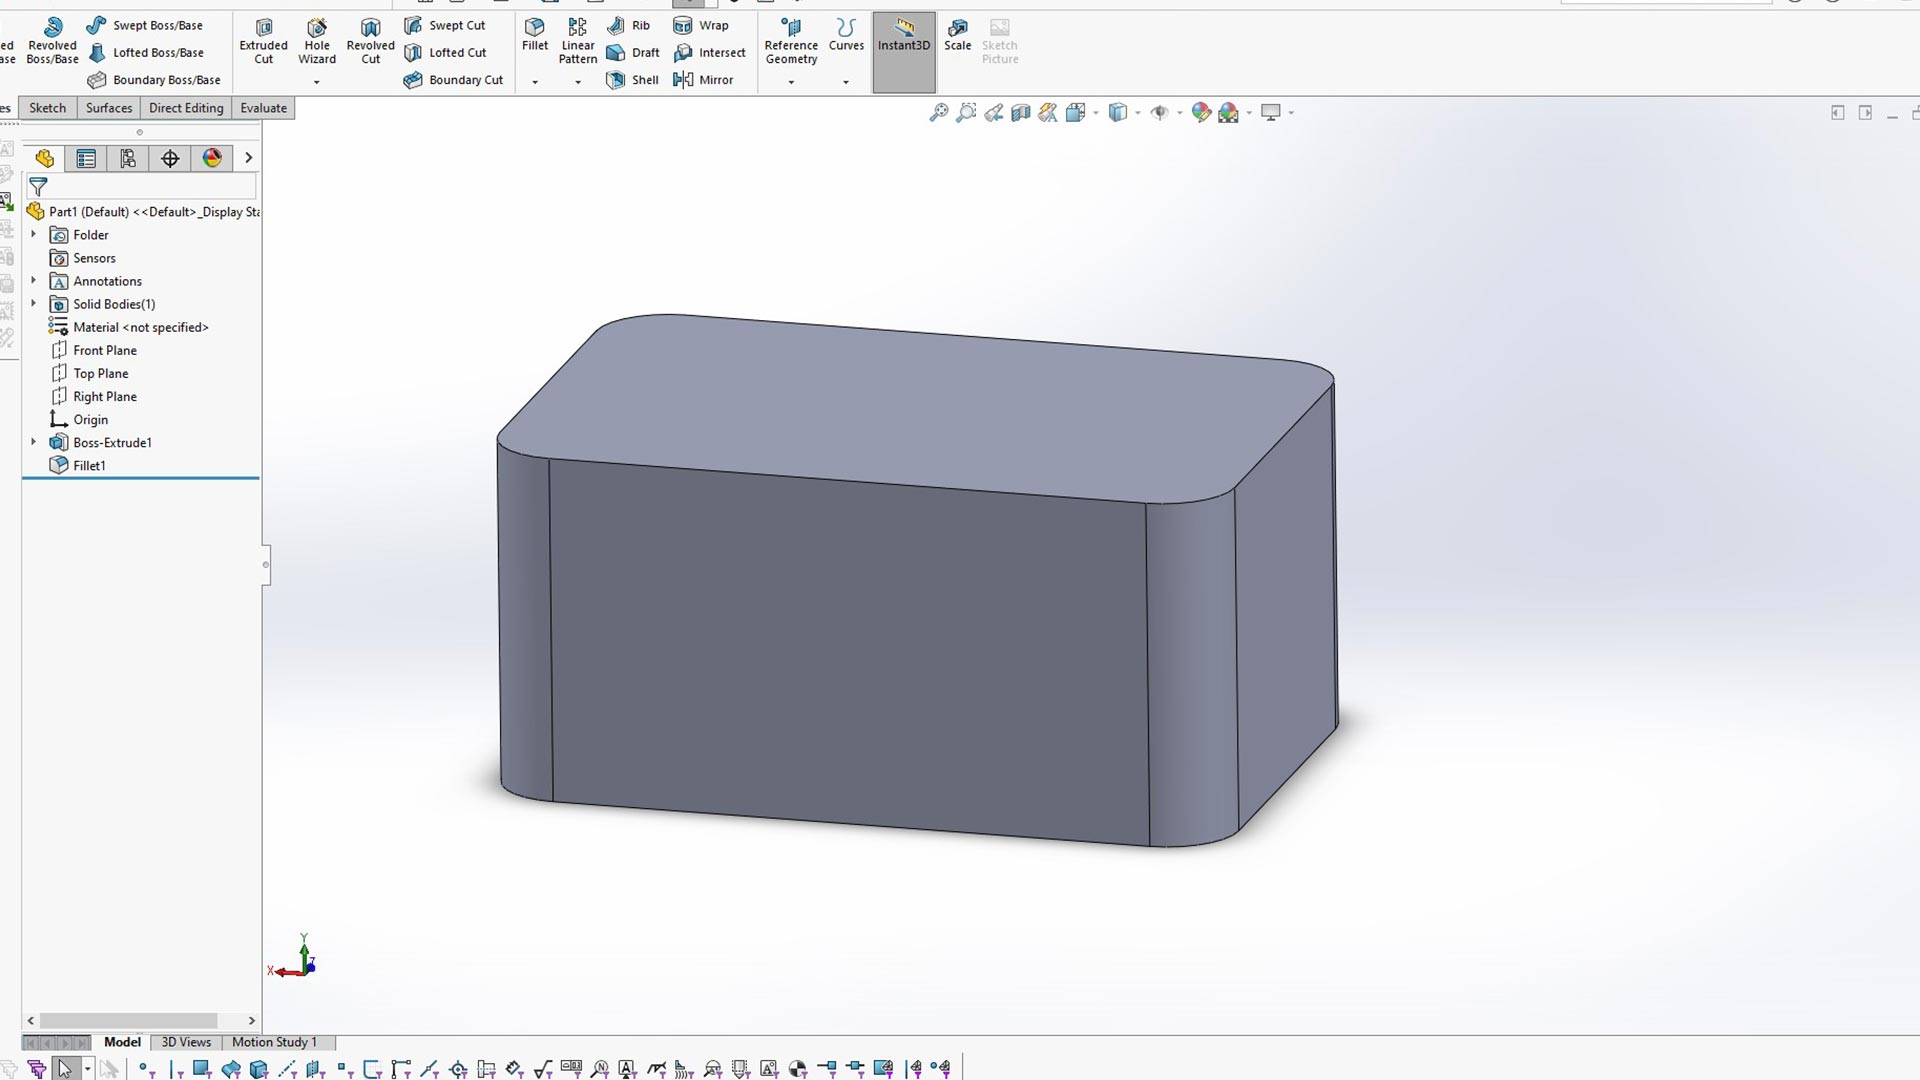
After extrution, I added fillet of 8mm on the four vertical edge
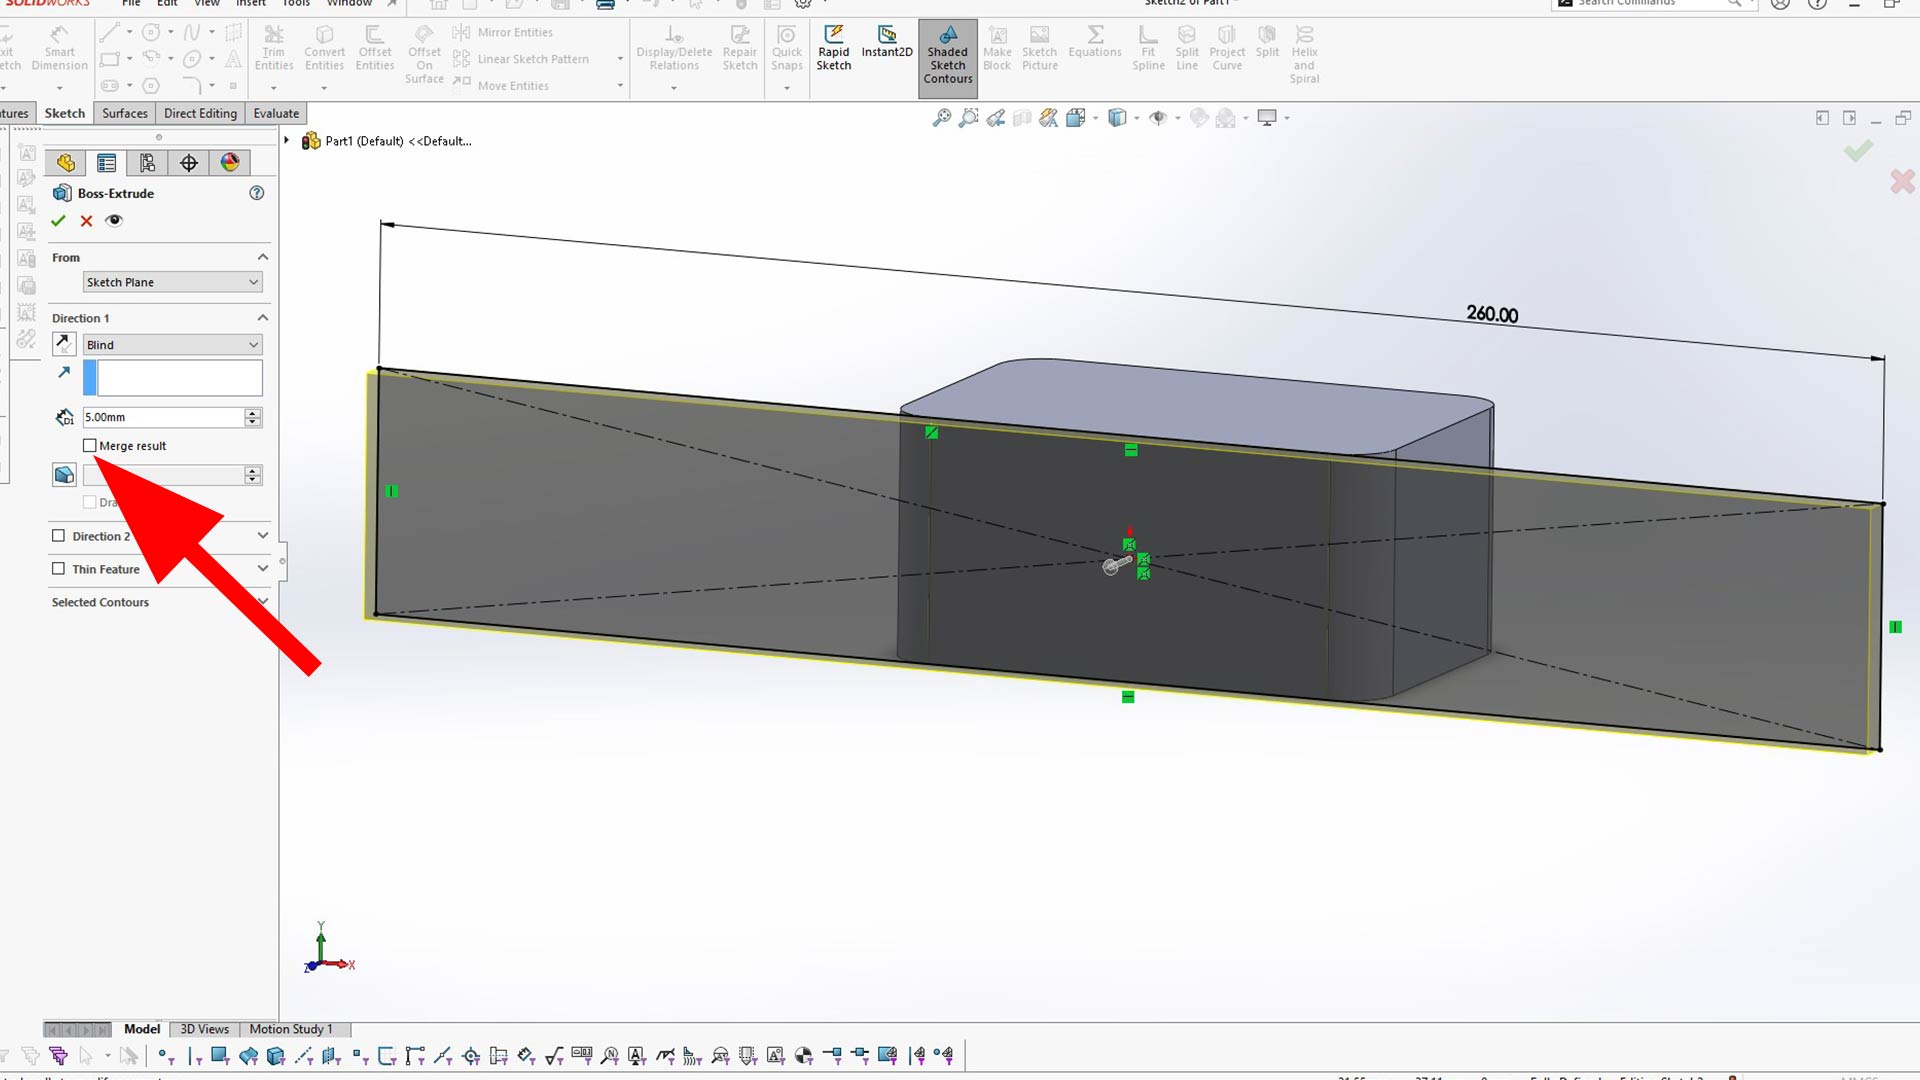
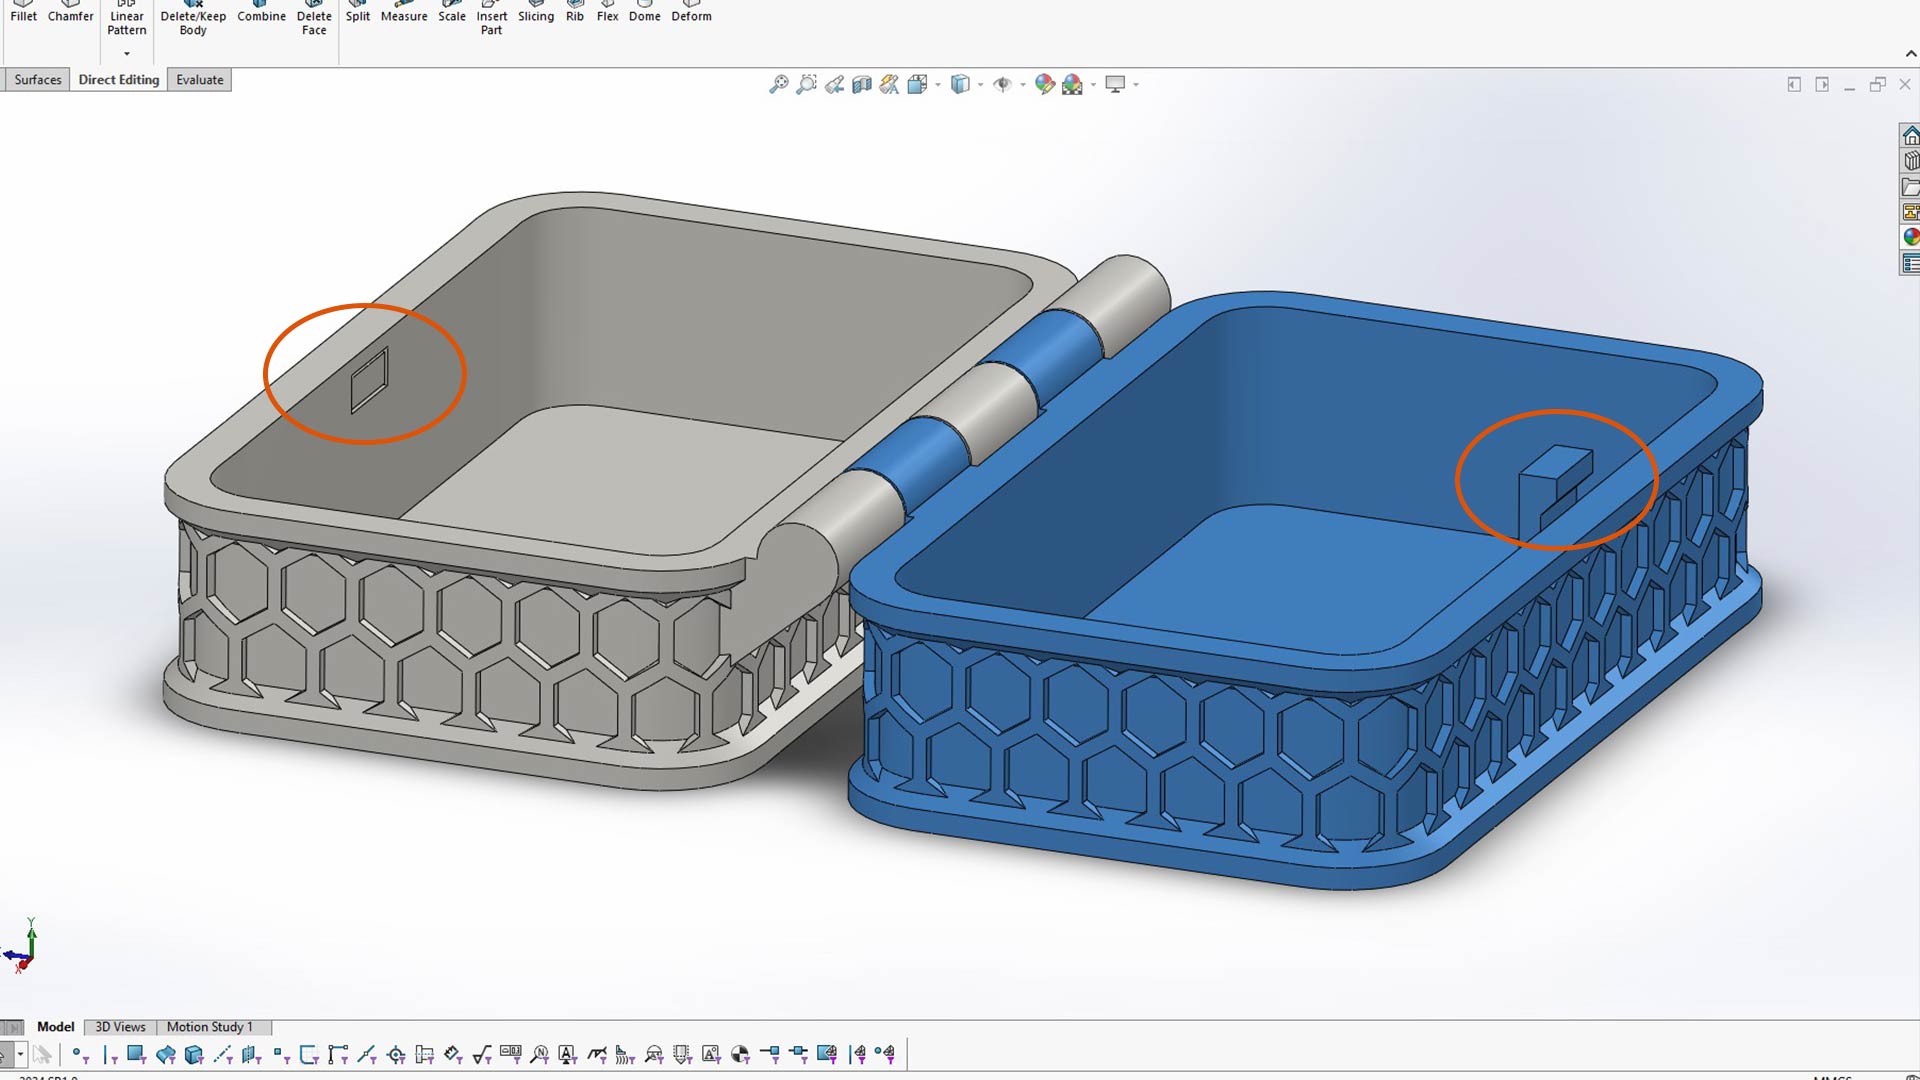
Next, I sketched and extruded a rectangle on one side. Here it is important not to merge/combine the bodies. They need to be separate. Make sure merge result is unchecked as highlighted below.
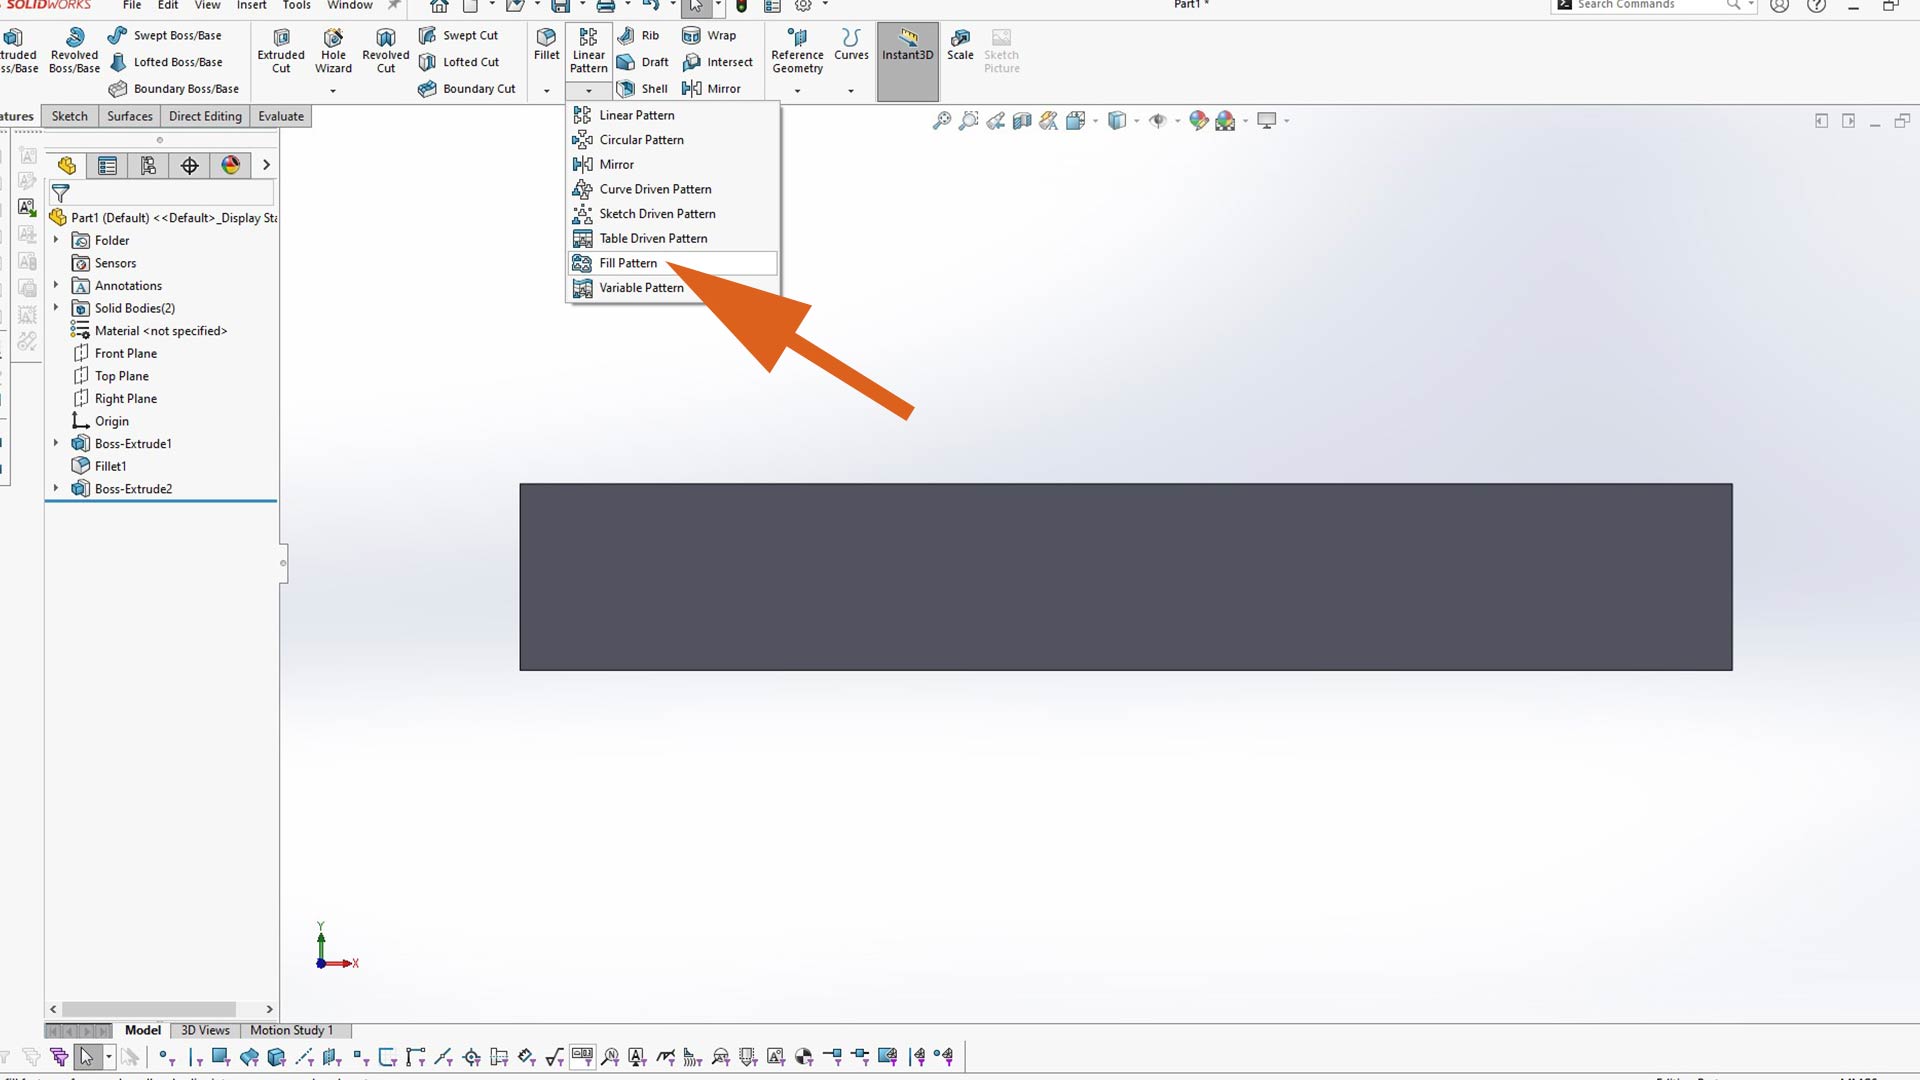
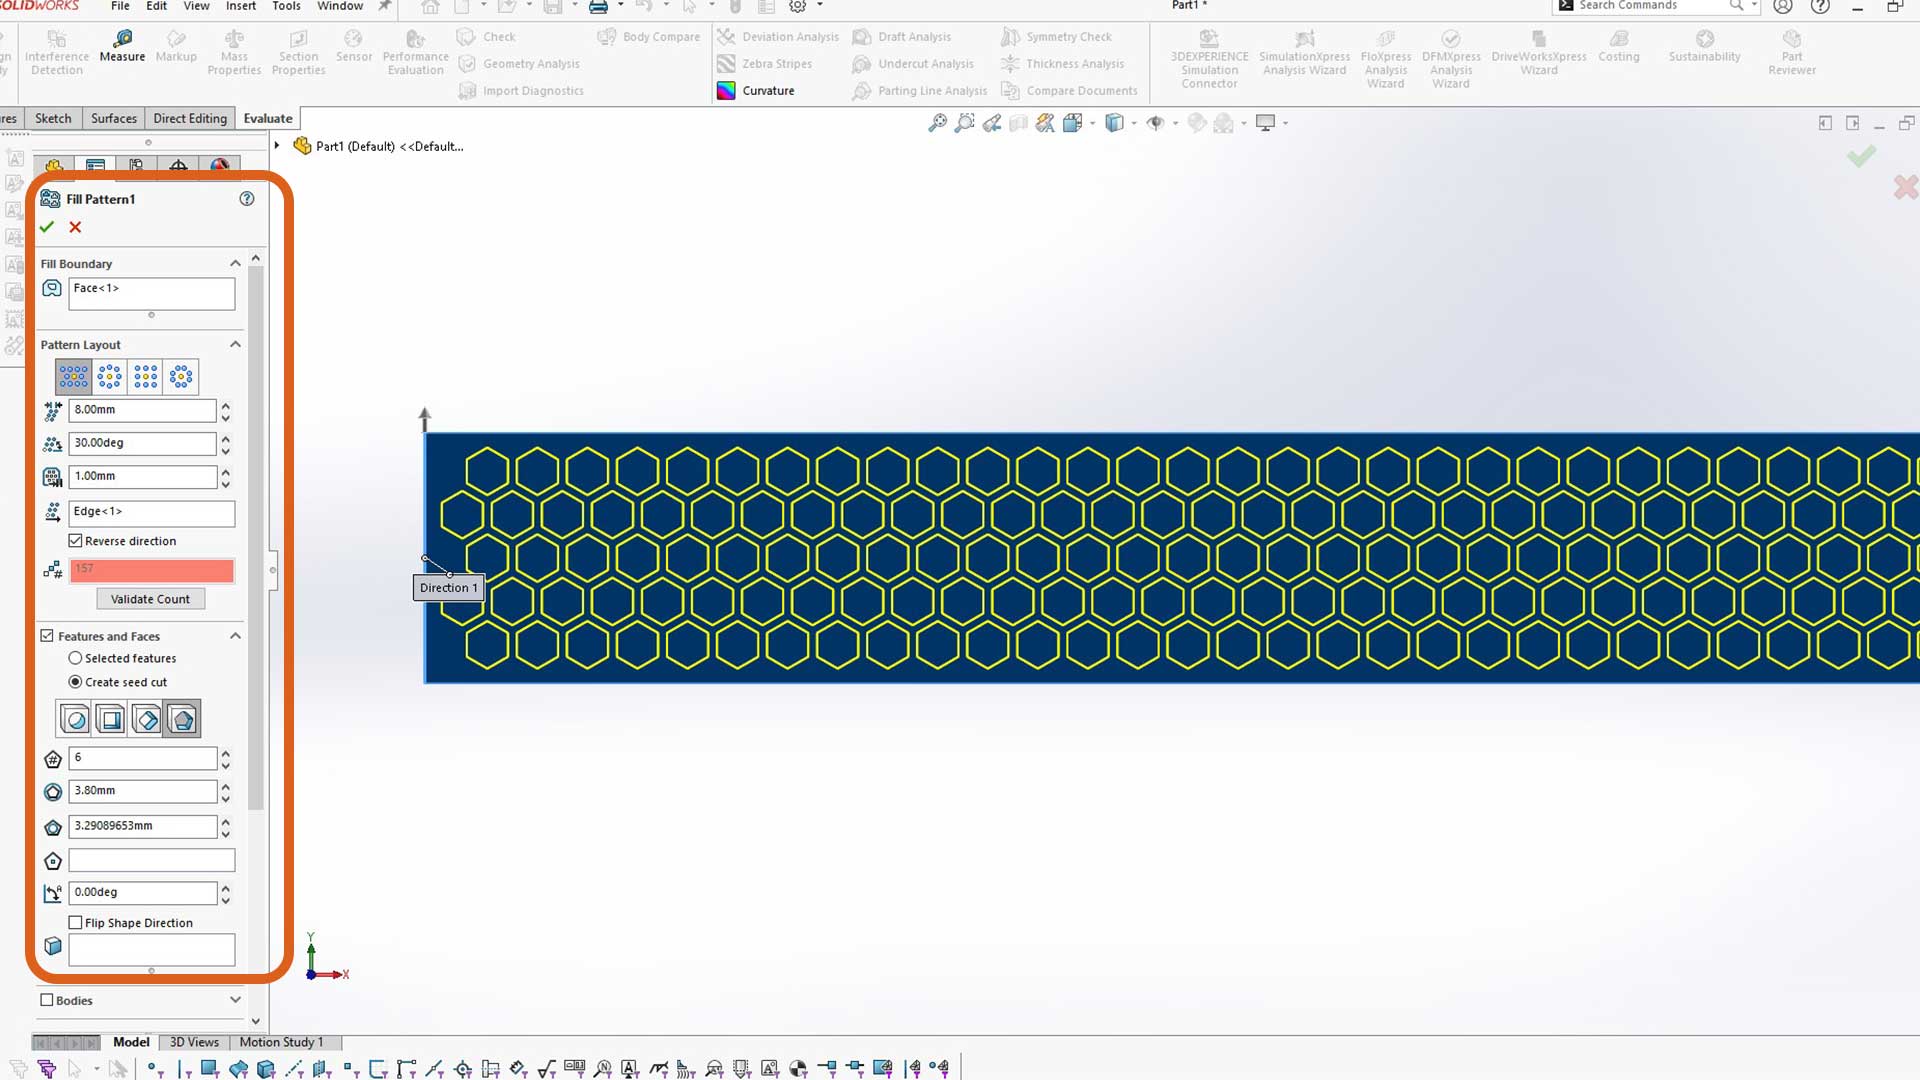
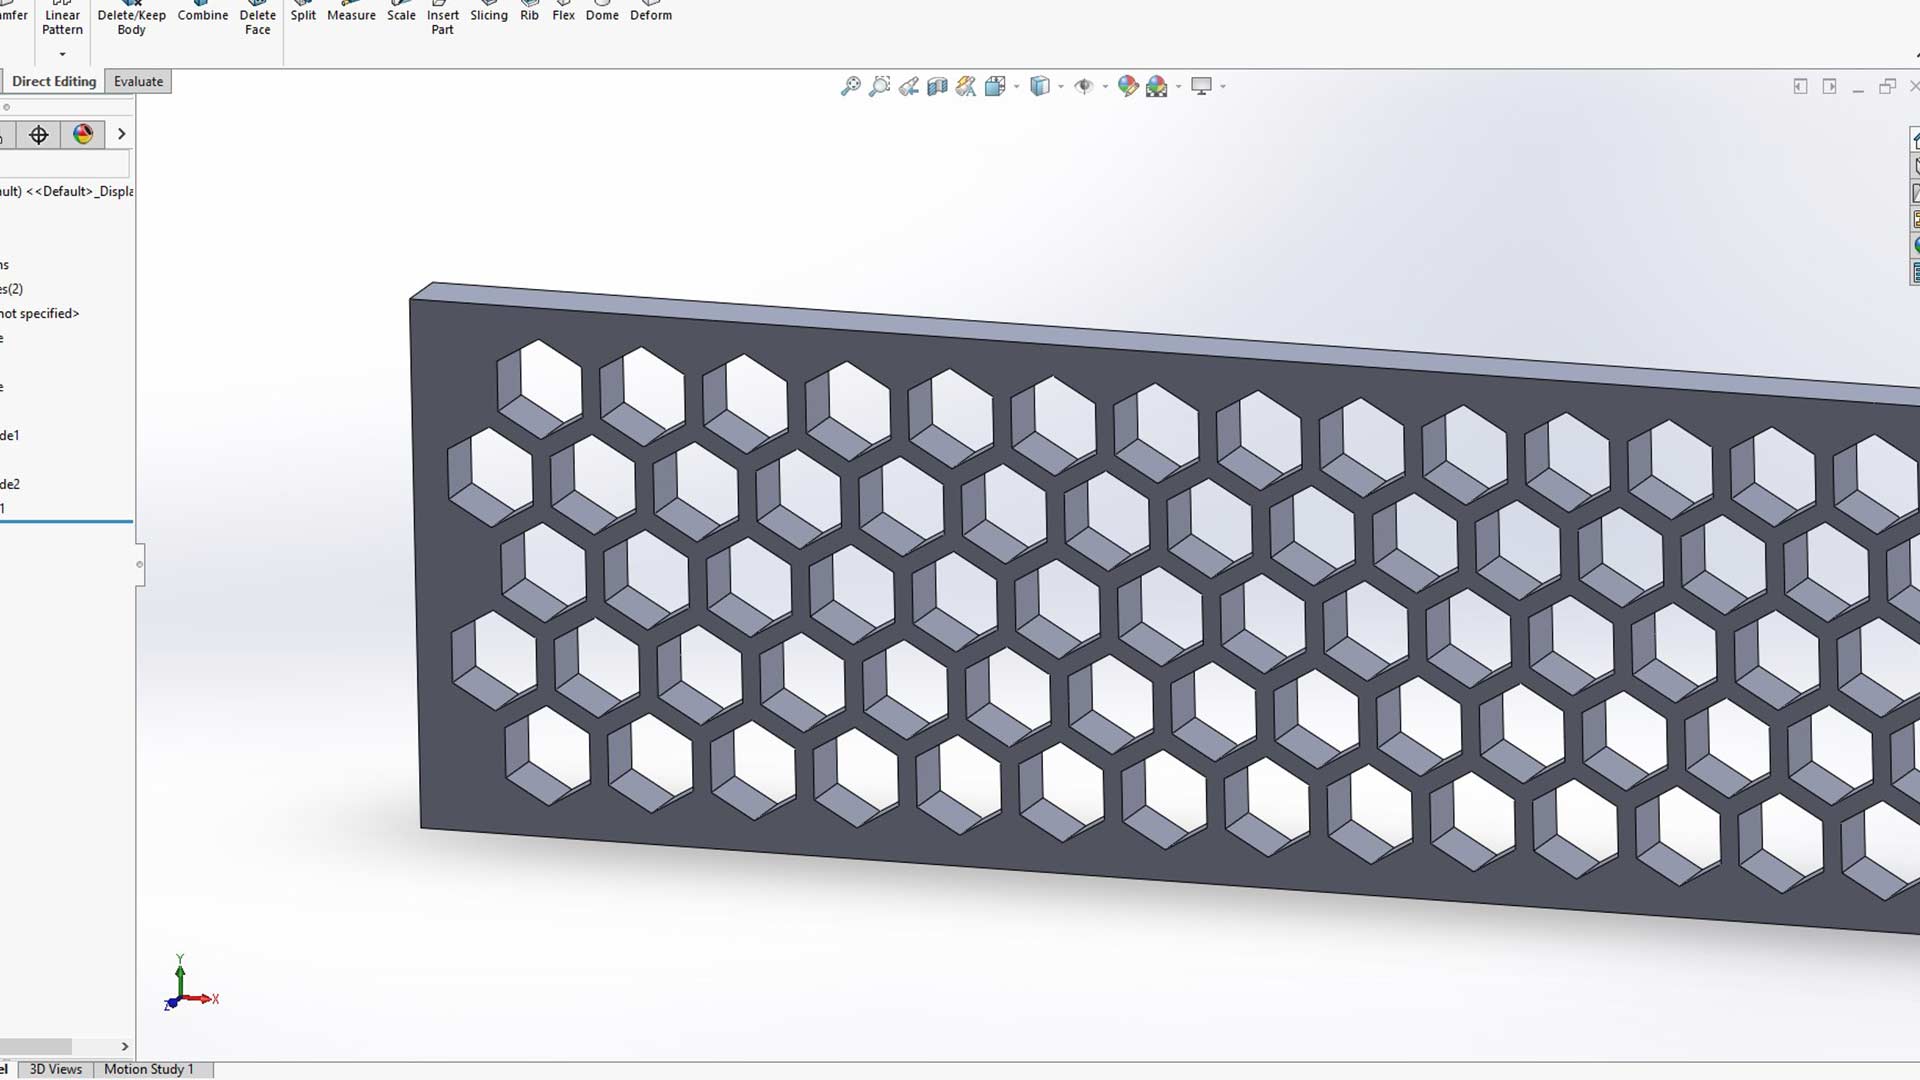
After, I added fill pattern.
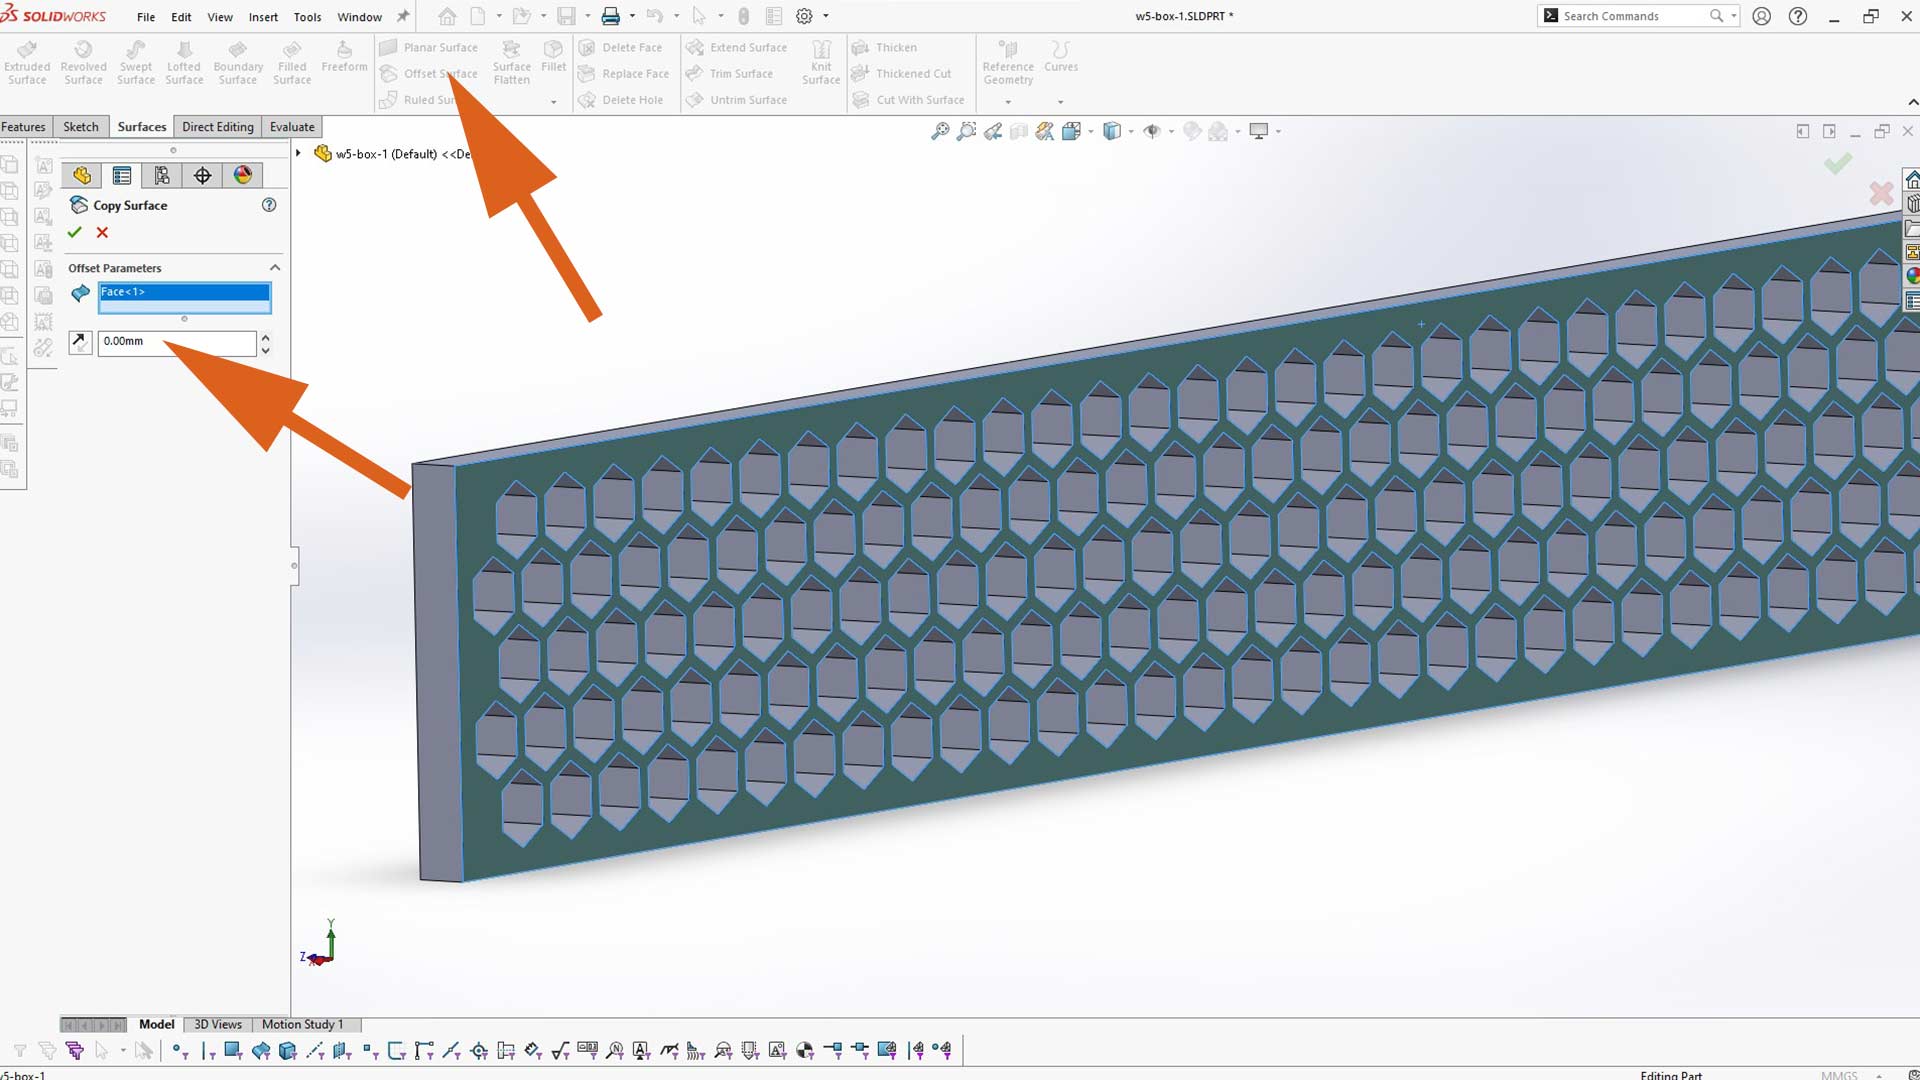
I added surface offset. I used 0mm as dimension. This is to keed the surface concide withthe body.
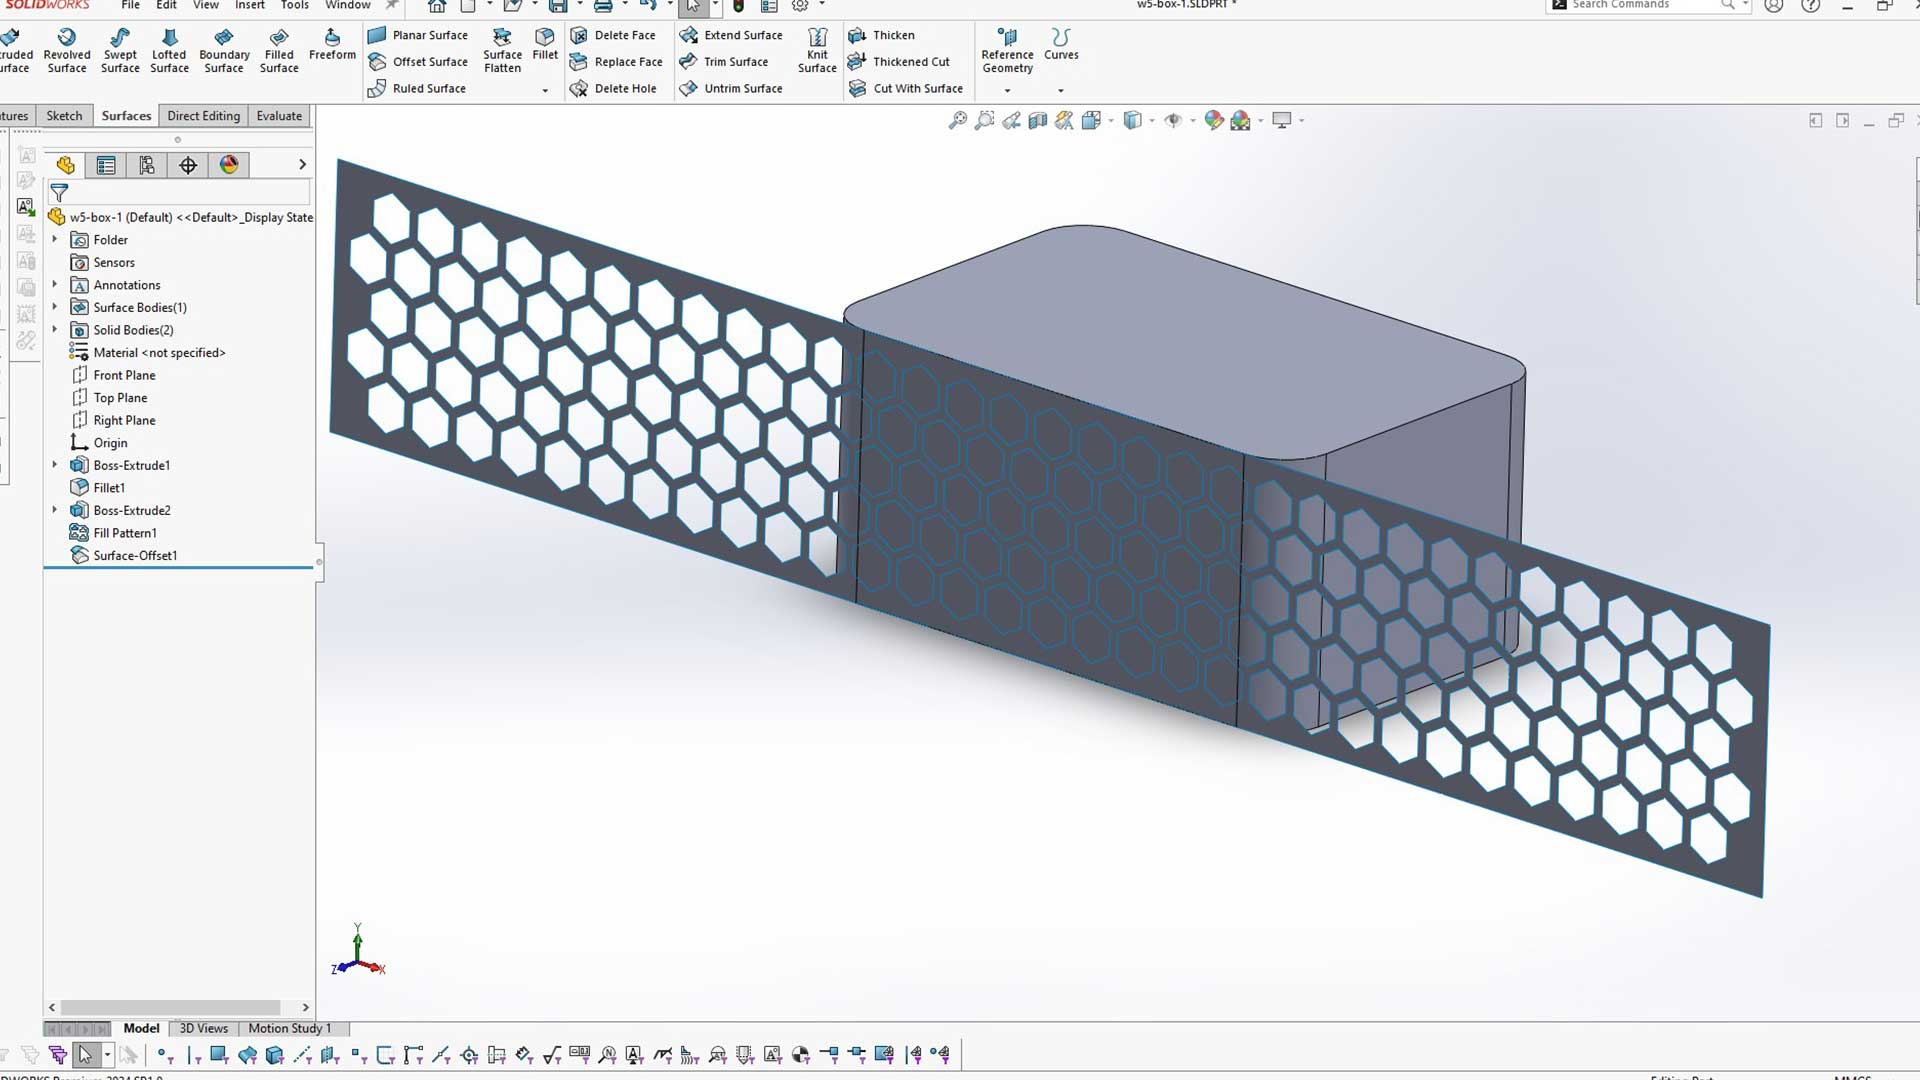
I tried deforming the surface the body however it keeps fialing. Therefore I decided to cut one section. This removed section will be readded with mirror tool afterward
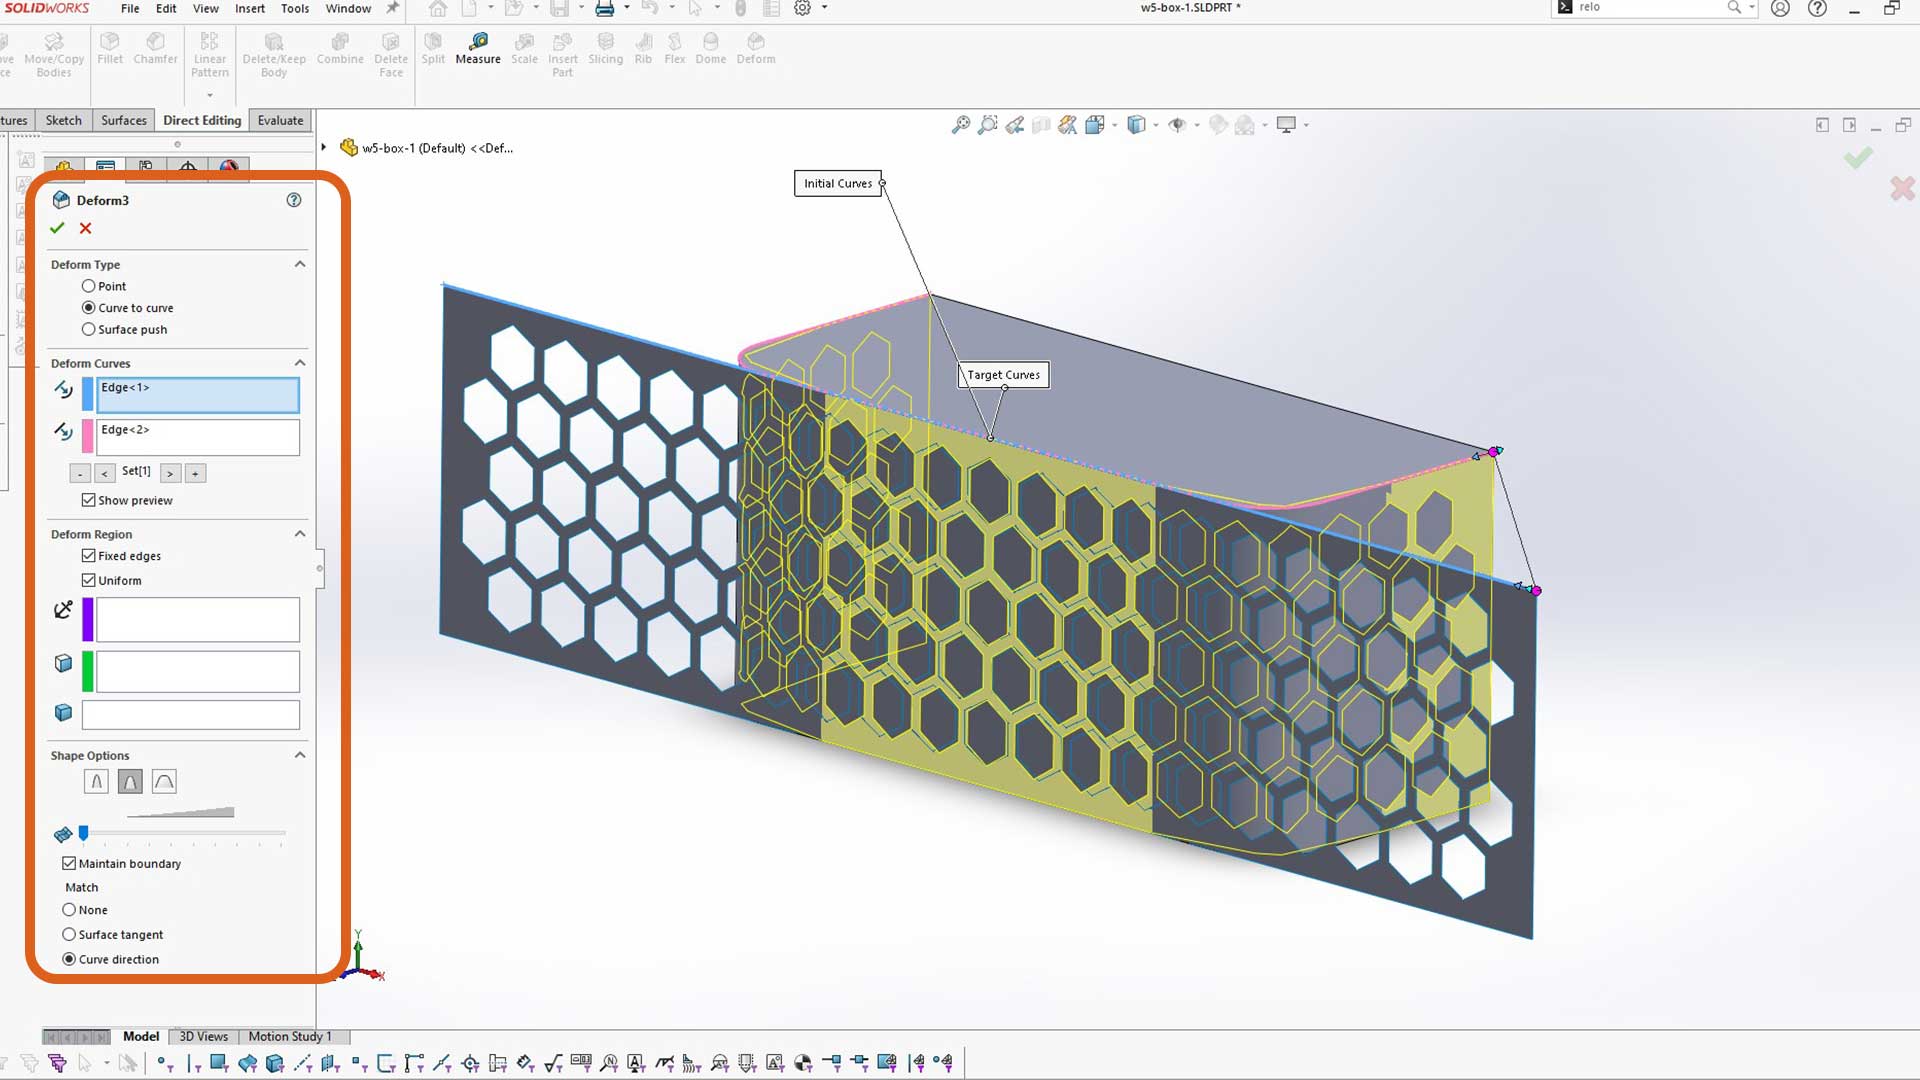
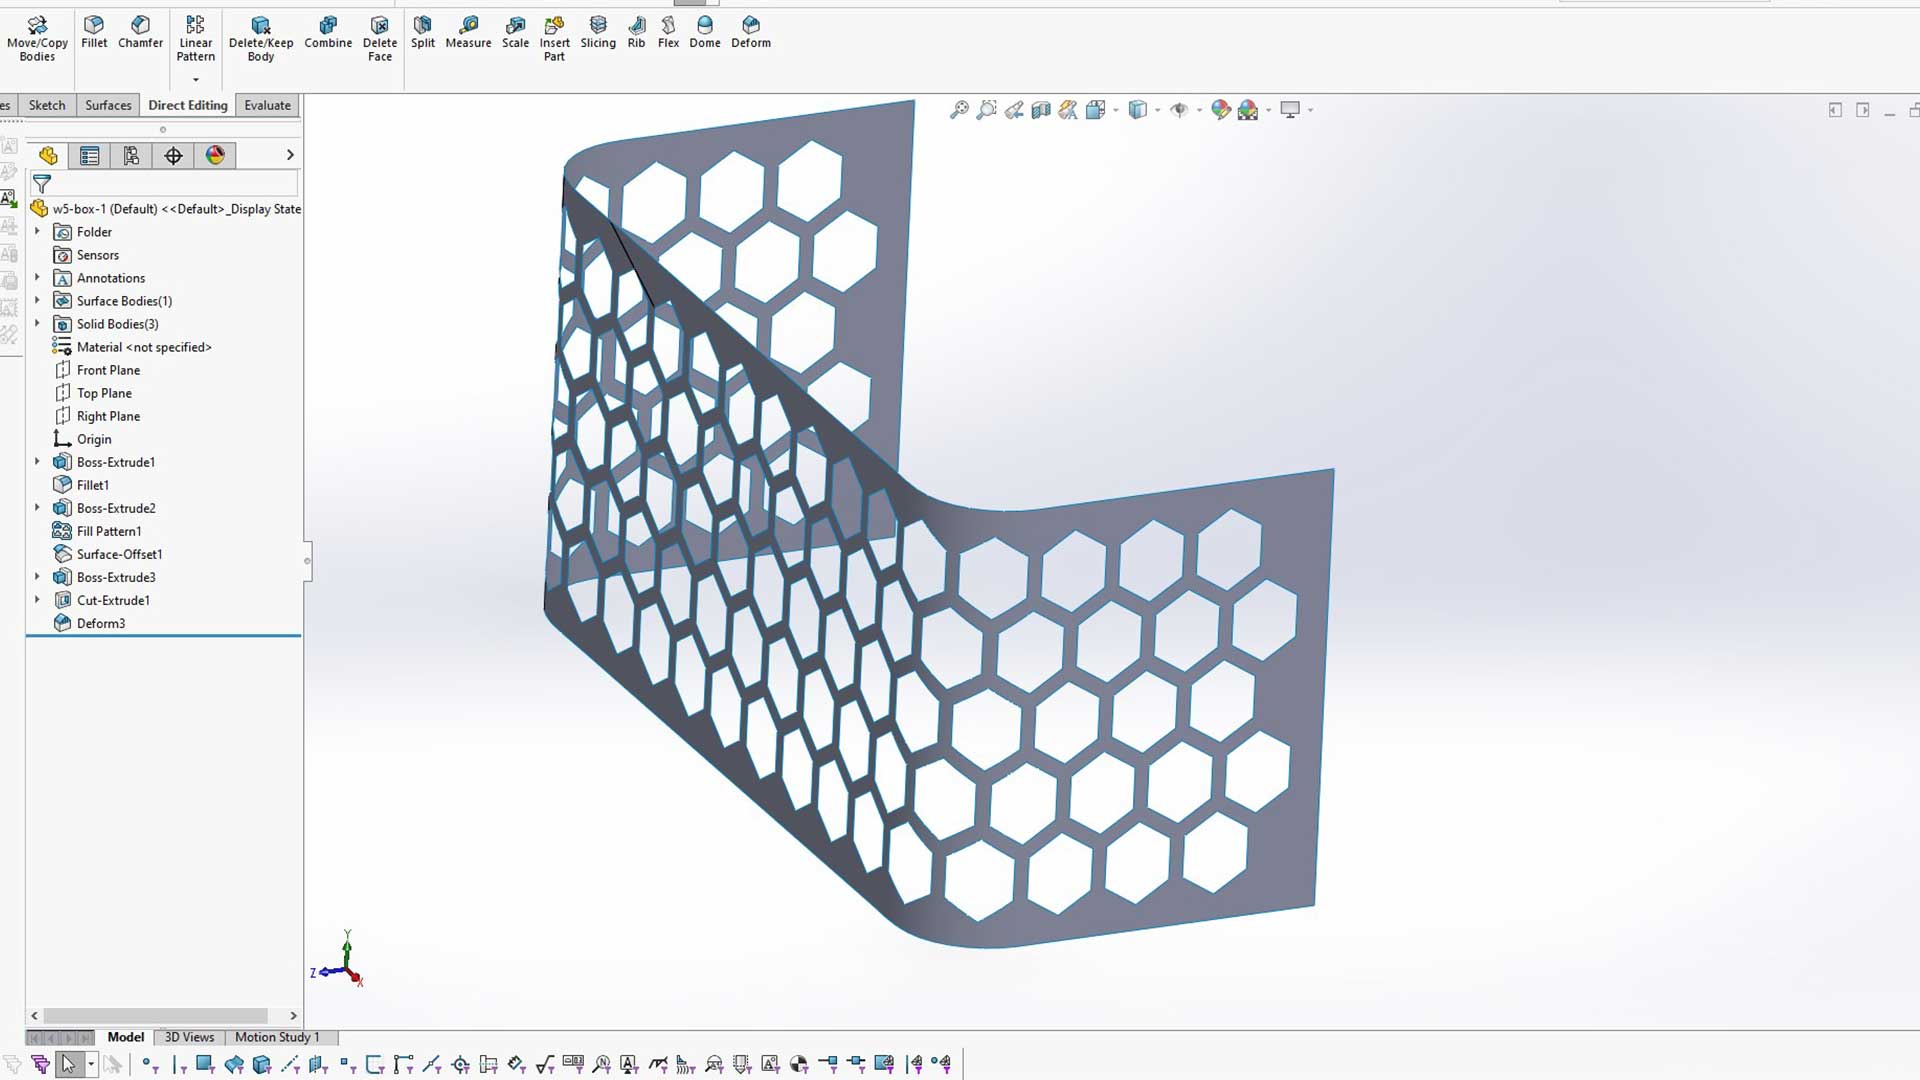
I used deform tool to wrap the surface around the body.
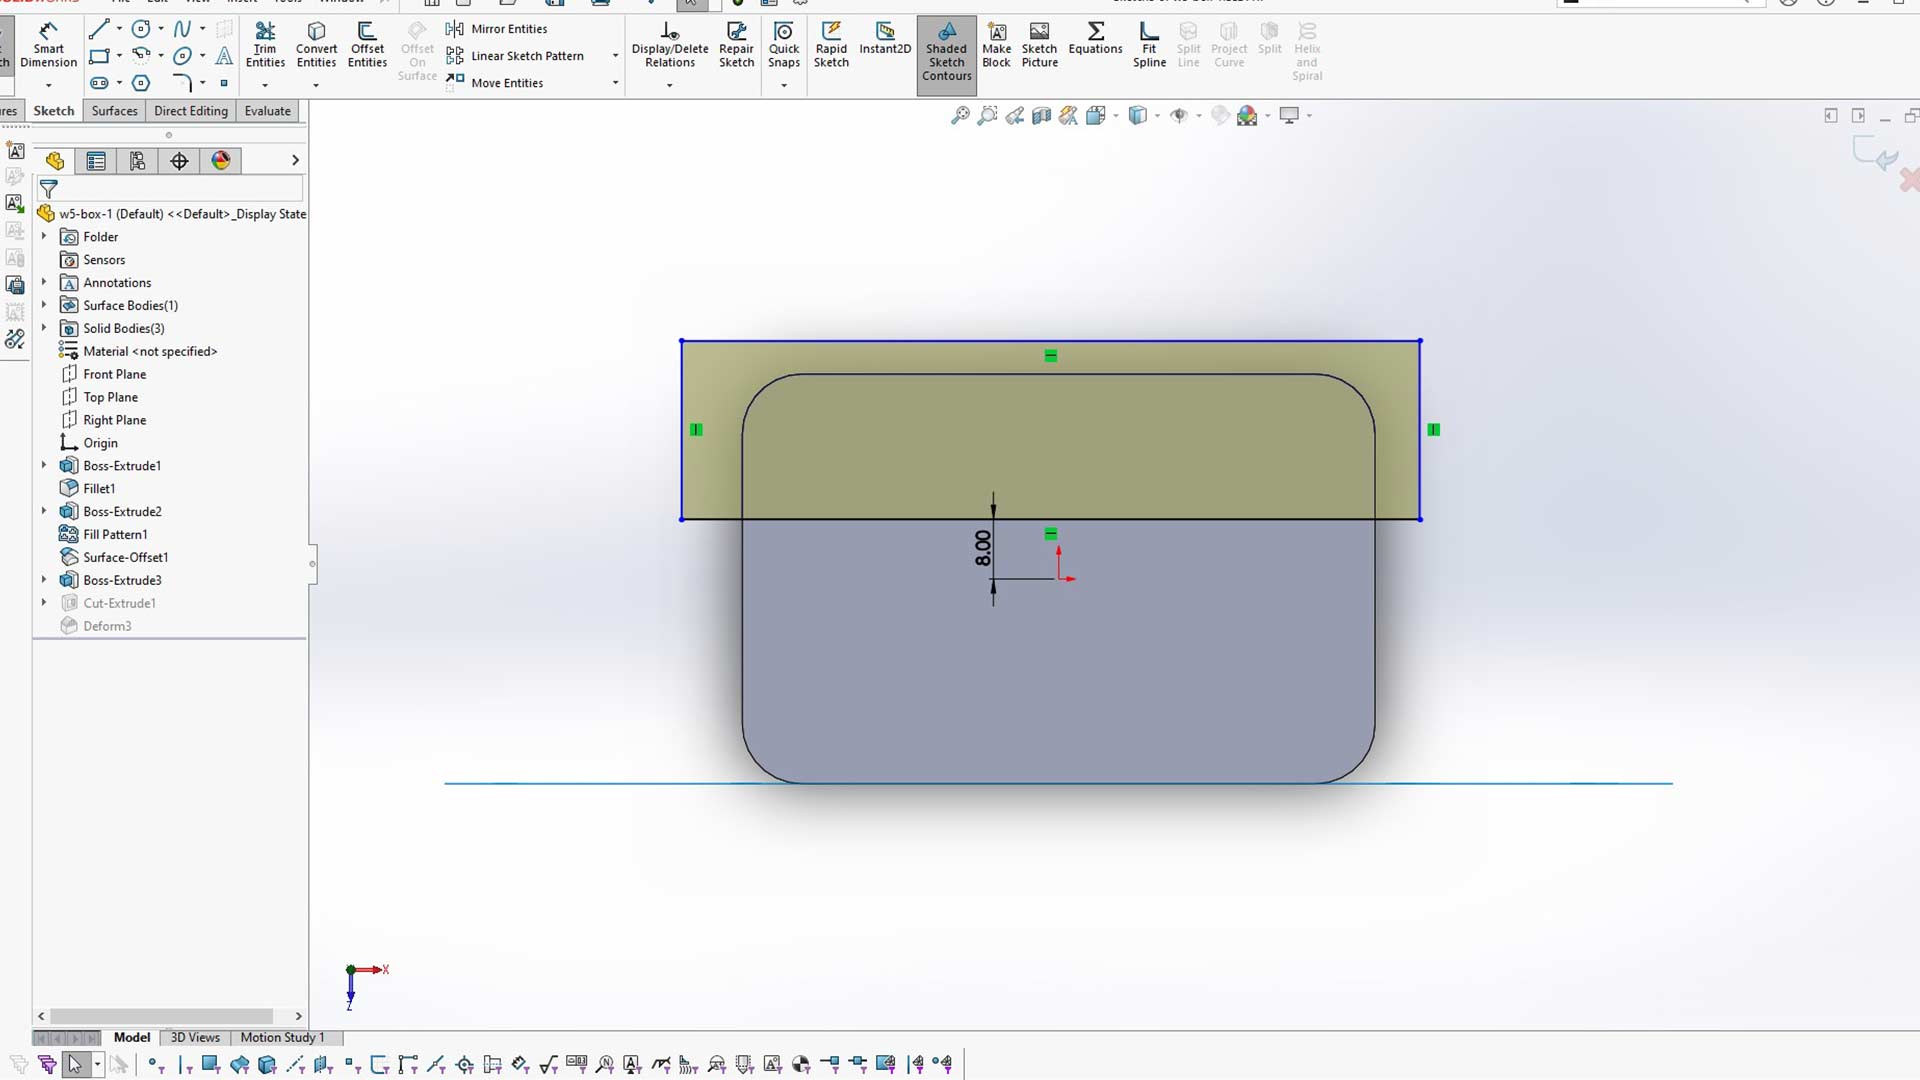
Next, I used trim tool to cut one section. The sketch is at the middle of the pattern (as shown with red arrow). This is to make sure after mirroring, the output will be identical in all side.
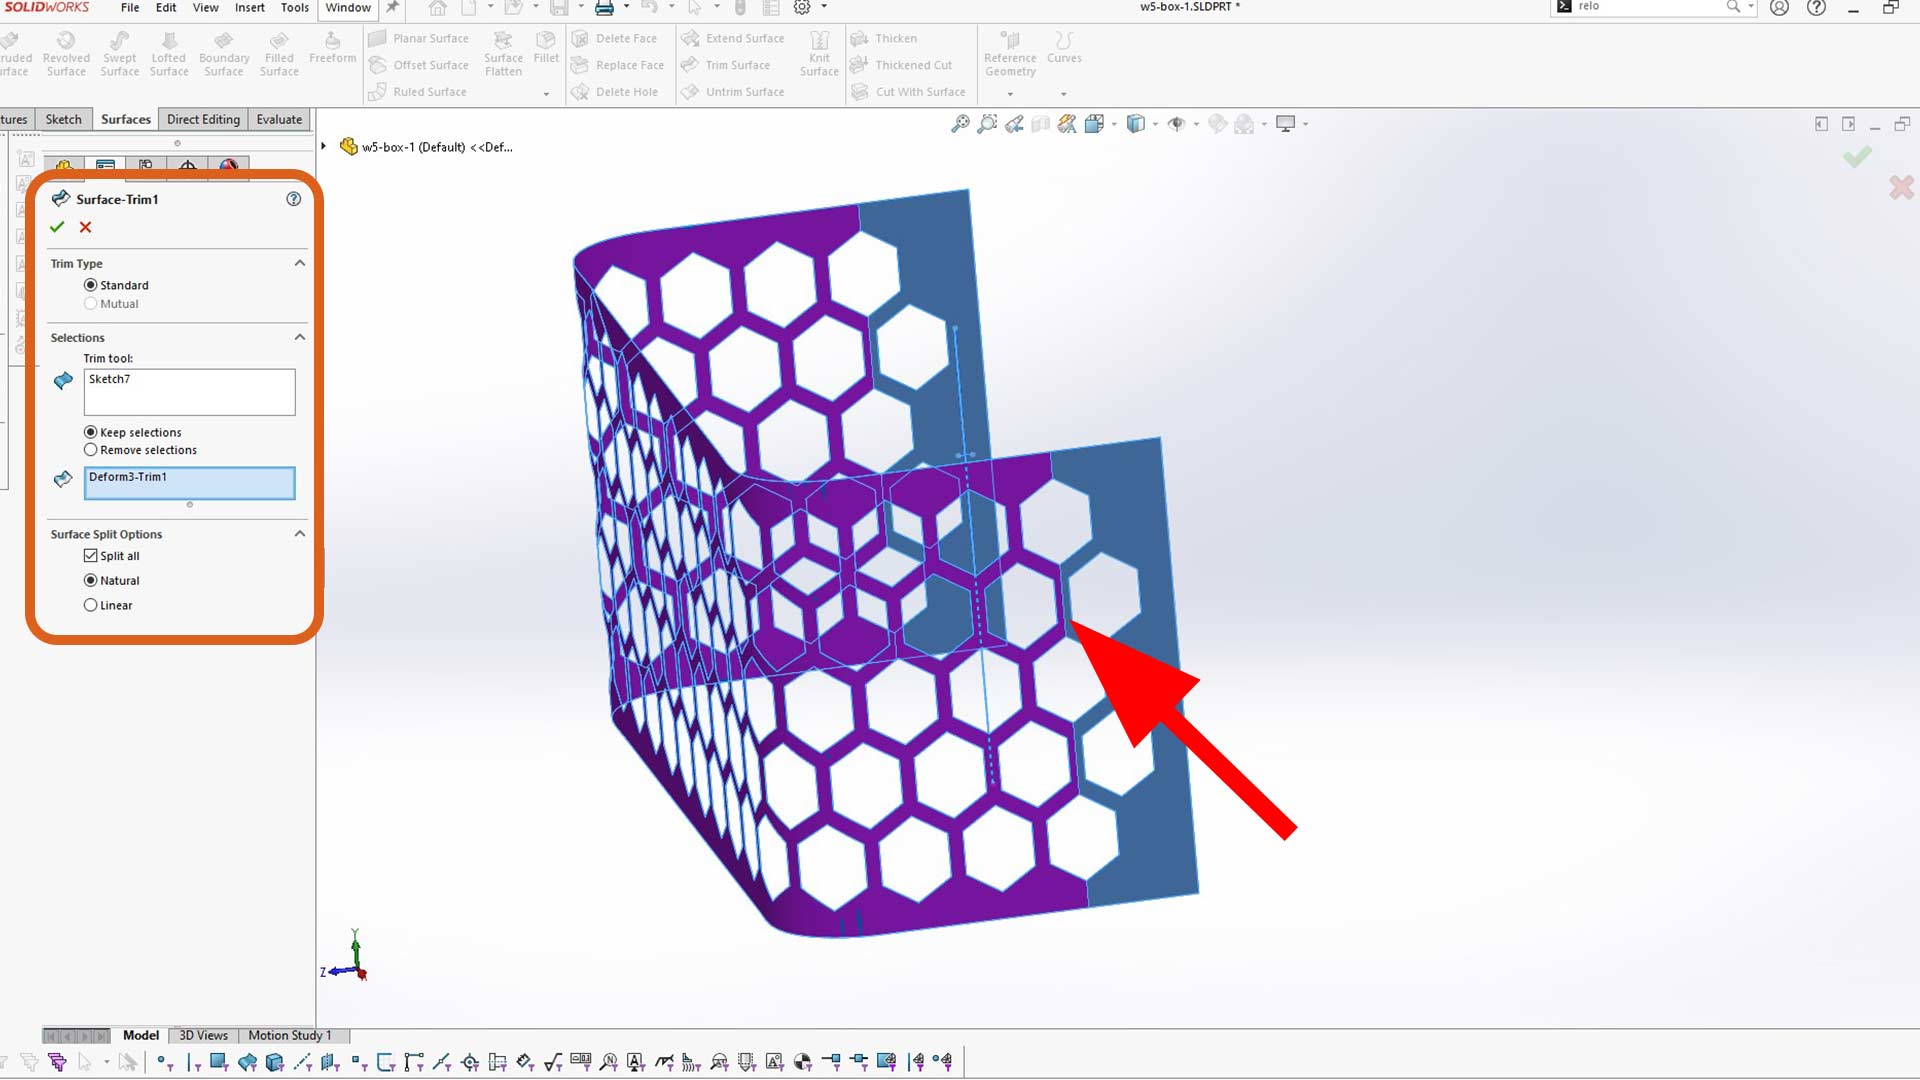
I created mirror after.

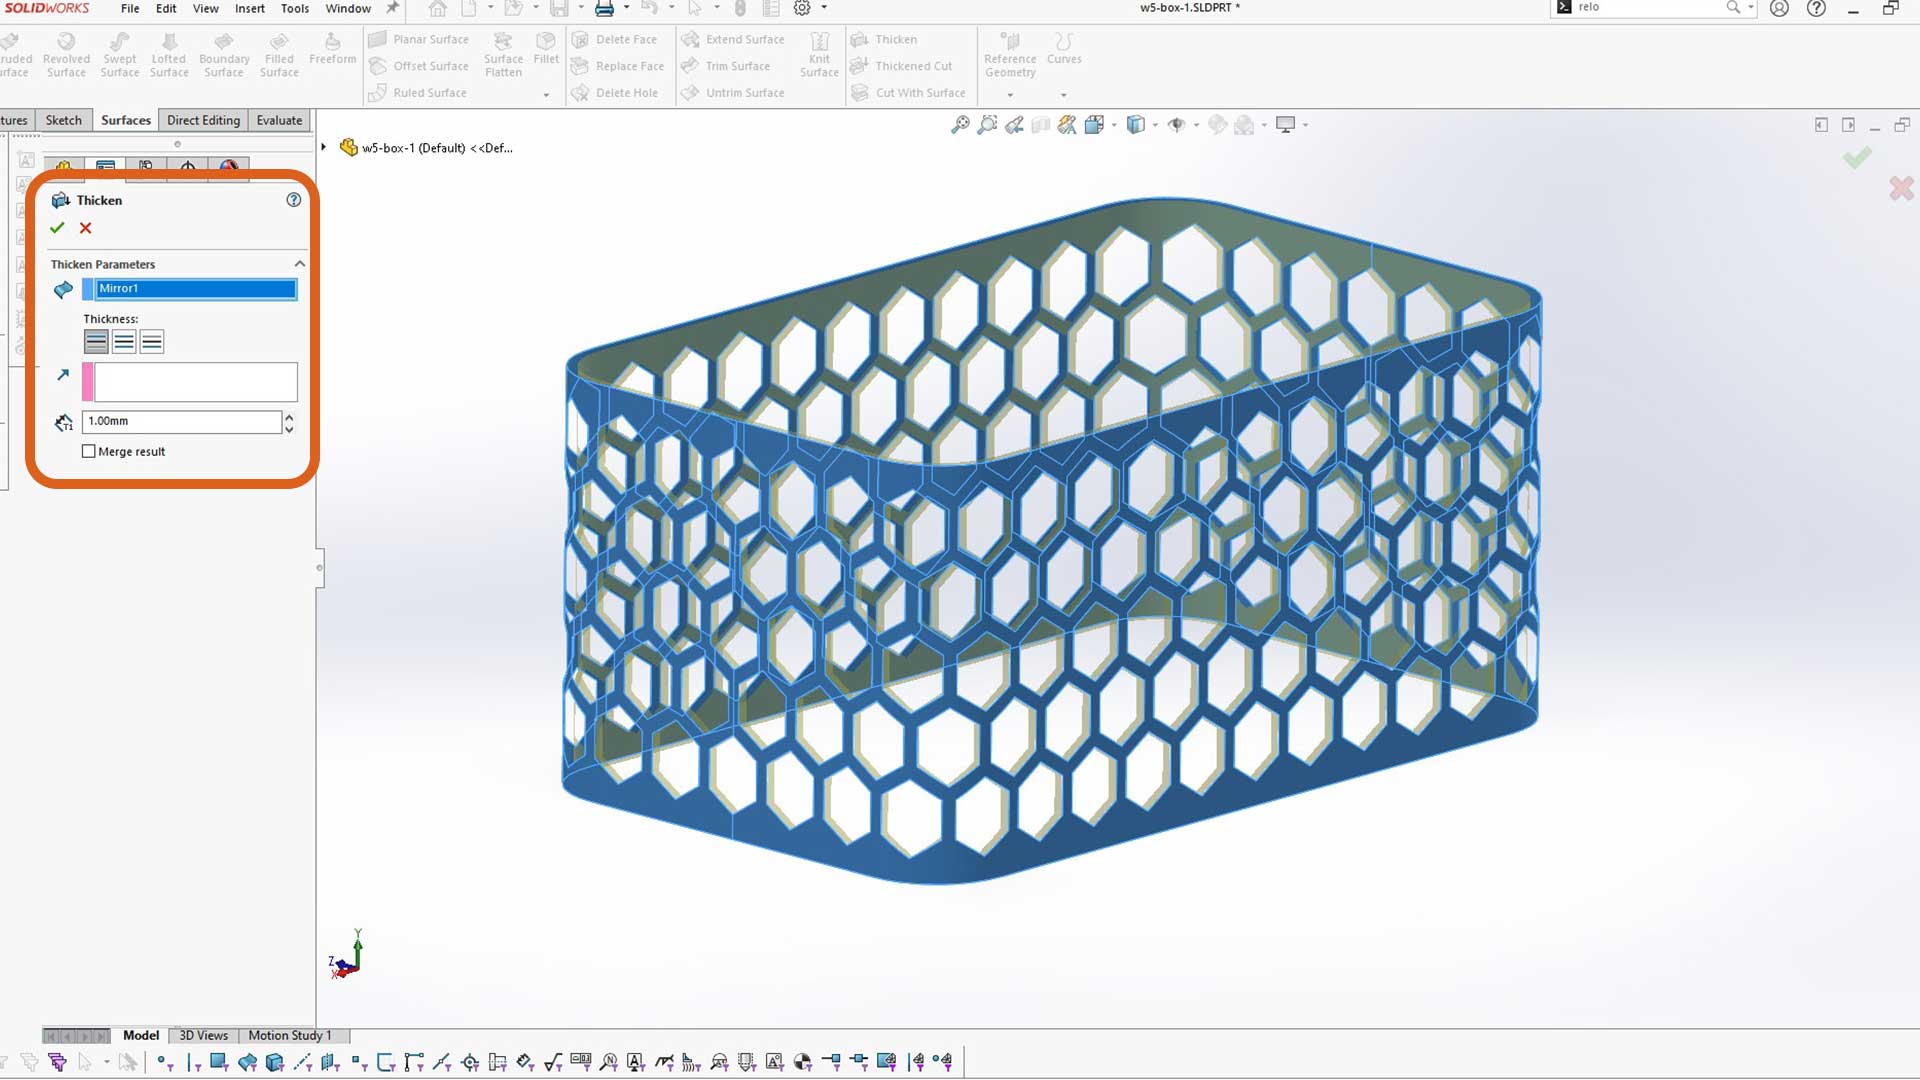
I used Thichen tool to convert surface into body.
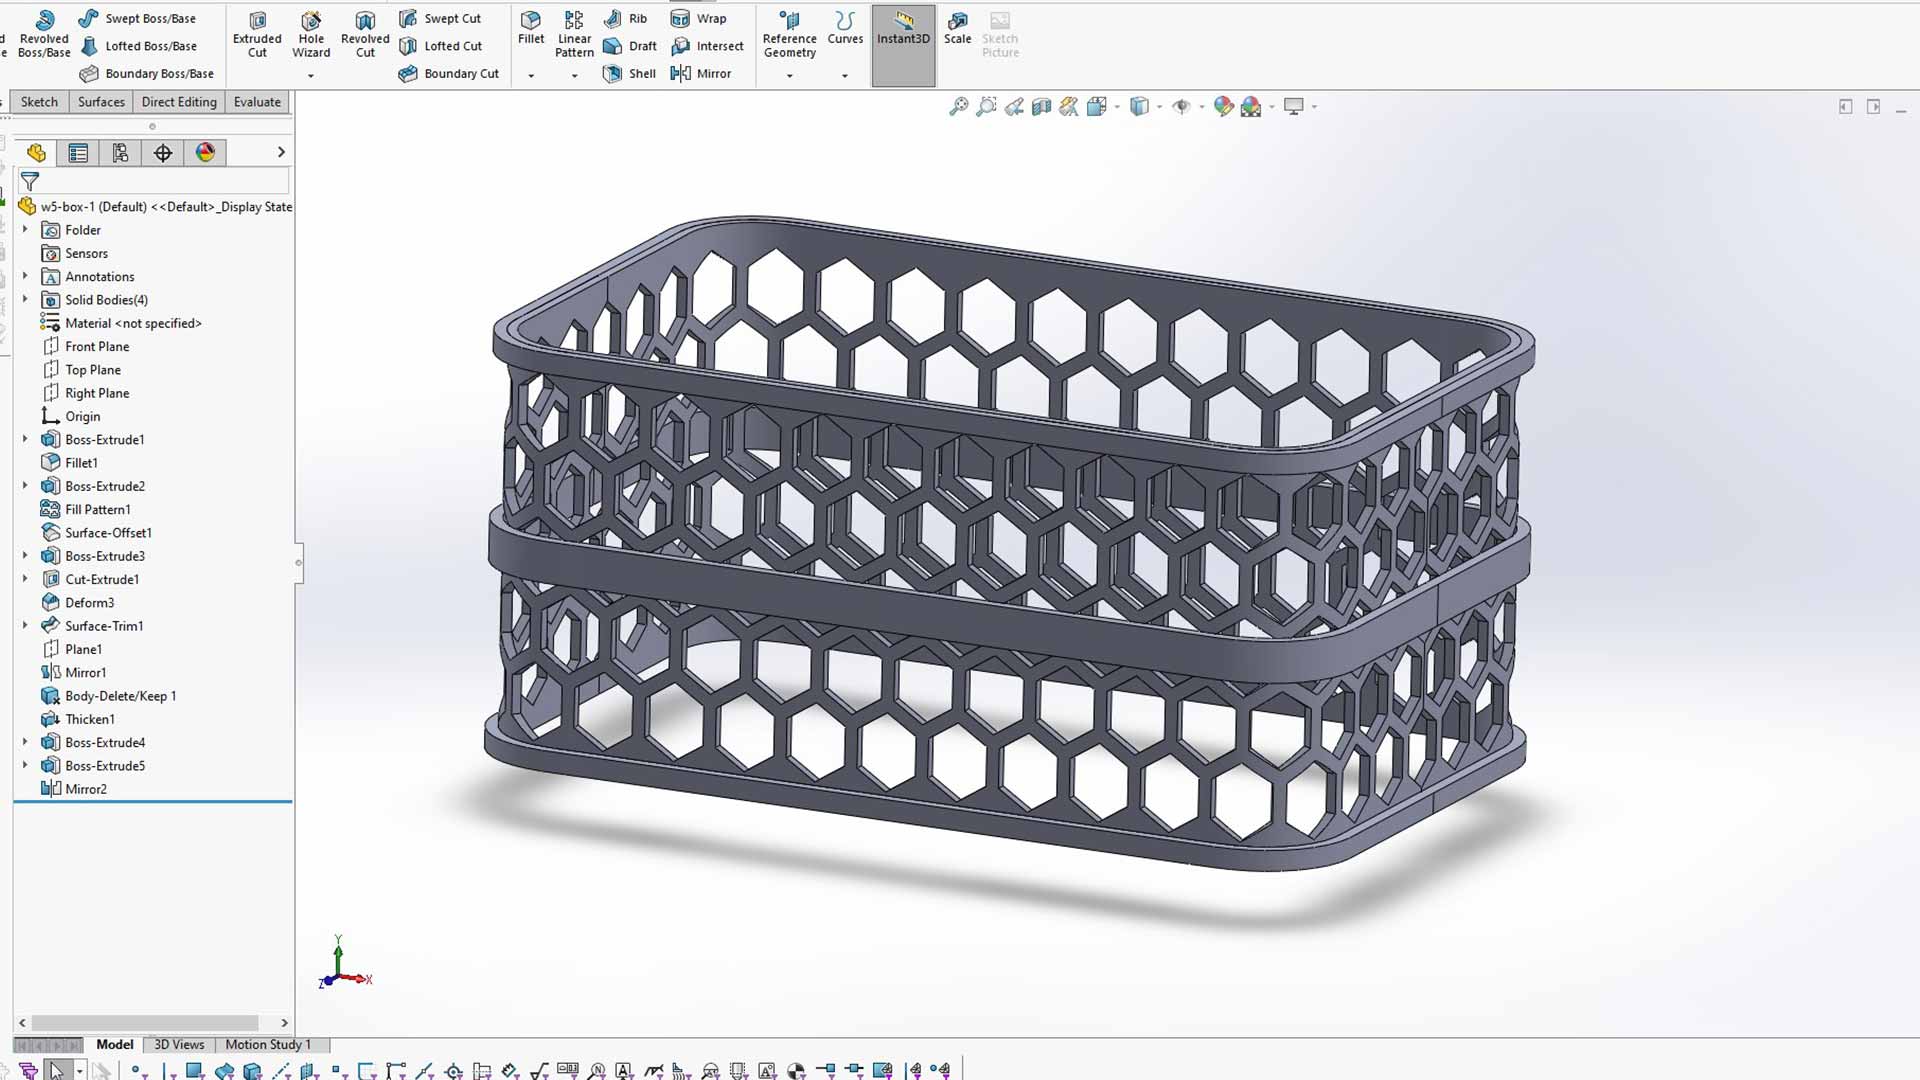
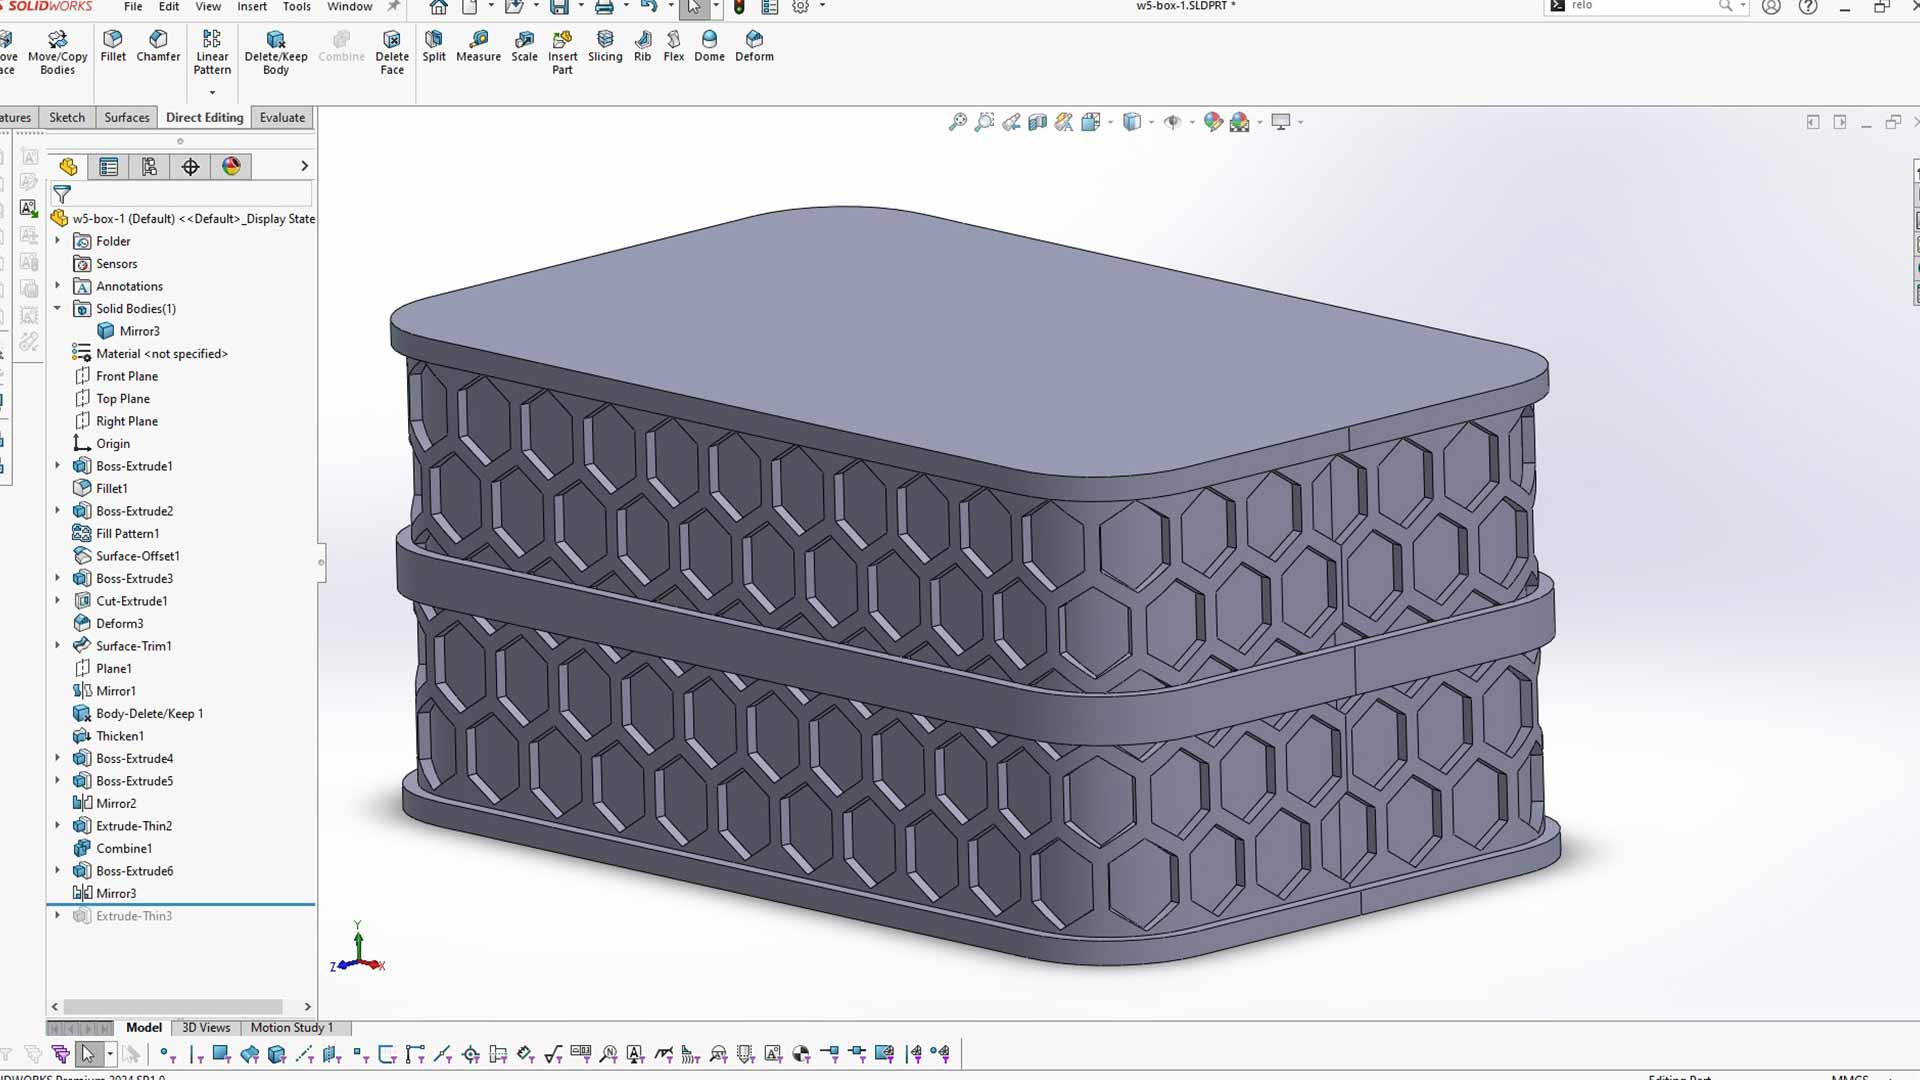
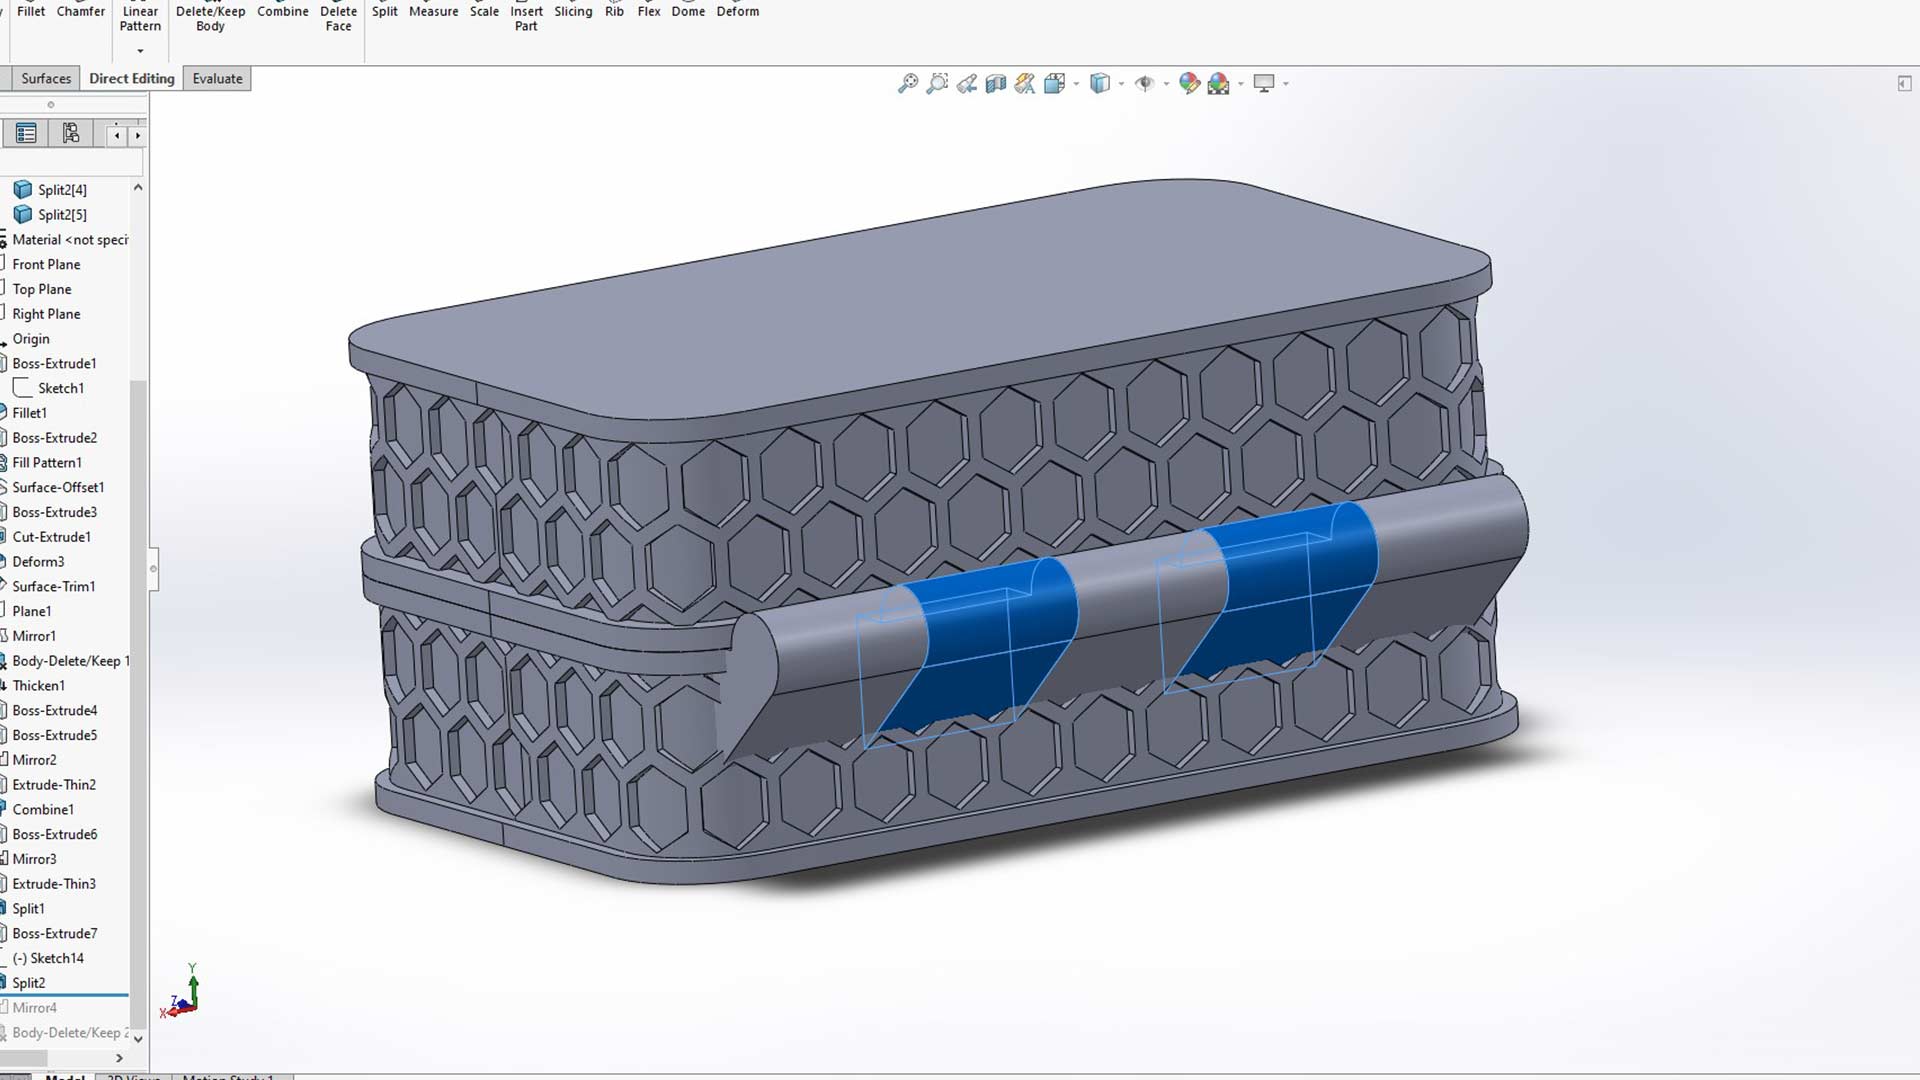
Next, I added three rings at the top, bottom and in middle as well.
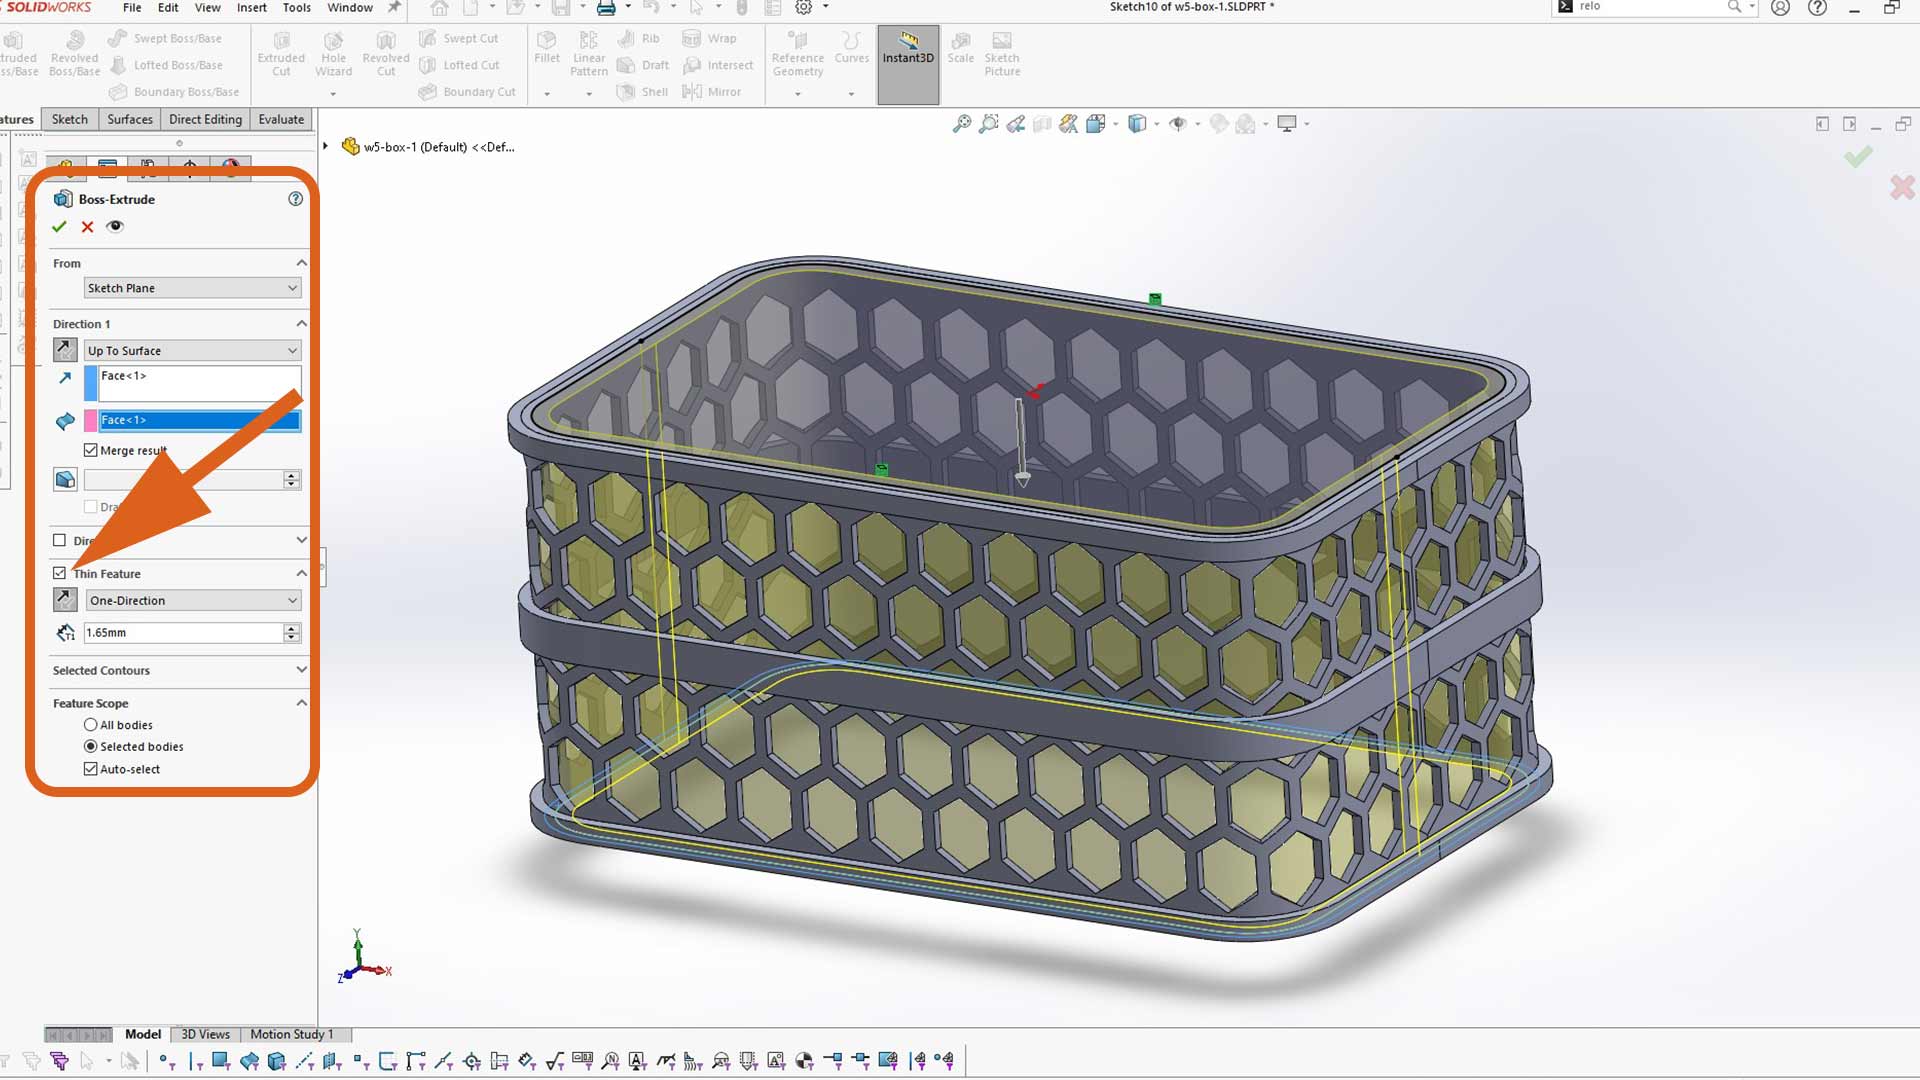
Next, I used extrude thin feature to make internal wall of the box
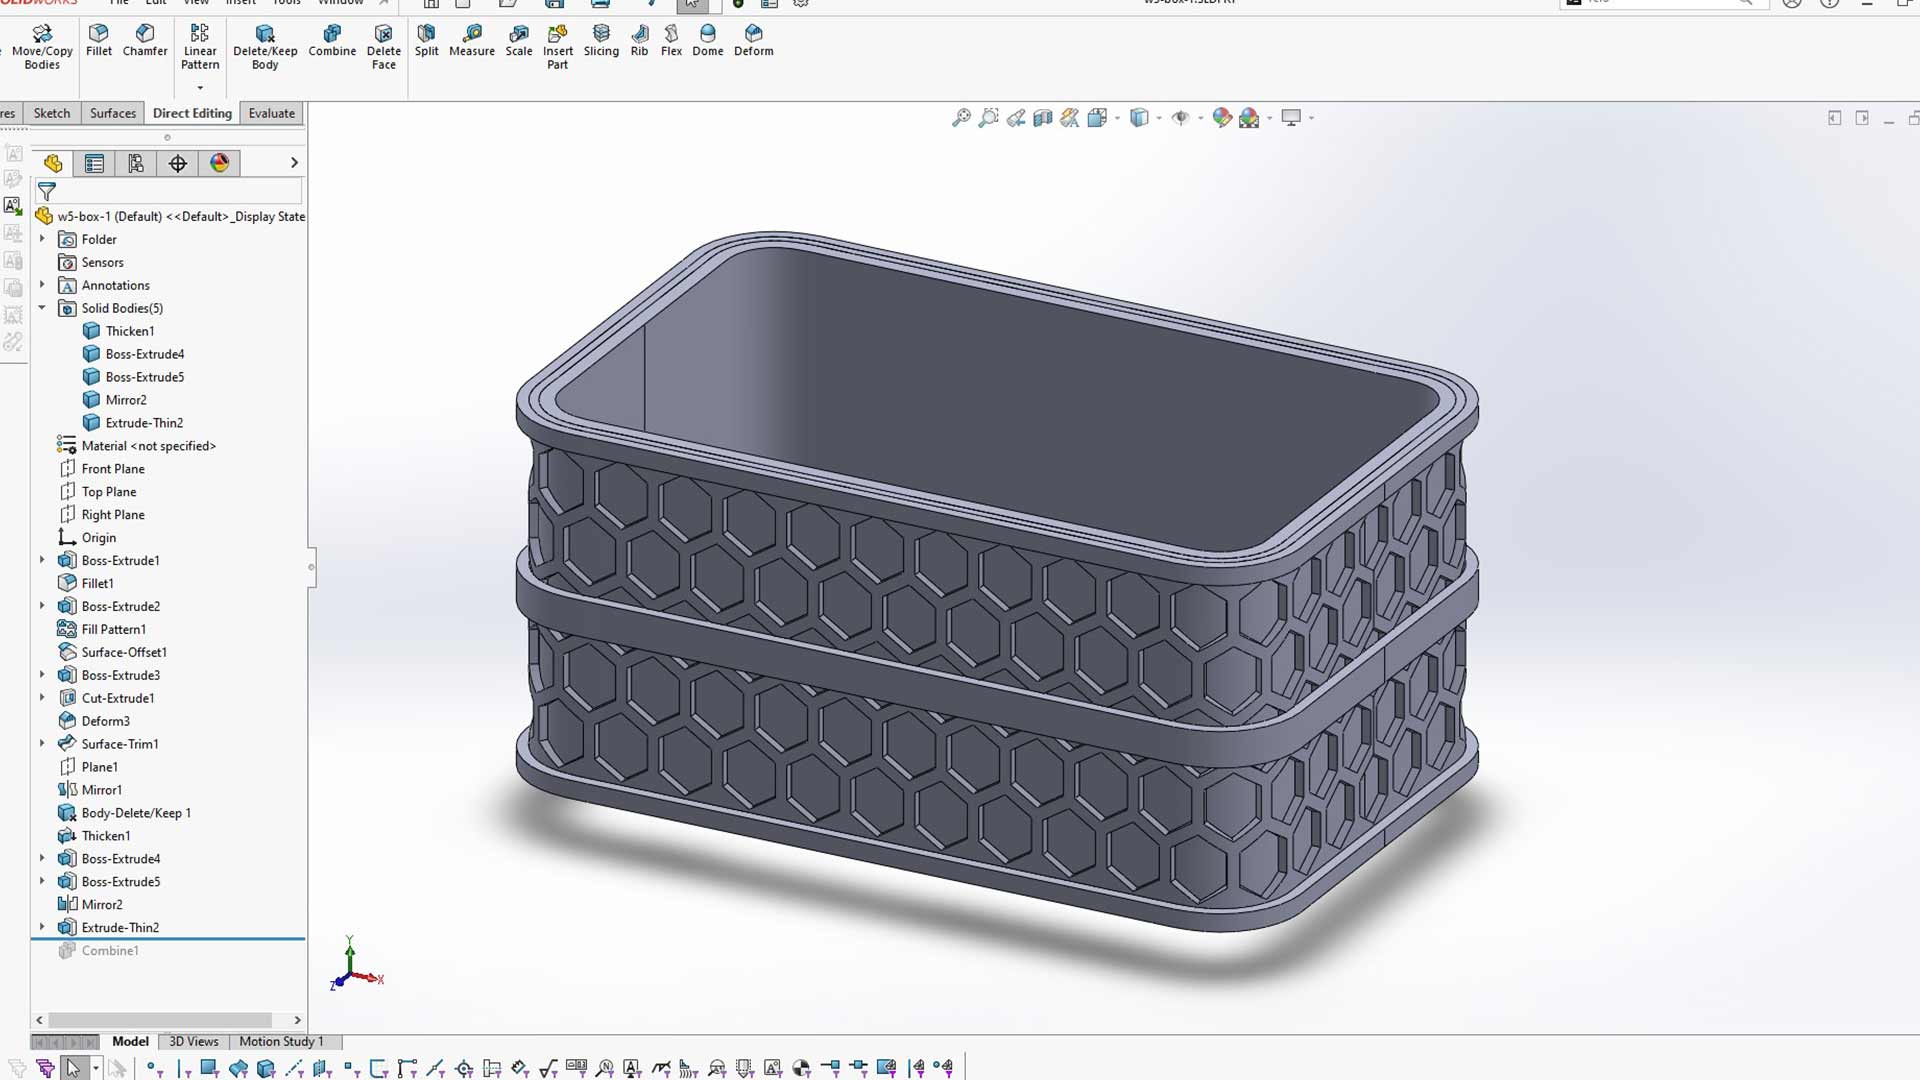
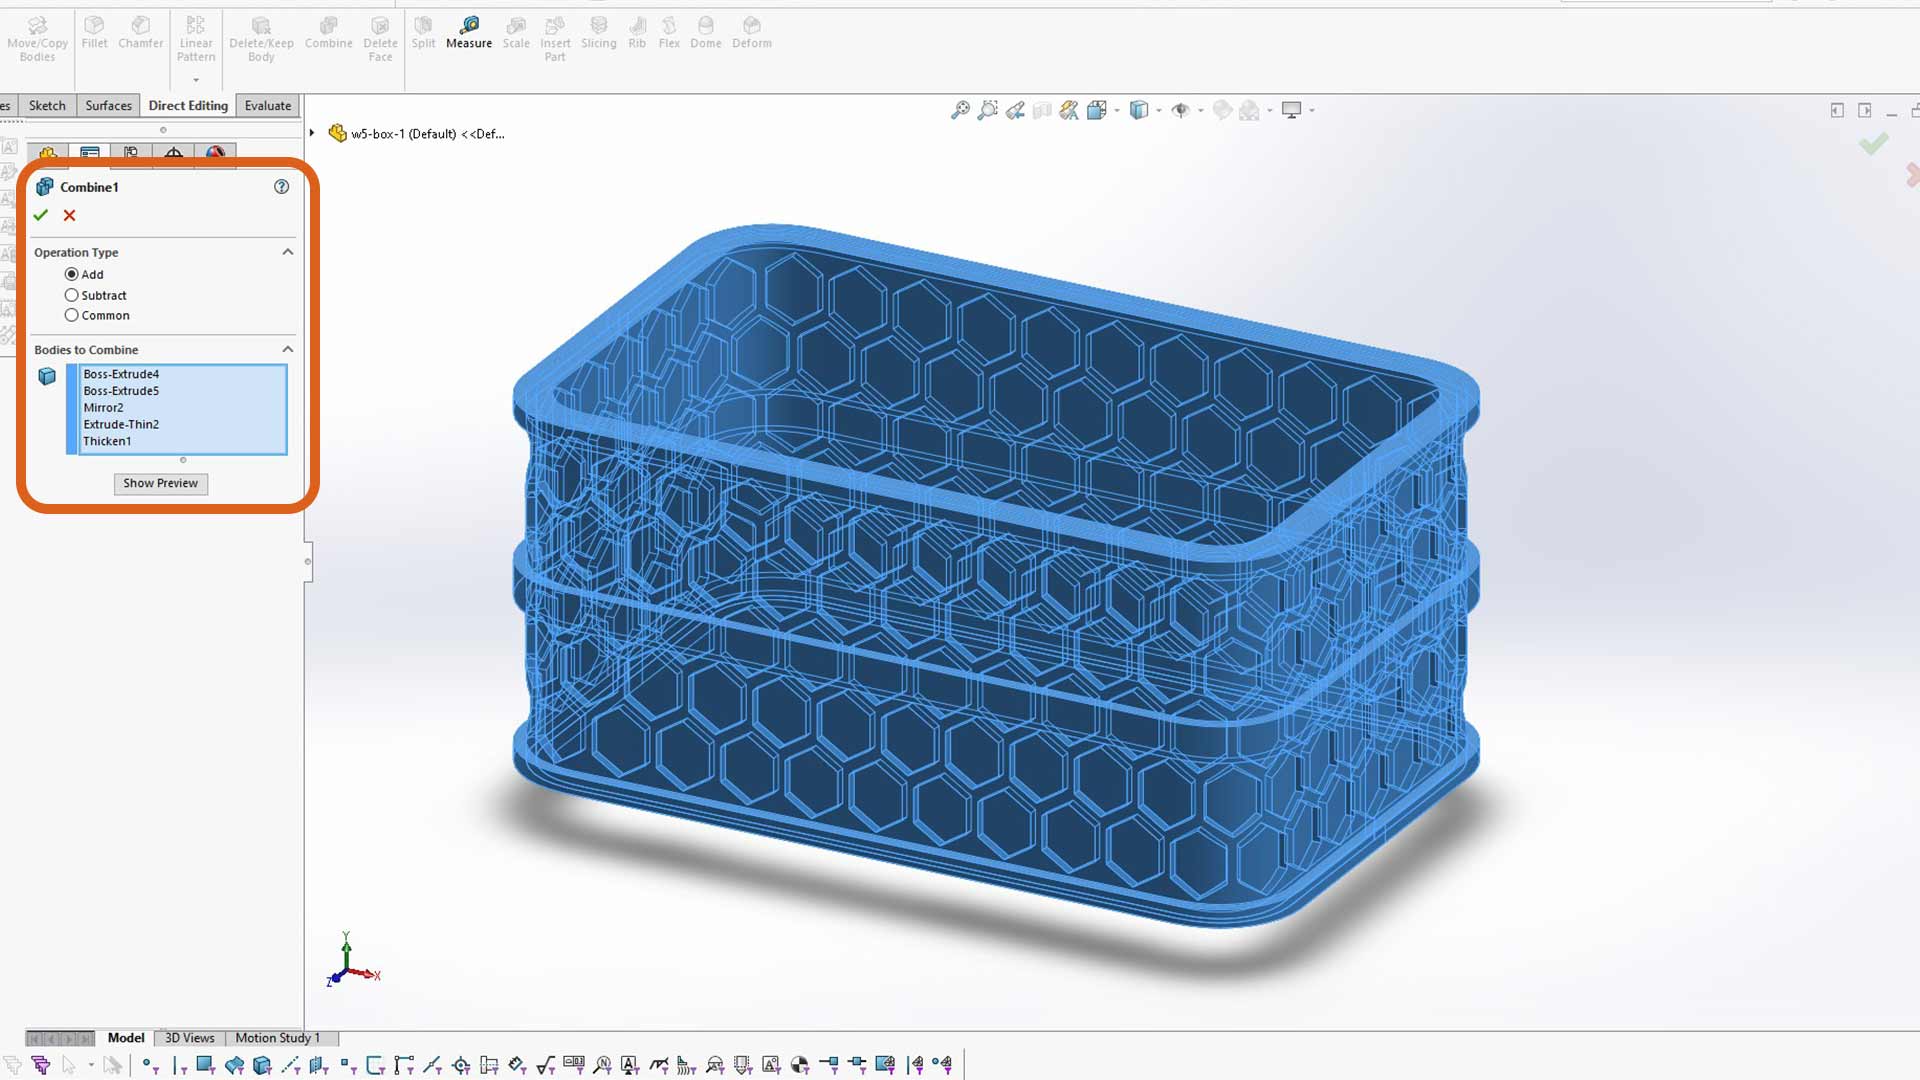
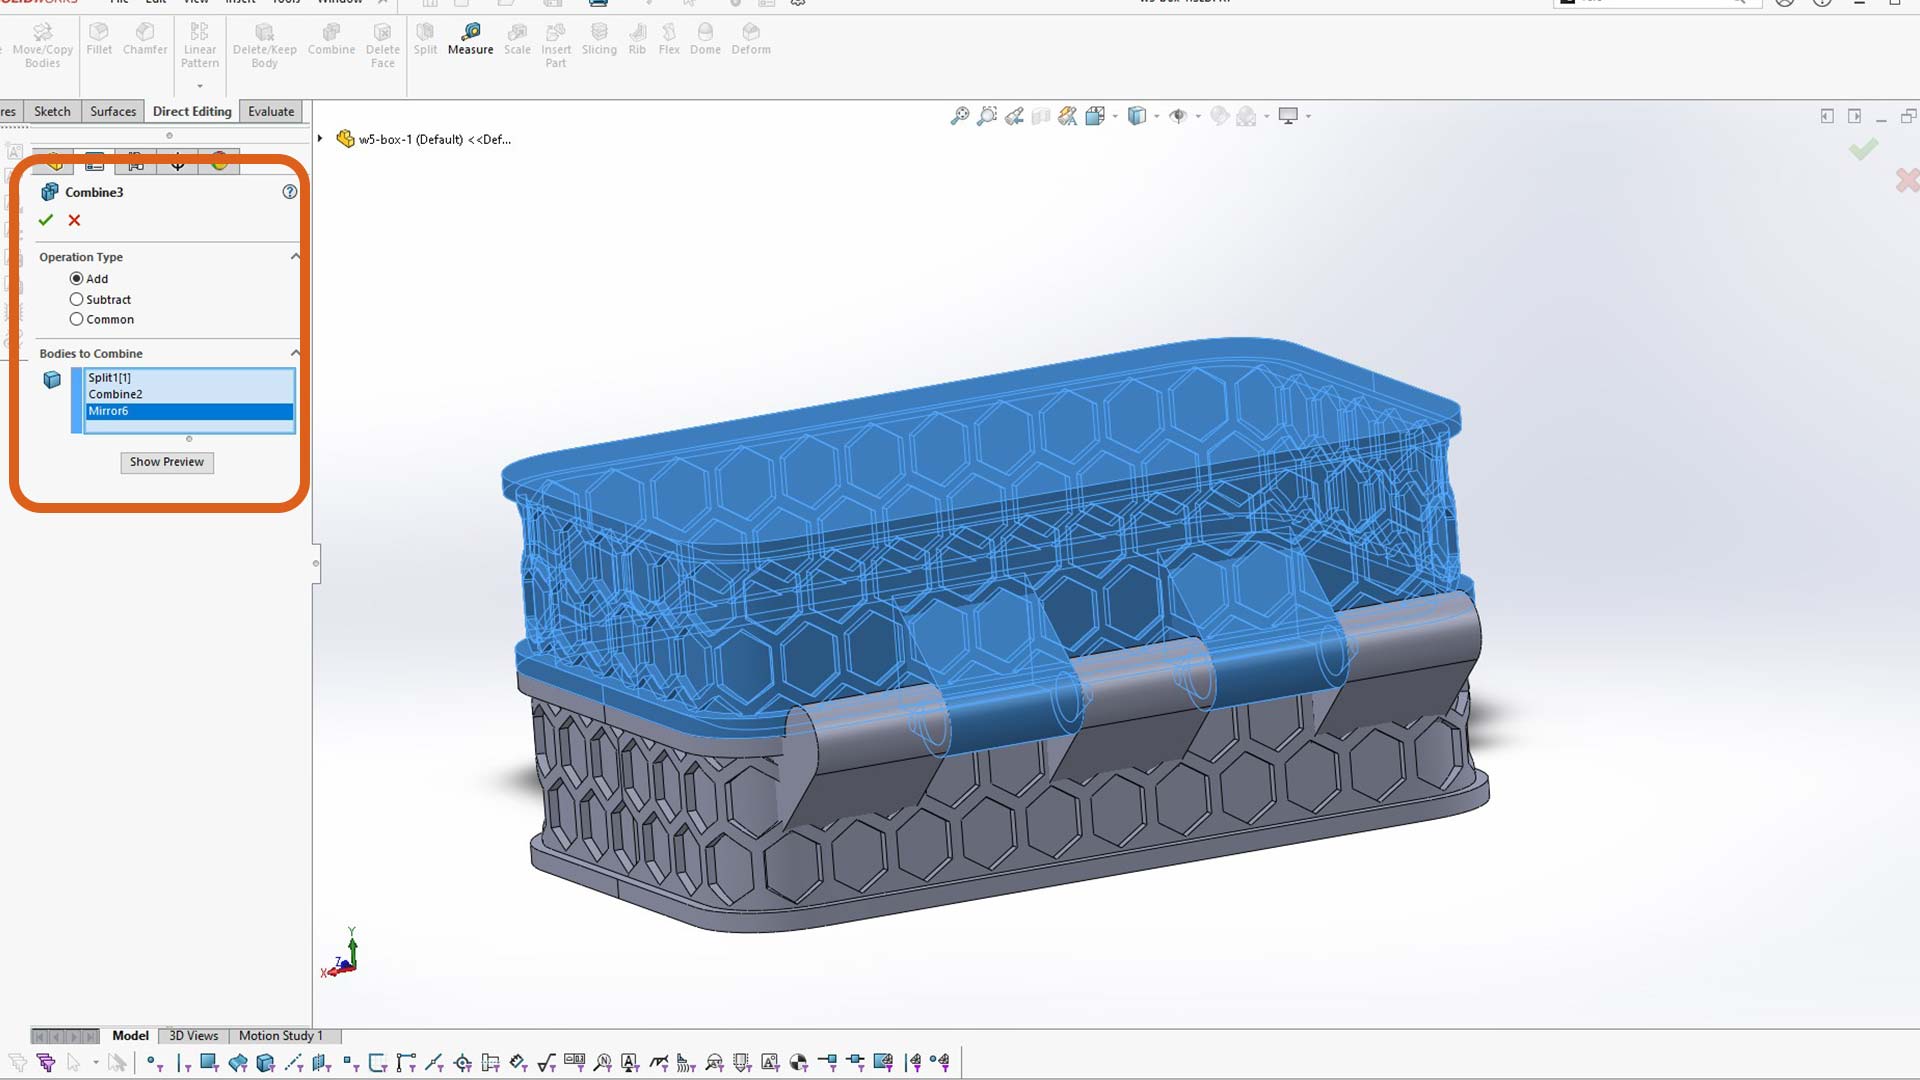
I used combine tool to megre all bodies together.
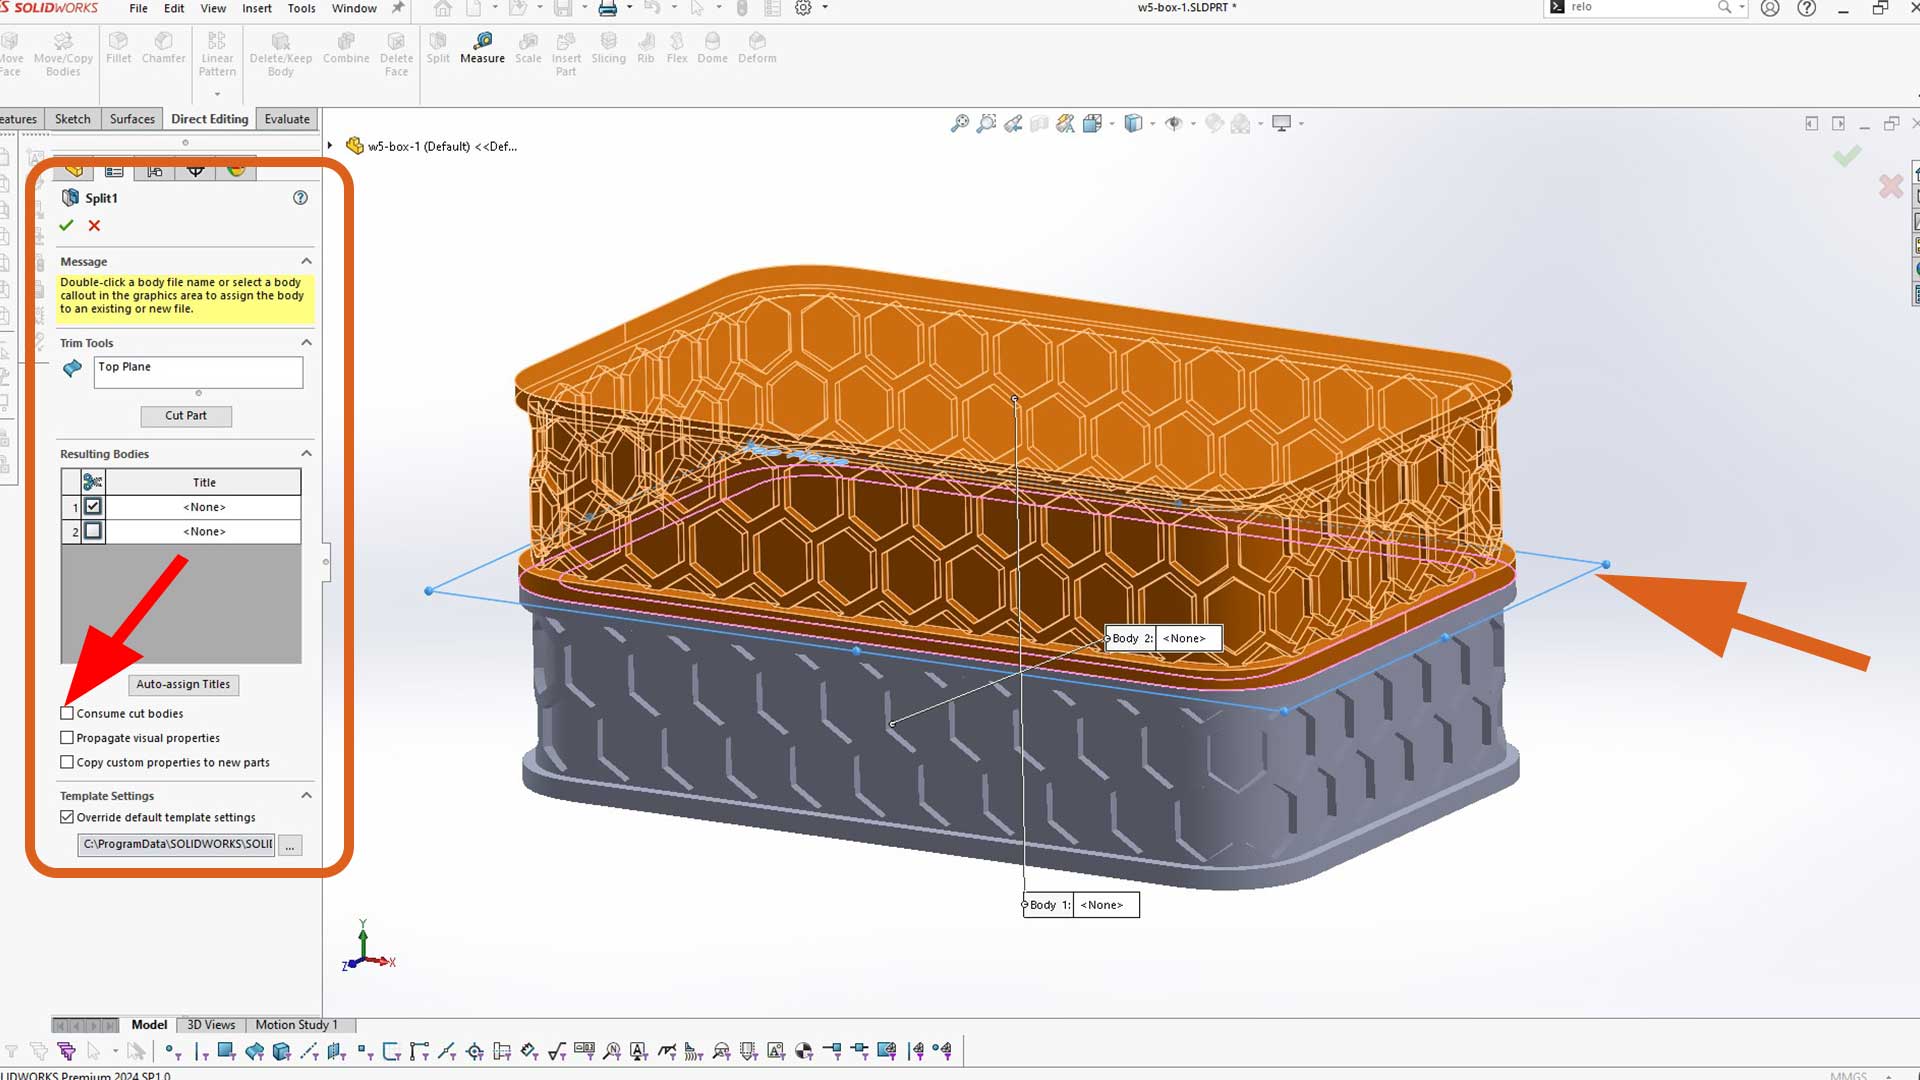
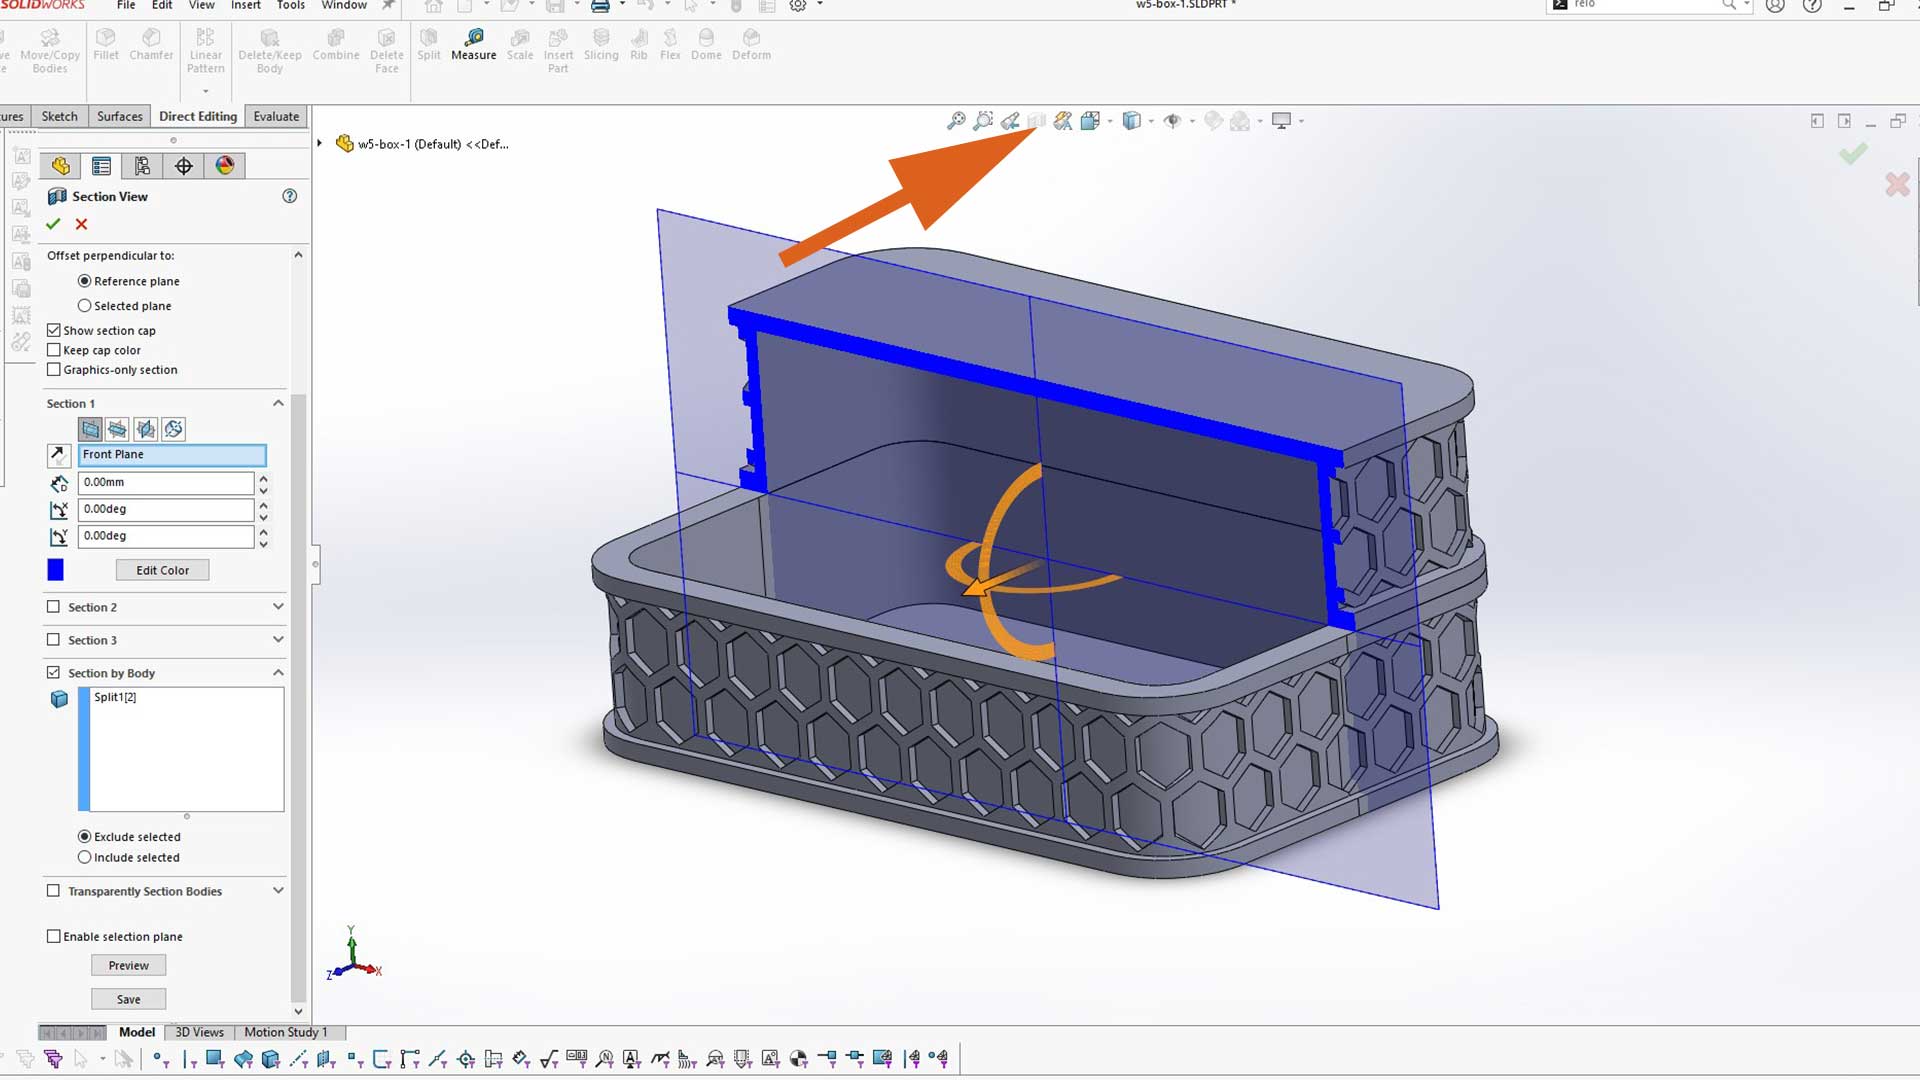
I used split tool to separated tob and battom body (box and cover). I used top plane as trim tool
Using section to visualive inside the body.
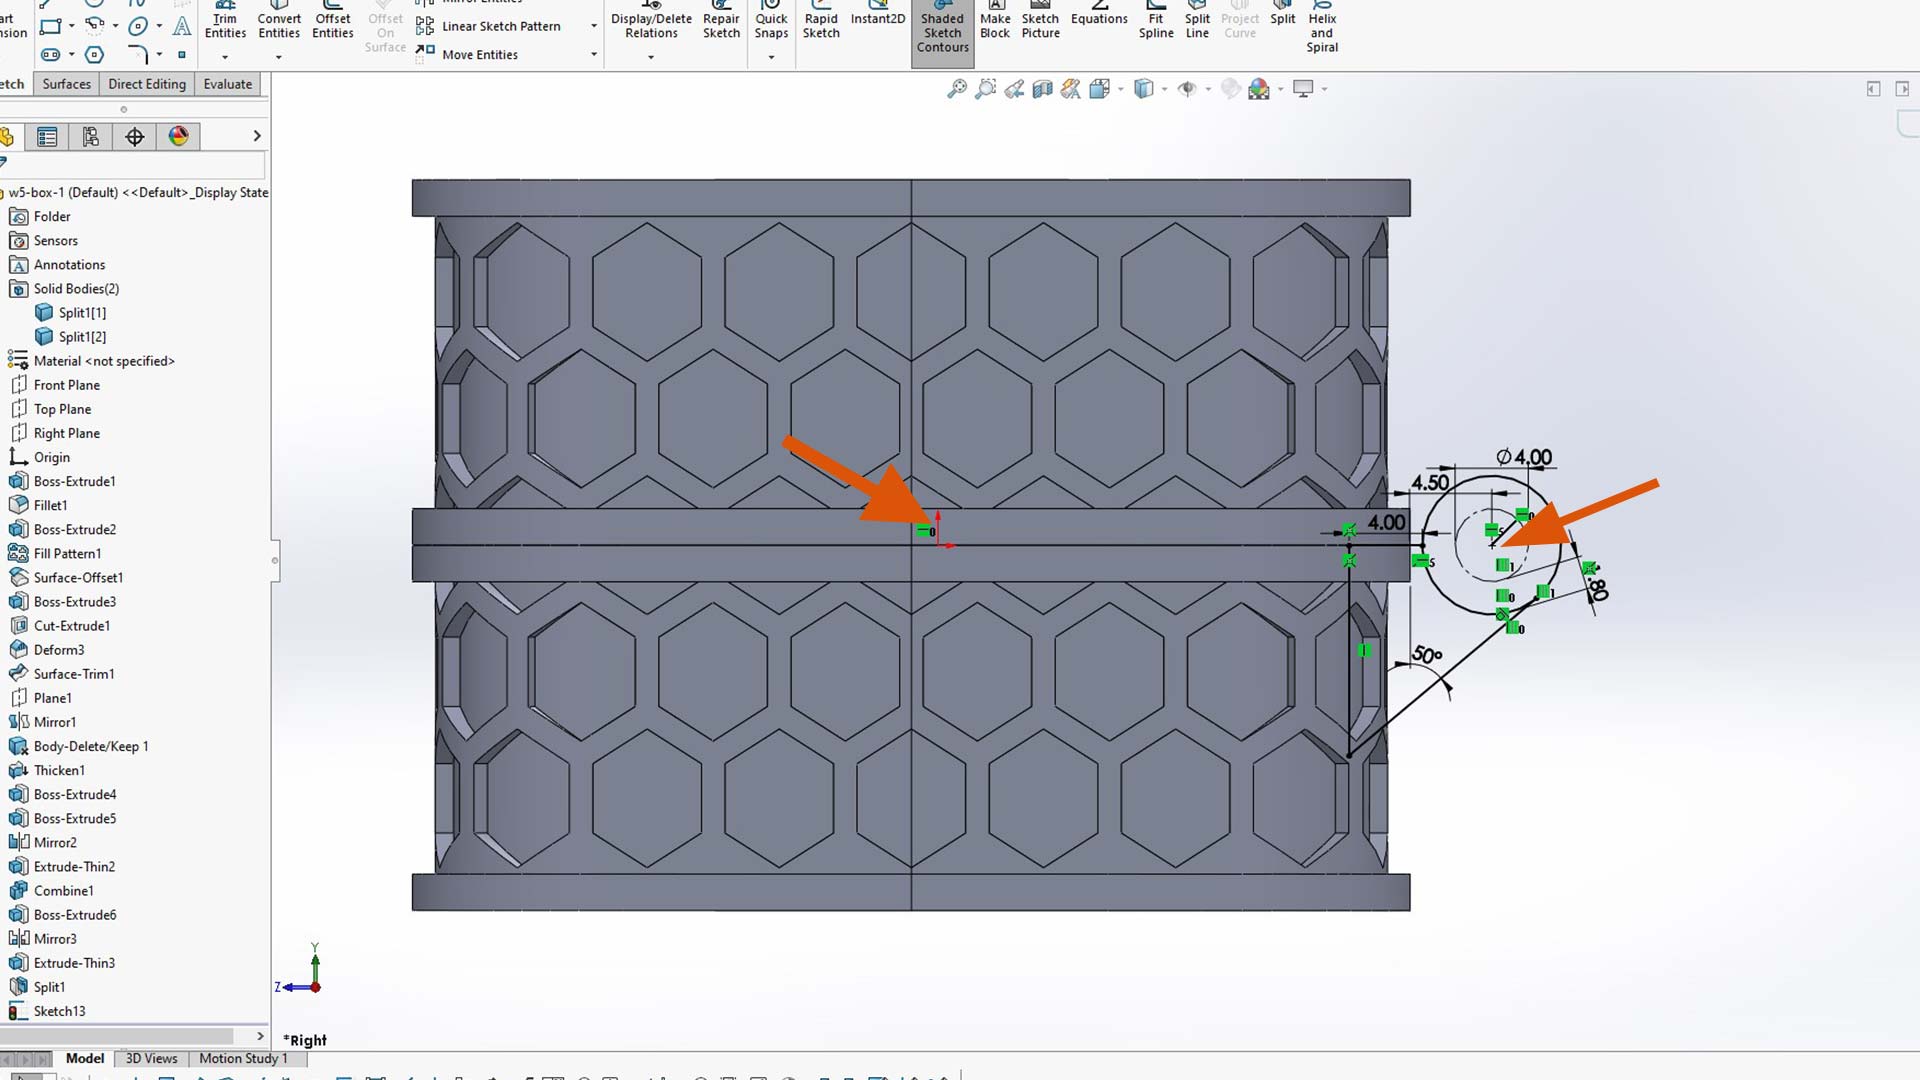
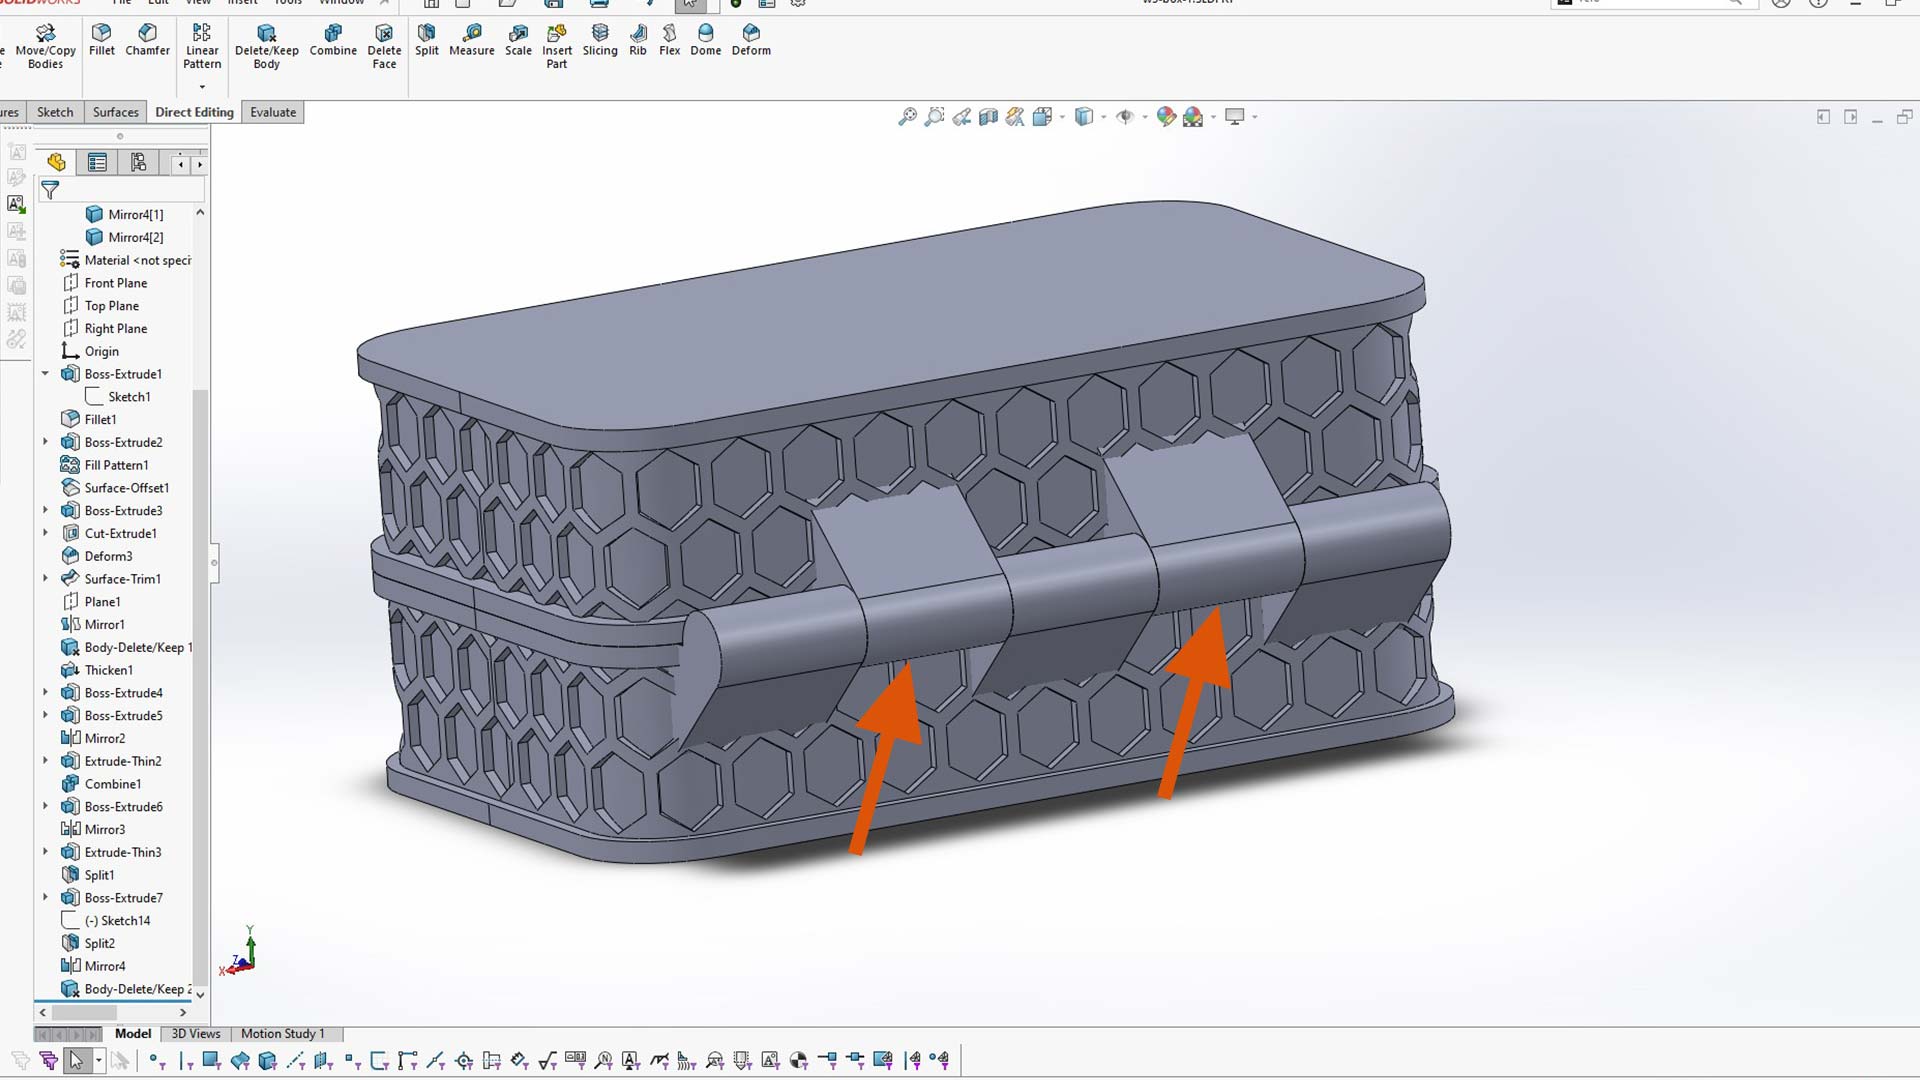
Next, I sketched hinge profile. At this stage, it is important to apply horizontal relation between hinge center and center box and its lid as shown.
I then used split tool to divide it into five equal bodies. It is recommended to hide everything except to body or bodies you are going slip.
After, I mirrored the highlighted bodies and then deleted the original ones. These will be later combined with the lid/cover.
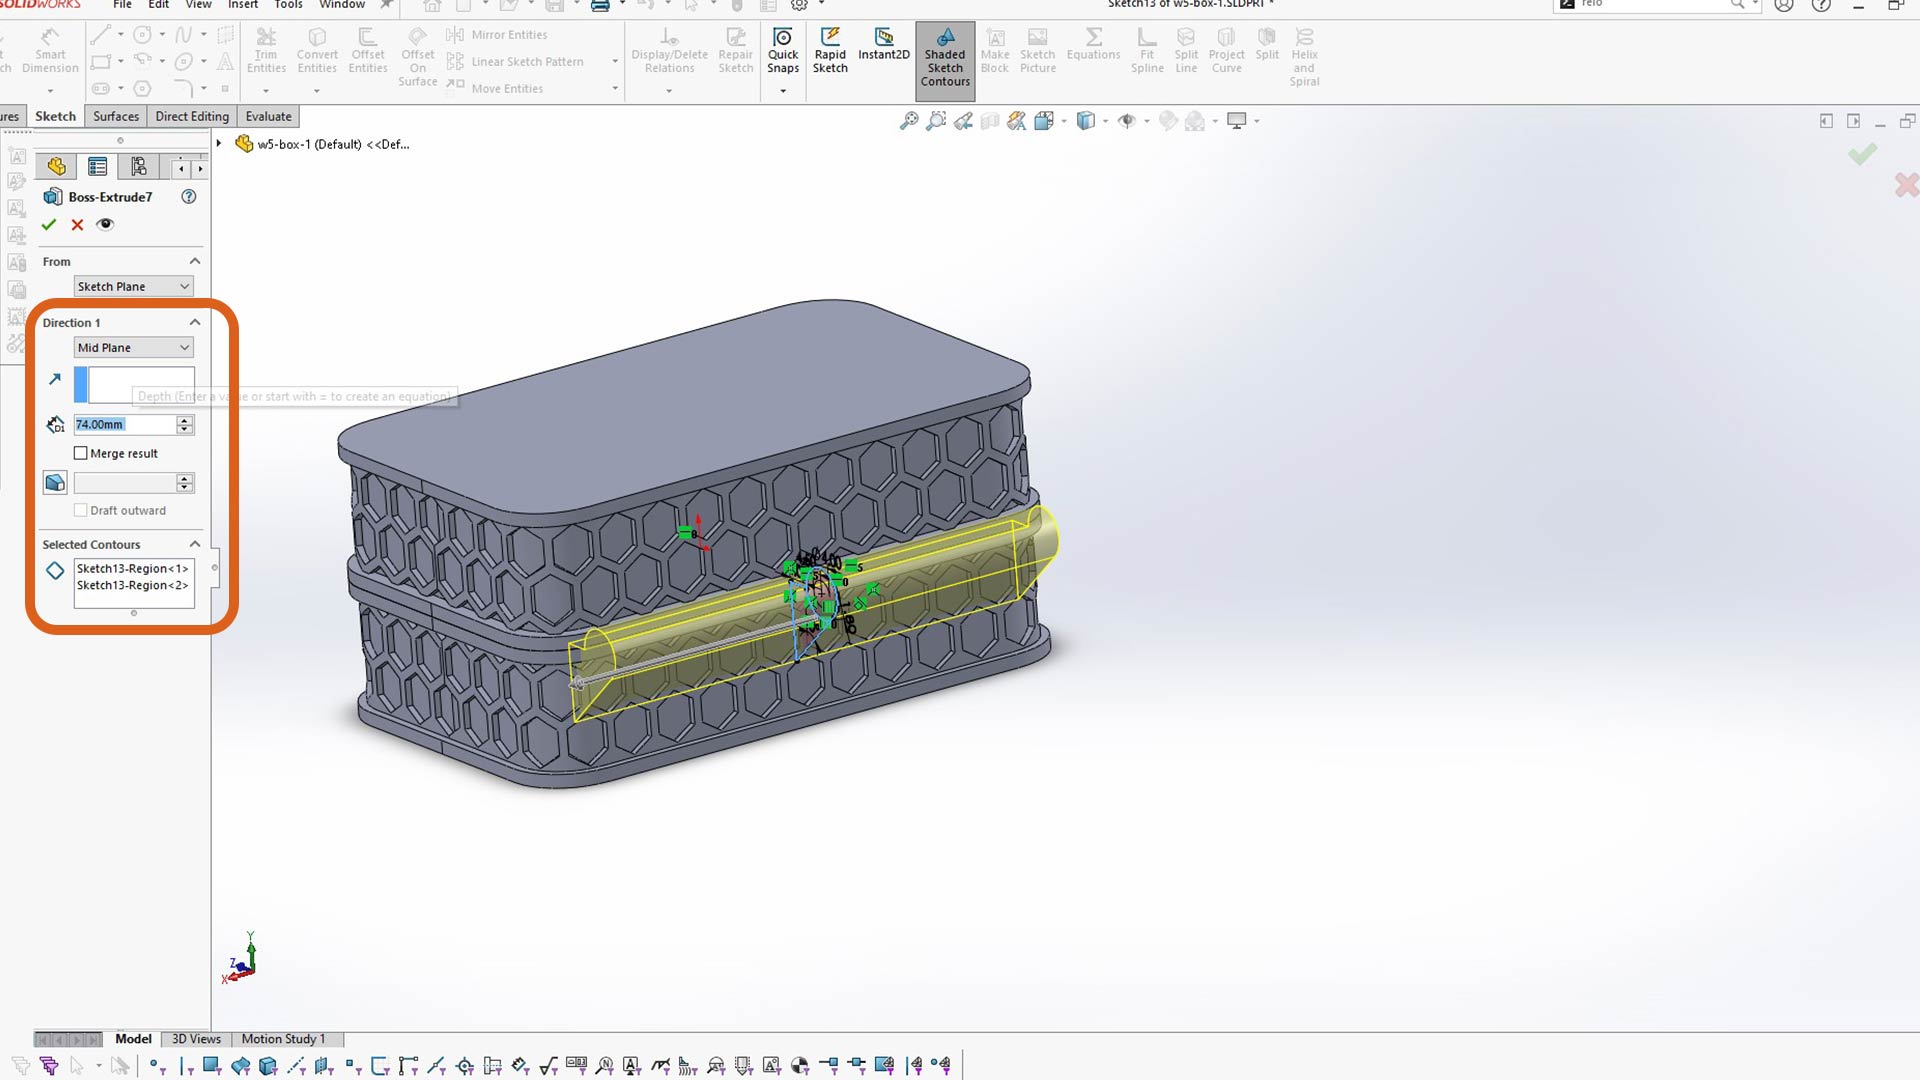
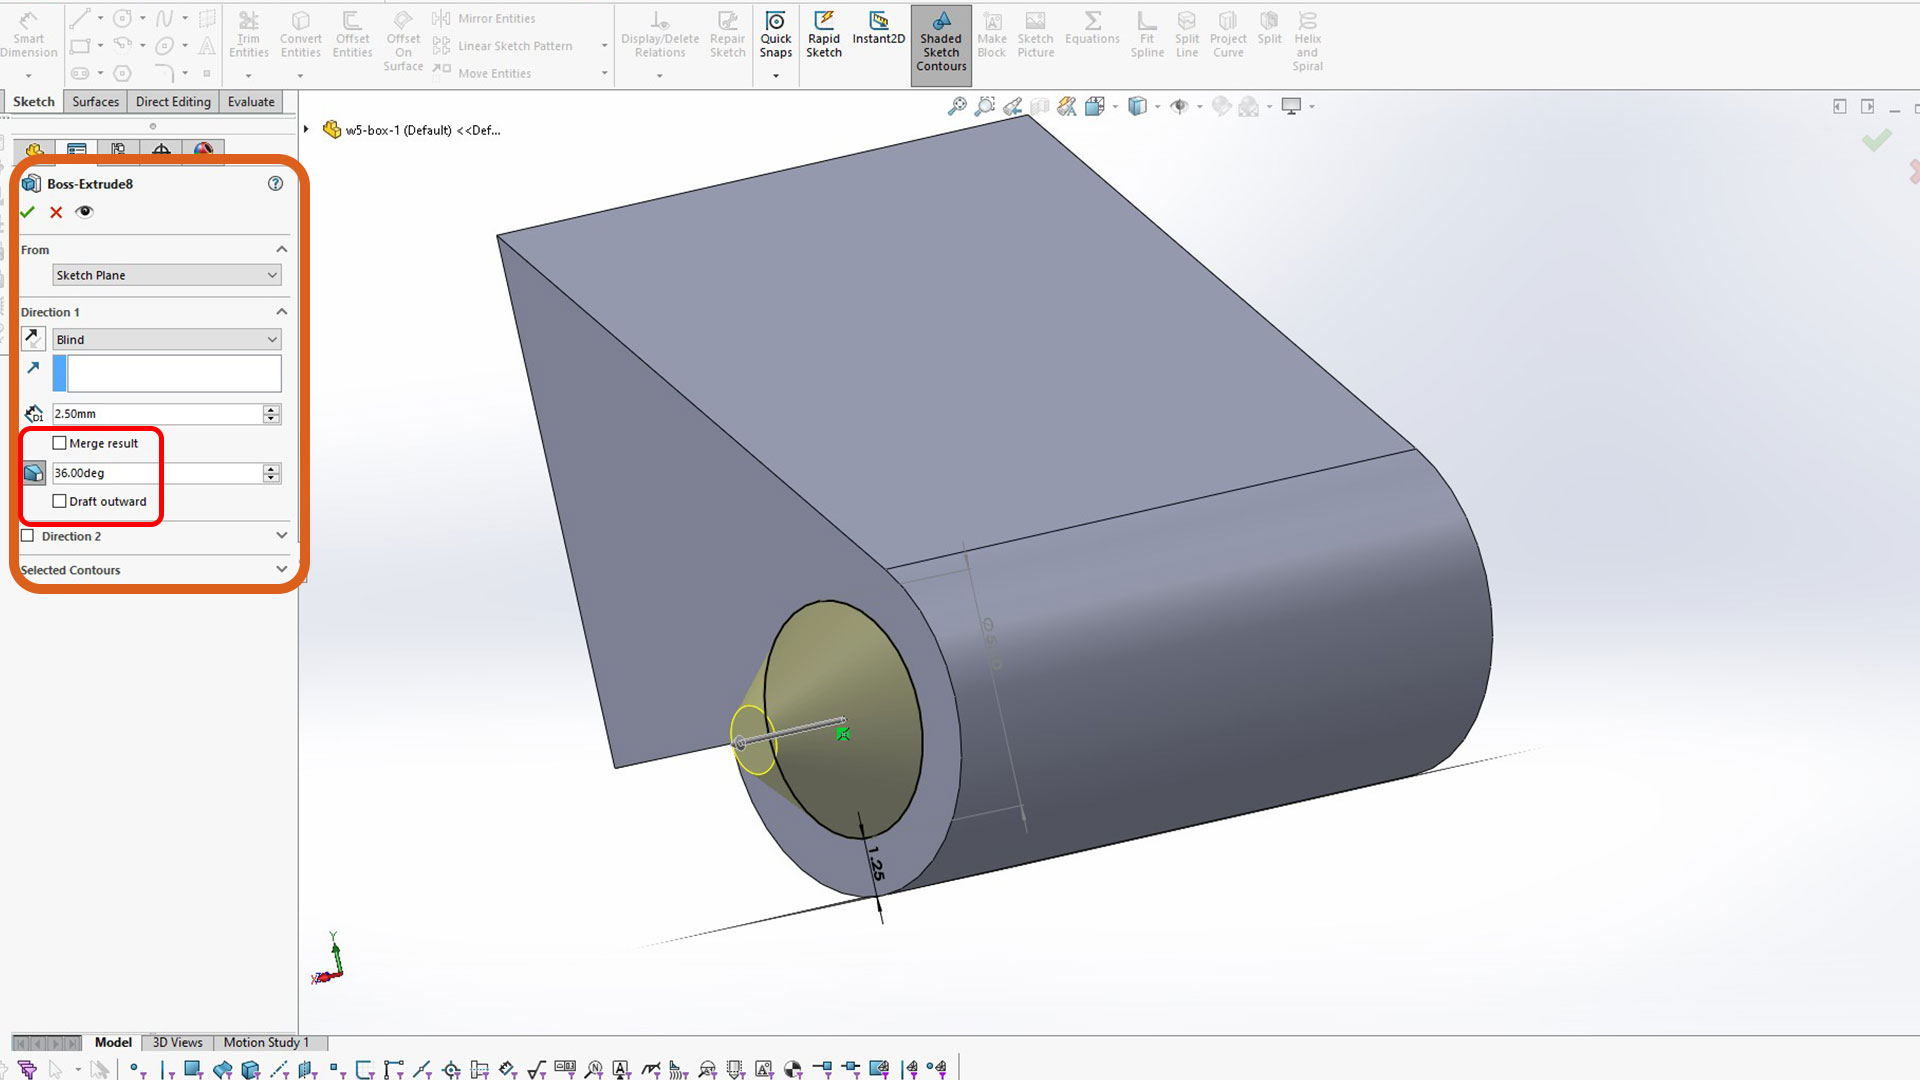
Next, I extruded a cylinder. I adde draft angle of 36. Pay attention to this value. Since this part will be printed without support, therefore it is better to keep in mind the maximum angle at which the printer can make without fail. If it exceed the max allowance, movement will not be smoth.
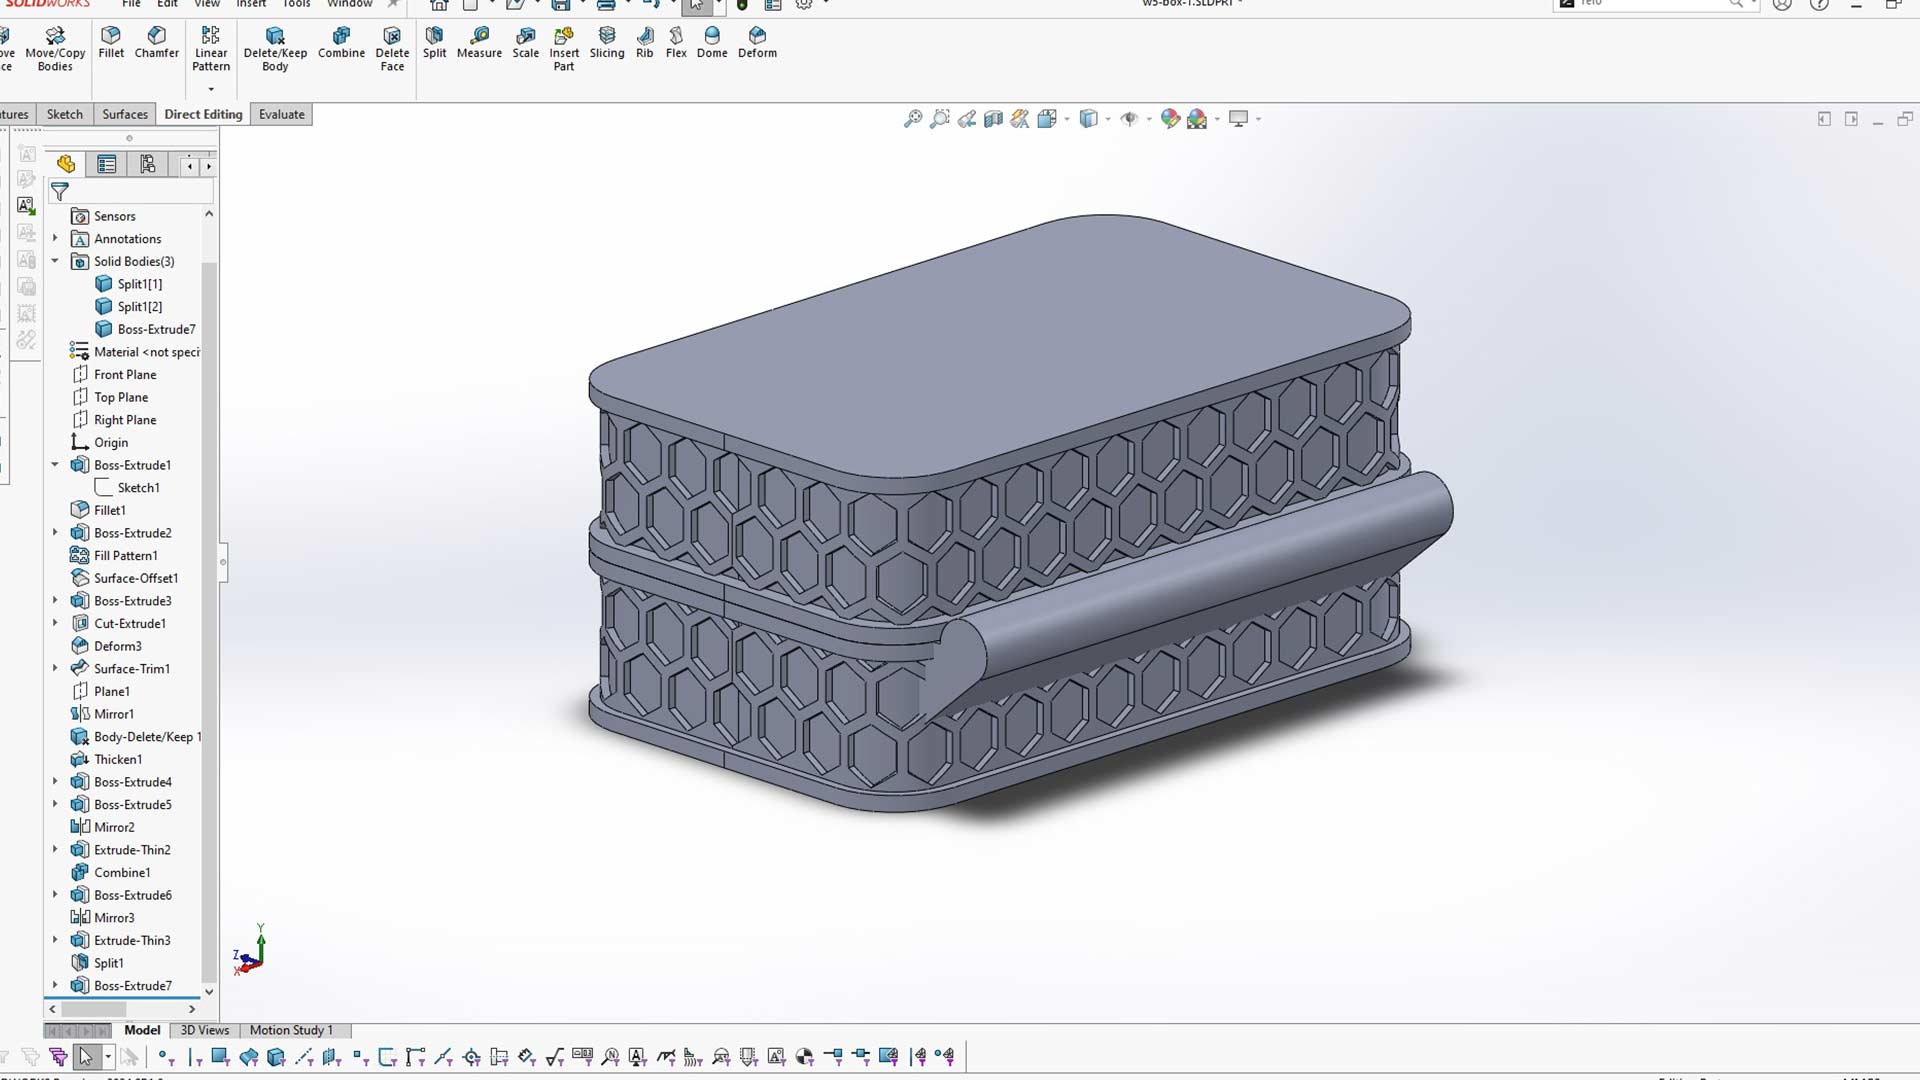
I then mirrored on other sides.
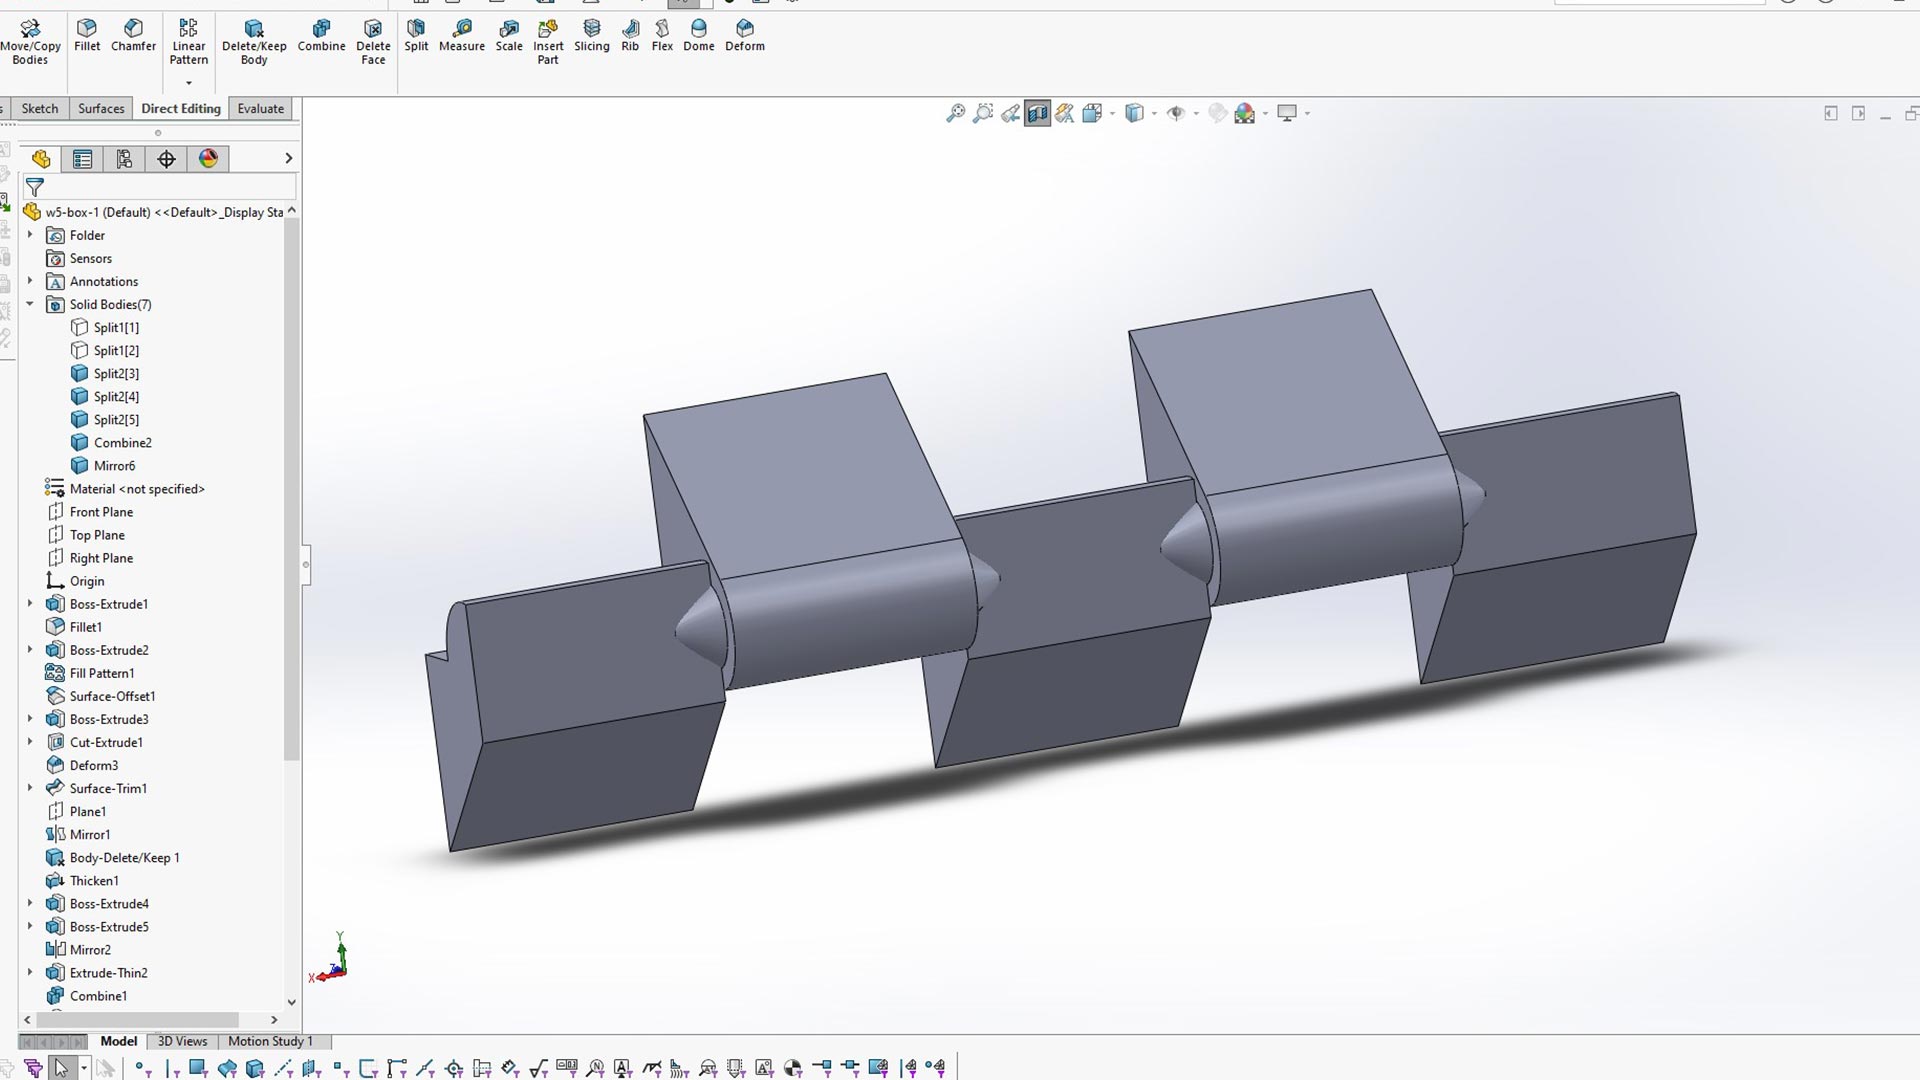
I then combined the bodies.
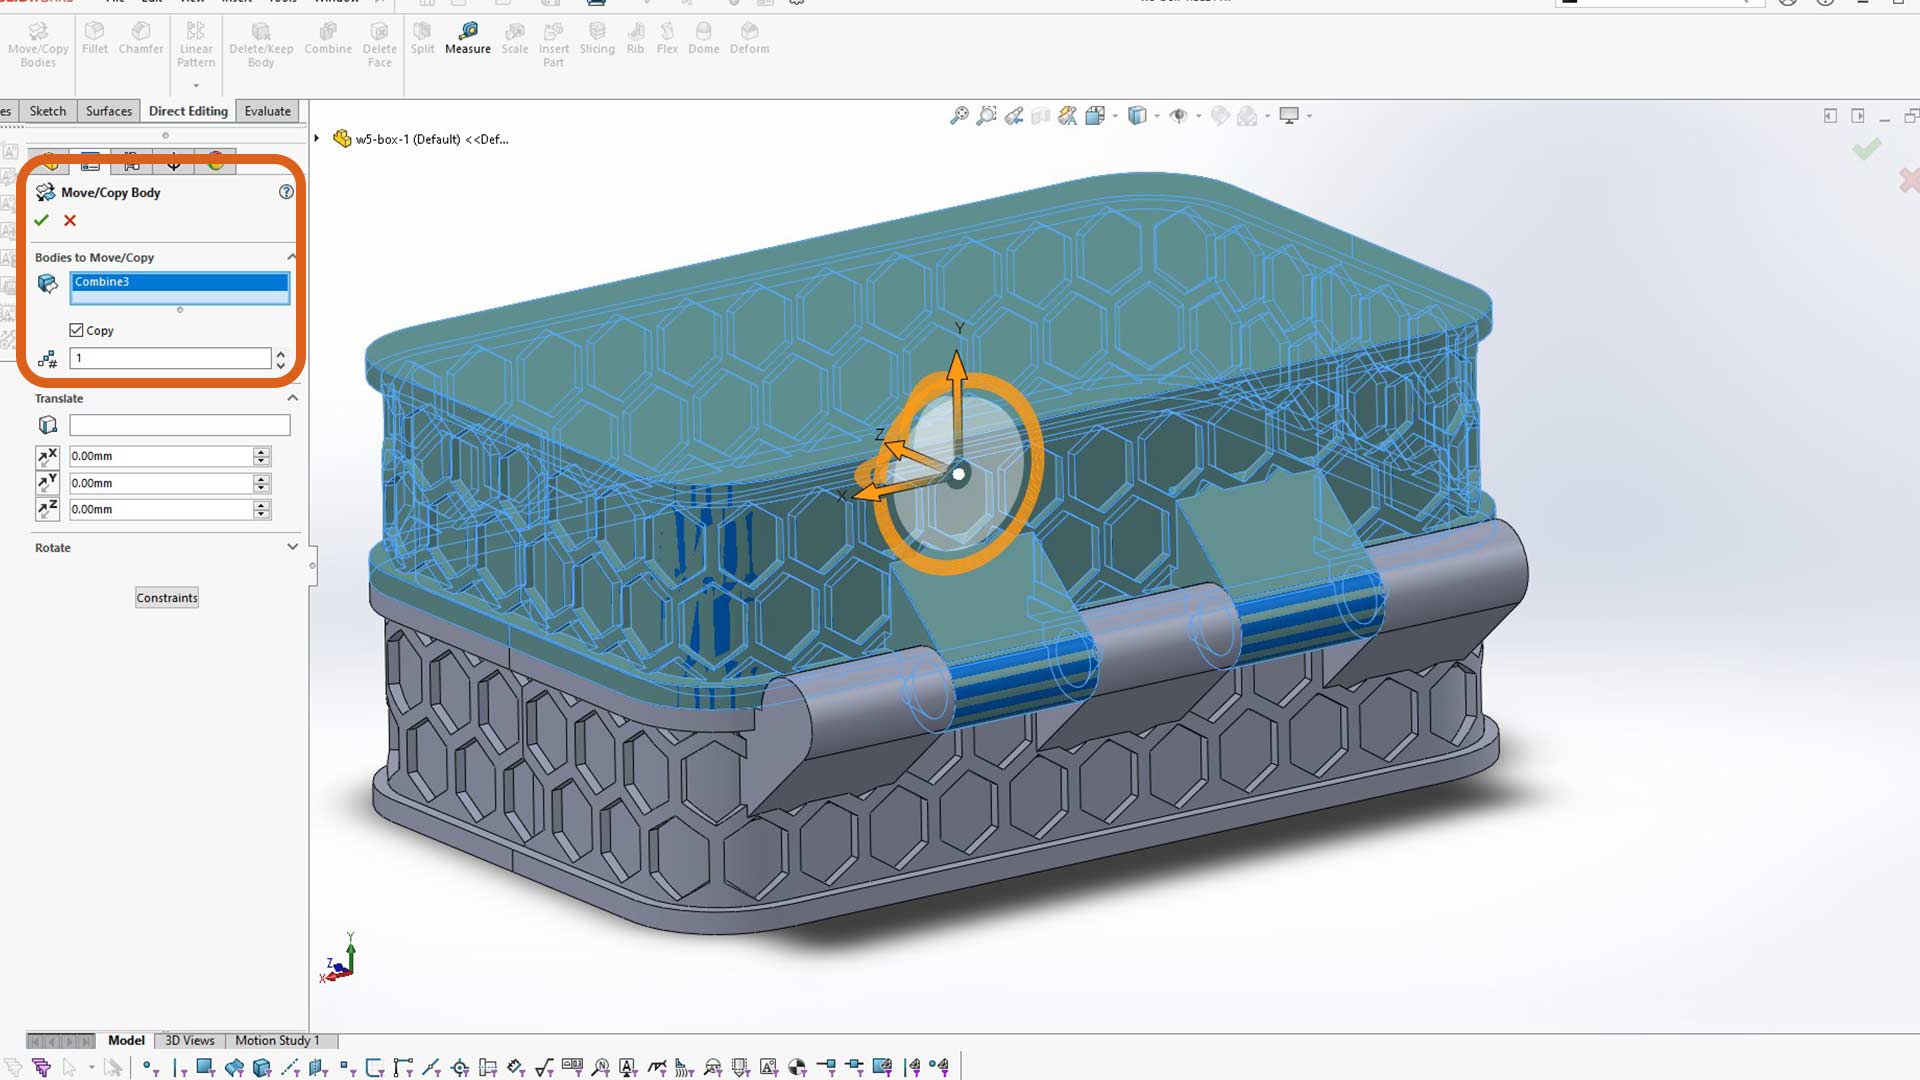
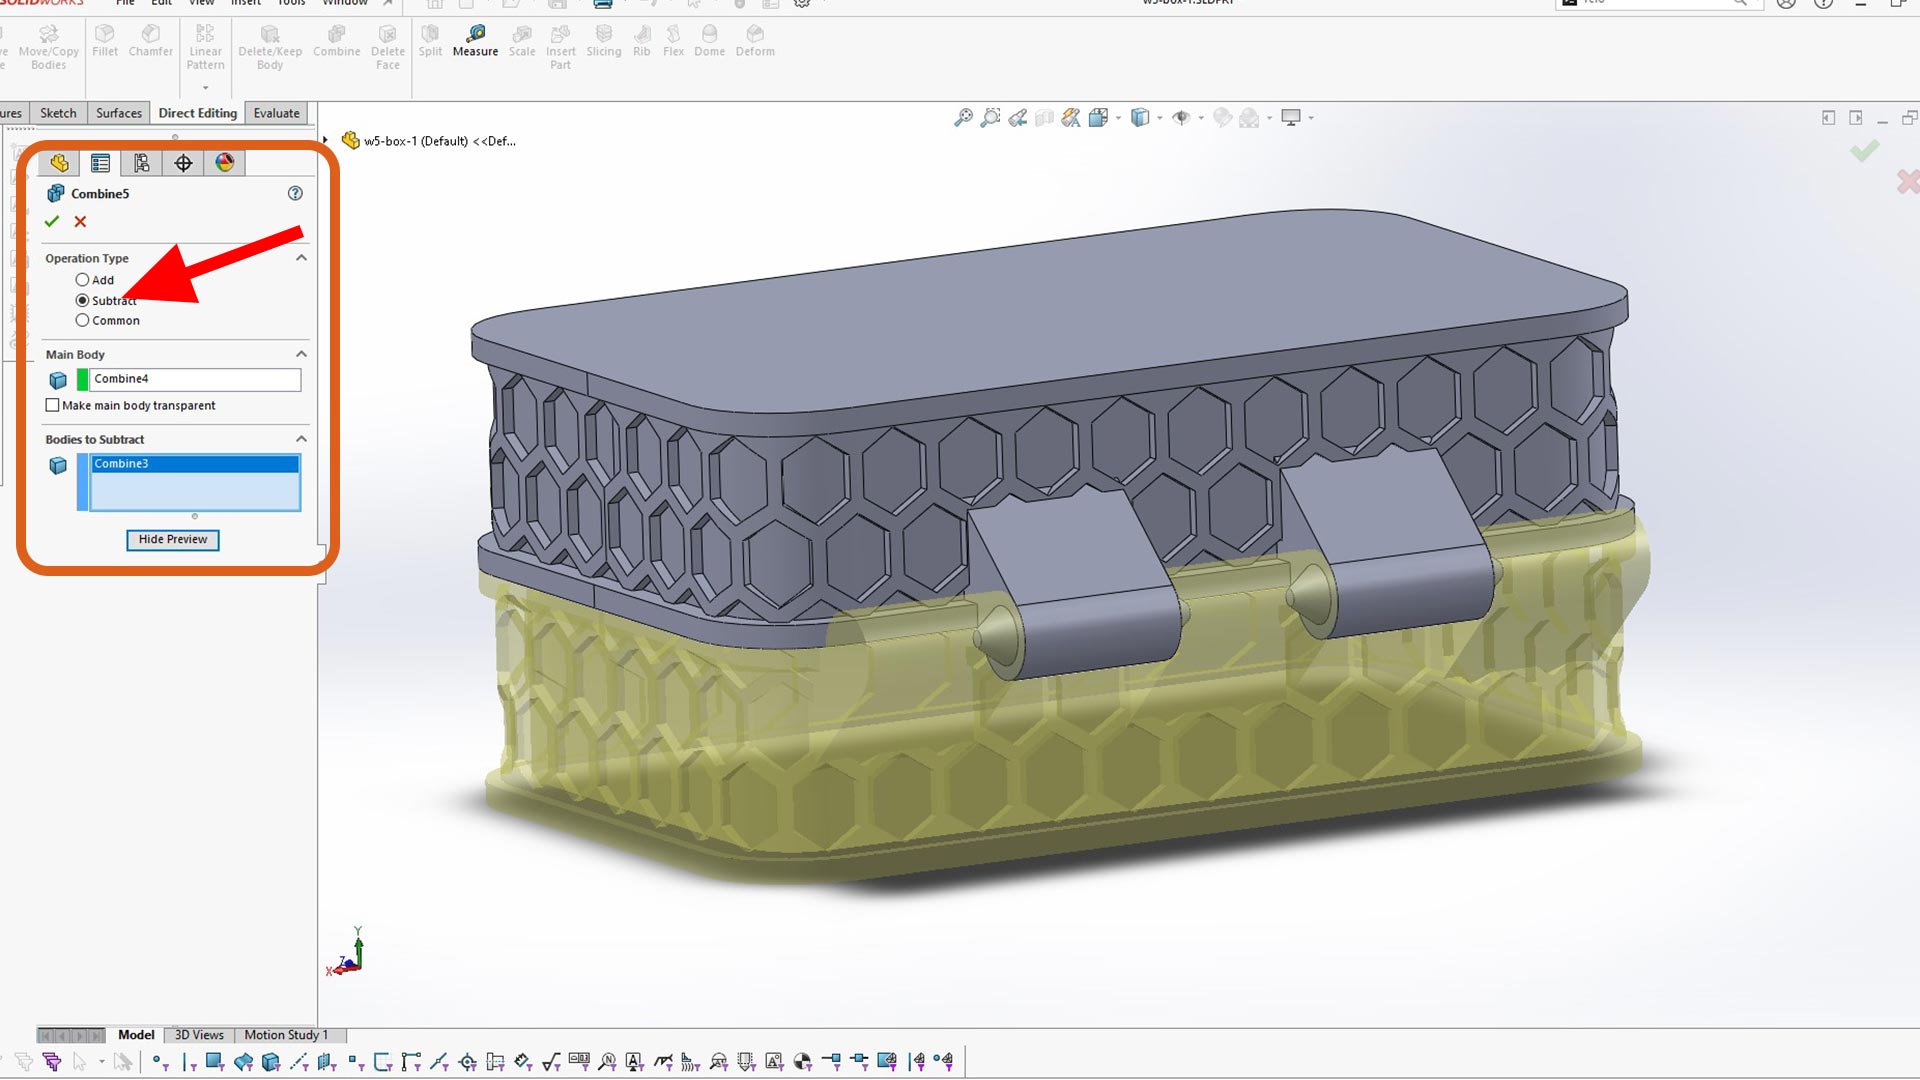
I duplicated the top body (lid) to be used to remove intersection
I used combine tool to substract the top part. Bottom body is the main. Using this method, I was able to remove the intersection/interference of the two bodies.
Section view
>
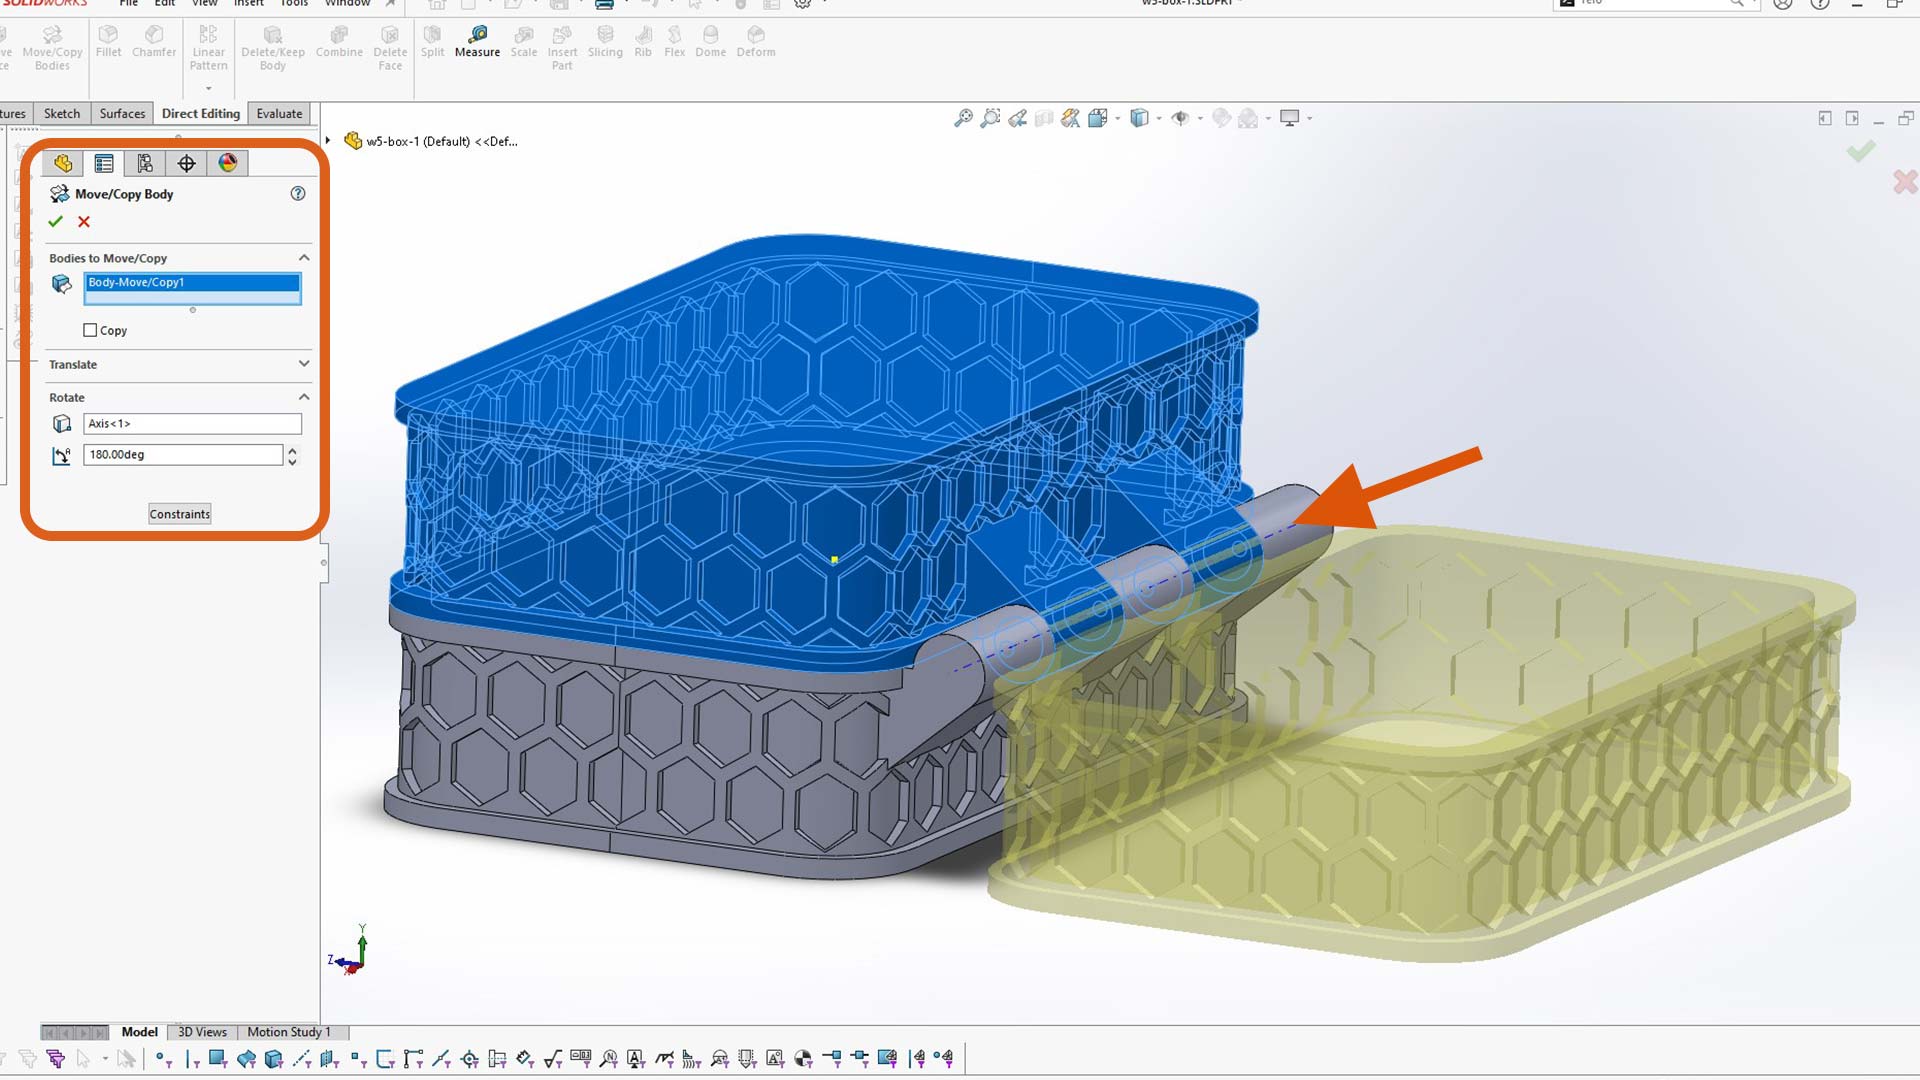
I rotated the top part around temporary axis by the value of 180 degree
>
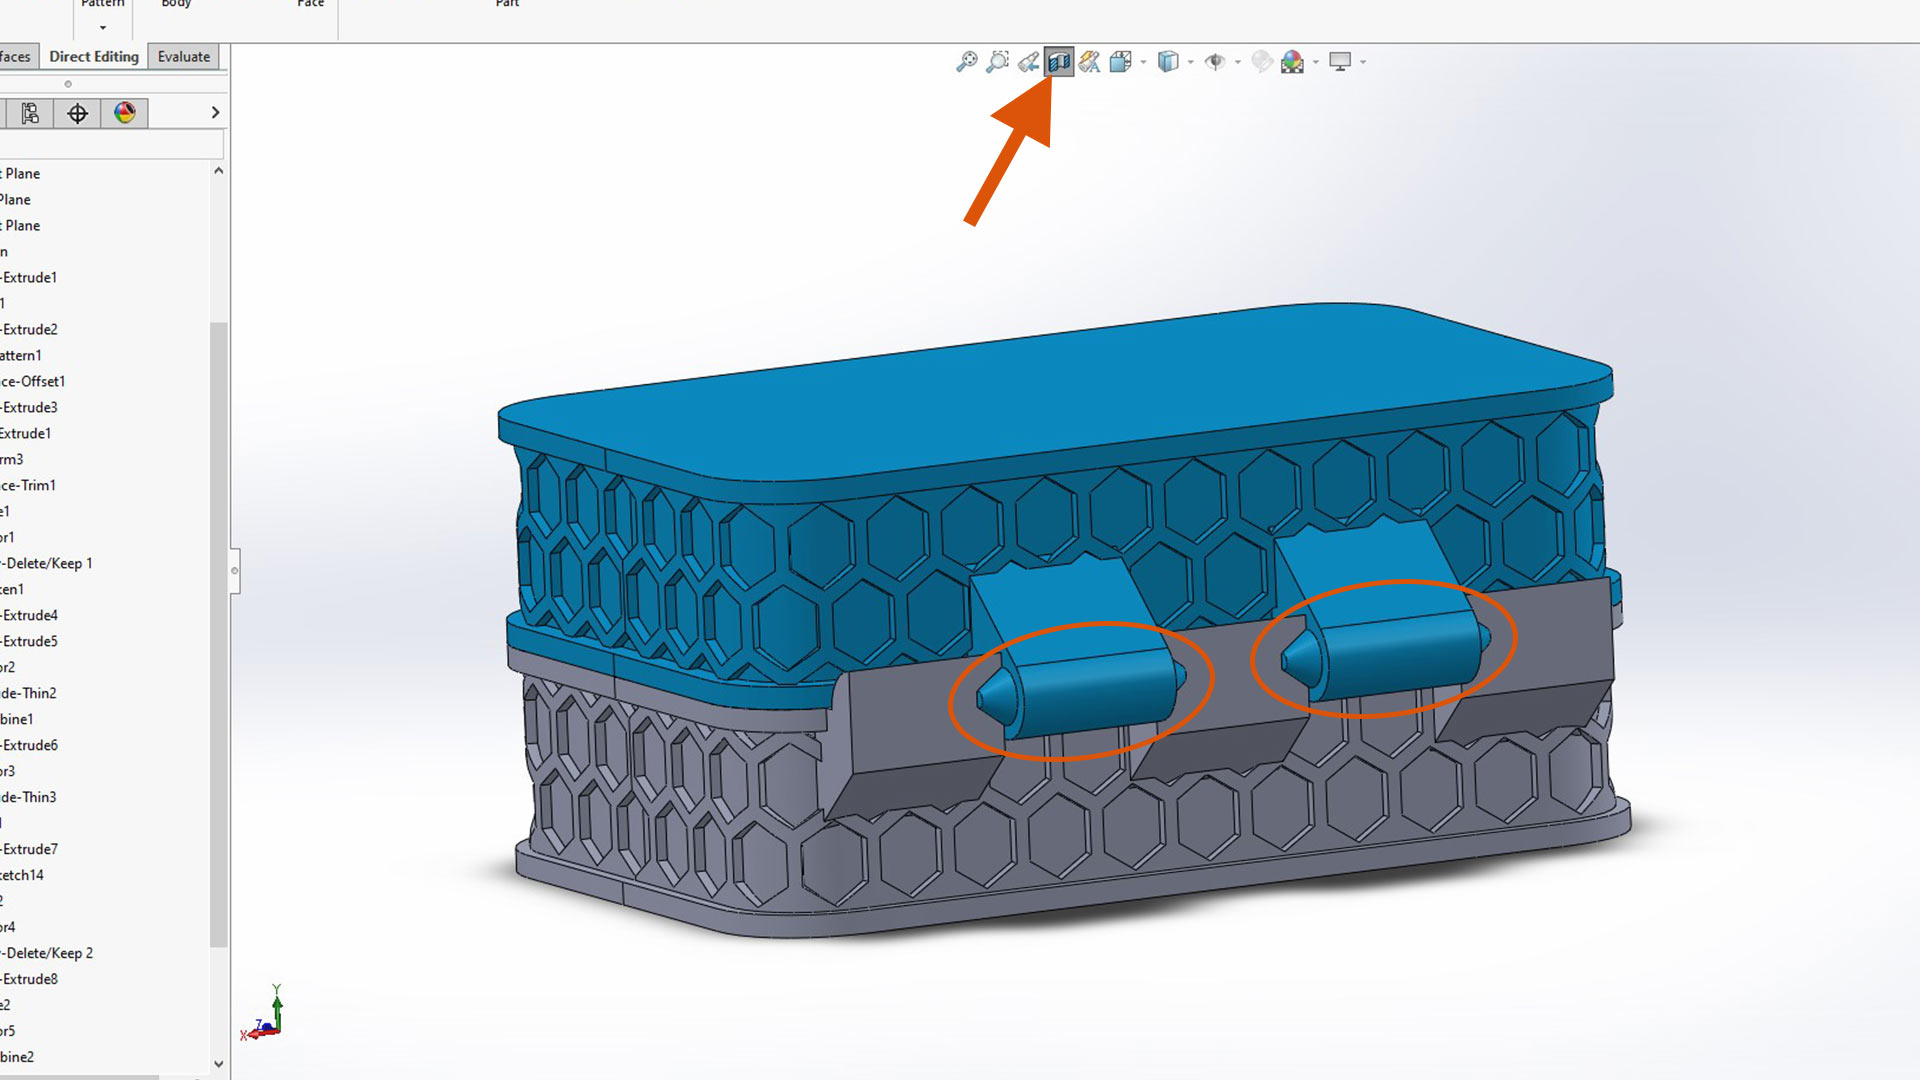
I used move face feature to create gap (clearence) between the two bodies as shown. The value of 0.5mm depend enterly on the printer. This value should be tested on each printer.
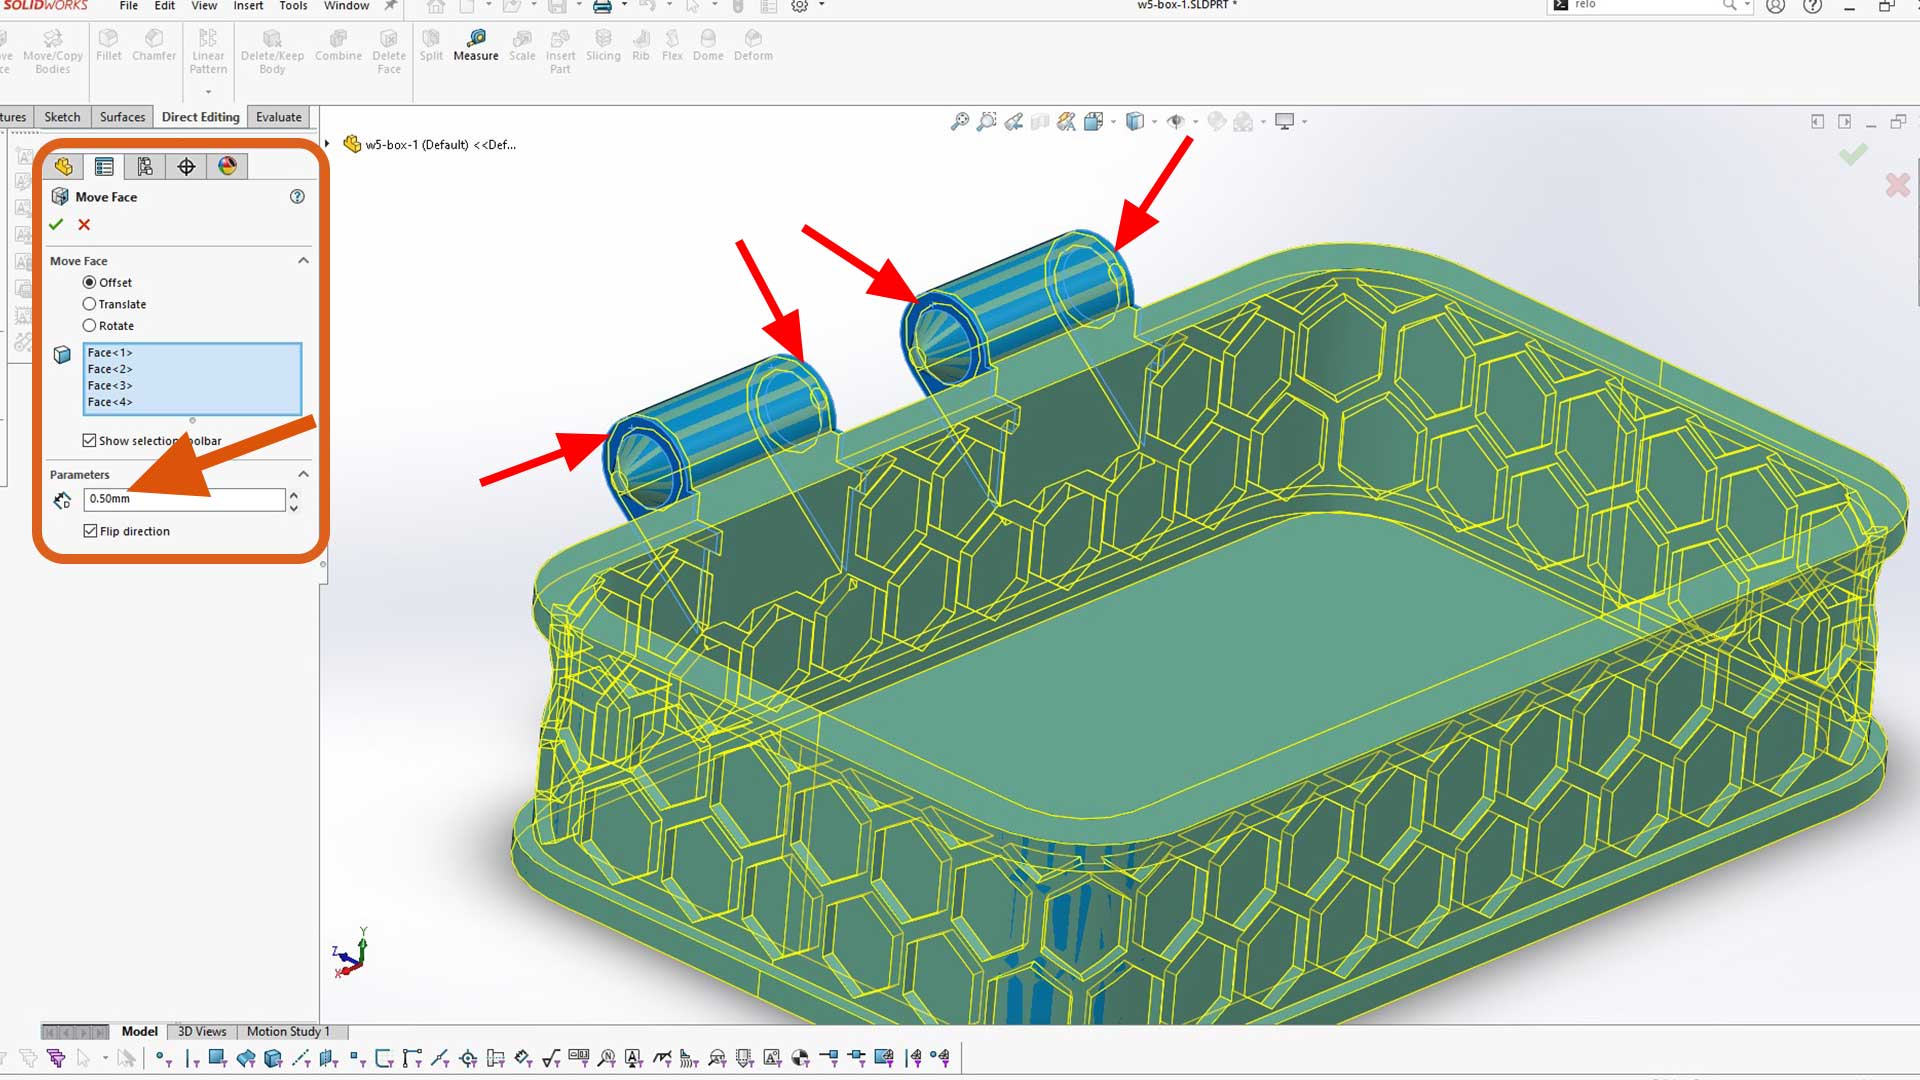
Intended gap
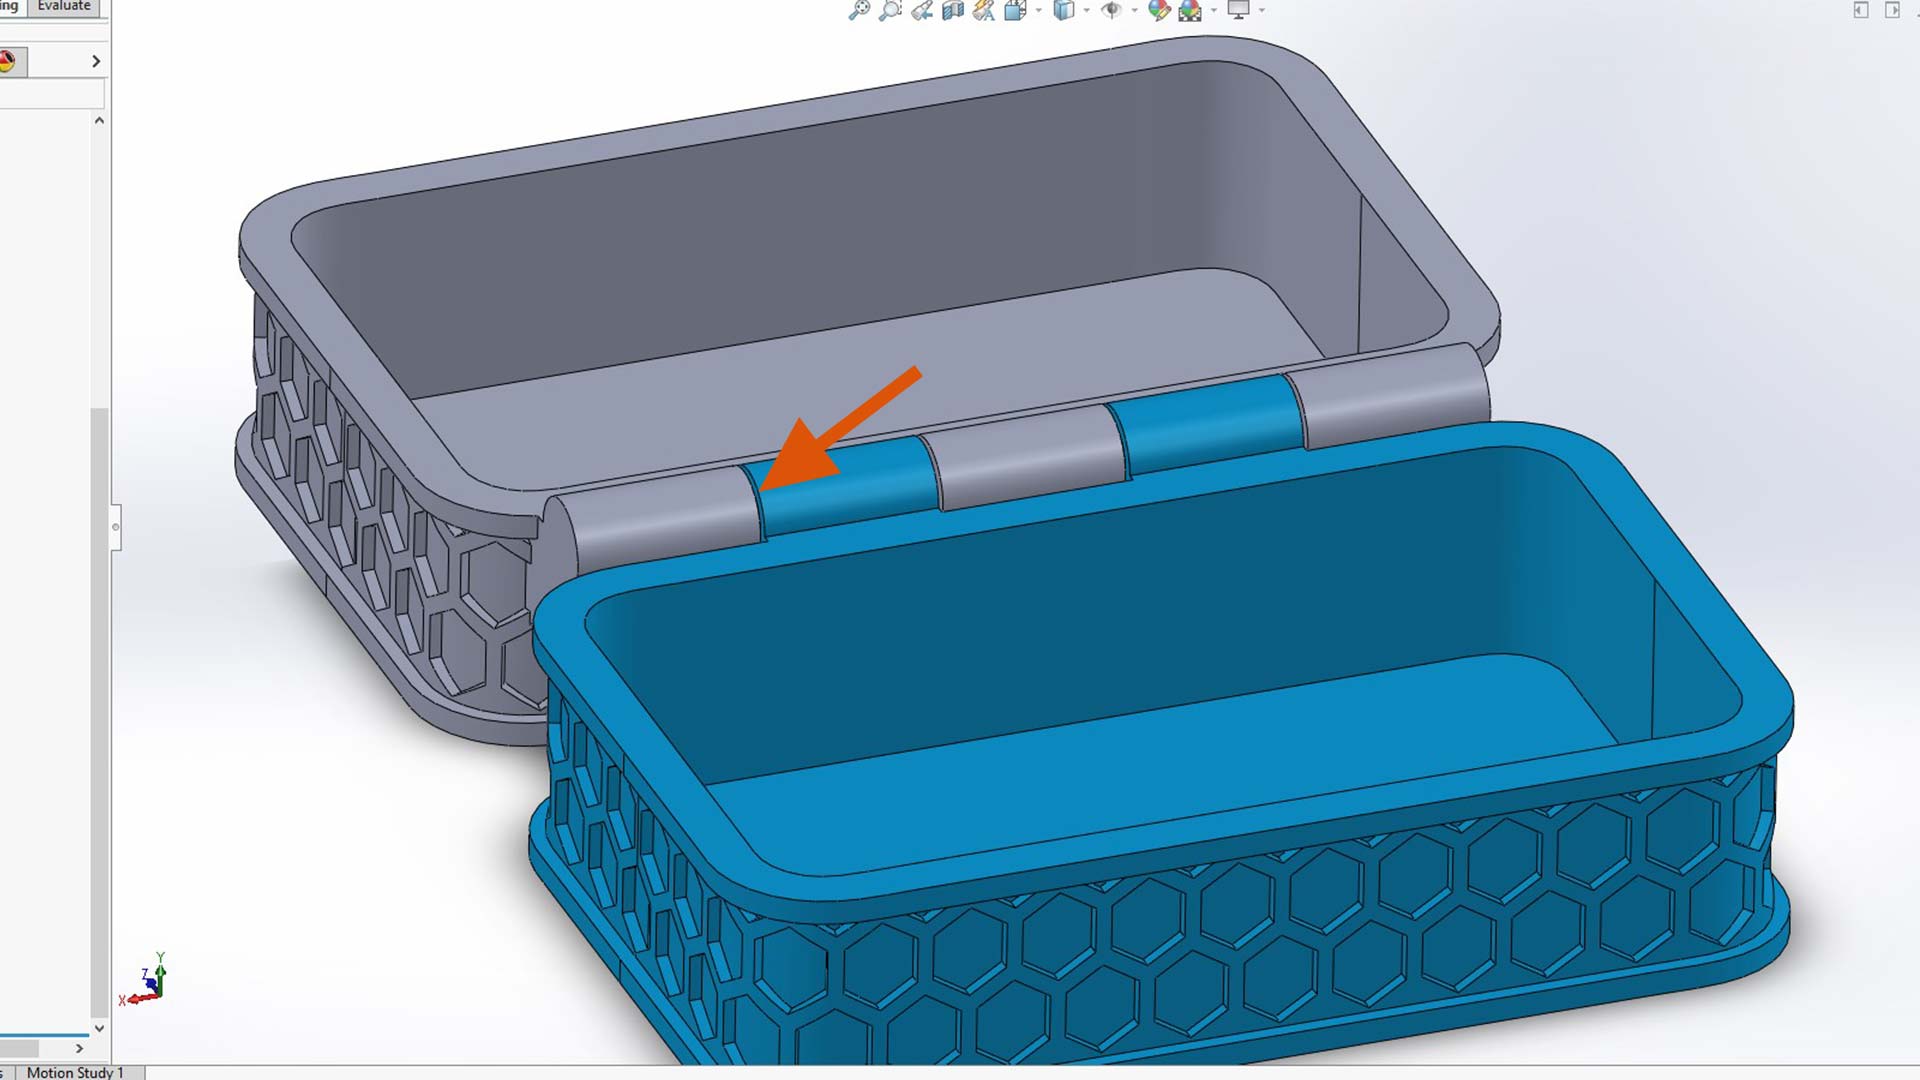
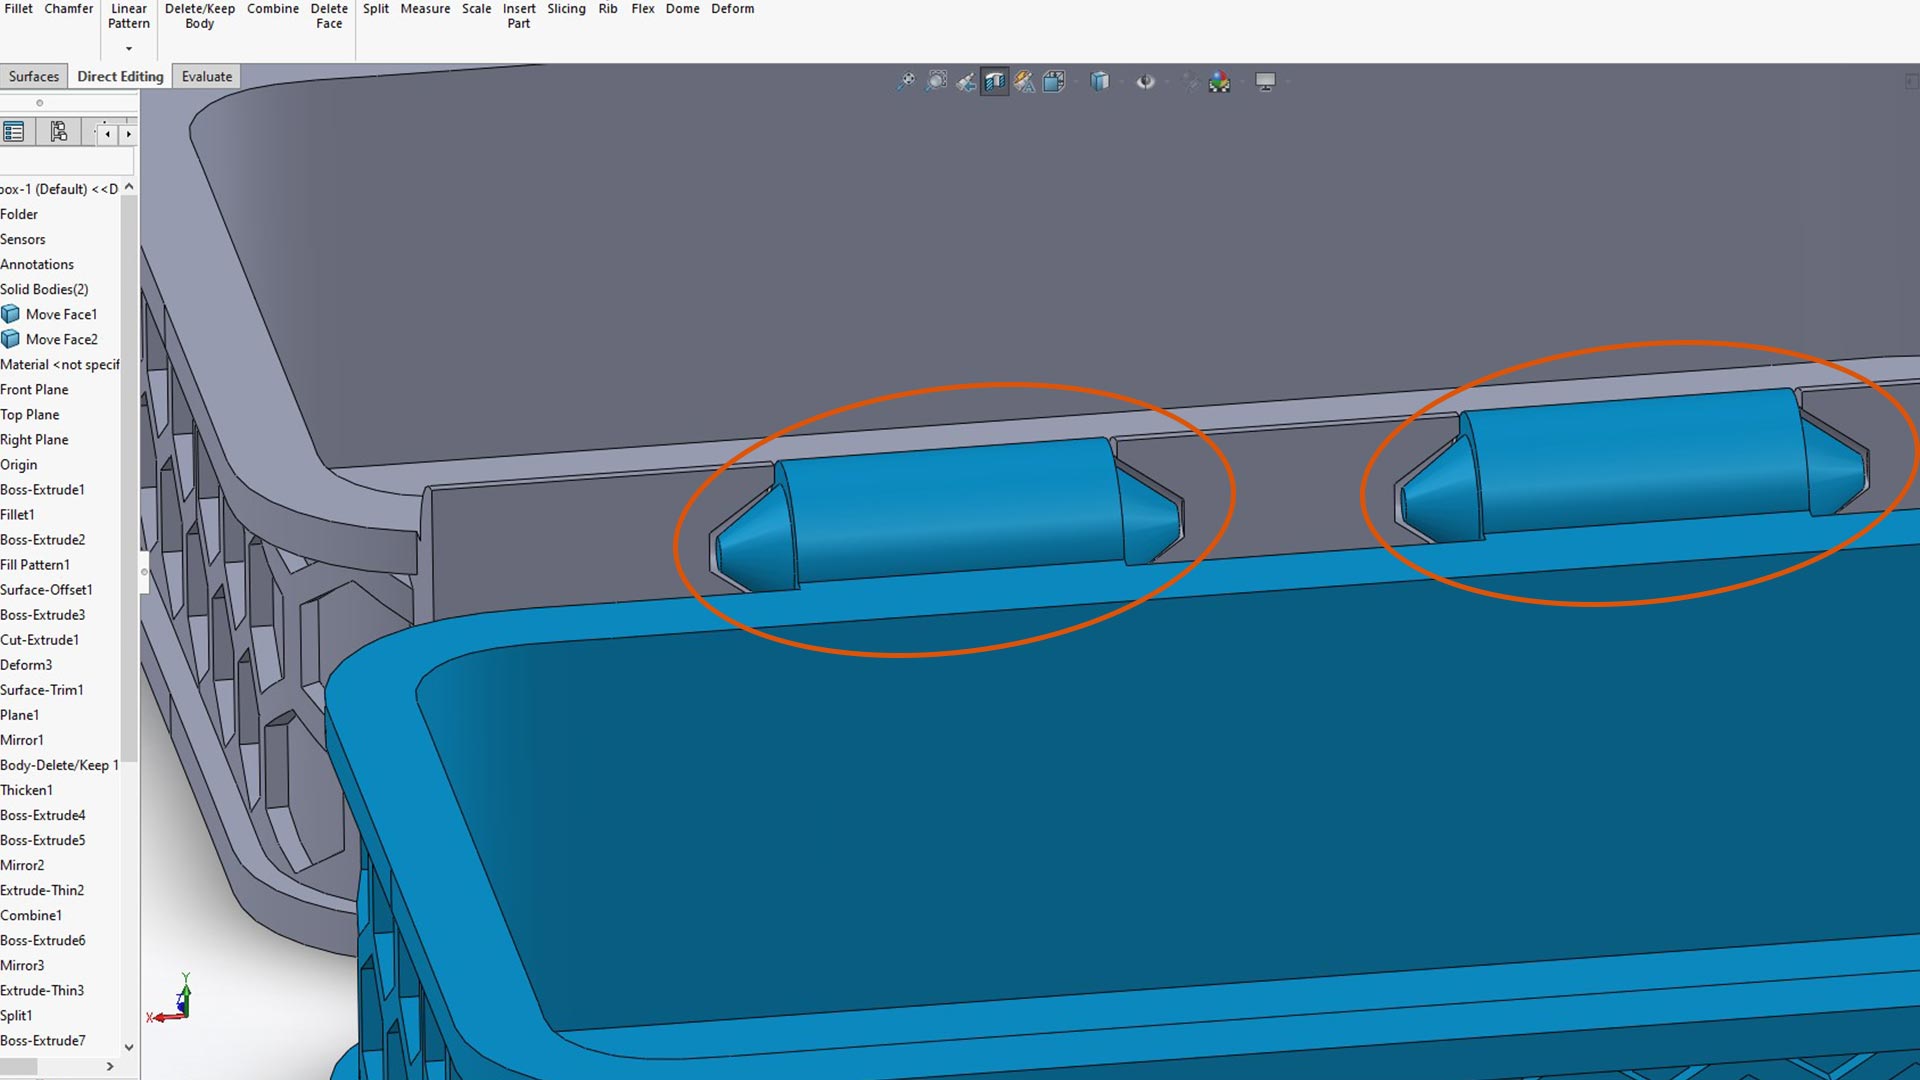
I did the same process on the bottom body as well. These two parts need to be separed so that when printed, one can move (rotate) freely.
I added tab so that the box can closed firmly
Slicing with ultmaker Cura
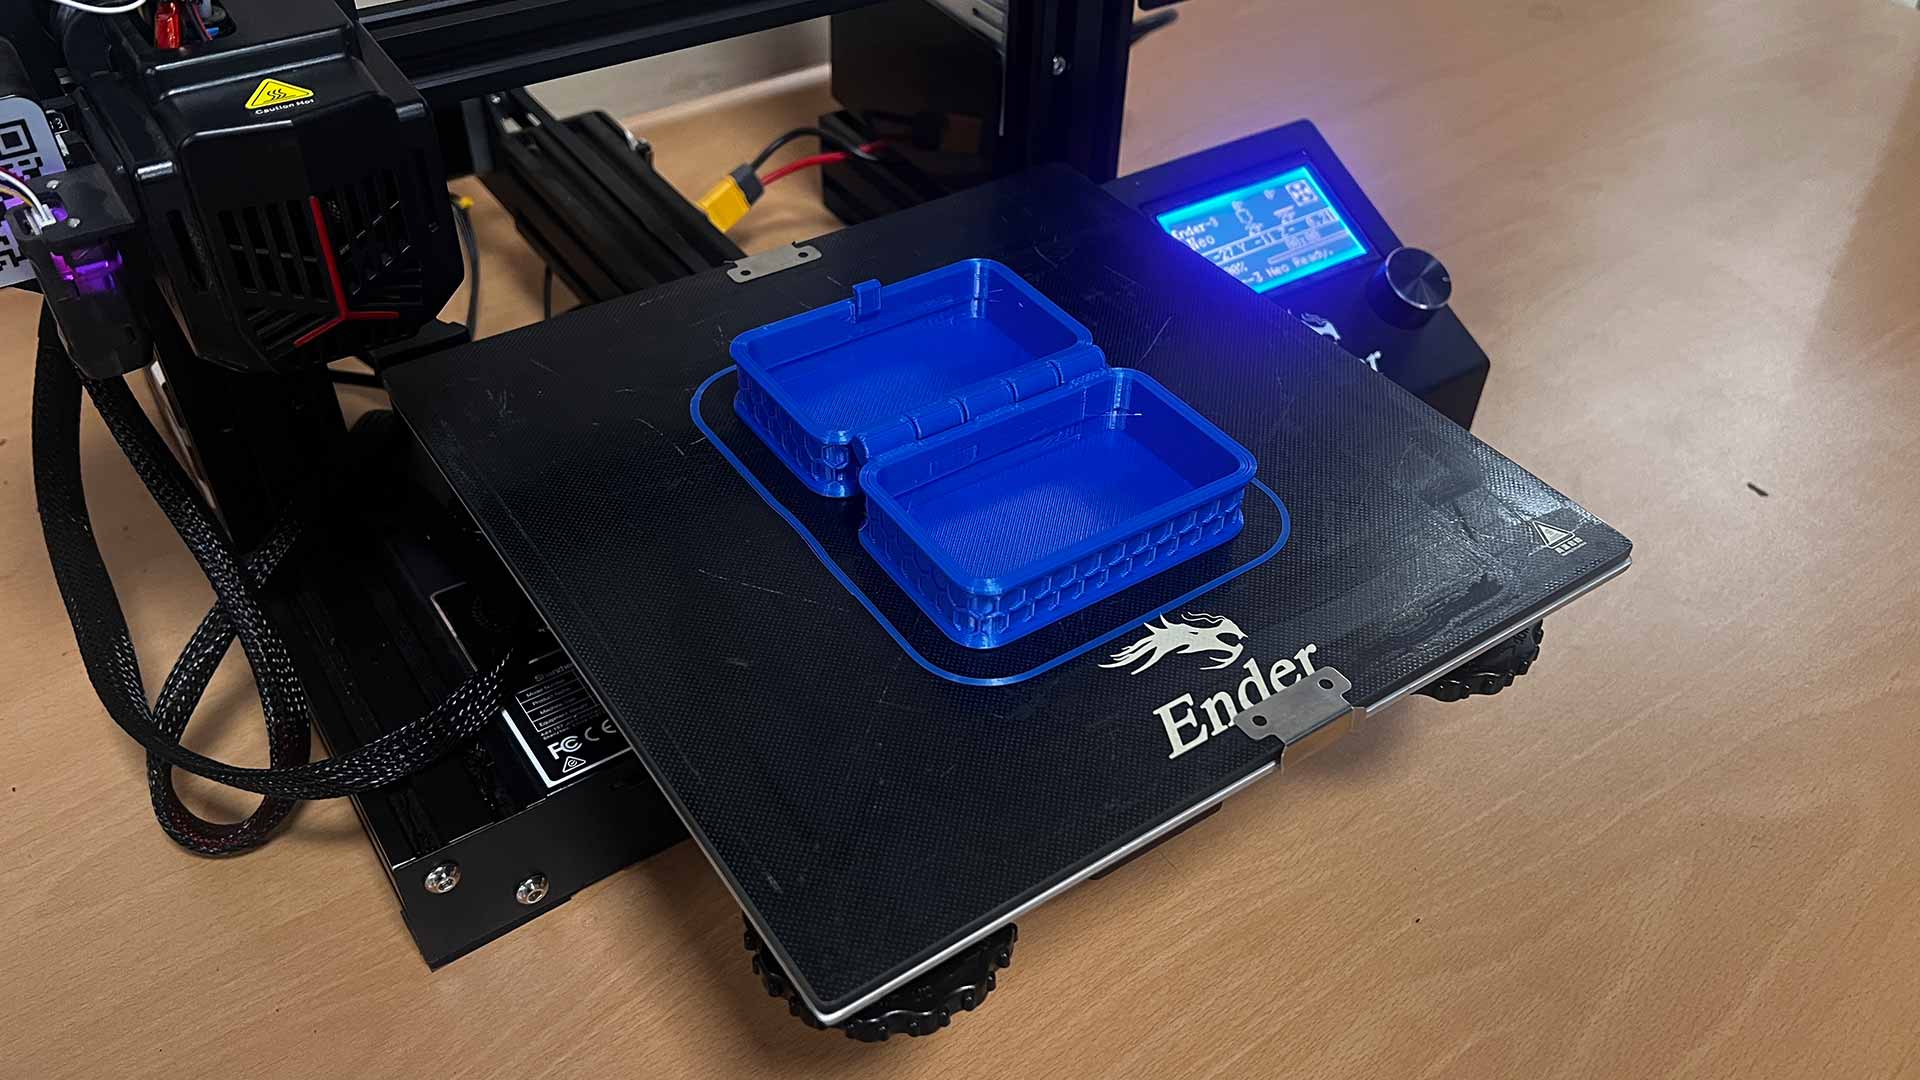
After design is complete, I sliced the moder with Ultmaker Cura to generate gcode for 3D printing.Printing time was 3 hours and 27 minutes.
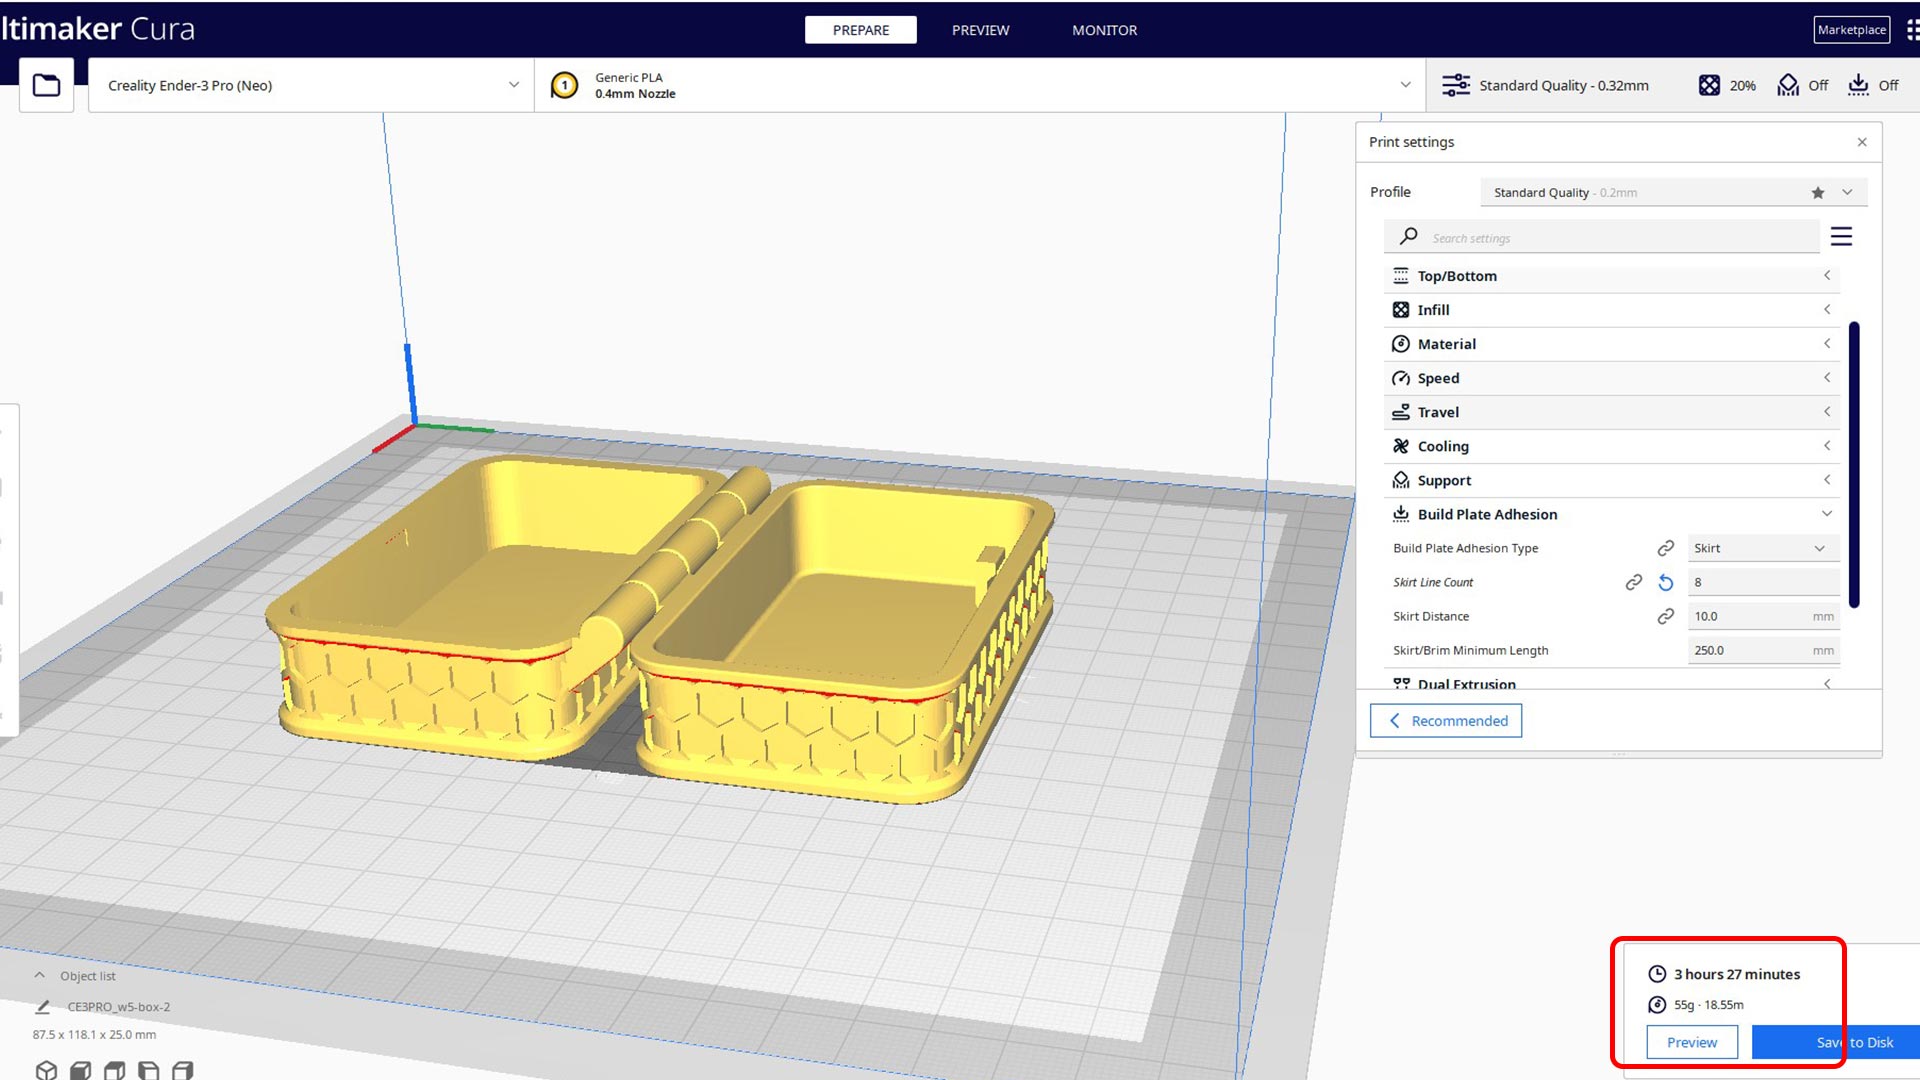
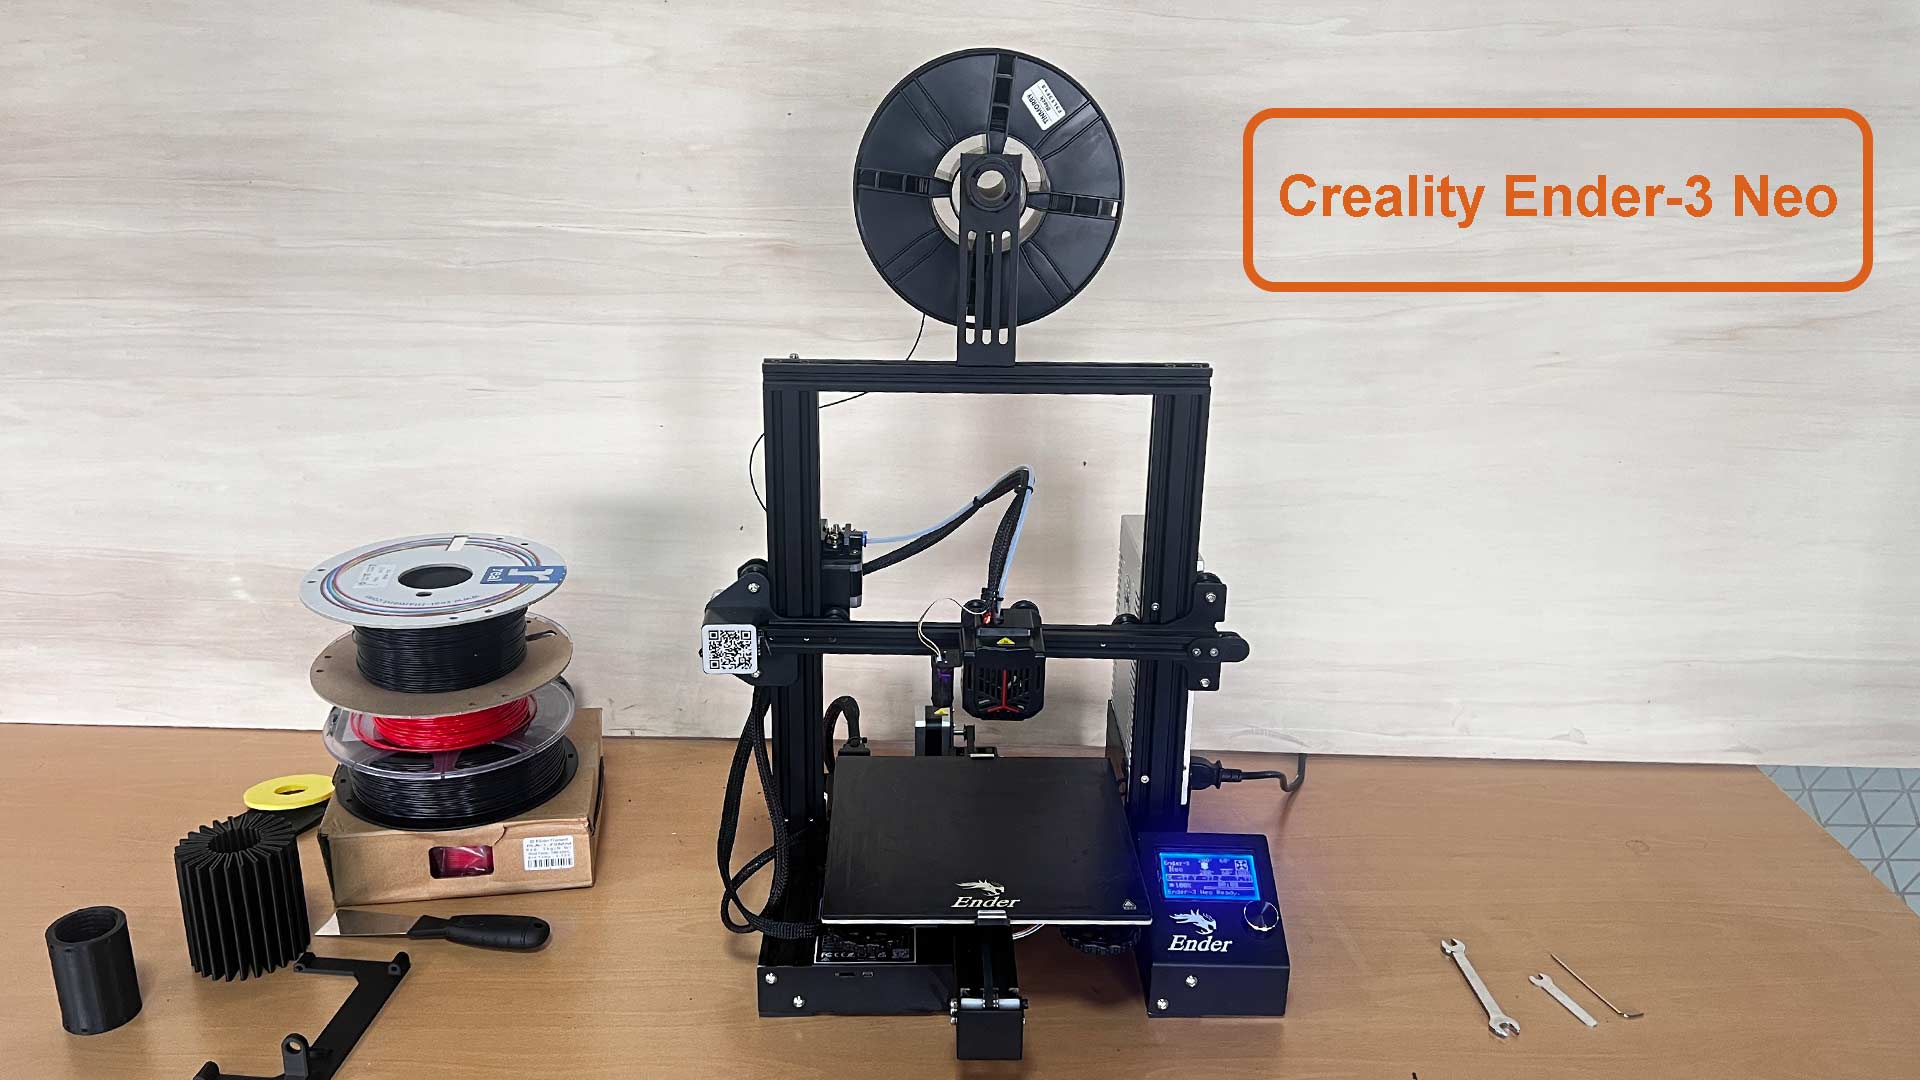
The machine I used is Creality Ender 3 Neo
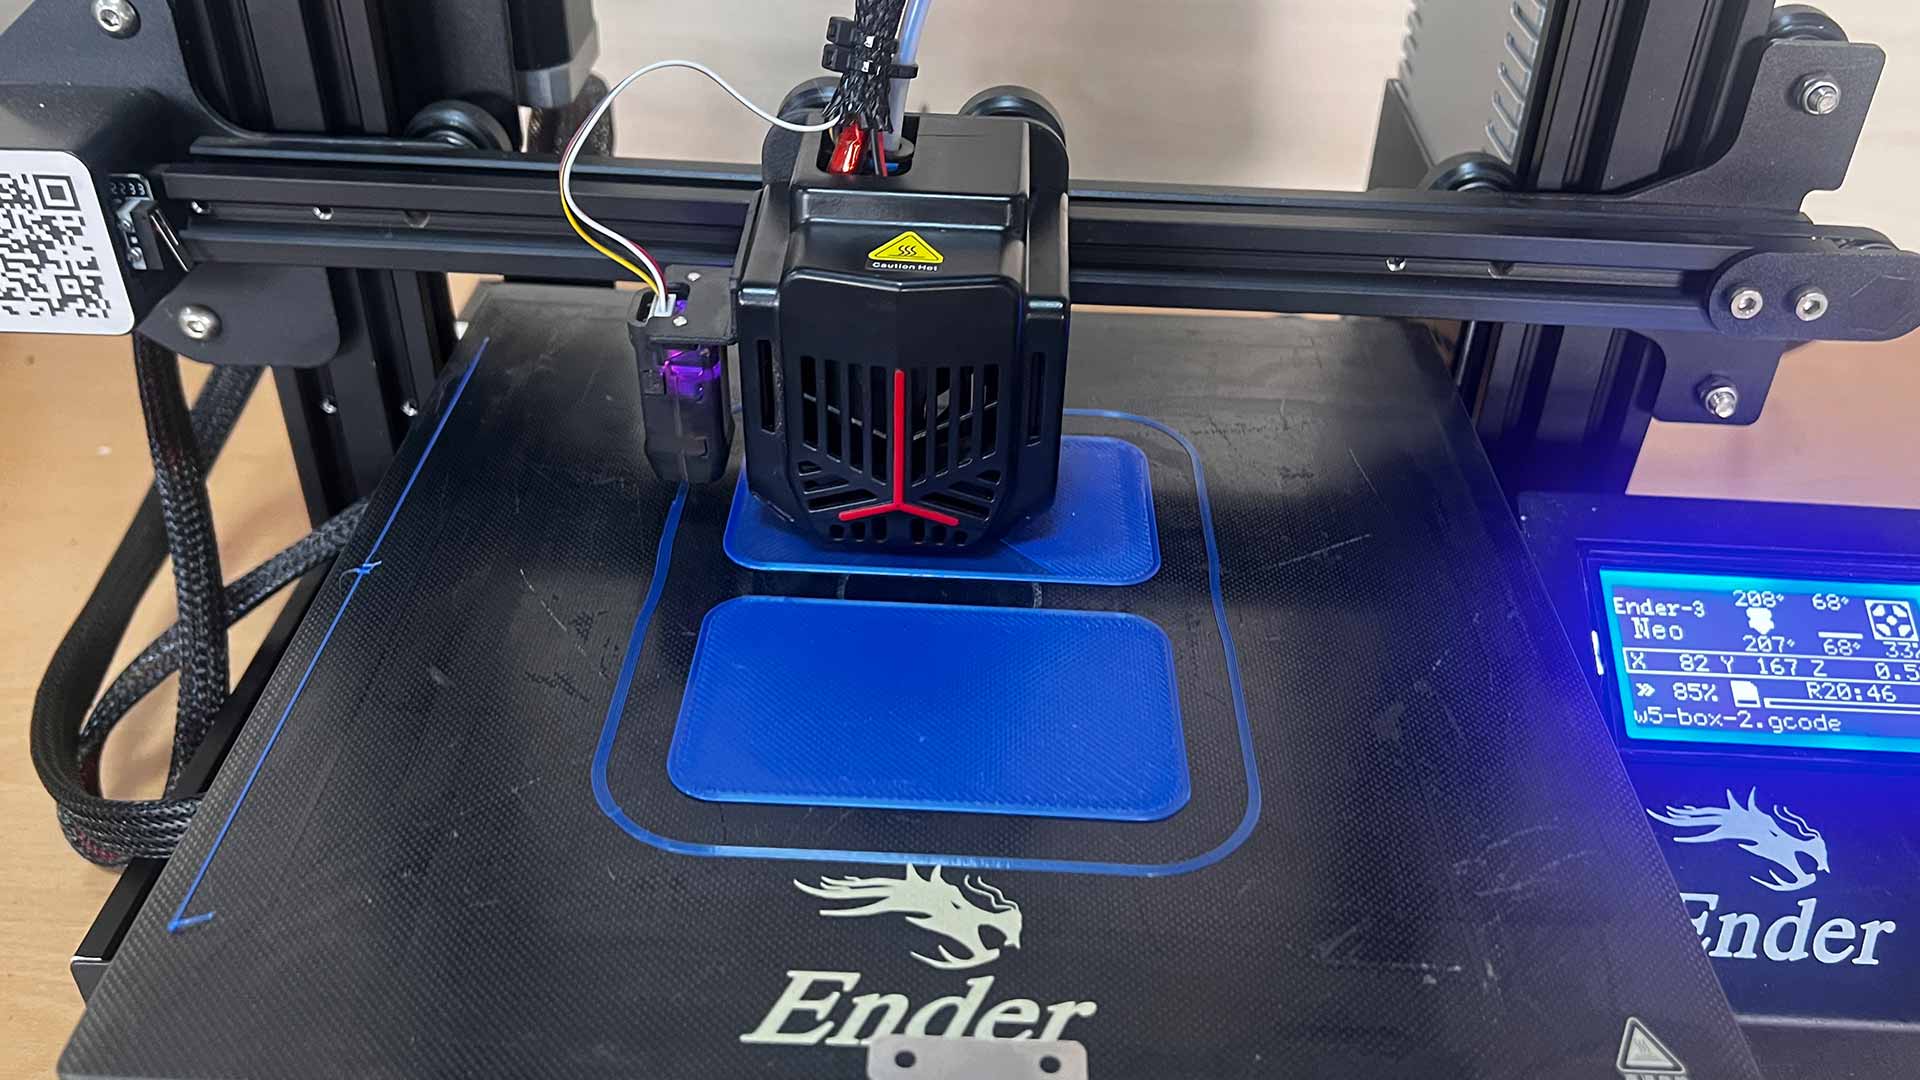
Printing started!
Final product. A box with its lid printed as one file.
3D Scanning
3D scanning is the process of taking the shape of a real object and turning it into a 3D digital model. It uses lasers, light, or cameras to measure the surface of the object and collect lots of points (called a point cloud) that indicate its exact size and shape. Those points are translated into software into a 3D model you can observe, modify, or 3D print.
I scanned a bottle using smartphone and software called Kiri Engine. It is a mobile appication you can use to scan an object with smartphone. I got it throgh app store.
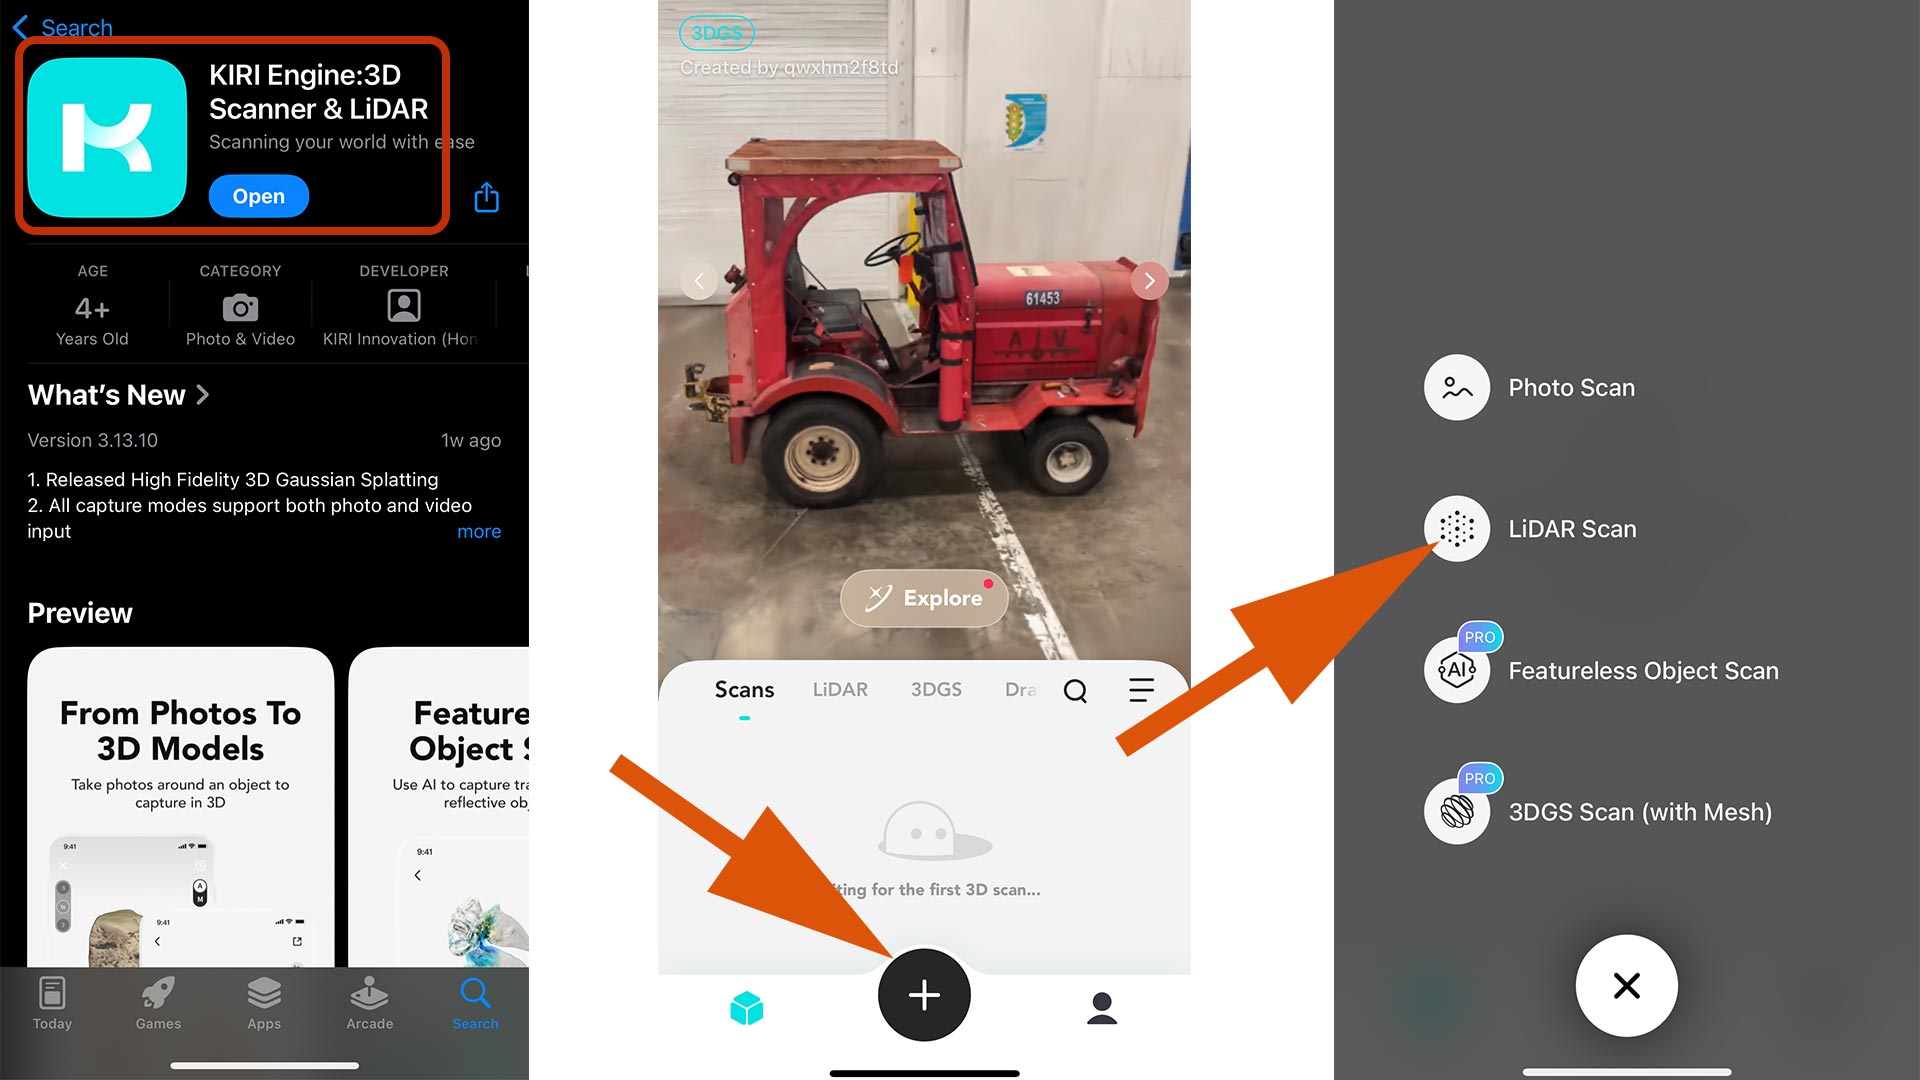
As highlighted in the above image, I opend the app and added new file (new scan). Then I selected LiDAR Scan as my scan method.
Scanning
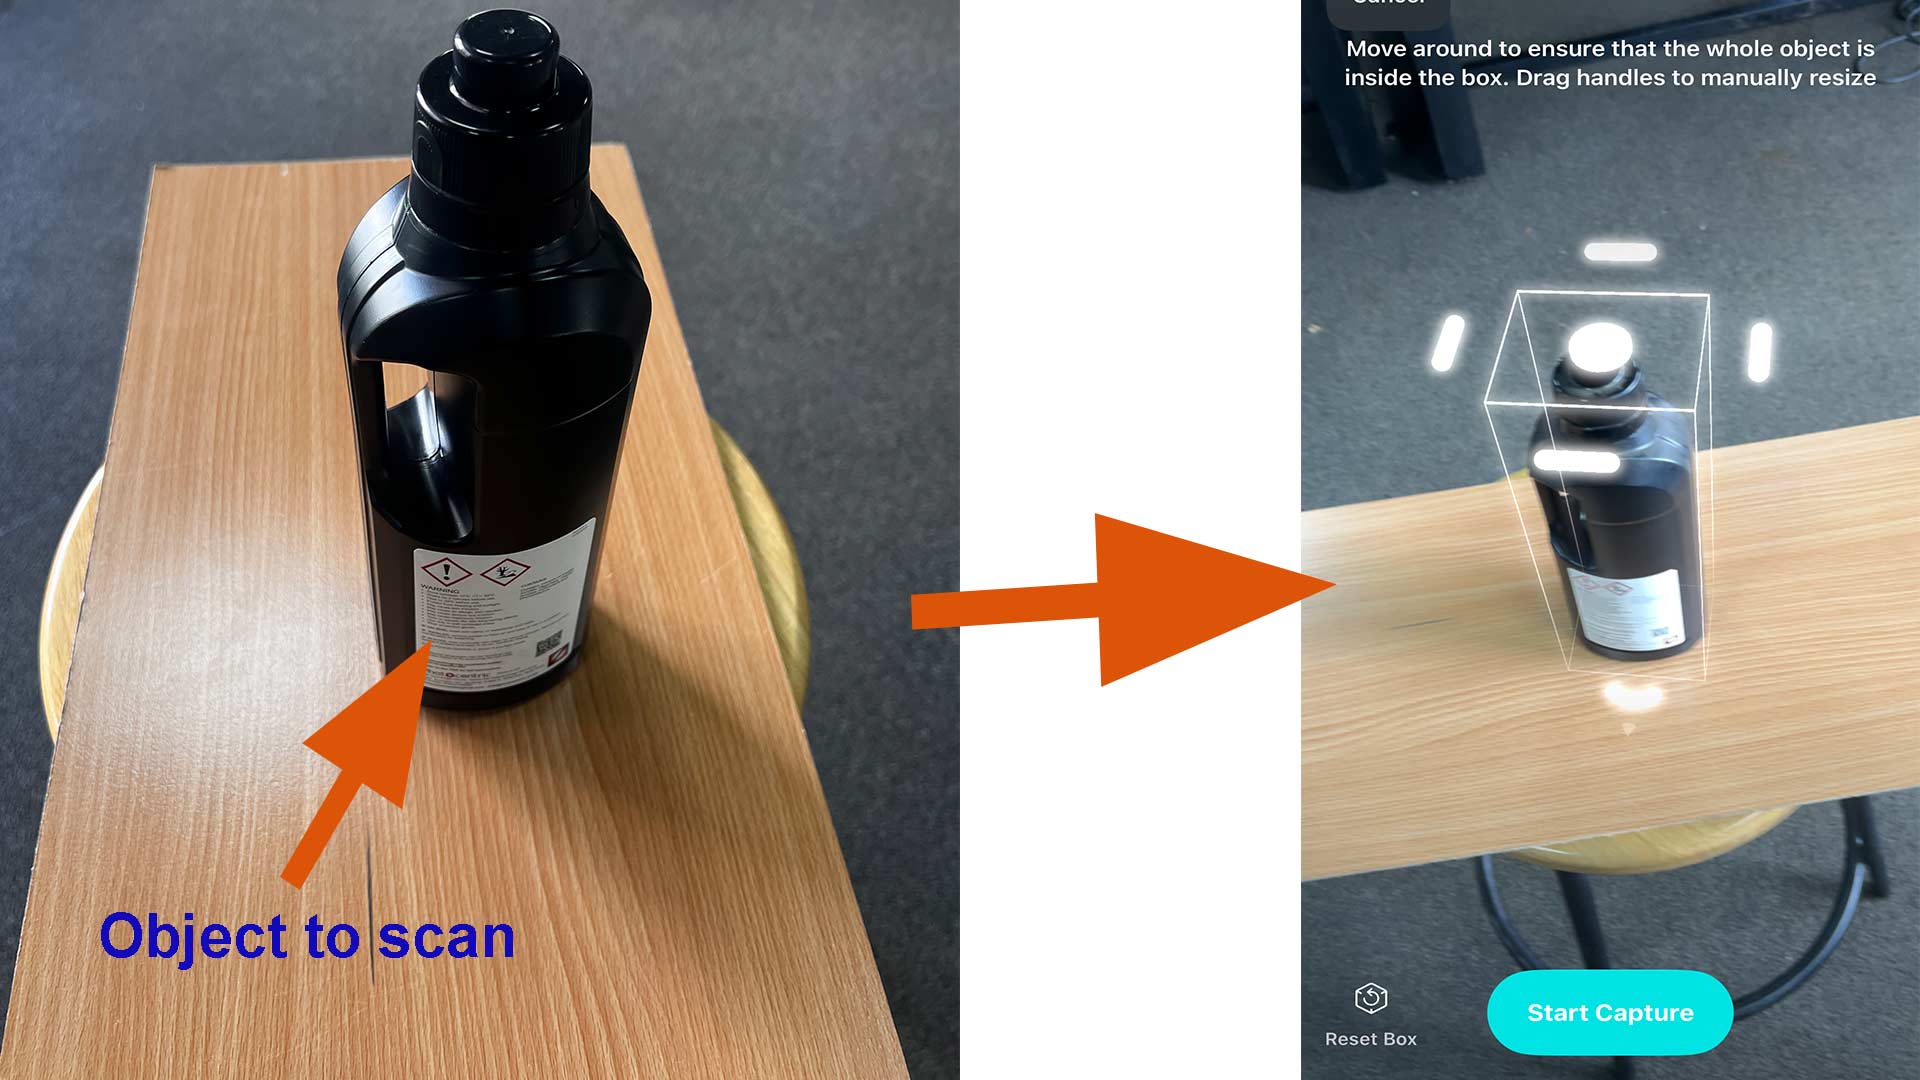
Next step is to place the object you want to scann in such that you will be ale to move around it without interuption.
The app guite you by showing a cube. I adjusted this cube to make sure that the object is in the cube.
Afterward, I started scanning with Start Capture
The main point is to rotate the object slowly while point the lidar to the object.
After scan is complete, file is pocessed (in cloud). Afterward, I exported the 3D model by selecting export.
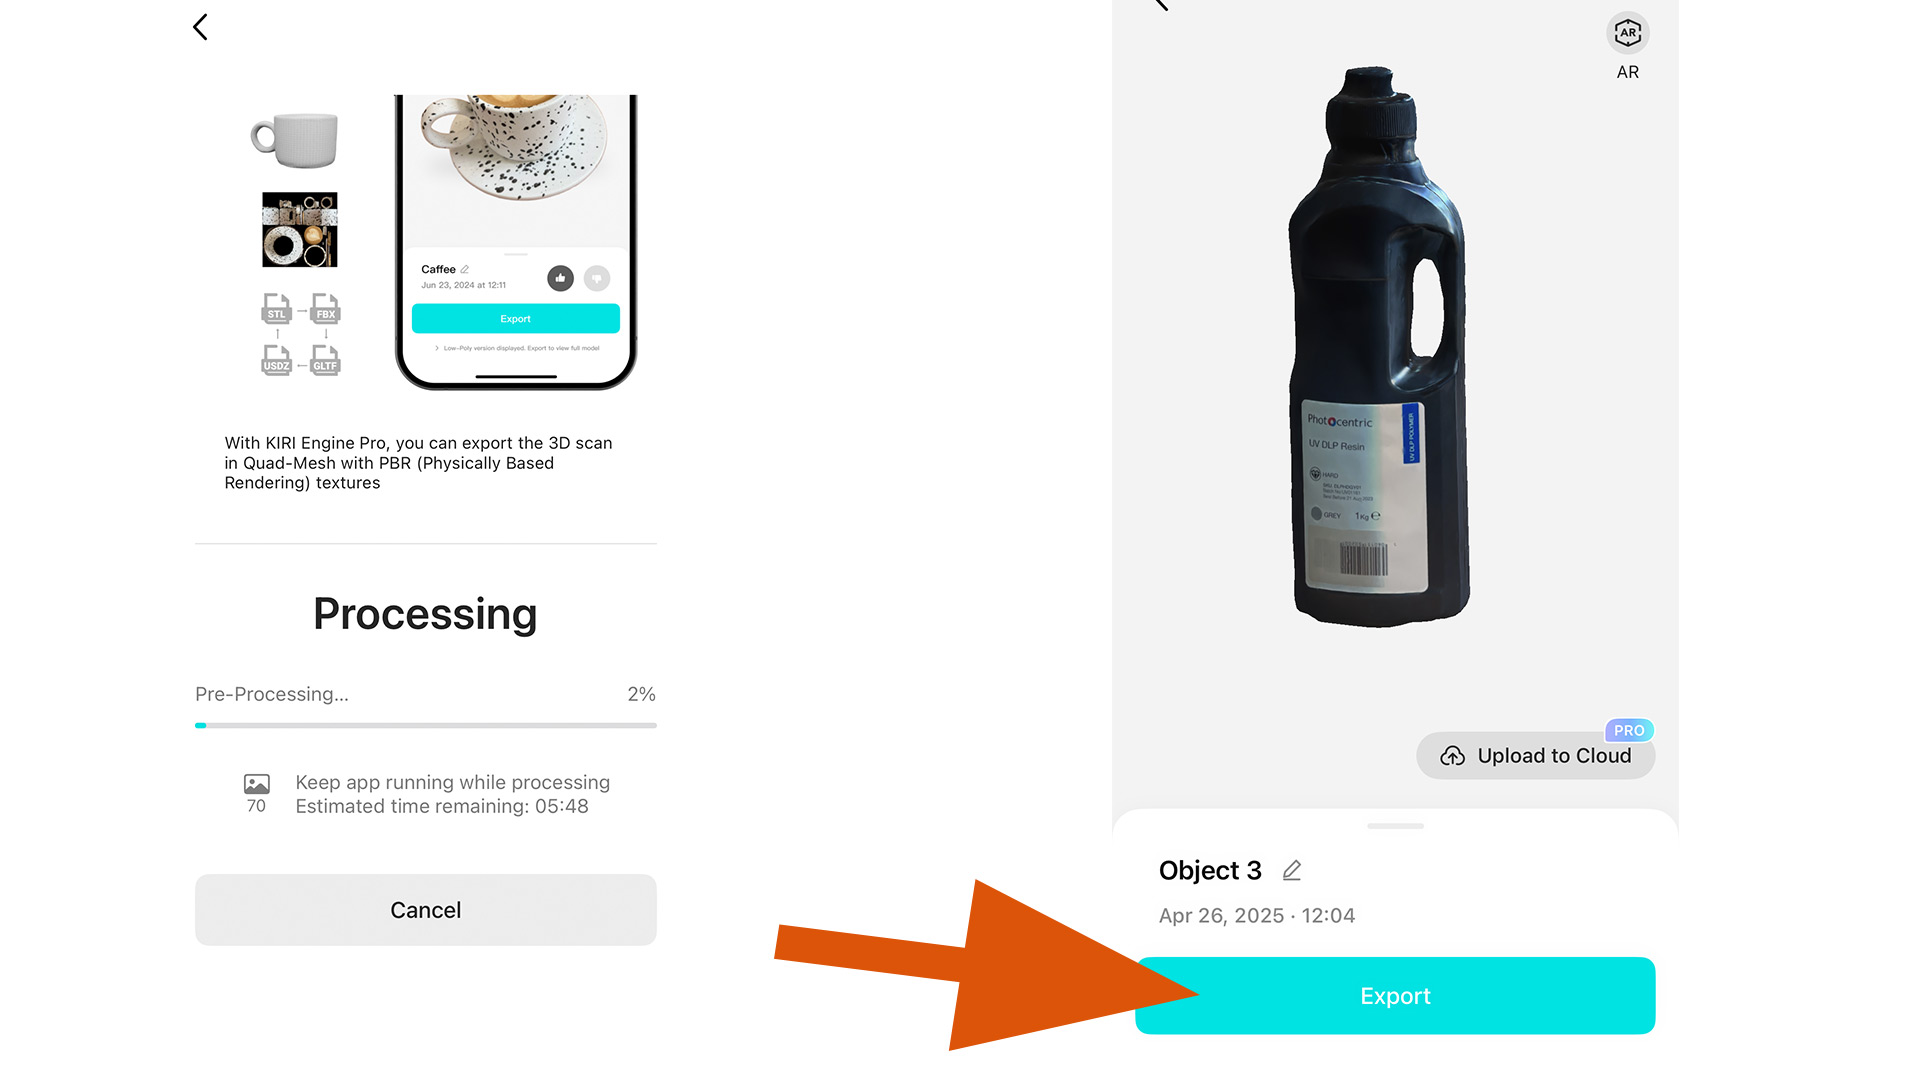
The file is exported as a zip folder. This folder contains several file and Obj file which a 3D model we can print.
Download files
Here you will find the original files I designed
3D files