One of the the most crucial step in 3D printing is bed leveling. 3D printer nozzle need to be at a certain distance from build plate. Even though some printers have automatic bed leveling, firstly you need to adjust offset distance.
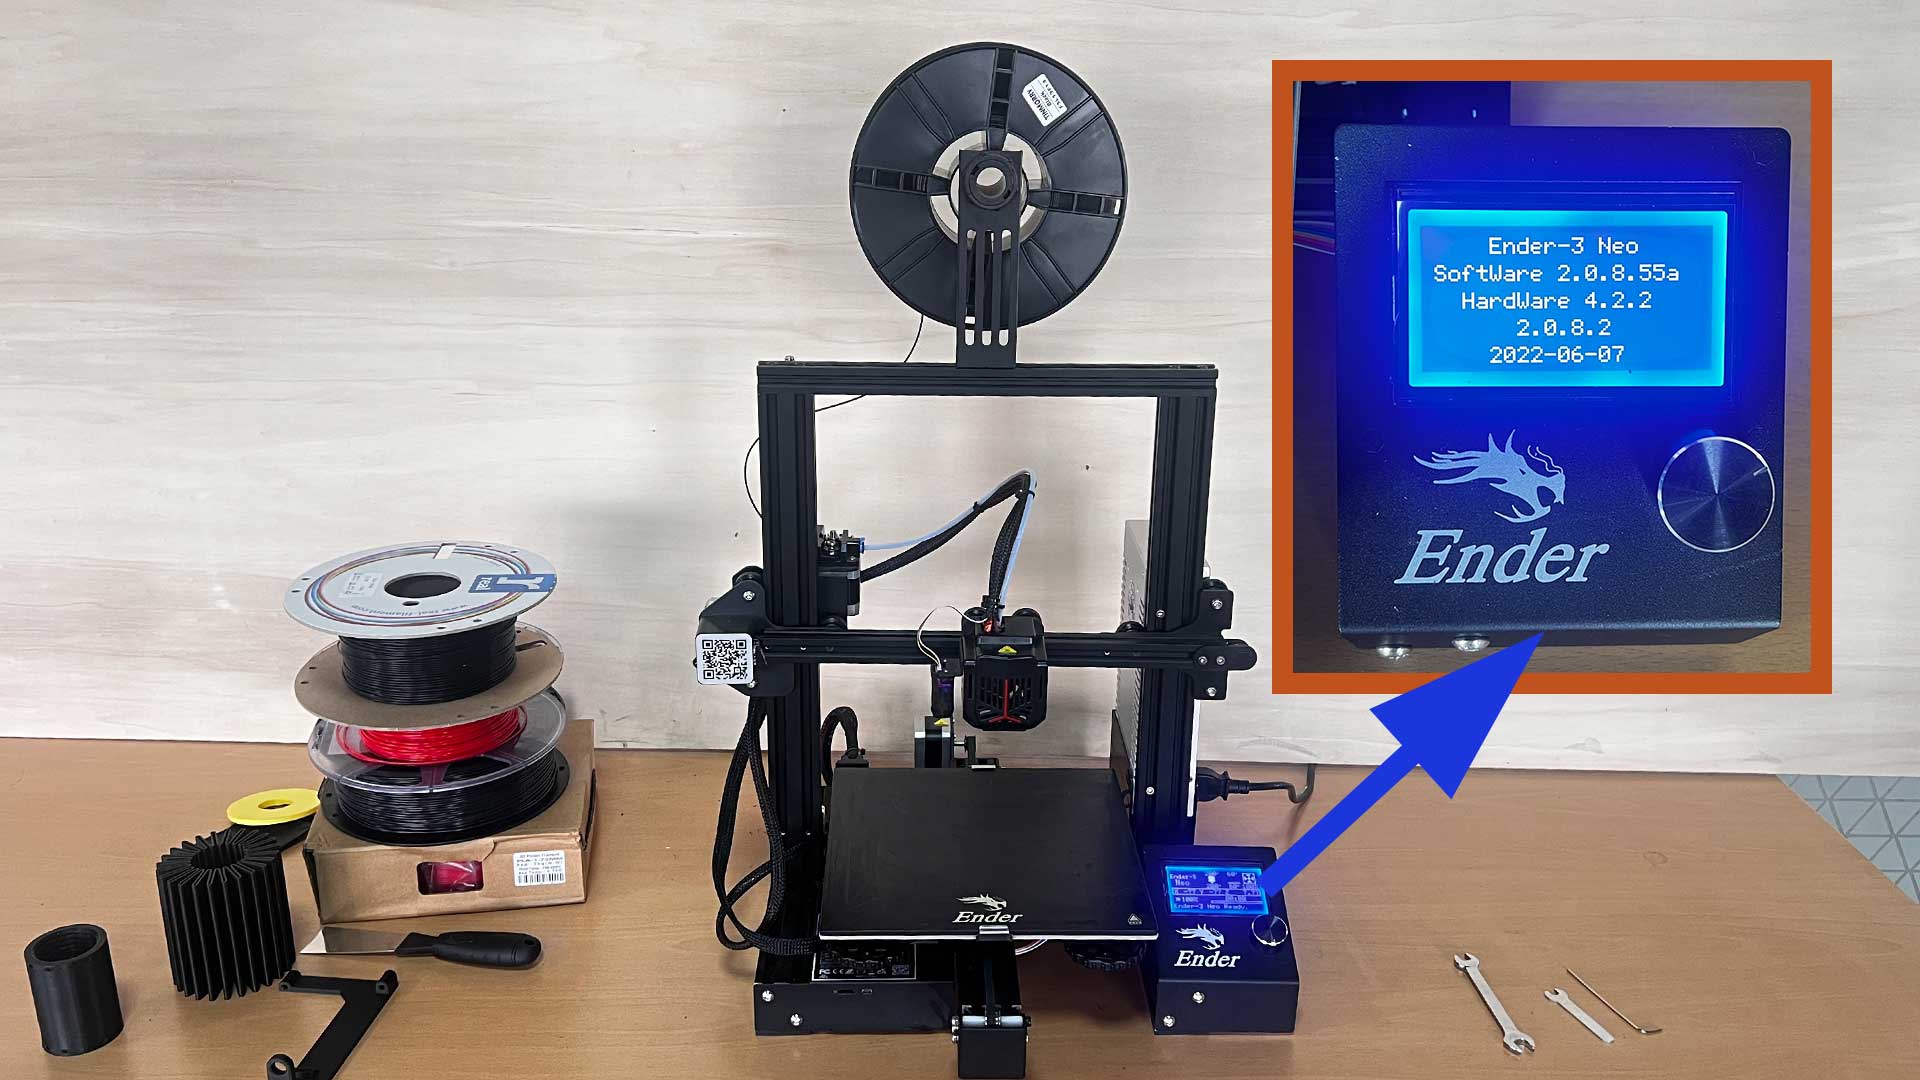
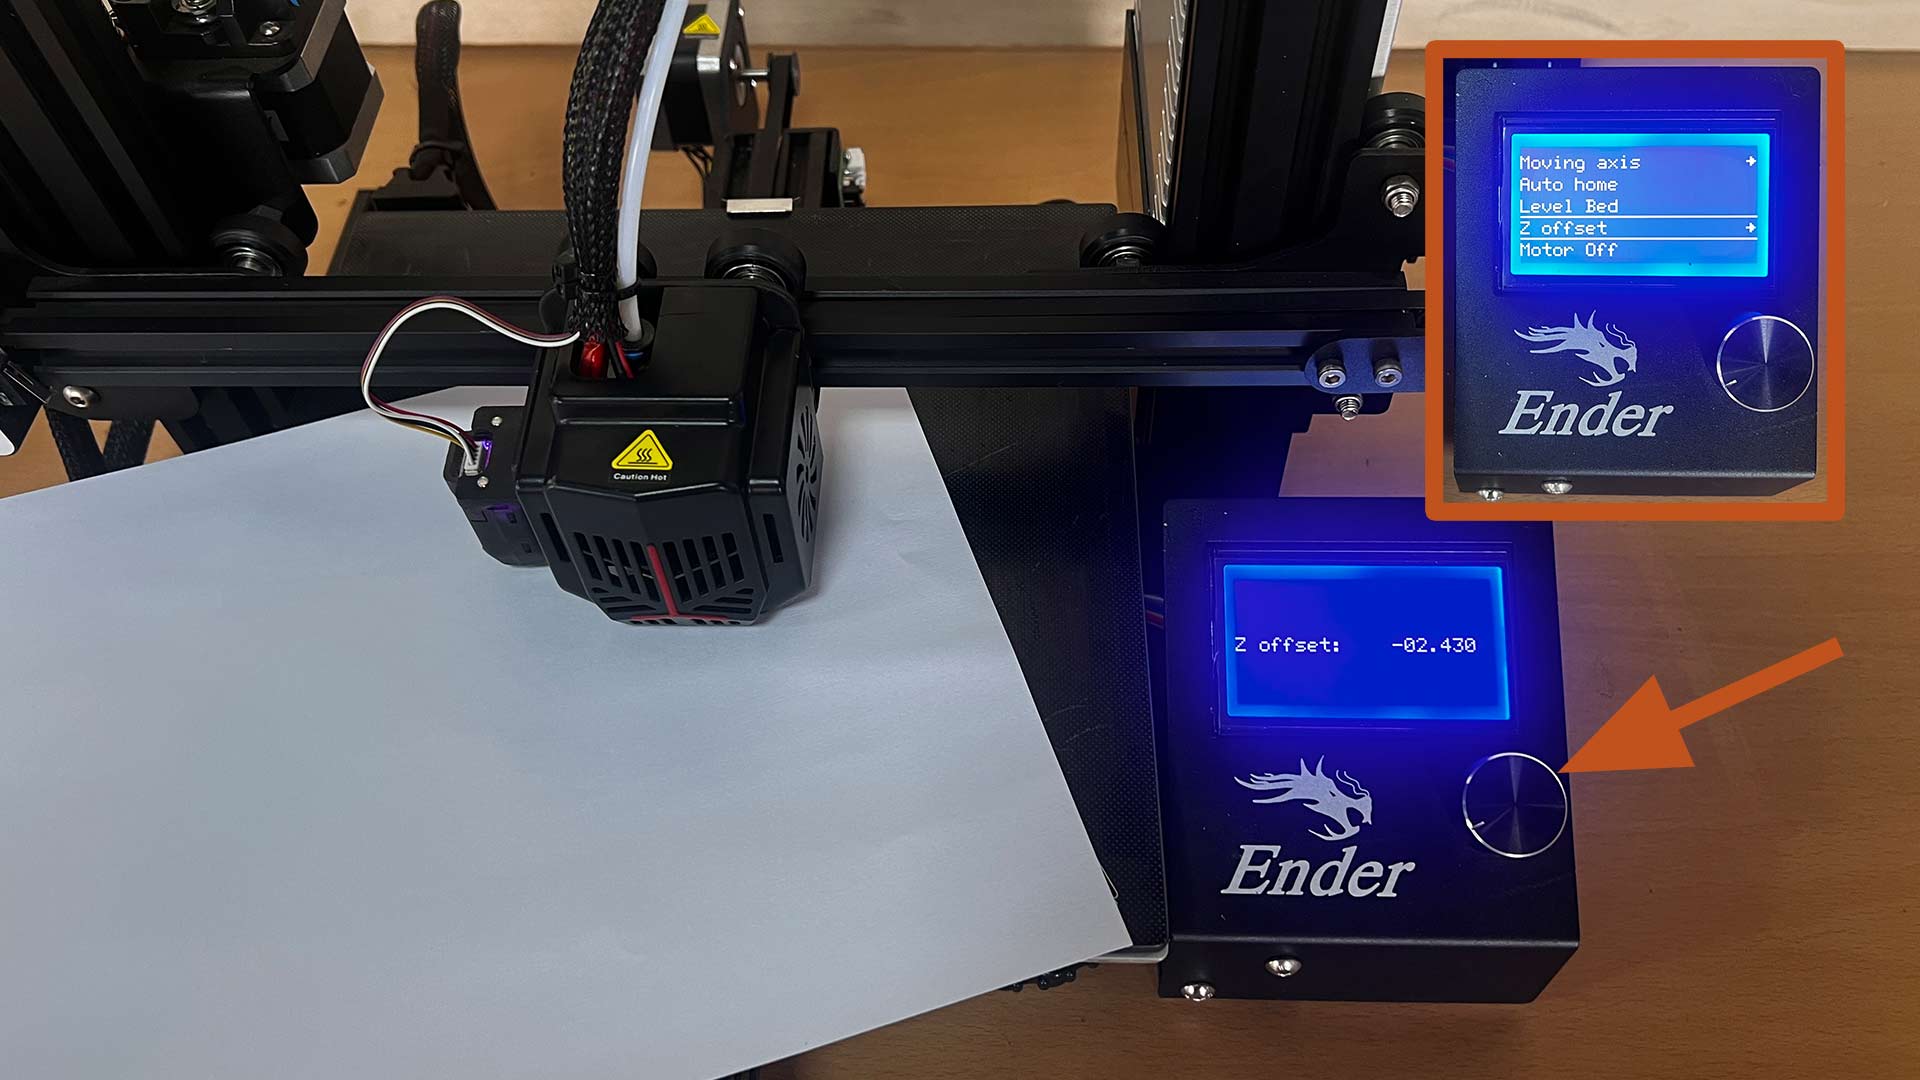
This 3D printer has automatic bed leveling. By selecting bed level. What is critical is to adjust z offset distance.
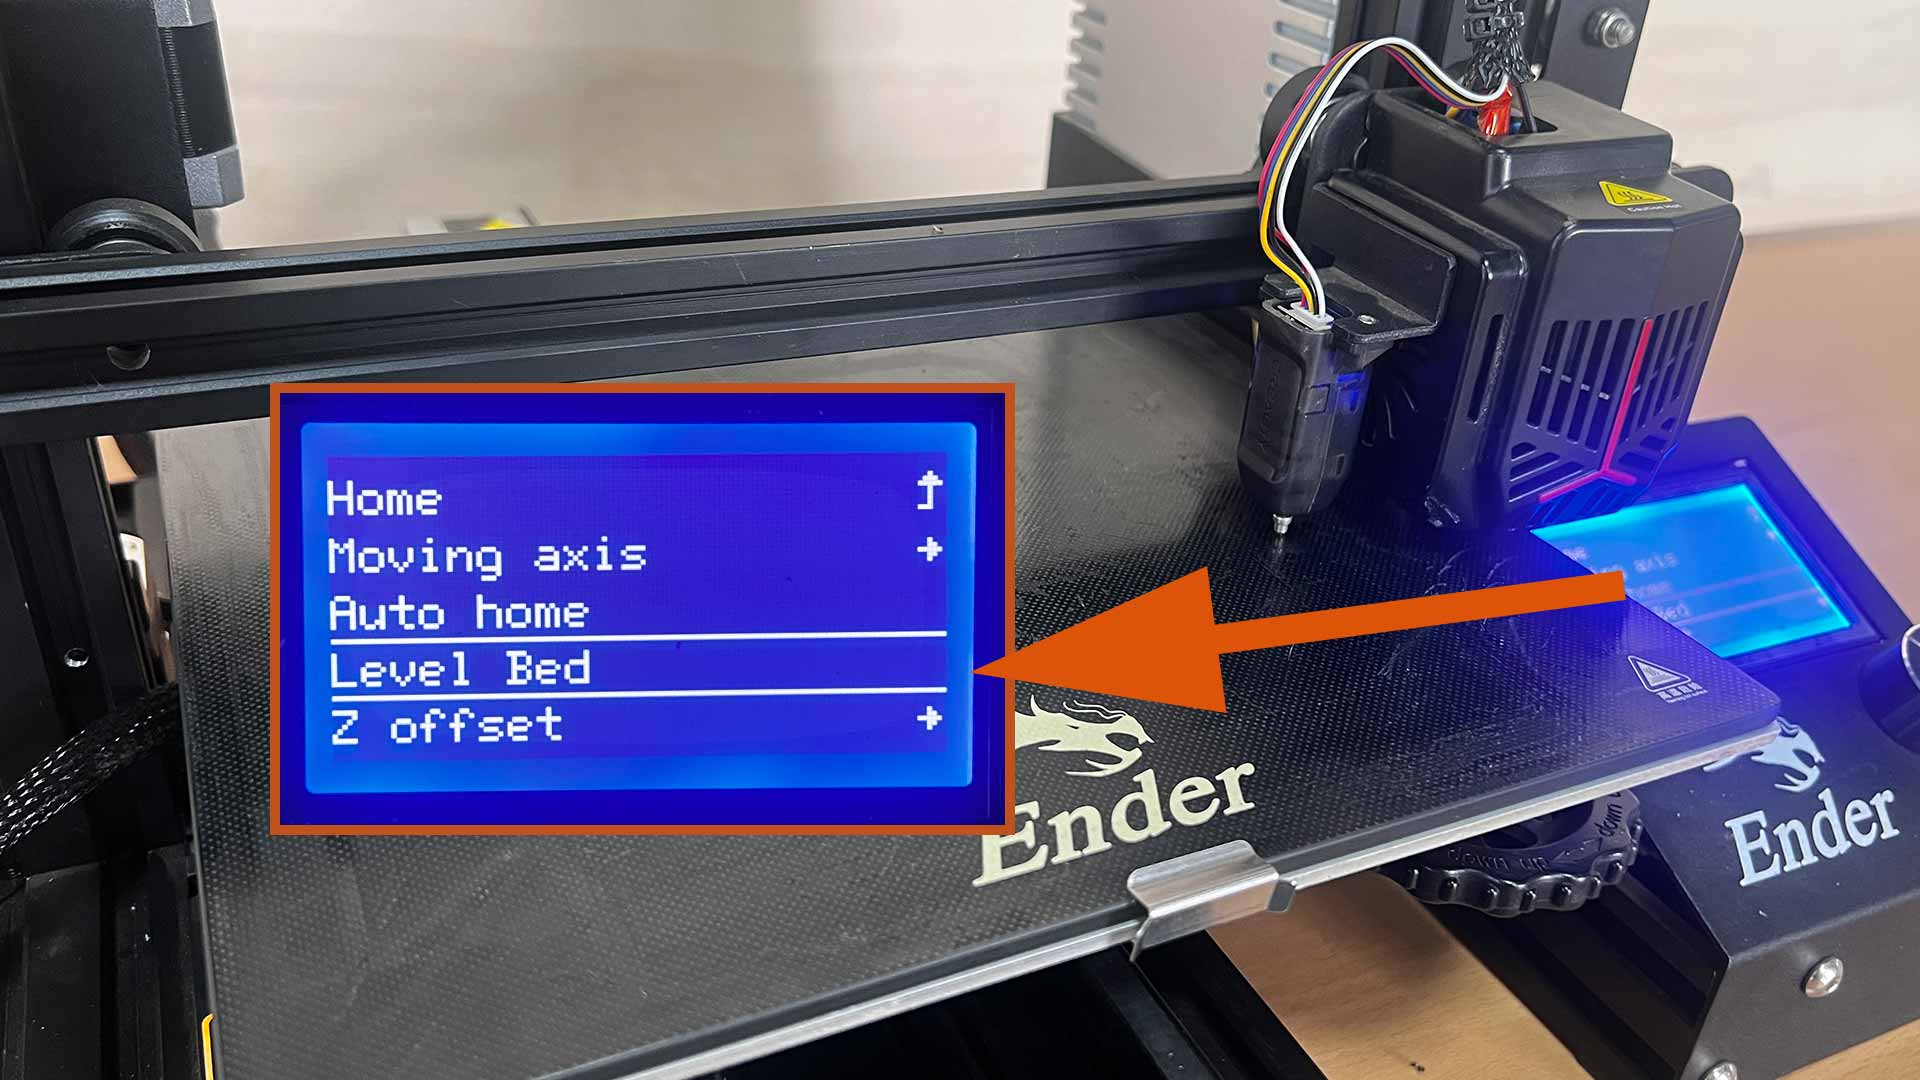
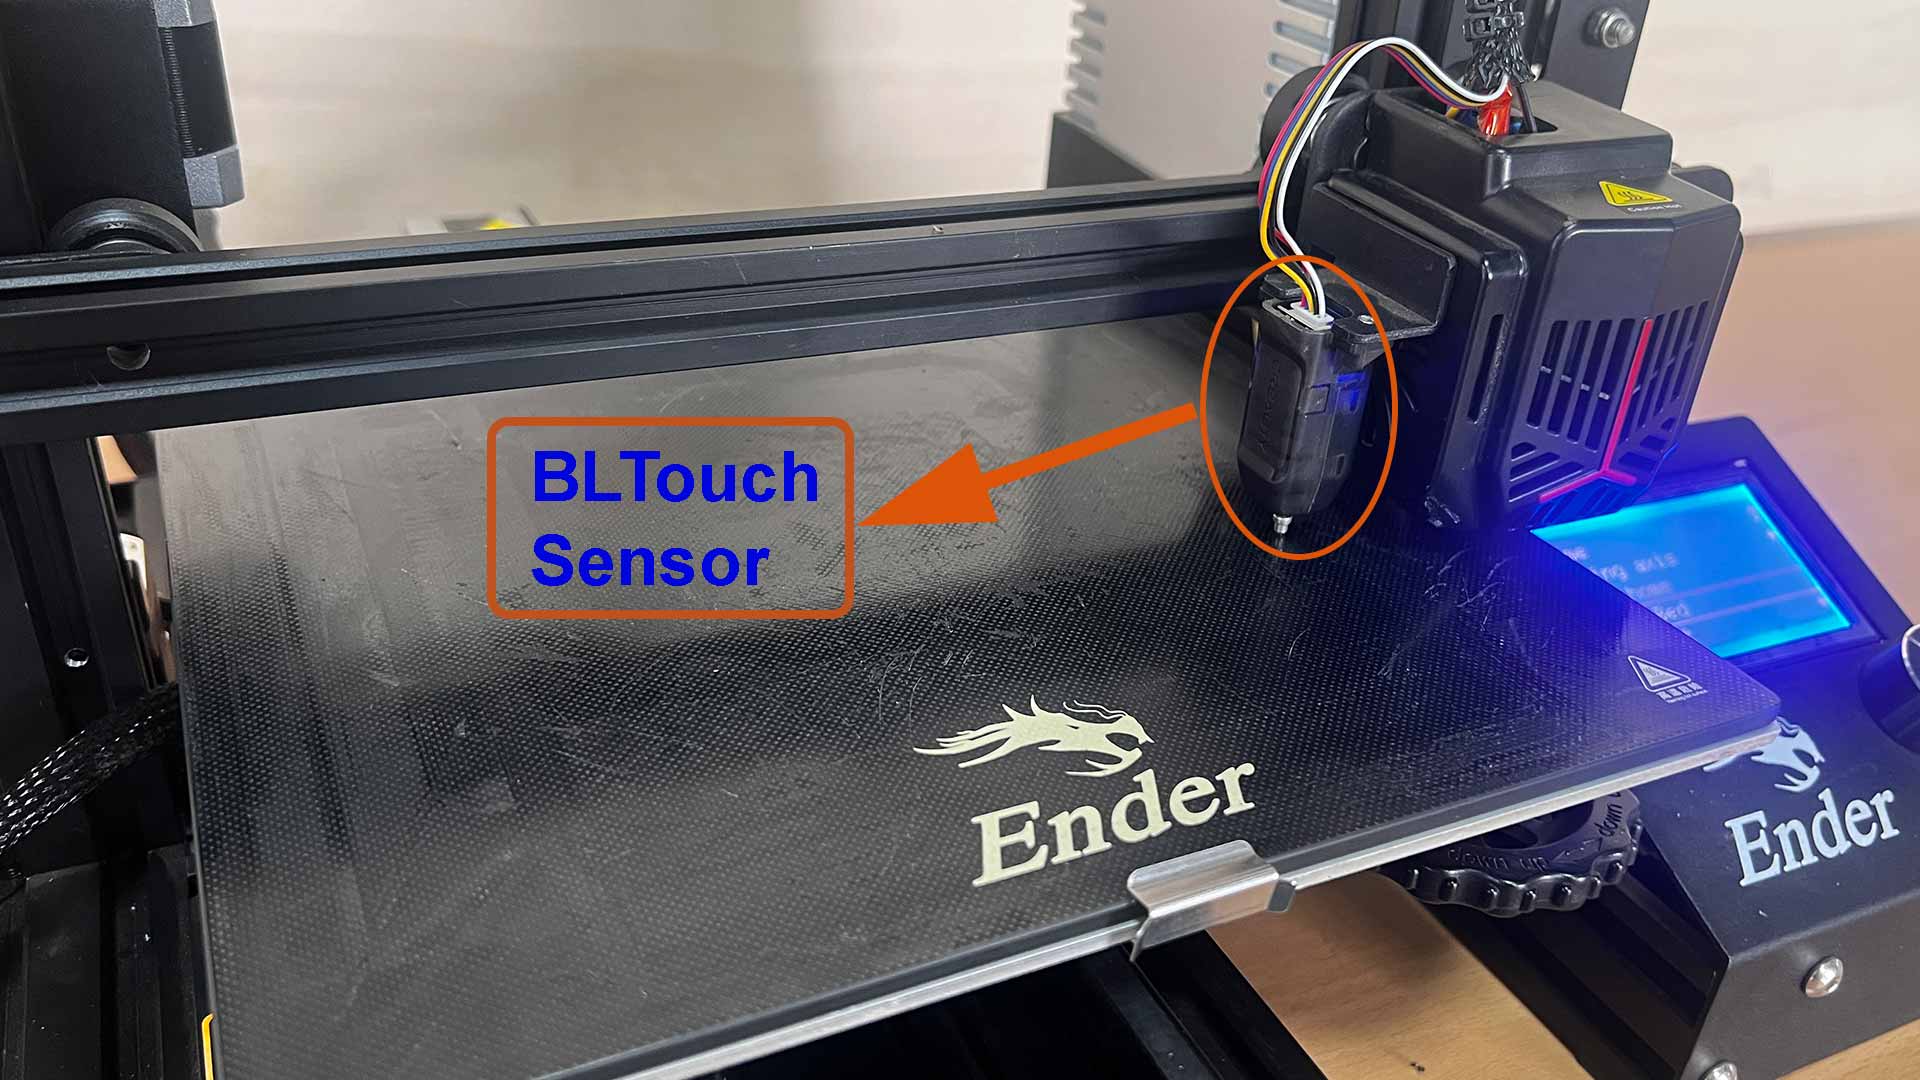
To start, select "Level Bed" (as highlighted). This machine uses BLTouch sensor for automatic bed leveling.
After bed leveling, it is more likely that the z offset distance will be out range. Form 0.4mm diameter nozzle, it should be around 0.1mm, aproximately the thichness of shhet of paper.
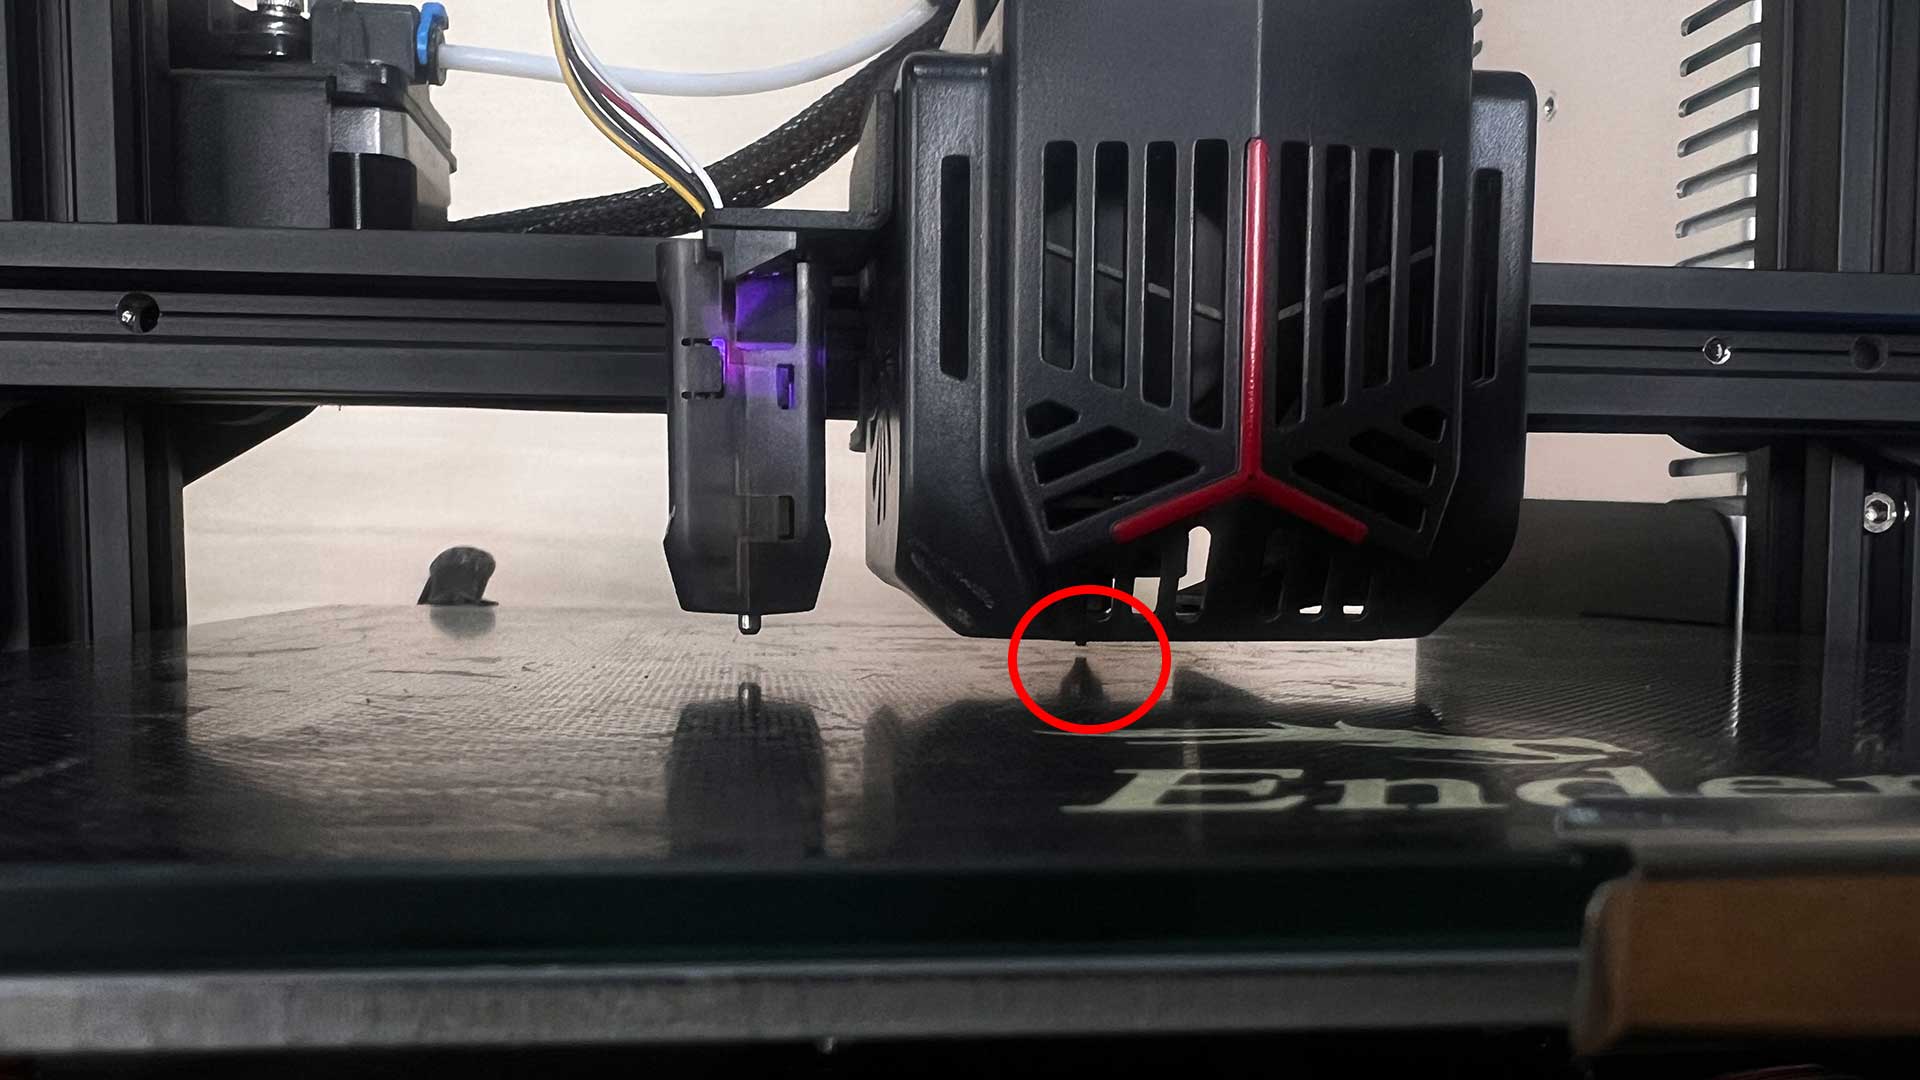
By using a sheet of paper, we were able to adjust this distance by rotate the knob until by reducing the gap between the nozzle and build plate until there is a little friction between paper and the nozzle. The distance should be around 0.1mm.
Ultimaker Cura is a 3D slicer printing software that converts 3D models (such as STL, OBJ) to G-code, the 3D printer's language where objects are printed in layer-by-layer manner. It is one of the most popular slicing software, specifically for Fused Deposition Modeling (FDM) 3D printers. In addition it is free to use for everyone whether it is personal or commercial use. We downloaded throght Ultmater website.

To get started slicing, import the file throght folder icon as highlighted. Additional is choose nozzle diameter at this stage you are planning to use. Here the lab, we are using 0.4mm
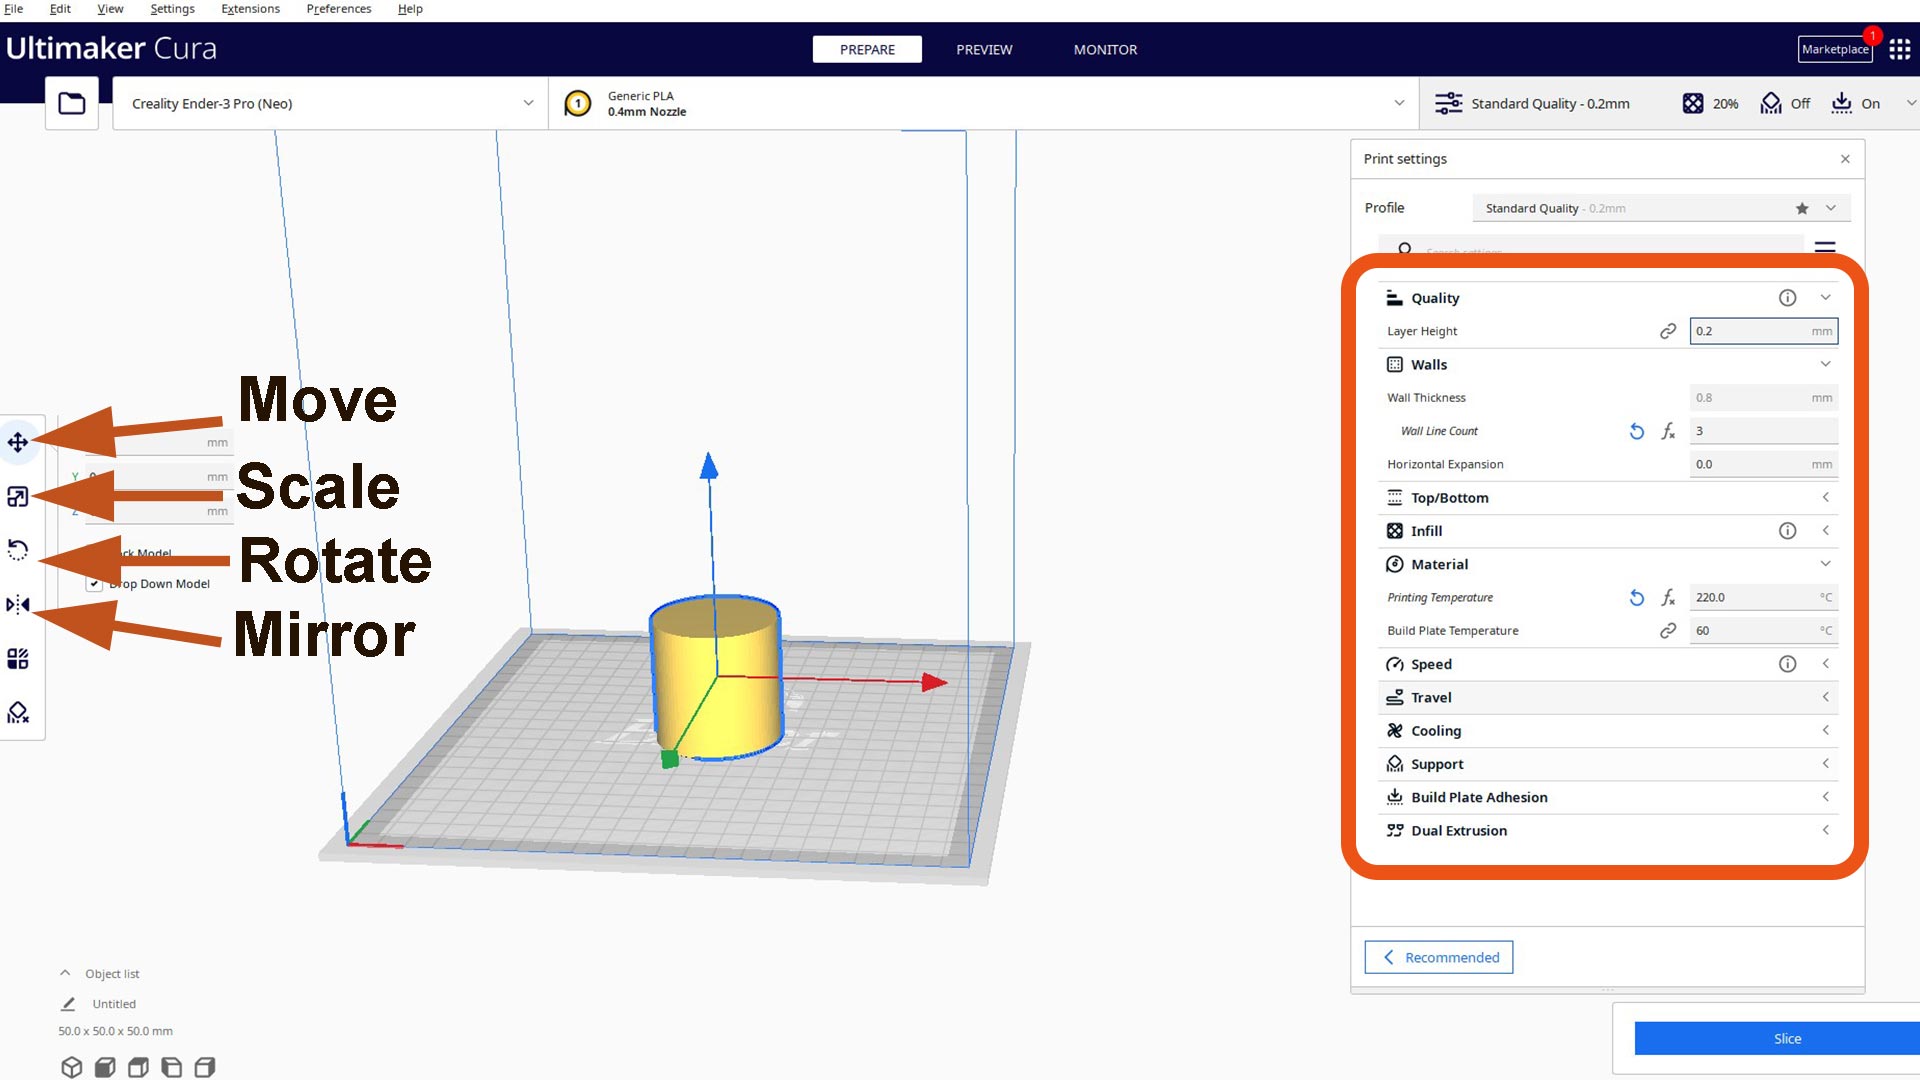
After importing .STL file, we have some controll of the model. These inclode move, scale, rorate and mirror.
After adjusting the model, select slice to generate gcode.
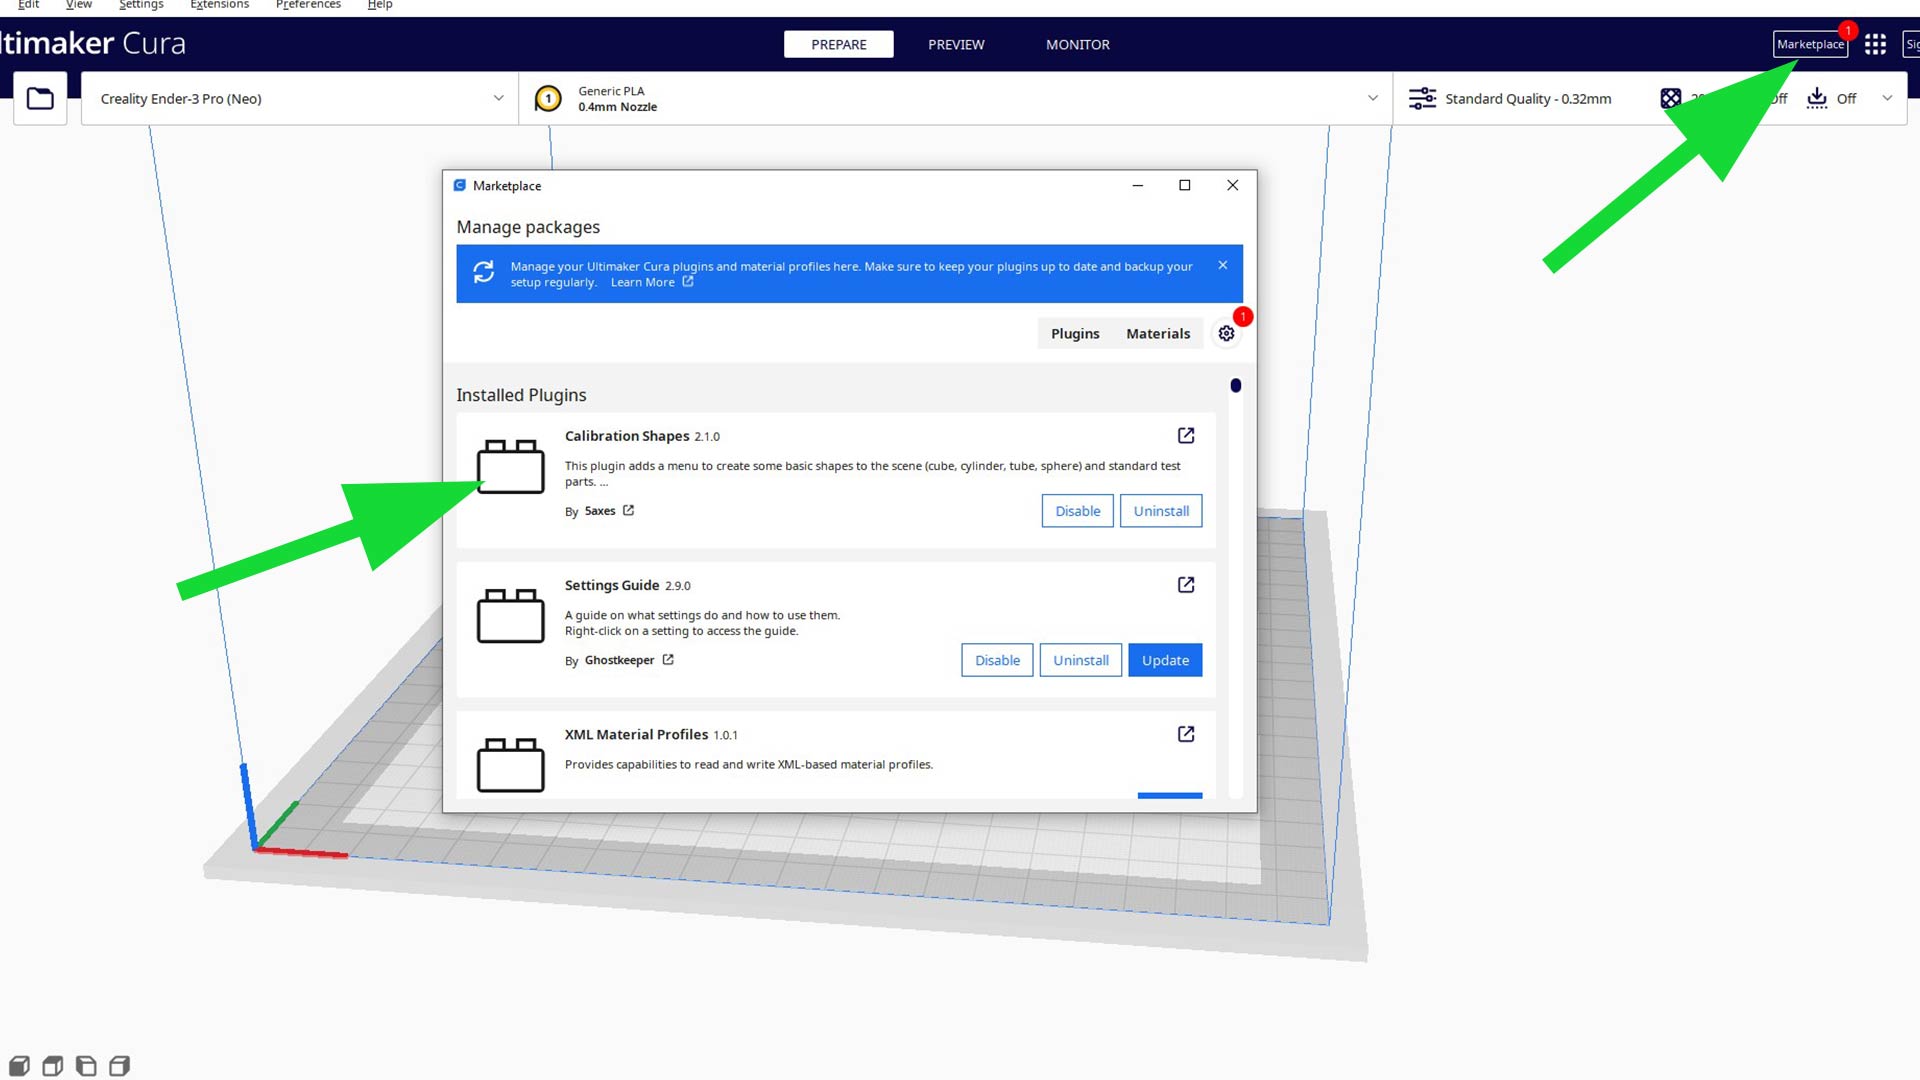
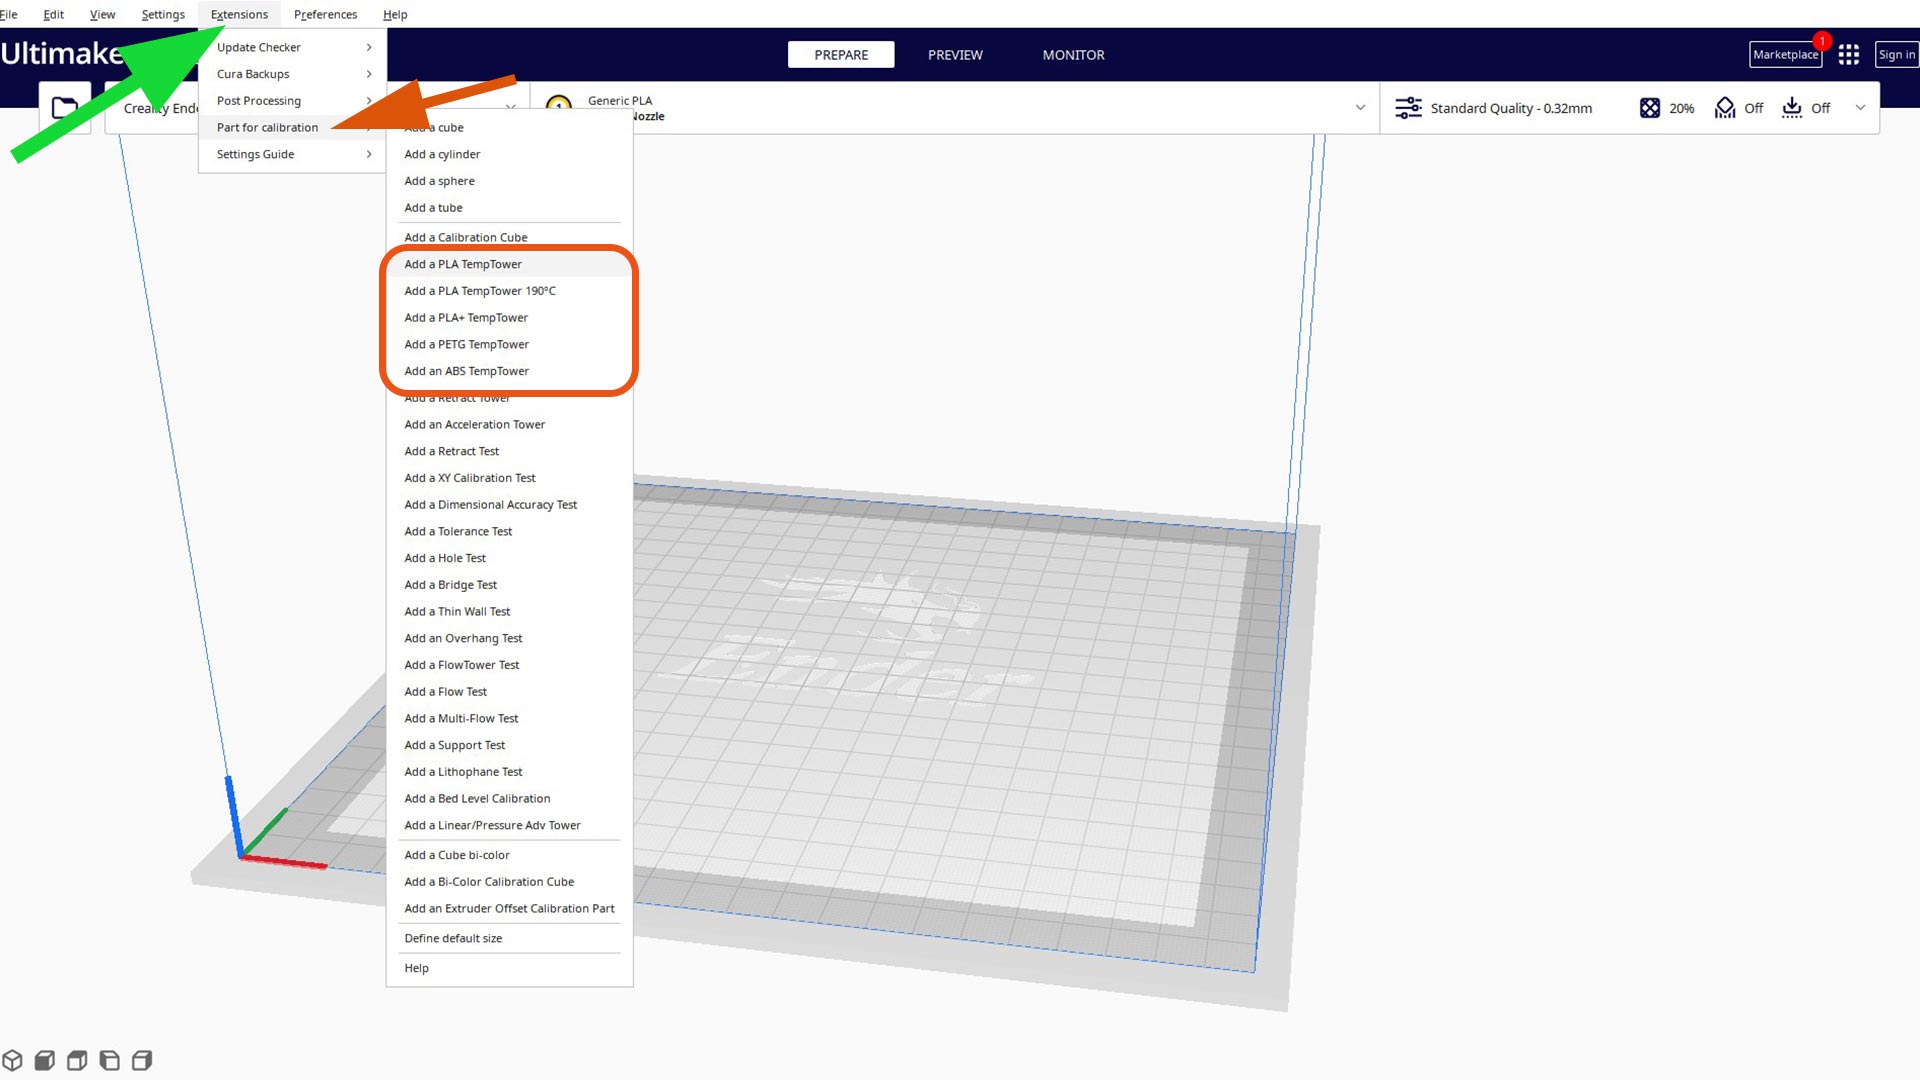
Through marketplace, we were installed extensions necessary for additional functionalities. We installed calibratiion part and post processing. calibratiionshapes gives you shapes to callibrate 3d printer directly into slicer. Post processing allows you to modify gcode.
We tested printing temperature afterwards by printing PLA TempTower.
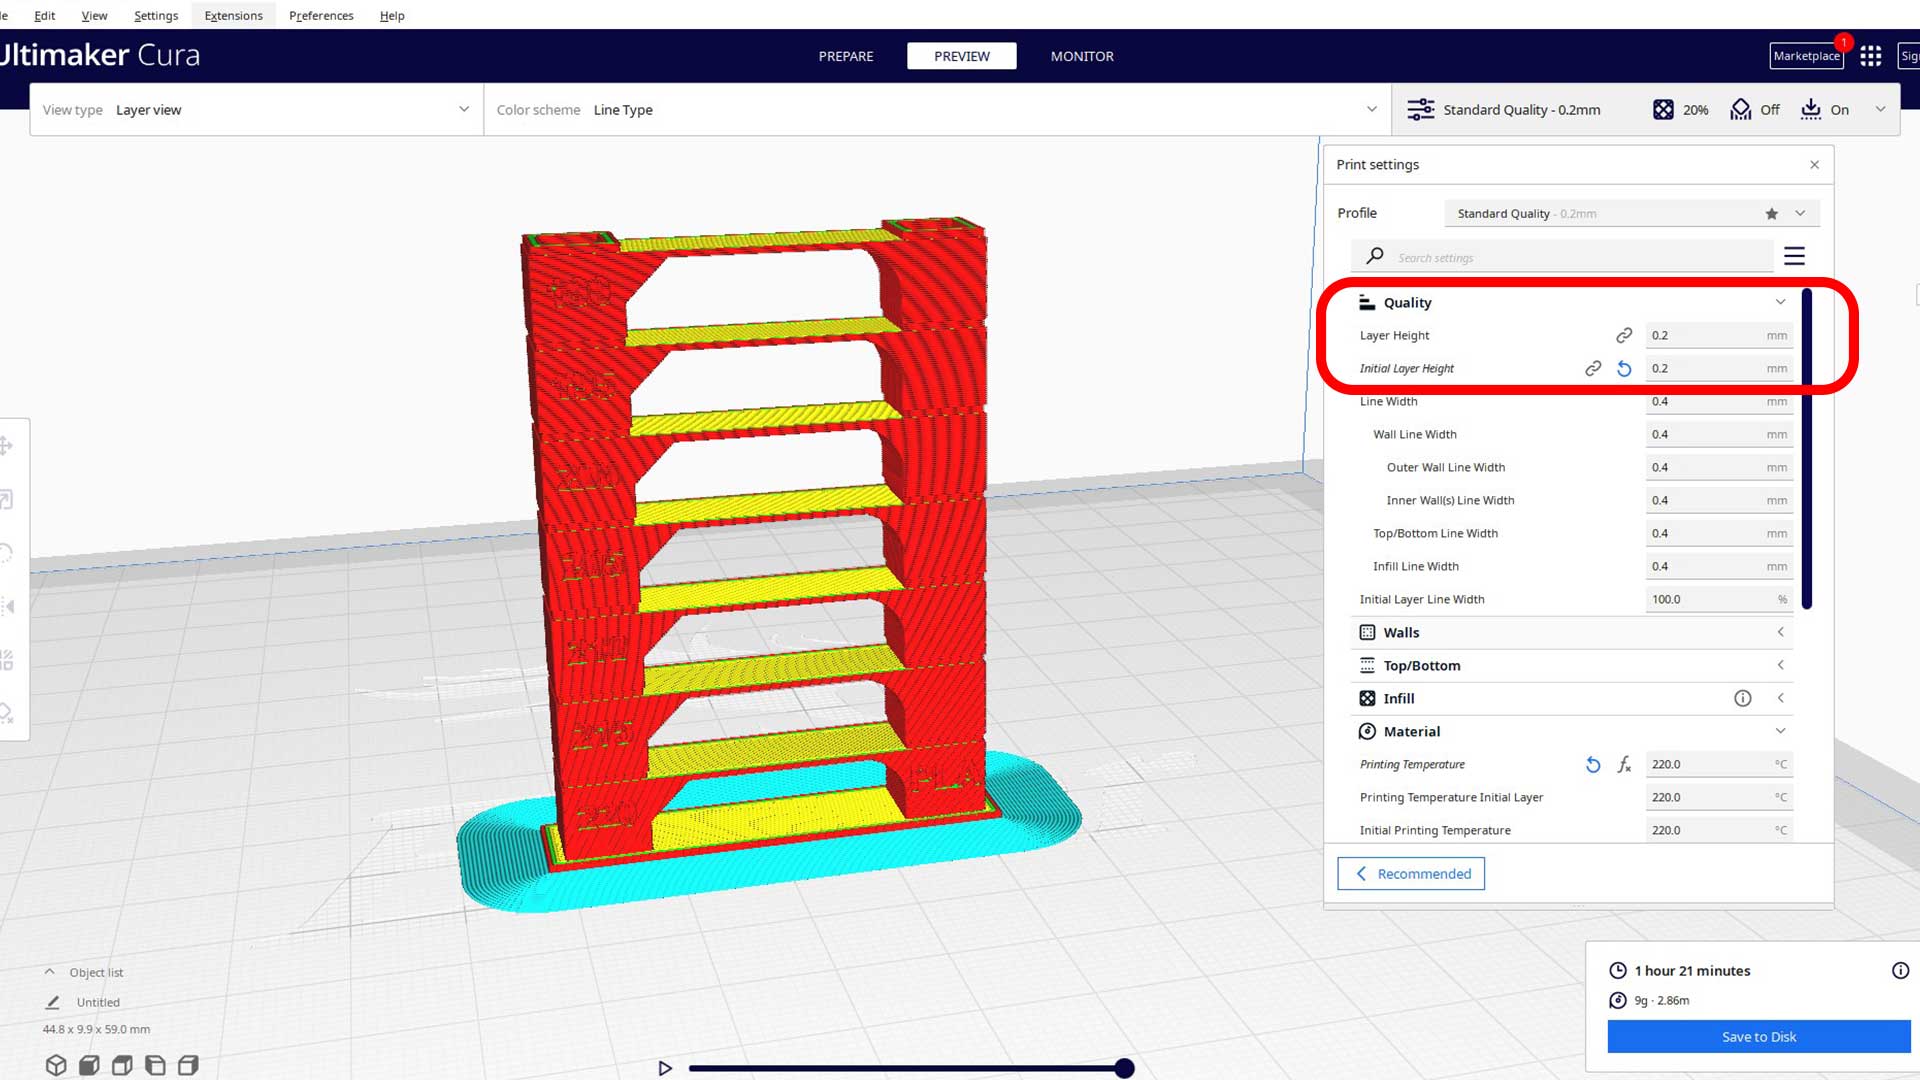
We use 0.2mm layer height.
By opening postprocessing extension, you can modify gcode command. In our case, we need to modify temperature.
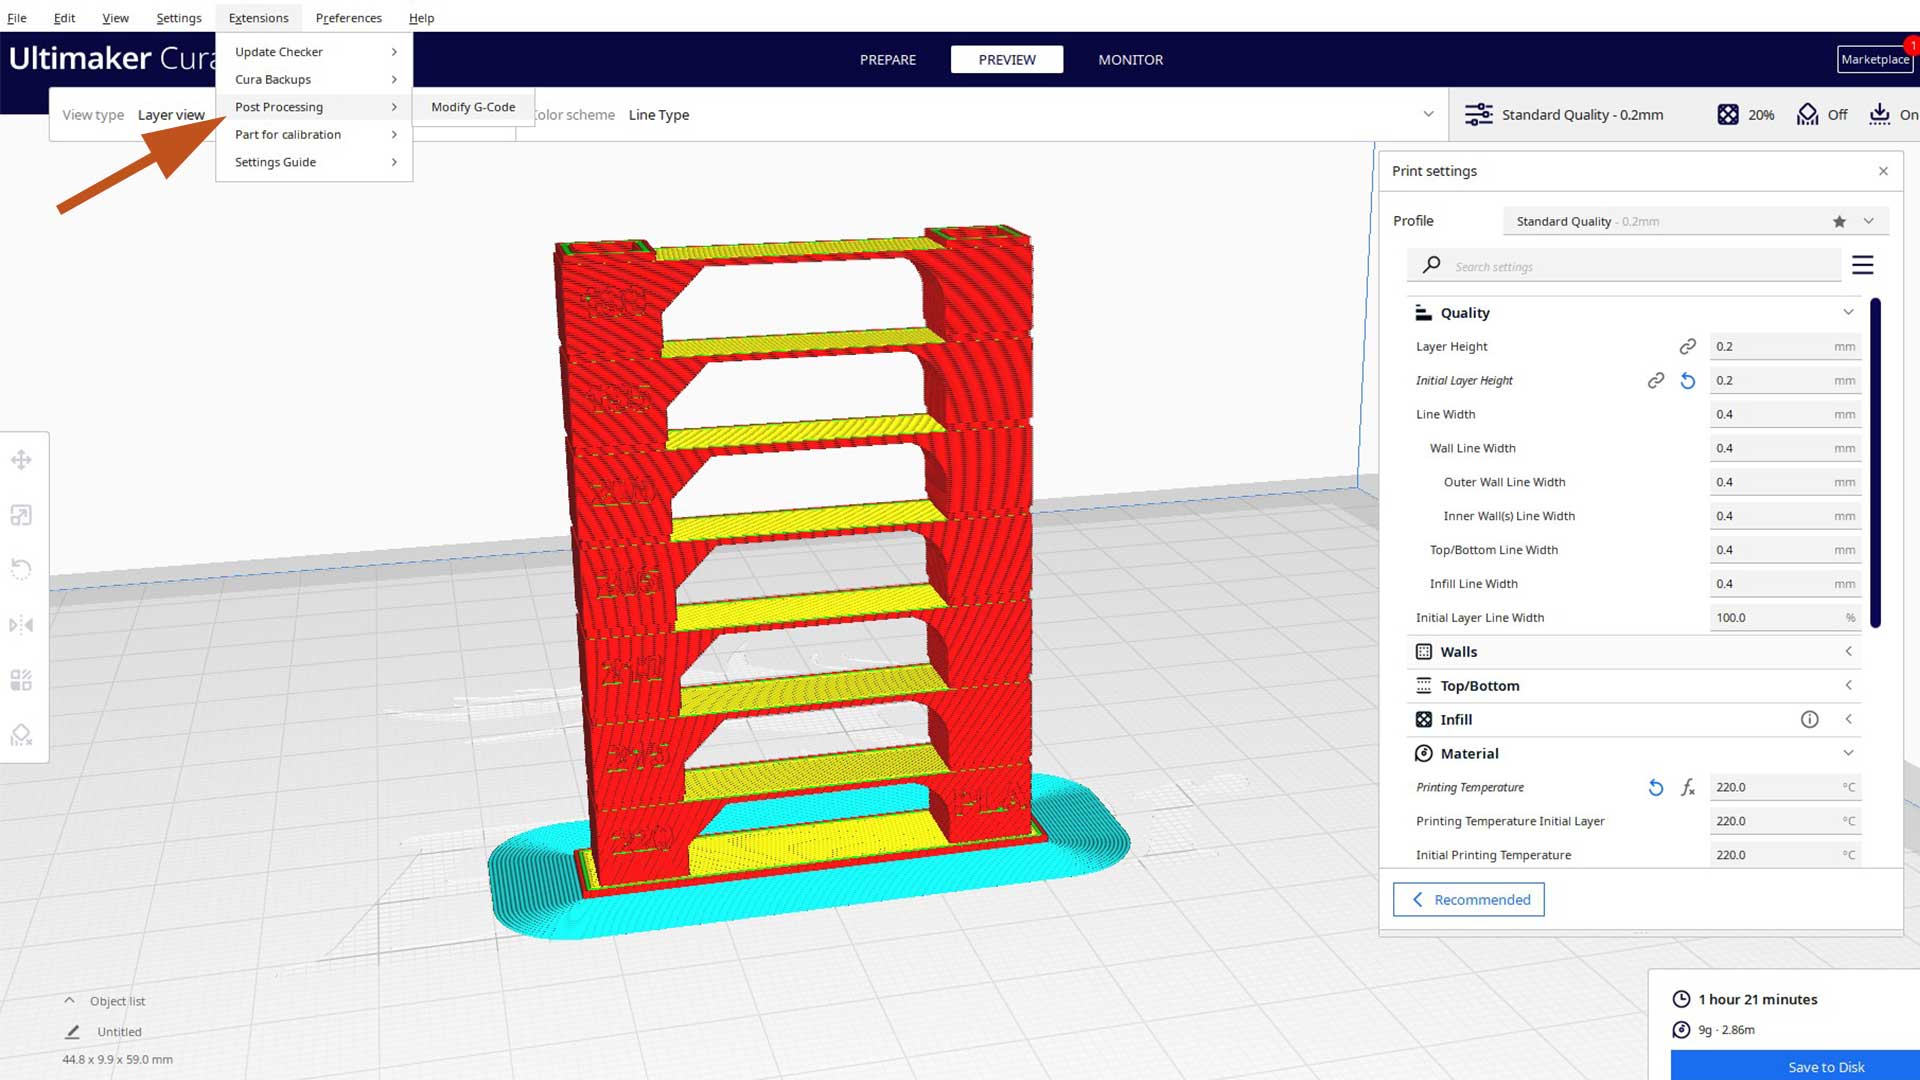
We used TempFanTower. Under its setting, starting temperature ist the initial temperature, temperature incriment is the value printer will change at a certain value. Change layers is the number of layers machine will print before changing temperature. Lastly, Layer offset, are the layers at the bottom of print before consideraring changing the temperature.

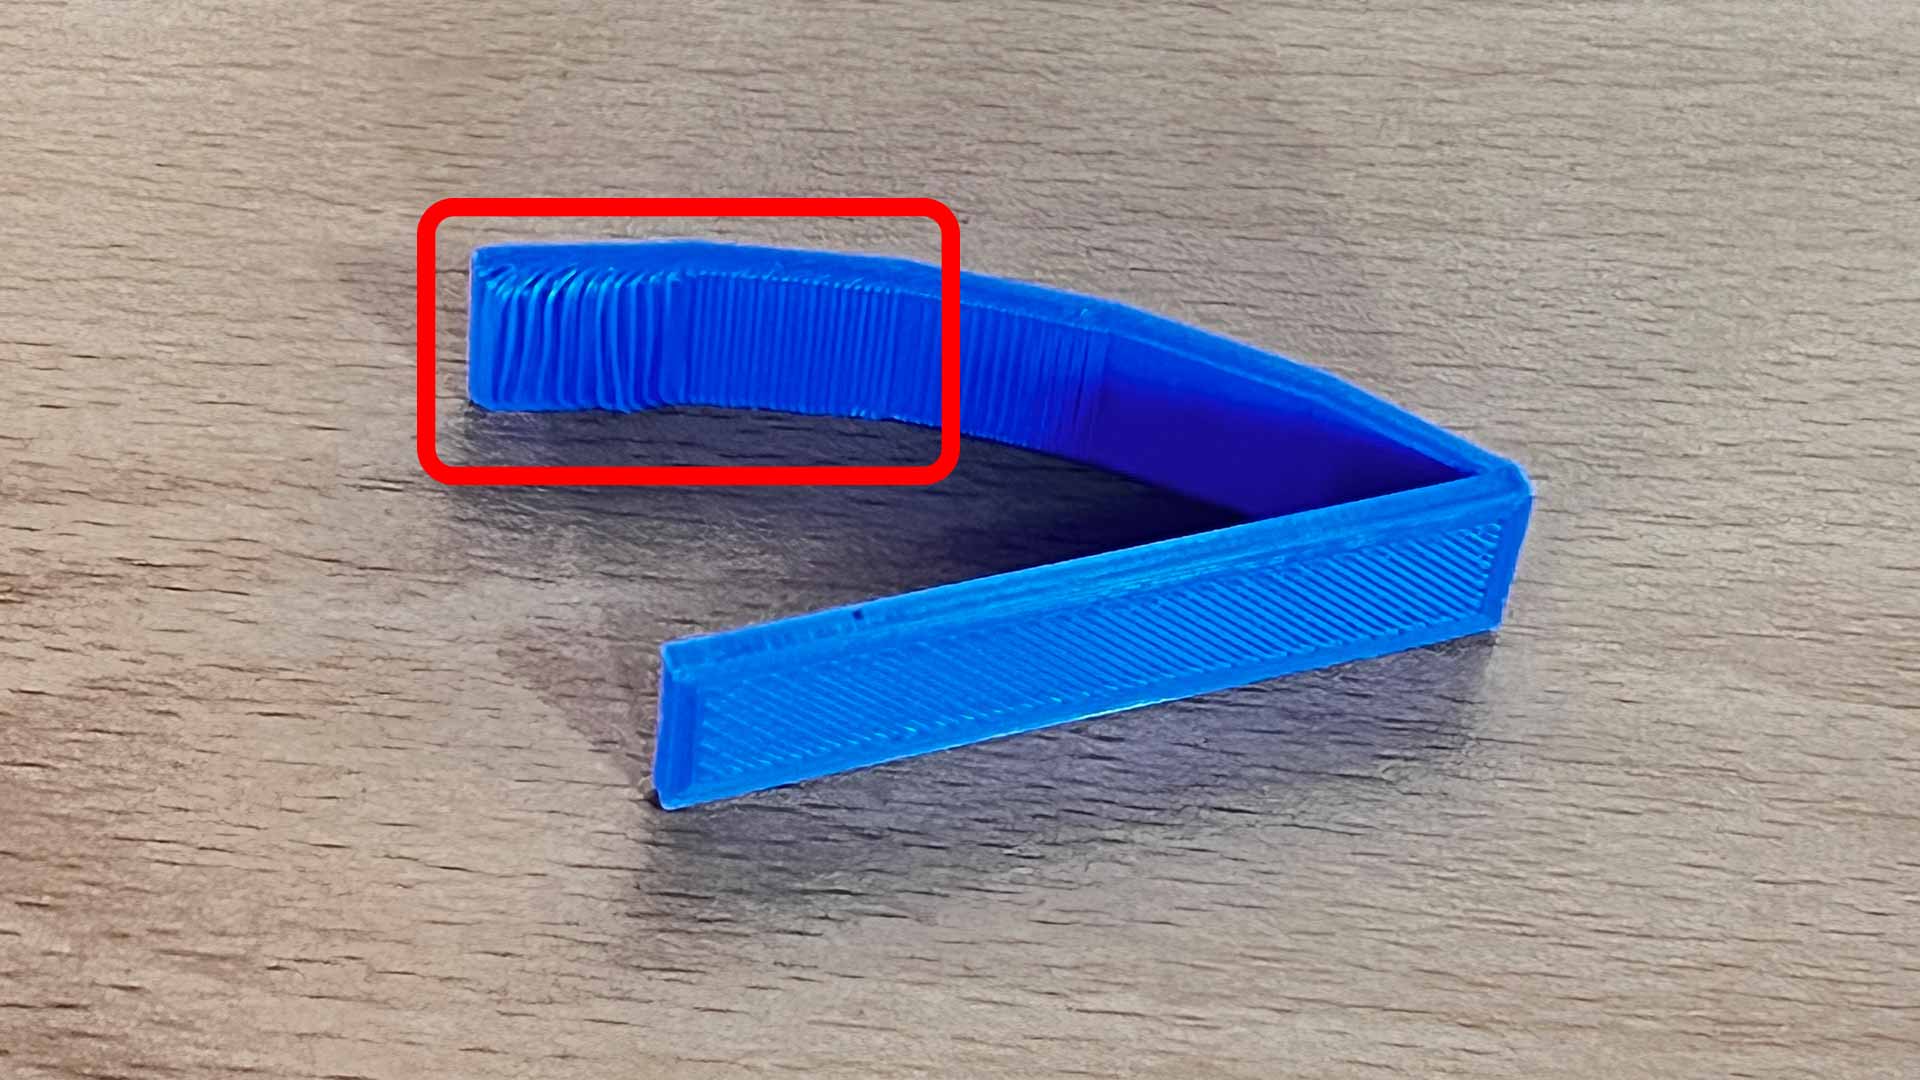
In 3D printing, overhang refers to any section of a print which protrudes out from the preceding layer with very little support beneath it. For example, if you're printing a ledge that's coming out from a wall — as the printer deposits each layer below, there's decreasing material to support it. If the angle is too steep (typically above 45° from vertical), the plastic will sag over, hang down, or even break unless you add supports.
Therefore, it is typical to test the maximum value you can print without support. The following model has a range in increase in overhang.

After printing, we found that 55 degree is the maximum you can print without the need of support fot our 3D printer.
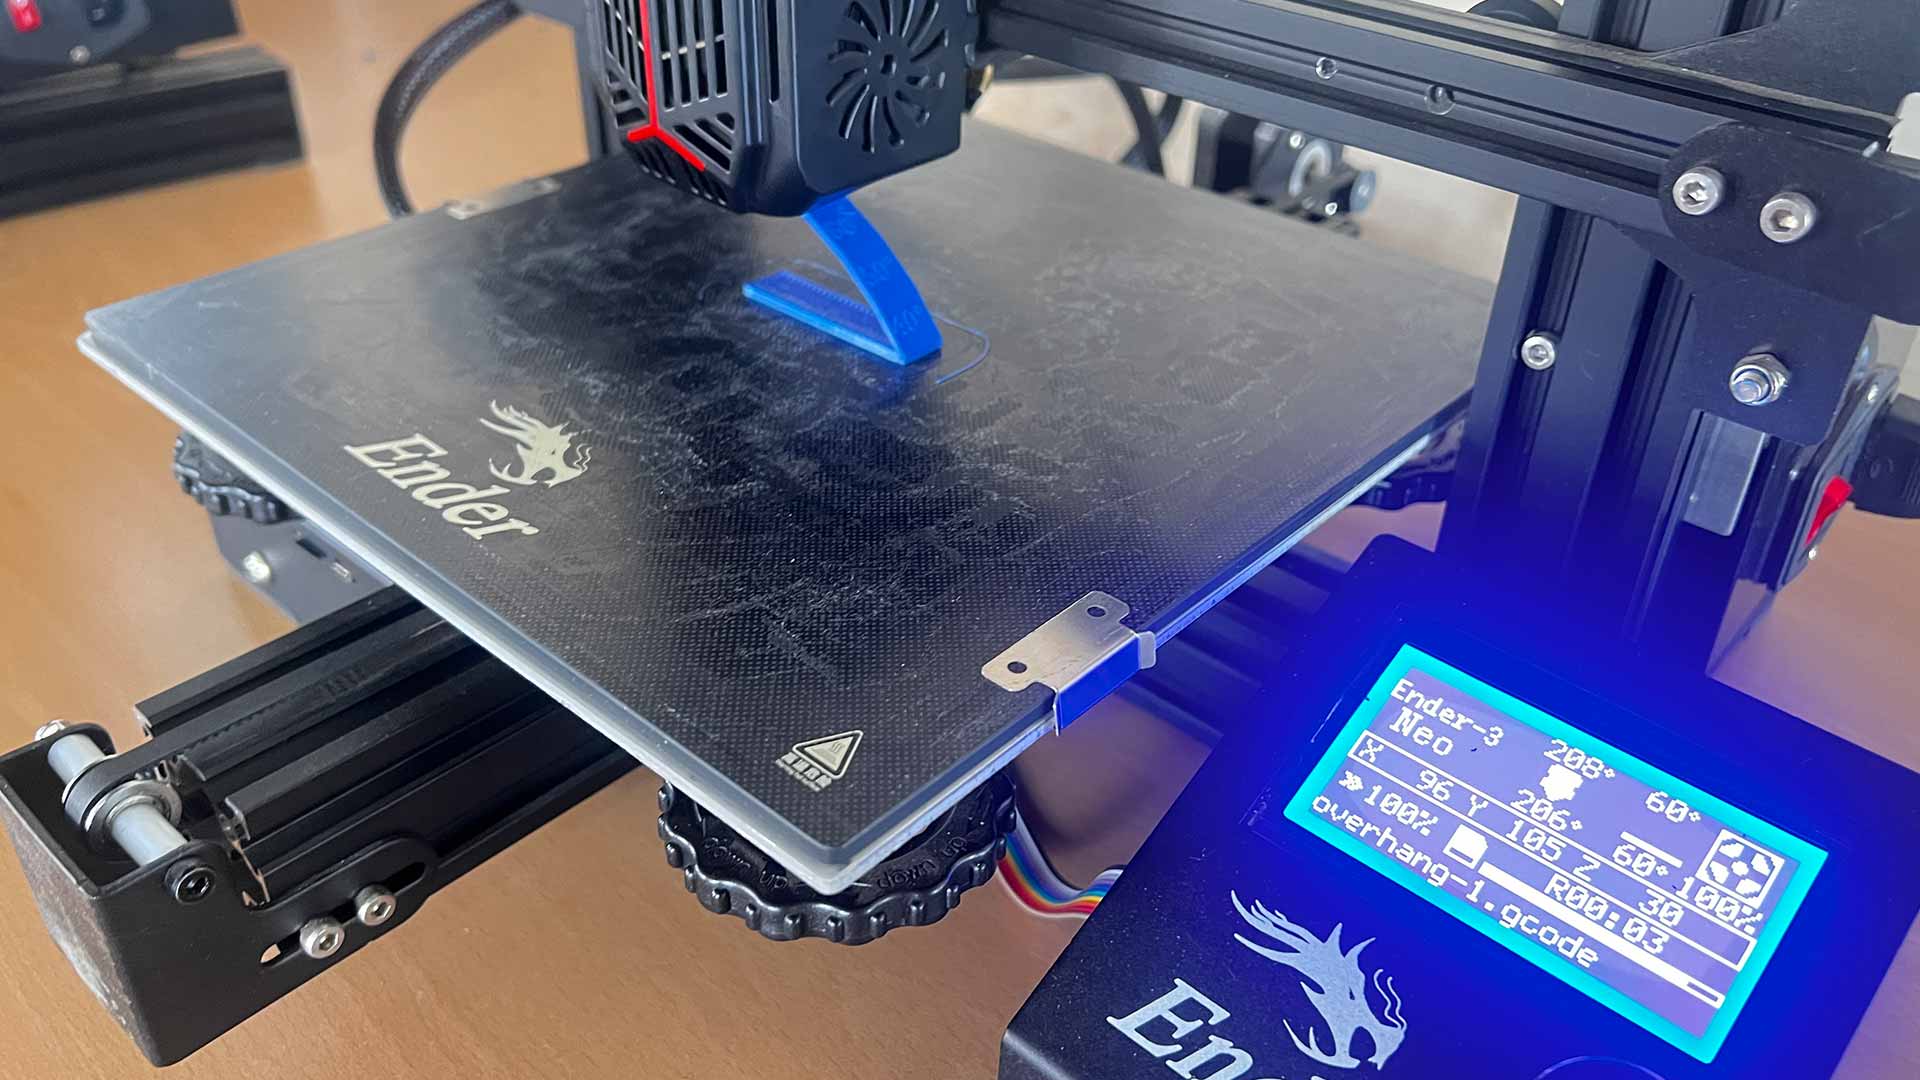
Above 55 degree, filament tends to sag more thus aftecting the quality.