13. Molding and Casting
This week we had to make a mold of silicone so we could cast a product from it. I decided to make a dagger from a video game I really like. I chose that because I need no mold for my final project, and I wanted to make something nice.
If you want to see more here is what we did in our group assignment. Group Assignment
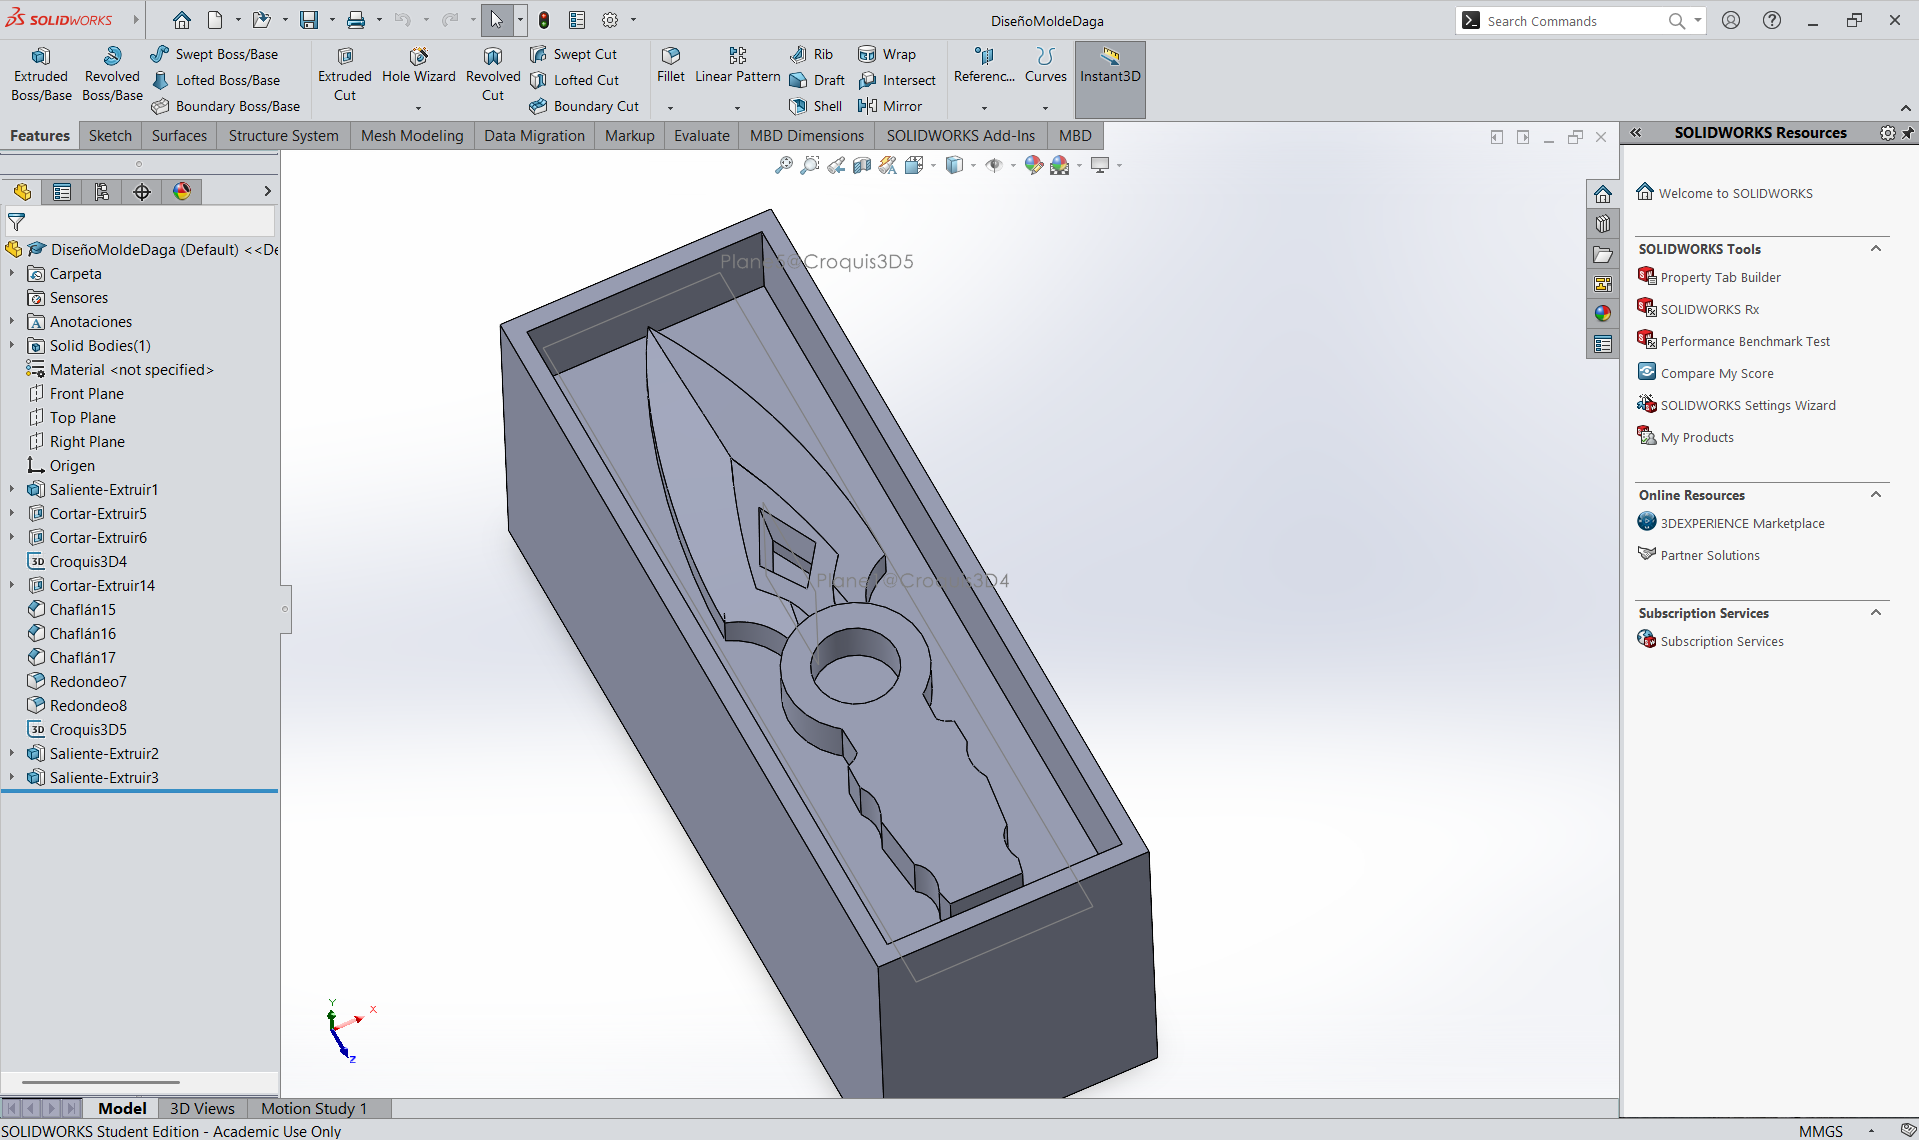
Solid work Design
I designed the Dagger in solid works taking into consideration that I will be splitting a wax block with a coworker that is also on the fab academy, so we’ll have 50-50 of the wax block
After working 1 day on the desing this was the result.
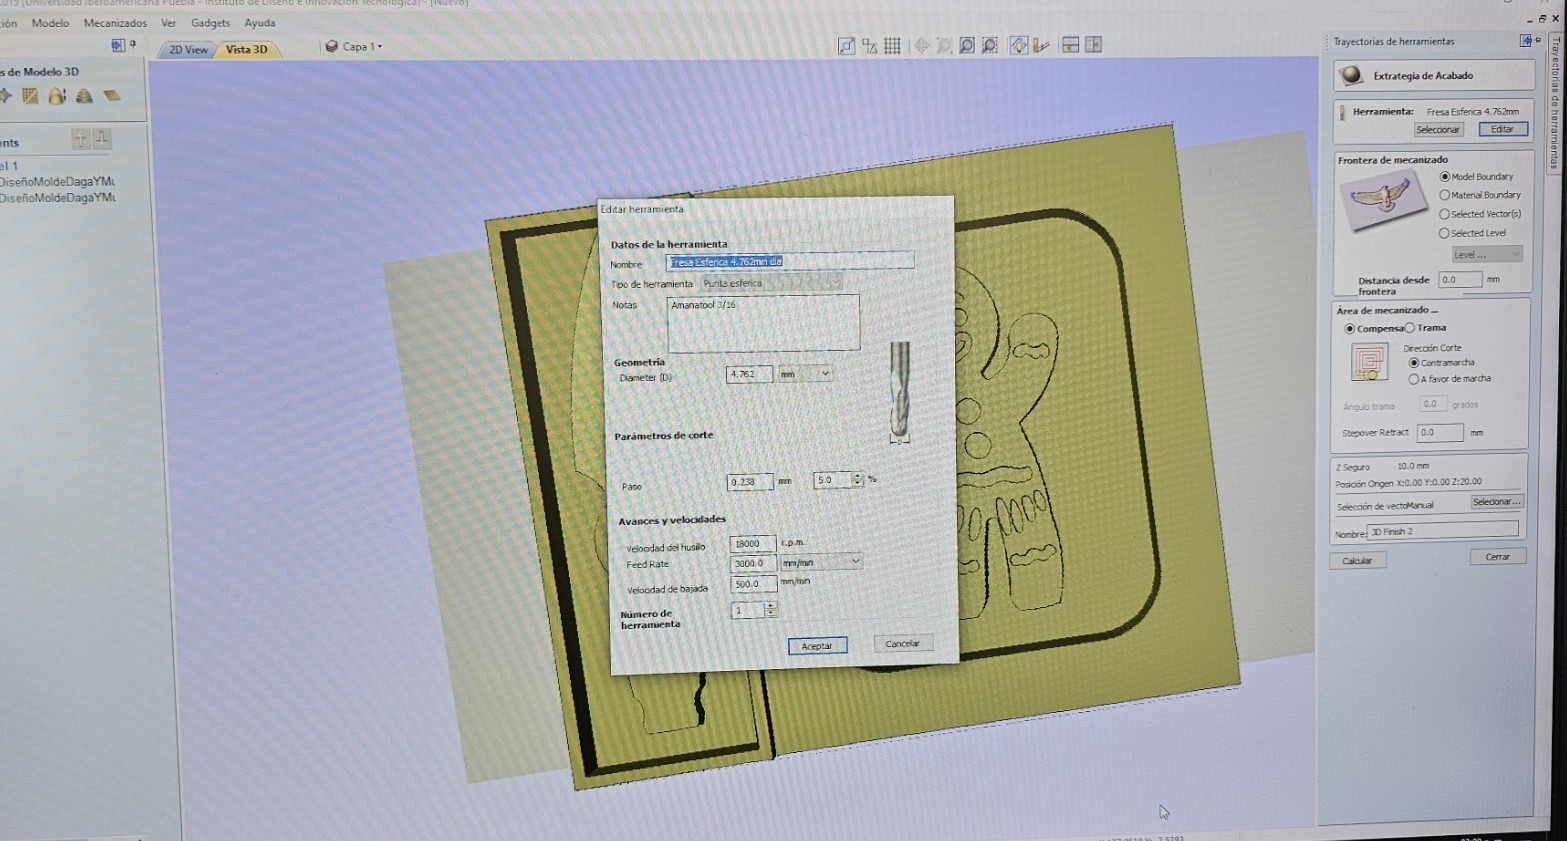
V-Carve
After having completed the design in SolidWorks I saved it as STL and exported the file to V-Carve software. For the base design we’ll be using the Router cnc machine
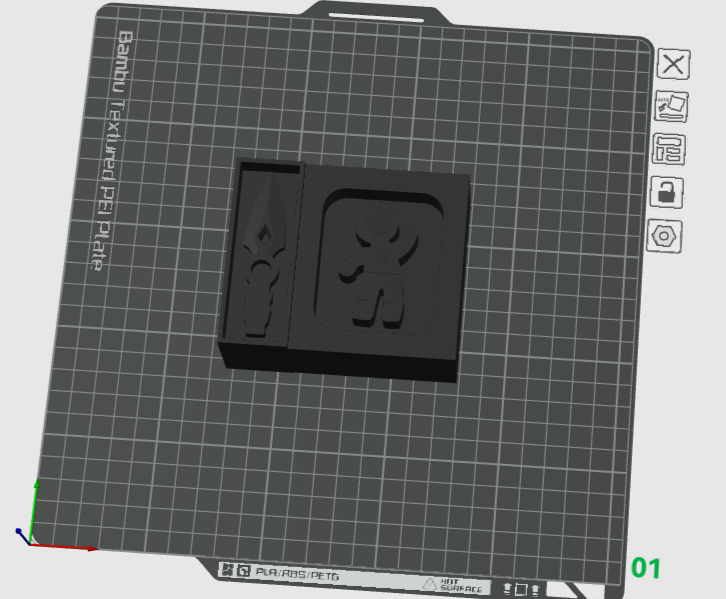
Because we were sharing the wax block, we combined our 2stl into one STL file. Because I have a bambu lab 3D printer I used its software to open both at the same time and put them together, then export it as one STL
When open V-Carve the software will ask for the measurements of the wax block so we measure it. In our case it was 85 mm x 72.75 mm x 34.5 mm. Once we entered the correct measurements, we imported our STL
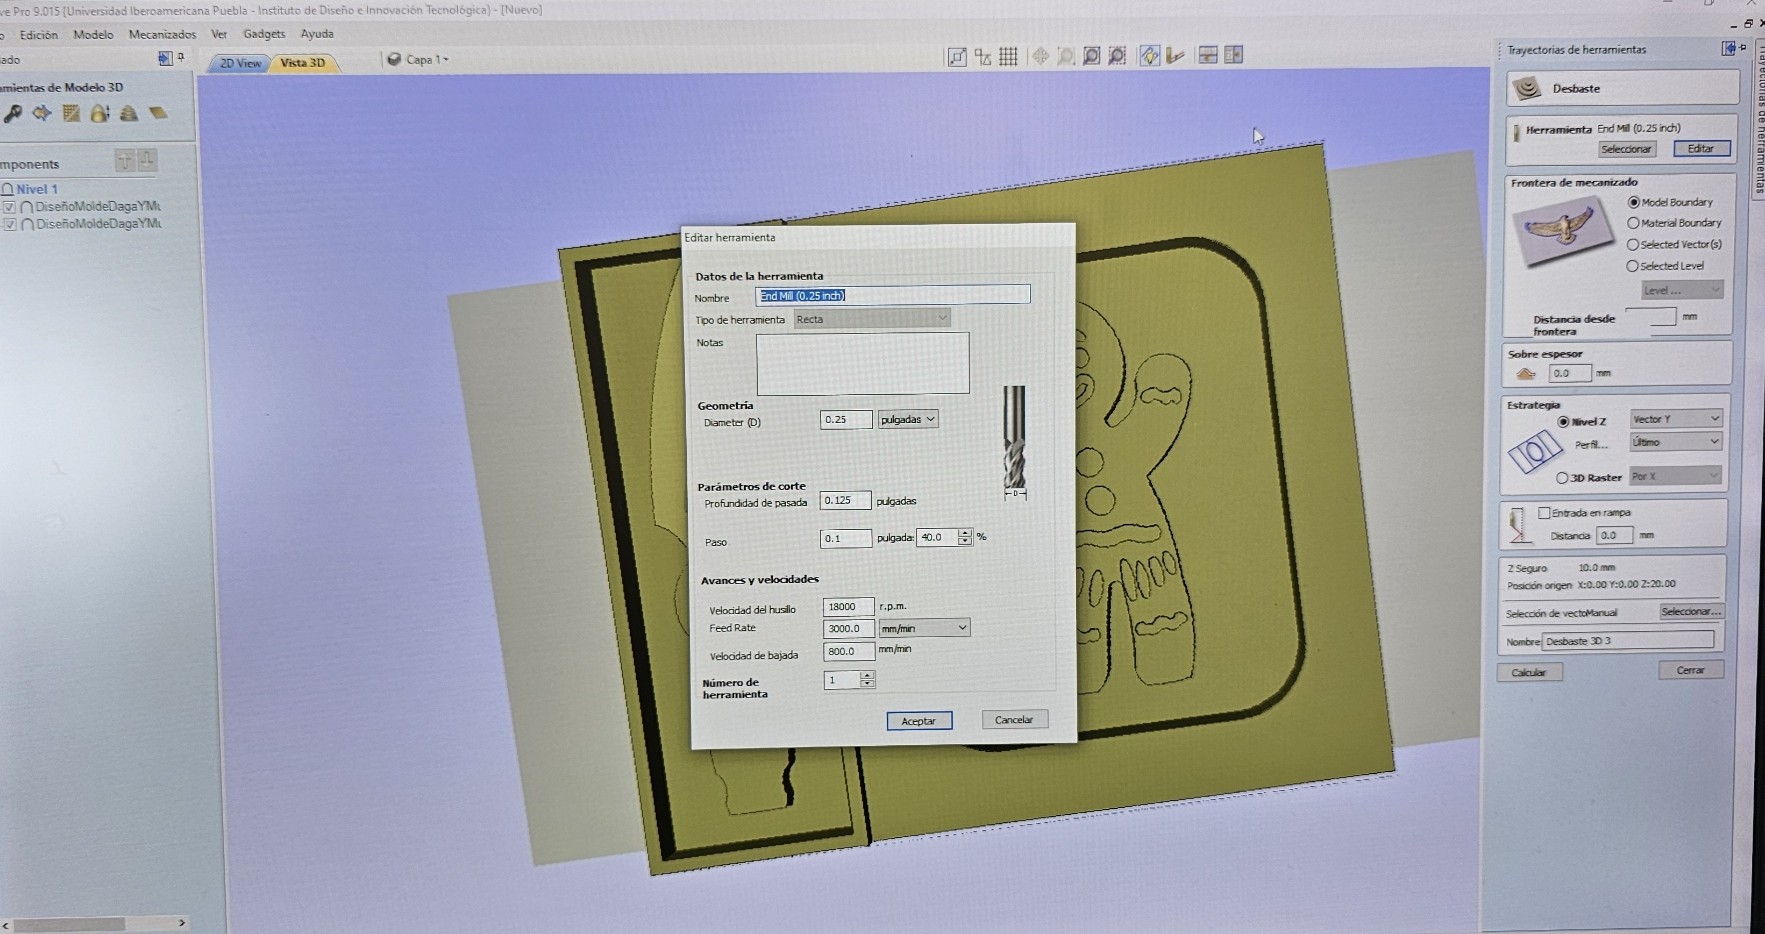
I began setting up the Roughing Toolpath using the options on the right panel. For this one I used the 1/4" tool with the next parameters
Then I used the finish tool finishing strategy so we could have a better detail on our piece.
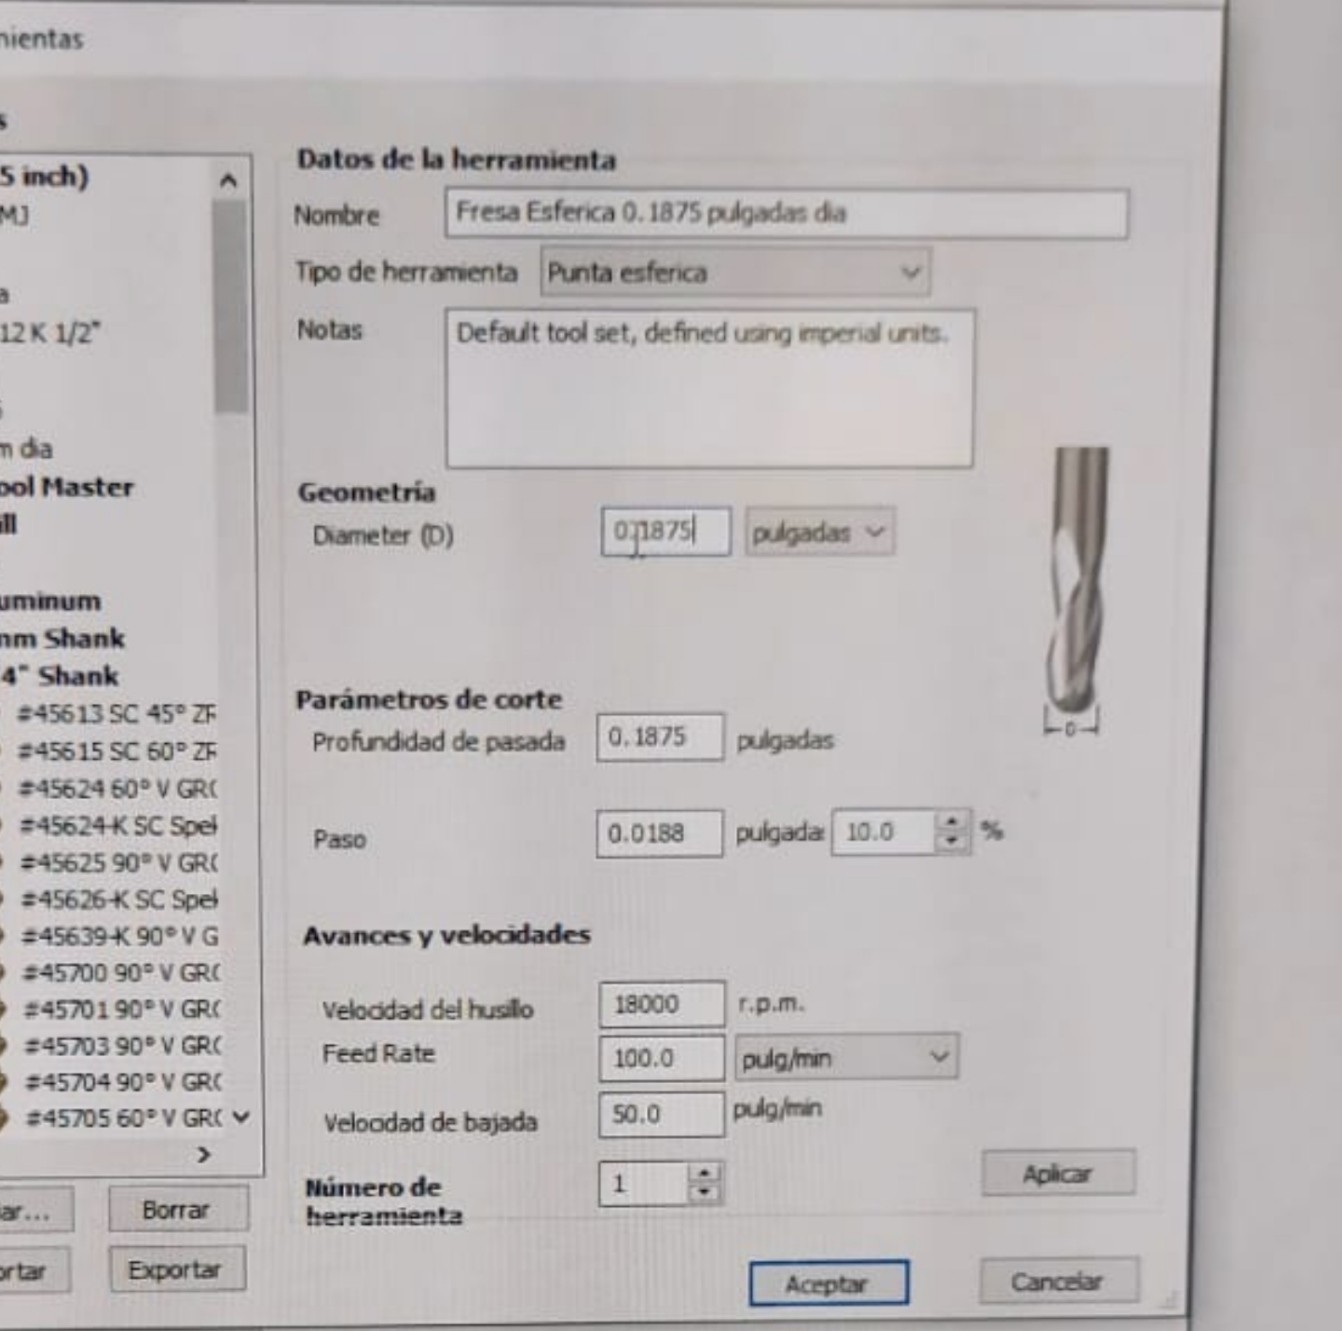
The pictures are a little blurry because the computer that have the co-procesor for the asia robotica (the cnc router we used) wouldn't allow us to take screen shots so I had to take them from my phone
This are the parameters of the 1/8 upcut endmill
We used 2 tools for the cutting process
- 1/4" 2-flute straight flat endmill (25 mm flute) for roughing
- 1/8" 4-flute upcut endmill (27 mm flute) for finishing.
Now that we have our 2 codes, the roughing and finish I saved it on my USB and went to the Router cnc.
Cutting the Wax block
We started by doing:
- Mounted the wax block securely on the CNC bed using double-sided tape to prevent any movement during machining
- Inserted the first tool, a 1/4" flat end mill, which performed the entire roughing process.
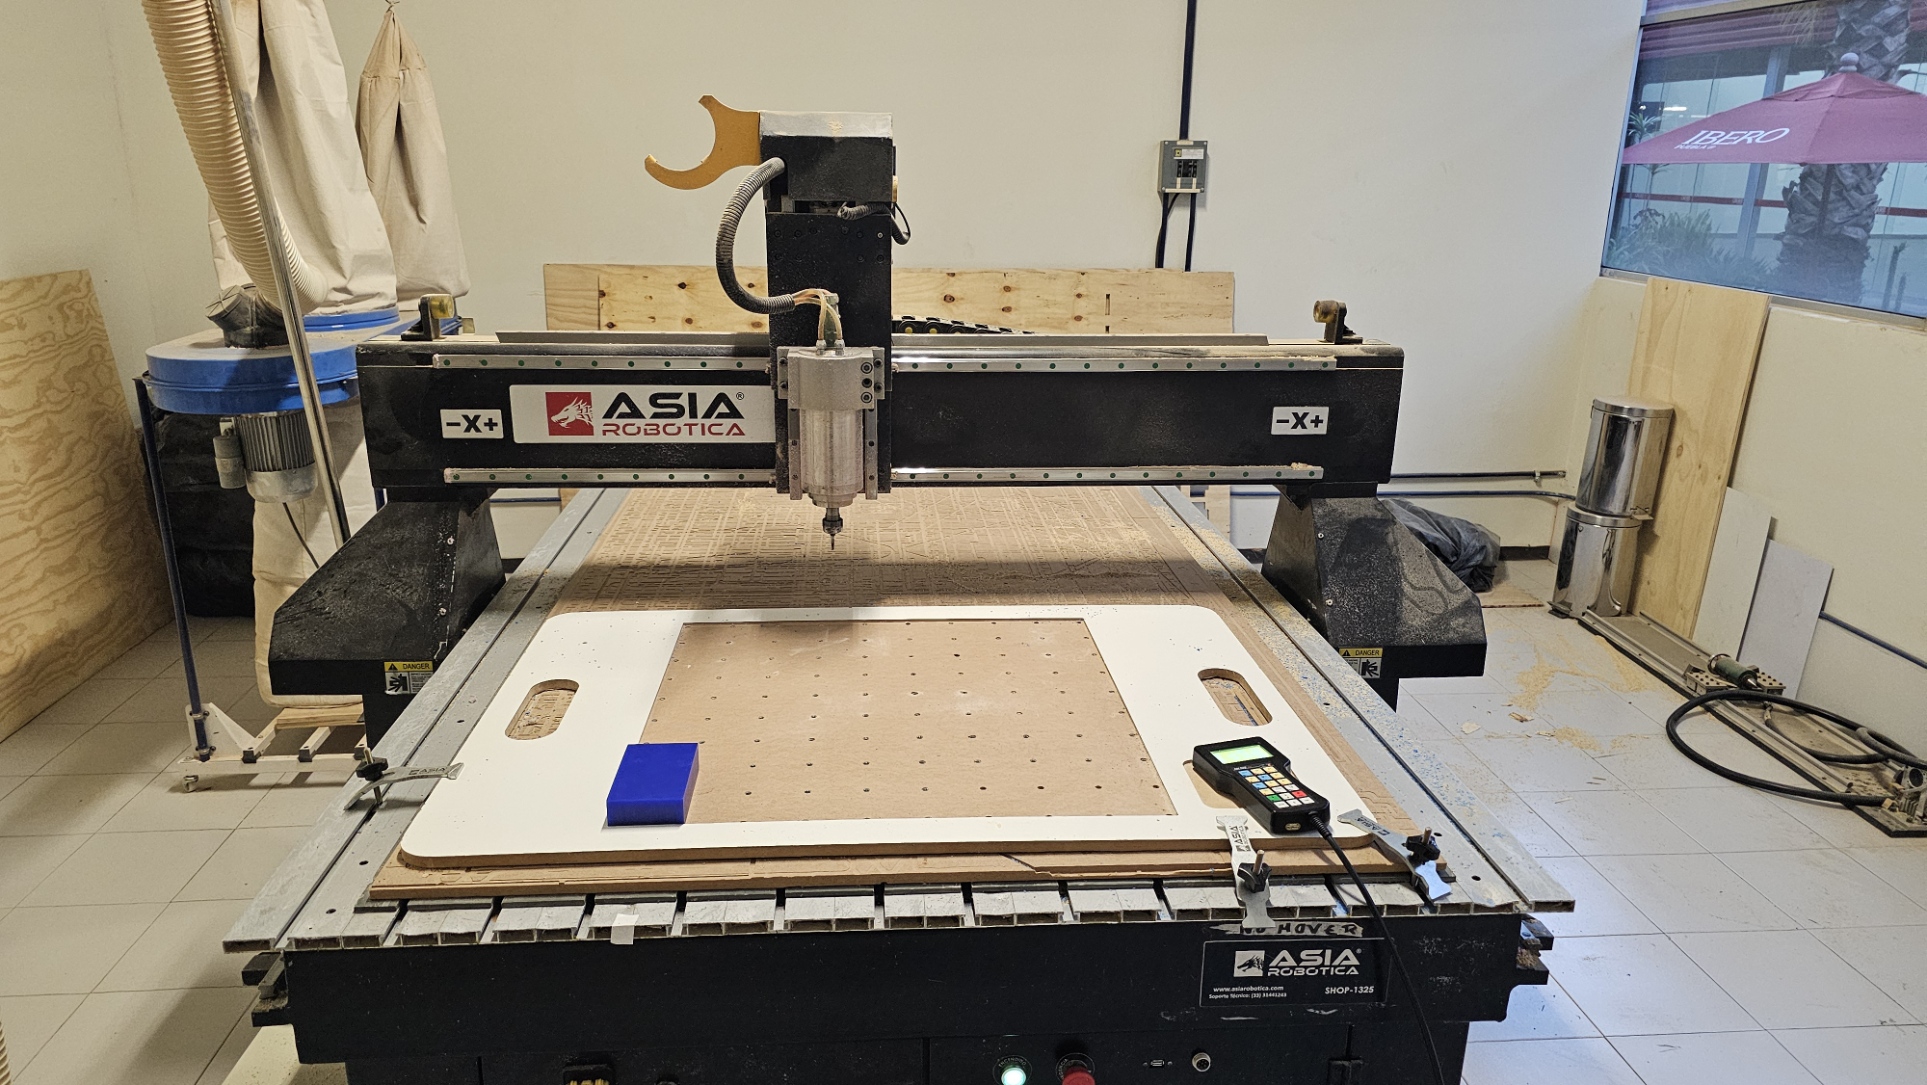
Once this roughing finished we have to change the tool for the 1/8" and start the finish part
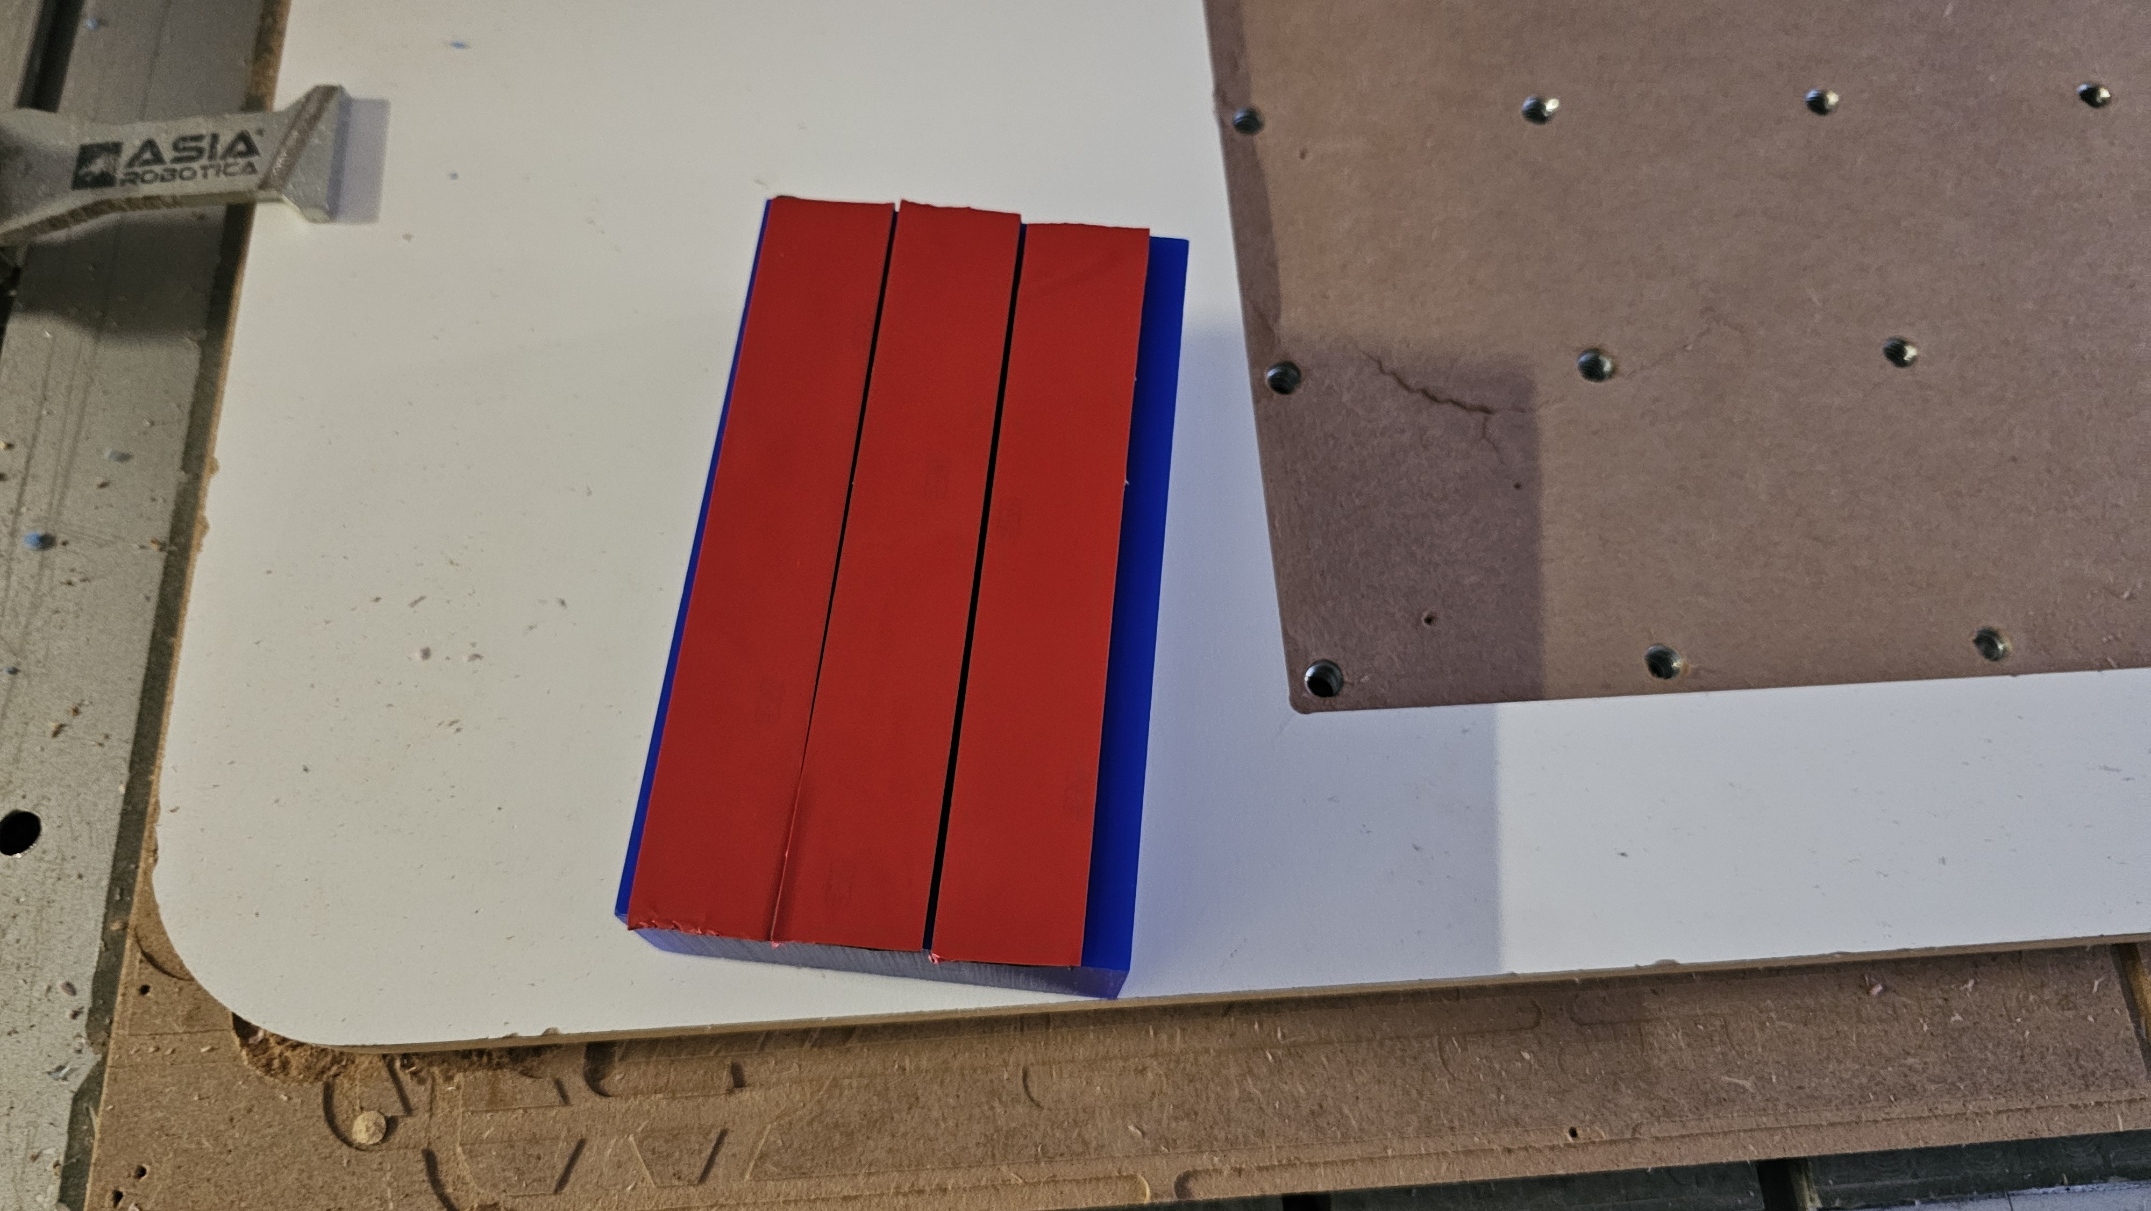
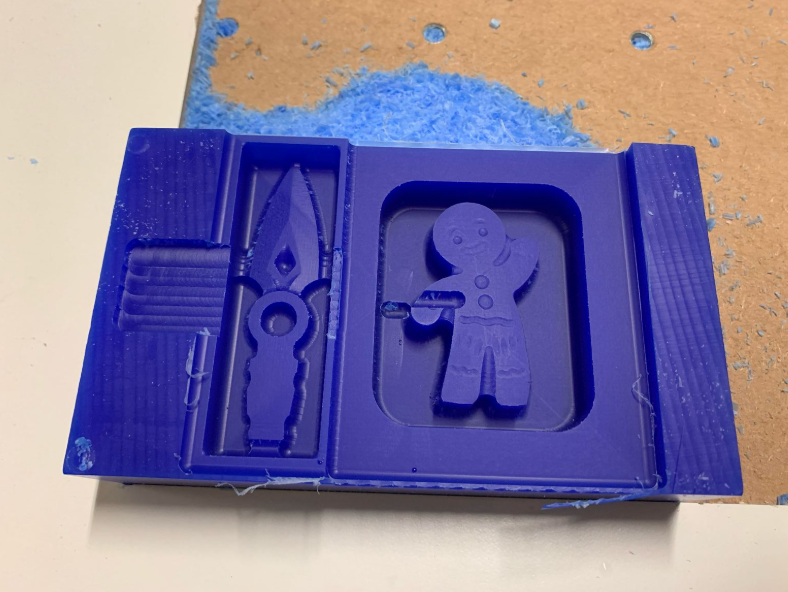
This was the final result after the 2 machining process
Materials for Silicone Mold Making
- Silicone 3030 Part A (Yellow bucket)
- Silicone 3030 Part B (White bottle)
- Digital scale
- Disposable coffee cups (used as containers)
- Wooden mixing sticks
- Nitrile or latex gloves

Mixing the Silicone
The first step was to calculate the amount of Part B required based on a 10:1 ratio of Part A to Part B. I used the weight of **53.8 g** for Part A, so the required amount of Part B was:
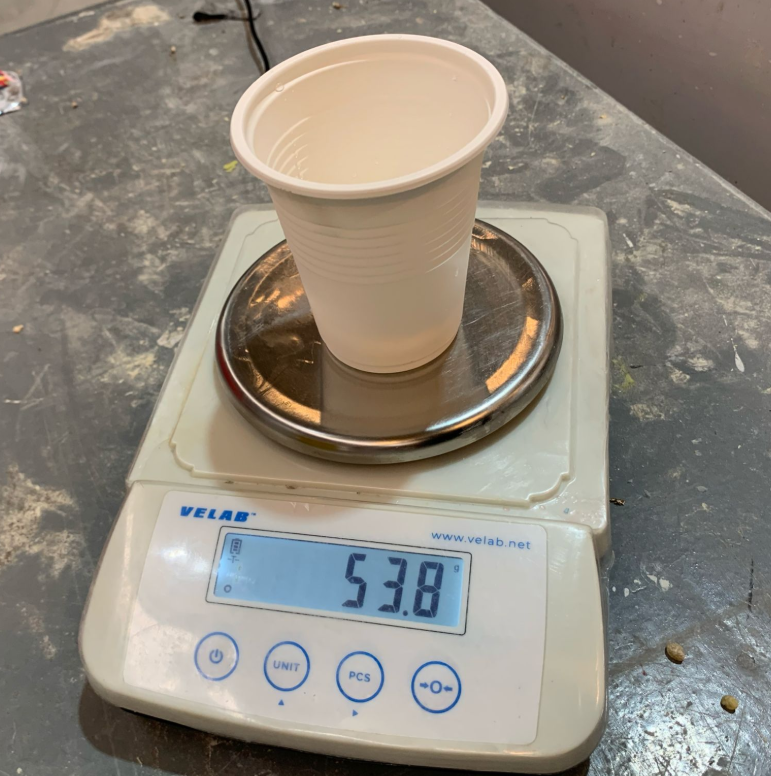
Part B = 53.8 g / 10 = 5.38 g
2.Adding 10% extra to Part B:
I decided to add 10% more to Part B. This increases the amount of Part B to:
Part B final = 5.38 g * 1.10 = 5.918 g
3. Total weight adjustment:
Adding the calculated amount of Part A (53.8 g) and Part B (5.918 g), the total weight of the silicone mixture before accounting for the container was:
Total adjusted weight = 53.8 g + 5.918 g = 59.718 g
However, after considering the weight of the container (7.9 g), the final total weight I used for the mixture was 61 g.
I decided to use more Part B than originally calculated in order to modify the curing time and flexibility of the silicone. By increasing the amount of Part B, the curing process is accelerated, and the final mold becomes more rigid. This is especially useful when working with molds that need to set faster or require greater durability and detail retention.In this case, the final weight of Part B used was 7.2 g, representing an increase of approximately 33.8% compared to the initial calculated amount (5.38 g). This modification ensures that the mold will cure more quickly and have the desired rigidity.
Mixing the Silicone:- Added Part B to Part A and mixed thoroughly.
- Poured the mixture into the wax mold slowly to avoid air bubbles.
- Tapped the mold to release air and let it cure for 16–24 hours.
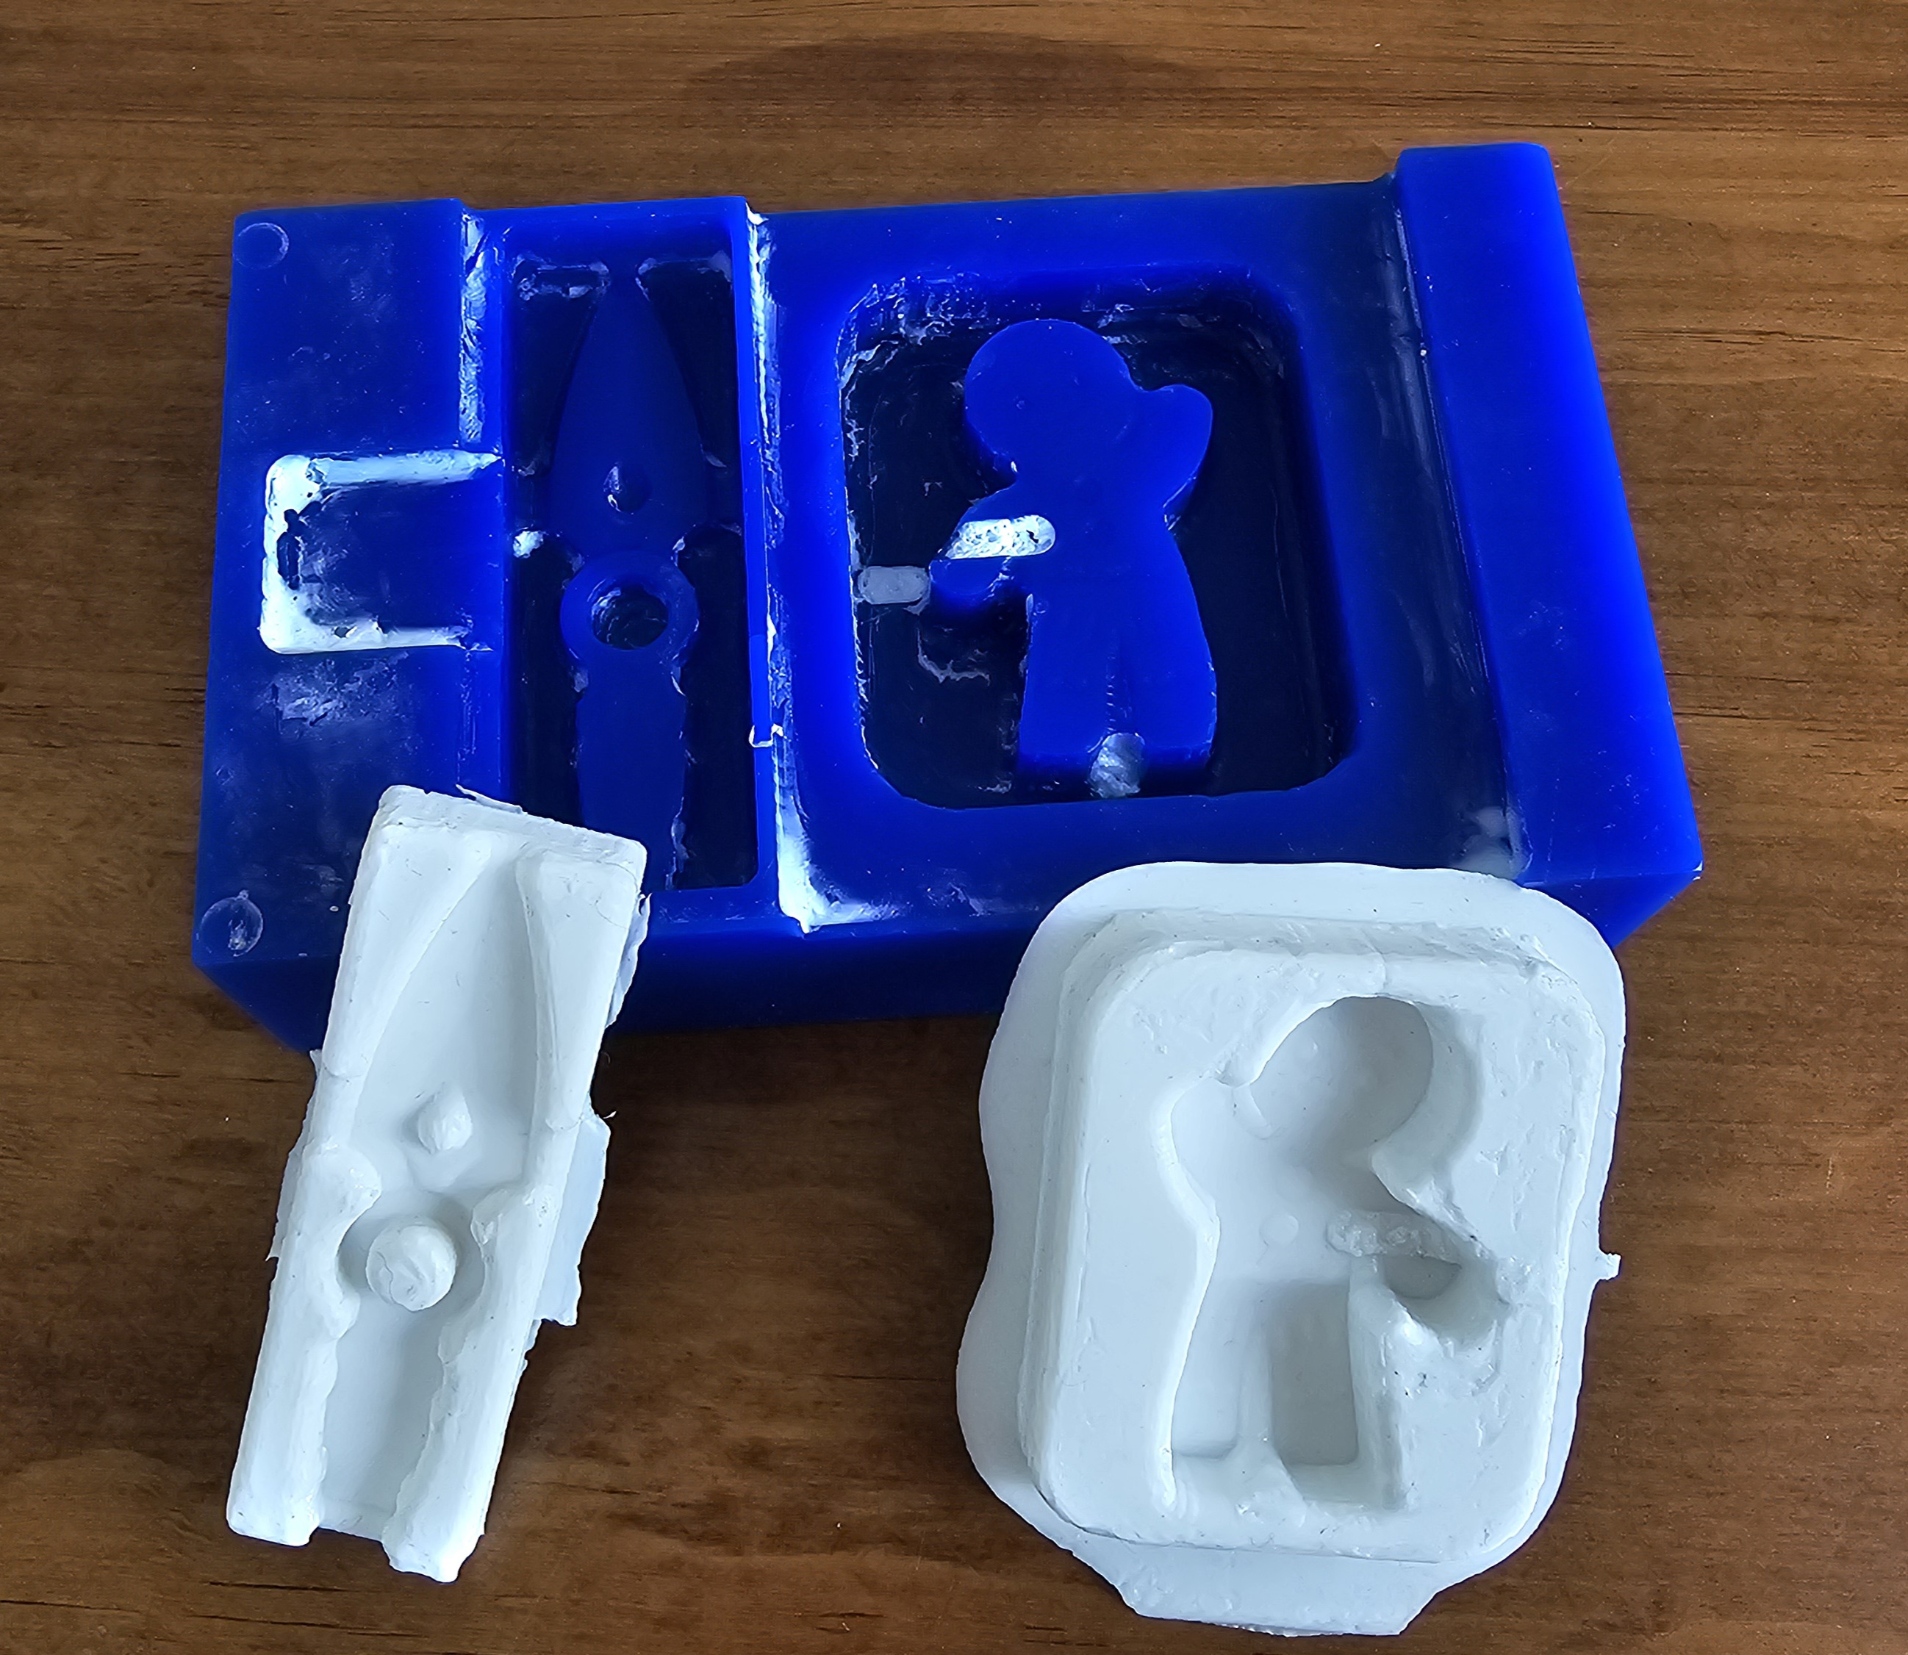
After curing, the silicone mold was ready for casting parts.
Using the mold
After completing the silicone mold, we decided to use it to make a candle as it will be a fun idea with our designs.
I let the wax sit inside the mold for a few hours to cool and harden completely. Once it was fully solidified, I carefully removed the candle from the silicone mold.
This was the final result of the candle: