1. Principles and Practices, Project Management
This week's assignments are listed below:
Principles and Practices
- Plan and sketch a potential final project
Project Management
- Work through a Git tutorial.
- Read, sign (add your name to) the student agreement and commit it to your repo
- Build a personal website in the class archive describing yourself and your final project. Refer to the lecture material for examples.
- Upload parts 1 and 2, to the class archive.
1.1. Plan and sketch a potential final project
1.1.2. Final Project: Voice-Assisted Mini Companion Bot
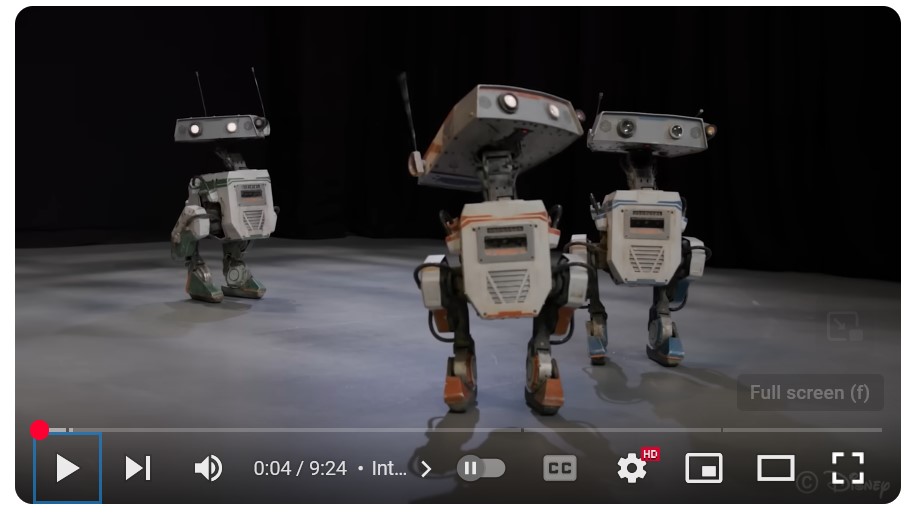
Inspired by the Disney Research team's bipedal animatronic characters that interact with crowds in real-time. I wanted to create a similar but smaller, desktop friendly design but smaller design for my desktop. Open-source leg mechanism designs (Legolas and Tinker) make this project a good choice for a final project. Unlike existing options like EMO, which are expensive to import in India, this design is more affordable
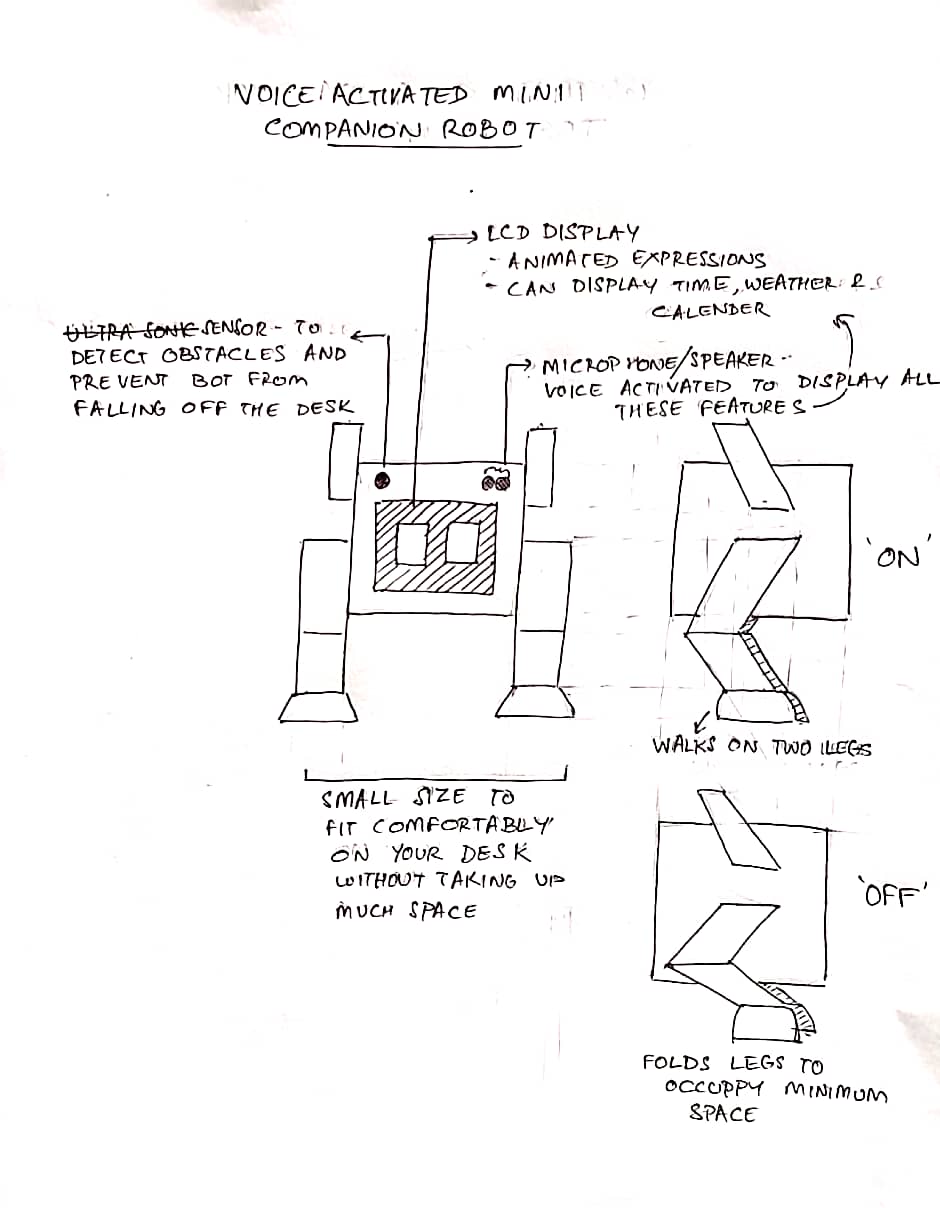
The Companion Bot has the following key features:
- An LCD display on the robot's front shows three expressions—happy, sad, and neutral—with accompanying sound effects from a speaker.
- The robot responds to voice commands for power control and can display time, weather, and temperature information, replacing its standard expressions.
- The robot features bird-like legs that fold when powered down to save space. When activated, the legs extend to full height, enhancing its interactive presence.
- Front-mounted sensors help the robot detect and avoid obstacles while preventing falls from the desktop.
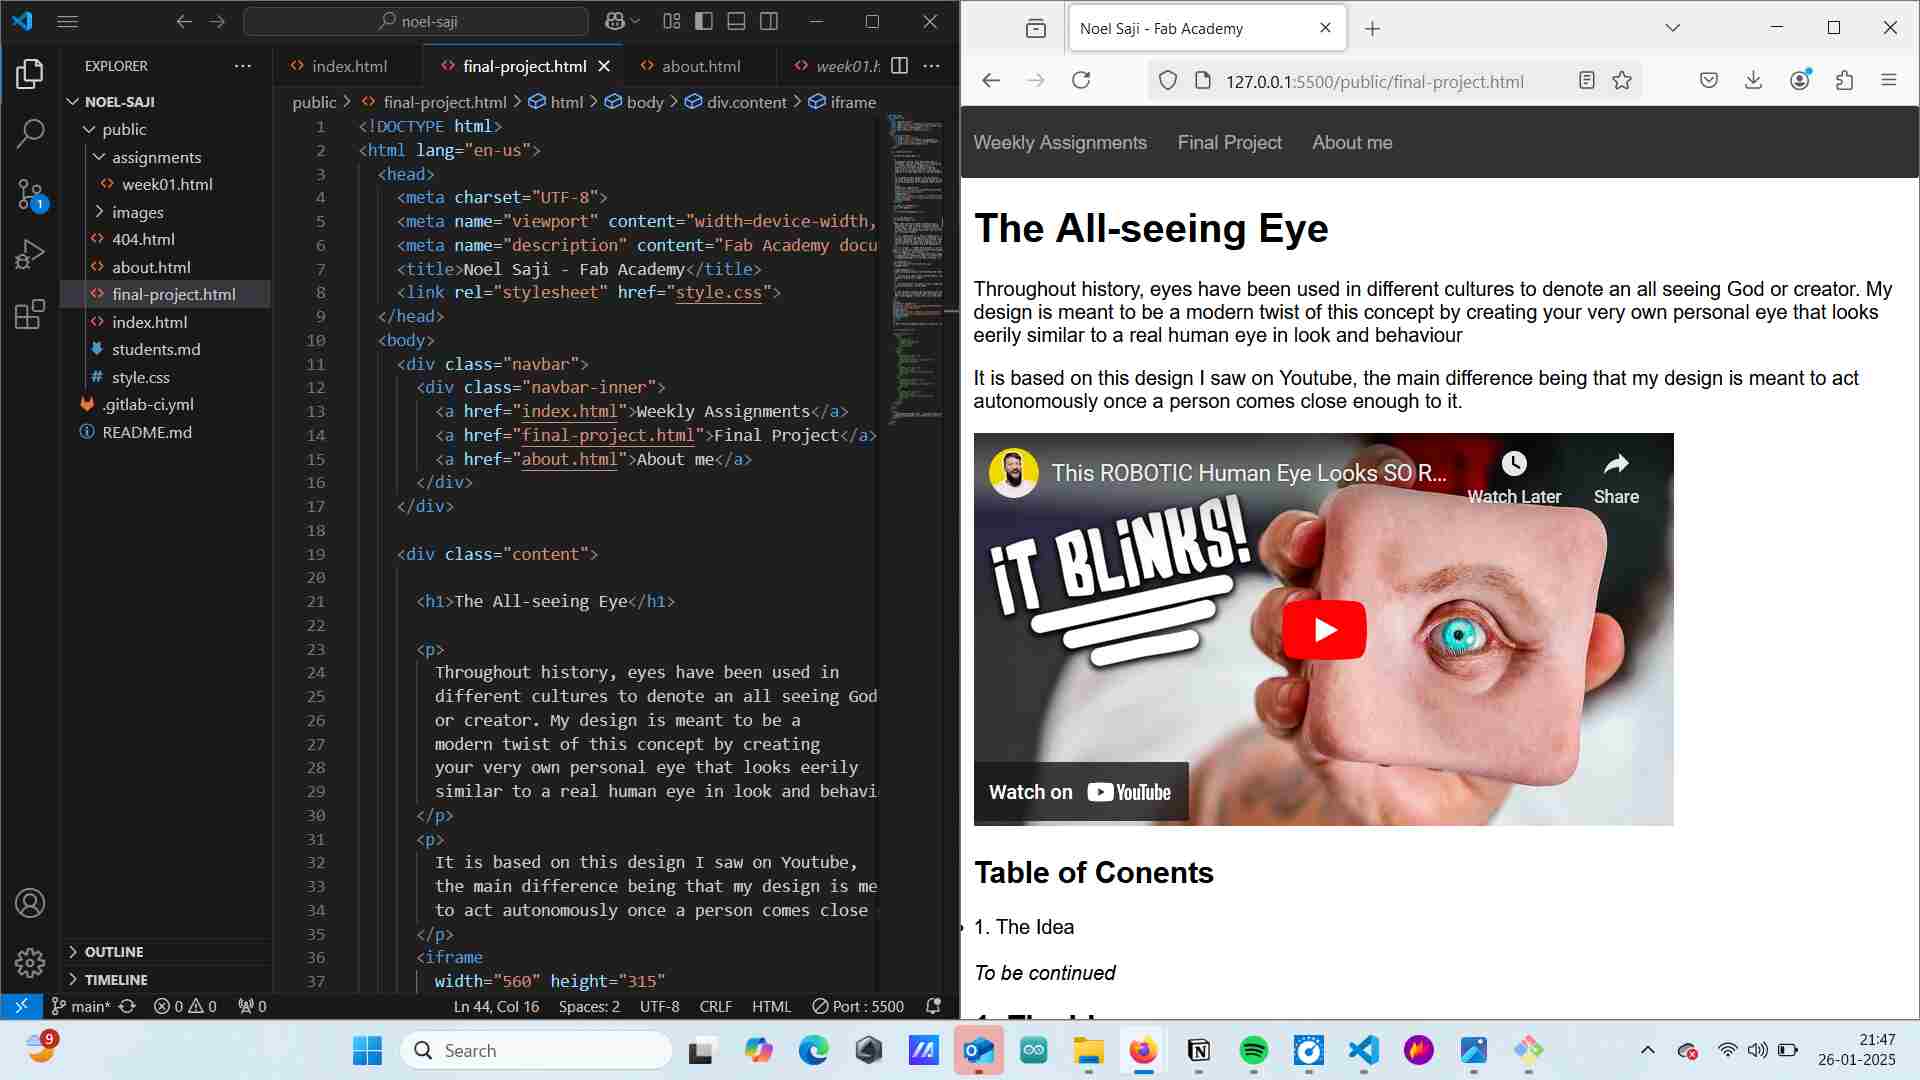
1.1.2. The All-seeing Eye
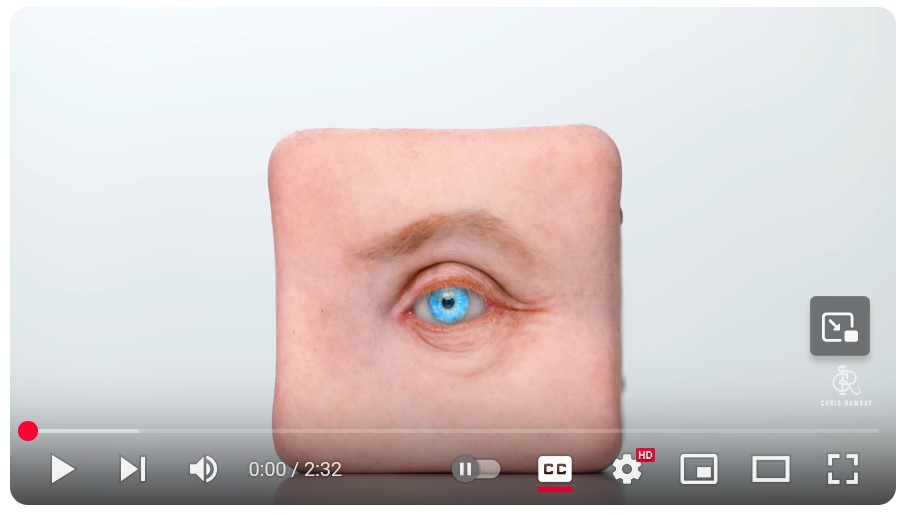
Throughout history, eyes have been used in different cultures to symbolise an all-seeing God or creator. My design a modern twist of this concept, creating your very own personal eye that mimics a human eye in both appearance and behaviou. looks eerily similar to a real human eye in look and behaviour It is based on the below given design I saw on Youtube, with the primary difference being that my design acts autonomously once a person comes close enough to it.
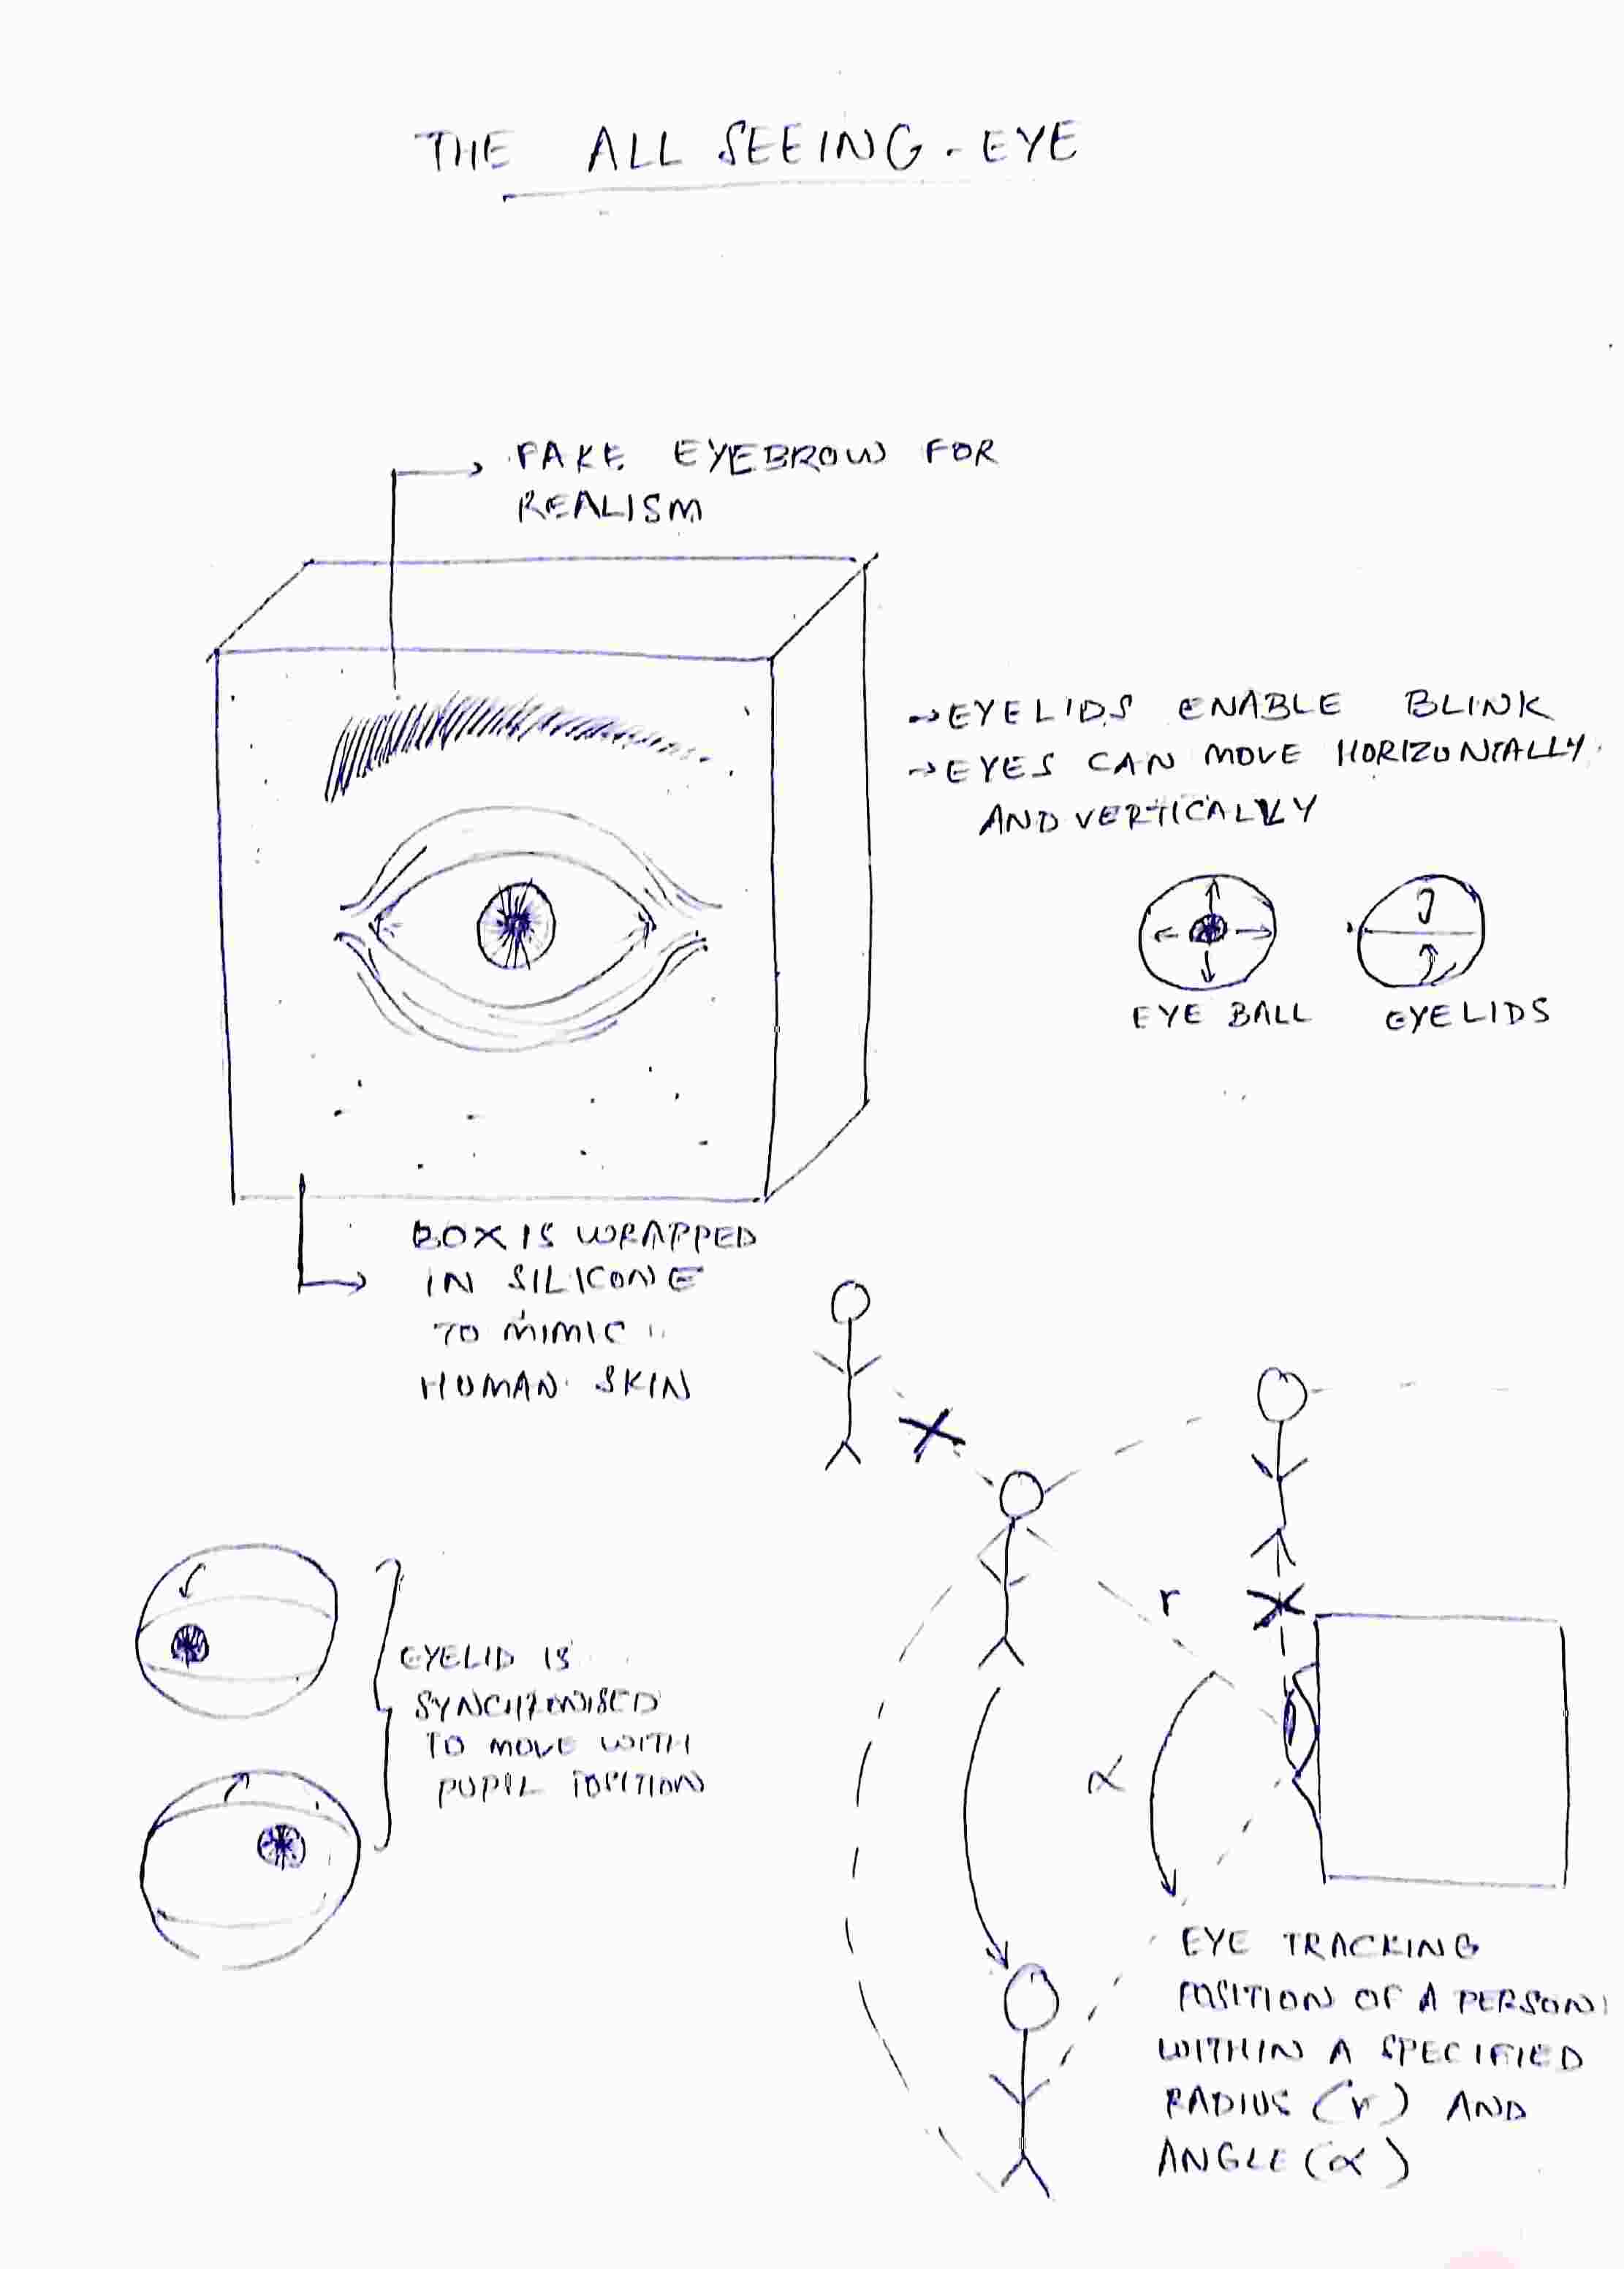
The All-seeing Eye has the following key features:
- The eye only opens once a person enters a specific sector (defined by a specific radius & angle).
- The blinking of the eyelid, side to side and up/down movements of the eye are controlled by servos.
- The distance between the two eyelids increases when the pupil points upward and decreases when it points downward, simulating real-life eye movements, as shown in this video.
1.1.3. Humanoid Robotic Face Chat-bot
A humanoid robotic face that can answer all your questions relevant to the site it is installed in.
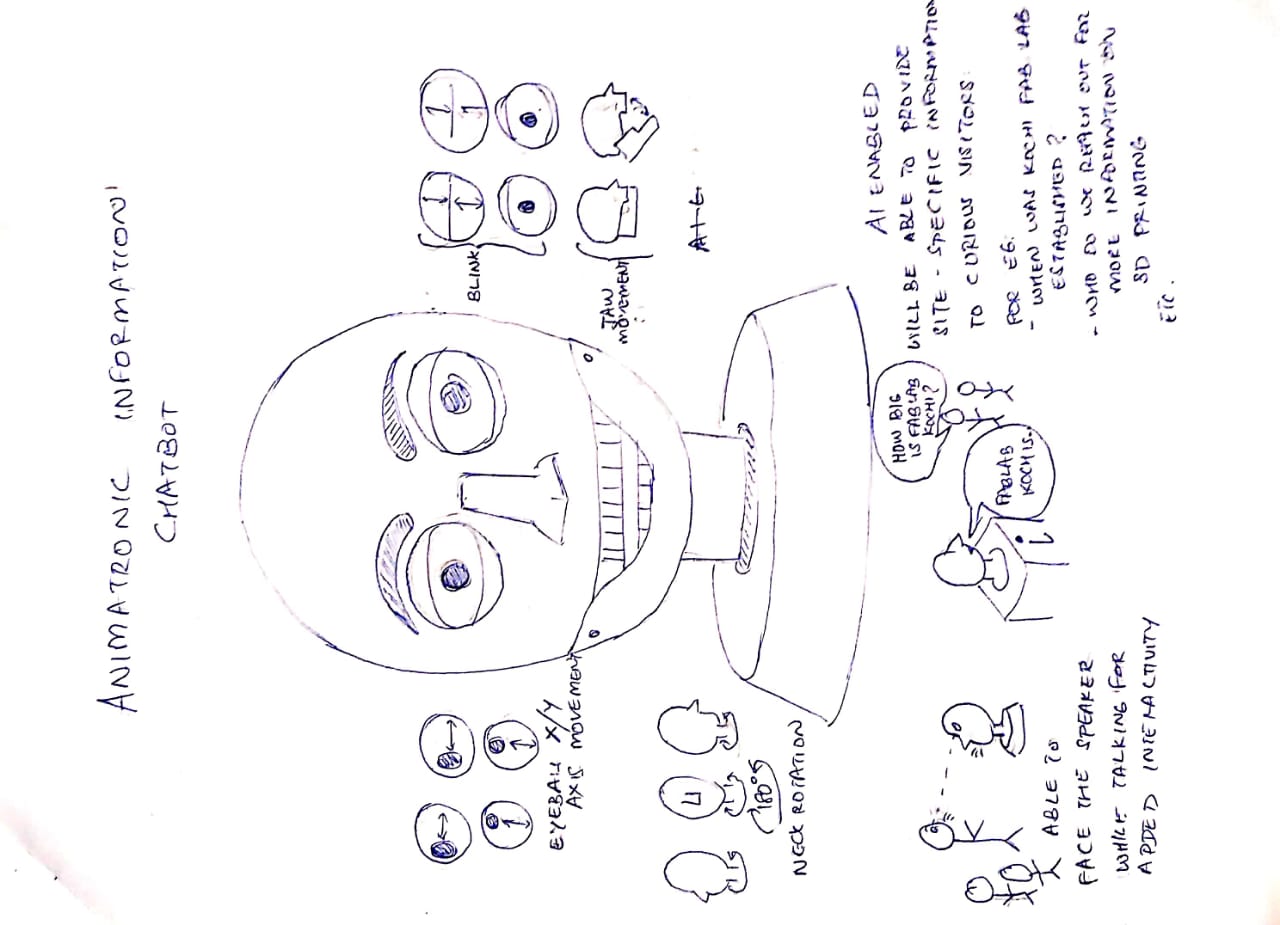
Key features of the Chat-bot include:
- Will be able to blink, move its eyeballs horizontally and vertically as well as move its lower jaw.
- Will be able to provide site specific information using an inbuilt AI model (eg:can be obtained by finetuning Gemini in Google AI Studio)
- Will be able to track faces and move so that it faces the person speaking.
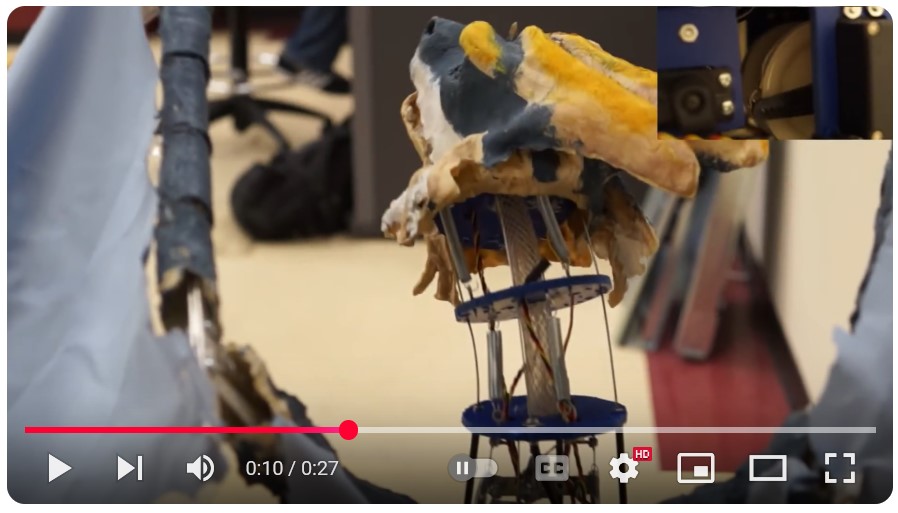
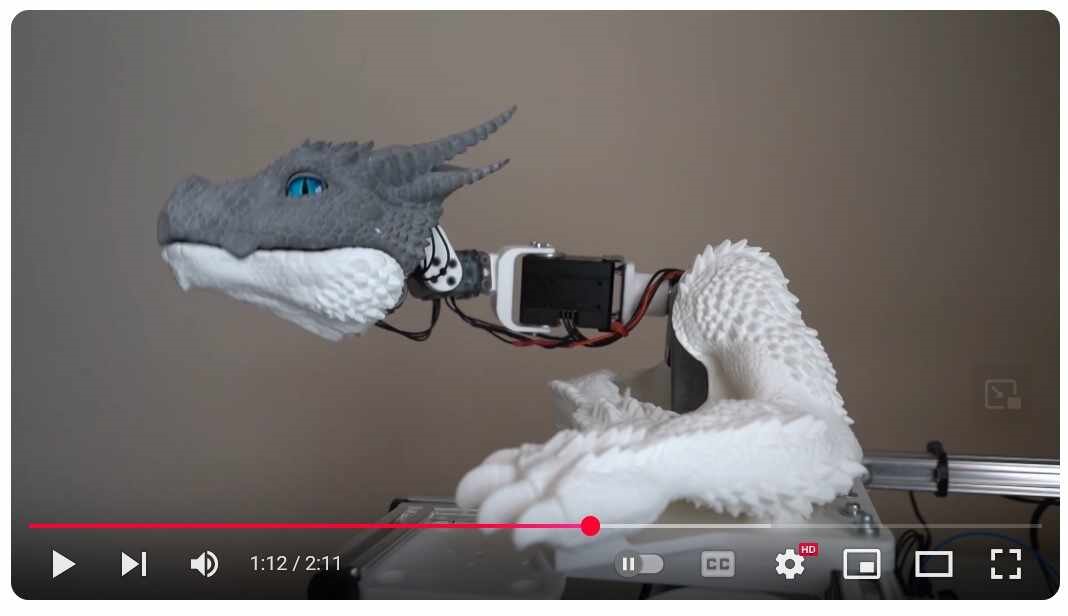
1.1.4. Animatronic Dinosaur Toy
Drawing inspiration from Legacy Effects' Jurassic World Apatosaurus Animatronic, I aimed to create a convincing prototype that would appeal to Jurassic Park/World fans like myself. The piece features a neck controlled by either a continuum mechanism (2 servos and 4 cables) or a 2-servo linkage (one for each rotation axis). Additional servos control the jaw and eye-blinking movements.
1.1.5. Animatronic Cuckoo Clock
Historically, clocks were elaborate design pieces featuring complex automata, which gained popularity as timepieces became more common. While modern tastes favor simplicity, my design aims to blend functional timekeeping with aesthetic appeal. Some features of this clock would be:
- The cuckoo bird animates with wing-flapping and beak movements, accompanied by music to simulate singing.
- The design maintains traditional aesthetics to evoke nostalgia.
- Users can set custom alarm times. When triggered, the cuckoo bird emerges through house doors, performs its animation (flapping and singing), and returns after three cuckoo calls.
- An Arduino controls the bird's animation and timing. The clock features a wooden construction with a standard dial face.
1.2. Work through a git tutorial
1.2.1. Setting Up Git
Git is a commonly used version control system that both records changes made to design files of different formats (including design files like CAD files) and allows us to go back to previous iterations easily.
Click here to download latest version of Git.
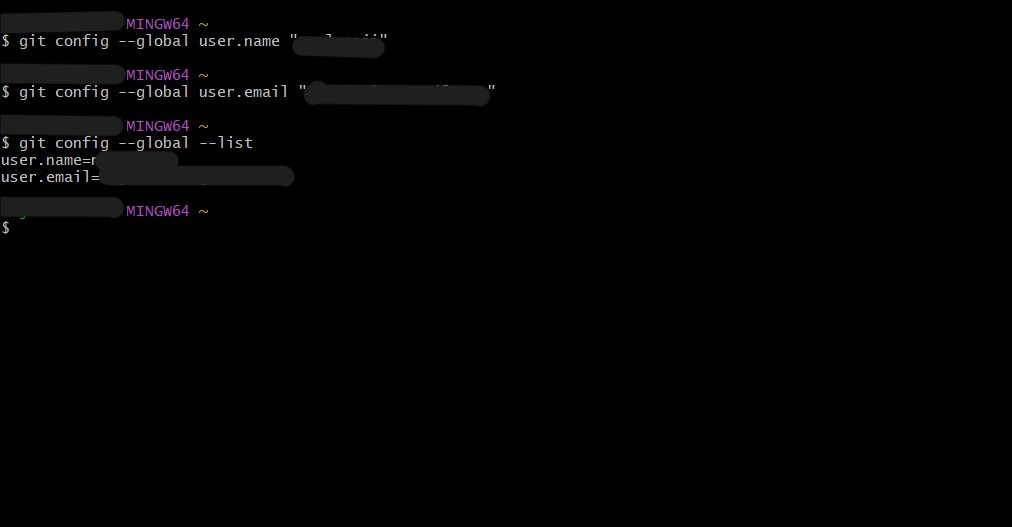
Since I use a Windows system, I will download Git Bash, which is a command line interface that I use to communicate with Git. Open Git Bash and configure your name and email address using the following commands
        $ git config --global user.name "[username]"
        $ git config --global user.email "[email]"
To ensure that configuration has been done properly enter the following
git config --global --list
1.2.2. Creating and adding SSH Keys
An SSH key is a unique key pair that can be used to establish a connection between local machine and remote server to transfer data securely. To create an SSH key pair enter
$ ssh-keygen -t ed25519 -C "[email]"
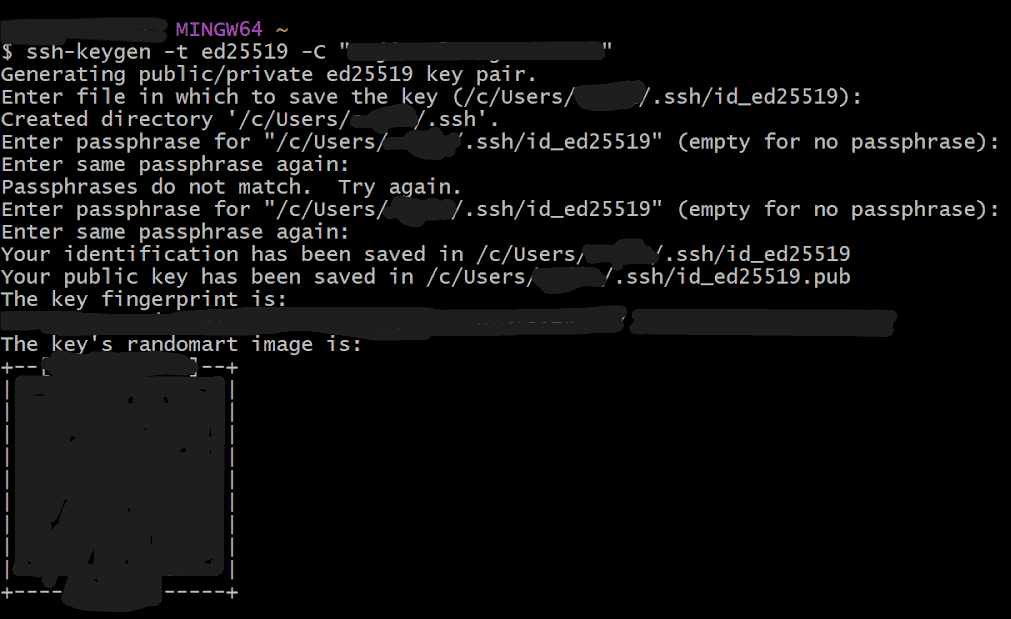 Be careful while entering the passphrase to ensure that they are identical.
A public and private key pair has been generated in this file path
Be careful while entering the passphrase to ensure that they are identical.
A public and private key pair has been generated in this file path
/c/Users/[username]/.ssh
An optional step would be be to set up a SSH agent. This step is required in cases where the .shh folder is stored somehwere else than its default location. To set it up, enter:
$ eval "$(ssh-agent -s)"
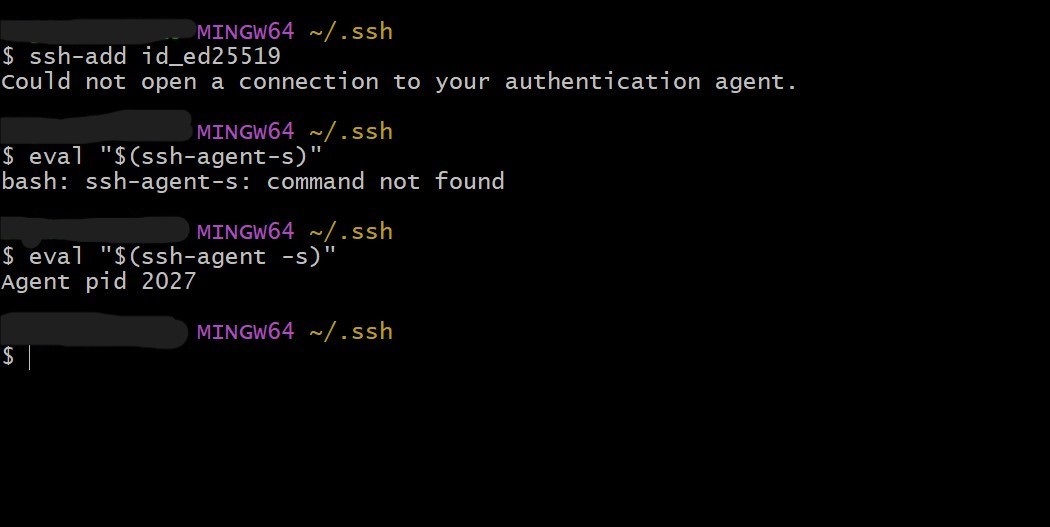
Make sure to add a space before '-s'.
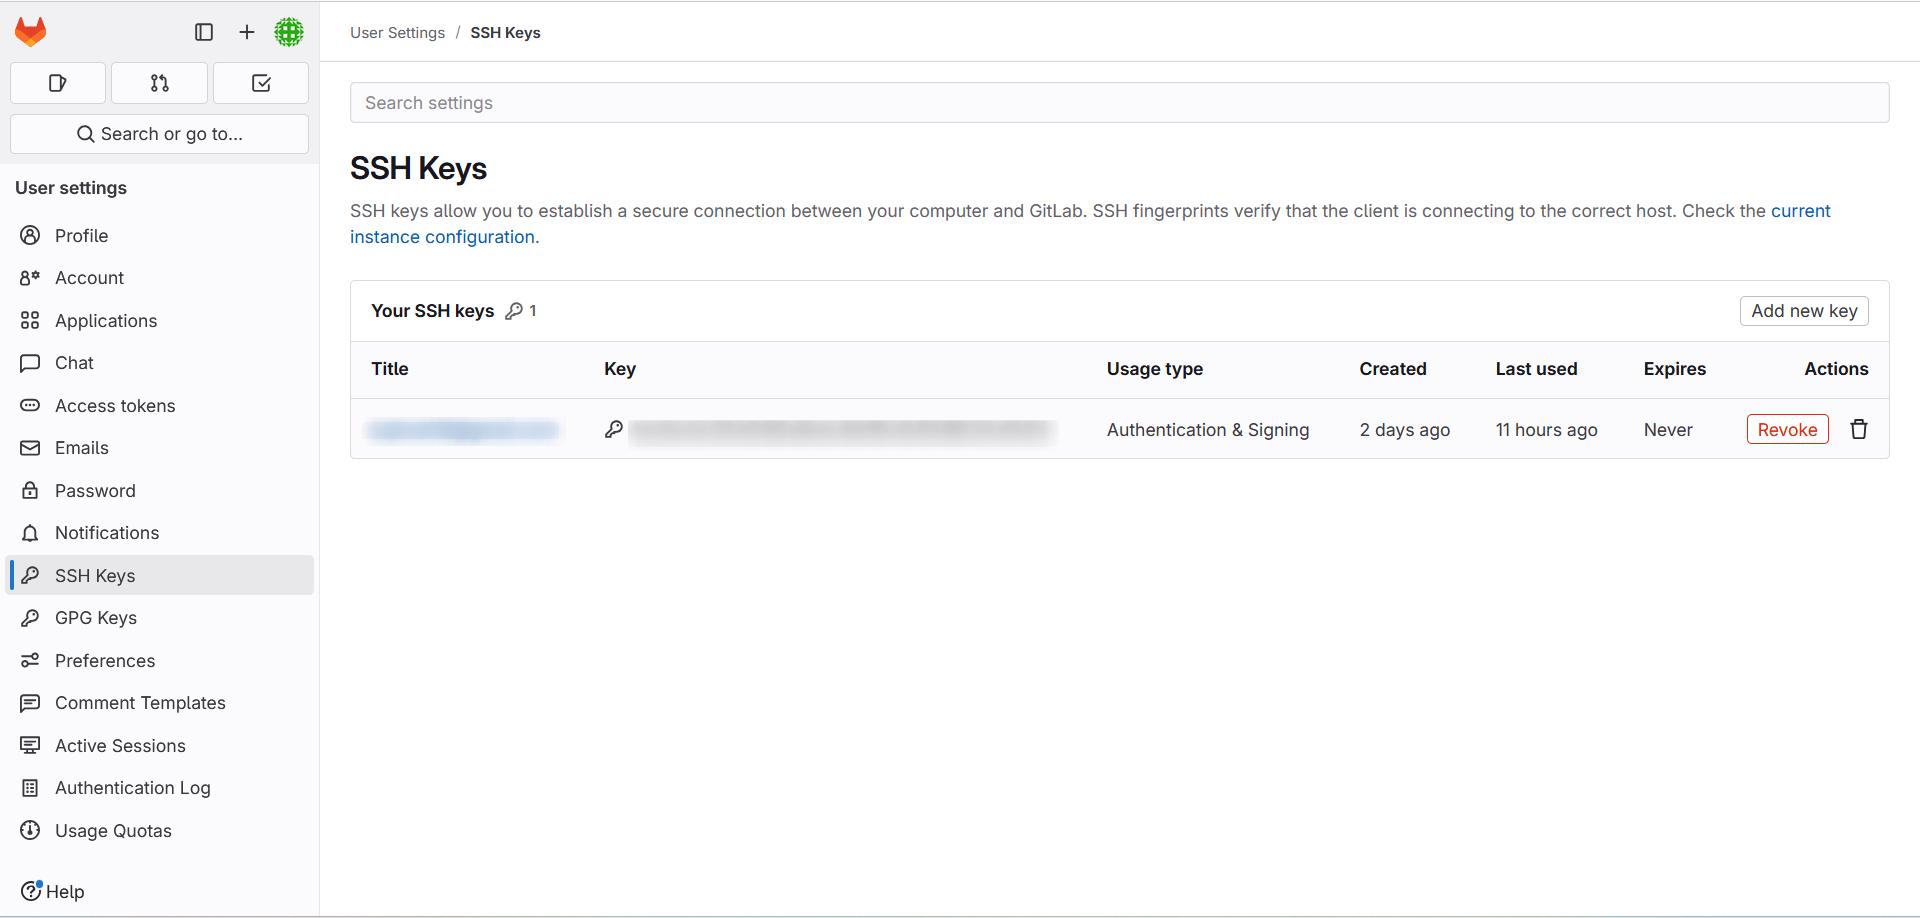
To add your public SSH key, go to your GitLab account>Settings>SSH Key>Add & paste the public SSH key (ie. the .pub file)The result should look something like this
1.2.3. Cloning your repository
Copy the URL to clone with SSH key
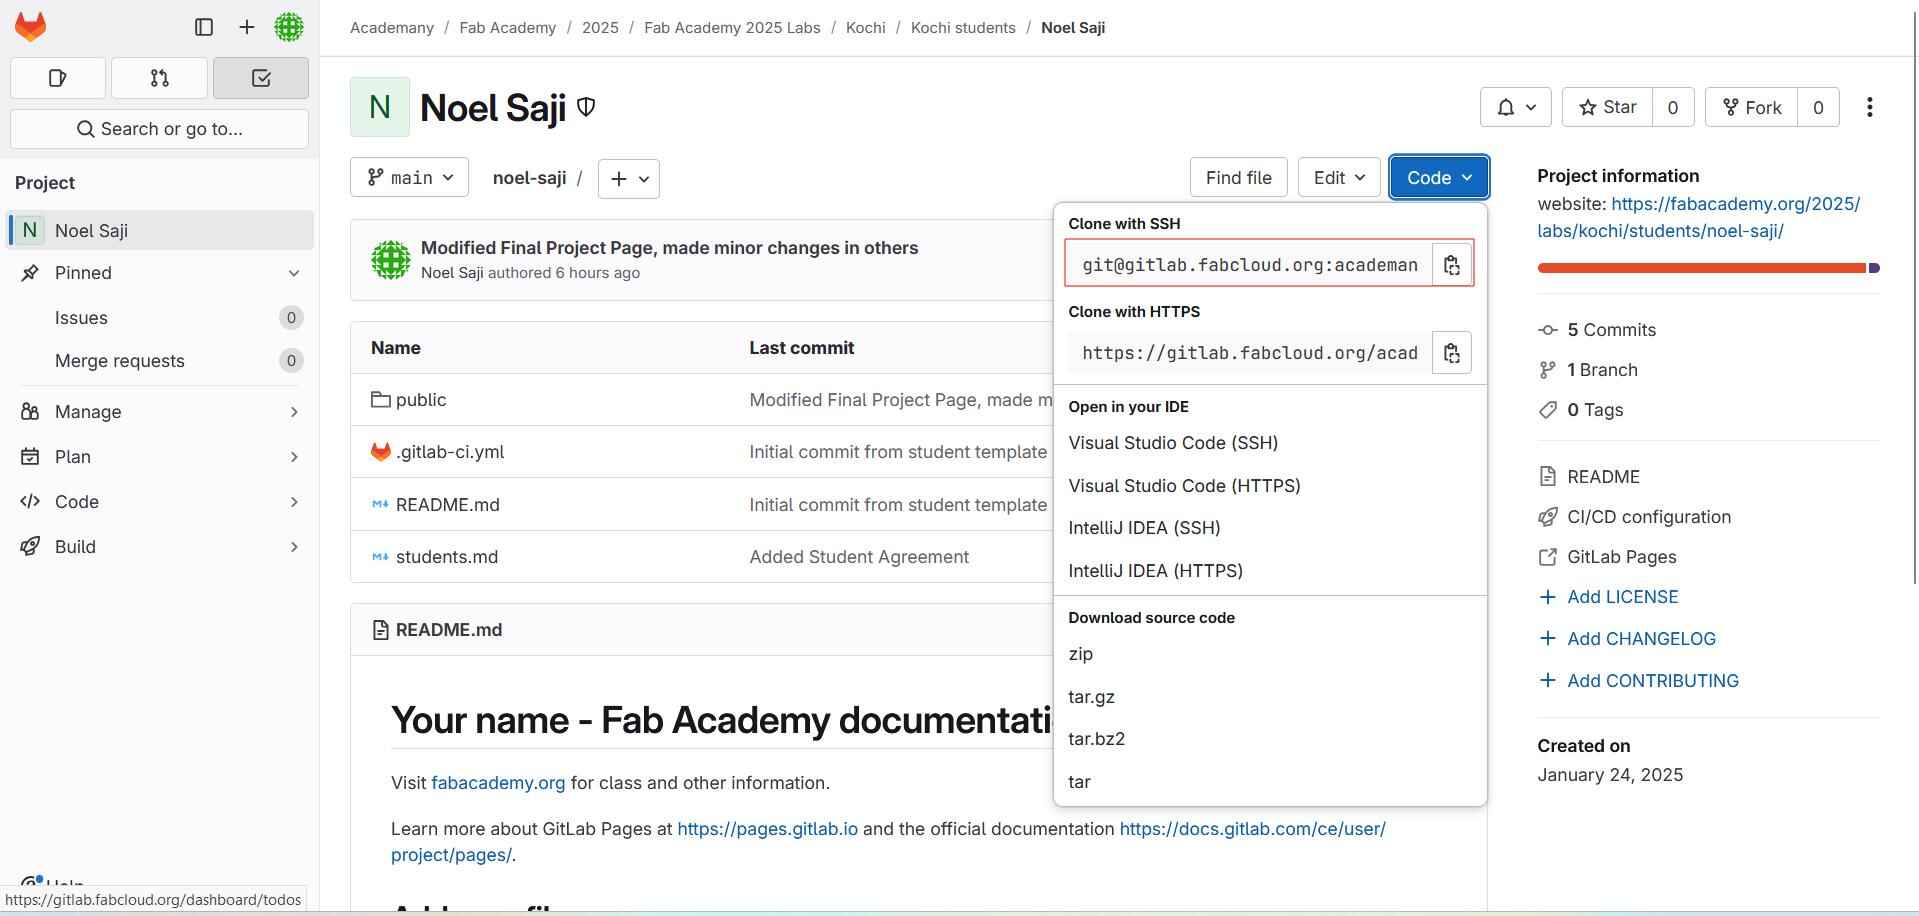
In Git Bash, type the following and press Enter
$ git clone [Paste the copied URL]
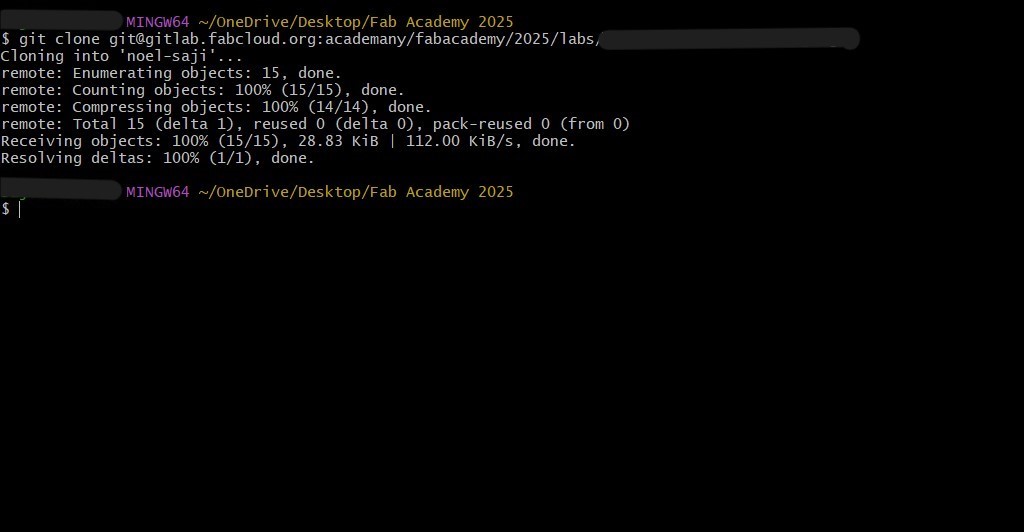
To copy or paste in Git Bash, the shortcuts are Ctrl+Insert or Shift+Insert. If you see 100% on your screen, it means the repository has been cloned.
The most commonly used git commands are:
git init, git status, git add, git commit, git log, git push
- init - To create a new repository
- status - To check the current status of the files in our repository
- add - To add the file(/s) to temporary memory cache
- log - To check the number and names of commits made
- push - To push the files from our local repo to the remote repo
1.3. Read, sign (add your name to) the student agreement and commit it to your repo
I use Visual Studio Code, which is a commonly used integrated development environment (IDE) to write and execute code. Click here to download Visual Studio Code
The Student Agreement form can be accessed from here. Right click on the page and save the page as a .md file into your github repository.
Open the file in Visual Studio and add your name.

Enter the following commands
      $ git status
      $ git add .
      $ git commit -m "[Comment to be added]"
      $ git log
      $ git push

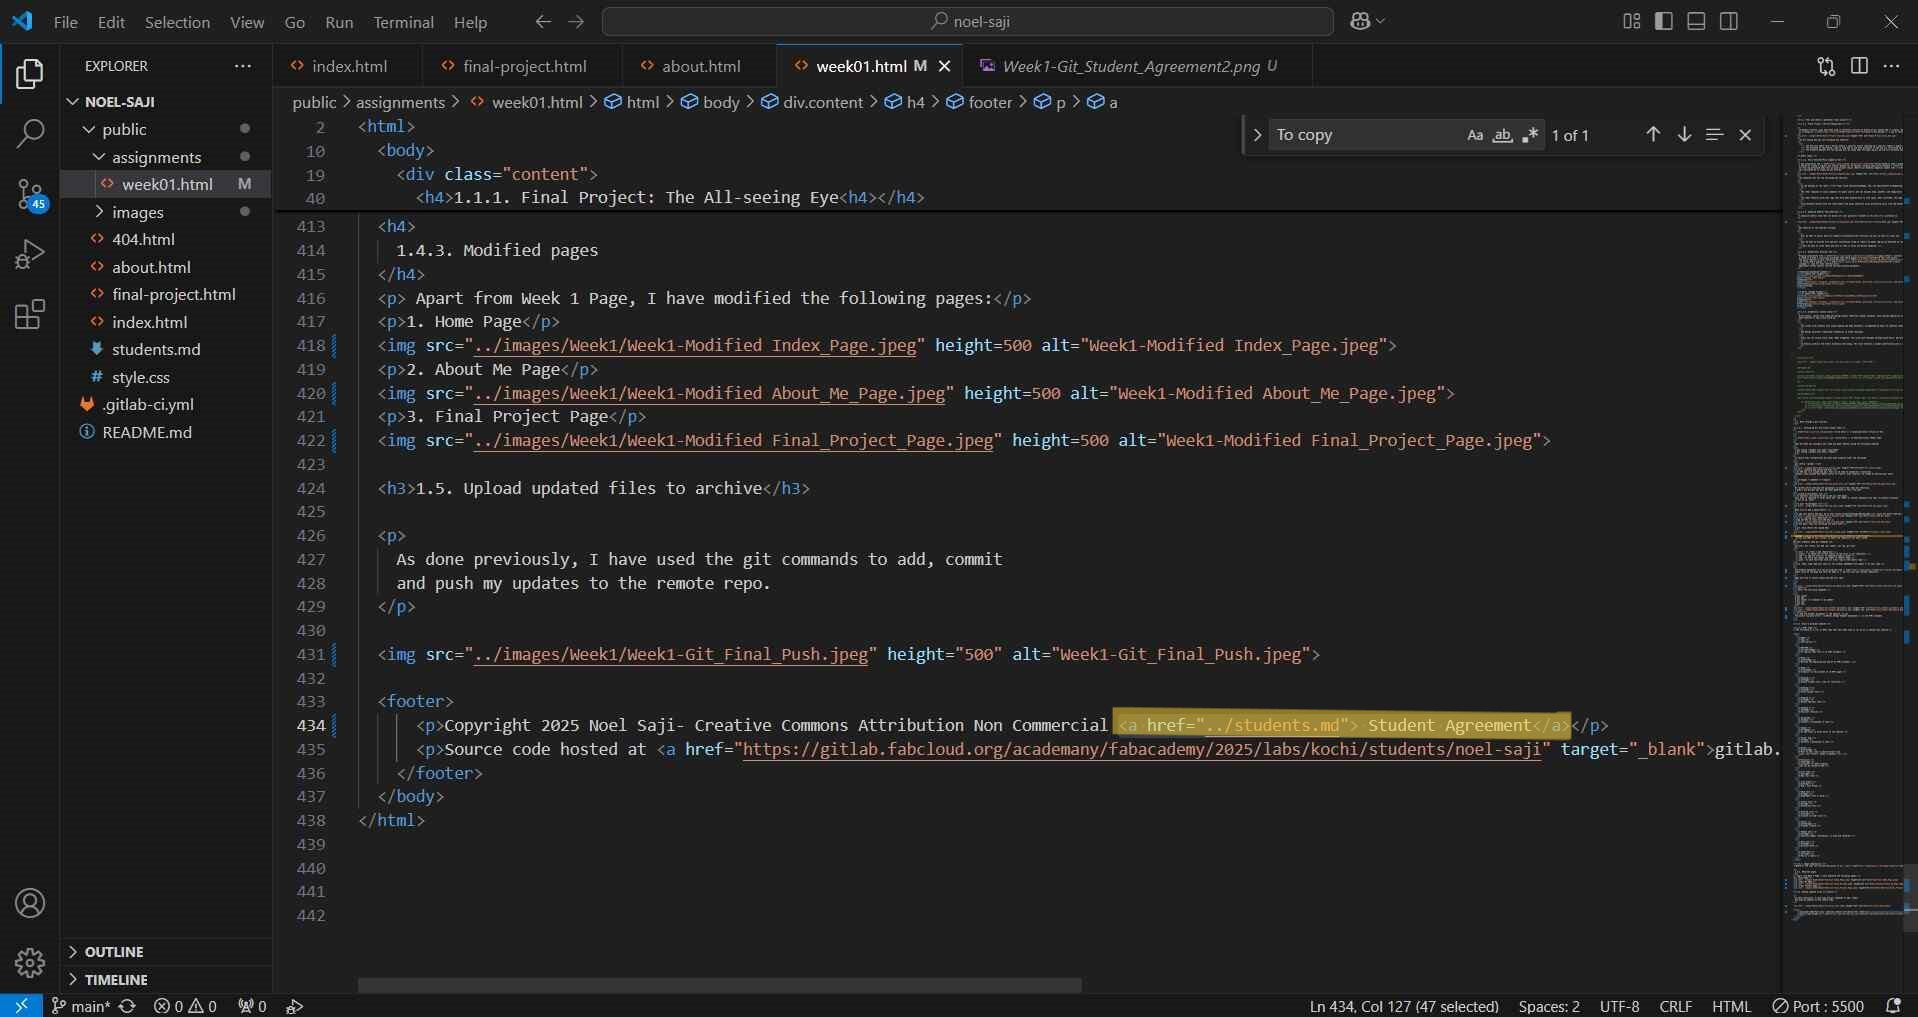
To add the Student Agreement to the website, we use the anchor tag in the HTML document.
<a href="../students.md">
To add the Student Agreement to the website, we use the anchor tag in the HTML document.
<a href="../students.md">
1.4. Build a personal website
1.4.1 Learning HTML/CSS
HTML is the coding language used for designing the basic elements of a webpage, including elements like the titles, subtitles, body text, etc. CSS is used to design the page, including adjust the spacing and/or position of both the text and the the body as a whole, adding colour, bounding boxes, etc.
We first learned to use HTML & CSS using a text editor called Phoenix Code where you can you can add code and see their effects in real time.
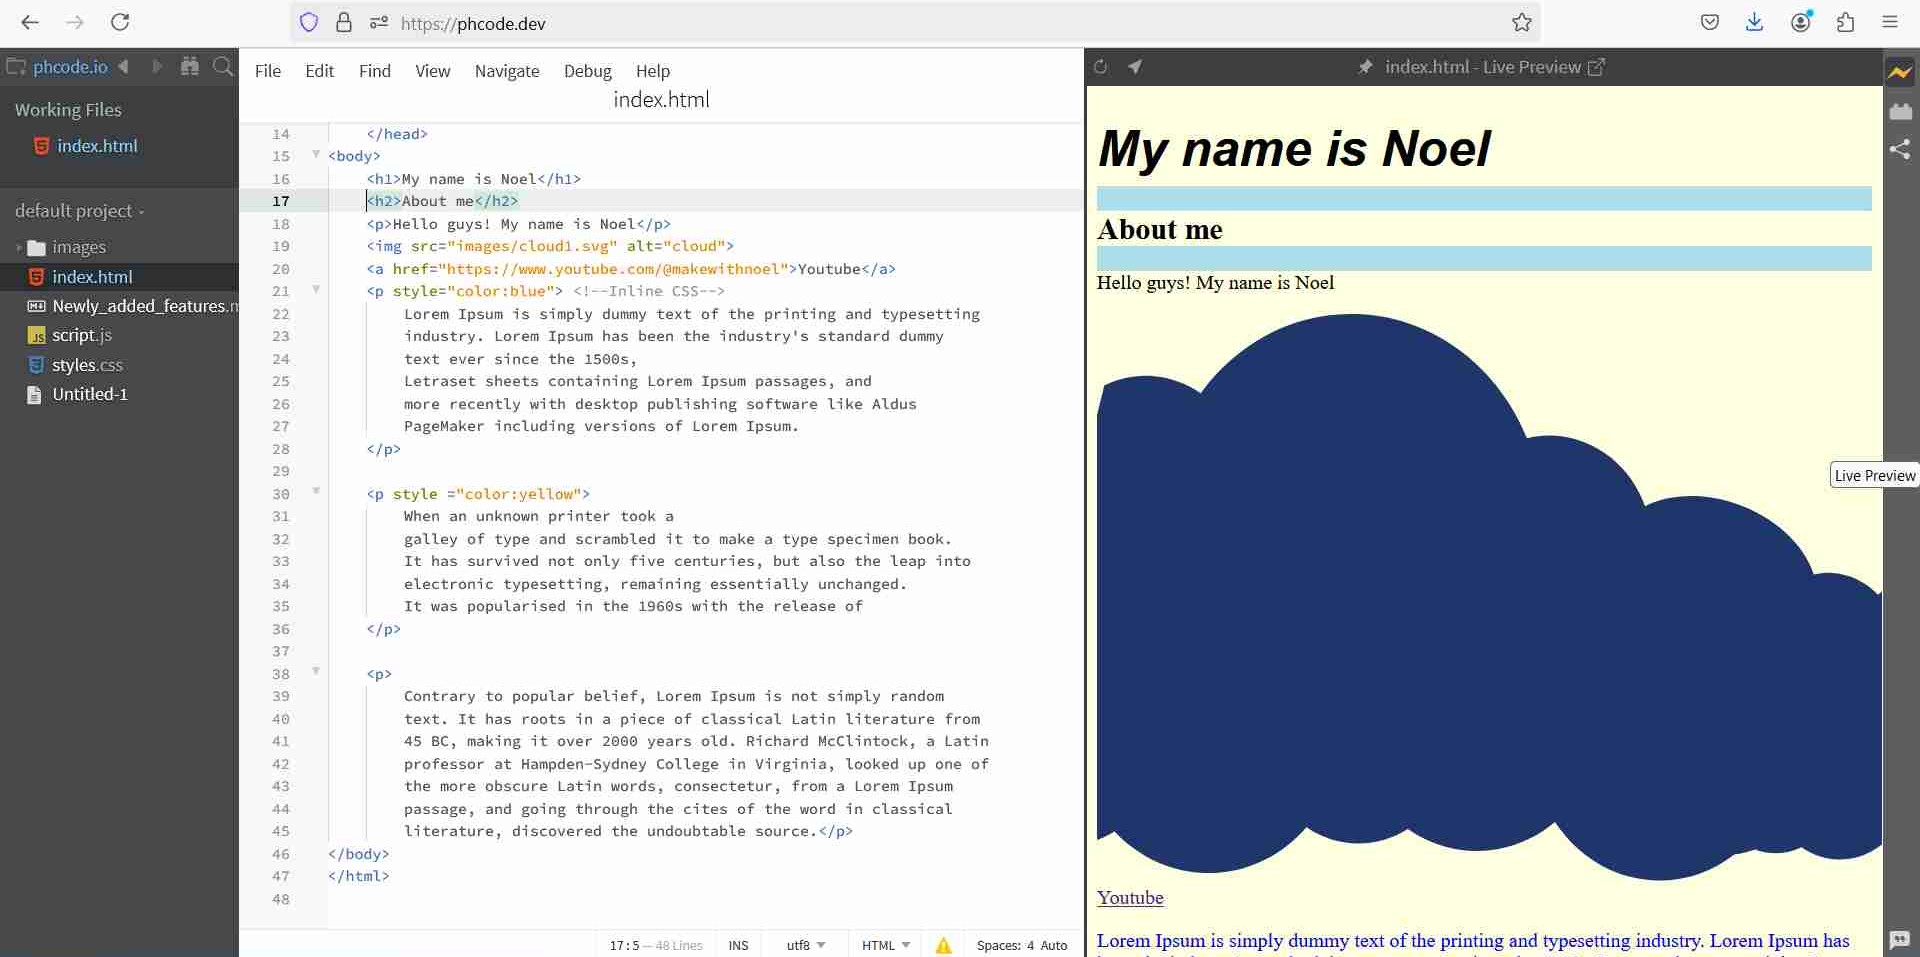
I learned HTML by using various online tutorials including many from W3schools.com like this one.
1.4.2 HTML Tags
The following is a list of HTML tags that have been used so far by me in making this website.
| Name | Tag | Description |
|---|---|---|
| DOCTYPE | <!DOCTYPE> | To specify that this is an HTML document |
| Html | <html> | Defines the beginning and end of an HTML document. |
| Body | <body> | Contains all the content of an HTML page |
| Heading 2 | <h2> | Second largest font, used for subtitles |
| Heading 3 | <h3> | Third largest font |
| Heading 4 | <h4> | Second smallest font |
| Heading 5 | <h5> | Smallest fontsize |
| Paragraph | <p> | Contains a paragraph of text |
| Image | <img> | To add links to other parts of the website |
| Anchor Tag | <a> | Contains a paragraph of text |
| Style | <style> | Part of CSS; used to add different font sizes, text colours, adjust alignment, etc. |
| Division | <div> | Container for HTML elements that can be styled by CSS |
| List item | <li> | Add list item |
| Line Break | <br> | Add a line break |
| Bold text | <b> | Highlights text in bold |
| Italic Text | <i> | Italicizes text |
| Ordered List | <ol> | Creates an order list |
| Table | <table> | Creates a table |
| Header Cell | <th> | Contains header information; is bold and centered |
| Data Cell | <td> | Contains data |
| Table Row | <tr> | Row in a table |
1.4.2. Tools
Based on the tips and instructions given to us, I use this tool to compress images below 100kb.
I used Live Server which helps me see a preview of the website by locally hosting it.
I used Save typing to autosave any changes I make to the HTML code.
1.4.3. Modified pages
Apart from Week 1 Page, I have modified the following pages:
1. Home Page
2. About Me Page
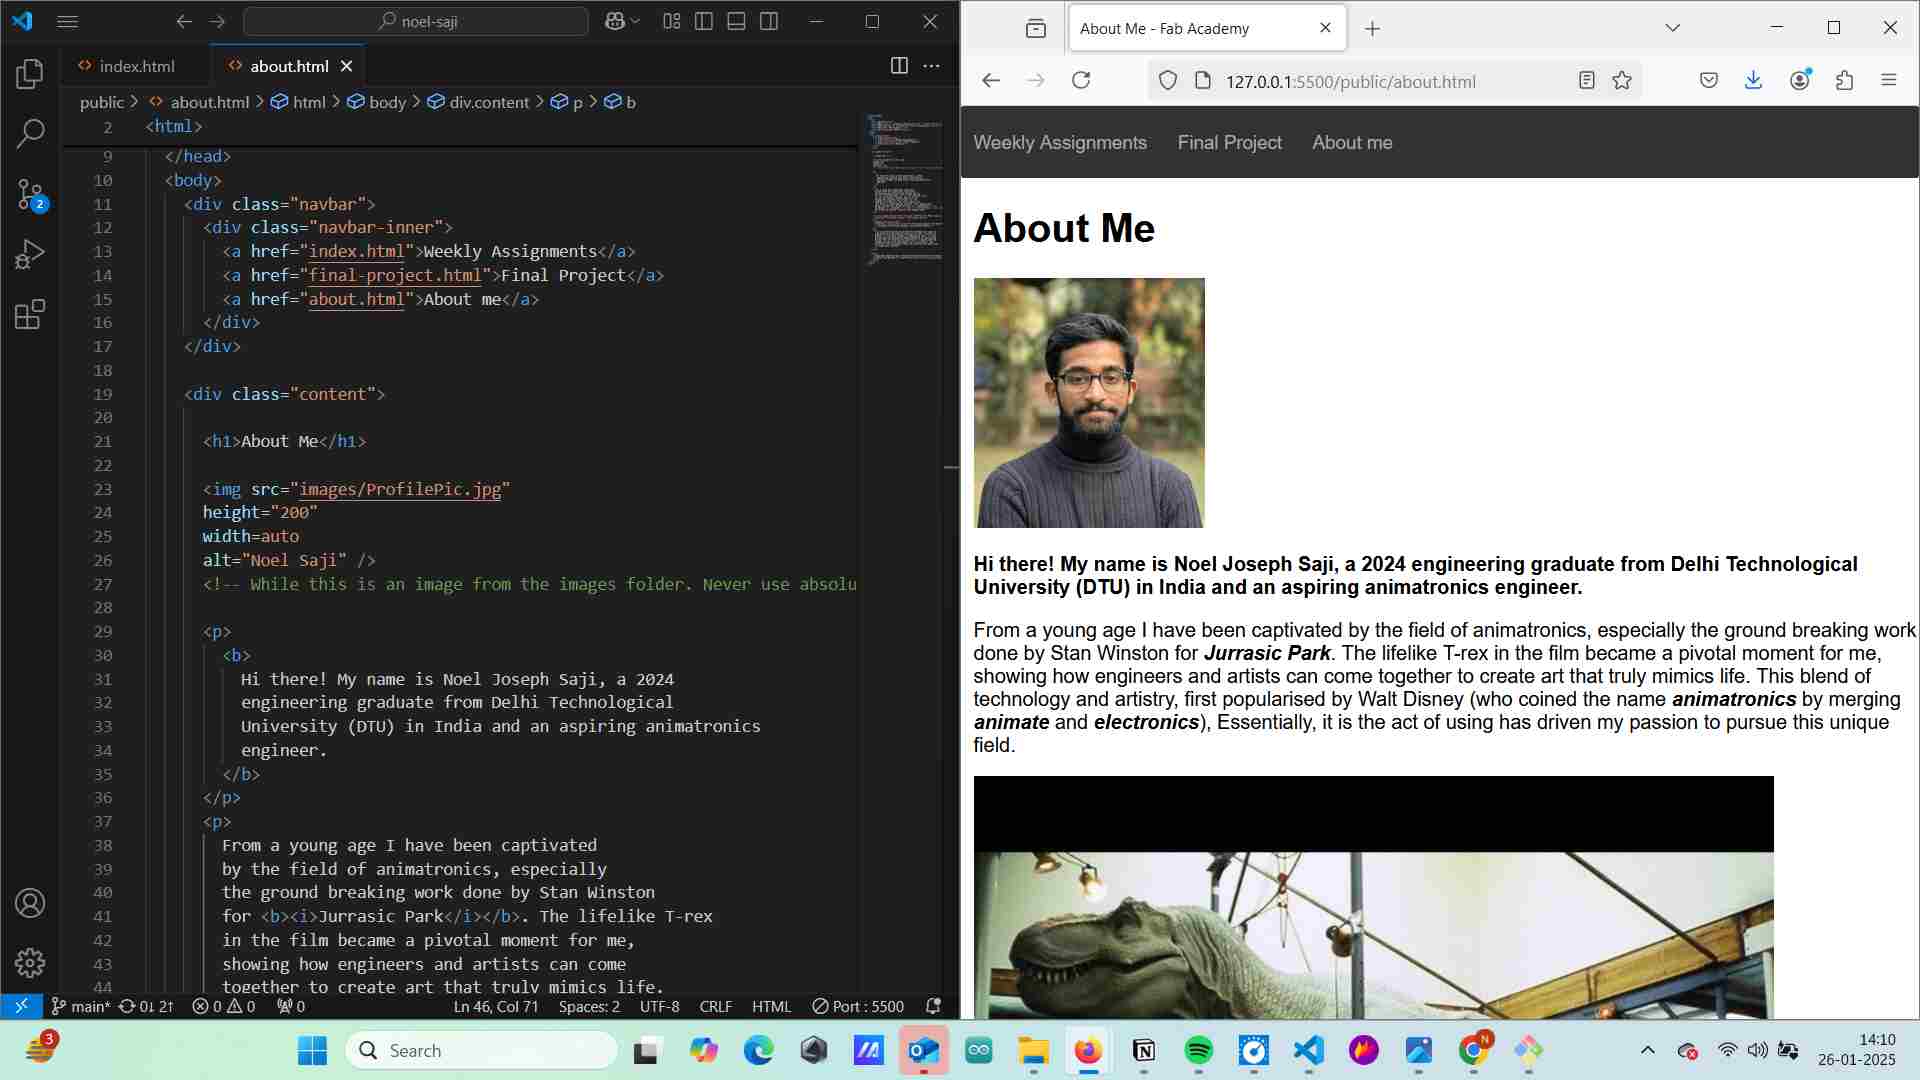
3. Final Project Page
1.5. Upload updated files to archive
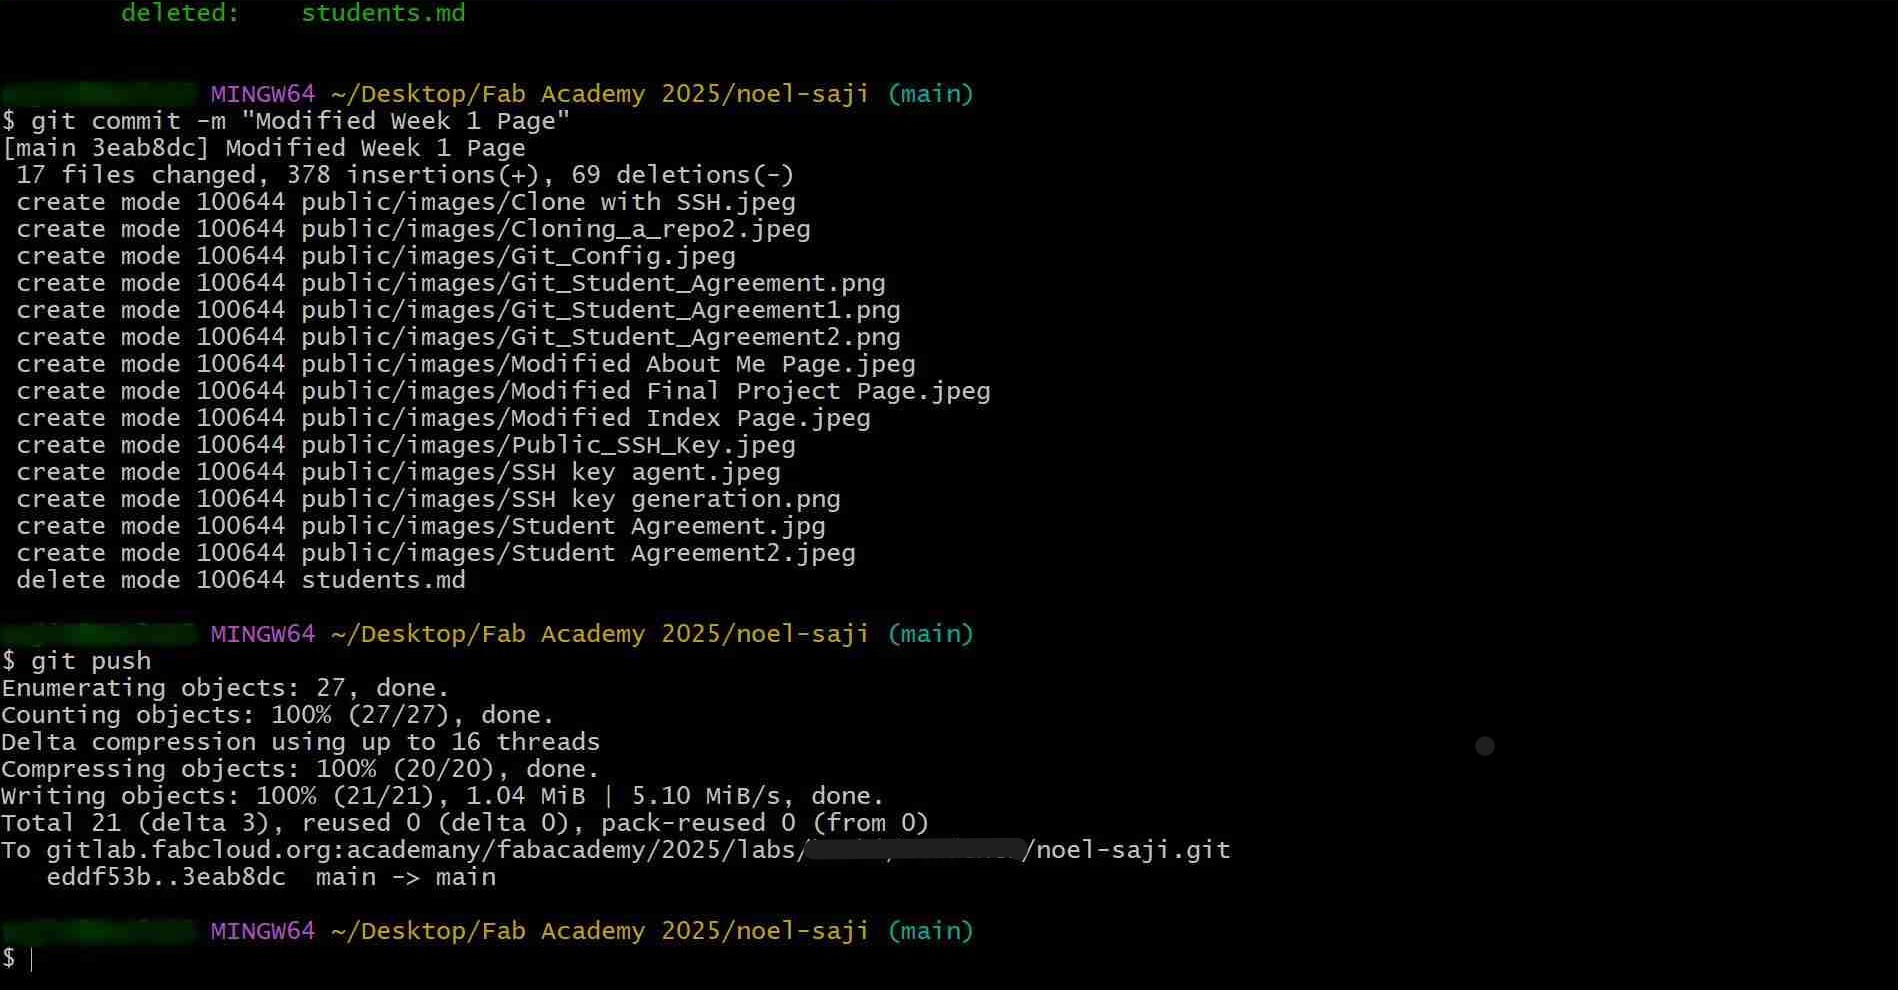
As done previously, I have used the git commands to add, commit and push my updates to the remote repo.
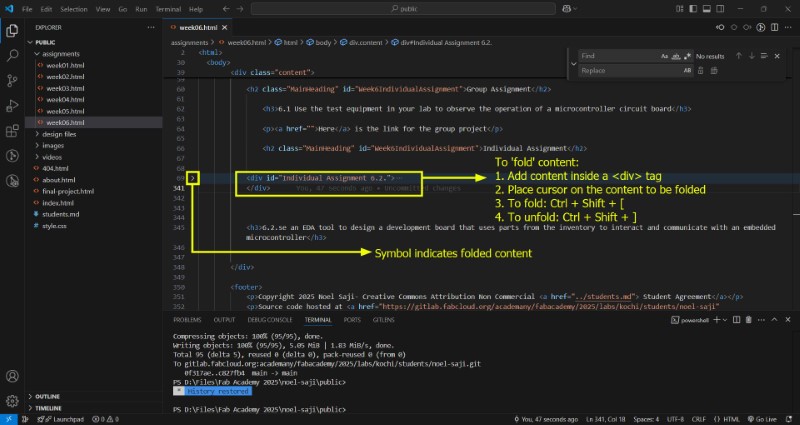
Tip: How to 'Fold' Content in Visual Studio Code
02-03-2025: I wanted to 'hide' certain portions of content while writing code to be able to easily move accross the page. Based on this forum post, this is called 'folding' and to achieve this affect you need to add the content inside <div>tags.
Tip: How to highlight blocks of text
13-03-2025 I really like how my fellow academy student Revisankar used background colours to make blocks of text visually different. So by rightclicking and choosing 'Inspect' command, I saw how he made the code for the effect and adapted it for my use . I used CSS styles to change the background colour to beige.
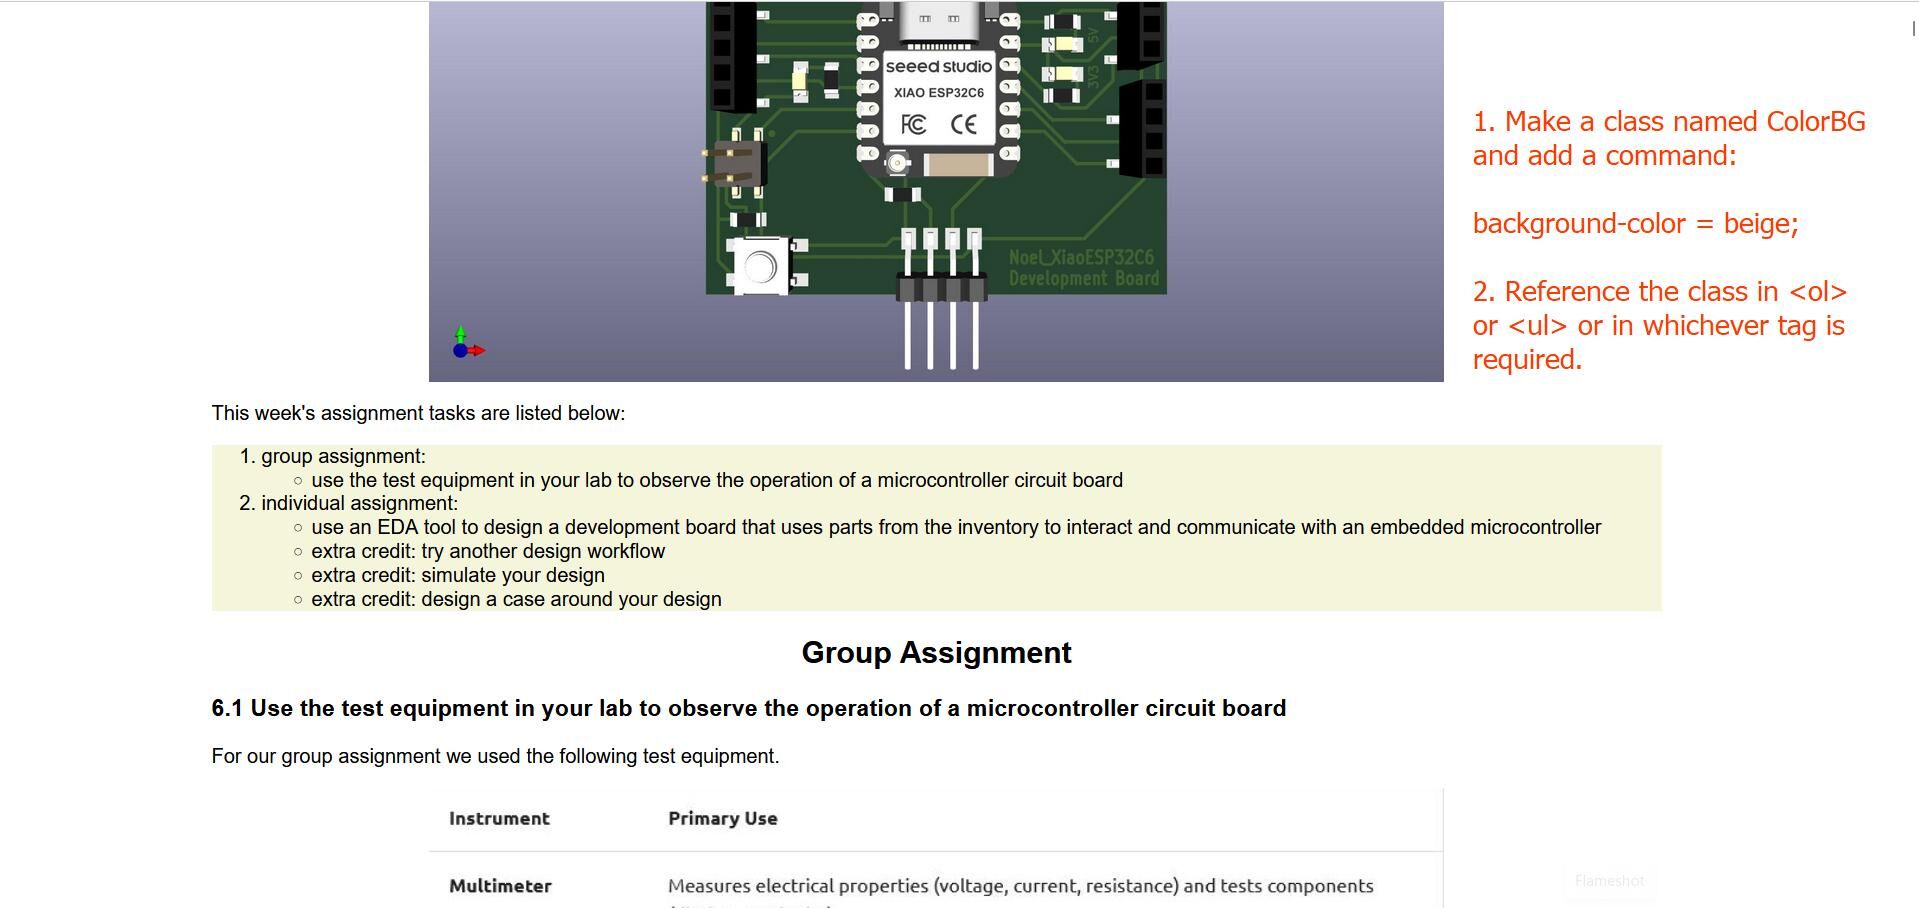
In HTML Page
       <ol class="ColourBG">
            .
            .
            .
  <ol>
In CSS style page:
       .ColourBG {
      padding-top:10px;
      background-color:beige;
      padding-bottom:10px;
      }
Please refer this example code by W3 schools to understand more.
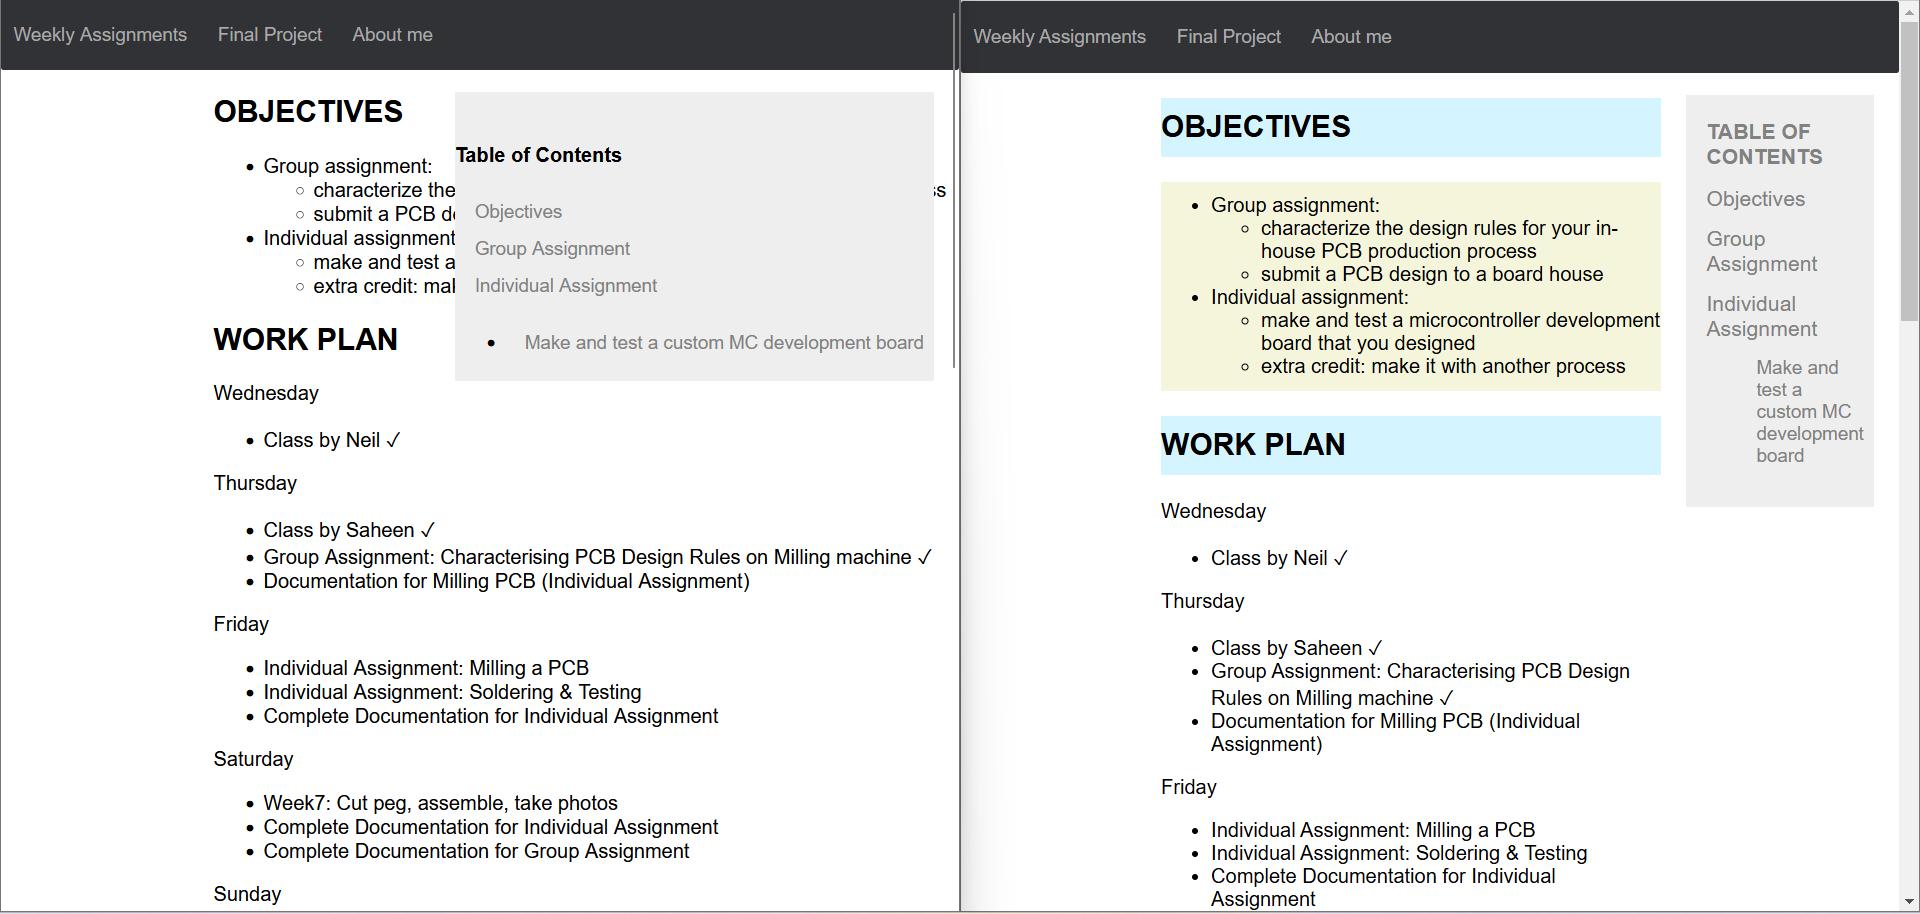
Tip: How to Add a Side Navigation Bar
13-03-2025: Here I have documented how I added a navigation side bar at the right side of the page using this tutorial.
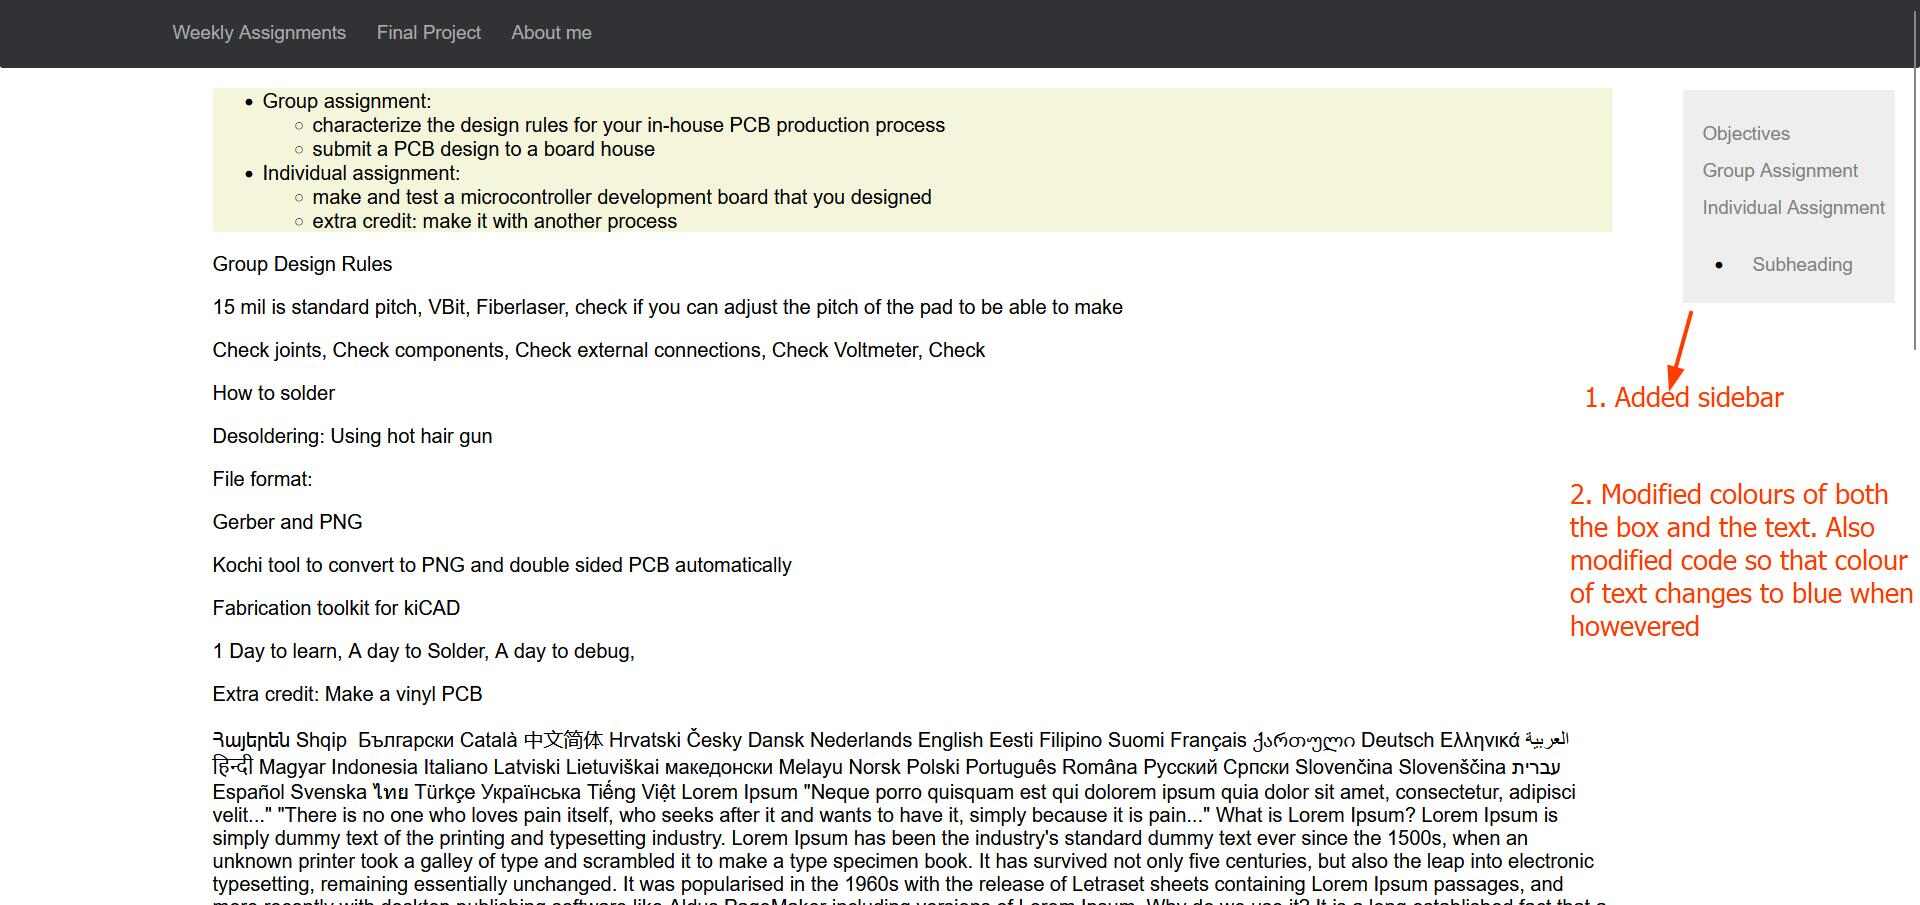
Later, I also modified the styling for content by replacing max-width by margin left, and a pad of 20 + 20 px
The following is my modified code for the same;
In the HTML page
            <class="sidenav">
              <a href="#Assignment">Objectives>
              <a href="#">Group Assignment>
              <a href="#">Individual Assignment>
              <a href="#">Subheading>
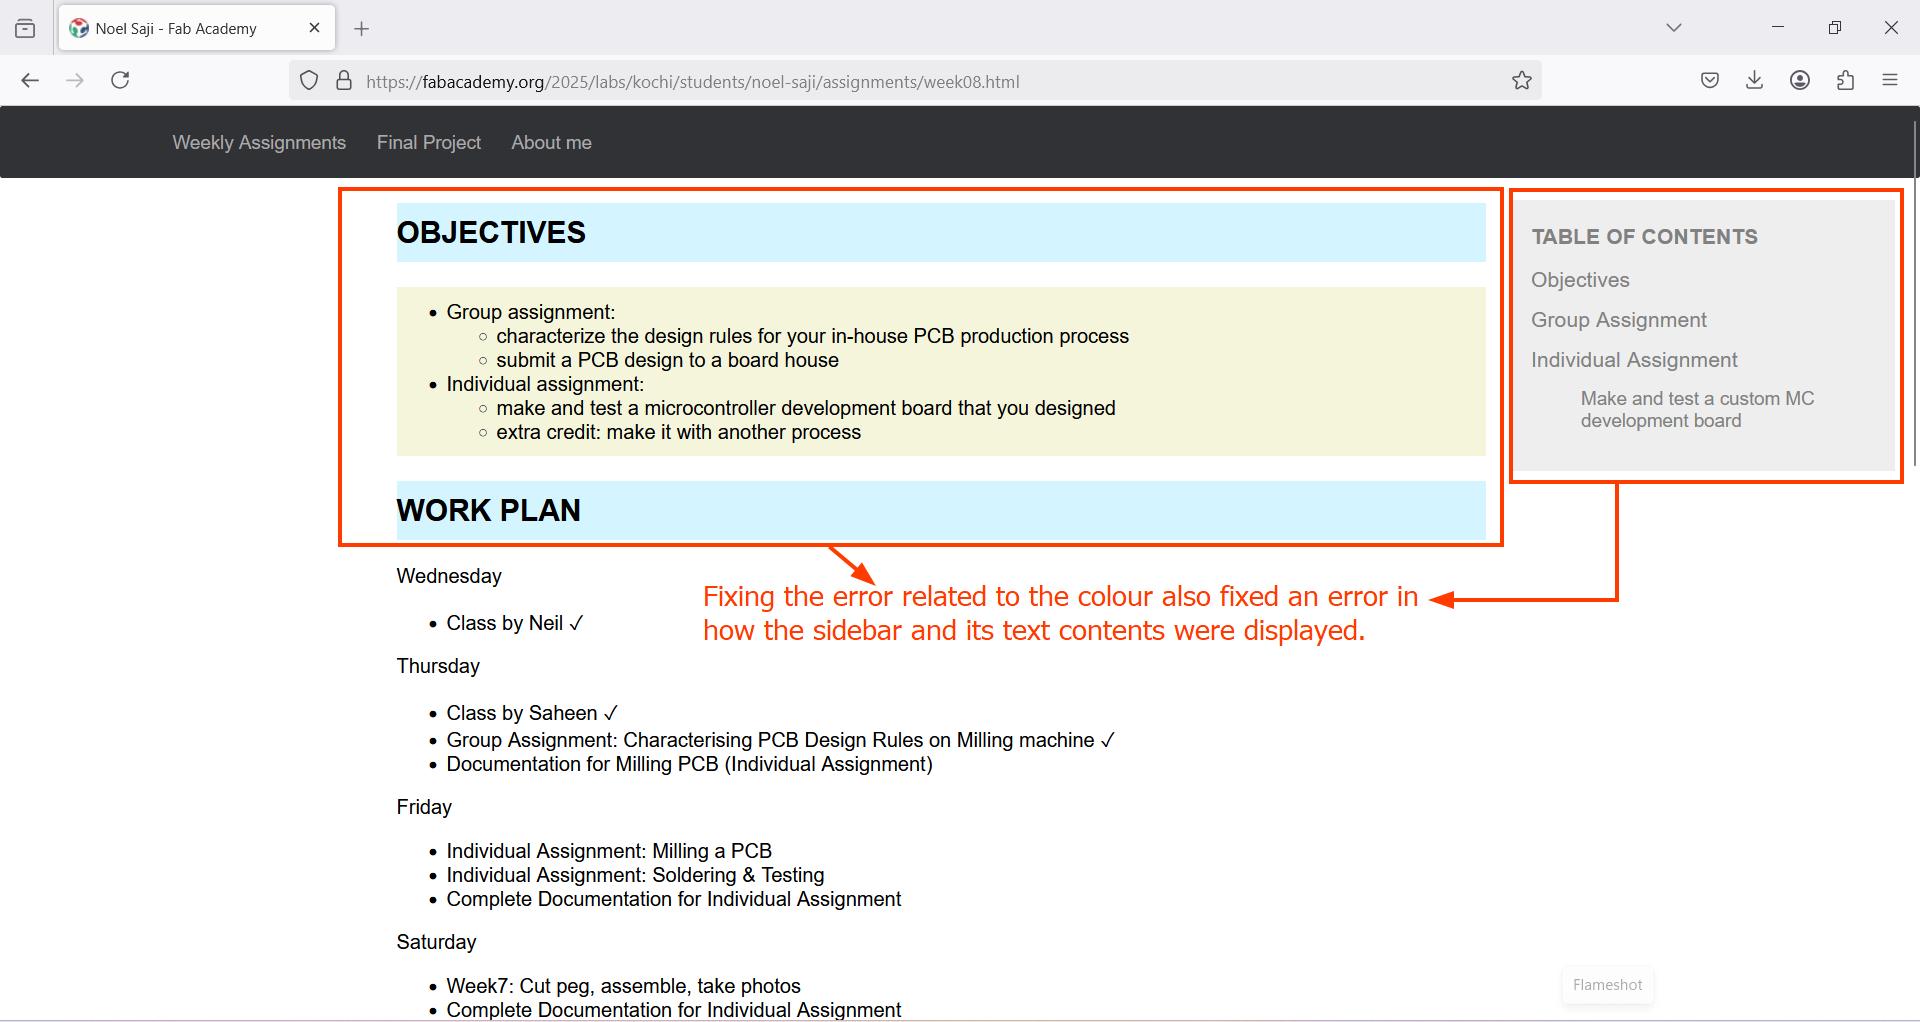
Tip: What to do when CSS elements not being reflected properly in Mozilla Firefox vs Chrome
14-03-2025: Some CSS elements are not reflected properly in global versions of my website in Mozilla Firefox. It shows up without problems in Chrome as well as my live server view in Firefox.
The first step is to right click and click Inspect to see the Inspector. Here, the code related to background colour was missing. I noticed that VS code automatically used RGB values to represent colours from the colour picker. This may not be supported in Mozilla Firefox, so I changed all the values to HEX code equivalent by double pressing the value displayed at the top of the colour picker
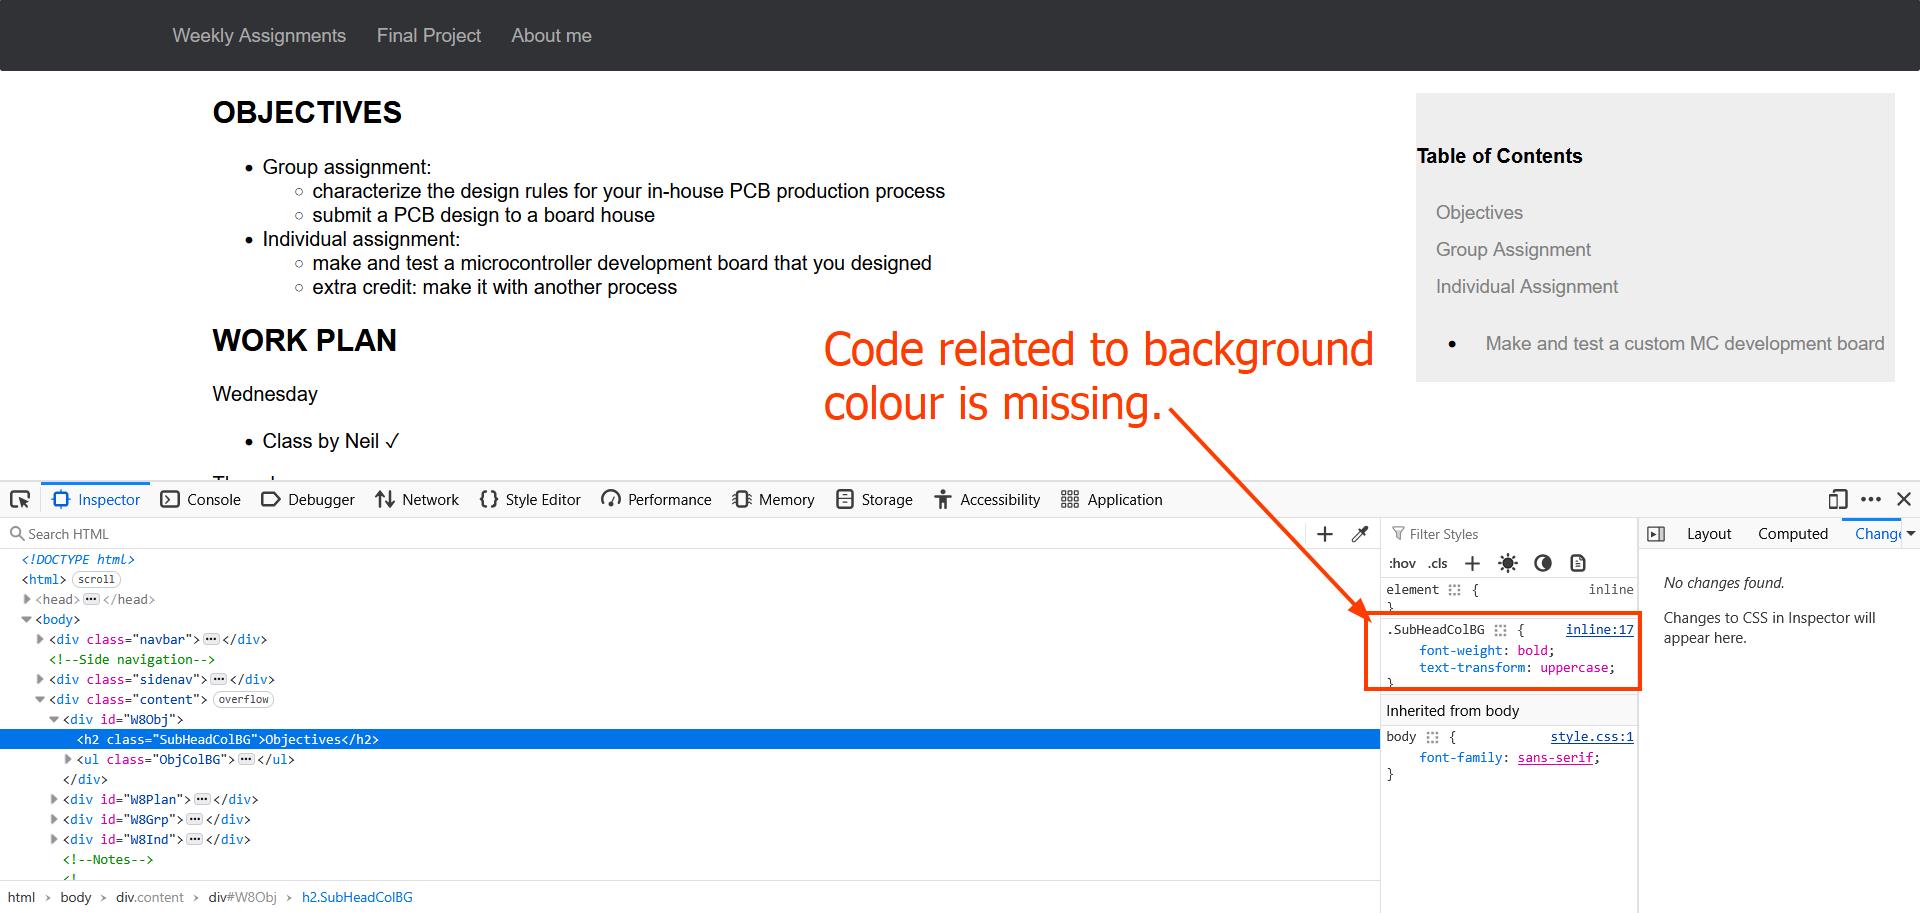
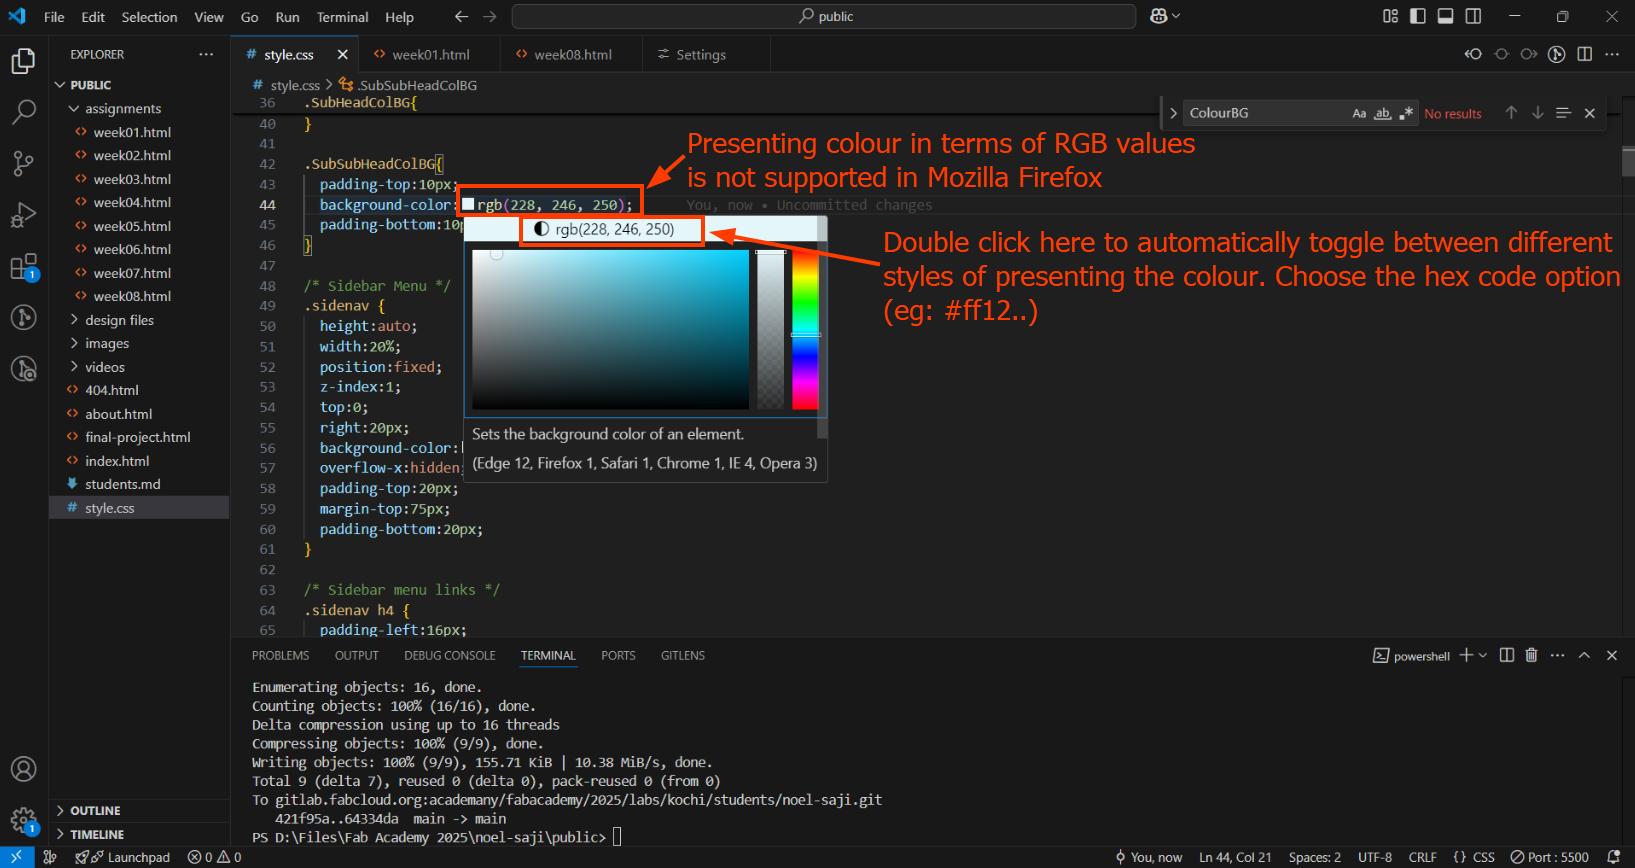
Now, when I push the changes, all the CSS elements are displayed properly
Another trick you could try is press Ctrl + F5; which causes a 'hard reload' that forces a webpage to access the latest update directly from the server
Conclusion
During Week 1 of Fab Academy, we did the following:
- Generated different ideas for a final project and made a sketch of a finalised project idea.
- Learned how git works and some basic git commands.
- Learned to code in HTML and CSS and developed a website to document our progress in Fab Academy.
References
Voice-Assisted Mini Companion Bot
- Design and Control of a Bipedal Robotic Character (DisneyResearchHub)
- A 1-foot tall, 3D-printed bipedal robot student project (umrobotics)
- Tinker: Open-sourced cartoon-Style Bipedal Robot (yuexuan li)
- EMO Launch video: The Coolest AI Desktop Pet with Personality and Ideas. (EMOPET ROBOT)
All Seeing-Eye
- This ROBOTIC Human Eye Looks SO REAL!! - UNUSUAL (Chris Ramsay)
- DIY Animatronic Eye Mechanism 3D Printed (Will Cogley)
- Eye Cube Tutorial video (Hendrikx Workshop)
Humanoid Robotic Face Chat-bot
- Google AI Studio
- Silicone Skin and 3D Printing: Creating an Expressive Animatronic Head (Will Cogley)
- Design and development of an ANTHROPOMORPHIC ANIMATRONIC HEAD. (AKASH)
- ChatGPT 4.o VS. PI chatbot in my Robot head (Will Huff)
- Faraj, Z., Selamet, M., Morales, C., Torres, P., Hossain, M., Chen, B., & Lipson, H. (2020). Facially expressive humanoid robotic face. HardwareX, 9, e00117.
Animatronic Dinosaur Toy
- JURASSIC WORLD: Building the Apatosaurus - Legacy Effects (Legacy Effects)
- Entirely Mechanical Robotic Arm (MenzMade)
- Kronos III - Animatronic Dragon - Progress Update 1
Web Development
- Visual Studio Downloads
- Phoenix Code (Code Text Editor)
- W3Schools Online Web Tutorials
- Image Resizer.com (For resizing and compressing images)
- Live Server (Visual Studio Extension)
- Save Typing (Visual Studio Extension)
AI prompts that were used
-
ChatGPT Prompt
            How to add captions to embedded video just like images
            <iframe width="560" height="315"
            src="https://www.youtube.com/embed/zx-BrMoFXoI?si=8qZED5AO_S_WBVjC&start=68"
            title="YouTube video player" frameborder="0" allow="accelerometer; autoplay; clipboard-write;
            encrypted-media; gyroscope; picture-in-picture; web-share"
            referrerpolicy="strict-origin-when-cross-origin" allowfullscreen>