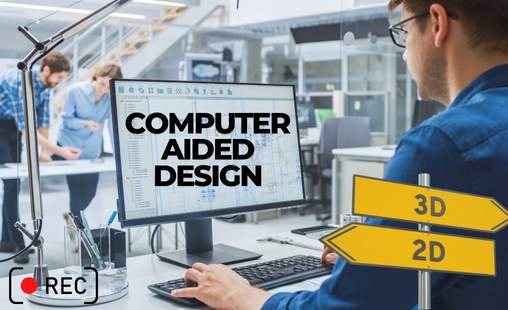
Computer Aided Design
This week, we explored the fundamentals of Computer-Aided Design (CAD), learning how to create and manipulate digital models using both 2D and 3D design tools. We experimented with vector and raster graphics for precise drawings and image editing, while also working with parametric and sculpting software to develop 3D models. Additionally, we practiced rendering and simulation techniques to enhance visualization and analyze design feasibility.
Learning Objectives
Assignments
What is CAD?
Computer-Aided Design (CAD) is the process of using specialized software to create, modify, analyze, and optimize designs. It plays a crucial role in various fields, including engineering, architecture, and product development. CAD enables designers to visualize concepts, test functionality, and prepare models for fabrication.
CAD can be categorized into different types based on its application:
2D Design is primarily used for creating sketches, technical drawings, and vector illustrations. It is useful for defining dimensions and layouts before proceeding to 3D modeling.
3D Design, on the other hand, allows for the creation of objects with volume and depth, making it essential for prototyping and manufacturing.
2D Design
2D design involves creating flat representations of objects, mainly used for technical drawings, schematics, and vector illustrations. It is essential for defining dimensions and layouts before transitioning to 3D modeling.
There are two primary types of 2D design:
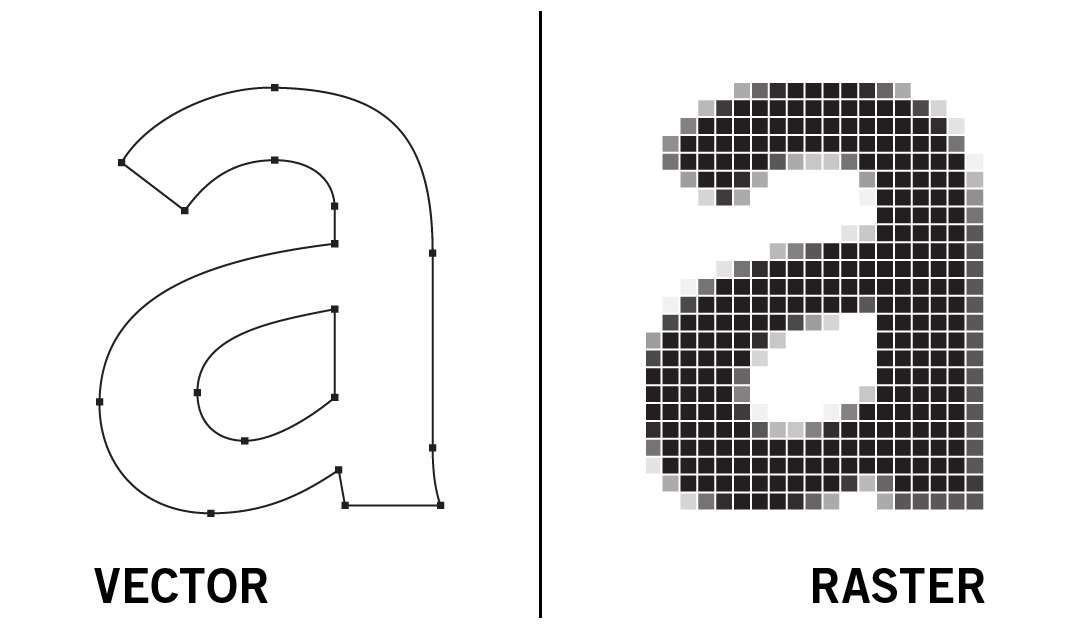
- Raster Graphics: Made up of pixels, raster graphics are commonly used for digital painting, image editing, and textures. Software such as Photopea, GIMP and Photoshop are used for raster-based design.
- Vector Graphics: Based on mathematical curves and shapes, vector graphics are scalable and precise. Software like Inkscape and Illustrator is used for vector-based design, making it ideal for schematics, logos, and diagrams.
Exploring Creative Solutions with 2D Design Software
I wanted to explore creative solutions using 2D design software, experimenting with raster, vector, and code-based design tools to create elements that could be integrated into my project design or website. My goal was to utilize different software tools effectively to produce unique and functional designs.
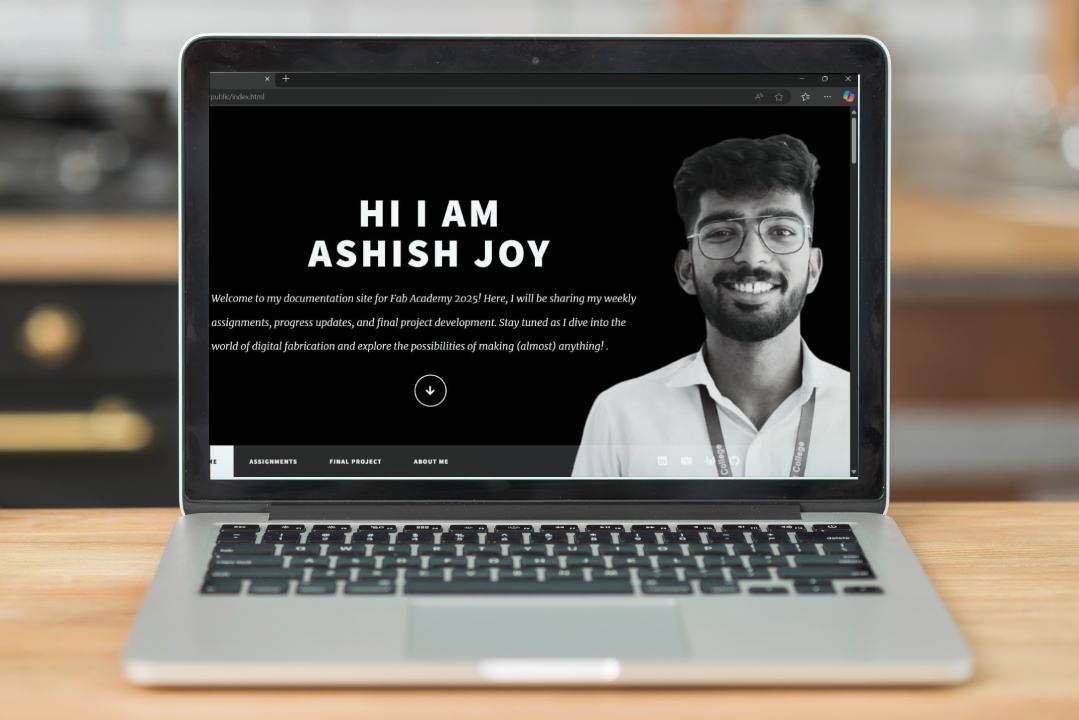
Photopea - Mockup Creation
Photopea is a web-based image editing software that provides advanced design capabilities similar to Photoshop. Since it runs entirely in the browser, there is no need to download or install anything, making it highly accessible. It supports multiple file formats, including PSD, PNG, JPG, SVG, and GIF, allowing users to open and edit Photoshop files without the need for Adobe software.
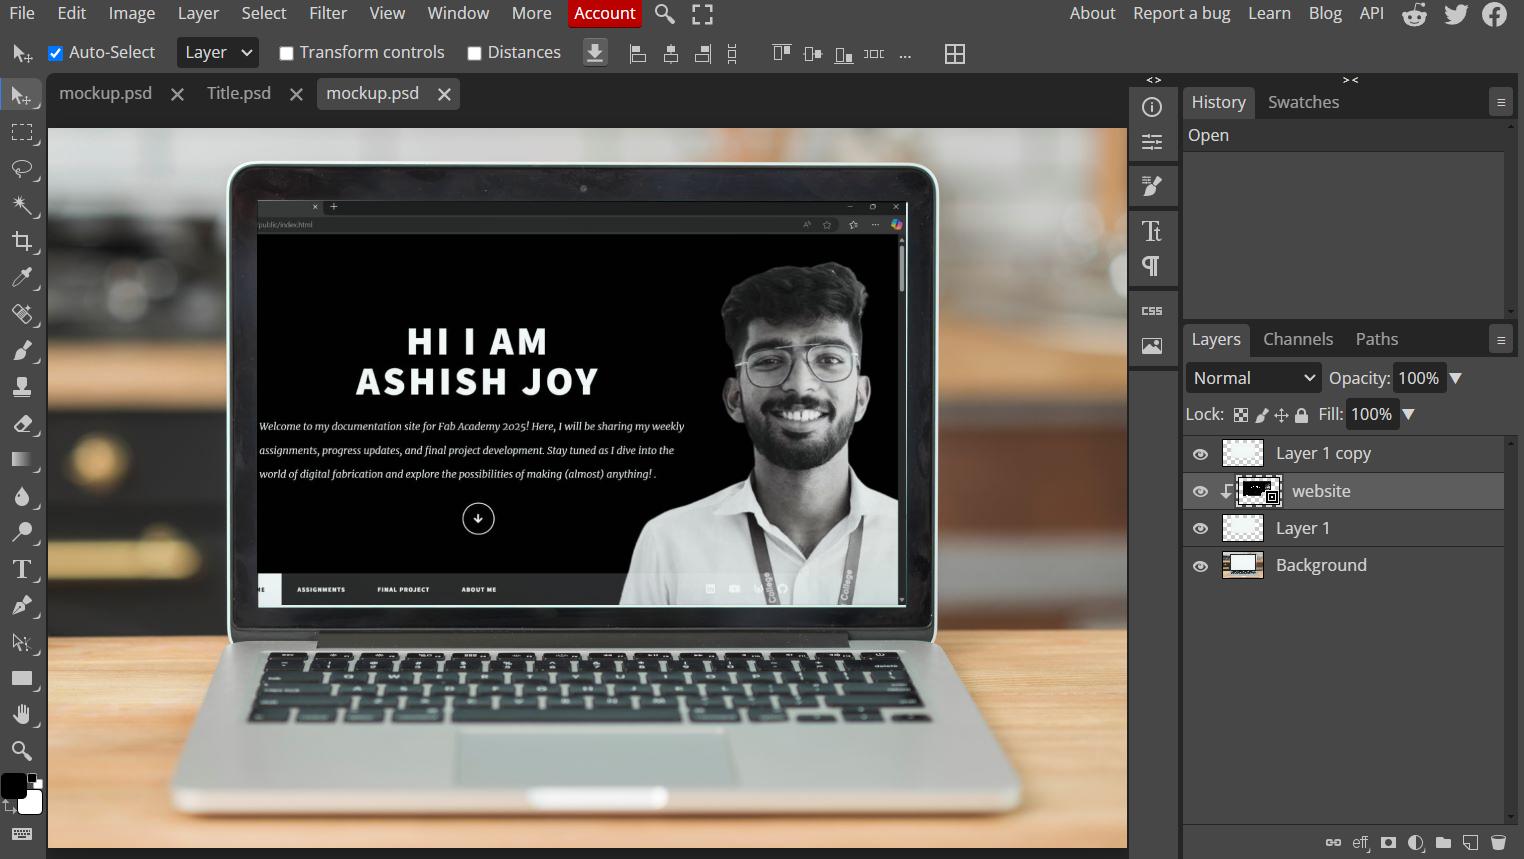
I used Photopea to create interface mockups for my project. This allowed me to visualize how elements would appear before implementing them. Since it is an online tool, I could quickly make adjustments without worrying about installation or software compatibility issues. The ability to work with PSD files was particularly useful, as I could modify templates and refine my layouts efficiently

Processing - Rasterized Image Generation
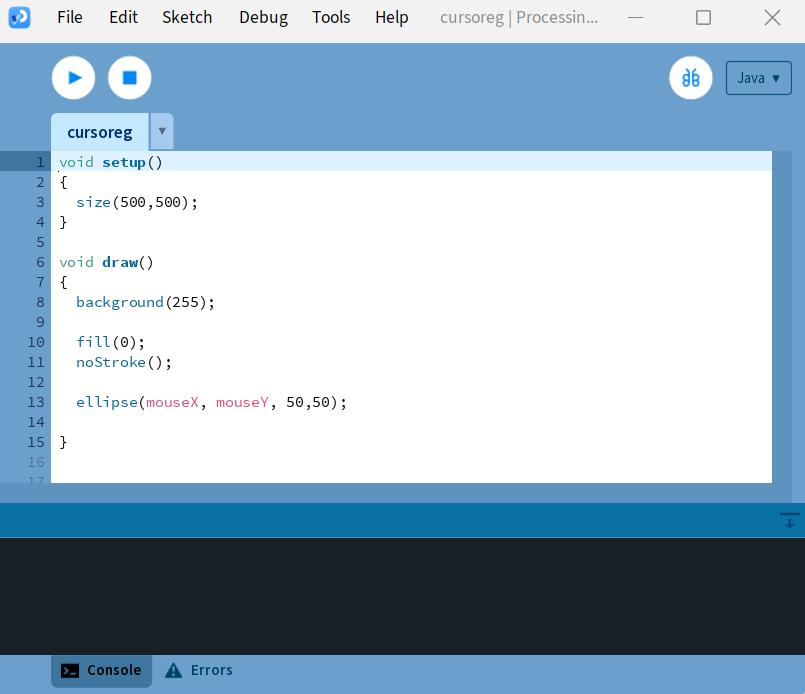
Processing is a flexible software sketchbook and programming language designed for artists and designers who want to create visual and interactive graphics. It is available for Windows, macOS, and Linux and can be downloaded from the official Processing website. Unlike traditional design software, Processing is based on coding, allowing users to generate dynamic visuals using simple scripts.
The language is built on Java and includes a comprehensive set of functions for drawing shapes, manipulating images, and creating animations. Users can write code to generate 2D and 3D graphics, apply transformations, and process images in real-time. Processing is widely used in creative coding, generative art, and interactive installations.
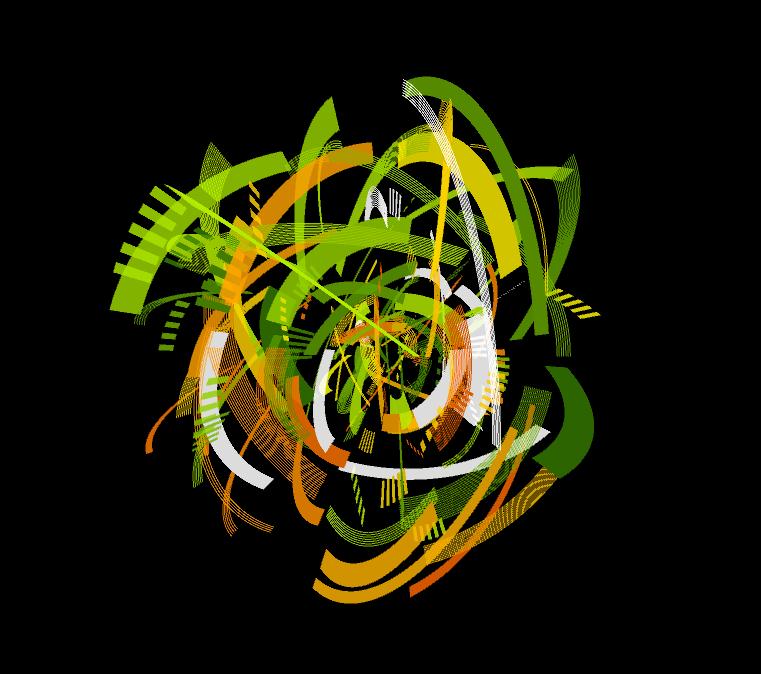
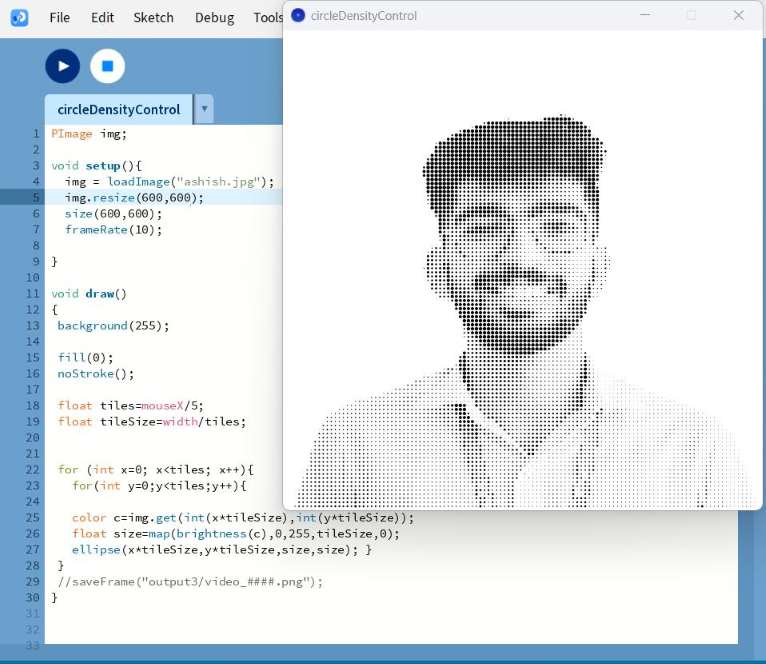 I have attached the link to the code of rasterization in Processing here.
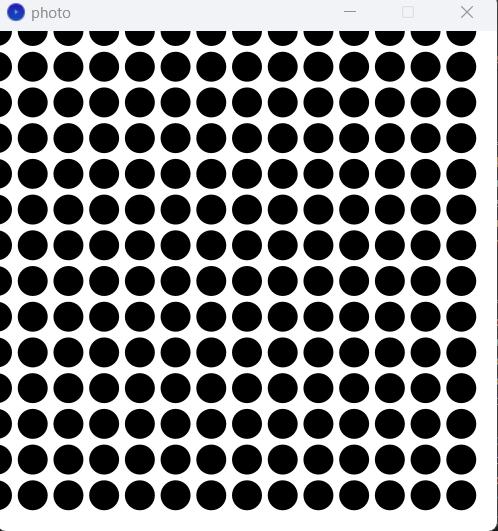
I used Processing to generate rasterized versions of images by writing simple scripts that manipulated pixels dynamically.
There is an online tool which can help to obtain similar rasterization effects without the need for any programming. The website is made of various image processing tools for processing jpeg images. The rasterization effect known as the dot pattern effect is on the given link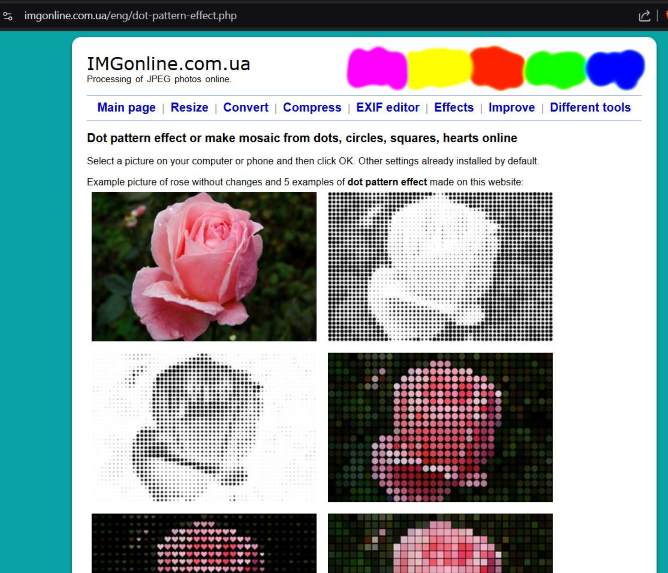
Canva - Thumbnail Generation
Canva is a user-friendly design platform that simplifies the process of creating visual content. It is available as a web application, but also has desktop and mobile versions for Windows, macOS, Android, and iOS. It is widely used for designing presentations, posters, social media graphics, and other digital media
For my project, I used Canva to generate thumbnails for each week’s documentation. Consistency in visual presentation was important for organizing my work, and Canva’s intuitive interface helped me quickly design and edit thumbnails that aligned with my project’s aesthetics.
One of Canva’s strengths lies in its template-based design system, which allows users to start with pre-made layouts and customize them using drag-and-drop tools. The platform provides access to a vast library of stock photos, icons, fonts, and design elements, making it easy to create polished graphics without requiring advanced design skills.

Inkscape - Pattern Design
Inkscape is a powerful open-source vector graphics editor, available for Windows, macOS, and Linux. It serves as a free alternative to Adobe Illustrator and is widely used for creating scalable vector graphics such as logos, illustrations, and technical drawings. Unlike raster-based programs, Inkscape allows users to create graphics that do not lose quality when resized.
Inkscape can be downloaded from the official website
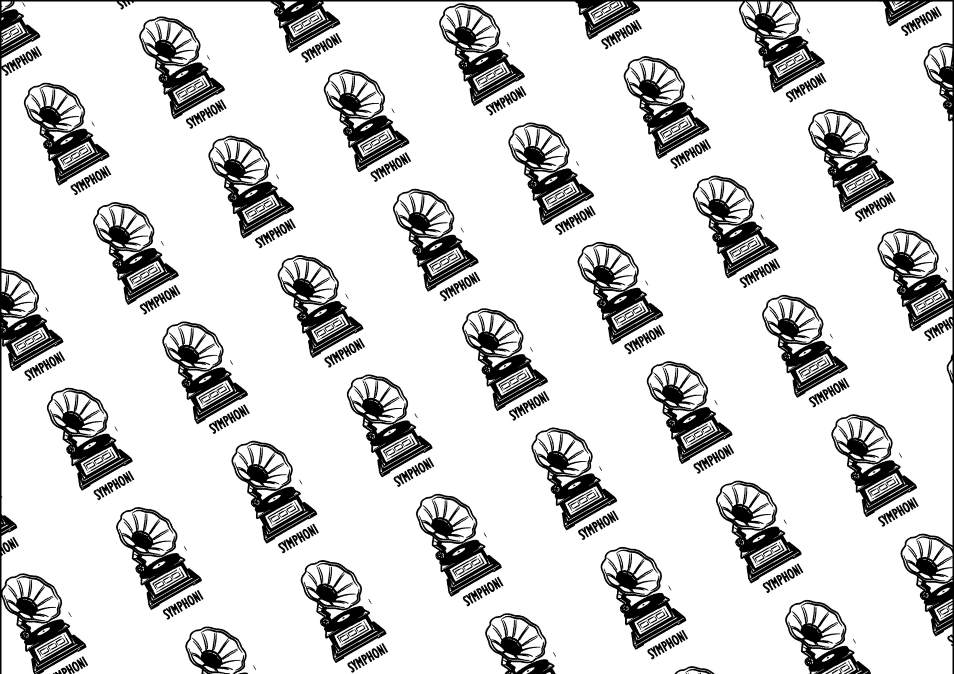
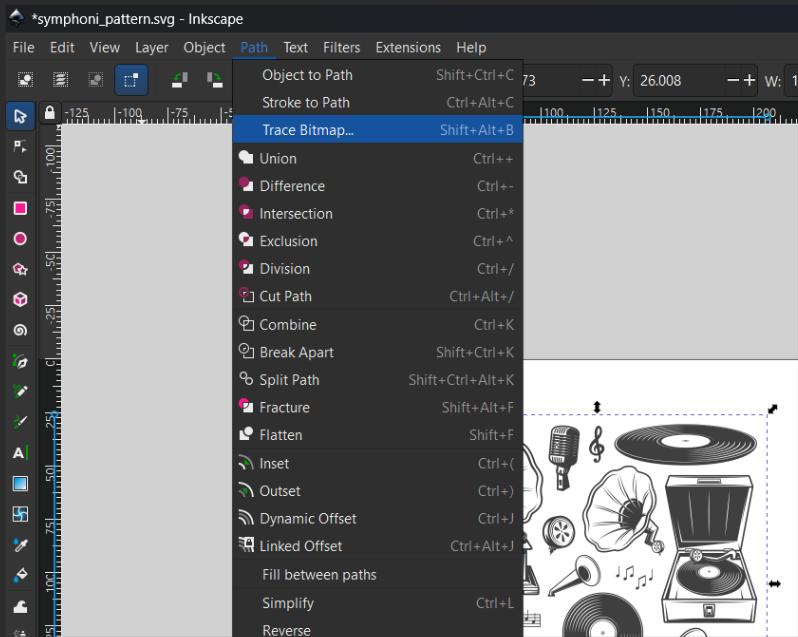
For my project, I used Inkscape to create custom patterns. I downloaded a free record player illustration from freePik. The image was in jpeg format which is a raster image format.
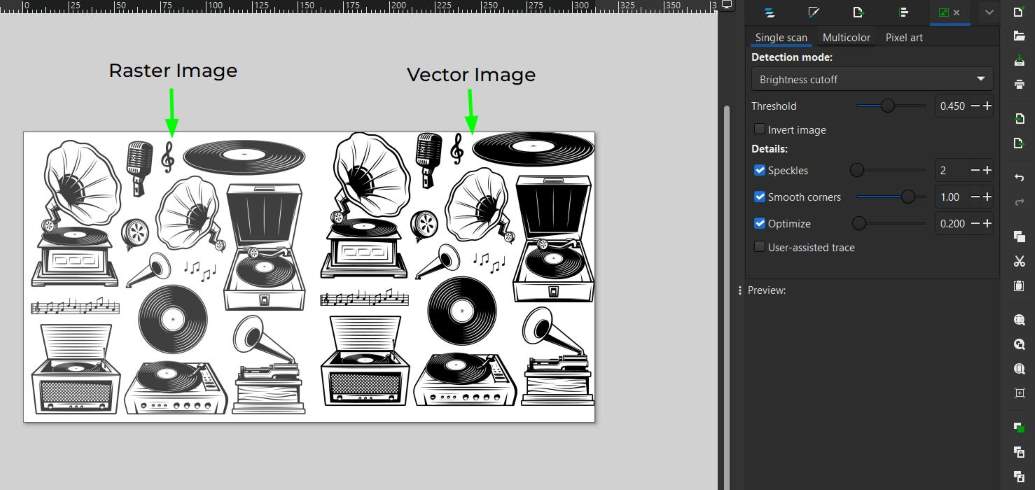
The raster image can be converted into vector image by using Trace Bitmap
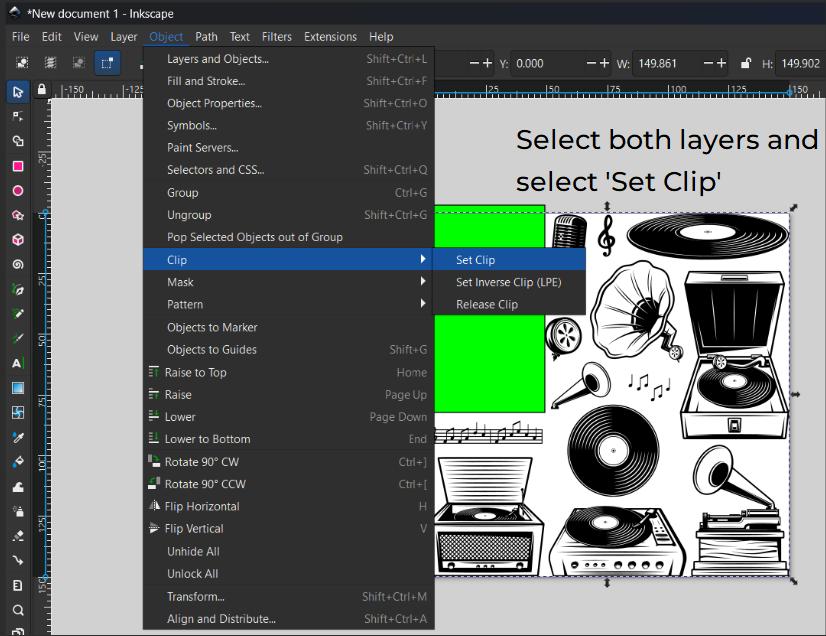
After getting the vector file, as there are multiple elements in the illustration we need only the gramophone. To crop the gramophone, the clip tool can be used. A layer must be added to top of the required crop area. I have added a rectangle on the gramophone. Select both the layers and select the clip in function. The Layer below the rectangle will be cropped or clipped.
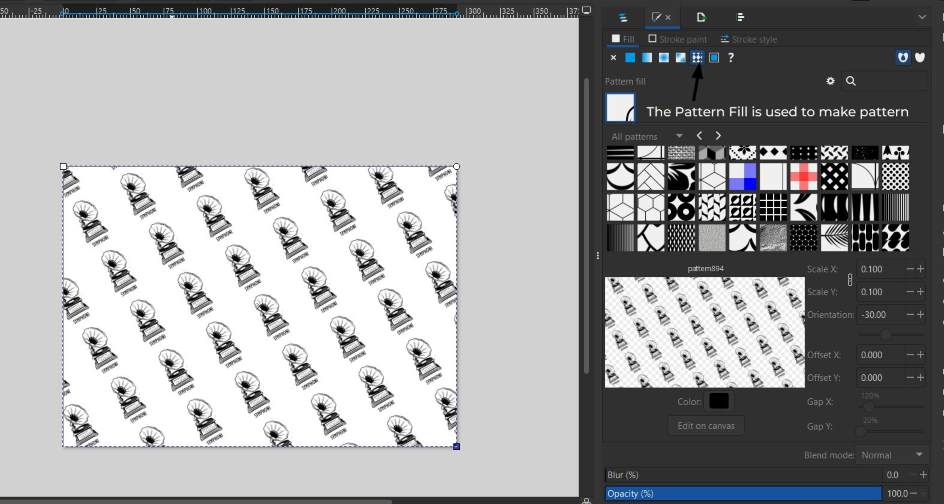
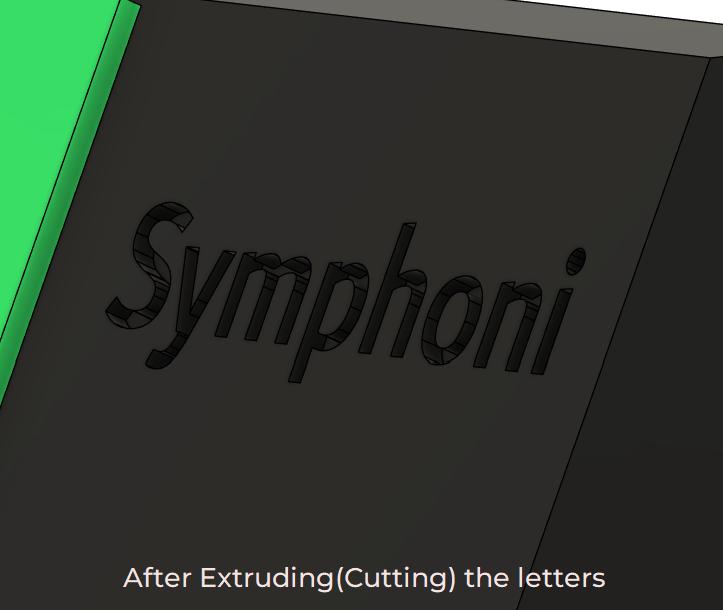
I added the title to the Gramophone - Symphoni. The layers are selected as pattern and added to our pattern folder. After adding the pattern, we can use it as a fill for our shapes
3D Design
3D design allows for the creation of objects with volume and depth, making it essential for prototyping and manufacturing. It enables designers to visualize models from multiple perspectives and test structural integrity before fabrication
There are different types of 3D modeling approaches:
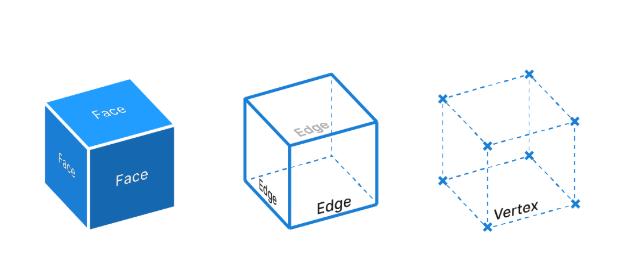
- Solid Modeling (BRep - Boundary Representation):Boundary Representation (BRep) modeling is the most widely used method in CAD applications for representing 3D objects. It provides a mathematically precise definition of an object's geometry by outlining the boundaries between solid and non-solid regions.
- Functional Modeling (FRep - Function Representation): Represents objects using mathematical functions, useful for procedural modeling.
- Volumetric Modeling (VRep - Volume Representation): Utilizes voxel-based methods to define 3D structures, frequently used in medical imaging and simulations.
Rendering and animation further enhance 3D designs by providing realistic visualizations. Simulation tools help analyze physical properties like stress, motion, and material behavior before actual fabrication. File formats such as STL, OBJ, STEP, and IGES are widely used for 3D modeling to ensure compatibility across different software.
Model a potential Final Project
Autodesk Fusion 360
For my project, I used Fusion 360 to create a detailed 3D model of my product design. Fusion 360 is a powerful, cloud-based 3D CAD, CAM, and CAE software developed by Autodesk. It is widely used for product design, engineering, and manufacturing. Fusion 360 integrates modeling, simulation, rendering, and fabrication tools in a single platform, making it ideal for both beginners and professionals.
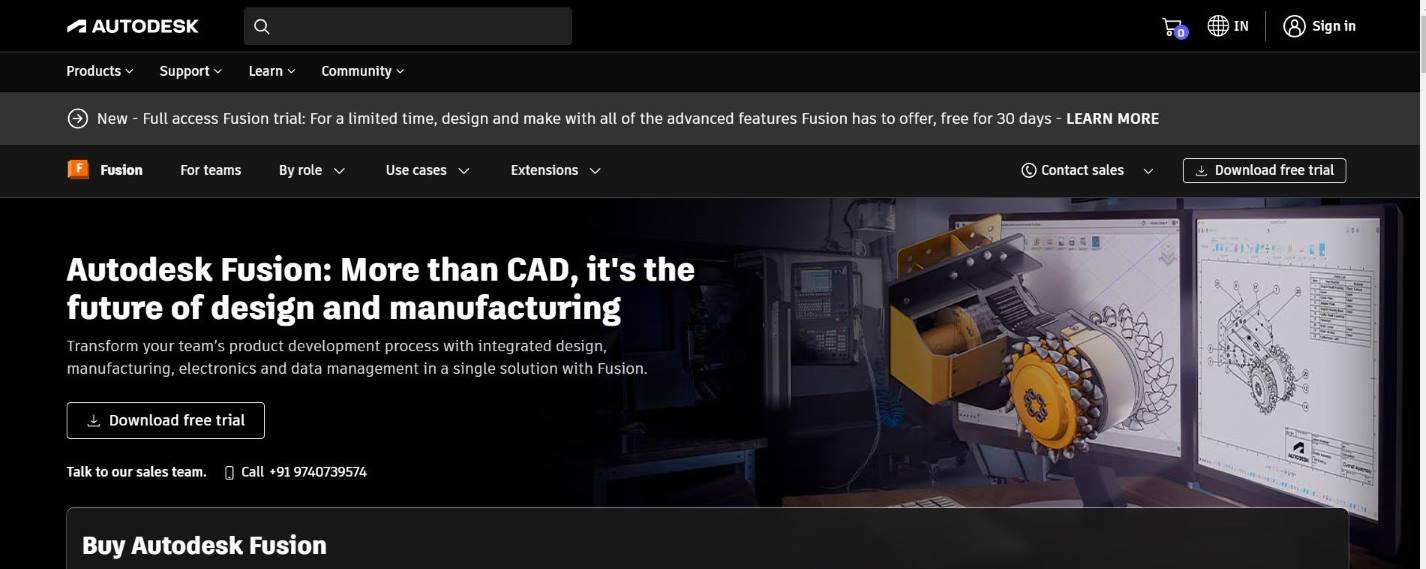
How to install Fusion 360
- Go to the Autodesk Fusion 360 website.
- Click on "Download Free Trial" or sign up for the Personal Use or Education License (students and educators can get it for free). I am using a Student License
- Install Fusion 360
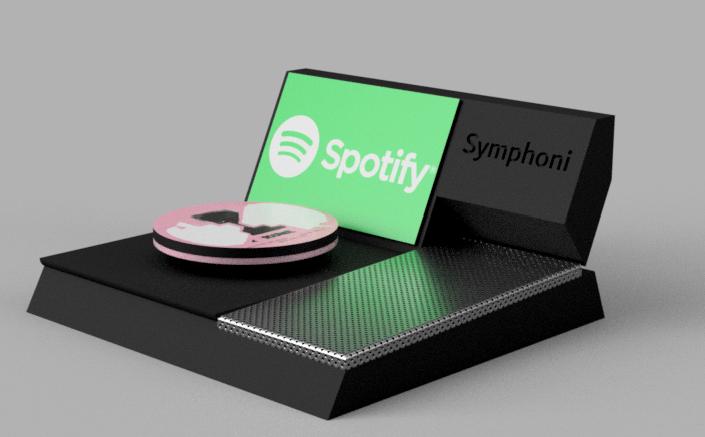
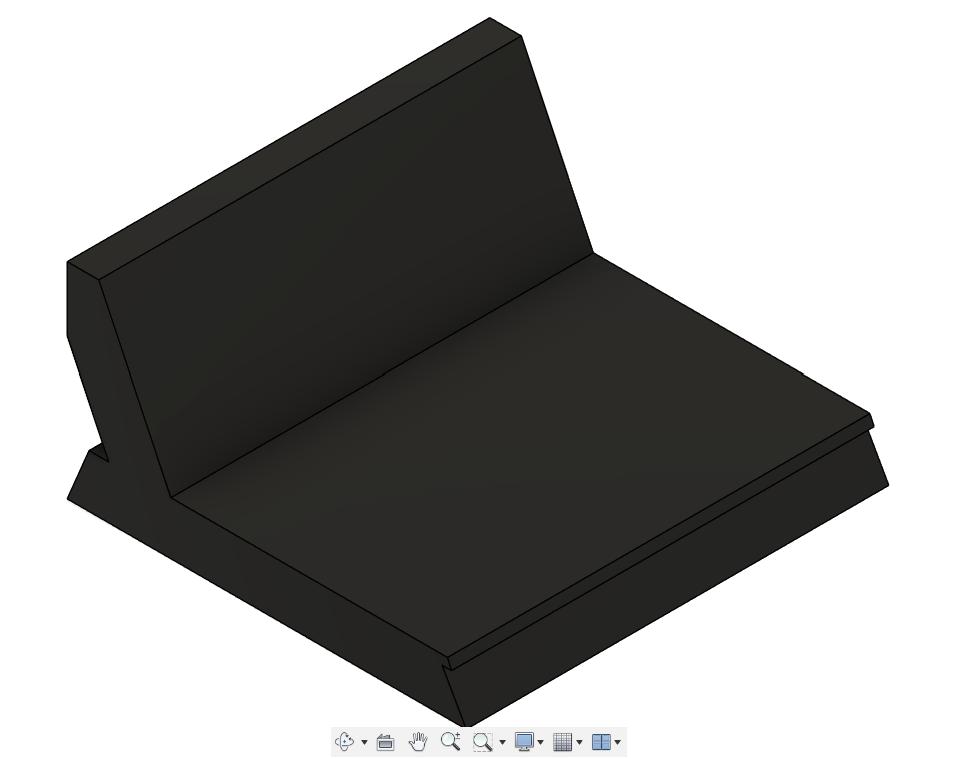
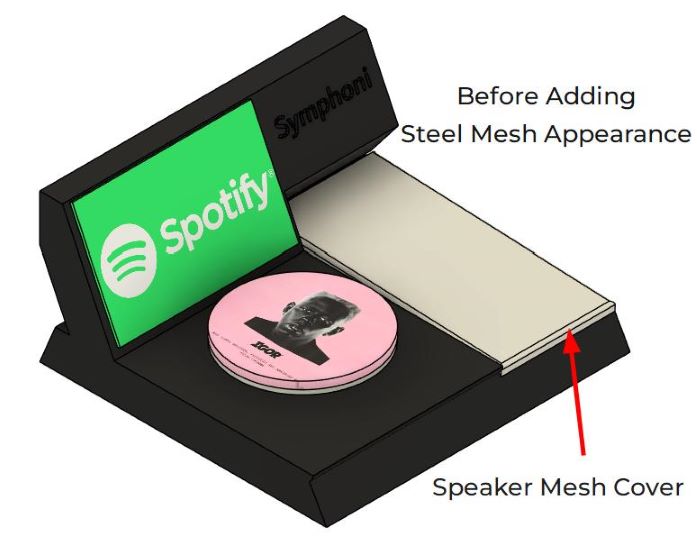
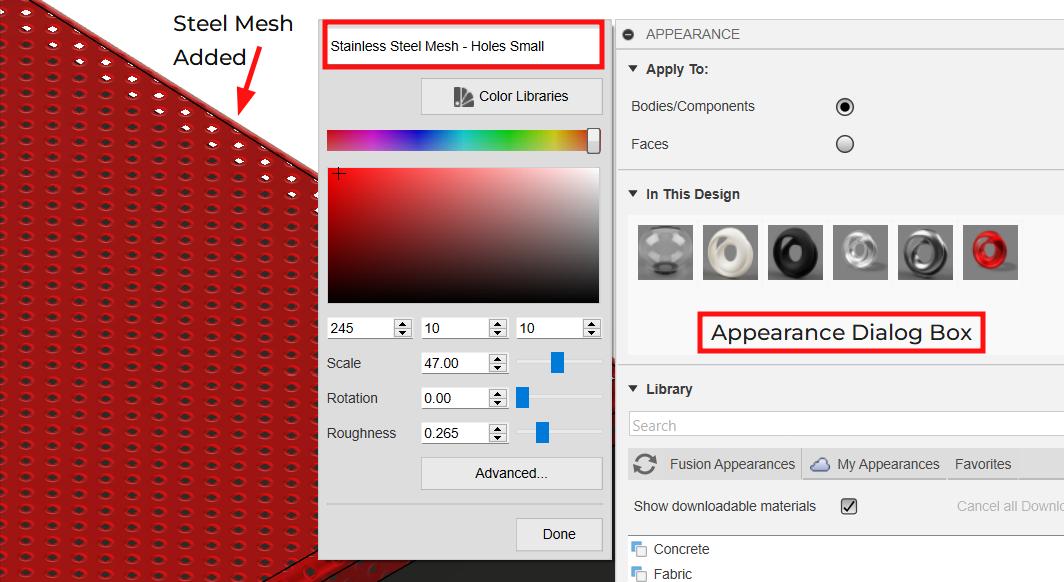
The above render is of the final design of Symphoni. My design process involved sketching the base shape, applying key modifications using extrude, fillet, and extrude cut, and enhancing the final look with appearances and decals. The Final stage was to render the image. This is why I love Fusion because it allows me to do 2D Sketching, 3D Modelling, Rendering and Animation all in one
The Design Process
Sketch Tool
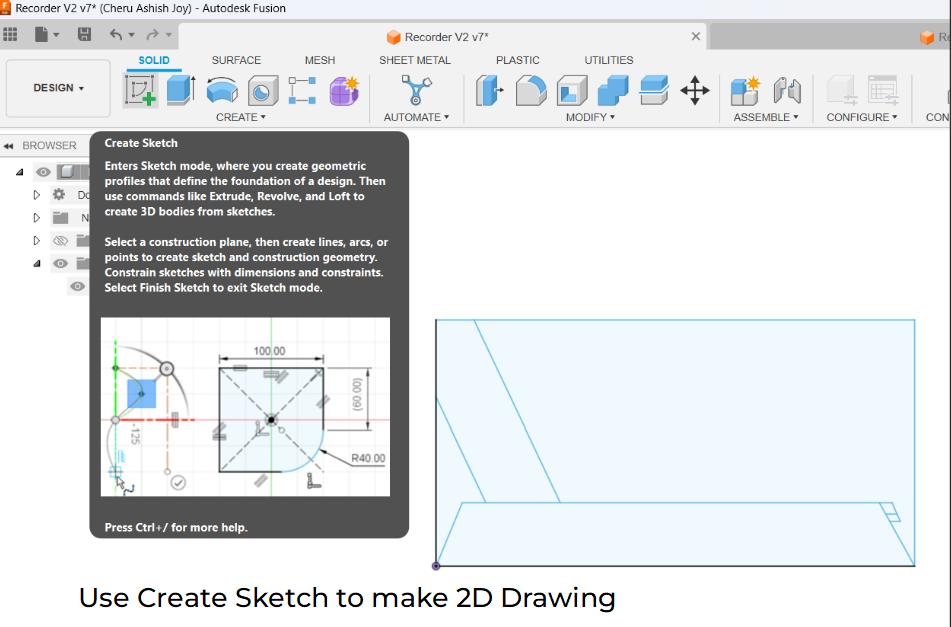
In Fusion 360, the Sketch environment is where you create 2D profiles that serve as the foundation for 3D models. Once you create a sketch, you can use extrude, revolve, sweep, or loft to turn it into a 3D shape.
Extrude Tool
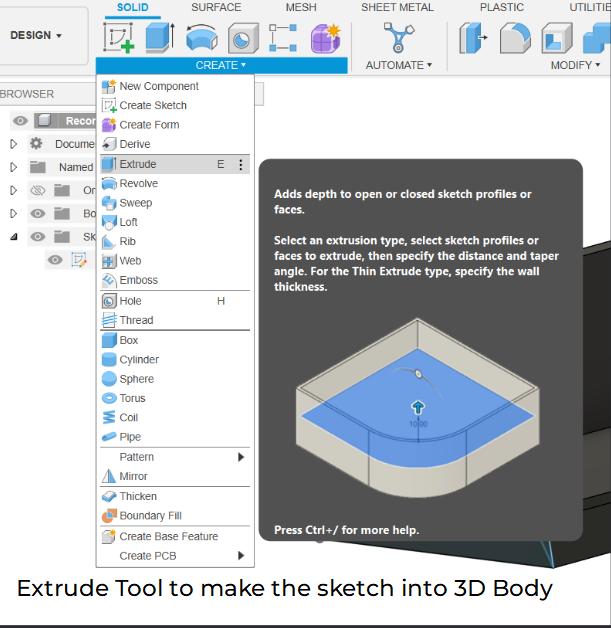
Extrusion is a fundamental modeling operation used to turn 2D sketches into 3D objects. It works by extending (or cutting) a closed sketch profile along a straight path to add or remove material.
Adding Decals to the design
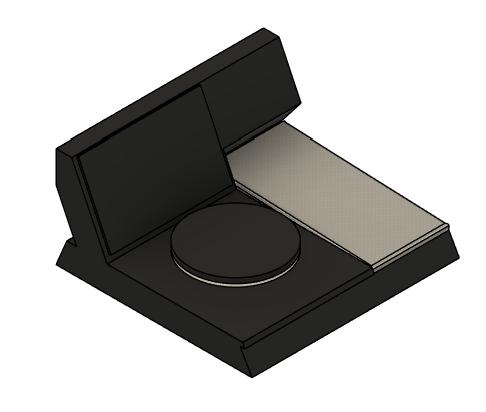
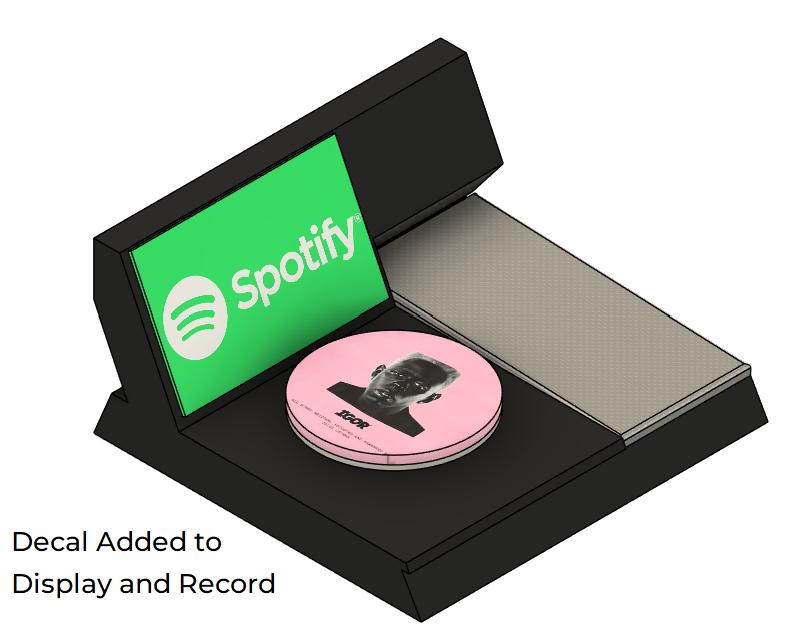
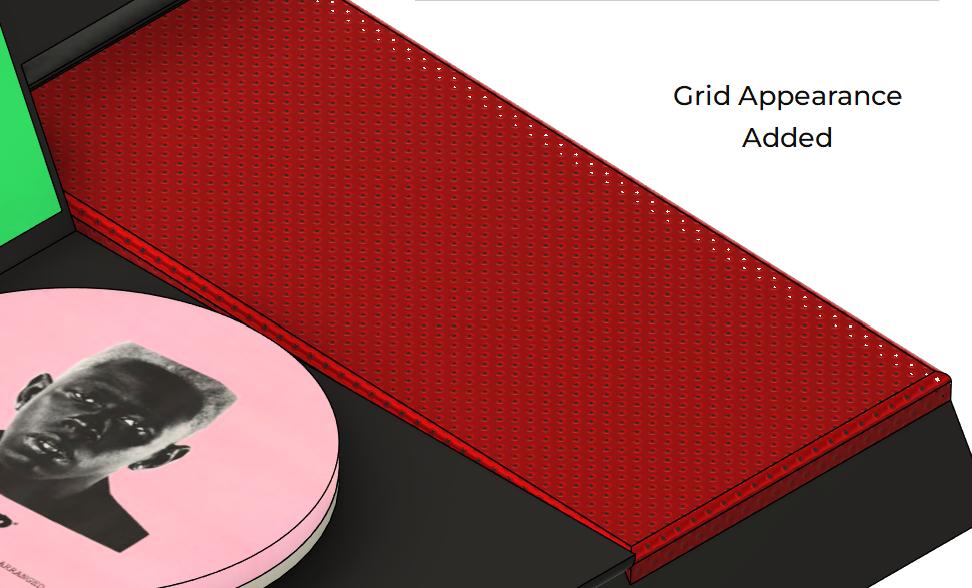
A decal in Fusion 360 is an image or graphic that you can apply to a 3D model's surface, like a sticker, logo, or label. It's commonly used for branding, visualization, or adding realistic details to models without modifying the geometry.
Engraving/Embossing Text
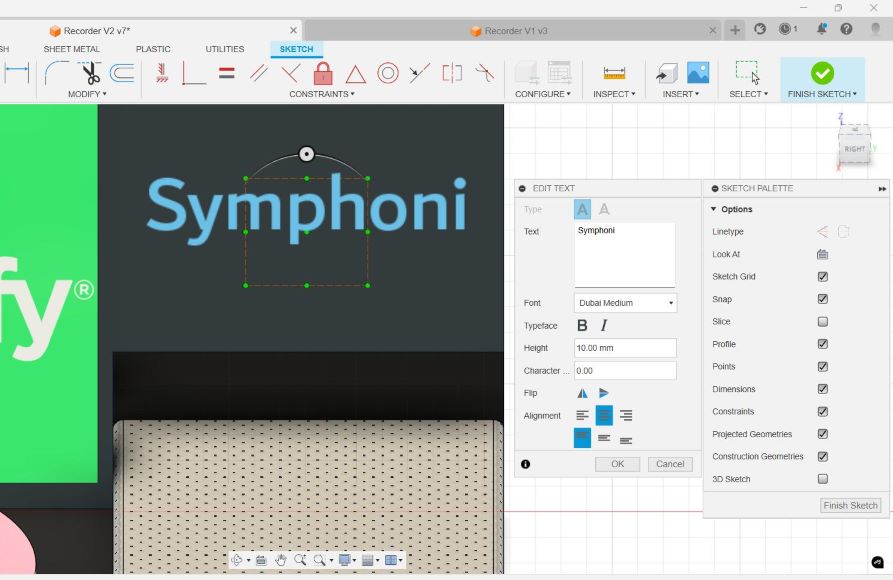
- Create the Text
- Go to the "Create" menu and select "Text".
- Click on the flat face where you want to place the text.
- Type your text, choose a font, size, and position.
- Click OK.
- Extrude (Emboss or Engrave)
- Select the Extrude tool (Press E).
- Click on the text sketch:
- For Embossing (Raised Text) → Extrude Up (positive value).
- For Engraving (Cut-In Text) → Extrude Down (negative value).
- Click OK.
Adding Appearance to Components

Blender
Blender is a powerful, open-source 3D creation suite that supports modeling, sculpting, rendering, animation, compositing, and simulation. It is widely used in industries like animation, game development, visual effects, and product visualization. Blender offers a flexible workflow with both procedural and manual tools, making it an excellent choice for professionals and hobbyists alike.
Blender is a free, open-source 3D creation software that can be downloaded from the official Blender website. It is available for Windows, macOS, and Linux. To install Blender, simply visit the website, download the latest stable version, and run the installer. Once installed, Blender can be launched immediately without the need for additional setup.
Using Blender for Animation and Rendering
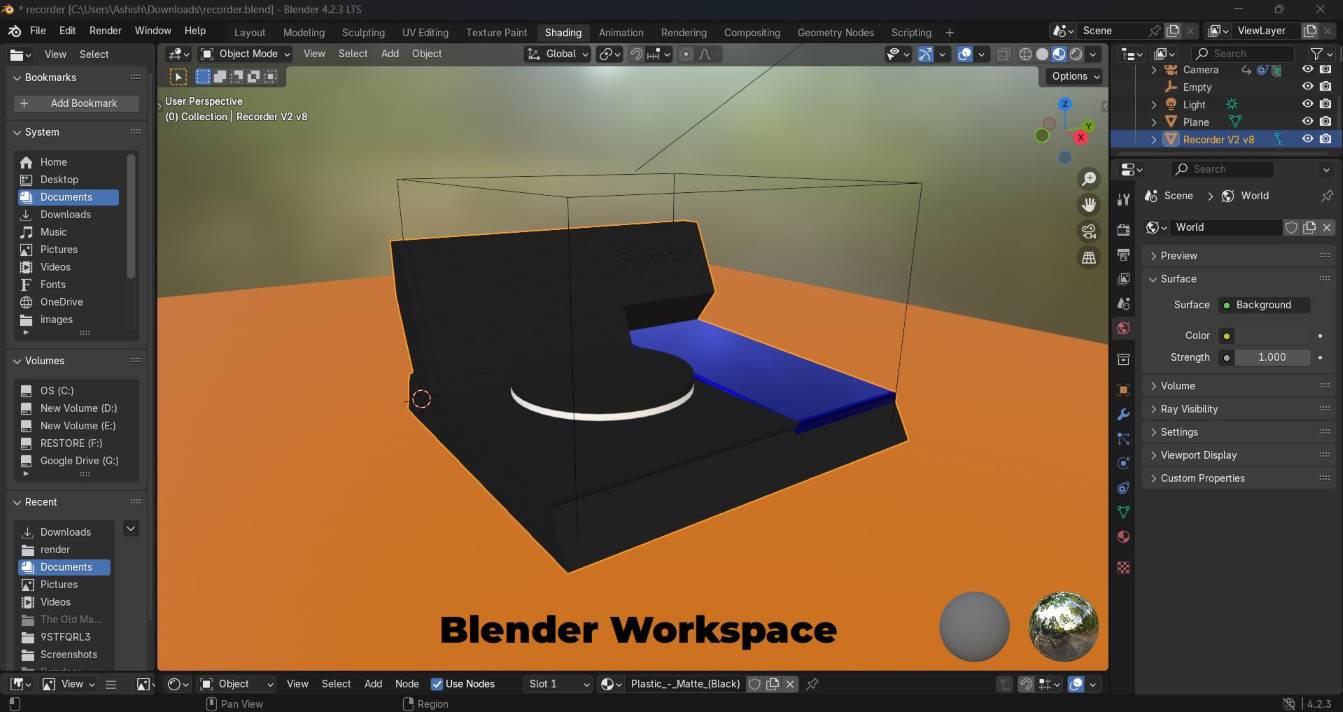
In this project, I used Blender to animate and render my Fusion 360 design. Below are the steps I followed to bring my design into Blender and set up an animation.
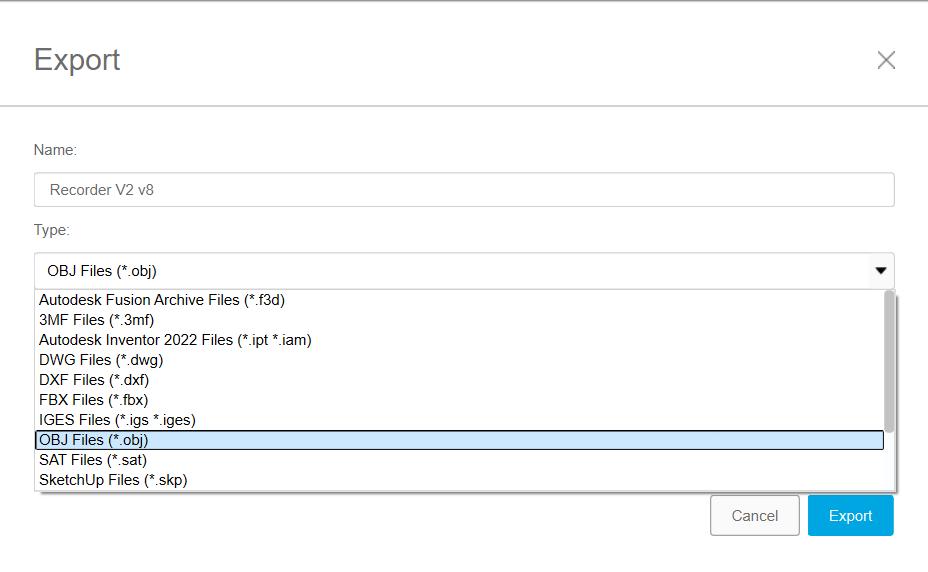
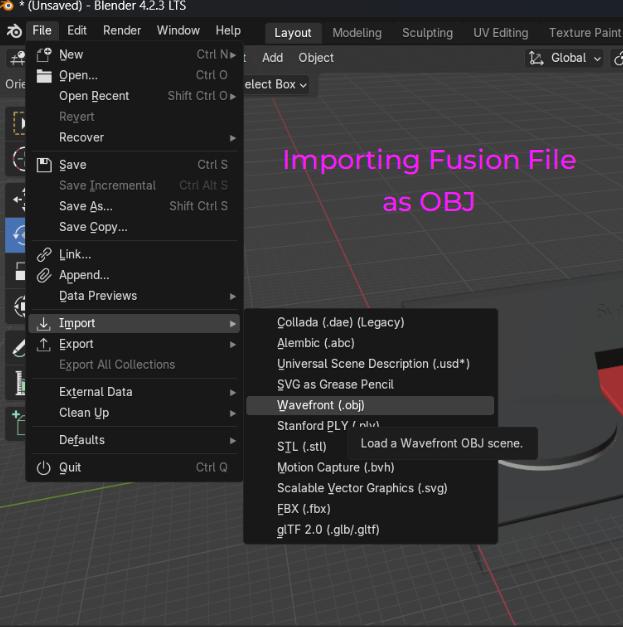
Step 1: Exporting from Fusion 360
To start, I exported my design from Fusion 360 as an OBJ file. This format ensures compatibility with Blender while maintaining the integrity of the model.
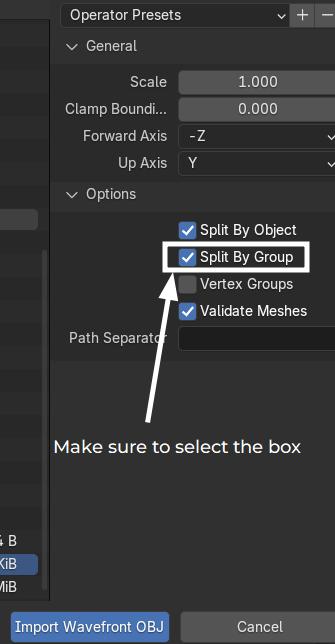
Step 2: Importing into Blender
Inside Blender, I imported the OBJ file by going to File > Import > Wavefront (.obj). I enabled the Split by Group option to keep the different components of the model separate.
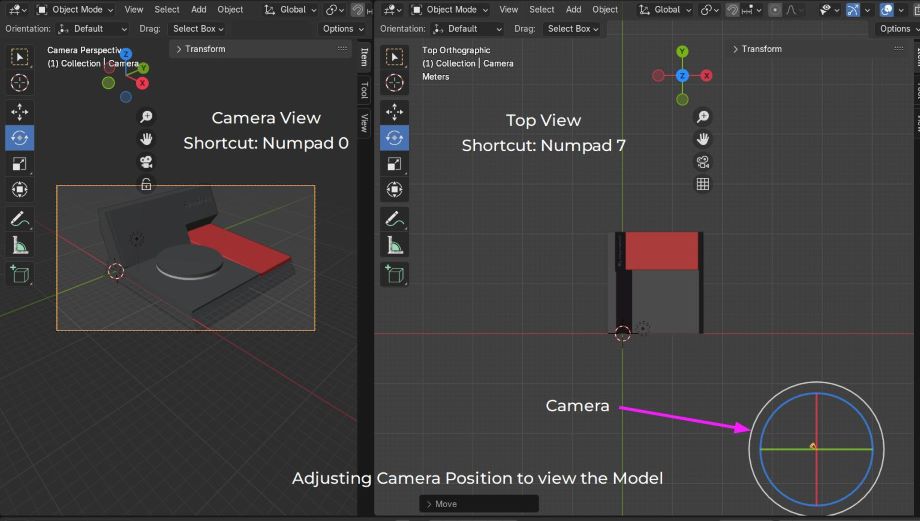
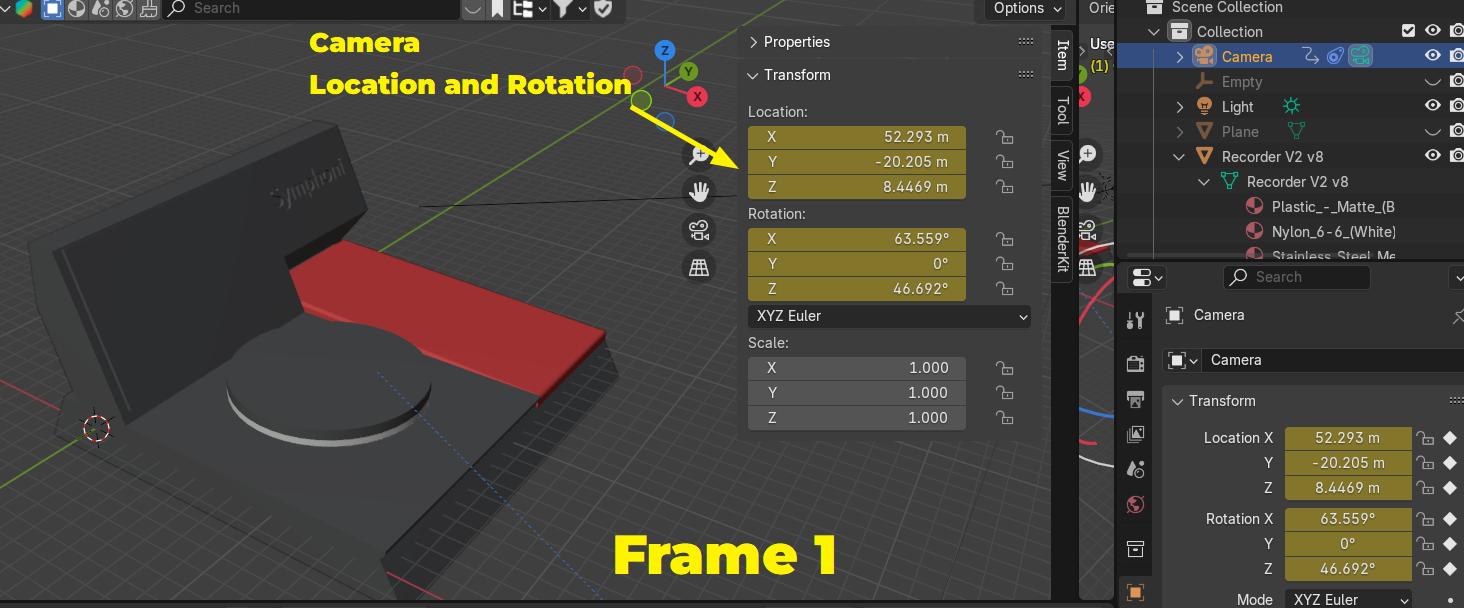
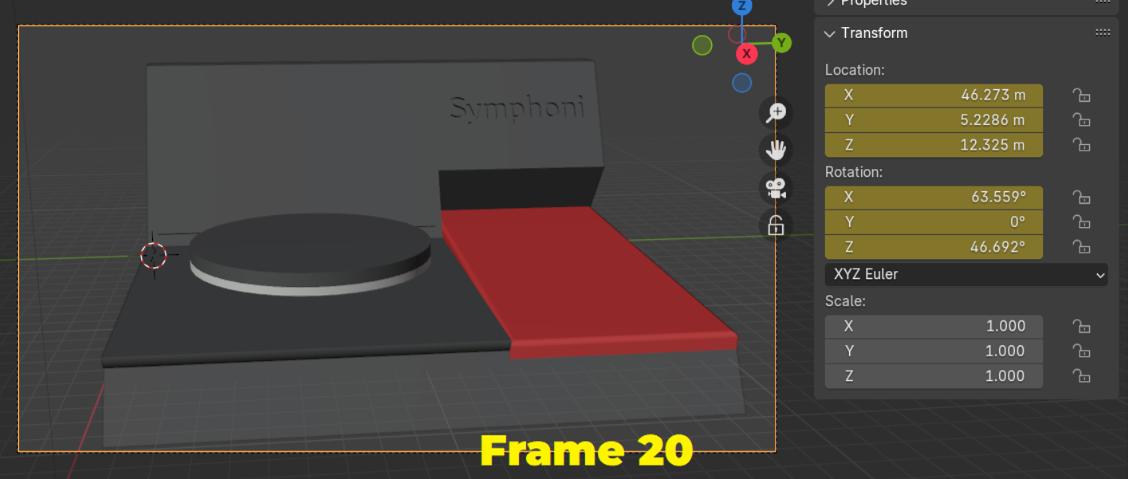
Step 3: Adjusting Camera Position
After importing the model, I adjusted the camera’s position to properly frame the design. This involved moving and rotating the camera to find the best viewing angle.
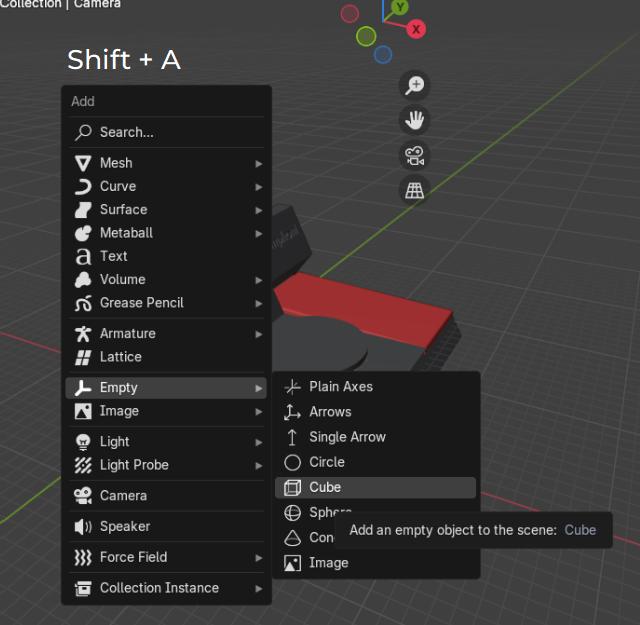
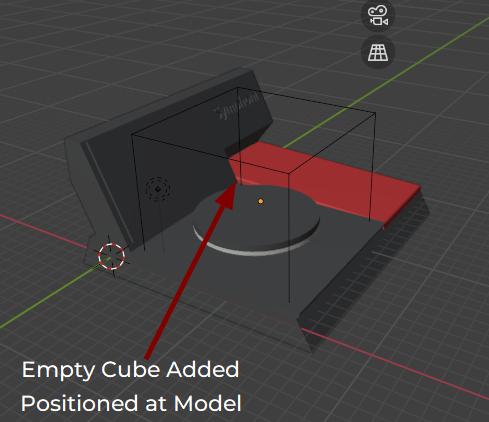
Step 4: Adding an Empty Object
To create a smooth animation, I added an Empty Object in Blender. This empty object serves as a tracking target for the camera.
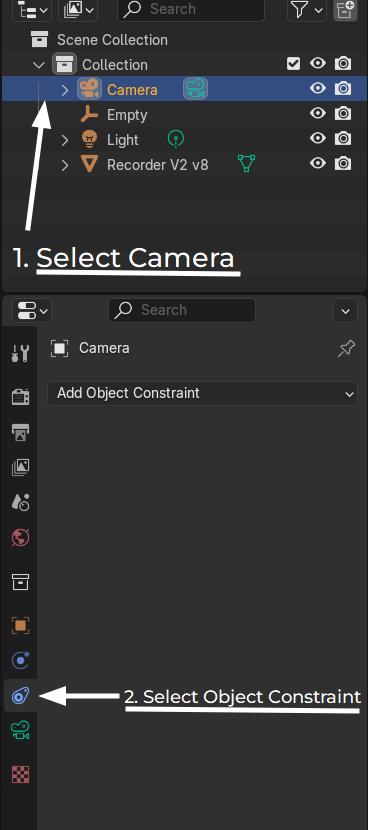
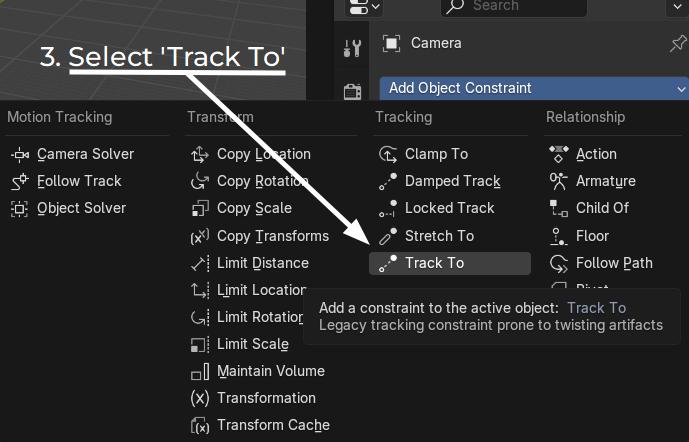
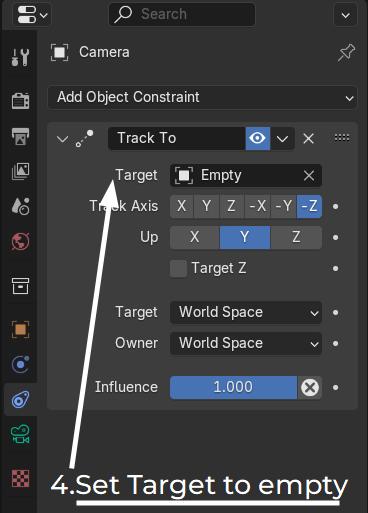
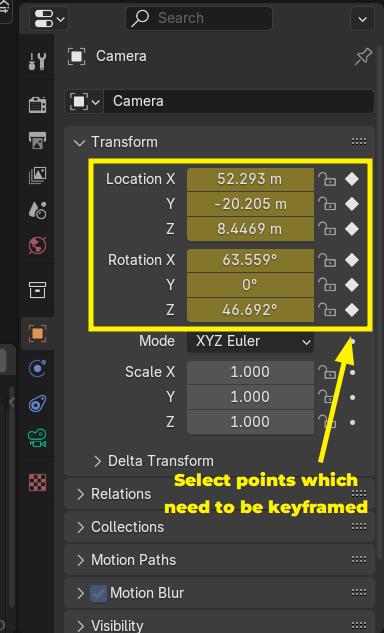
Step 5: Applying Object Constraint to the Camera
With the empty object in place, I selected the camera and applied a Track To constraint, setting the empty object as the target. This setup allowed the camera to follow the model dynamically.
Step 6: Adding Material
I used an Add-on for adding materials to my design. The add on is called BlenderKit .IT can be downloaded from its website. With BlenderKit, you can quickly apply high-quality materials to your image plane without manually setting up textures. Experiment with different materials and settings to achieve the best visual results.

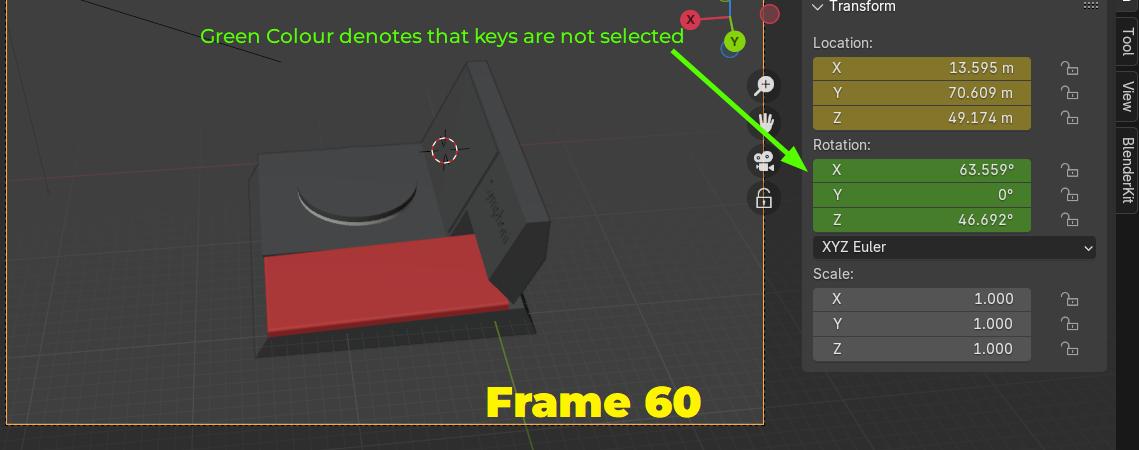
Step 7: Keyframing the Animation
I used Blender’s Timeline to insert keyframes for the camera and the model. This helped create smooth motion over time.
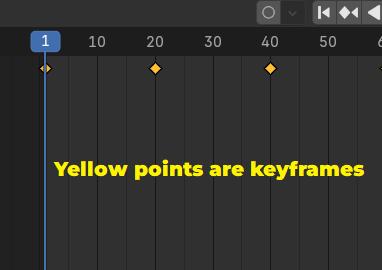
Multiple Frames are keyframed according to change in the camera orientation and rotation.
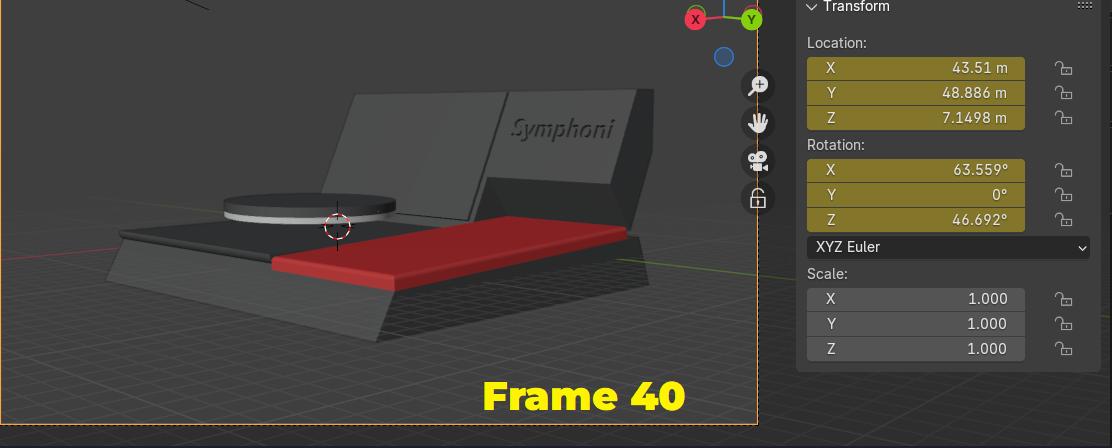
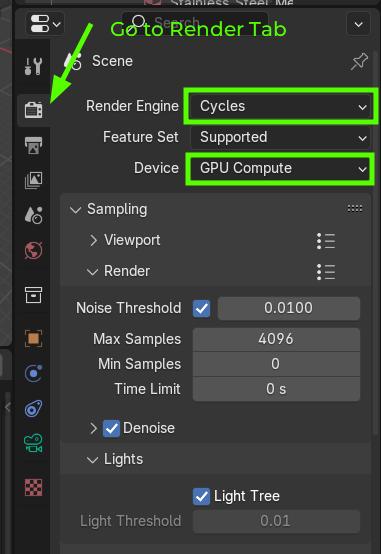
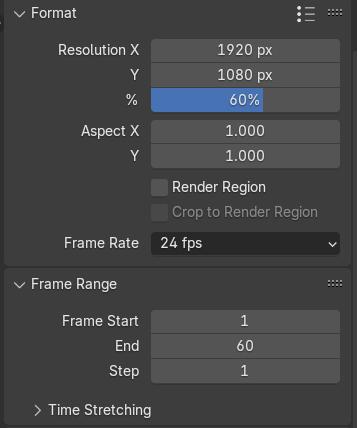
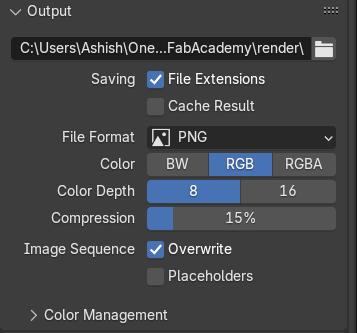
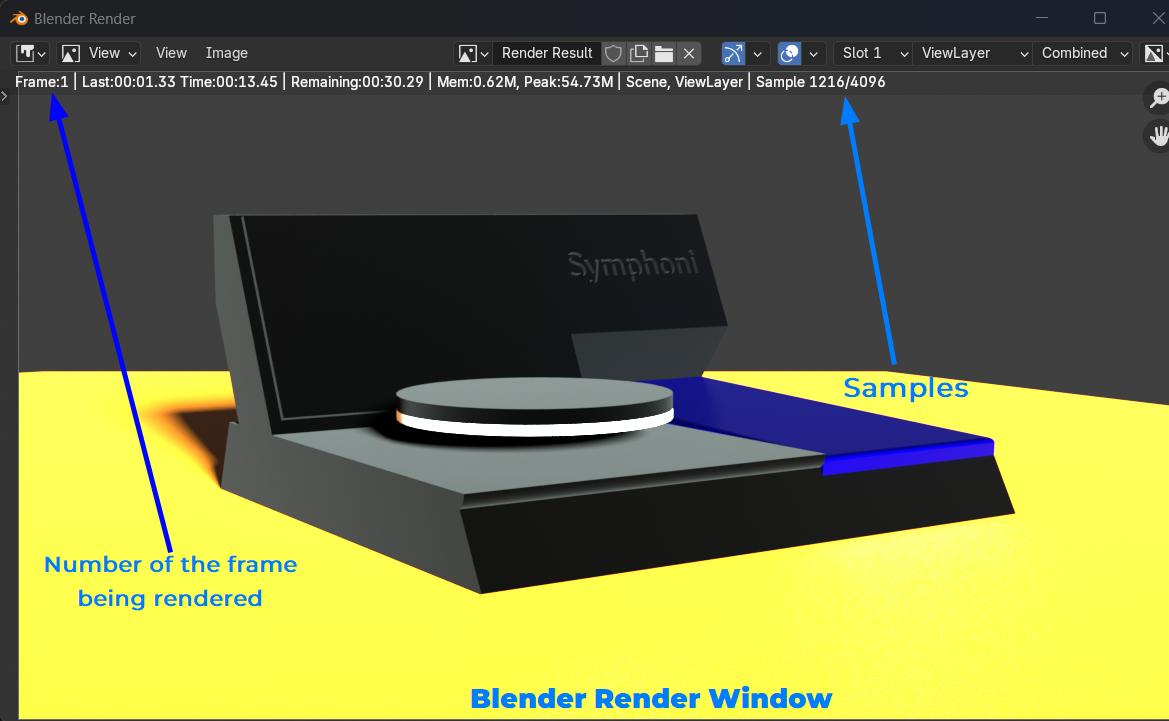
Step 8: Rendering the Animation
Finally, I configured the rendering settings, selected the Cycles engine for high-quality output, and rendered the animation frame by frame.
Through this process, I was able to create a professional-looking animation that showcases my design effectively.
Compressing Images and Videos
Why Compress Images and Videos?
Compression helps reduce the file size of images and videos, making them easier to store, share, and load on websites or apps. It’s an essential part of managing media content, especially when dealing with large files or when you have limited storage space. Compression can be either lossless (no loss in quality) or lossy (some quality may be sacrificed in exchange for smaller file sizes).
Image and Video Compression
There are two main types of compressions:- Lossless Compression
This method retains the original image and video quality, without any data loss. It's ideal when you need to preserve every detail, such as for professional photography, videography or high-quality graphics. Common image formats include PNG, TIFF, and certain JPEG compression methods.
- Lossy Compression
In this case, some of the image and video data is discarded to reduce the file size. While this can cause a decrease in quality, it can result in significantly smaller files, which is useful for web use or social media sharing. JPEG is the most common lossy image format. Common video formats include MP4 (H.264), WebM, and HEVC (H.265).
Tools for Image Compression
I used mainly Photos app on my system.
Tools for Video Conversion
HandBrake
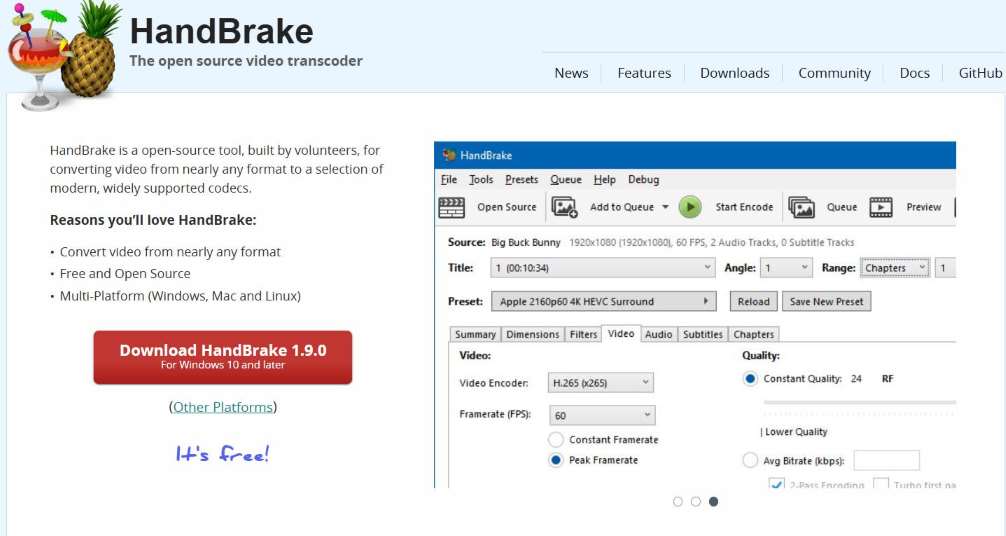
HandBrake is fantastic for users who need more control over the compression and conversion process. It’s open-source and supports various formats like MP4, MKV, and WebM. You can download HandBrake from their official website
Some of the cool features it offers include:
How to Compress Videos Using HandBrake
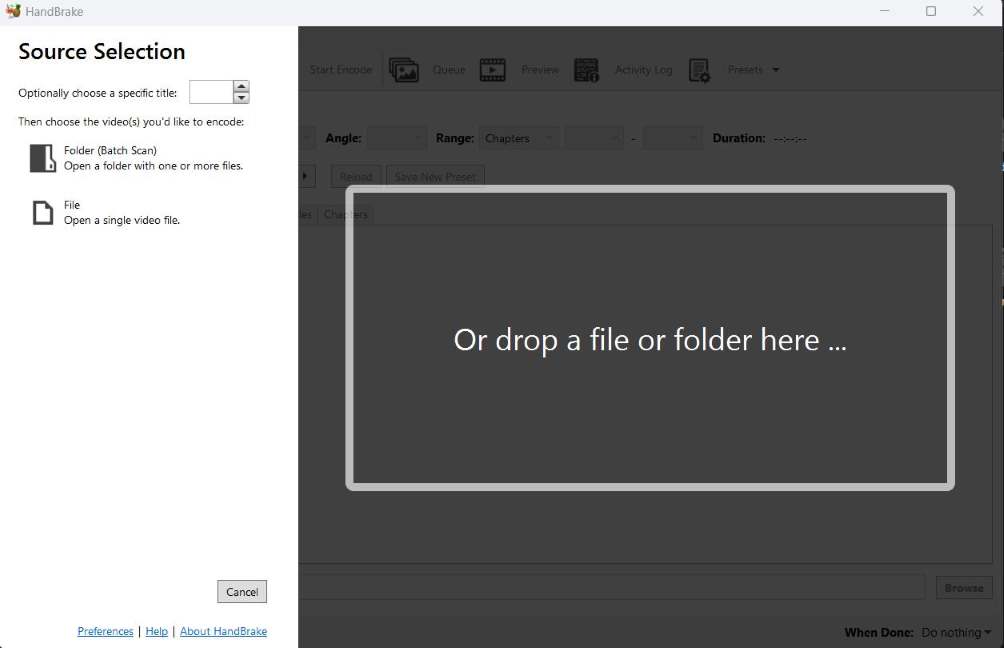
- Open HandBrake and select the video you want to compress.
- Choose the output format and the preset settings
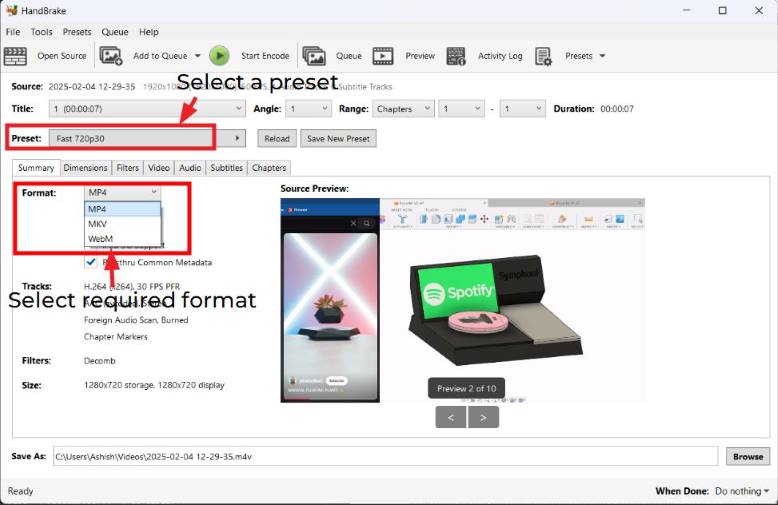
- Choose the output video encoder and settings (like resolution, bitrate, and frame rate).
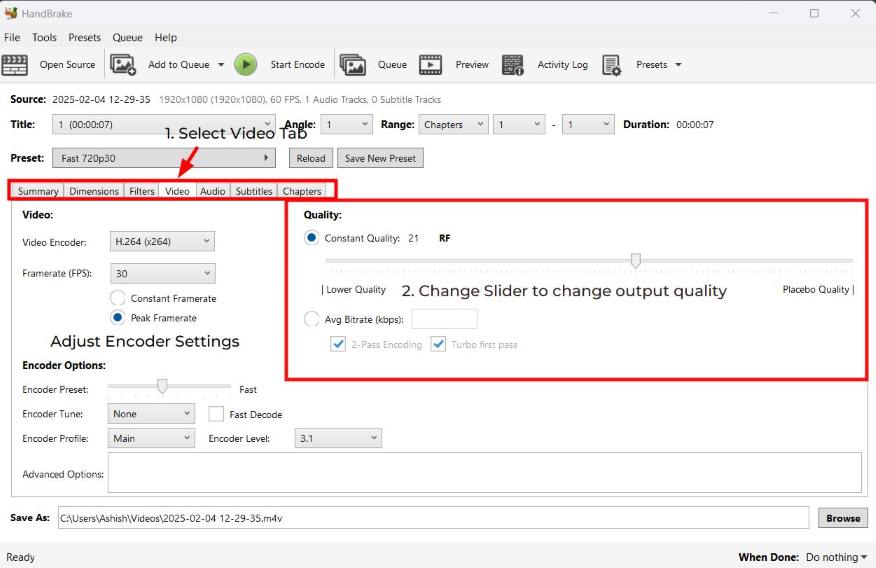
- Press the start encode button.

The Start encode button starts encoding the video into required format. Please make sure the file extension is the same as you want in the Save as Box.
 You can compress videos like this using Handbrake for multiple files by changing the required parameters.
Tools for Image and Video Capture
Screen Capturing is extremely important for documentation and there are tools which make the whole process a lot quicker and easier. I'll show the tools I used to take screenshots and Screen Recording
Flameshot
Flameshot is an open-source, feature-rich screenshot tool mainly for Linux, but it also works on Windows and macOS. It’s known for its built-in editing features, easy customization, and simple keyboard shortcuts.
Flameshot can be downloaded from the website
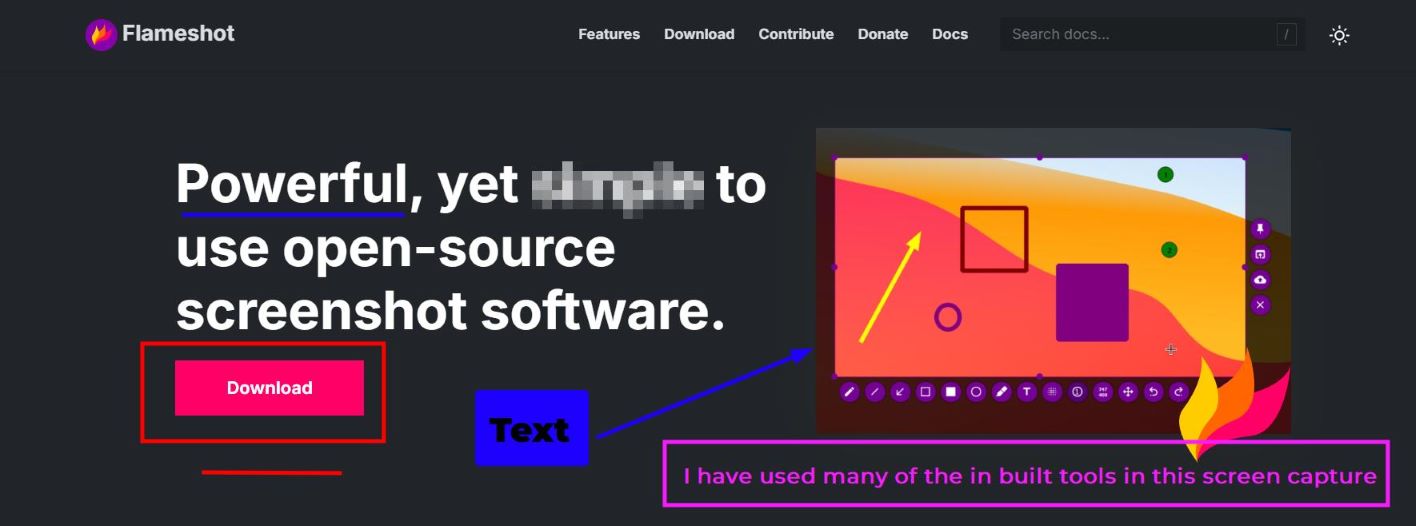
The builtin features like drawing boxes, arrows, pixelation and text are extremely helpful while documenting a process. The tools replace the need for a separate image editor software as the minimum required tools are already provided by Flameshot
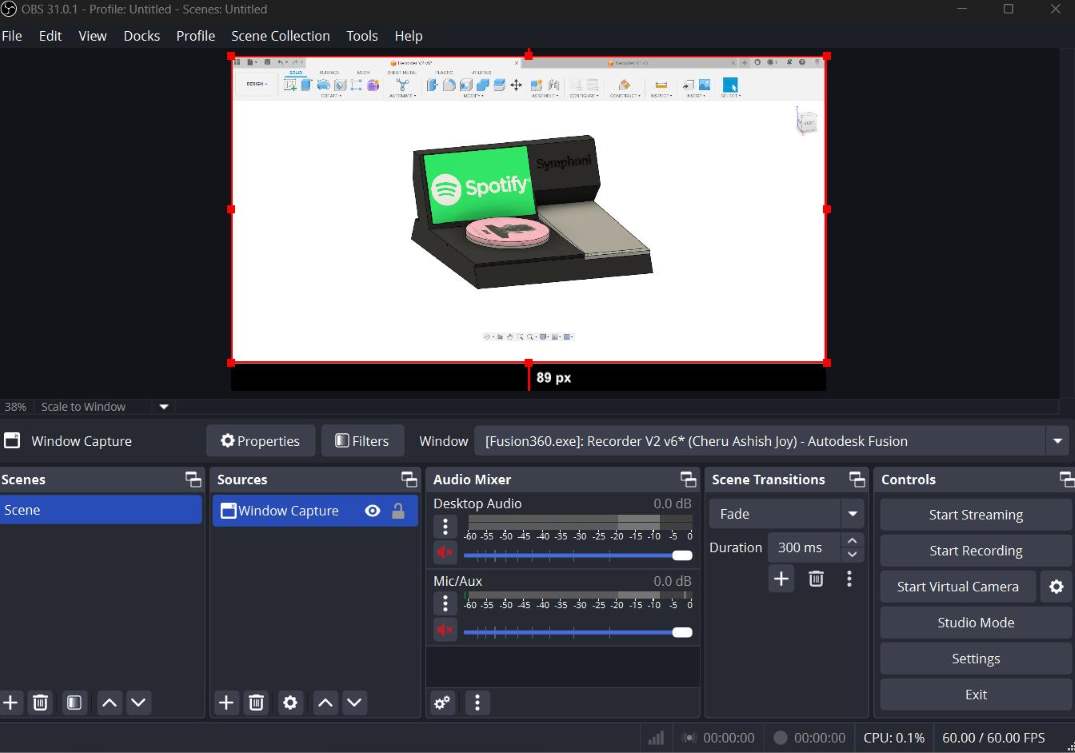
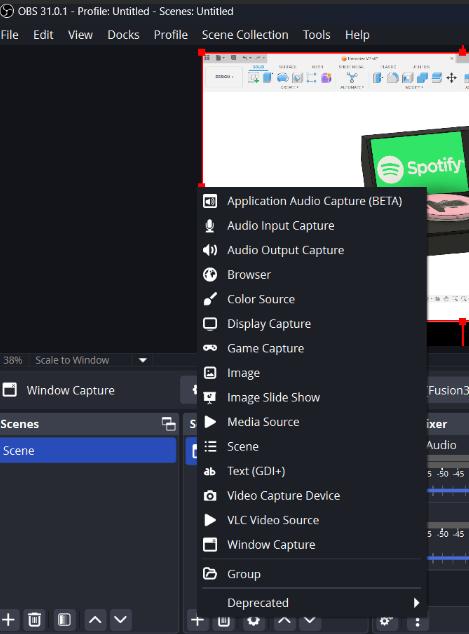
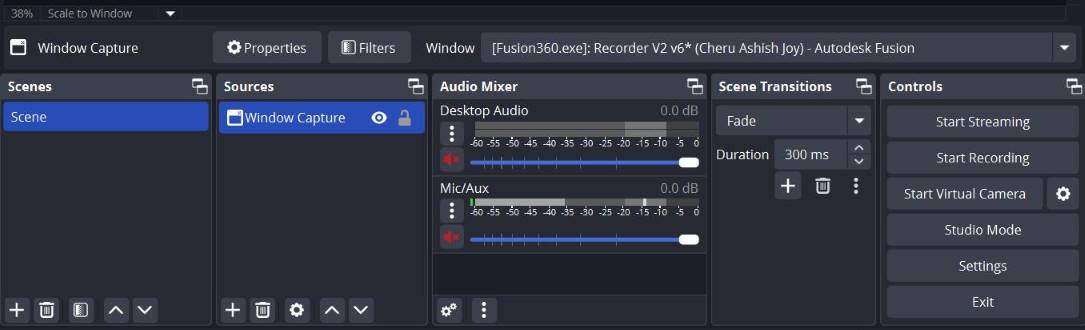
OBS Studio
OBS Studio (Open Broadcaster Software) is a free, open-source tool for screen recording and live streaming. It’s widely used by content creators, gamers, and professionals for making tutorials, recording gameplay, and live broadcasting on platforms like YouTube, Twitch, and Facebook.
OBS Stuio can be downloaded from website
Tools for Image and Video Capture
Davinci Resolve
DaVinci Resolve is a professional video editing software developed by Blackmagic Design. It is widely used for video editing, color correction, visual effects (VFX), and audio post-production. The free version, DaVinci Resolve, offers powerful editing tools, while DaVinci Resolve Studio (paid version) includes advanced features like noise reduction, AI tools, and HDR grading.
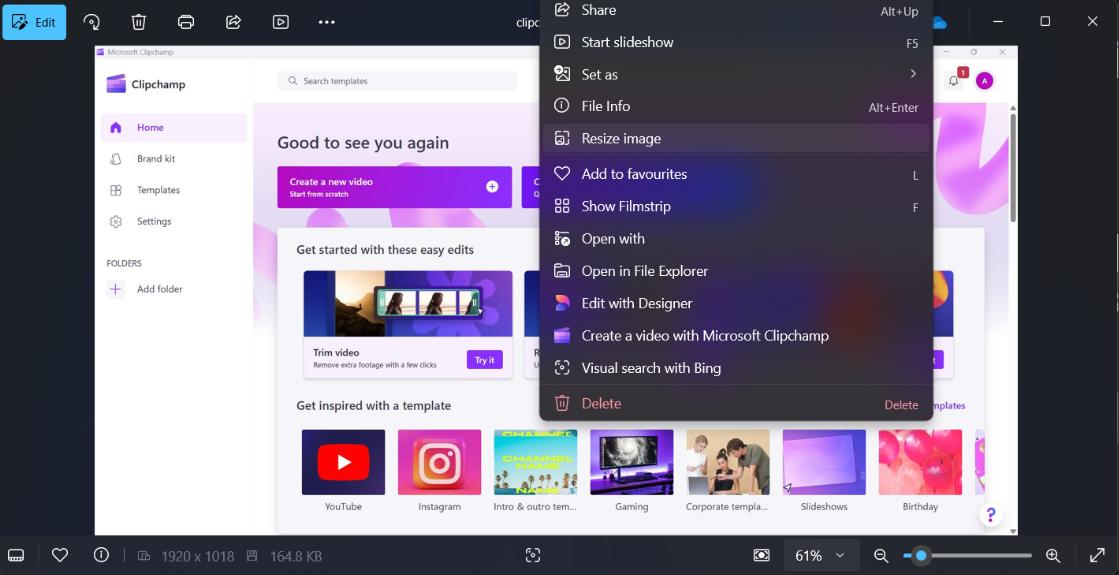
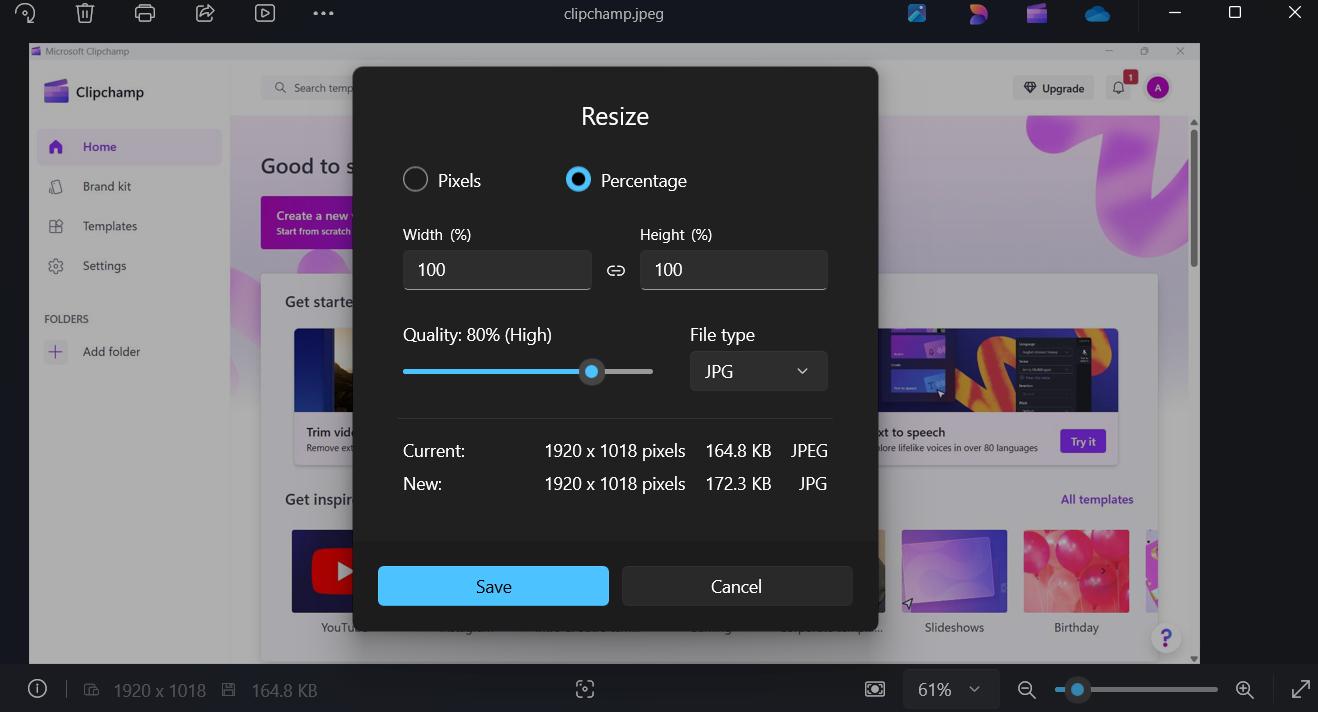
Microsoft Clipchamp
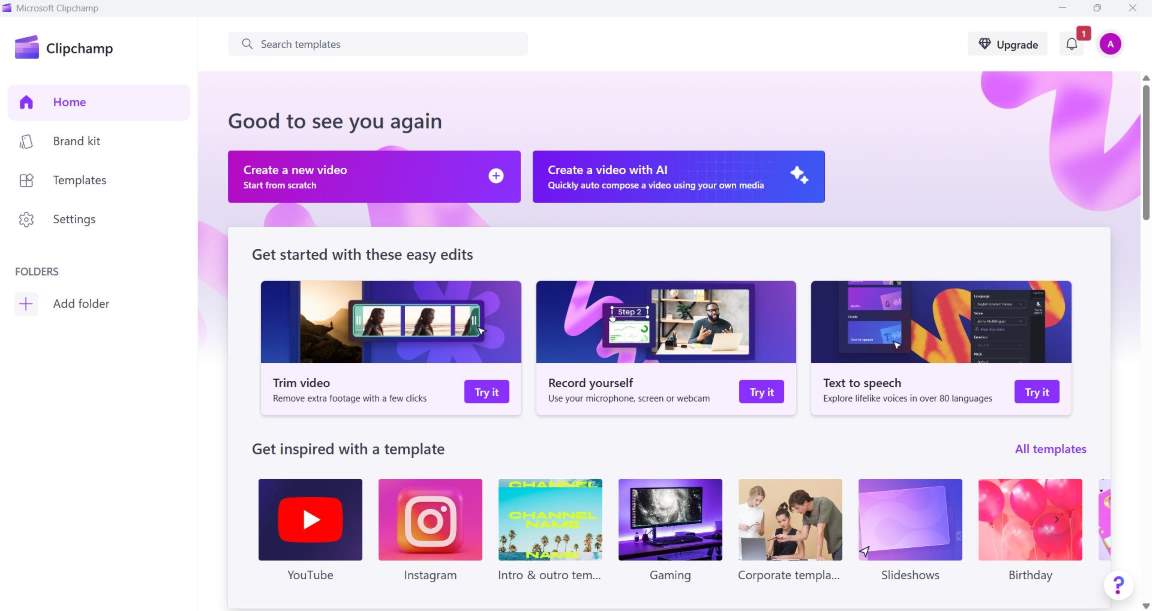
Clipchamp is a user-friendly online tool, and it’s great for those who prefer simplicity and don't want to mess around with advanced settings. It’s especially handy for quick conversions and basic edits, like trimming, adding text, or even recording videos directly within the platform. You can download Clipchamp from their official website. It is pre-installed on Microsoft Windows Systems as a video editor.
Conclusion
Design Files -
I have compressed all my files into a ZIP Folder to minimize storage. cd
These are files you'll find in the ZIP Folder
2D Design
- Photopea The Mockup Design - My Website on a Laptop Screen
- Canva The Assignment Thumbnails
- Inkscape The Patterened Background
- Processing: I have used Processing to make image rasterization of my photo for my website. Code
3D Design
- Fusion 360: Fusion 360 File - CAD Design
- Blender Blender File of Animation of CAD