The Communication Protokoll
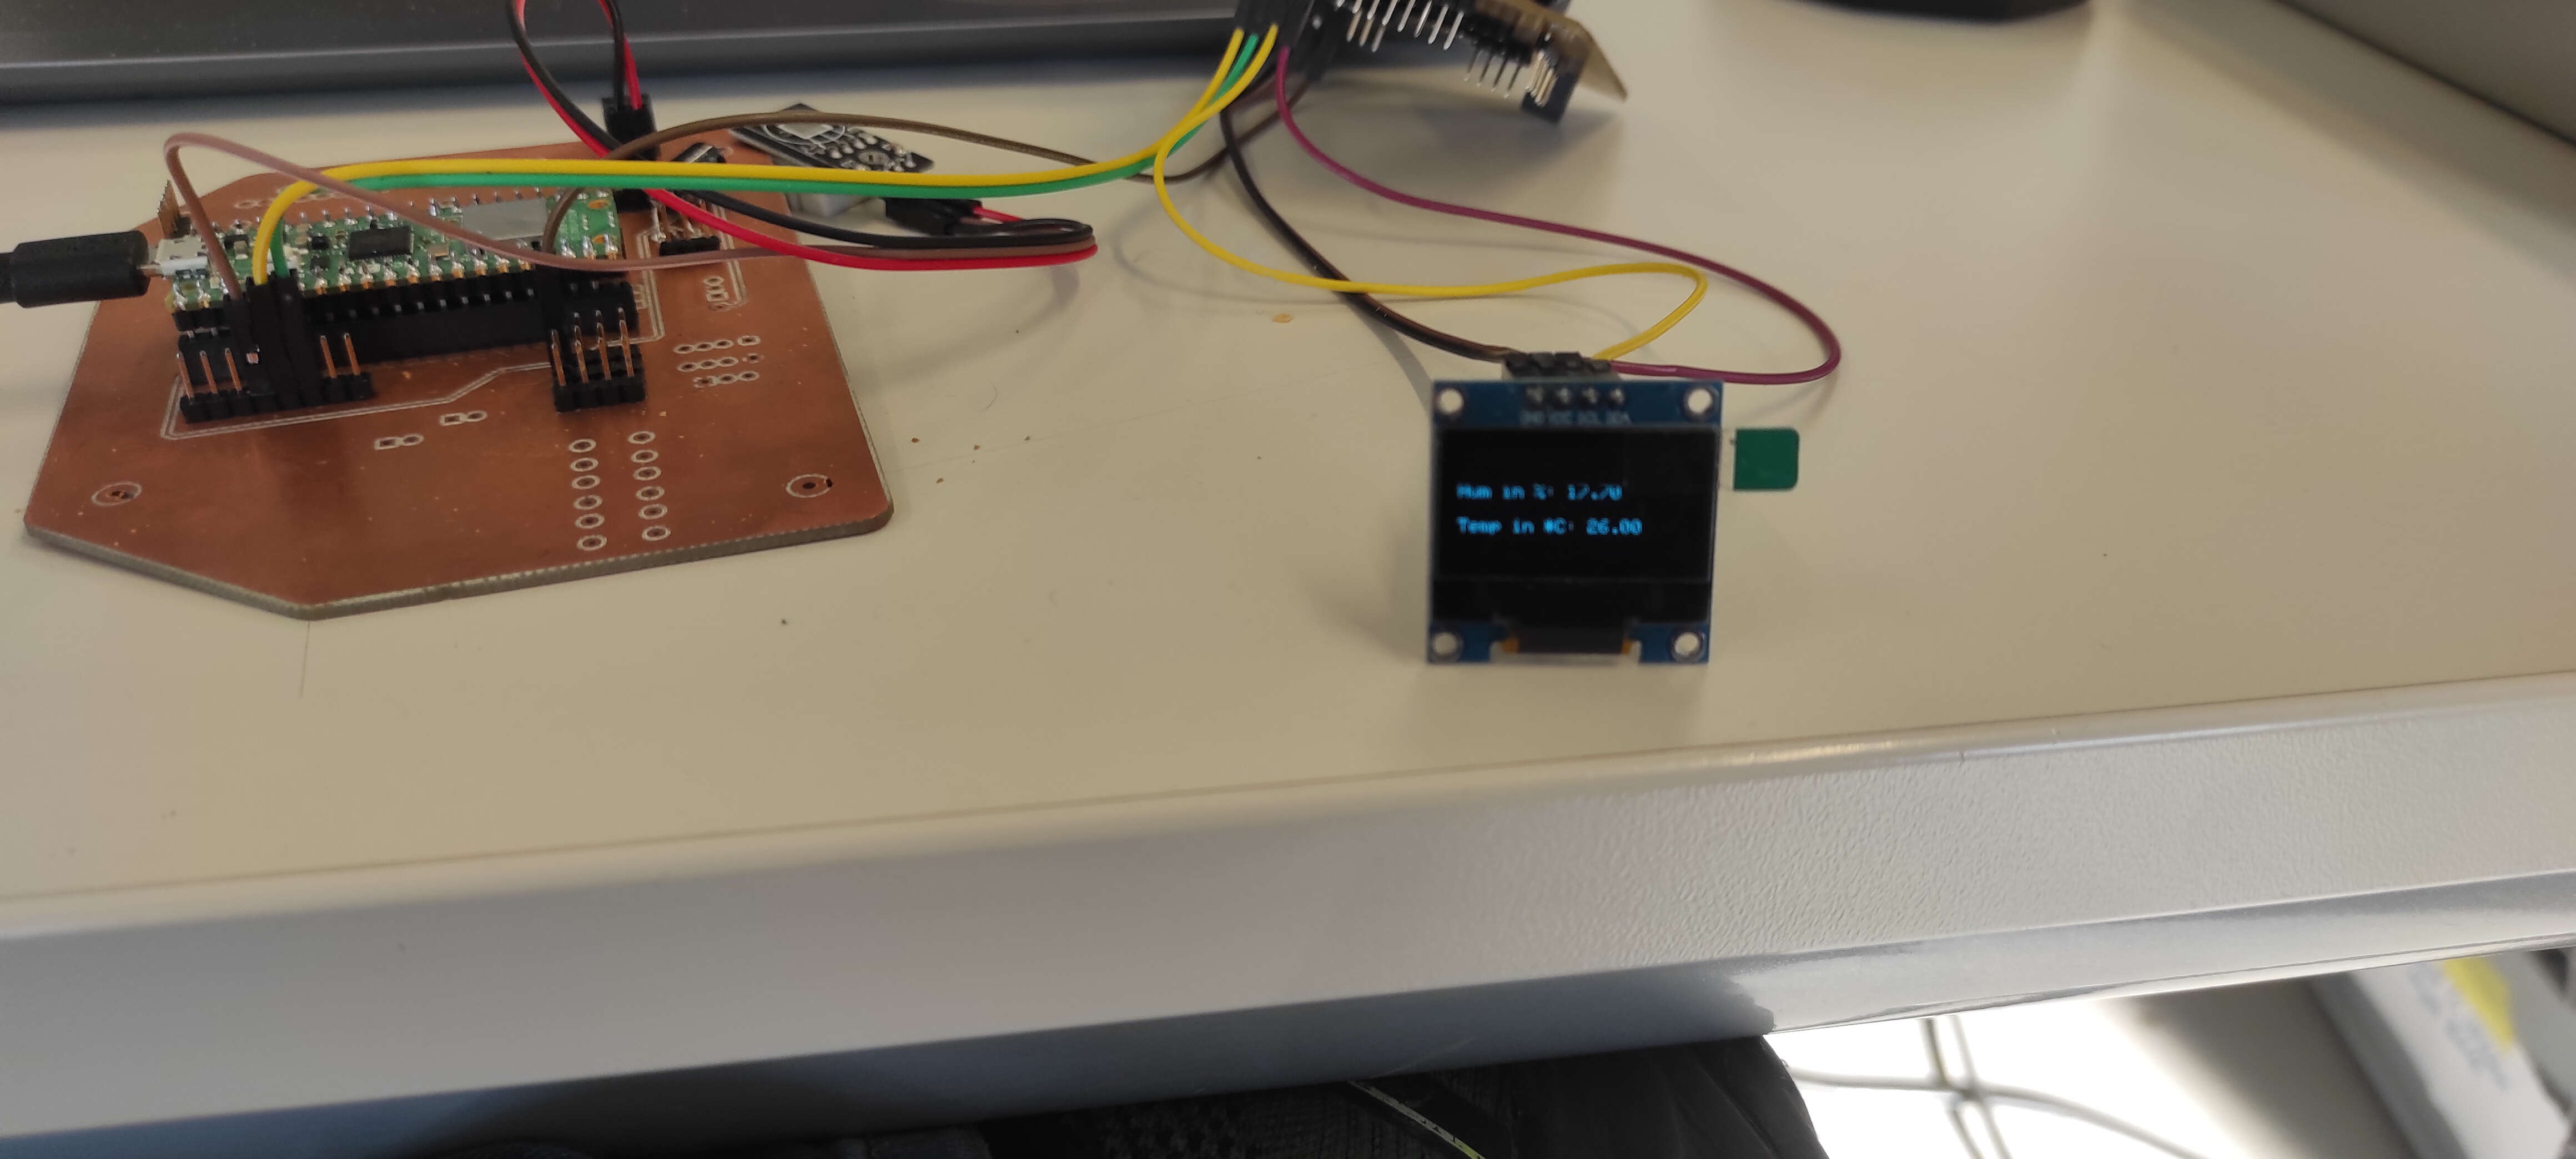
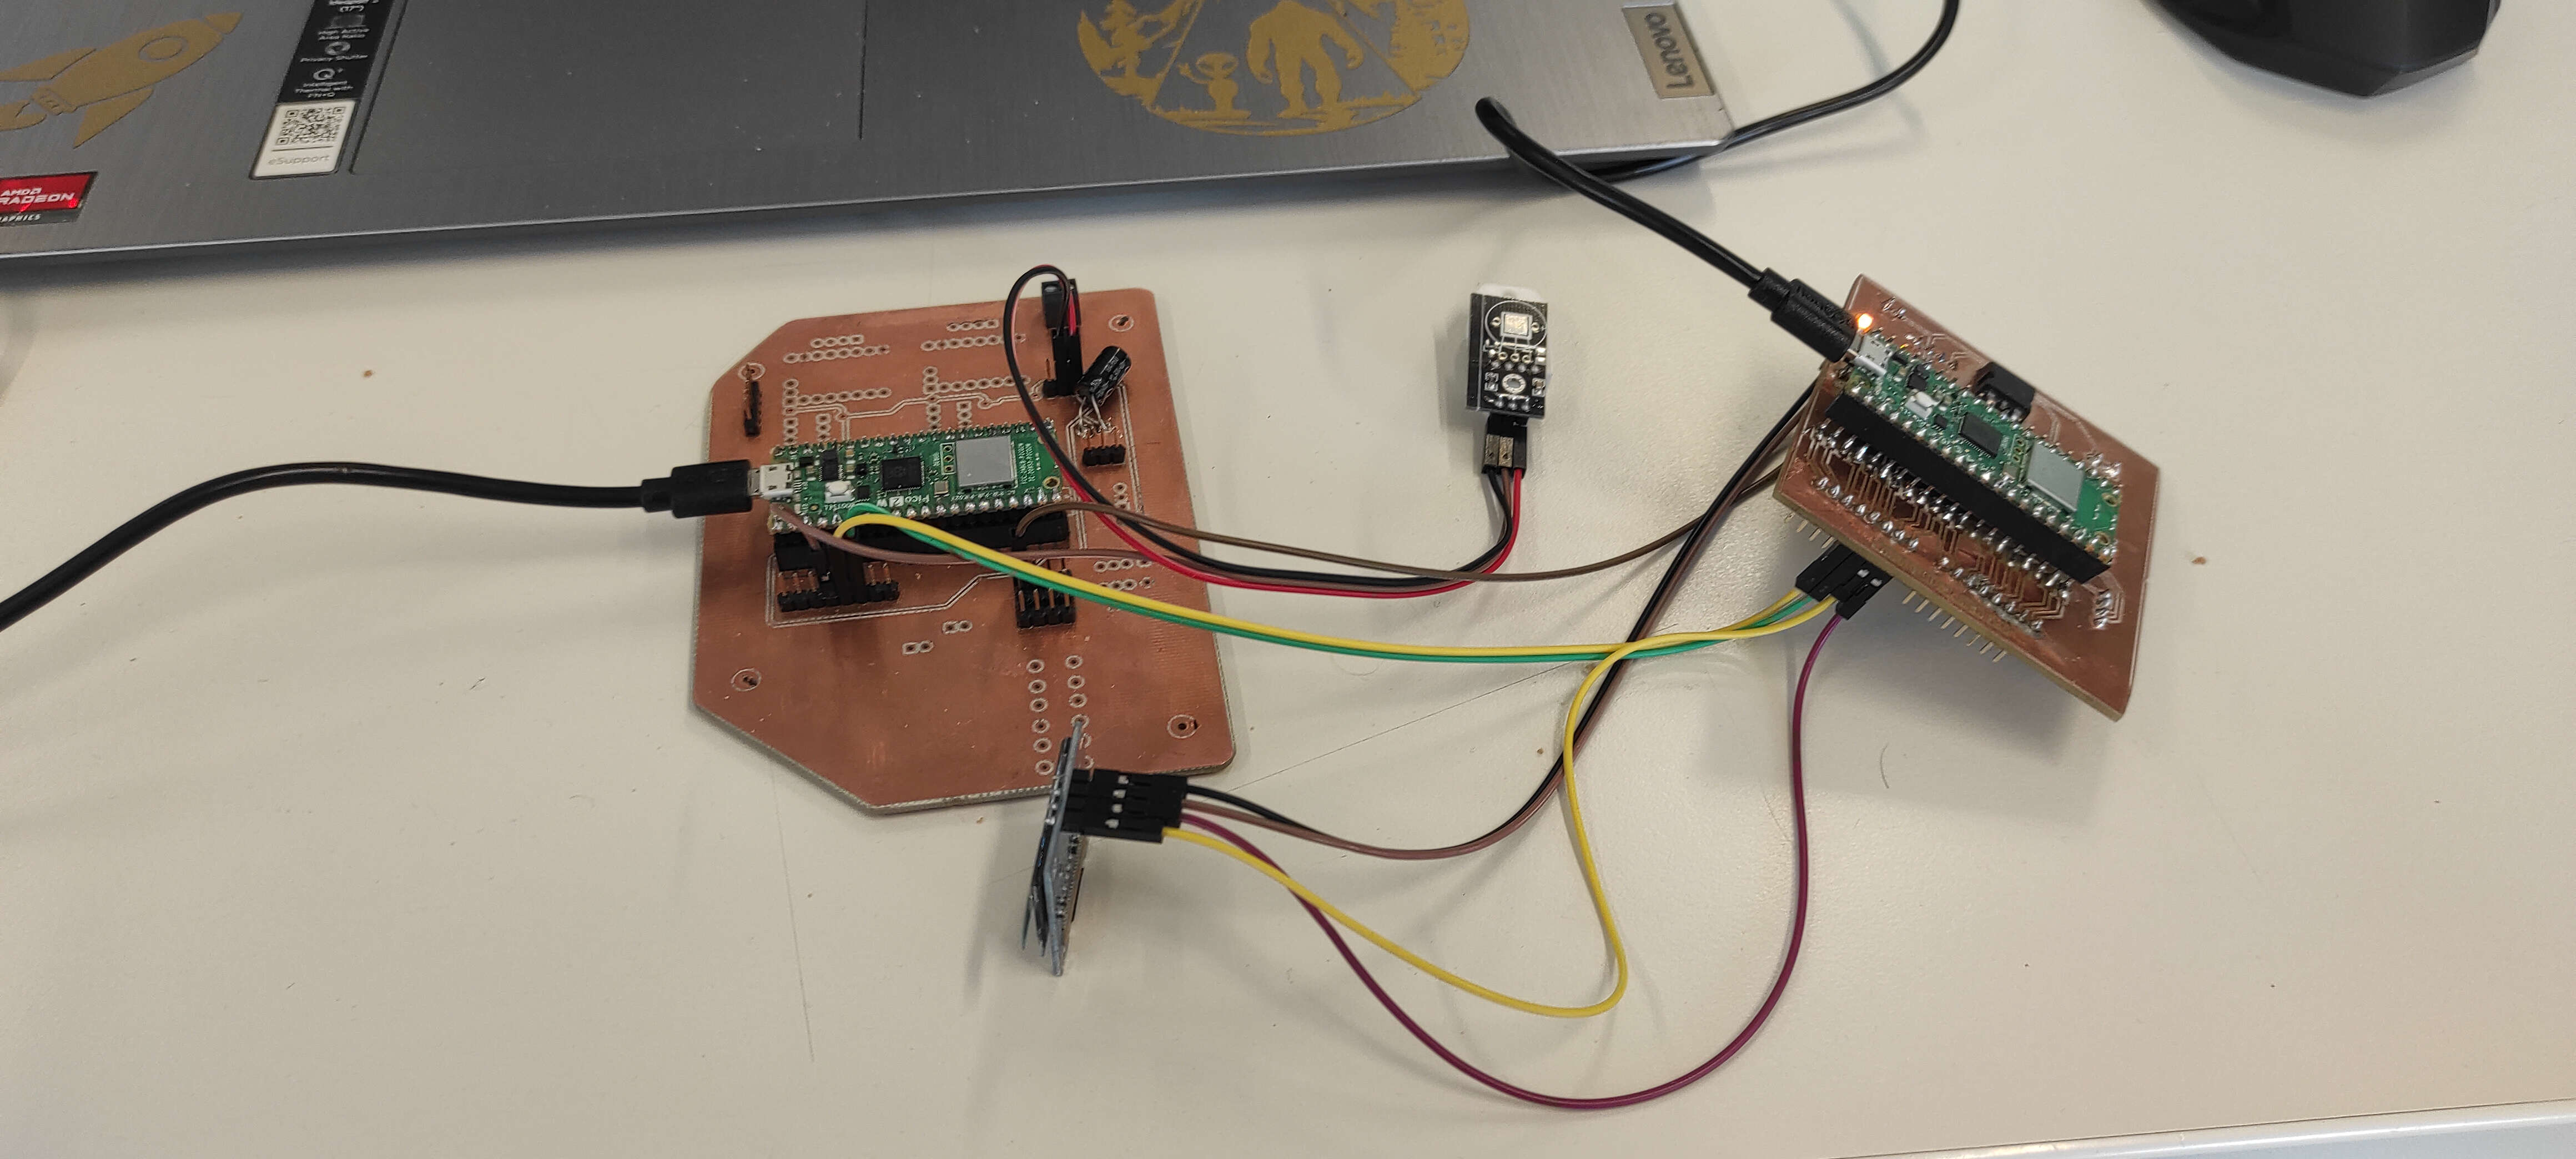
We created a test setup for I2C and MQTT communication. In this setup, the Parent sends a "get" request over I2C to retrieve temperature and humidity data from the Child. Upon receiving the request, the Child reads the data from the DHT22 sensor and publishes it to the MQTT broker.
Since the Parent is subscribed to the temperature and humidity topics, it receives the newly published data and displays it on the screen. Additionally, for debugging purposes, we included another I2C message from the Parent to the Child with the payload "Data Acquired."
Parent
On the Parent side we needed to connect the dislplay, which is an OLED I2C Display, like in Lysanders Assignment, to the Pins GP6 for SDA and GP7 for SCL which are pin 7 and 8 on the Breakout pins. For the I2C Connection of Parent and Child, the pins GP4 and GP5 (SDA/SCL) are used which are pin 5 and 6 on the Breakout pins.

The code
#include
#include
#include
#include
#include
#include

uint32_t delayMS;  //start to count

int sending_request_ms = 20000;

// WiFi-Credentials
const char *ssid = "xxxxxxxxxxxxxx";
const char *password = "xxxxxxxxxxxxxxxx";

// MQTT Broker IP address
const char *mqtt_identifier = "xxxxxxxxxxxxx";
const char *mqtt_server = "xxxxxxxxxxxxxxx";
const char *mqtt_user = "xxxxxxxxxxx";
const char *mqtt_pass = "xxxxxxxxxxxxxxxxx";


WiFiClient espClient;
PubSubClient client(espClient);
char msg[50];
char topic[50];
long lastMsg = 0;


bool gotTemp = false;
bool gotHum = false;
String latestTemp = "";
String latestHum = "";

#define Child_ADDR 0x10


//OLED Setup
#define SCREEN_WIDTH 128
#define SCREEN_HEIGHT 64

#define OLED_SDA 6  // Yellow wire GP6
#define OLED_SCL 7  // Purple wire GP7

Adafruit_SSD1306 display(SCREEN_WIDTH, SCREEN_HEIGHT, &Wire1, -1);


void setup(void) {

  Serial.begin(115200);

//I2C channel 1 start as Parent
  Wire.begin();

//I2C channel 2 start for the OLED
  Wire1.setSDA(OLED_SDA);
  Wire1.setSCL(OLED_SCL);
  Wire1.begin();

  if (!display.begin(SSD1306_SWITCHCAPVCC, 0x3C)) {
    Serial.println("SSD1306 OLED failed to start");
    while (1)
      ;  // Stop here if OLED fails
  }

  display.clearDisplay();
  display.setTextSize(1);
  display.setTextColor(WHITE);
  display.setCursor(0, 20);
  display.println("Waiting...");
  display.display();

  //Wifi and MQTT connection
  setup_wifi();
  client.setServer(mqtt_server, 1883);
  client.setCallback(callback);
  delay(2000);
}

void loop() {


  if (!client.connected()) {
    reconnect();
  }
  client.loop();

  // Display of the Data on the Screen and "Data Acquired"
  if (gotTemp && gotHum) {

    Wire.beginTransmission(Child_ADDR);  // Address of the Child
    Wire.write("Data Aquired");          // Send 5 bytes
    Wire.endTransmission();              // Stop condition
    Serial.println("Sent: Data Acquired");

    gotTemp = false;
    gotHum = false;

    display.clearDisplay();
    display.setCursor(0, 40);
    display.println("Temp in *C: " + latestTemp);
    display.setCursor(0, 20);
    display.println("Hum in %: " + latestHum);
    display.display();
  }

  //get request after 20 seconds
  long now = millis();
  if (now - lastMsg > sending_request_ms) {
    lastMsg = now;

    Wire.beginTransmission(Child_ADDR);  // Address of the Child
    Wire.write("get");                   // Send 5 bytes
    Wire.endTransmission();              // Stop condition
    Serial.println("Sent: get");
  }
}

void setup_wifi() {
  delay(10);
  // We start by connecting to a WiFi network
  Serial.println();
  Serial.print("Connecting to ");
  Serial.println(ssid);

  WiFi.begin(ssid, password);

  while (WiFi.status() != WL_CONNECTED) {
    delay(500);
    Serial.print(".");
  }

  Serial.println("");
  Serial.println("WiFi connected");
  Serial.println("IP address: ");
  Serial.println(WiFi.localIP());
}

void reconnect() {
  // Loop until we're reconnected
  while (!client.connected()) {
    Serial.print("Attempting MQTT connection...");
    // Attempt to connect
    if (client.connect(mqtt_identifier, mqtt_user, mqtt_pass)) {
      Serial.println("connected");
      // Subscribe to the Temp and Hum topics for the callback
      strcpy(topic, mqtt_identifier);
      strcat(topic, "/humidity");
      client.subscribe(topic);

      strcpy(topic, mqtt_identifier);
      strcat(topic, "/temperature");
      client.subscribe(topic);
    } else {
      Serial.print("failed, rc=");
      Serial.print(client.state());
      Serial.println(" try again in 5 seconds");
      // Wait 5 seconds before retrying
      delay(5000);
    }
  }
}

void callback(char *incomingTopic, byte *message, unsigned int length) {
  Serial.print("Message arrived on topic: ");
  Serial.print(incomingTopic);
  Serial.print(". Message: ");

  String messageTemp;
  for (int i = 0; i < length; i++) {
    Serial.print((char)message[i]);
    messageTemp += (char)message[i];
  }
  Serial.println();

  String expectedTopicTemperat = String(mqtt_identifier) + "/temperature";
  String expectedTopicHumi = String(mqtt_identifier) + "/humidity";

  if (String(incomingTopic) == expectedTopicTemperat) {
    Serial.println("Temperature: " + messageTemp);

    gotTemp = true;

    latestTemp = String(messageTemp);
  }

  if (String(incomingTopic) == expectedTopicHumi) {
    Serial.println("Humidity: " + messageTemp);

    gotHum = true;

    latestHum = String(messageTemp);
  }
}
Child
On the Child side we needed to connect the DHT22, which is an humidity and Temperature Sensor, like in Mikas Assignment, to pin GP3 which is pin 4 on Breakout pins. For the I2C Connection of Parent and Child, the pins GP4 and GP5 (SDA/SCL) are used which are pin 5 and 6 on the Breakout Pins.

The code
                        #include
#include
#include
#include
#include
#include
#include

//DHT22 setup

#define DHTPIN 3  // Digital pin connected to the DHT sensor

#define DHTTYPE DHT22  // DHT 22 (AM2302)
DHT_Unified dht(DHTPIN, DHTTYPE);

// WiFi-Credentials
const char *ssid = "xxxxxxxxxxxxxx";
const char *password = "xxxxxxxxxxxxxxxx";

// MQTT Broker IP address
const char *sub_identifier = "xxxxxxxxxxxx";
const char *mqtt_identifier = "xxxxxxxxxxxxx";
const char *mqtt_server = "xxxxxxxxxxxxxxx";
const char *mqtt_user = "xxxxxxxxxxx";
const char *mqtt_pass = "xxxxxxxxxxxxxxxxx";


WiFiClient espClient;
PubSubClient client(espClient);
char msg[50];
char topic[50];
int value = 0;

#define Child_ADDR 0x10
String receivedText = "";

void setup(void) {

  Serial.begin(115200);

  //Wifi,MQTT and dht begin
  setup_wifi();
  client.setServer(mqtt_server, 1883);
  dht.begin();

  //I2C channel 1 start as Child with a specific adress
  Wire.begin(Child_ADDR);
  Wire.onReceive(receiveEvent);

  delay(2000);
}

void loop() {


  if (!client.connected()) {
    reconnect();
  }
  client.loop();
}


void setup_wifi() {
  delay(10);
  // We start by connecting to a WiFi network
  Serial.println();
  Serial.print("Connecting to ");
  Serial.println(ssid);

  WiFi.begin(ssid, password);

  while (WiFi.status() != WL_CONNECTED) {
    delay(500);
    Serial.print(".");
  }

  Serial.println("");
  Serial.println("WiFi connected");
  Serial.println("IP address: ");
  Serial.println(WiFi.localIP());
}

void reconnect() {
  // Loop until we're reconnected
  while (!client.connected()) {
    Serial.print("Attempting MQTT connection...");
    // Attempt to connect
    if (client.connect(mqtt_identifier, mqtt_user, mqtt_pass)) {
      Serial.println("connected");
    } else {
      Serial.print("failed, rc=");
      Serial.print(client.state());
      Serial.println(" try again in 5 seconds");
      // Wait 5 seconds before retrying
      delay(5000);
    }
  }
}

void receiveEvent(int numBytes) {

    //recieves a message through I2C
  receivedText = "";
  while (Wire.available()) {
    char c = Wire.read();
    if (isPrintable(c)) {
      receivedText += c;
    }
  }

  Serial.print("Received: ");
  Serial.println(receivedText);

  receivedText.trim();

  //checks if it is the "get" request
  if (receivedText == "get") {
    //get temperature

    sensors_event_t event;

    dht.temperature().getEvent(&event);


    // Convert the value to a char array
    char tempString[8];
    dtostrf(event.temperature, 1, 2, tempString);
    Serial.print("Temperature: ");
    Serial.println(tempString);

    //changes the topic to publish to
    strcpy(topic, sub_identifier);
    strcat(topic, "/temperature");

    //and publish it to MQTT
    client.publish(topic, tempString);

    //get humidityy
    dht.humidity().getEvent(&event);

    // Convert the value to a char array and publish it to MQTT
    char humString[8];
    dtostrf(event.relative_humidity, 1, 2, humString);
    Serial.print("Humidity: ");
    Serial.println(humString);

    //changes the topic to publish to
    strcpy(topic, sub_identifier);
    strcat(topic, "/humidity");

    //and publish it to MQTT
    client.publish(topic, humString);
  }
}
Result
In the Video u see everything working. The top rigth window is the serial output of the Child. After receiving the "get", it reads the temperature and publishes them. After that it gets "Data Acquired"
Under the Child is the Parent, Where you can see, that "get" was sent, the Data was read through MQTT and then "Data Acquired" sent to the Child
On the left you see MQTT-Explorer(look in Mikas Repo for more Information). We used it for Debugging, to see if the Data was sent to the MQTT Broker. As you see, it worked.