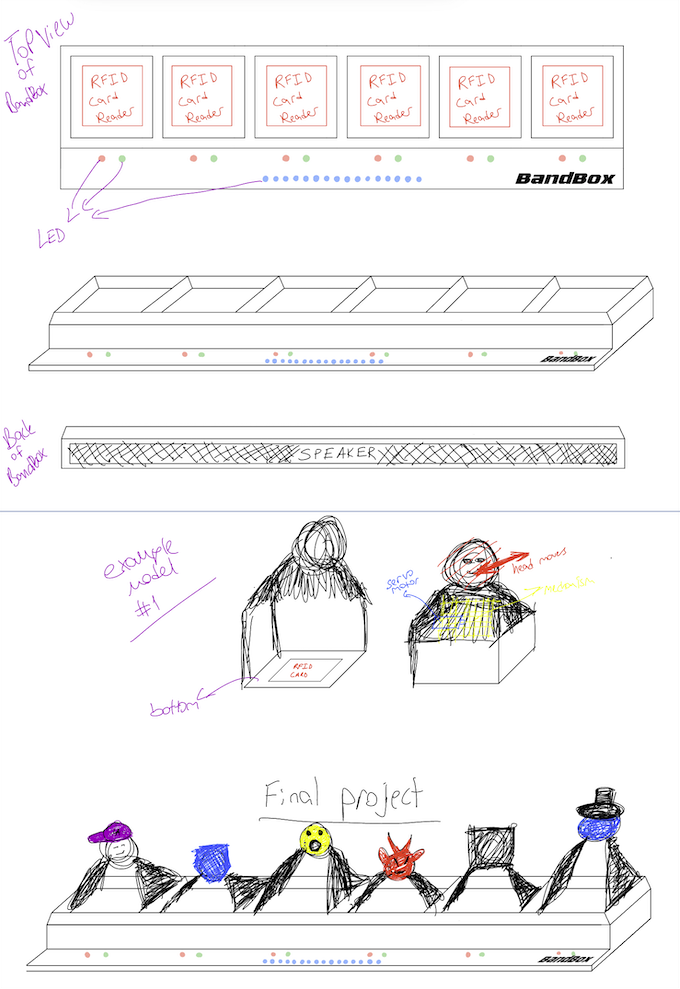
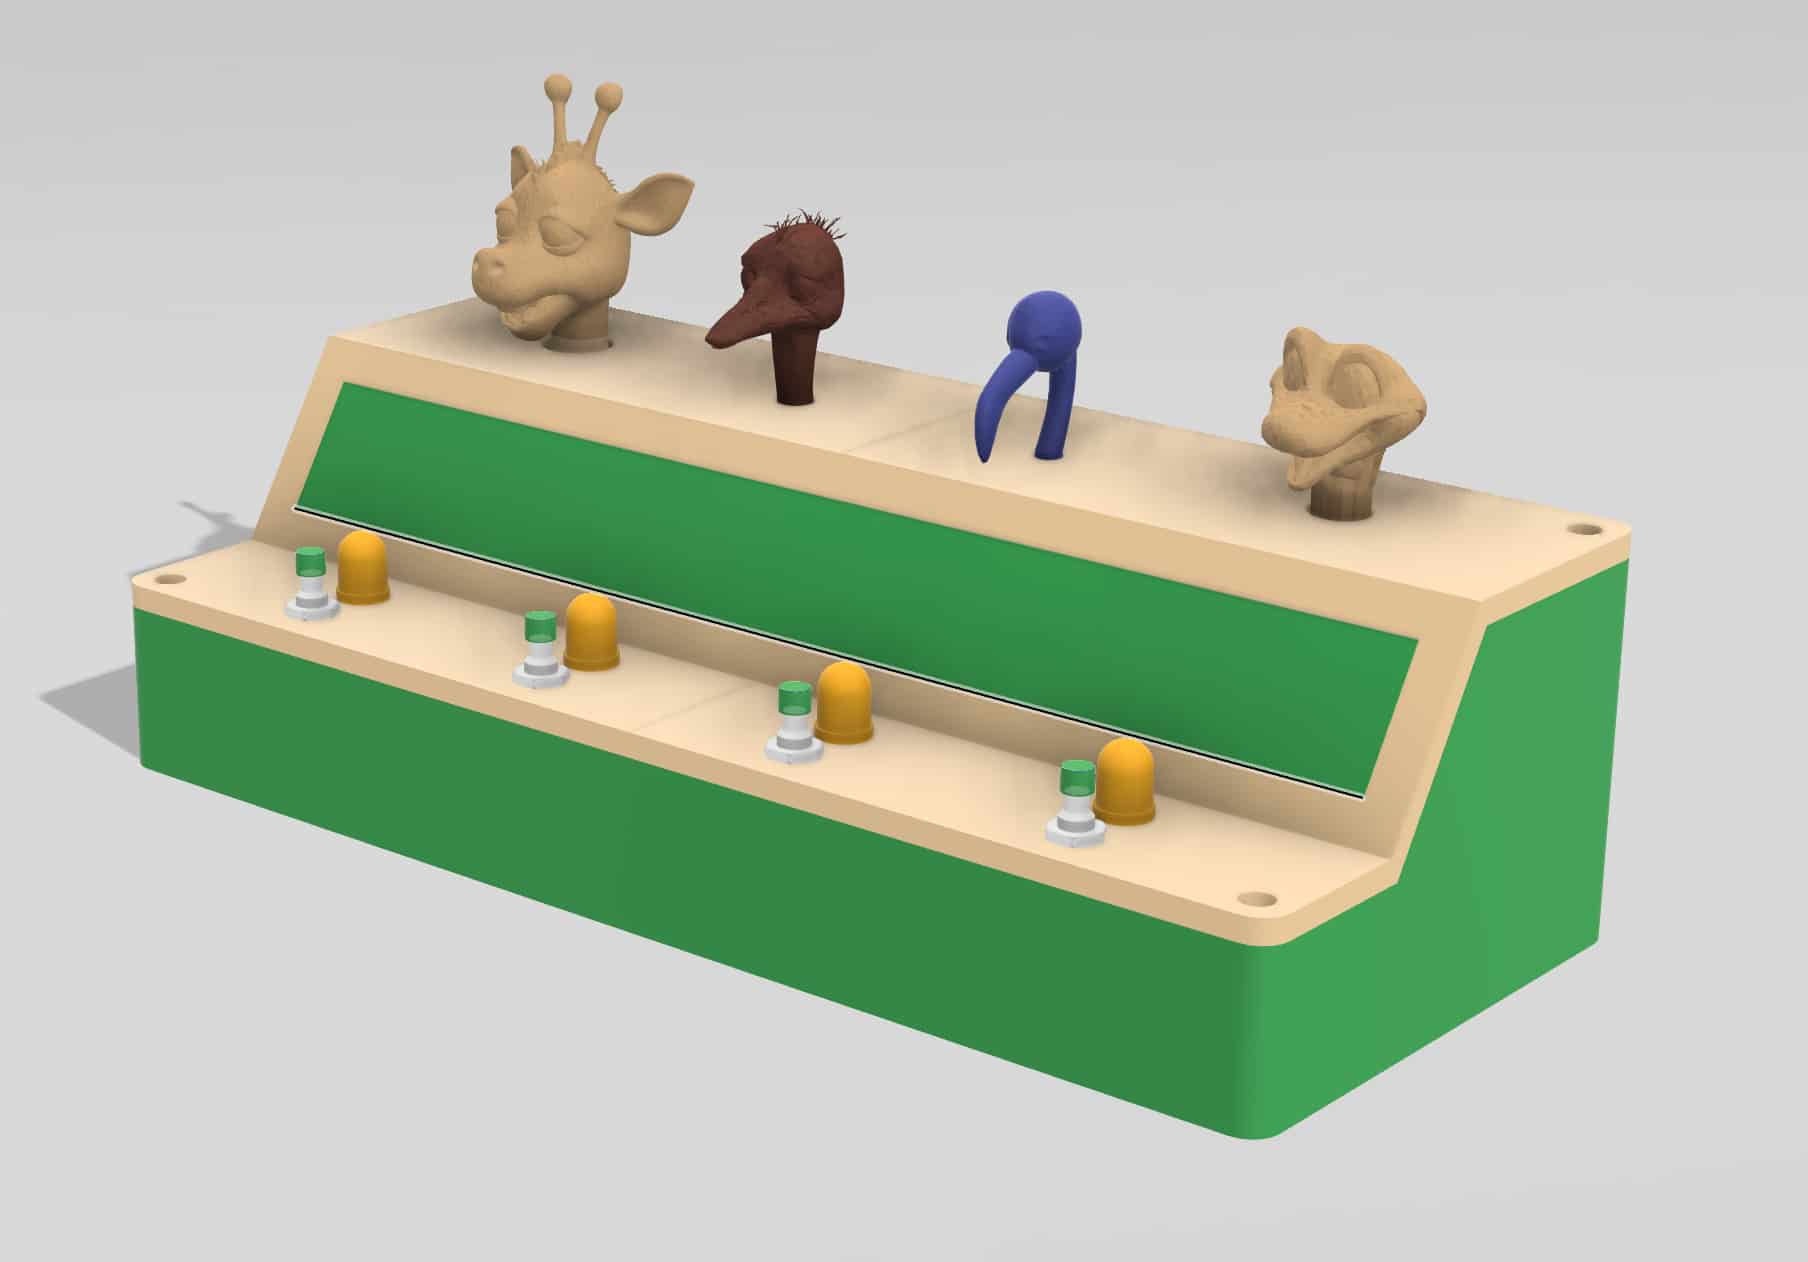
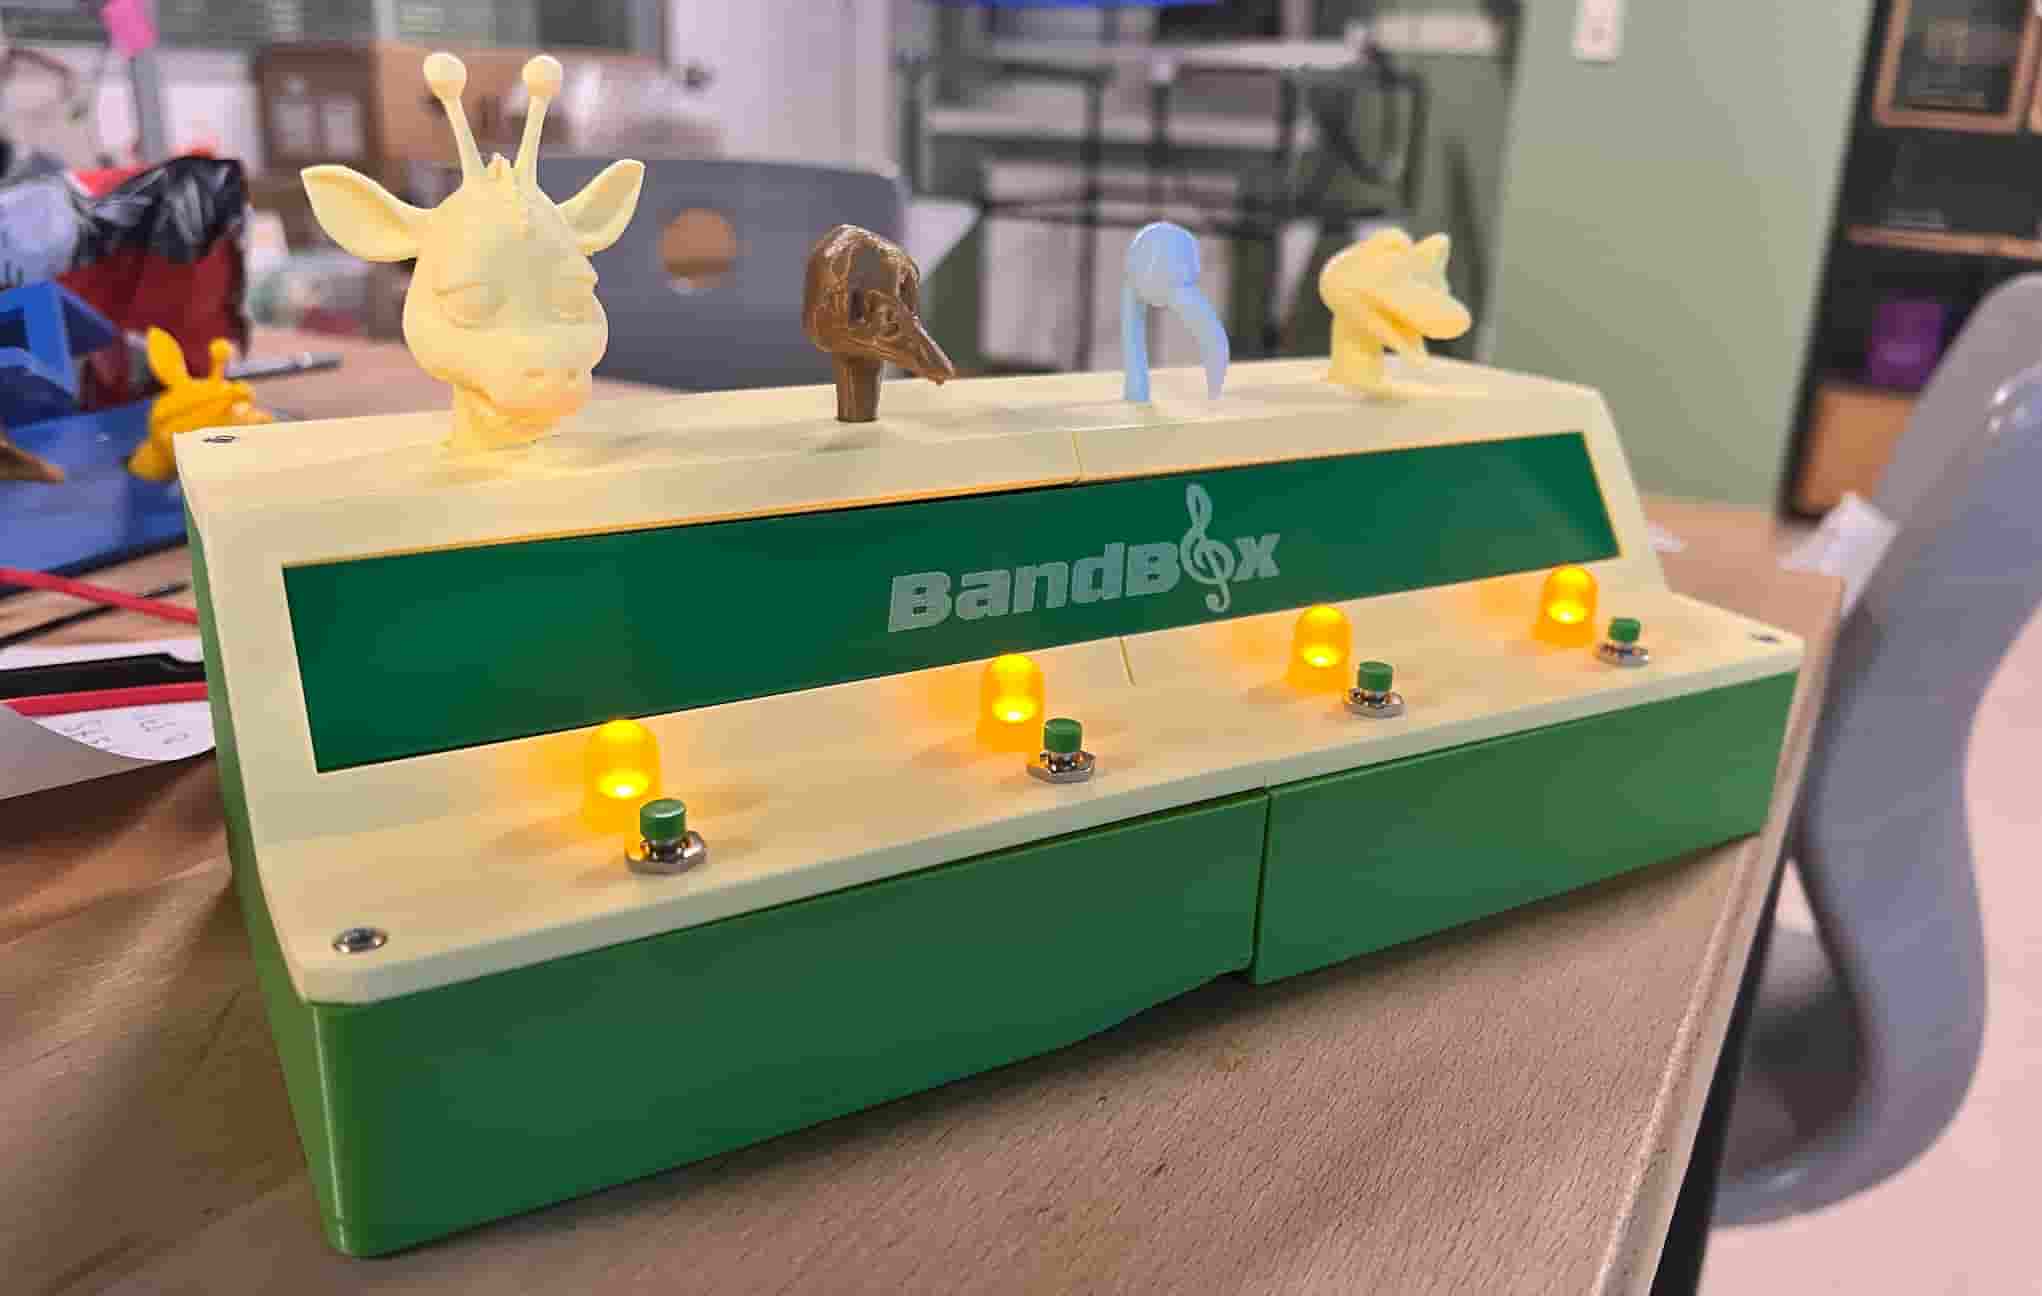
My Final Project: BandBox
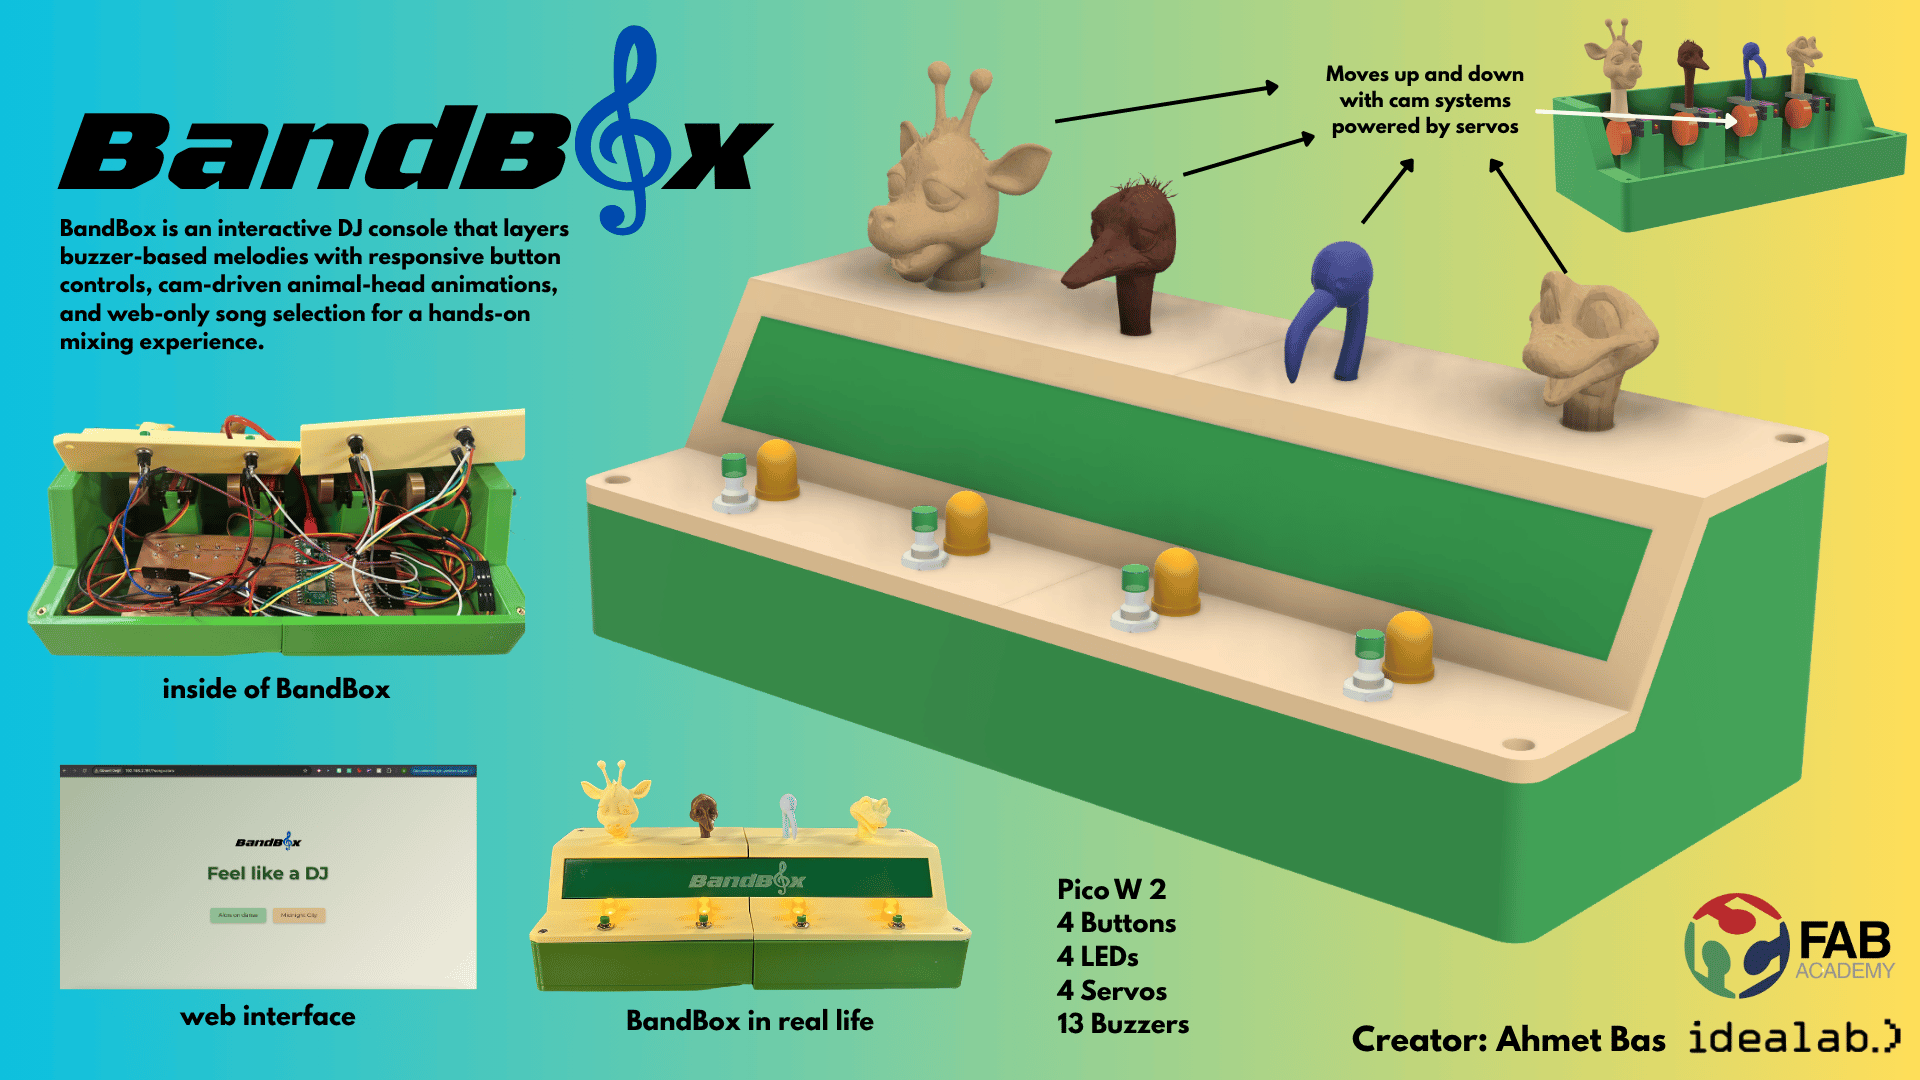
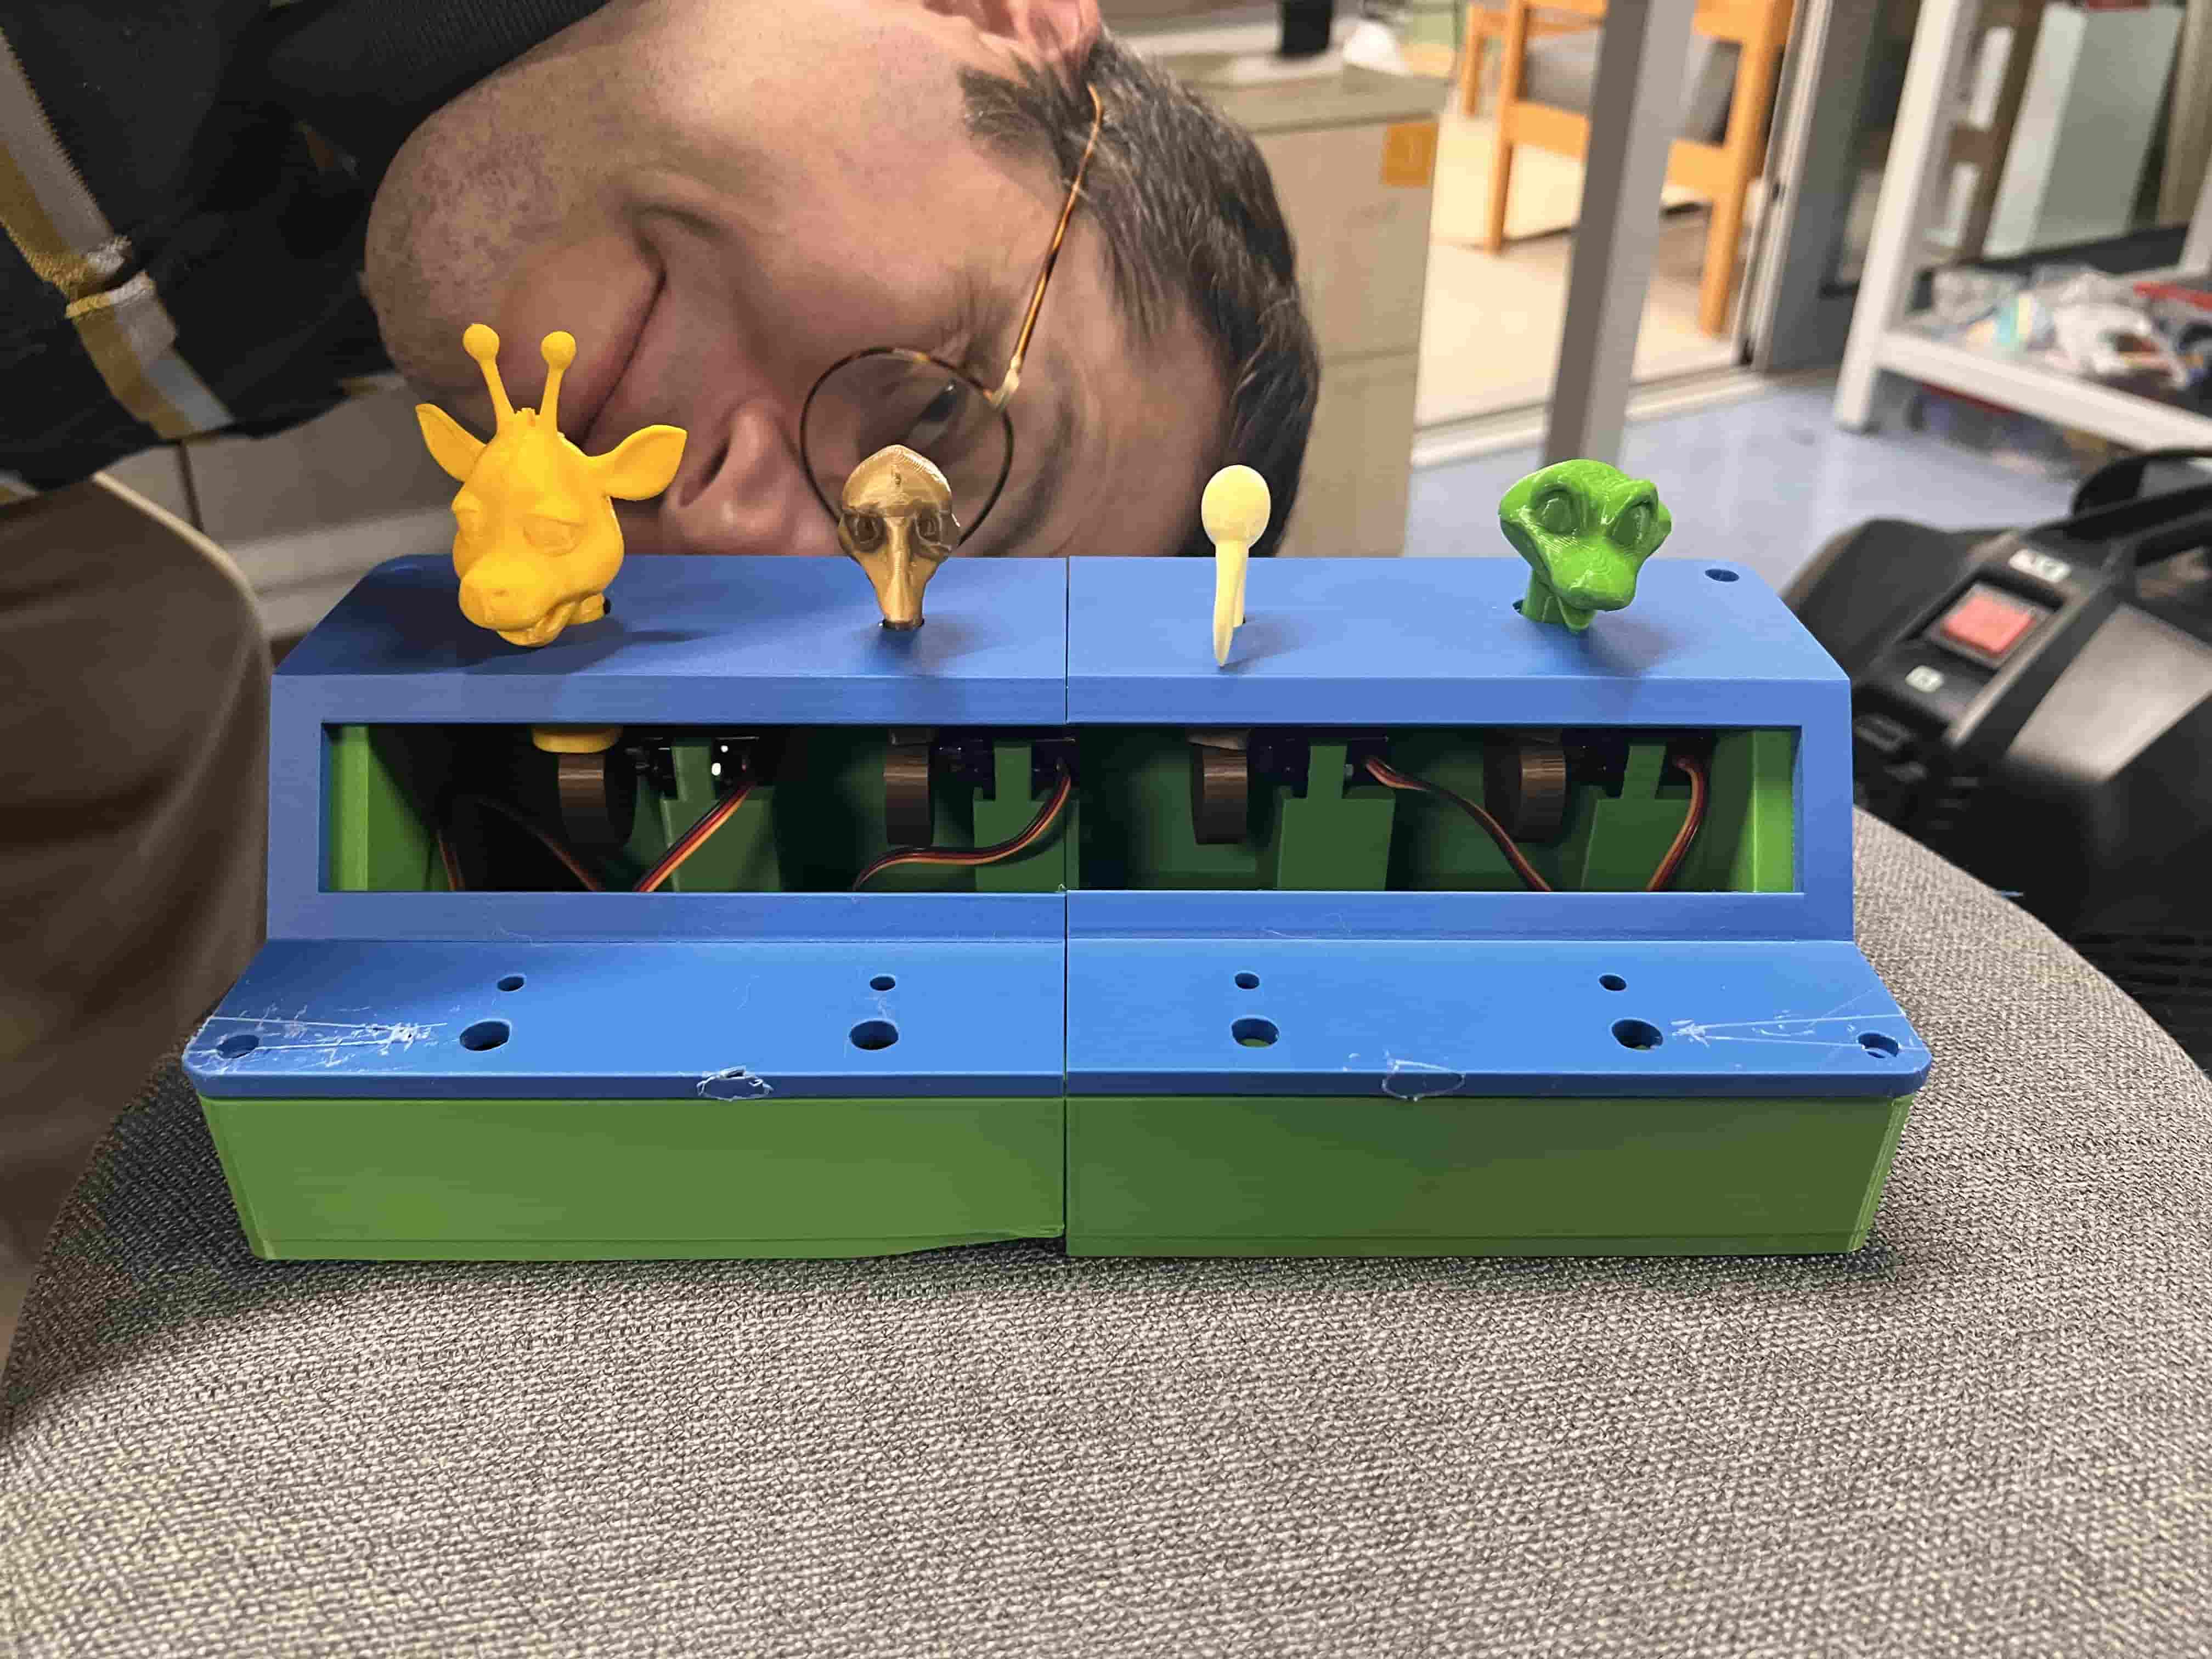
BandBox is an interactive and engaging hands-on music creation platform that blends physical interaction with digital sound design. Inspired by popular beatbox applications like Incredibox, BandBox brings music composition to life through tactile play. Users place uniquely designed figurines into specific slots, and each figure represents a unique sound or musical loop. When a figurine is placed in a slot, it comes to life, moving its mouth as if singing or playing an instrument, while contributing its sound to the overall composition.
Research
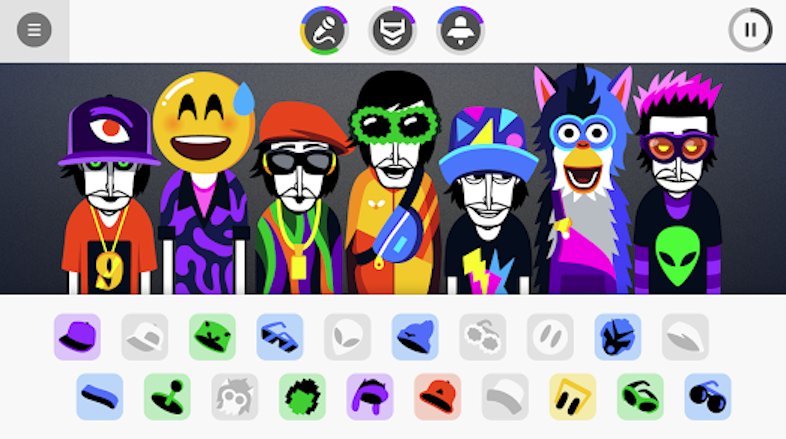
Incredibox
Try IncrediboxIncredibox is a beatboxing-based music video game created, developed, and published by the French company So Far So Good (SFSG). The concept of the game is users dragging and dropping sound icons on different characters to make music. The player can find combos to unlock animated bonuses and record mixes to integrate a ranking.[1] An automatic mode is also available to generate an endless composition of randomness.
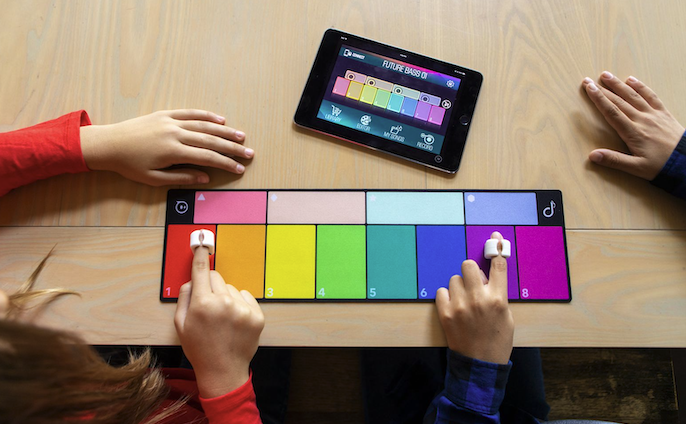
Sphero Specdrums
Sphero Specdrums are app-enabled music rings that make the world your instrument by turning colors into sounds. Connect to the Specdrums MIX or Edu app and tap on anything – your clothes, drawings, or the included playing pad – to create and mix sounds, beats, and loops that all play through your mobile device
More About Bandbox
How It Works:
Bandbox is designed for:
System Integration
As part of the final integration phase of my project, I carefully combined all electronic, mechanical, and interface components into a cohesive system. The following documentation outlines how the different modules (buzzers, servos, LEDs, buttons, enclosure) were integrated, tested, and packaged into the final form.
🔗 You can view the full System Integration documentation by visiting this page
BandBox Assembly Documentation
1. CAD Design
Watch the design process.
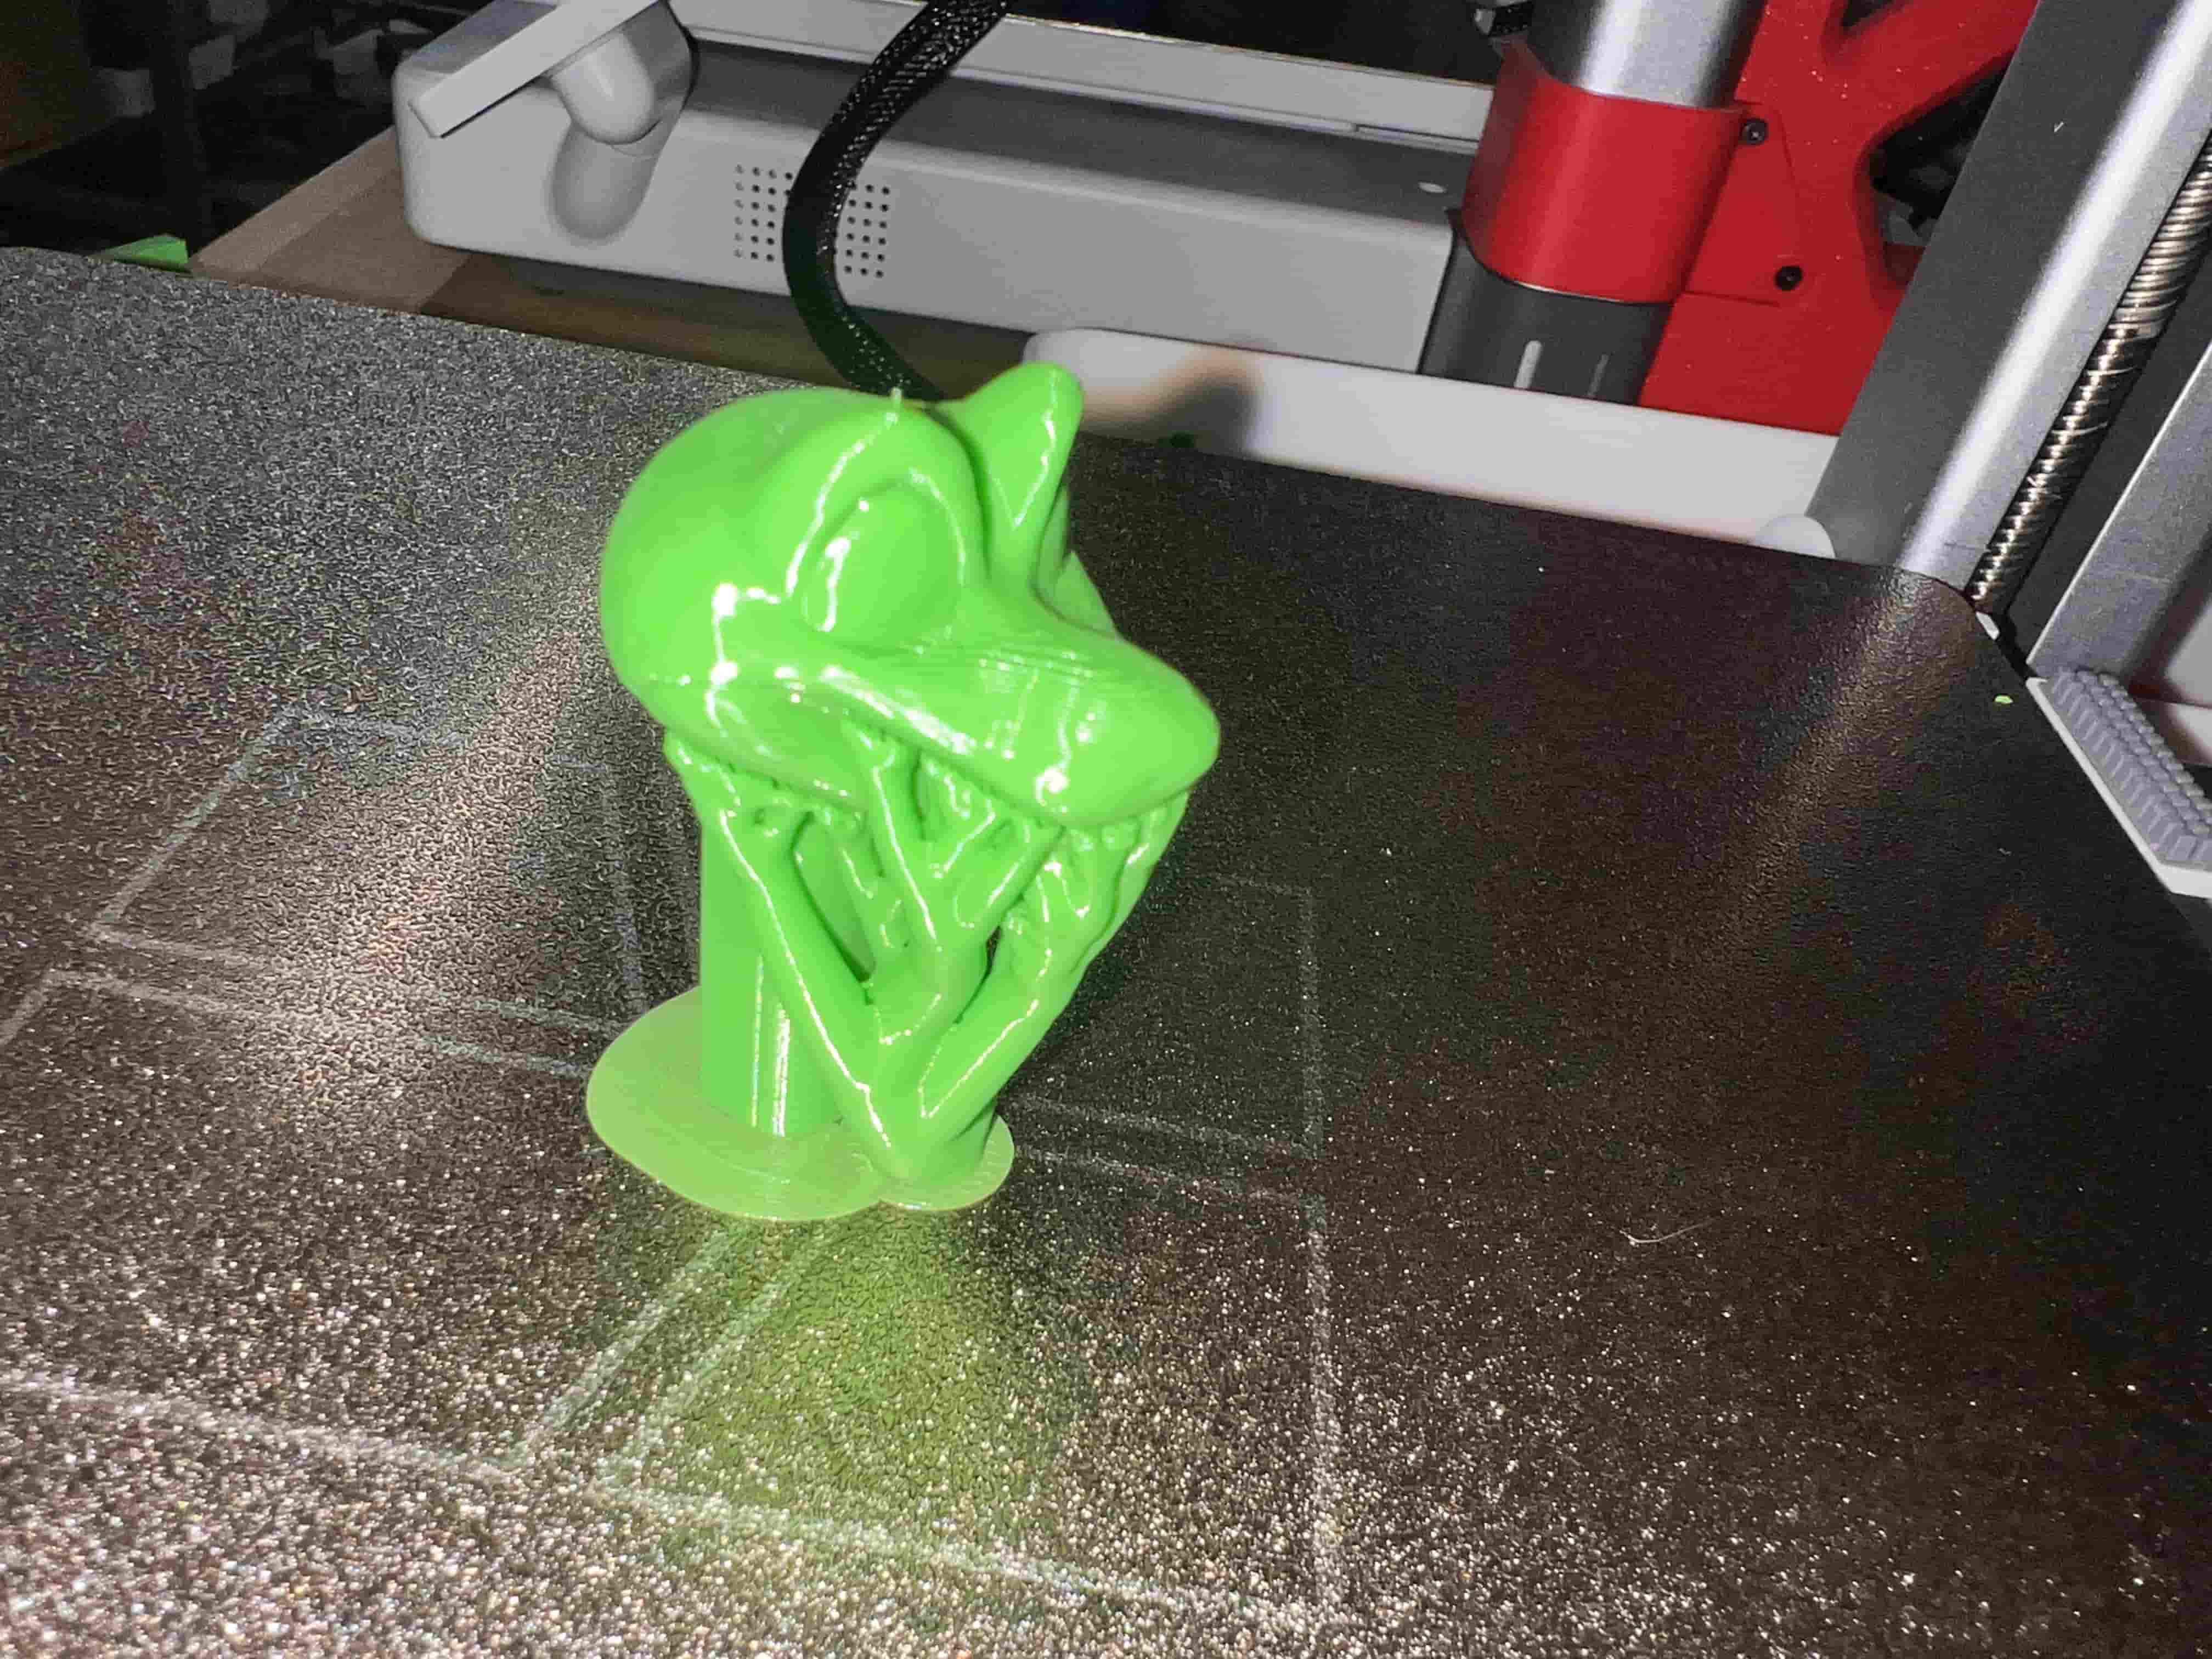
2. Figurine Prototyping

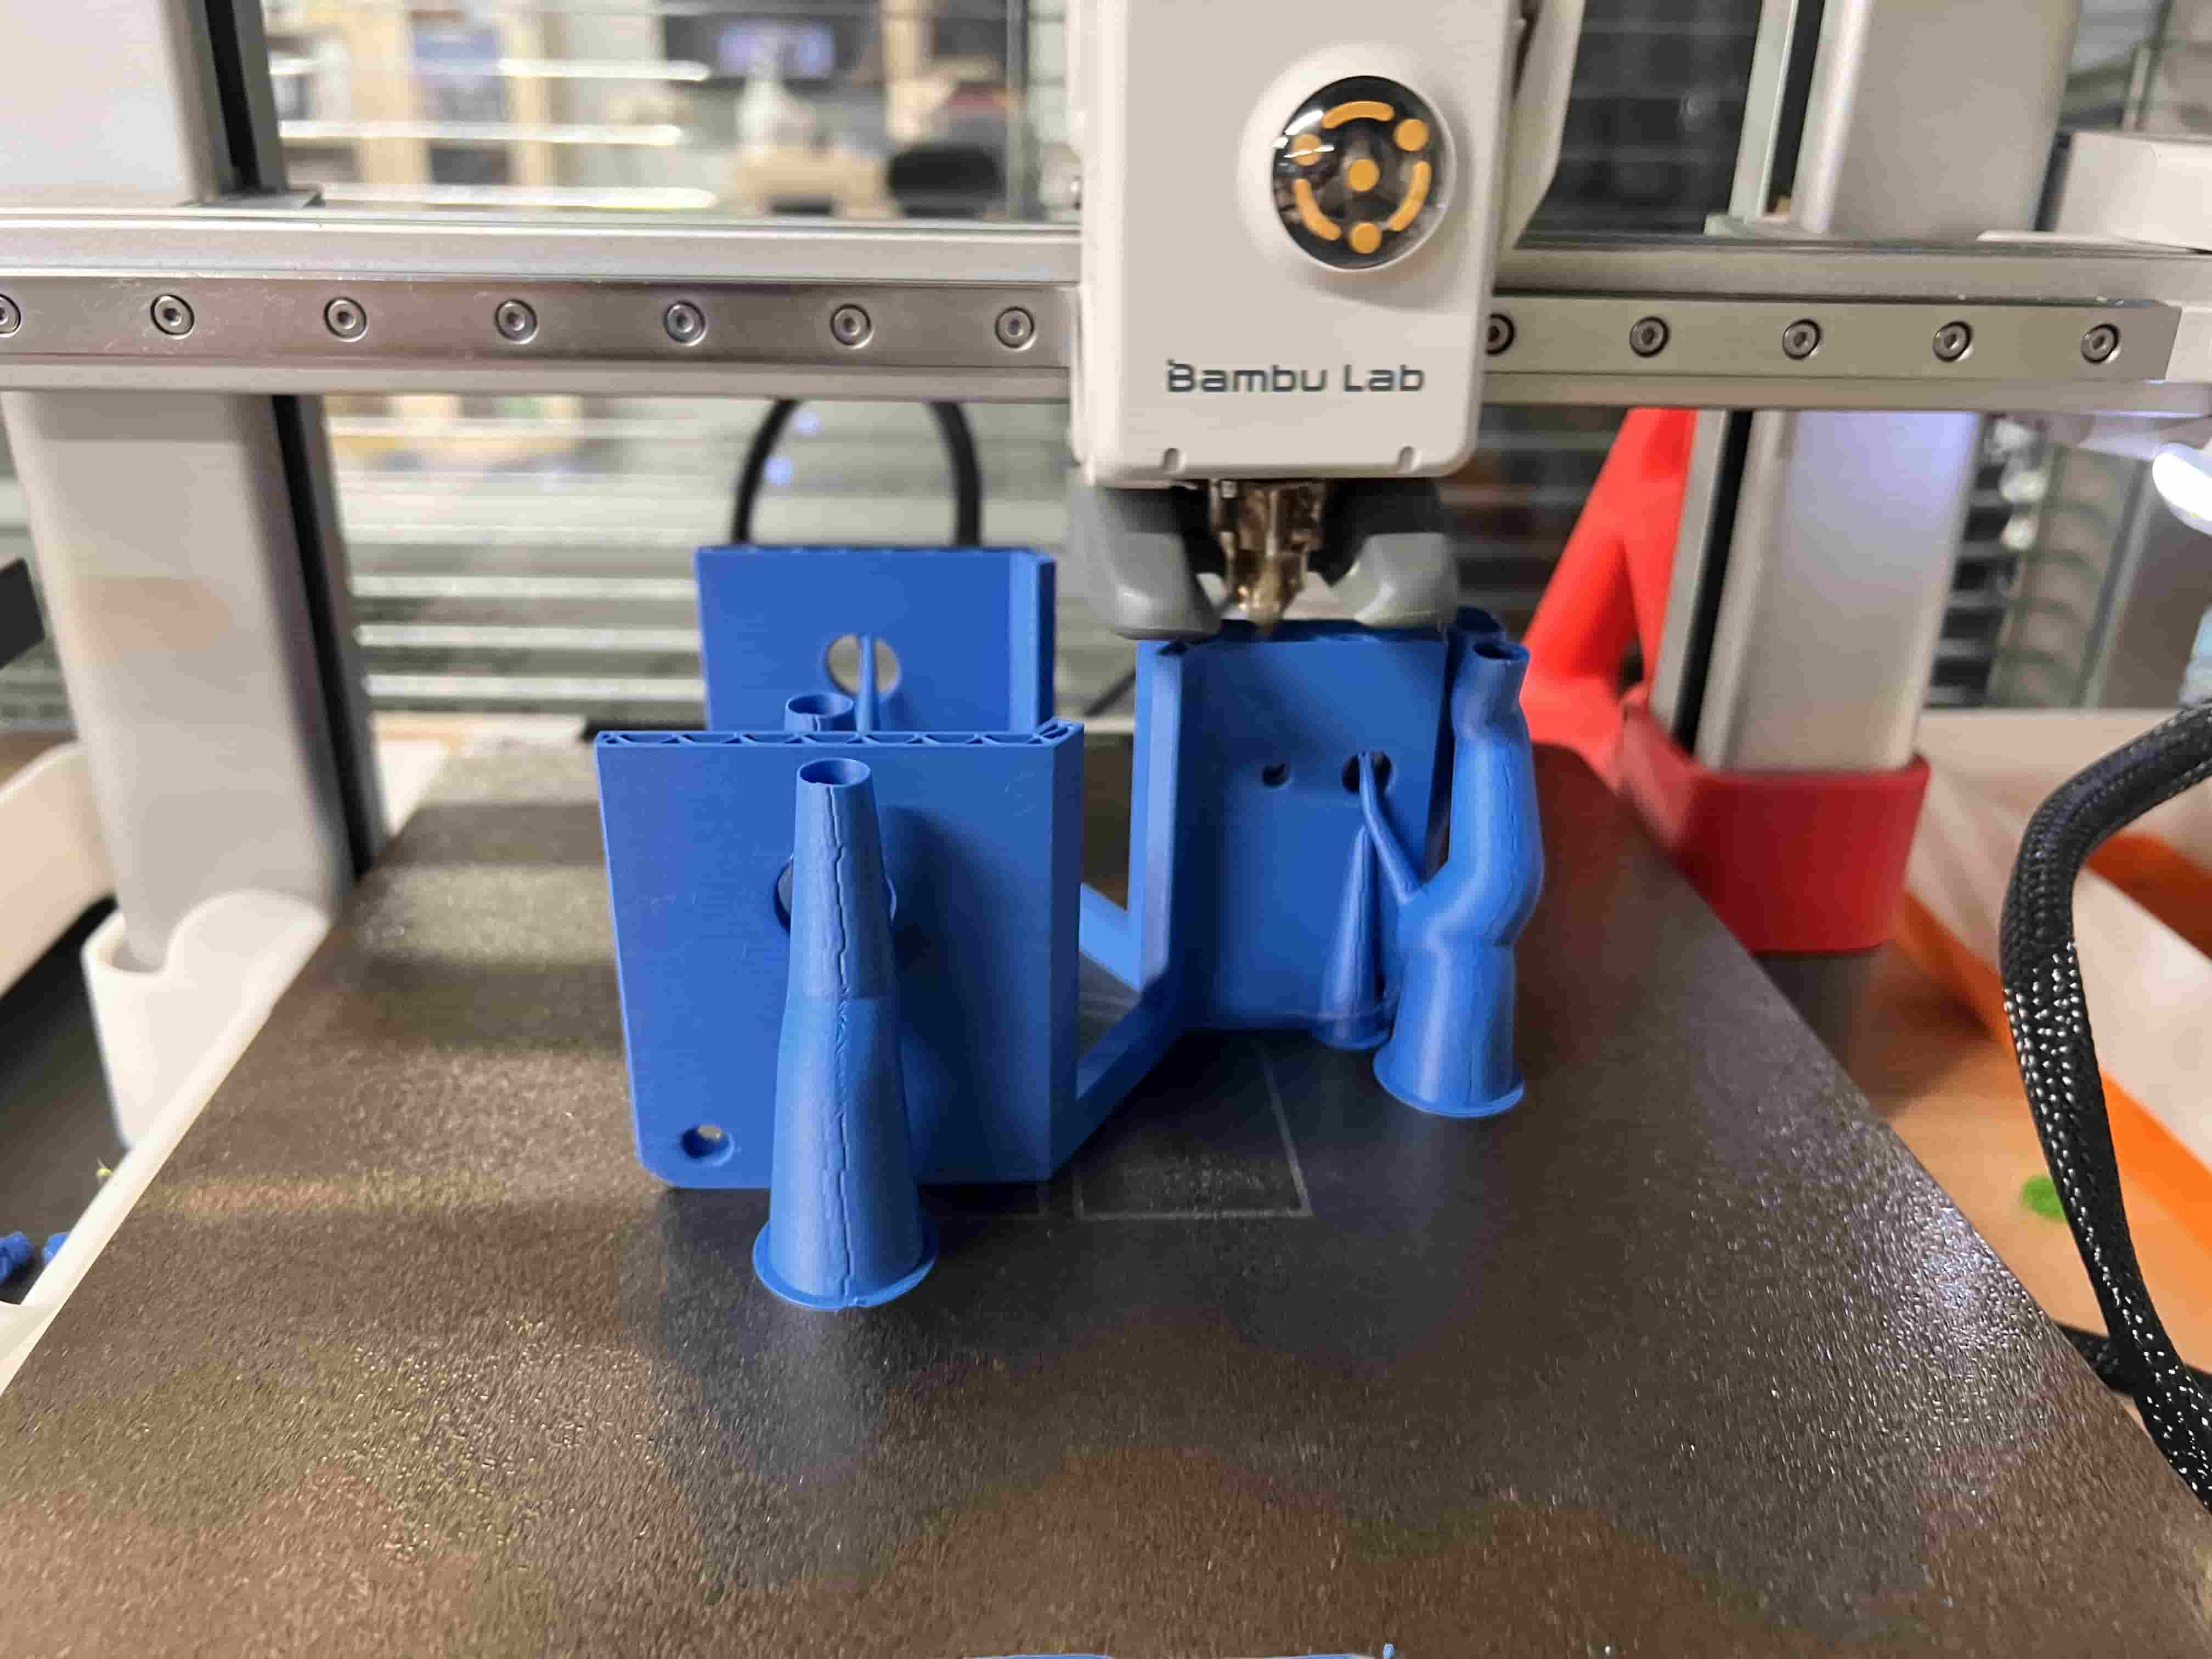
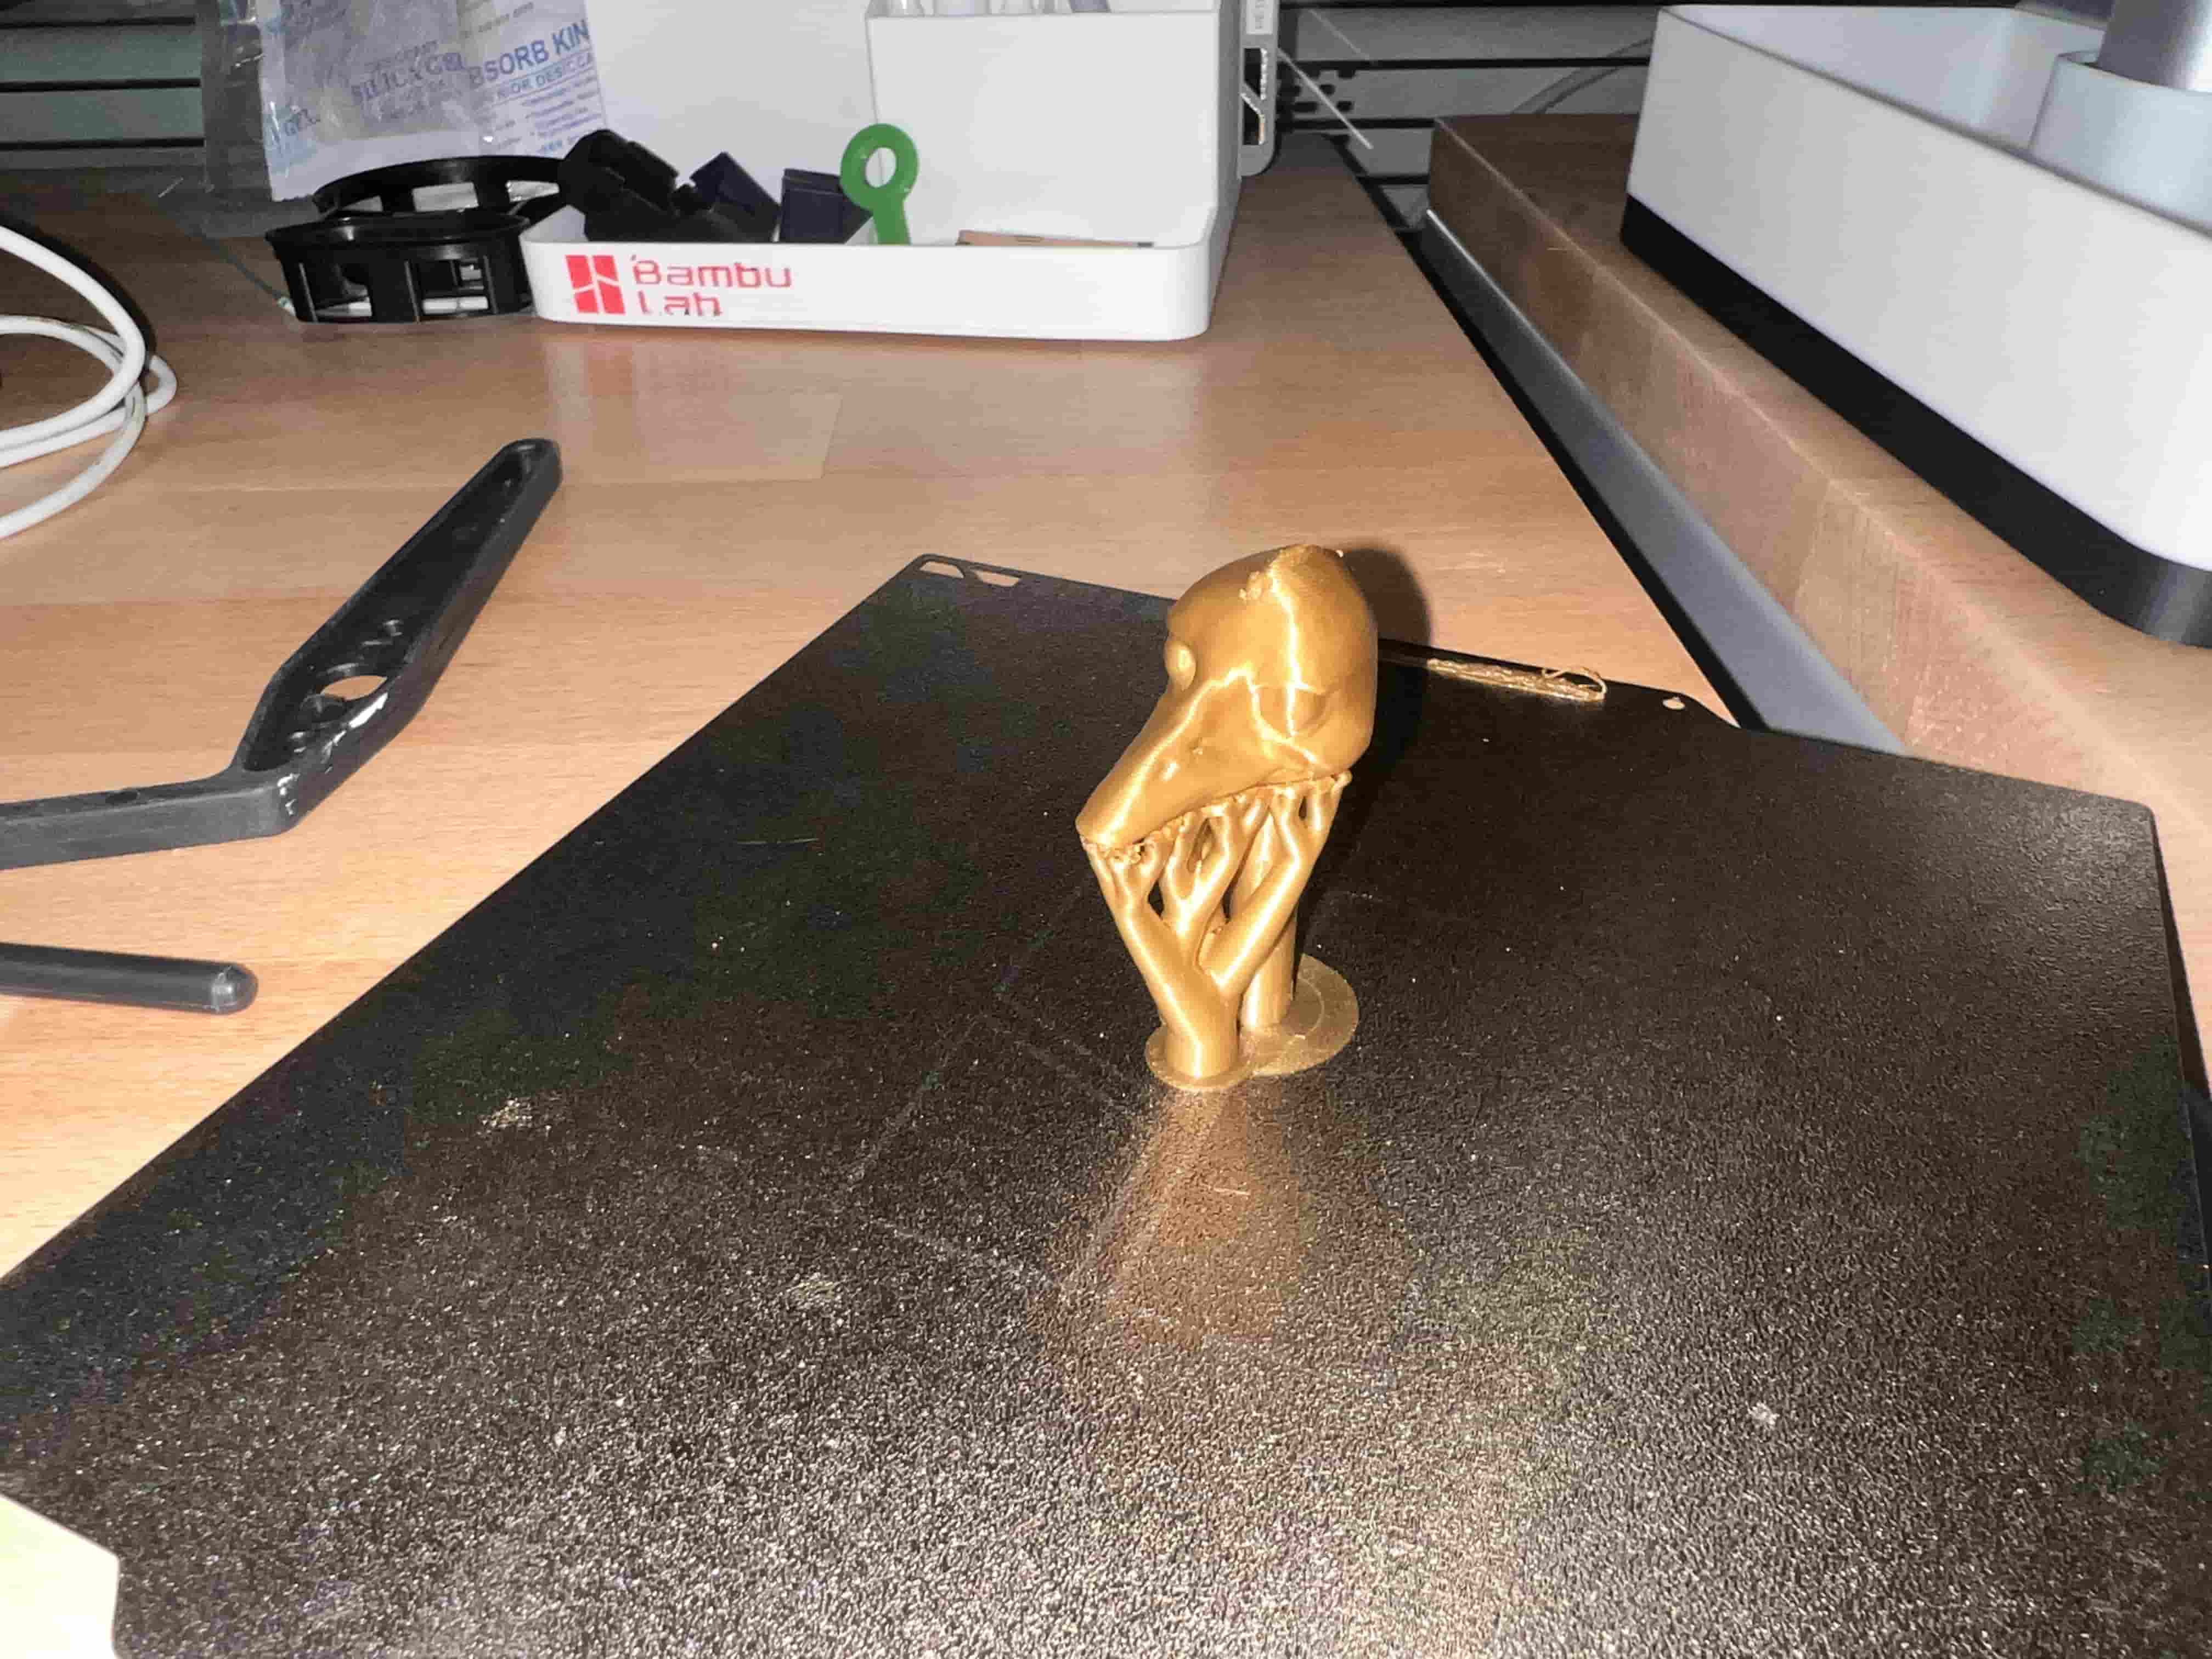
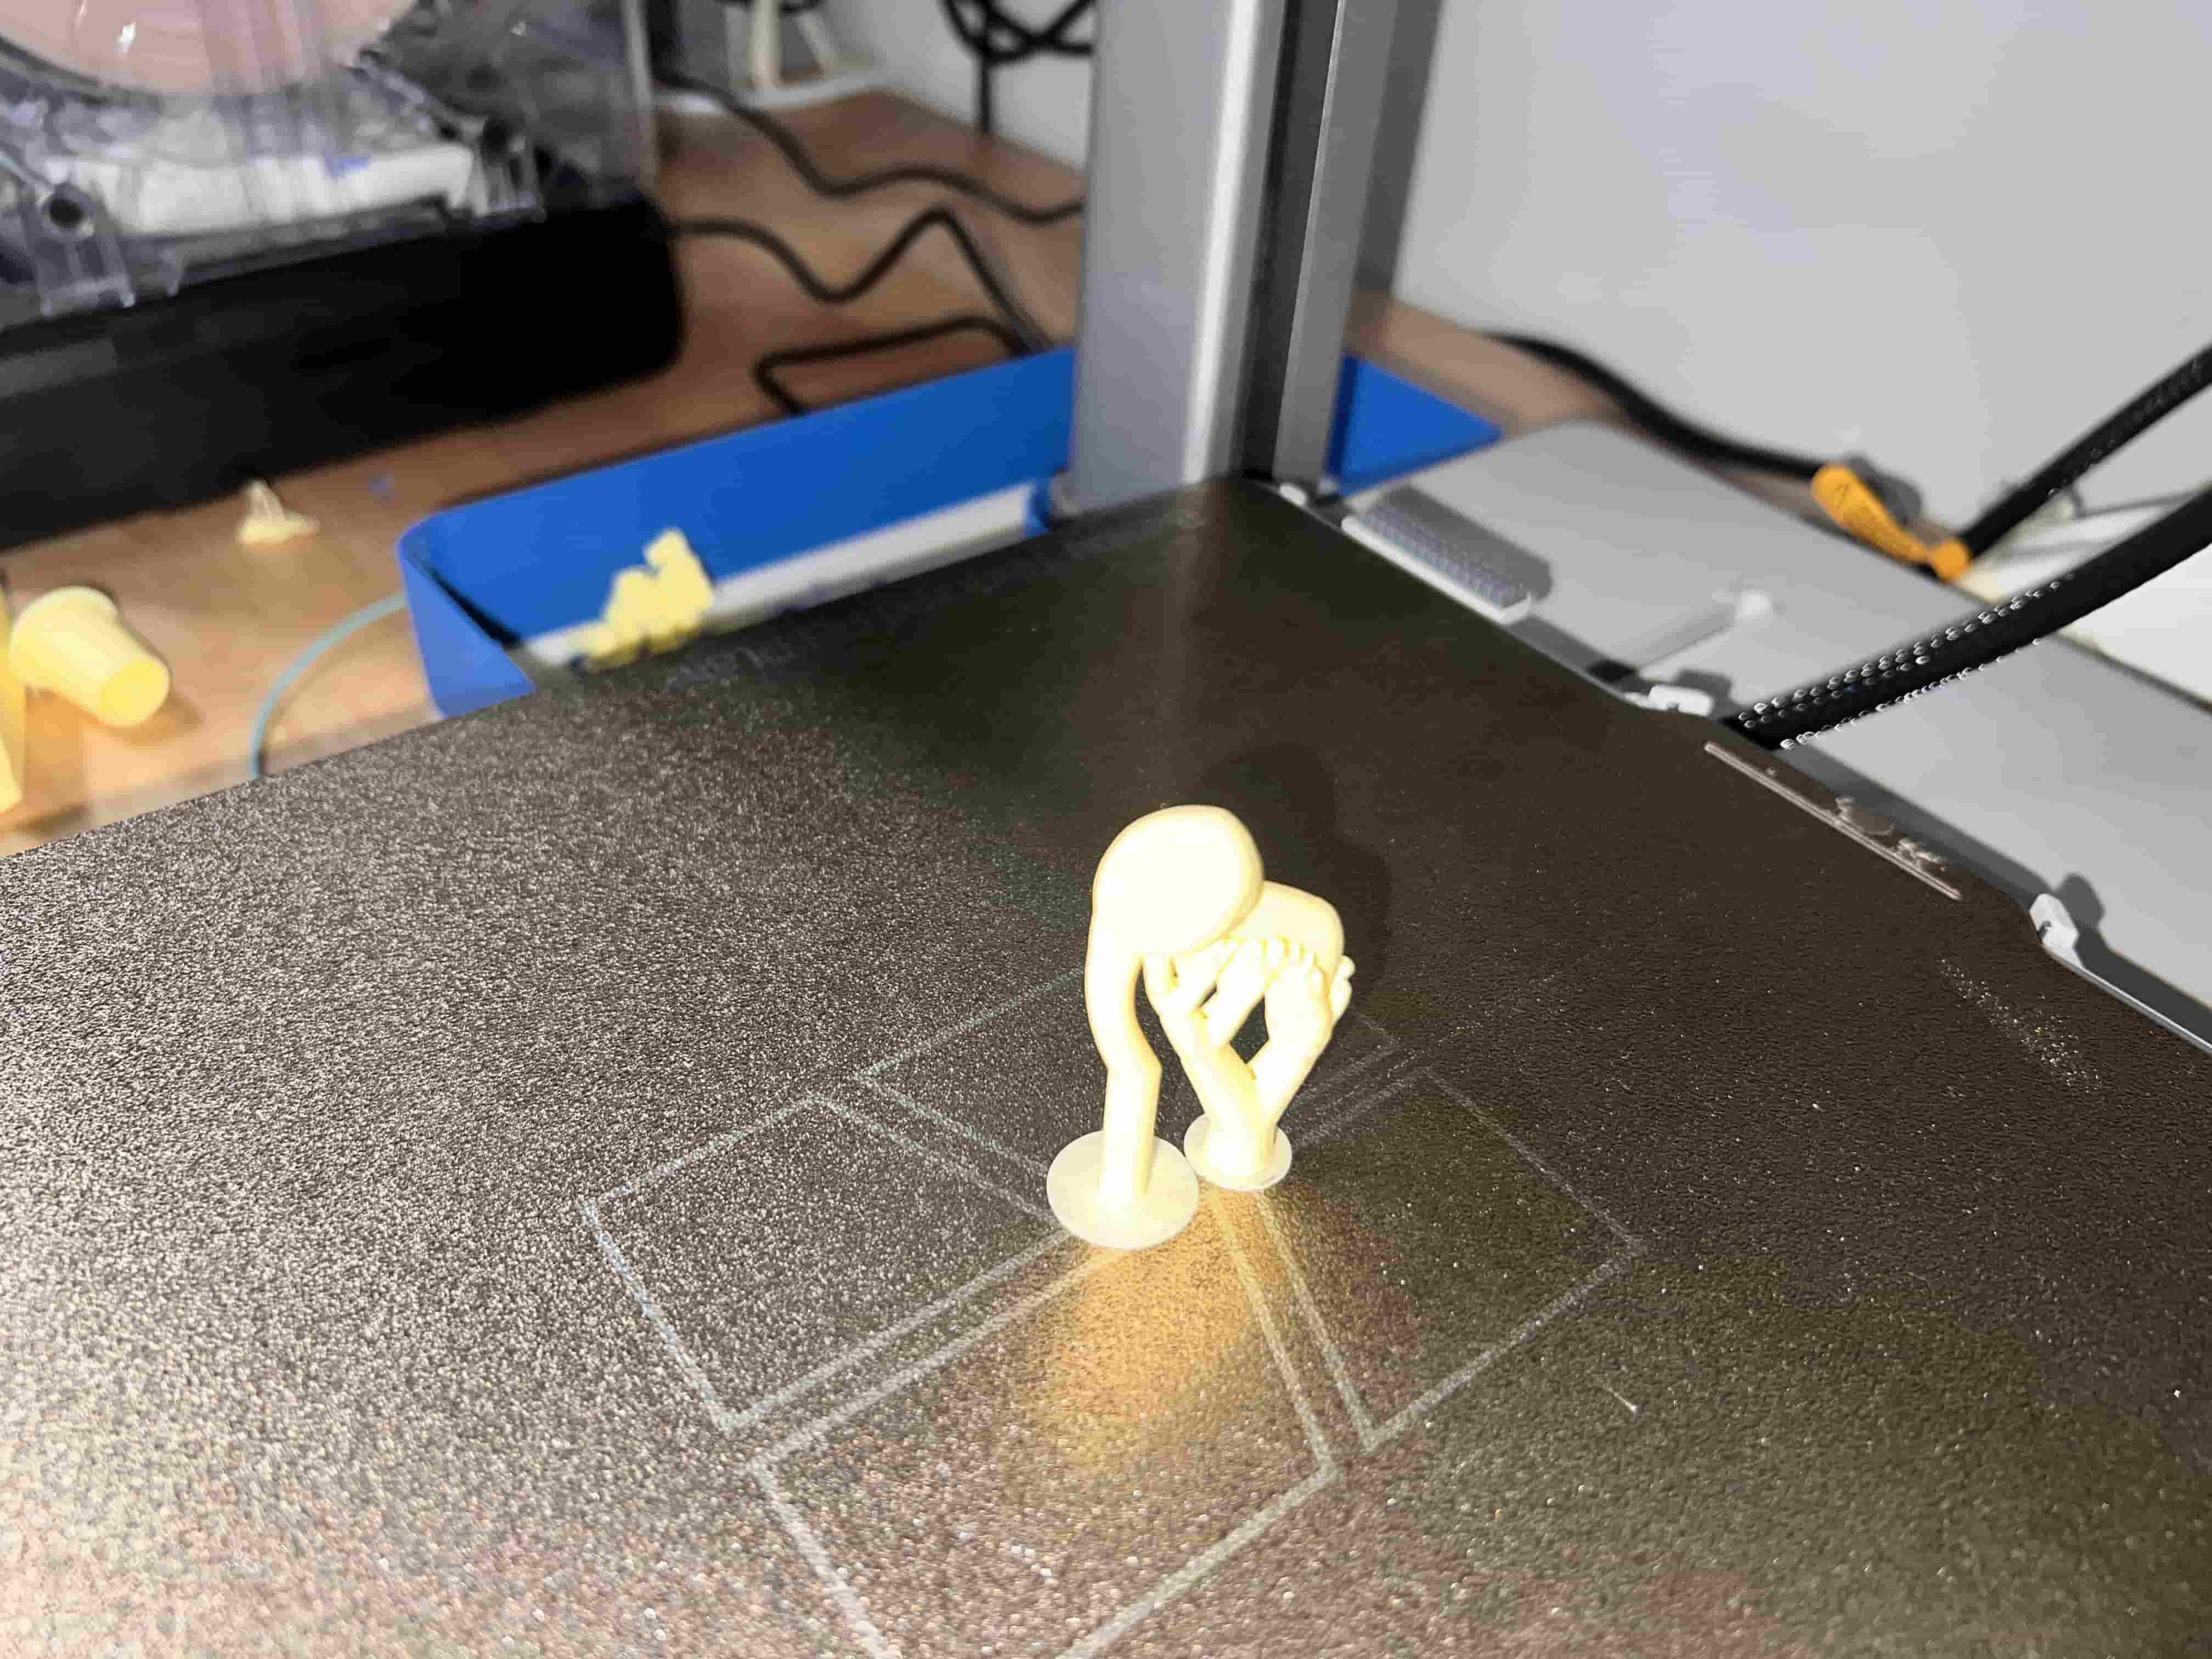
3. Enclosure Printing
The enclosure is split into two halves for easier printing and assembly. All parts were printed in green PLA at 0.2 mm layer height.
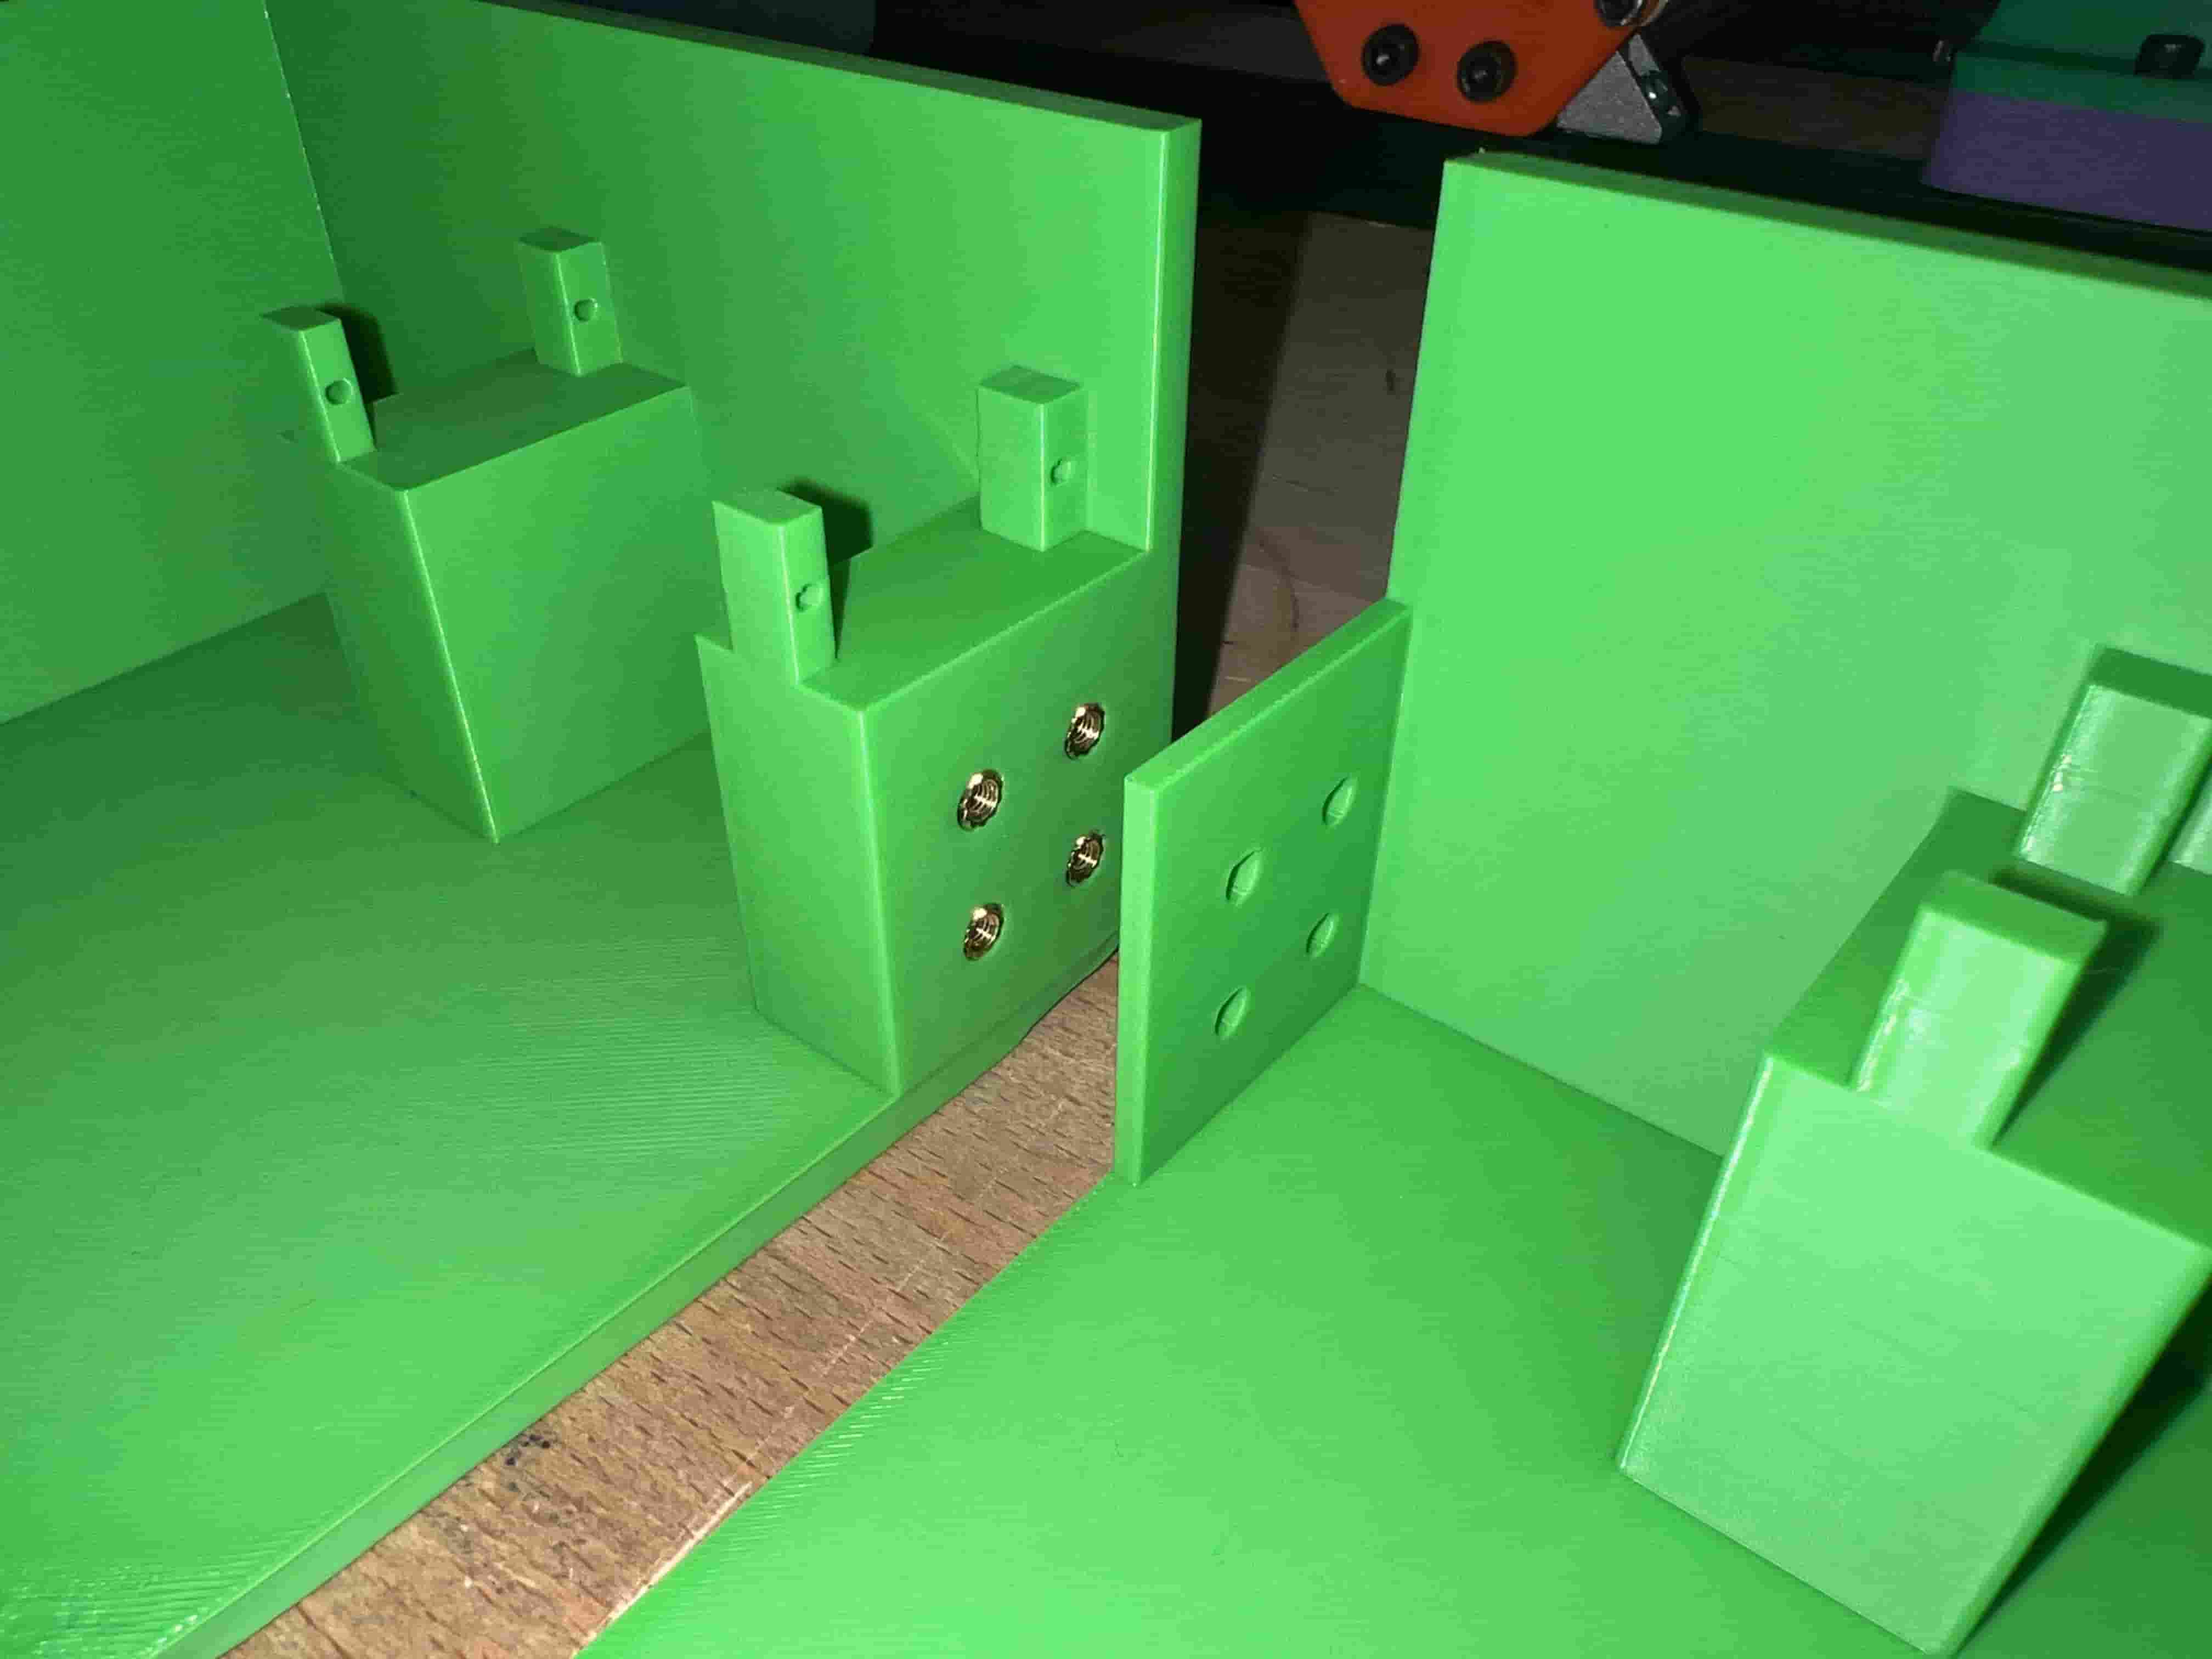
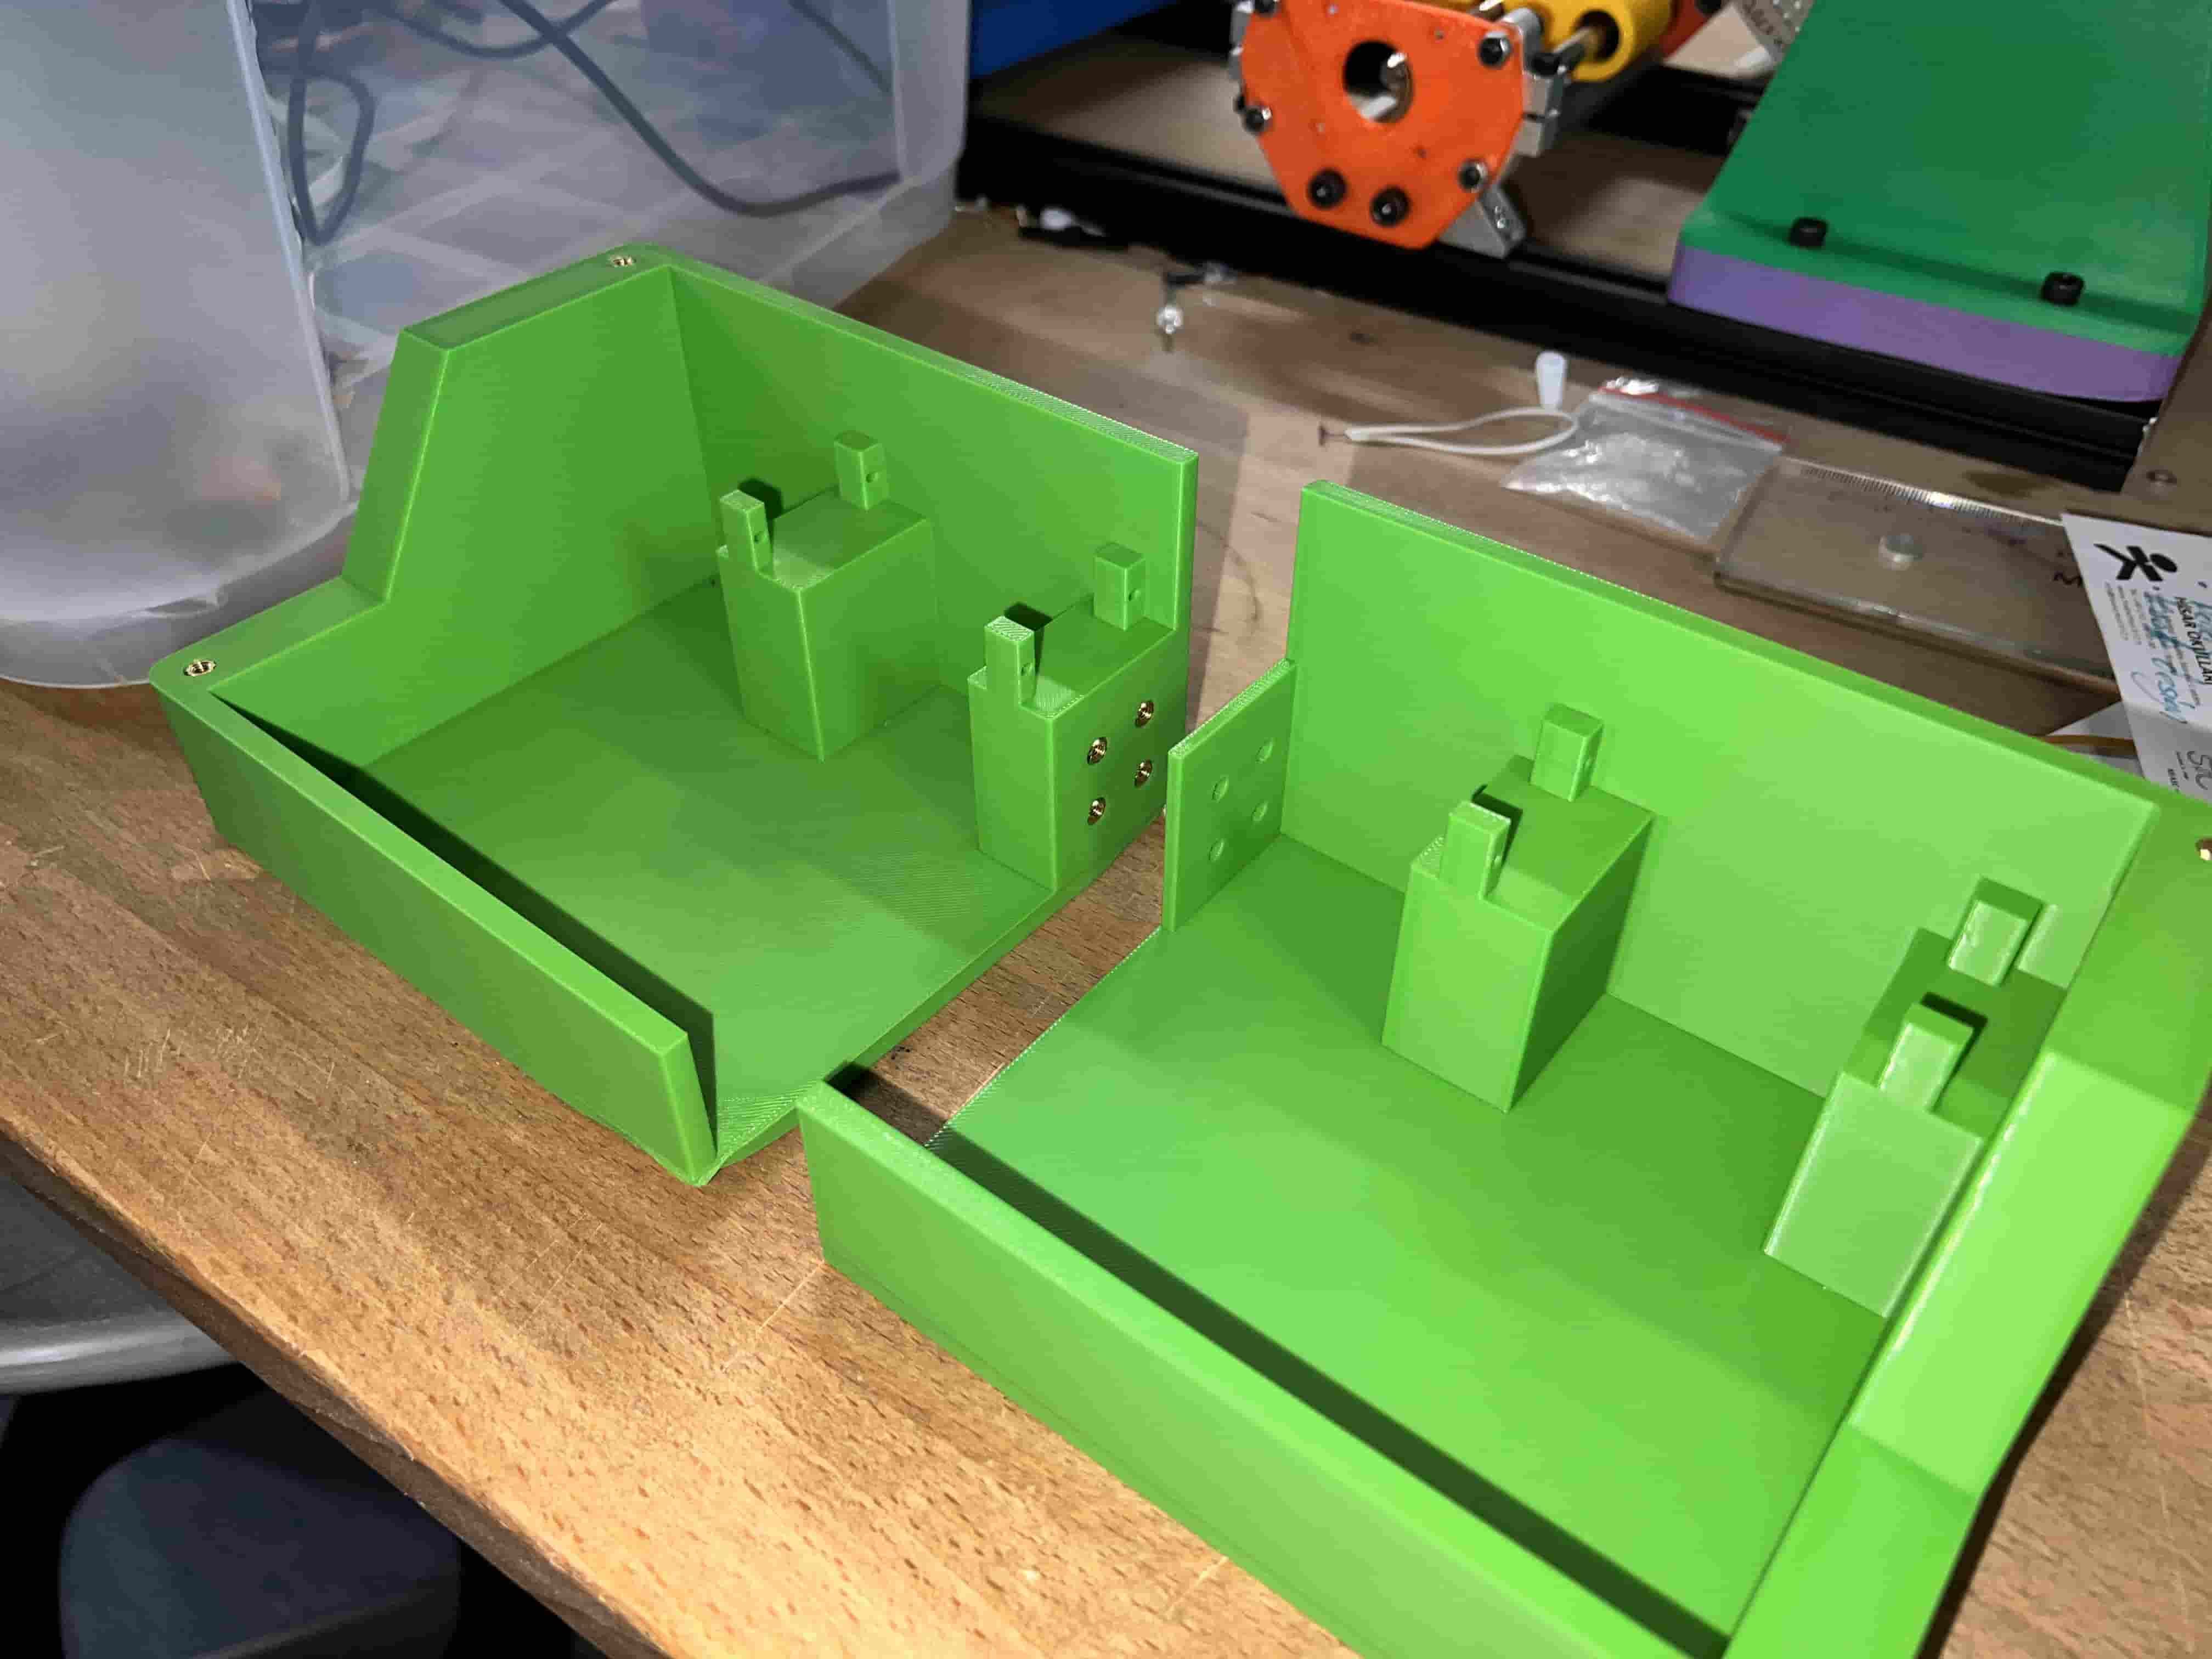
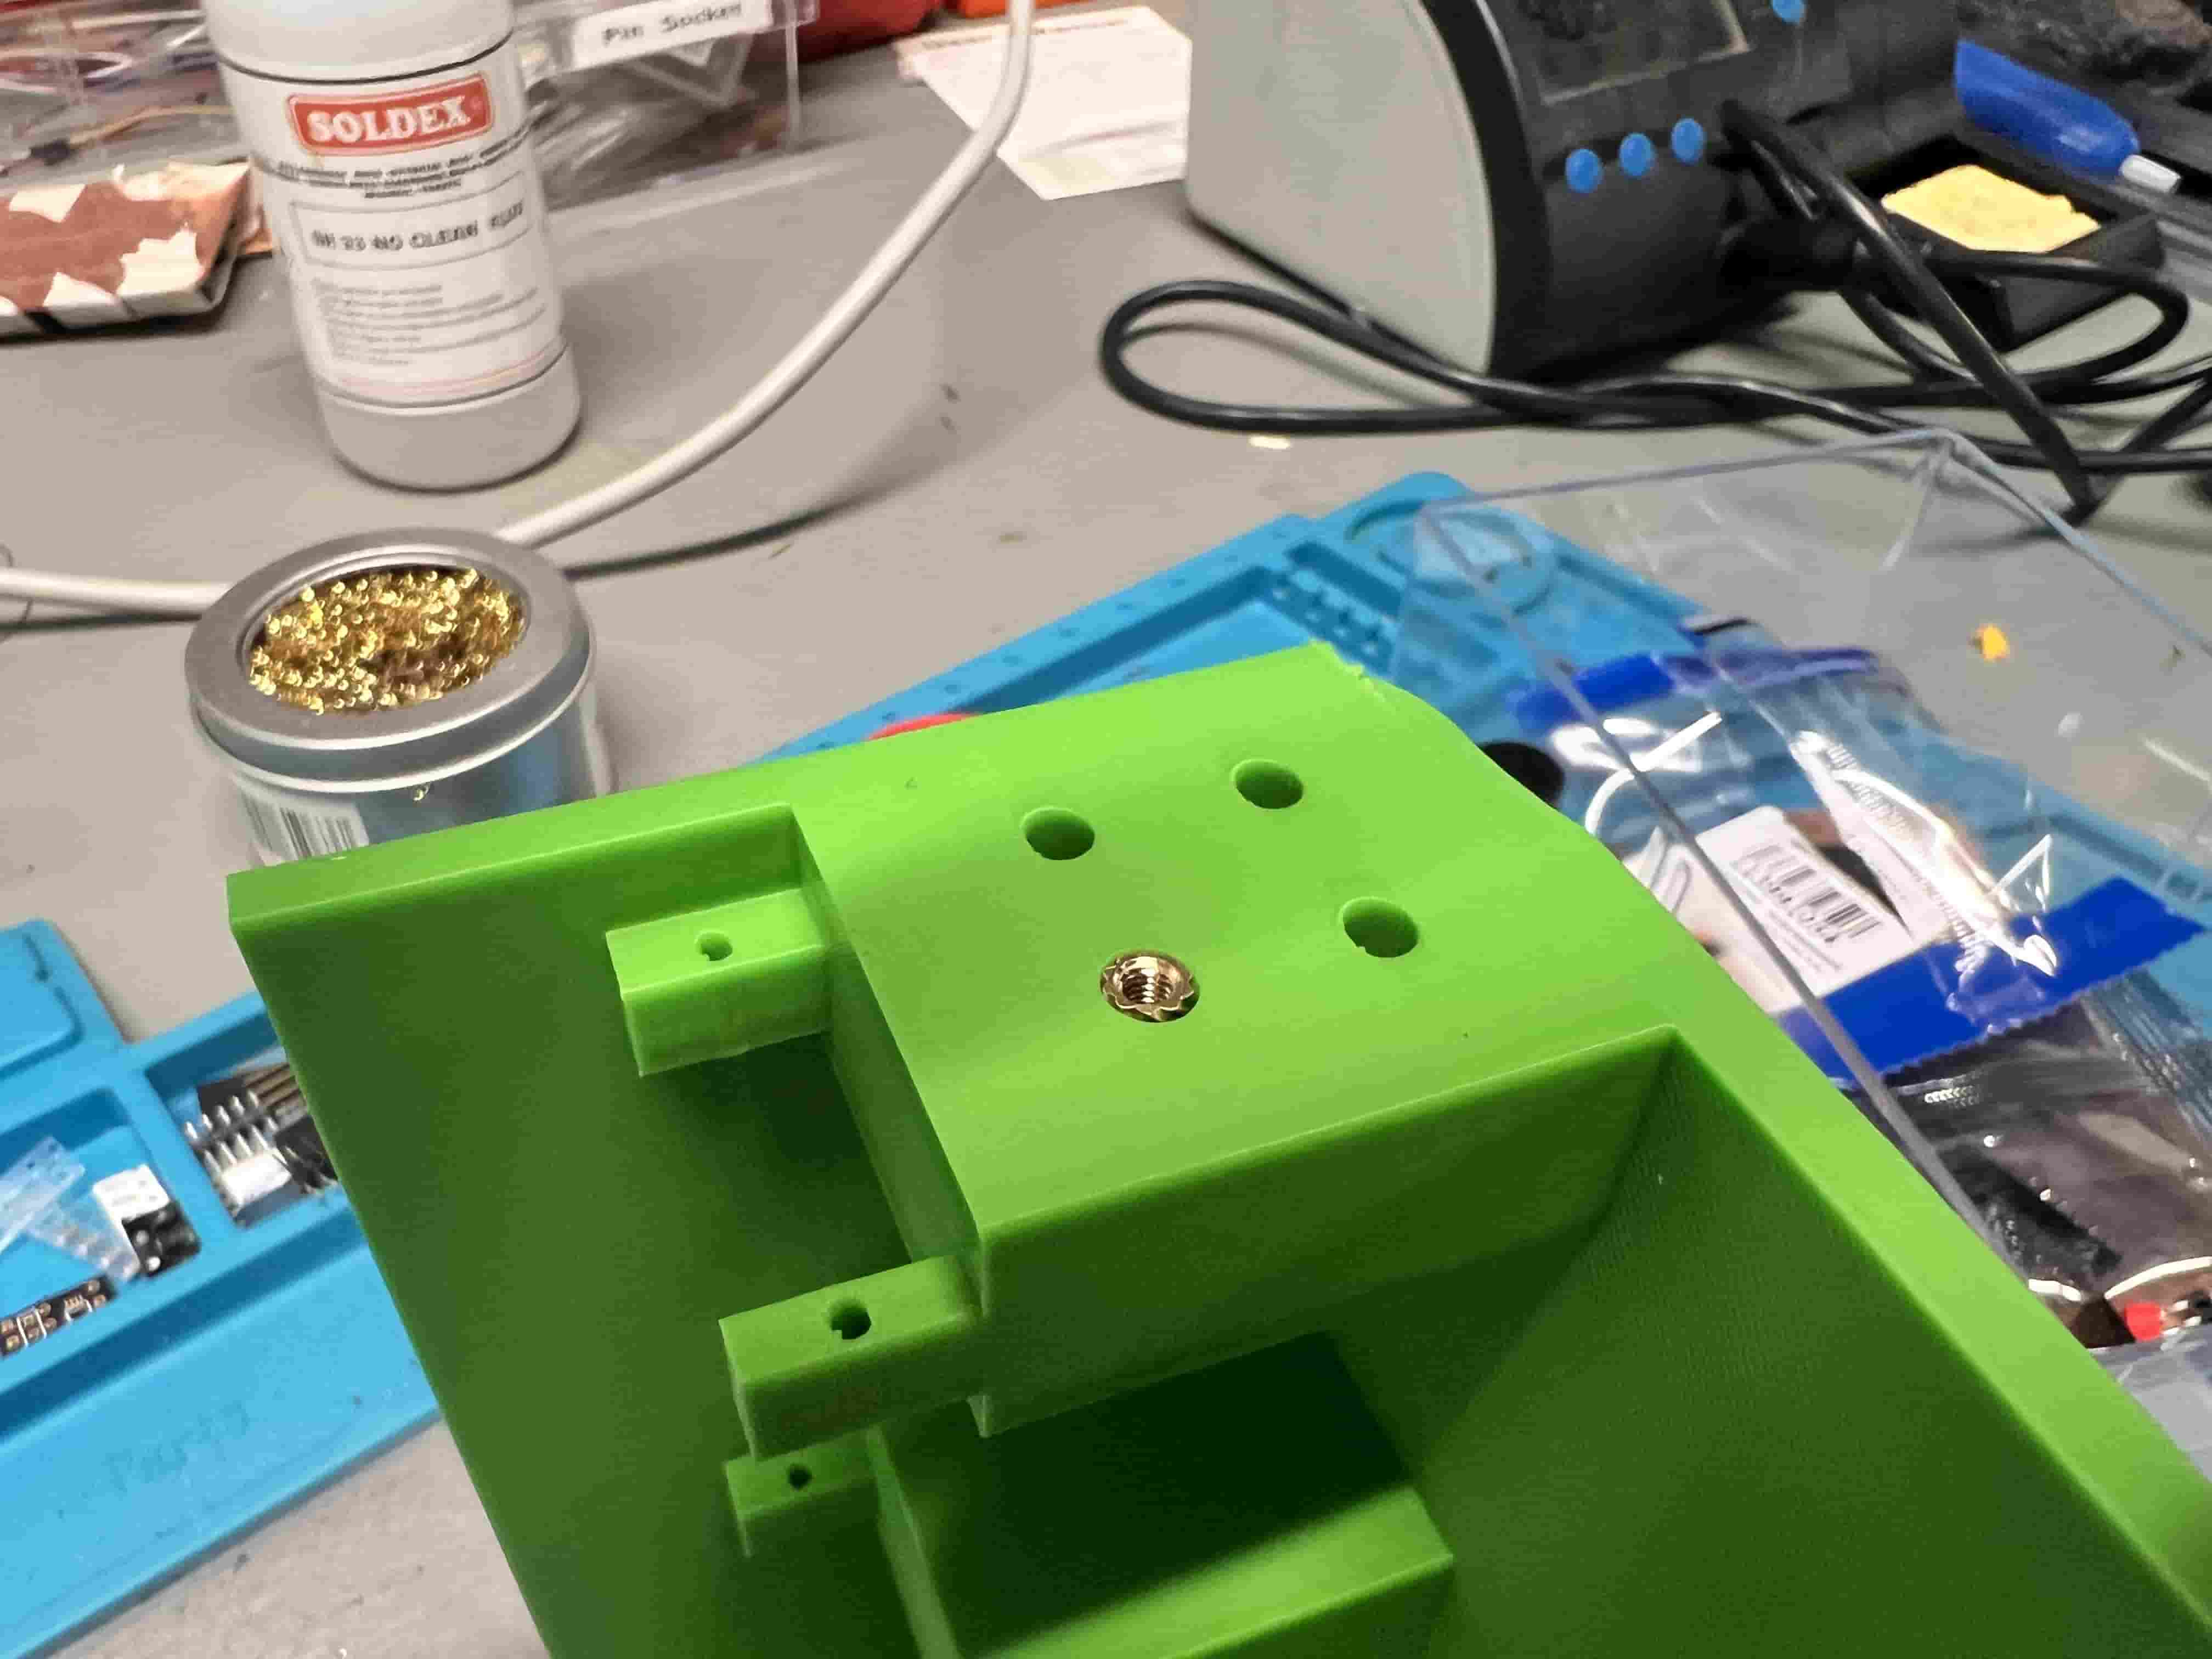
4. Brass Insert Installation
M2 brass heat-set inserts were pressed into the printed standoffs using a soldering iron for reliable screw retention.
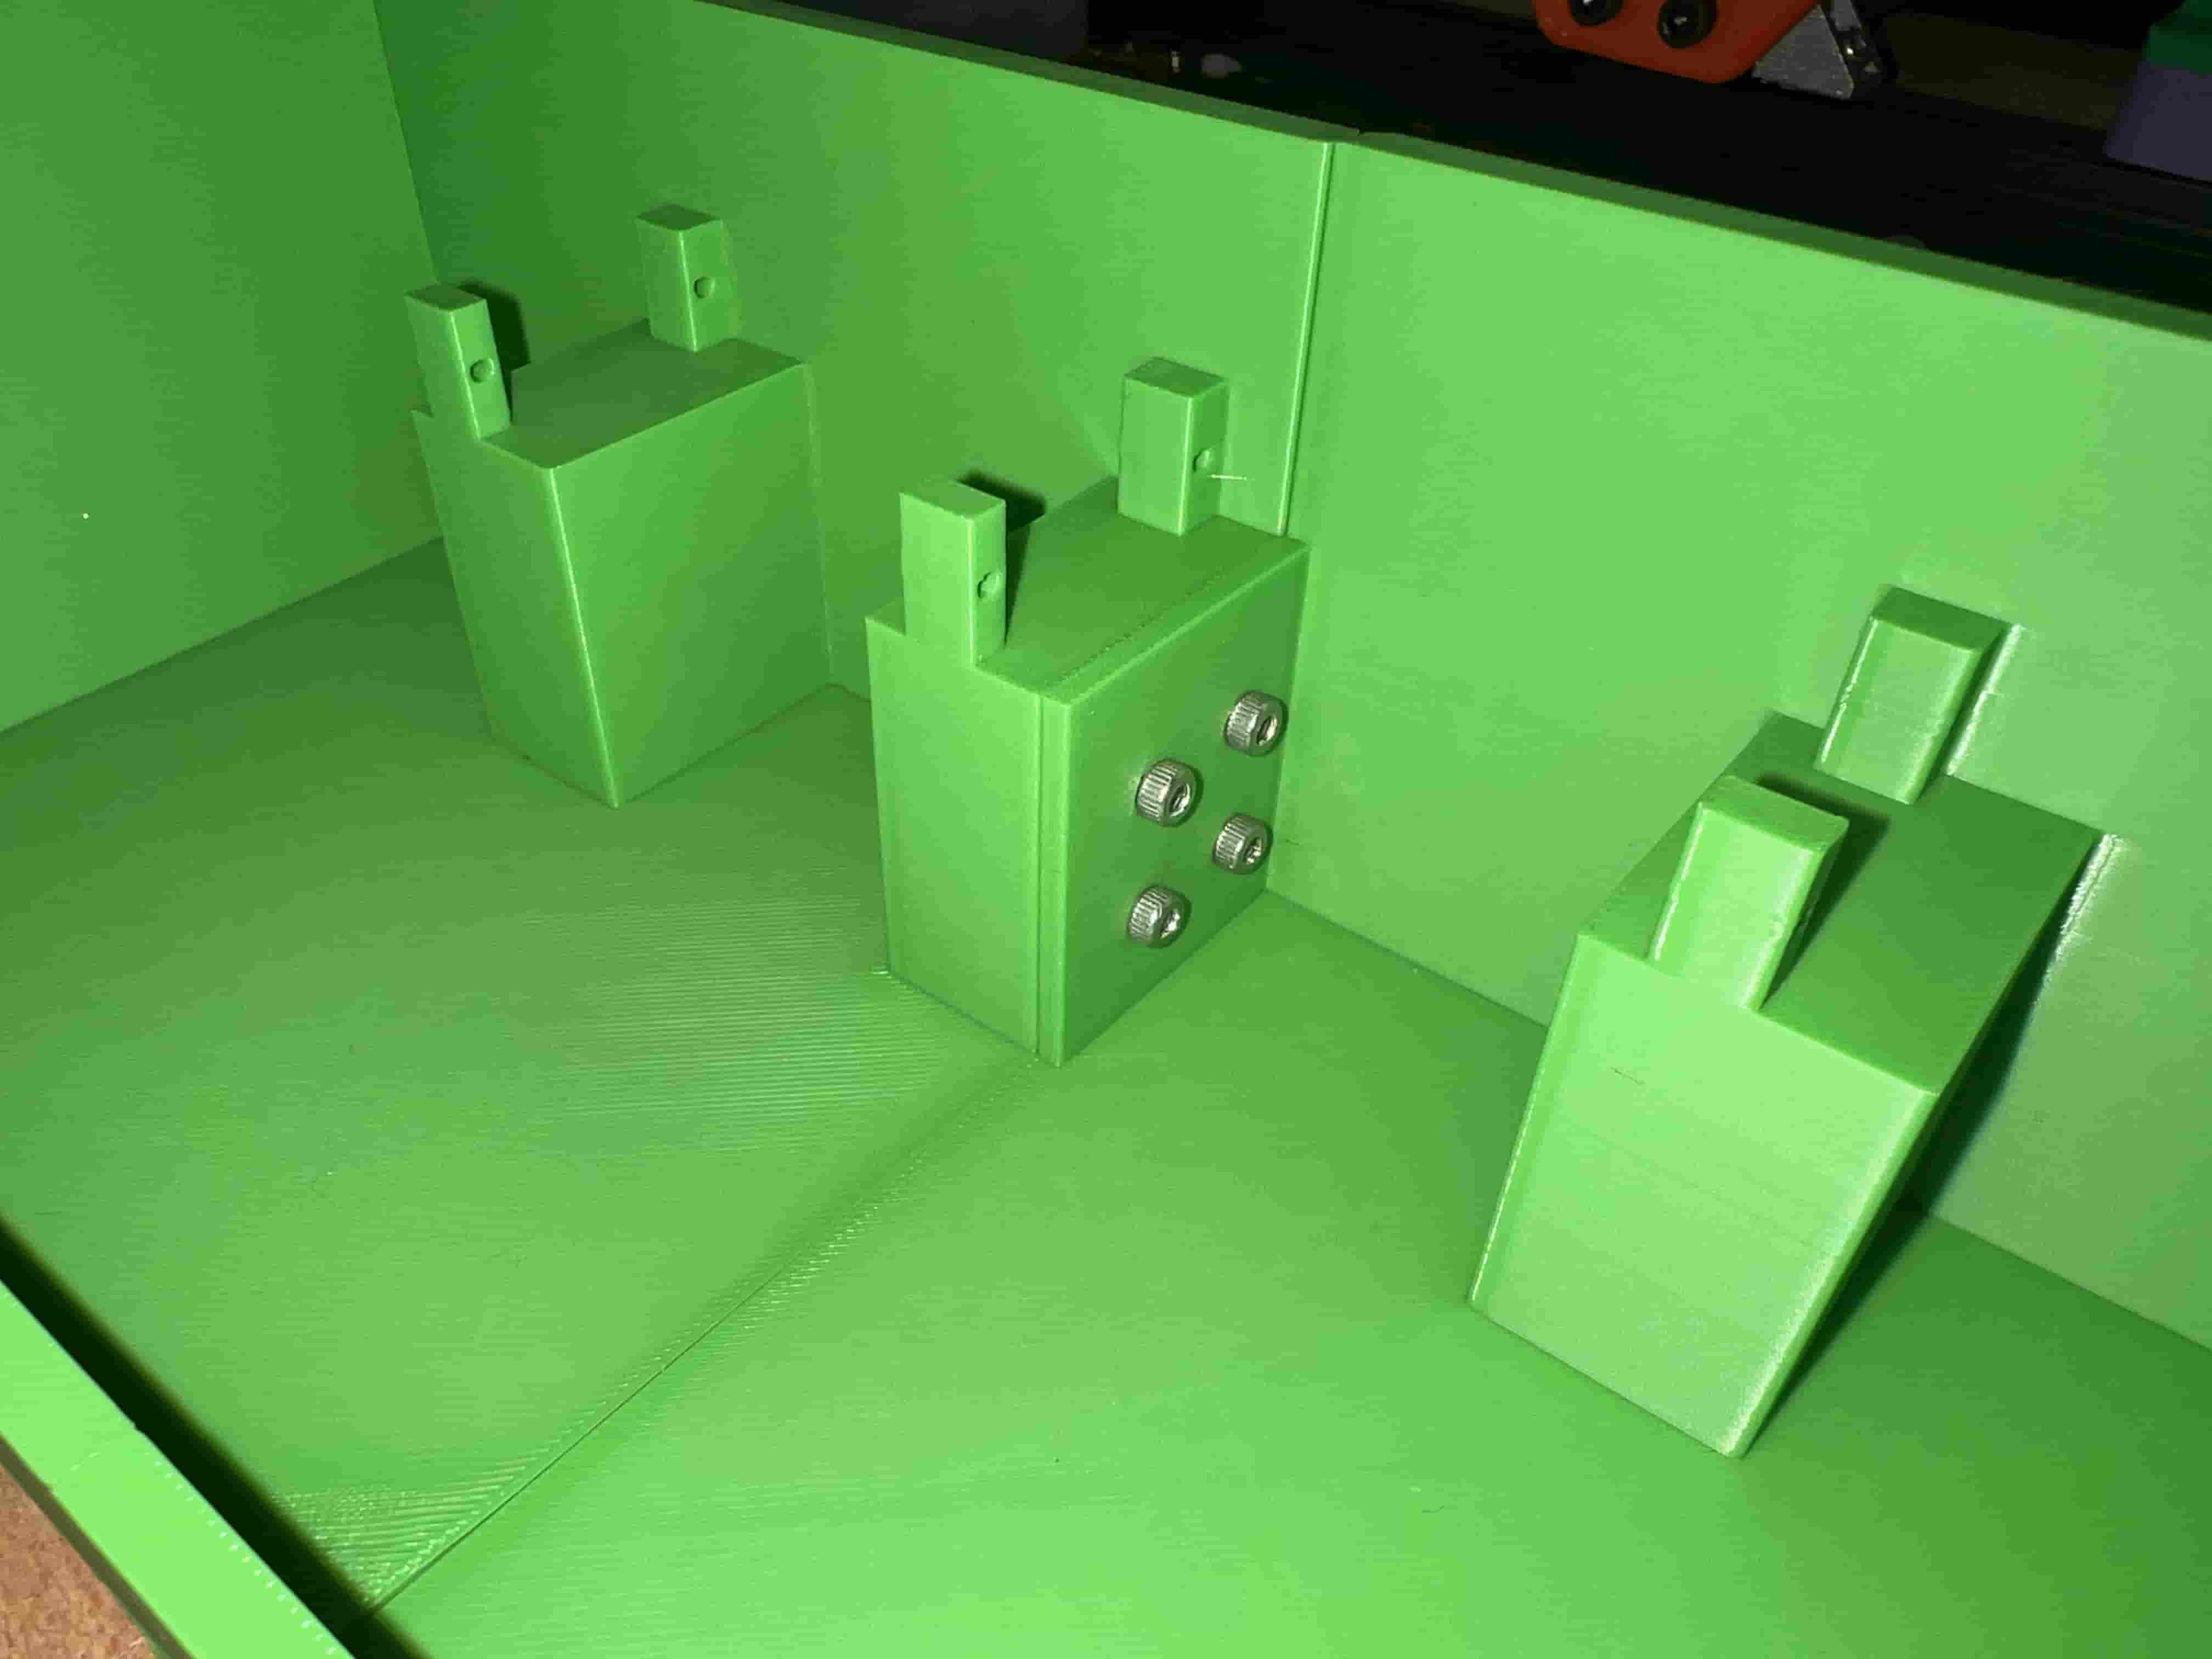
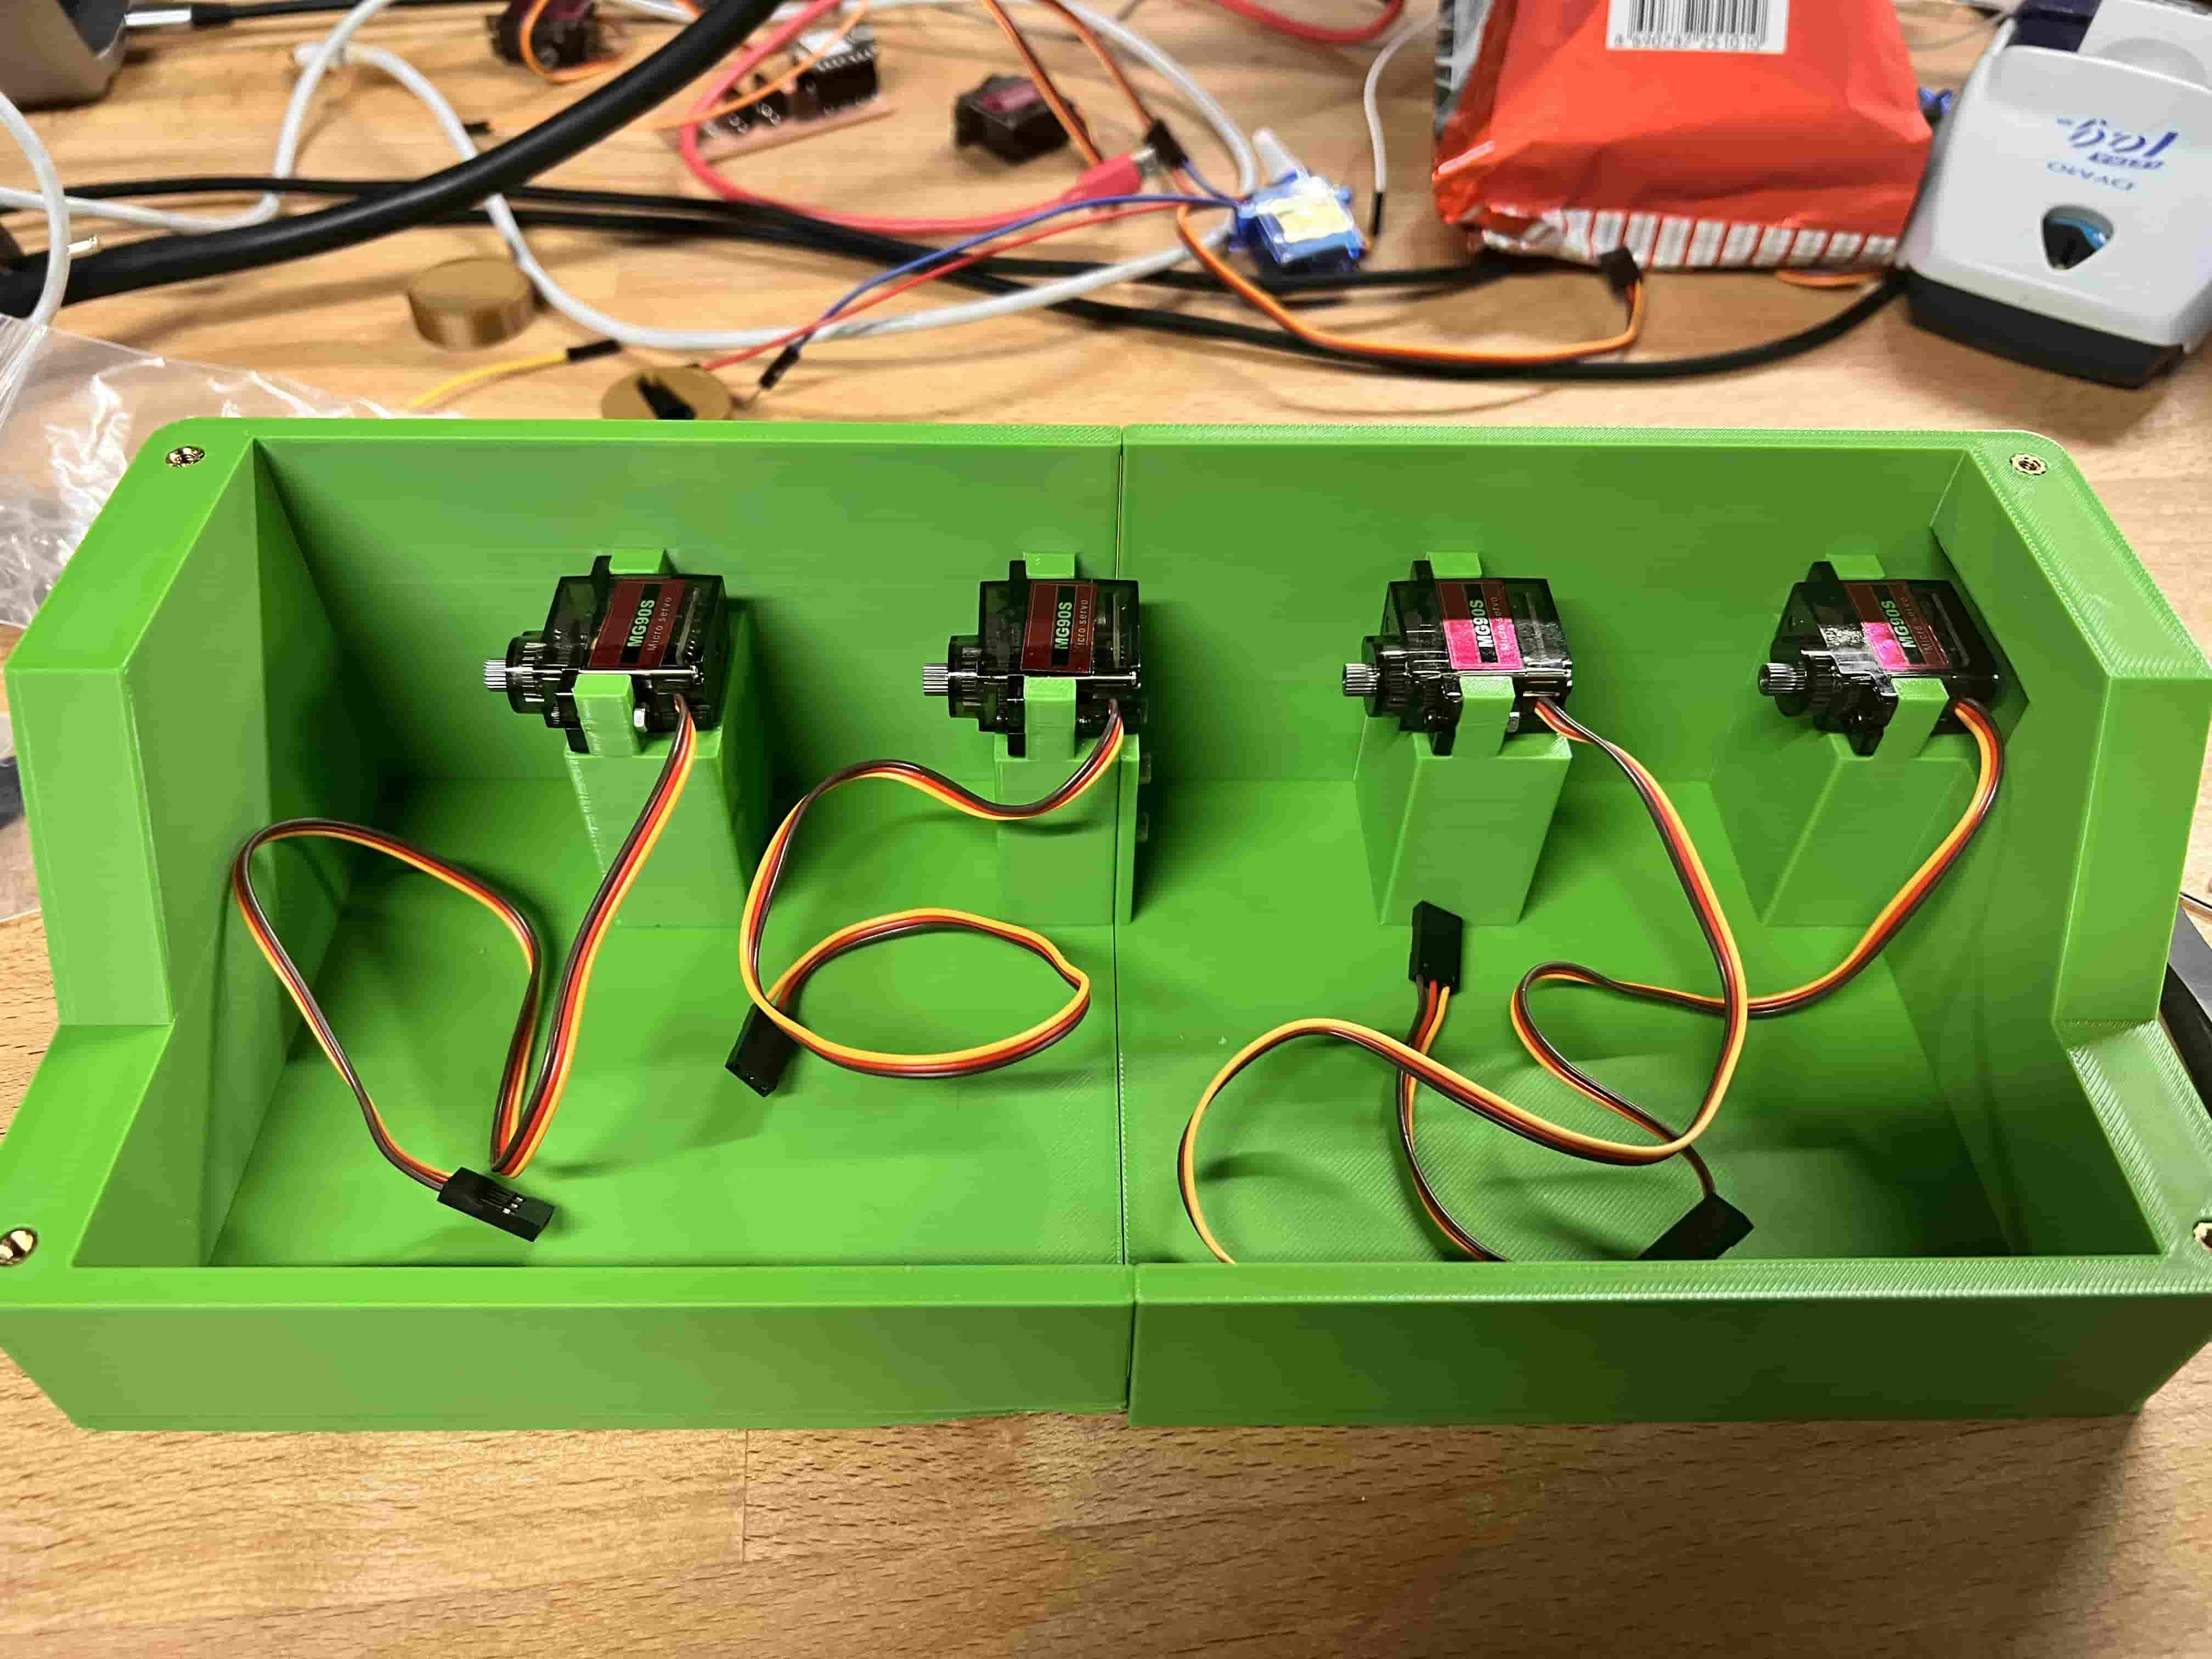
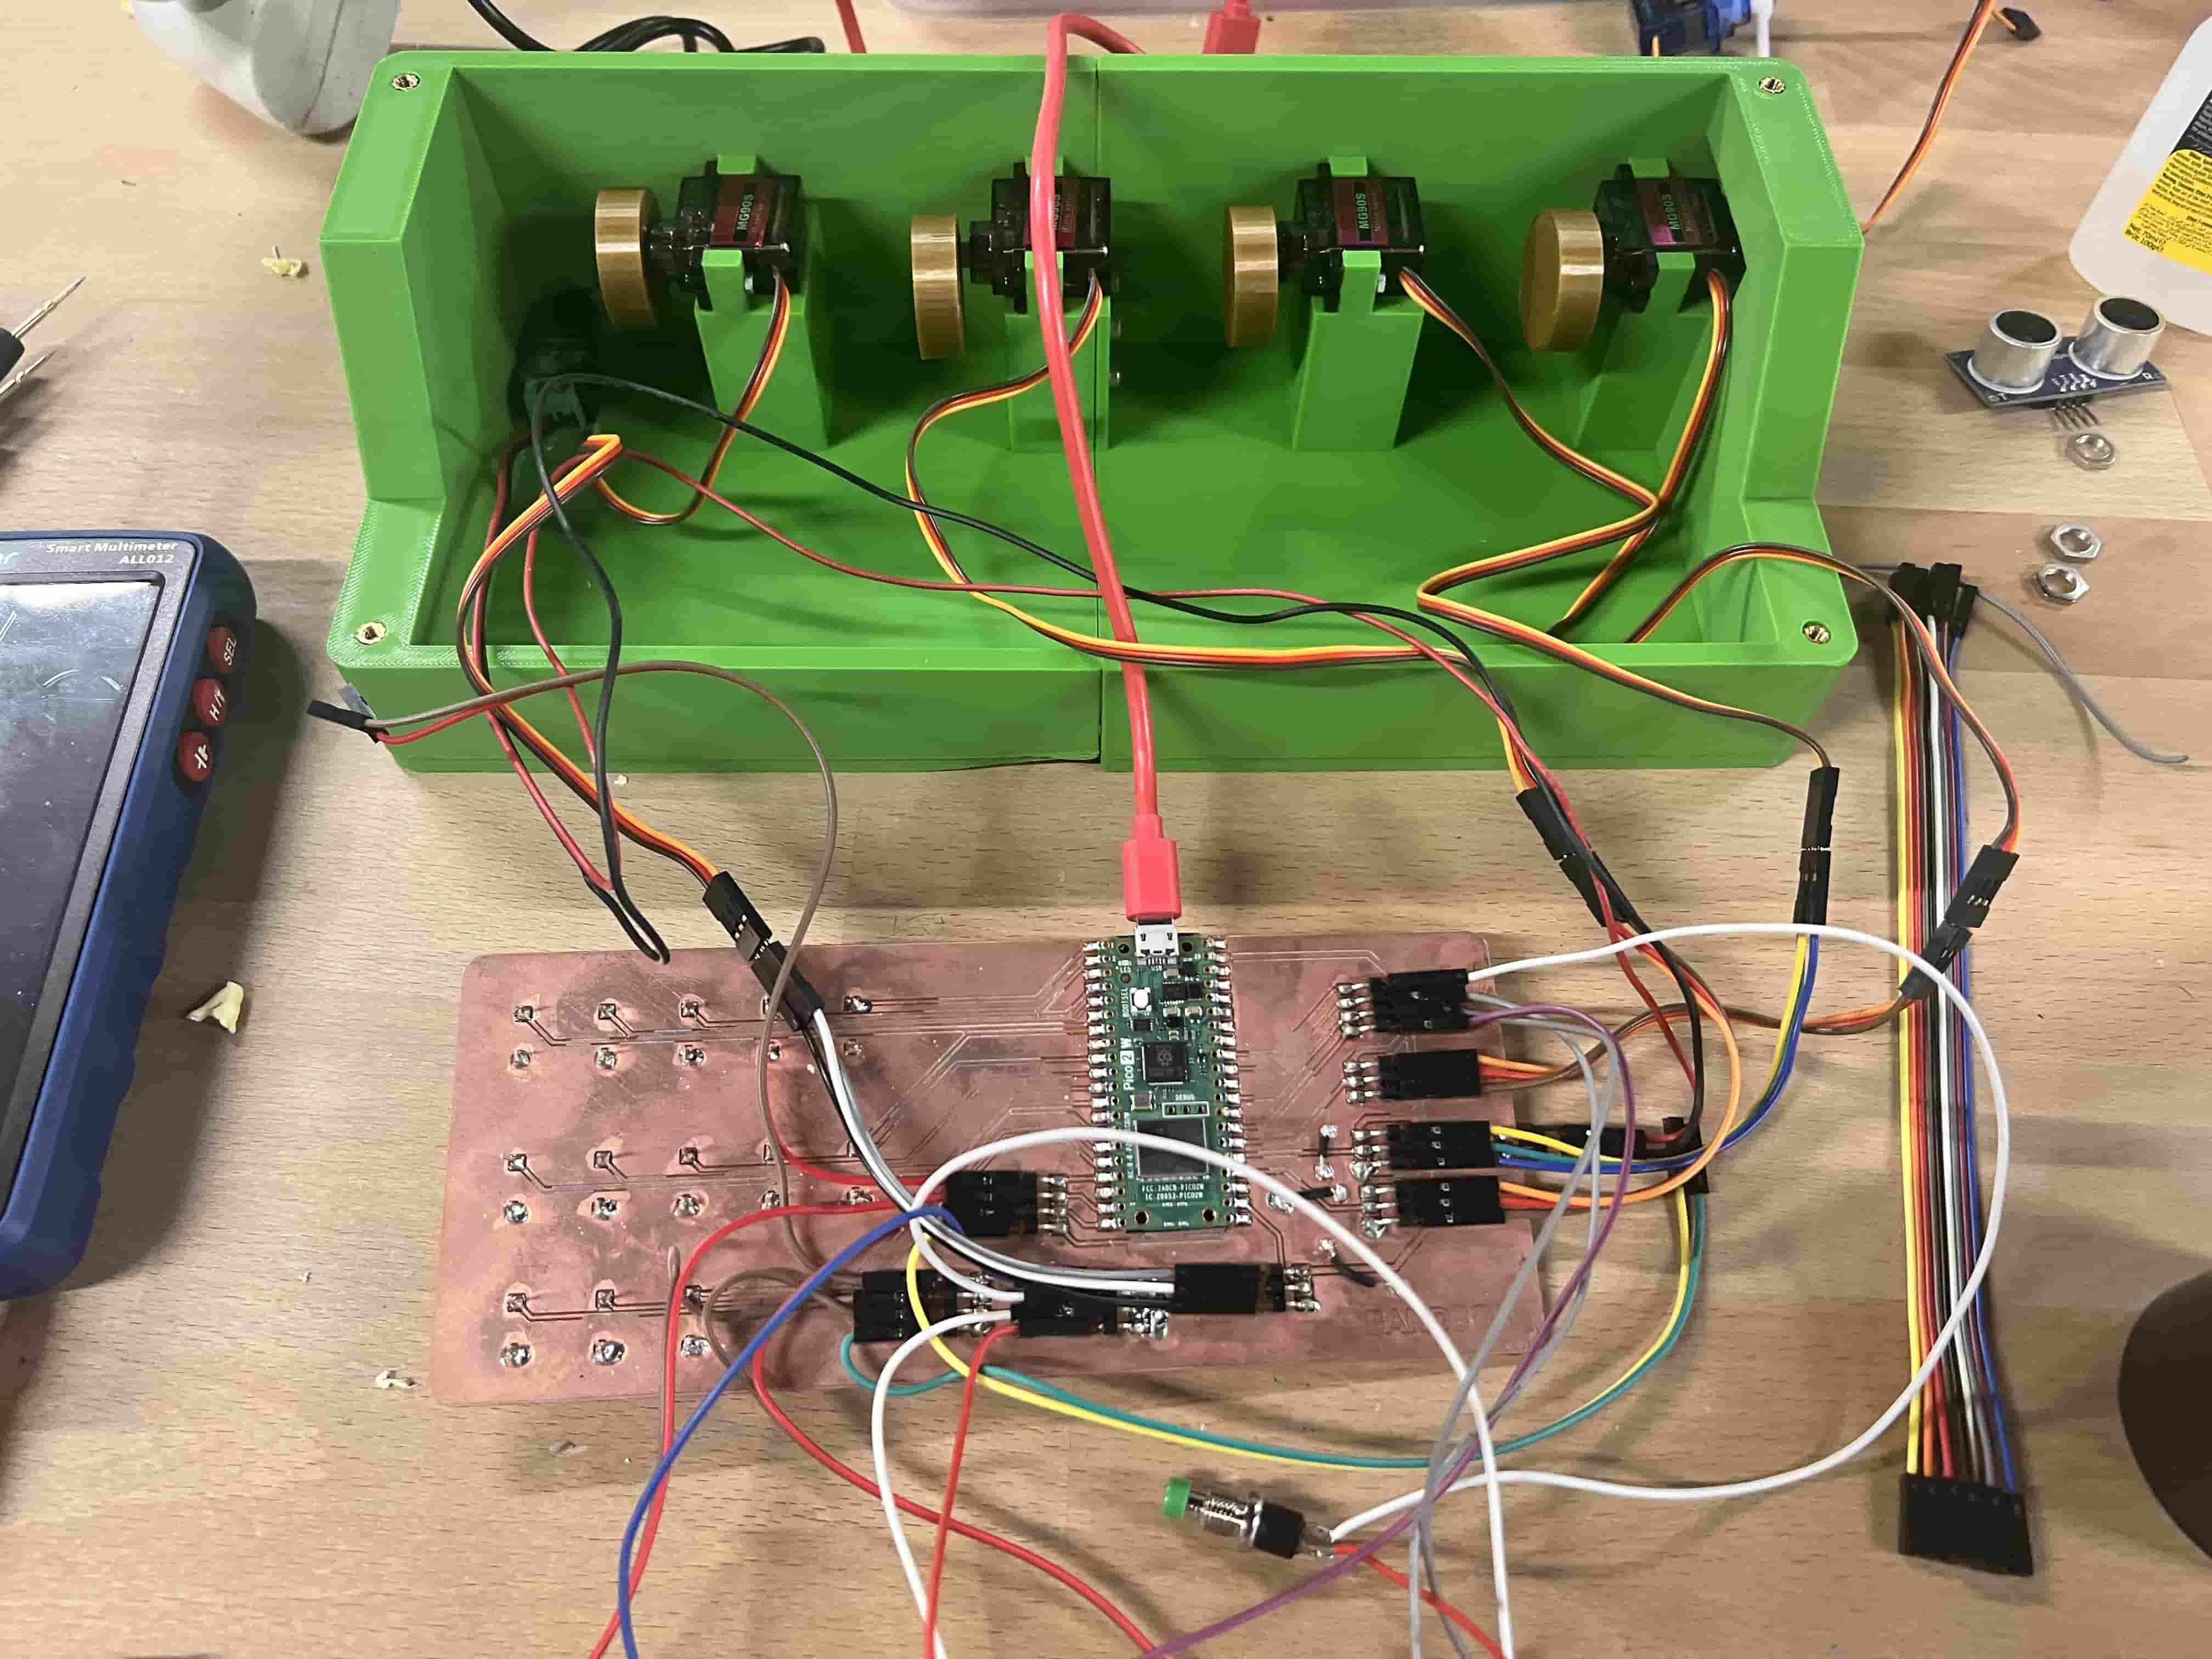
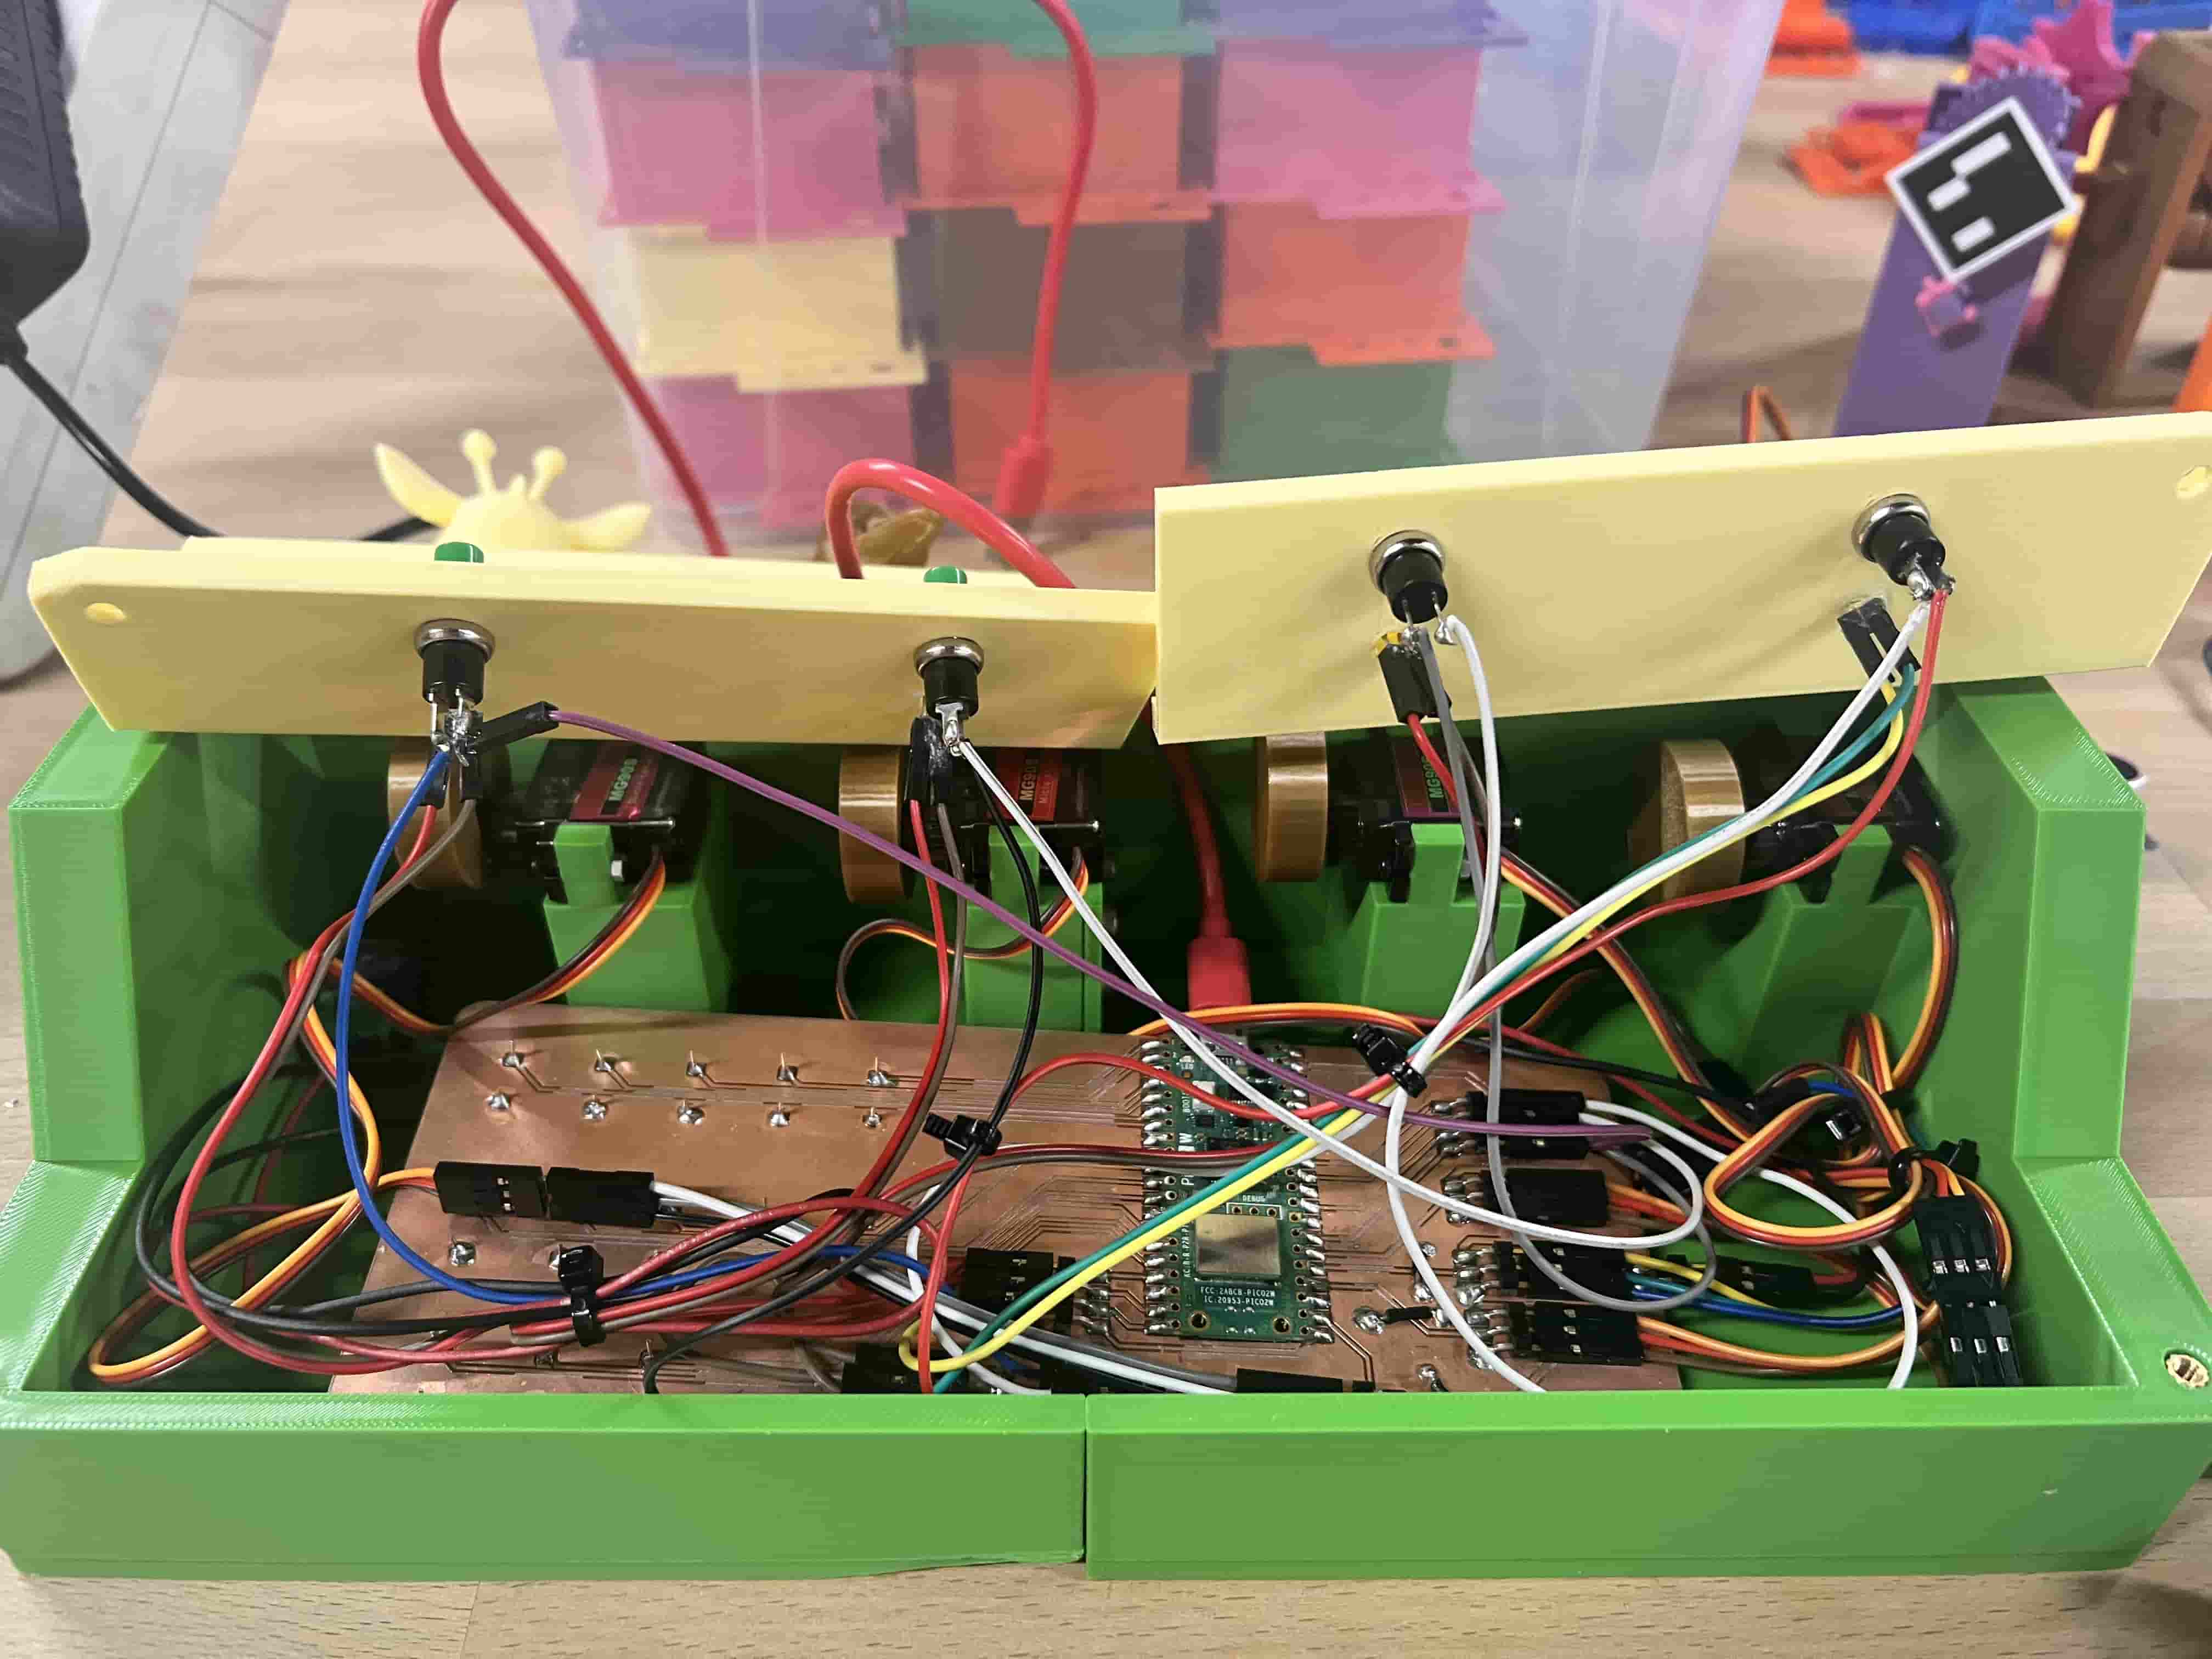
5. Servo Mounting
MG90S servos were screwed into the brass-reinforced pillars. Wiring was fed through the rear channel.
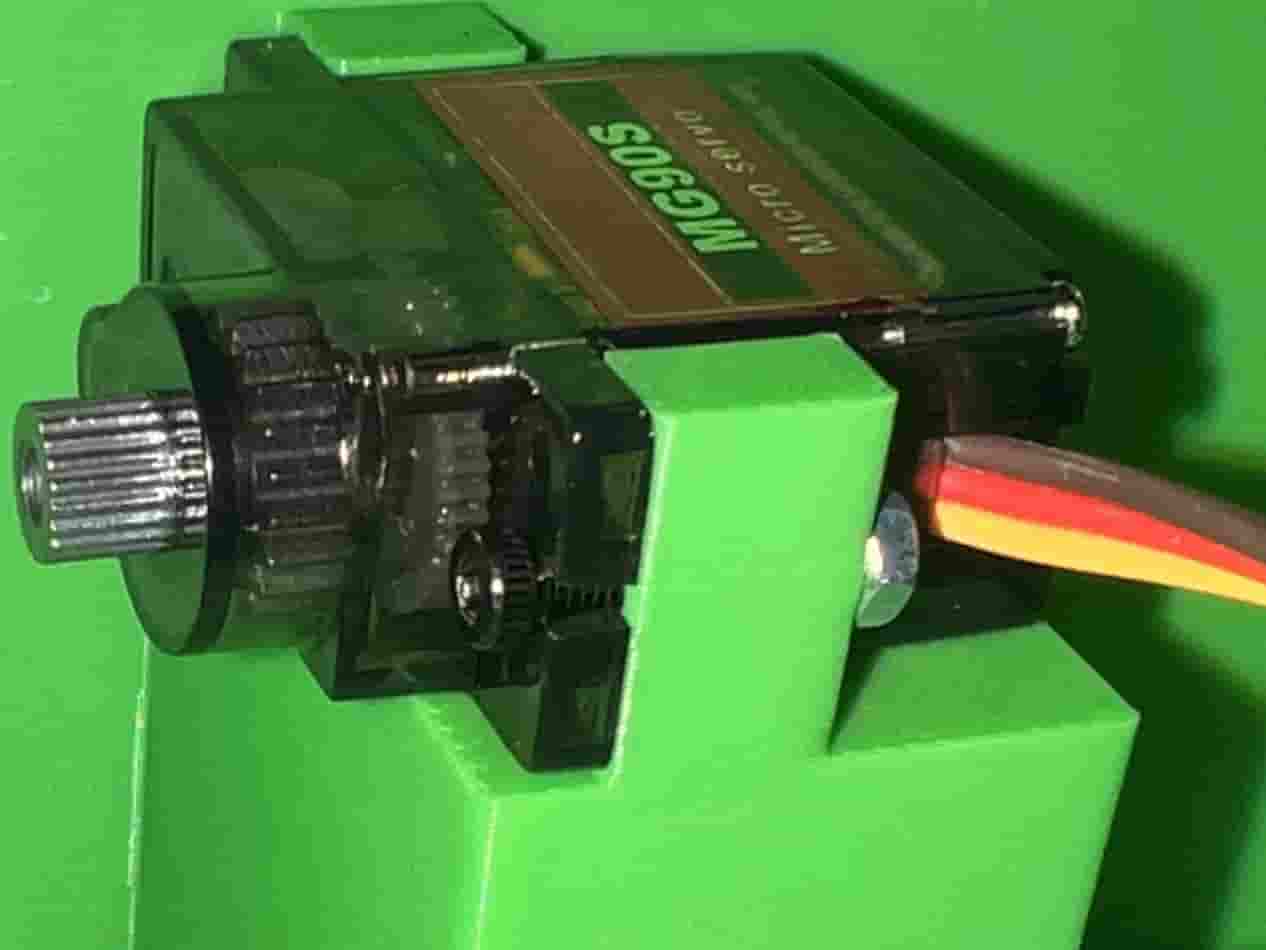
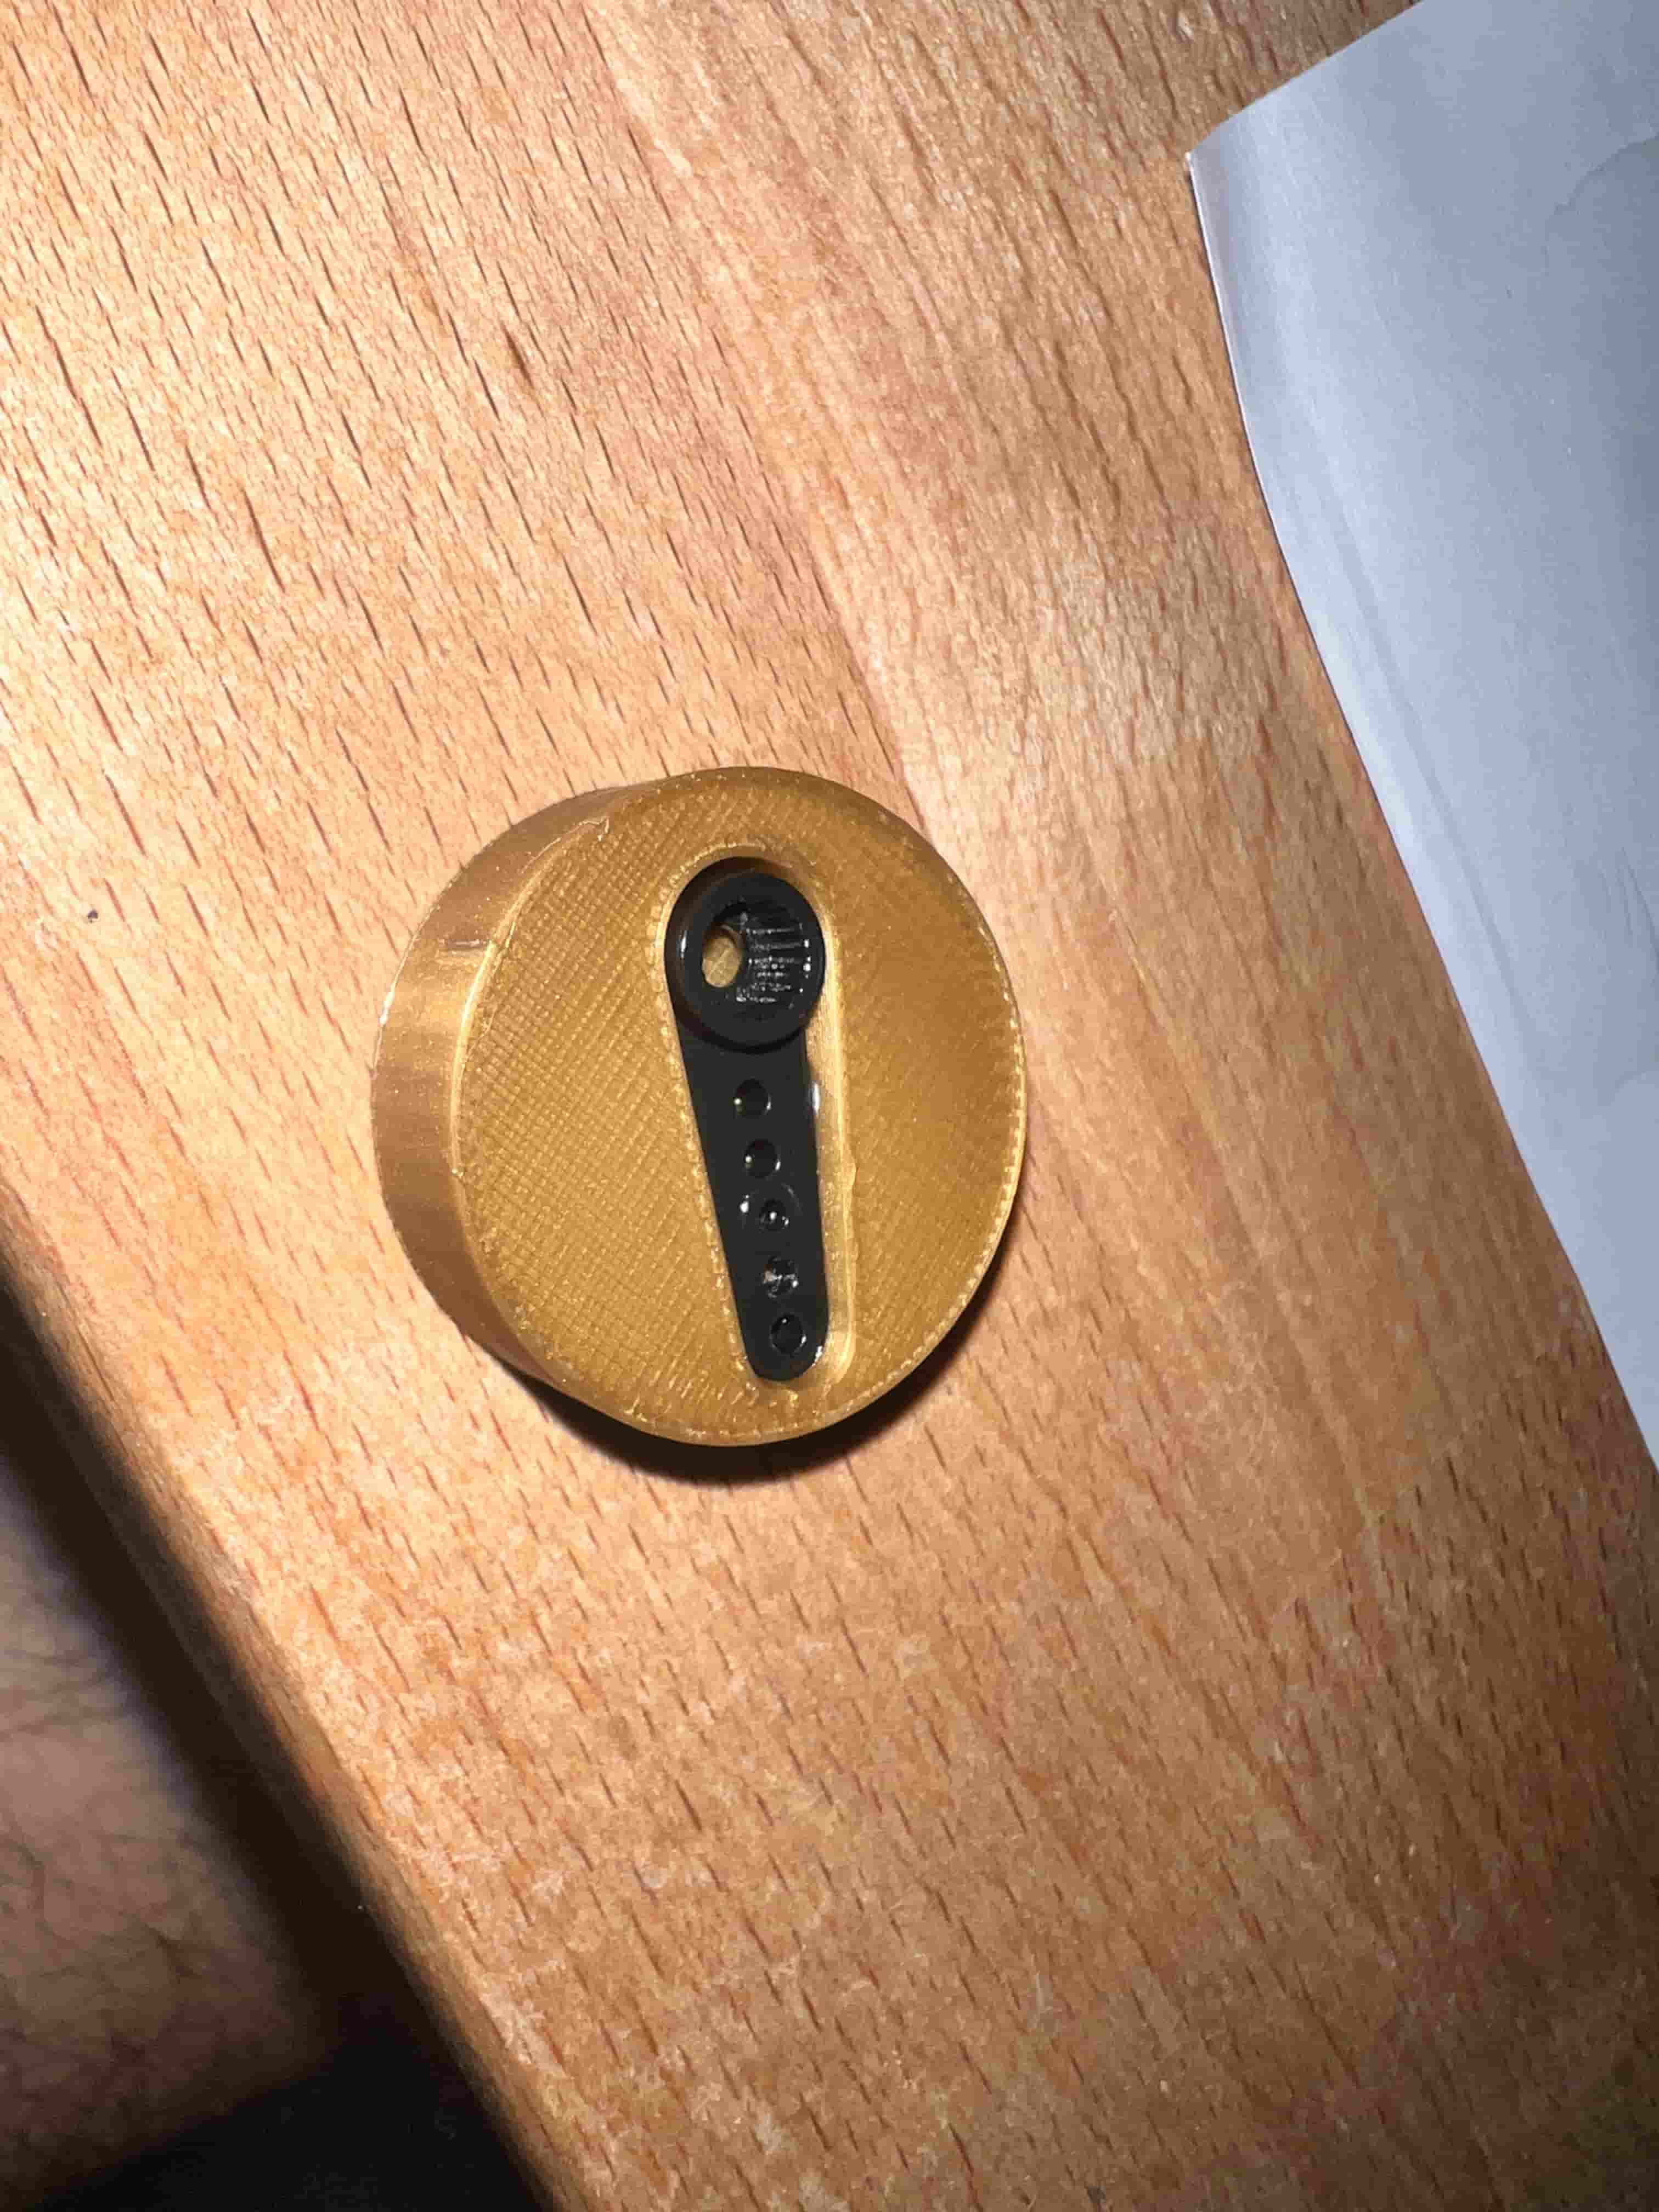
6. Knob Attachment
Custom PLA knobs were press-fitted onto each servo spline. A smooth fit ensures reliable rotation.
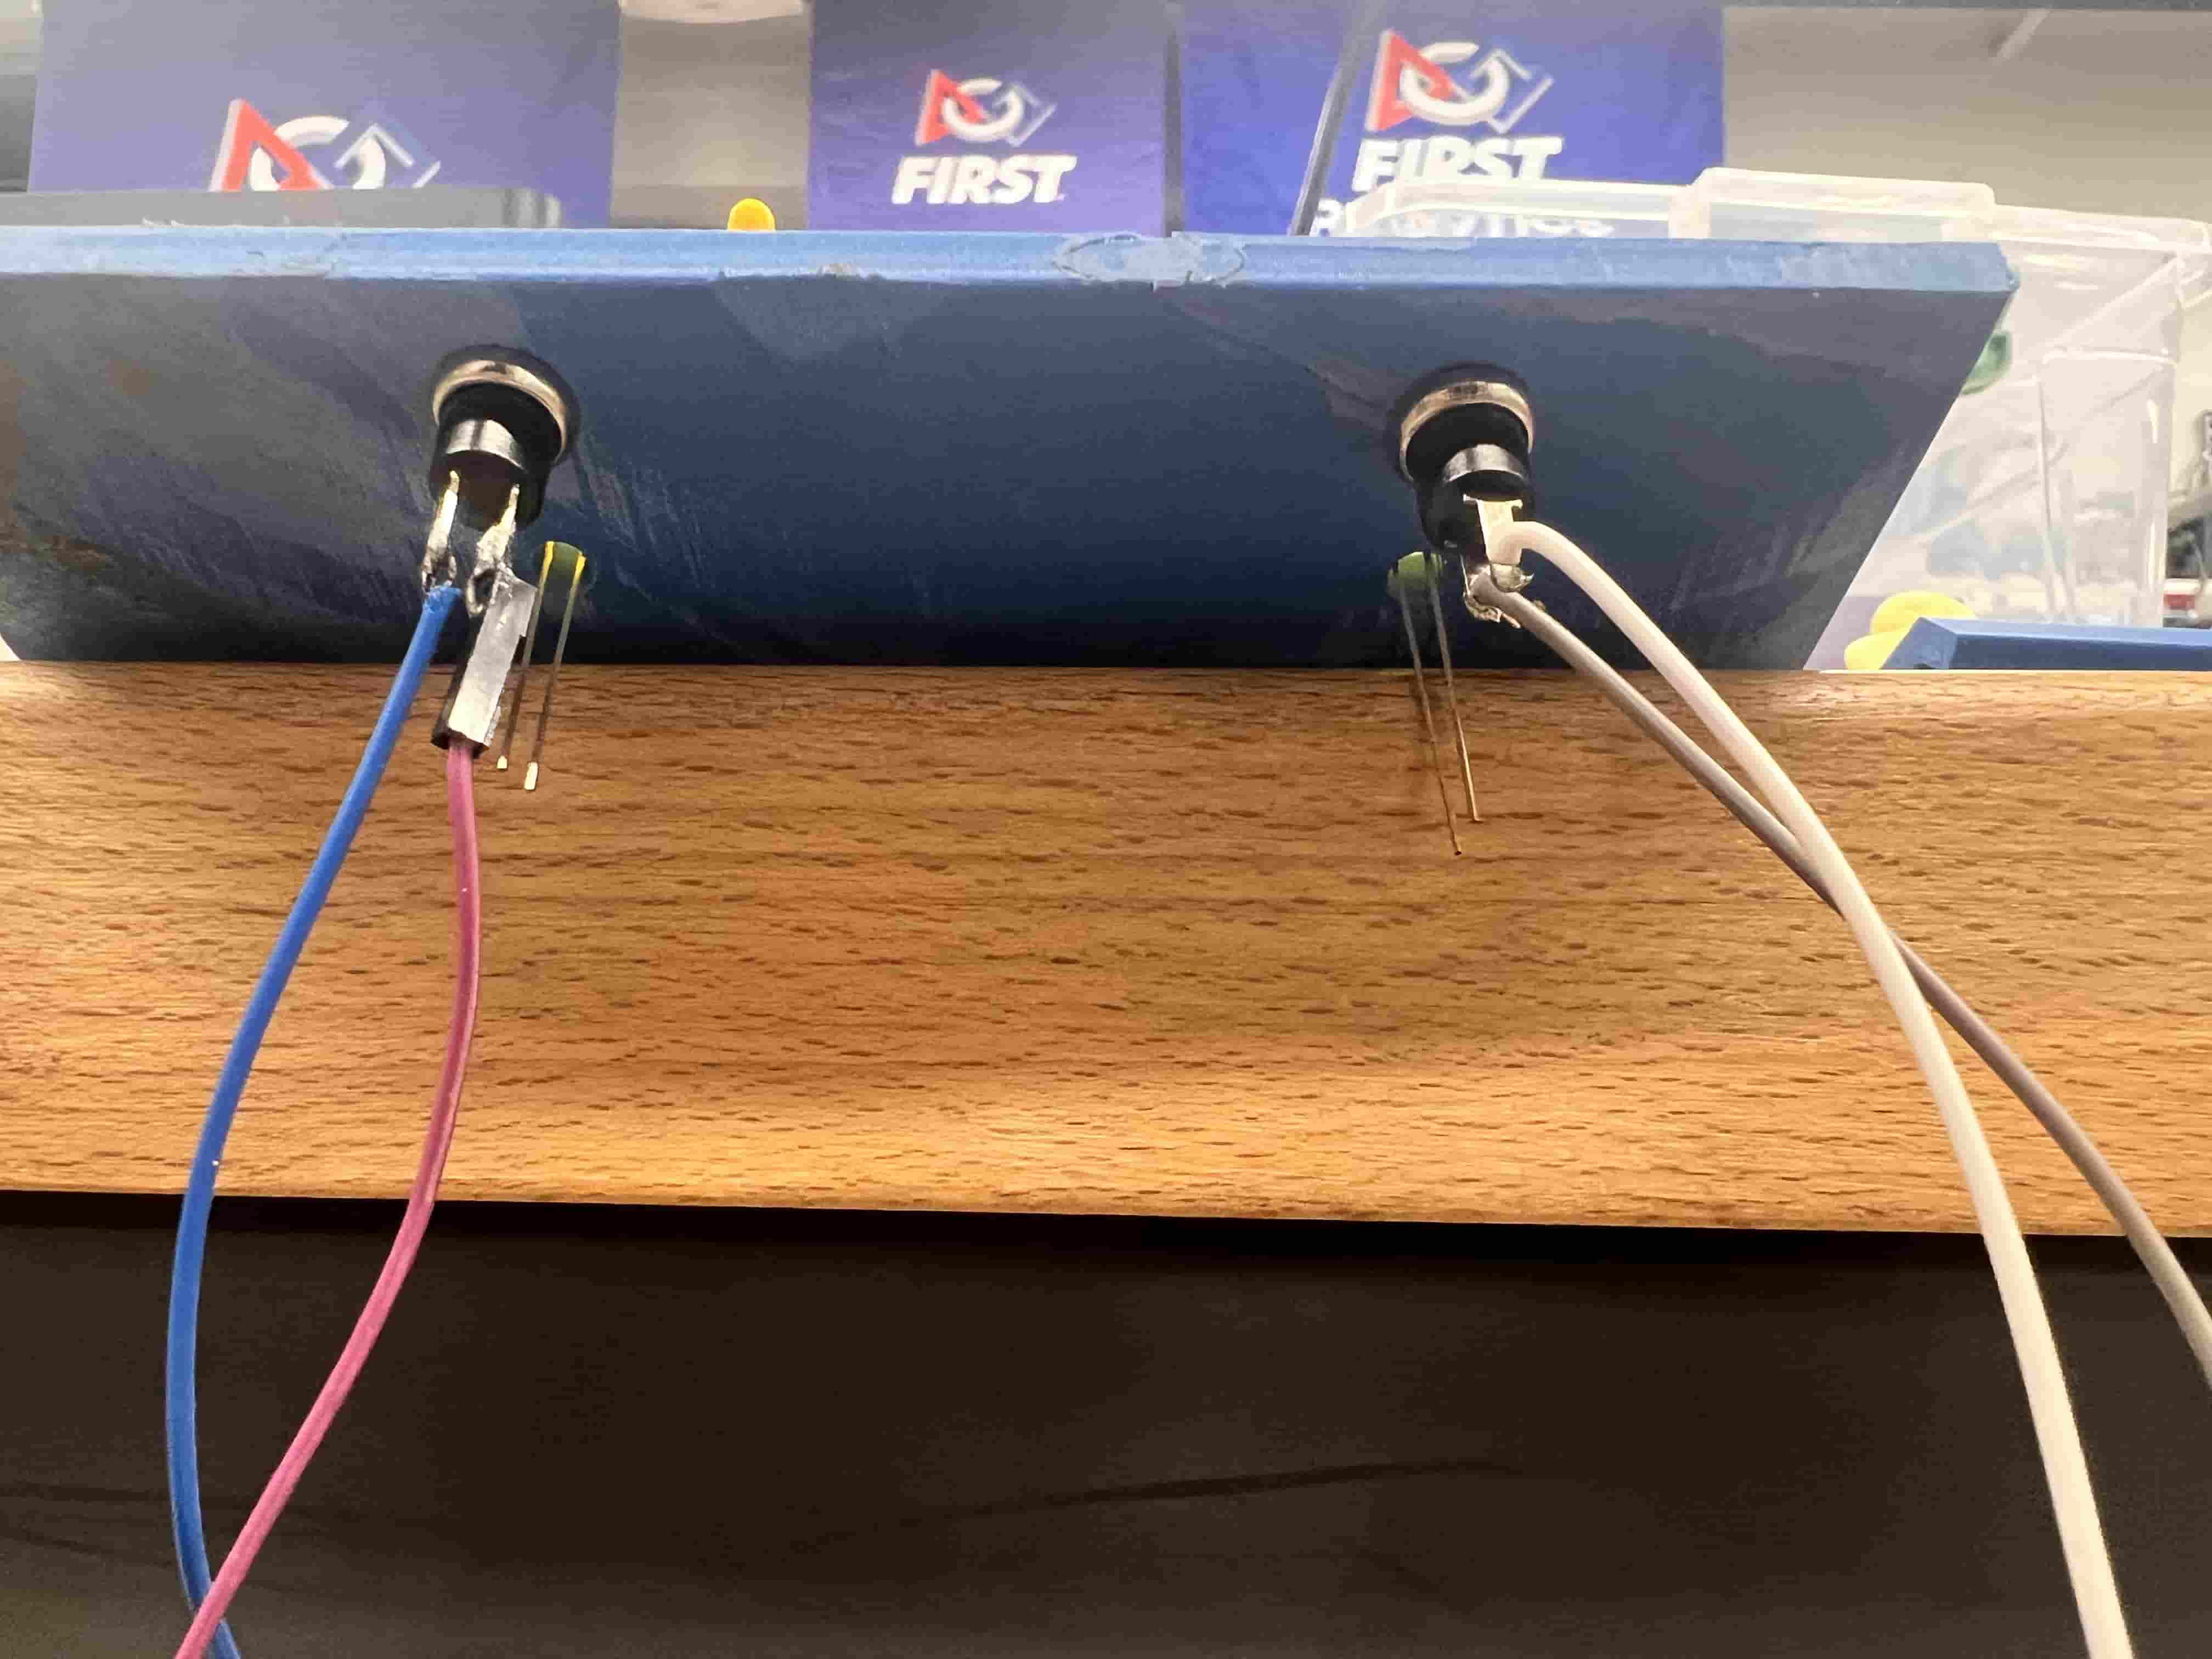
7. Button Panel Wiring
Two front panels house the momentary pushbuttons and amber LEDs.
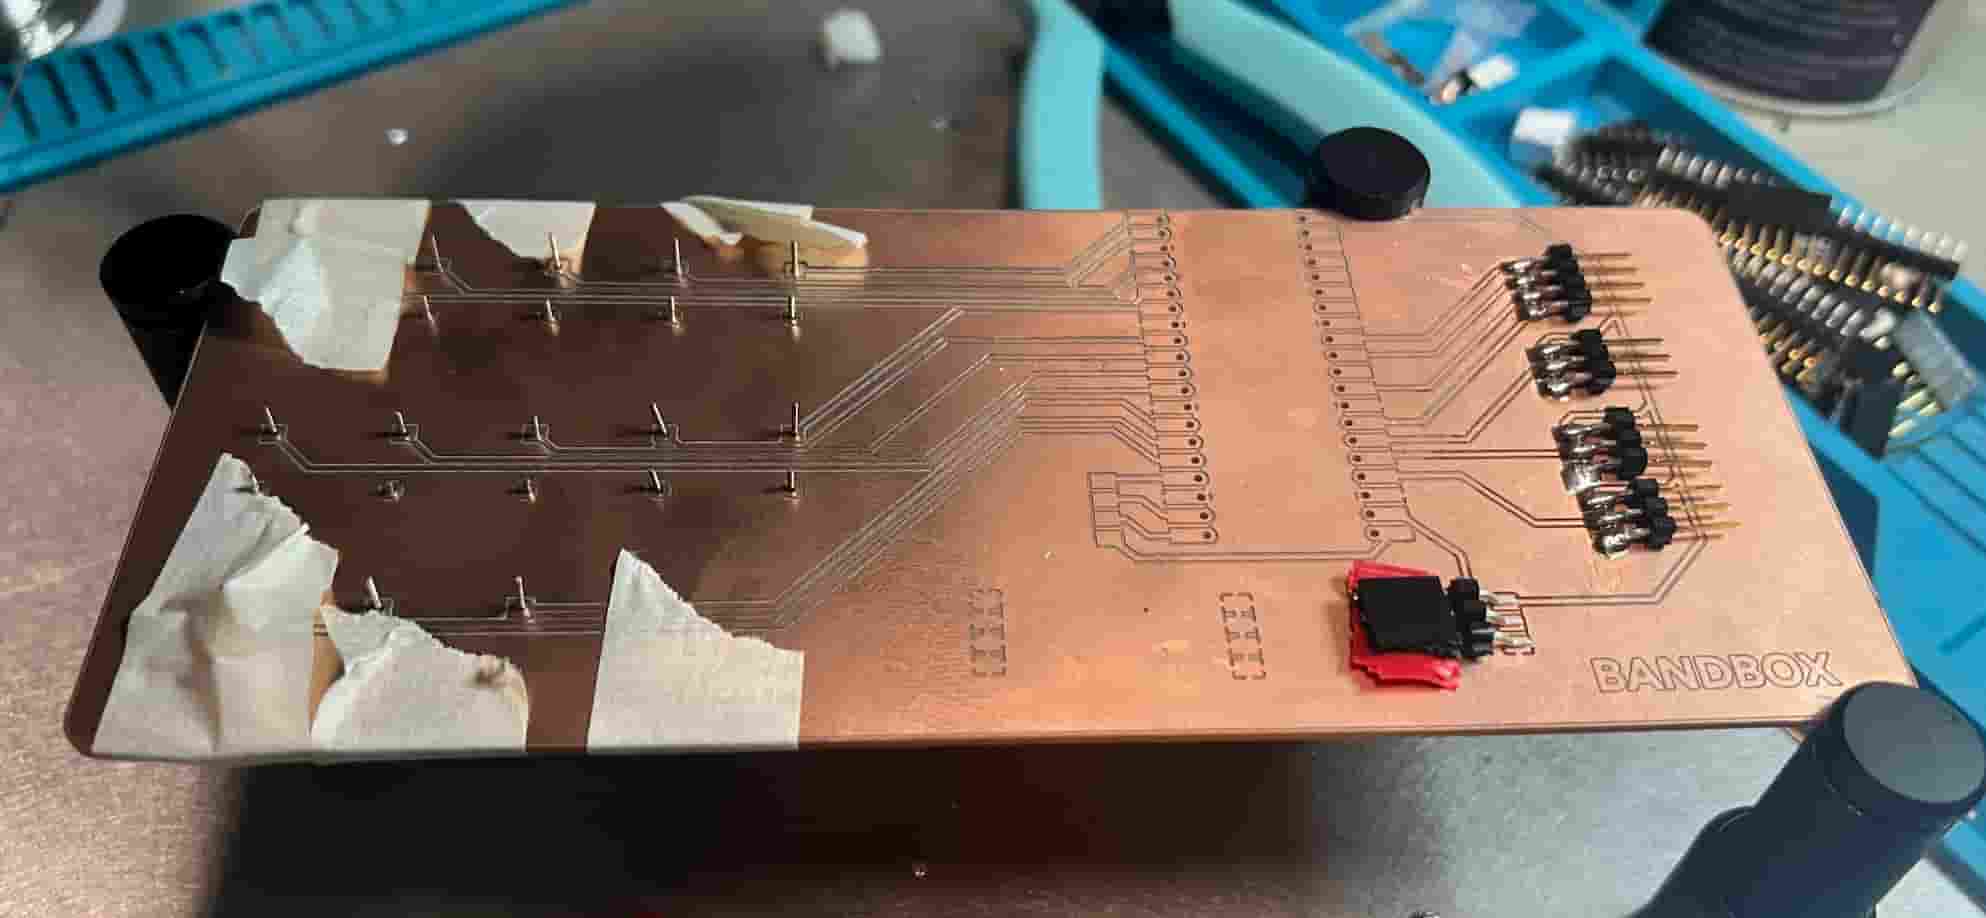
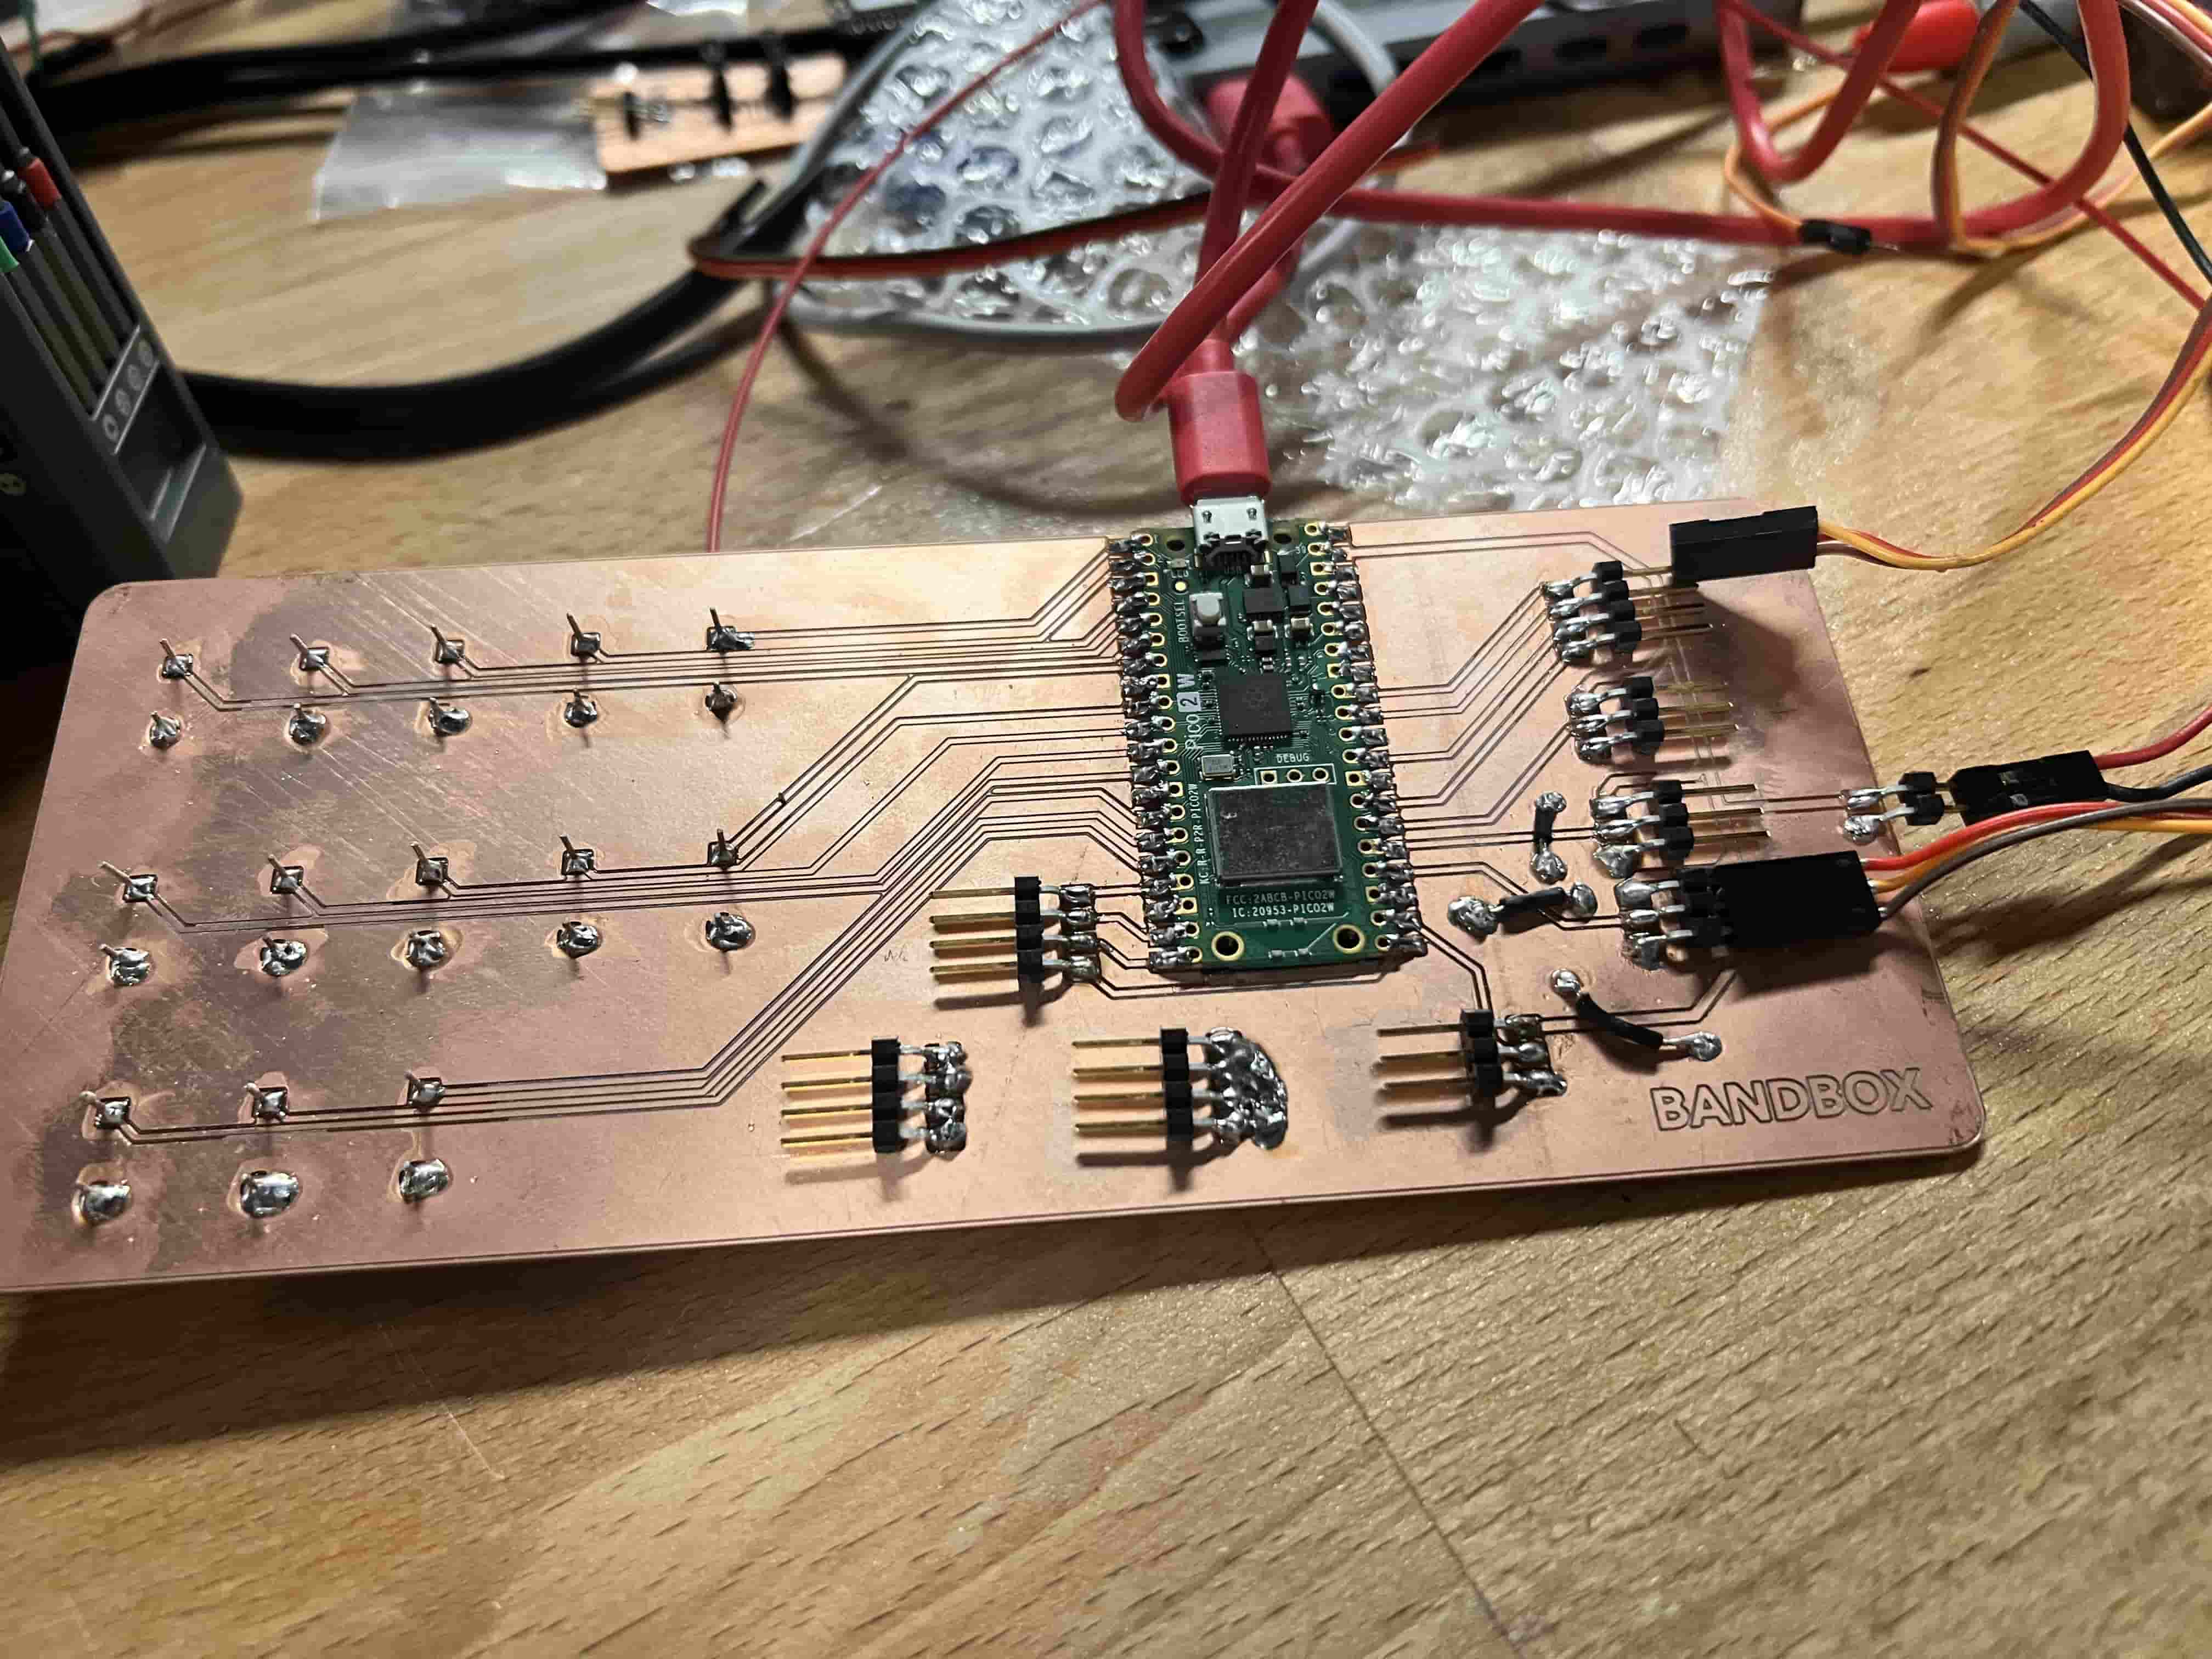
BandBox PCB Design Documentation
The BandBox is an interactive DJ-style console that layers simple buzzer-based sounds with servo-driven animal-head animations and LED feedback. This document analyzes both the schematic and PCB layouts to highlight design choices, signal integrity, power distribution, and manufacturability.
1. Schematic Overview
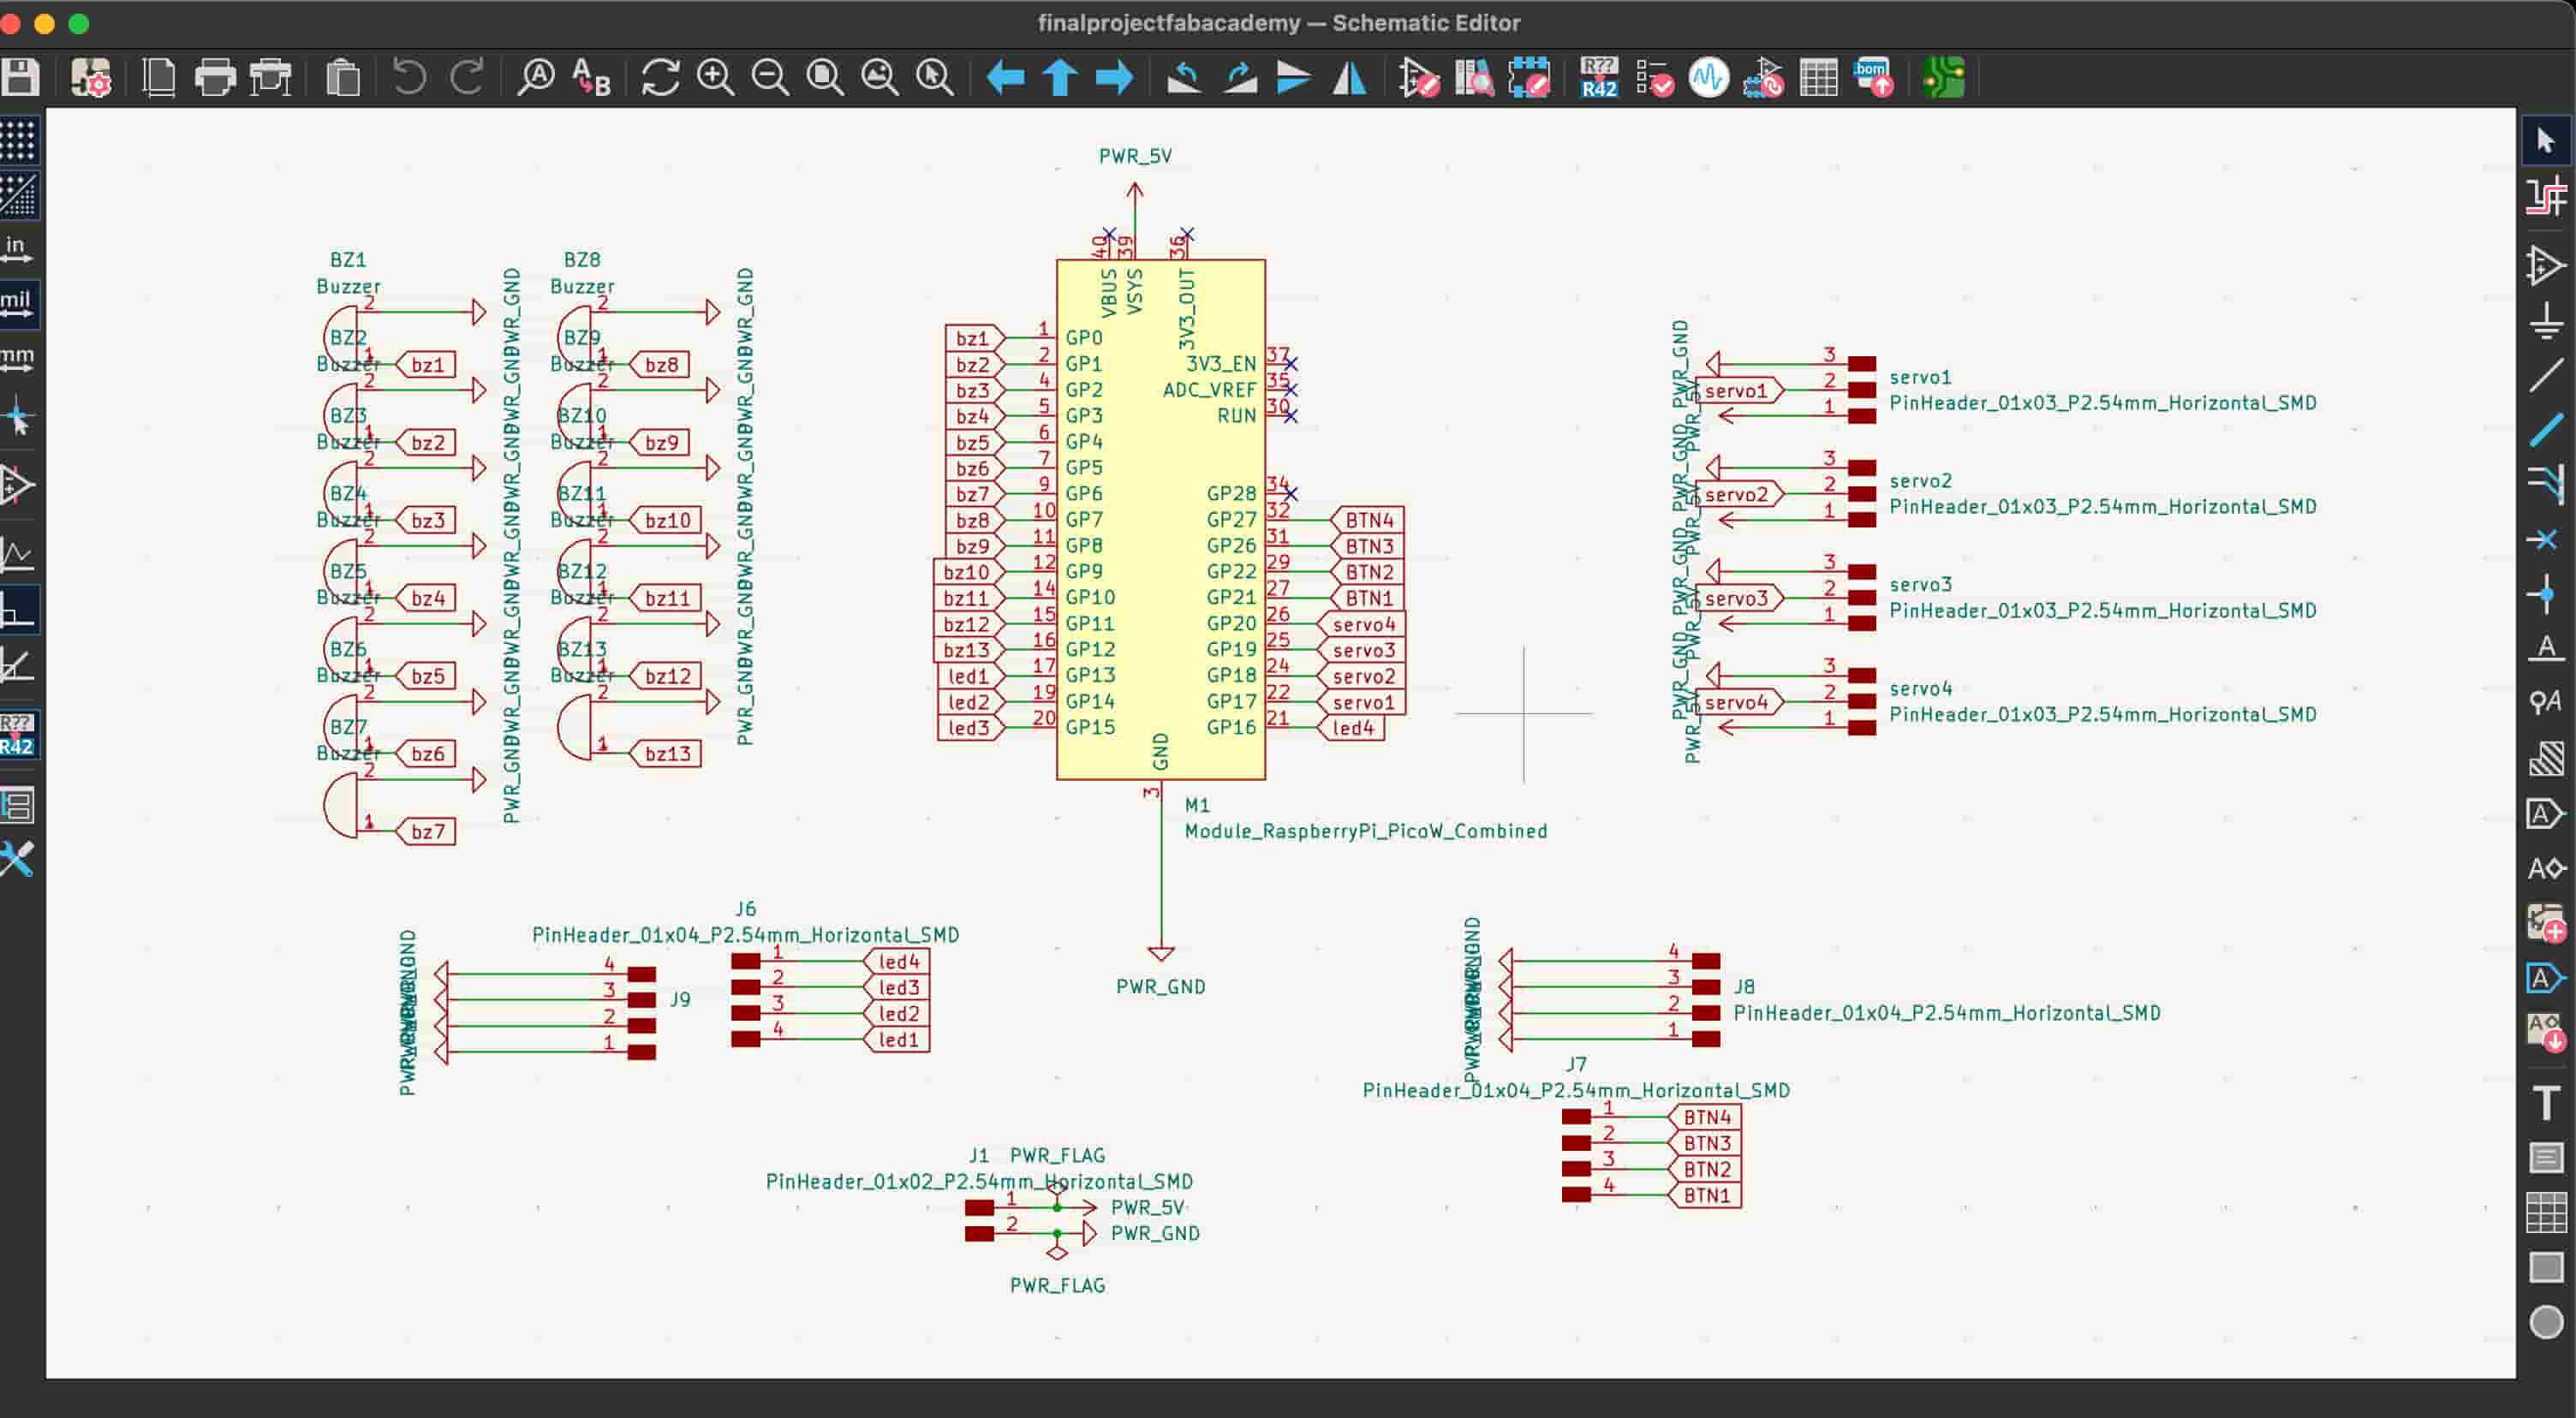
The schematic centers around a Raspberry Pi Pico W module (M1), distributing GPIO pins to:
- Passive Buzzers (BZ1–BZ13) on GP0–GP12
- LED Indicators (LED1–LED4) on GP13–GP15
- Push‑Buttons (BTN1–BTN4) on GP16–GP19
- Servo Headers (Servo1–Servo4) on GP20–GP23
- Power Flag for 5 V supply and ground
Key design points:
- Grouped connectors: Buzzers and servos share PWR_5V and PWR_GND nets for clean power routing.
- Pin‑header footprints: Standard 2.54 mm horizontal SMD headers simplify wiring to external modules.
- Clear labeling: Each net and component is clearly named for quick assembly and troubleshooting.
2. PCB Layout Overview
The two-layer PCB uses a solid copper pour on the front (F.Cu) for ground, with signal traces routed on both front and back layers. Major sections include:
- Buzzer Array (Left): Three rows of buzzers are aligned horizontally; their signal traces fan into the Pico footprint.
- Pico Module Footprint (Center): Centrally located to minimize trace lengths and balance mechanical stress.
- Servo & Button Connectors (Right): Organized vertically to ease cable management.
- Silkscreen & Branding: The
BANDBOXlogo is placed in the bottom-right corner for identification.
3. Component Placement
Components are logically grouped by function:
- Buzzers: Clustered together to allow uniform acoustic performance and straightforward routing.
- Headers: Placed at board edges for easy access when assembling cables or wires.
- Pico Module: Centered to distribute digital signals evenly in all directions.
Recommendation: Ensure a small keepout around each buzzer to prevent acoustic damping by nearby parts.
4. Trace Routing & Signal Integrity
Signal traces are 0.5 mm wide, suitable for low-current digital signals. The following strategies maintain signal integrity:
- Direct routing: Buzzers and servos are routed with minimal vias to reduce inductance.
- Ground plane: A continuous copper pour on F.Cu provides a low‑impedance return path and EMI shielding.
- Power traces: 1 mm width on PWR_5V and PWR_GND to handle servo inrush currents.
5. Power Distribution & Grounding
All 5 V power nets are tied together via the PWR_FLAG header. Key points:
- Decoupling: Add local decoupling capacitors close to the Pico module and near servo headers to smooth voltage dips.
- Ground fill: Maximizes trace clearance and reduces loop area for digital signals.
- Star topology: Consider a star‑point distribution for servos to limit noise coupling.
6. Mechanical Considerations
Recommended enhancements:
- Mounting Holes: Four M3 holes in board corners for secure enclosure integration.
- Edge Clearance: Maintain 2 mm clearance from board edge to any copper or silkscreen.
- Board Shape: Rounded corners (as shown) reduce stress concentrations in 3D‑printed enclosures.
7. Design for Manufacturability
- Panelization: Leave tabs or mouse‑ears if you plan to panelize multiple boards.
- Silkscreen: Keep silkscreen font at least 1 mm high for readability after assembly.
- Solder Paste: Define precise paste masks for the Pico footprint and headers to improve reflow reliability.
8. Conclusion
This PCB design efficiently integrates the Pico W module with buzzers, LEDs, buttons, and servos in a compact layout. By following the recommendations above—adding decoupling, mounting features, and optimizing power routing—you can ensure reliable performance and ease of assembly for the BandBox interactive console.
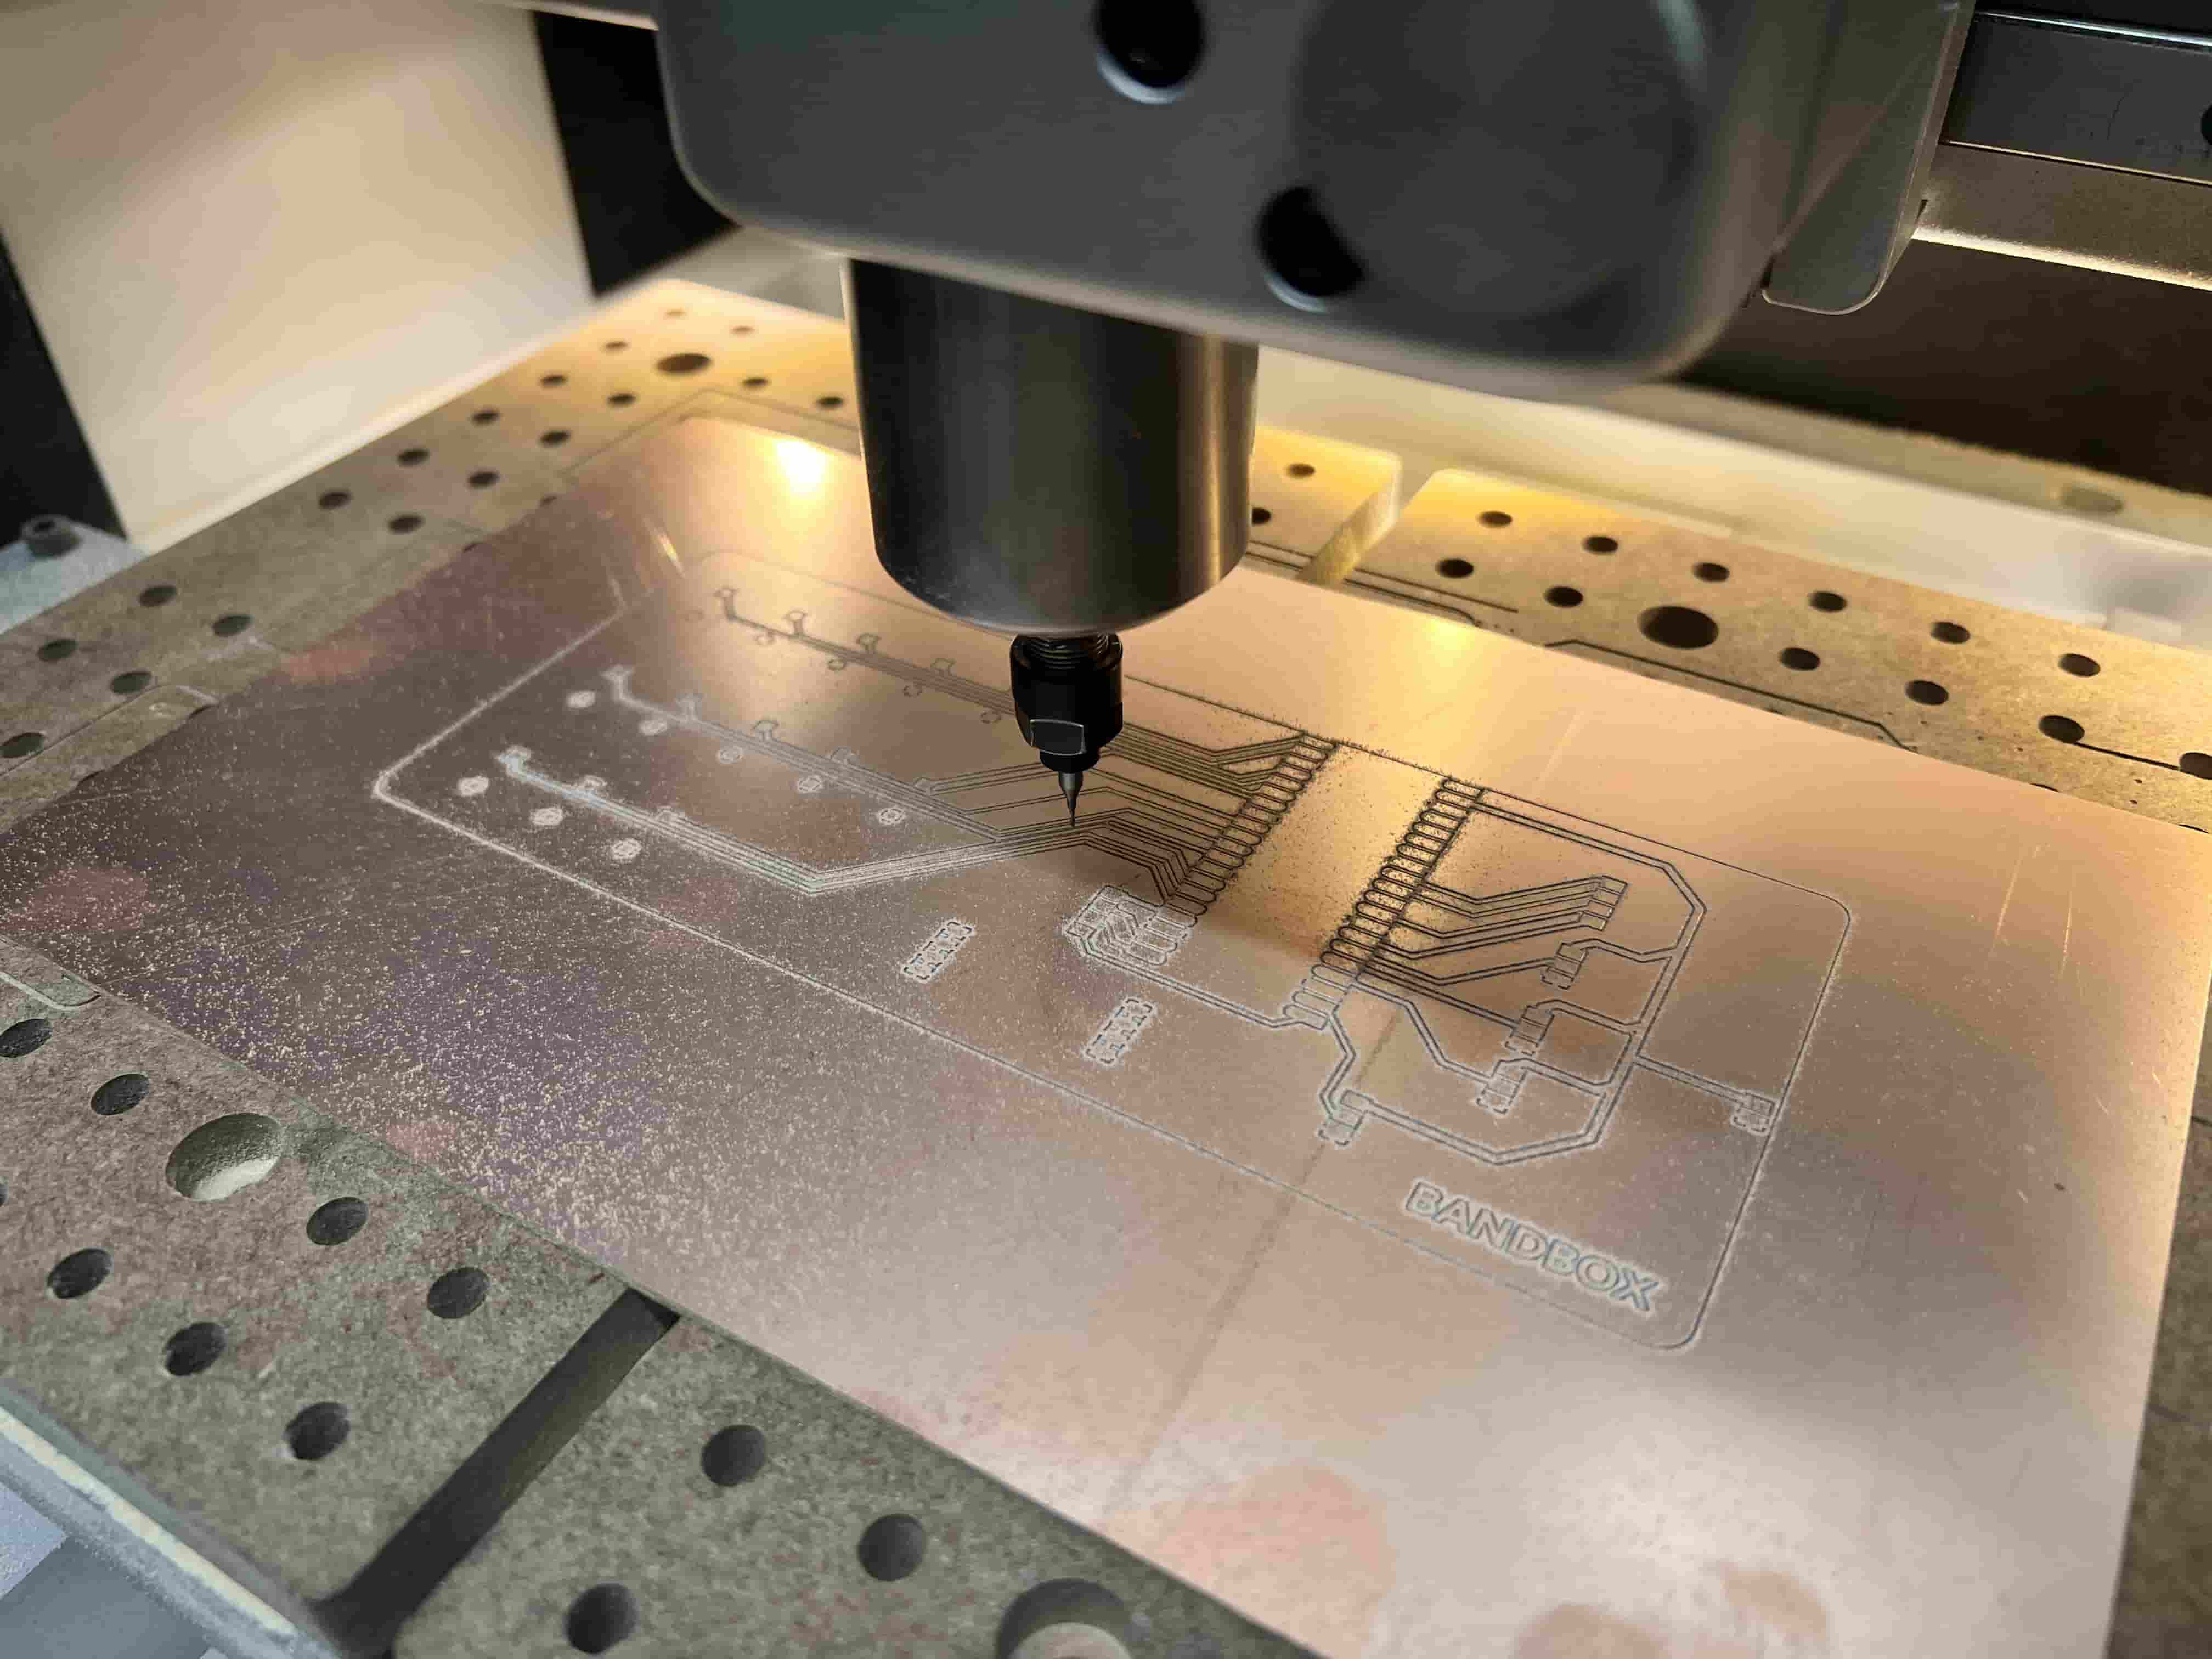
PCB Fabrication & Soldering
The custom copper-clad board was milled, drilled, and cleaned before soldering the Pico W 2, headers, and wiring pin-breakouts.
Final Assembly & Testing
Both halves were reassembled, sealed with M2 screws, and the BandBox was powered on to verify servo motion, LED feedback, and button response.
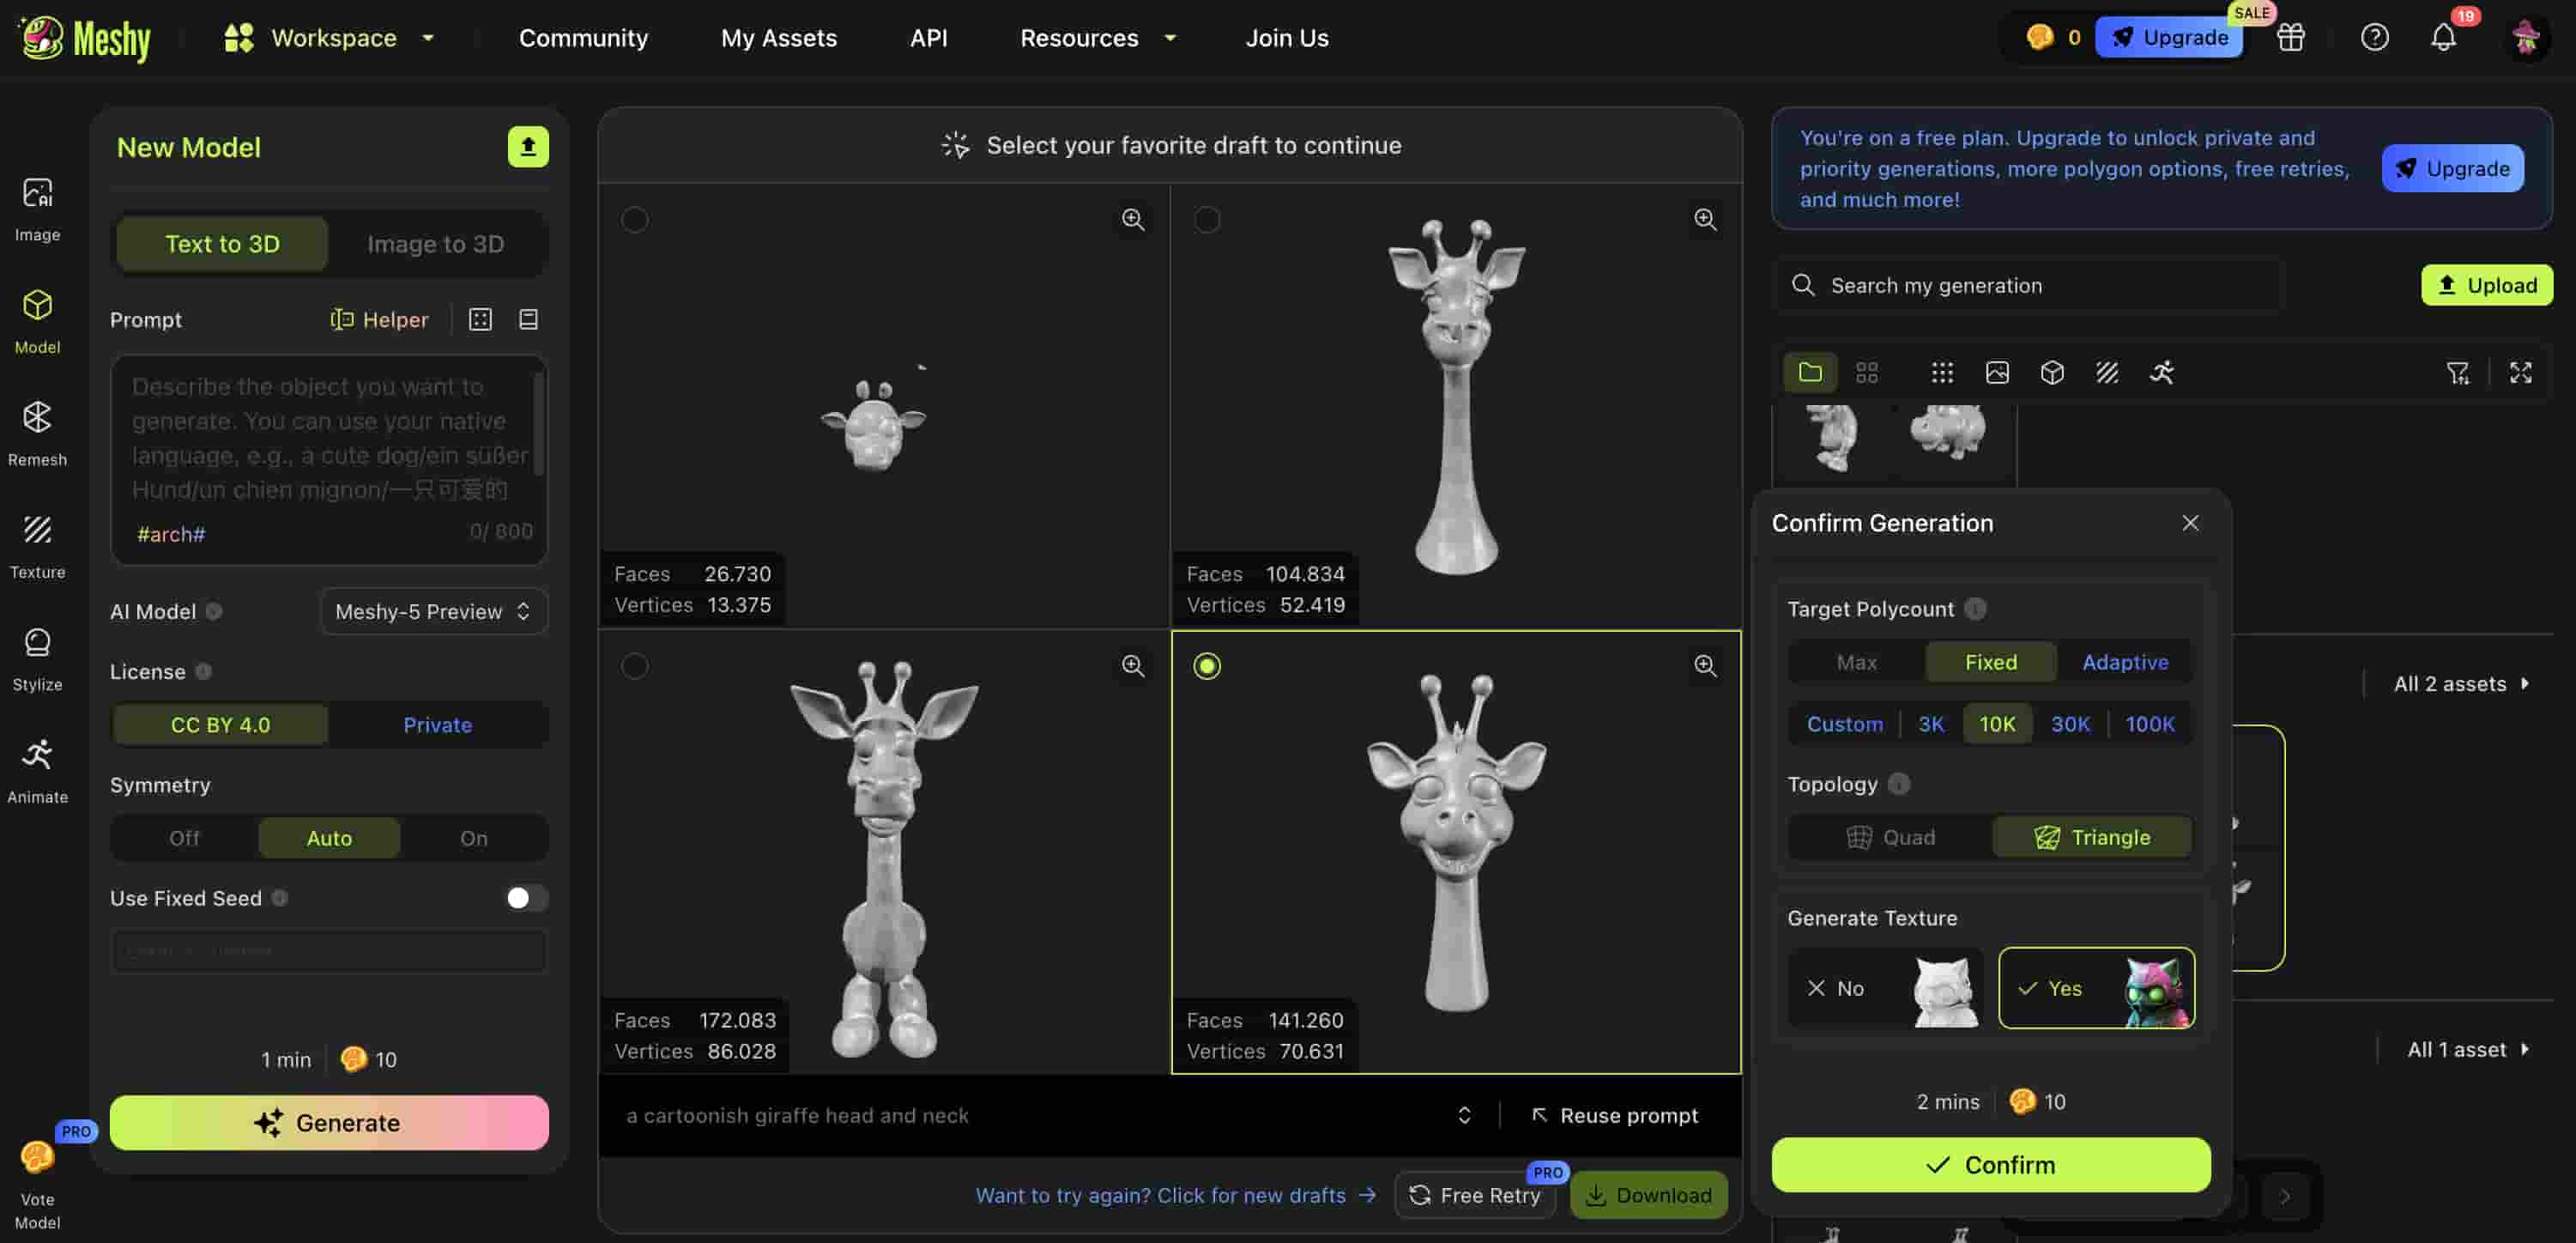
Generating Animal Heads with Meshy.ai
In this section, I’ll walk through how I used Meshy.ai’s Text to 3D feature to create the cartoonish animal heads that bring BandBox to life.
Requirements
- A Meshy.ai account (free or Pro)
- Access to the WebGL-enabled browser
- A clear text prompt describing your model
Step-by-Step Tutorial
-
Log in to Meshy.ai
Go to meshy.ai and sign in (or sign up) with your email. -
Select “Text to 3D”
In the left-hand menu, choose theText to 3Dtab underNew Model. -
Enter your prompt
In the Prompt box, type a clear description, for example:a cartoonish giraffe head and neck -
Adjust symmetry
SetSymmetry → Auto(or On/Off based on your design). -
Choose polycount
Under “Target Polycount” pick:Fixed → 10Kfor a mid-resolution mesh- Or
Adaptiveto let Meshy decide
-
Pick topology
ChooseTrianglefor maximum compatibility, orQuadif you’ll do heavy sculpting later. -
Enable texture generation
Toggle “Generate Texture → Yes” if you want a ready-to-use PBR texture. -
Generate your draft
Click theGeneratebutton. Wait ~1–2 minutes for Meshy to render several drafts. -
Preview and select
Hover over the thumbnails, rotate to inspect each model, then select the one you like best. -
Confirm & download
In the Confirm panel, clickConfirm, then download your asset in GLB, OBJ or another supported format.
Importing & Using Your Model
-
Blender:
File → Import → glTF 2.0 (.glb/.gltf)or OBJ. Check normals and materials. -
Three.js / model-viewer: Host the .glb file and embed with:
<model-viewer src="models/giraffe_head.glb" alt="Cartoon giraffe head" camera-controls auto-rotate></model-viewer> - Unity / Unreal: Drag the downloaded asset into your project’s asset folder and apply textures/materials as needed.
Tips for Better Results
- Be specific in your prompt (“cartoon giraffe head with big eyes” vs. “giraffe”).
- Experiment with different polycounts for performance vs. detail trade-offs.
- Use Quad topology if you plan to sculpt or tweak the mesh heavily.
- Download the texture maps (albedo, normal, roughness) for realistic PBR shading.
Coding the Bandbox
This project lets you pick between two songs (“Alors on danse” or “Midnight City”) via a web interface, then animates LEDs, buzzers, and servos on your Pico W to perform one of two interactive routines.
Features
- Wi-Fi connection and lightweight HTTP server
- On-page buttons to choose song
- Two performance modes:
- BandBox — layered melodies + servo sweep + LED feedback
- Midnight City — dual-octave melodies, multi-servo choreography
Software Setup
- Install MicroPython firmware on your Pico W.
- Copy the full script to `main.py` on the Pico W using Thonny.
- Edit
WIFI_SSIDandWIFI_PASSWORDto match your network. - Reset the board; note the IP printed in REPL.
- Point your browser to
http://<your-pico-ip>and choose a song.
Code Structure
Global Variables
play_request— holds “alors” or “midnight” after web click.http_server— the listening socket object.HTML_PAGE— the web UI template with two buttons.
Key Functions
connect_wifi()
Activates station mode, connects to your SSID, and returns the assigned IP.
start_server()
Binds to 0.0.0.0:80, listens for one connection at a time, and returns the socket.
handle_client(cl)
Reads an HTTP request, extracts ?song=… if present, sets
play_request, then responds with the static HTML page.
run_bandbox()
Implements your BandBox routine: initializes four buzzers, three LEDs, four buttons, and one servo; defines two melodies; then loops handling button presses to toggle melodies, servo movements, and LED states.
run_midnight_city()
A second routine that uses two buzzers (one octave apart), four LEDs, four buttons, and up to four servos; defines two larger melodies and leverages buttons to mix them with choreographed servo sweeps.
main()
Orchestrates everything: connects to Wi-Fi, starts the server, then in an endless loop waits for a web command to launch one of the two routines.
Extending & Troubleshooting
- To add more songs, extend
HTML_PAGEand handle new values inmain(). - If your buttons “bounce,” consider simple software debouncing in
handle_client. - Adjust PWM duty ranges in
angle_to_duty()if your servos jitter.
Download Code File
Here is the full code
Bill of Materials (BOM)
Electronics BOM
| Quantity | Component | Description | Unit Cost (USD) | Total Cost | Product Link |
|---|---|---|---|---|---|
| 1 | Raspberry Pi Pico W | Microcontroller with Wi-Fi | $6.00 | $6.00 | Link |
| 4 | Push Buttons (Momentary) | For user interaction | $0.30 | $1.20 | Link |
| 4 | LEDs (10mm) | Yellow visual feedback | $0.10 | $0.40 | Link |
| 13 | 5V Passive Buzzers | Melody playback | $0.50 | $6.50 | Link |
| 1 | Custom PCB | Header-only board | $5.00 | $5.00 | Link |
| – | Wires & Headers | Wiring and connectors | ~$5.00 | ~$5.00 | Link |
Structural BOM
| Quantity | Component | Description | Unit Cost (USD) | Total Cost | Product Link |
|---|---|---|---|---|---|
| 1 | PLA Filament | 1kg, 1.75mm | $25.00 | $25.00 | Link |
| 1 | 5mm Acrylic Sheet | Laser-cut clear panel | $10.00 | $10.00 | Link |
| – | Brass Inserts + Screws (M3) | Assembly hardware | ~$5.00 | ~$5.00 | Link |
| – | 5V Power Adapter | External power for servos | ~$10.00 | ~$10.00 | Link |
Estimated Total Cost: ~$86.10
Final Video
Final Slide