Group assignment Use the test equipment in the lab to observe the operation of an embedded microcontroller.
Individual assignment Use an EDA tool to design an embedded microcontroller system using parts from the inventory, and check its design rules for fabrication.
What I knew beforehand
I approached this task by understanding that designing a circuit is similar to designing an office workflow. It is necessary to carefully identify the routes, or traces, through which electricity, information, and energy must flow in order to complete a task.
I also related the process of selecting standard components, such as microcontrollers, and adding custom input and output modules to using APIs or cloud services in a business model. In both cases, pre-built functionalities are integrated to create a unique operational system.
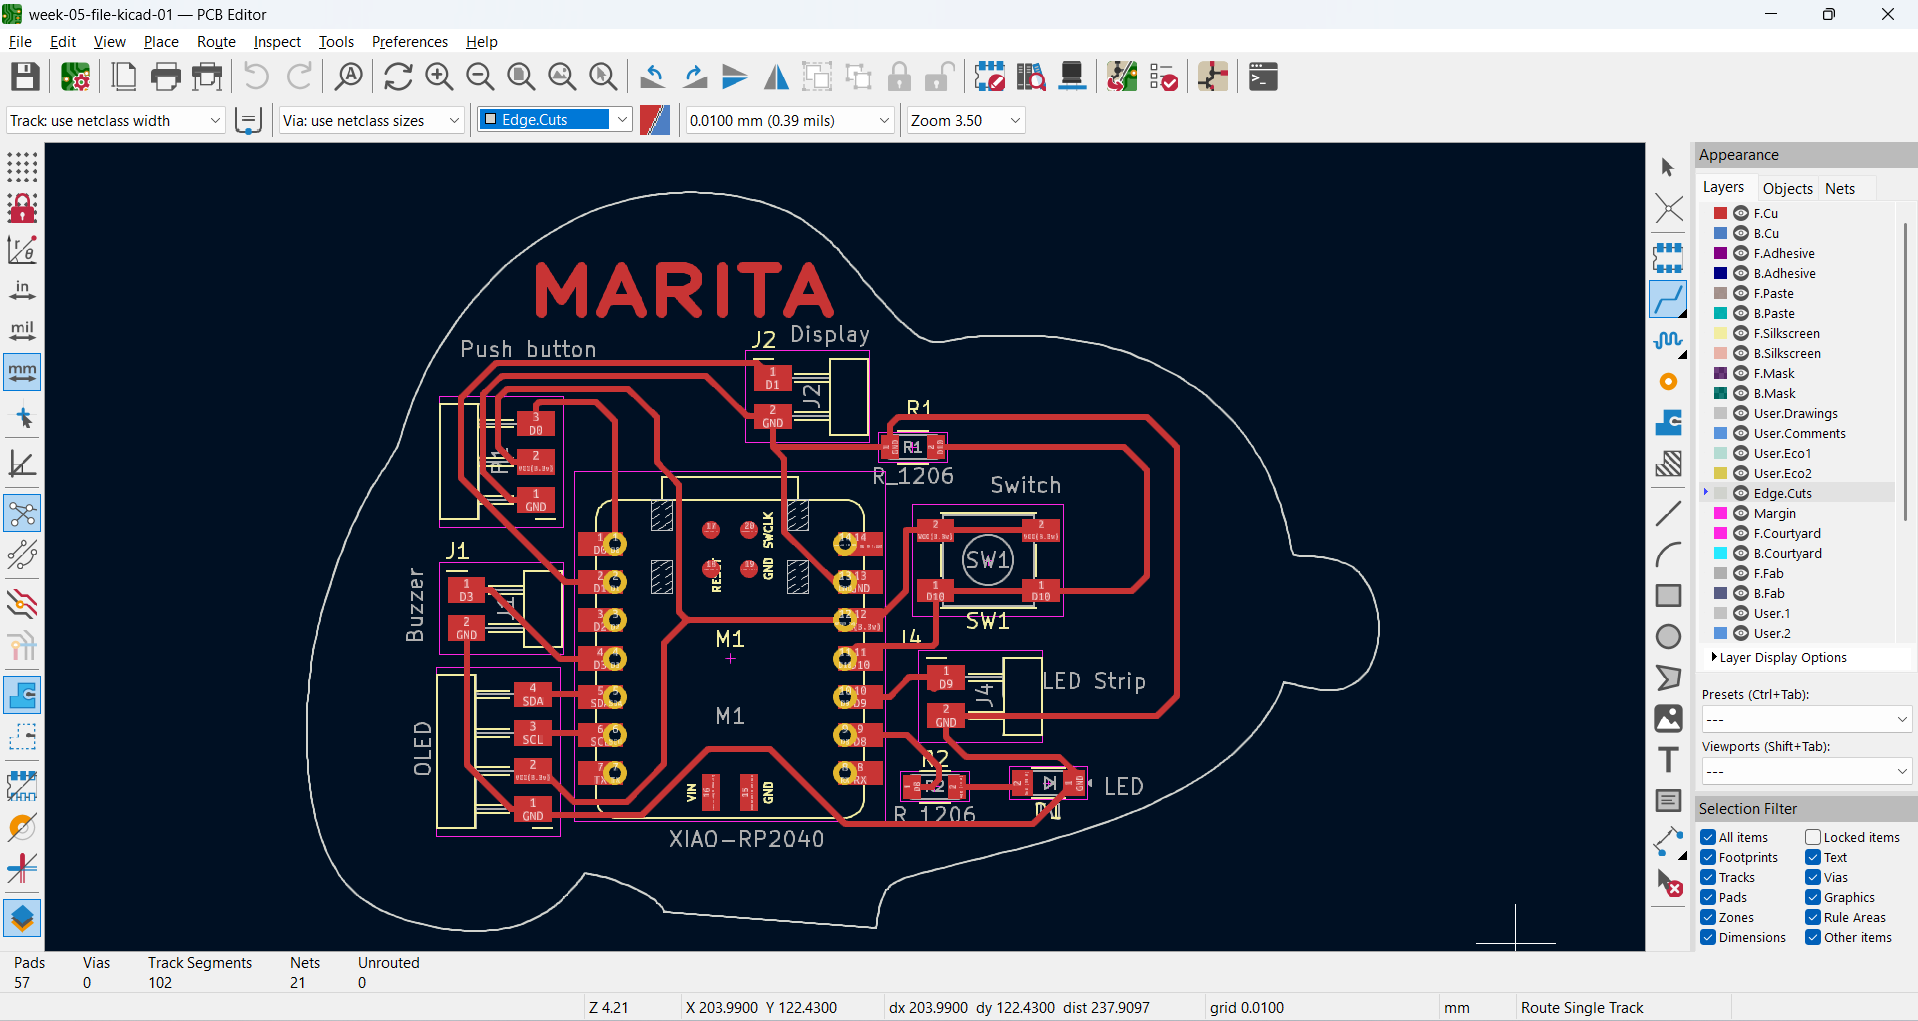
This week marked my first experience with KiCad and the practice of PCB schematic design. Working through the exercise in February 2025, I designed what would become the foundation of the Pitch timer PCB the XIAO RP2040 connected to a display, buzzer, LED strip, and push button. I used an analogy that helped me throughout: circuit routing as an office workflow, where traces are the communication channels between departments. The board I designed this week was revised, refined, and ultimately milled in 2026 on the Makera Carvera at ESAN Fab Lab. The 2025 version had design flaws that only became visible during fabrication; the 2026 version corrected them. This is exactly the iterative process that KiCad and Fab Academy make possible.
Group assignment Check this link I learned that it is possible to monitor digital signals, analog signals, and signals transmitted through communication protocols in order to verify possible failures. For this task, a logic analyzer can be used to capture a specific amount of data during a defined time interval.
Individual assignment This week, my goal was to design the main board for my final project. I considered connecting the following electronic components to a XIAO RP2040 microcontroller:
Push button: D0
HMI display with serial communication: D1
Buzzer: D3
OLED display using I2C protocol: SDA on pin 5 and SCL on pin 6
LED: D8
LED strip: D9
Switch: D10
Installing the KiCad FabLib library
I worked with KiCad. For Fab Academy projects, it is recommended to use the KiCad FabLib library. The most recent version can be downloaded as kicad-fablib_0.0.3.zip from the following link:
After downloading the file, I unzipped it and installed the symbols and footprints separately.
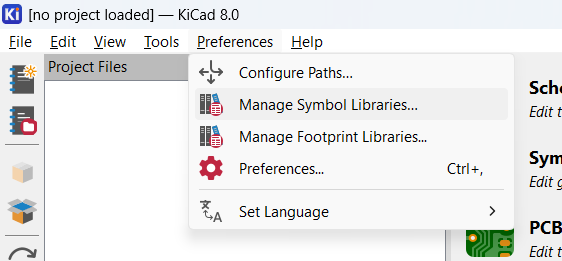
I selected Manage Symbol Libraries.
KiCad menu used to manage symbol libraries.
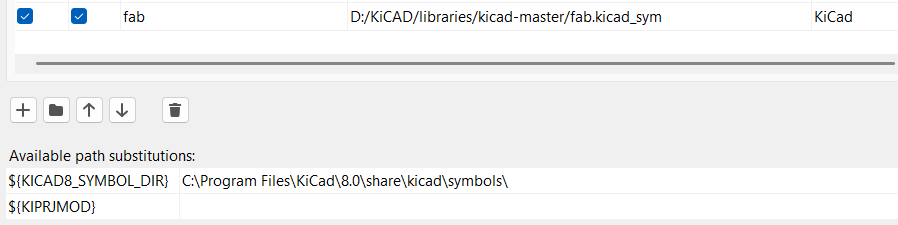
I added the fab.kicad_sym file from the Symbols folder.
Adding the FabLib symbol library file.
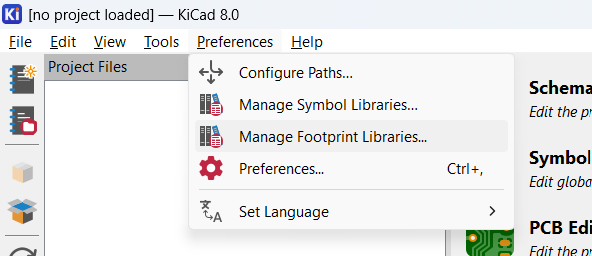
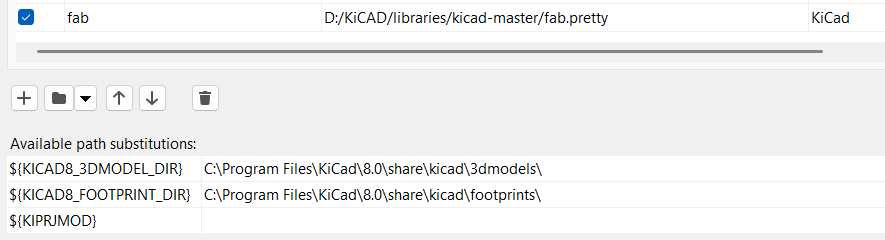
In the same way, I selected Manage Footprint Libraries.
KiCad menu used to manage footprint libraries.
I added the fab.pretty folder from the Footprints folder.
Adding the FabLib footprint folder.
Creating the KiCad project
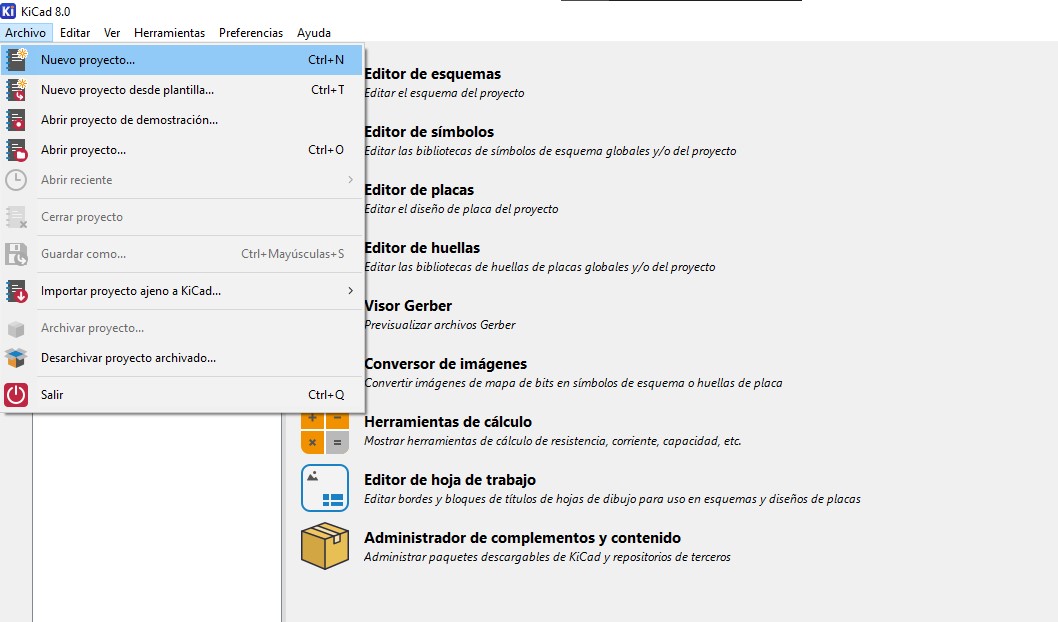
I created a new project.
Creating a new KiCad project.
A KiCad project is divided into two main parts: the schematic diagram and the printed circuit board, or PCB. In the schematic diagram, the components are added and the electrical connections are defined. In the PCB editor, the physical components are arranged and the electrical connections are routed.
Schematic design
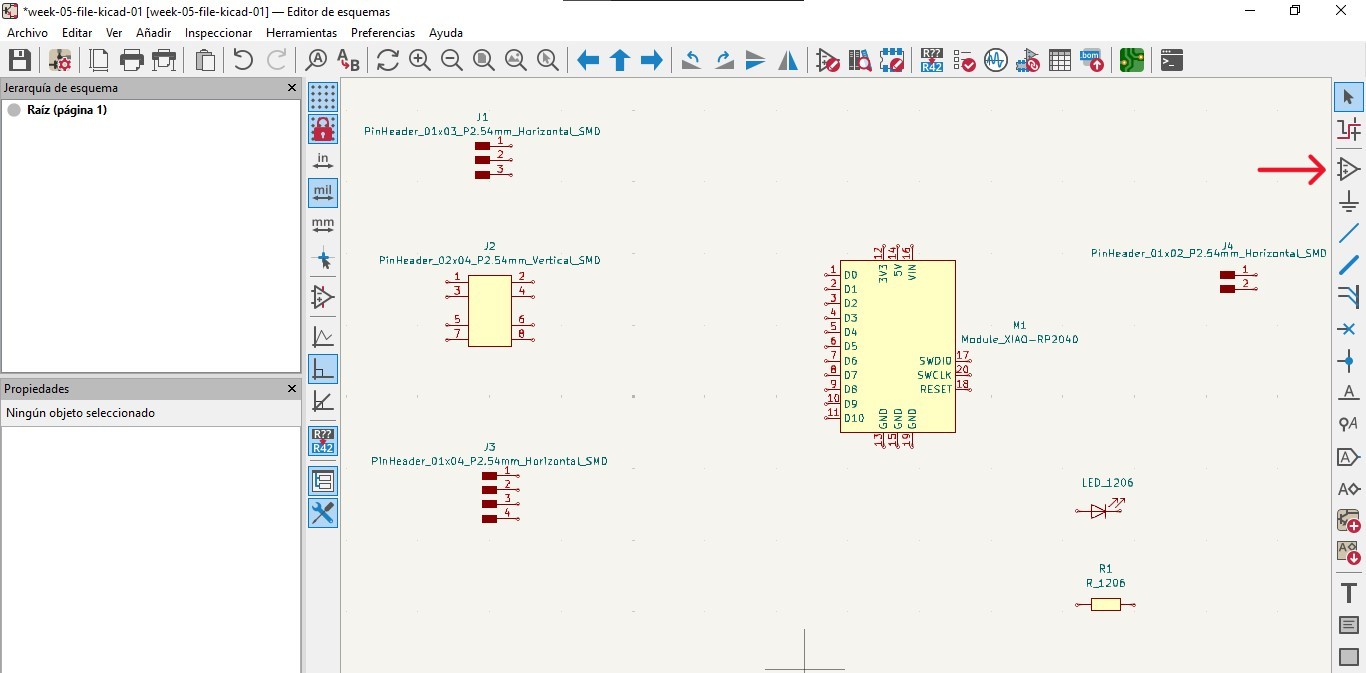
In the schematic diagram, I added all the required components using the Add Symbol command.
Schematic editor view with the selected components.
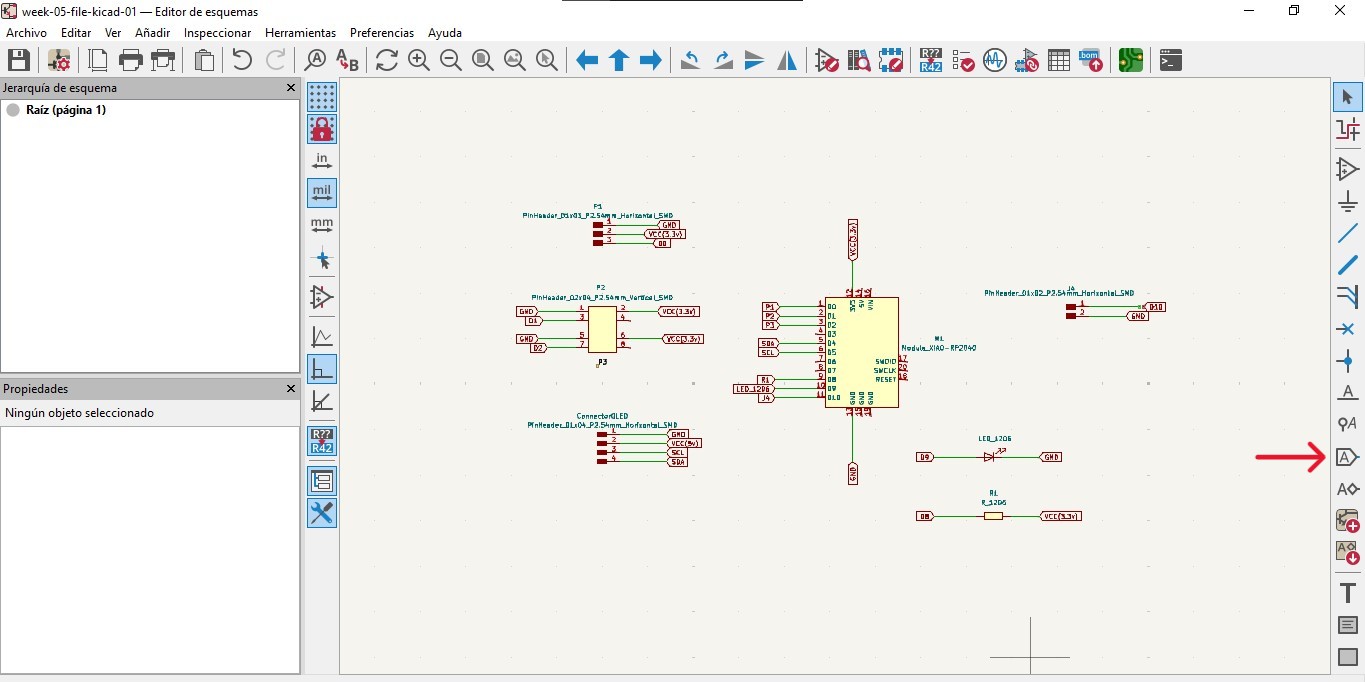
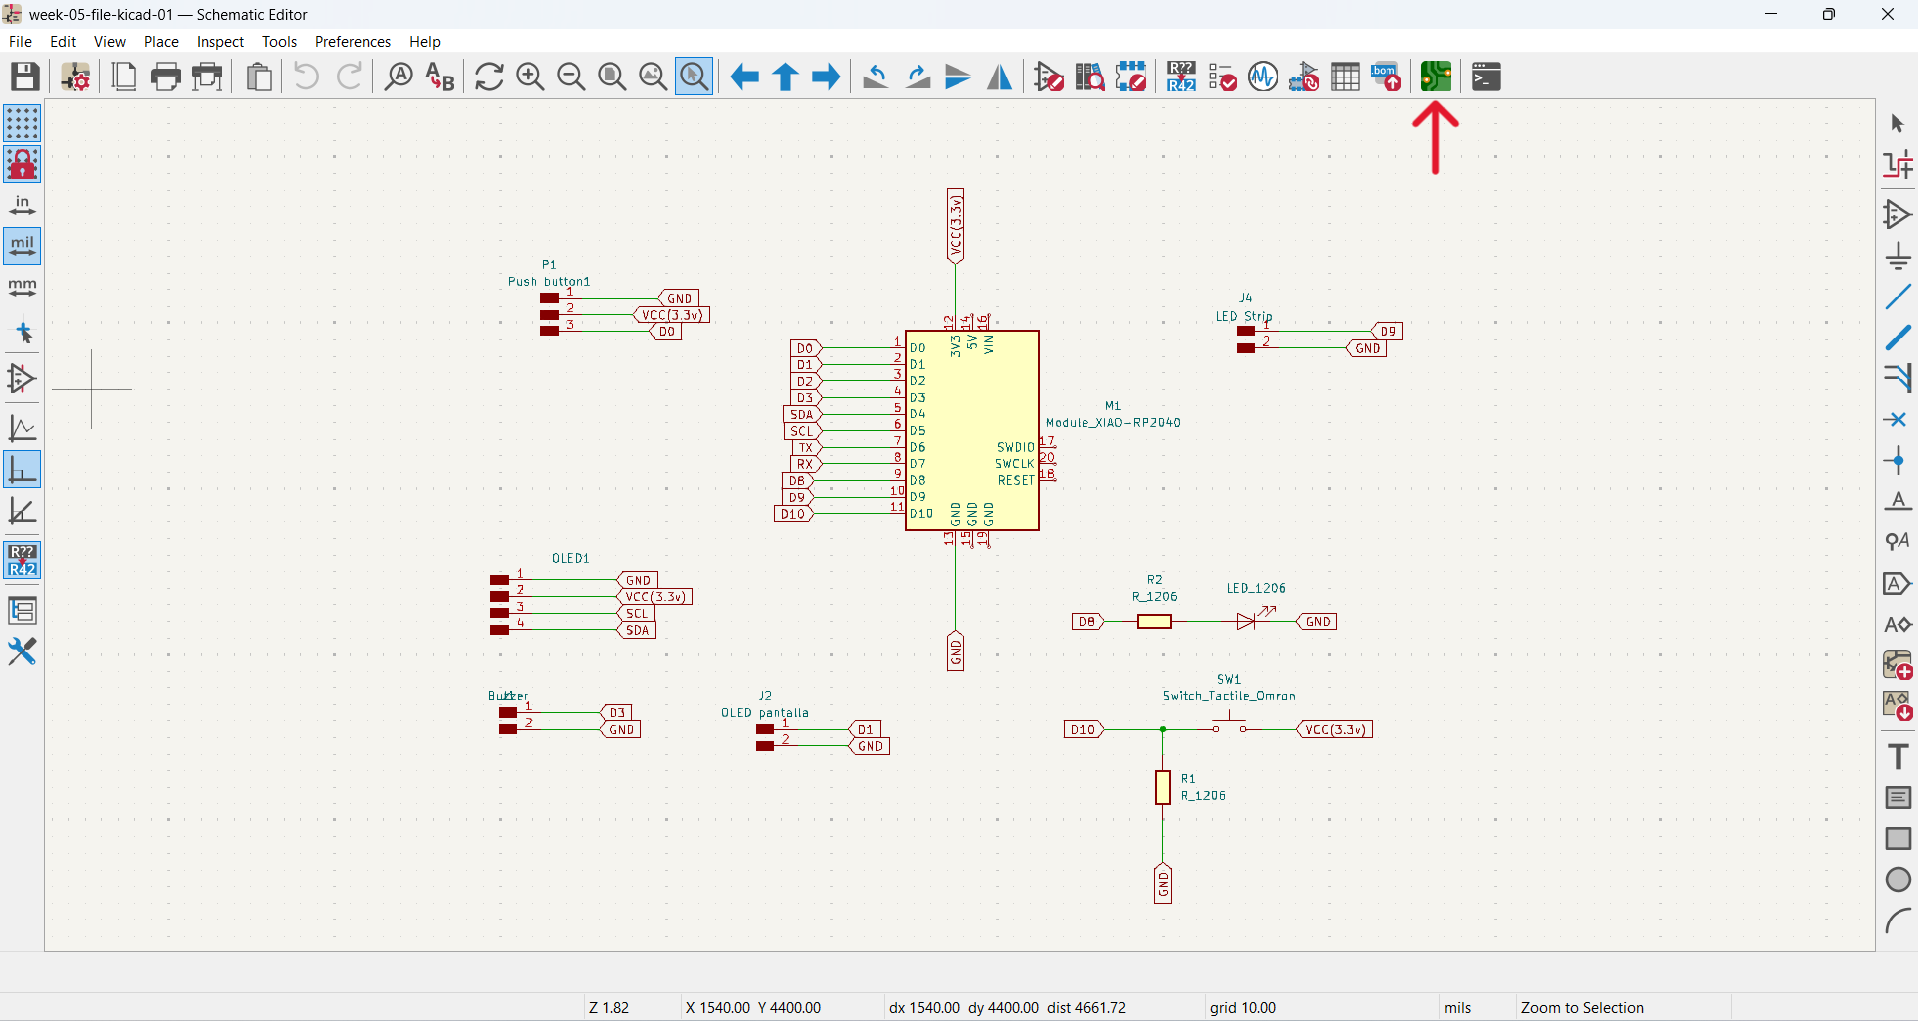
After adding the components, I defined the connections, or nets, using the Add Global Labels command.
Adding global labels to define the electrical nets.
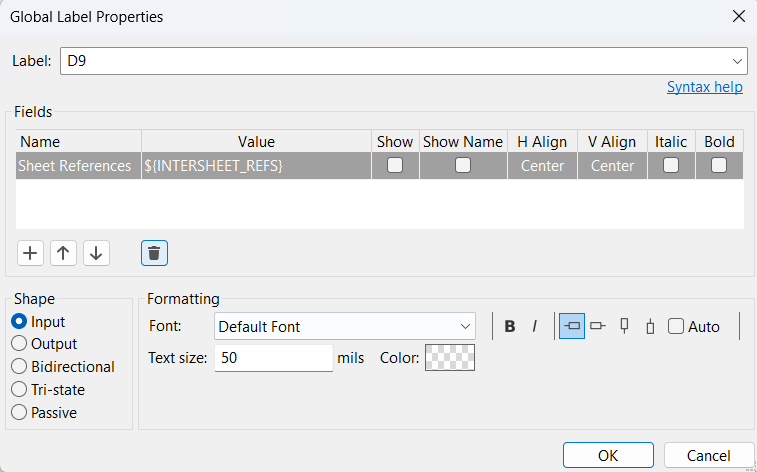
I created a global label by assigning a name and selecting its type, such as input or output. Then, I connected the label to a wire in order to establish the connection. I repeated this process for the wires that needed to share the same connection.
Global label properties window used to name and classify a connection.
PCB layout and routing
Once the schematic connections were finished, I changed to the PCB editor.
Changing from the schematic editor to the PCB editor.
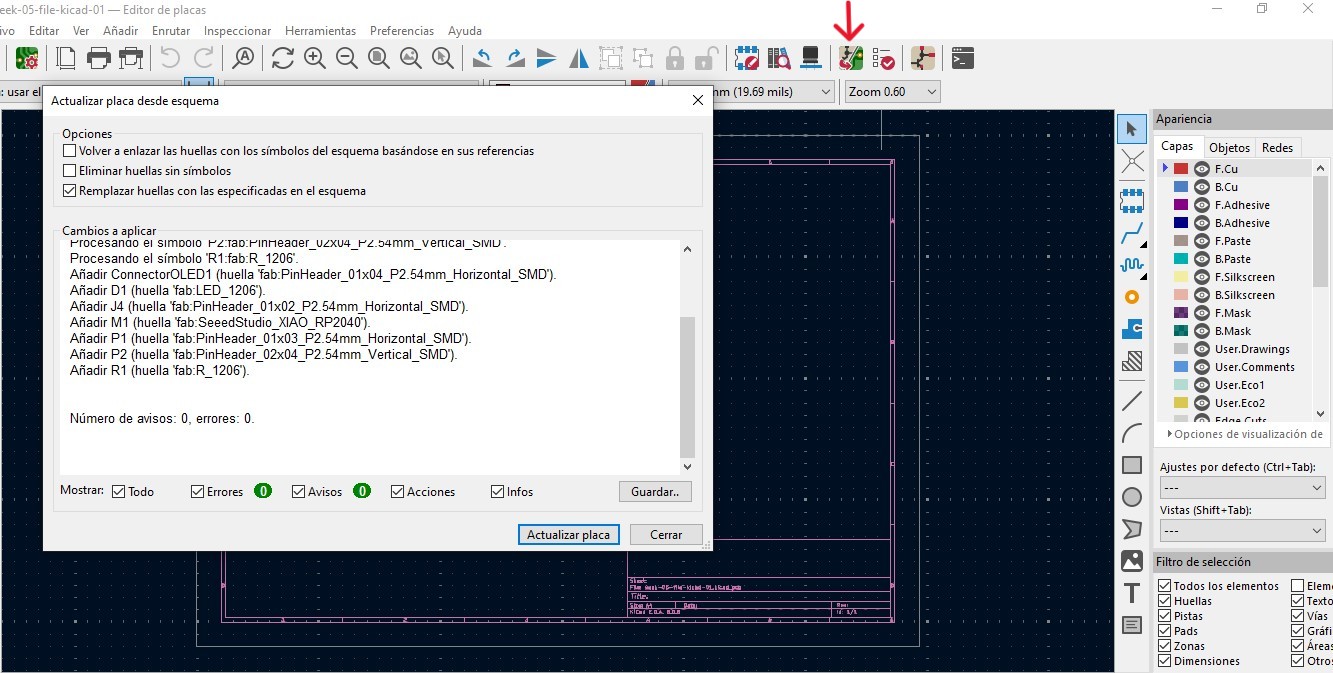
When opening the PCB editor, I pressed Update PCB from Schematic to load the footprints of the components used in the schematic.
Updating the PCB from the schematic to load the footprints.
Next, I arranged the components according to how I wanted them to be physically located on the board. As a recommendation, component placement should make the routing of the traces easier.
Arranging the components on the board before routing.
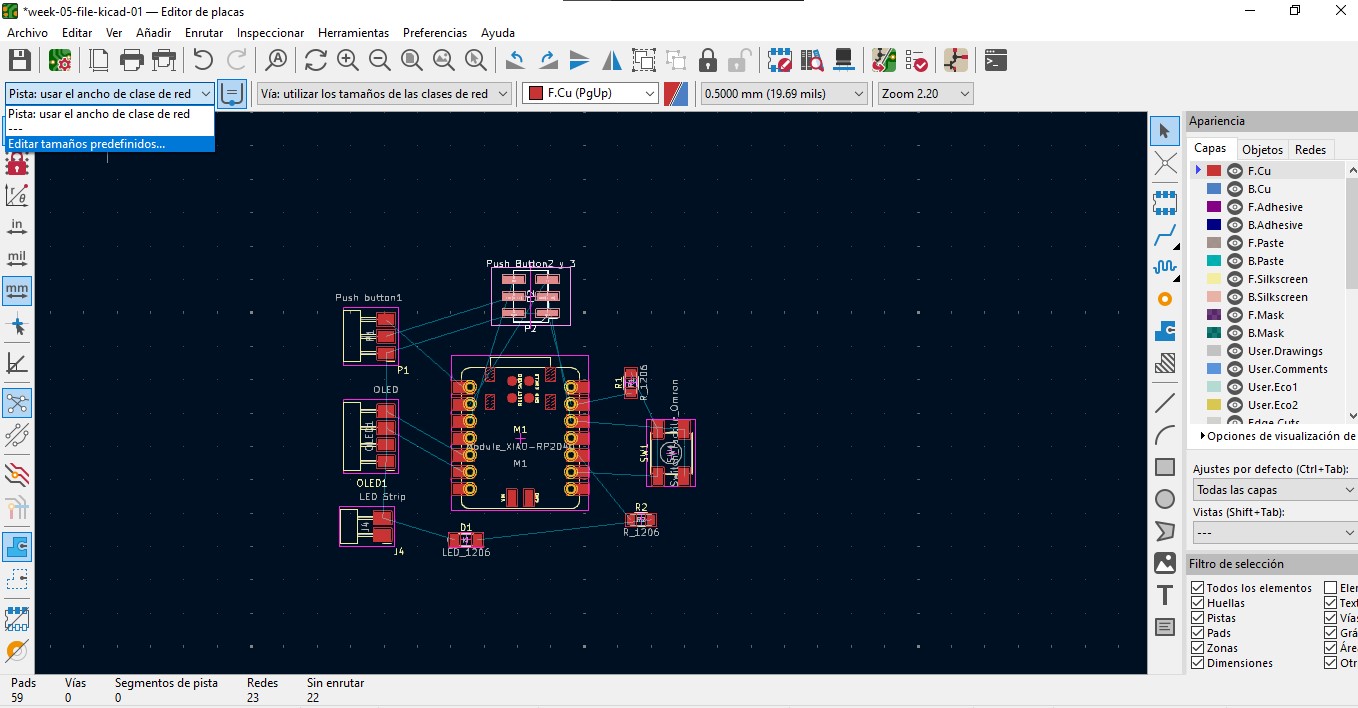
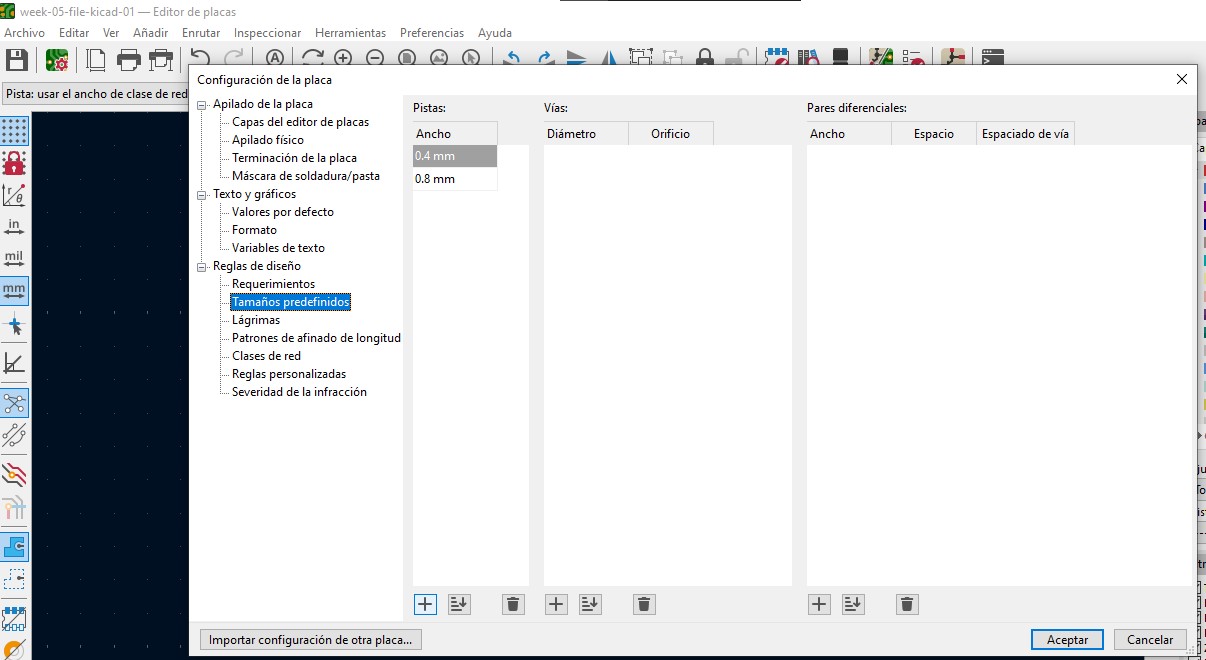
Before routing, I defined the track widths:
0.4 mm for signal traces
0.8 mm for power connections
Defining the track width before routing.
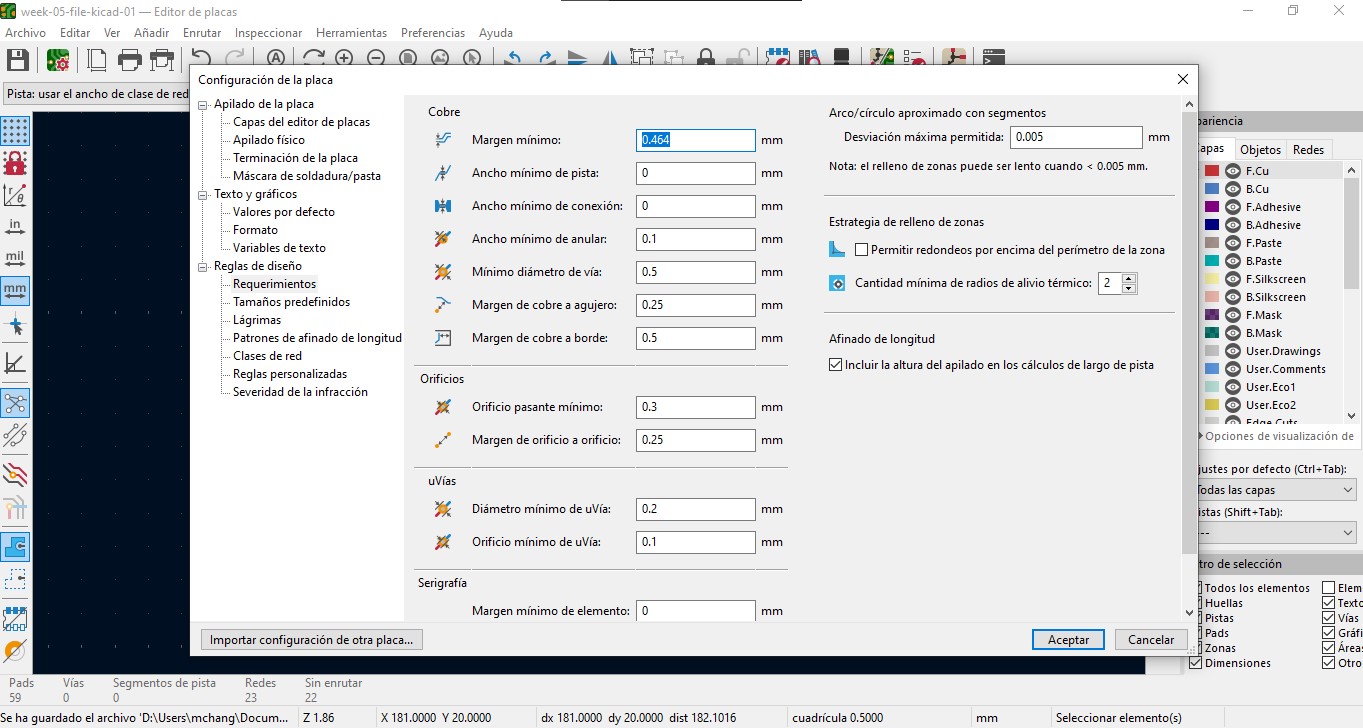
I also configured the clearance between traces according to the size of the milling bit that would be used, which was 1/64 inch. The clearance was set to 0.4 mm.
Configuring clearance according to the 1/64 inch milling bit.
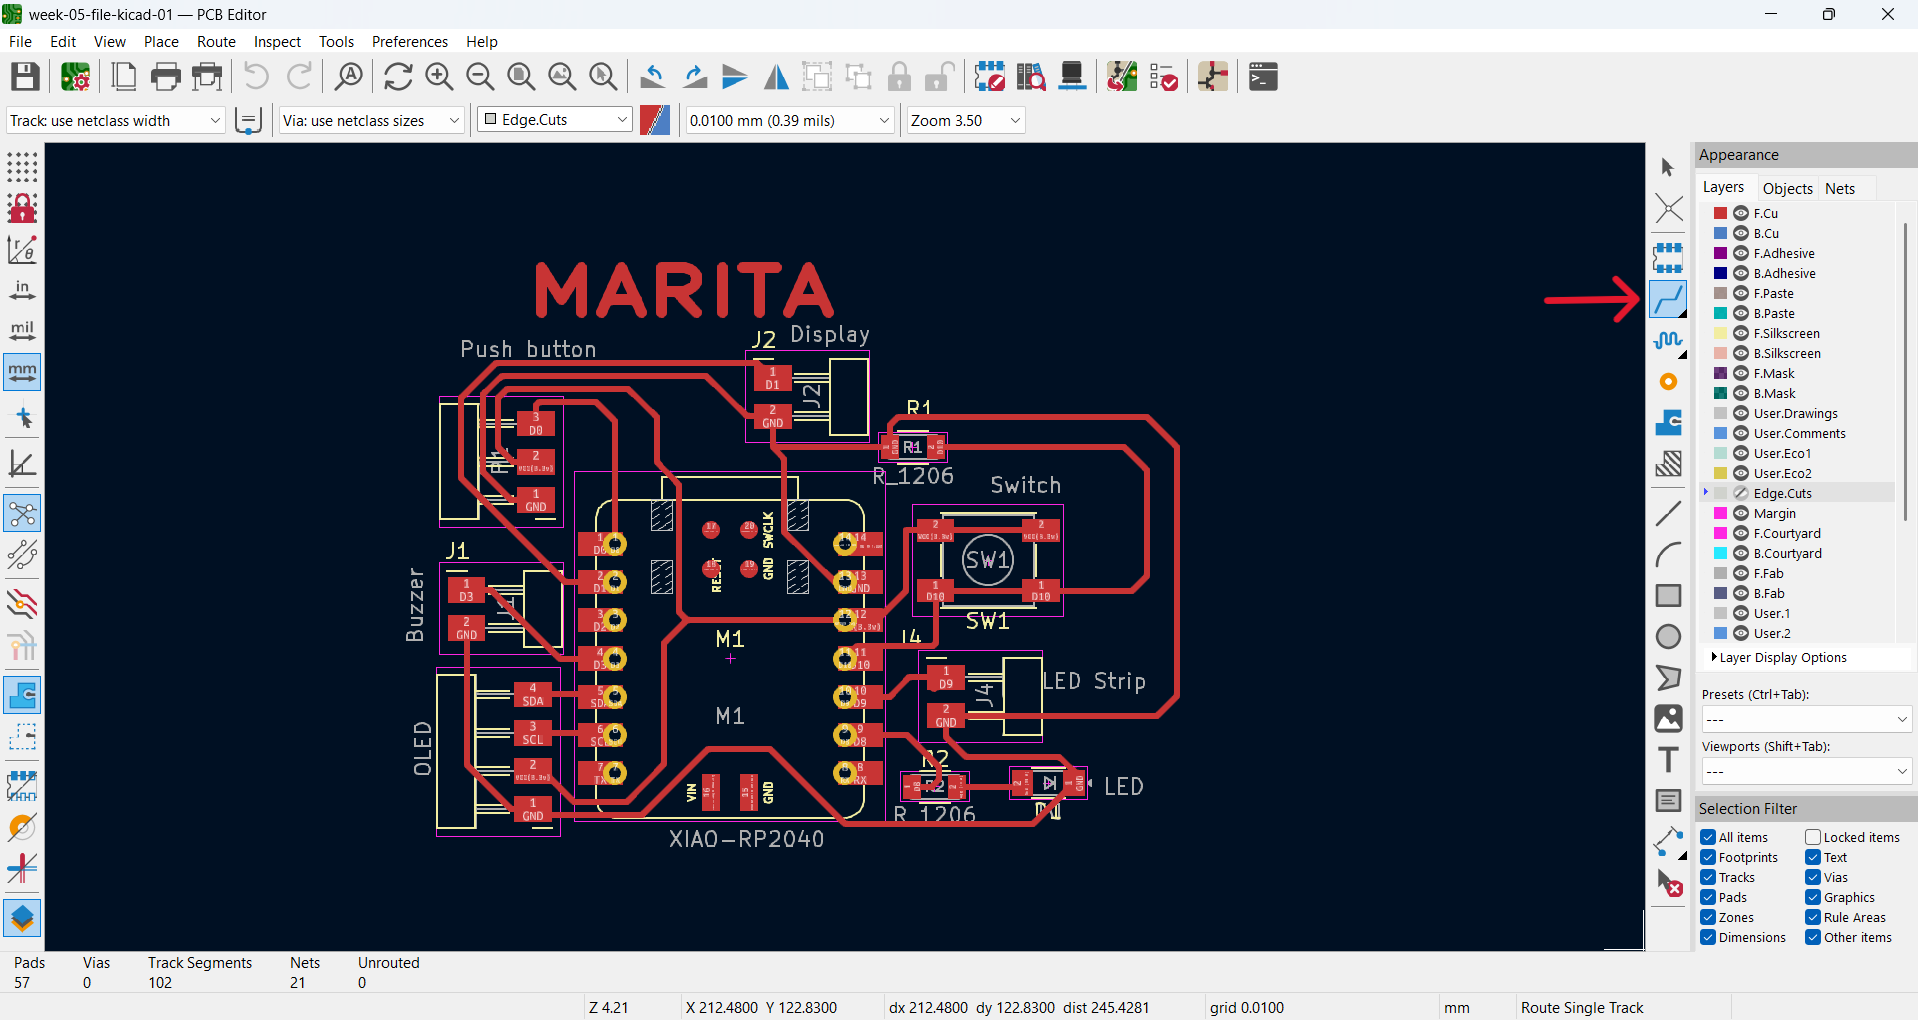
I routed the tracks manually using the Route Tracks command. I chose to route my traces on the front copper layer, F.Cu.
Manually routed PCB design on the front copper layer.
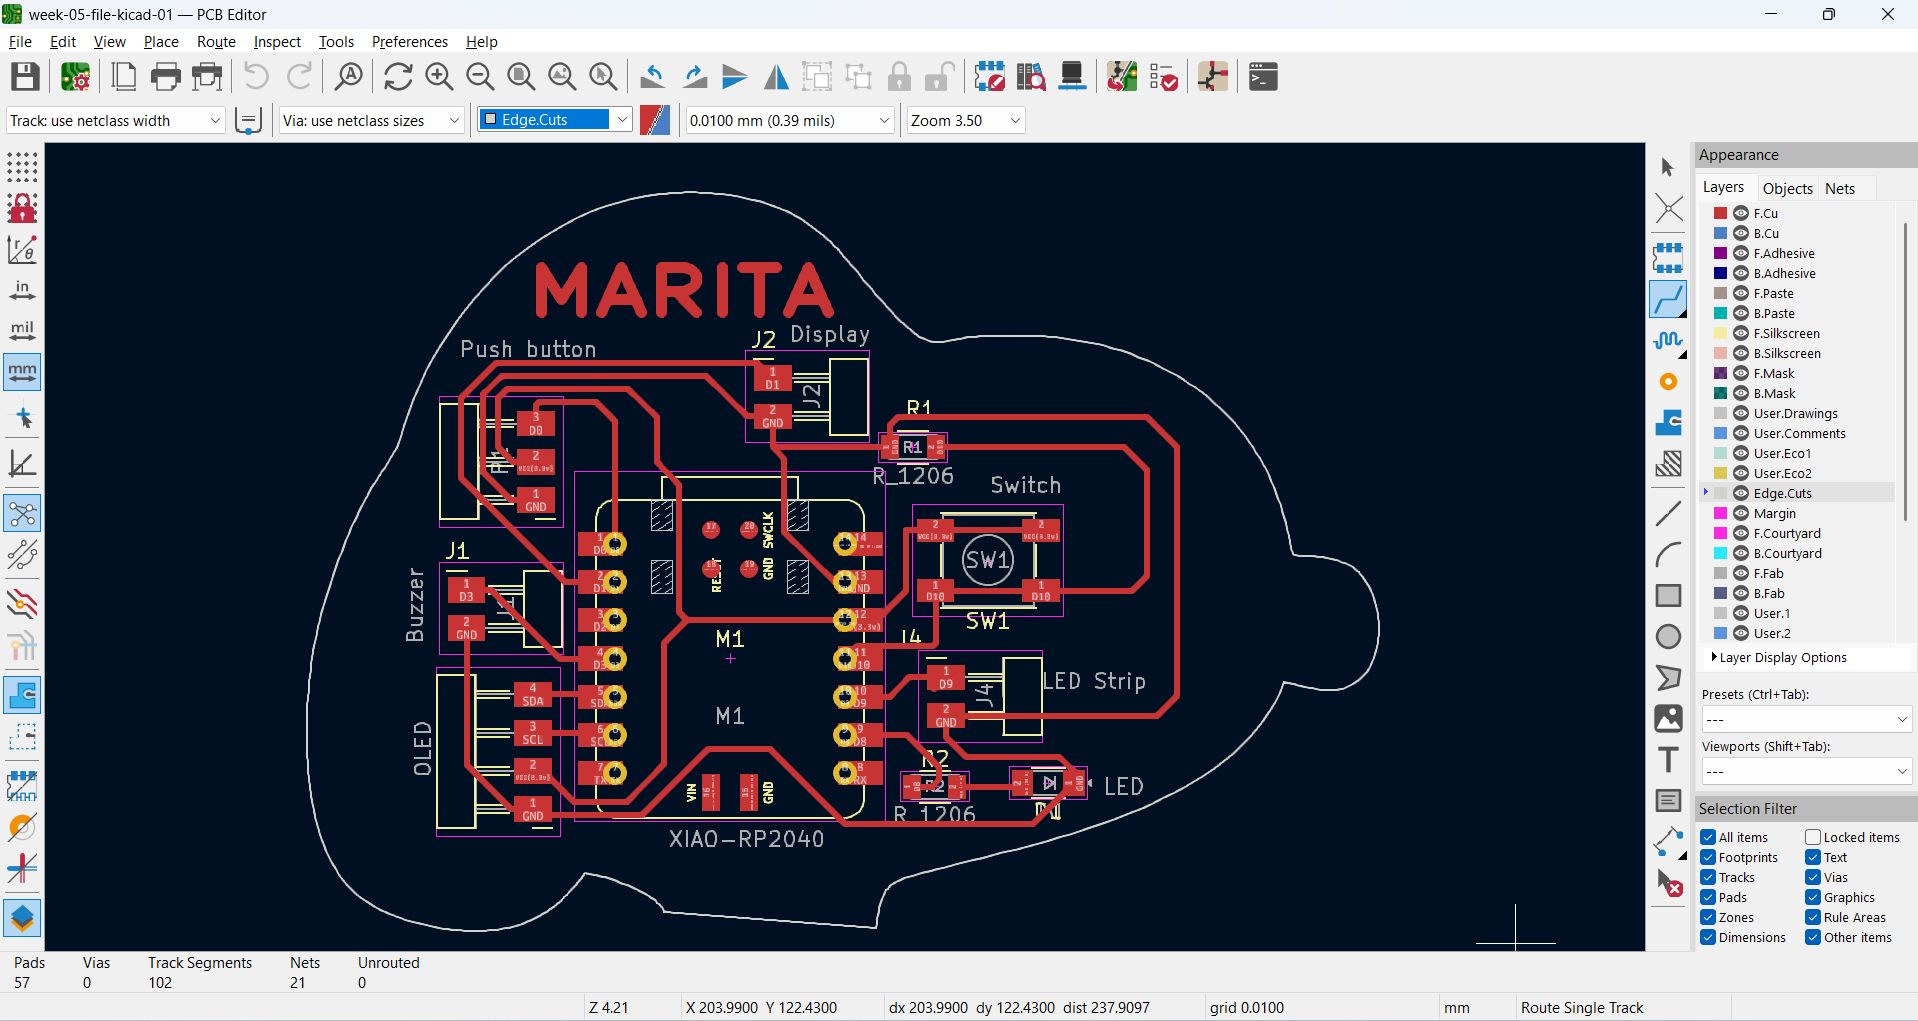
Finally, I enclosed the entire circuit in a rectangle or another custom shape. This outline must be placed on the Edge.Cuts layer.
Final custom board outline drawn on the Edge.Cuts layer.Reflections
KiCad is a relatively straightforward tool to use. However, the main challenge is carefully placing the components during the design phase. If the components are not positioned correctly, routing problems appear, such as trace crossings or the inability to connect to power and ground properly.
Without a preliminary sketch on paper or a whiteboard, it is difficult to map everything needed in the software. This can lead to missing components or mistakes that may only be discovered after the board has already been milled.
Achieving a fully routed board with no unconnected lines was challenging, but it was also an engaging and entertaining process.