Design and produce something with a digital process (incorporating computer-aided design and manufacturing) not covered in another assignment, documenting the requirements that your assignment meets, and including everything necessary to reproduce it.
What I knew beforehand
I enjoy crafts. I know how to crochet, knit with needles, sew on a conventional sewing machine, and do some hand embroidery. Over the years, however, my eyesight has made it increasingly difficult to work on designs with fine detail or to combine different materials and textures — the physical effort and time required for small, precise handwork have become a real limitation.
This documentation was produced in June 2026. I chose digital embroidery for Wildcard Week because it sits at the intersection of two things I care about: craft traditions I have practiced for years, and digital fabrication tools I have been learning throughout this program. I know how to crochet, knit, sew, and embroider by hand — but fine-detail handwork has become increasingly difficult for me over time. Digital embroidery does not replace that knowledge; it amplifies it. The decisions that matter in Ink/Stitch — which fill method, which stitch density, how to organize paths — are much more intuitive with a textile background than without one.
Digital Embroidery
For Wildcard Week I chose digital embroidery — a process that converts vector artwork into stitch paths that an embroidery machine executes automatically on fabric. The complete workflow goes from image selection and vectorization in Inkscape, through stitch configuration and simulation with the Ink/Stitch extension, to physical production on a Baby Lock Ellageo PLUS embroidery machine available at the Fab Lab.
I chose this technique because it connects directly to my work at ESAN's business incubator: branded textile elements are a common output for student entrepreneurship projects, and learning this workflow lets me guide teams through it as part of their product development process.
Why this process is not covered in other assignments
Digital embroidery works by stitching thread through an existing fabric surface, following vector-defined paths and fill patterns generated by Ink/Stitch. It does not build volume layer by layer like 3D printing, nor does it cut or remove material like laser cutting or CNC milling. The output depends entirely on software decisions: which fill method is used, how paths are organized, and how stitch density is configured.
Tools and Materials
Inkscape, Ink/Stitch extension, Baby Lock Ellageo PLUS, White linen fabric, Cut-away stabilizer, Blue embroidery thread, .pes file
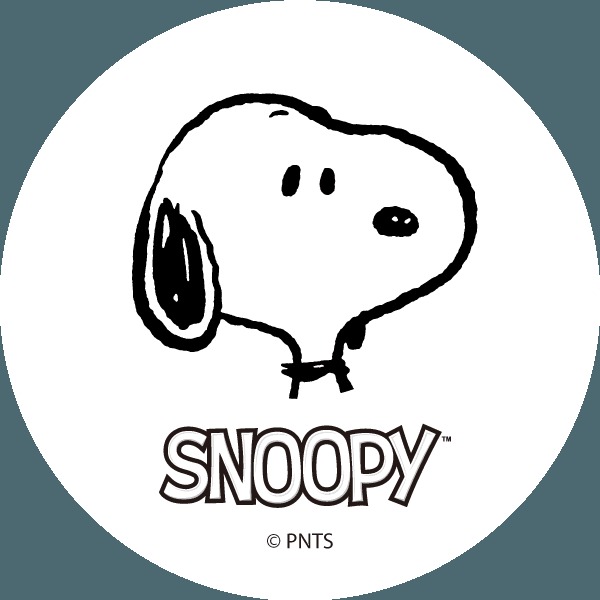
The design I chose is a simplified front-facing illustration of Snoopy — the iconic Peanuts character — showing the head, ears, and facial details with the text "SNOOPY" beneath. I selected this design because its combination of outline contours, solid filled areas, and text represents a good range of embroidery challenges in a single piece: it requires both outline-type stitches for the contour and fill-type stitches for the solid ear areas and lettering.
For vectorization I worked from the simplified black-and-white version of the design, which provides clean, well-defined edges that convert reliably through Inkscape's Trace Bitmap tool.
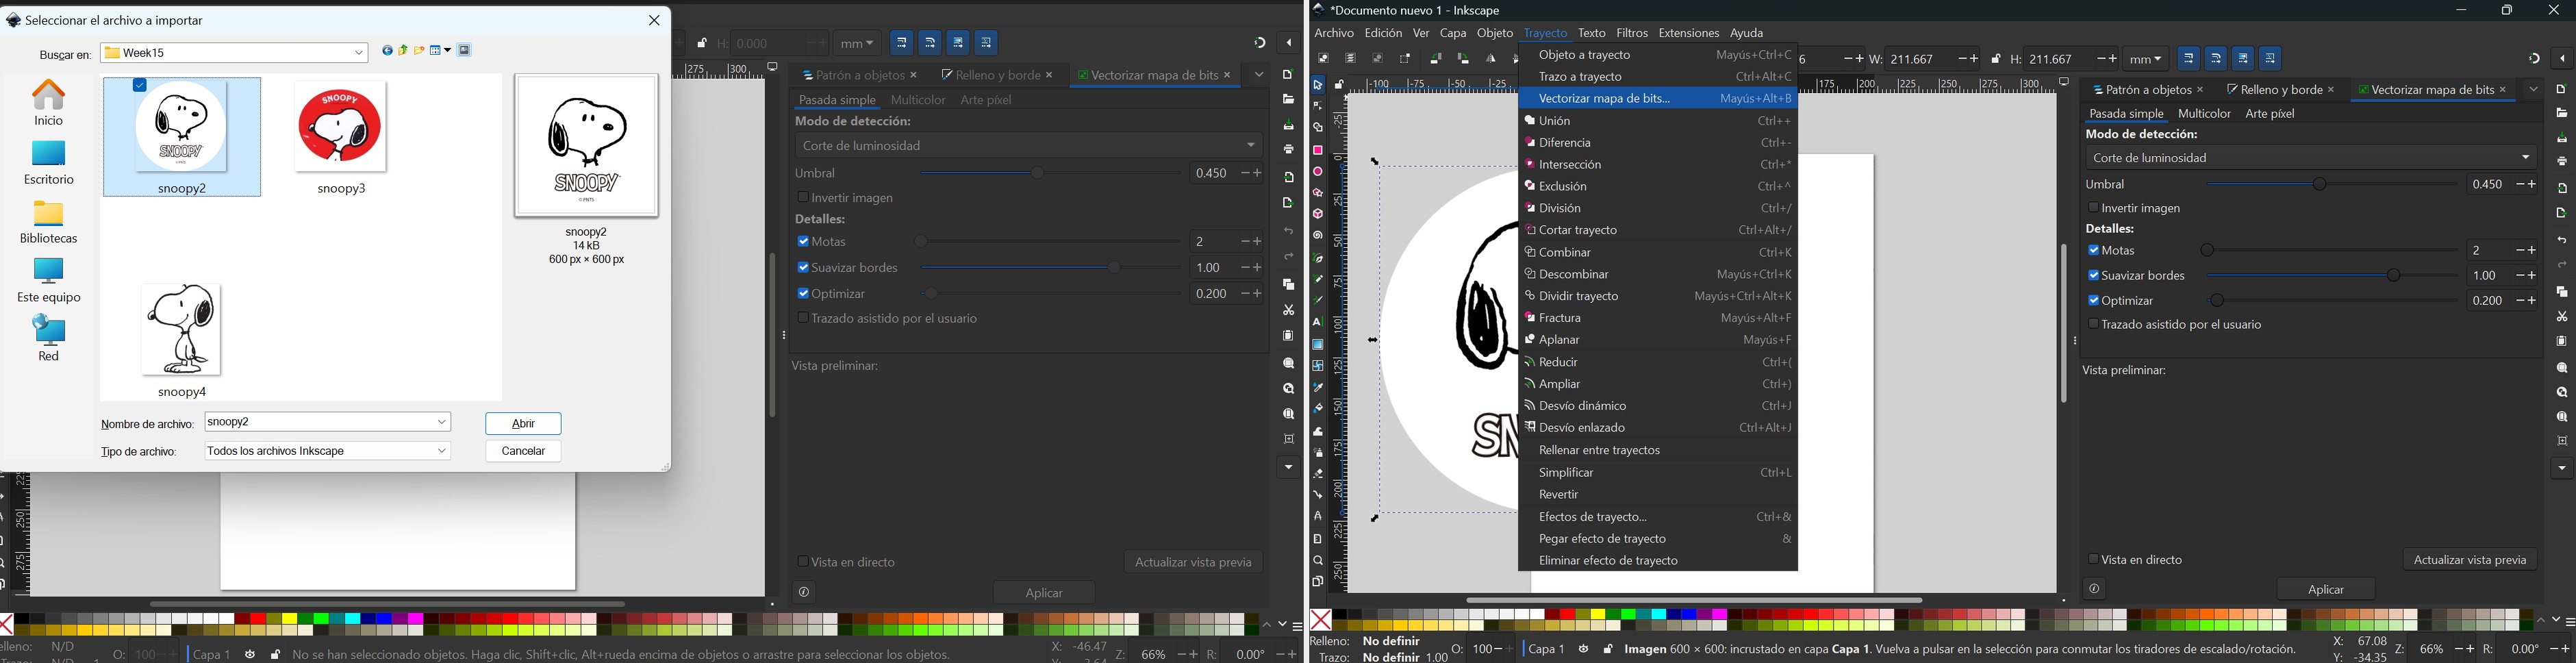
I opened Inkscape and imported the reference image using File → Import. The file browser showed the working folder (Week15) with the available Snoopy images — I selected snoopy2 (600 × 600 px, 14 kB), the simplified black-and-white version, because its clean edges produce the most reliable vectorization result.
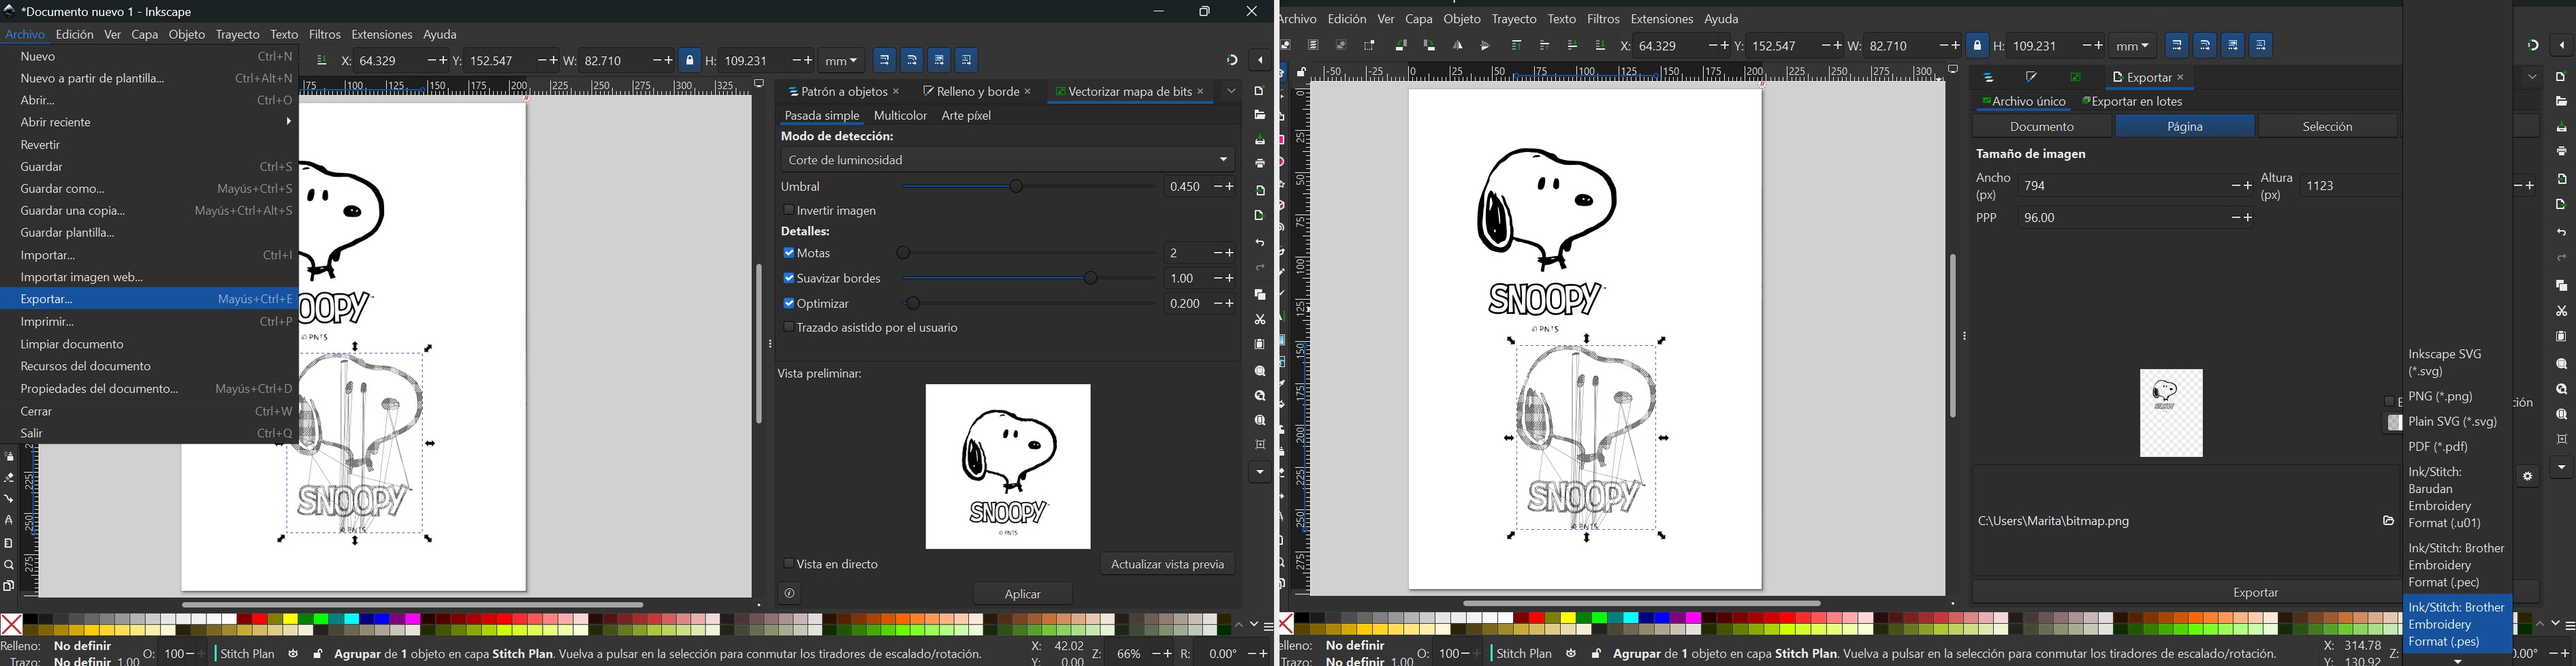
With the image selected on the canvas, I opened the vectorization panel from Path → Trace Bitmap (shortcut Shift+Alt+B). I used Single scan — Luminosity Cutoff mode with a threshold of 0.450, keeping Smooth corners at 1.00 and Optimize at 0.200 to produce clean curves without losing the character's proportions.
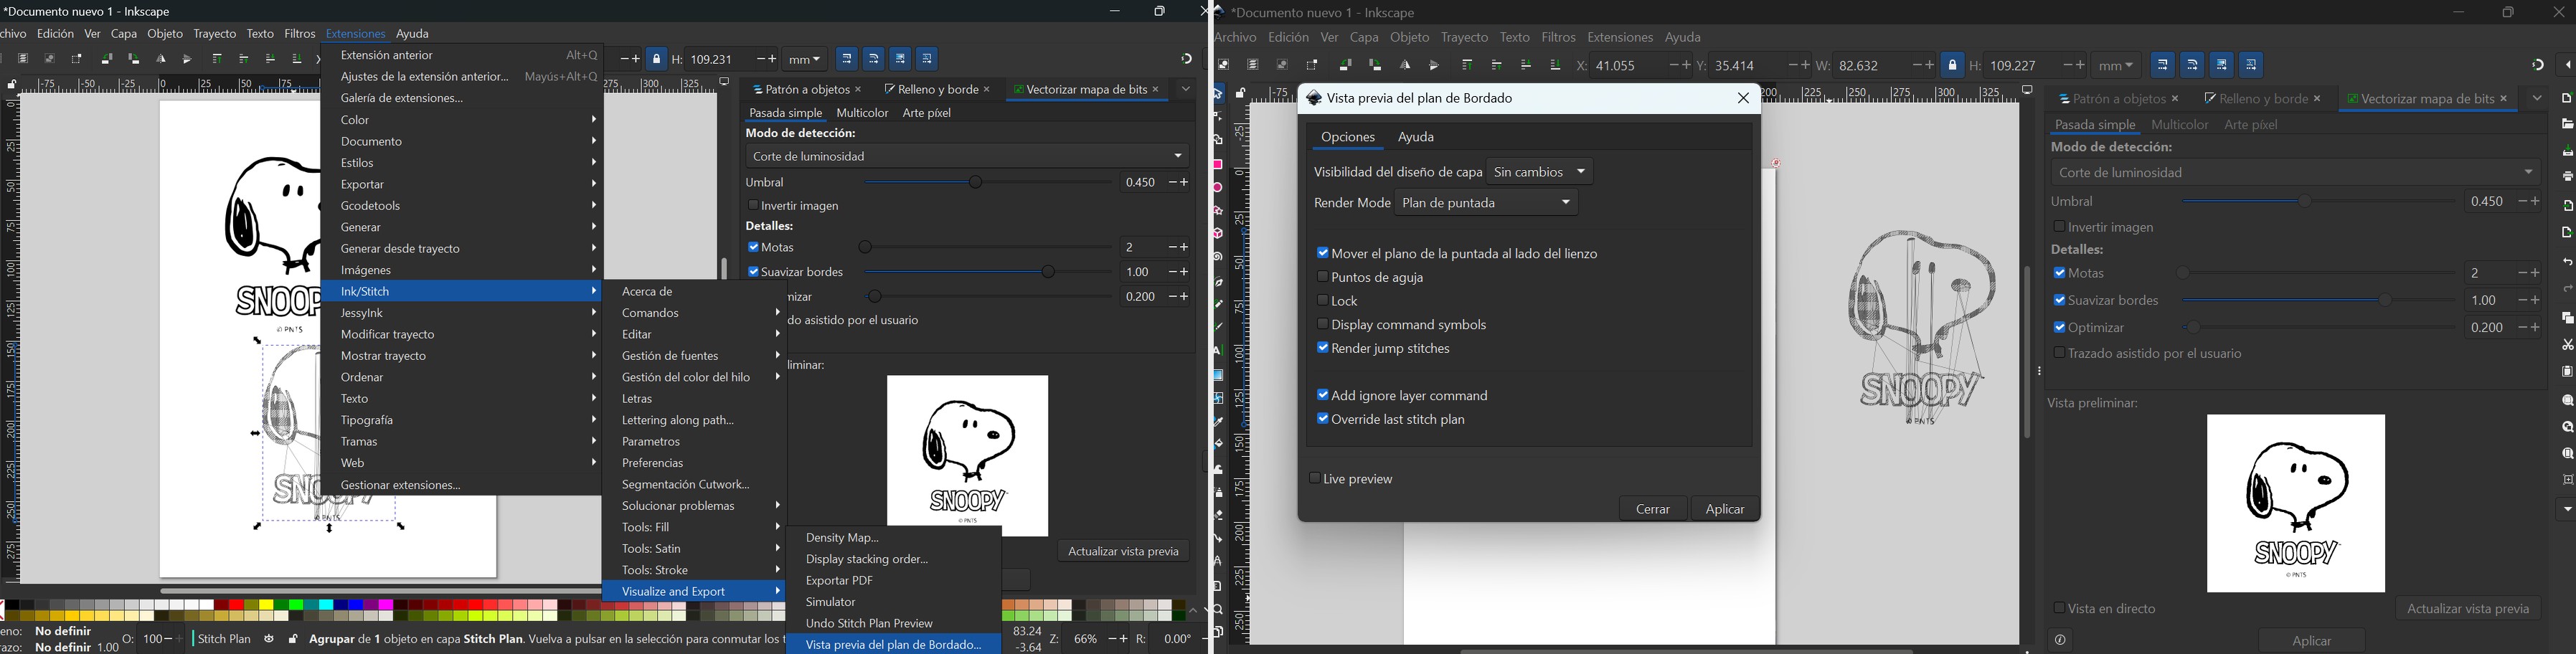
With the vectorized paths on the canvas, I accessed Ink/Stitch from Extensions → Ink/Stitch. The extension adds a full submenu to Inkscape covering stitch parameter editing, color management, simulation, and export — all from within the same application. I configured each path independently using the Params panel (Extensions → Ink/Stitch → Params), applying two stitch types:
Auto Fill — for solid filled areas (ear fill, text body): covers the interior of closed paths with parallel rows of stitches.
Running Stitch — for the outline contour and fine face details: follows the path linearly producing a clean traced line.
3Stitch plan preview and simulation
Before exporting, I used two Ink/Stitch tools to verify the design:
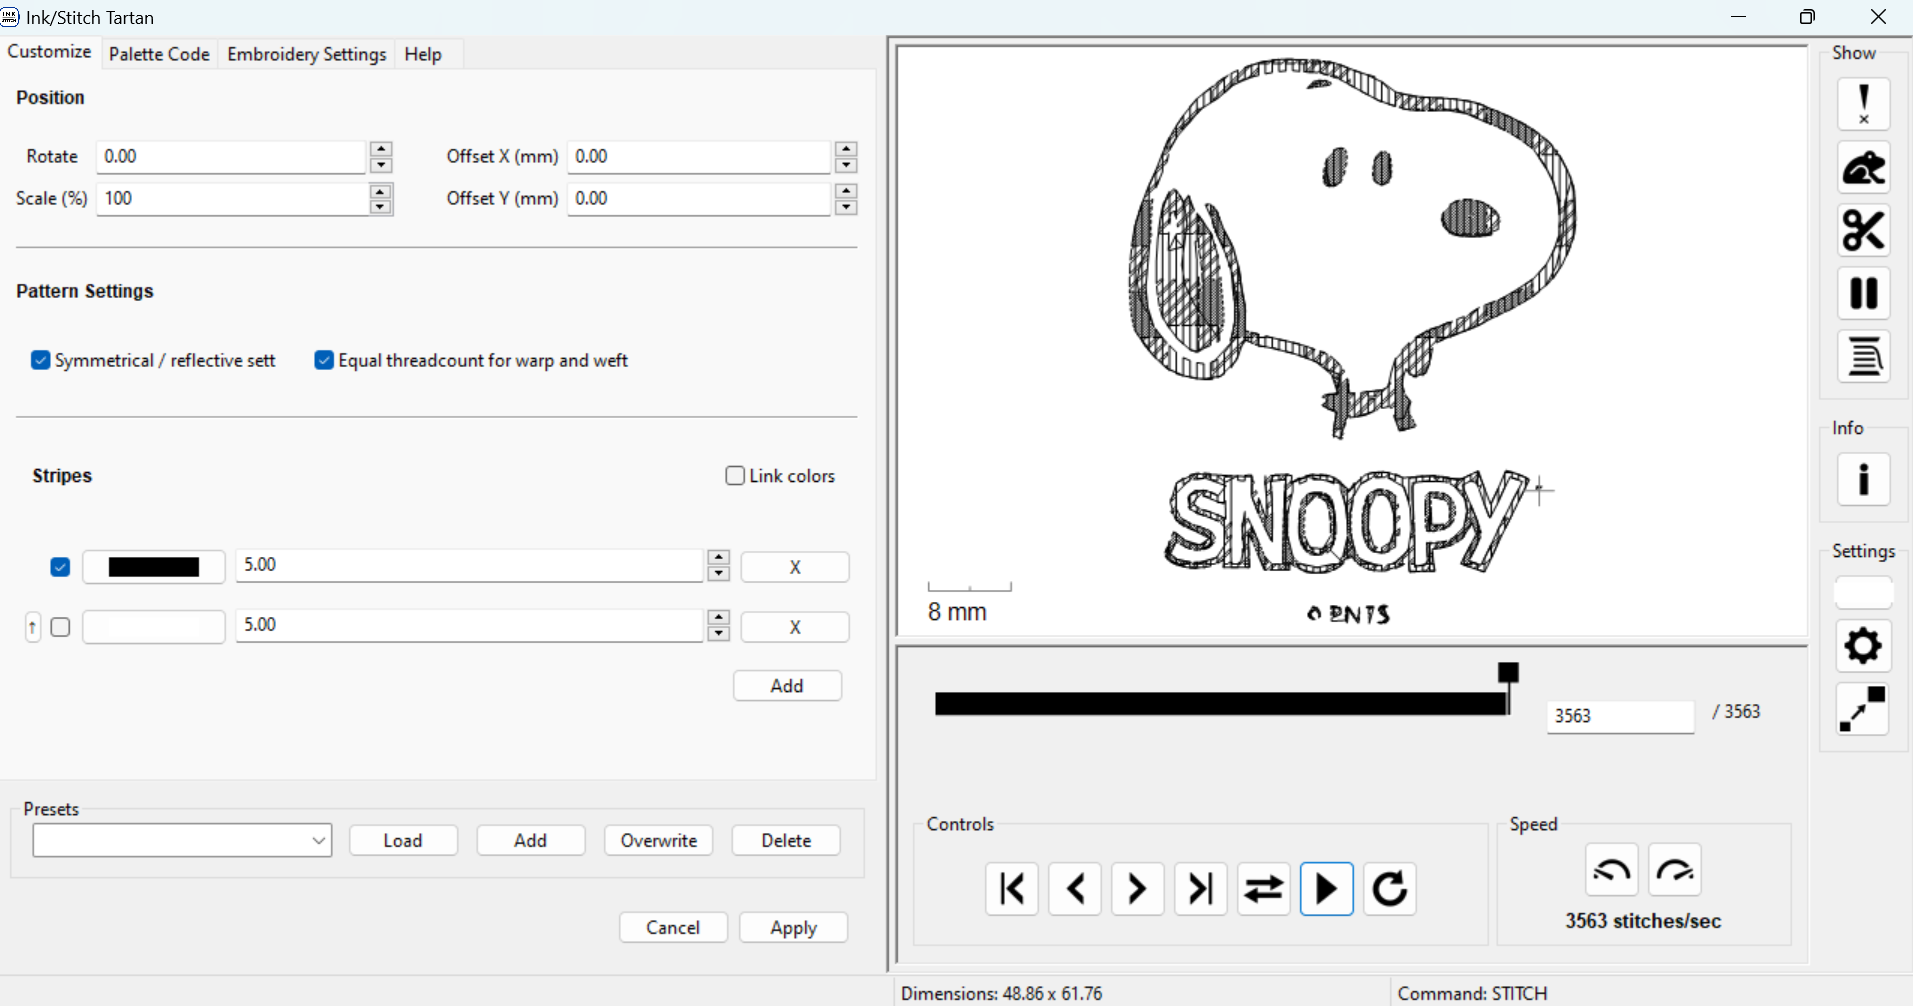
Stitch Plan Preview (Extensions → Ink/Stitch → Visualize and Export → Stitch Plan Preview) — renders the complete stitch plan on the Inkscape canvas, showing every stitch path and jump stitch without opening the interactive simulator. The fastest way to check fill patterns and stitch order.
Simulator (Extensions → Ink/Stitch → Visualize and Export → Simulator) — plays back the full embroidery sequence stitch by stitch at configurable speed. Confirmed: 3,563 stitches · 48.86 × 61.76 mm.
I exported the file using File → Export (Shift+Ctrl+E), selecting Ink/Stitch: Brother Embroidery Format (.pes) from the format dropdown — the native format read by Baby Lock and Brother embroidery machines. The export panel showed the final document dimensions (794 × 1123 px at 96 DPI) and the output path. Clicking Export generated the machine file ready for USB transfer.
Physical Embroidery Process — Baby Lock Ellageo PLUS
The machine used is a Baby Lock Ellageo PLUS, a professional embroidery machine with a color touchscreen that displays the design preview, stitch count, and estimated time. The machine was available at the Fab Lab and accepts .pes files directly via USB.
1Machine setup and file loading
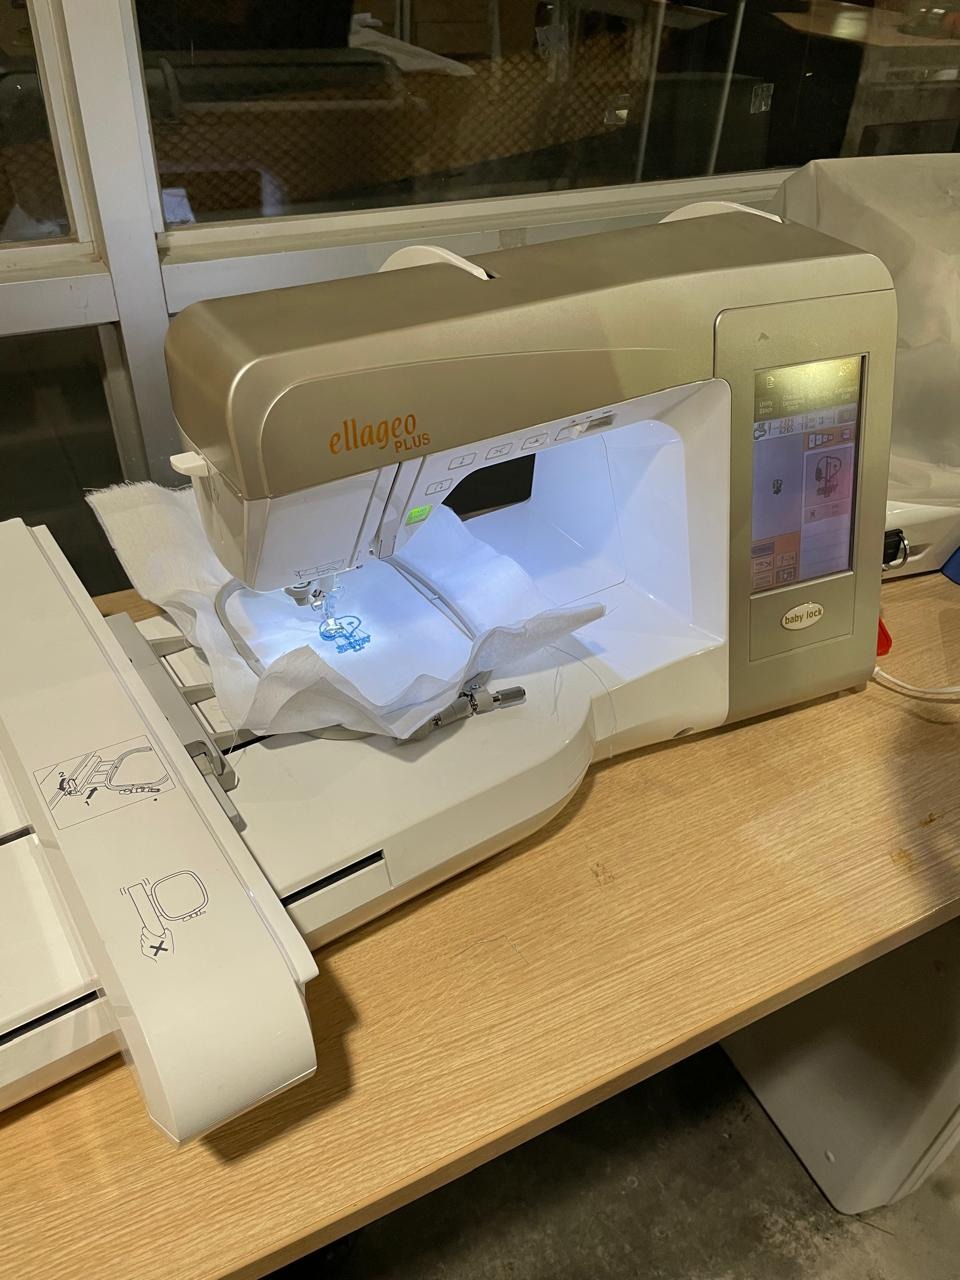
The Baby Lock Ellageo PLUS was powered on and set to Embroidery mode. The .pes file was transferred via USB drive. Once loaded, the machine's touchscreen displayed a preview of the Snoopy design with the stitch count (6,265) and estimated embroidery time (19 minutes), confirming the design was correctly read.
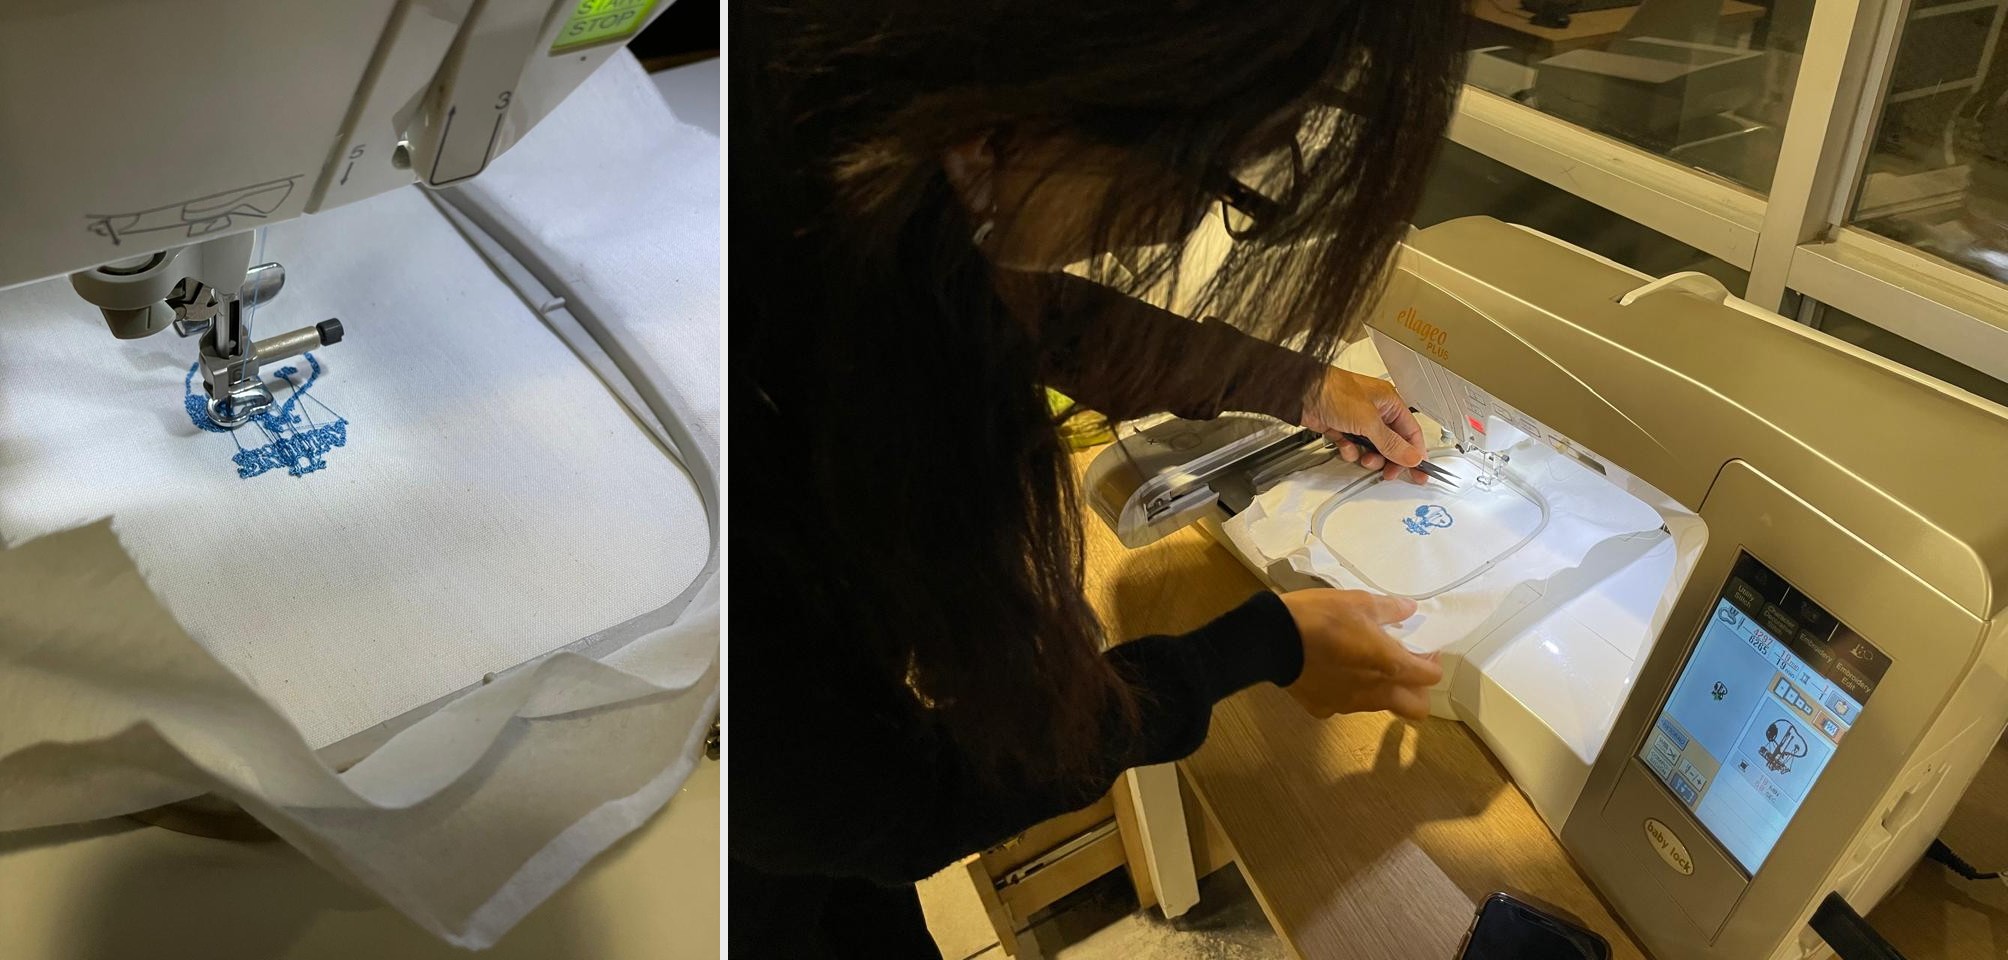
Baby Lock Ellageo PLUS at the start of the embroidery run — the touchscreen displays 6,265 stitches and an estimated time of 19 minutes. The first stitches are already visible on the white linen under the presser foot.
2Material preparation — fabric, stabilizer, and hoop
White linen fabric was used as the embroidery base. A cut-away stabilizer was placed beneath the fabric before mounting — essential to prevent the linen from puckering or shifting as the needle punches through repeatedly. Both layers were placed into the embroidery hoop together and tensioned evenly. The hoop was then attached to the machine's embroidery arm.
3Thread setup
The bobbin was loaded with white thread matching the fabric, keeping the back surface clean. The upper thread was loaded with blue thread — the single color used across the entire design. No thread changes were needed during the run.
4Embroidery run — monitoring the process
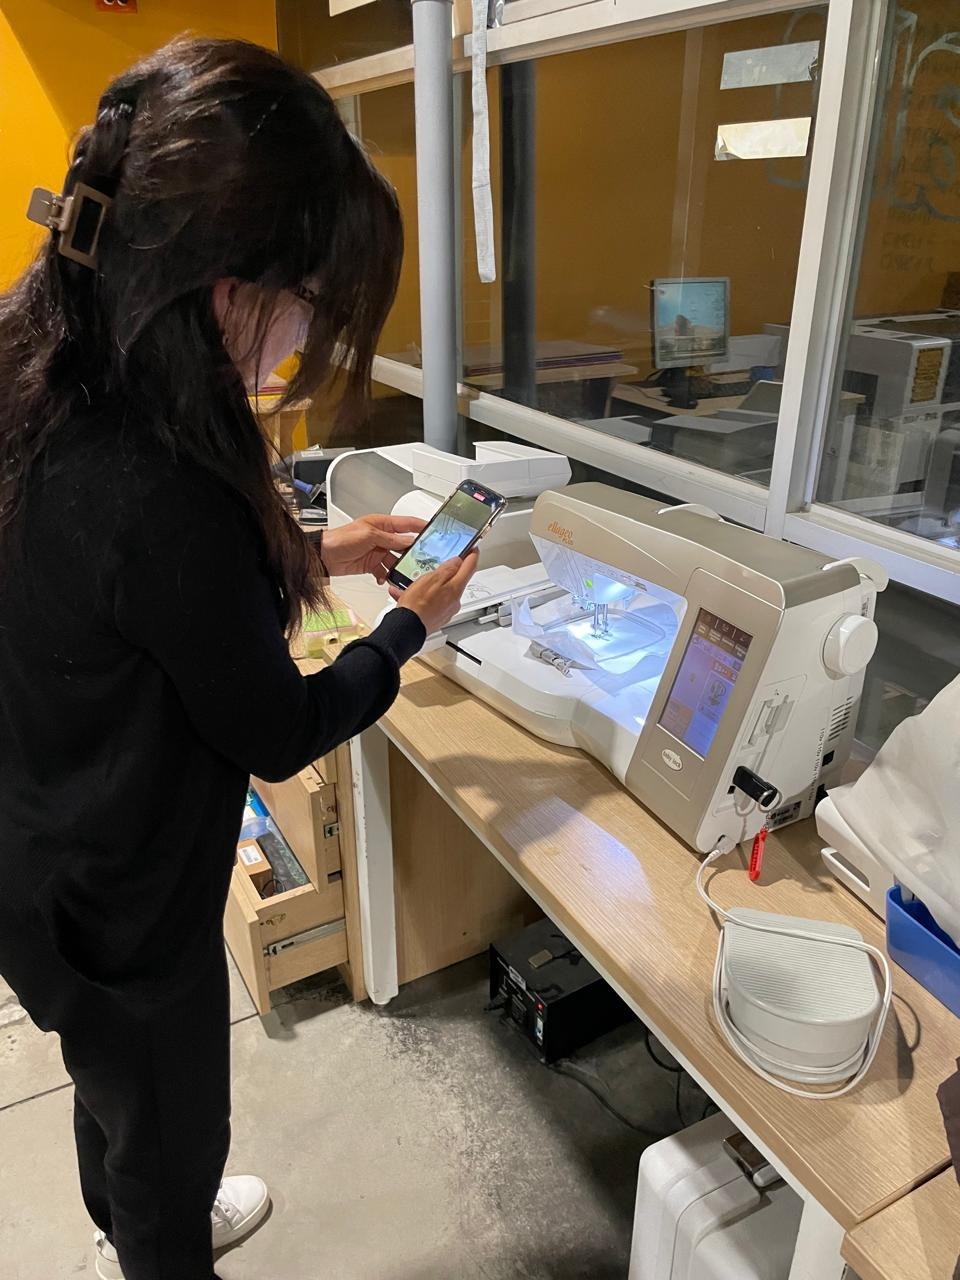
I pressed START/STOP on the machine to begin the embroidery. The machine ran the full 6,265-stitch sequence automatically — outline first, ear fill second, text last — following the stitch order confirmed in the simulation. I monitored the process throughout and documented it with photographs.
Monitoring the run — verifying the hoop was correctly positioned and the fabric tension was even as the Baby Lock Ellageo PLUS stitched the design. The completed Snoopy embroidery is visible in the hoop on the machine's arm.
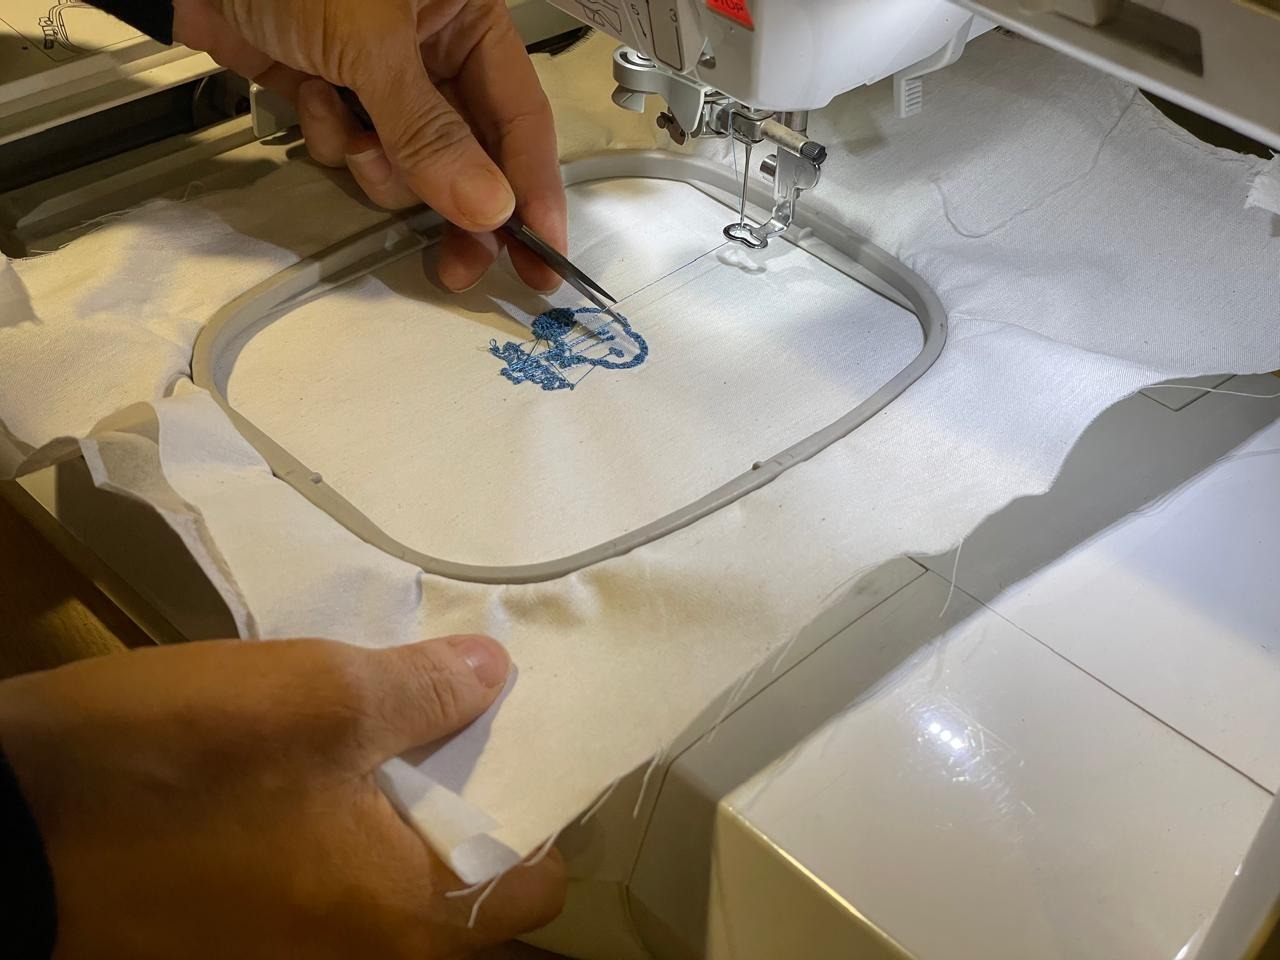
Documenting the embroidery process — left: recording from the side as the machine stitches the design; right: recording from the front showing the Baby Lock Ellageo PLUS touchscreen and arm in operation.
5Thread trimming and finishing
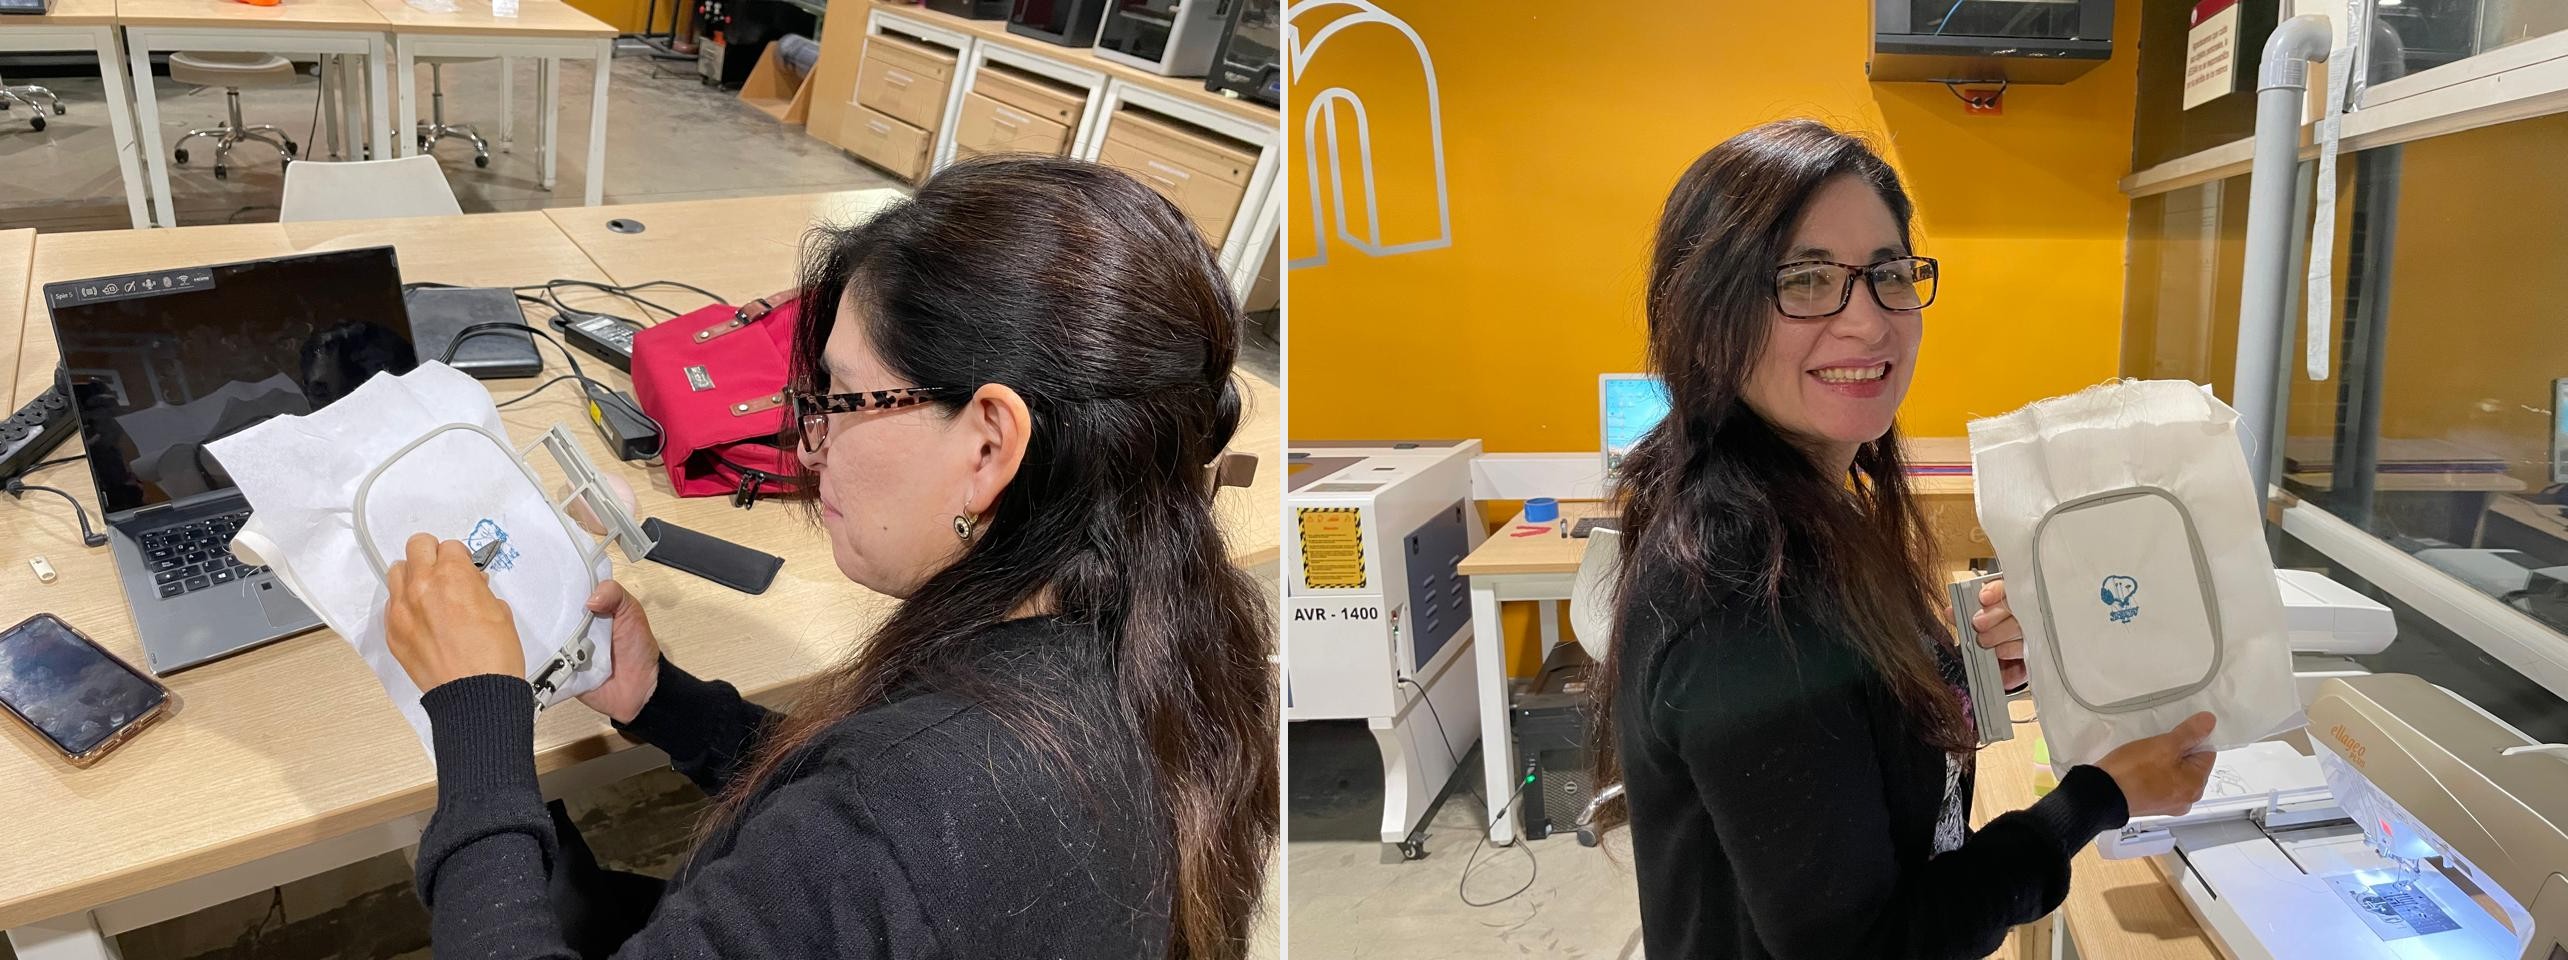
When the machine completed all stitches, I removed the hoop from the embroidery arm. Jump stitches and loose thread ends on both front and back were trimmed with small scissors and tweezers. The stabilizer was left in place as the design area is compact and does not affect the drape of the linen.
On the first attempt, after transferring the .pes file to the Baby Lock machine via USB, the machine displayed an error and was unable to load the design. After checking the machine settings, the cause was clear: the design dimensions exceeded the maximum embroidery area supported by the installed hoop size.
✅ Solution — Scale down and re-export
I returned to Inkscape, selected all paths, and scaled the entire design down to fit within the machine's supported embroidery area. I re-ran the Ink/Stitch stitch plan preview to confirm the adjusted dimensions and re-exported the .pes file. After transferring the corrected file, the machine loaded it correctly and the embroidery ran without further issues.
Result
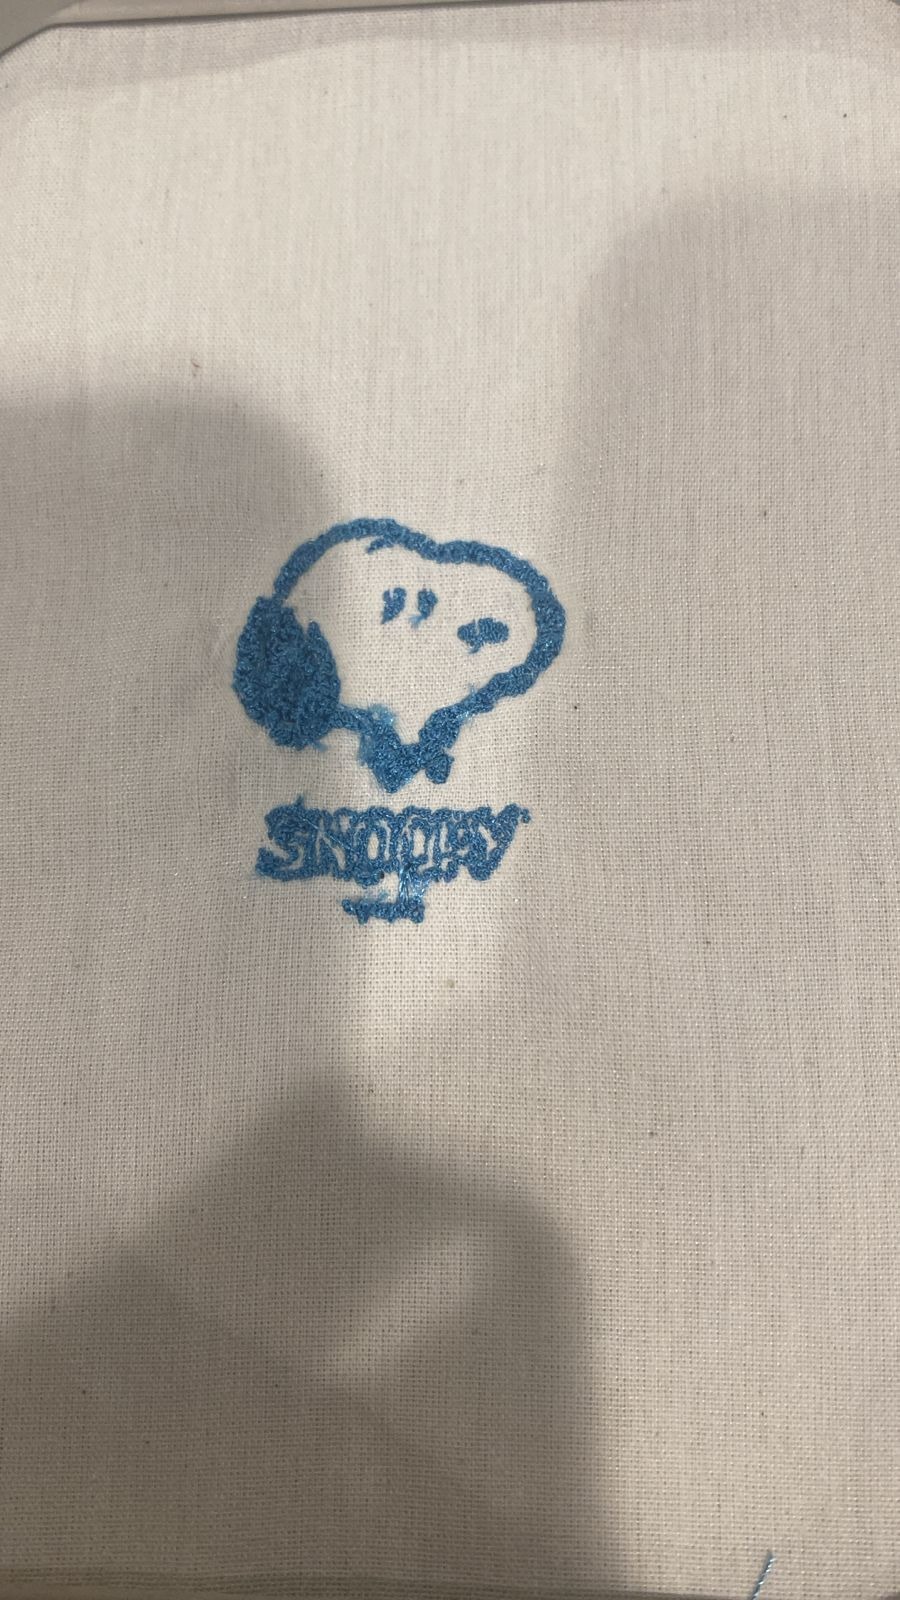
The embroidery was completed successfully on white linen fabric. The blue thread reproduces the character's outline with running stitches along the contour and face details, and auto-fill rows across the solid ear areas and "SNOOPY" lettering. The result is clean and clearly legible from a normal viewing distance.
Digital embroidery is remarkable. You can choose complex designs, configure stitch types and fill patterns in software, and then let the machine execute the embroidery automatically with a level of precision and consistency that handwork cannot match.
What I find most motivating is that this technology allows me to continue doing what I love — working with textiles and crafts — while using digital tools to achieve detail and quality that my hands alone can no longer produce at the same pace. It is not a replacement for craft knowledge; it is an amplifier of it. The understanding of textiles, materials, and composition that comes from years of manual work makes it much easier to make good decisions in the software.
I also learned:
Vectorization quality matters. Using a clean black-and-white reference image made the Trace Bitmap result much more reliable. A complex or low-contrast image would have required extensive manual path cleanup.
Stitch type is a design decision. Choosing between Auto Fill and Running Stitch for each path changes the visual texture of the result — worth testing on small areas before committing to a full export.
The simulator saves material. Running the Ink/Stitch simulator confirmed the stitch count (6,265) and sequence before the machine started, directly preventing additional material waste.
Machine constraints must be checked first. The hoop size limit was not visible in Inkscape — it only surfaced when the machine rejected the file. Checking the supported embroidery area before designing would have avoided this iteration.
Direct application to my work. This process is immediately applicable to producing branded textile elements for entrepreneurship projects at ESAN's incubator — patches, labels, or embroidered logos for product prototypes that students develop during the program.
Resources
Download the files used in this assignment
The files below contain everything needed to reproduce this embroidery: the machine-ready .pes export and the original reference design used for vectorization.