
W15 | Interface and Application Programming
📝 Group Assignment:
- Compare as many tool options as possible.
- Document your work on the group work page and reflect on your individual page what you learned.
What We Did
For the group assignment, we compared two interface tools: Python + Guizero and Lovable. With Guizero we built a desktop interface in Thonny with two buttons to control an LED — turning it on and off. We started with a basic version and then improved it by adding colors to the buttons and updating the interface text. With Lovable we generated a hand tracking interface using a single prompt. The result was a professional-looking web app that detected hand movements in real time, showing a skeleton overlay on the joints and details about each finger — including whether they were extended or curled, their bend angle, and pinch value. We also found a problem: the interface sometimes detected the thumb incorrectly, reading it as closed when it was extended and vice versa.
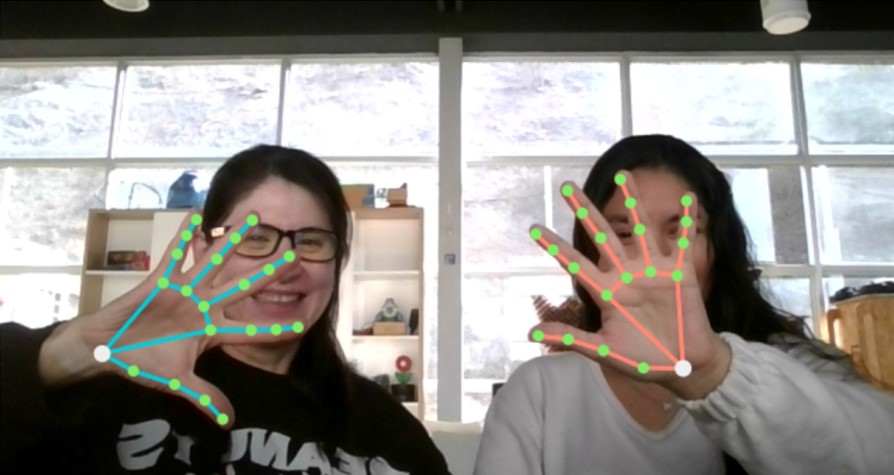
To see the full process in detail — you can visit the group page here.
What I Learned
This week I discovered that there is more than one way to create a user interface. Before this assignment, I thought of interfaces as something complex to build from scratch. Now I know there are tools that make it accessible at different levels — some give you more control over the code, others prioritize speed and visual results. Understanding both approaches gives me more options when thinking about how to design the interaction between a user and a device.
📝 Individual Assignment:
- Write an application for the embedded board that you made. that interfaces a user with an input and/or output device(s).
Starting Point
For this week's assignment, I wanted to explore an idea I had considered for Pambu during the early stages of the project: equipping the robot with a camera that could detect children's emotions in real time — happy 😊, sad 😢, or angry 😠 — so it could trigger different emotional regulation responses automatically. However, this idea was eventually set aside; Pambu's final design uses push buttons instead for emotion input.
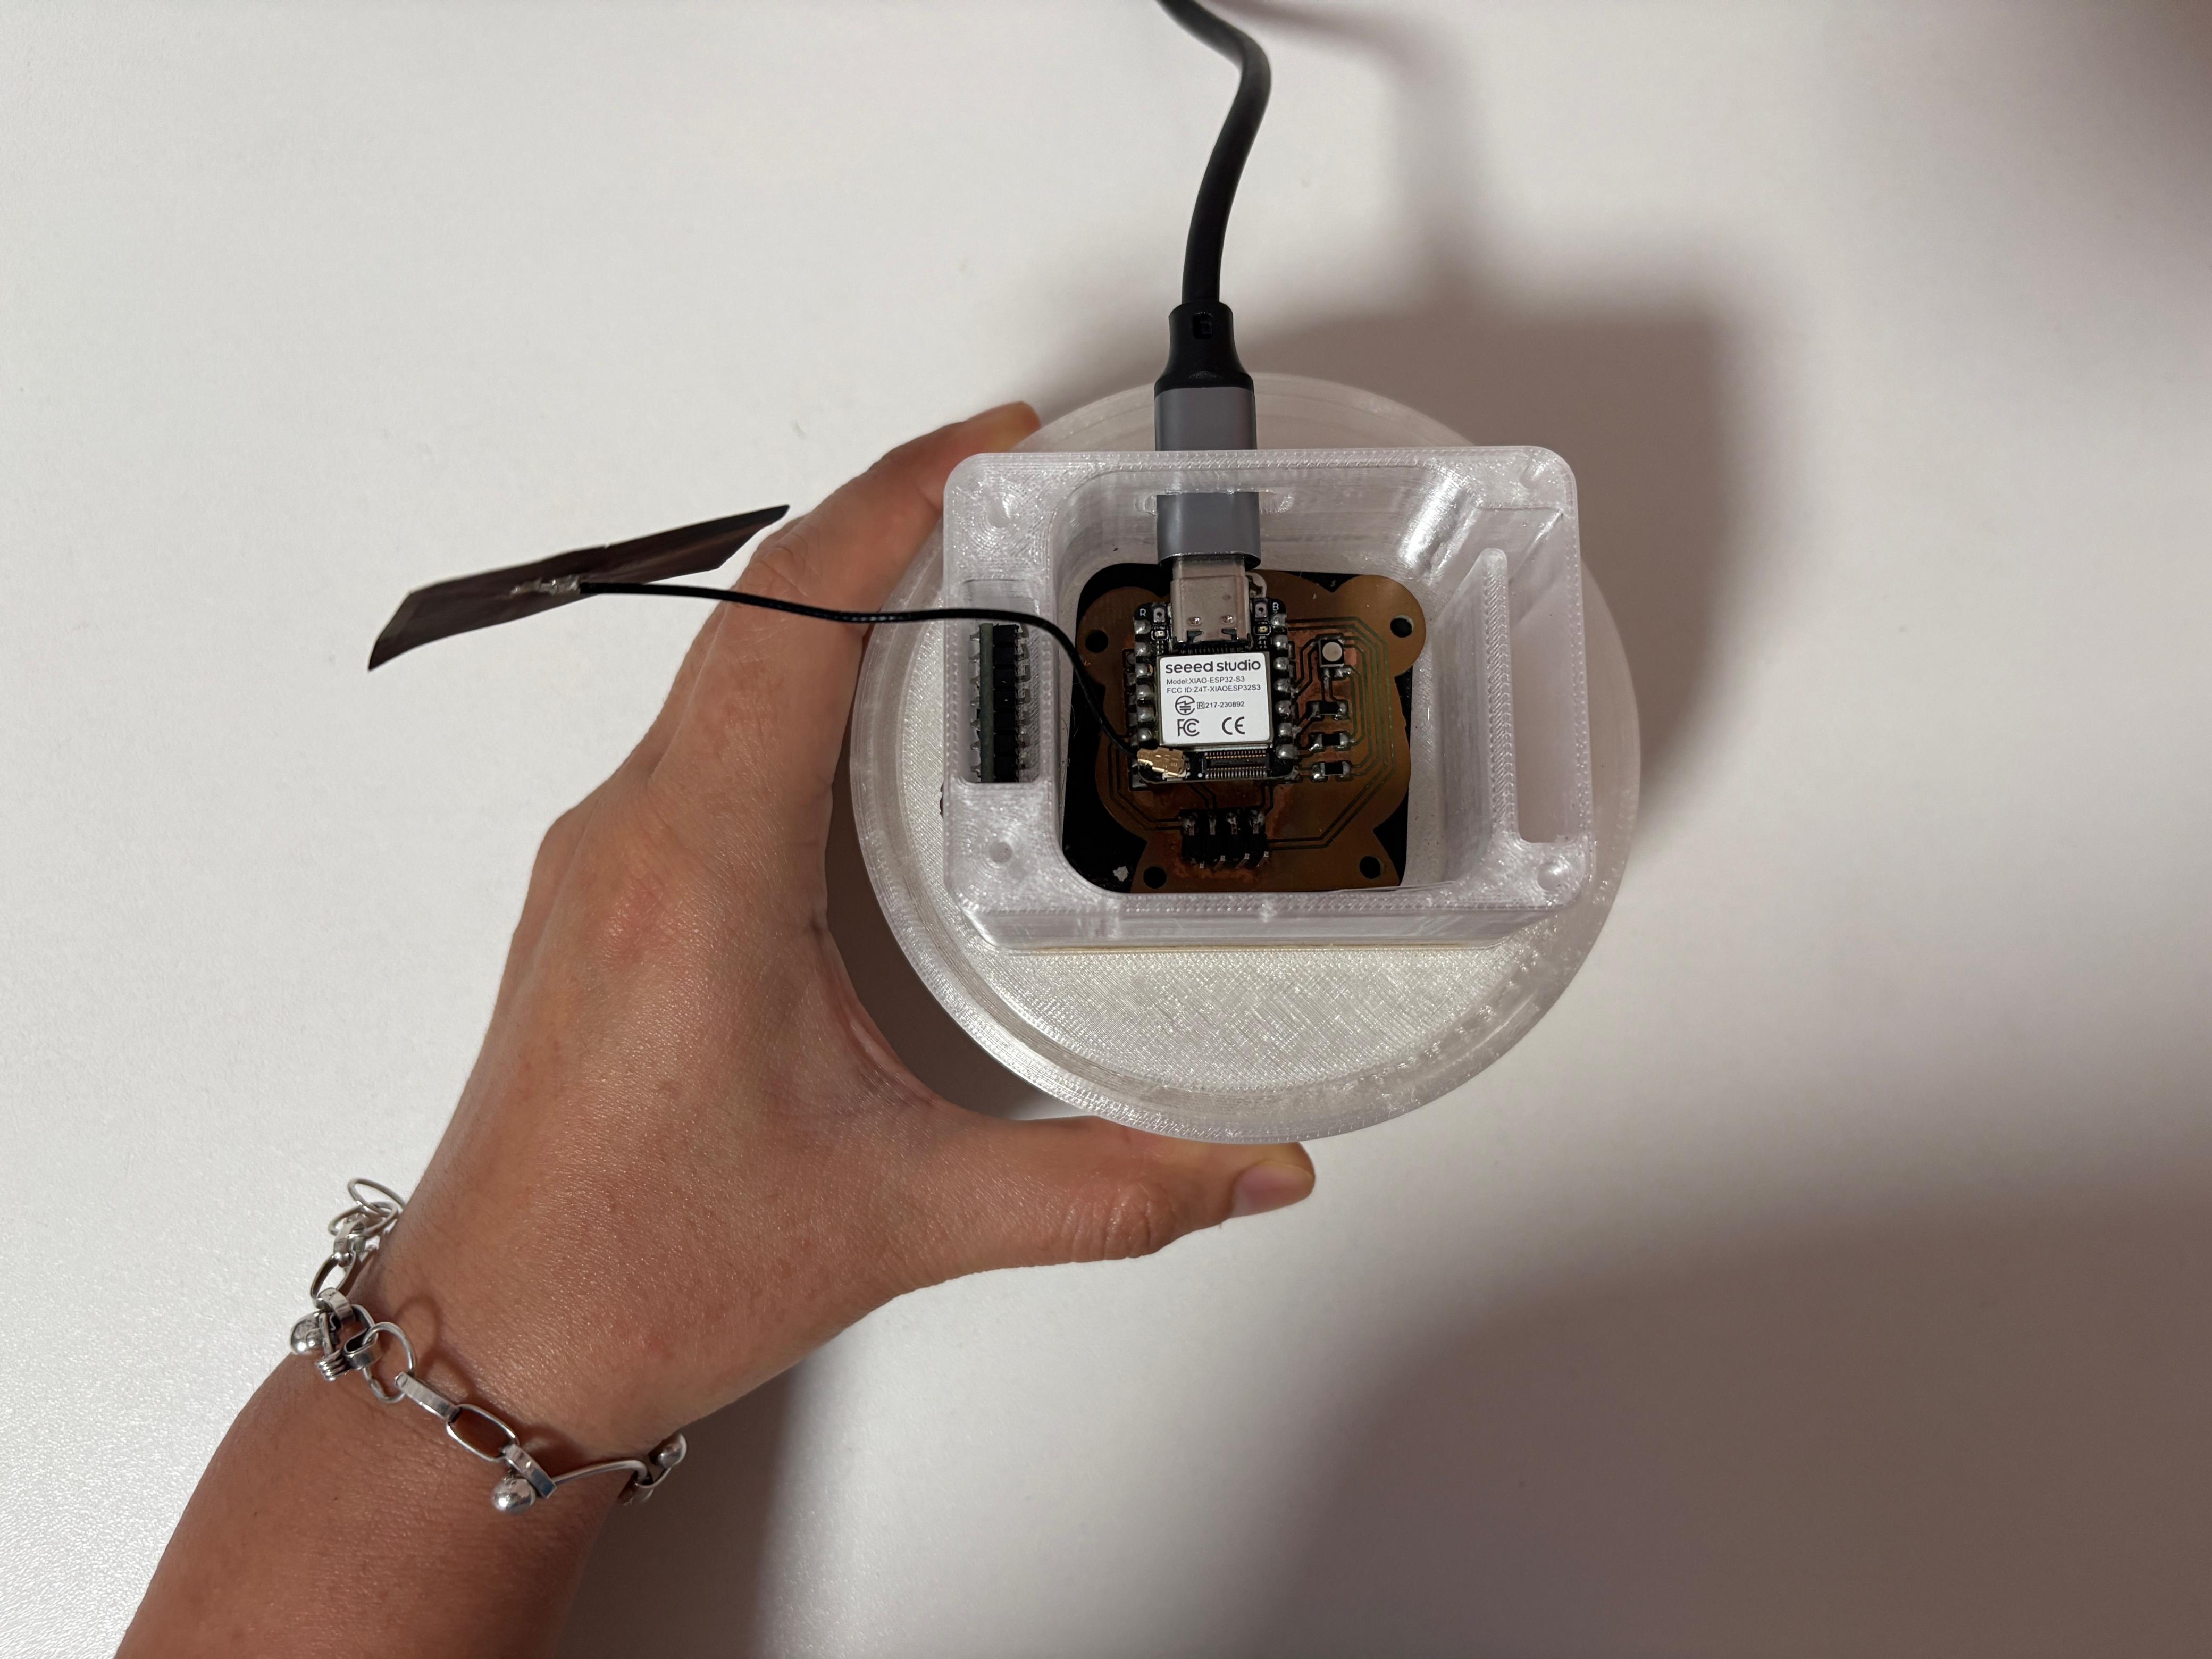
For this week, I decided to revisit that original concept and explore what tools and approaches could realistically support it — not to implement it in the final project, but to understand what would be involved. This led me to two different experiments, both using my XIAO ESP32-S3 board and its RGB LED as a way to test communication between a UI and embedded hardware.
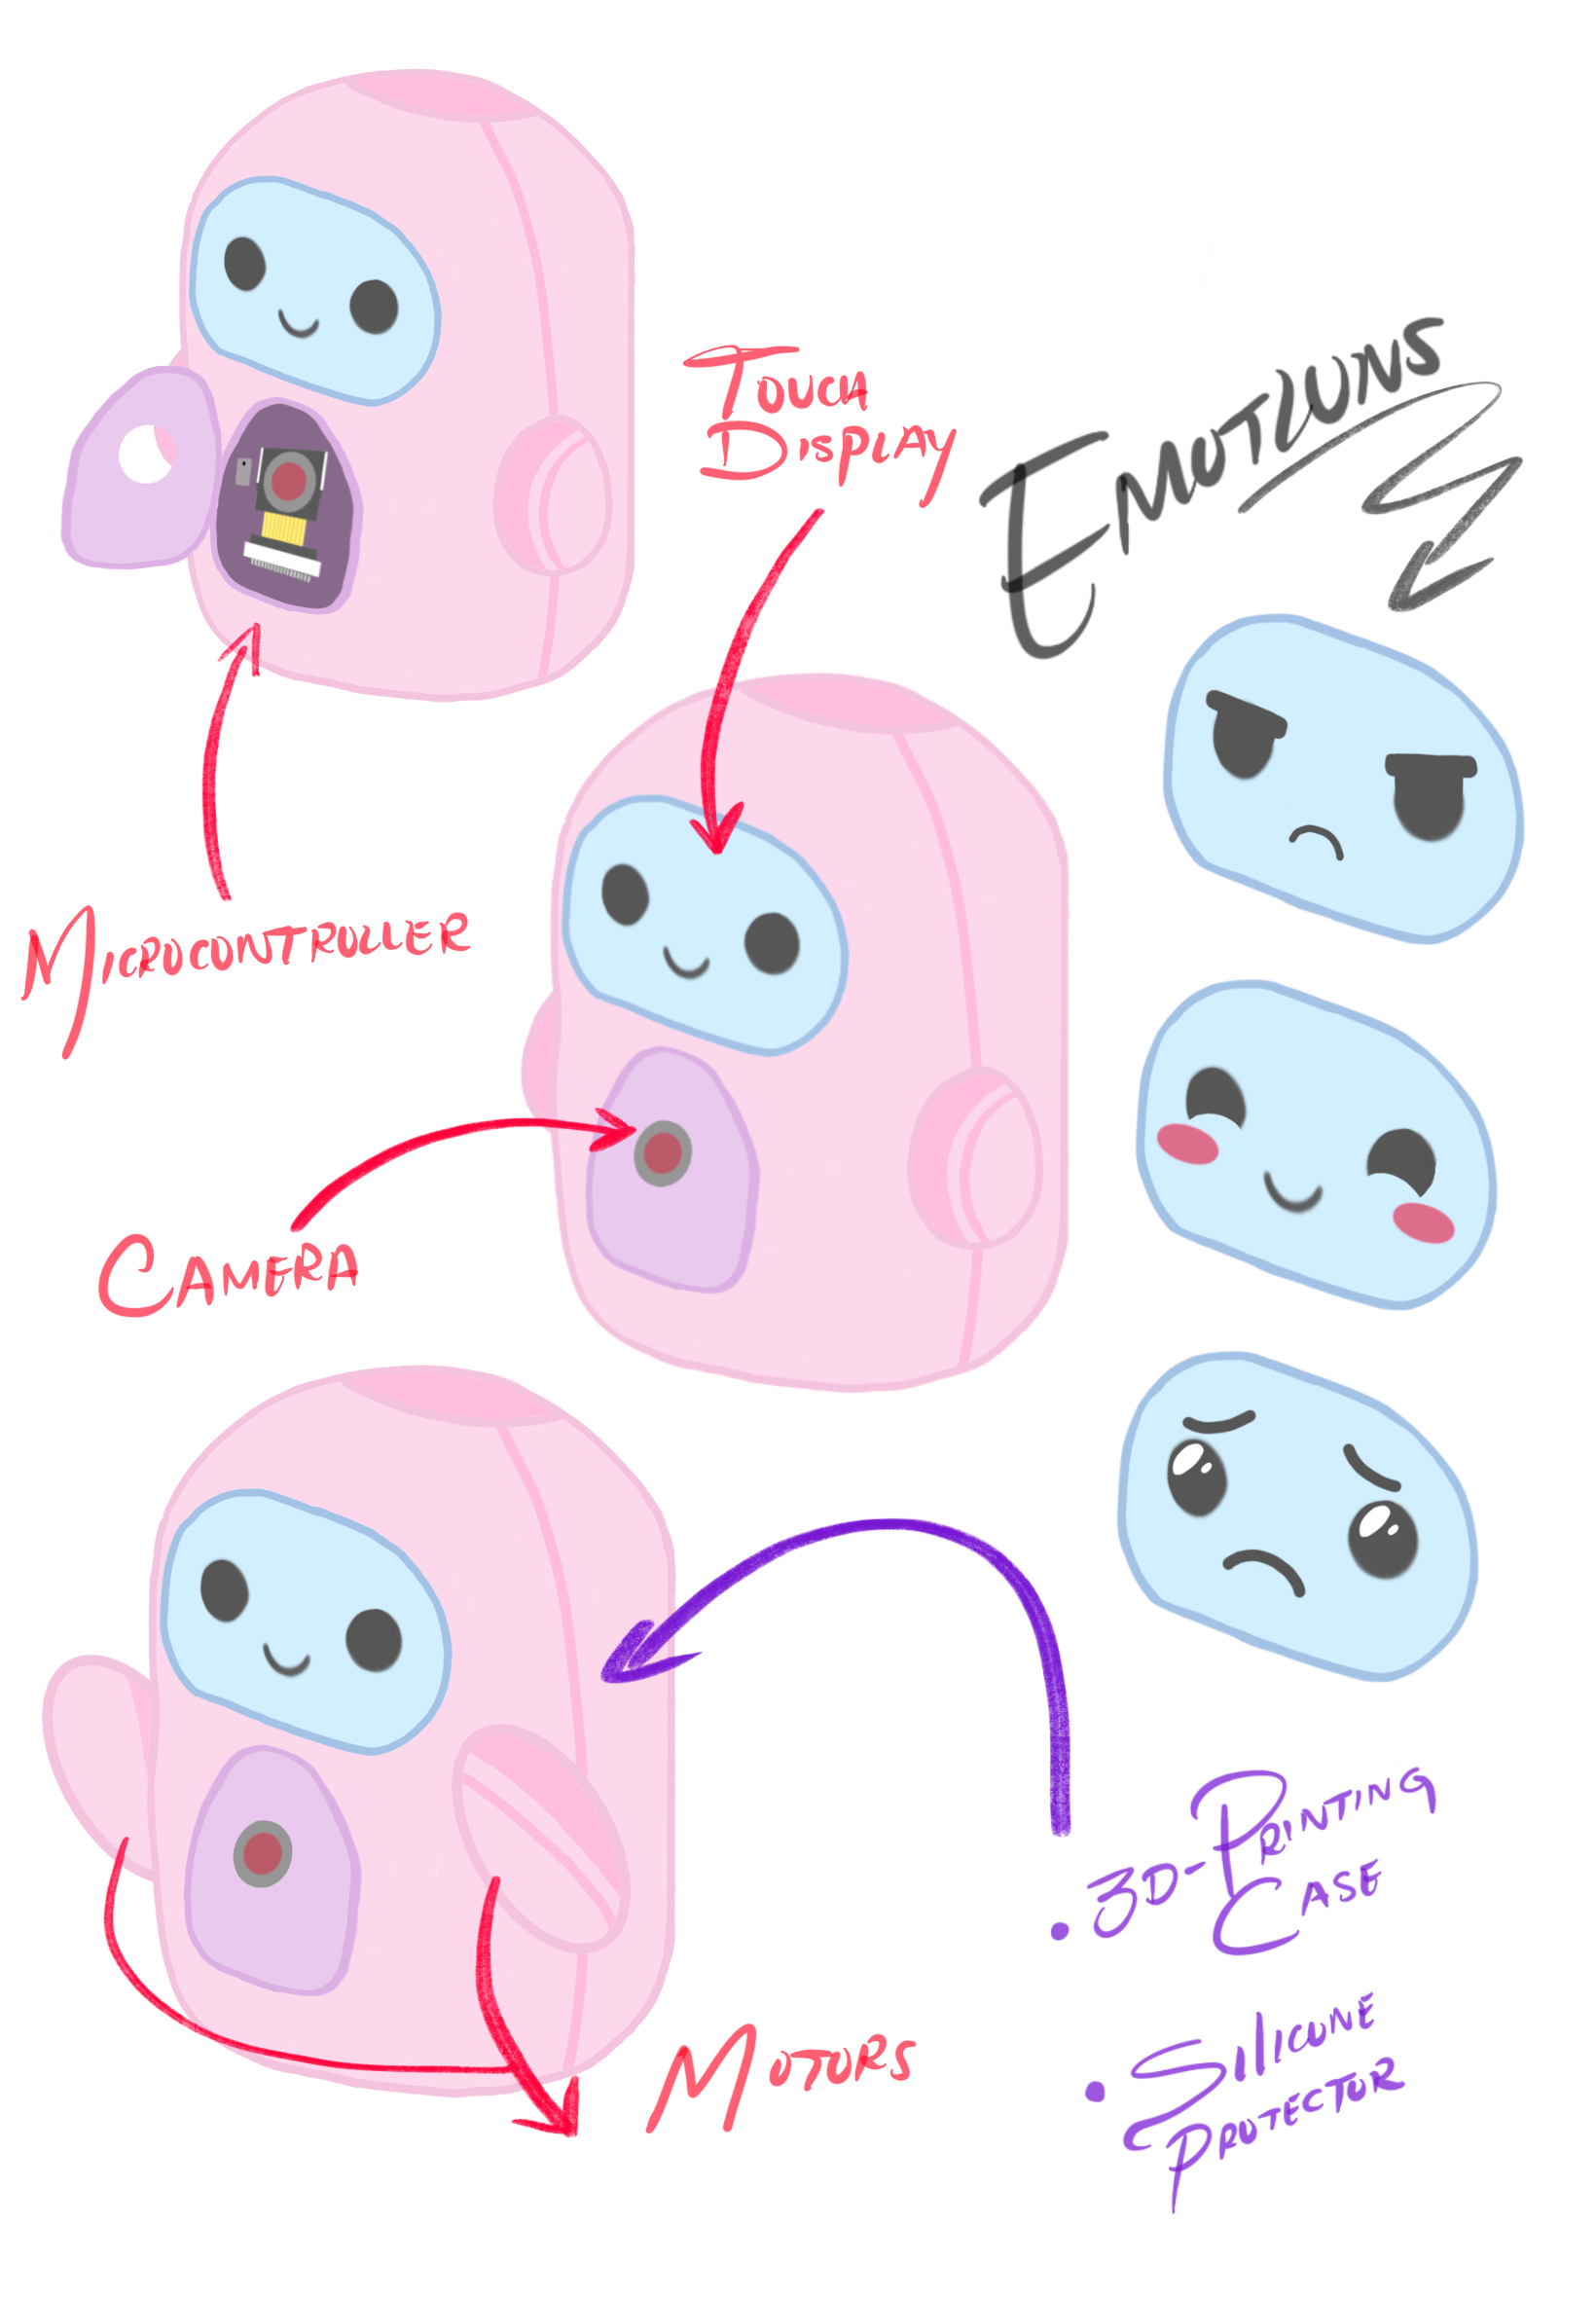
First sketch / idea of my final project
Exploring AI-Generated Interfaces
Lovable: First Attempt
The first tool I explored was Lovable, an AI-powered web application generator that lets you describe an interface in natural language and generates a fully functional web app from it. Since it has a limited number of free tokens, I needed to be strategic with my prompts — so I used ChatGPT first to help me craft a clear, detailed prompt before loading it into Lovable.
My first prompt targeted three-emotion detection using the laptop camera, sending serial commands to the XIAO ESP32-S3 to light the RGB LED in different colors:
🤖 PROMPT
"Create a web interface that uses the laptop's camera to perform real-time facial emotion recognition. Detect three emotions: happy, sad, and angry. Send messages through the serial port to a XIAO ESP32S3 so that when a happy face is detected, the RGB LED connected to pins D7, D8, and D9 turns green; when a sad face is detected, it turns blue; and when an angry face is detected, it turns red. On the right side of the interface, display a large emoji representing the detected emotion. Also include a label showing the detected emotion in text and update both the LED and emoji continuously in real time."
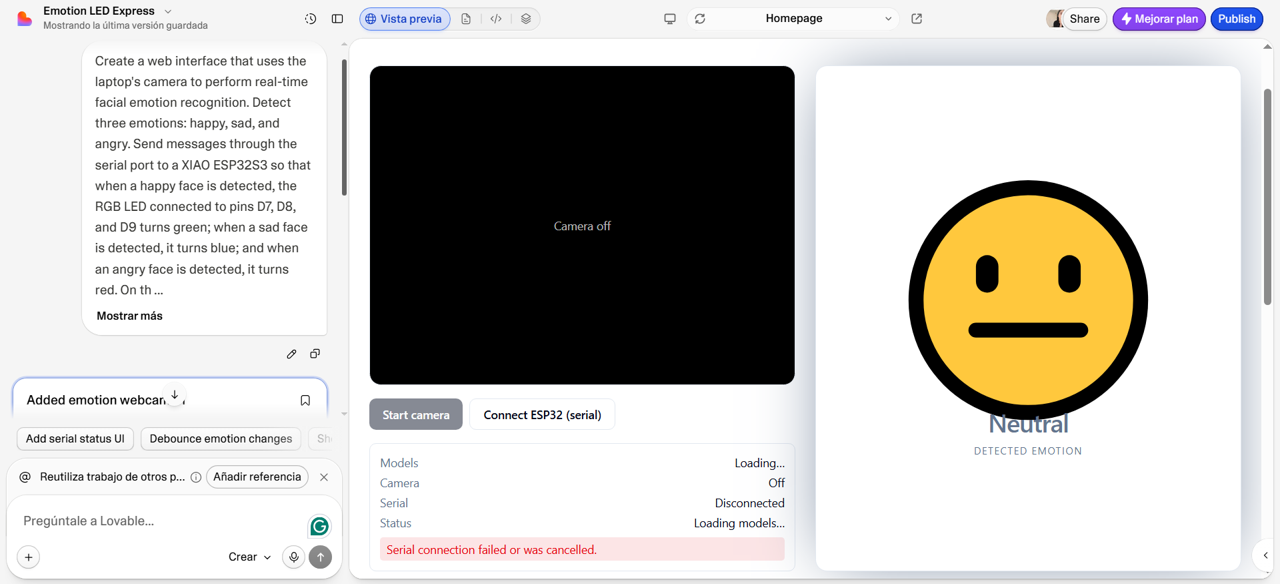
Error: Failed to load models
Lovable generated the interface, but when I tested it I got the following error: Failed to load models. After investigating, the cause was clear: the approach relied on local model files for facial recognition that were not available in Lovable's environment.
How It Was Supposed to Work
The intended flow was straightforward: the browser would access the laptop camera and run a facial emotion recognition model in real time. Each time an emotion was detected, the interface would send a command through Web Serial to the XIAO ESP32-S3 — and the board would respond by changing the RGB LED color accordingly. The emoji and text label on screen would update simultaneously, creating a synchronized response between the interface and the hardware.
The problem was that no browser-compatible pre-trained model for three-emotion detection could be found. Without it, the interface had nothing to run. This attempt could not move forward. 😔
Second Attempt: Smile Detection
Since the first attempt failed, I went back to ChatGPT to find an alternative. It was clear that for three-emotion detection there were no browser-compatible pre-trained models available, so I changed the goal: instead of detecting three emotions, I focused on a single detection — whether the user is smiling or not. For this, ChatGPT suggested MediaPipe Face Landmarker, a browser-compatible solution that loads automatically without requiring local model files.
I crafted a new prompt:
🤖 PROMPT
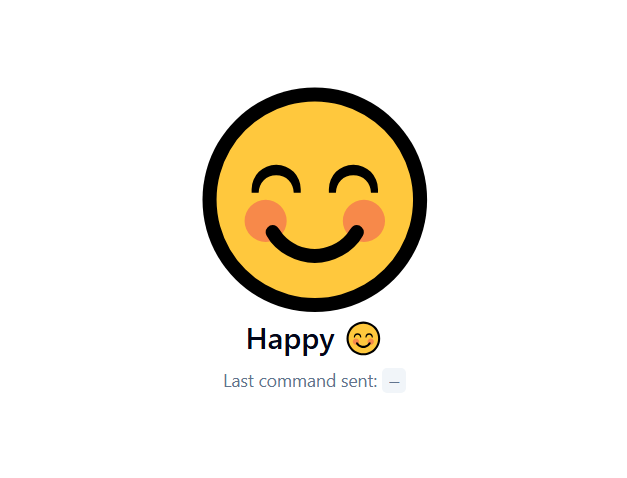
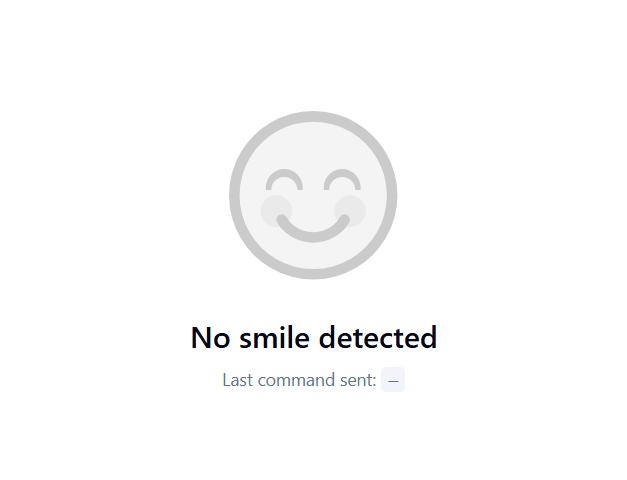
"Create a web interface that uses the laptop camera to detect when the user is smiling in real time using MediaPipe Face Landmarker. The interface should include a live webcam feed, a large happy emoji (😊) displayed on the right side when a smile is detected, and a text label indicating either 'Happy 😊' or 'No smile detected'. Implement Web Serial communication with a XIAO ESP32S3. When a smile is detected, send the serial command RAINBOW — the ESP32 should generate a smooth rainbow effect by gradually changing PWM values on pins D7, D8, and D9. When no smile is detected, send the command OFF and turn the LED off. Only send a command when the detection state changes to avoid serial flooding."
Lovable generated both the web interface and the Arduino sketch — the code for the board is displayed directly inside the app, ready to copy into Arduino IDE. The result was a web app called Smile Detector with a live camera feed on the left and the emotion status on the right, plus a "Connect to XIAO ESP32S3" button to establish the serial connection from the browser.
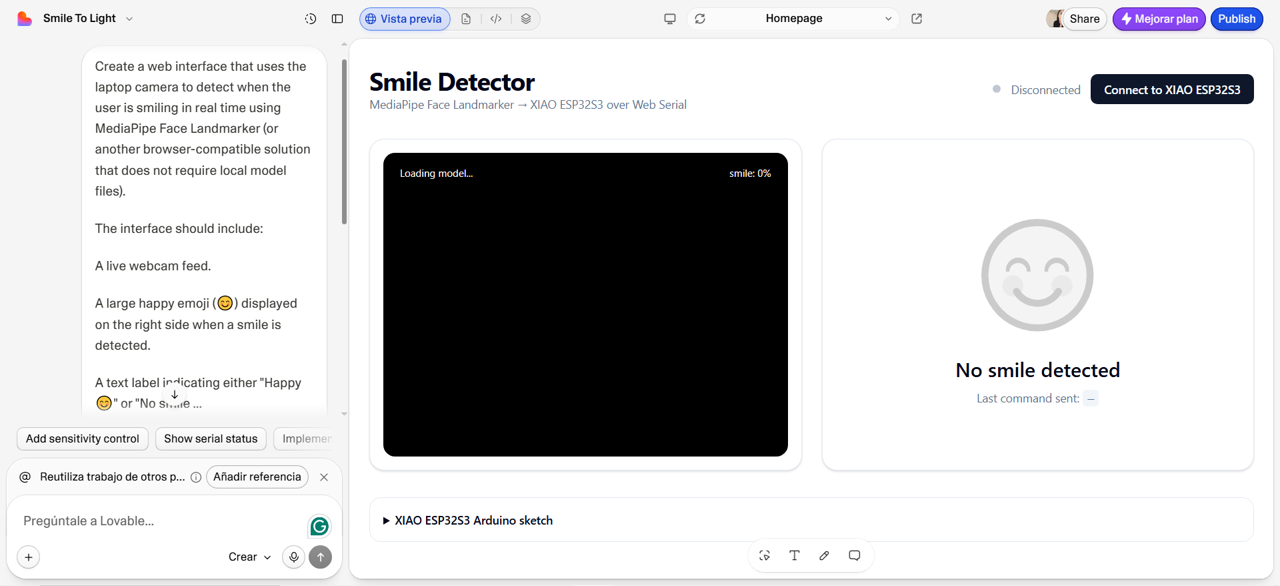
The process of getting everything up and running was simple:
How It Works: Smile Detector
The Smile Detector works through two components that communicate via Web Serial: the browser-based interface generated by Lovable, and the XIAO ESP32-S3 running the Arduino sketch.
On the browser side, MediaPipe Face Landmarker analyzes the webcam feed frame by frame, detecting facial landmarks and calculating whether the user is smiling. When the detection state changes — from no smile to smile, or vice versa — the interface sends a serial command to the board. Commands are only sent on state changes to avoid flooding the serial port with repeated messages.
Two commands are used:
On the board side, the Arduino sketch waits for incoming commands through the serial connection. When it receives RAINBOW, it starts cycling through colors smoothly — gradually shifting the hue and writing the corresponding values to the RGB LED on pins D7, D8, D9. When it receives OFF, it stops and turns the LED off. Since my accessory board uses a common anode RGB LED, the color values are handled with inverted logic internally inside the writeRGB function — so the rest of the code stays clean and readable.
void loop() {
  if (Serial.available()) {
    String cmd = Serial.readStringUntil('\n');
    cmd.trim();
    if (cmd == "RAINBOW") rainbow = true;
    else if (cmd == "OFF") {
      rainbow = false;
      writeRGB(0, 0, 0);
    }
  }
  if (rainbow) {
    hsvToRgb(hue, ...); // converts hue to RGB for smooth color cycling
    hue += 0.6f;        // advances the color each loop
    delay(15);          // controls the speed of the effect
  }
}
The loop checks for incoming commands — RAINBOW starts the color cycle, OFF stops it and turns the LED off
Hero Shot 🏆
Smile detected — the board responds with a rainbow effect through Web Serial 🌈
The Smile Detector interface is live and accessible — you can try it directly from your browser:
Desktop Interface with Python
Mood RGB Controller
For the second experiment I took a completely different approach — no camera, no AI detection. Instead, I built a simple desktop interface using Python in Thonny that lets the user manually trigger emotion states through buttons. Each button sends a command through serial to the XIAO ESP32-S3, which responds by changing the RGB LED color.
To build the interface I used two libraries that need to be installed before running the script:
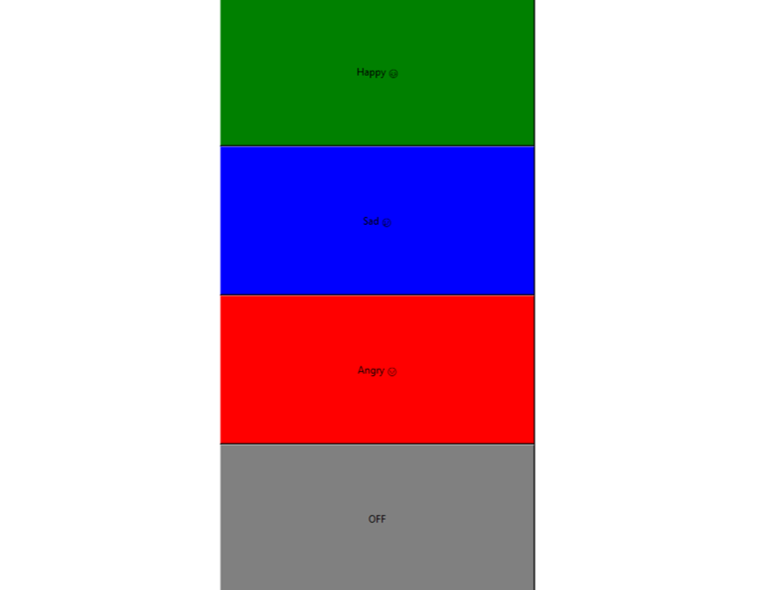
The interface has four buttons: Happy 😊, Sad 😢, Angry 😠, and OFF — each with a color matching the emotion it represents. When a button is pressed, Python sends a single character through serial to the board: 3 for happy (green), 1 for sad (blue), 2 for angry (red), and 4 to turn the LED off. On the board side, an Arduino sketch listens for the incoming character and sets the RGB LED to the corresponding color on pins D7, D8, D9.
How It Works: Mood RGB Controller
The Mood RGB Controller works through two components: a Python script running in Thonny that creates the interface, and the XIAO ESP32-S3 running the Arduino sketch.
When the user clicks a button, the Python script sends a single character through the serial connection to the board:
3→ Happy 😊 → LED turns green1→ Sad 😢 → LED turns blue2→ Angry 😠 → LED turns red4→ OFF → LED turns off
The board listens for incoming characters and responds immediately by changing the LED color. The connection is established at the start of the script and stays open as long as the app is running. When the app is closed, the connection closes automatically. Unlike the Smile Detector, there is no automatic detection here — the user decides which emotion to send. This makes the interface simpler and more direct, and it worked without any issues from the first try.
# Serial connection
xiao = serial.Serial('COM15', 9600)
time.sleep(2)

def set_happy():
    xiao.write(b'3')  # green

def set_sad():
    xiao.write(b'1')  # blue

def set_angry():
    xiao.write(b'2')  # red

def set_ledOFF():
    xiao.write(b'4')  # off
Hero Shot 🏆
"Three emotions, three colors, one working interface."
⚠️ Problems and How I Fixed Them
Problem — Common anode vs common cathode LED
The code generated by Lovable assumed a common cathode LED, but my accessory board uses a common anode LED — which means the logic is inverted: 0 means fully on and 255 means fully off. The generated code also had an inconsistency: the COMMON_ANODE flag was set to false, but the OFF command was already written as writeRGB(255, 255, 255) — which is actually the correct behavior for common anode. The colors worked, but the code was contradicting itself.
✅ Fix
Two corrections were made to the Arduino sketch:
- Changed
COMMON_ANODE falsetoCOMMON_ANODE true - Changed the OFF command from
writeRGB(255, 255, 255)towriteRGB(0, 0, 0), letting the function handle the inversion internally
The same logic applied to the Mood RGB Controller sketch — all color values are written with inverted logic to account for the common anode configuration.
Final Thought
As part of my 2026 cycle, this assignment pushed me to explore two very different ways of building an interface and connecting it to embedded hardware. Both experiments achieved the same goal — controlling an RGB LED from a custom interface — but the path to get there was very different. Lovable was faster to set up but required some review and corrections along the way. The Python approach in Thonny was simpler and worked without issues from the start. Each tool has its place: Lovable is great when you want something visual up and running quickly, while Python gives you more control and fewer surprises.