Introduction to my Final project
As mentioned in week 1 and in my final project proposal I choose to make a 2D drawing robot that uses an Graphical user interface which can control its movement and sends to it what to draw.
For my system integration week I choose to include the following:
- The over all sketching.
- The CAD design.
- System Logic Flowchart
- The BOM (bill of material)
- Electronics block diagram.
- The timeline of the tasks.
Sketching

CAD design
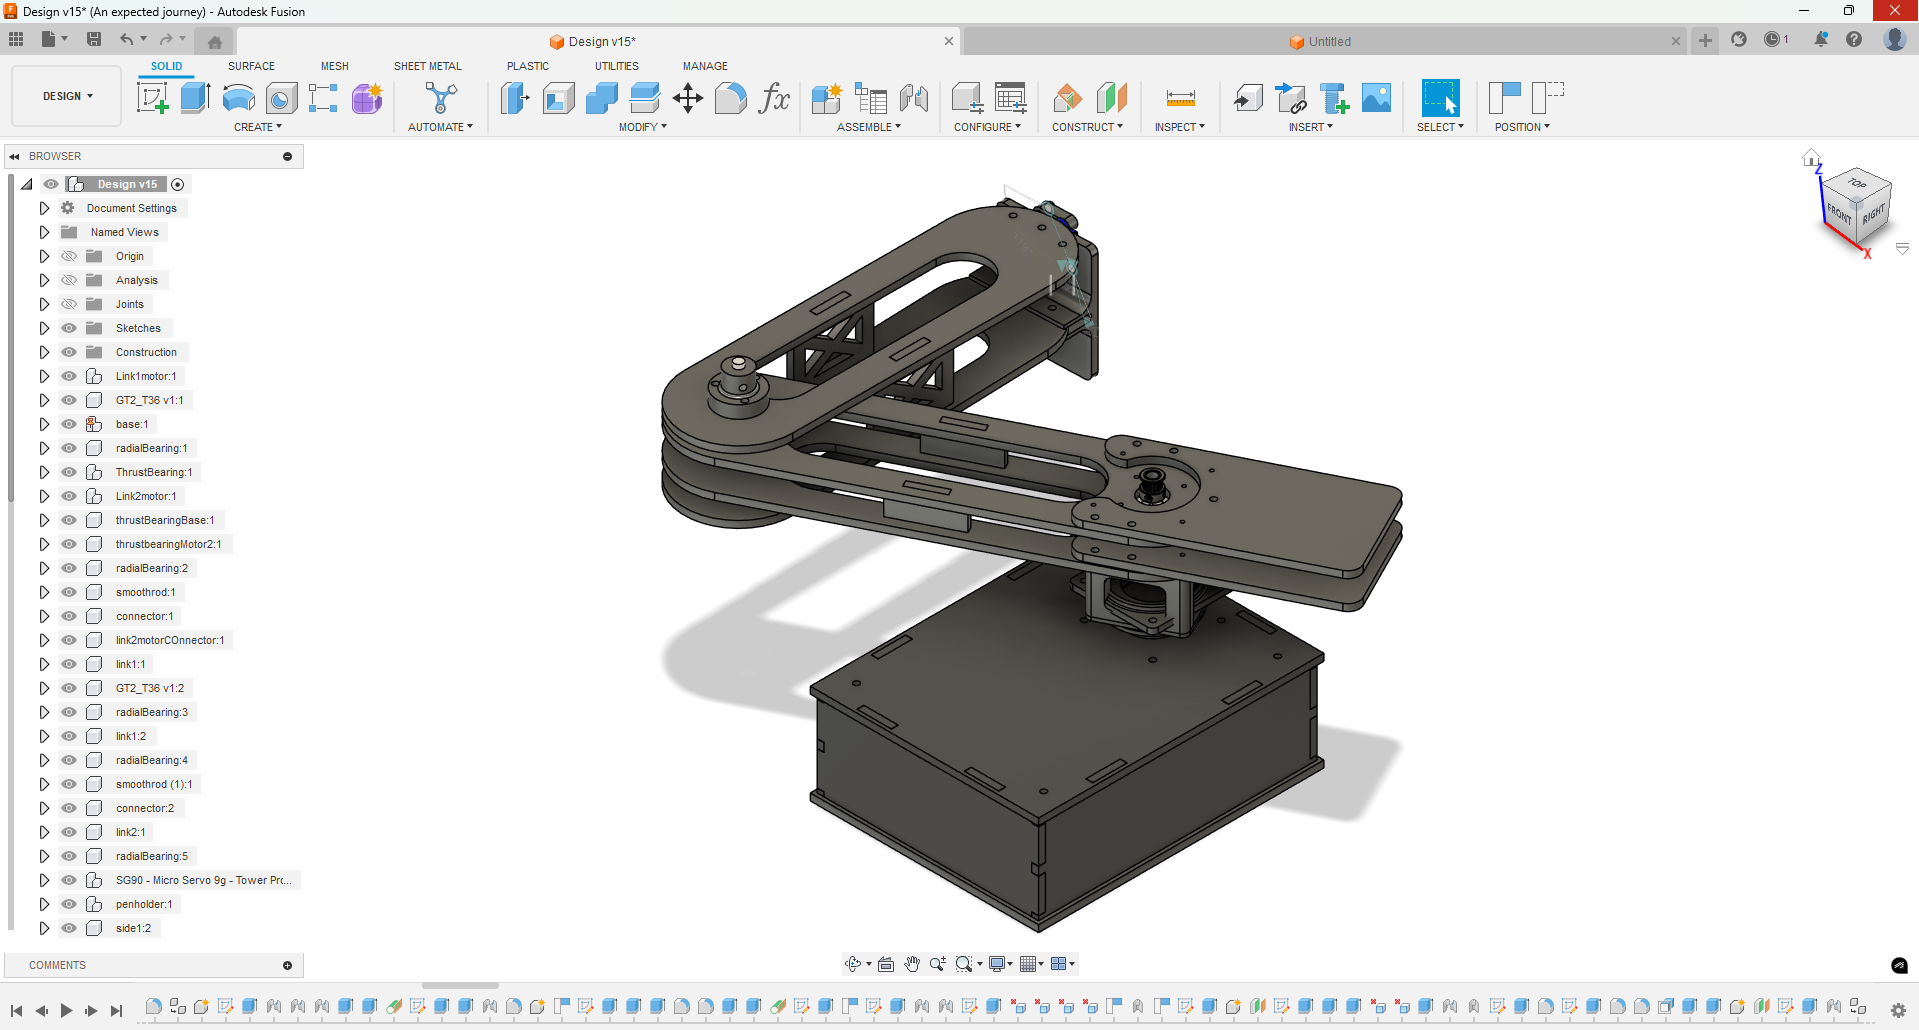
.png)
System Logic Flowchart
Here I used Code2flow to make a flowchart show how the system will work and behave. It starts with homing sequence where the motors should zeroing their angles, checking the connection to the GUI. Then once the system receives a command it starts to move accordingly. after that checking if there is no commands lift to be executed. then sends a message that it finished the drawing and finally go to the rest point.
Bill of Materials (BOM)
| Components | Quantity | Links | Cost |
|---|---|---|---|
| Stepper motor | 2 | Stepper motor Nema 17 | 900 EGP |
| Servo motor | 1 | Servo motor SG90 | 100 EGP |
| GT2 timing belt | 2 | Timing belt 1m 6mm | 60 EGP |
| Stepper motor pulley (20 teeth) | 2 | 20 teeth 5mm bore | 100 EGP |
| Stepper motor pulley (36 teeth) | 2 | 36 teeth 5mm bore | 150 EGP |
| Limit switch | 2 | Limit switches | 15 EGP |
| Stepper motor driver A4988 | 2 | A4988 Driver | 170 EGP |
| ESP32 C3 Controller | 1 | Xiao ESP32 C3 | 750 EGP |
| LCD with I2C interface | 1 | 20x4 LCD display | 350 EGP |
| 12V Power Supply (2A or higher) | 1 | Local shop or reused | ~150 EGP |
| Wires, Connectors, USB cable | - | Assorted jumper wires and USB-C | ~100 EGP |
| Perfboard or Custom PCB | 1 | Inventory / Fab Academy | - |
| Heat sinks for A4988 (optional) | 2 | Inventory | - |
| 3D printed pen holder | 1 | Custom design | - |
| Materials | Quantity | Notes | Cost |
| Acrylic 6mm / Plywood 6mm | 1 sheet | Inventory | - |
| 3D printing filament | ~100g | Inventory | - |
| Screws, nuts, standoffs | As needed | Inventory | - |
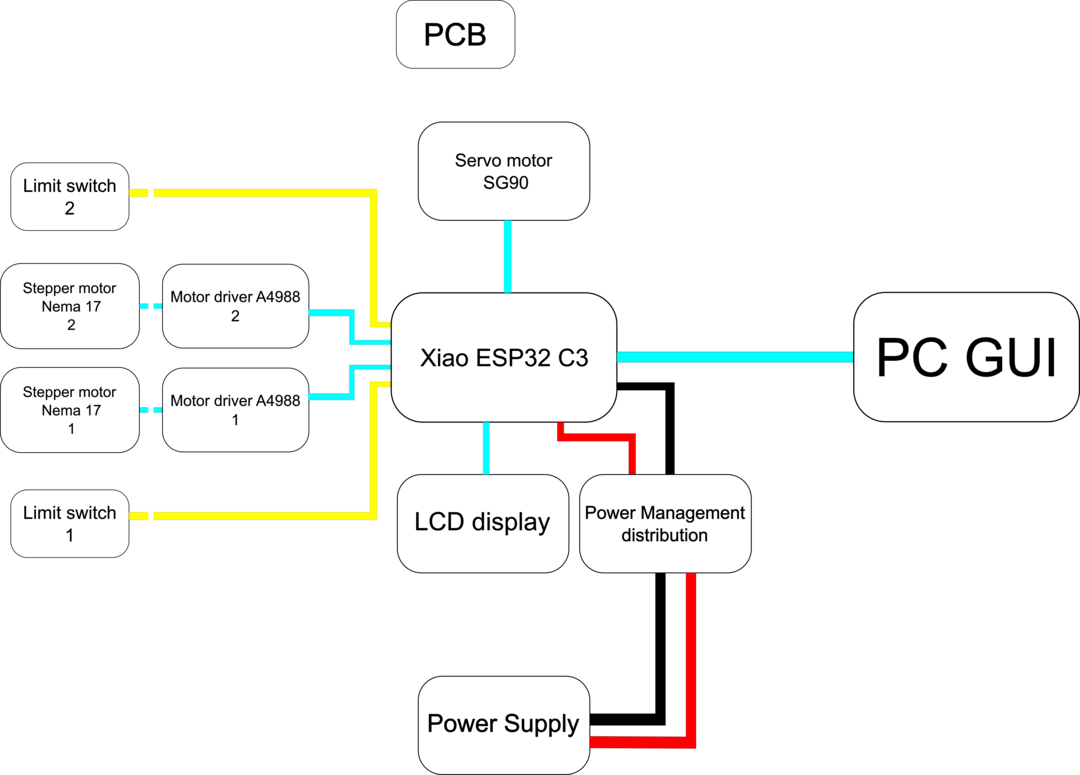
Electronics block diagram.
Tasks Timeline
With the help of our instructor Ahmad Saeed I broke down the project to smaller tasks and and put them into a timetable.