
Table of Contents
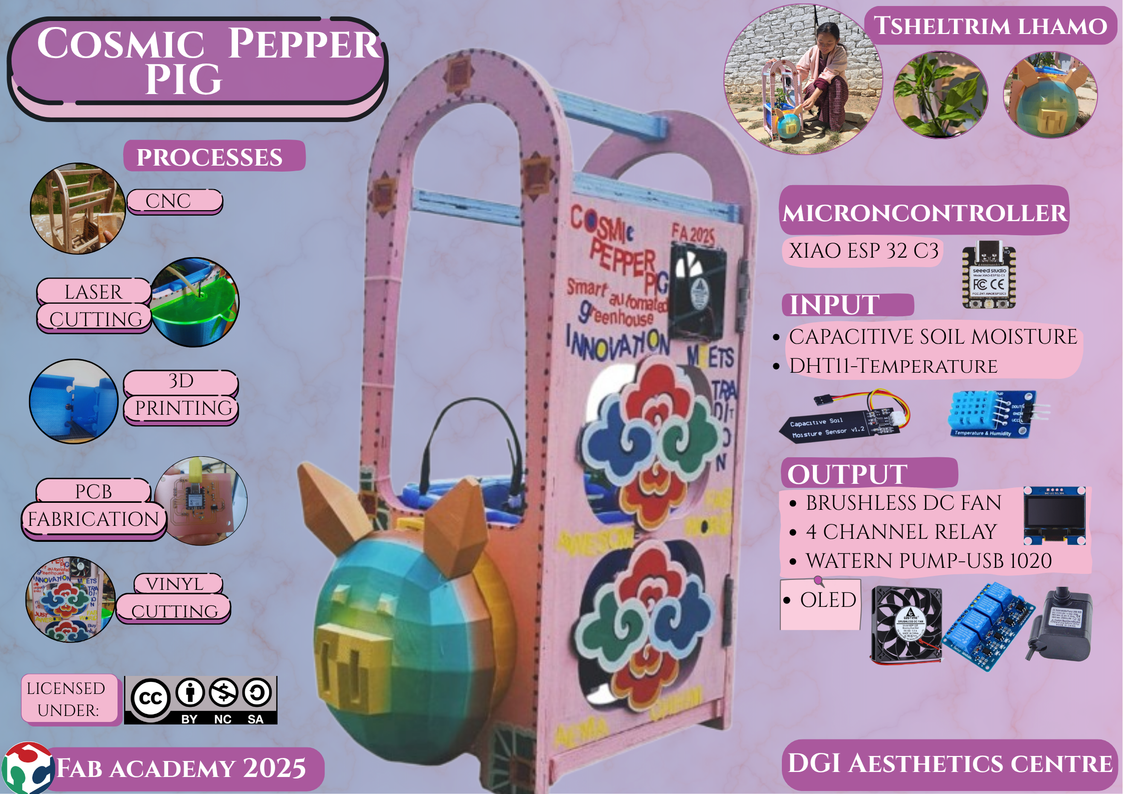
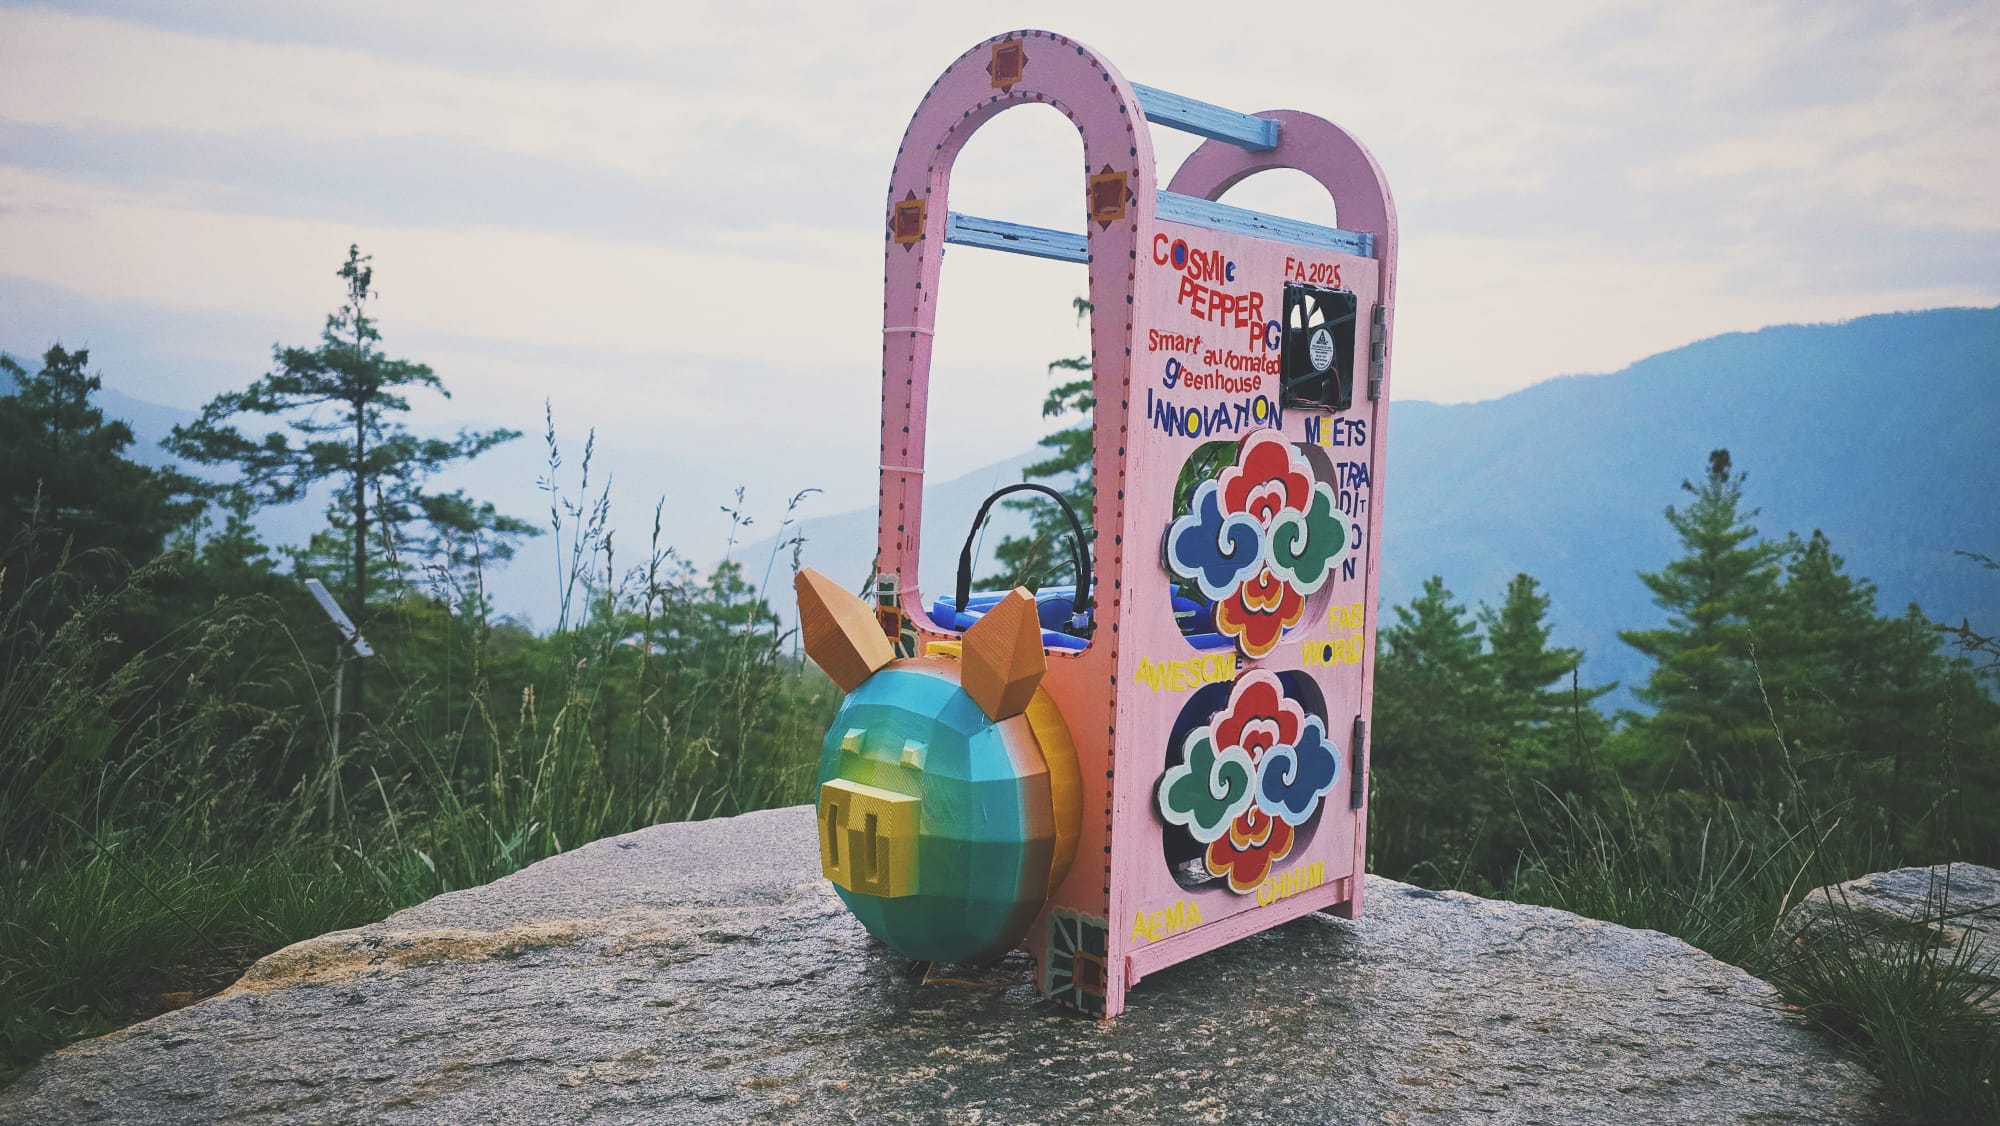
My final project is the COSMIC PEPPER PIG which is a smart automated system for pepper growth. It will take in 2 inputs: soil moisture and temperature and its designated corresponding outputs will be: a fan, a water pump and an OLED to display the real time data. I will be using Xiao ESP 32 c3 as the microcontroller. To make this project fun and interesting for myself, I designed the enclosure similar to a cosmic pig. Check the PROJECT DEVELOPMENT page and also my Final Project FULL JOURNEY page.
Slide
Video
BOM-Bill of Materials
| Component Name | Specification | Price (Nu.) | Price (USD) | Quantity | Total Cost (Nu.) | Online or Local Market |
|---|---|---|---|---|---|---|
| Soil moisture sensor | Capacitive V2.0 | 54 | 0.65 | 1 | 54 | Available in the lab |
| DHT22 | AM2302 | 121 | 1.46 | 1 | 121 | Available in the lab |
| LDR | Photoresistor | 149 | 1.80 | 1 | 149 | Available in the lab |
| 4 channel relay | 5V module | 219 | 2.64 | 1 | 219 | Available in the lab |
| Water pump | Submersible | 398 | 4.80 | 1 | 398 | Available in the lab |
| Xiao ESP32 C3 | Wi-Fi + BLE | 471 | 5.67 | 1 | 471 | Available in the lab |
| LED bulb | 12V DC | 159 | 1.91 | 1 | 159 | Available in the lab |
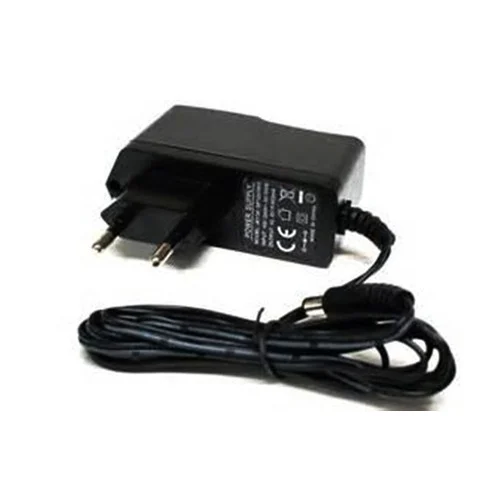
| 240V to 12V converter | Step down | 190 | 2.29 | 1 | 190 | Available in the lab |
| USB Wall charger | 5V 1A | 190 | 2.29 | 1 | 190 | Available in the lab |
| Fan | 3-inch DC | — | — | 1 | 0 | Available in the lab |
| Plastic Polyethylene | 2m x 2m | 100 | 1.20 | 1 | 100 | Available in the lab |
| PLA filament for 3D printing | Deep Blue, 2 kg | 849 | 9.95 | 2 | 1698 | Available in the lab |
| 4mm wood | Laser cutting (30cm x 20cm) | 40 | 0.47 | 1 | 40 | Available in the lab |
| 18mm wood | CNC (2400mm x 1200mm) | 1200 | 14.06 | 1 | 1200 | Available in the lab |
| Vinyl sticker | Yellow Glossy Wrap | 249 | 2.92 | 1 | 249 | Available in the lab |
| Total (Nu.) | 5637 | (All Available in the Lab) | ||||
| Total (USD) | $66.41 USD | |||||
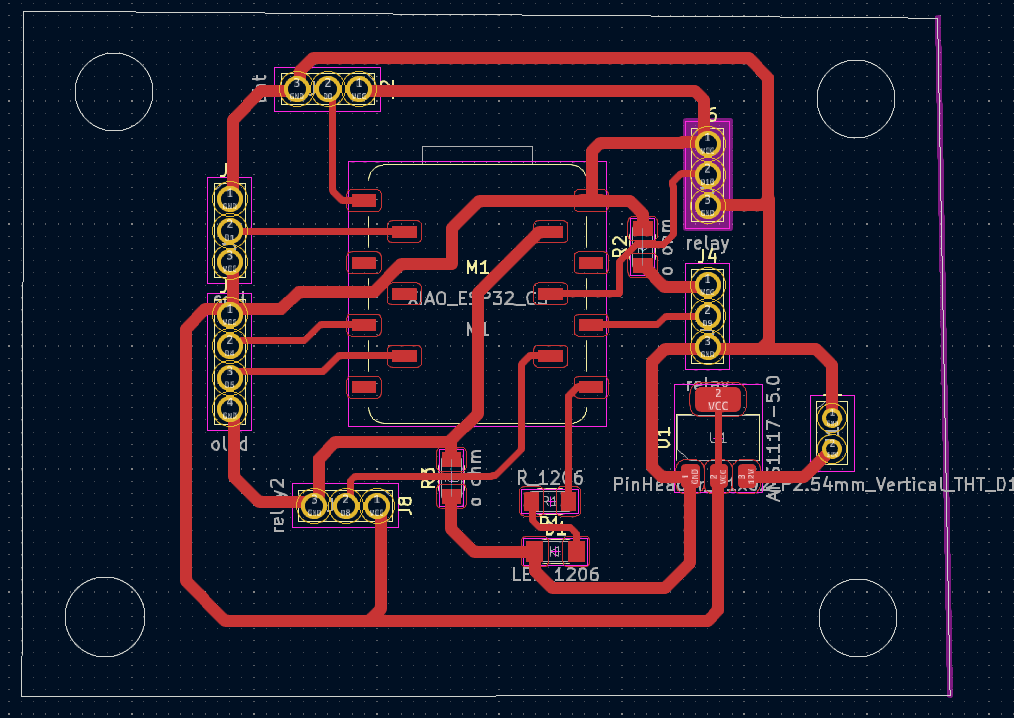
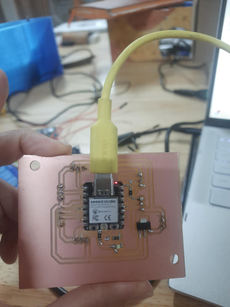
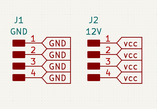
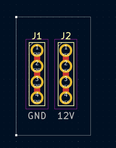
This is the custom board that I created. The main board for the MCU with a 5V regulator and functionalities control, one board for the power supply which will have a supply of 12 V from the adaptor and then it will take to the main board, the fan, the water pump and 1 pinout for the main supply coming from the 12 V adaptor via a connector.

The Code
#include "DHT.h" #include#include #include #define DHTPIN 2 #define DHTTYPE DHT11 #define SOIL_PIN 3 #define PUMP_RELAY_PIN 8 // Water pump #define FAN_RELAY_PIN 10 // Fan for high temp #define TEMP_HIGH_THRESHOLD 30 // Temp above which fan turns on #define TEMP_LOW_THRESHOLD 20 // Temp below which heater turns on #define SOIL_THRESHOLD_PERCENT 30 // Below this %, water the soil #define SCREEN_WIDTH 128 #define SCREEN_HEIGHT 64 #define OLED_RESET -1 #define I2C_SDA 6 #define I2C_SCL 7 DHT dht(DHTPIN, DHTTYPE); TwoWire I2C_OLED = TwoWire(0); Adafruit_SSD1306 display(SCREEN_WIDTH, SCREEN_HEIGHT, &I2C_OLED, OLED_RESET); void setup() { Serial.begin(115200); dht.begin(); analogReadResolution(12); pinMode(PUMP_RELAY_PIN, OUTPUT); pinMode(FAN_RELAY_PIN, OUTPUT); digitalWrite(PUMP_RELAY_PIN, HIGH); digitalWrite(FAN_RELAY_PIN, HIGH); I2C_OLED.begin(I2C_SDA, I2C_SCL, 100000); if (!display.begin(SSD1306_SWITCHCAPVCC, 0x3C)) { Serial.println(F("SSD1306 allocation failed")); while (true); } display.clearDisplay(); display.setTextSize(1); display.setTextColor(SSD1306_WHITE); display.setCursor(0, 0); display.println("Initializing..."); display.display(); delay(1000); } void loop() { float temp = dht.readTemperature(); float hum = dht.readHumidity(); int soilRaw = analogRead(SOIL_PIN); int soilPercent = map(soilRaw, 4095, 0, 0, 100); // === Temperature control === if (!isnan(temp)) { if (temp >= TEMP_HIGH_THRESHOLD) { digitalWrite(FAN_RELAY_PIN, LOW); } else if (temp < TEMP_LOW_THRESHOLD) { digitalWrite(FAN_RELAY_PIN, HIGH); } else { digitalWrite(FAN_RELAY_PIN, HIGH); } } // === Soil Moisture control === if (soilPercent < SOIL_THRESHOLD_PERCENT) { digitalWrite(PUMP_RELAY_PIN, LOW); } else { digitalWrite(PUMP_RELAY_PIN, HIGH); } // === OLED Display === display.clearDisplay(); display.setCursor(0, 0); if (isnan(temp) || isnan(hum)) { display.println("DHT Error!"); } else { display.print("Temp: "); display.print(temp); display.println(" C"); display.print("Hum : "); display.print(hum); display.println(" %"); display.print("Fan : "); display.println(temp >= TEMP_HIGH_THRESHOLD ? "ON" : "OFF"); display.print("Heat: "); display.println(temp < TEMP_LOW_THRESHOLD ? "ON" : "OFF"); } display.print("Soil: "); display.print(soilPercent); display.println(" %"); display.print("Pump: "); display.println(soilPercent < SOIL_THRESHOLD_PERCENT ? "ON" : "OFF"); display.display(); // === Serial Monitor Output === Serial.print("Temp: "); Serial.print(temp); Serial.print(" C, "); Serial.print("Humidity: "); Serial.print(hum); Serial.print(" %, "); Serial.print("Soil: "); Serial.print(soilPercent); Serial.println(" %"); delay(2000); }
System Integration
Afterwards I braided the wires as a part of system integration making sure that they were hidden very well.I screwed the pcb and the relay to the head. There were braided together and then passed through the CNCed part and then taken to their respective connections underneath the pot. I also used zip ties to make sure they are grouped in the cleanest way possible.

HEROSHOT
This is a video that showcases the 1st function of my project which is automatic irrigation as water pump is activated when soil moisture is below a certain threshold. I supplied heat to the dht11 using my hands.
This is the command i used to compress this video: ffmpeg -i function1.mp4 -vcodec libx264 -crf 28 -an function1_compressed.mp4
This video demonstrates the second function of my project: automatic temperature regulation and improved air ventilation. The DC fan activates when the temperature exceeds a predefined threshold.
This is the command i used to compress this video: ffmpeg -i function2.mp4 -vcodec libx264 -crf 28 -an function2_compressed.mp4
How Was It Evaluated?
My Cosmic Pepper Pig project was evaluated on a few key things: how well it actually worked, and how effectively I used all the design and fabrication skills I've learned. Here’s a quick rundown of what we looked at:
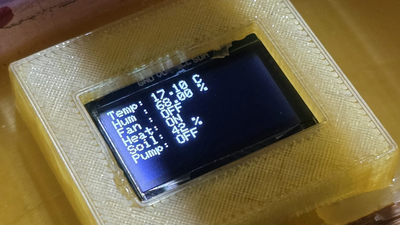
- Did it do its job? The main thing was its core functions. I'm happy that the water pump kicked in automatically when the soil got dry, and the fan started up when the temperature got too high. The OLED display also showed real-time data, which was a much more practical solution than the tricky web server I initially considered.
- We tested it to see if it could run continuously without crashing, and it held up well.
- How well did the design come together? This was a big part for me, blending looks with function. All my 2D and 3D designs for the pig’s enclosure – from the cosmic head, the well painted CNC-milled middle section, and the 3D-printed pot and water reservoir – they all fit perfectly. It ended up looking amazing! Plus, taking the time to braid and hide all the wires really helped make the whole setup look neat and professional.
- Electronics and Programming: I successfully designed, milled, and integrated my custom PCB. The soldering was clean, and the XIAO ESP32 C3 code was solid, reliably controlling all the sensors and outputs. Switching from that constantly-changing IP-based web display to the OLED was definitely the right move for usability.
- Did everything work together? All the hardware, sensors, and the code seamlessly integrated. The whole system operated as one unit, which really showed me I've got a grasp on system integration.
- Documentation and Presentation: My detailed weekly documentation, along with the final project page, slides, and video, really served as a complete record of the project. It clearly showed my journey, the challenges, and what I achieved.
What Are the Implications?
The Cosmic Pepper Pig isn’t just a fun project; I think it has some real implications, especially as a smart automated system for growing chilli in climates such as ours(chilly and windy):
- This project shows we can totally grow specific crops, like chili, even in places where the weather usually wouldn't allow it. This could mean more local food, less reliance on imports, and better food security for communities in mountainous or colder regions.
- By automating watering and climate control, my system uses water and energy much more efficiently. The sensors make sure that things like water and ventilation are only provided when they're actually needed, which cuts down on waste and supports sustainable farming.
- I tried to use readily available parts and common fabrication methods like 3D printing, laser cutting, and CNC. This means the technology could be replicated and adapted easily, especially within Fab Lab communities. It could really help empower local folks to try out more advanced farming techniques without needing super expensive, high-tech stuff.
- Last but not the least, Tech Can Be Fun! The "cosmic pig" design shows that technology doesn't have to look boring. We can add fun and engaging aesthetics to functional tools, making them more approachable and appealing, especially for home use or in educational settings.
What Worked, What Didn't, and What I Learned
Working on the Cosmic Pepper Pig was a rollercoaster of successes and challenges, and honestly, every single one taught me something valuable.
What Worked Well:
- My Designs Came to Life! Both my laser cutting and 3D printing designs turned out exactly as I envisioned. The head, the CNC-milled middle module, and the 3D-printed pot and water reservoir all matched my digital models perfectly. A huge shout-out to my instructors, Mr. Anith Ghalley and Mr. Rico, for their help, especially with the 3D printing. Their advice on insulating the printer to keep the temperature stable was a game-changer for getting good prints.
- Automated Controls Felt Like Magic as successfully writing the code(with the help of LLM-AI) to automatically activate the water pump based on soil moisture and the DC fan based on temperature was incredibly satisfying. It’s a great feeling when the logic you wrote actually makes things happen!
- Initial Web Display was a Good Start: Even though I moved away from it, my initial web server setup for displaying sensor values via an IP address worked flawlessly in early tests. It was a good stepping stone.
What Didn't Work (or Needed More Work):
- The biggest hurdle was the dynamic IP address when I was using the web server for displaying data. It kept changing, which made it super impractical for a permanent display. That’s why I decided to switch to a local OLED screen – much more reliable.
- Early on, temperature fluctuations in the lab messed with my 3D prints. It wasn't a design flaw, but something I had to learn to manage with environmental adjustments.
What I Learned:
This project was a huge learning curve for me, not just on the technical side, but also in how to approach problems and plan things out.
- I really grasped that building something like the Cosmic Pepper Pig is about holistic integration. It's not just wiring up components; it's making sure the design, electronics, programming, and mechanical parts all work together seamlessly as one big, functional system.
- Plan, Plan, Plan, and Document! While some issues were unexpected, I realized just how crucial thorough planning and detailed documentation are. When I took the time to map things out and write down my steps carefully, the process was smoother, and debugging became a lot less frustrating.
- I feel much more confident now in bringing together different digital fabrication techniques (3D printing, laser cutting, CNC milling), electronics design and production (with my custom PCB), and embedded programming. Understanding how these different fields interact and influence each other was a profound lesson.
All in all, the Cosmic Pepper Pig project gave me a solid set of skills and a much deeper appreciation for the complexities of turning an idea into a working reality. It was an incredibly valuable experience in putting everything I learned into practice and tackling real-world challenges.
You can access the files here
Boards that i used-power and my main MCU
All of the designs for my final project