Week 17. Four Axis Milling
Wildcard week! I thought it would be interesting to carve my design in the Roland mill with the additional rotary axis installed.
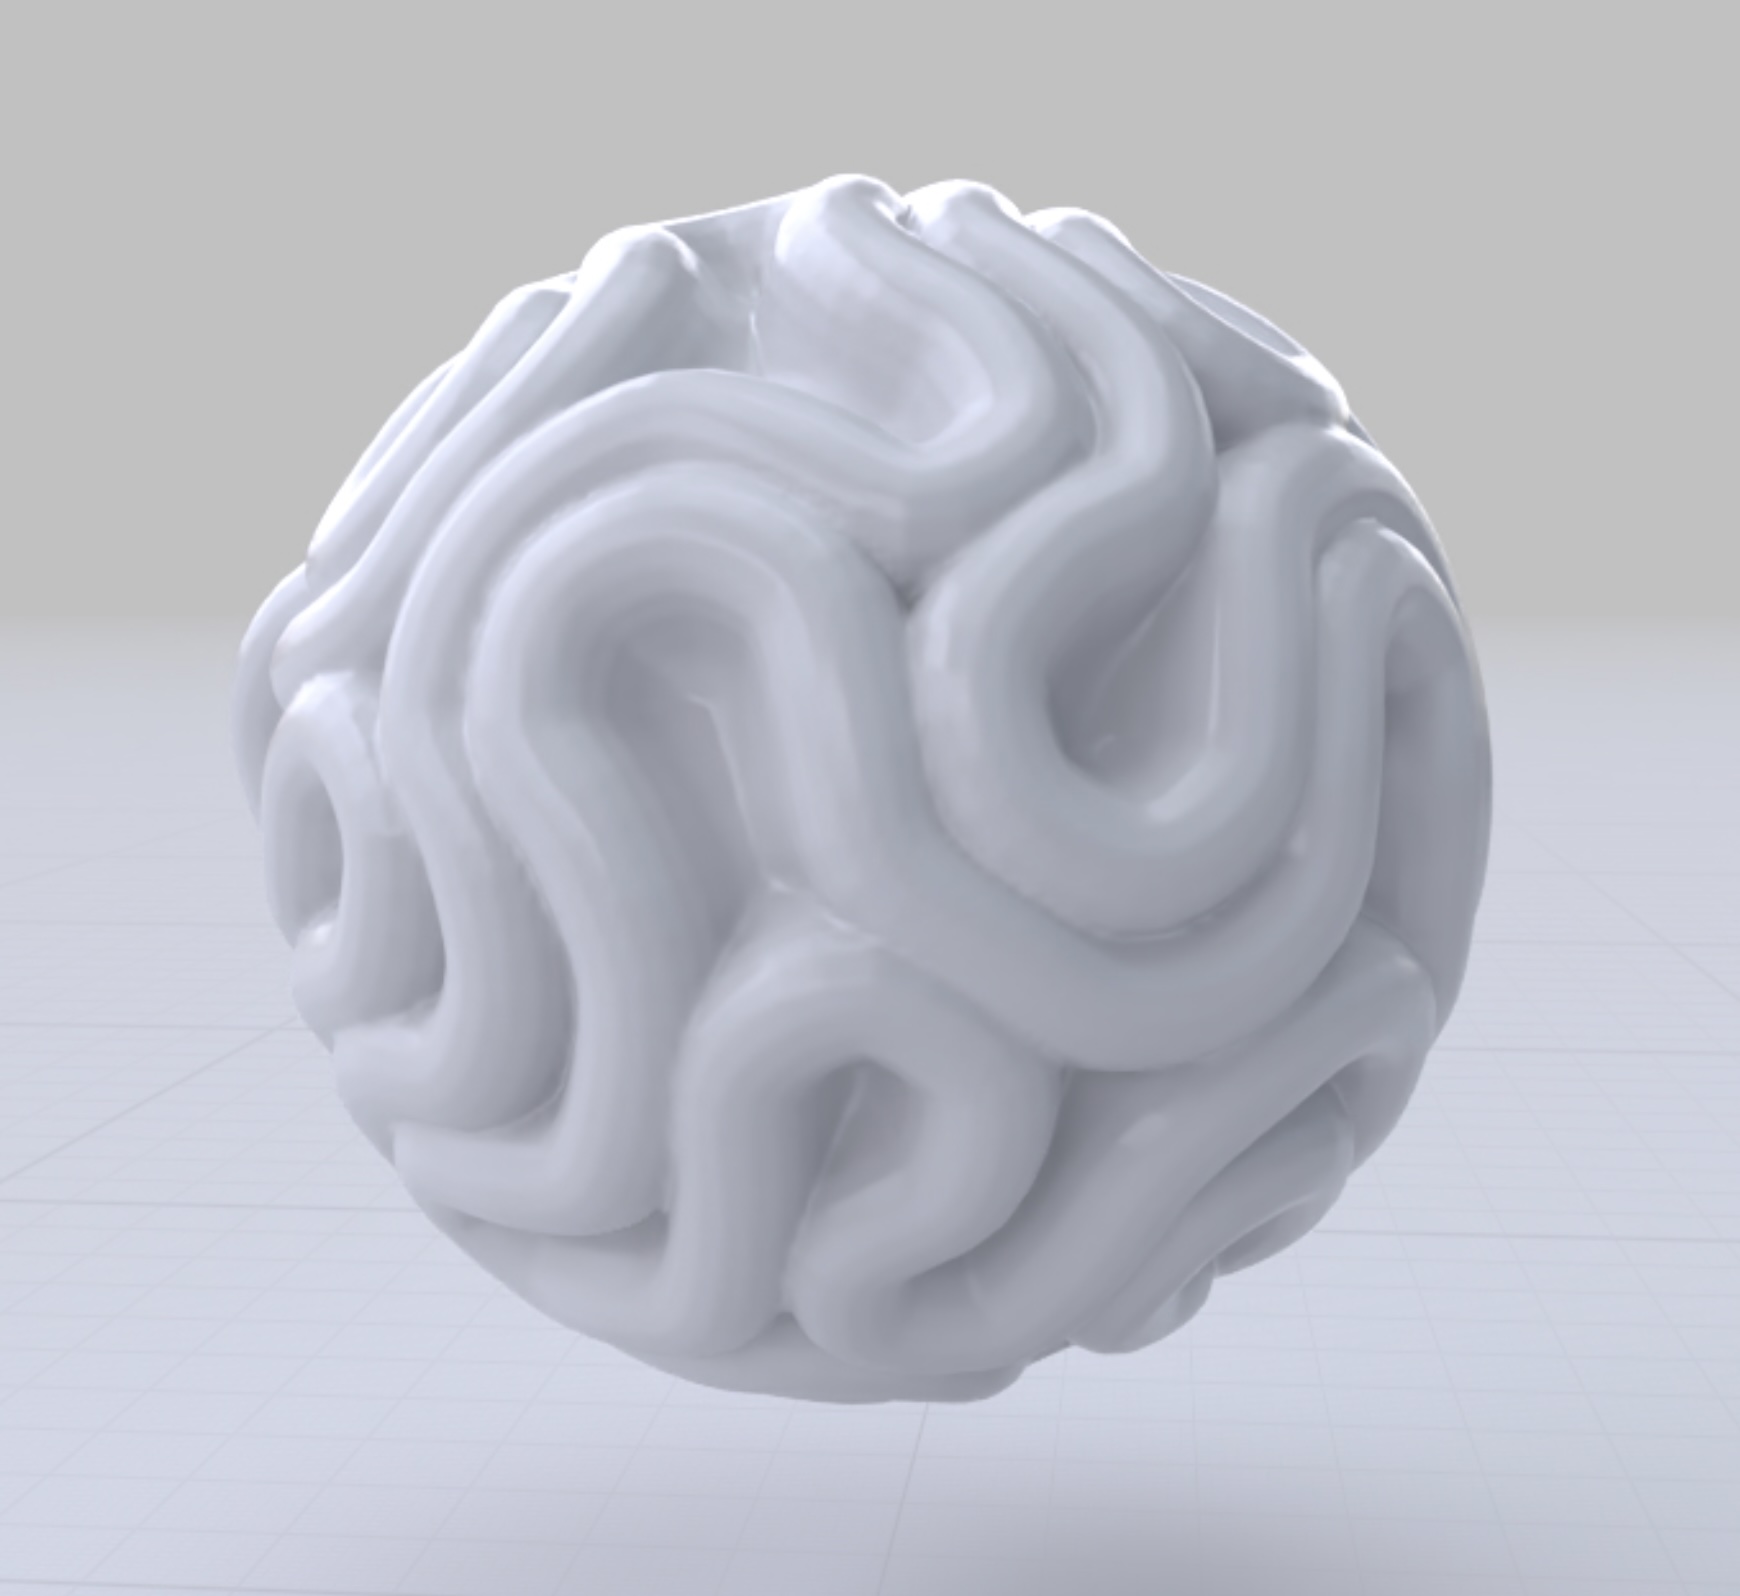
3D labyrinth in oak. 40mm diameter.
Design with Womp
I started with my webapp's model as a GLB file.
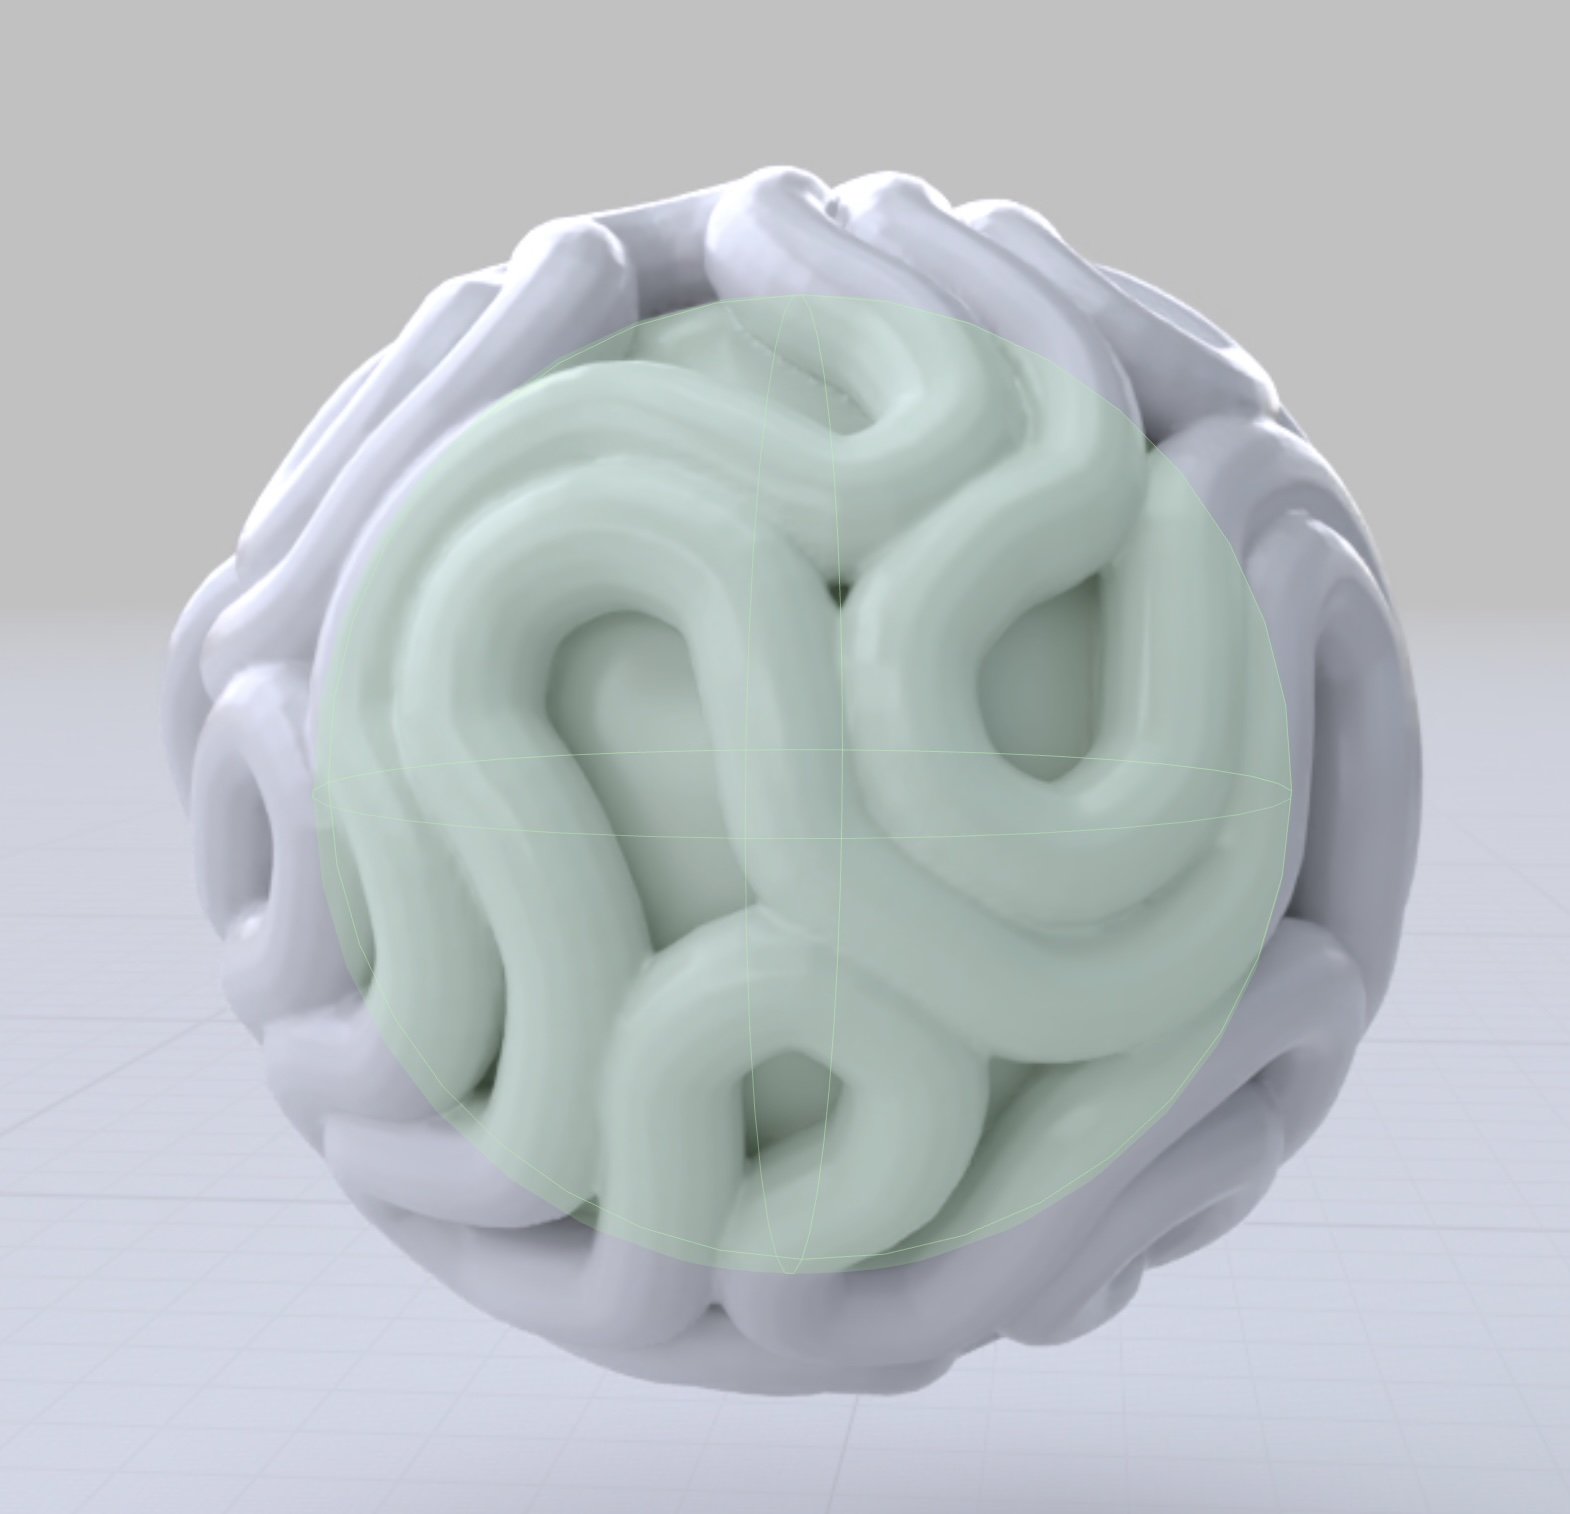
I imported this to WOMP and added a sphere on the inside.
I increased the "goop factor" on the sphere until the sphere melded with the inside of the labyrinth path. This smooth union was helpful for the milling process, to match the size and range of the tools that we have available.
CAM with DeskProto
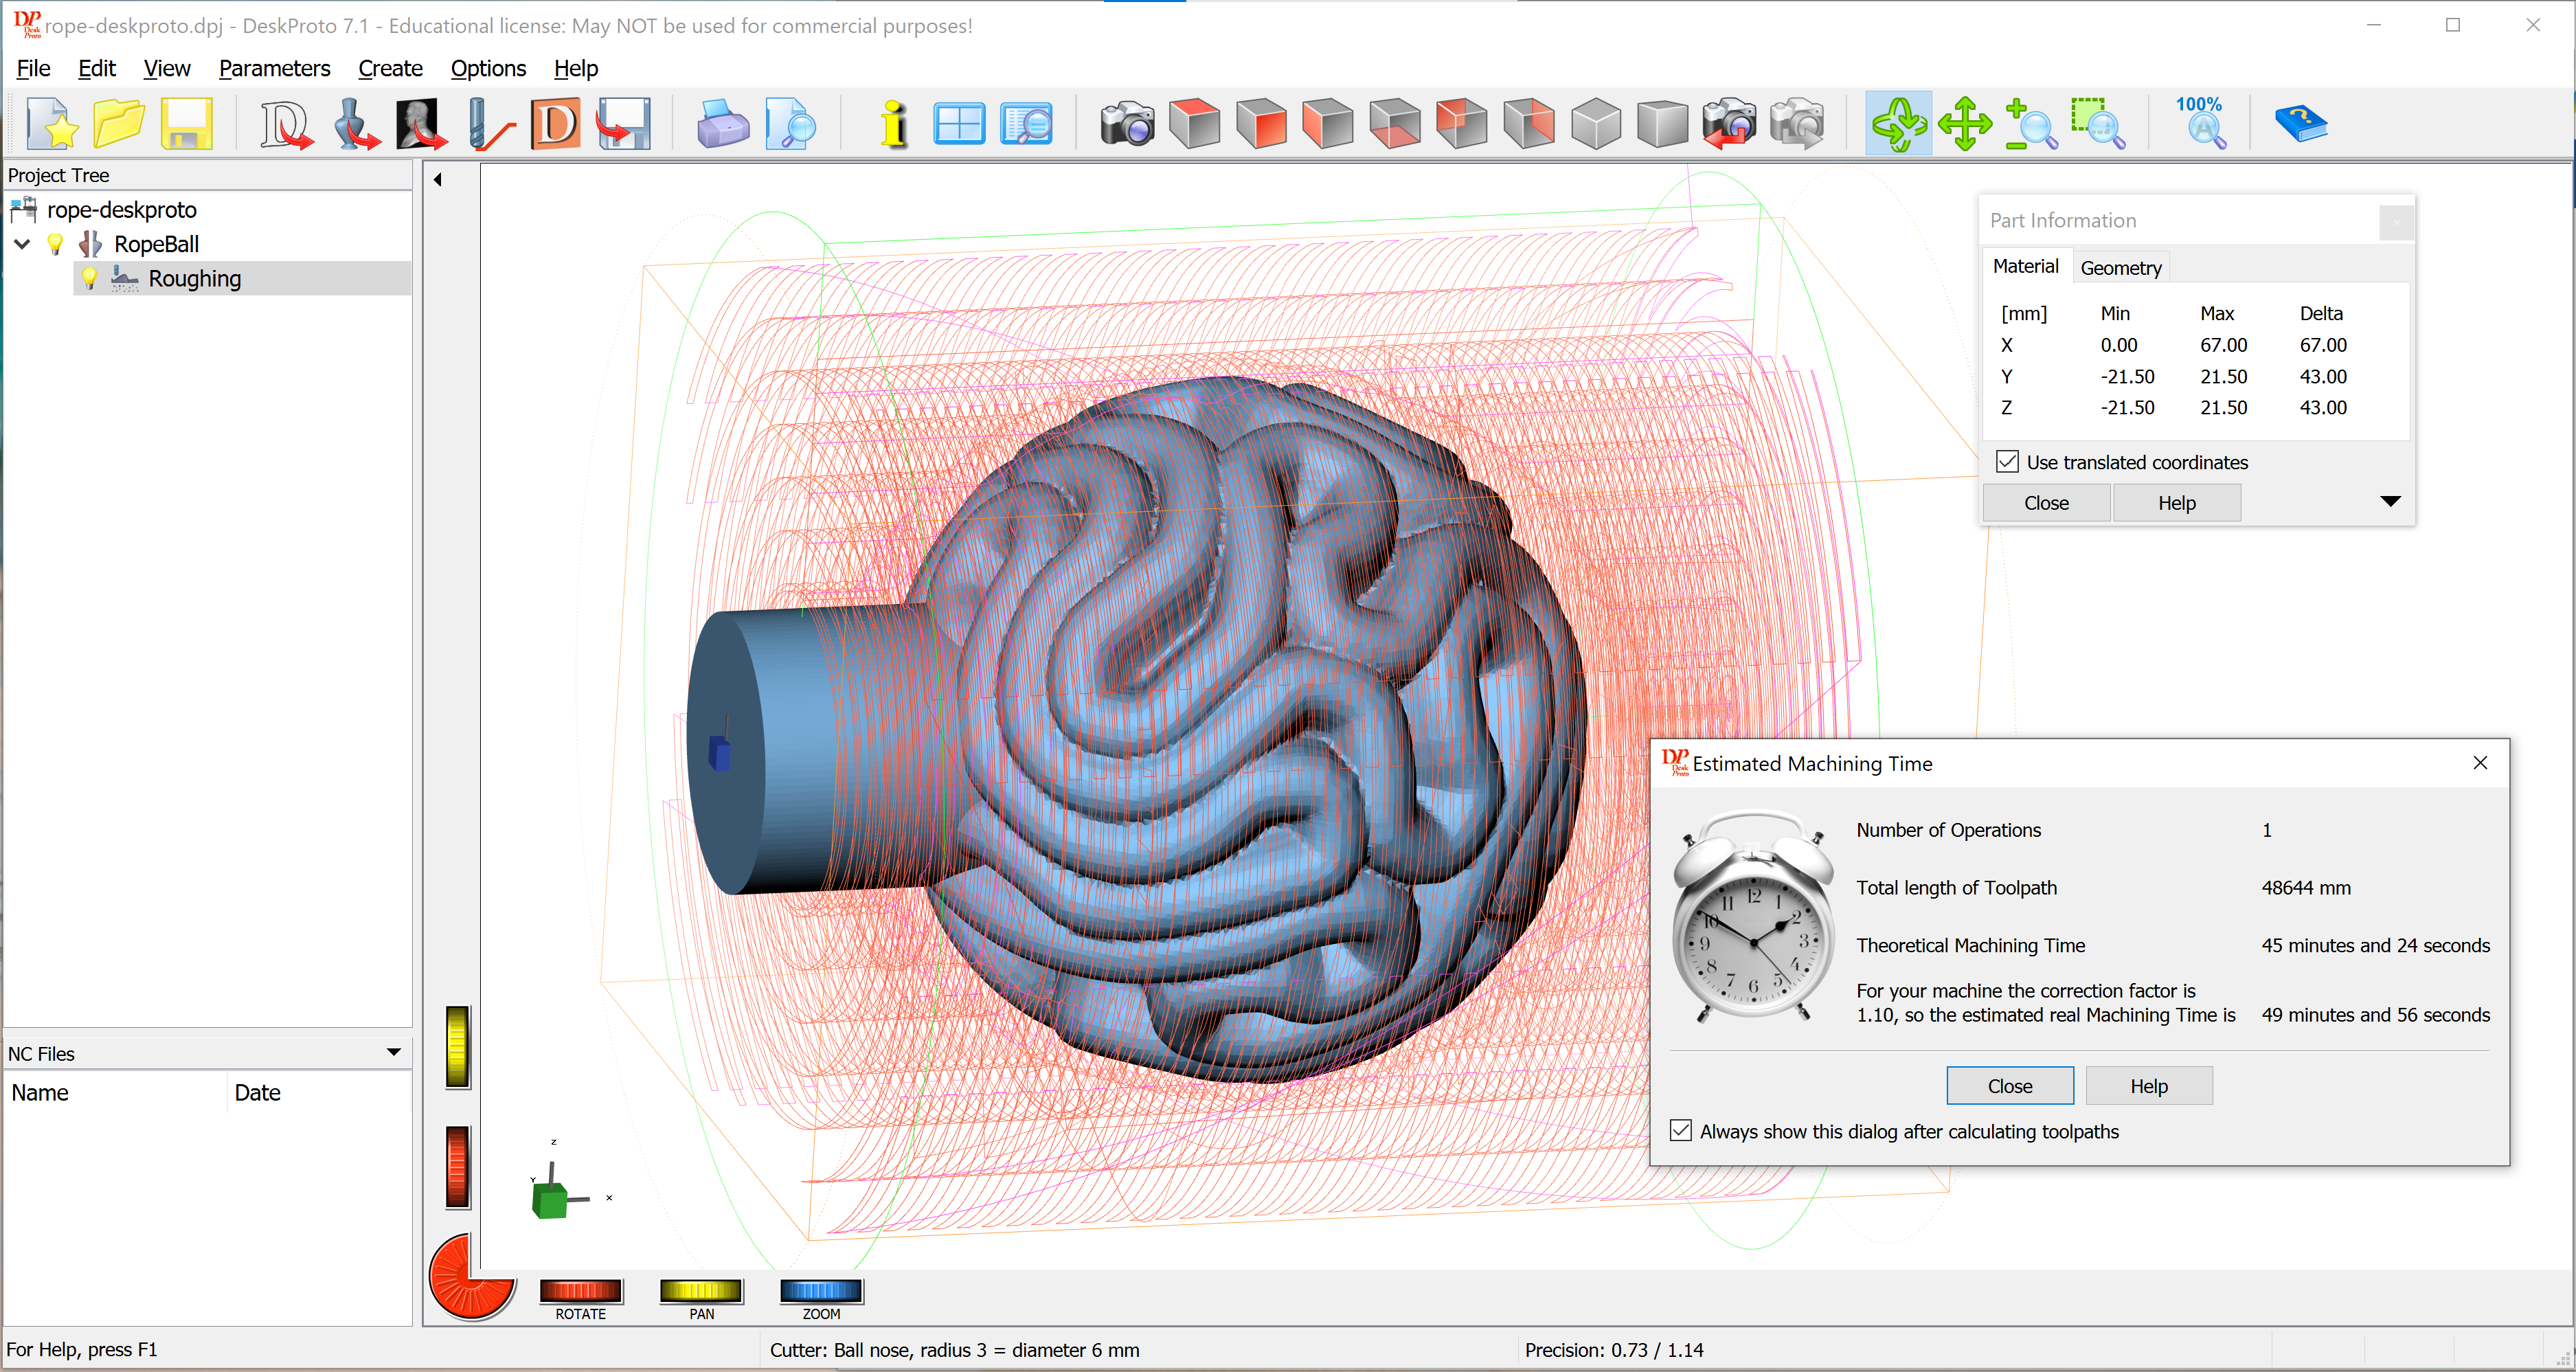
6mm ballnose mill roughing path preview. Estimated time 50 minutes, actual time ended up closer to 3 hours.
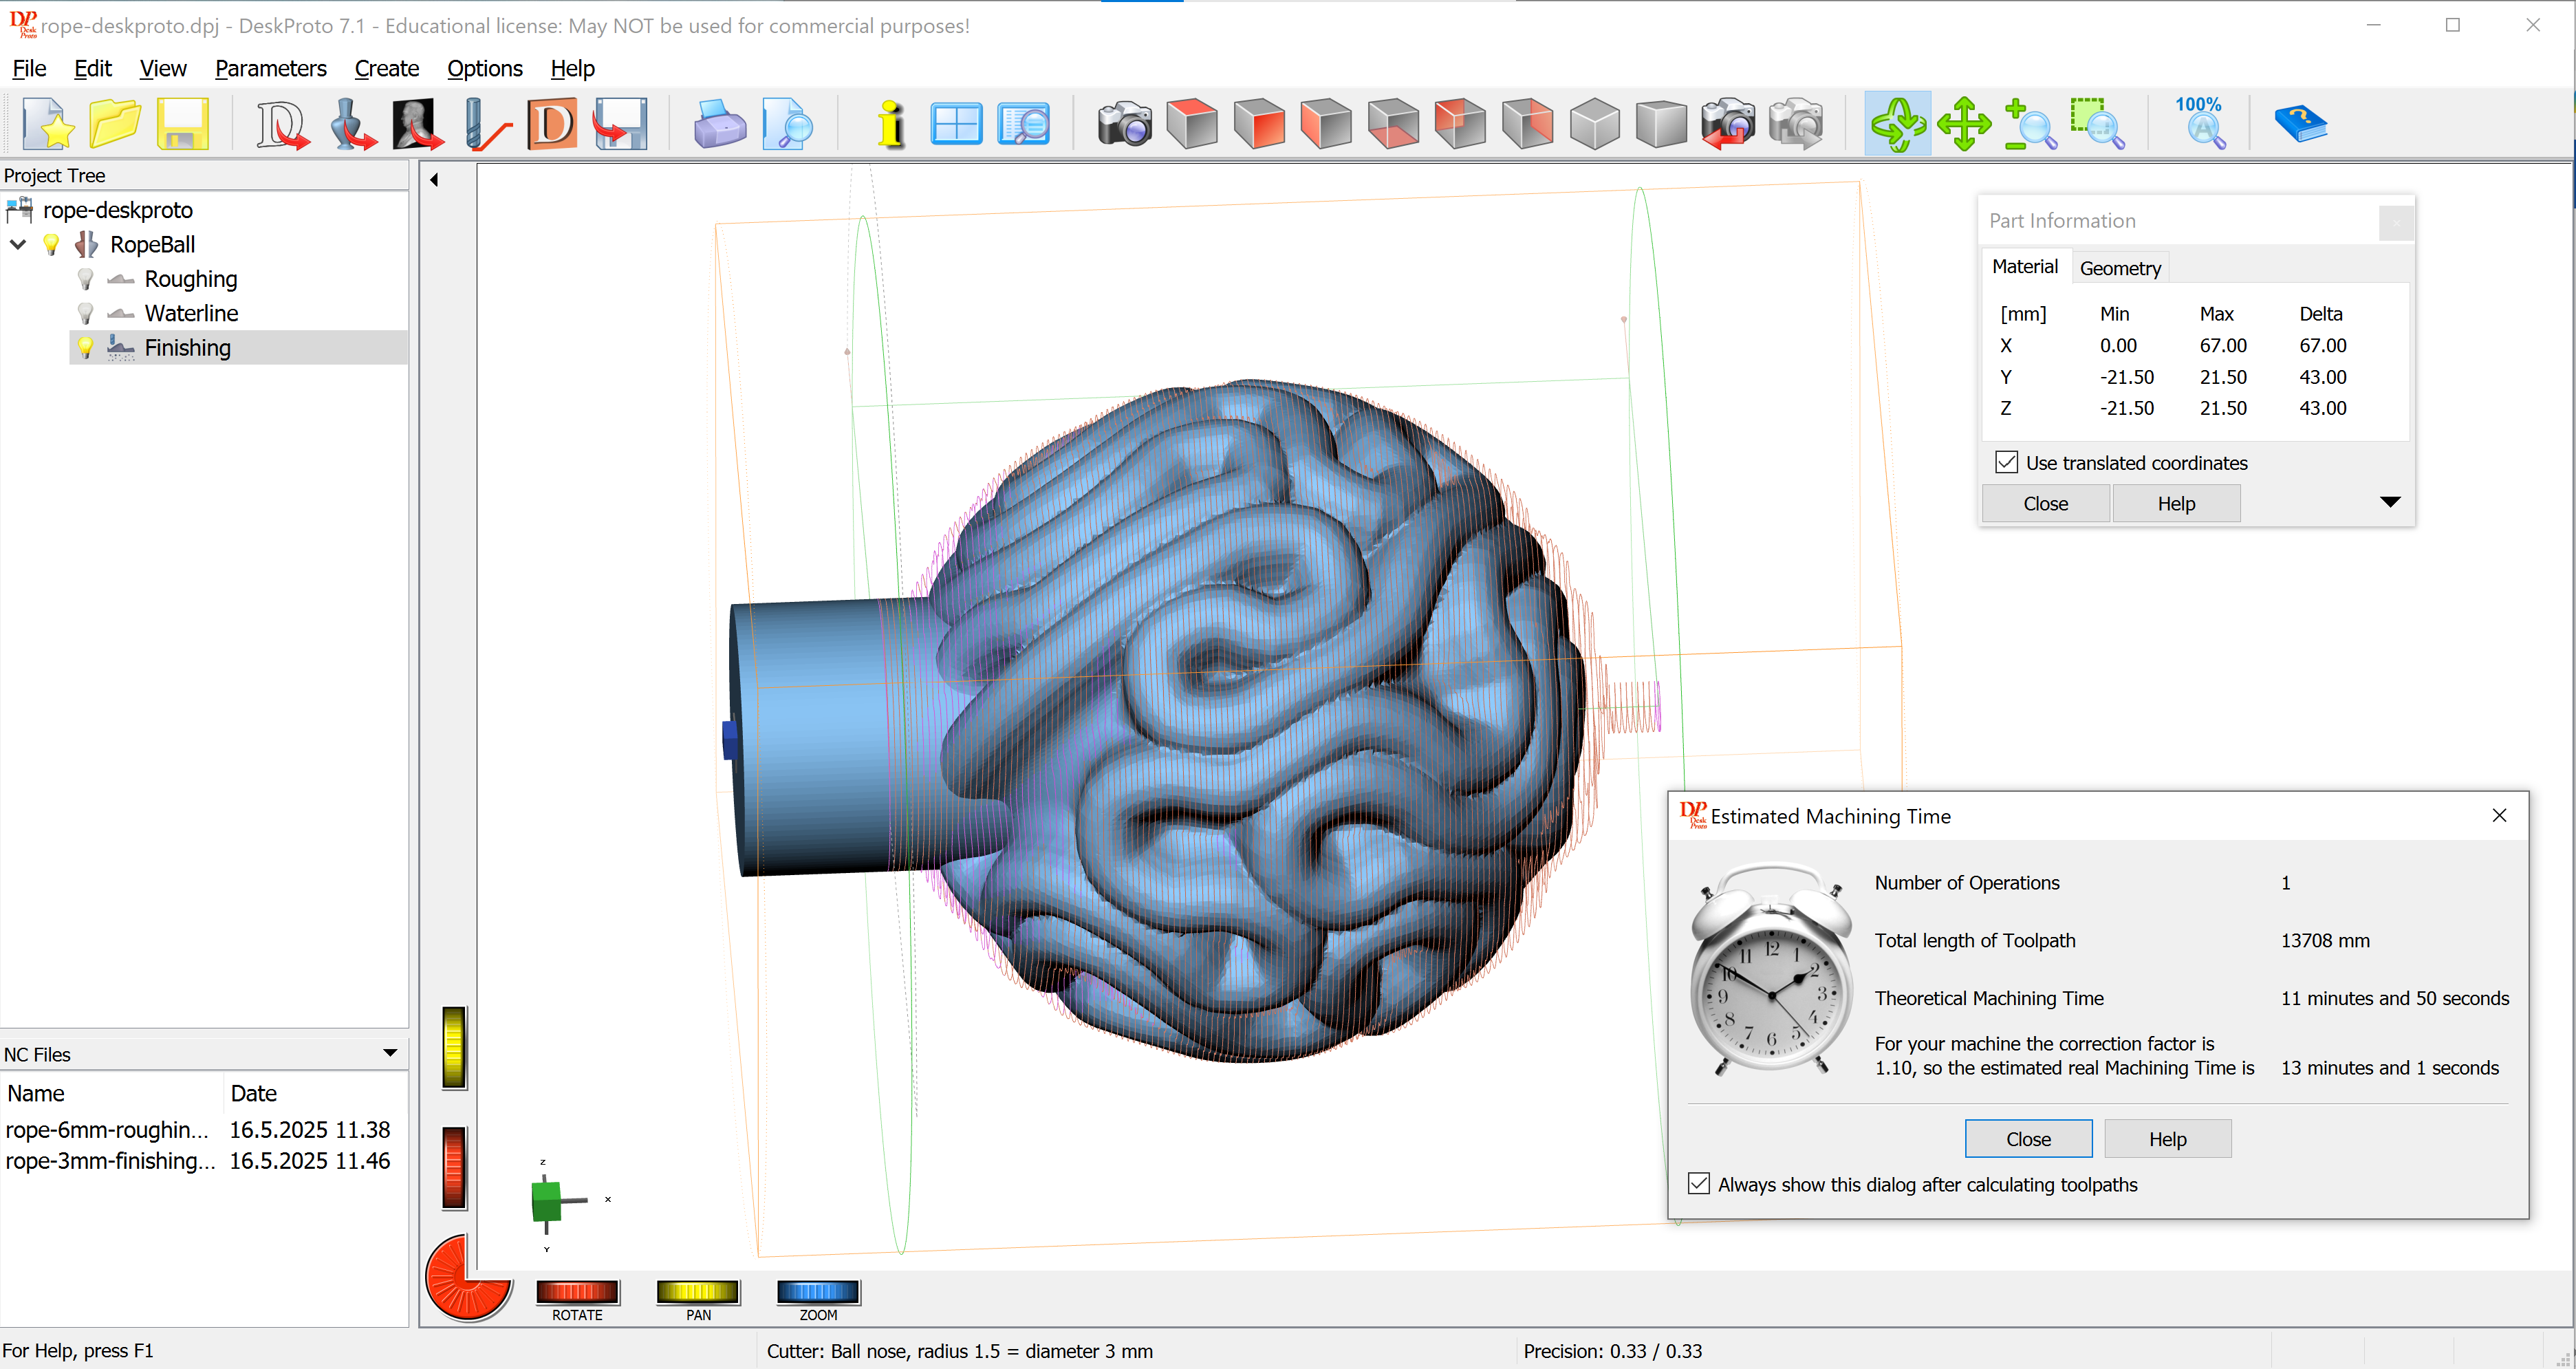
3mm ballnose mill finishing path preview.
Milling with Roland MDX-40 and ZCL-40
The first version was milled from SikaBlock M600 N material, as a practice run and test of the toolpaths. It is a polyurethane foam designed for millability and mold making.
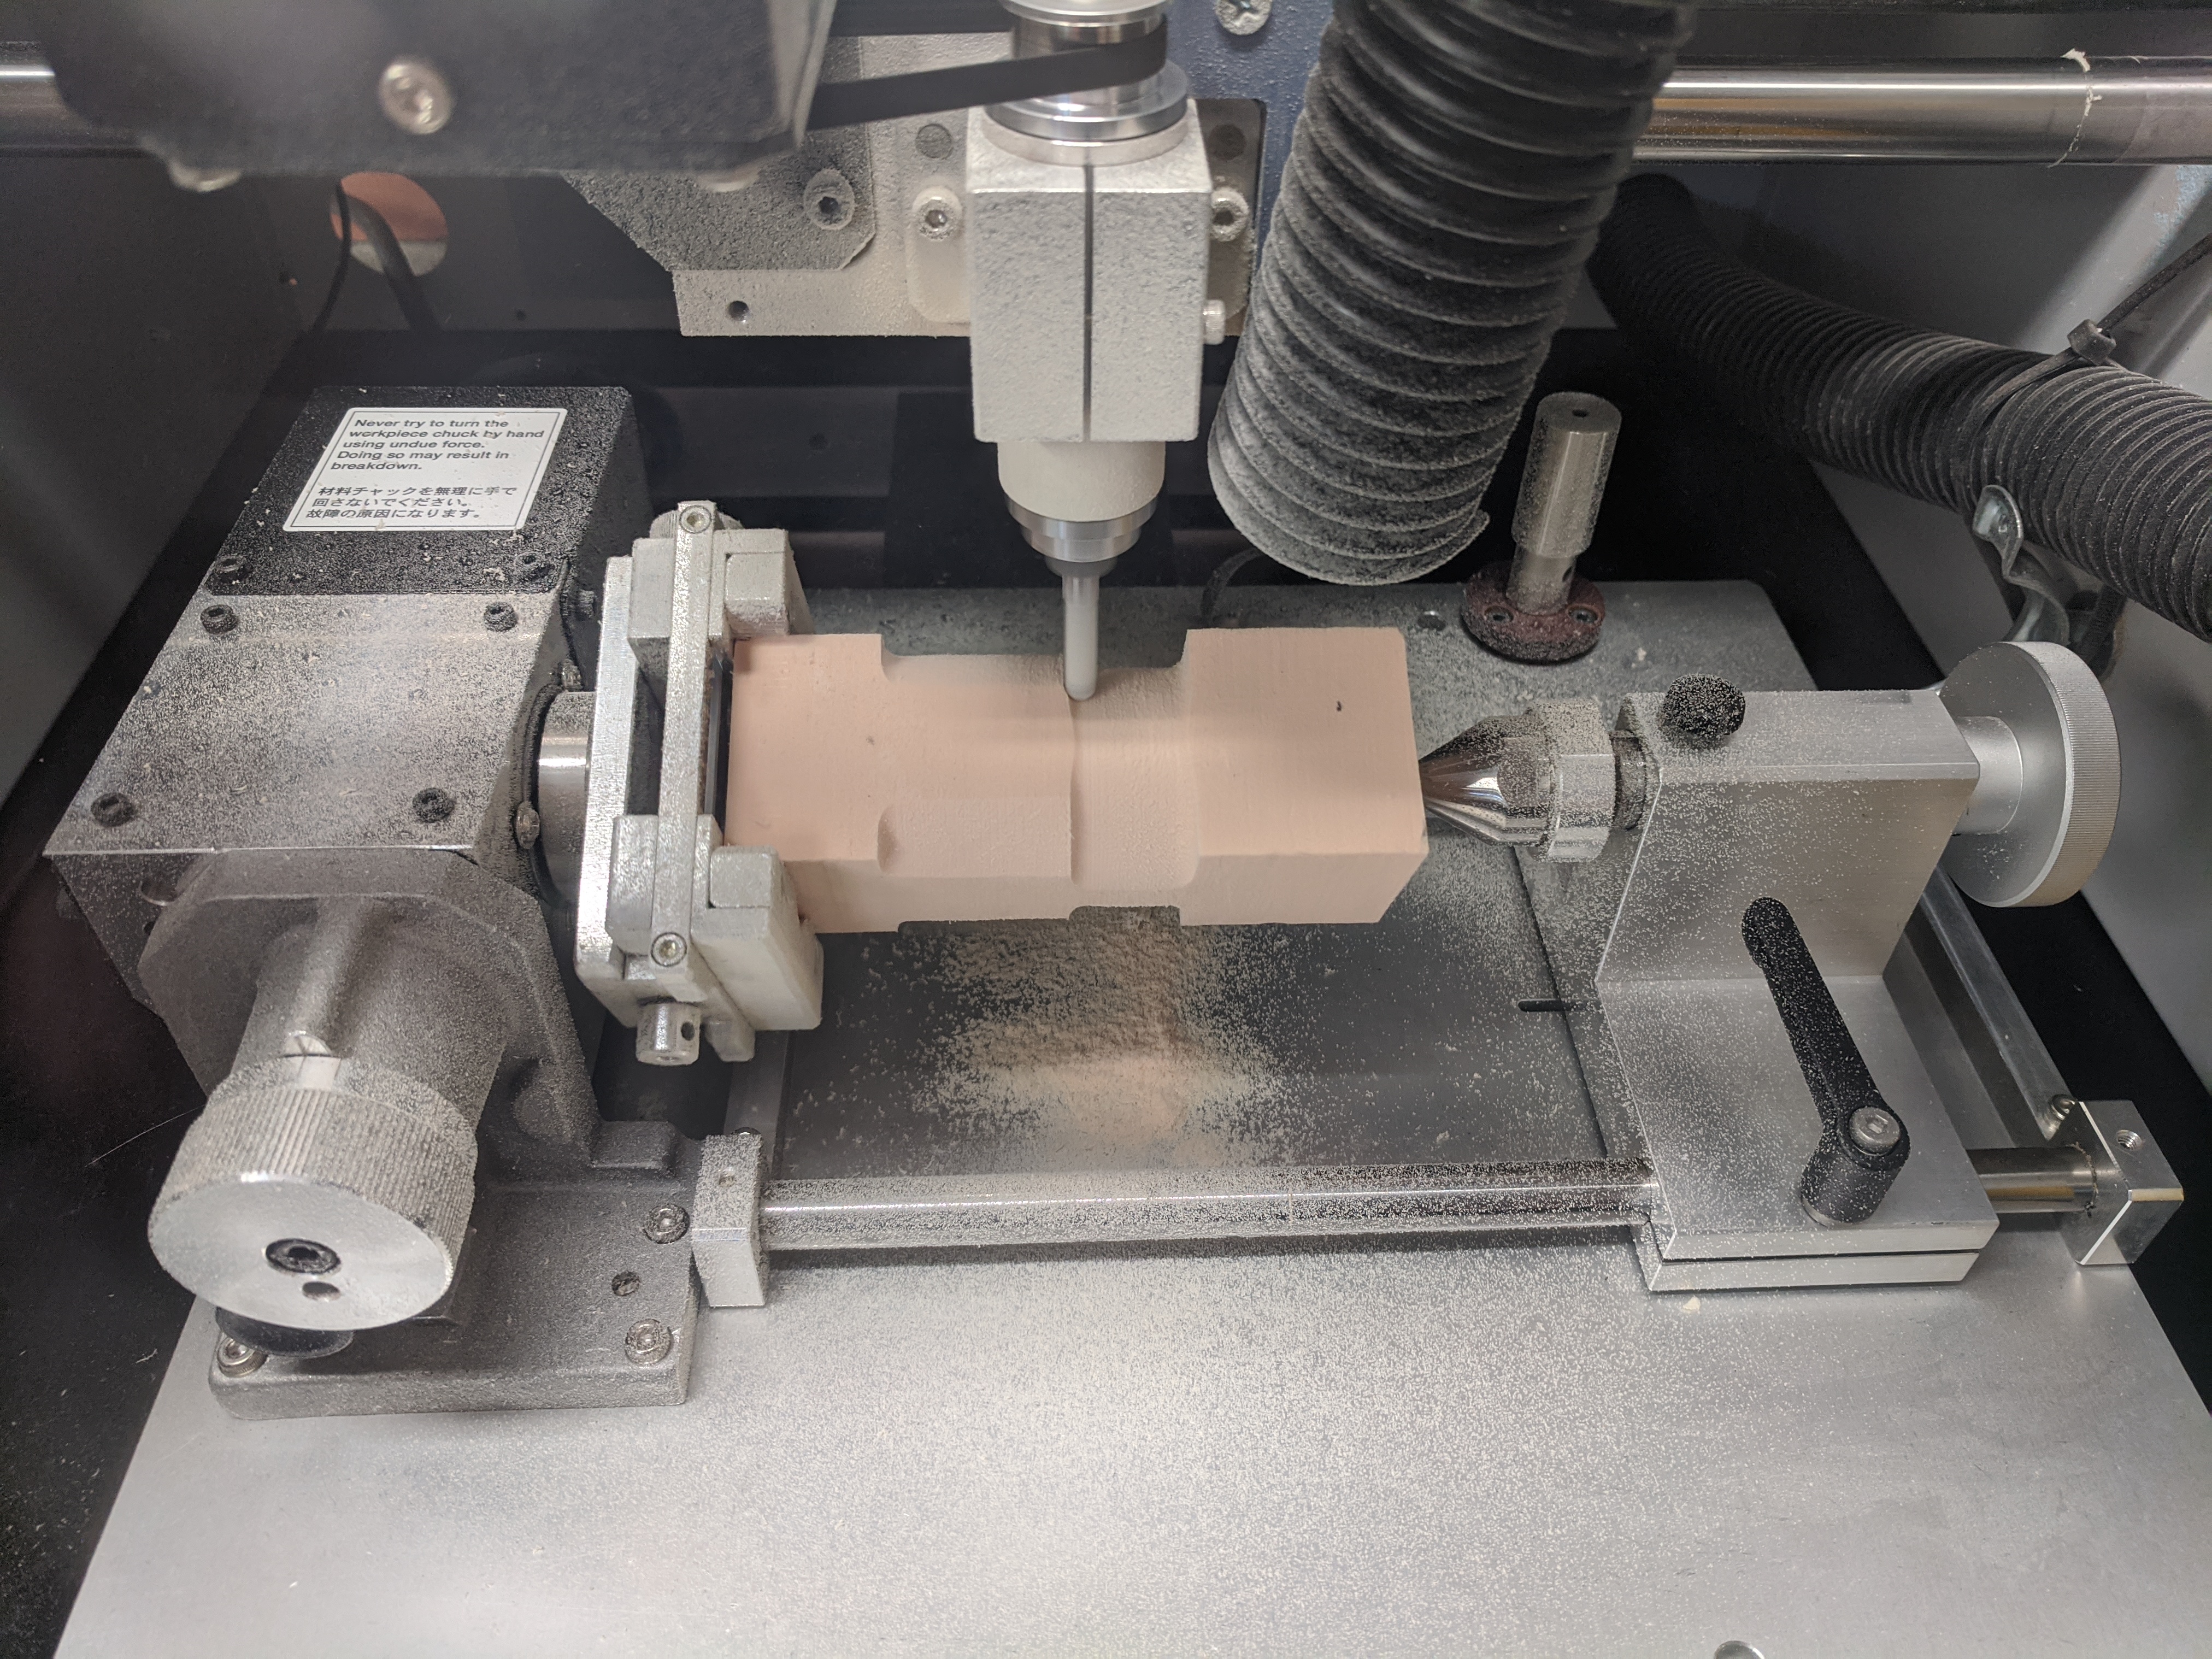
Foam first roughing pass with 6mm tool.
Foam detail pass with 3mm tool.
I installed the cutting tool tool low, so the tip hit the base of the piece when going to the home position. Fortunately nothing broke, and I was able to install the mill at the correct position and recalibrate. I paid much more attention to this step with wood.
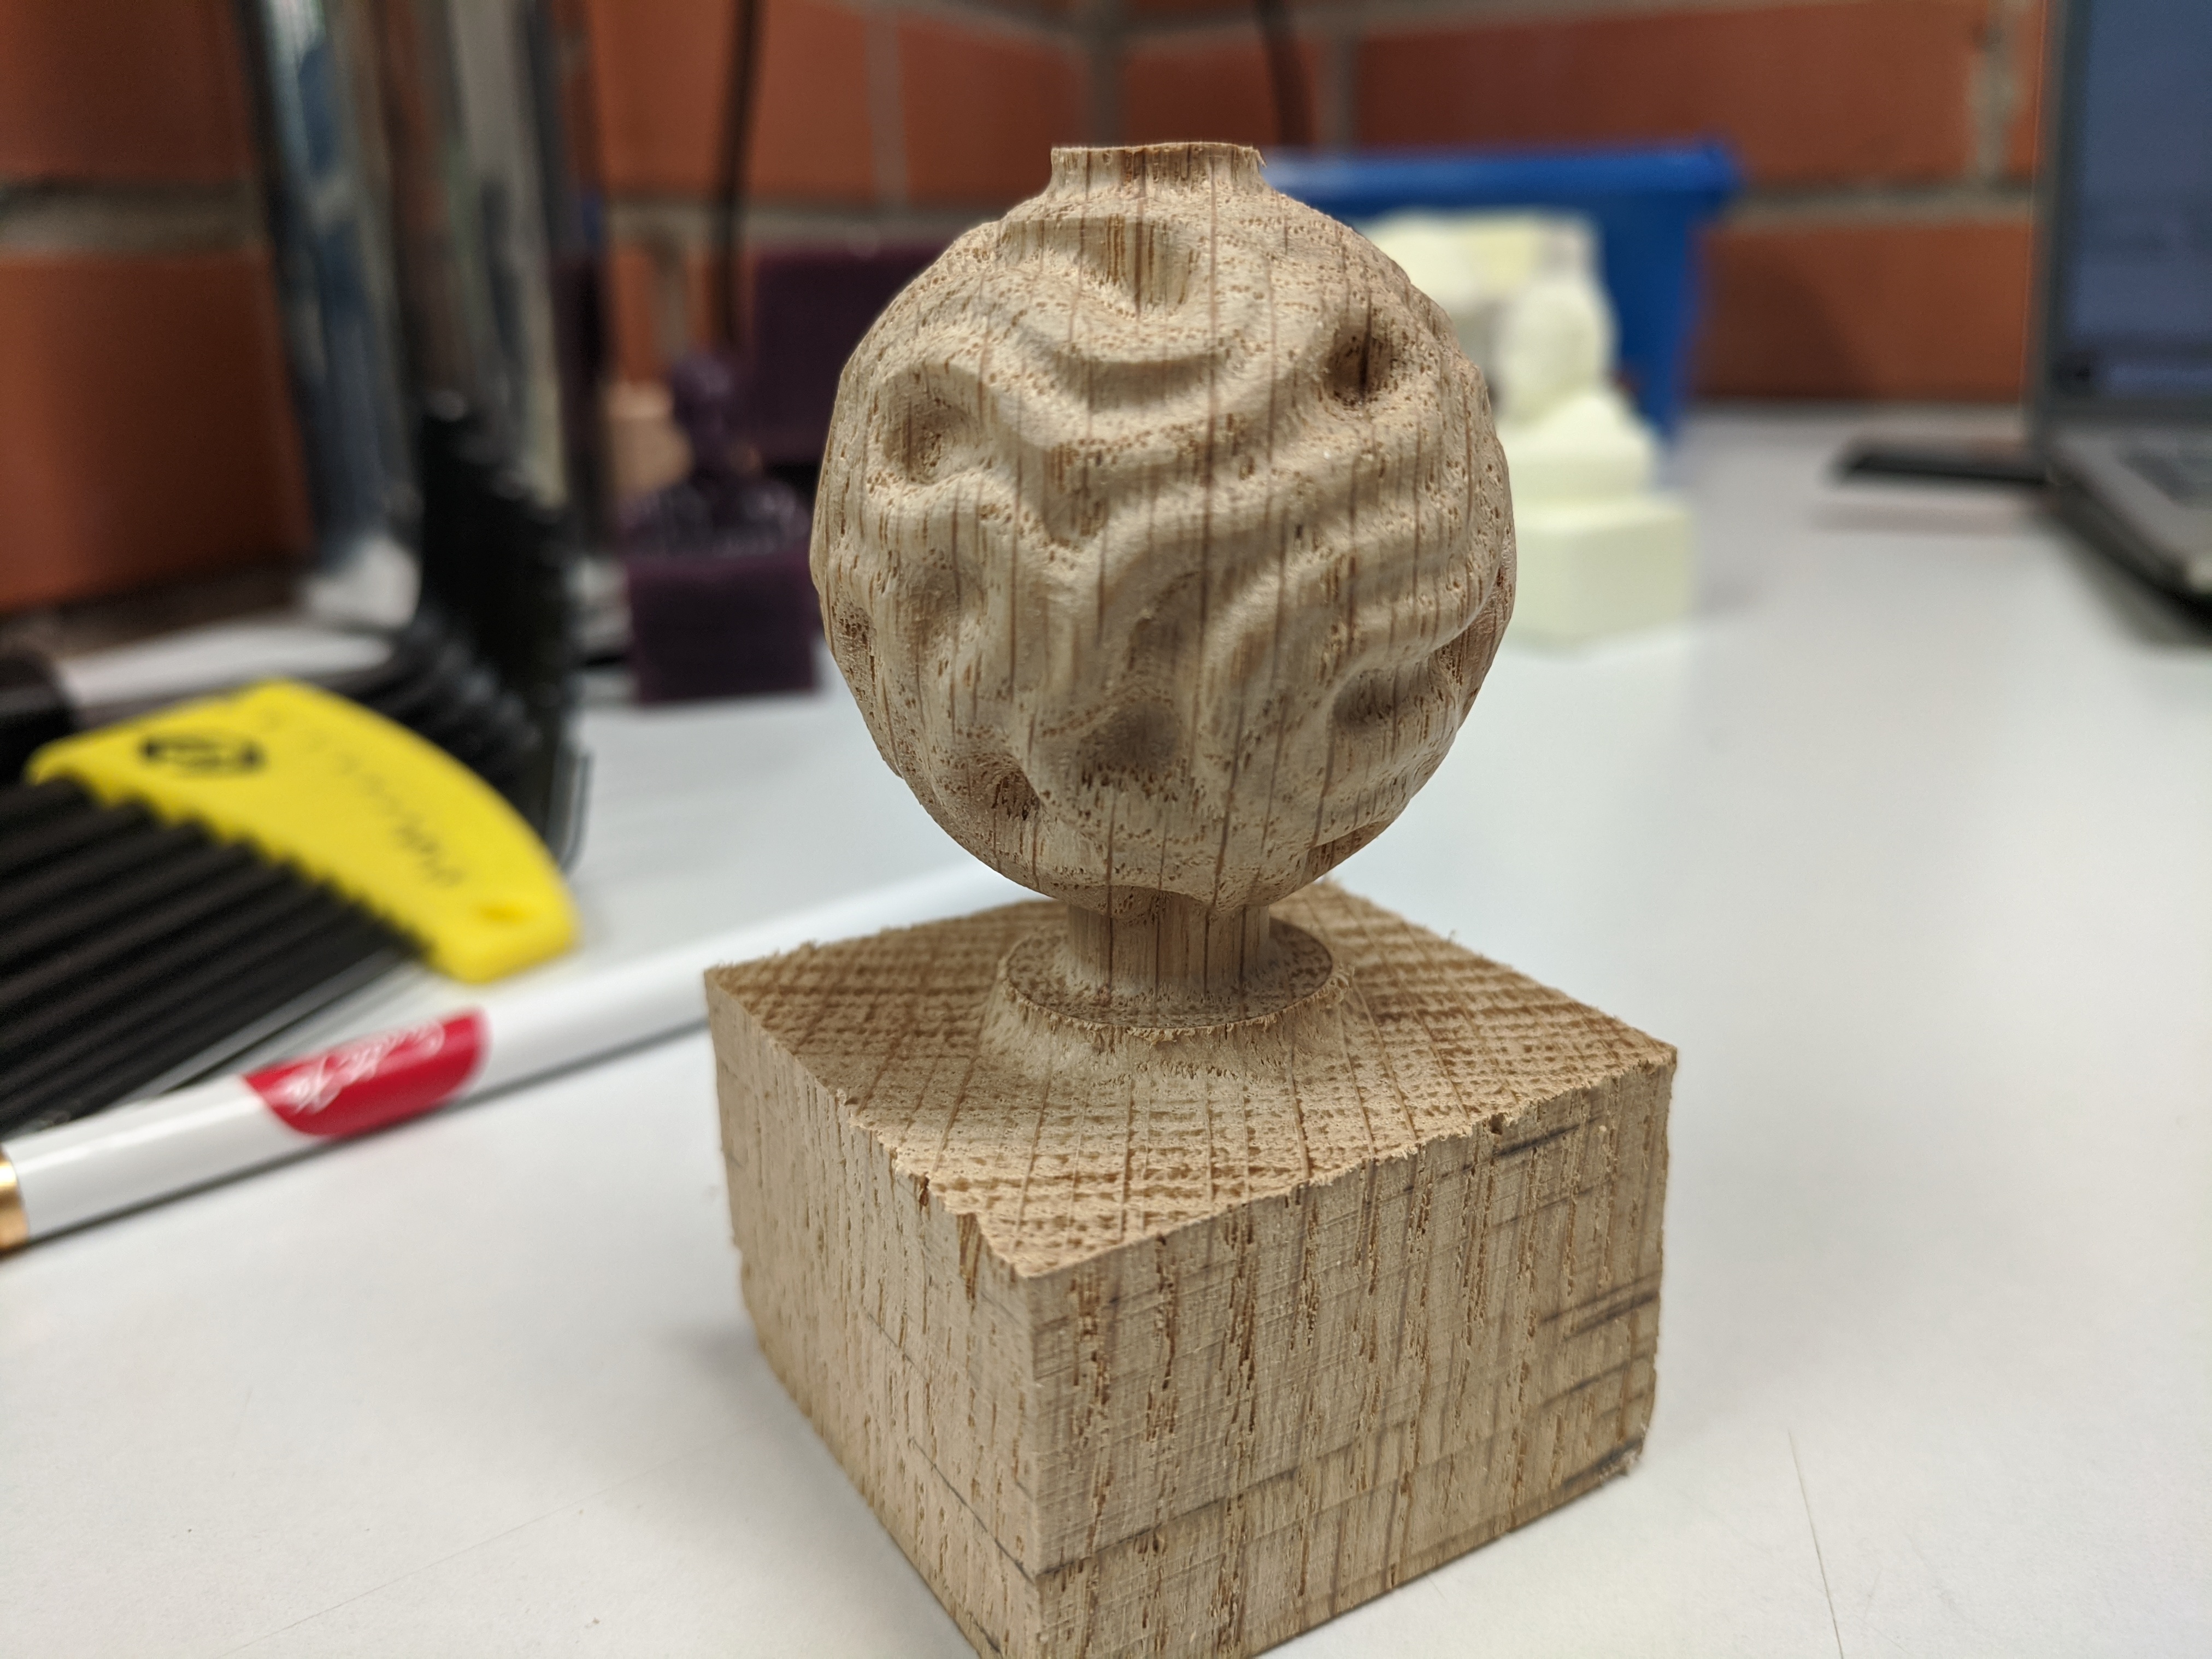
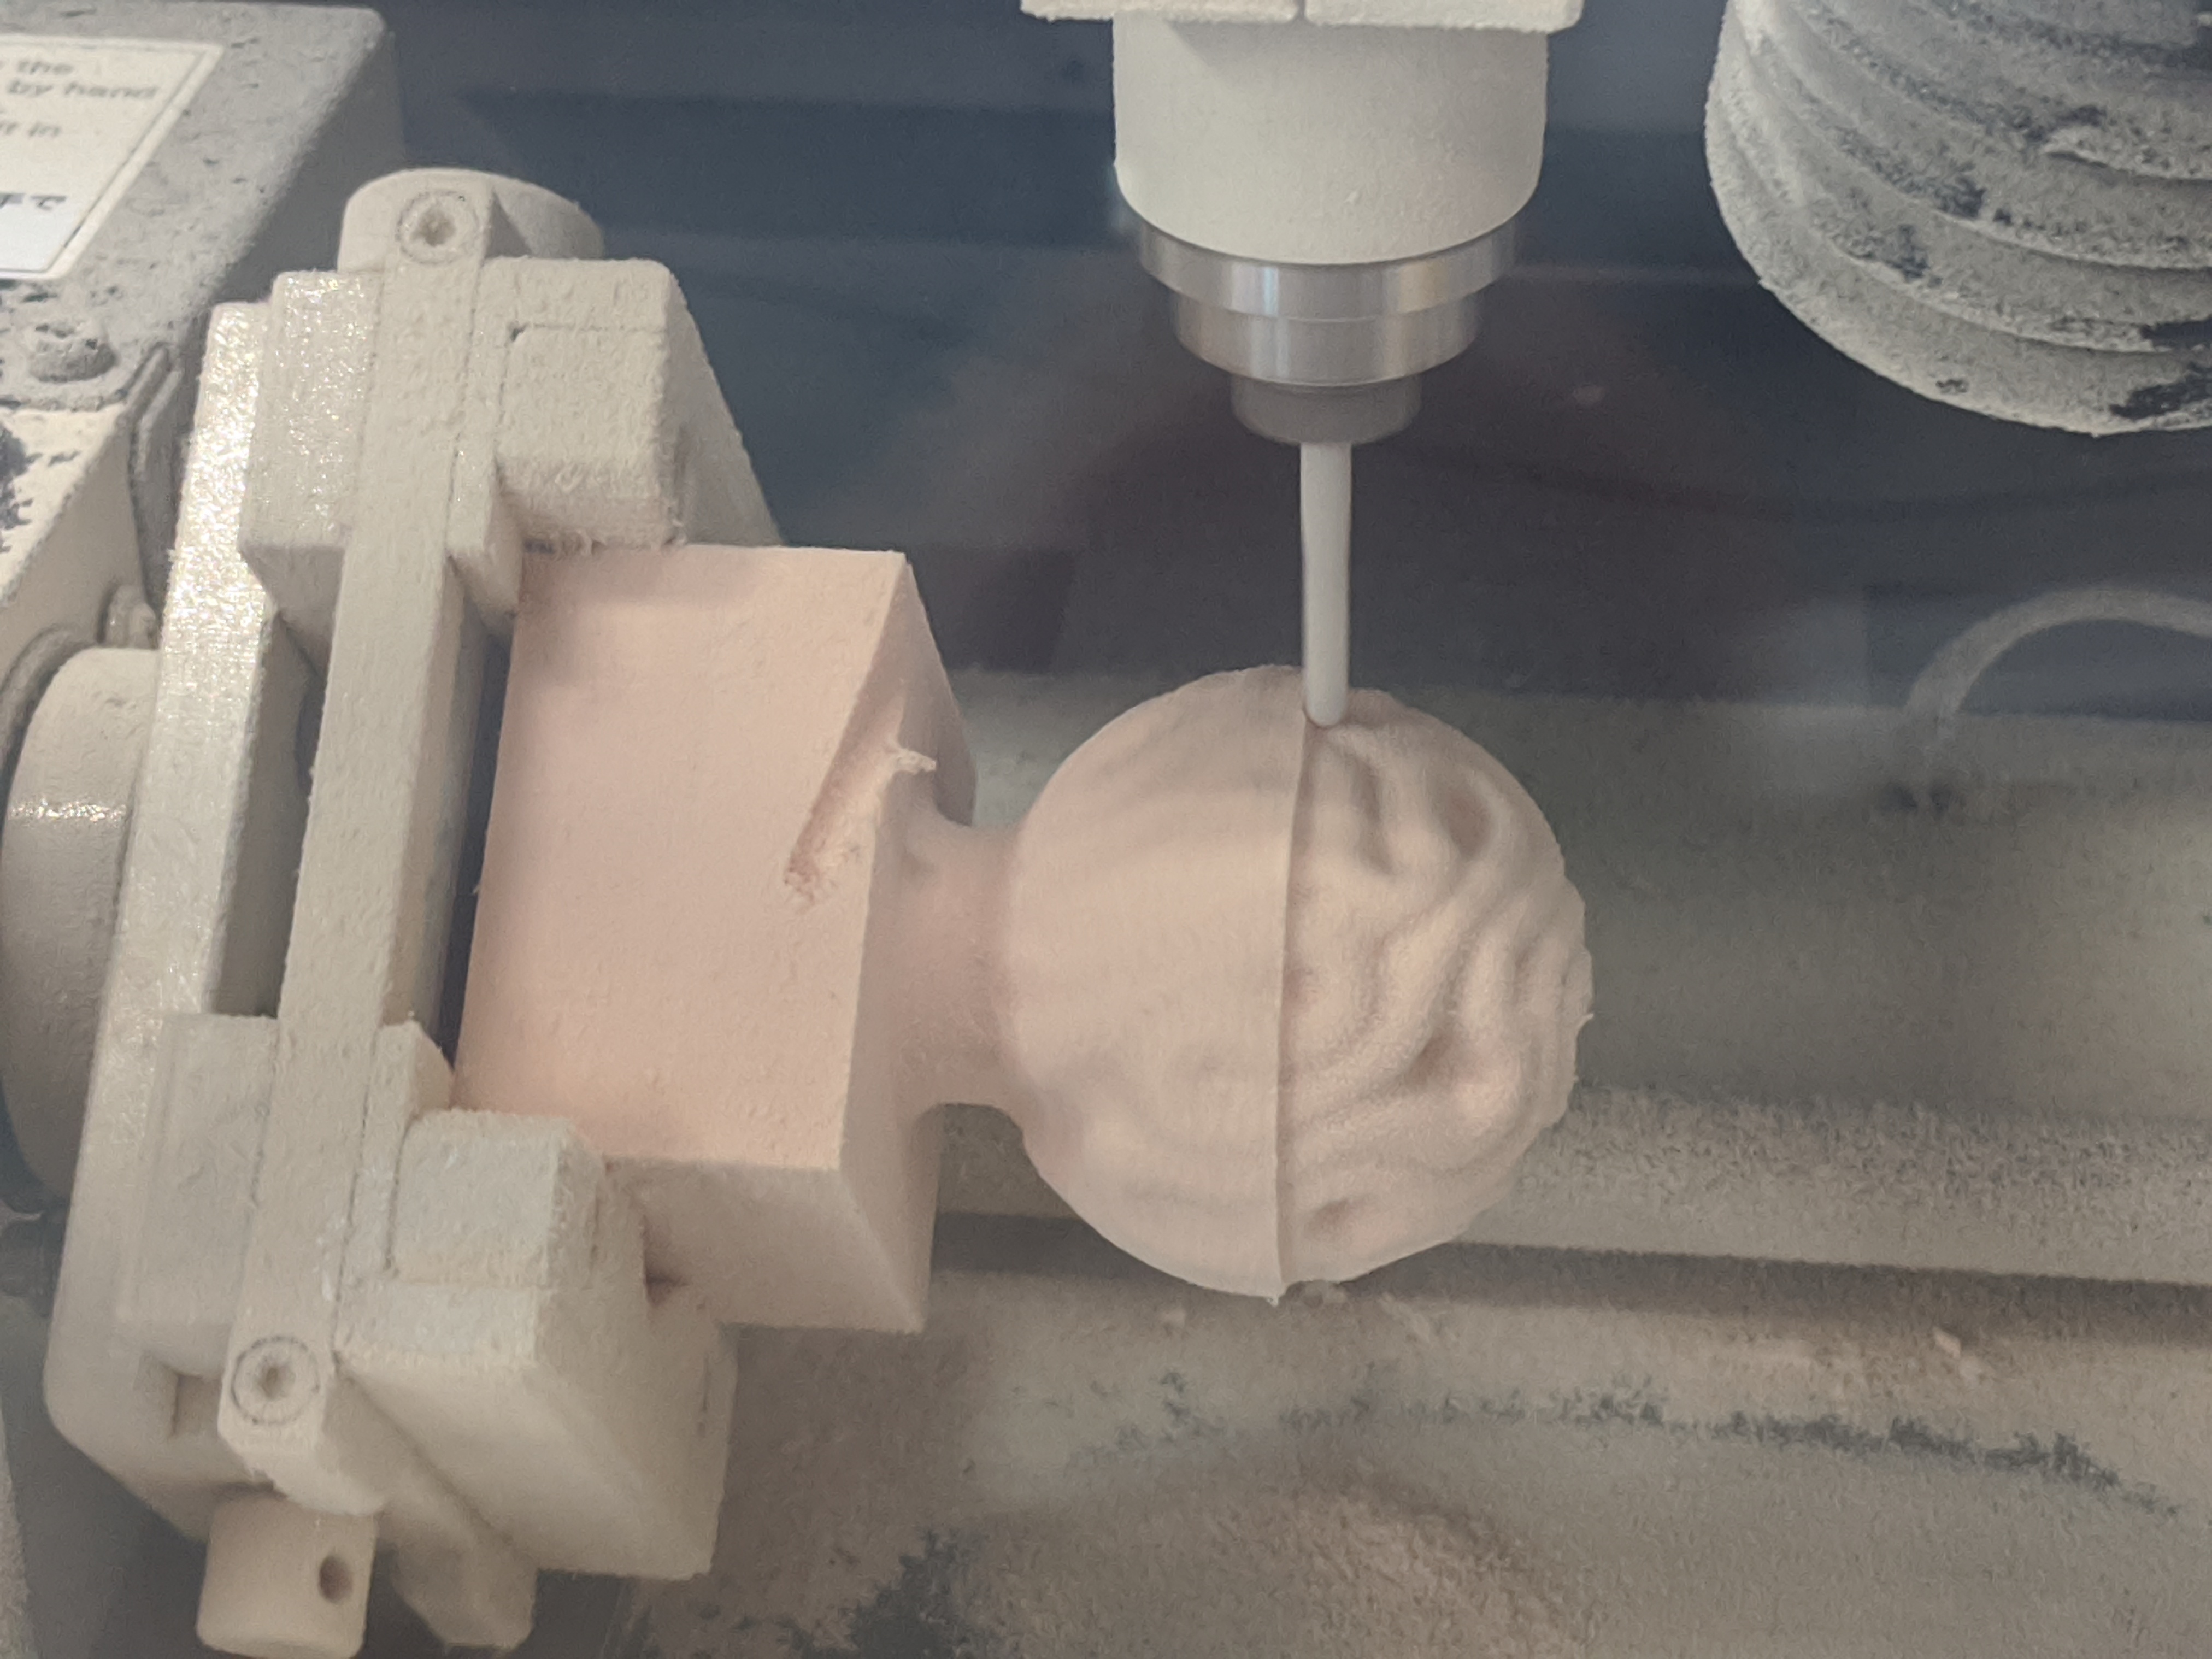
Completed test carving.
At this point I went back to CAM and added a tab on the right, so that the pin on the right would keep contact through the process.
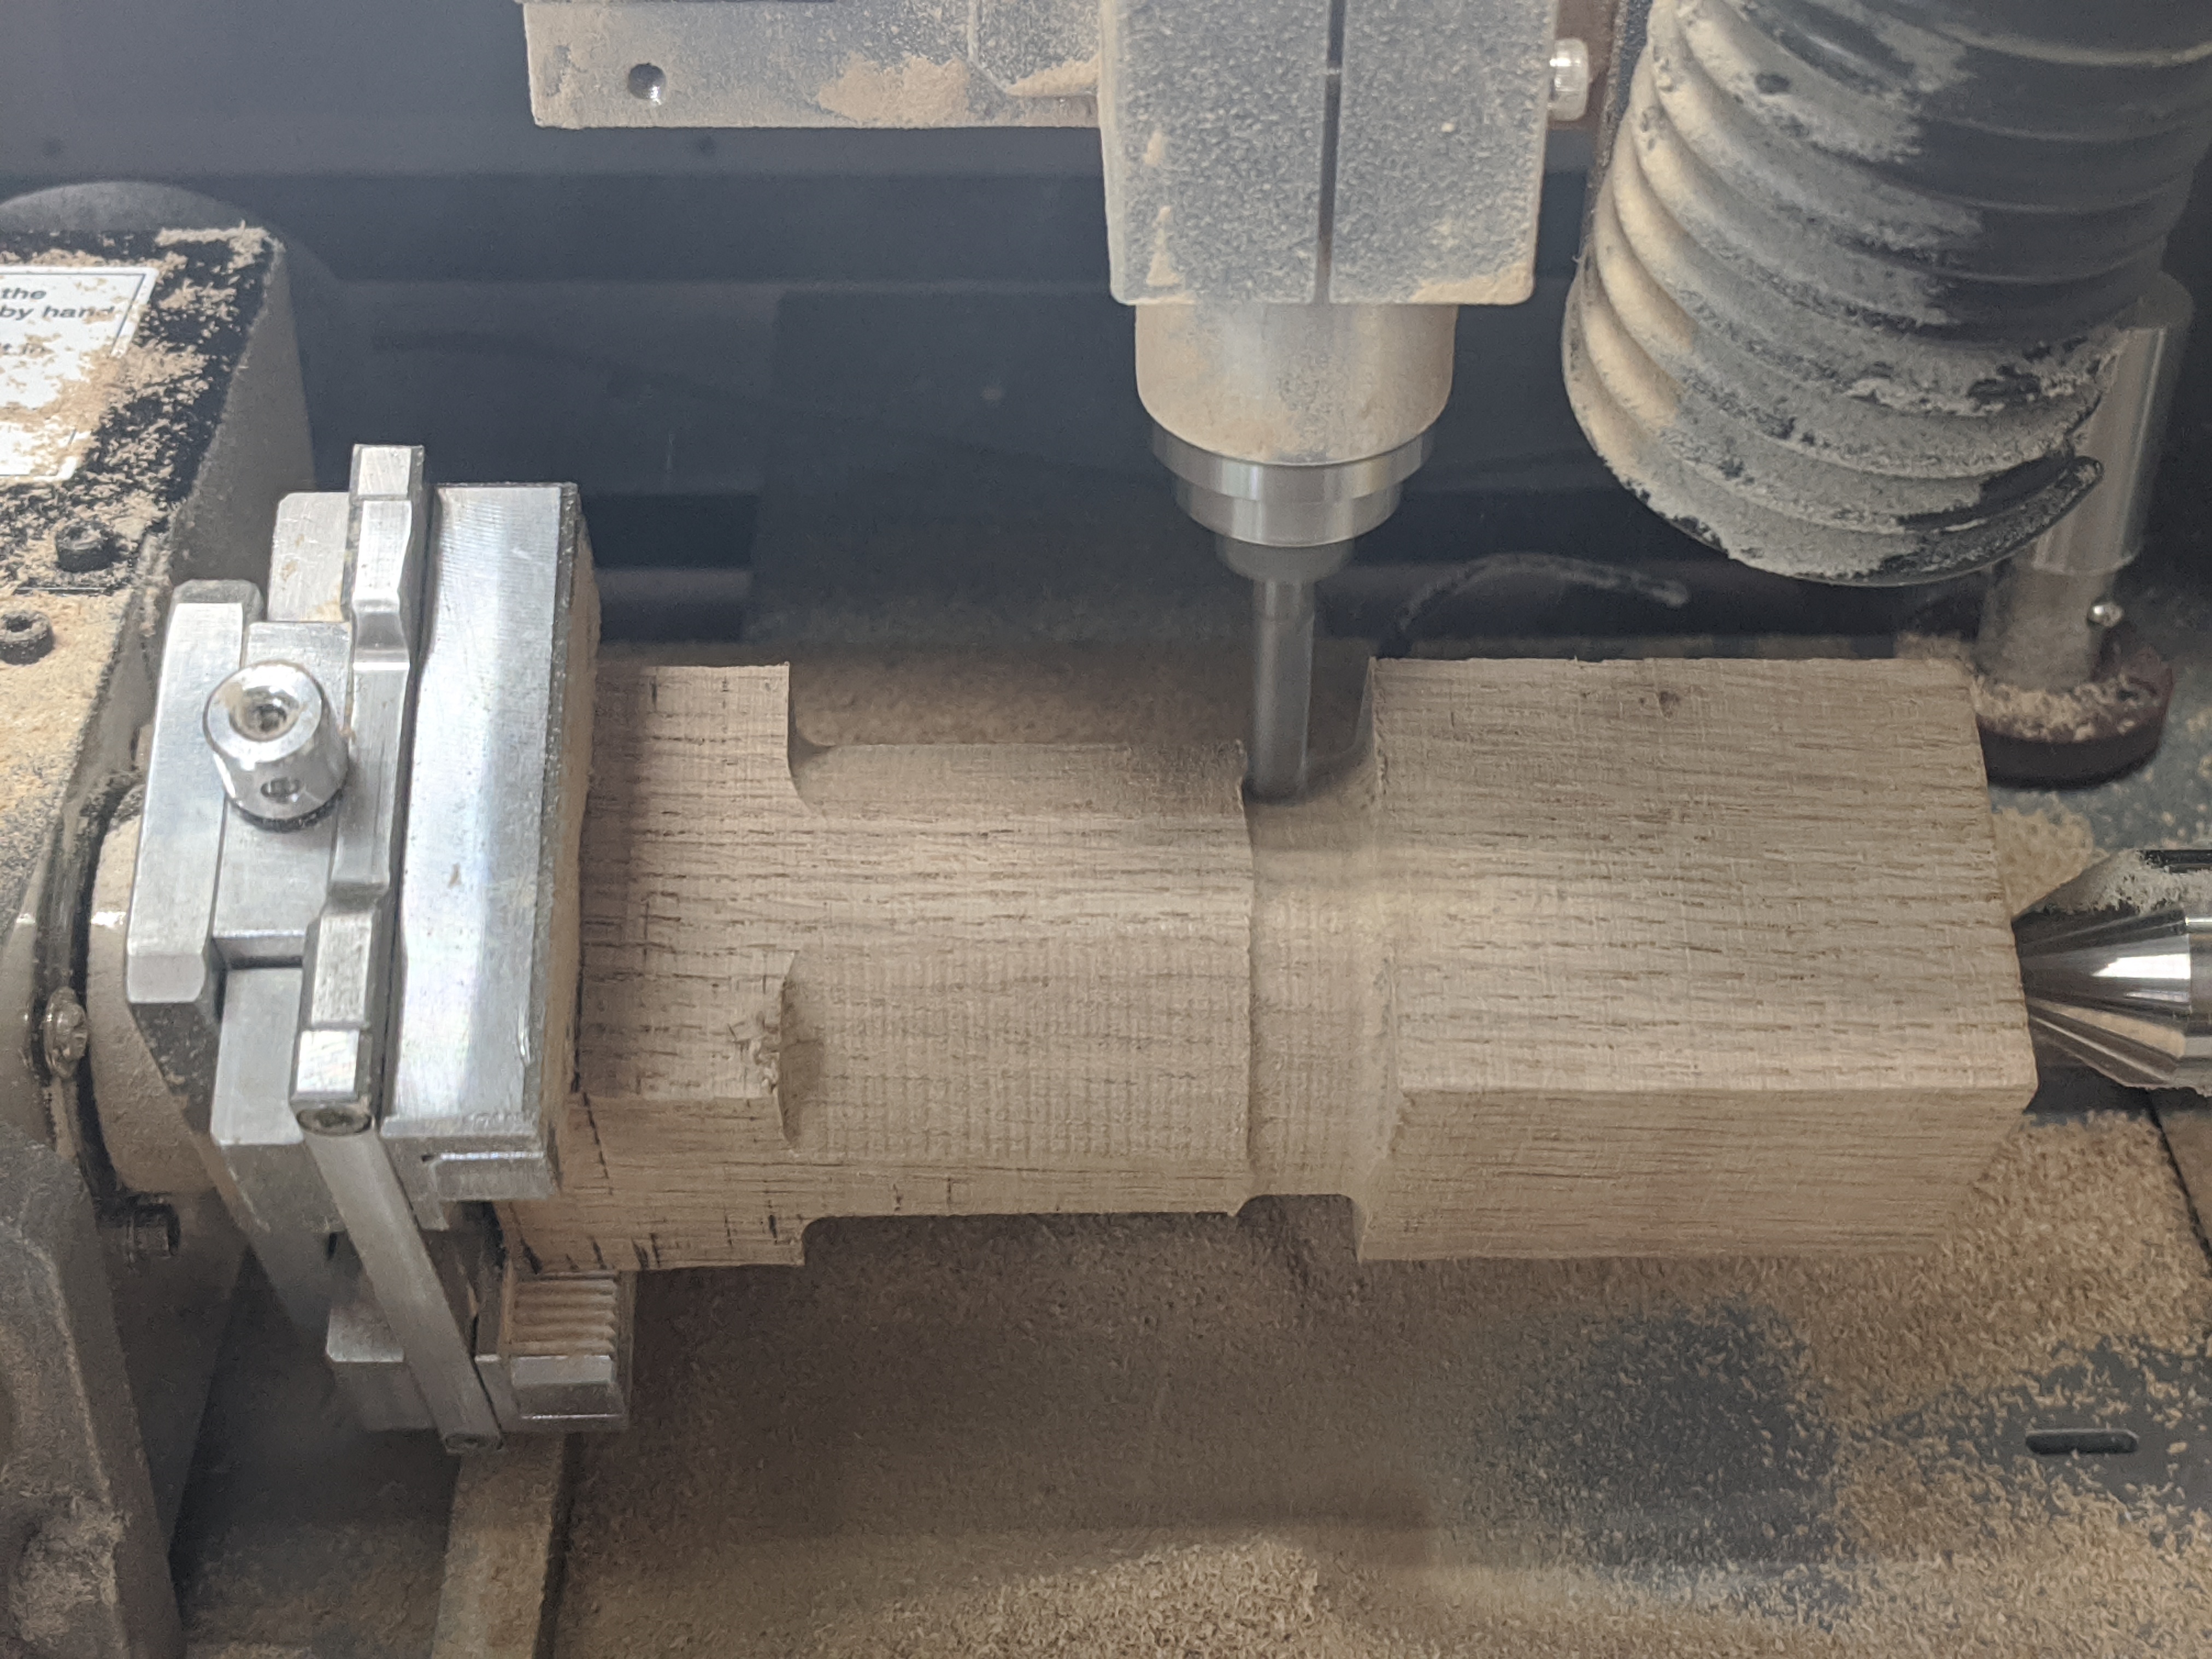
First pass with 6mm mill. That's a lot of work to make a dowel. Next time I'll try to match the design and stock a little better, for example by starting with a round dowel. But it was satisfying when the mill finally started to move in the Z dimension, and the rough form started to emerge.
10x and 120x timelapse of the finishing pass.
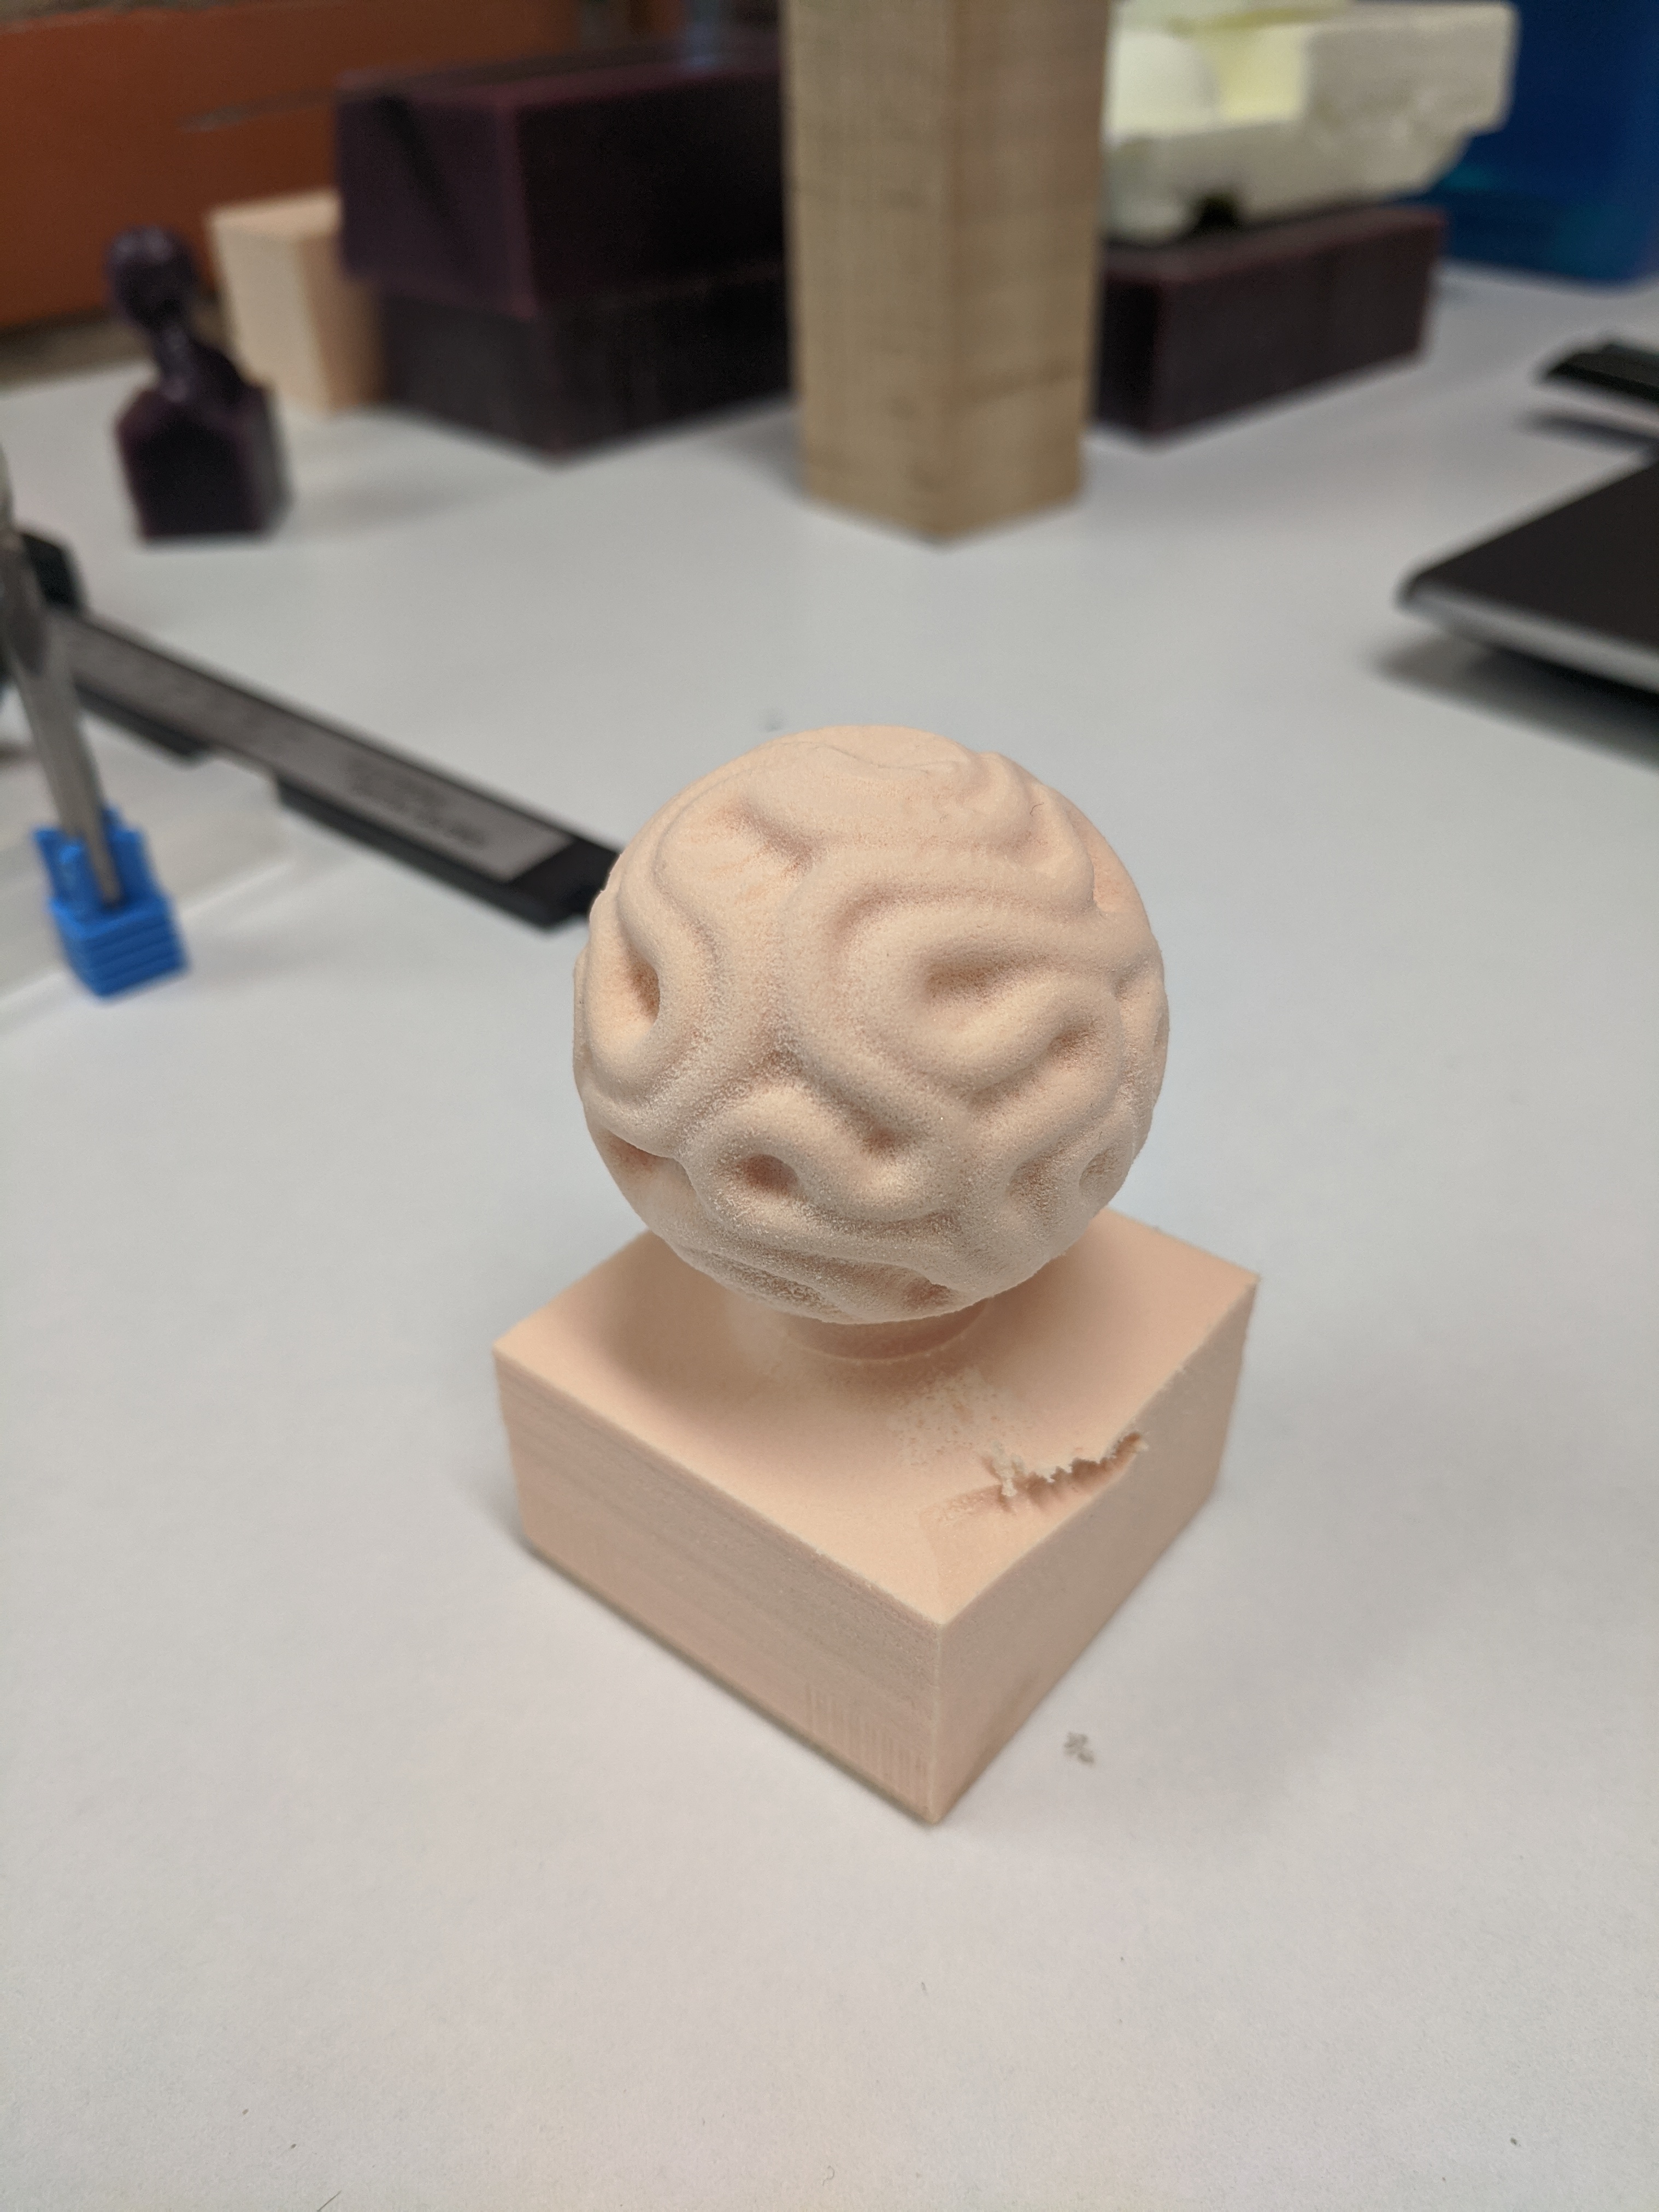
Done, phew.
Conclusion
The rotary stage takes a lot of the vertical space in this desktop mill, so the maximum stock size is about 42mm. The ideal scale for this design would be 80mm. The process was pretty noisy and mind-numbing to supervise... a more positive spin would be that it was meditative.
If I do another wooden version of the design, I think it would be cool to break the design into several parts that can be milled with a 3 axis process. That would let me create a version with the proper scale.
But I like my brain bead knob for what it is.
References
Aalto Wiki: 3D Milling with DeskProto and MDX-40 (4th axis) – Shoutout to Jonas Tjepkema for documenting this so thoroughly! Every issue that I had, like the mill end hitting the foam part, was a result of skimming a section too lightly. All the info is in there.
- ← Previous
Week 16. System Integration - Next →
Week 18. Final Labyrinth Parts