Week 14 assignment: Networking and Communications
Summary
This week I had to design, build, and connect wired or wireless node(s) with network or bus addresses and local input &/or output device(s).
Process
This week I will be working with an arduino UNO Wifi R4 and a seeeduino xiao ESP32-C3. First, I communicated with both boards through communication with the serial port so that they could communicate with text between them. Then, one of them will send a command so that a LED diode is energized in the other. Finally, one of them will send information of the sexagesimal degree to which a servomotor connected to the other board must rotate.
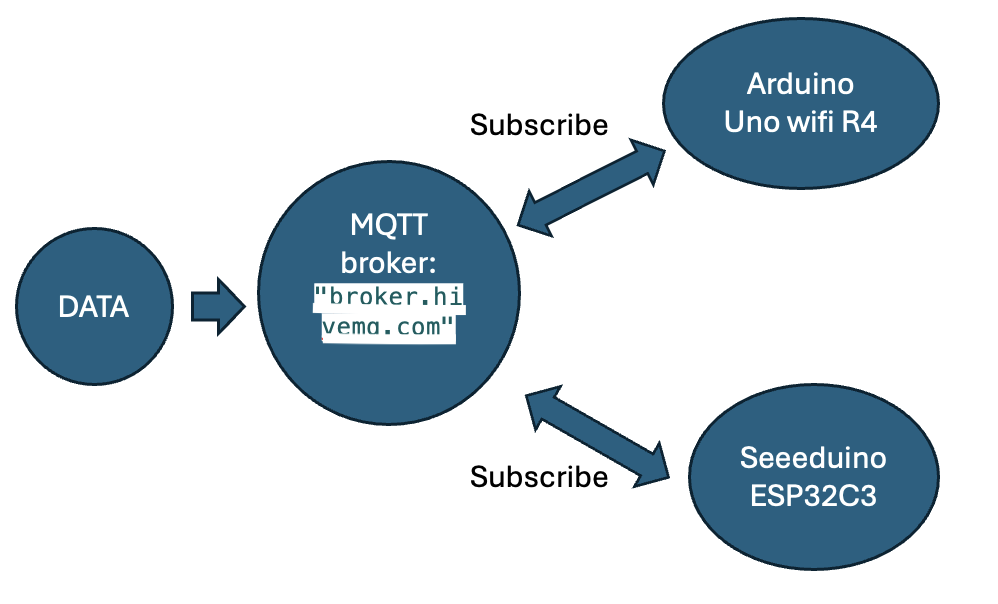
To set up a network communication system between the Arduino uno and my Seeeduino, I can use a few different types of communication, such as UART (serial communication), I2C, or even wireless communication. I decided to use wireless communication because they have no physical cables required, allowing for greater flexibility and mobility.
Also, they are ideal for long-distance communications and the ESP32 has built-in WiFi. Here's how I established the wifi communication between an Arduino uno wifi and a Seeeduino esp32:
I used the MQTT (Message Queuing Telemetry Transport) messaging protocol. MQTT uses a publish/subscribe messaging pattern.
Clients publish messages to a broker on specific topics, and other clients subscribe to those topics to receive the messages.
The central hub in MQTT communication is the broker, which is responsible for receiving messages from publishers and sending them to the appropriate subscribers.
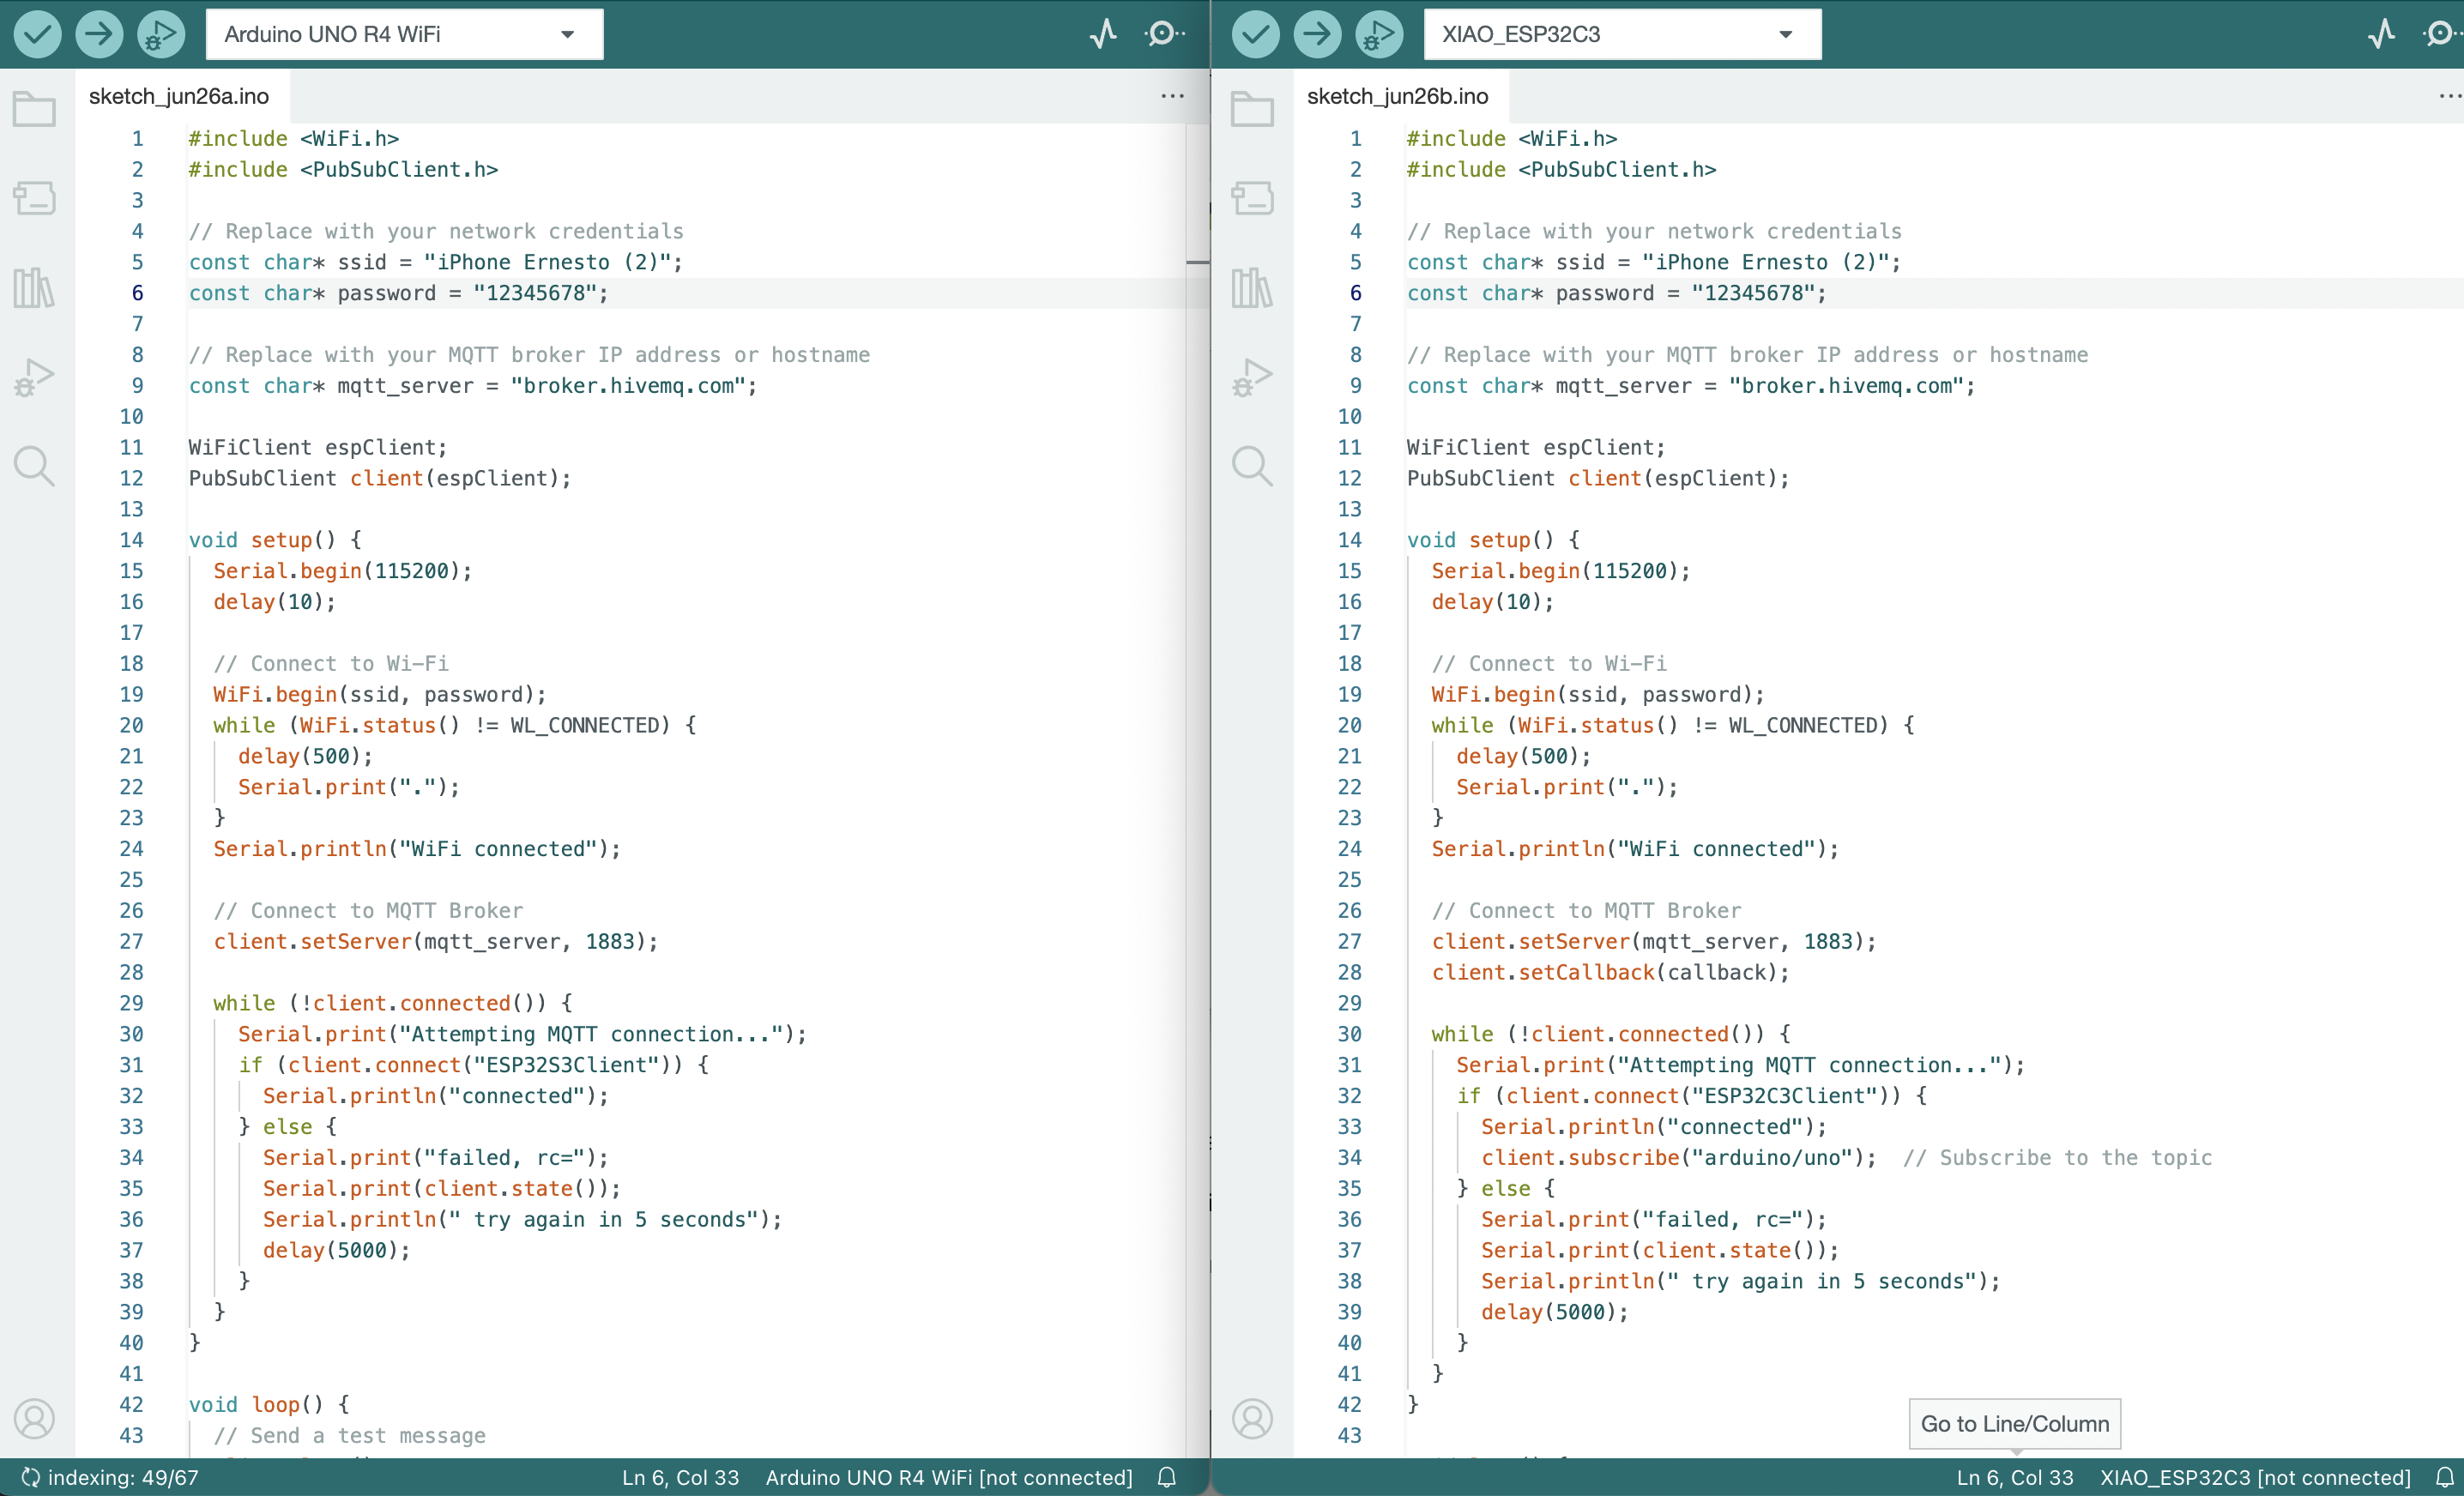
For the 3 cases I needed to install the required libraries in arduino IDE:
-WiFi.h for WiFi functionality.
-PubSubClient.h for MQTT functionality.
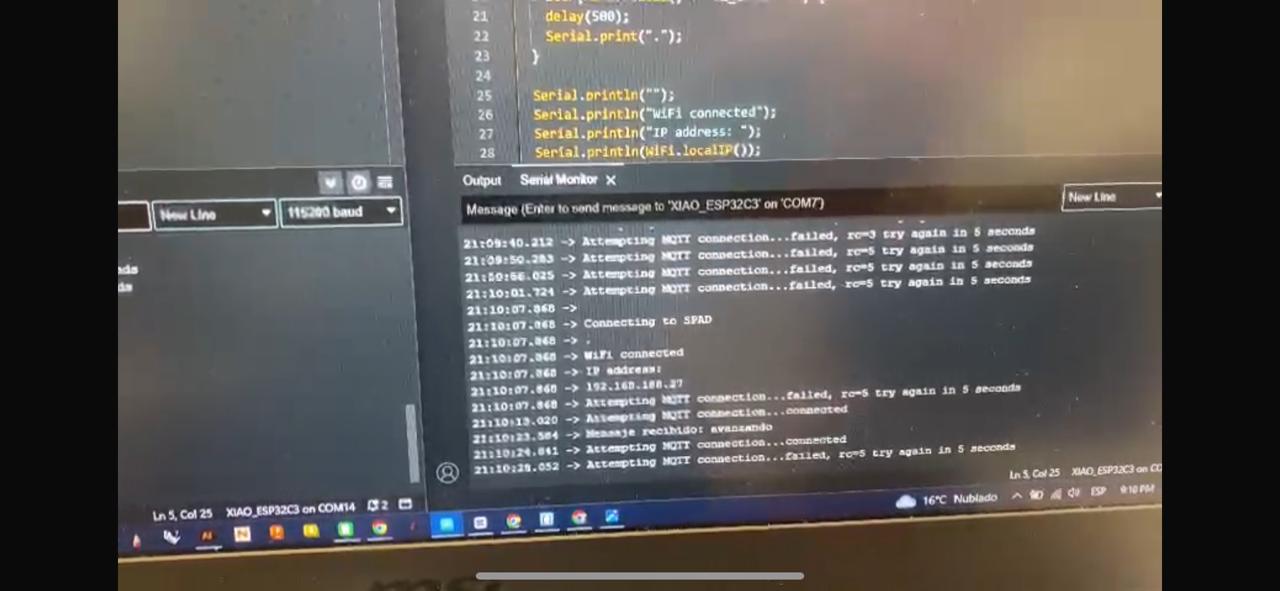
Text comunication between Arduino Uno wifi R4 and Seeeduino ESP32C3
Seeeduino ESP32C3: It publishes a message "HI, HELLO, ETC" to the topic "seeeduino/chat"
Arduino Uno WiFi R4: It subscribes to the topic "seeeduino/chat" using client.subscribe("seeeduino/chat"). It receives messages from the topic and prints them to the Serial Monitor using the callback function.
Below you can see a video of the communication made, and at the end the code of both programs.
Arduino Uno WiFi R4 code:
#include
#include
// Configuración Wi-Fi y MQTT
vconst char* ssid = "iPhone Ernesto (2)";
const char* password = "12345678";
const char* mqtt_server = "broker.hivemq.com";
WiFiClient espClient;
PubSubClient client(espClient);
void setup_wifi() {
delay(10);
Serial.println();
Serial.print("Conectando a ");
Serial.println(ssid);
WiFi.begin(ssid, password);
while (WiFi.status() != WL_CONNECTED) {
delay(500);
Serial.print(".");
}
Serial.println("");
Serial.println("WiFi conectado");
Serial.println("Dirección IP: ");
Serial.println(WiFi.localIP());
}
void callback(char* topic, byte* payload, unsigned int length) {
char message[length + 1];
memcpy(message, payload, length);
message[length] = '\0';
Serial.print("Mensaje recibido: ");
Serial.println(message);
// Procesar el mensaje y realizar acciones
if (strcmp(message, "A") == 0) {
digitalWrite(LED_BUILTIN, HIGH); // Enciende el LED
Serial.println("LED encendido");
} else if (strcmp(message, "B") == 0) {
digitalWrite(LED_BUILTIN, LOW); // Apaga el LED
Serial.println("LED apagado");
}
}
void reconnect() {
while (!client.connected()) {
Serial.print("Intentando conexión MQTT...");
if (client.connect("ArduinoClient")) {
Serial.println("conectado");
client.subscribe("arduino/chat");
} else {
Serial.print("falló, rc=");
Serial.print(client.state());
Serial.println(" Intentando de nuevo en 5 segundos");
delay(5000);
}
}
}
void setup() {
Serial.begin(115200);
pinMode(LED_BUILTIN, OUTPUT); // Configura el pin del LED como salida
setup_wifi();
client.setServer(mqtt_server, 1883);
client.setCallback(callback);
}
void loop() {
if (!client.connected()) {
reconnect();
}
client.loop();
// Enviar mensaje desde el servidor
if (Serial.available()) {
String msg = Serial.readStringUntil('\n');
client.publish("arduino/chat", msg.c_str());
}
}
Seeeduino ESP32C3 code:
#include <WiFi.h>
#include <PubSubClient.h>
// Configuración Wi-Fi y MQTT
const char* ssid = "Phone Ernesto (2)";
const char* password = "12345678";
const char* mqtt_server = "broker.hivemq.com";
WiFiClient espClient;
PubSubClient client(espClient);
void setup_wifi() {
delay(10);
Serial.println();
Serial.print("Conectando a ");
Serial.println(ssid);
WiFi.begin(ssid, password);
while (WiFi.status() != WL_CONNECTED) {
delay(500);
Serial.print(".");
}
Serial.println("");
Serial.println("WiFi conectado");
Serial.println("Dirección IP: ");
Serial.println(WiFi.localIP());
}
void callback(char* topic, byte* payload, unsigned int length) {
char message[length + 1];
memcpy(message, payload, length);
message[length] = '\0';
Serial.print("Mensaje recibido: ");
Serial.println(message);
// Procesar el mensaje y realizar acciones
}
void reconnect() {
while (!client.connected()) {
Serial.print("Intentando conexión MQTT...");
if (client.connect("ESP32Master")) {
Serial.println("conectado");
client.subscribe("seeeduino/chat");
} else {
Serial.print("falló, rc=");
Serial.print(client.state());
Serial.println(" Intentando de nuevo en 5 segundos");
delay(5000);
}
}
}
void setup() {
Serial.begin(115200);
setup_wifi();
client.setServer(mqtt_server, 1883);
client.setCallback(callback);
}
void loop() {
if (!client.connected()) {
reconnect();
}
client.loop();
// Enviar mensaje desde el servidor
if (Serial.available()) {
String msg = Serial.readStringUntil('\n');
client.publish("seeeduino/chat", msg.c_str());
}
}
LED interaction between Arduino Uno wifi R4 and Seeeduino ESP32C3
The code works in such a way that when you enter the word "H" in the serial monitor of the seeeduino esp32c3, the led of port 13 of the arduino uno wifi r4 lights up. Then when you enter the word "L", it turns off,
Below you can see a video of the communication made, and at the end the code of both programs.
Arduino Uno WiFi R4 code:
#include <WiFi.h>
#include <PubSubClient.h>
const char* ssid = "iPhone Ernesto (2)";
const char* password = "12345678";
const char* mqtt_server = "broker.hivemq.com";
WiFiClient espClient;
PubSubClient client(espClient);
void setup() {
pinMode(10, OUTPUT);
Serial.begin(115200);
setup_wifi();
client.setServer(mqtt_server, 1883);
client.setCallback(callback);
}
void setup_wifi() {
delay(10);
Serial.println();
Serial.print("Conectando a ");
Serial.println(ssid);
WiFi.begin(ssid, password);
while (WiFi.status() != WL_CONNECTED) {
delay(500);
Serial.print(".");
}
Serial.println("");
Serial.println("WiFi conectado");
Serial.println("Dirección IP: ");
Serial.println(WiFi.localIP());
}
void callback(char* topic, byte* payload, unsigned int length) {
Serial.print("Mensaje recibido [");
Serial.print(topic);
Serial.print("] ");
String msg;
for (int i = 0; i < length; i++) {
msg += (char)payload[i];
}
Serial.println(msg);
if (msg == "H") {
digitalWrite(10, HIGH);
Serial.println("LED encendido");
} else if (msg == "L") {
digitalWrite(10, LOW);
Serial.println("LED apagado");
}
}
void reconnect() {
while (!client.connected()) {
Serial.print("Intentando conexión MQTT...");
if (client.connect("ArduinoUnoR4ESP32S3")) {
Serial.println("conectado");
client.subscribe("led/control");
} else {
Serial.print("falló, rc=");
Serial.print(client.state());
Serial.println(" intentando de nuevo en 5 segundos");
delay(5000);
}
}
}
void loop() {
if (!client.connected()) {
reconnect();
}
client.loop();
}
Seeeduino ESP32C3 code:
#include <WiFi.h>
#include <PubSubClient.h>
const char* ssid = "iPhone Ernesto (2)";
const char* password = "12345678";
const char* mqtt_server = "broker.hivemq.com"; //172.20.10.9 ip seeduino
WiFiClient espClient;
PubSubClient client(espClient);
void setup() {
Serial.begin(115200);
setup_wifi();
client.setServer(mqtt_server, 1883);
}
void setup_wifi() {
delay(10);
Serial.println();
Serial.print("Conectando a ");
Serial.println(ssid);
WiFi.begin(ssid, password);
while (WiFi.status() != WL_CONNECTED) {
delay(500);
Serial.print(".");
}
Serial.println("");
Serial.println("WiFi conectado");
Serial.println("Dirección IP: ");
Serial.println(WiFi.localIP());
}
void reconnect() {
while (!client.connected()) {
Serial.print("Intentando conexión MQTT...");
if (client.connect("SeeeduinoXIAO")) {
Serial.println("conectado");
} else {
Serial.print("falló, rc=");
Serial.print(client.state());
Serial.println(" intentando de nuevo en 5 segundos");
delay(5000);
}
}
}
void loop() {
if (!client.connected()) {
reconnect();
}
client.loop();
if (Serial.available()) {
char c = Serial.read();
if (c == 'H' || c == 'L') {
client.publish("led/control", String(c).c_str());
Serial.print("Enviado: ");
Serial.println(c);
}
}
}
Degree for a servomotor between Arduino Uno wifi R4 and Seeeduino ESP32C3
In this last example, the code works by requesting the angle on the resial monitor of the seeeduino esp32c3. Then, send this information to the Arduino Uno WiFi R4 and it prints the provided angle on the servo motor. In this code we work with the servo.h library that I worked in week 9: Outputs.
Below you can see a video of the communication made, and at the end the code of both programs.
Arduino Uno WiFi R4 code:
#include <WiFi.h>
#include <PubSubClient.h>
#include <Servo.h>
const char* ssid = "iPhone Ernesto (2)";
const char* password = "****"; // clave de la red ssid
const char* mqtt_server = "broker.hivemq.com";
WiFiClient espClient;
PubSubClient client(espClient);
Servo myServo;
void setup() {
myServo.attach(9); // El pin 9 se usa para el control del servo
Serial.begin(115200);
setup_wifi();
client.setServer(mqtt_server, 1883);
client.setCallback(callback);
}
void setup_wifi() {
delay(10);
Serial.println();
Serial.print("Conectando a ");
Serial.println(ssid);
WiFi.begin(ssid, password);
while (WiFi.status() != WL_CONNECTED) {
delay(500);
Serial.print(".");
}
Serial.println("");
Serial.println("WiFi conectado");
Serial.println("Dirección IP: ");
Serial.println(WiFi.localIP());
}
void callback(char* topic, byte* payload, unsigned int length) {
Serial.print("Mensaje recibido [");
Serial.print(topic);
Serial.print("] ");
String msg;
for (int i = 0; i < length; i++) {
msg += (char)payload[i];
}
Serial.println(msg);
int angle = msg.toInt();
if (angle >= 0 && angle <= 180) {
myServo.write(angle);
Serial.print("Servo movido a: ");
Serial.println(angle);
}
}
void reconnect() {
while (!client.connected()) {
Serial.print("Intentando conexión MQTT...");
if (client.connect("ArduinoUnoR4ESP32S3")) {
Serial.println("conectado");
client.subscribe("servo/angle");
} else {
Serial.print("falló, rc=");
Serial.print(client.state());
Serial.println(" intentando de nuevo en 5 segundos");
delay(5000);
}
}
}
void loop() {
if (!client.connected()) {
reconnect();
}
client.loop();
}
Seeeduino ESP32C3 code:
#include <WiFi.h>
#include <PubSubClient.h>
const char* ssid = "iPhone Ernesto (2)";
const char* password = "****"; // clave de la red ssid
const char* mqtt_server = "broker.hivemq.com";
WiFiClient espClient;
PubSubClient client(espClient);
void setup() {
Serial.begin(115200);
setup_wifi();
client.setServer(mqtt_server, 1883);
}
void setup_wifi() {
delay(10);
Serial.println();
Serial.print("Conectando a ");
Serial.println(ssid);
WiFi.begin(ssid, password);
while (WiFi.status() != WL_CONNECTED) {
delay(500);
Serial.print(".");
}
Serial.println("");
Serial.println("WiFi conectado");
Serial.println("Dirección IP: ");
Serial.println(WiFi.localIP());
}
void reconnect() {
while (!client.connected()) {
Serial.print("Intentando conexión MQTT...");
if (client.connect("SeeeduinoXIAO")) {
Serial.println("conectado");
} else {
Serial.print("falló, rc=");
Serial.print(client.state());
Serial.println(" intentando de nuevo en 5 segundos");
delay(5000);
}
}
}
void loop() {
if (!client.connected()) {
reconnect();
}
client.loop();
if (Serial.available()) {
String angle = Serial.readStringUntil('\n');
int angleValue = angle.toInt();
if (angleValue >= 0 && angleValue <= 180) {
client.publish("servo/angle", angle.c_str());
Serial.print("Enviado: ");
Serial.println(angle);
}
}
}
Group assignment
In the group assignment I learned to communicate 2 plates. These connected to a common server and could send texts to each other. It was an interesting form of chat that we programmed.
My contribution to the group work was to give one of my boards that I am using for my final project to carry out communication between devices. The microcontroller used is a XIAO seeeduino esp32c3 that has the WiFi connectivity that we need.
Here is the link to the group assignments:
Files:
Code for SeeeduinoESP32C3 Texting
Code for Arduino UNO servomotor
Code for SeeeduinoESP32C3 Servomotor