15. Interface and Application Programming
The primary objective of this week is design and programming Human Machine Interface Applications to interact with microcontrollers.
The group assignment of this week you can found it here.
Research
Human Machine Interface (HMI) Applications are systems designed to facilitate interaction between humans and technological devices or systems. Some key features of these applications include:
- Data visualization: These systems provide clear and understandable visual representations of relevant information, such as sensor readings, system states, and graphs.
- Control and monitoring: These systems permit users to observe and regulate the operation of machines, industrial processes, automation systems, and other such devices.
- Intuitive interaction: They employ graphical user interfaces (GUI) or touch screens that facilitate the comprehension and operation of the systems by users, even those without a profound technical background.
- Decision-making: They provide pertinent information and analytical tools that assist users in making well-informed decisions regarding the operation and control of systems.
- Systems integration: They facilitate communication and coordination between different devices, machines, and systems, thereby enabling comprehensive management and automation.
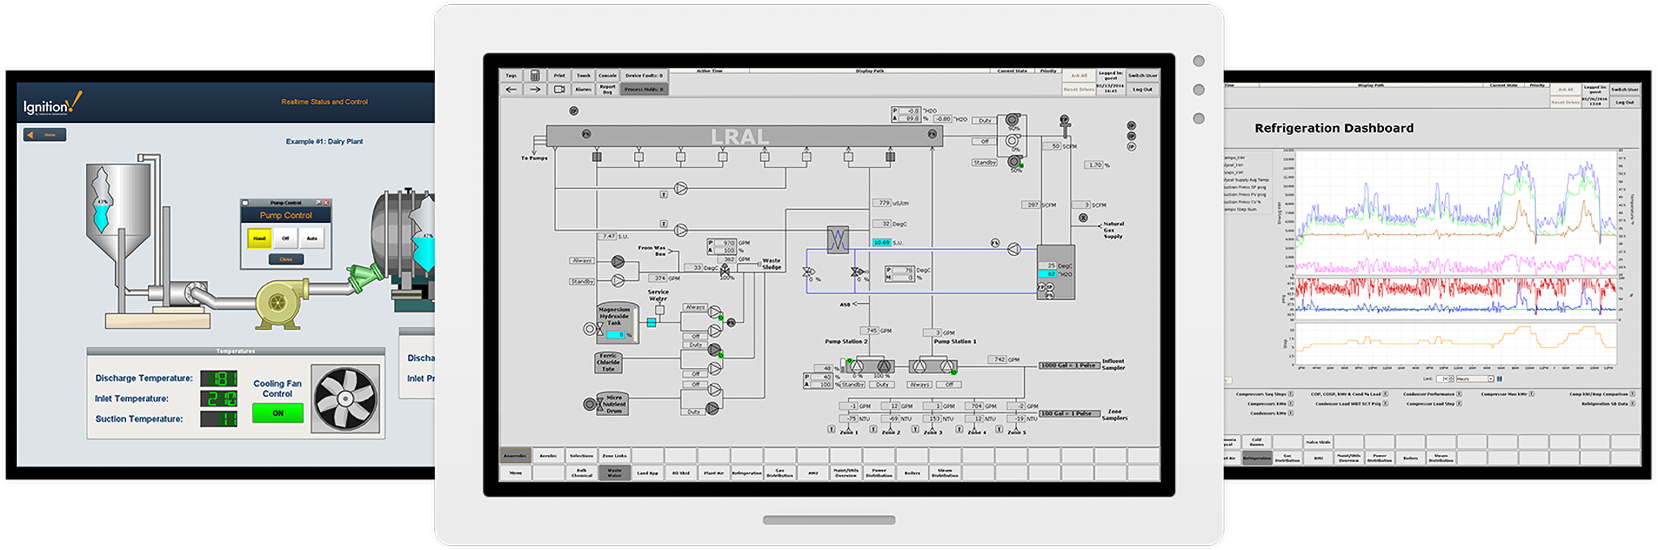
Examples of Human Machine Interface (HMI) Applications
Images taken from: https://inductiveautomation.com/resources/article/what-is-hmi.
The development of Human Machine Interface (HMI) applications is a highly complex and diversified professional field. These interactive systems integrate a wide range of disciplines, including the design of graphical interfaces and the programming of advanced control and monitoring algorithms. HMI experts must possess a skill set that encompasses areas such as ergonomics, usability, software engineering, and artificial intelligence. Additionally, they must adapt to the specific requirements of various industrial sectors, such as automation, aviation, medicine, and home automation, among others. The ever-evolving technological landscape and evolving user expectations present ongoing challenges for HMI professionals, who must remain abreast of developments and creative in their solutions. In this context, the creation of HMI applications is a highly complex and dynamic field that requires the integration of diverse areas of knowledge and the ability to adapt to rapidly changing environments.
The diversity and complexity inherent in the development of Human Machine Interface (HMI) applications is evident in the wide range of solutions that can be implemented using programming tools such as Visual Studio Community 2022. This week, two practical examples will be presented that illustrate the versatility of these applications.
The initial example will entail the design of an HMI application for the purpose of controlling the switching on and off of an LED. This application will be tested on a range of microcontrollers in order to demonstrate its adaptability to different hardware platforms.
The second example will focus on the visualization of data from the sensors of an Arduino Nano 33 BLE Sense rev2. This HMI application will allow for real-time monitoring of the readings obtained by the various sensors integrated in this development board.
The case studies presented demonstrate the capacity of HMI applications to address a broad spectrum of requirements, ranging from fundamental device control to the presentation of intricate data from embedded systems. The versatility and adaptability of these solutions, developed using cutting-edge programming tools, underscore the complexity and diversity inherent in the professional domain of human-machine interface design.

Visual Studio Community 2022 Logo
Image taken from: https://archive.org/details/visualstudio-2022-community-j
Visual Studio Community 2022 is a powerful, free integrated development environment (IDE) developed by Microsoft. It is designed for use by programmers, developers, and code enthusiasts, enabling them to create a wide variety of applications for multiple platforms and devices. This IDE offers a complete programming experience, encompassing code editing, debugging, graphical user interface (GUI) design, and application publishing.
One of the primary advantages of Visual Studio Community 2022 is its versatility. It enables the development of web, mobile, desktop, gaming, and cloud service applications using a multitude of programming languages, including C#, Visual Basic, C++, JavaScript, and others. This makes it an indispensable tool for developers engaged in diverse projects and requiring an integrated development environment that allows them to address multiple technologies.
Furthermore, Visual Studio Community 2022 features an extensible framework that enables users to enhance its functionality through the installation of add-ons and additional tools tailored to their specific requirements. These include tools for version control, code analysis, unit testing, continuous integration and deployment, among others. These extensions facilitate improvements in developer productivity and workflow efficiency.
Another noteworthy attribute of this integrated development environment (IDE) is its intuitive and customizable user interface. Developers are afforded the flexibility to adjust the appearance and layout of the interface elements according to their preferences, thereby enabling them to work in a more comfortable and efficient manner. Furthermore, Visual Studio Community 2022 offers a comprehensive range of templates and wizards that facilitate the initiation of new projects and accelerate the development process.
Visual Studio Community 2022 is a free and robust development tool that offers programmers and developers a comprehensive and adaptable platform for developing a diverse range of contemporary, high-quality applications. Its versatility, extensibility, and user-friendliness have made it an appealing and widely utilized choice among software development professionals and enthusiasts.
Visual Studio Installer is available to facilitate the installation of Visual Studio family applications. Visual Studio Installer is a tool developed by Microsoft that allows you to download, install, and configure the different versions of Visual Studio, Microsoft's integrated development environment (IDE).
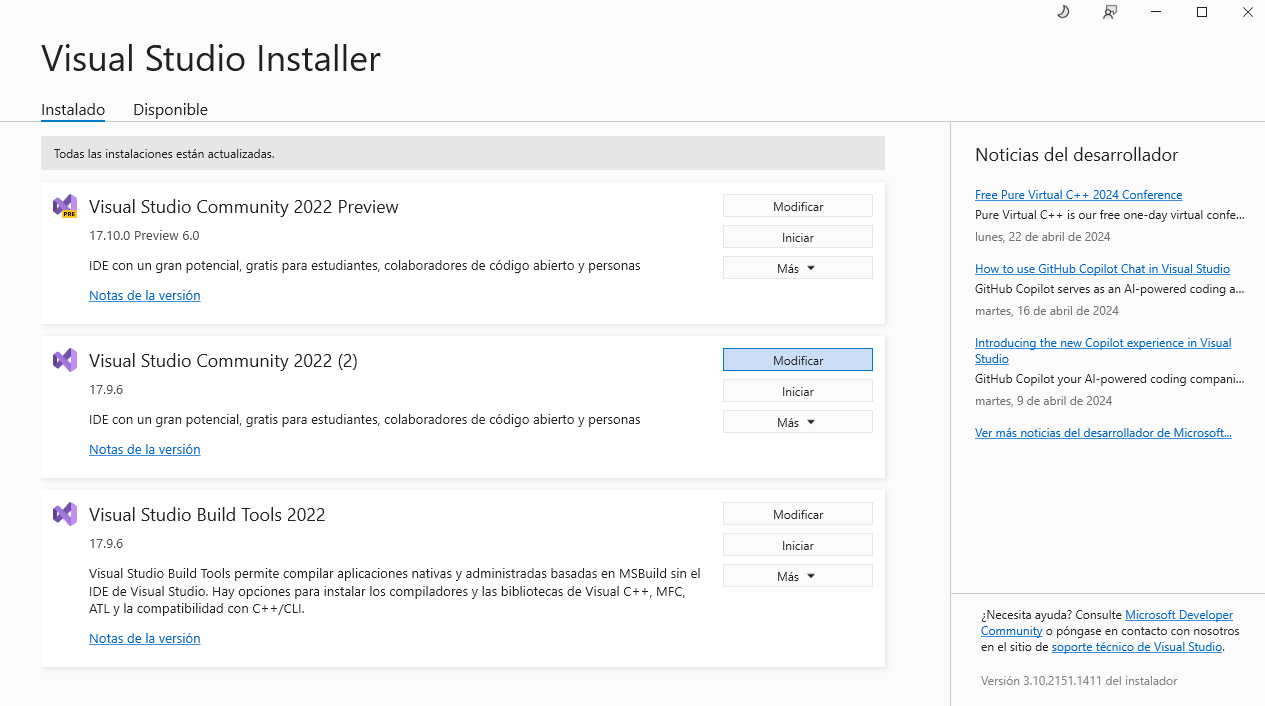
Visual Studio Installer
Some of the main advantages of Visual Studio Installer are:
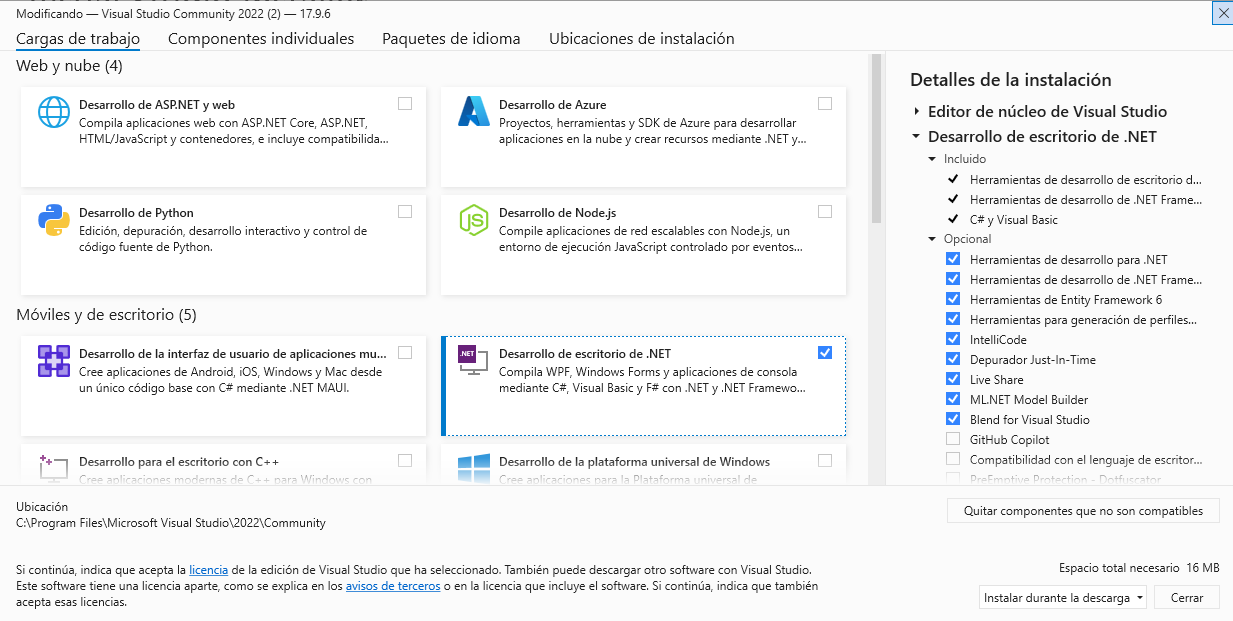
- Installation flexibility: Visual Studio Installer allows you to select and download only the components and features you need, avoiding the installation of unnecessary features and optimizing the use of disk space.
- Easy updates: Visual Studio Installer allows users to keep up with the latest versions of Visual Studio and its complementary tools, making it easy to incorporate enhancements and new features.
- Multi-platform support: Visual Studio Installer supports the installation of Visual Studio on different operating systems, such as Windows, MacOS, and Linux, which expands development options and makes it easier to work in different environments.
- Workload Management: This tool allows you to select and configure specific workloads for each project, such as Web development, desktop applications, mobile, and others, optimizing the development environment for specific needs.
- Integration with Extensions: Visual Studio Installer facilitates the installation of extensions and complementary tools that enrich the capabilities of the IDE, expanding the possibilities of customization and adaptation to the needs of each developer.
The C# programming language was utilized for the development of the aforementioned applications, specifically for those intended for use on the Windows operating system.
Windows Forms using C# language
The process begins with the creation of a new project.
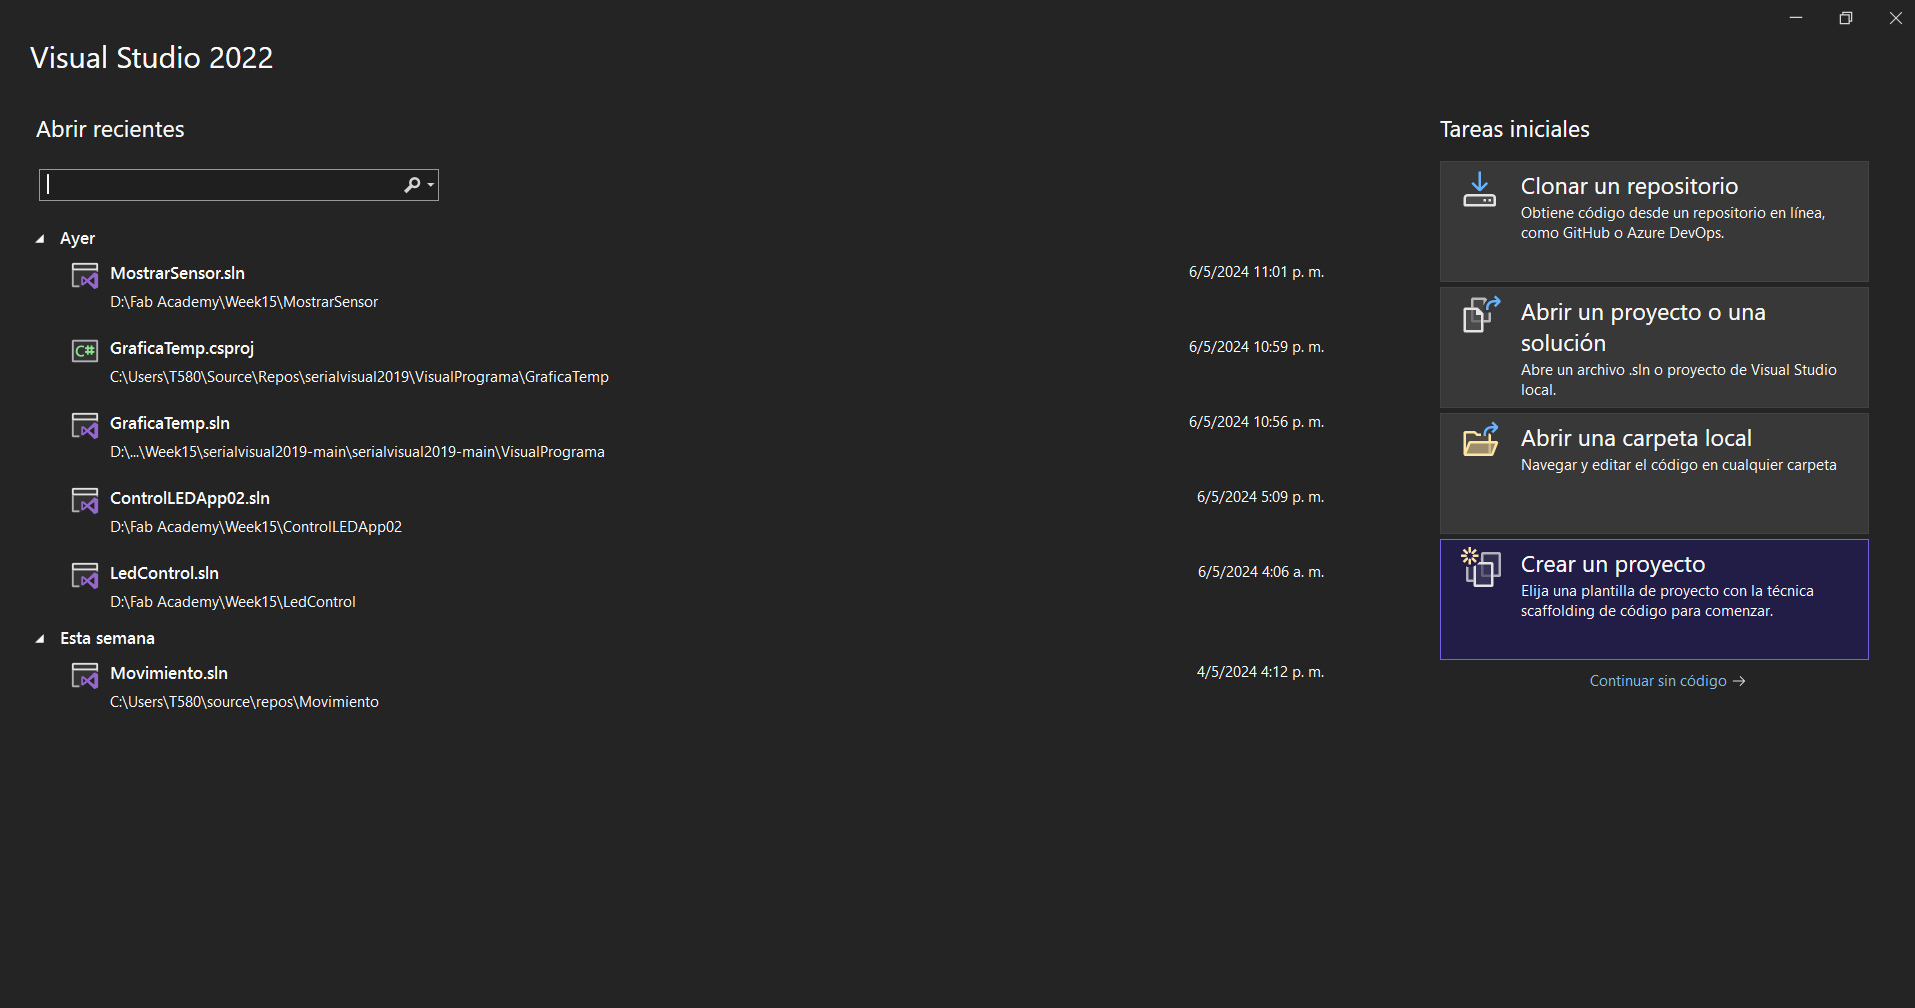
The characteristics of the project have been selected. In this instance, it will be a Windows desktop application developed in the C# language.
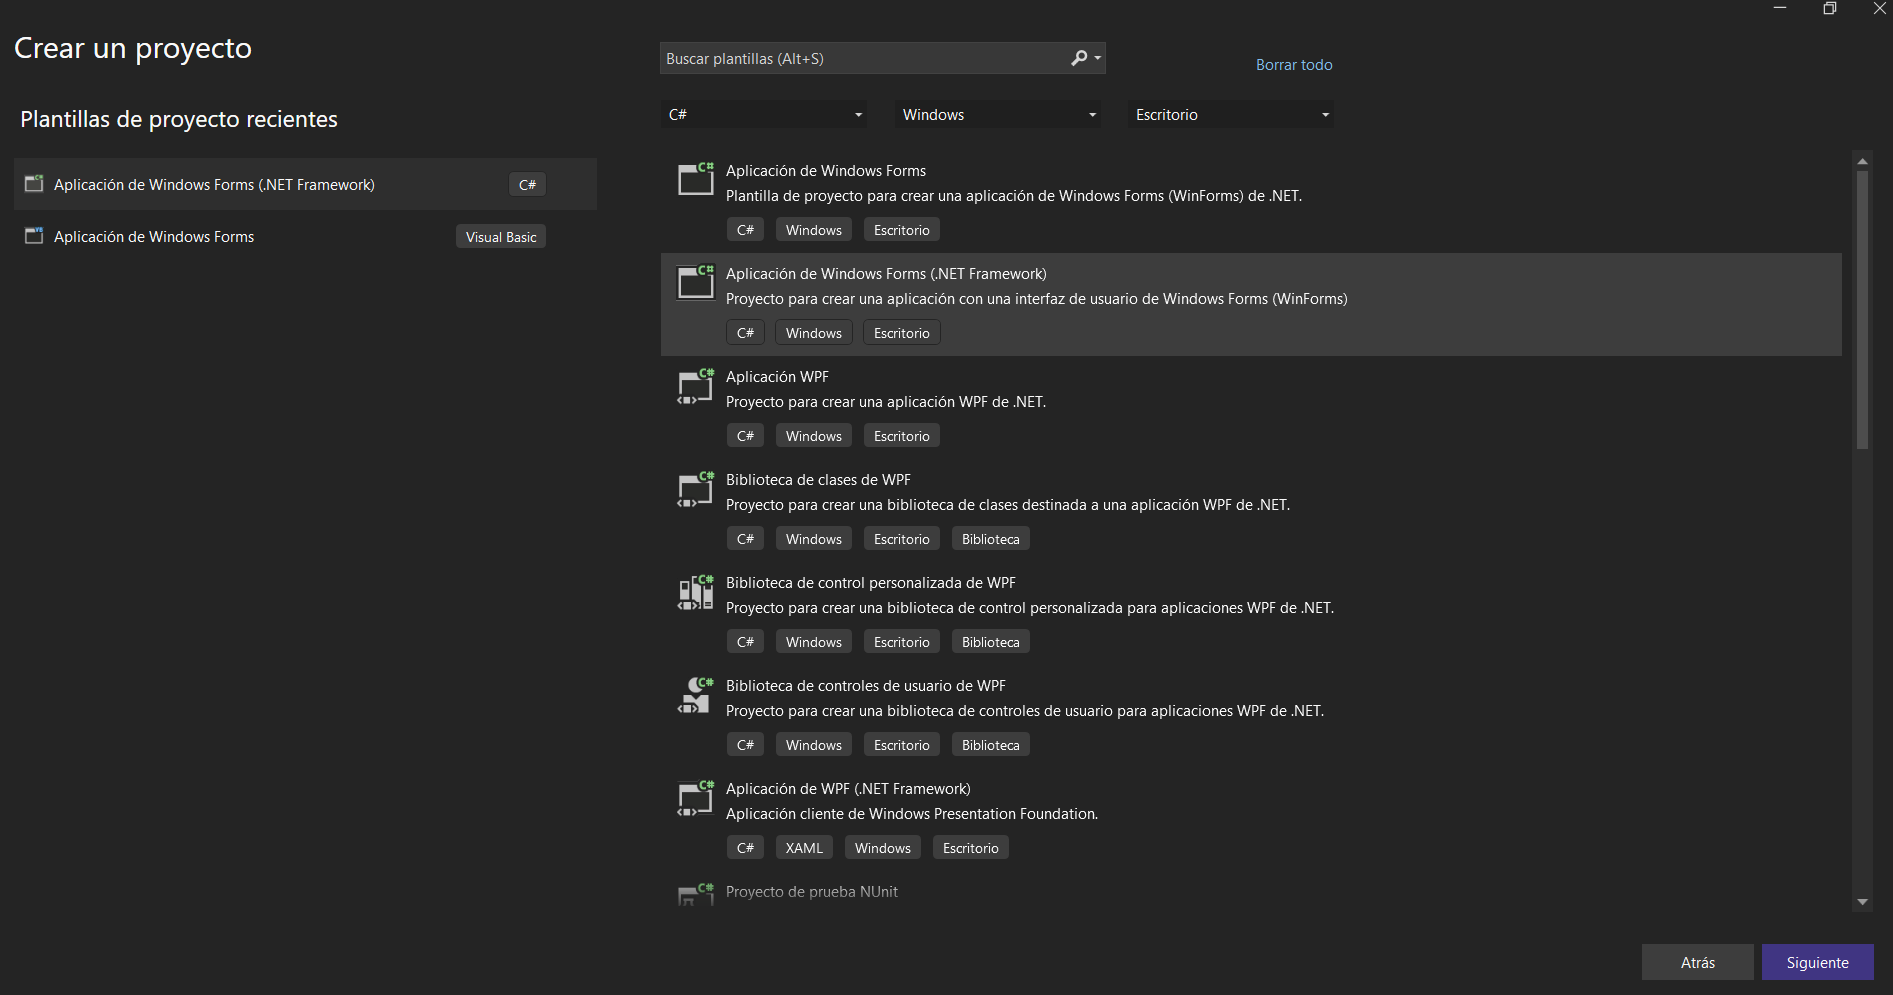
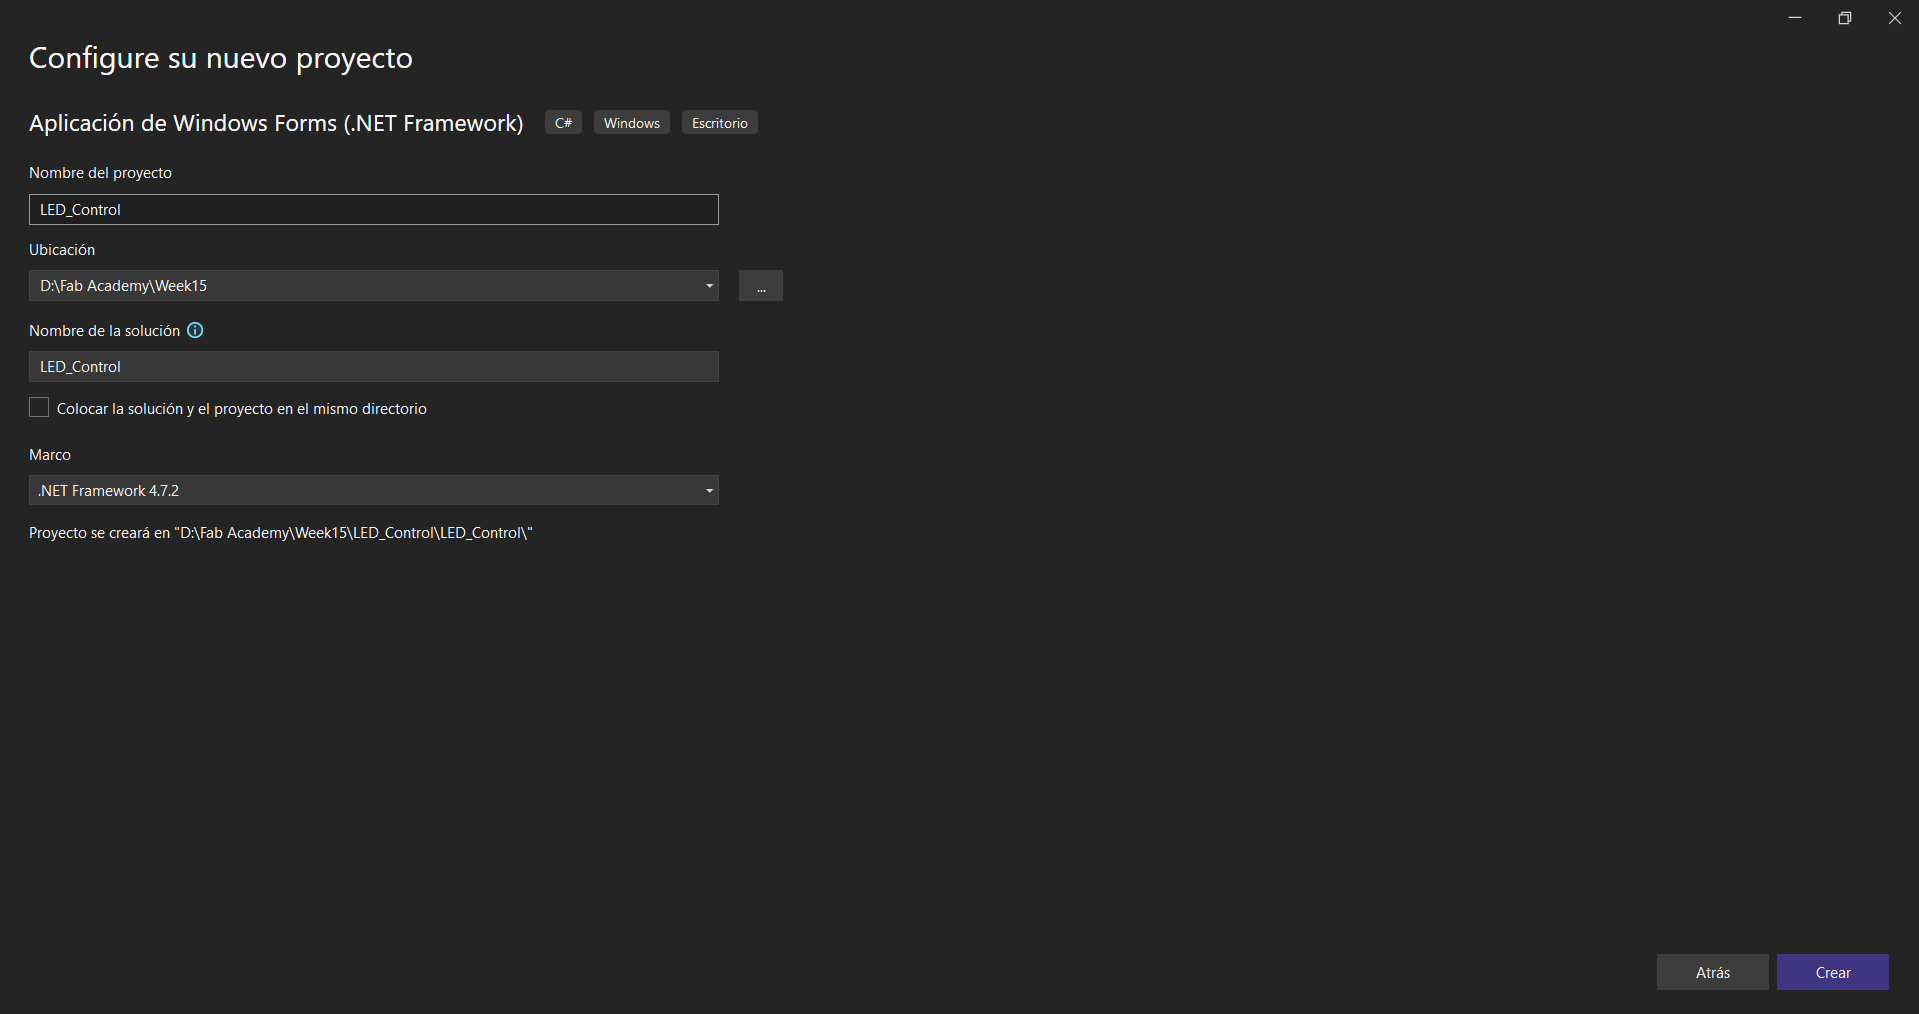
The project has been designated a name and the folder containing all the files has been identified.
This is the initial window that is displayed.
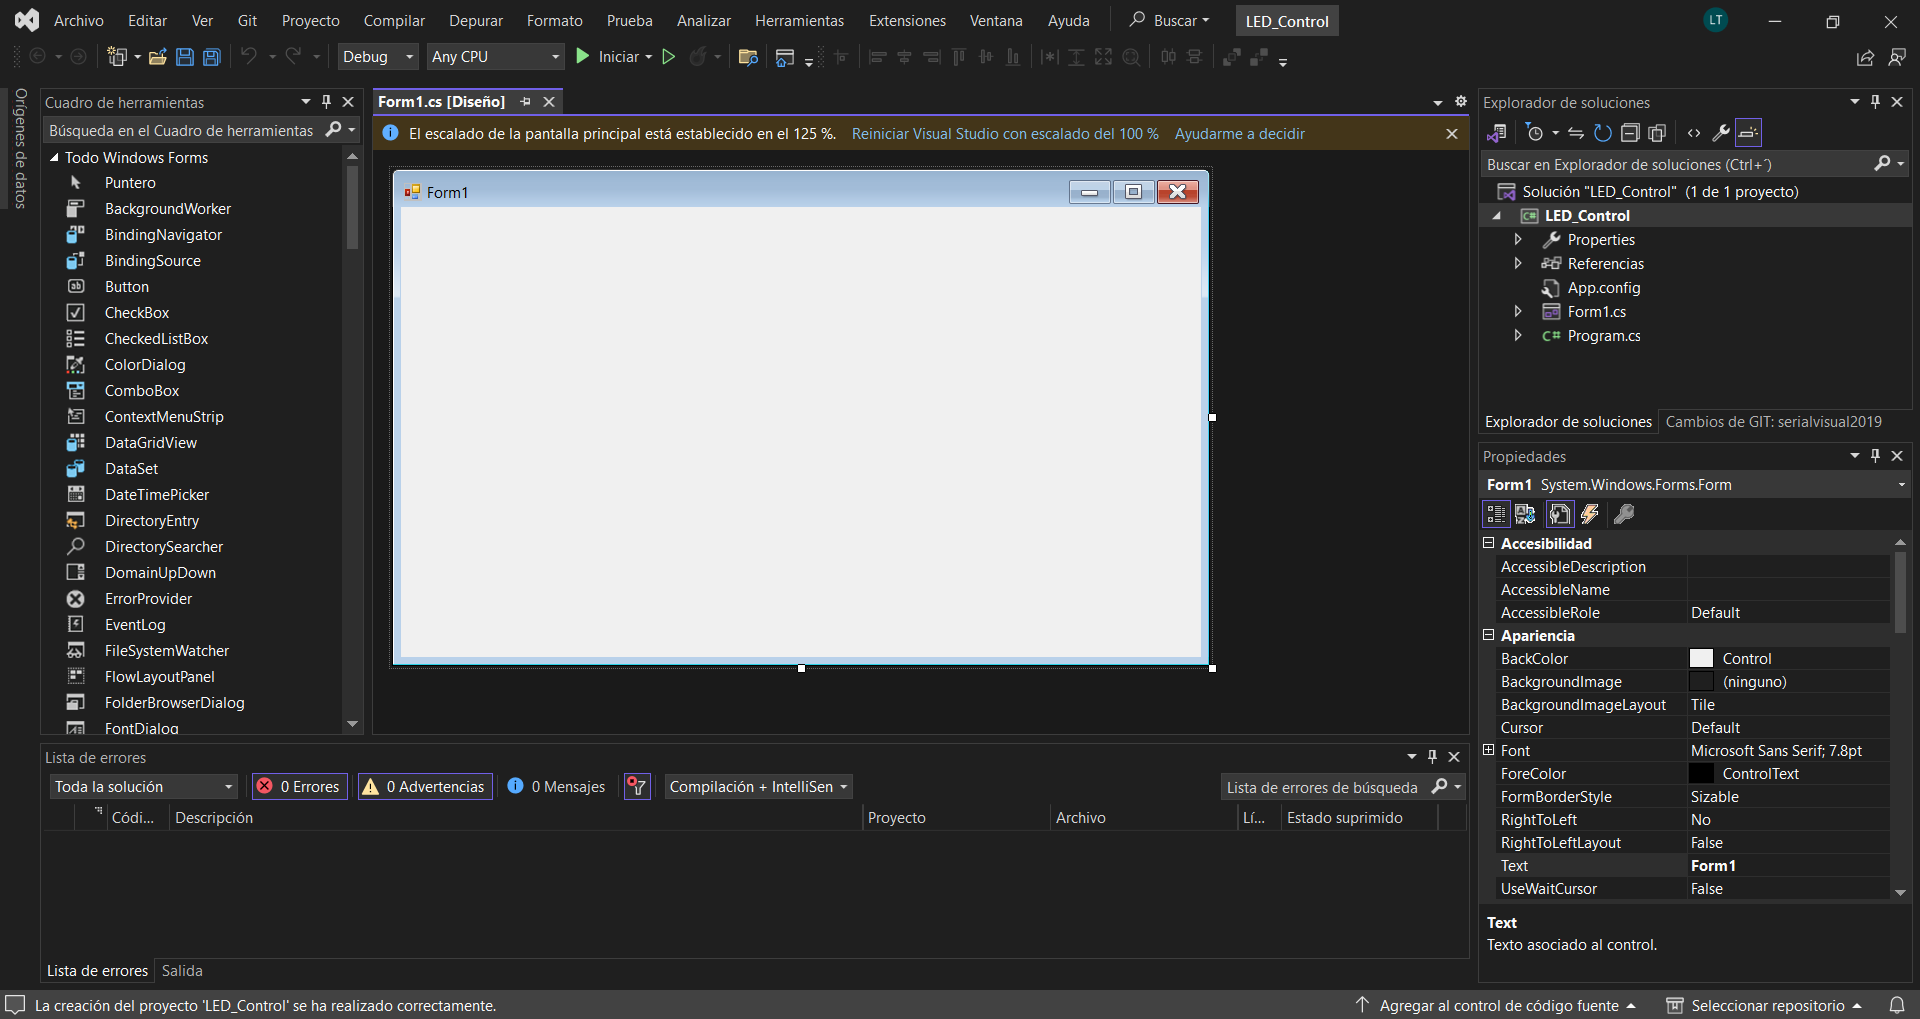
The toolbox, which contains all the possible tools to be used, is displayed here. For this case, only two buttons, a label, a groupbox and a serial port will be required, which is not visible in the application window. The properties window is also displayed, which allows the user to change the properties of the tools and add events to them.
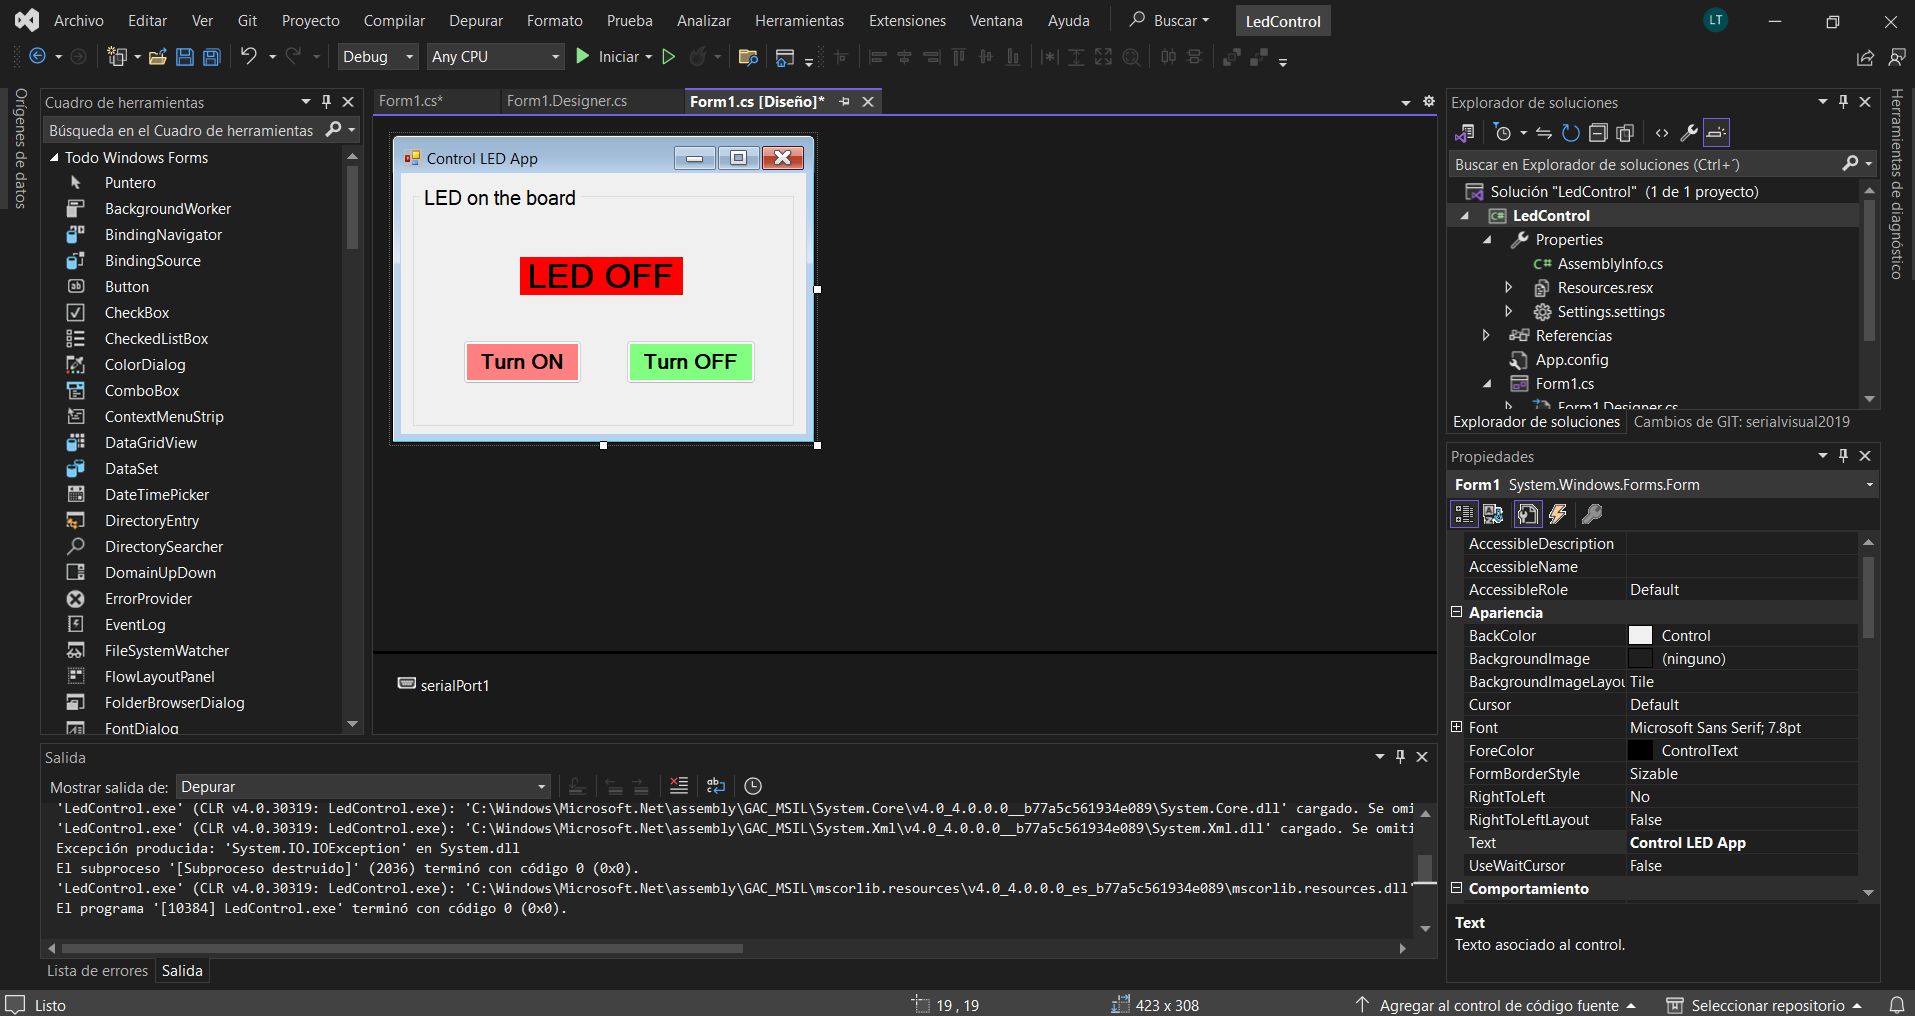
Let us now examine the programming. It comprises two distinct components: the visual aspect and the events. The visual aspect can be achieved by incorporating the requisite tools and modifying their properties through the Visual Studio Community 2022 graphical interface, which automatically generates the design code. This is illustrated in the diagram below.
            namespace LedControl
            {
                partial class Form1
                {
                    /// <summary>
                    /// Variable del diseñador necesaria.
                    /// </summary>
                    private System.ComponentModel.IContainer components = null;

                    /// <summary>
                    /// Limpiar los recursos que se estén usando.
                    /// </summary>
                    /// <param name="disposing">true si los recursos administrados se deben desechar; false en caso contrario.</param>
                    protected override void Dispose(bool disposing)
                    {
                        if (disposing && (components != null))
                        {
                            components.Dispose();
                        }
                        base.Dispose(disposing);
                    }

                    #region Código generado por el Diseñador de Windows Forms

                    /// <summary>
                    /// Método necesario para admitir el Diseñador. No se puede modificar
                    /// el contenido de este método con el editor de código.
                    /// </summary>
                    private void InitializeComponent()
                    {
                        this.components = new System.ComponentModel.Container();
                        this.labelLED = new System.Windows.Forms.Label();
                        this.buttonEncender = new System.Windows.Forms.Button();
                        this.buttonApagar = new System.Windows.Forms.Button();
                        this.groupBox1 = new System.Windows.Forms.GroupBox();
                        this.serialPort1 = new System.IO.Ports.SerialPort(this.components);
                        this.groupBox1.SuspendLayout();
                        this.SuspendLayout();
                        //
                        // labelLED
                        //
                        this.labelLED.AutoSize = true;
                        this.labelLED.BackColor = System.Drawing.Color.Red;
                        this.labelLED.Font = new System.Drawing.Font("Microsoft Sans Serif", 19.8F, System.Drawing.FontStyle.Bold, System.Drawing.GraphicsUnit.Point, ((byte)(0)));
                        this.labelLED.Location = new System.Drawing.Point(107, 72);
                        this.labelLED.Name = "labelLED";
                        this.labelLED.Size = new System.Drawing.Size(163, 38);
                        this.labelLED.TabIndex = 0;
                        this.labelLED.Text = "LED OFF";
                        //
                        // buttonEncender
                        //
                        this.buttonEncender.BackColor = System.Drawing.Color.FromArgb(((int)(((byte)(255)))), ((int)(((byte)(128)))), ((int)(((byte)(128)))));
                        this.buttonEncender.Font = new System.Drawing.Font("Microsoft Sans Serif", 12F, System.Drawing.FontStyle.Bold, System.Drawing.GraphicsUnit.Point, ((byte)(0)));
                        this.buttonEncender.Location = new System.Drawing.Point(50, 155);
                        this.buttonEncender.Name = "buttonEncender";
                        this.buttonEncender.Size = new System.Drawing.Size(119, 44);
                        this.buttonEncender.TabIndex = 1;
                        this.buttonEncender.Text = "Turn ON";
                        this.buttonEncender.UseVisualStyleBackColor = false;
                        this.buttonEncender.Click += new System.EventHandler(this.buttonEncender_Click);
                        //
                        // buttonApagar
                        //
                        this.buttonApagar.BackColor = System.Drawing.Color.FromArgb(((int)(((byte)(128)))), ((int)(((byte)(255)))), ((int)(((byte)(128)))));
                        this.buttonApagar.Font = new System.Drawing.Font("Microsoft Sans Serif", 12F, System.Drawing.FontStyle.Bold, System.Drawing.GraphicsUnit.Point, ((byte)(0)));
                        this.buttonApagar.Location = new System.Drawing.Point(213, 155);
                        this.buttonApagar.Name = "buttonApagar";
                        this.buttonApagar.Size = new System.Drawing.Size(130, 44);
                        this.buttonApagar.TabIndex = 2;
                        this.buttonApagar.Text = "Turn OFF";
                        this.buttonApagar.UseVisualStyleBackColor = false;
                        this.buttonApagar.Click += new System.EventHandler(this.buttonApagar_Click);
                        //
                        // groupBox1
                        //
                        this.groupBox1.Controls.Add(this.labelLED);
                        this.groupBox1.Controls.Add(this.buttonApagar);
                        this.groupBox1.Controls.Add(this.buttonEncender);
                        this.groupBox1.Font = new System.Drawing.Font("Microsoft Sans Serif", 12F, System.Drawing.FontStyle.Regular, System.Drawing.GraphicsUnit.Point, ((byte)(0)));
                        this.groupBox1.Location = new System.Drawing.Point(12, 12);
                        this.groupBox1.Name = "groupBox1";
                        this.groupBox1.Size = new System.Drawing.Size(381, 242);
                        this.groupBox1.TabIndex = 3;
                        this.groupBox1.TabStop = false;
                        this.groupBox1.Text = "LED on the board";
                        //
                        // Form1
                        //
                        this.AutoScaleDimensions = new System.Drawing.SizeF(8F, 16F);
                        this.AutoScaleMode = System.Windows.Forms.AutoScaleMode.Font;
                        this.ClientSize = new System.Drawing.Size(405, 261);
                        this.Controls.Add(this.groupBox1);
                        this.Name = "Form1";
                        this.Text = "Control LED App";
                        this.FormClosing += new System.Windows.Forms.FormClosingEventHandler(this.Form1_FormClosing);
                        this.Load += new System.EventHandler(this.Form1_Load);
                        this.groupBox1.ResumeLayout(false);
                        this.groupBox1.PerformLayout();
                        this.ResumeLayout(false);

                    }

                    #endregion

                    private System.Windows.Forms.Label labelLED;
                    private System.Windows.Forms.Button buttonEncender;
                    private System.Windows.Forms.Button buttonApagar;
                    private System.Windows.Forms.GroupBox groupBox1;
                    private System.IO.Ports.SerialPort serialPort1;
                }
            }
The subsequent phase of the process entails programming the events associated with each inserted tool. The code is presented below for reference.
            using System;
            using System.Collections.Generic;
            using System.ComponentModel;
            using System.Data;
            using System.Drawing;
            using System.Linq;
            using System.Text;
            using System.Threading.Tasks;
            using System.Windows.Forms;
            using System.IO.Ports;

            namespace LedControl
            {
                public partial class Form1 : Form
                {
                    public Form1()
                    {
                        InitializeComponent();
                    }

                    private void buttonEncender_Click(object sender, EventArgs e)
                    {
                        try
                        {
                            serialPort1.WriteLine("H");
                            labelLED.BackColor = Color.Lime;
                            labelLED.Text = "LED ON";
                            buttonApagar.Enabled = true;
                            buttonEncender.Enabled = false;
                        }

                        catch(Exception error)
                        {
                            MessageBox.Show(error.Message);
                        }

                    }

                    private void Form1_Load(object sender, EventArgs e)
                    {
                        try
                        {
                            buttonApagar.Enabled = false;
                            serialPort1.PortName = "COM11";
                            serialPort1.Open();
                        }
                        catch(Exception error)
                        {
                            MessageBox.Show(error.Message);
                        }
                    }

                    private void Form1_FormClosing(object sender, FormClosingEventArgs e)
                    {
                        if (serialPort1.IsOpen)
                        {
                            try
                            {
                                serialPort1.Close();
                            }
                            catch(Exception error)
                            {
                                MessageBox.Show(error.Message);
                            }
                        }
                    }

                    private void buttonApagar_Click(object sender, EventArgs e)
                    {
                        try
                        {
                            serialPort1.WriteLine("L");
                            labelLED.BackColor = Color.Red;
                            labelLED.Text = "LED OFF";
                            buttonApagar.Enabled = false;
                            buttonEncender.Enabled = true;
                        }

                        catch (Exception error)
                        {
                            MessageBox.Show(error.Message);
                        }
                    }
                }
            }
In accordance with the programmed events, the plaque is programmed to send a character H via the Serial Port when the on button is clicked and a character L when the off button is clicked. This must be taken into account in the programming, which was left in the following way:
            // Variable to store the LED state
            bool ledState = false;

            void setup() {
              // Initialize the serial port
              Serial.begin(9600);
              // Set the LED pin as output
              pinMode(LED_BUILTIN, OUTPUT);
              // It is ensured that the LED is off at startup.LED
              digitalWrite(LED_BUILTIN, LOW);
            }

            void loop() {
              // Checks if data is available on the serial port
              if (Serial.available() > 0) {
                // Reads the character string sent from the Serial Port
                String inputString = Serial.readStringUntil('\n');

                // Removes whitespace at the beginning and end of the string
                inputString.trim();

                // Compares the received string
                if (inputString == "H") {
                  // Turn on the LED
                  digitalWrite(LED_BUILTIN, HIGH);
                  ledState = true;
                  Serial.println("LED ON");
                } else if (inputString == "L") {
                  // Turn on the LED
                  digitalWrite(LED_BUILTIN, LOW);
                  ledState = false;
                  Serial.println("LED OFF");
                } else {
                  // Maintains the current LED status
                  Serial.println("LED status unchanged");
                }
              }
            }
The result is show in this three videos.
Raspberry Pi Pico
Seeed Studio RP2040
Arduino Nano 33 BLE Sense rev2
The second project will entail the creation of an application to display the temperature data collected by the environmental sensor HTS221, which is integrated with the Arduino Nano 33 BLE Sense rev2. The project will commence with the development of a new Visual Studio Community 2022 desktop application for the Windows operating system, utilizing the C# programming language in a manner analogous to the previous project. The form is composed of a group box, a serial port, and two labels: one to display the value that the sensor measures and is transmitted by the serial port, and the other to display the symbol of the unit of measurement used, degrees Celsius.
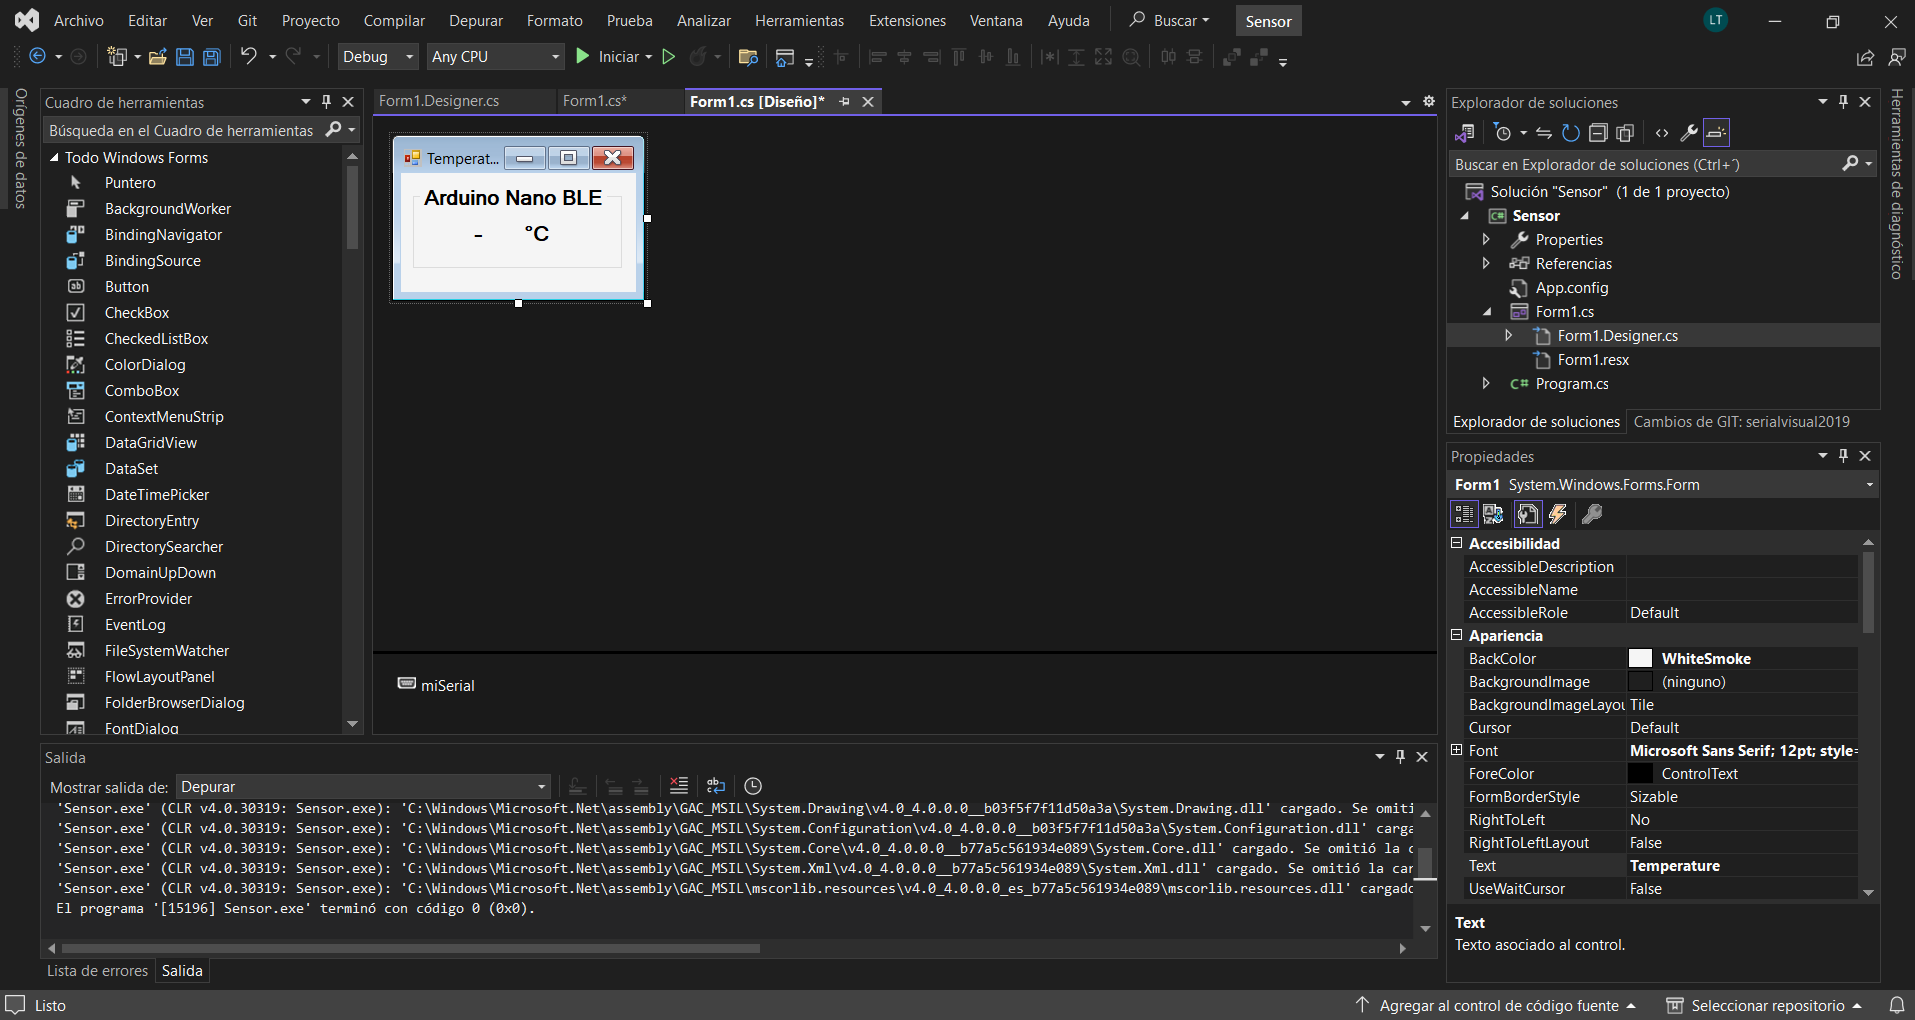
The auto-generated Form.Designer code is as follows:
              namespace Sensor
              {
                  partial class Form1
                  {
                      /// <summary>
                      /// Variable del diseñador necesaria.
                      /// </summary>
                      private System.ComponentModel.IContainer components = null;

                      /// <summary>
                      /// Limpiar los recursos que se estén usando.
                      /// </summary>
                      /// <param name="disposing">true si los recursos administrados se deben desechar; false en caso contrario.</param>
                      protected override void Dispose(bool disposing)
                      {
                          if (disposing && (components != null))
                          {
                              components.Dispose();
                          }
                          base.Dispose(disposing);
                      }

                      #region Código generado por el Diseñador de Windows Forms

                      /// <summary>
                      /// Método necesario para admitir el Diseñador. No se puede modificar
                      /// el contenido de este método con el editor de código.
                      /// </summary>
                      private void InitializeComponent()
                      {
                          this.components = new System.ComponentModel.Container();
                          this.label1 = new System.Windows.Forms.Label();
                          this.miSerial = new System.IO.Ports.SerialPort(this.components);
                          this.label2 = new System.Windows.Forms.Label();
                          this.groupBox1 = new System.Windows.Forms.GroupBox();
                          this.groupBox1.SuspendLayout();
                          this.SuspendLayout();
                          //
                          // label1
                          //
                          this.label1.AutoSize = true;
                          this.label1.Location = new System.Drawing.Point(56, 36);
                          this.label1.Margin = new System.Windows.Forms.Padding(5, 0, 5, 0);
                          this.label1.Name = "label1";
                          this.label1.Size = new System.Drawing.Size(20, 25);
                          this.label1.TabIndex = 0;
                          this.label1.Text = "-";
                          //
                          // miSerial
                          //
                          this.miSerial.PortName = "COM11";
                          //
                          // label2
                          //
                          this.label2.AutoSize = true;
                          this.label2.Location = new System.Drawing.Point(106, 36);
                          this.label2.Margin = new System.Windows.Forms.Padding(5, 0, 5, 0);
                          this.label2.Name = "label2";
                          this.label2.Size = new System.Drawing.Size(37, 25);
                          this.label2.TabIndex = 0;
                          this.label2.Text = "°C";
                          //
                          // groupBox1
                          //
                          this.groupBox1.Controls.Add(this.label1);
                          this.groupBox1.Controls.Add(this.label2);
                          this.groupBox1.Location = new System.Drawing.Point(12, 12);
                          this.groupBox1.Name = "groupBox1";
                          this.groupBox1.Size = new System.Drawing.Size(209, 84);
                          this.groupBox1.TabIndex = 1;
                          this.groupBox1.TabStop = false;
                          this.groupBox1.Text = "Arduino Nano BLE";
                          //
                          // Form1
                          //
                          this.AutoScaleDimensions = new System.Drawing.SizeF(13F, 25F);
                          this.AutoScaleMode = System.Windows.Forms.AutoScaleMode.Font;
                          this.BackColor = System.Drawing.Color.WhiteSmoke;
                          this.ClientSize = new System.Drawing.Size(235, 119);
                          this.Controls.Add(this.groupBox1);
                          this.Font = new System.Drawing.Font("Microsoft Sans Serif", 12F, System.Drawing.FontStyle.Bold, System.Drawing.GraphicsUnit.Point, ((byte)(0)));
                          this.Margin = new System.Windows.Forms.Padding(5, 5, 5, 5);
                          this.Name = "Form1";
                          this.StartPosition = System.Windows.Forms.FormStartPosition.CenterScreen;
                          this.Text = "Temperature";
                          this.Load += new System.EventHandler(this.Form1_Load);
                          this.groupBox1.ResumeLayout(false);
                          this.groupBox1.PerformLayout();
                          this.ResumeLayout(false);

                      }

                      #endregion

                      private System.Windows.Forms.Label label1;
                      private System.IO.Ports.SerialPort miSerial;
                      private System.Windows.Forms.Label label2;
                      private System.Windows.Forms.GroupBox groupBox1;
                  }
              }
The following is the code for the event programming:
            using System;
            using System.IO.Ports;
            using System.Windows.Forms;

            namespace Sensor
            {
                public partial class Form1 : Form
                {
                    public Form1()
                    {
                        InitializeComponent();
                    }

                    private void Form1_Load(object sender, EventArgs e)
                    {
                        SerialPort miSerial = new SerialPort("COM11");
                        miSerial.BaudRate = 9600;
                        miSerial.Parity = Parity.None;
                        miSerial.DataBits = 8;
                        miSerial.Handshake = Handshake.None;
                        miSerial.RtsEnable = true;
                        miSerial.DtrEnable = true;
                        miSerial.DataReceived += new SerialDataReceivedEventHandler(DataReceivedHandler);
                        miSerial.Open();
                    }

                    private void DataReceivedHandler(object sender, SerialDataReceivedEventArgs e)
                    {
                        SerialPort sp = (SerialPort)sender;
                        string indata = sp.ReadLine();

                        if (label1.InvokeRequired)
                        {
                            label1.Invoke(new MethodInvoker(delegate
                            {
                                label1.Text = indata;
                            }));
                        }
                    }
                }
            }
To program the Arduino Nano 33 BLE Sense Rev2 we used one of the examples provided in week 12 modified to only display the temperature on the Monitor Serie. The resulting code is presented below.
              #include <Arduino_HTS221.h>

              void setup() {
                Serial.begin(9600);
                while (!Serial);

                if (!HTS.begin()) {
                  Serial.println("Failed to initialize humidity temperature sensor!");
                  while (1);
                }
              }

              void loop() {
                // read all the sensor values
                float temperature = HTS.readTemperature();

                // print each of the sensor values
                Serial.println(temperature);

                // wait 1 second to print again
                delay(1000);
              }
The final result is show in the next videos:
After doing some satisfactory tests with the Arduino Nano 33 BLE Sense Rev2 I decided to create another HMI to measure distance. To do this I took advantage of the design I made in week 12 of the board with incorporated sensors and loaded the microcontroller with the same code used to measure distance that I used that week. For this I modified the Visual Studio code, as shown below:
        namespace Sensor
        {
            partial class Form1
            {
                /// <summary>
                /// Variable del diseñador necesaria.
                /// </summary>
                private System.ComponentModel.IContainer components = null;

                /// <summary>
                /// Limpiar los recursos que se estén usando.
                /// </summary>
                /// <param name="disposing">true si los recursos administrados se deben desechar; false en caso contrario.</param>
                protected override void Dispose(bool disposing)
                {
                    if (disposing && (components != null))
                    {
                        components.Dispose();
                    }
                    base.Dispose(disposing);
                }

                #region Código generado por el Diseñador de Windows Forms

                /// <summary>
                /// Método necesario para admitir el Diseñador. No se puede modificar
                /// el contenido de este método con el editor de código.
                /// </summary>
                private void InitializeComponent()
                {
                    this.components = new System.ComponentModel.Container();
                    System.ComponentModel.ComponentResourceManager resources = new System.ComponentModel.ComponentResourceManager(typeof(Form1));
                    this.label1 = new System.Windows.Forms.Label();
                    this.miSerial = new System.IO.Ports.SerialPort(this.components);
                    this.label2 = new System.Windows.Forms.Label();
                    this.groupBox1 = new System.Windows.Forms.GroupBox();
                    this.groupBox1.SuspendLayout();
                    this.SuspendLayout();
                    //
                    // label1
                    //
                    this.label1.AutoSize = true;
                    this.label1.Font = new System.Drawing.Font("Microsoft Sans Serif", 19.8F, System.Drawing.FontStyle.Bold, System.Drawing.GraphicsUnit.Point, ((byte)(0)));
                    this.label1.Location = new System.Drawing.Point(65, 36);
                    this.label1.Margin = new System.Windows.Forms.Padding(5, 0, 5, 0);
                    this.label1.Name = "label1";
                    this.label1.Size = new System.Drawing.Size(29, 39);
                    this.label1.TabIndex = 0;
                    this.label1.Text = "-";
                    //
                    // miSerial
                    //
                    this.miSerial.PortName = "COM11";
                    //
                    // label2
                    //
                    this.label2.AutoSize = true;
                    this.label2.Font = new System.Drawing.Font("Microsoft Sans Serif", 19.8F, System.Drawing.FontStyle.Bold, System.Drawing.GraphicsUnit.Point, ((byte)(0)));
                    this.label2.Location = new System.Drawing.Point(148, 36);
                    this.label2.Margin = new System.Windows.Forms.Padding(5, 0, 5, 0);
                    this.label2.Name = "label2";
                    this.label2.Size = new System.Drawing.Size(64, 39);
                    this.label2.TabIndex = 0;
                    this.label2.Text = "cm";
                    //
                    // groupBox1
                    //
                    this.groupBox1.Controls.Add(this.label1);
                    this.groupBox1.Controls.Add(this.label2);
                    this.groupBox1.Font = new System.Drawing.Font("Microsoft Sans Serif", 18F, System.Drawing.FontStyle.Bold, System.Drawing.GraphicsUnit.Point, ((byte)(0)));
                    this.groupBox1.Location = new System.Drawing.Point(33, 39);
                    this.groupBox1.Name = "groupBox1";
                    this.groupBox1.Size = new System.Drawing.Size(307, 121);
                    this.groupBox1.TabIndex = 1;
                    this.groupBox1.TabStop = false;
                    this.groupBox1.Text = "Measuring distance";
                    this.groupBox1.Enter += new System.EventHandler(this.groupBox1_Enter);
                    //
                    // Form1
                    //
                    this.AutoScaleDimensions = new System.Drawing.SizeF(13F, 25F);
                    this.AutoScaleMode = System.Windows.Forms.AutoScaleMode.Font;
                    this.BackColor = System.Drawing.Color.WhiteSmoke;
                    this.ClientSize = new System.Drawing.Size(415, 194);
                    this.Controls.Add(this.groupBox1);
                    this.Font = new System.Drawing.Font("Microsoft Sans Serif", 12F, System.Drawing.FontStyle.Bold, System.Drawing.GraphicsUnit.Point, ((byte)(0)));
                    this.Icon = ((System.Drawing.Icon)(resources.GetObject("$this.Icon")));
                    this.Margin = new System.Windows.Forms.Padding(5);
                    this.Name = "Form1";
                    this.StartPosition = System.Windows.Forms.FormStartPosition.CenterScreen;
                    this.Text = "Distance";
                    this.Load += new System.EventHandler(this.Form1_Load);
                    this.groupBox1.ResumeLayout(false);
                    this.groupBox1.PerformLayout();
                    this.ResumeLayout(false);

                }

                #endregion

                private System.Windows.Forms.Label label1;
                private System.IO.Ports.SerialPort miSerial;
                private System.Windows.Forms.Label label2;
                private System.Windows.Forms.GroupBox groupBox1;
            }
        }
Auto-generated Form.Designer code
        using System;
        using System.IO.Ports;
        using System.Windows.Forms;

        namespace Sensor
        {
            public partial class Form1 : Form
            {
                public Form1()
                {
                    InitializeComponent();
                }

                private void Form1_Load(object sender, EventArgs e)
                {
                    SerialPort miSerial = new SerialPort("COM9");
                    miSerial.BaudRate = 9600;
                    miSerial.Parity = Parity.None;
                    miSerial.DataBits = 8;
                    miSerial.Handshake = Handshake.None;
                    miSerial.RtsEnable = true;
                    miSerial.DtrEnable = true;
                    miSerial.DataReceived += new SerialDataReceivedEventHandler(DataReceivedHandler);
                    miSerial.Open();
                }

                private void DataReceivedHandler(object sender, SerialDataReceivedEventArgs e)
                {
                    SerialPort sp = (SerialPort)sender;
                    string indata = sp.ReadLine();

                    if (label1.InvokeRequired)
                    {
                        label1.Invoke(new MethodInvoker(delegate
                        {
                            label1.Text = indata;
                        }));
                    }
                }

                private void groupBox1_Enter(object sender, EventArgs e)
                {

                }
            }
        }
Code for the event programming
        using System.Runtime.InteropServices;
        using System.Text;
        using Microsoft.Win32;

        namespace System.IO.Ports;

        internal static class InternalResources
        {
          internal static void EndOfFile()
          {
            throw new EndOfStreamException(SR.GetString("IO_EOF_ReadBeyondEOF"));
          }

          internal static string GetMessage(int errorCode)
          {
            StringBuilder stringBuilder = new StringBuilder(512);
            if (Microsoft.Win32.SafeNativeMethods.FormatMessage(12800, IntPtr.Zero, (uint)errorCode, 0, stringBuilder, stringBuilder.Capacity, null) != 0)
            {
              return stringBuilder.ToString();
            }
            return SR.GetString("IO_UnknownError", errorCode);
          }

          internal static void FileNotOpen()
          {
            throw new ObjectDisposedException(null, SR.GetString("Port_not_open"));
          }

          internal static void WrongAsyncResult()
          {
            throw new ArgumentException(SR.GetString("Arg_WrongAsyncResult"));
          }

          internal static void EndReadCalledTwice()
          {
            throw new ArgumentException(SR.GetString("InvalidOperation_EndReadCalledMultiple"));
          }

          internal static void EndWriteCalledTwice()
          {
            throw new ArgumentException(SR.GetString("InvalidOperation_EndWriteCalledMultiple"));
          }

          internal static void WinIOError()
          {
            int lastWin32Error = Marshal.GetLastWin32Error();
            WinIOError(lastWin32Error, string.Empty);
          }

          internal static void WinIOError(string str)
          {
            int lastWin32Error = Marshal.GetLastWin32Error();
            WinIOError(lastWin32Error, str);
          }

          internal static void WinIOError(int errorCode, string str)
          {
            switch (errorCode)
            {
            case 2:
            case 3:
              if (str.Length == 0)
              {
                throw new IOException(SR.GetString("IO_PortNotFound"));
              }
              throw new IOException(SR.GetString("IO_PortNotFoundFileName", str));
            case 5:
              if (str.Length == 0)
              {
                throw new UnauthorizedAccessException(SR.GetString("UnauthorizedAccess_IODenied_NoPathName"));
              }
              throw new UnauthorizedAccessException(SR.GetString("UnauthorizedAccess_IODenied_Path", str));
            case 206:
              throw new PathTooLongException(SR.GetString("IO_PathTooLong"));
            case 32:
              if (str.Length == 0)
              {
                throw new IOException(SR.GetString("IO_SharingViolation_NoFileName"));
              }
              throw new IOException(SR.GetString("IO_SharingViolation_File", str));
            default:
              throw new IOException(GetMessage(errorCode), MakeHRFromErrorCode(errorCode));
            }
          }

          internal static int MakeHRFromErrorCode(int errorCode)
          {
            return -2147024896 | errorCode;
          }
        }
Auto-generated InternalResources.cs code
The result of the measurement can be seen in the following video.