6. Embedded Programming
The primary goal of this week was to program microcontrollers and establish connections with other devices.
Microcontrollers are integrated electronic devices used to control and perform automated tasks in various systems. These tiny integrated circuits contain a central processing unit (CPU), memory, input/output ports, and other components needed to perform specific functions. The automotive industry widely employs microcontrollers to control braking systems, fuel injection, and vehicle entertainment systems. Microcontrollers are utilized in household appliances like washing machines, ovens, and air conditioners to manage control and monitoring functions. In consumer electronics, they are found in devices such as cell phones, digital cameras, and electronic toys to control various operations and enhance user interactivity.
Research
At first, I intended to undertake a TinyML project, despite my lack of prior experience in the field. However, I encountered several obstacles, which I will detail below, in attempting to explain the process of running a neural network on the edge and the challenges involved.
TinyML, short for Tiny Machine Learning, is the implementation of machine learning models in devices with limited resources, such as microcontrollers. This technology enables machine learning algorithms to run directly at the edge, without the need for cloud connections, allowing for optimized local data processing and inference. TinyML has various applications in fields ranging from healthcare to industry. TinyML has various applications in the medical field, such as real-time monitoring of vital signs using portable devices. It also helps optimize manufacturing processes and improve energy efficiency in industries. The advantages of TinyML include local data processing, reducing latency, and improving privacy by avoiding external dependencies. Additionally, it promotes energy efficiency and extends battery life by running on low-power devices. However, the limitations of embedded devices restrict model complexity due to memory and processing constraints.
In the field of machine learning, there exists a subfield known as deep learning. This subfield involves the use of neural networks with multiple layers to learn data representations in a hierarchical manner. By using this approach, complex tasks such as speech recognition, computer vision, and natural language processing can be tackled with higher levels of accuracy and generalization than traditional machine learning methods. The use of deep neural networks enables the extraction of meaningful features and the resolution of complex problems in various application areas.
A neural network is a computational model inspired by the functioning of the human brain. It is composed of a set of interconnected units called artificial neurons, which are organized in layers. These neurons process and transmit information through weighted connections. Neural networks are utilized in artificial intelligence and machine learning to execute tasks such as pattern recognition, classification, and regression by adjusting connection weights to learn from input data and generate desired outputs.
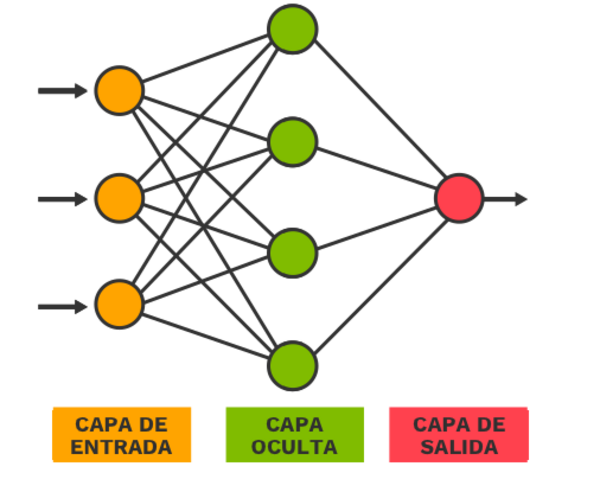
Image taken for: https://es.linkedin.com/pulse/y-las-redes-neuronales-d%C3%B3nde-est%C3%A1n-lisandro-m-carnielli
In the context of neural networks, connection weights are essential parameters that determine the strength of influence of one neuron over another in the transmission of information. Each connection between neurons is associated with a specific weight that indicates the relative importance of the signal being transmitted. During the neural network training process, optimization algorithms such as gradient descent are used to adjust the weights. This is done to minimize the loss function and improve the model's predictive capability. By modifying the connection weights, the neural network can accurately learn complex patterns in the input data and perform tasks such as classification, pattern recognition, or prediction. Properly tuning the connection weights is crucial for the effective functioning of a neural network in solving machine learning problems.
The process of TinyML can be summarized in the following image:
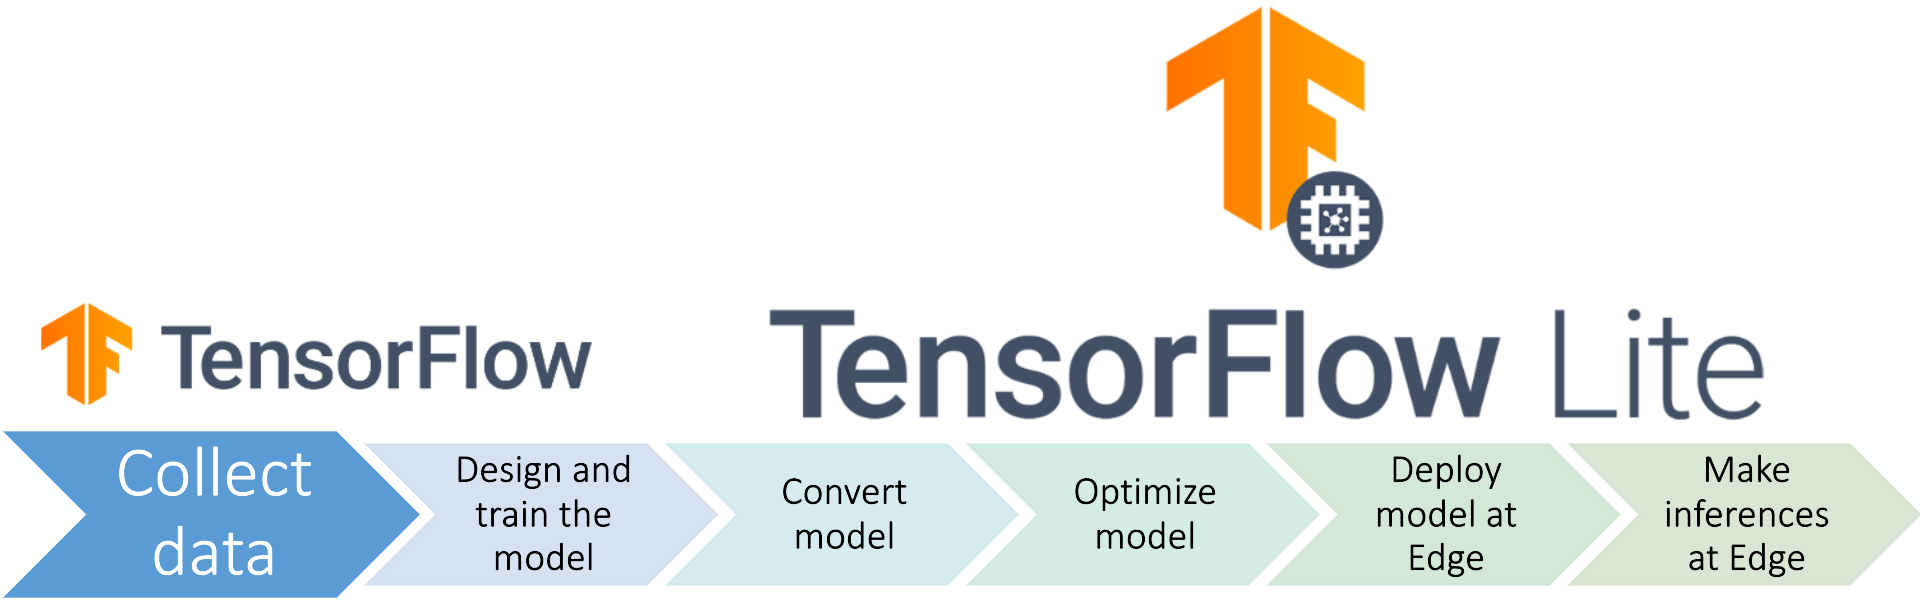
The initial stages of neural network training typically involve utilizing publicly available databases. After determining the appropriate neural network for the task, TensorFlow offers the essential resources for its implementation. This platform streamlines the creation and refinement of deep learning models, enabling users to work productively on their AI projects.
For the task of developing a digit image classifier, the literature recommends using a convolutional neural network with two hidden layers, two convolutional layers, and two clustering layers. This network design efficiently captures the relevant features of the images and accurately classifies the digits present in them.
The final four steps are specific to TinyML and typically involve the use of the TensorFlow Lite tool.
The third step, which involves using the functions provided by the tool, is relatively straightforward. However, my progress was limited due to my incipient knowledge of the subject. Nevertheless, reaching this point represents a significant first step in my learning and exploration of the field of TinyML.
The optimization of machine learning models for implementation at the edge is a developing field of technology. Currently, there is no clear consensus on the best techniques to employ in each situation, making it an active area of research. This optimization process is crucial for adapting machine learning models to resource-constrained devices and improving their efficiency in edge computing environments.
Additional information about the subject can be found on the Ringa Tech and Real Time LAB YouTube channels. And the advances of this initiator project can be found here.
Project completed
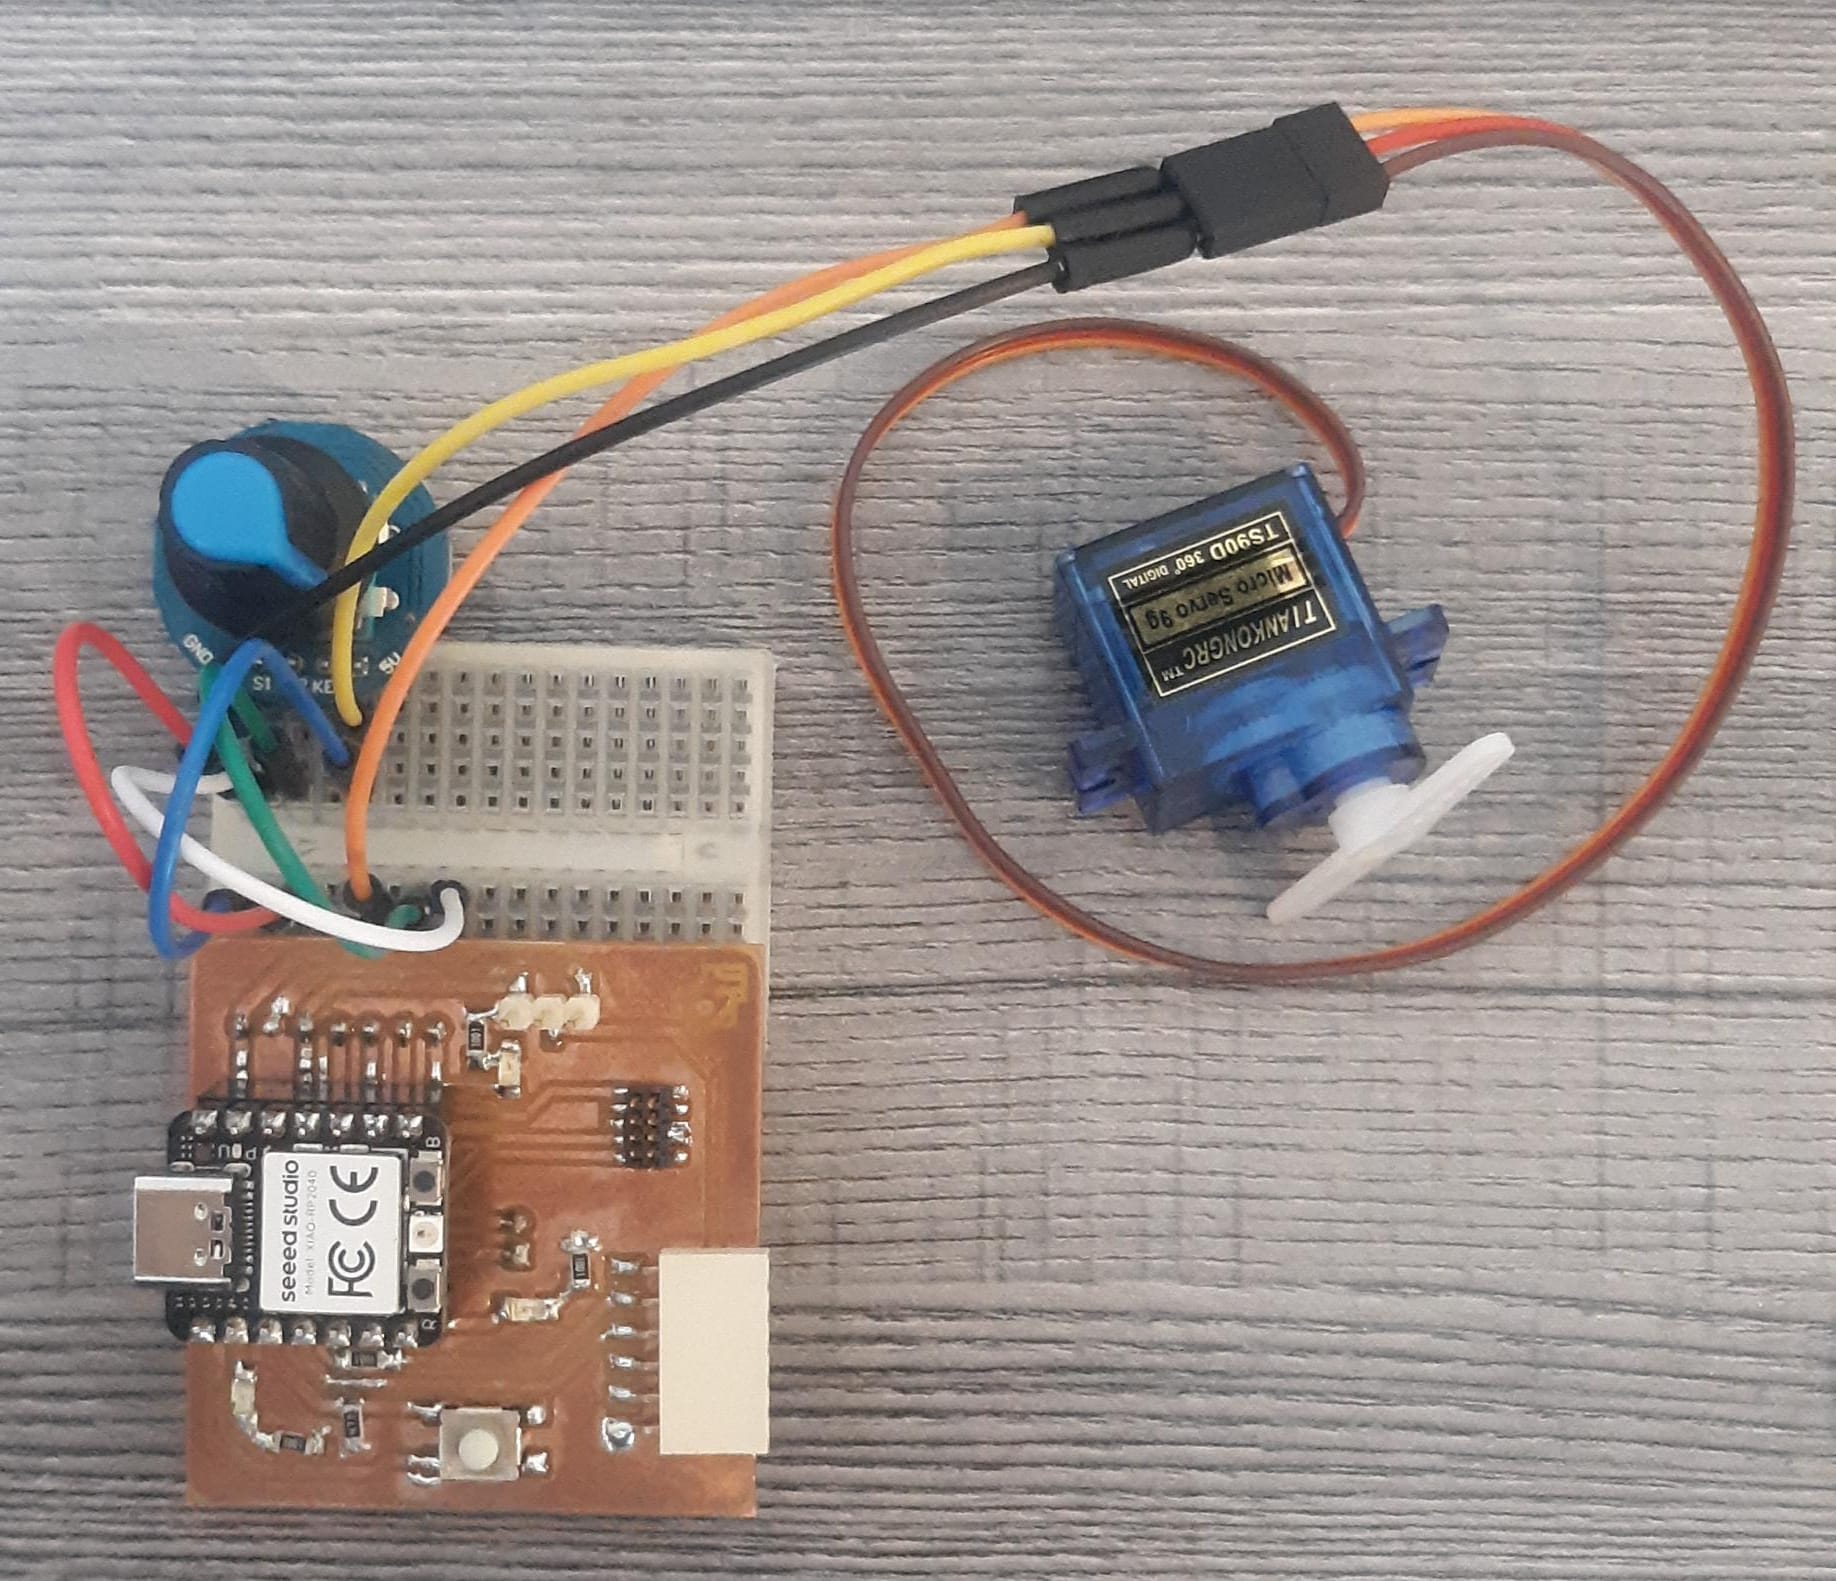
At this stage, I attempted to regulate the speed of a servomotor using a rotary encoder in conjunction with the board designed earlier. Unfortunately, the microcontroller experienced a bootload failure that rendered it unusable and I was unable to replace it in time to finish the weekly documentation. This setback hindered my ability to accurately and effectively control the servo motor with this board. For this reason, I decided to replace the board with a Raspberry Pi Pico RP2040. Refer to the week 8 documentation for an advanced version of this task, this time using a board I designed and built.
A rotary encoder, also referred to as a shaft encoder or pulse generator, is an electromechanical device utilized to convert the angular position of a shaft to a digital code. There exist two encoder types, yet for the purposes of this project, we will employ a relative or incremental rotary encoder, which uses a very small disk attached to a small shaft marked with a large number of lines on the radial side, similar to the spokes of a wheel. The optical switch, analogous to a photodiode, generates an electrical pulse each time one of the lines traverses its field of view. An electronic control circuit counts the pulses to ascertain the angle at which the shaft rotates. In its most basic configuration, this system cannot measure the absolute angle of the shaft. It can only quantify the change in angle in relation to a reference point, such as the shaft position at the time the power was initiated. In the event that absolute position is required, a second sensor can be added that detects the shaft passing through its zero position. However, this system presents a second issue: it cannot determine the direction of shaft rotation. To address this, the optical sensor must be augmented with two sensors placed at different angles around the shaft. The direction of rotation can then be deduced by analysing the order in which the two sensors detect each radial line. This type of encoder is known as a quadrature encoder.

Image taken for: https://www.celeramotion.com/inductive-sensors/es/asistencia/documentacion-tecnica/codificadores-absolutos-y-codificadores-incrementales/.
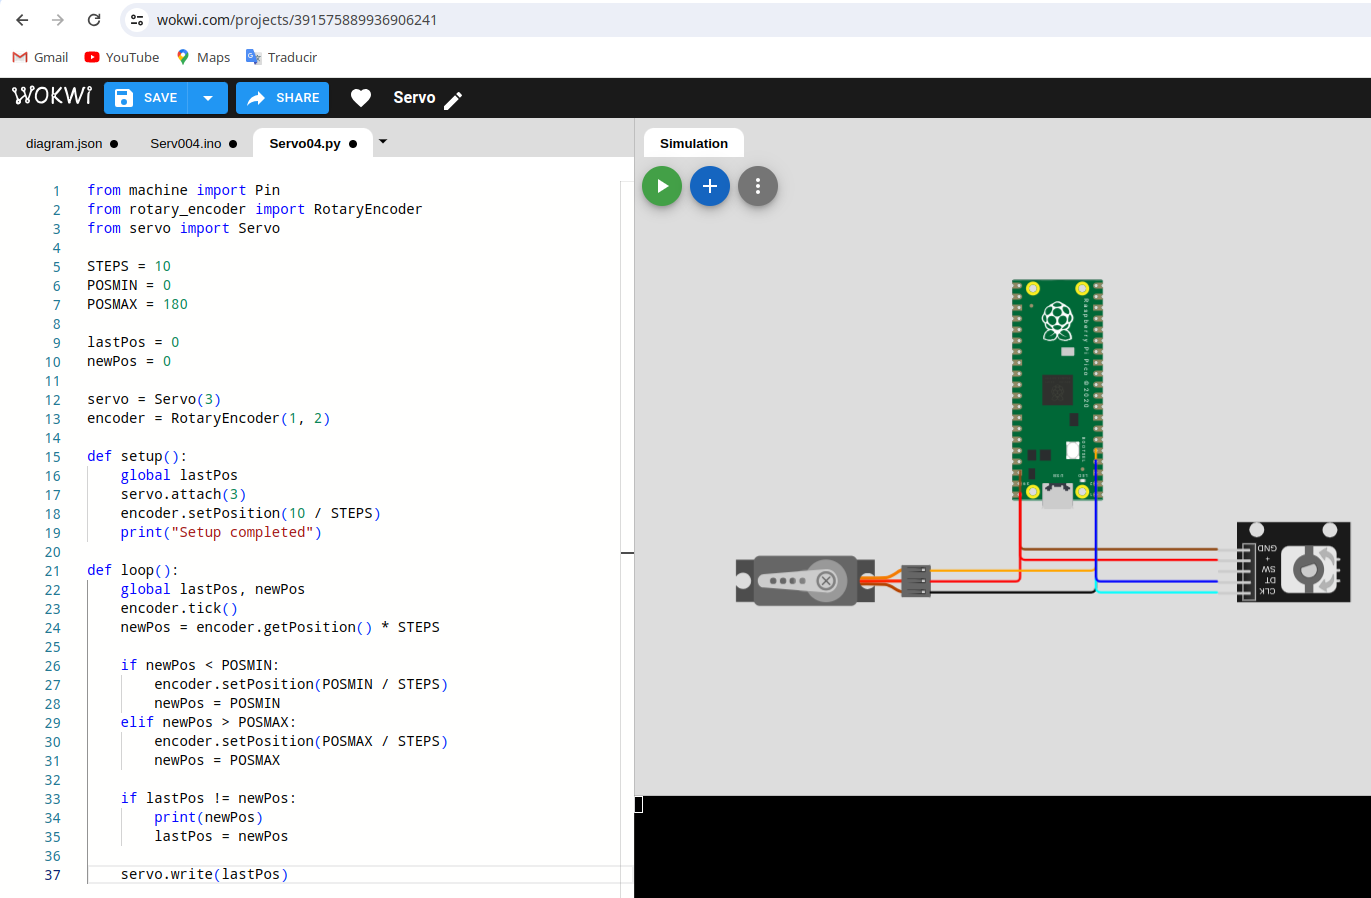
Initially, I simulated two variants of the code using Wokwi - one in the Arduino IDE language and the other using MicroPython.
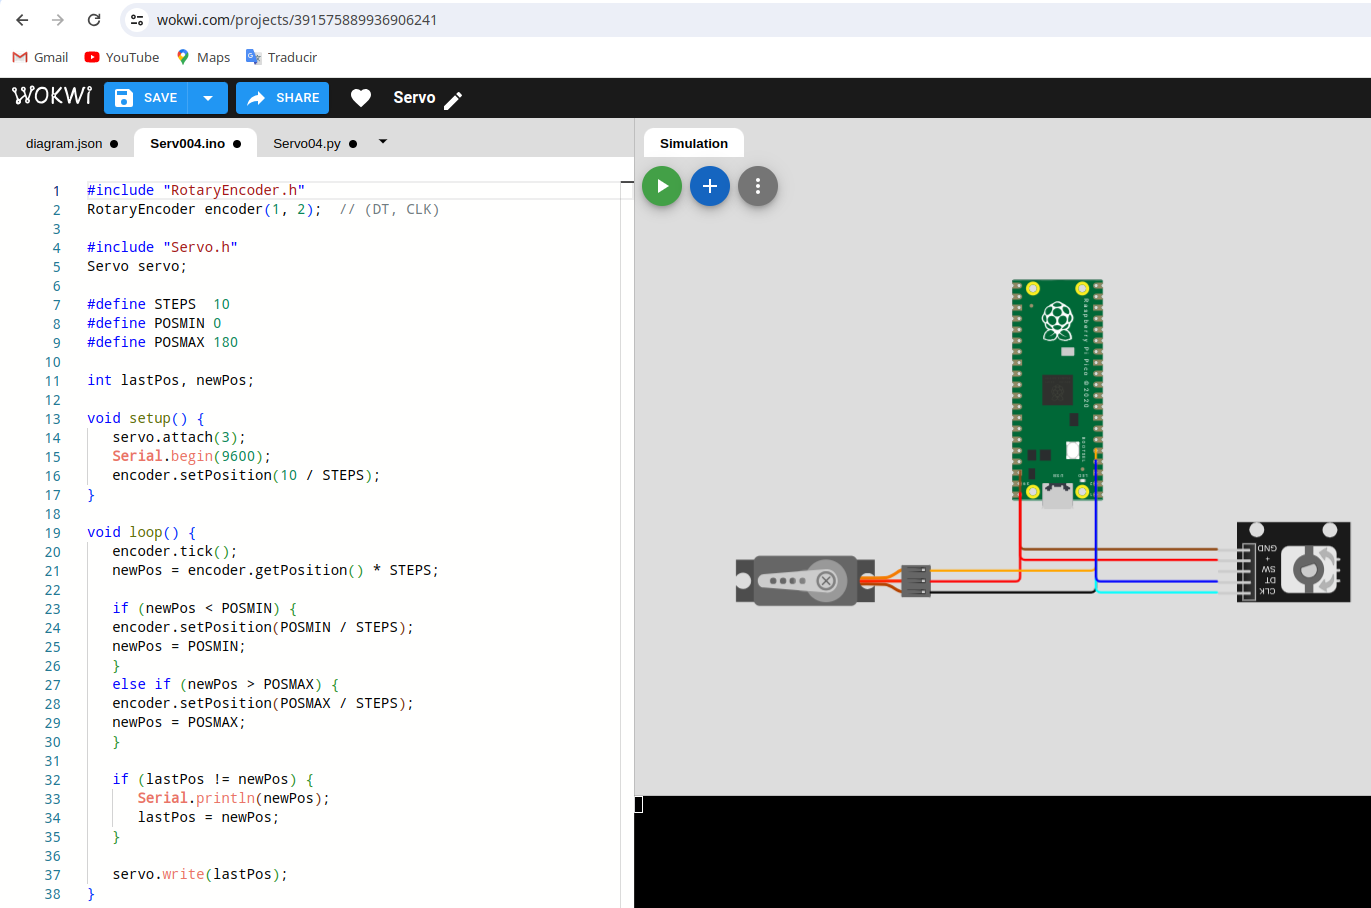
The sample codes below:
C++ code
          #include <RotaryEncoder.h>
          RotaryEncoder encoder(1, 2);  // (DT, CLK)

          #include "Servo.h"
          Servo servo;

          #define STEPS  10
          #define POSMIN 0
          #define POSMAX 180

          int lastPos, newPos;

          void setup() {
             servo.attach(3);
             Serial.begin(9600);
             encoder.setPosition(10 / STEPS);
          }

          void loop() {
             encoder.tick();
             newPos = encoder.getPosition() * STEPS;

             if (newPos < POSMIN) {
             encoder.setPosition(POSMIN / STEPS);
             newPos = POSMIN;
             }
             else if (newPos > POSMAX) {
             encoder.setPosition(POSMAX / STEPS);
             newPos = POSMAX;
             }

             if (lastPos != newPos) {
                Serial.println(newPos);
                lastPos = newPos;
             }

             servo.write(lastPos);
          }
MicroPython code
          from machine import Pin
          from rotary_encoder import RotaryEncoder
          from servo import Servo

          STEPS = 10
          POSMIN = 0
          POSMAX = 180

          lastPos = 0
          newPos = 0

          servo = Servo(3)
          encoder = RotaryEncoder(1, 2)

          def setup():
              global lastPos
              servo.attach(3)
              encoder.setPosition(10 / STEPS)
              print("Setup completed")

          def loop():
              global lastPos, newPos
              encoder.tick()
              newPos = encoder.getPosition() * STEPS

              if newPos < POSMIN:
                  encoder.setPosition(POSMIN / STEPS)
                  newPos = POSMIN
              elif newPos > POSMAX:
                  encoder.setPosition(POSMAX / STEPS)
                  newPos = POSMAX

              if lastPos != newPos:
                  print(newPos)
                  lastPos = newPos

              servo.write(lastPos)
The result is shown in the following video:
In fulfillment of the group assignment, we undertook an investigation of the datasheet of our microcontrollers, with the objective of comparing their respective performance and development workflows with those of other architectures. The results of this endeavor are presented here.