Interface Application Programming
It doesn't just have to work, it also has to look good.
Group assignment
The group's tasks: compare as many tool options as possible fablab website.
General Objective
The objective of this week is to send data read by a microcontroller to a database in the cloud and in turn display it on a web page.To carry out this work I based myself on the tutorials at randomnerdtutorials
Idea
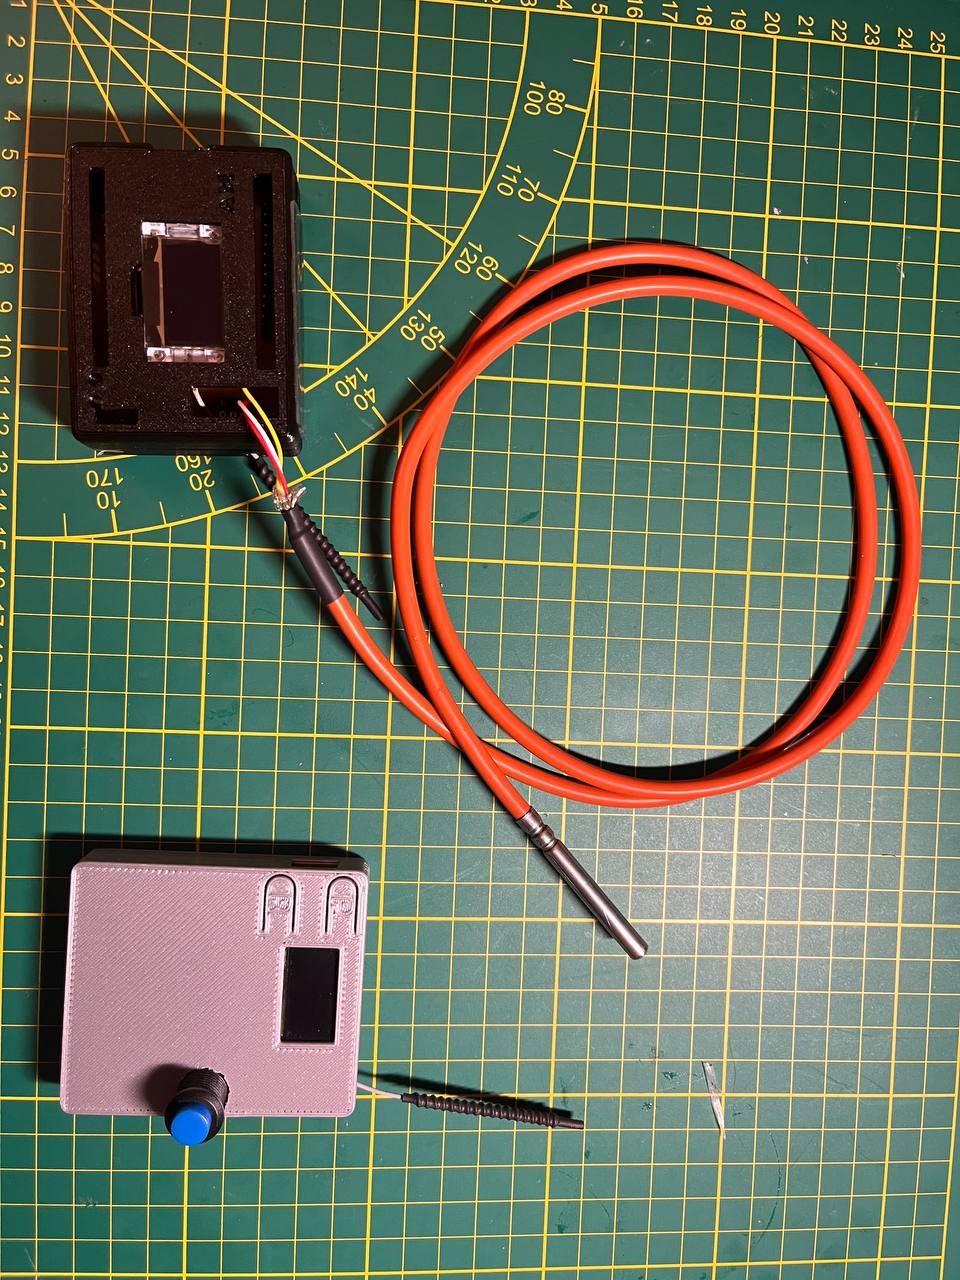
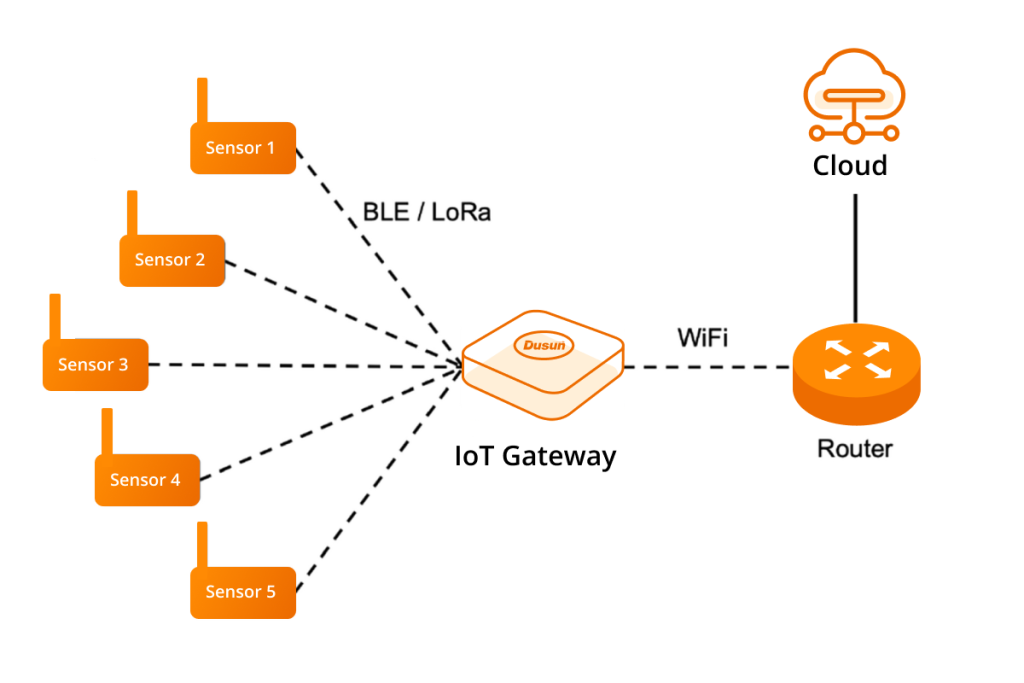
To carry out the objective, I used the two PCBs from the previous week that I had already connected between them using Lora technology and that also already had a temperature sensor added.
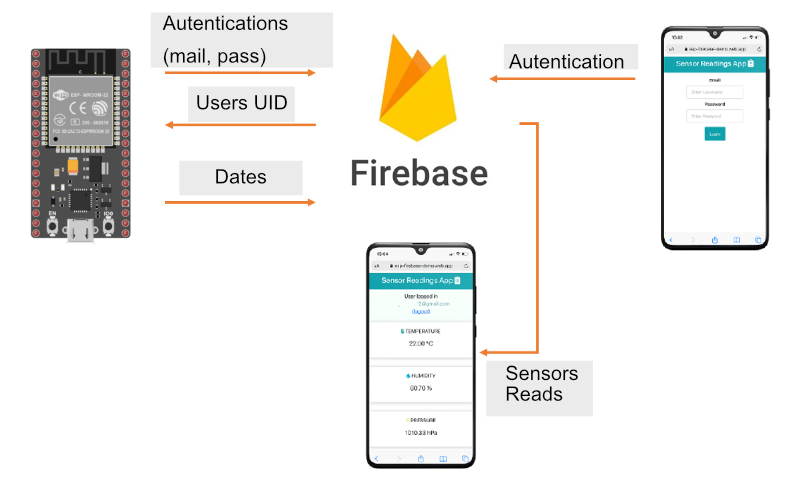
Realtime Database Firebase
I will create a web application in Firebase to display the sensor readings saved in the Firebase Realtime Database. The sensor readings web page is protected with email and password authentication. The following diagram shows the broad outline of the project that I am going to build.
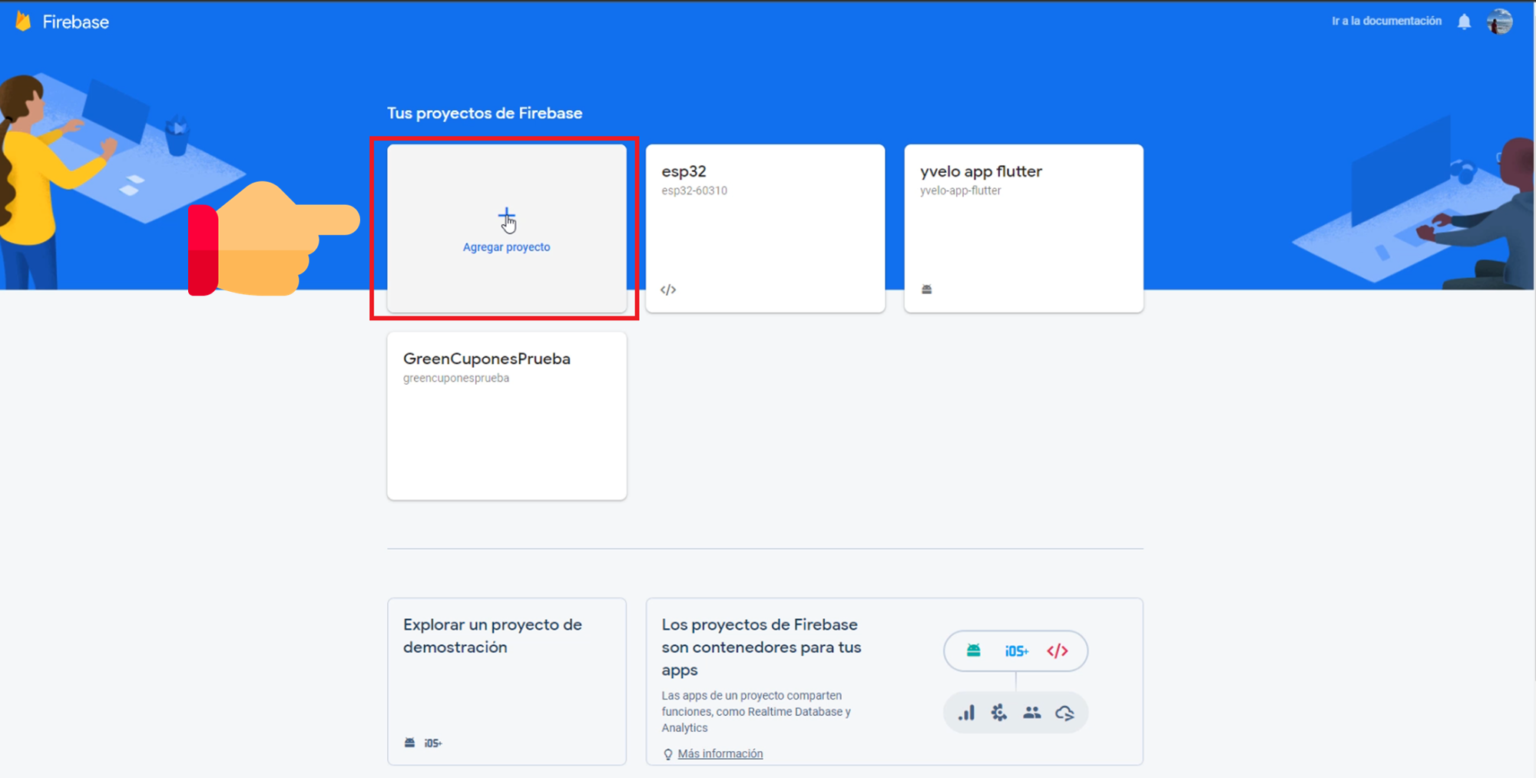
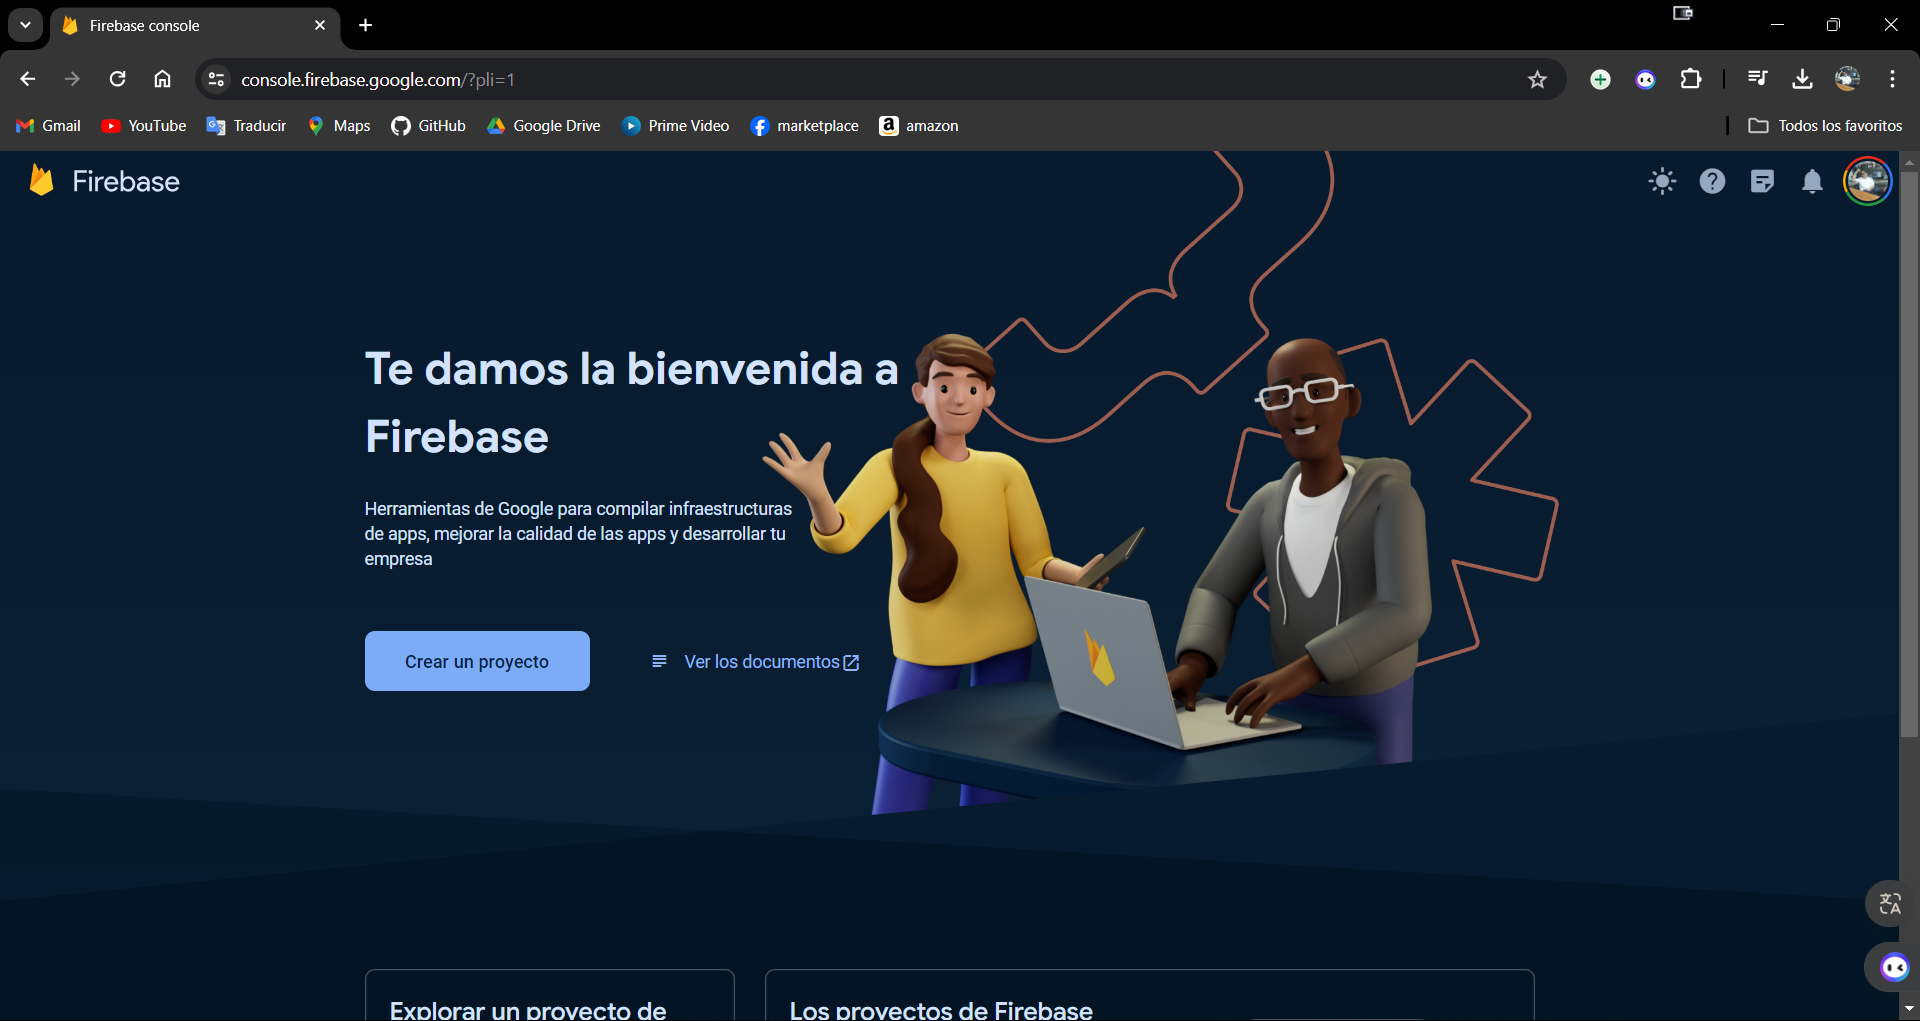
The first thing we should do is search on Google, enter Firebase Console and create a new project, name it, accept the conditions and follow the steps directly
Once the project is created, we enter the web option, we indicate the option to configure Firebase Hosting and we give it a name, whatever it may be.
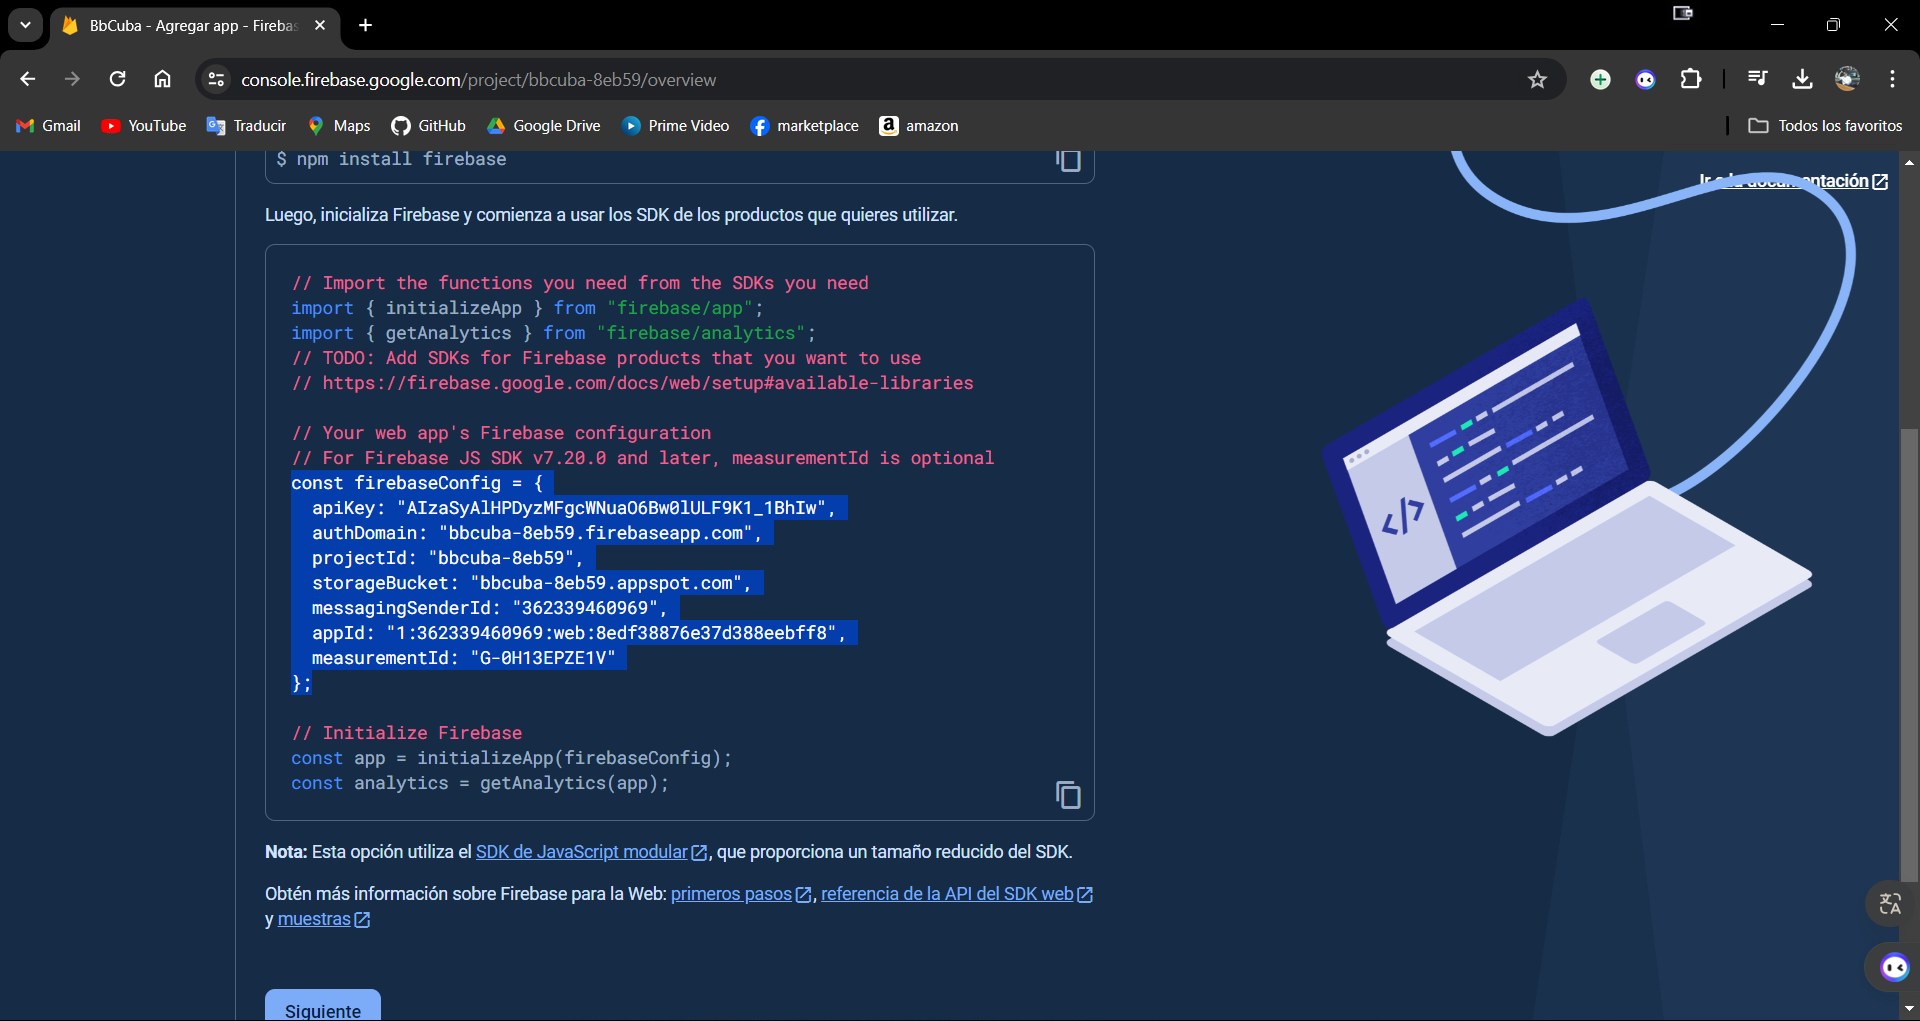
Just as at the beginning it is just to follow the steps linearly and accept everything, it shows us the following fragment of code, I recommend saving it in a blog of notes, because we will need it later.
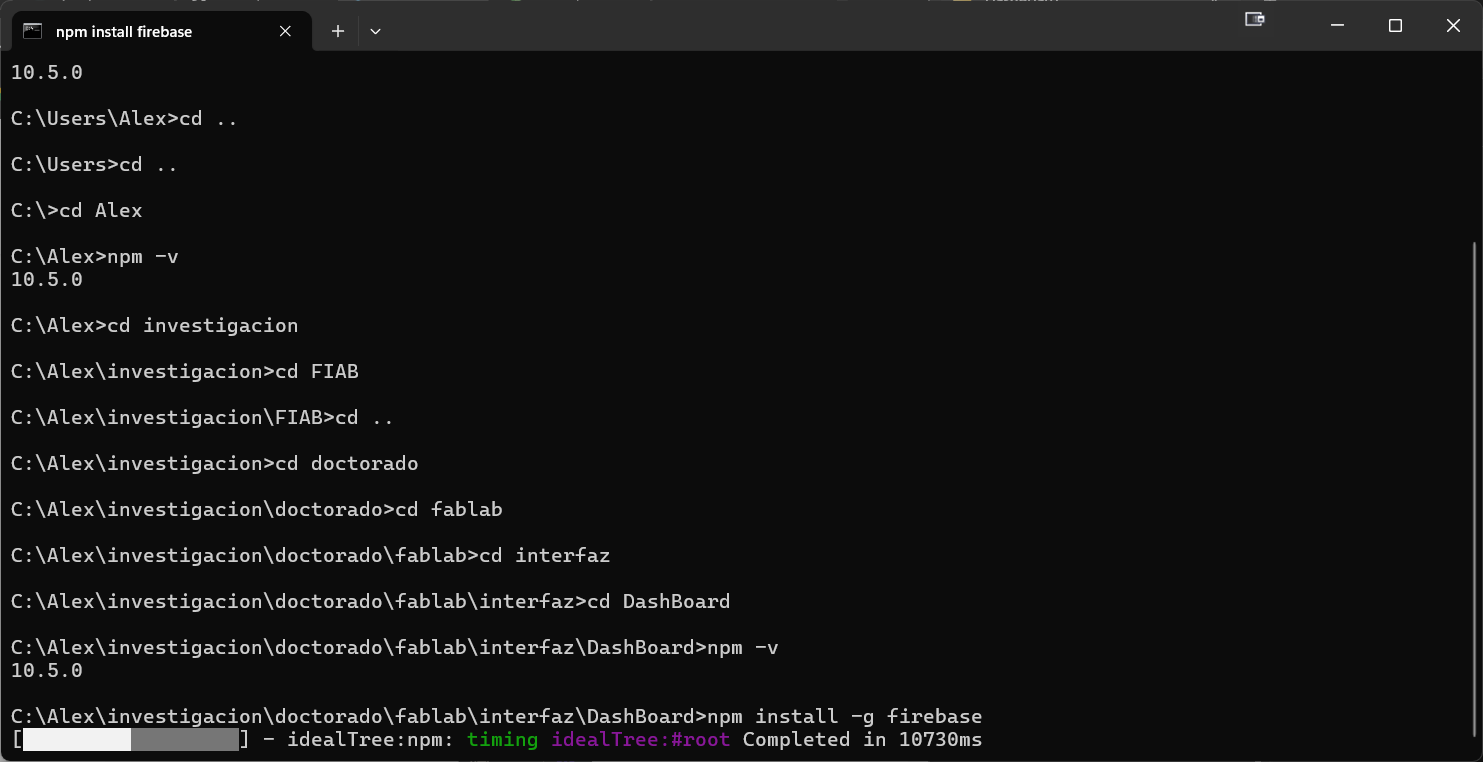
Dependecias
The next step is to install the Firebase CLI, to continue with the process, the following is the command:
npm install -g firebase-tools
It must be run from any terminal within the project folder.
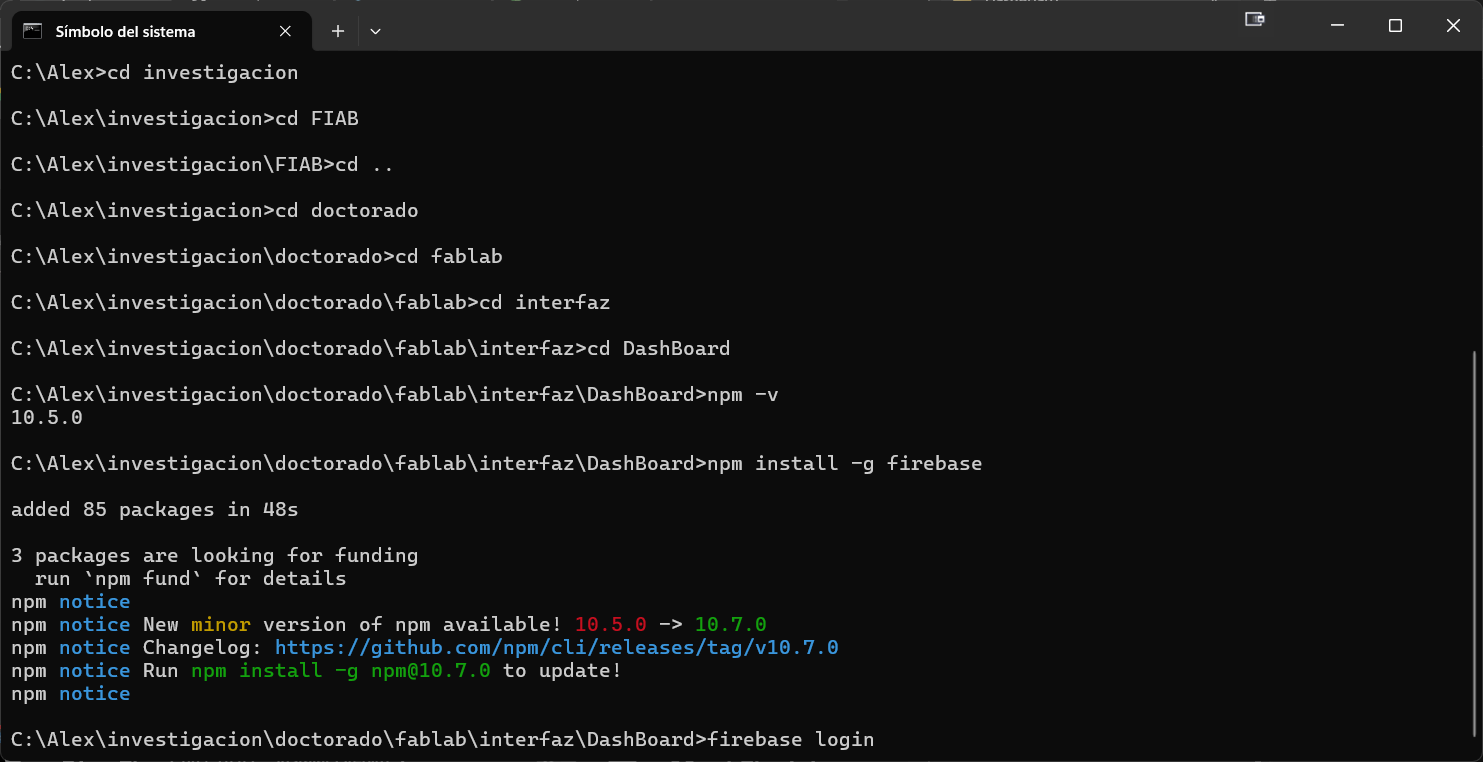
Completed successfully, now enter the firebase login command:
firebase login
And a browser window appears, requesting entry to the Gmail account that was used for the firebase process
Finally it is executed:
firebase init
Then the configuration list appears, with the Space Bar, we select the Realtime Database, Hosting and use an exiting project options and then ENTER
There, we can now upload the page code

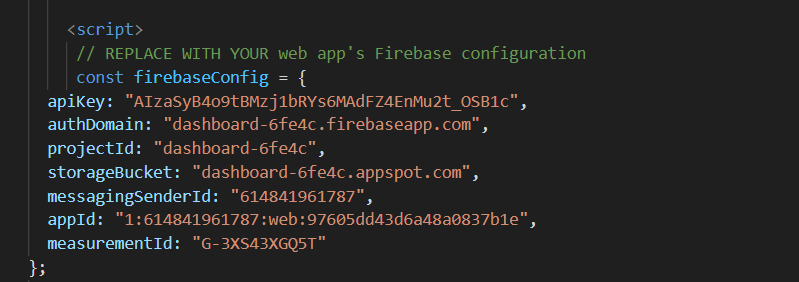
Now, we must replace the code fragment that was waiting in a notes blog that was generated by firebase.
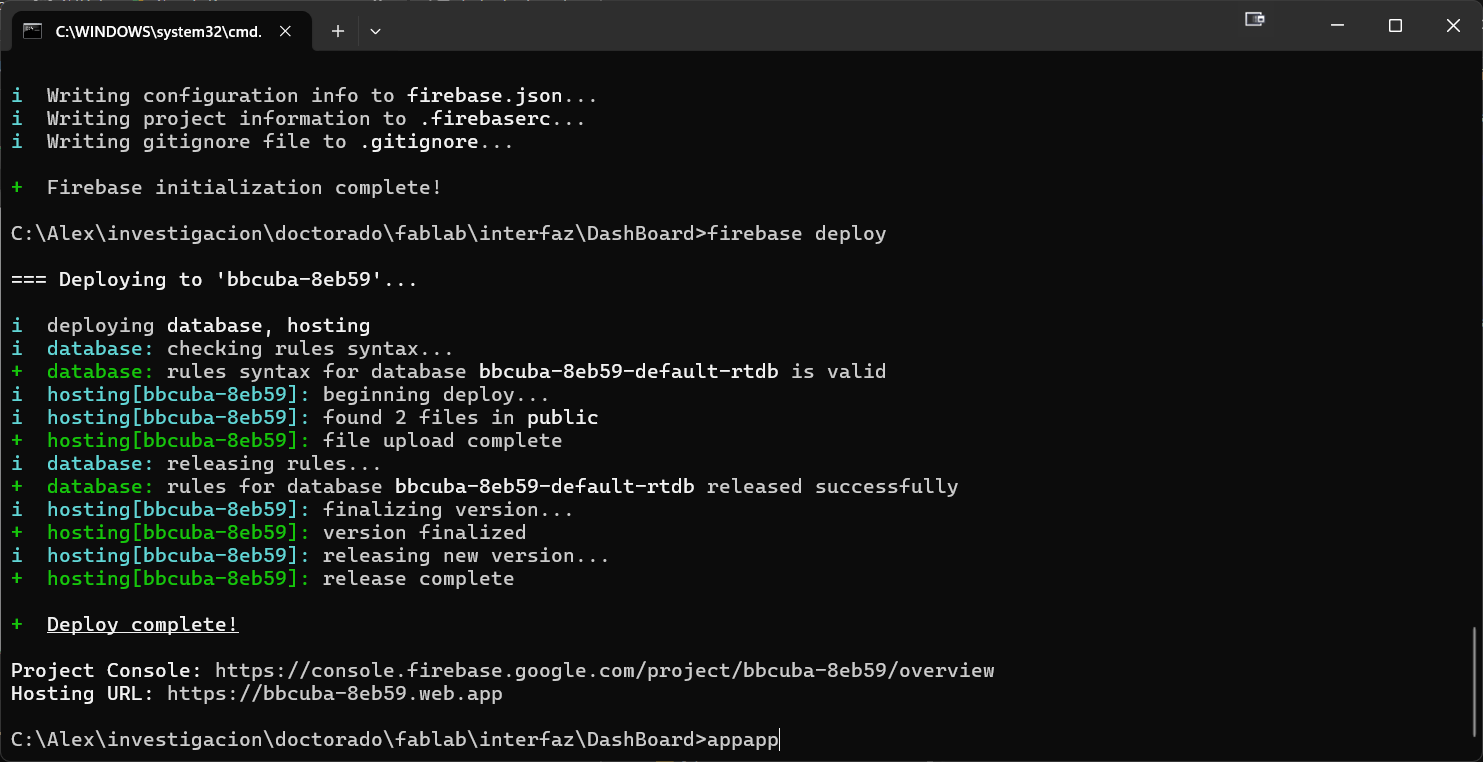
Once we have arranged the files, we indicate the firebase deploy, to upload the files to the hosting. If we upload the files correctly, a link is generated that will take us to the following interface.
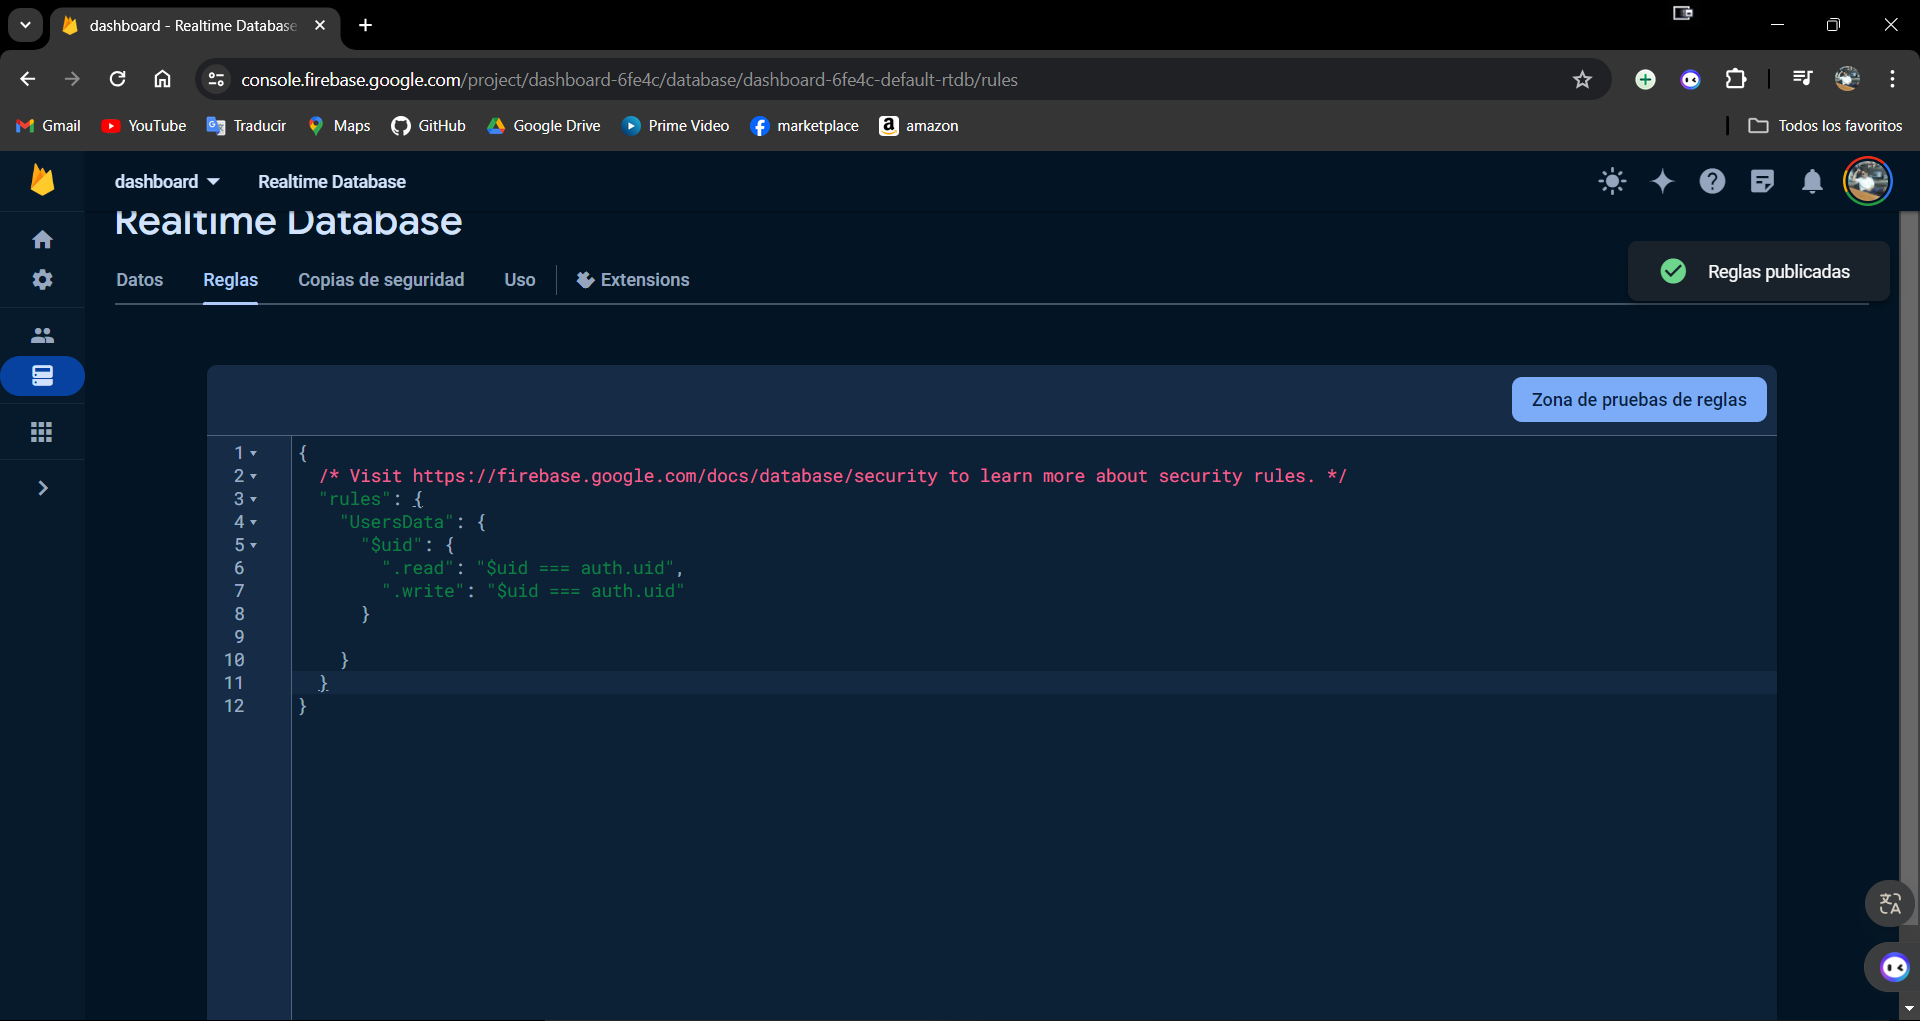
Finally we must generate one last configuration in Firebase, for that we go to the Realtime Database option, we select create a database and once created, we go to the Rules option, we change it as in the image and click Publish
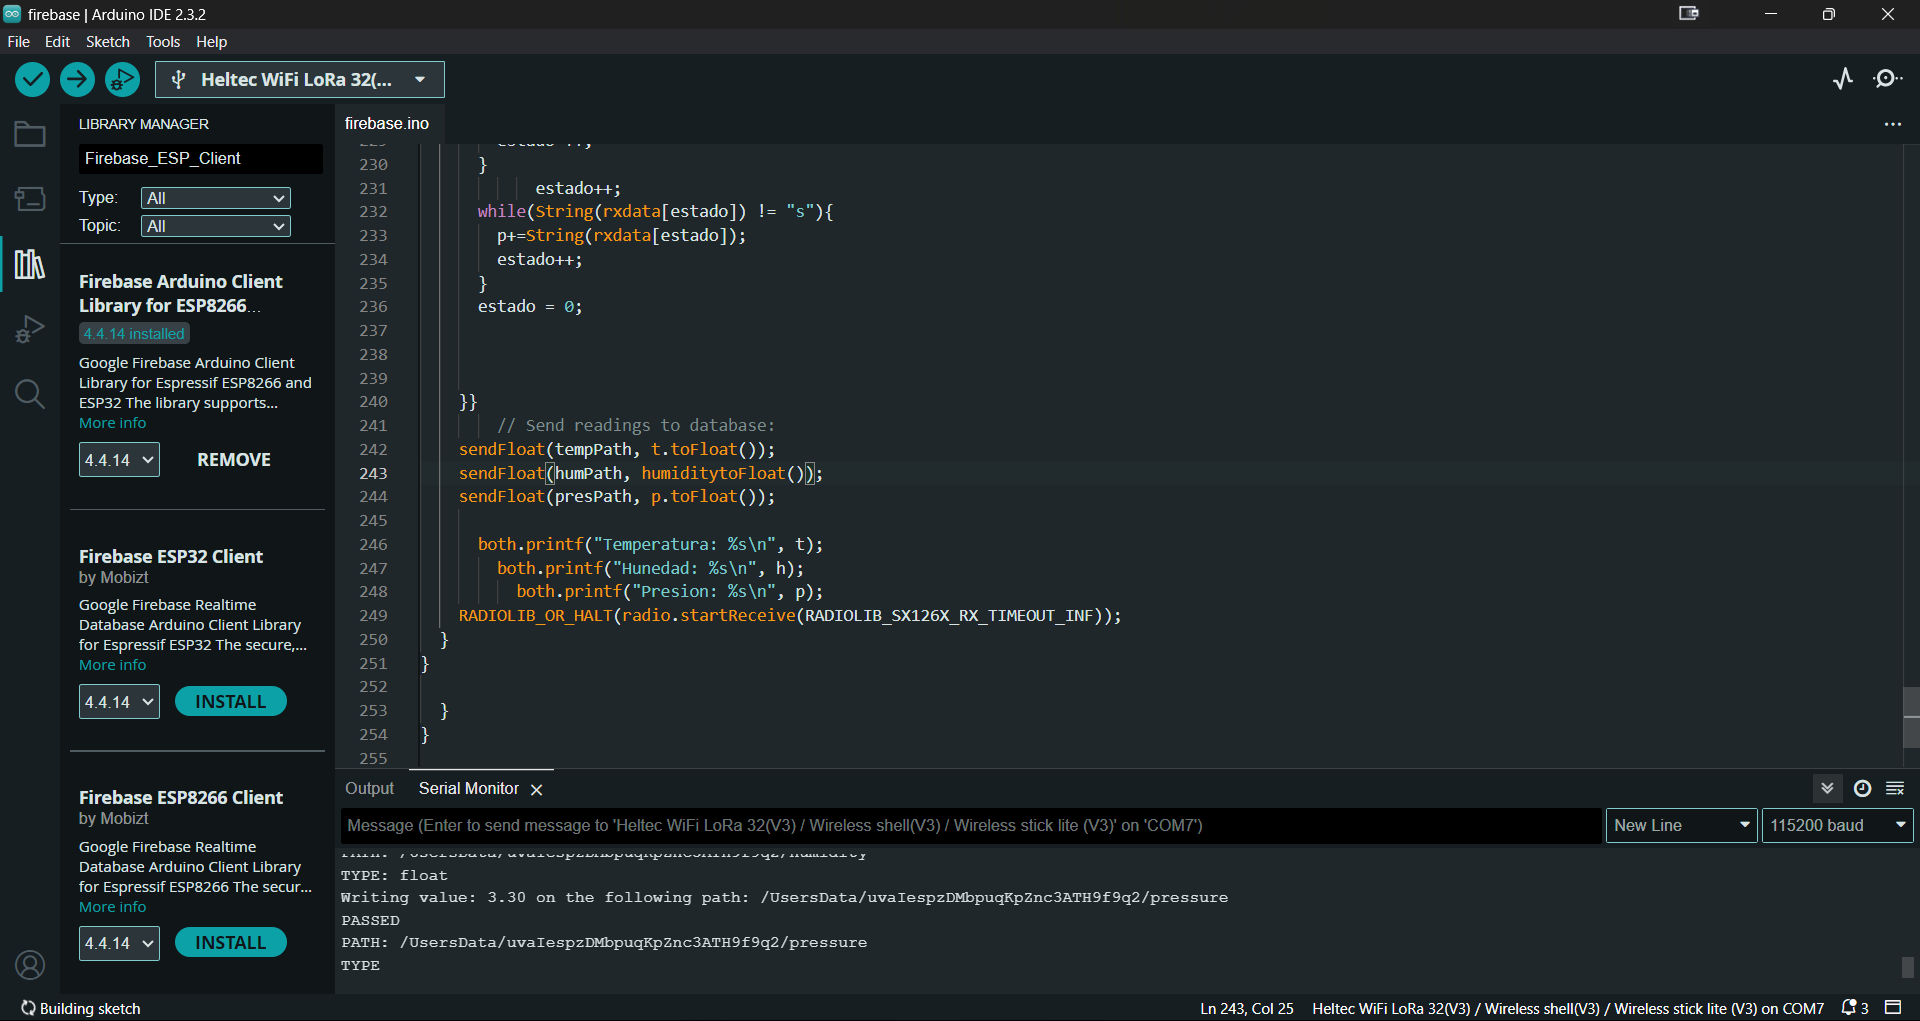
Now in the ESP32
For the ESP32 program, I will use the same one from last week, I will only add the
Result
Finally we see a video where the chain of sending, receiving and presenting the data can be seen in real time.
Result
And in this other video, I put a screen recording of the parameters updating.