Molding and Casting
Not everything is 3D printing
Group assignment
The group's tasks: review the safety data sheets for each of your molding and casting materials, then make and compare test casts with each of them compare printing vs machining moldss fablab website.
General Objective
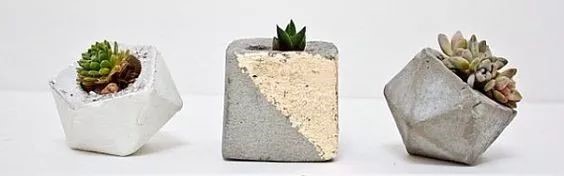
The Objective is to make something simple, an object whose importance has great importance and for this reason you do not decide to use the Molding and Casting technique, and do not use another known technique such as 3D printing or CNC milling. In this case I decided to make a pot for a captus.
Molding and Casting
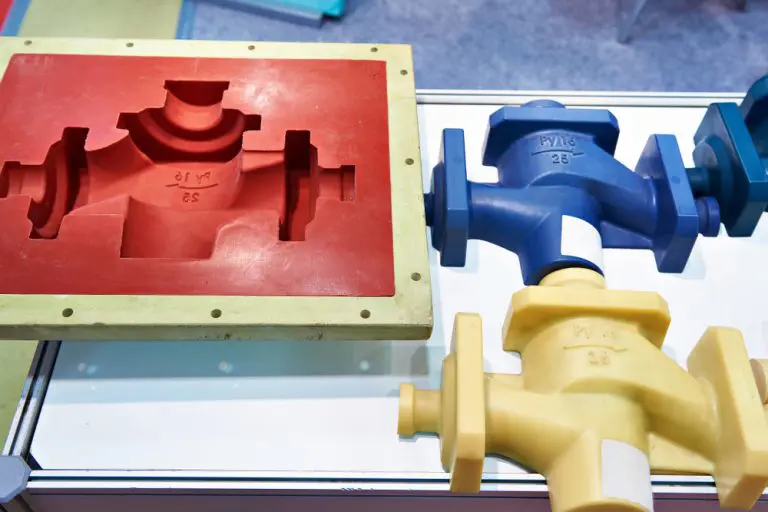
The main difference between molding and casting is the use of the material in the process. Casting usually involves metal, while molding focuses on plastics. In both cases, the melted material is passed into a die or mold to create the final shape. However, some other key differences in the process will change the final product.
Design
To mold or cast a part, you need to design a part that is the negative of the part to be manufactured where the material of the new part will be sampled to build the shape.
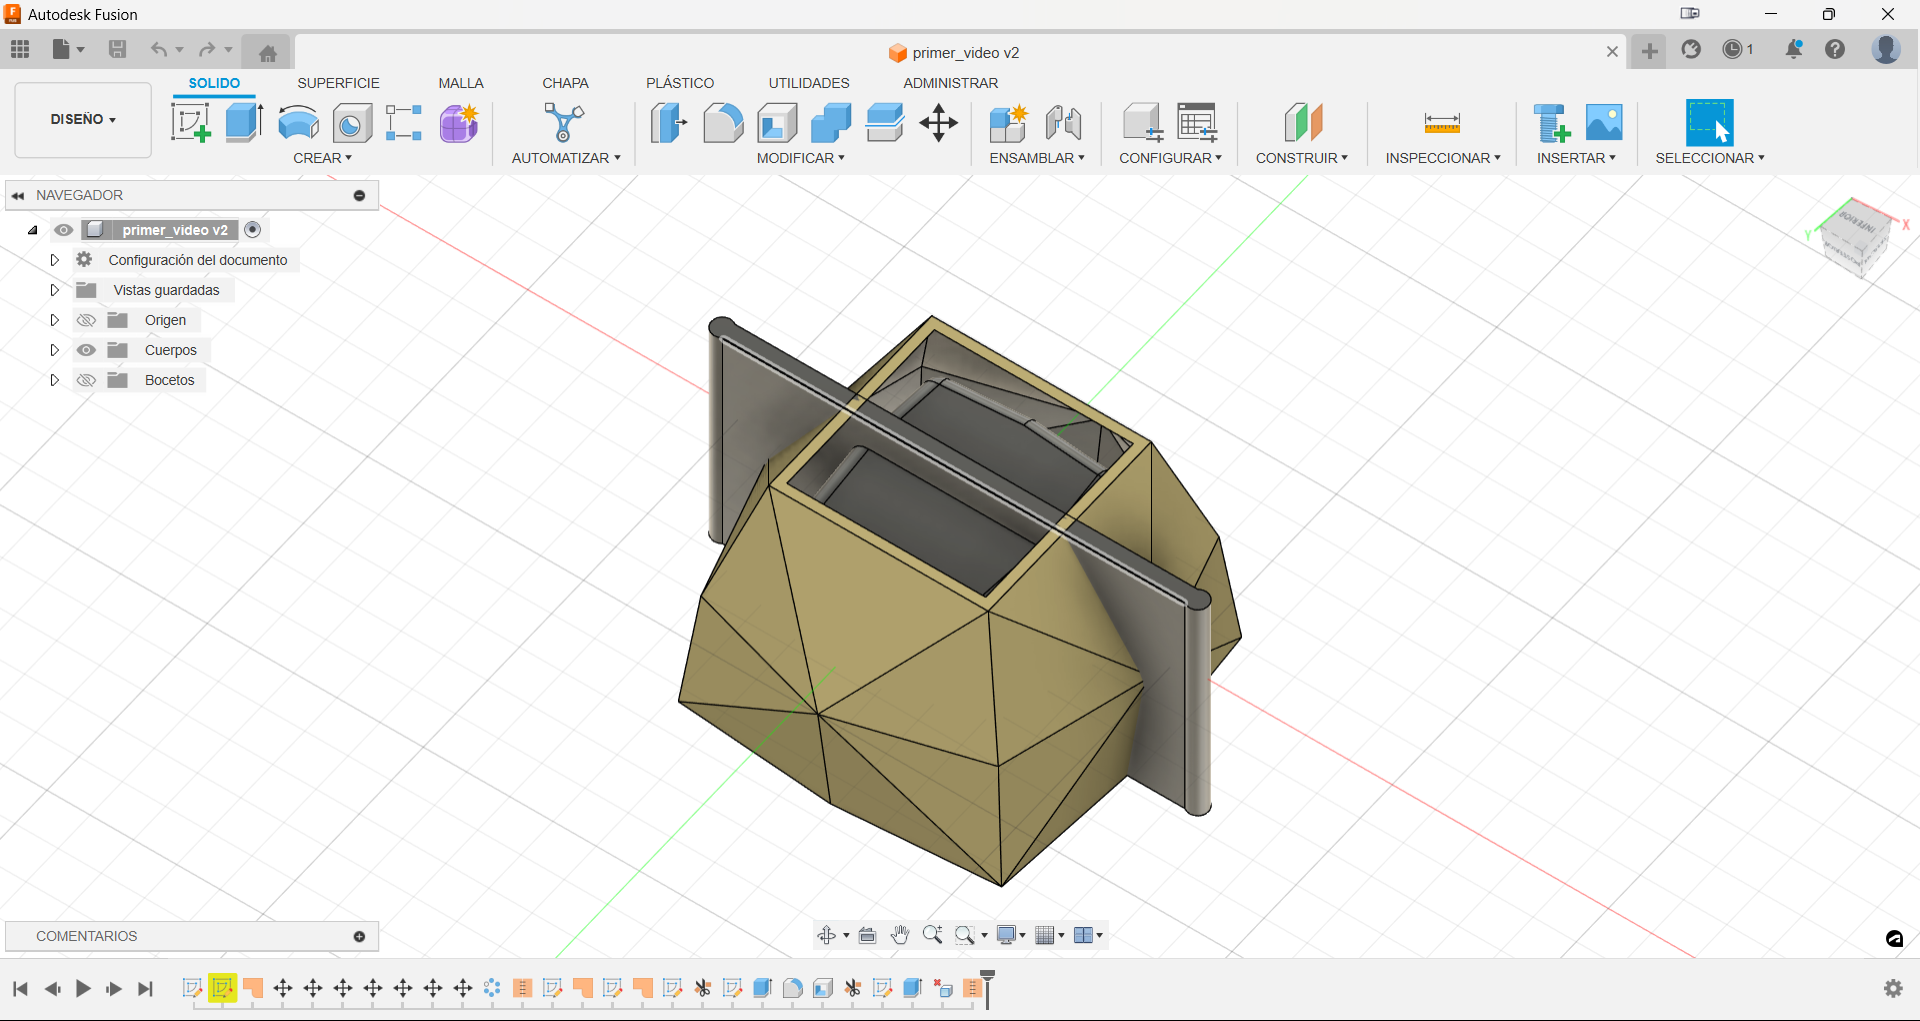
To do this, in the Autodesk Fusion program I started by first creating 3 rectangles, one from the other and moving them in space, since I want my pot to have a slightly conical geometry.
I don't want the body to have a flat shape, so with the Line tool and the Surface tool, I gave it a scaly effect.
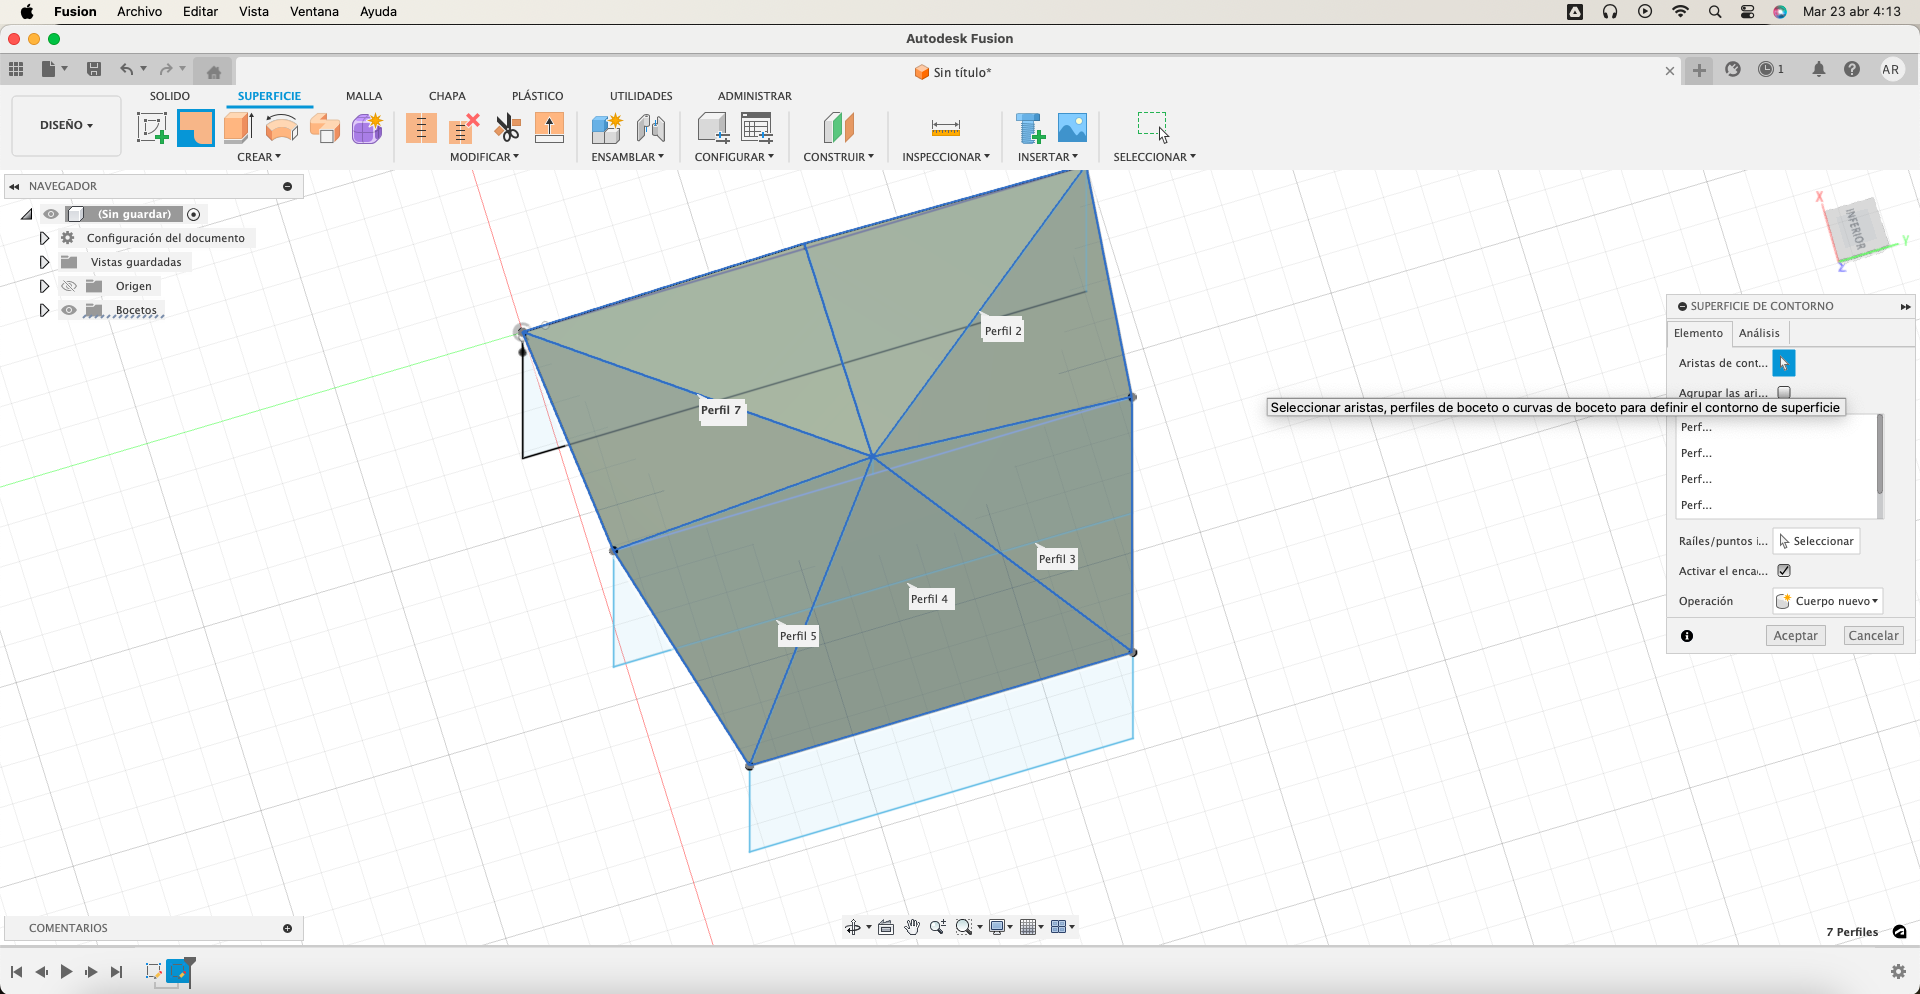
After having one of the faces ready, use the Pattern Surfaces tool, where with a parameter of 4 faces, create the body of the pot and with the seam tool close the edges that could have been detached.
Create a Surface both at the base and at the top to completely close the piece, this way I would have the outside of the mold ready, now I will make space inside to deposit the material to be molded.
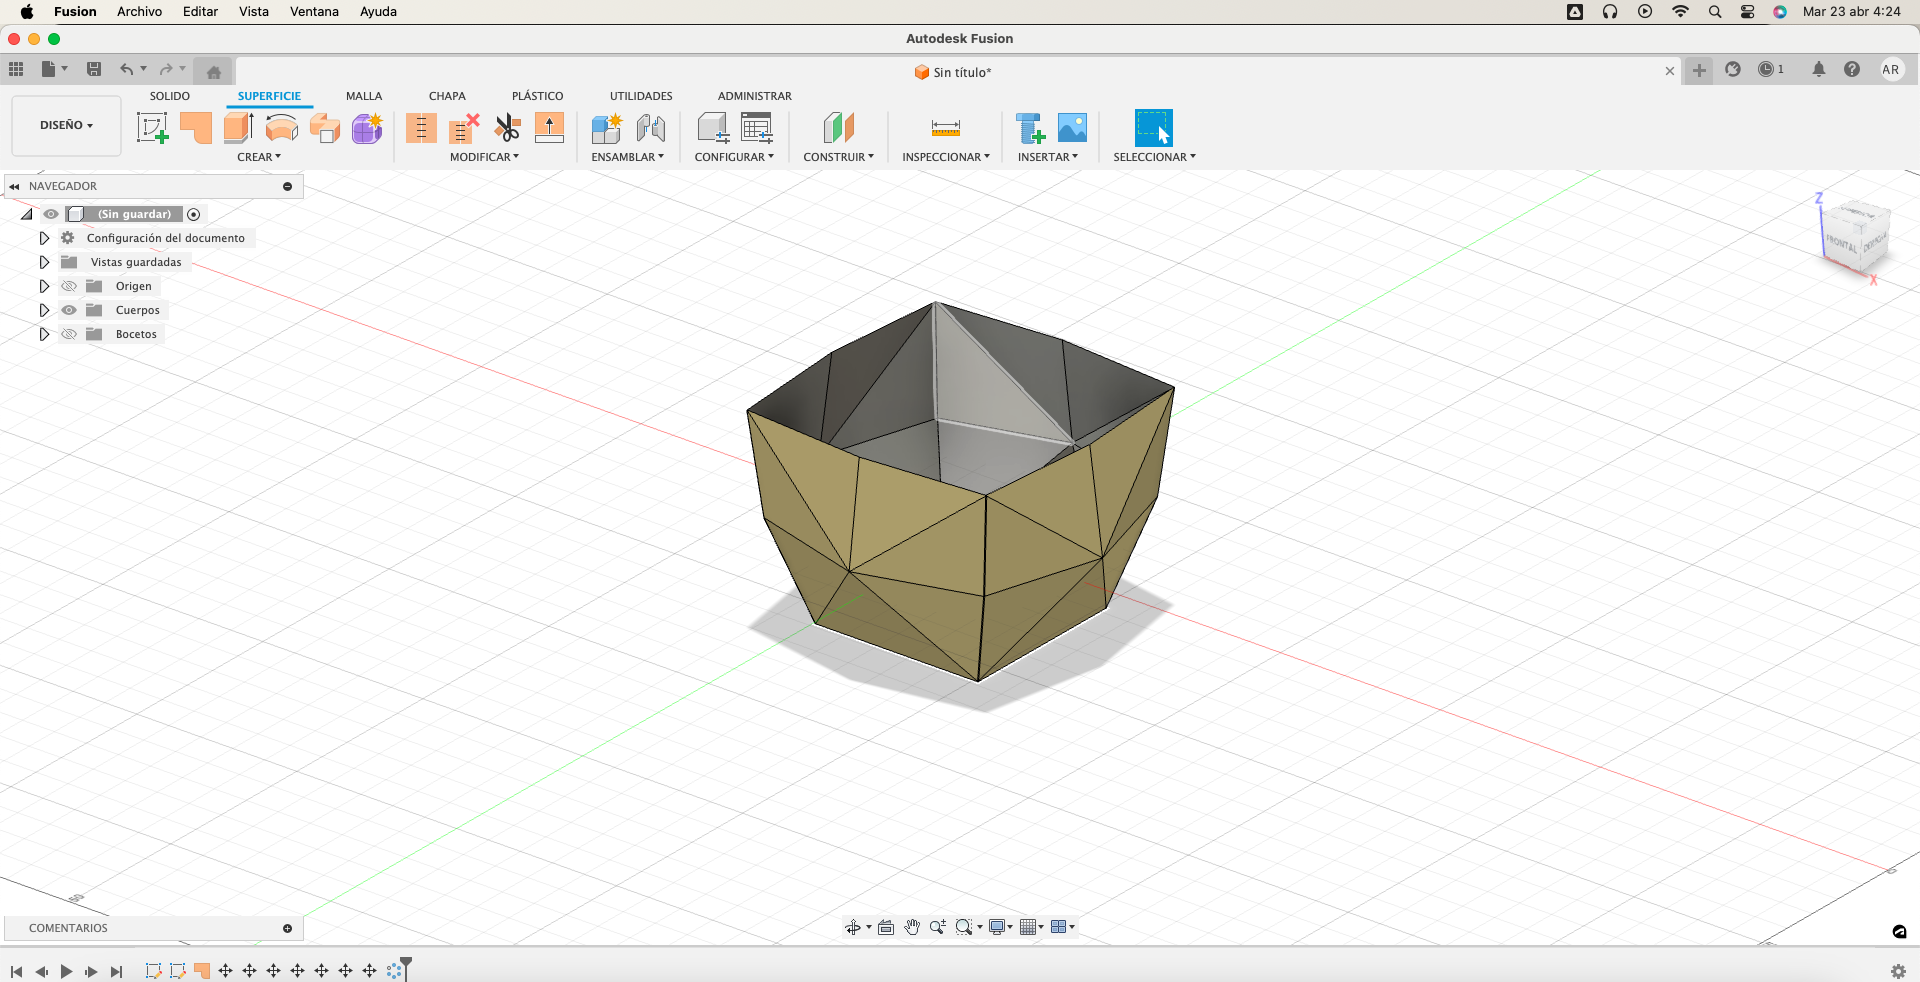
With the fillet tool, I make an indentation of the size I want to be empty in the final design and with the Fillet tool I smooth the edges.
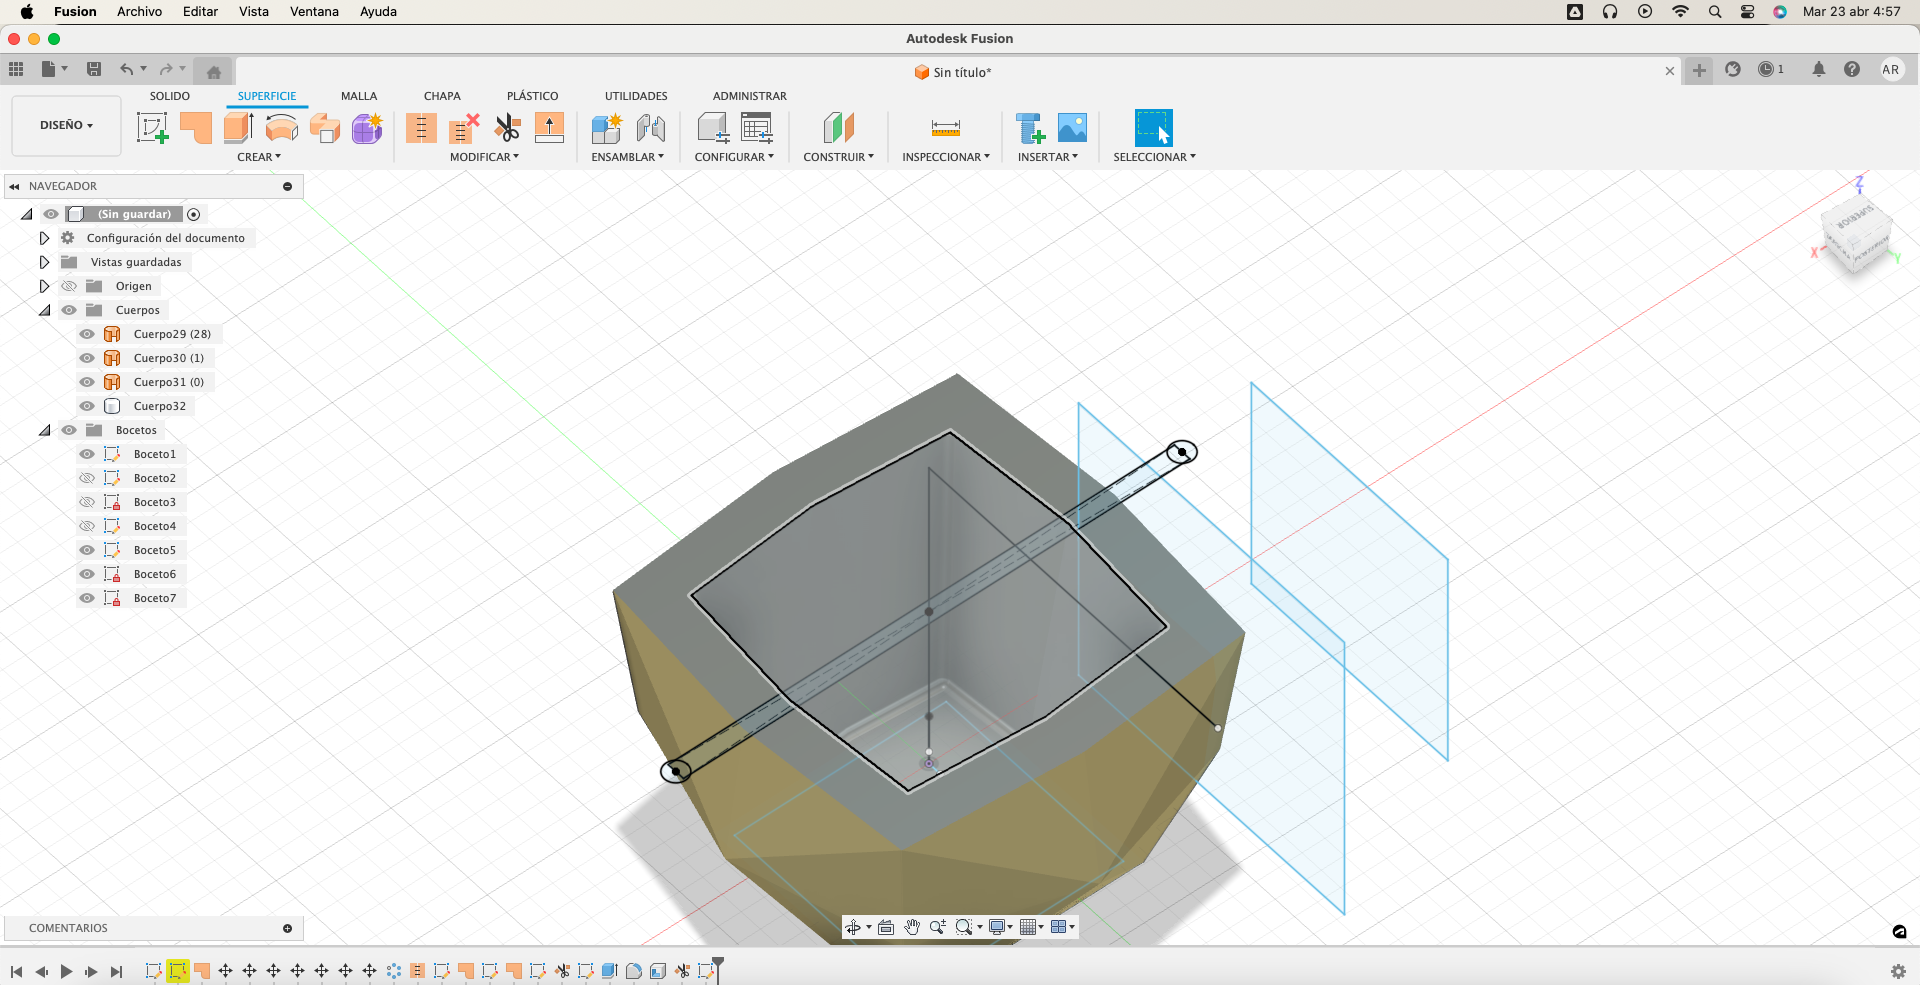
At this point, I eliminate the base of the piece because I will deposit the material through it, and I create two supports on the sides that will serve to hold the mold for the duration of the process.
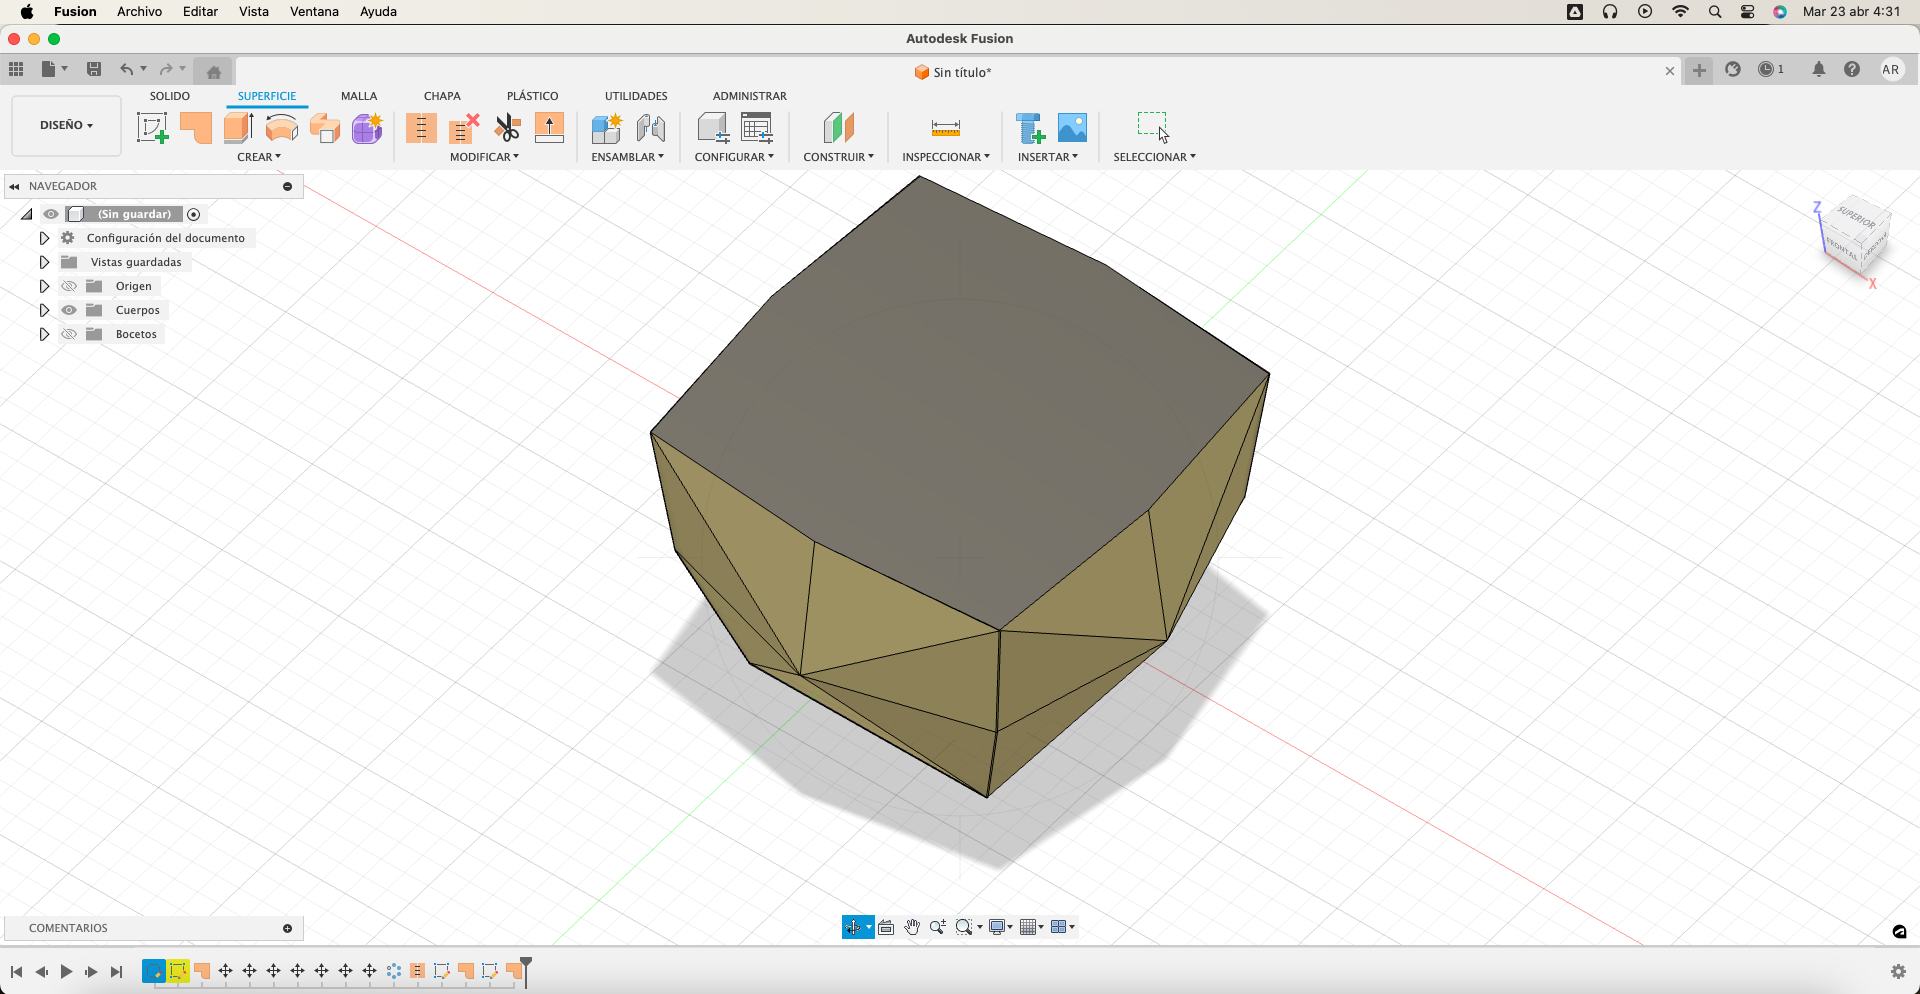
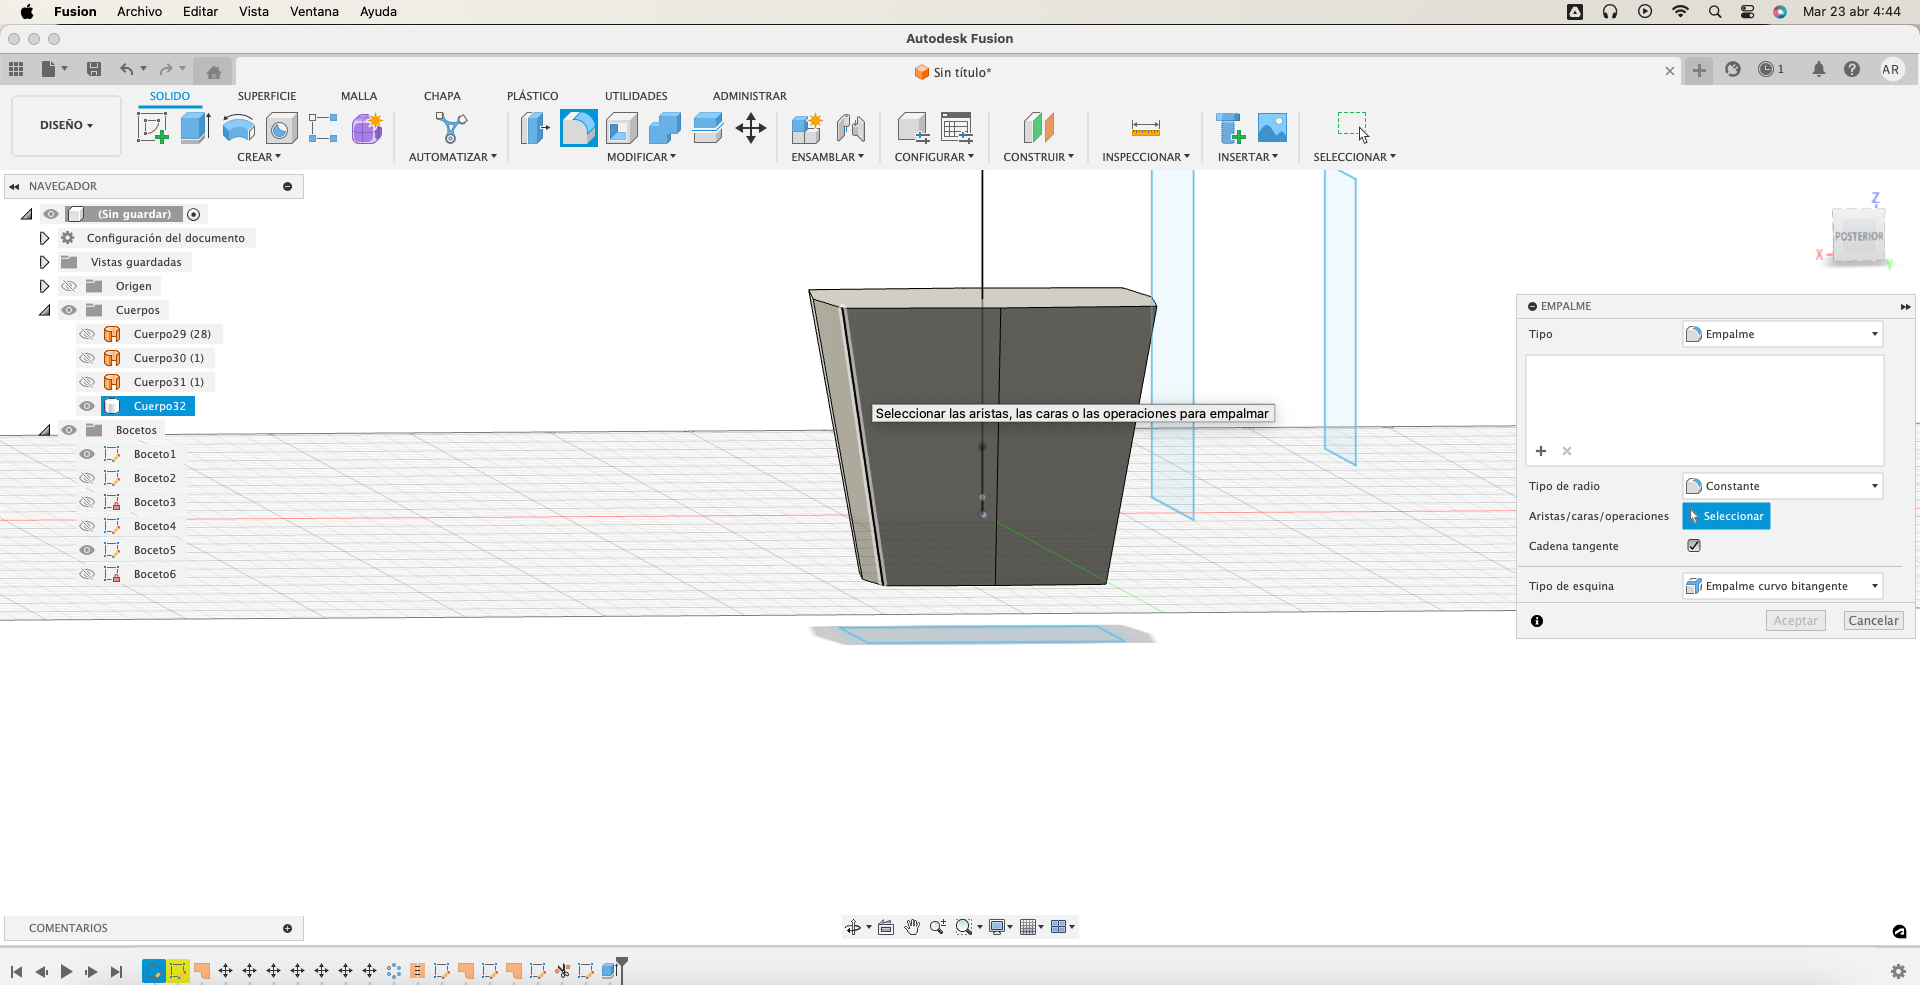
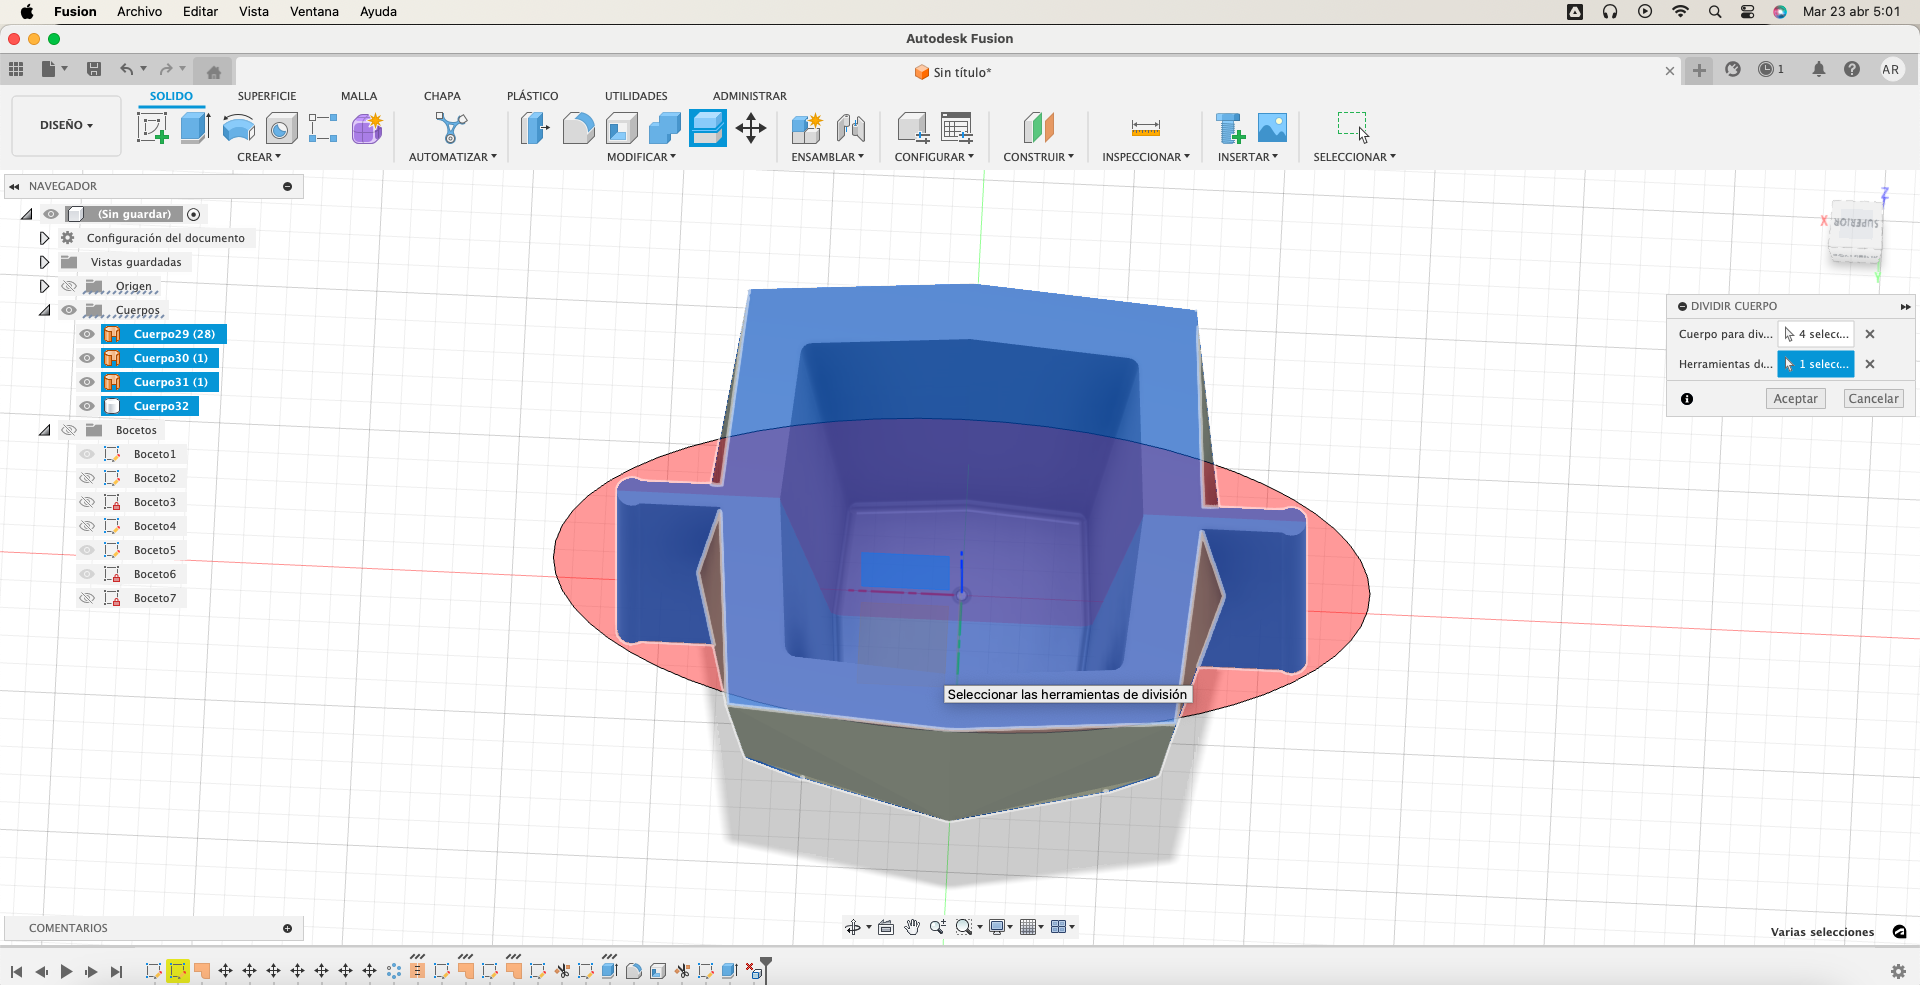
Finally, with the Body Division tool, I divide the body in half so that it is possible to remove the mold once the casting is done.
3D Printer
After exporting each body as an STL it is time to print them, to do this use a Prusa MK3S with a 0.4mm nozzle, without supports, a fill of 15% and the rest of the default parameters of the PrusaSlicer.

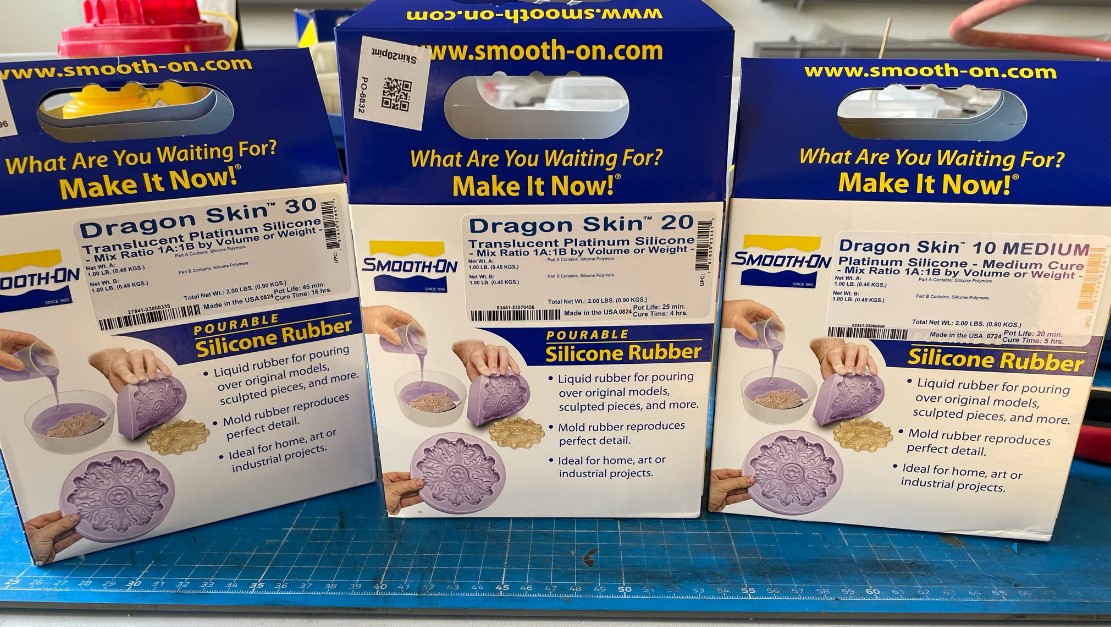
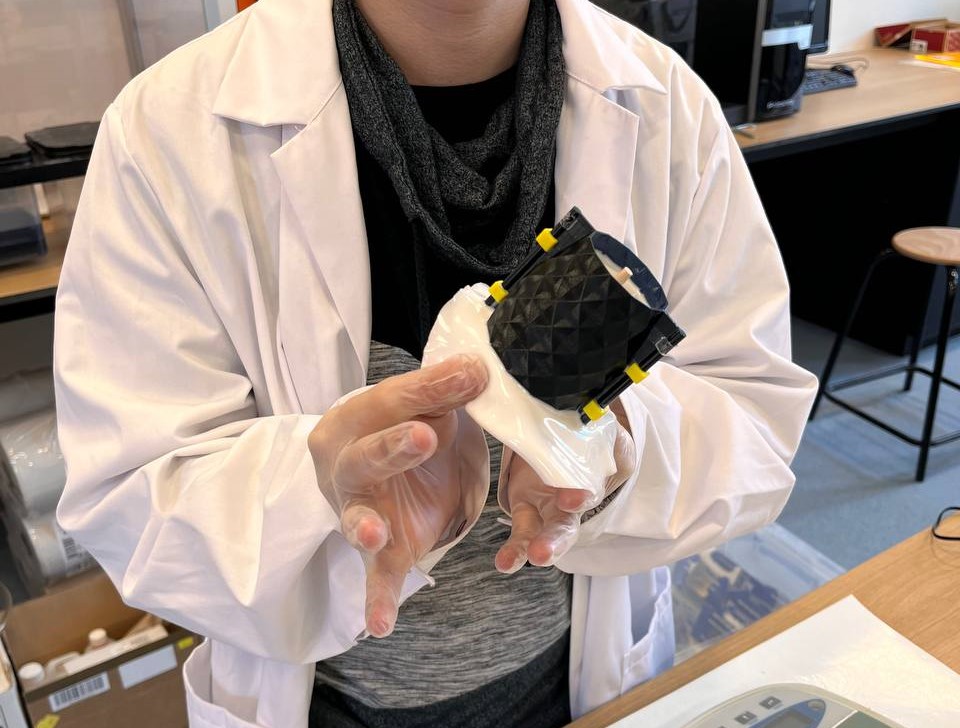
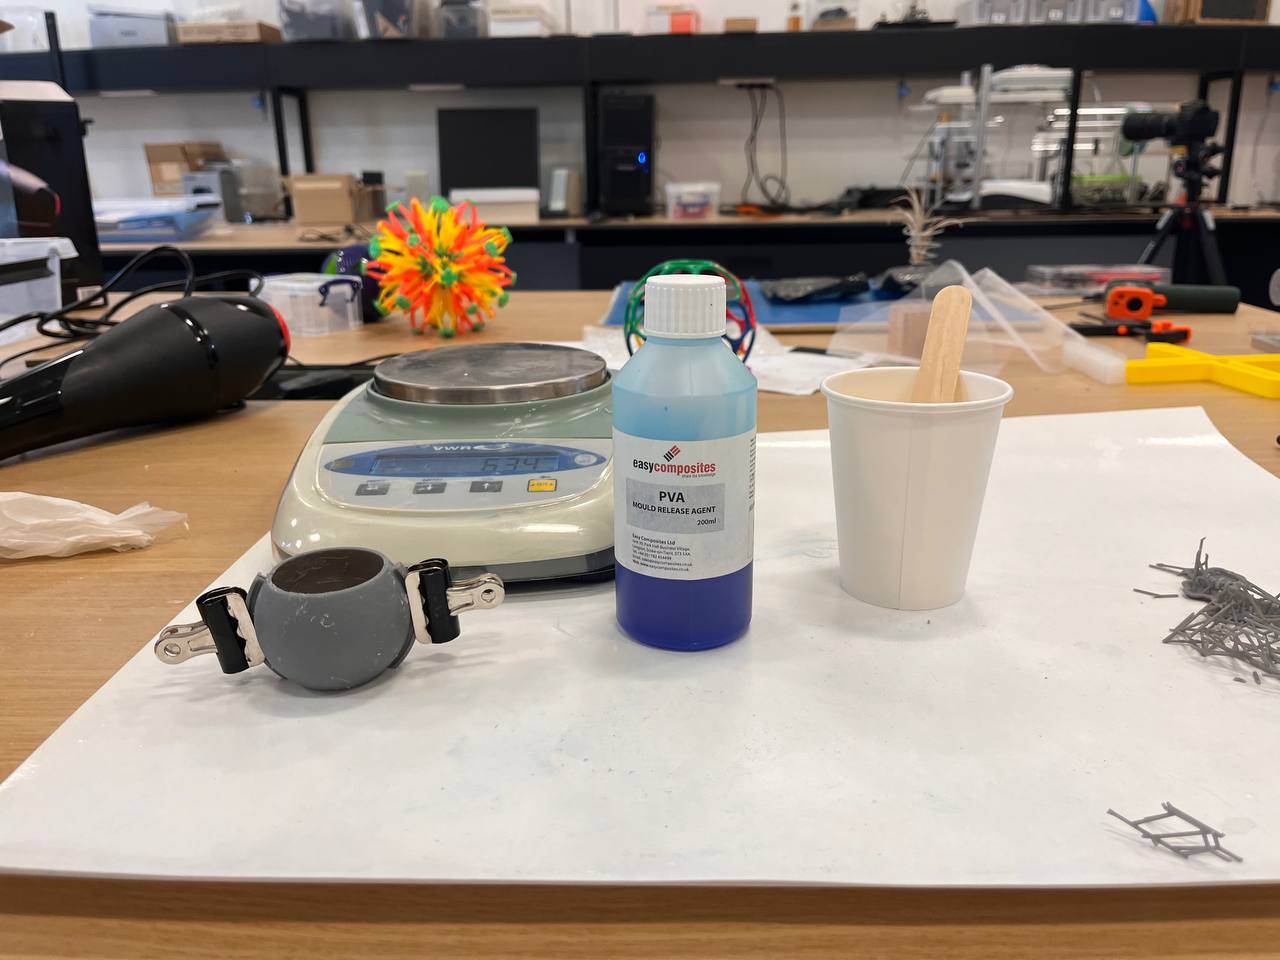
In the laboratory there was a wide variety of silicones, resins and even soft metal, so I selected one with good hardness and a very short curing time, 30 minutes, so I wouldn't have to wait many hours for my piece.
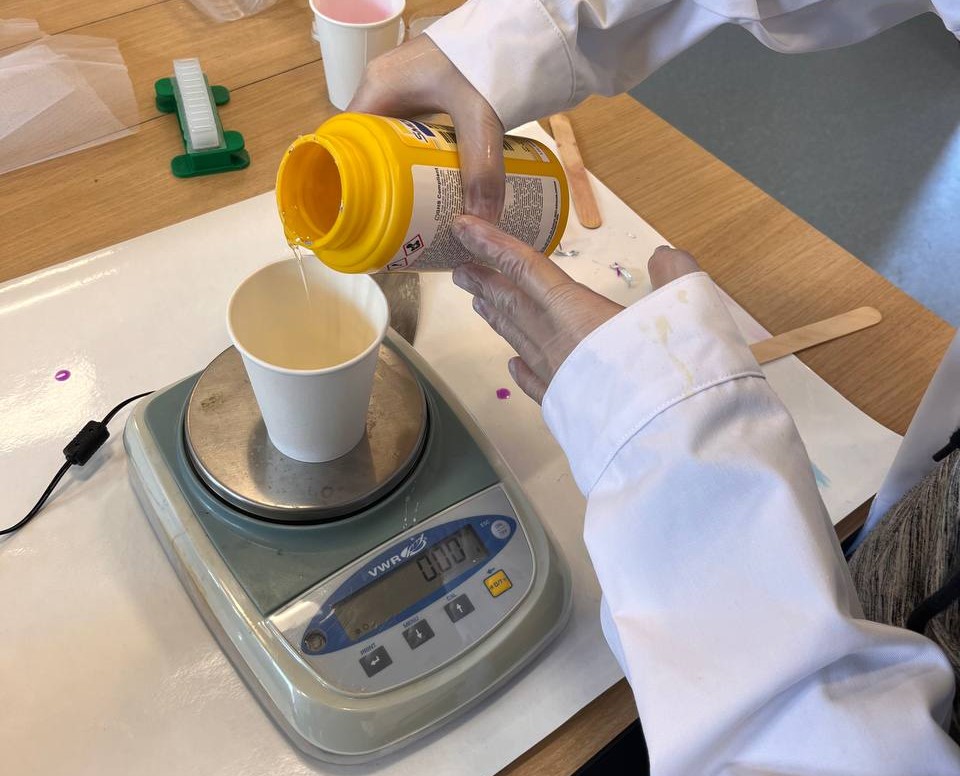
The mixture of the material is 1:1 in volume and weight, so with the help of a digital weight I pour both substances into a disposable container. 80g of total material will be enough, but it is always good to add a little more to avoid taking risks. Once both substances are mixed with mechanical stirring, I pour them into the mold. This substance takes 7 minutes to solidify, it is a short time but it is enough to mix and deposit.
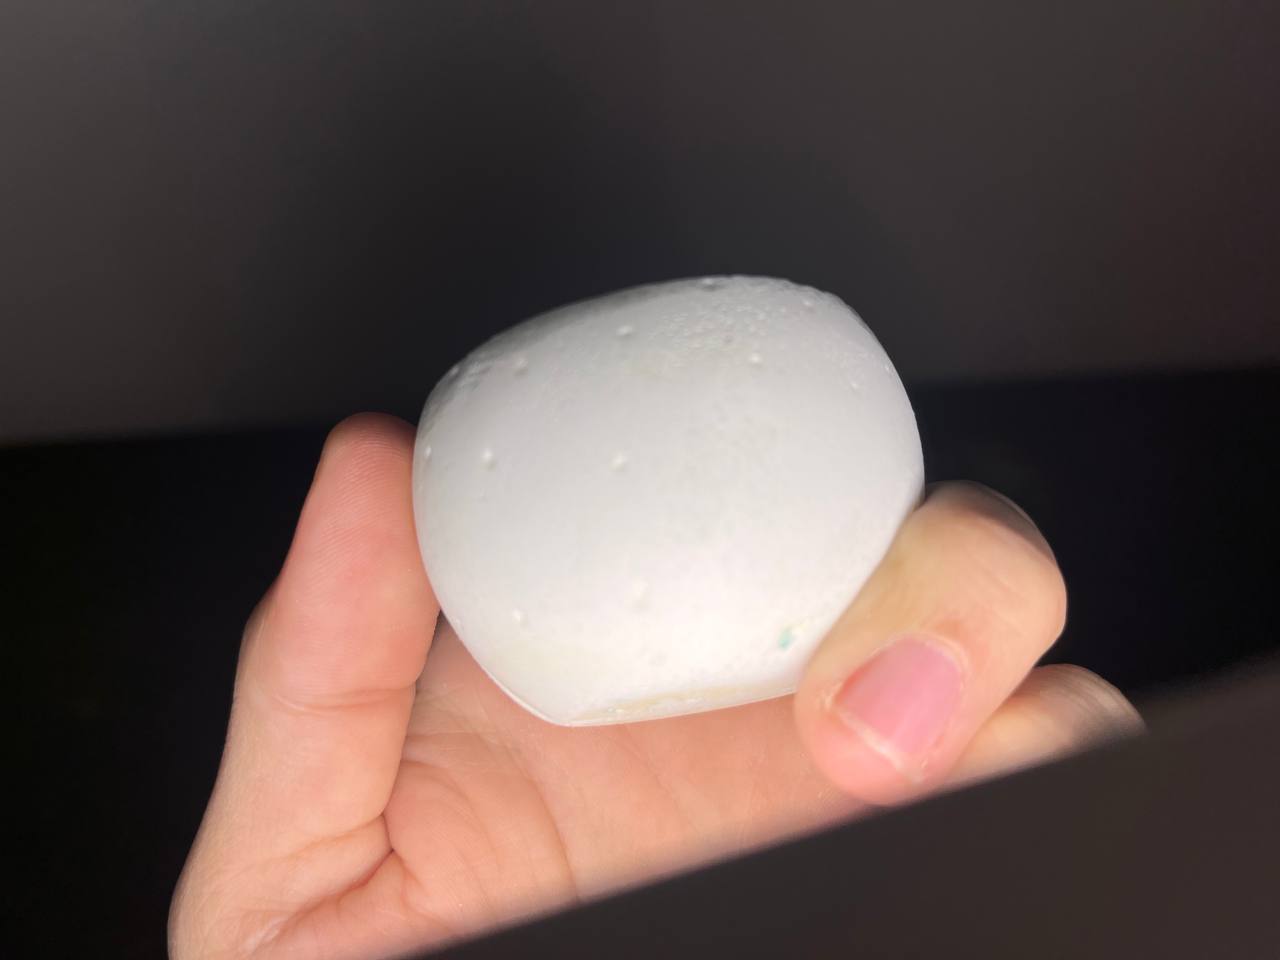
After 30 minutes, it is ready, and I had 2 problems:
1- As the material used was very liquid, it came out a little at the bottom of the piece, it will be solved quickly with a cutter.
2- Since the material was so hard I should have used lucricant because now it is completely stuck to the mold and I will have to break it to remove the piece, it will be solved quickly with a hammer.
Result
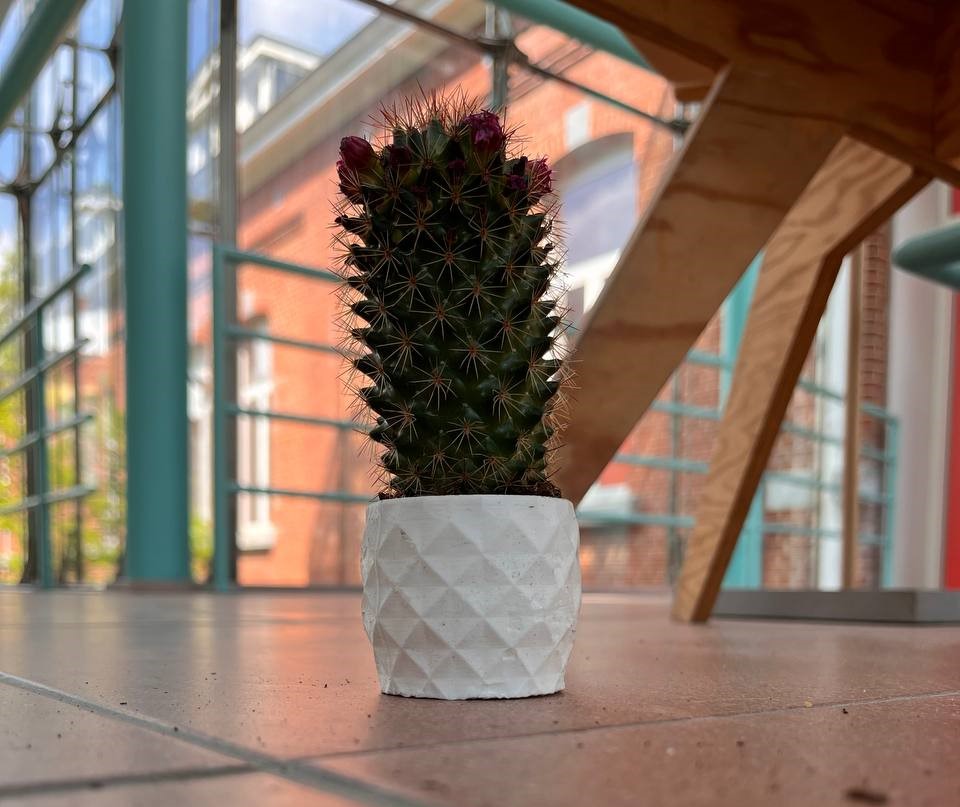
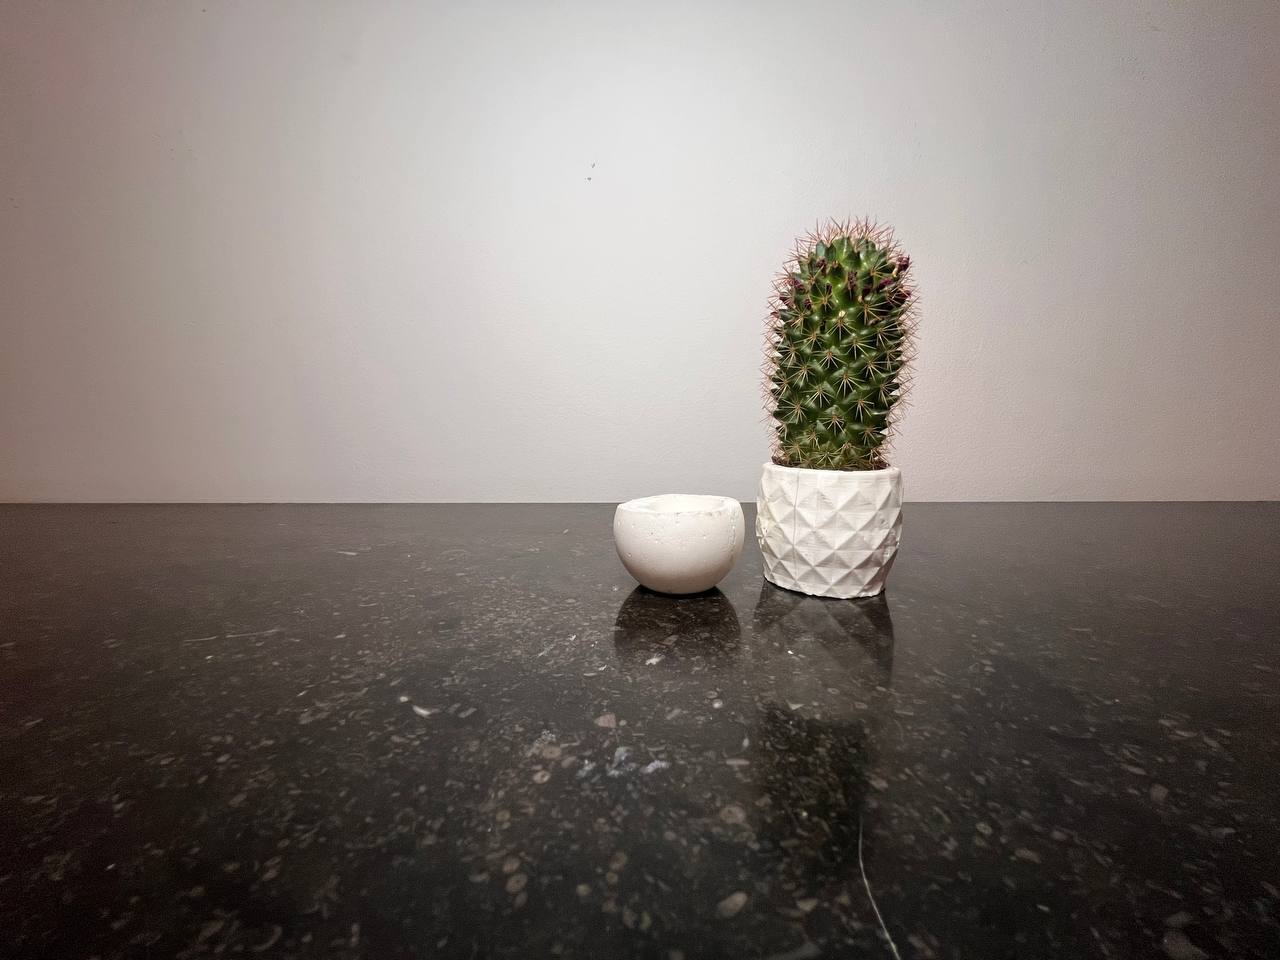
Once the mold has been removed from my beloved cactus, we see the final result, which is quite acceptable.
How about trying it in resin?
The mold for the cactus pot turned out well, and making it in resin may not change anything, but what about a smoother pot?...will you notice the difference?
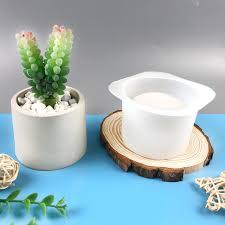
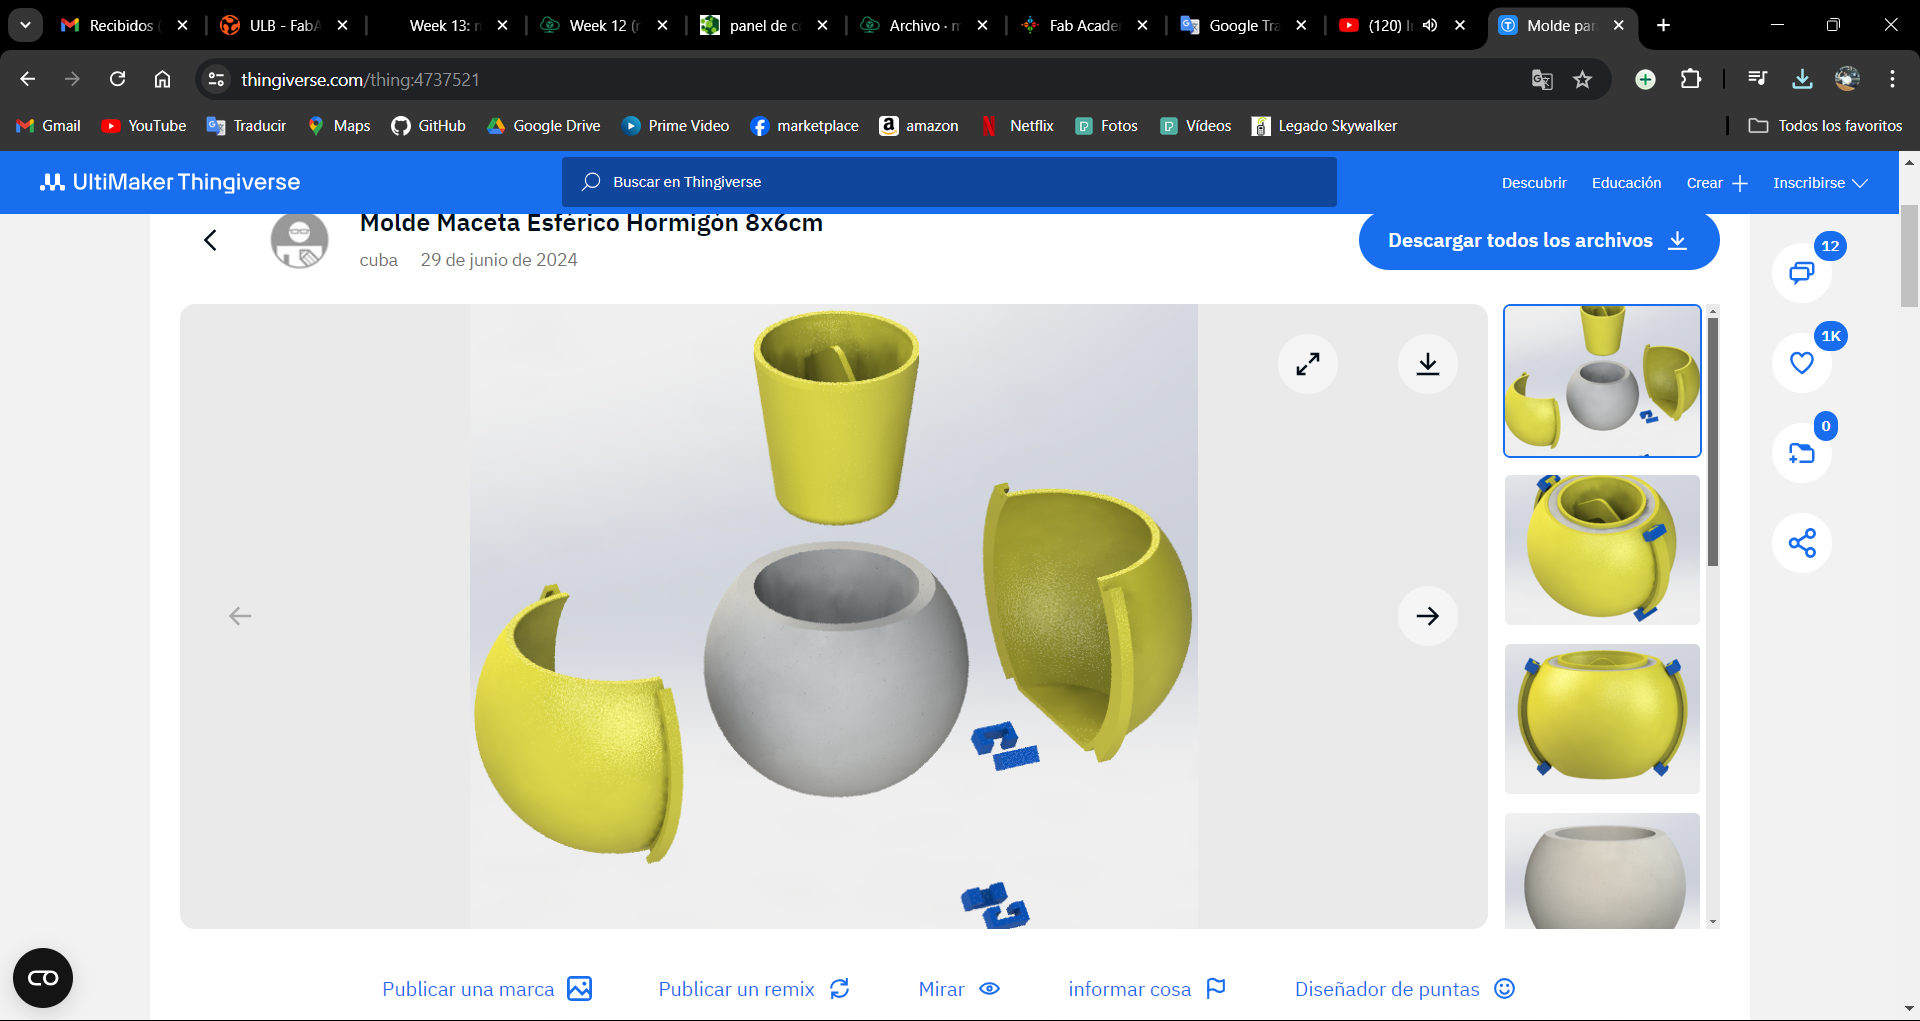
The first thing we will do is search thingiverse for a very smooth design, then in the FormLabs laminating software we will load the part and configure the parameters.
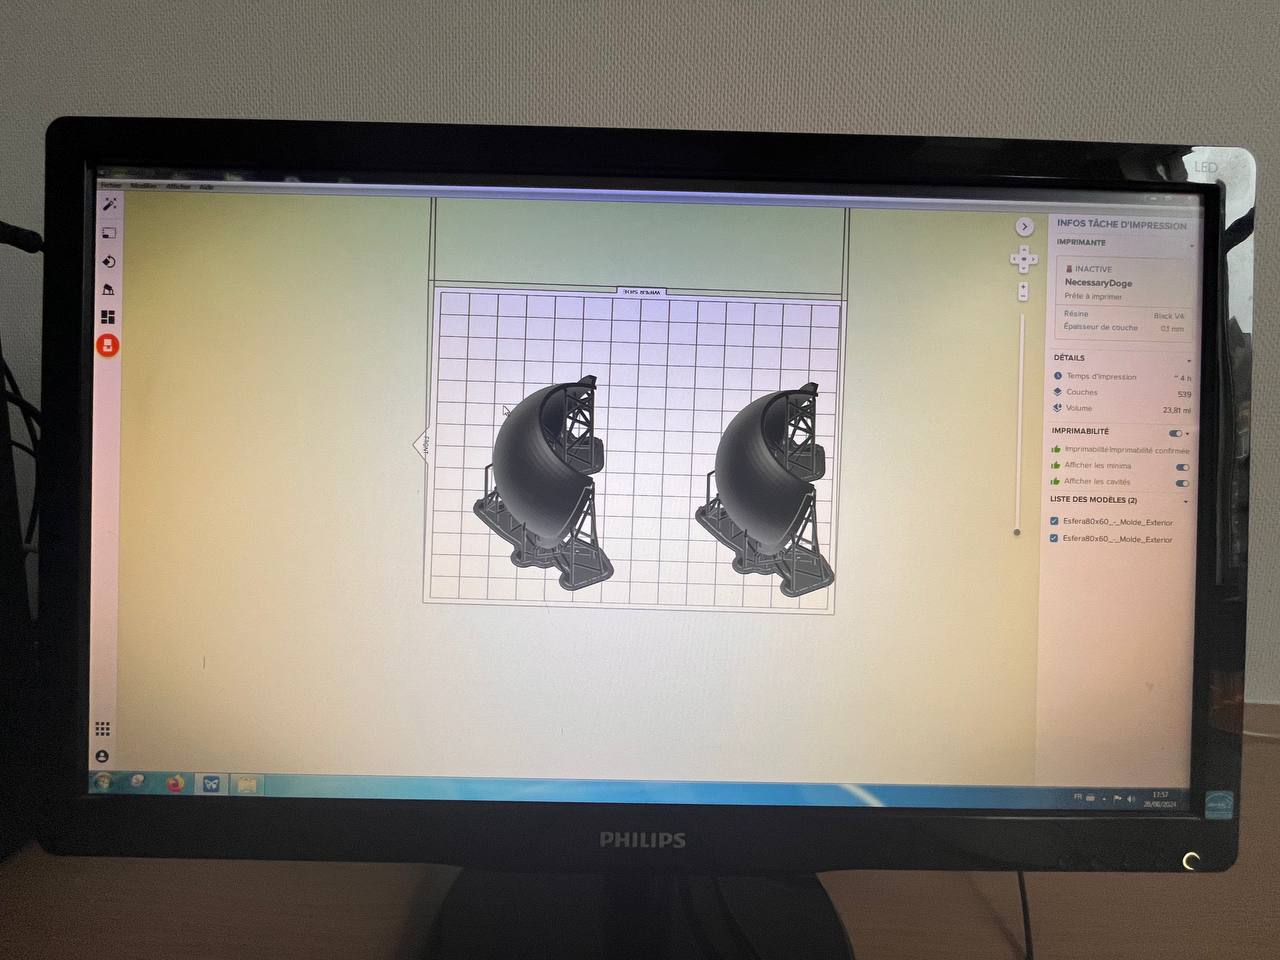
Generally, resin 3D printers create parts with a smooth surface finish, which means there are virtually no visible layer lines. In this laminating software there are surely many parameters to configure but we will only make sure that the layer height is 0.1 and that the color of the resin is correct, in this case gray.
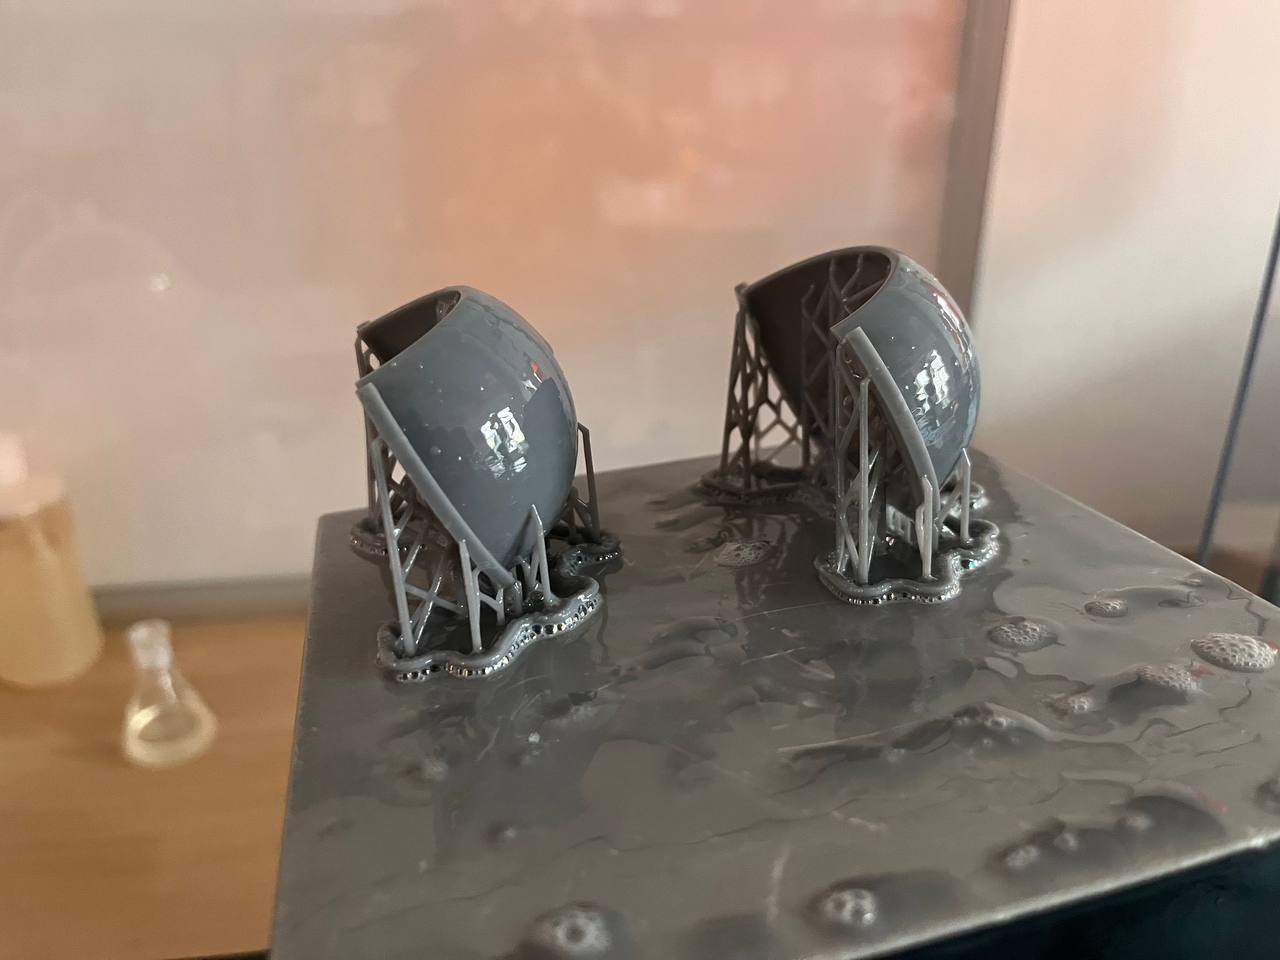
After about 4 hours the pieces will be ready, just by looking at them we can see that the finish is very superior, but now comes the truly complicated part of this type of printing...Cleaning the pieces!!!
3D Printer
The first thing we will do is take off both pieces with a spatula and drop them in isorpropyl alcohol (about 10 minutes), while we can we can quickly clean the printer bed so that no residue is created.
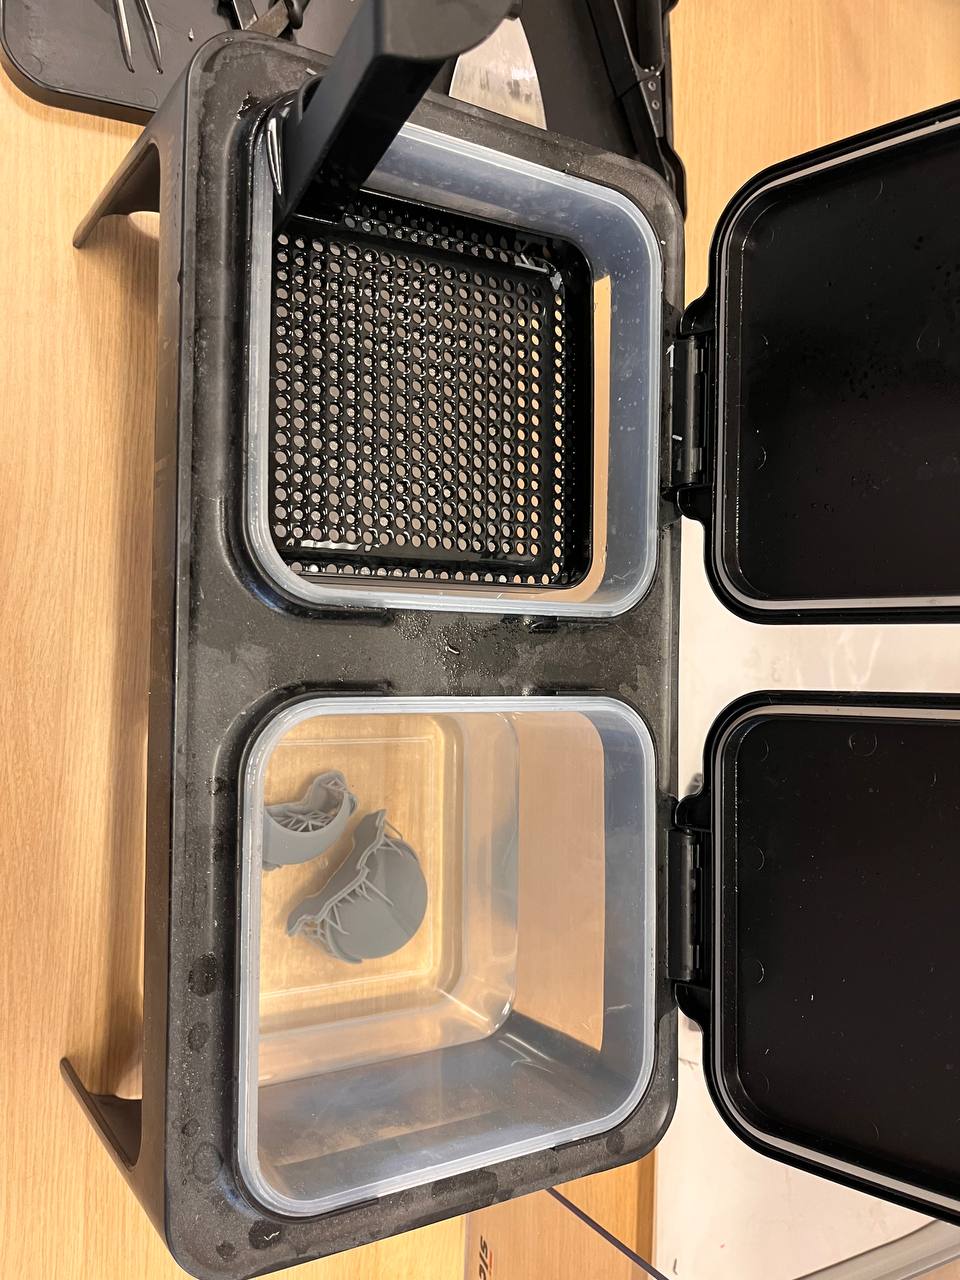
After that time, we remove the pieces from this first alcohol bath and put them in clean alcohol for another 10 minutes, to finish removing any resin dirt that may remain.

After this, it is time to give the pieces a curing session with ultraviolet light, for that we put them on the curing bed for about 6 minutes.
With this we are ready to melt...this time we will not forget to add the lubricant...a few small drops that we will spread throughout the interior of the mold before melting...with the lubricant on, I will prepare the same formula as for the captus pot.
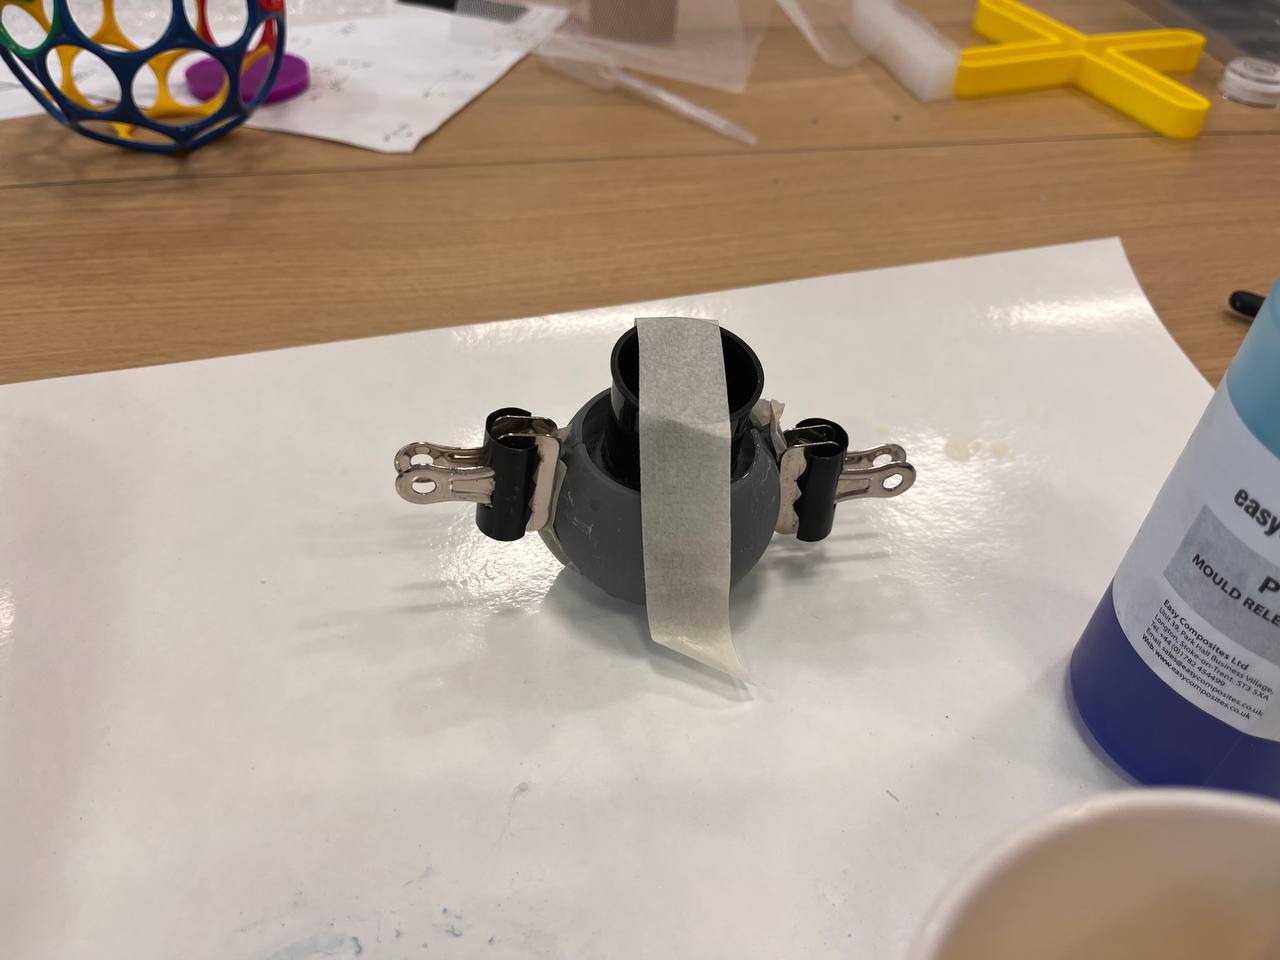
I have forgotten to print a center for the piece...hahaha...but it doesn't matter for the comparison, we can use this old roll of photography film, it will be off-center but it will do.
With this we are ready to melt...this time we will not forget to add the lubricant...a few small drops that we will spread throughout the interior of the mold before melting...with the lubricant on, I will prepare the same formula as for the captus pot.
But when we get a little closer and pass our hand looking for imperfections, we will see that small holes remain, this is not air, it is that the resin impression always has a support, and I put them on the side of the casting...so next time, supports on the opposite side. All the files used this week are in this Link.