Probe an input device(s)'s analog levels and digital signals
Document your work on the group work page and reflect on your individual page what you learned
Individual assignment:
Measure something: add a sensor to a microcontroller board that you have designed and read it.
Group Assignment
The group assigment link is available here on the fabalab page.
What is Input devices?
An input device is one that sends data to the Arduino to be processed.
An example of an input device is an ultrasonic
sensor that uses ultrasonic frequency to detect how far anything kept in front of it.
Commonoly input devices know as sensors.
Many microcontroller projects require some form of user-input, like a button press,
and produce some output to inform the user of the device’s current state or errors. Inputs are often simple components such as push-buttons, switches, and dials. Users can utilize LEDs as simple output devices.
This how-to article covers the basics of connecting these simple physical components on an Arduino.
Sensors respond to input from the physical world and convert this into an electrical signal
that Arduino can read on an input pin. The nature of the electrical signal provided by a sensor
depends on the kind of sensor and how much information it needs to transmit.
Sensors use the following methods to provide information:
Digital
Some devices, such as the tilt sensor and the motion sensor , simply switch a voltage on and off.
These can be treated like the switch recipes
Analog
Other sensors provide an analog signal (a voltage that is proportional to what is being sensed, such as temperature or light level).
The recipes for detecting light ,and motion
There are many, many sensors and the differences and uses of some of them can be very confusing.
In this list of Arduino sensors
we will explain what each one is used for, read more from this link: Sensors types
My selection sensor
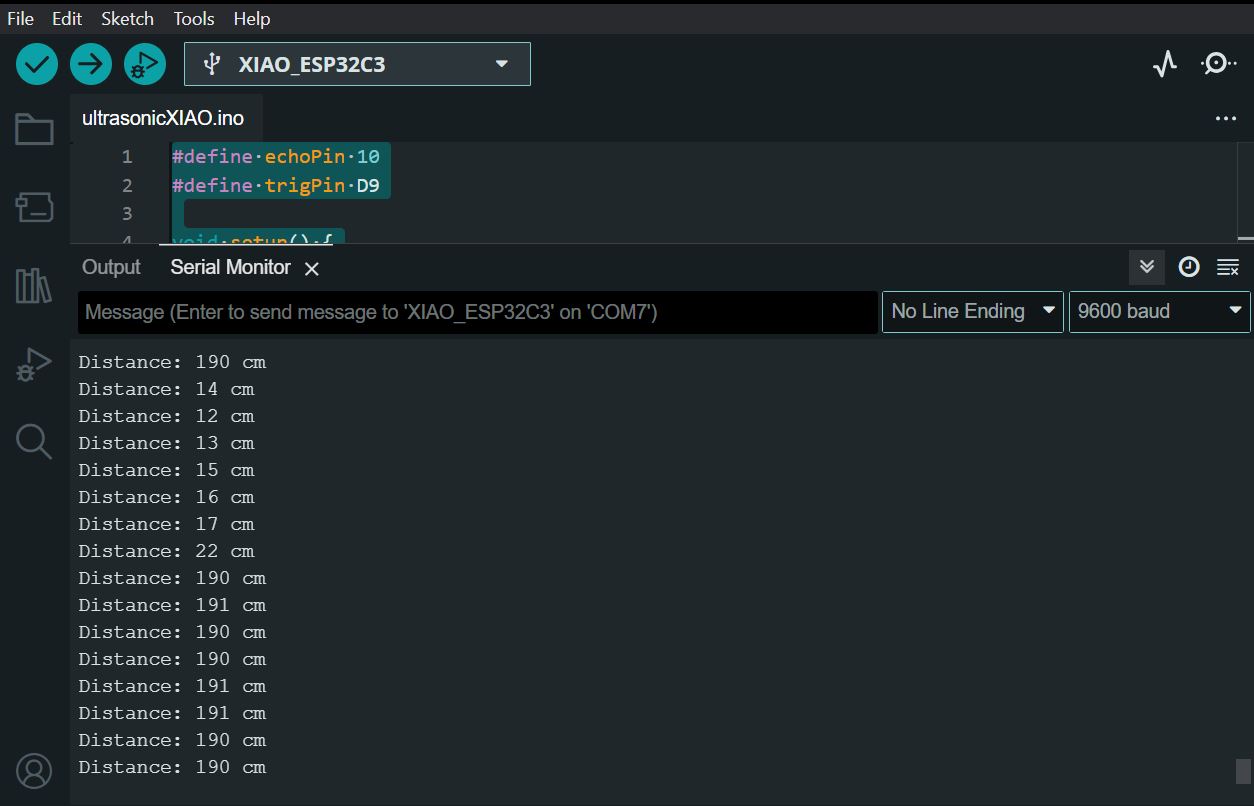
This week, I've been focusing on input devices, specifically experimenting with
ultrasonic sensors to gather data. I've successfully configured the Arduino IDE to
read data from the ultrasonic sensor and display it on the serial monitor.
This process involves utilizing the ultrasonic sensor's ability to measure distance
by sending and receiving ultrasonic waves. The Arduino IDE's serial monitor then displays
the distance readings in real-time, providing valuable insights into the sensor's performance
and capabilities. It's an exciting project that showcases the versatility of
Arduino and the potential applications of ultrasonic sensors in various projects.
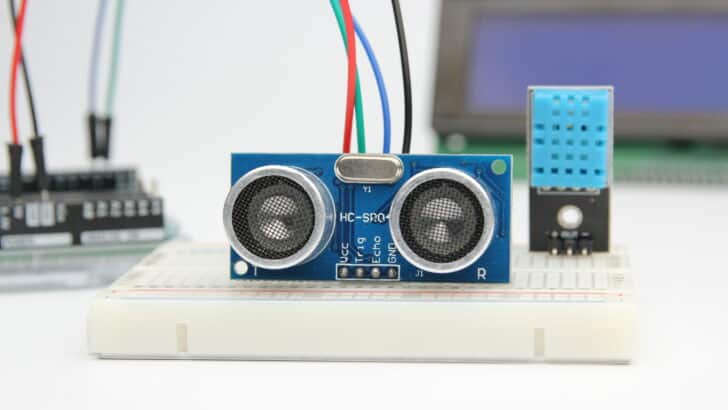
Ultrasonic Sensor
The Ultrasonic sensor is a type of sensor commonly used in various fields such as robotics,
automation, and distance measurement applications.
It operates on the principle of sending and receiving ultrasonic
waves to determine the distance between the sensor and an object.
Here are some key points about Ultrasonic sensors:
Working Principle: Ultrasonic sensors emit high-frequency sound waves (ultrasonic waves) and
measure the time it takes for these waves to bounce back after hitting an object.
This time measurement is used to calculate the distance to the object.
Applications: Ultrasonic sensors are versatile and find applications in robotics for
obstacle detection and avoidance, liquid level measurement in tanks,
proximity sensing in automation systems, and parking assist systems in vehicles.
Types: There are two main types of Ultrasonic sensors: 2-wire sensors,
which provide a simple distance output, and 3-wire sensors, which offer
more advanced functionalities such as adjustable sensing range and sensitivity.
Advantages: Ultrasonic sensors are non-contact sensors, meaning they do not need
physical contact with objects to measure distance. They are also unaffected by
color, transparency, or surface texture of objects, making them suitable for
various environments.
Limitations: Ultrasonic sensors may face challenges in accurately detecting objects
with irregular shapes or surfaces, and they can be affected by environmental
factors such as temperature and humidity.
Ultrasonic sensors play a crucial role in modern technology by
providing accurate and reliable distance measurement capabilities
across a wide range of applications.
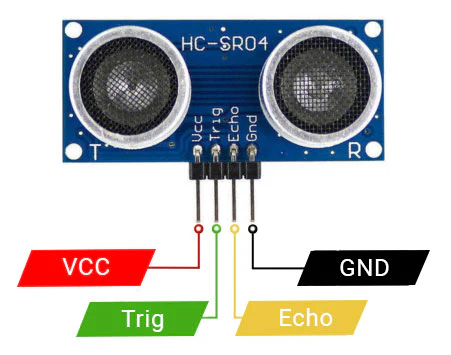
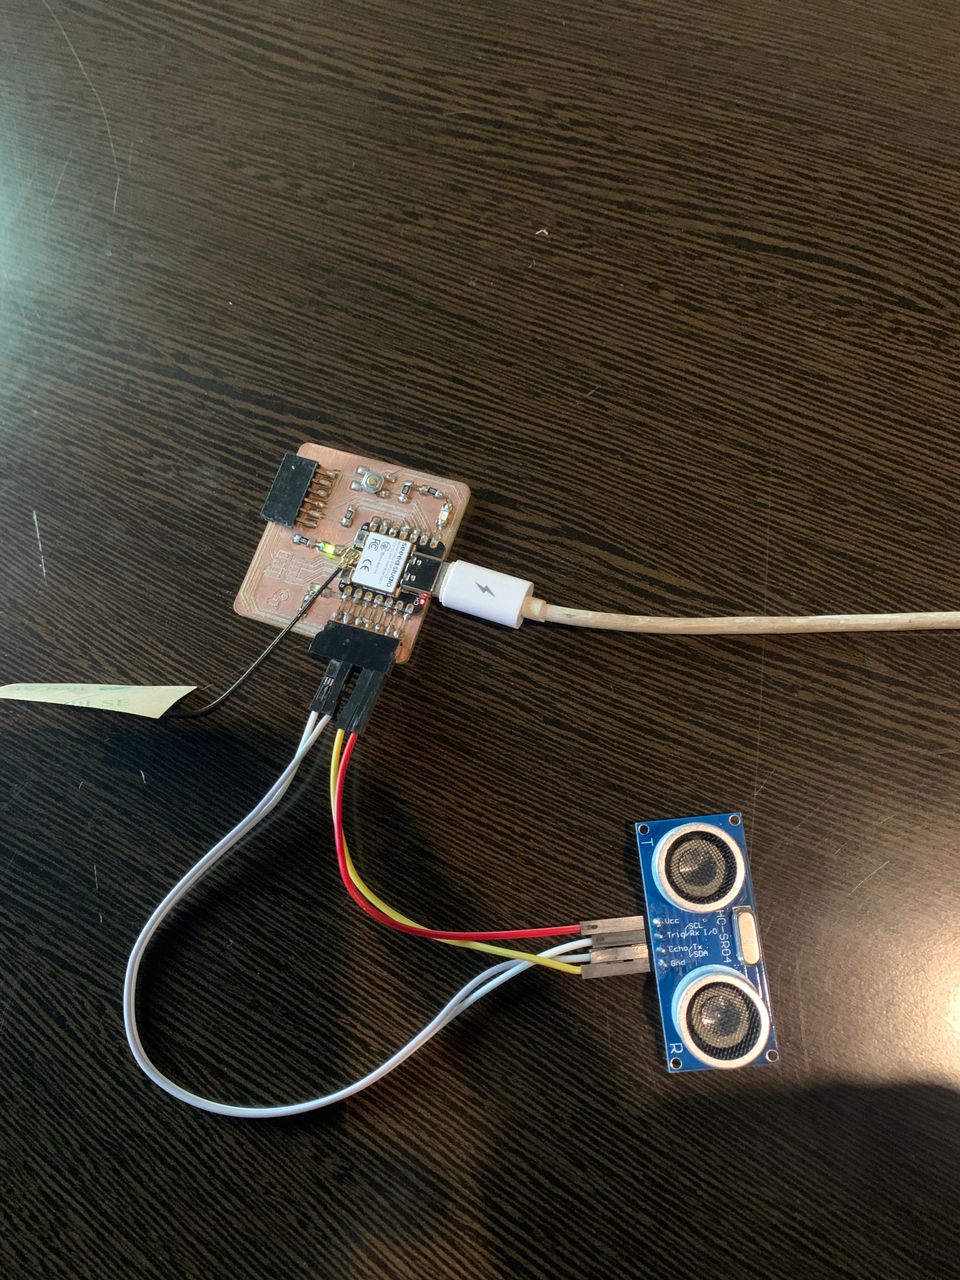
The sensor has 4 pins. 5volts is supplied to the VCC pin and GND is connected to the GND of Arduino.
There are two other pins called TRIG and ECHO pins. The
Trig pin transmits an ultrasonic wave and the ECHO pin receives the reflected signal from the object.
Ultrasonic Sensor Datasheet:
Model:HC-SR04
Working Voltage:5v
Working Current:15mA
Working Frequency:40Hz
Max Range:4m
Min Range:2cm
Measuring Angle:15 degree
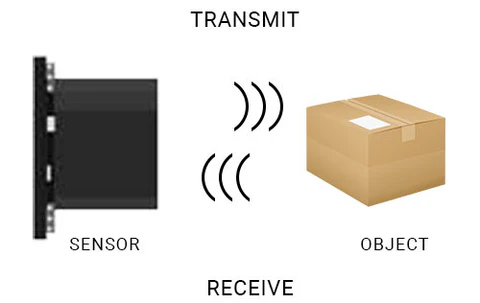
Ultrasonic sensor working
Ultrasonic sensors work on the principle that it emits waves at a higher frequency that cannot be heard
by humans. Then sensor waits for the wave to be reflected and calculates the distance of how far is the object
when in front of the sensor. The practical Distance that can be
measured is 2cm to 80cm but theoretically, it is mentioned that the distance can be up to 400 cm.
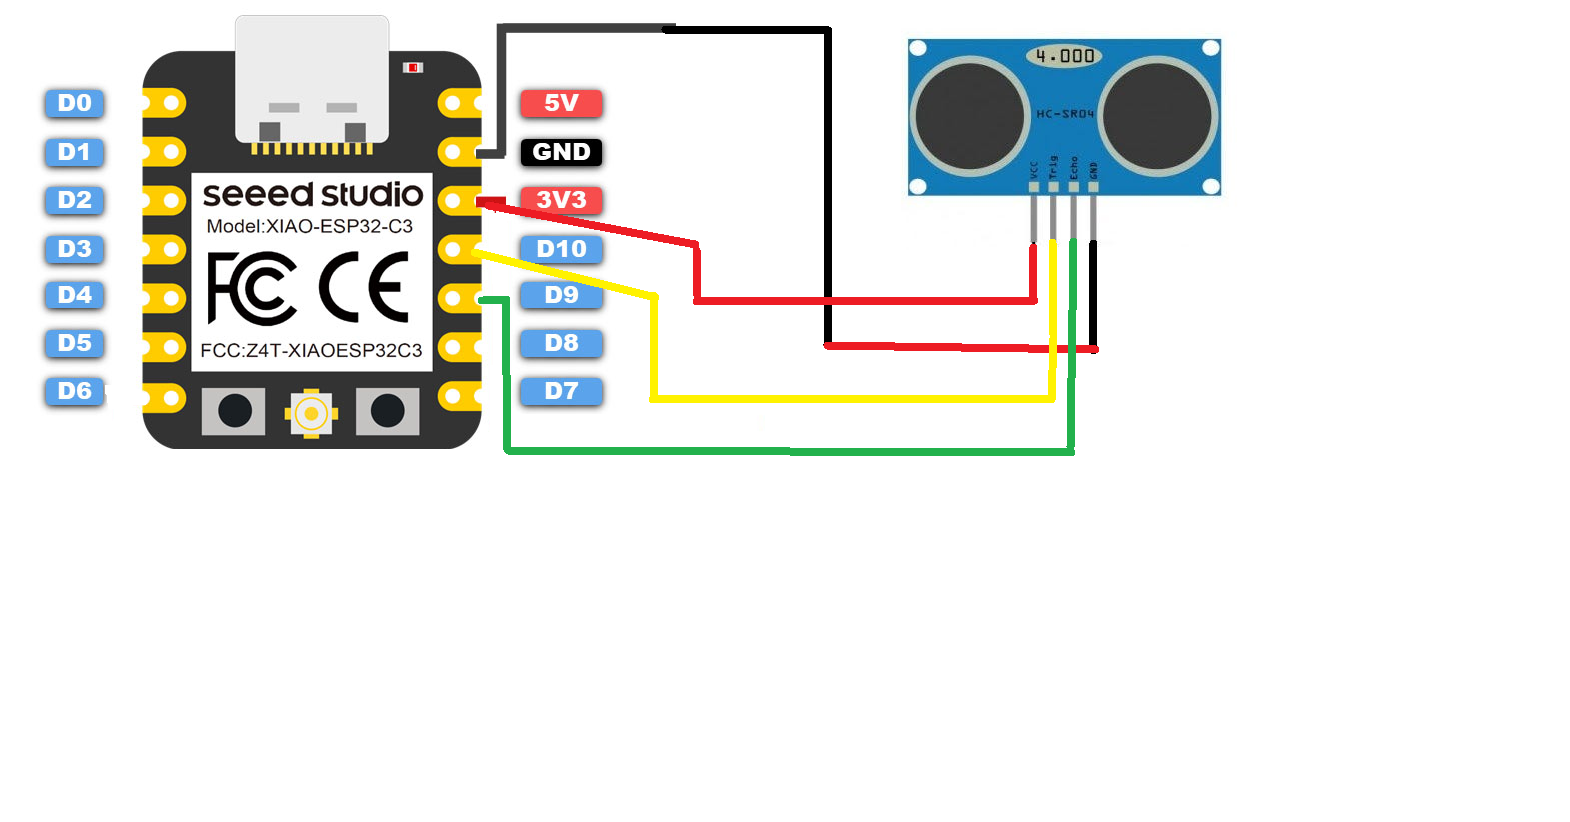
Connection
Here is a detailed guide on how to connect ultrasonic sensor to the XIAO ESP32-C3 board.
For this setup, the echo pin of the ultrasonic sensor is connected to pin 10 (or GPIO10),
while the trigger pin is connected to pin D9 (or GPIO9) on the XIAO board.
1. Ultrasonic Sensor Basics: The ultrasonic sensor operates by emitting sound waves
and measuring the time it takes for these waves to bounce back after hitting an object.
This data is used to calculate distances, making it ideal for proximity sensing and object detection applications.
2. XIAO ESP32-C3 Board:The XIAO ESP32-C3 is a compact and powerful microcontroller board,
perfect for IoT projects, sensor interfacing, and more.
3. Connection Steps:
Connect the echo pin of the ultrasonic sensor to pin 10 (GPIO10) on the XIAO board.
Connect the trigger pin of the ultrasonic sensor to pin D9 (GPIO9) on the XIAO board.
Ensure proper wiring and check for any loose connections.
Code
Here is a sample Arduino code to get started with reading distance data from the ultrasonic sensor:
#define echoPin 10
#define trigPin D9

void setup() {
  Serial.begin(9600);
  pinMode(trigPin, OUTPUT);
  pinMode(echoPin, INPUT);
}

void loop() {
  digitalWrite(trigPin, LOW);
  delayMicroseconds(2);
  digitalWrite(trigPin, HIGH);
  delayMicroseconds(10);
  digitalWrite(trigPin, LOW);

  long duration = pulseIn(echoPin, HIGH);
  int distance = duration * 0.034 / 2;  // Convert time to distance in cm (speed of sound is 0.034 cm/microsecond)

  Serial.print("Distance: ");
  Serial.print(distance);
  Serial.println(" cm");
  delay(1000);
}