Molding and casting
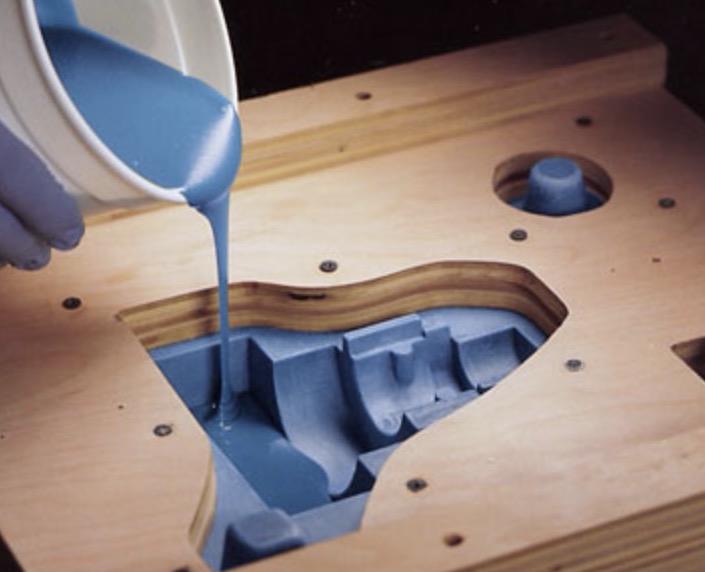
Molding and casting are manufacturing techniques employed to reproduce objects with precision and efficiency. The process typically involves creating a mold around a positive model of the desired object. This mold is crafted using materials like silicone rubber, urethane rubber, or plaster, depending on factors such as complexity and the material to be cast. Once the mold is ready, the positive model is removed, leaving behind a cavity that mirrors the shape of the original object.
In the casting phase, the mold is filled with the chosen casting material, which can range from resins and plasters to metals. After the material has set or solidified within the mold, it is carefully removed to reveal the cast object. This method enables the production of multiple replicas that closely resemble the original, making molding and casting invaluable in industries such as manufacturing, prototyping, and arts and crafts, where precise replication is essential.
What are molds and what are they used for?
Molds are negative forms that are used to shape casting materials, creating duplicates of the model (object) the mold was made from. The resulting cast will be an exact likeness of the shape of the hollow mold form. The easiest example of what a mold is, that almost everyone has used before, is an ice cube tray. The hollow forms of the mold get filled with water (the casting material) to produce ice cubes. The cubes are released from the mold and voila! Finished cast pieces.
Many industries use mold making as a way of producing their wares. Commercial ceramic factories use plaster molds and slip (liquid clay) to produce bowls, cups, candlesticks, figurines, and more. Plastic factories use metal molds and different processes like injection molding, rotational molding, and blow molding to produce plastic parts. The glass industry blows molten silica into metal or graphite molds to produce drinking glasses, bowls, vases, etc. Most parts of any car's body and engine are made in molds.
There are 3 basic types of molds:
1.One part
2.Two part
3.Multi-part (advanced)
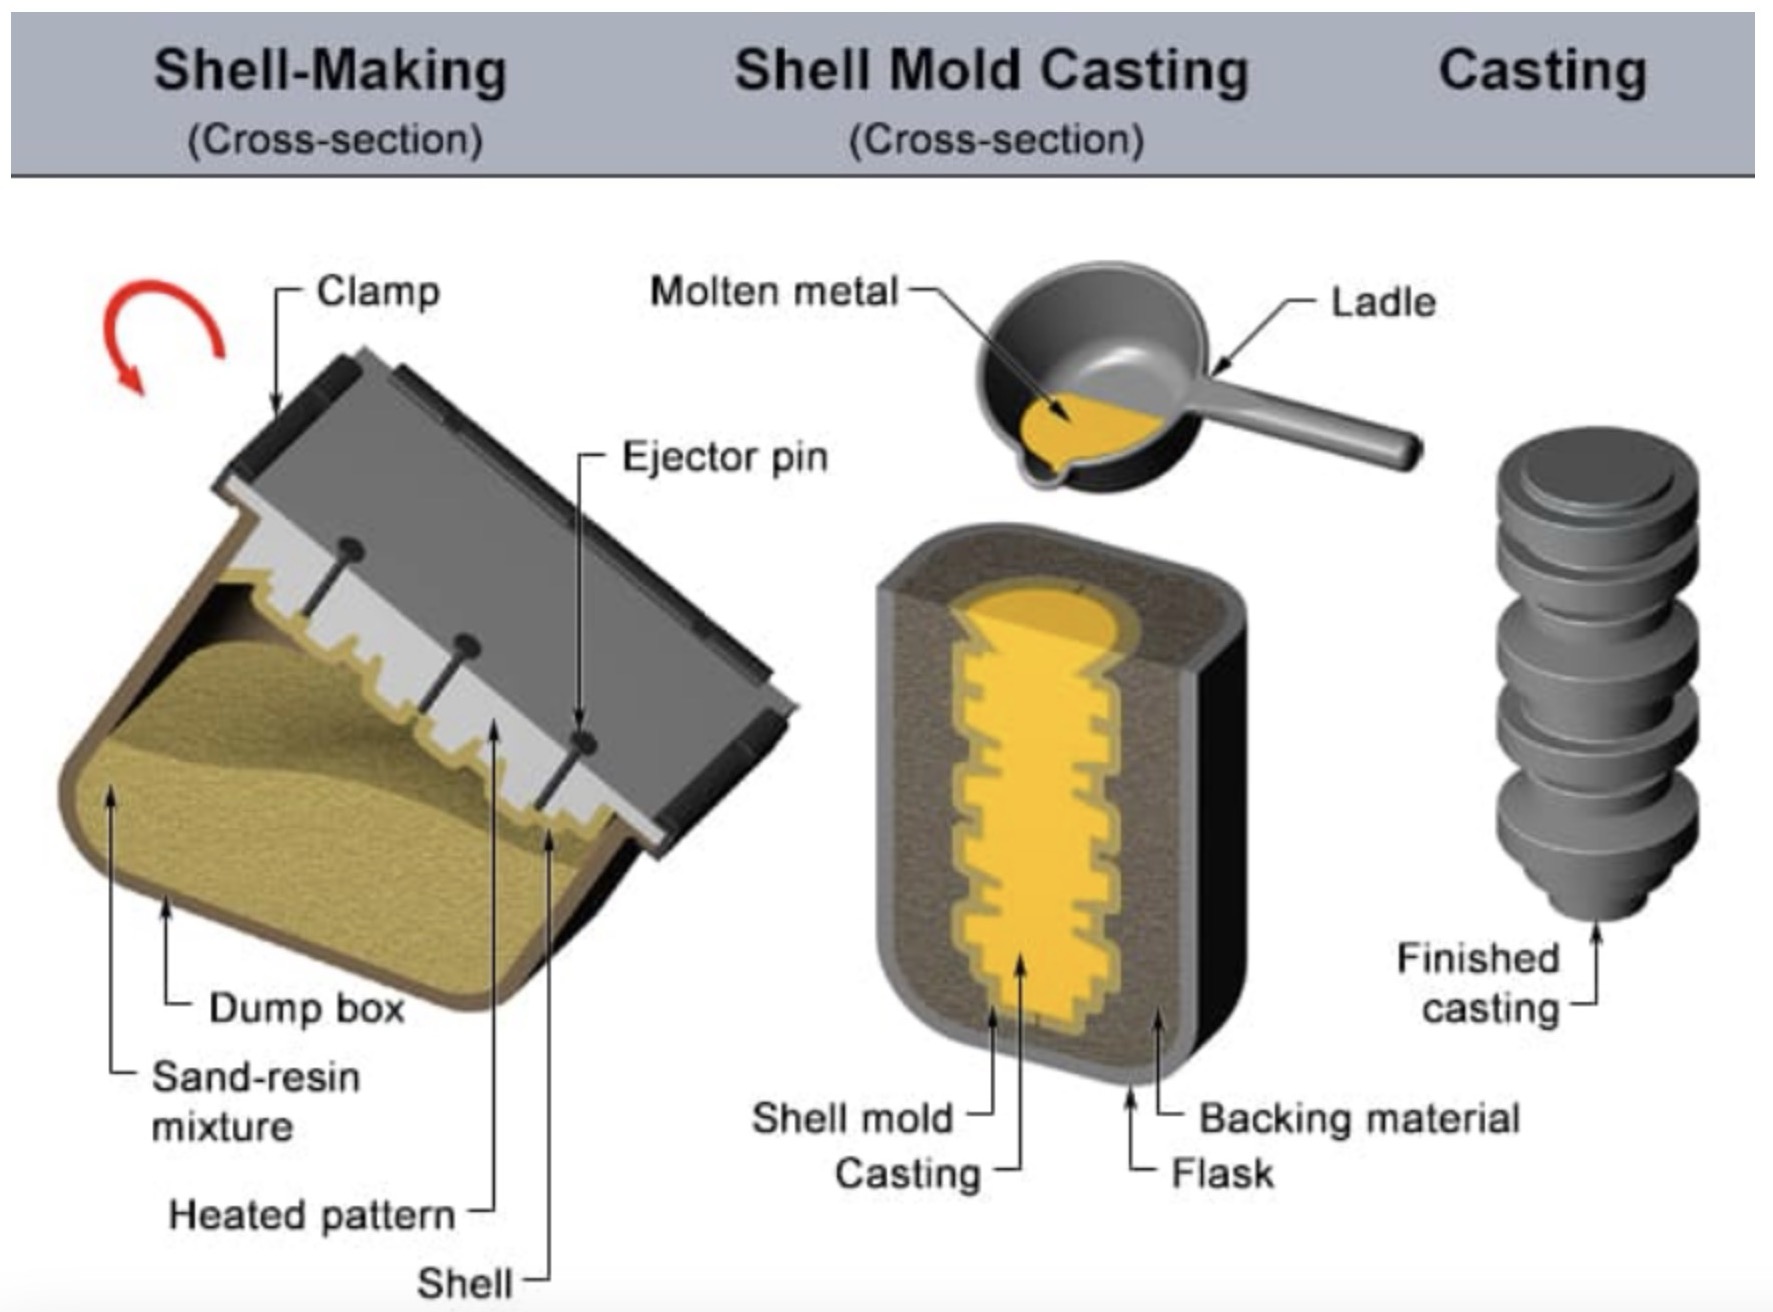
Casting
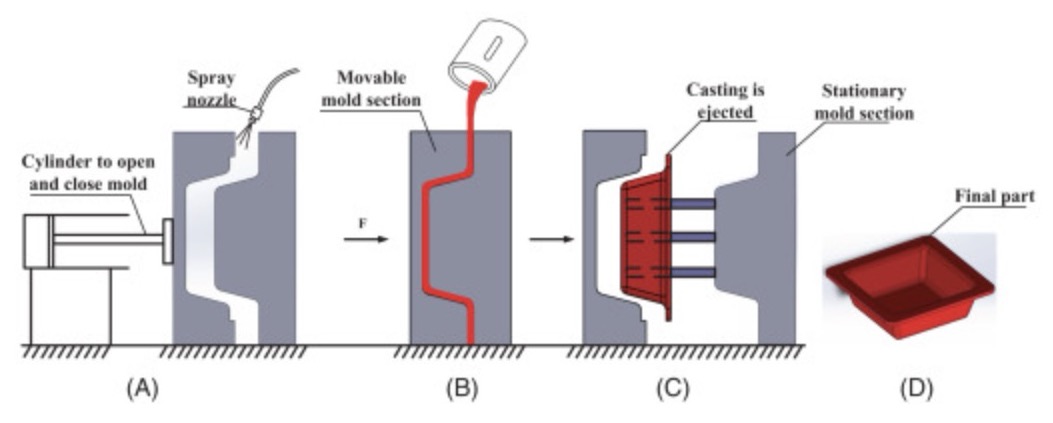
Casting is a manufacturing process in which a molten material is introduced into a solid mold and allowed to solidify. The solid material takes the shape of the mold. The term usually refers to metals but can also apply to the same process for other materials.
Assignment
Group work
In group work we were supposed to review the safety data sheets for each of your molding and casting materials, then make and compare test casts with each of them compare printing vs machining molds
Product Overview:
SILASTIC™ RTV-3483 Mold-Making Base and SILASTIC™ RTV-3083 Mold-Making Curing Agent are designed for the detailed reproduction of figures, art objects, and similar items. These products feature outstanding release properties, high flowability, long working time, low hardness, high tear resistance, and high elasticity, making them suitable for various molding applications including plaster, polyurethane, and polyester resins.
Safety Precautions and Handling:
Proper substrate preparation is crucial for effective use, with the surface of the original needing to be clean and free of loose material, and a suitable release agent should be used on porous substrates. The base and curing agent should be mixed in a 100:5 ratio, thoroughly stirring to avoid prolonged mixing or exceeding 35°C (95°F). De-airing the mixture is recommended to remove entrapped air, and the mixture should be poured onto the original immediately after mixing. The material cures to a flexible rubber within 24 hours at room temperature, achieving full mechanical properties within 7 days.
Environmental and Health Safety:
Safety data sheets (SDS) must be consulted before handling to understand the physical and health hazards. The product should be stored at or below 32°C (89.6°F) in original, unopened containers. Disposal must comply with local, state, and federal regulations, as empty containers may contain hazardous residues, necessitating careful handling and disposal.
Specific Warnings:
The product is not intended for food molding, dental, or human skin applications. Molds may degrade when exposed to temperatures above 150°C (302°F) over time or in high ambient temperatures. While fully cured material exhibits excellent chemical resistance, aggressive casting materials may eventually degrade the molds, necessitating periodic checks during long production runs.
Regulatory and Stewardship Information:
Dow provides extensive product stewardship and regulatory compliance support, encouraging customers to review their manufacturing processes and applications from the standpoint of human health and environmental quality. Dow products should be used in compliance with intended uses and regulations, with current safety data sheets available from Dow's website or customer service. Always ensure to follow local regulations and guidelines for handling and disposal of chemical materials.
Datasheet of silicone.
EcoPoxy FlowCast Resin Safety datasheet
Composition:
Part A (Resin): Bisphenol-A epoxy resin
Part B (Hardener): Cycloaliphatic amine
Hazards:
Causes skin irritation
May cause an allergic skin reaction
Causes serious eye irritation
Harmful if inhaled
First Aid Measures:
Inhalation: Move to fresh air, seek medical attention if symptoms persist.
Skin Contact: Wash with plenty of soap and water. Remove contaminated clothing.
Eye Contact: Rinse cautiously with water for several minutes. Remove contact lenses if present and easy to do.
Ingestion: Rinse mouth, do not induce vomiting, seek medical attention.
Handling and Storage:
Handle with proper ventilation.
Store in a cool, dry place, away from direct sunlight and incompatible materials.
Personal Protection:
Wear protective gloves, clothing, and eye/face protection.
For more detailed information, you can access the full Safety datasheet Here.
Safey Data sheet of cement
Identification:
Product Identifier: Cement (commonly Portland Cement)
Uses: Construction material, concrete production, mortar, etc.
Hazard Identification:
Health Hazards: Skin irritation, serious eye damage, respiratory irritation, potential allergic reactions.
Precautions: Use protective gear (gloves, goggles, masks), ensure good ventilation, avoid contact with skin and eyes.
Composition:
Ingredients: Mainly calcium silicates, calcium aluminates, and other compounds.
First Aid Measures:
Inhalation: Move to fresh air, seek medical attention if symptoms persist.
Skin Contact: Wash with plenty of water, remove contaminated clothing.
Eye Contact: Rinse cautiously with water for several minutes, seek medical attention.
Fire Fighting Measures:
Suitable Extinguishing Media: Water spray, foam, dry powder.
Specific Hazards: Not flammable, but decomposes to produce toxic fumes.
Accidental Release Measures:
Personal Precautions: Wear protective equipment, avoid dust formation.
Environmental Precautions: Prevent entry into waterways, sewers, and soil.
Handling and Storage:
Handling: Minimize dust generation, use protective equipment.
Storage: Store in a cool, dry place, away from incompatible materials.
Exposure Controls/Personal Protection:
Exposure Limits: Follow occupational exposure limits.
Personal Protection: Use respiratory protection, gloves, eye protection, and protective clothing.
Physical and Chemical Properties:
Appearance: Grey powder
pH: 12-13
Solubility: Slightly soluble in water
Stability and Reactivity:
Stability: Stable under normal conditions.
Reactivity: Reacts with acids, ammonium salts.
Toxicological Information:
Acute Toxicity: Can cause skin and eye irritation.
Chronic Effects: Prolonged exposure may cause respiratory issues and skin conditions.
For more detailed information, you can access the full Safety datasheet Here.
Make and compare test casts with each of them
We did casts with resin, cement, wax and soldering iron
Wax
Ease: Easy to use and quick setting.
Quality: Produces good results with fine details.
Drawbacks: None significant, ideal for quick and detailed casts.
Resin
Ease: Requires precise mixing and careful stirring.
Drying Time: Takes a long time to cure.
Quality: High-quality results, but prone to air bubbles if not mixed properly.
Drawbacks: Time-consuming, sensitive to mixing ratios.
Cement
Ease: Moderately easy, needs good mixing.
Drying Time: Dries in 3-4 hours, but can take longer if not mixed well.
Quality: Can result in air bubbles if not stirred properly.
Drawbacks: Inconsistent drying, prone to air bubbles.
Soldering Iron
Ease: Not recommended, used for experimentation, we did for fun and not just to try out something new.
Quality: Poor finish, not practical for casting.
Drawbacks: Overheating can melt silicone molds, poor results.
Summary
Best for Quick and Detailed Casts: Wax.
High-Quality but Time-Consuming: Resin.
Moderately Easy but Inconsistent: Cement.
Not Practical: Soldering Iron.
Comparision images
All these were the casts which we 3 did and the above comparision is based on these casts.
Compare printing vs milling molds
Our SLA printer was not working and it still under maintenance and we couldn't do resing printing, so for the comparision data we went online and researched and compared both of them.
SLA Printing Molds:
Precision and Detail:
SLA (Stereolithography) 3D printing excels in producing high-detail, precise molds. It uses a UV laser to cure liquid resin into solid parts, allowing for intricate designs and fine features.
Surface Finish:
SLA molds have very smooth surface finishes, which can be beneficial for applications requiring high-quality surface textures.
Material Versatility:
SLA can work with a variety of resins, including high-temperature and castable resins, making it suitable for diverse applications from dental molds to intricate jewelry casting.
Production Efficiency:
SLA molds can be produced relatively quickly and with a high degree of accuracy, reducing the time required for post-processing and finishing (Formlabs) (Forge Labs).
Wax Milling Molds:
Traditional Approach:
Wax milling involves using CNC machines to carve molds out of wax. This method is a staple in lost-wax casting, especially for metal parts.
Material Limitations:
The primary material used is wax, which is easy to machine but may have limitations in terms of durability and temperature resistance compared to some SLA resins.
Surface Finish and Detail:
While wax milling can achieve good detail, it may not match the fine resolution of SLA printed molds. The surface finish can be smooth but might require additional polishing for very fine details.
Hands-On Process:
Wax milling is more hands-on and may require skilled labor to ensure precision and quality, which can increase the time and cost of production (3DSourced).
Conclusion:
Both SLA printing and wax milling have their unique advantages and applications. SLA printing offers higher precision, better surface finish, and material versatility, making it suitable for detailed and high-quality molds. Wax milling remains a reliable traditional method, particularly for lost-wax casting, providing ease of machining and suitability for a variety of metal casting applications. The choice between the two methods depends on the specific requirements of the project, including the desired detail, surface quality, and production efficiency.
Data Sources
For the comparision the data was taken and compared from following links:
https://formlabs.com/asia/blog/ultimate-guide-to-stereolithography-sla-3d-printing/
https://3dsourced.com/3d-printing-technologies/lost-wax-casting-3d-printing/
https://forgelabs.com/blog/mold-design-with-stereolithography/
My personal Learnings
From the group assignment, I learned the importance of thoroughly reviewing safety data sheets for each material used in molding and casting. Comparing the test casts, we found that wax was the easiest and fastest to work with, producing good results. Resin required precise mixing and proper stirring to avoid air bubbles, and it took a long time to cure. Cement needed perfect mixing to prevent prolonged drying times and air bubbles. Soldering iron was not practical for casting as it could damage molds and result in unfinished casts.
Individual Assignment
Design a mold around the process I'll be using,produce it with a smooth surface finish,
and use it to cast parts
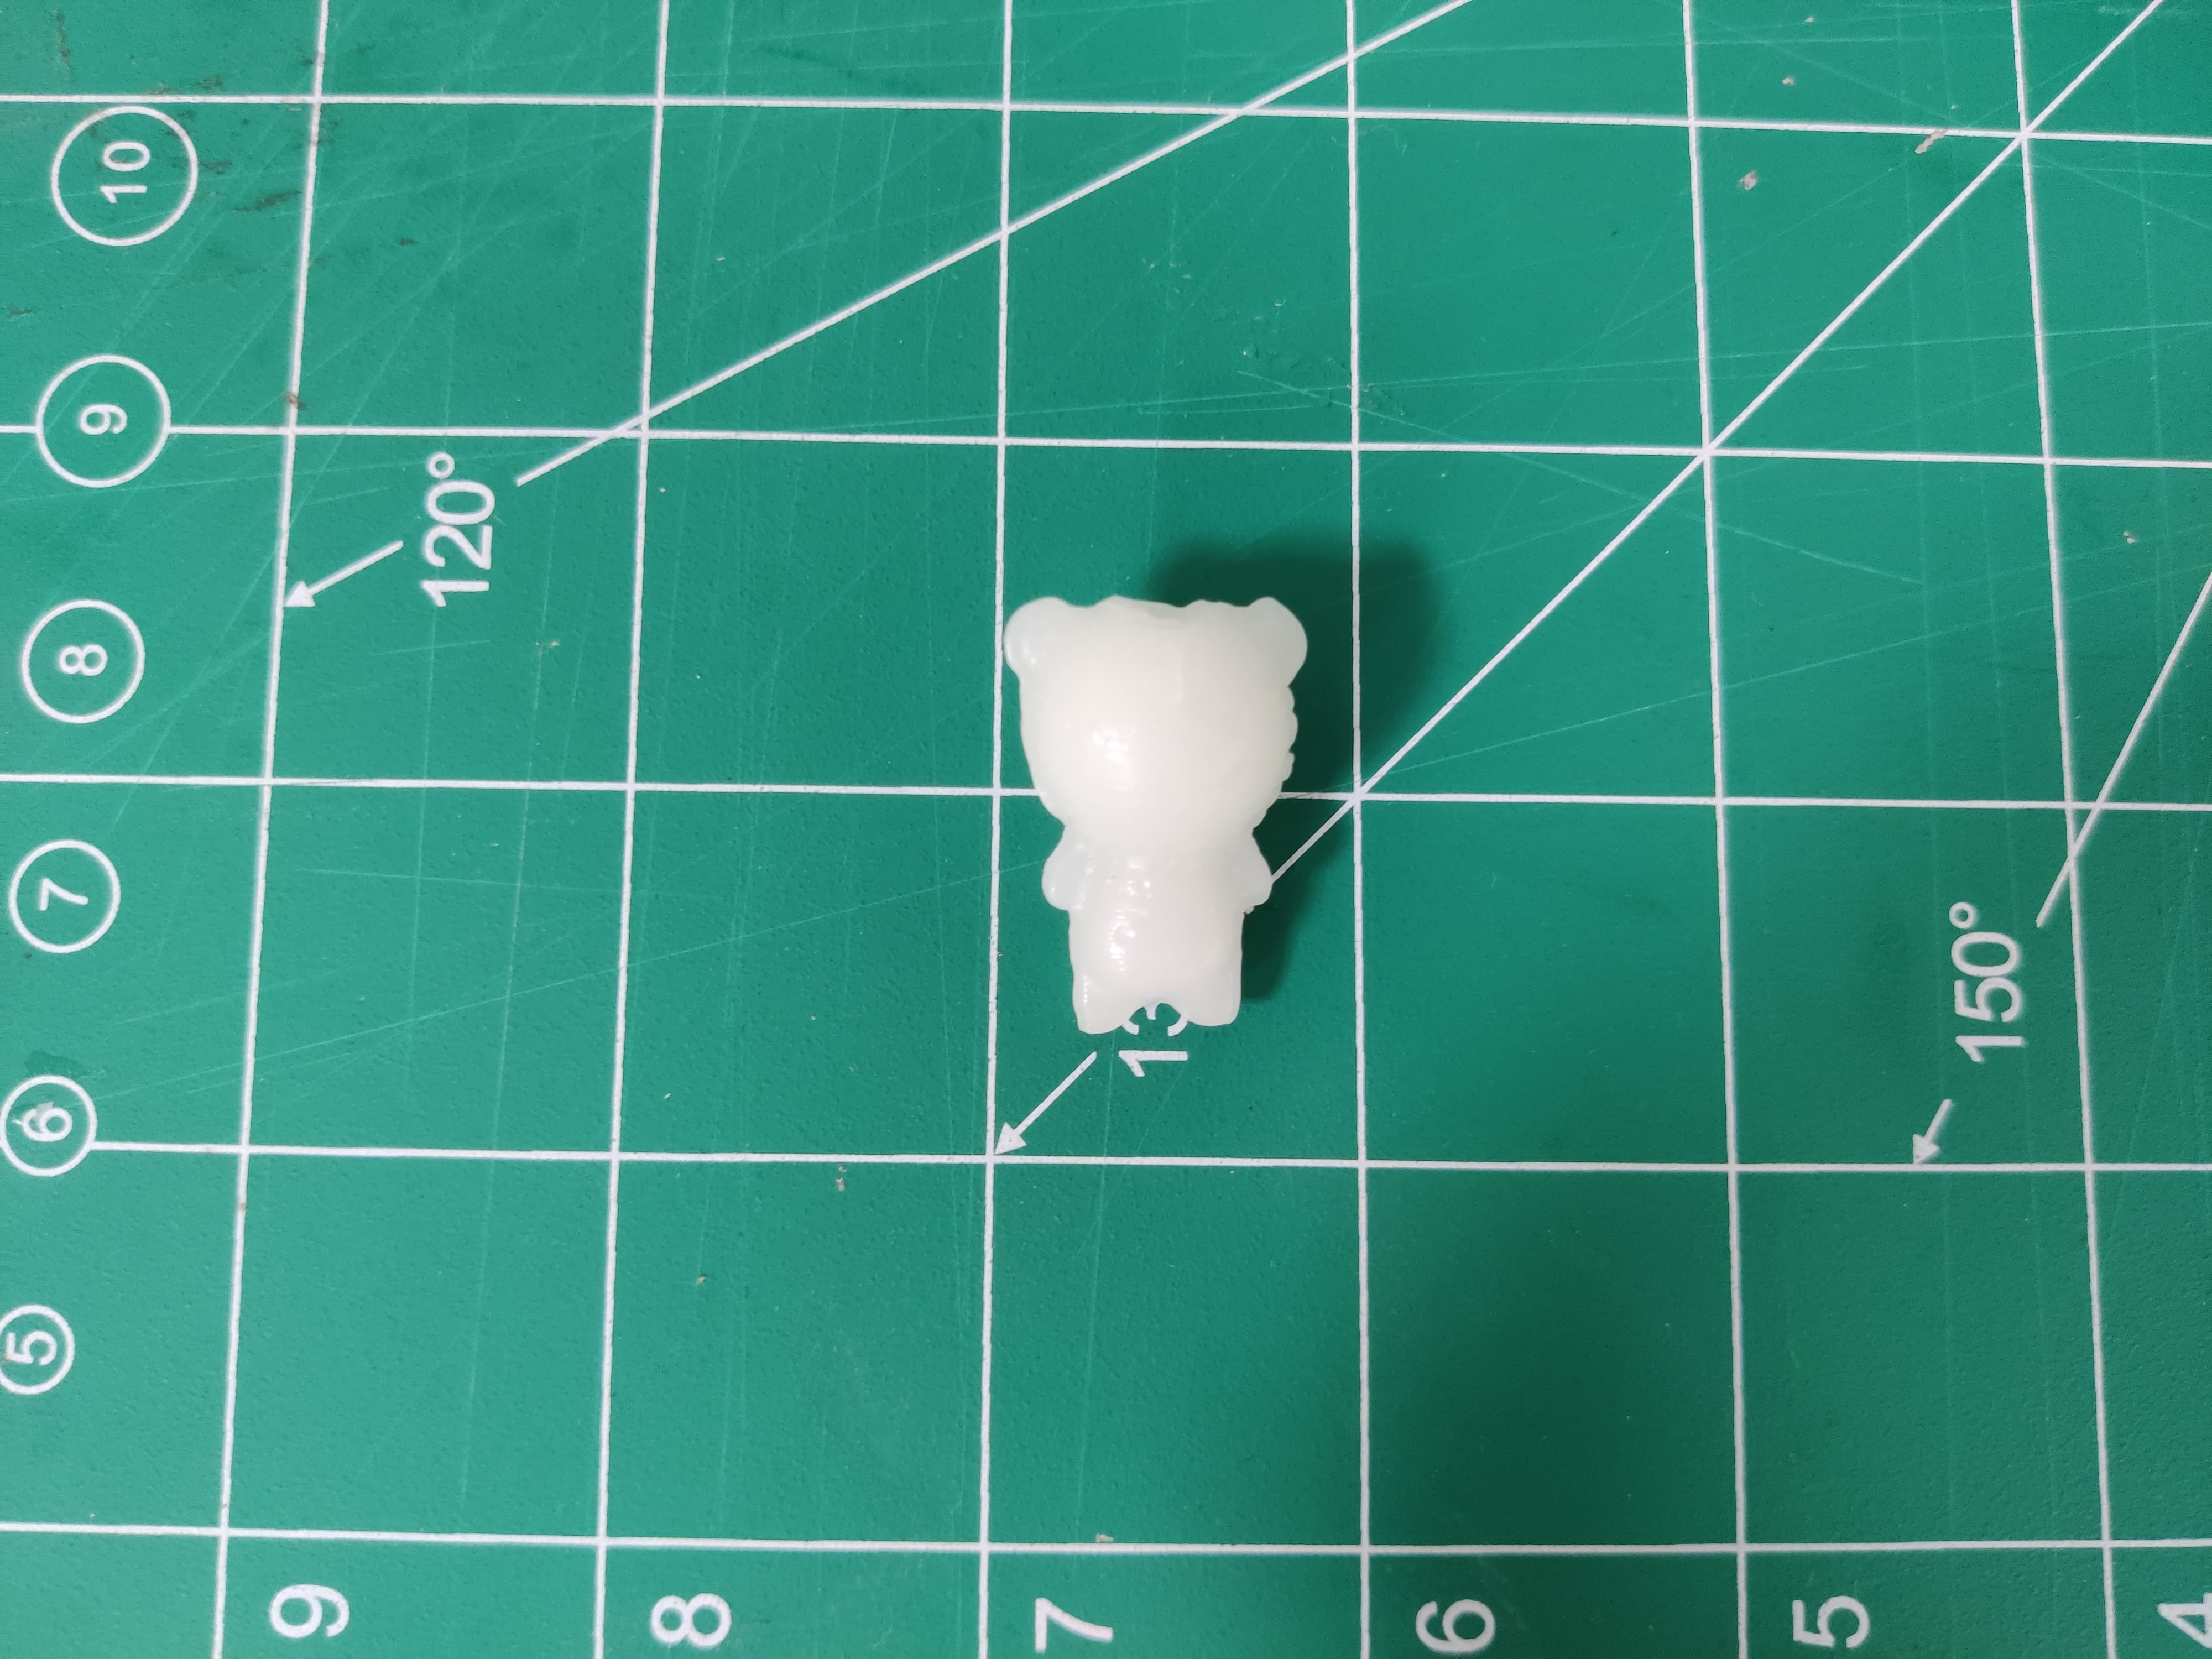
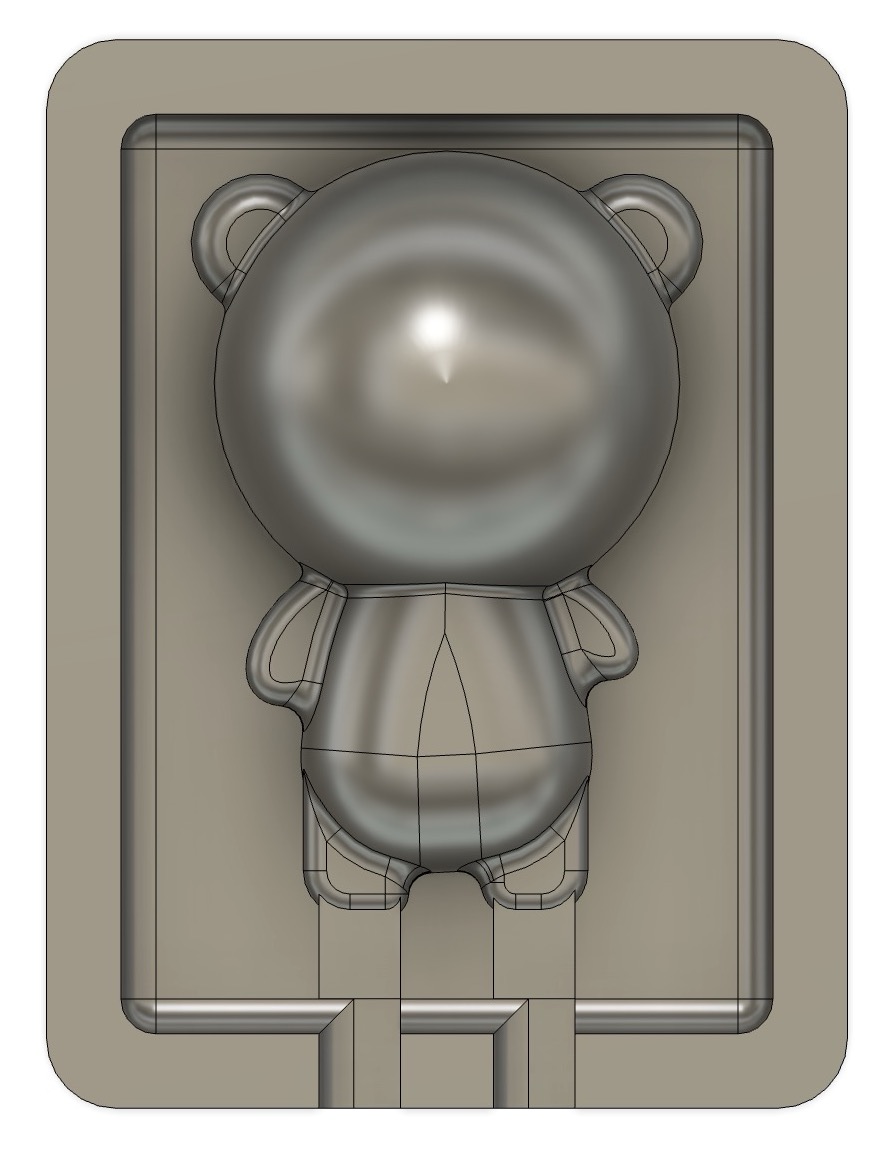
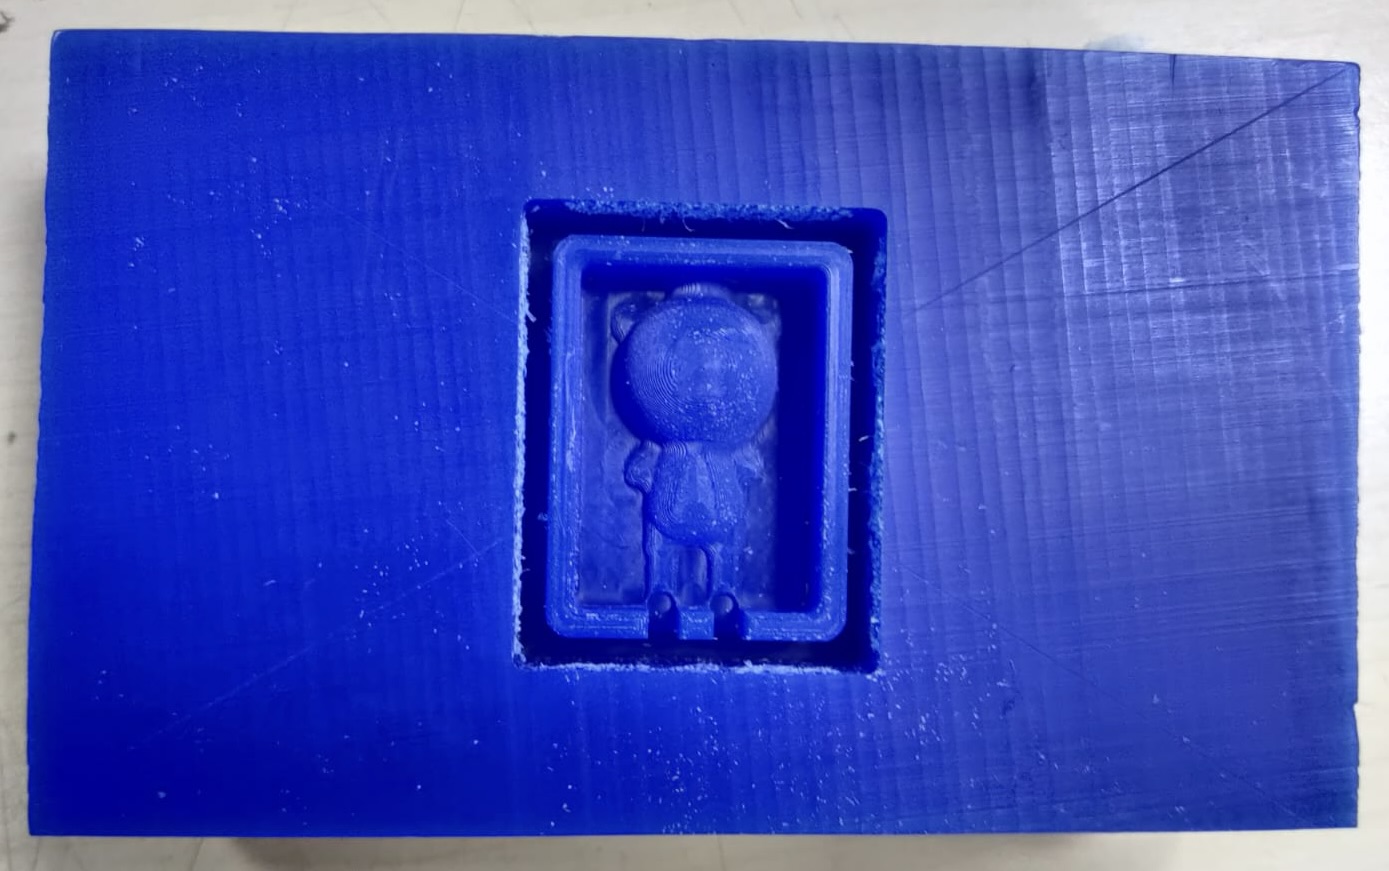
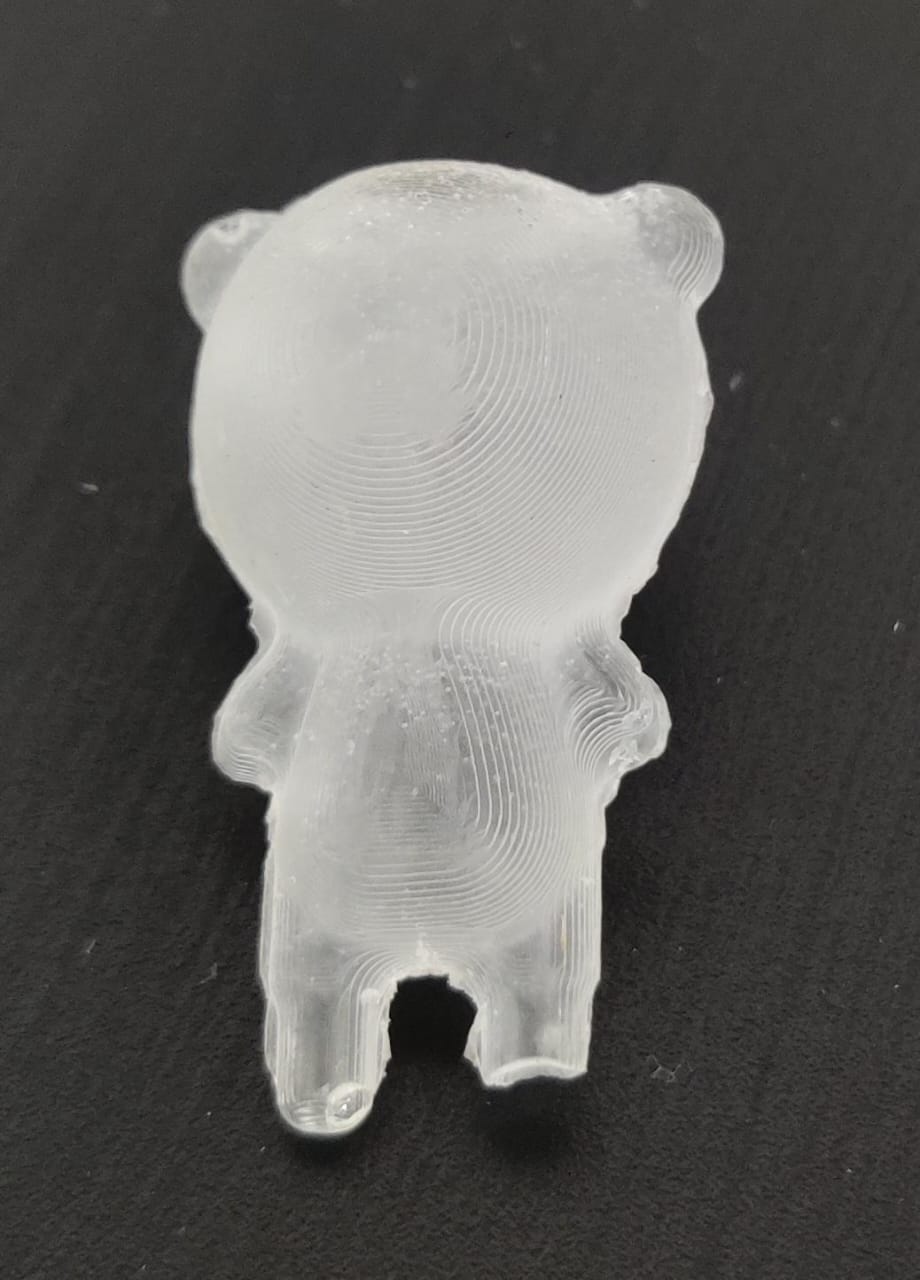
The object I chose was a teddy bear key chain with a hemisphere bulge on his head and many curves structure on the entire body.The reason I went for such an object was to check out the bubble formation, and explore how silicone, alginate gel would work around the cavity.
Materials and Processes Explored
For Mother-mould :
CNC Milling
3D printing SLA and PLA
For mould Making :
Silicone
Alginate
For Casting :
Resin
White Cement
Ration I have used
Alginate : Water - 1:2
Plaster of Paris : Water - 2:1
White Cement : Water - 3:1
Silicone : Hardener - 5% 1000 gm Silicone - 50 ml Hardener 20 gm Silicone - 1 ml Hardener 100 gm Silicone - 5 ml Hardener
Clear Commercial Resin : Hardener - 15% 1000 gm Resin - 15 ml Hardener You can use 10 ml for a slower set or if it is a hot day.
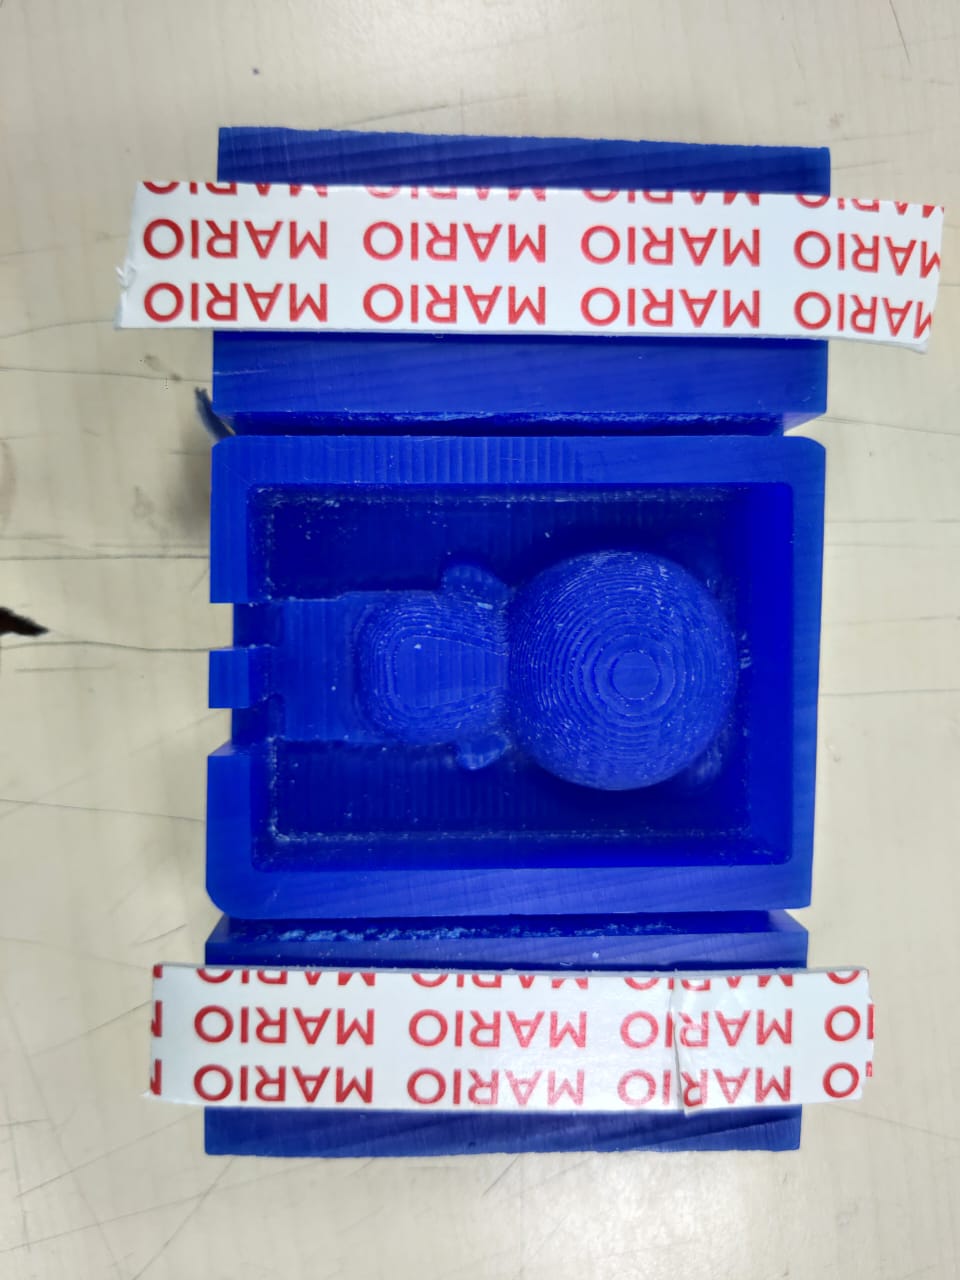
Teddy Bear - CNC milling of Wax Block
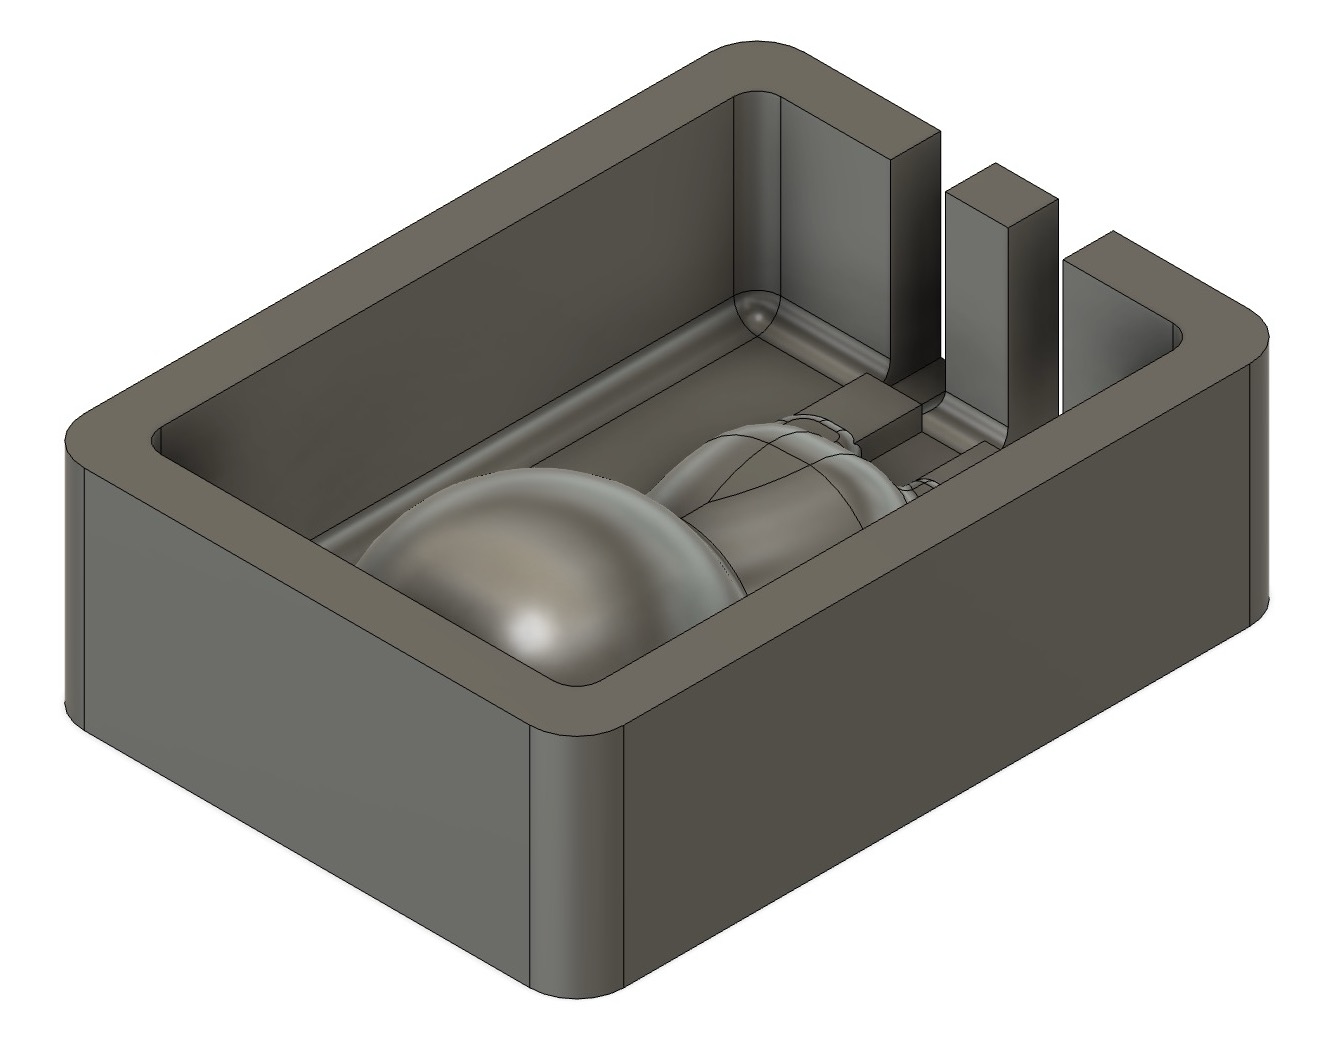
Step 1: Design a CAD file
For doing wax block milling 1st step is to design a positive mold in any cad software, as I was making a teddy bear and it is a 3d structure, I'll require 2 part mold
Always remember to have a slot or pipe in your design file for pouring any medium so that it will flow properly, also increase the height of the wall, atleast 1cm above your design, because when you cast anything after drying the casting material shrinks so if it is above the design it will take the whole design perfectly.
Step 2 : Export your design in STL format.
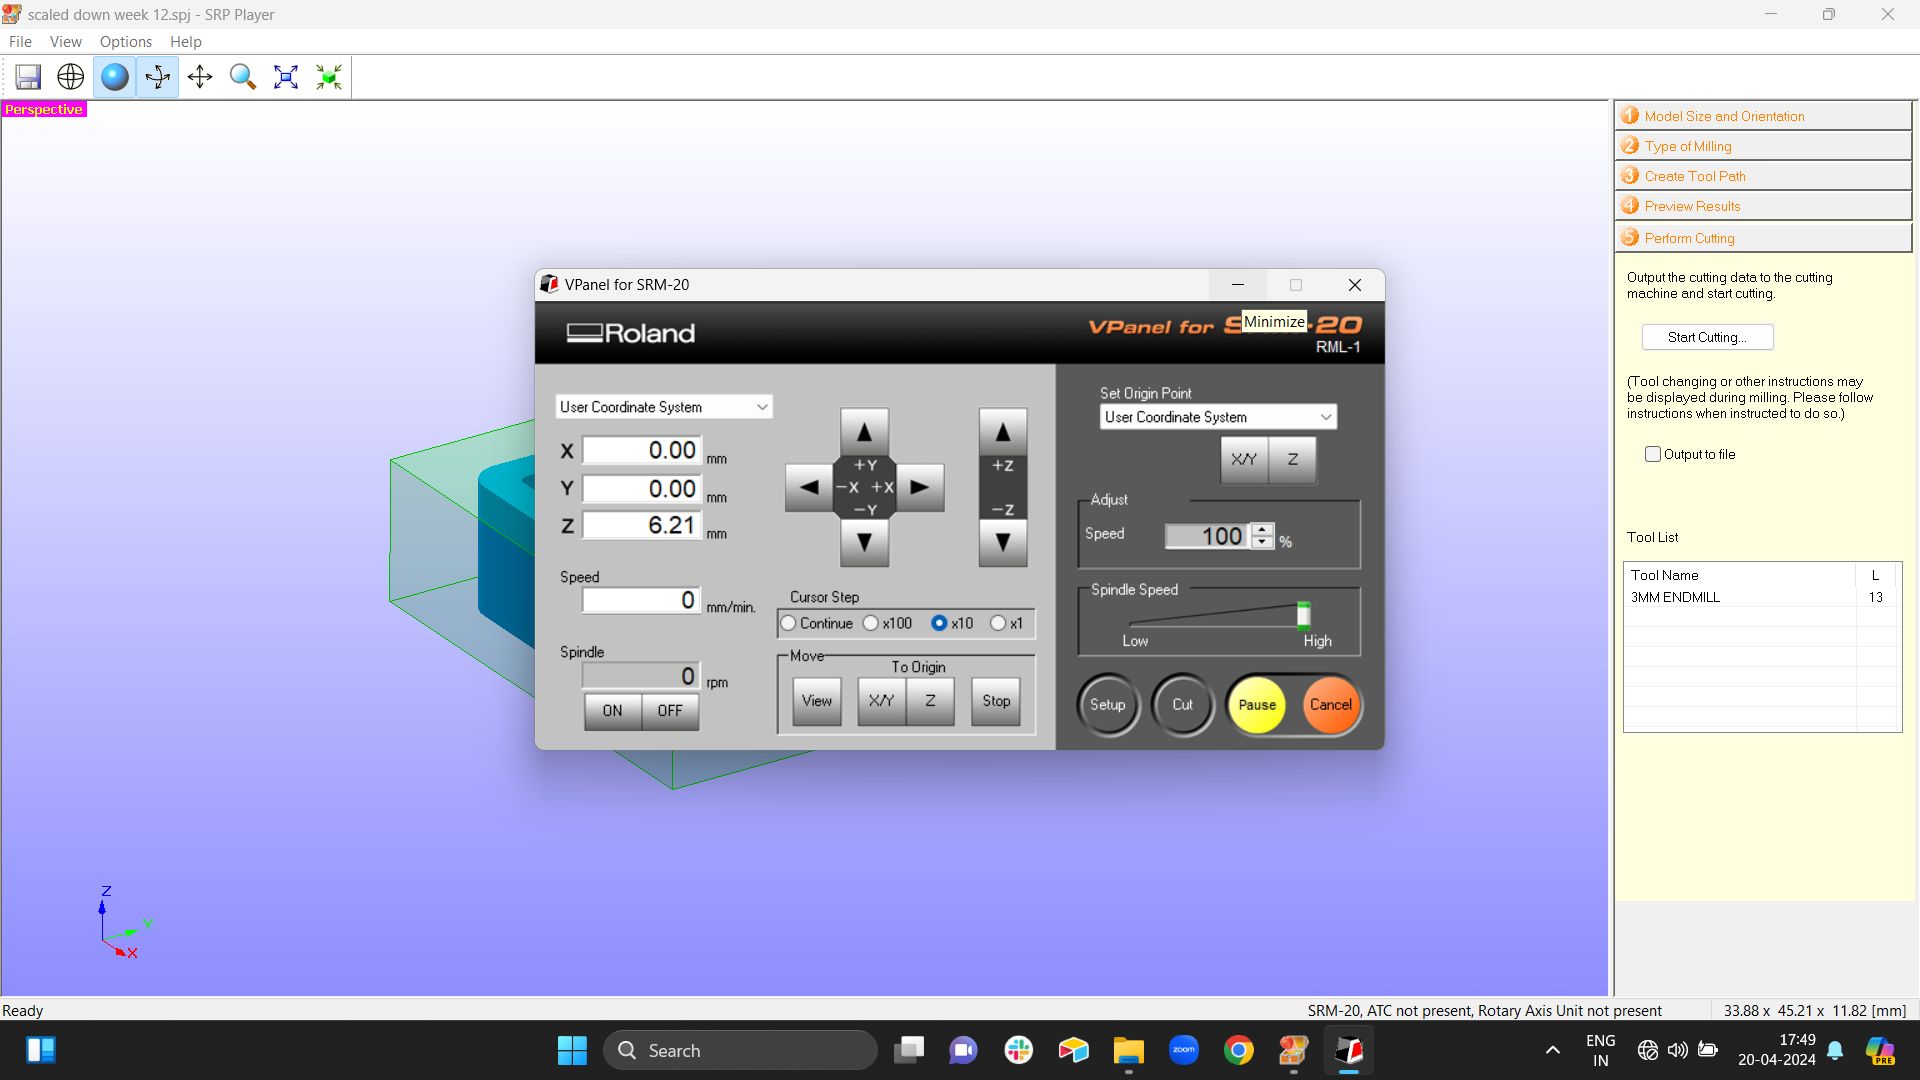
So the software for milling is SRM player and that software requires stl file.
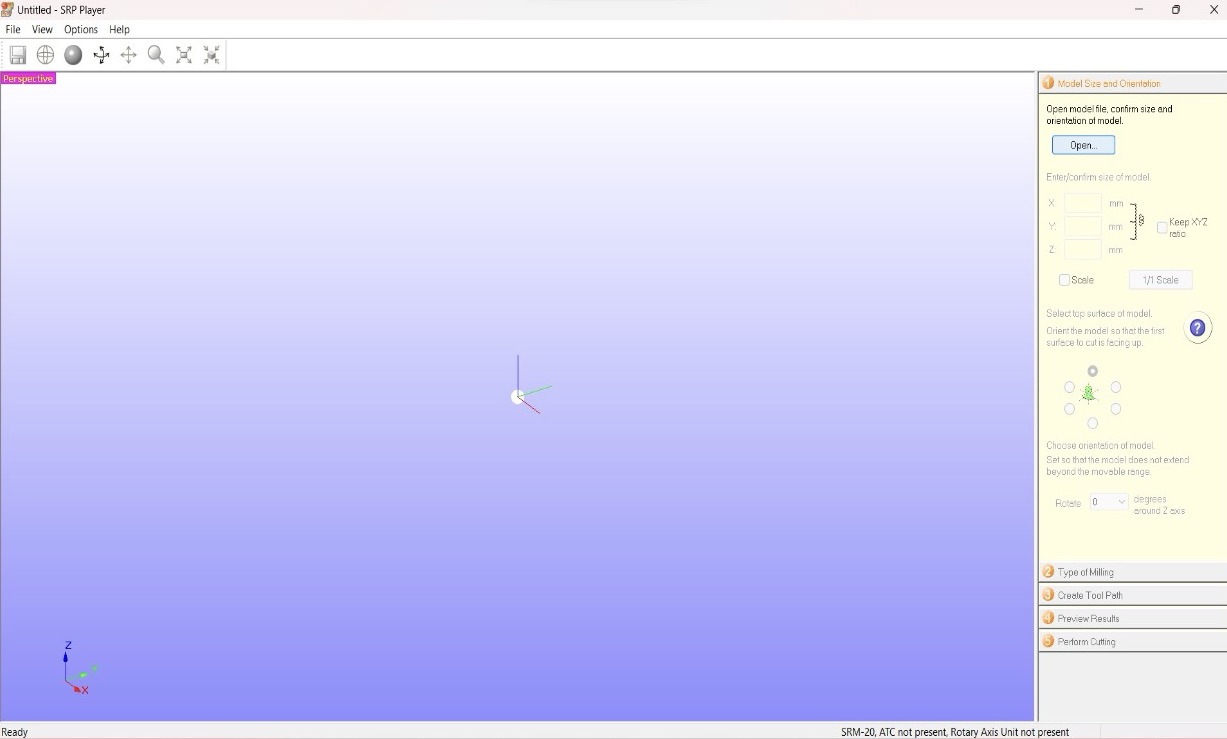
Step 3: setting up the file on srm player software
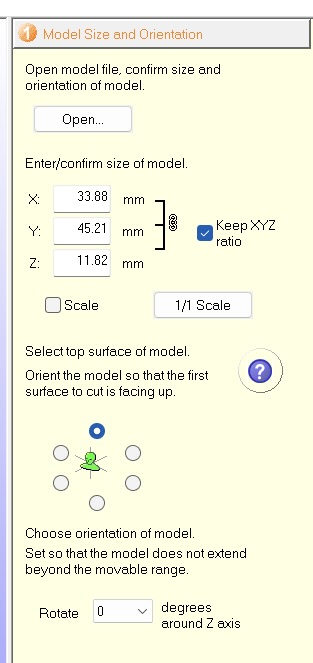
At the start insert your file by clicking on open and select your file, once the stl file is selected you can adjust the x, y and z origing my moving the object, you can see the dimensions on the right hand side and can scale and rotate the model accordingly.

Follow the next instruction as it is self explanatory, that says orient the model so that the first cutting surface is facing up, after orienting the next step it says choose orientation of the model so that the model does not extend beyond the movable range.
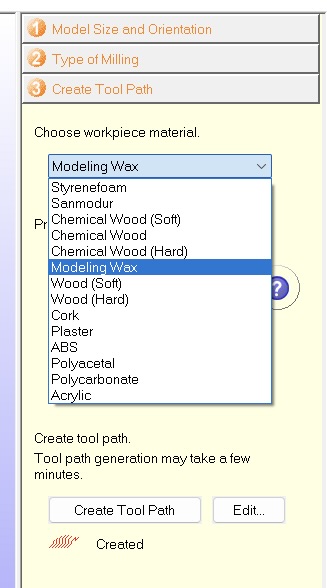
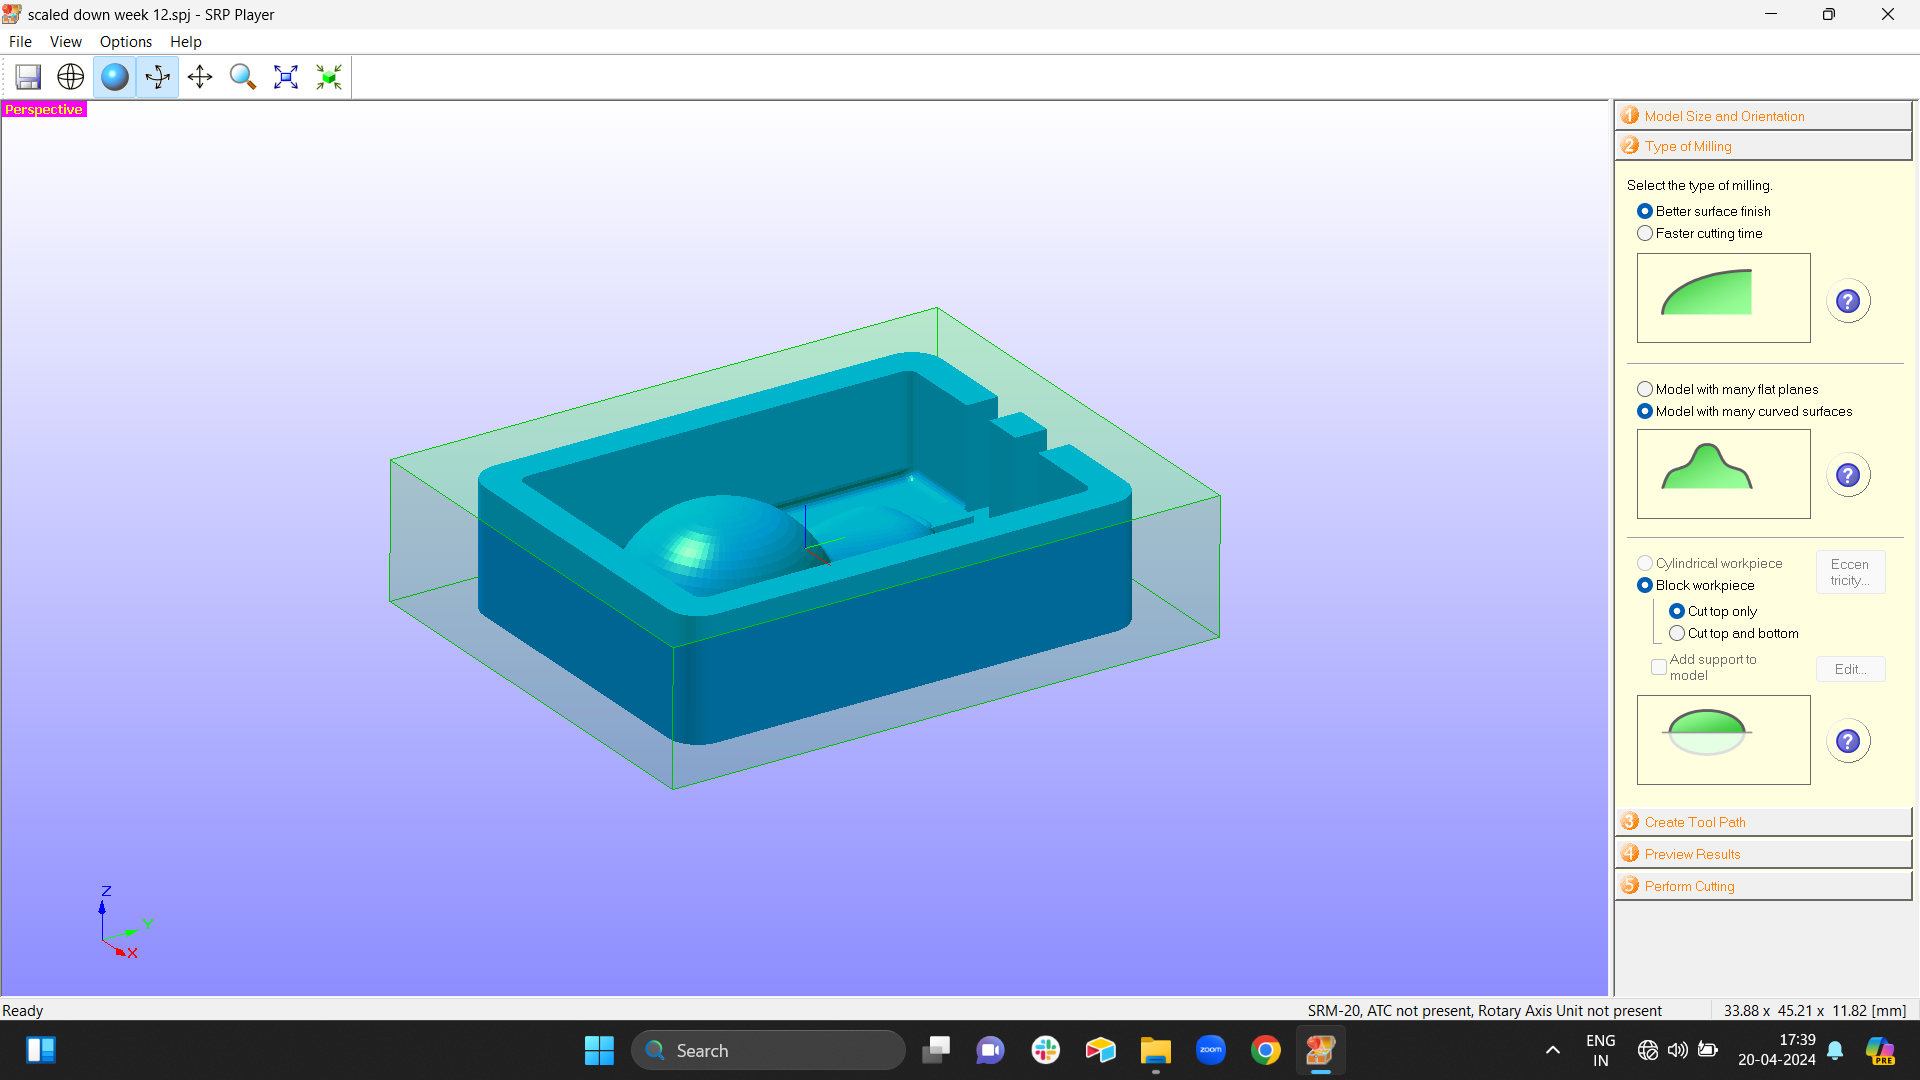
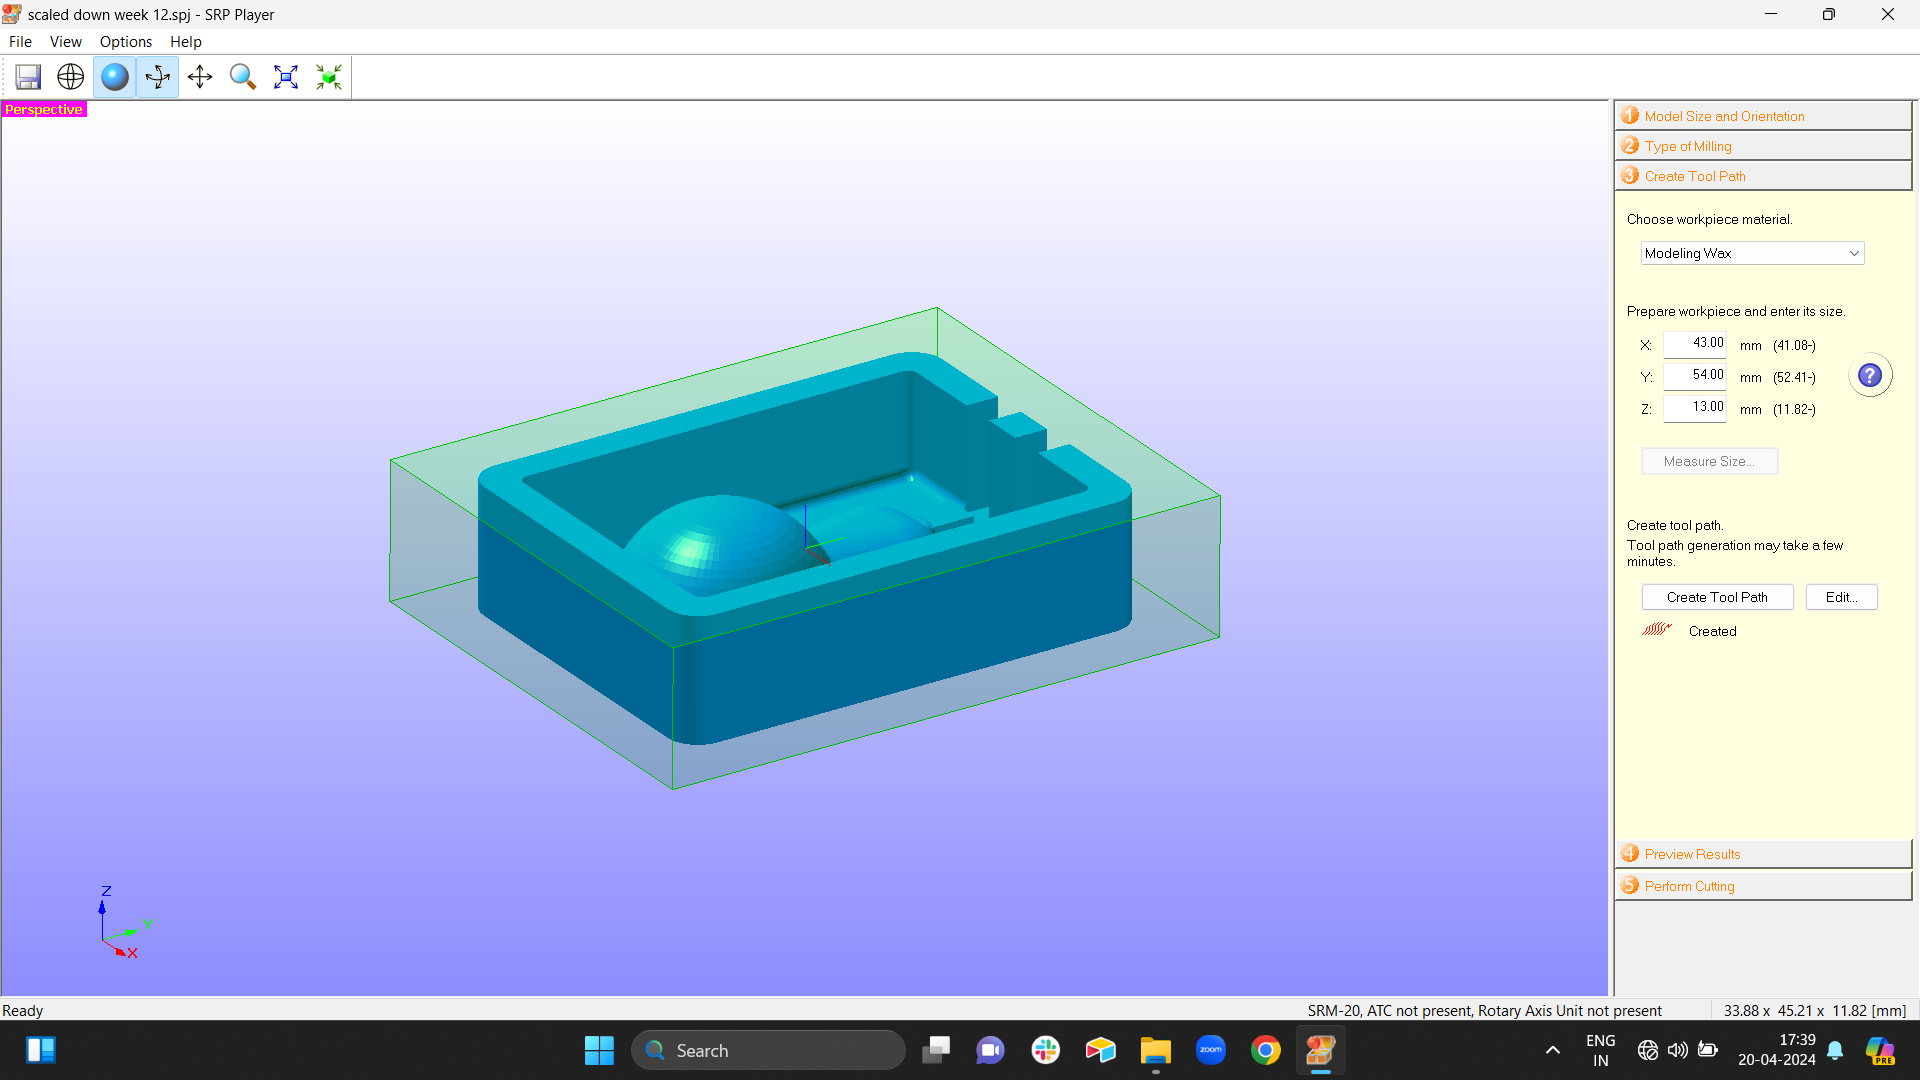
Step 4 : Type of milling
After completing the above things select the 2nd pannel that says type of milling when you open that a dropdown comes that says choose workspace material, here we select modelling wax, depending on what you are milling we need to select that material. Then again the process is self explanatory and it depens on what option you want to select.
Step 5 : Create tool path
Below type of materials there is an option of create toolpath select that and then there is a dropdown where you need to select tools for roughing and finishing of the milling process. Once selected tools for both press apply and select create tool path it will make toolpath for you, once there is a rectangle around the object that means the toolpath is made.
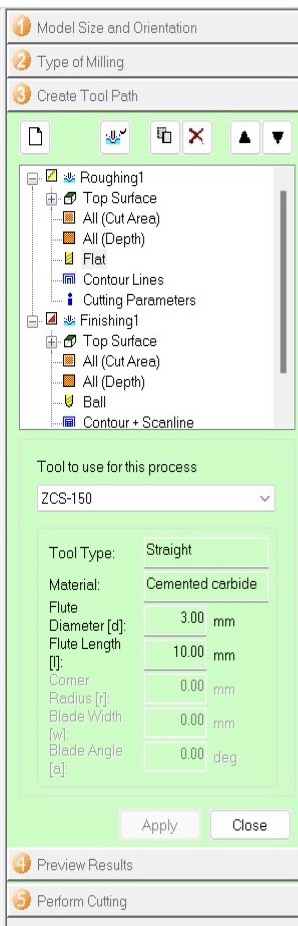
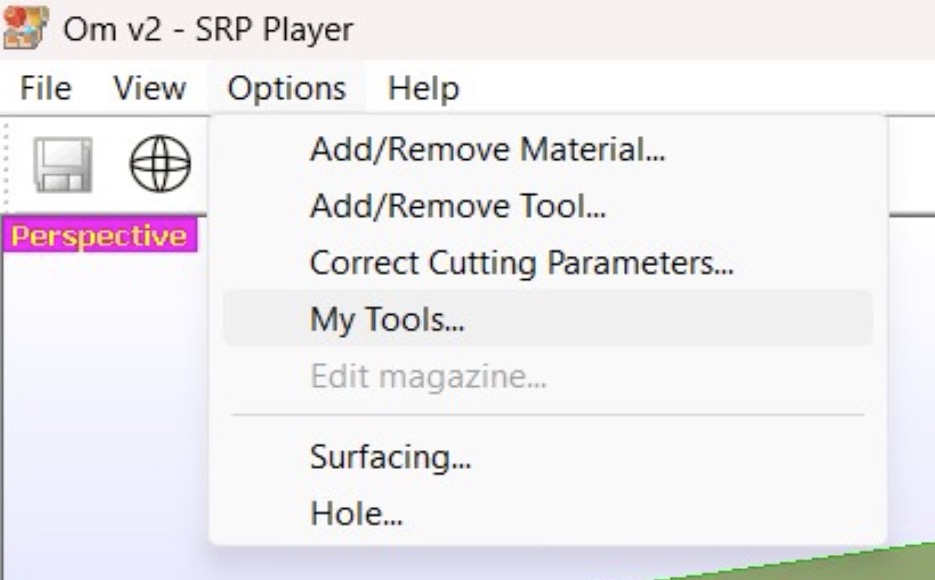
To add/ remove tools or materials and also to select tools go in
Left hand corner > options > my tools > select the tool > 3mm end milling
I have selected 3mm end mill for both roughing and finishing.
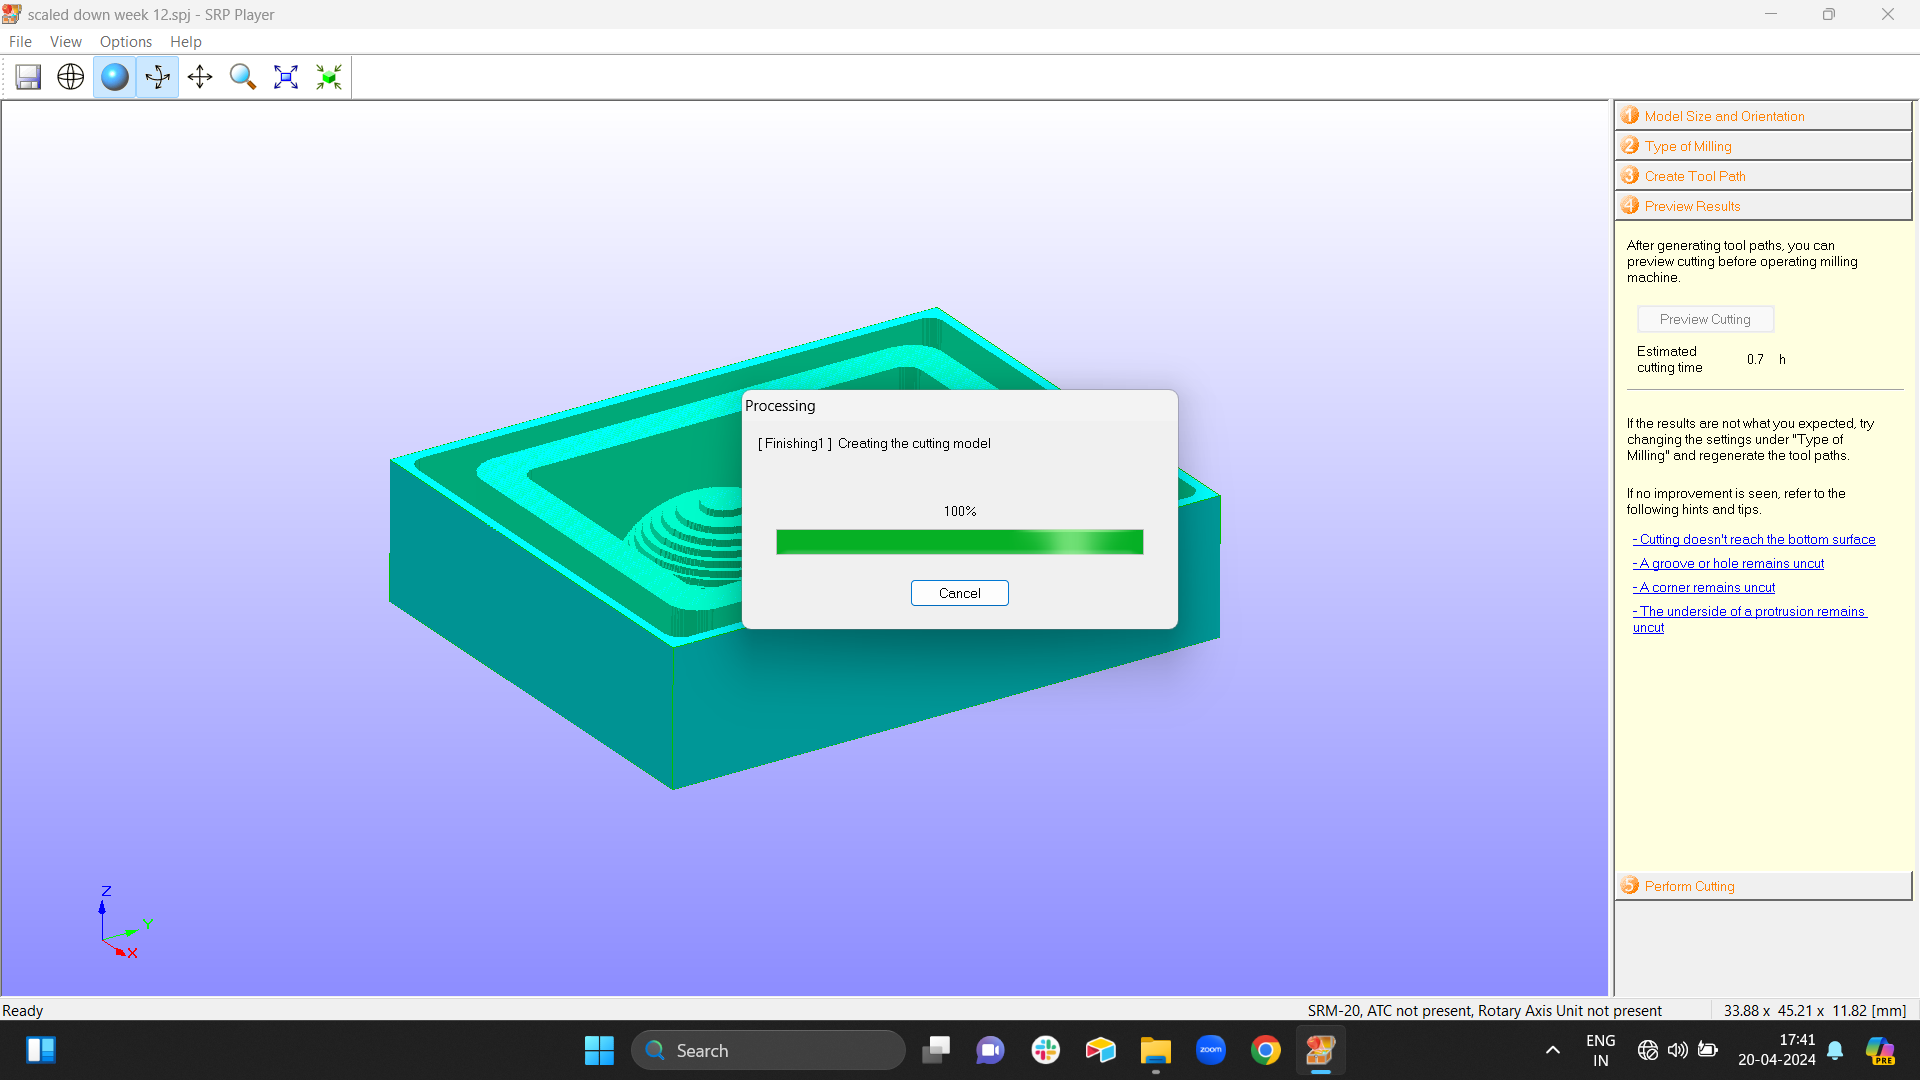
Step 6 : Preview cutting
You can also see how will the model look by pressing preview cutting.
Step 7 : V pannel for setting x, y and z origin
Once everything is done first stick the wax block with the help of double sided tape in the srm machine bed.
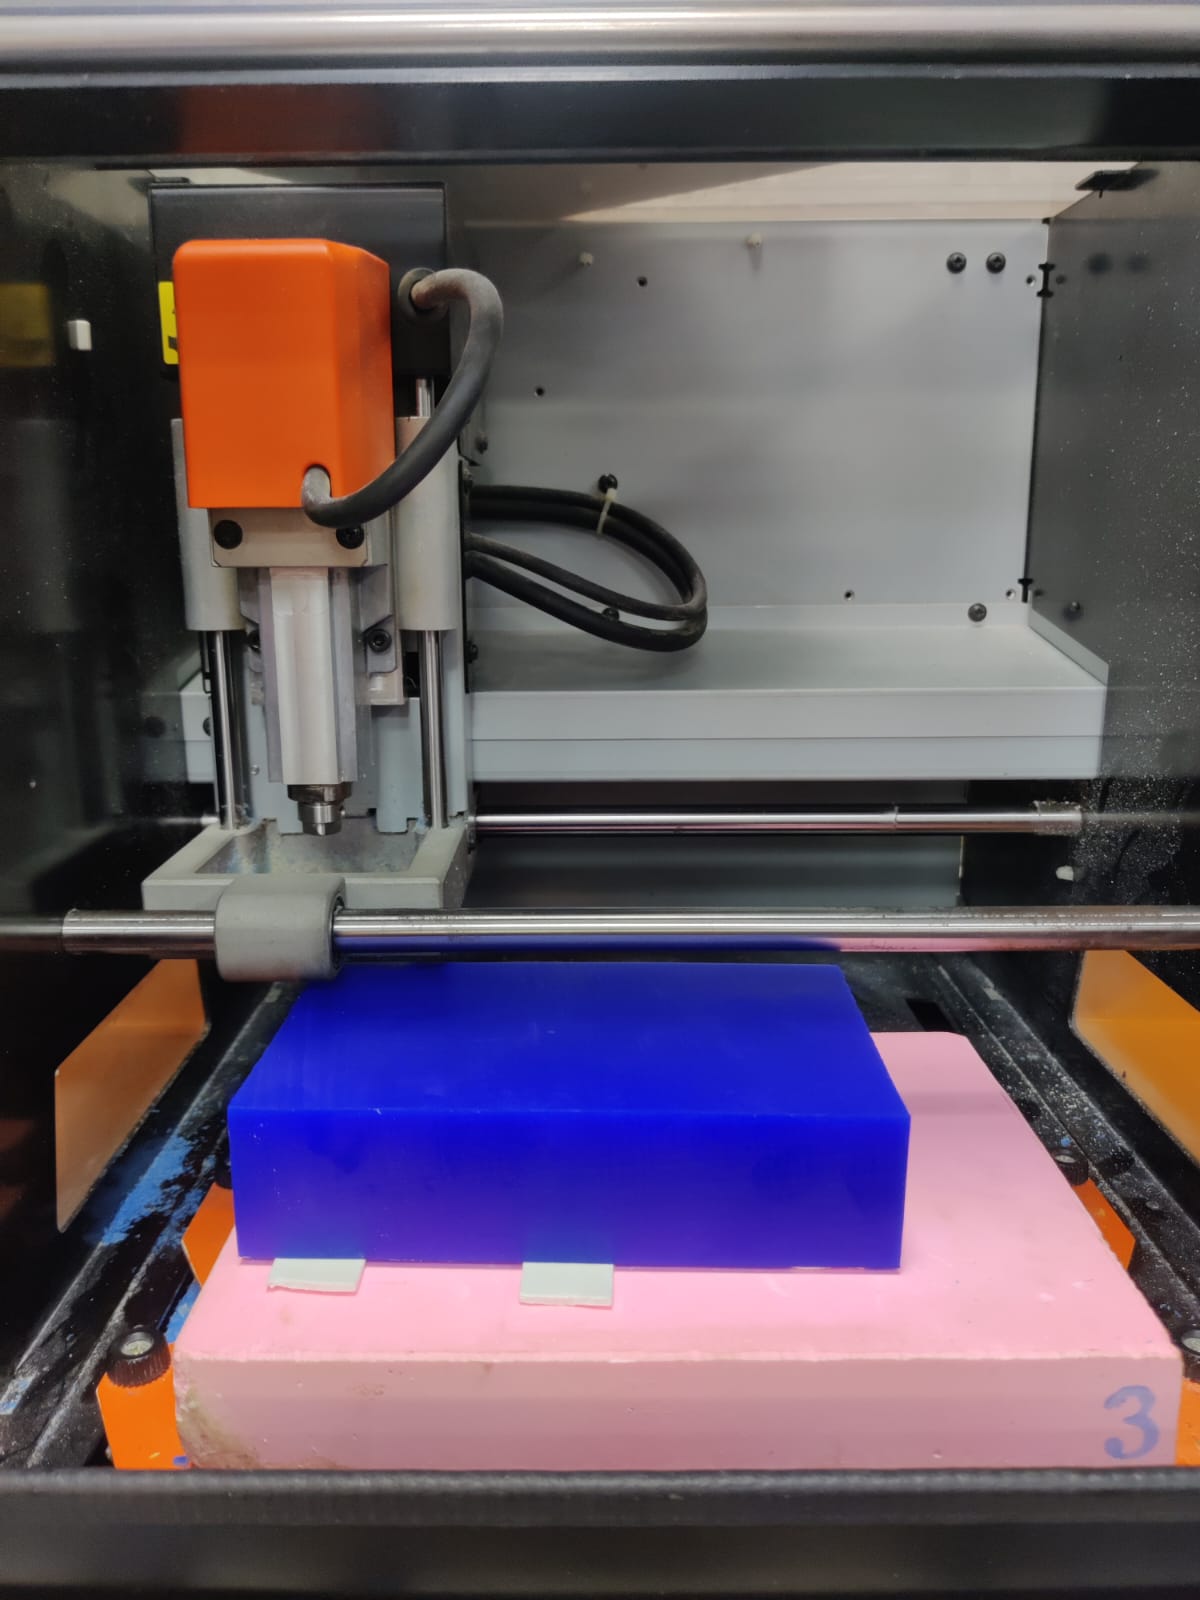
Open v pannel to adjust x, y and z origin, in this process mark the xy origing on the centre of the block and for the z origin do it manually by inserting a paper and checking the friction.
To know in detail process and explanation of using v pannel and important tips of srm machine go here. It is under milling process.
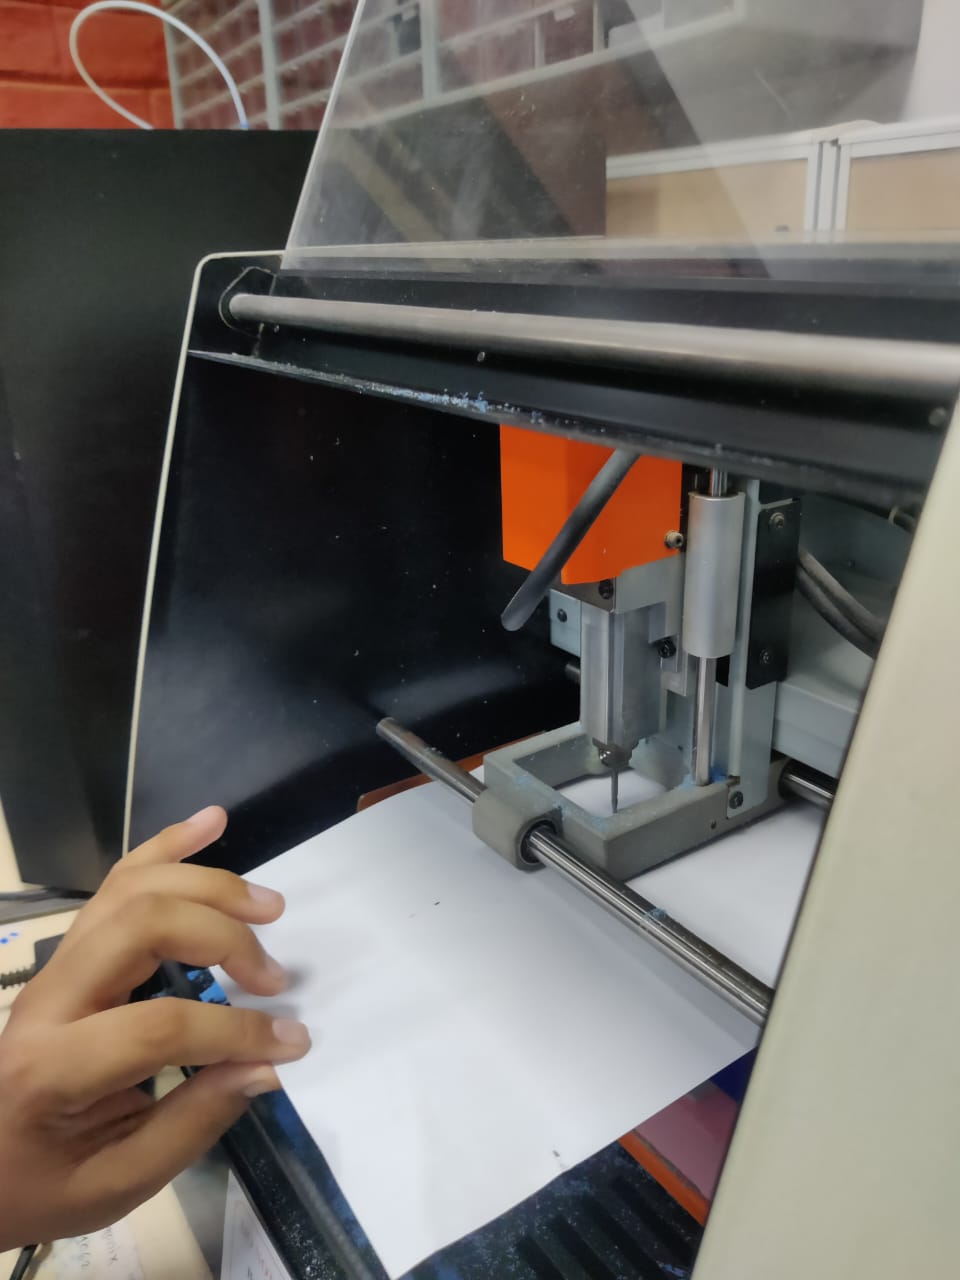
Use allen key to insert the tool
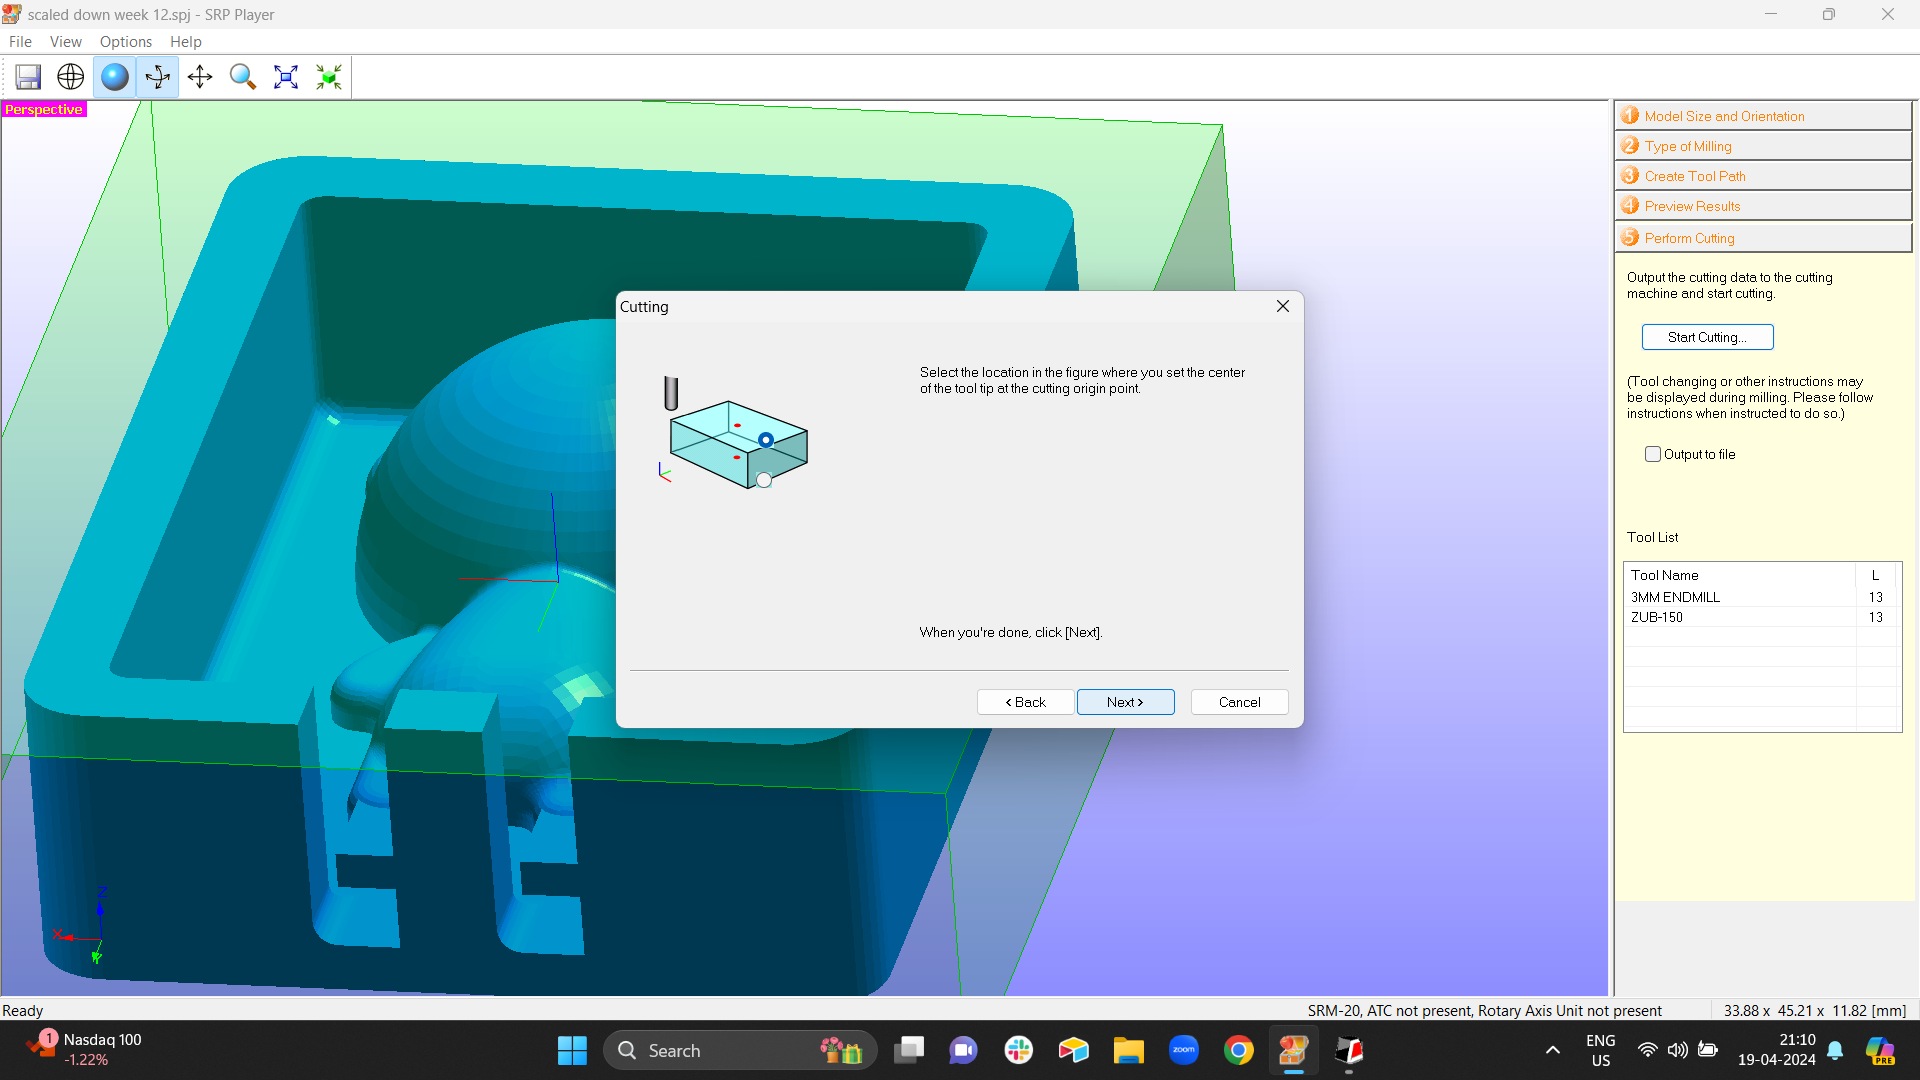
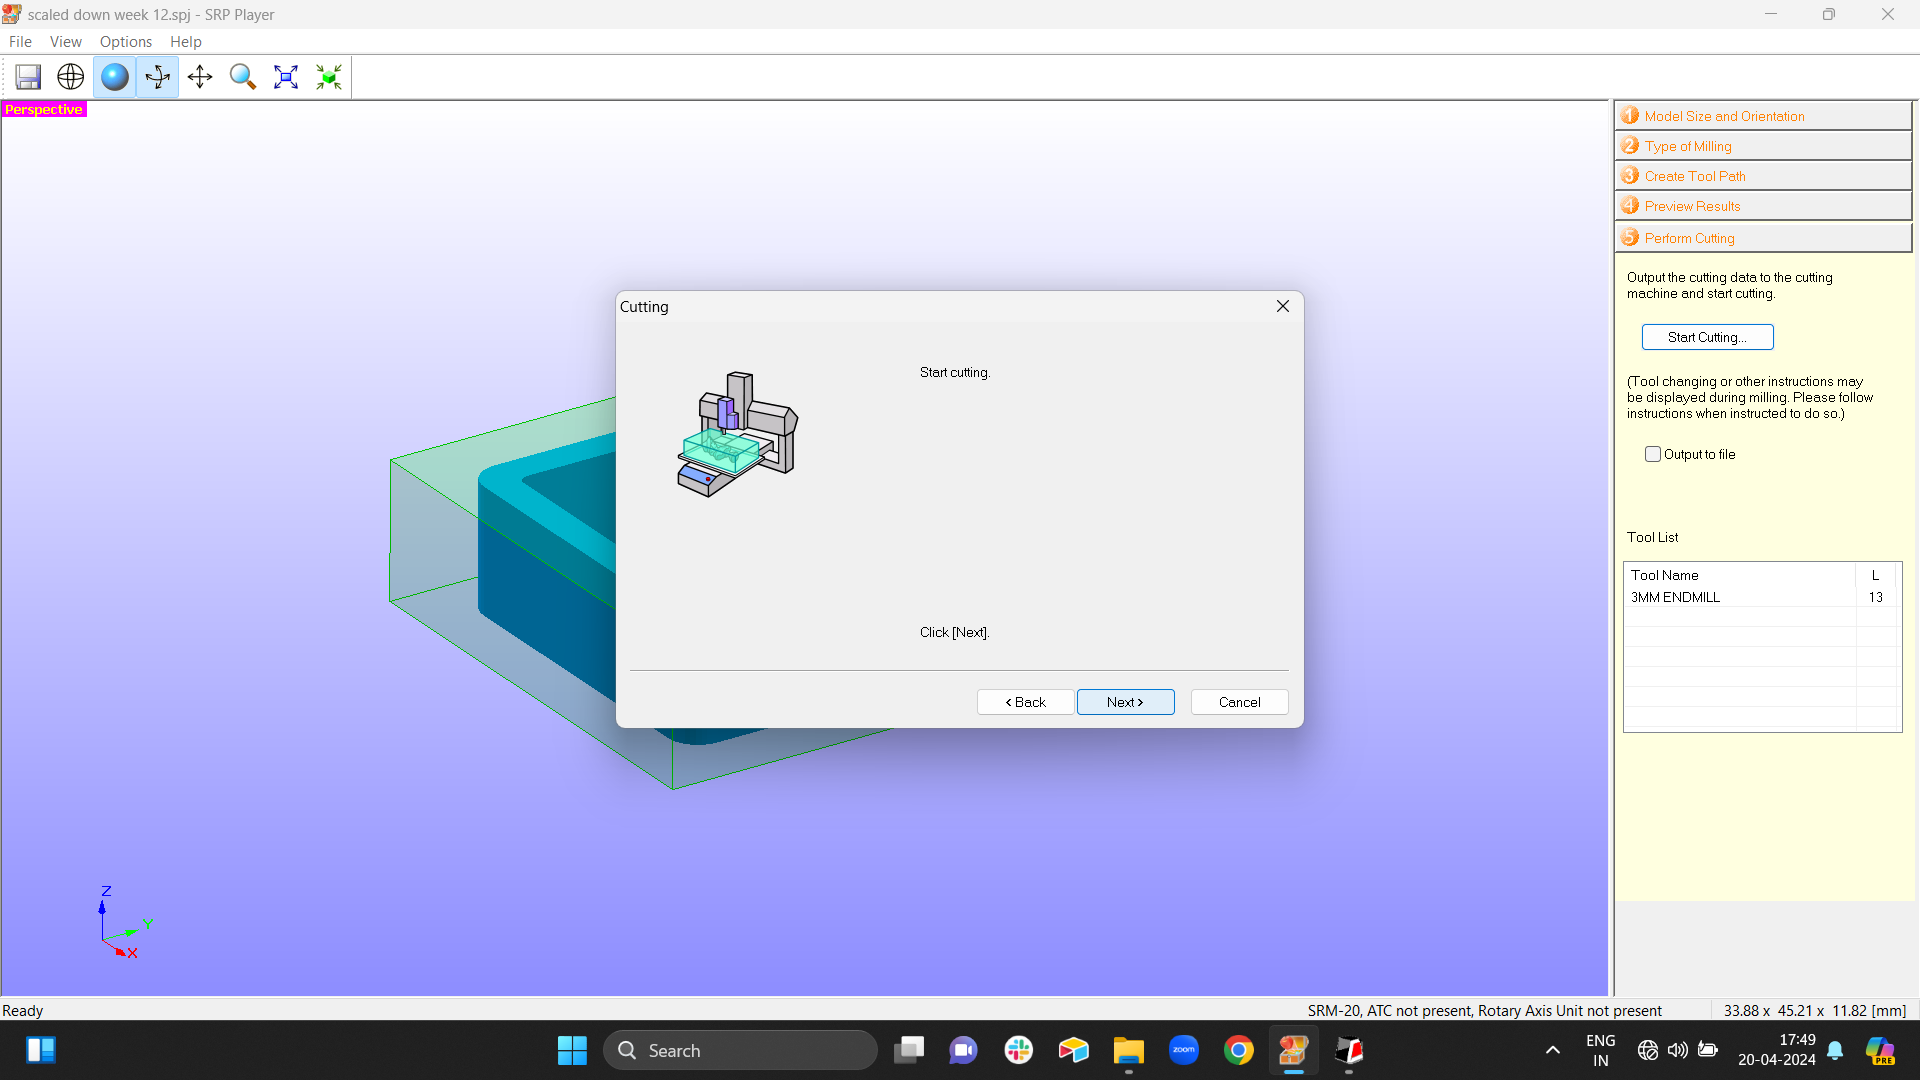
Step 8 : start cutting
Go back to srm player and you can see start cutting option there select that and it will ask you to put the roughing tool, then select location and again it will ask start cutting, keep pressing next.

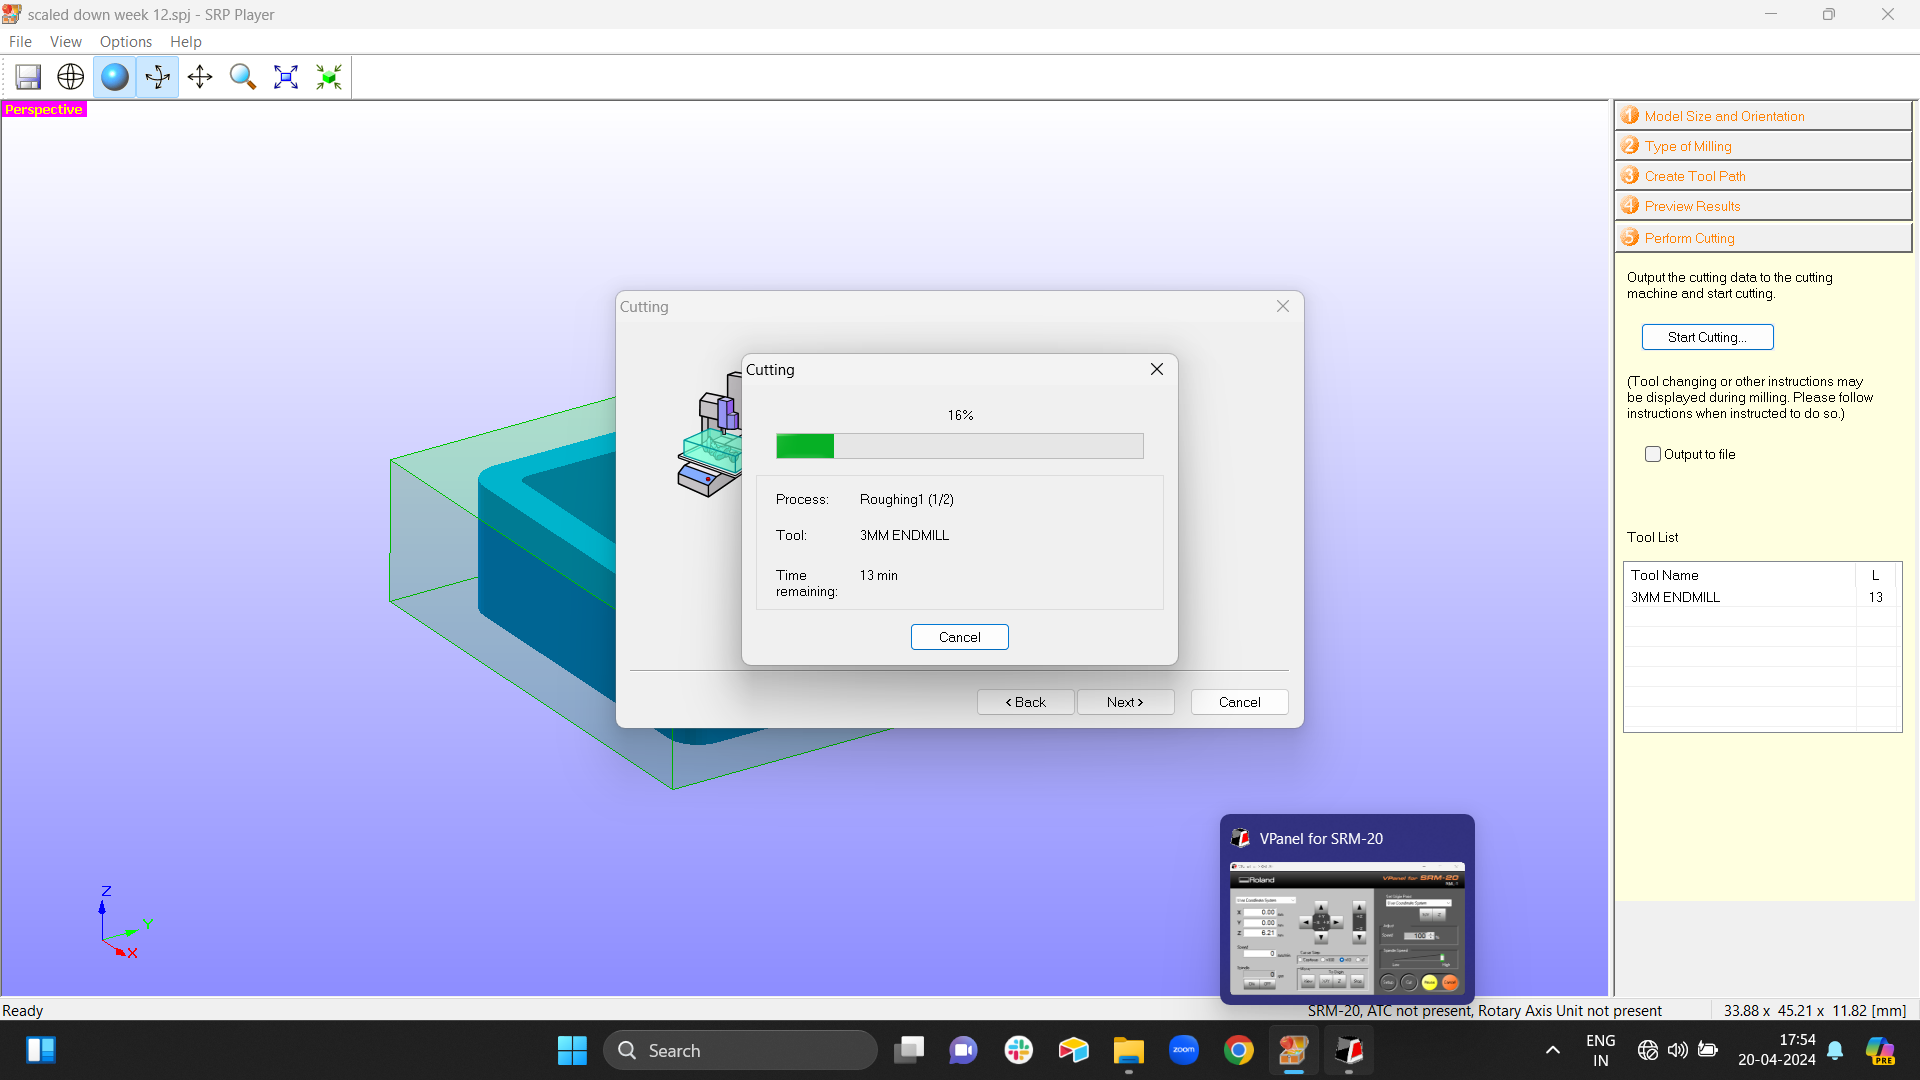
Step 9 : Cutting
Then the cutting starts, first it starts with roughing and you can see the estimated time, so I had selected same tool for roughing and finishing so it continuous automatically after roughing, but if there are different tools, it says after roughing is done that change the tool, so you need to change the tool and press start cutting again.
Once the roughing is done press view on v pannel and clean the wax, you can use vaccum too but we can collect the wax in a container and can resuse it to make a wax block only little wax can be cleaned with vaccum.s

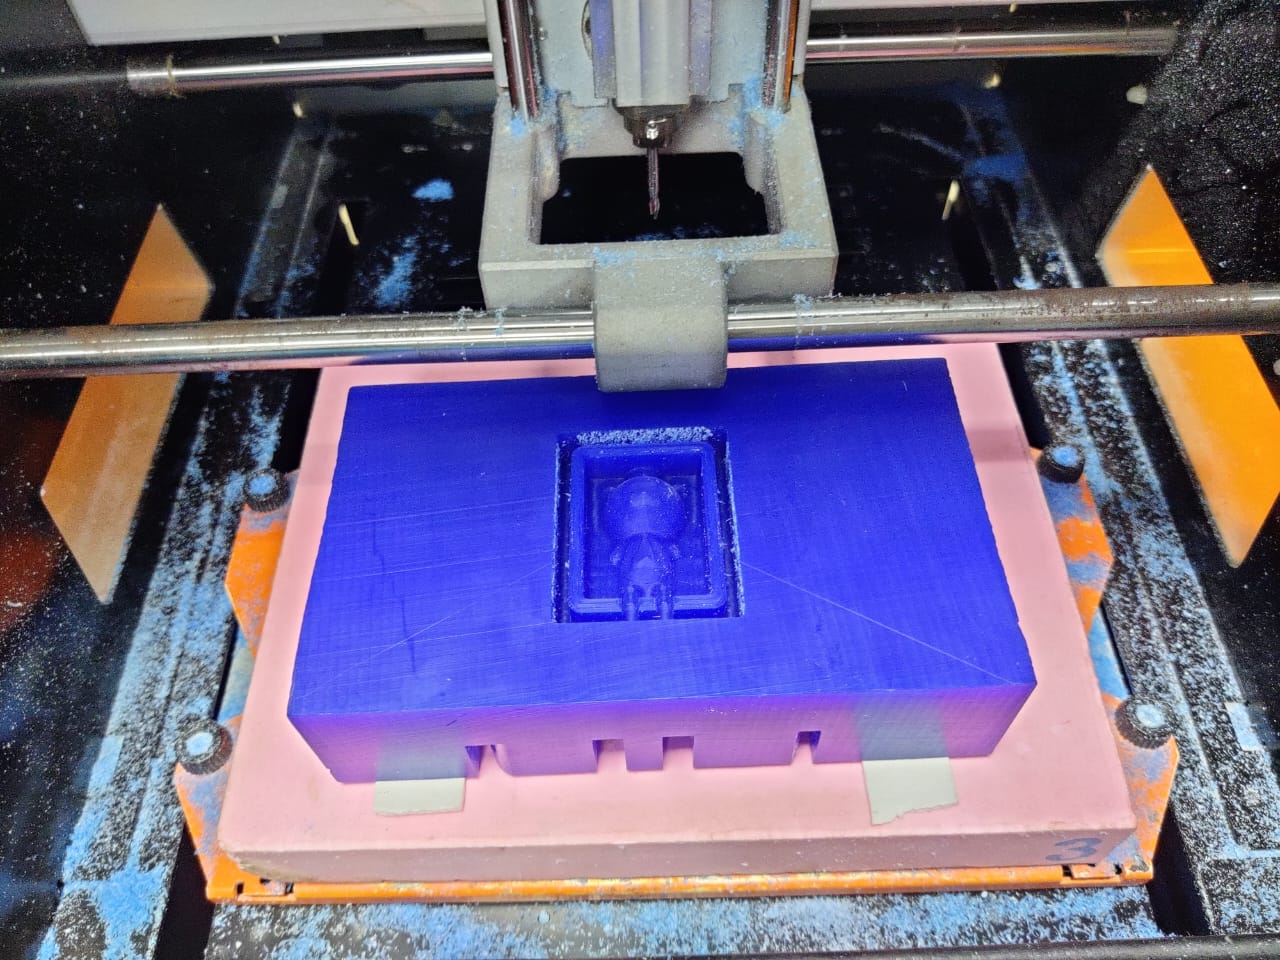
Step 10 : Cutting
After competing again collect the wax, clean it with vaccum and you can see the final results of milling
Casting
For making mold from the mother mold I was planning to use silicon and algenate as the part of the mold and for casting White cement, wax which was wasted while milling and chocolate.
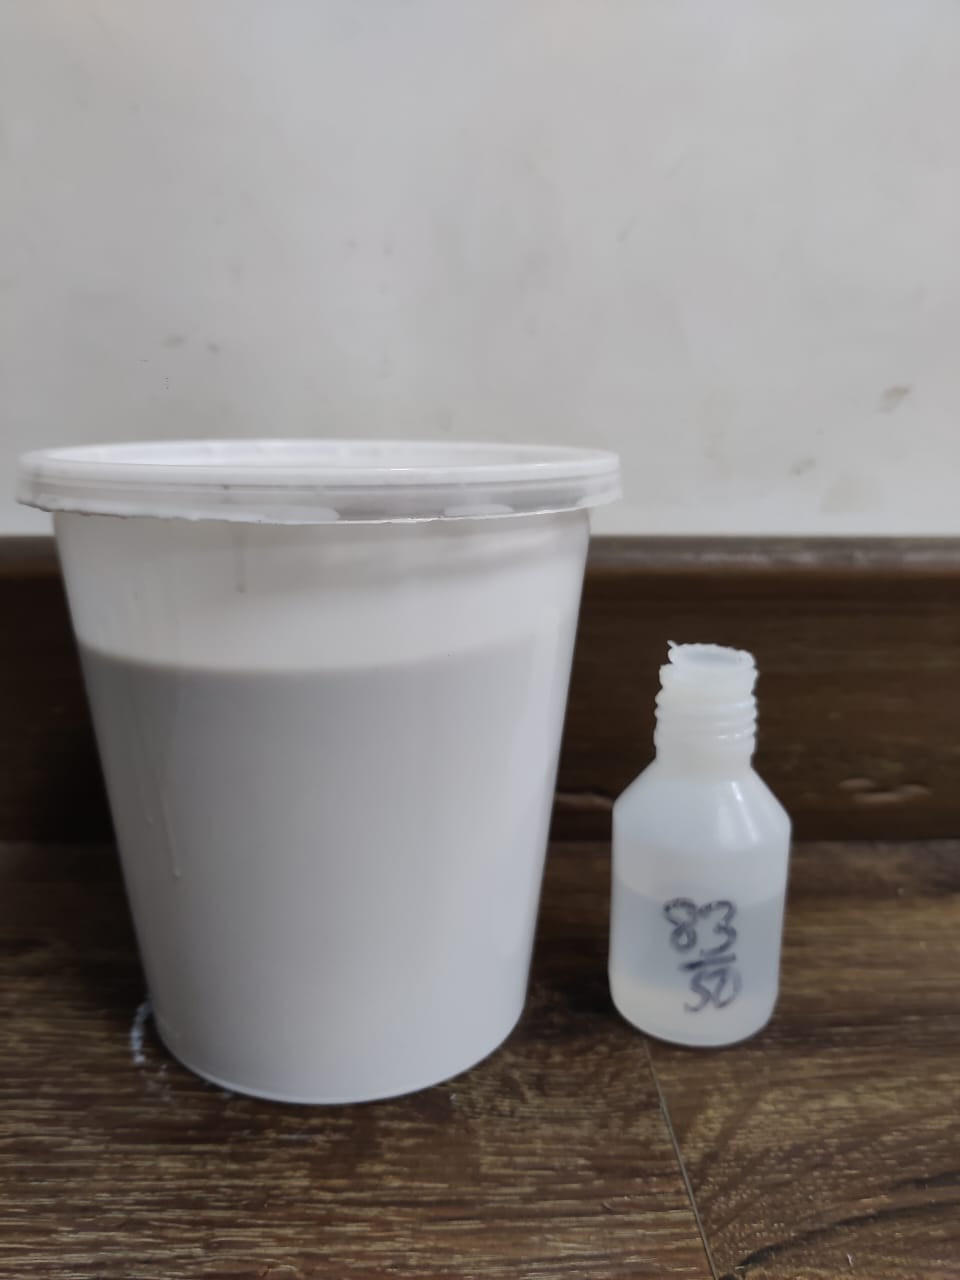
Ratio for silicon
The silicon was ordered from a local shop and he gives Dow corning silicon but he gives it in normal container as per our requirements
The proportion is 1kg of silicon to 50 grams of hardner
Casting Process
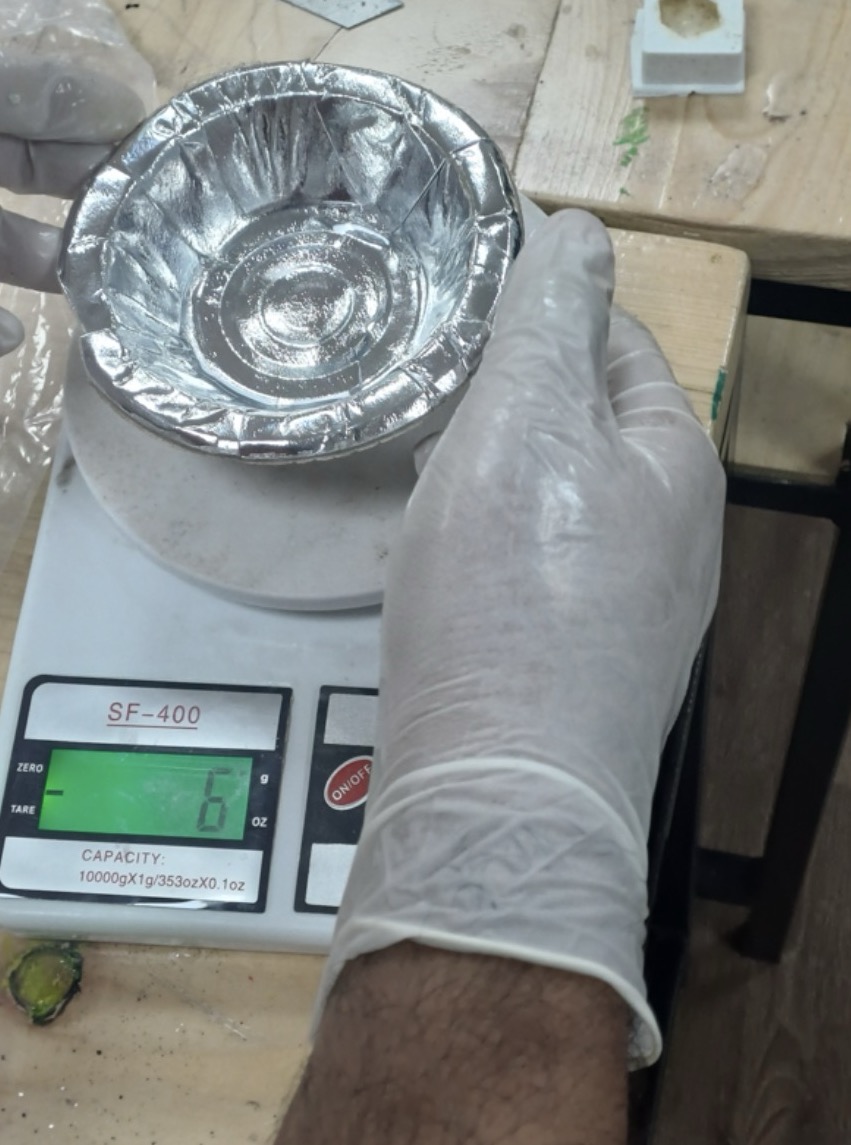
As per the proportions given we used 250 grams of silicone and 12.5 grams of hardner as we all 3 were doing it together.
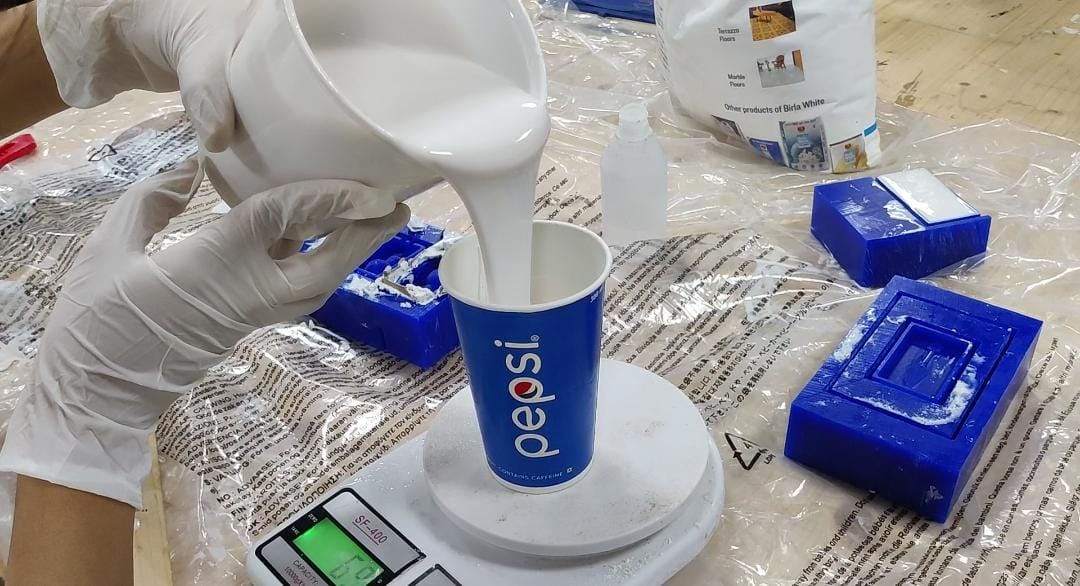
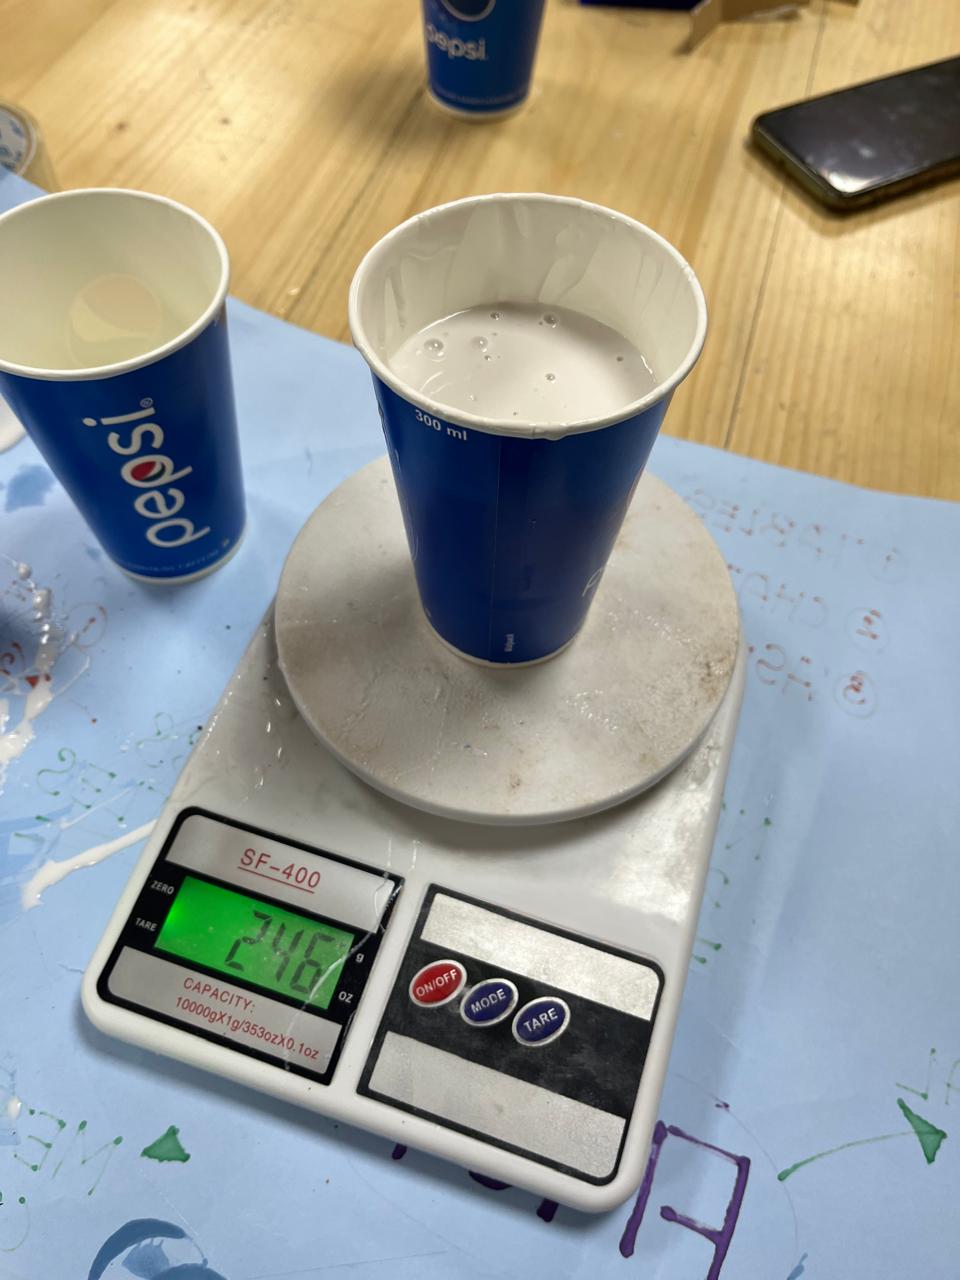
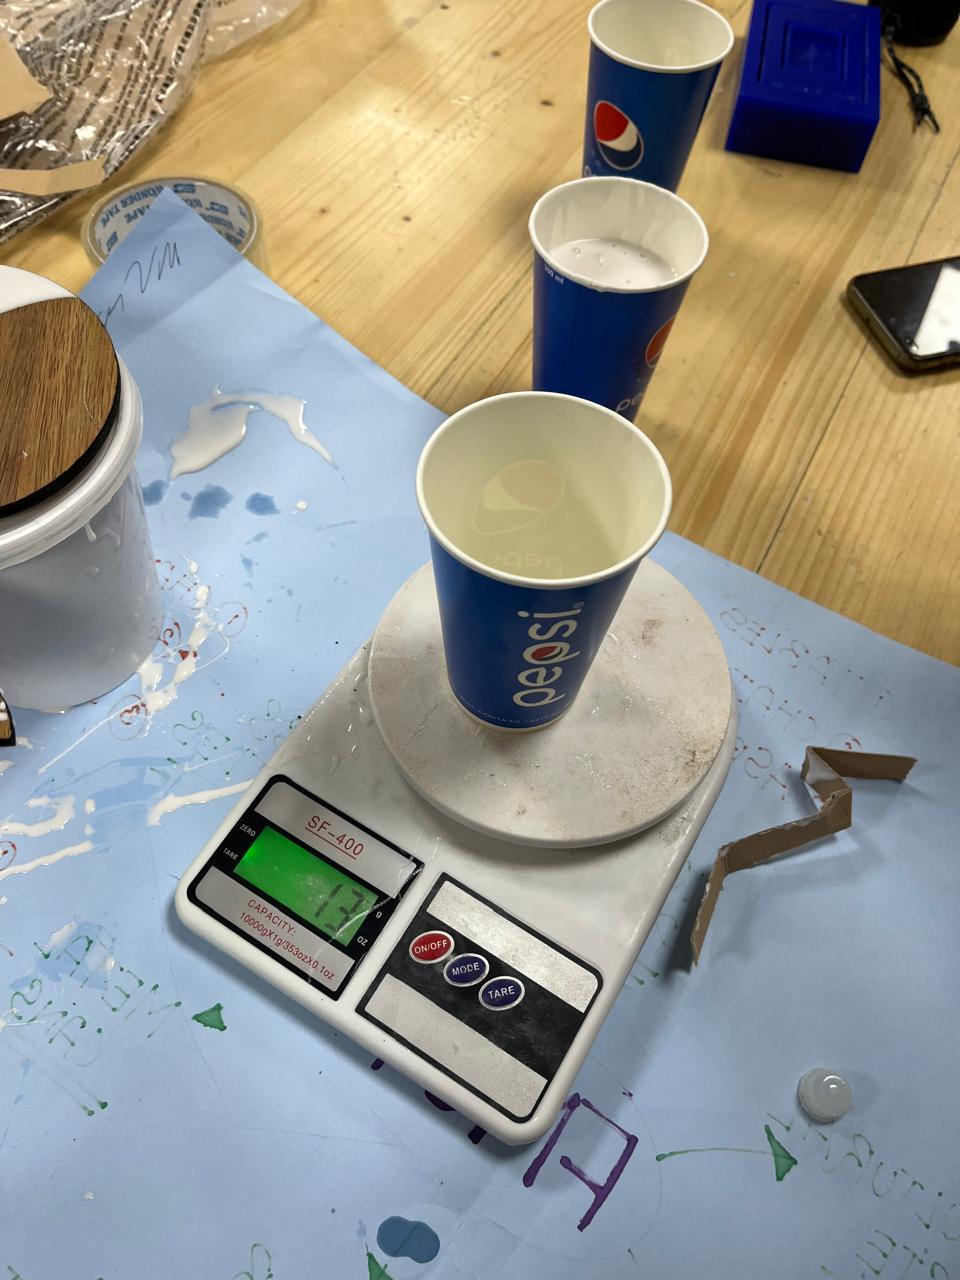
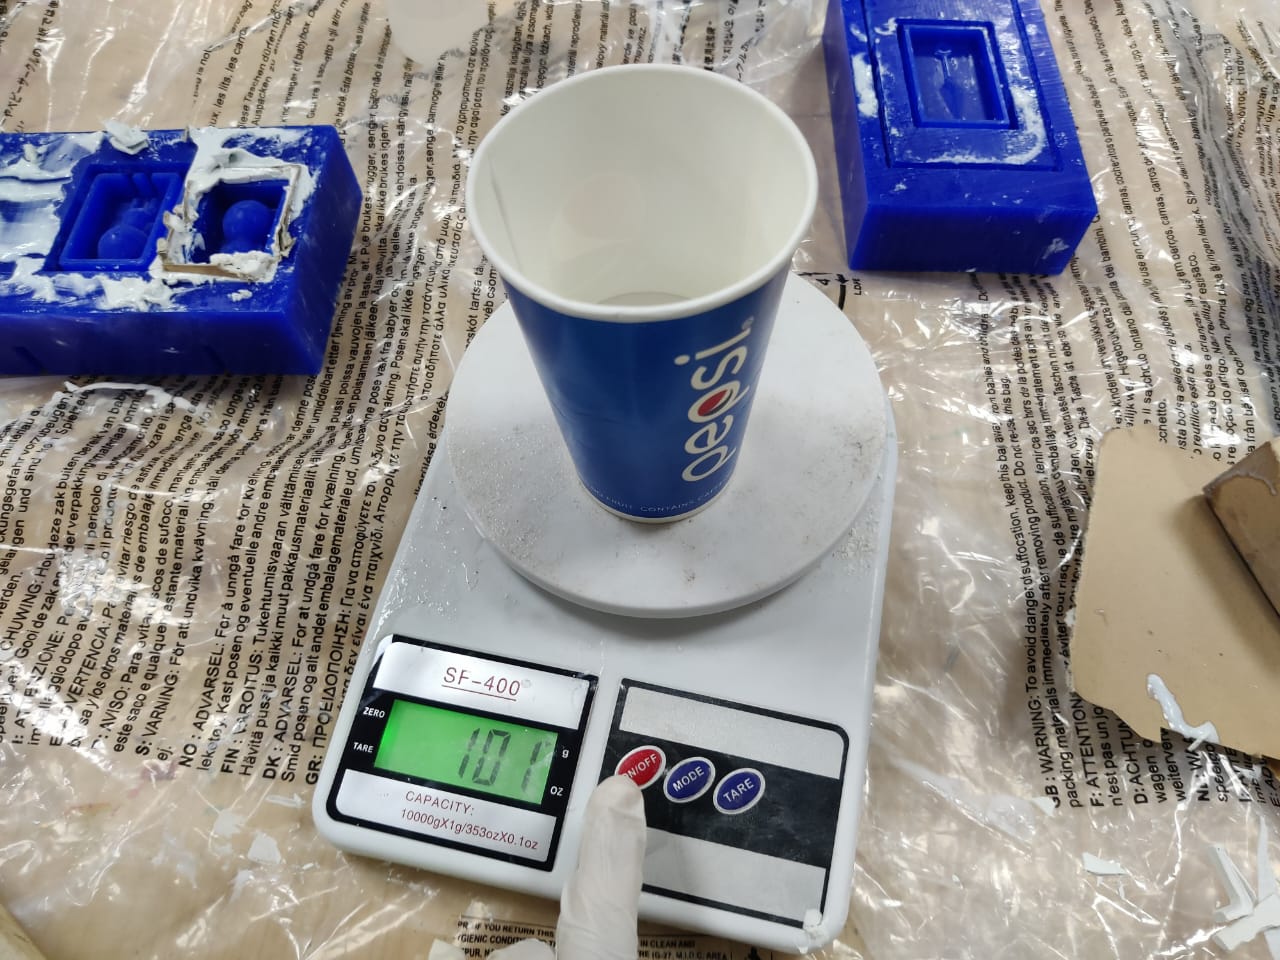
After taking both in seperate containers we started pouring the hardner slowly slowly into the silicon and simultaneously started mixing it, mix till both mixtures are mixed properly and then start pouring it in your mold.

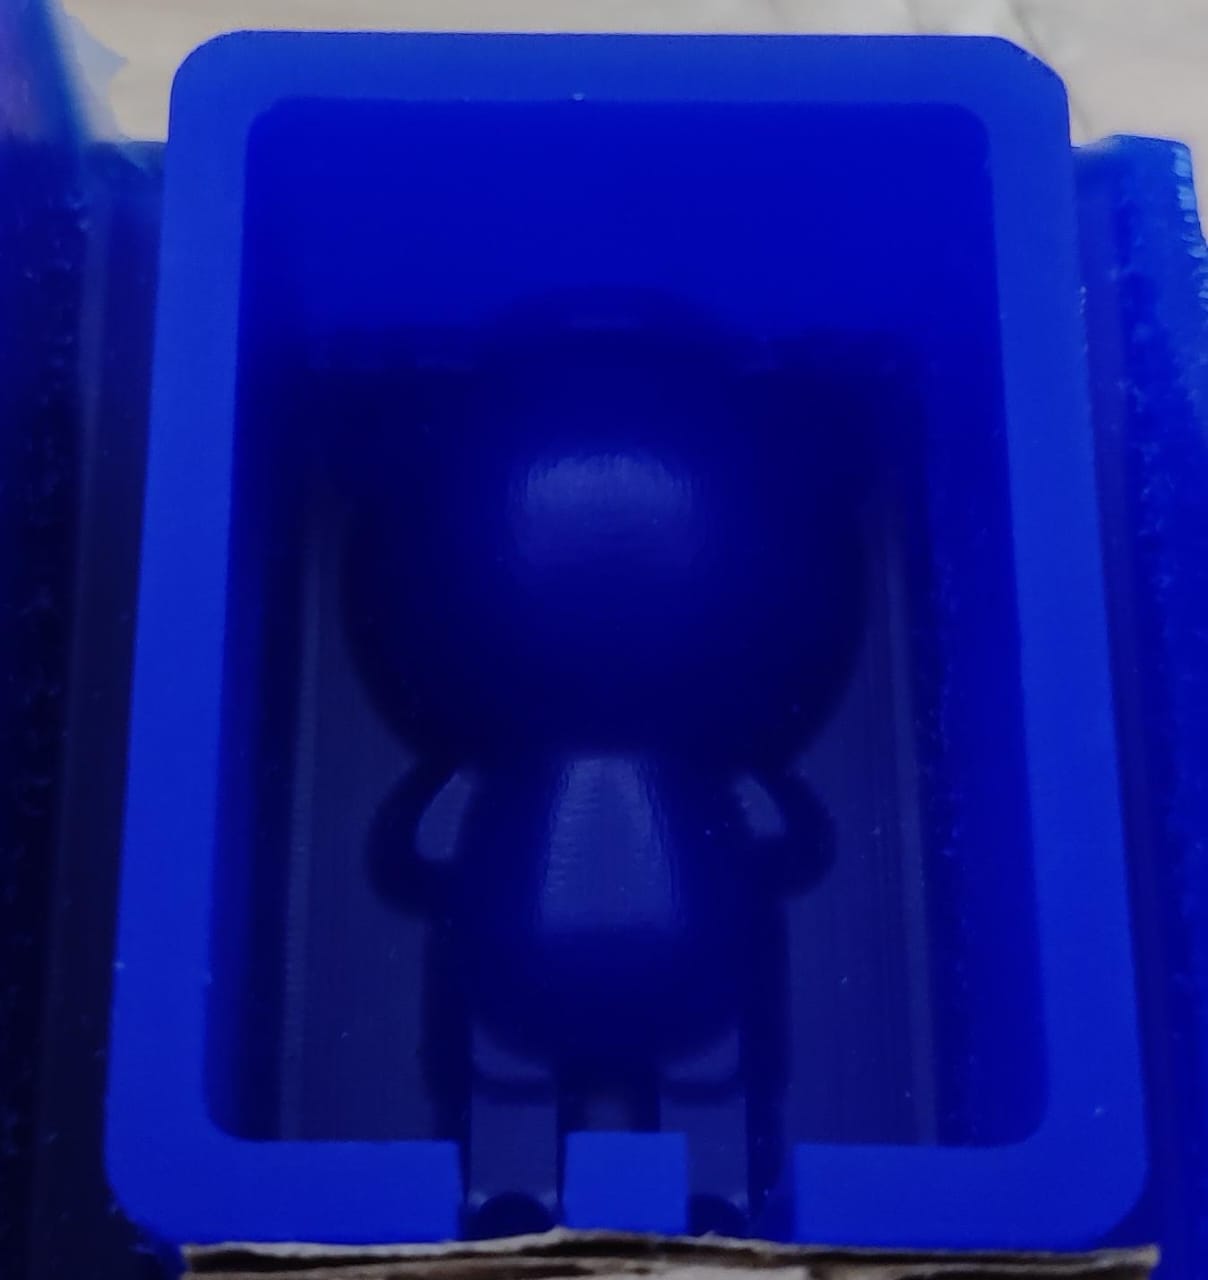
Before started the pouring I realised that I did not increase the wall height so there is no place for the top surface, so for timming i made a box with cardboard which acted as a wall and I also milled other one besides that which had wall.
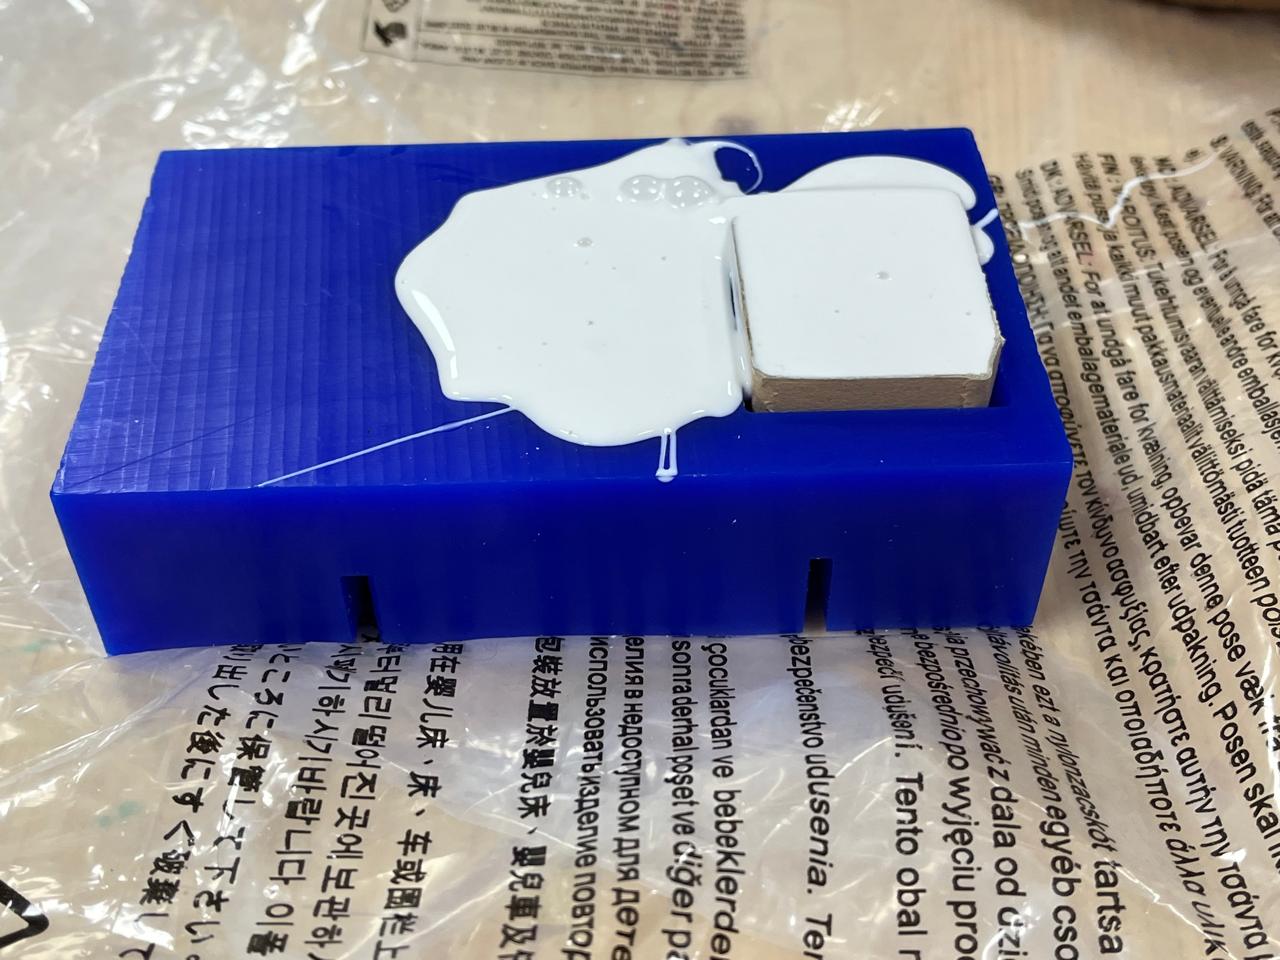
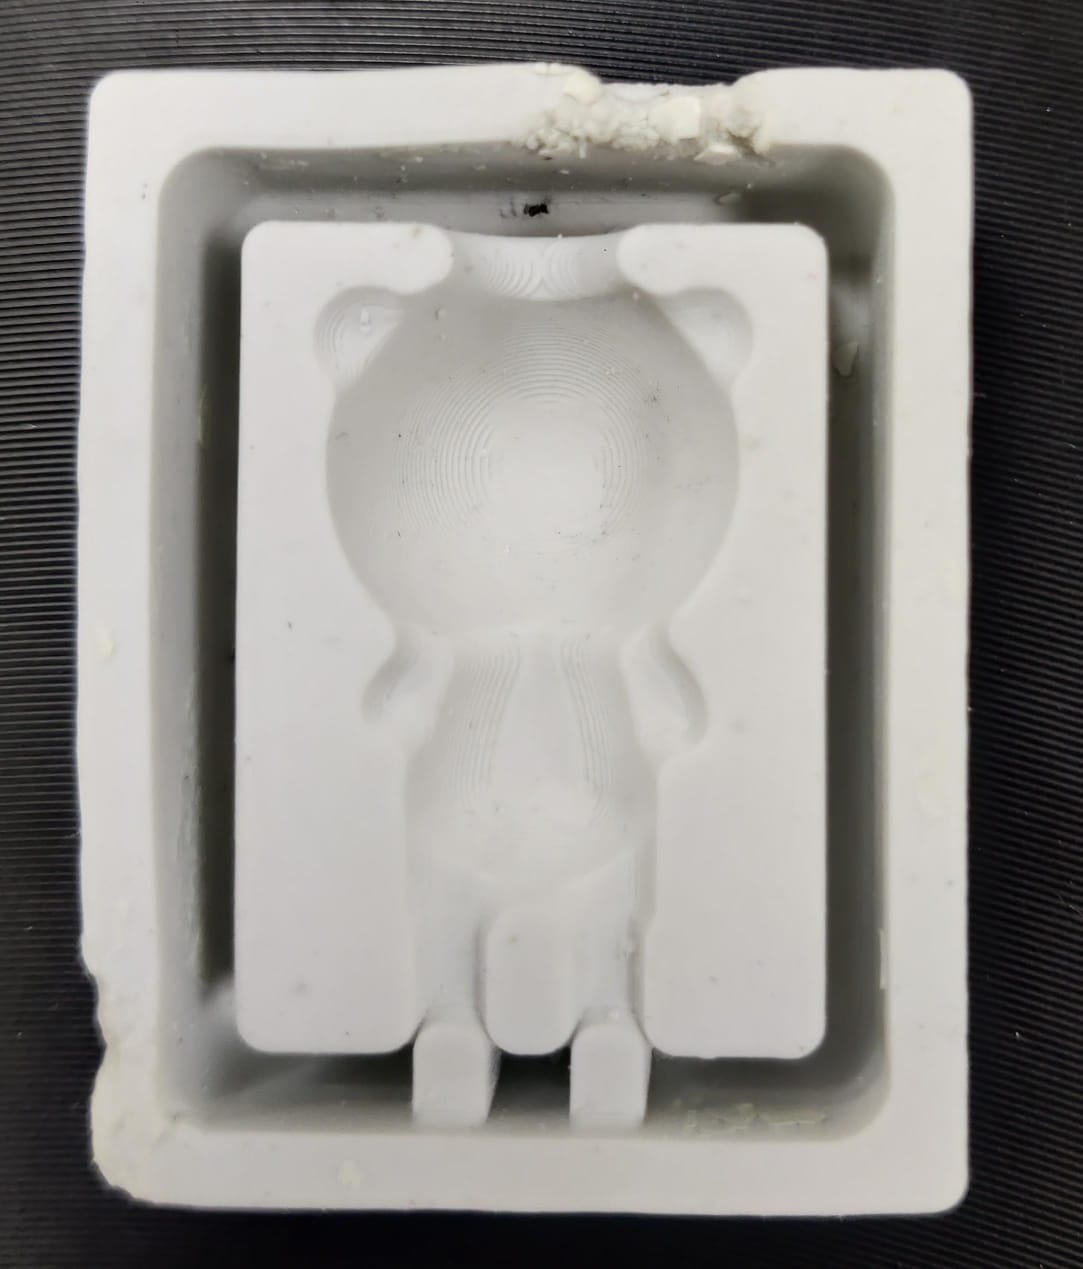
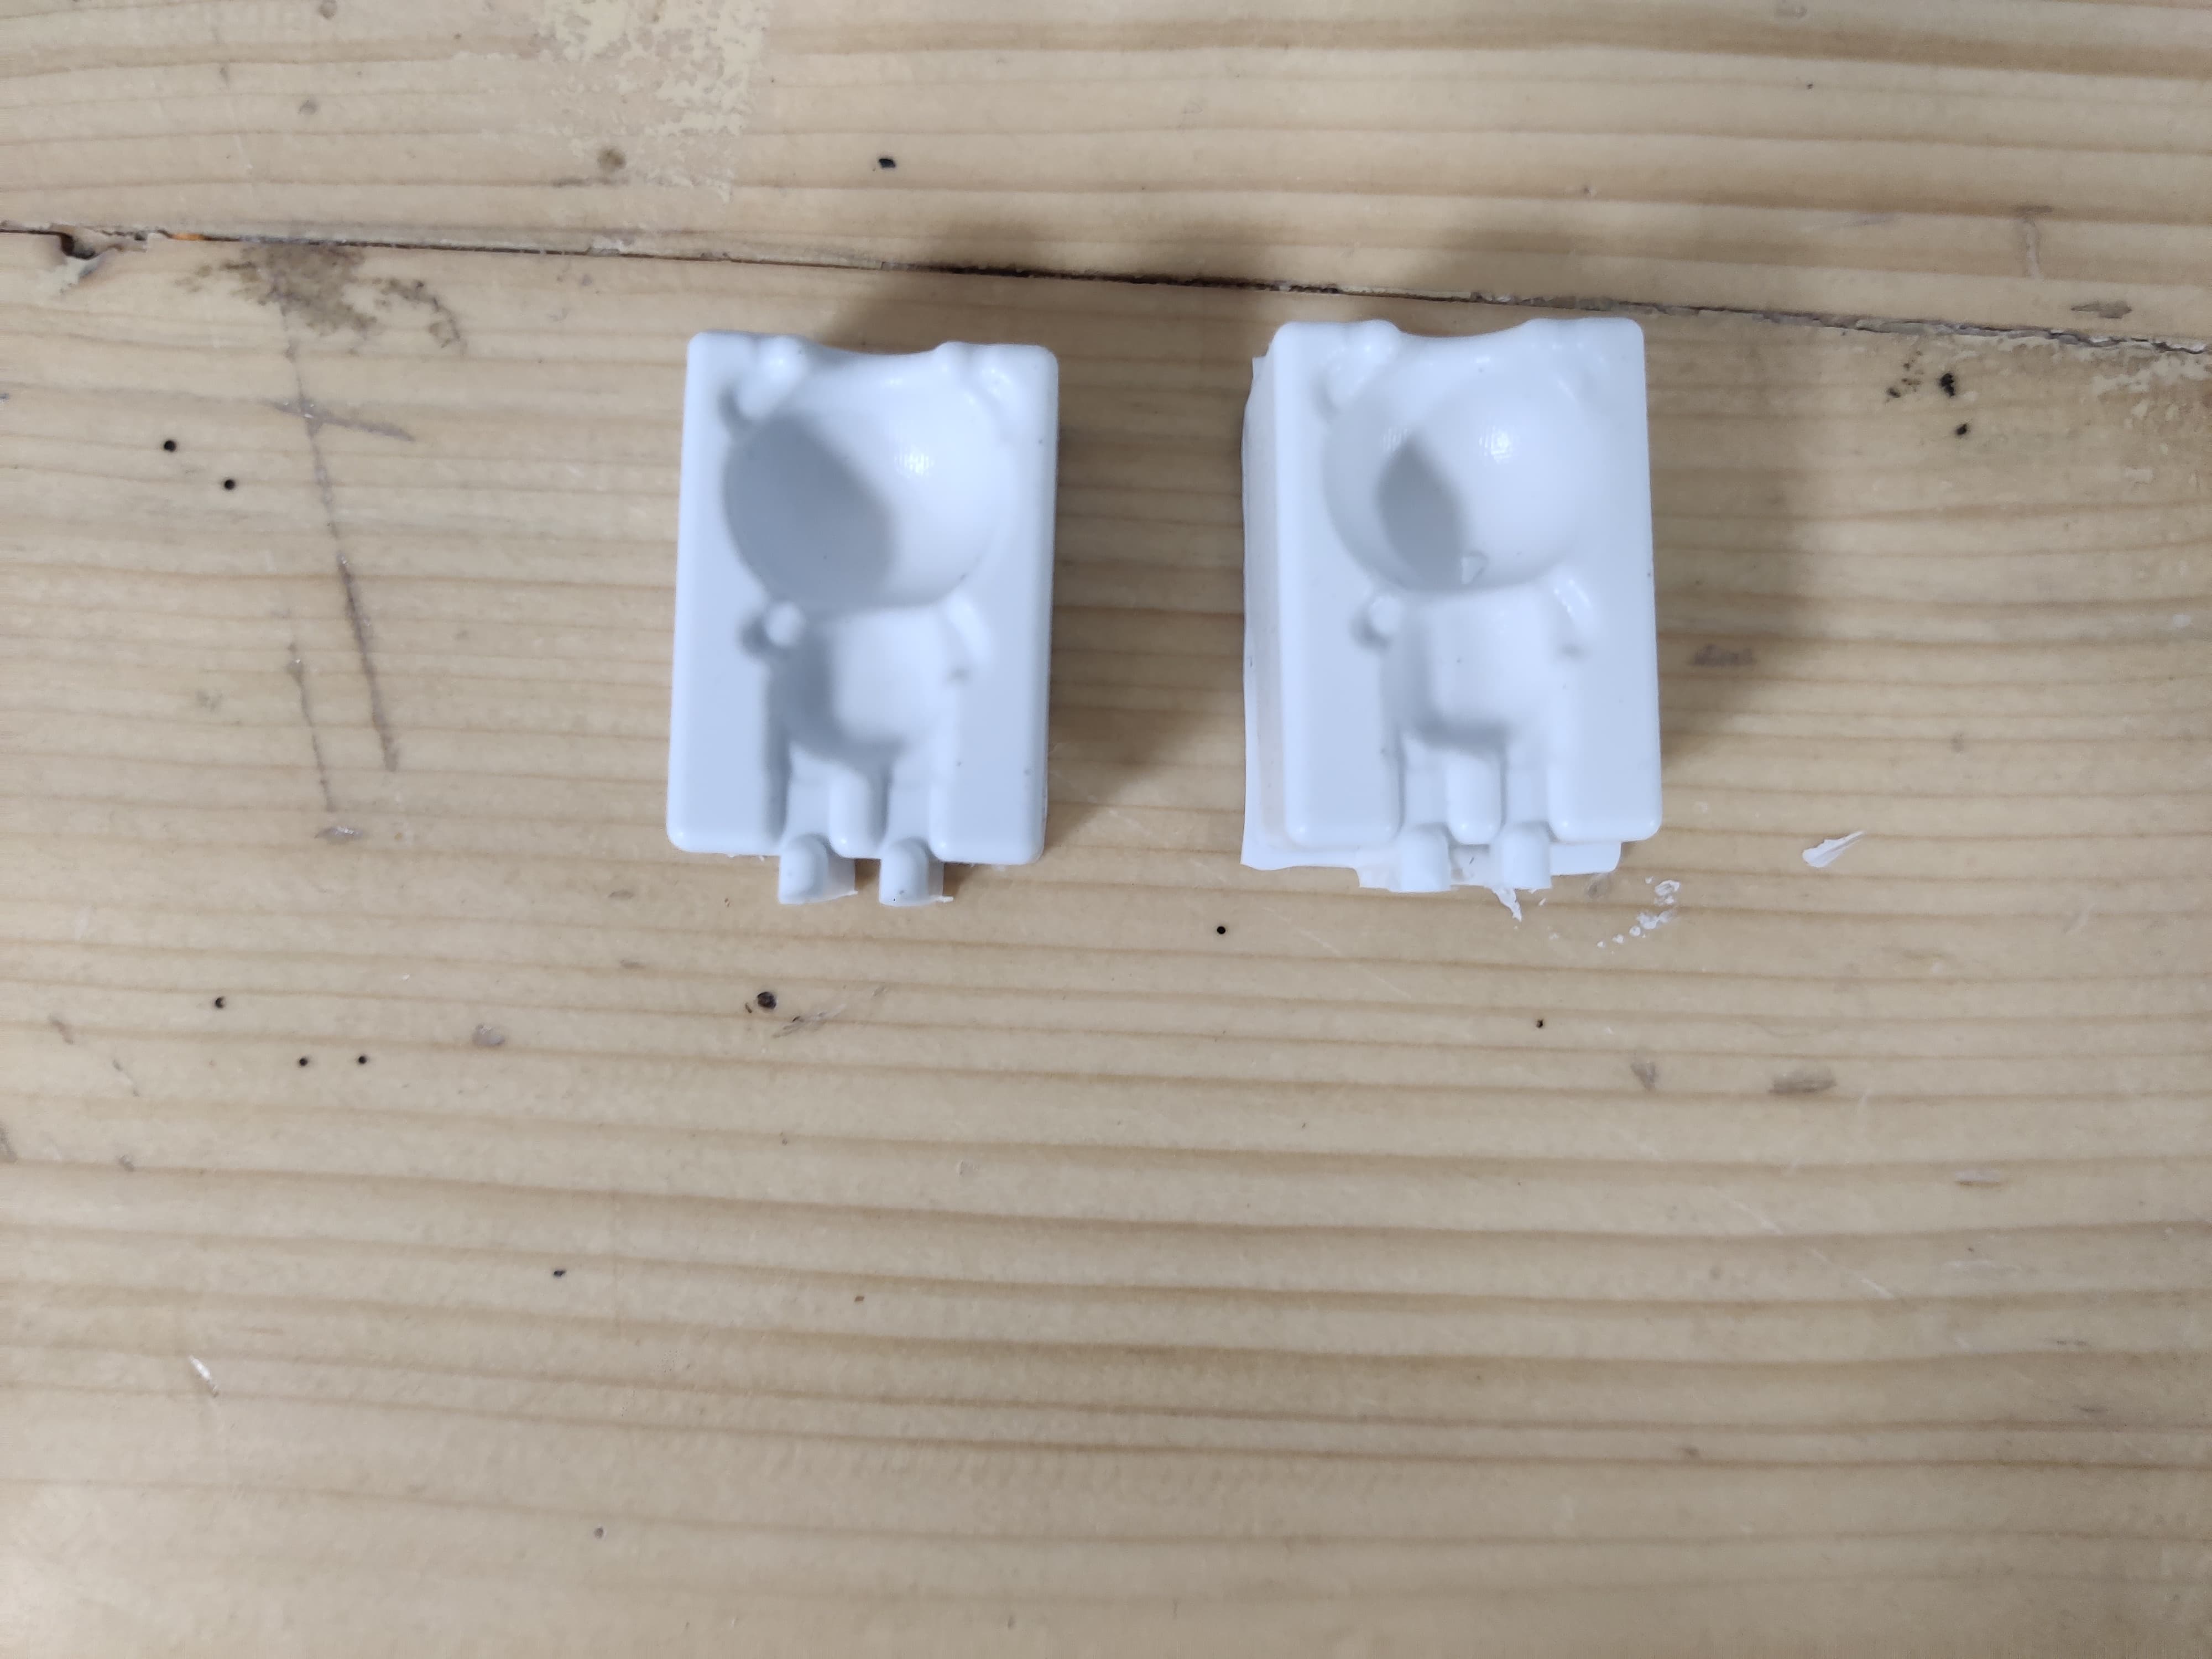
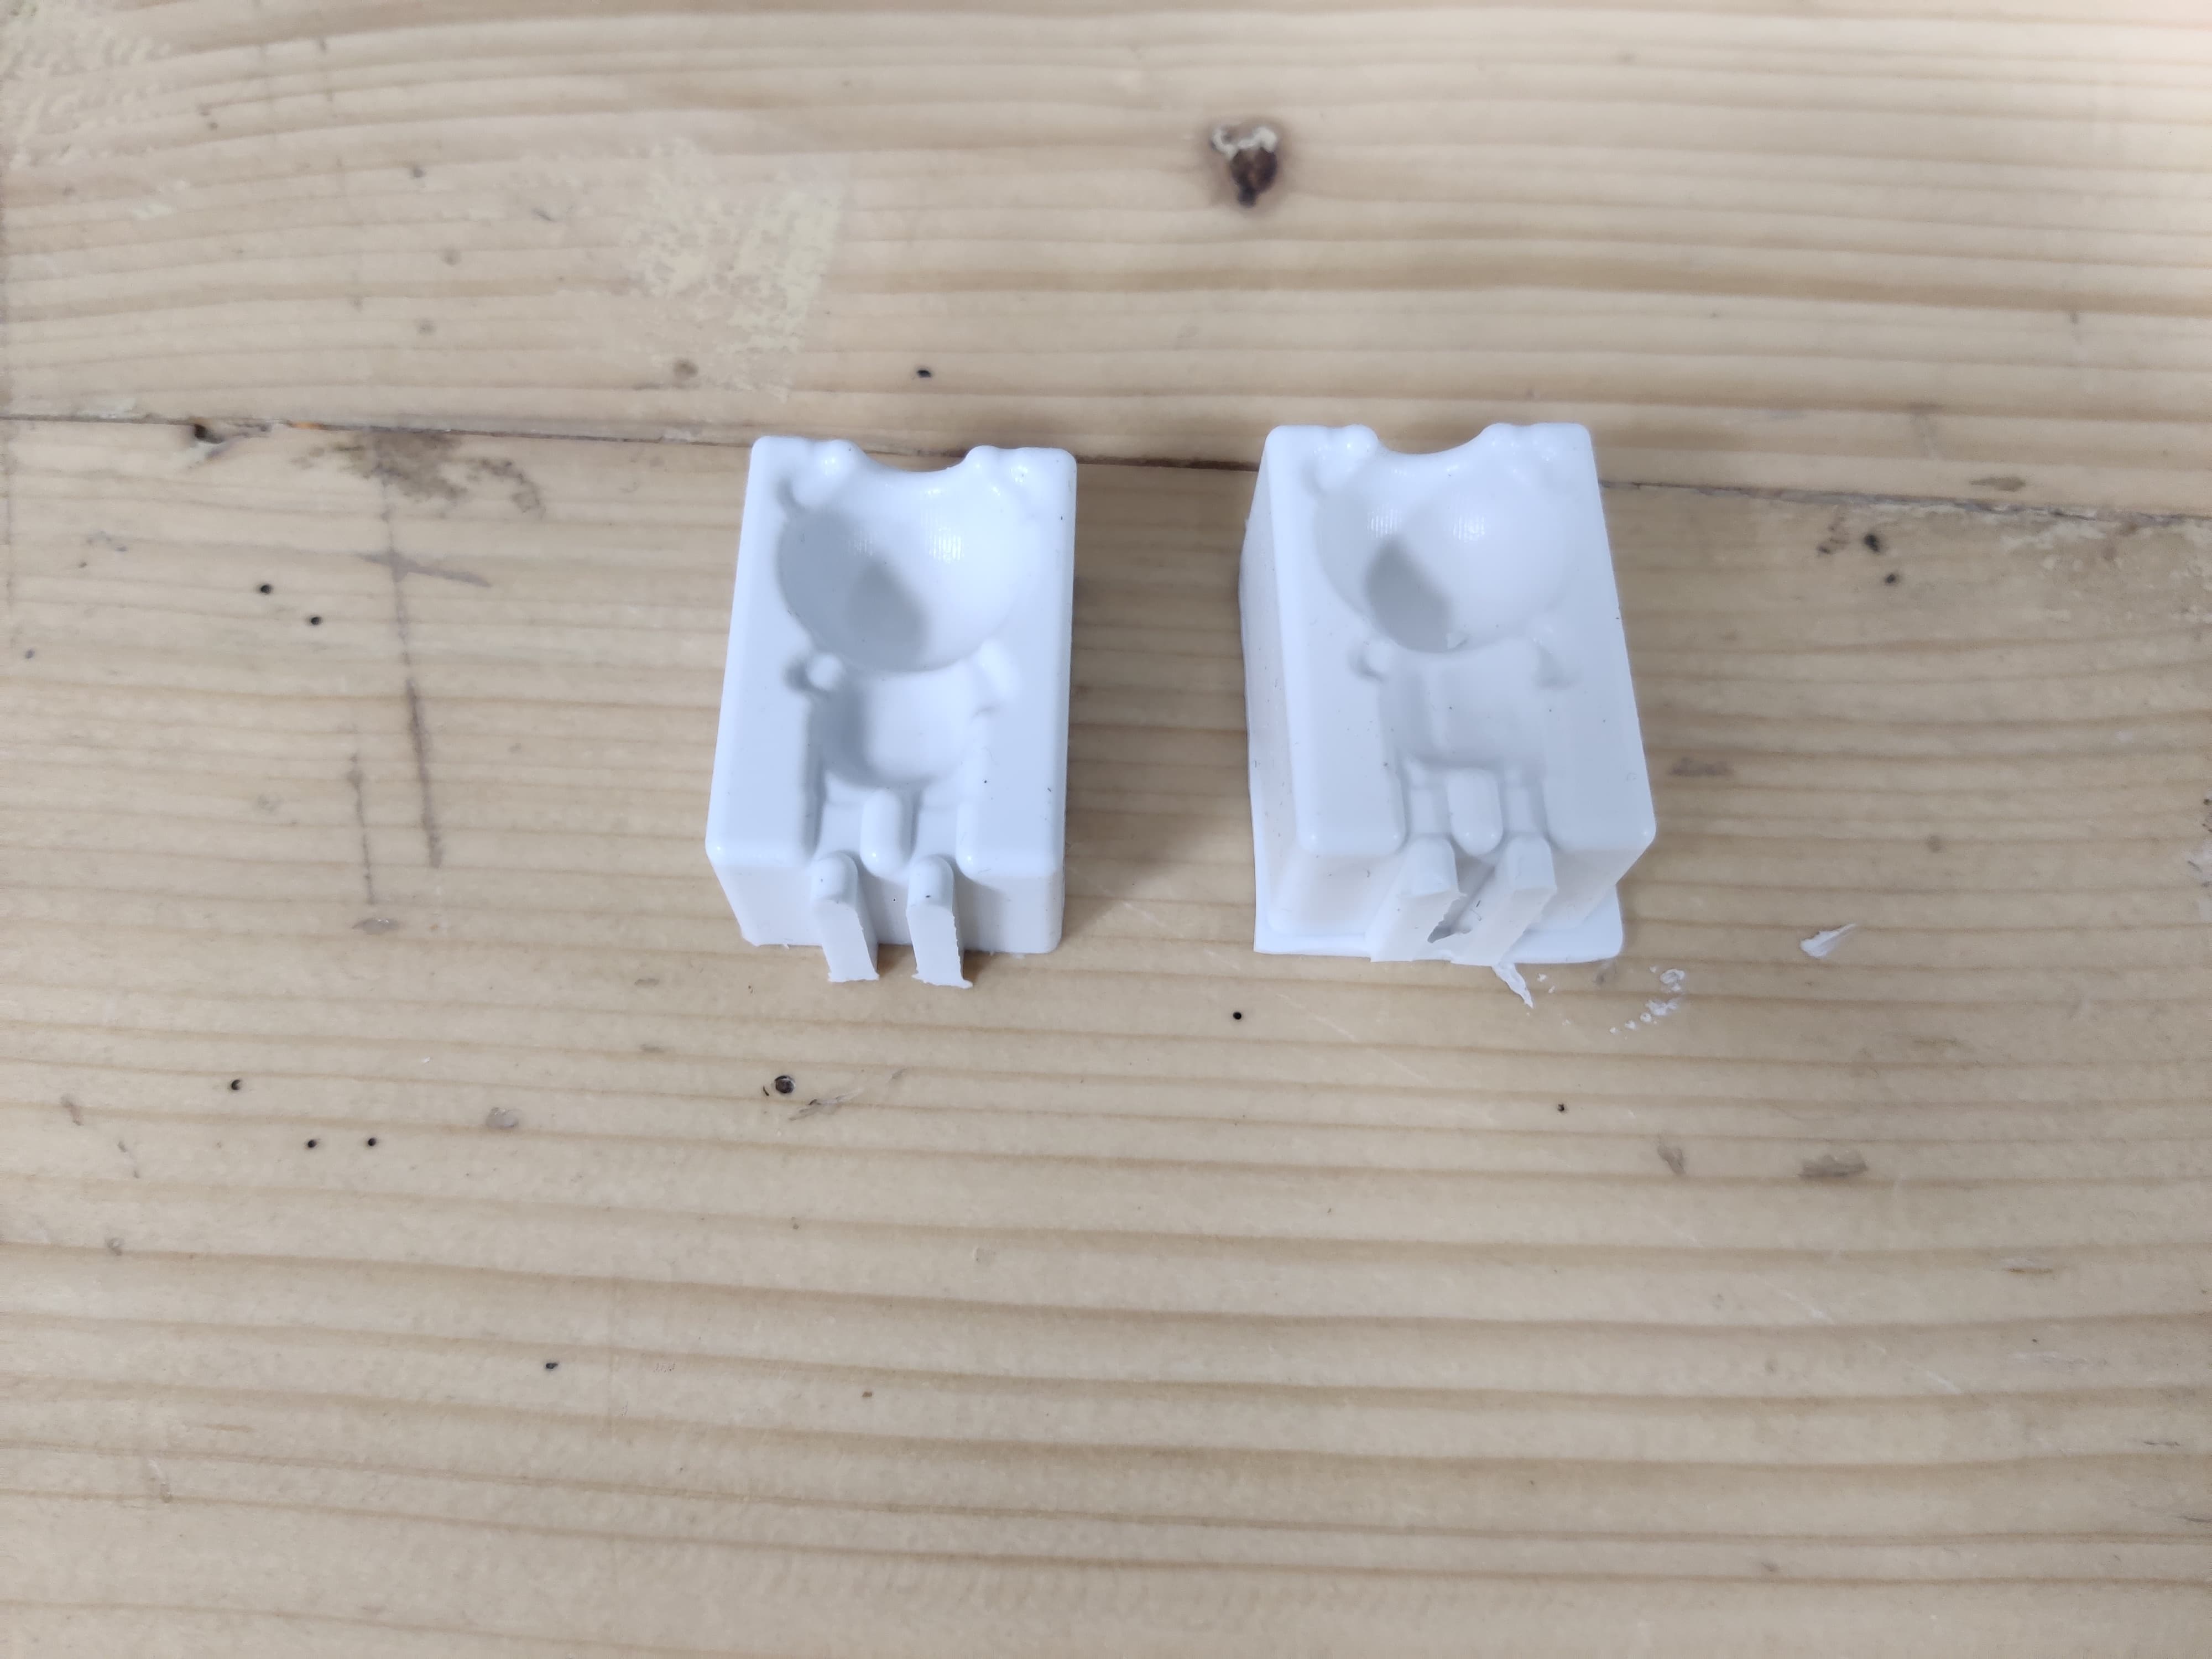
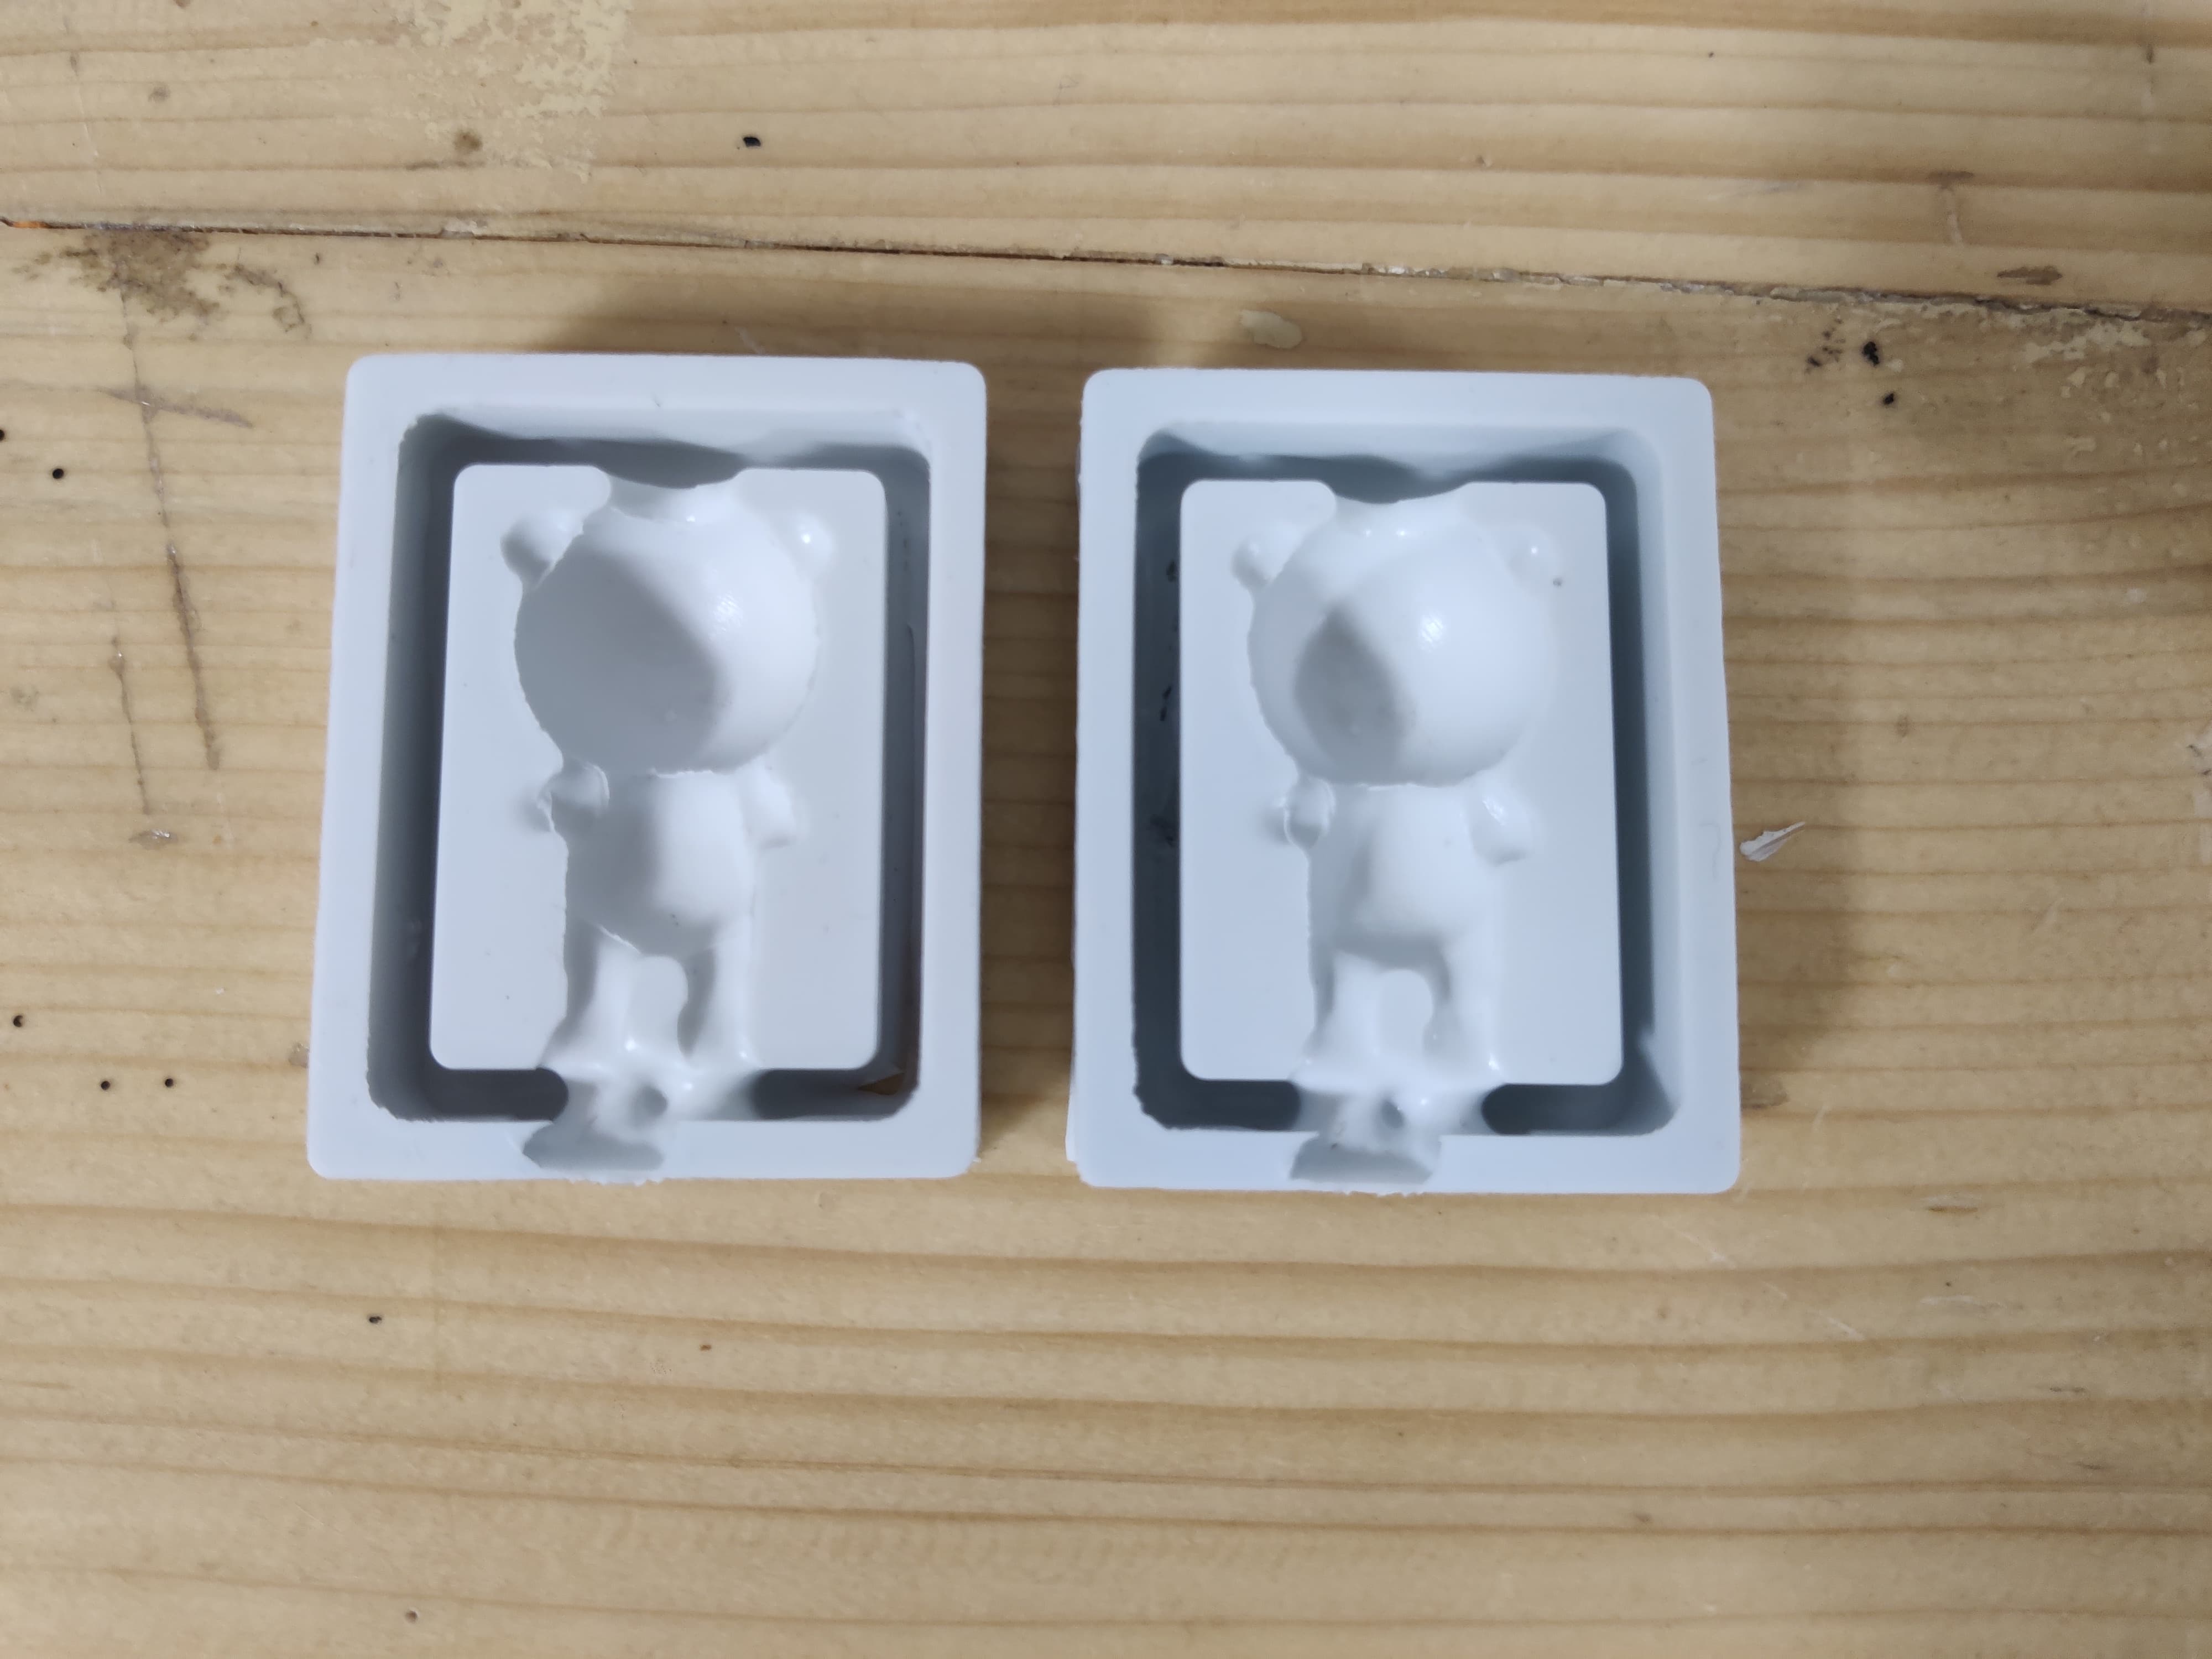
Results after pouring
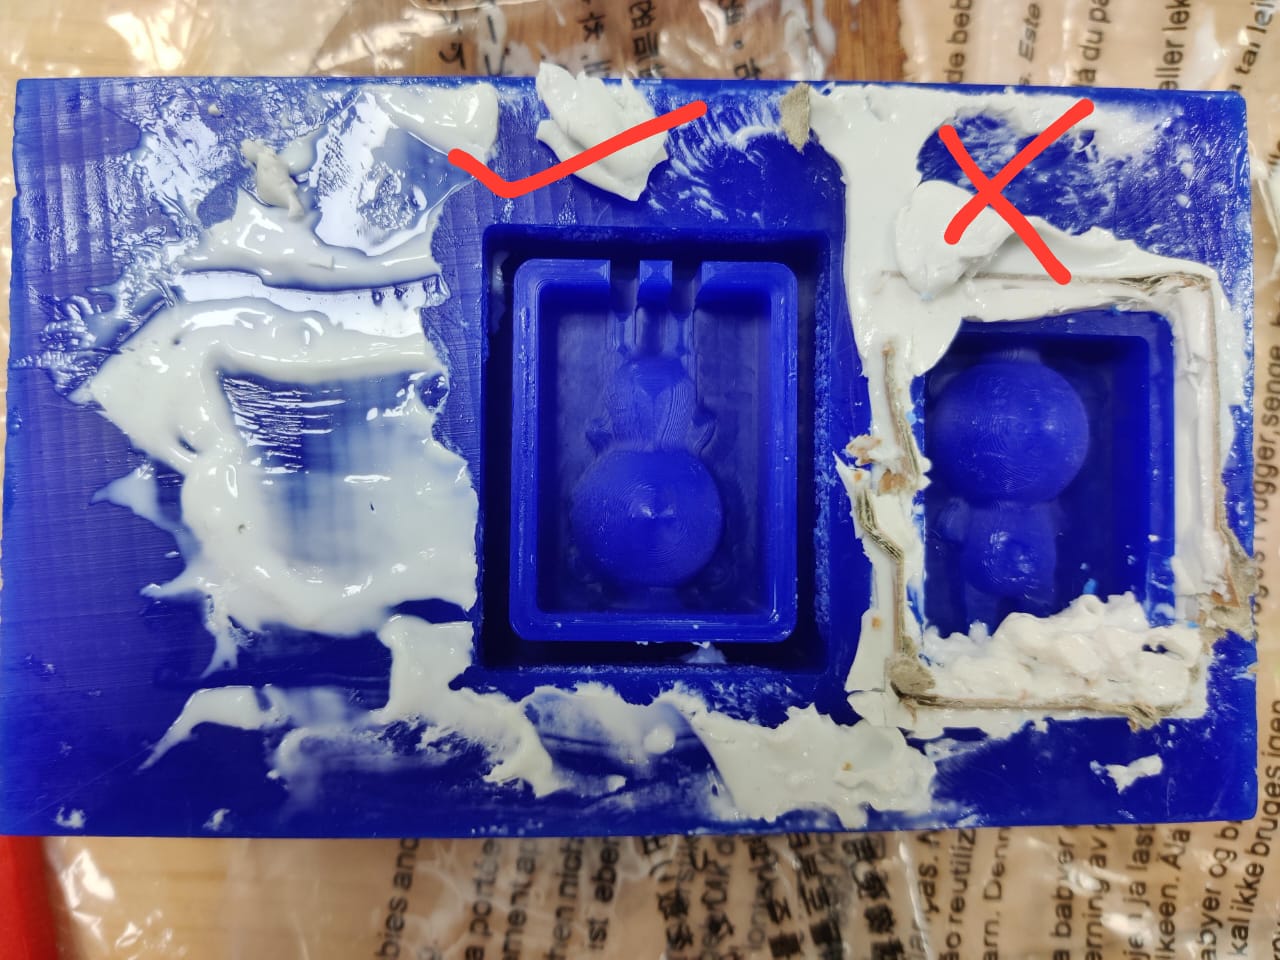

One mold didn't come out well which had cardboard wall the other one turned out good
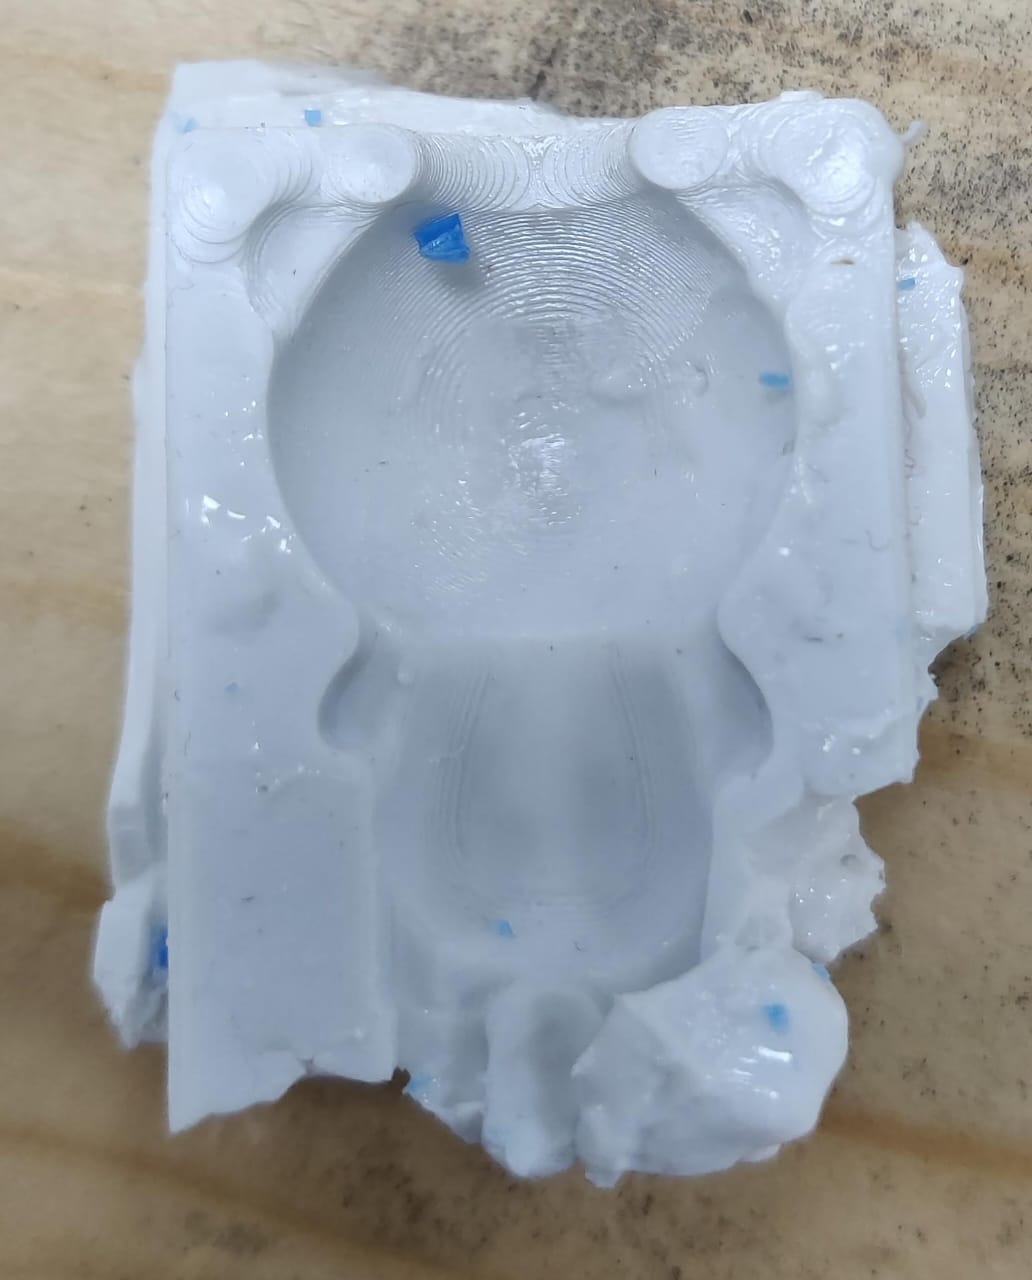
After this I trimmed the extra layer from the silicon mold
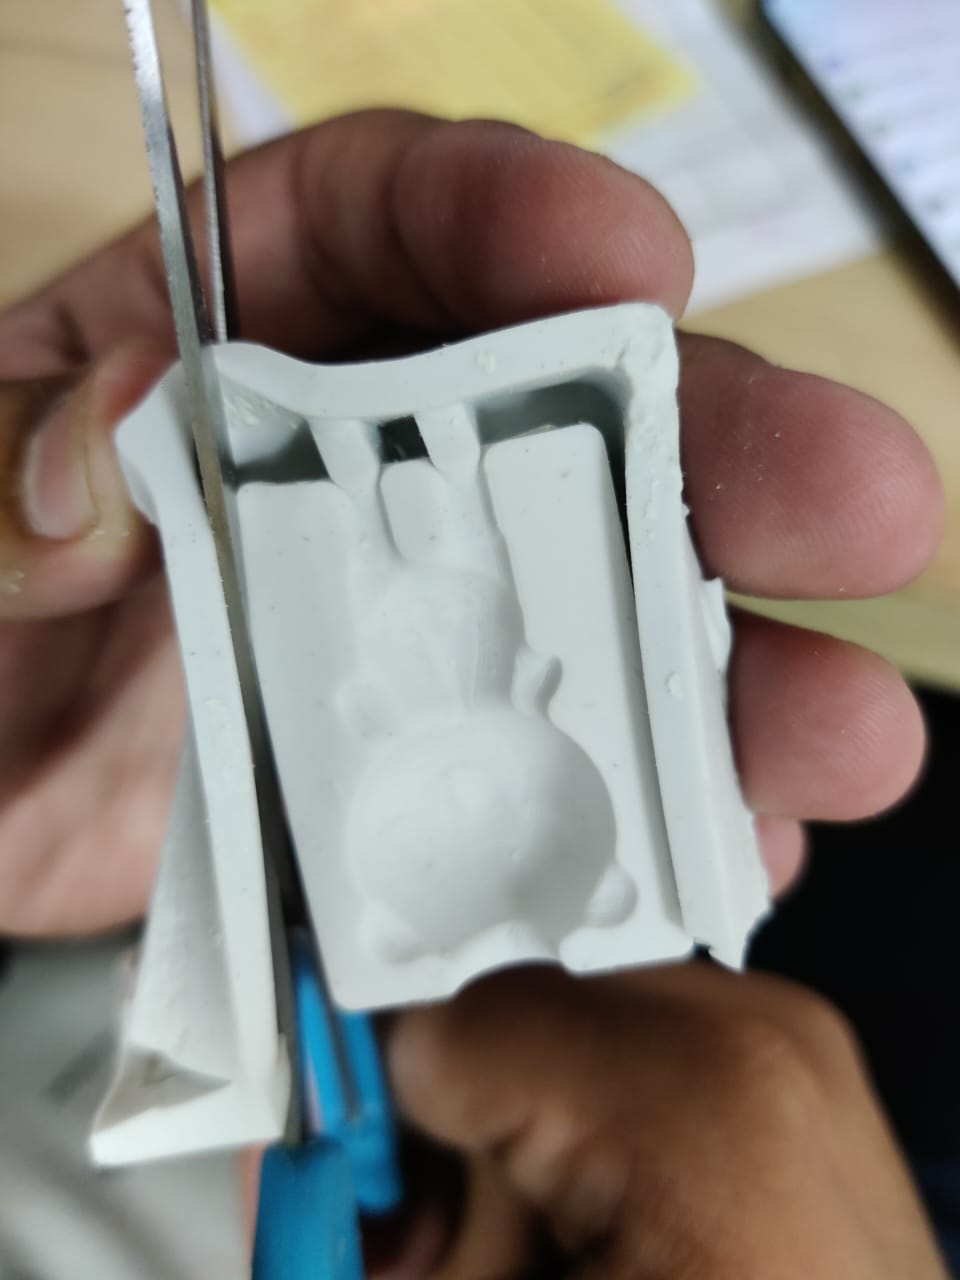
I have poured silicone in another mold but for timing to try out the casting I poured white cement into the half mold in the proportion of 2:1, 2 of cement and 1 of water

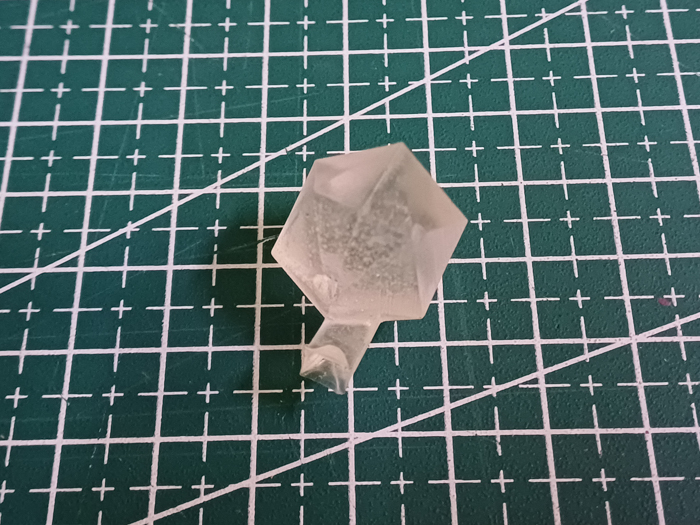
Casting resin
We got craft resin from a local vendor. This had to used in a 2:1 ratio. For 2 parts of Resin, 1 part of the hardener.
In mold:
Bring your silicone mold together with the help of rubber bands and pour through the opening.
Here, I had a two parts of silicone, so I rubber-bound them together and used a syringe to pour the resin.
Upgrade
In the above wax milling we did not use the ball tool so the wax was only not finished, so I milled the wax again and for the finishing layer I used 3mm ball tool.
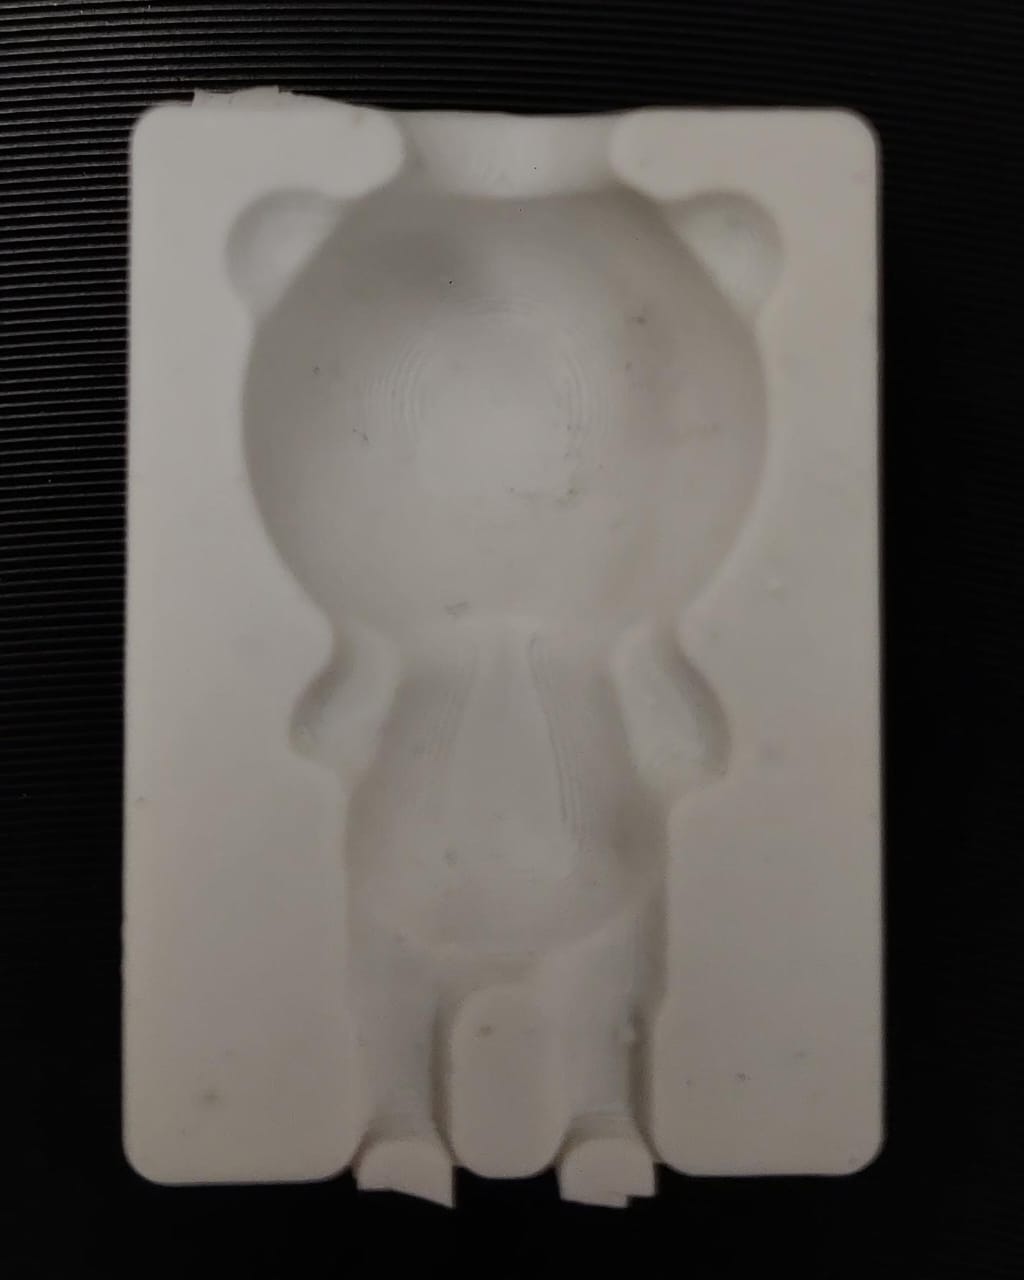
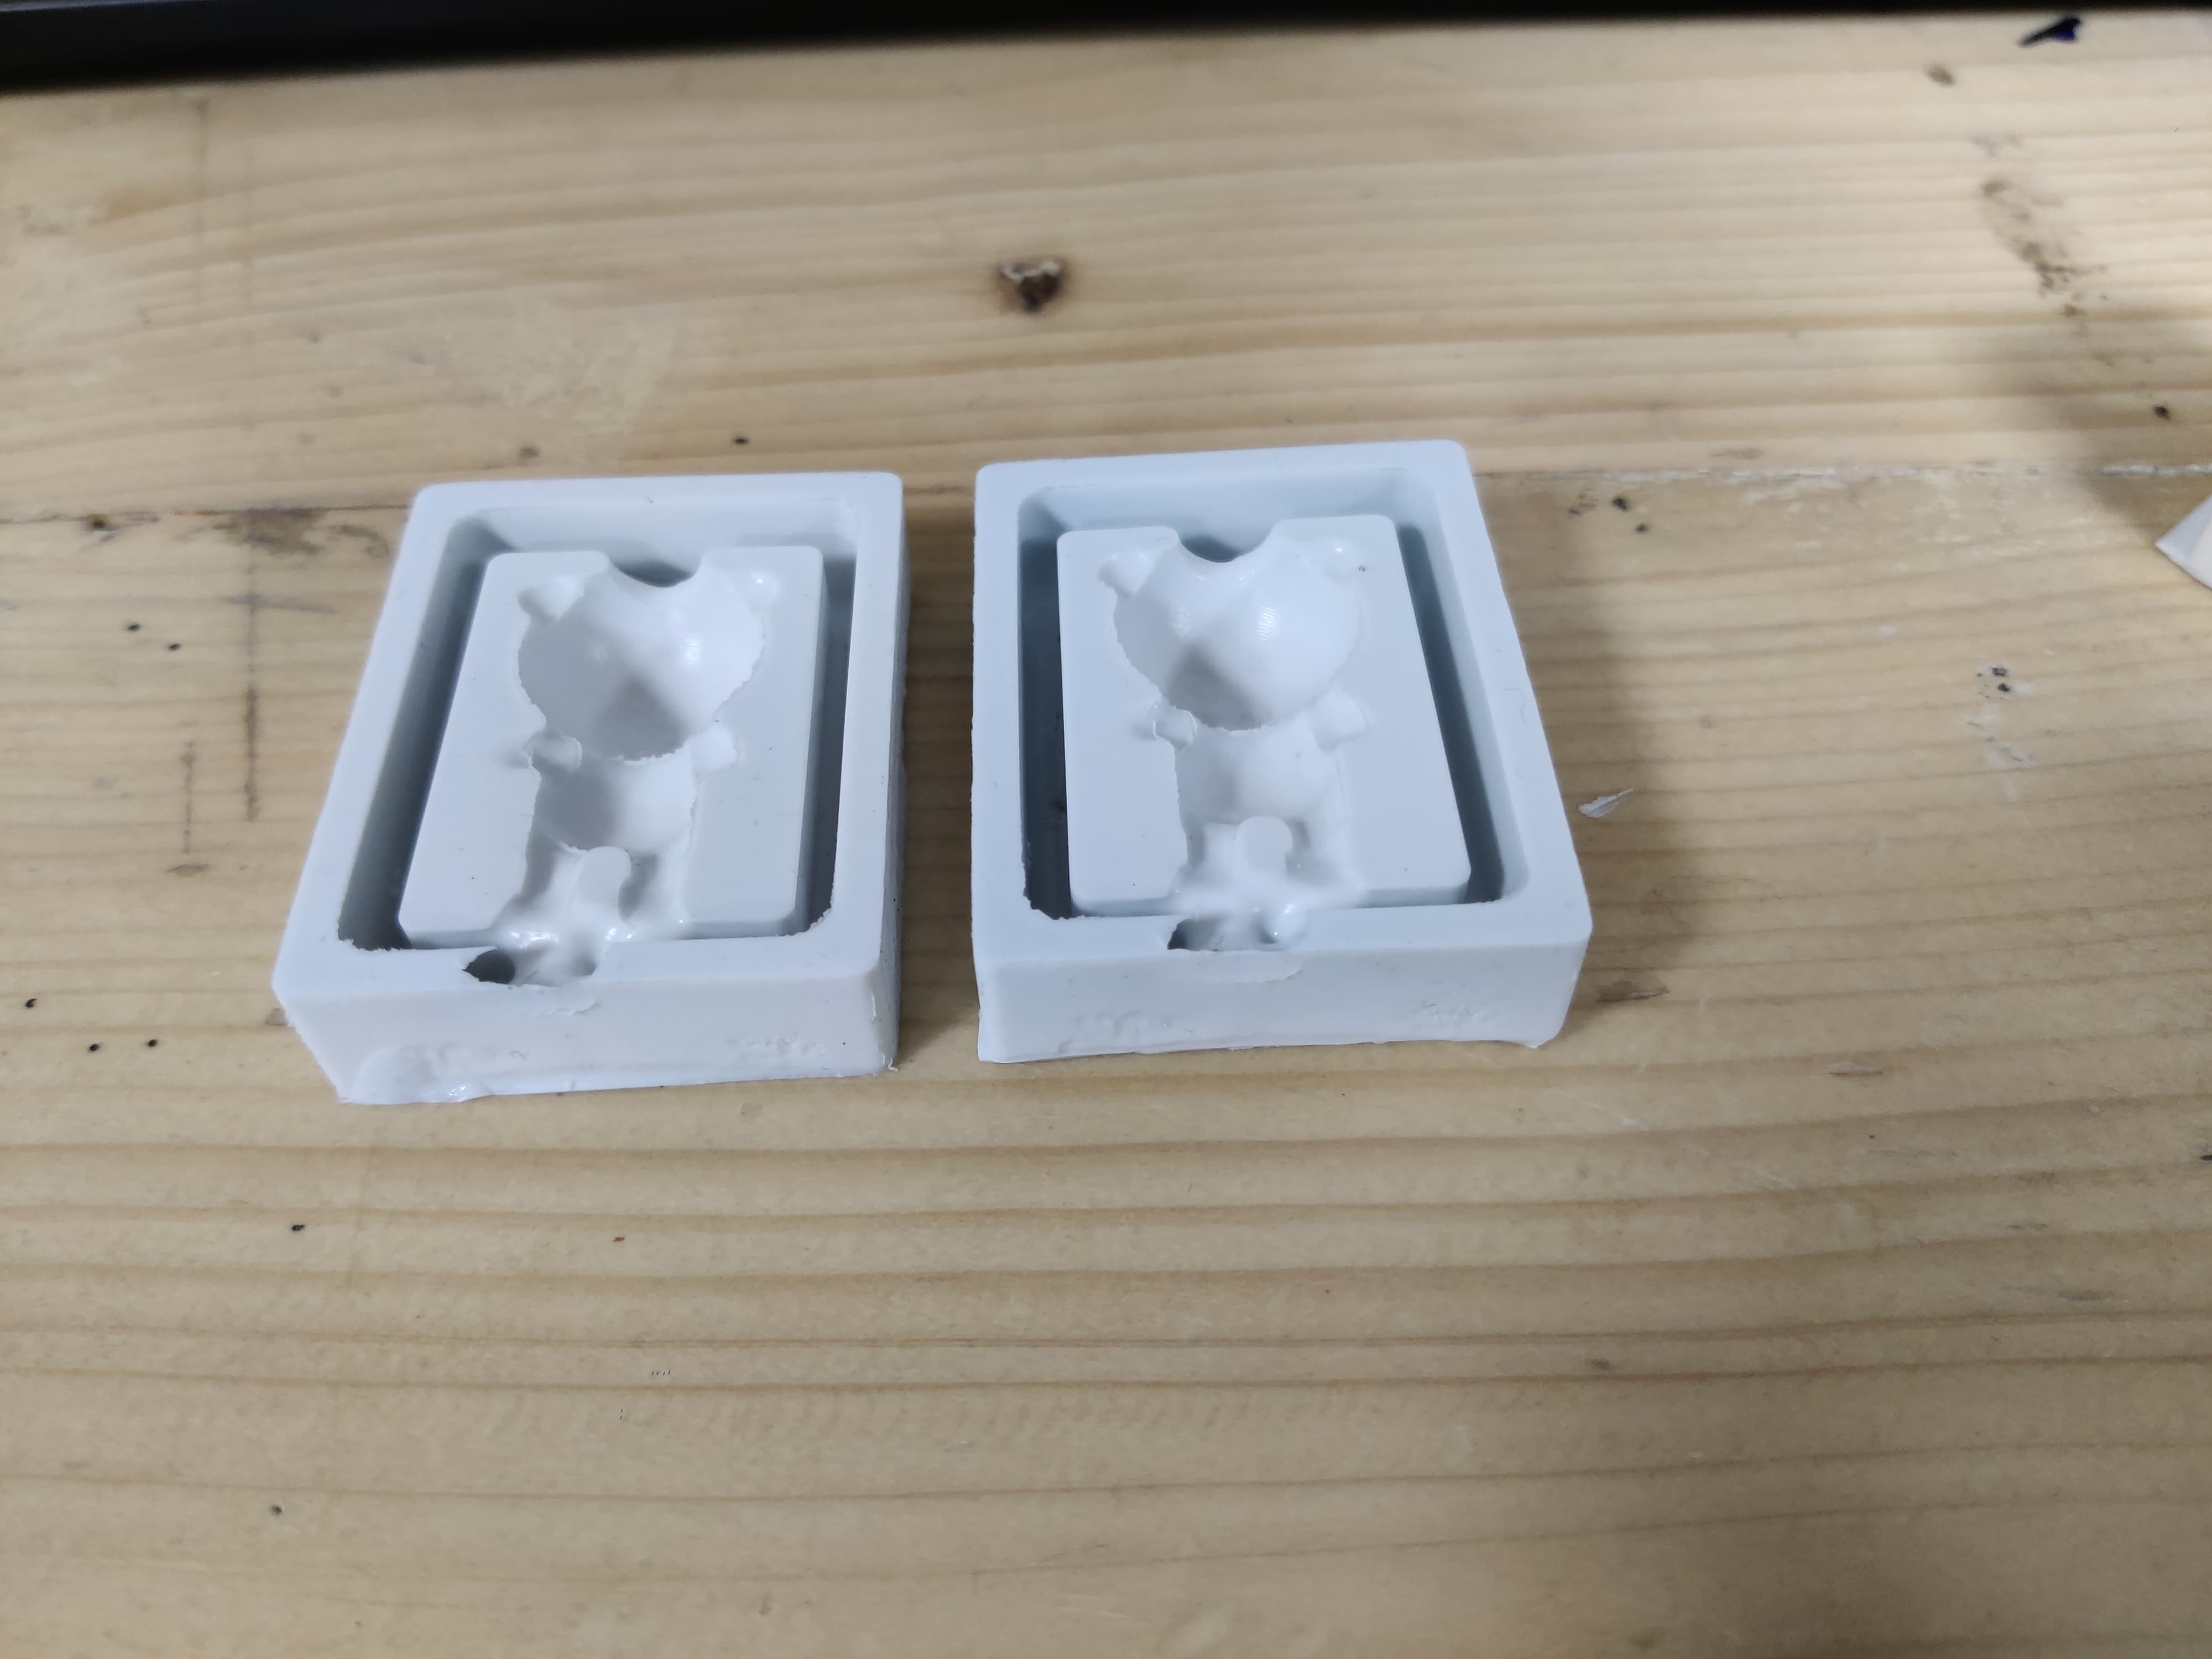
Recasting
After doing the wax milling again I did the silicone casting too, the process remains the same as mentioned above.
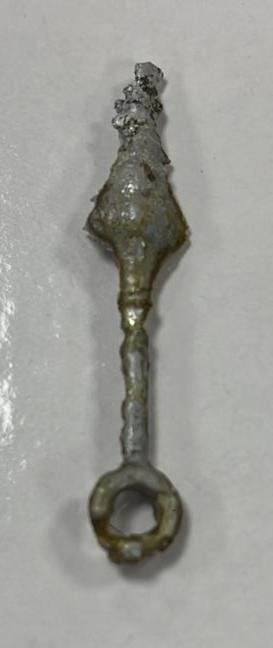
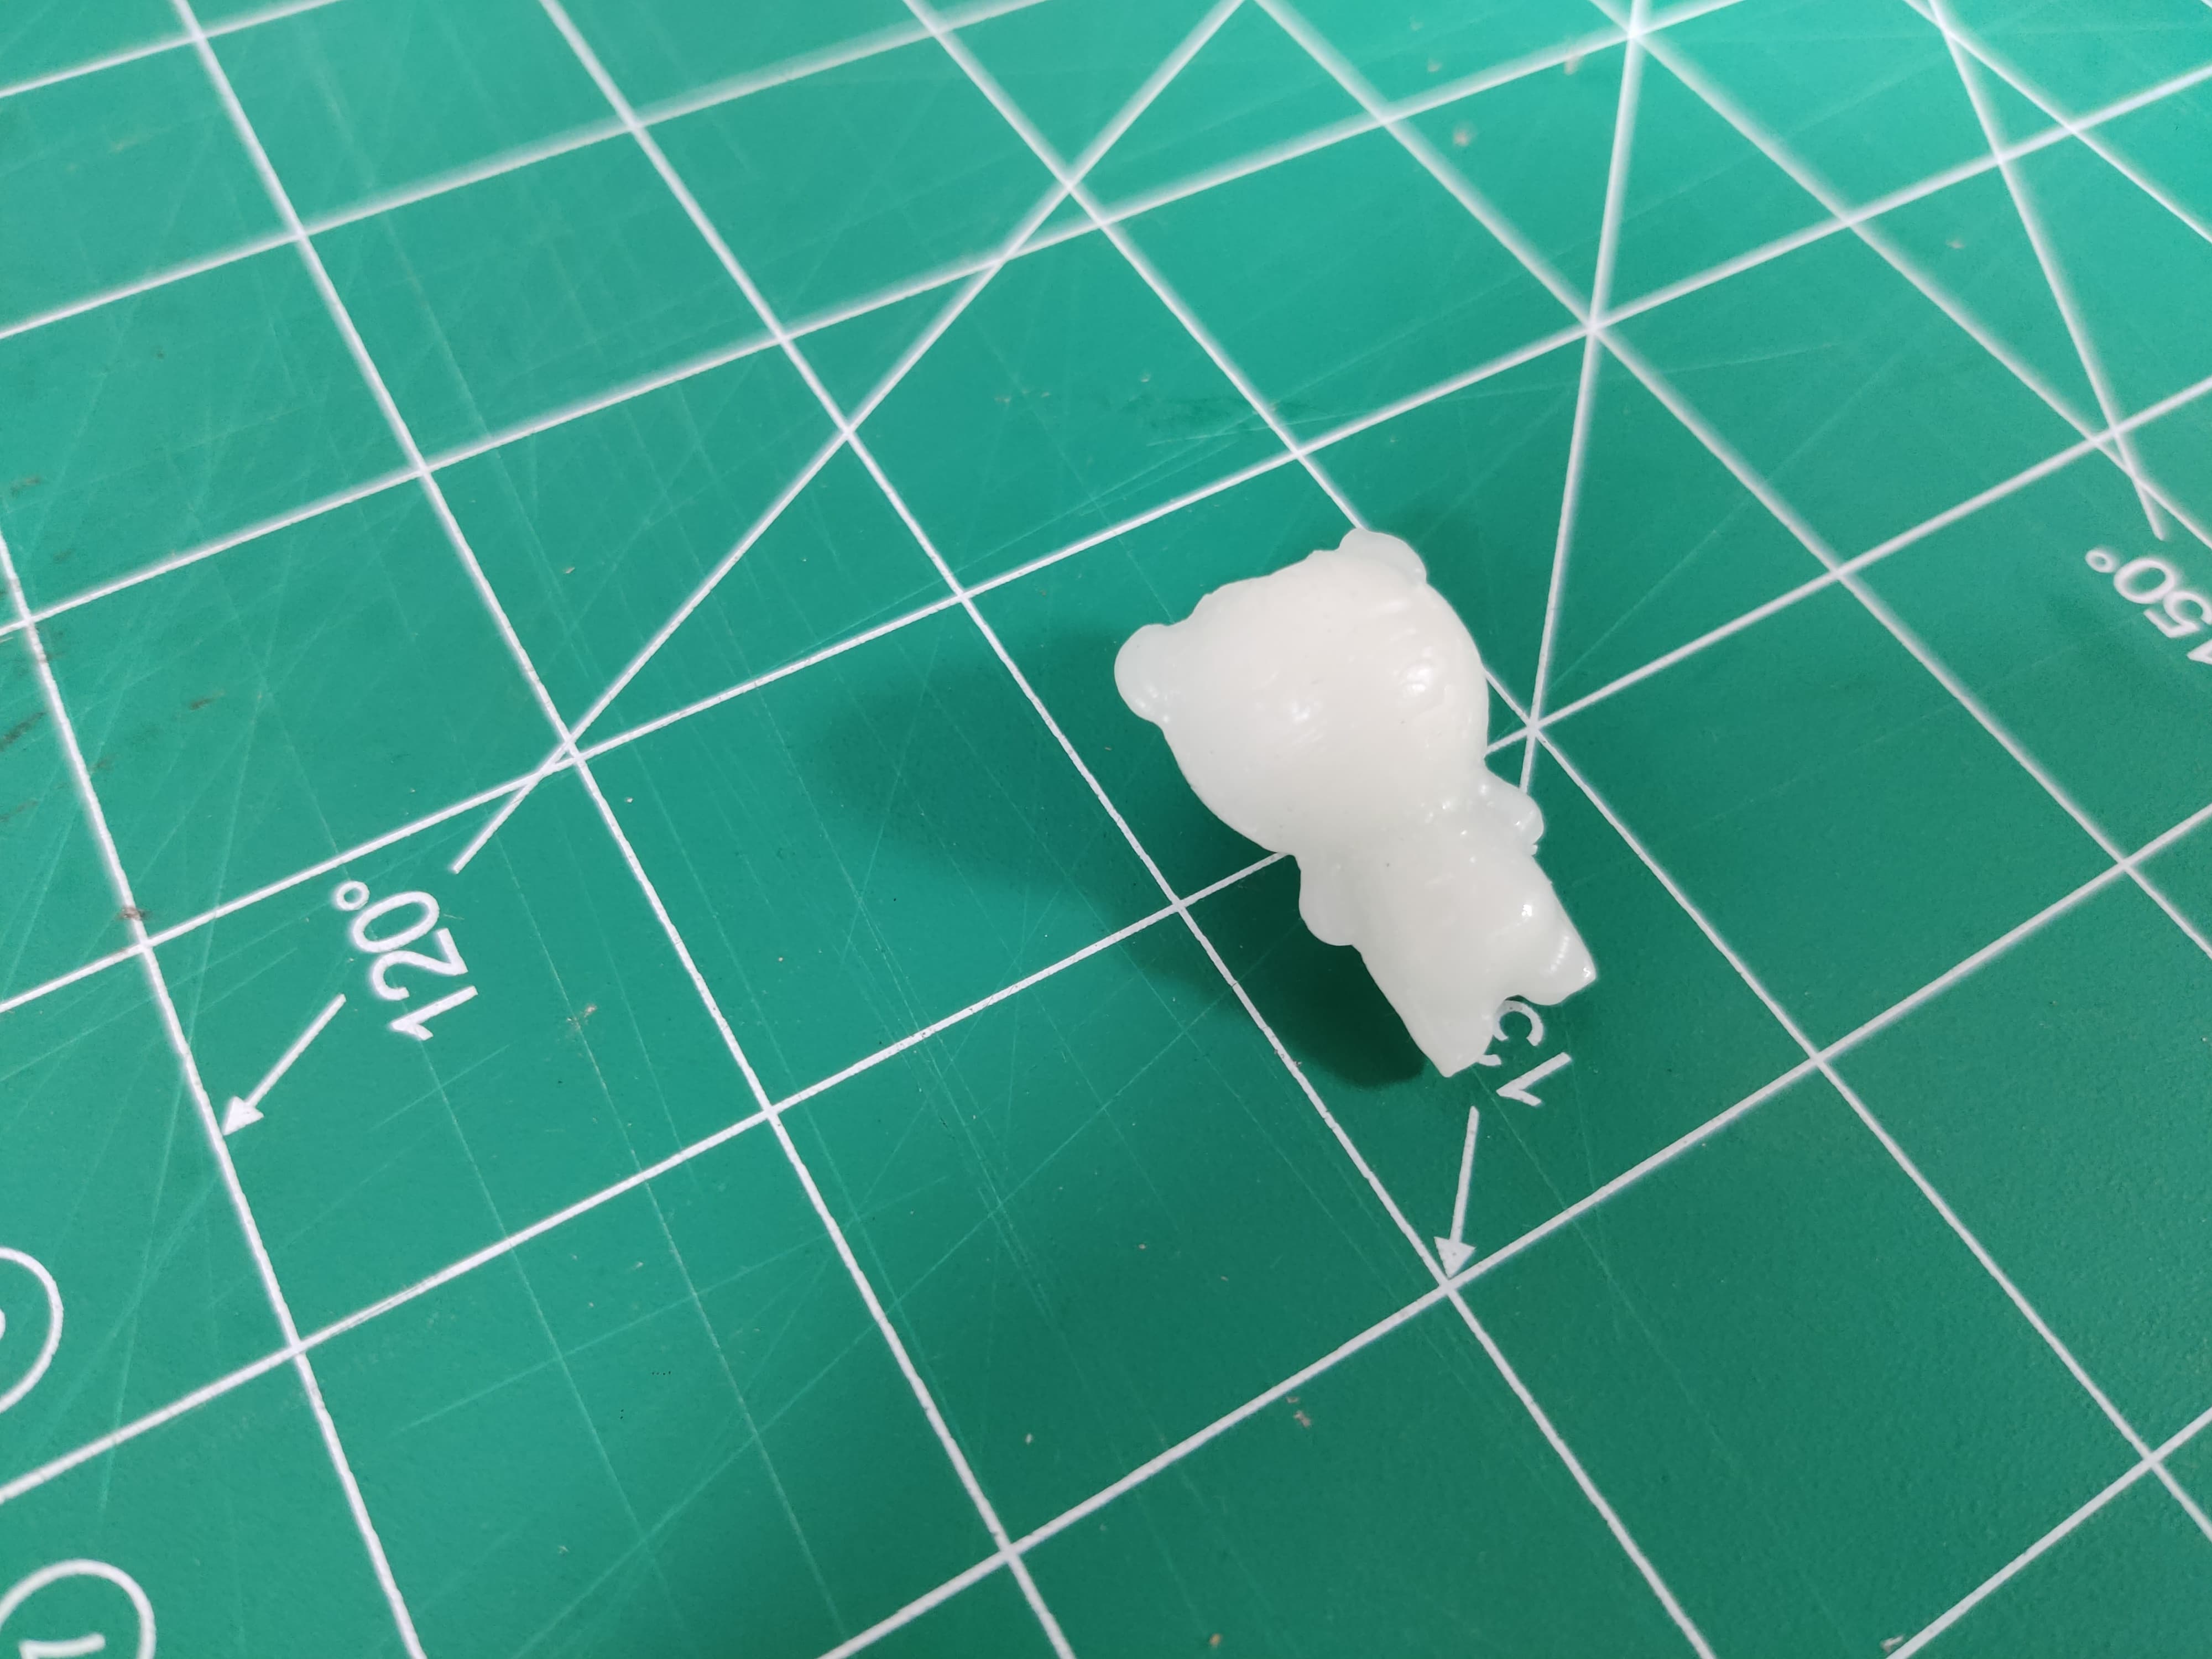
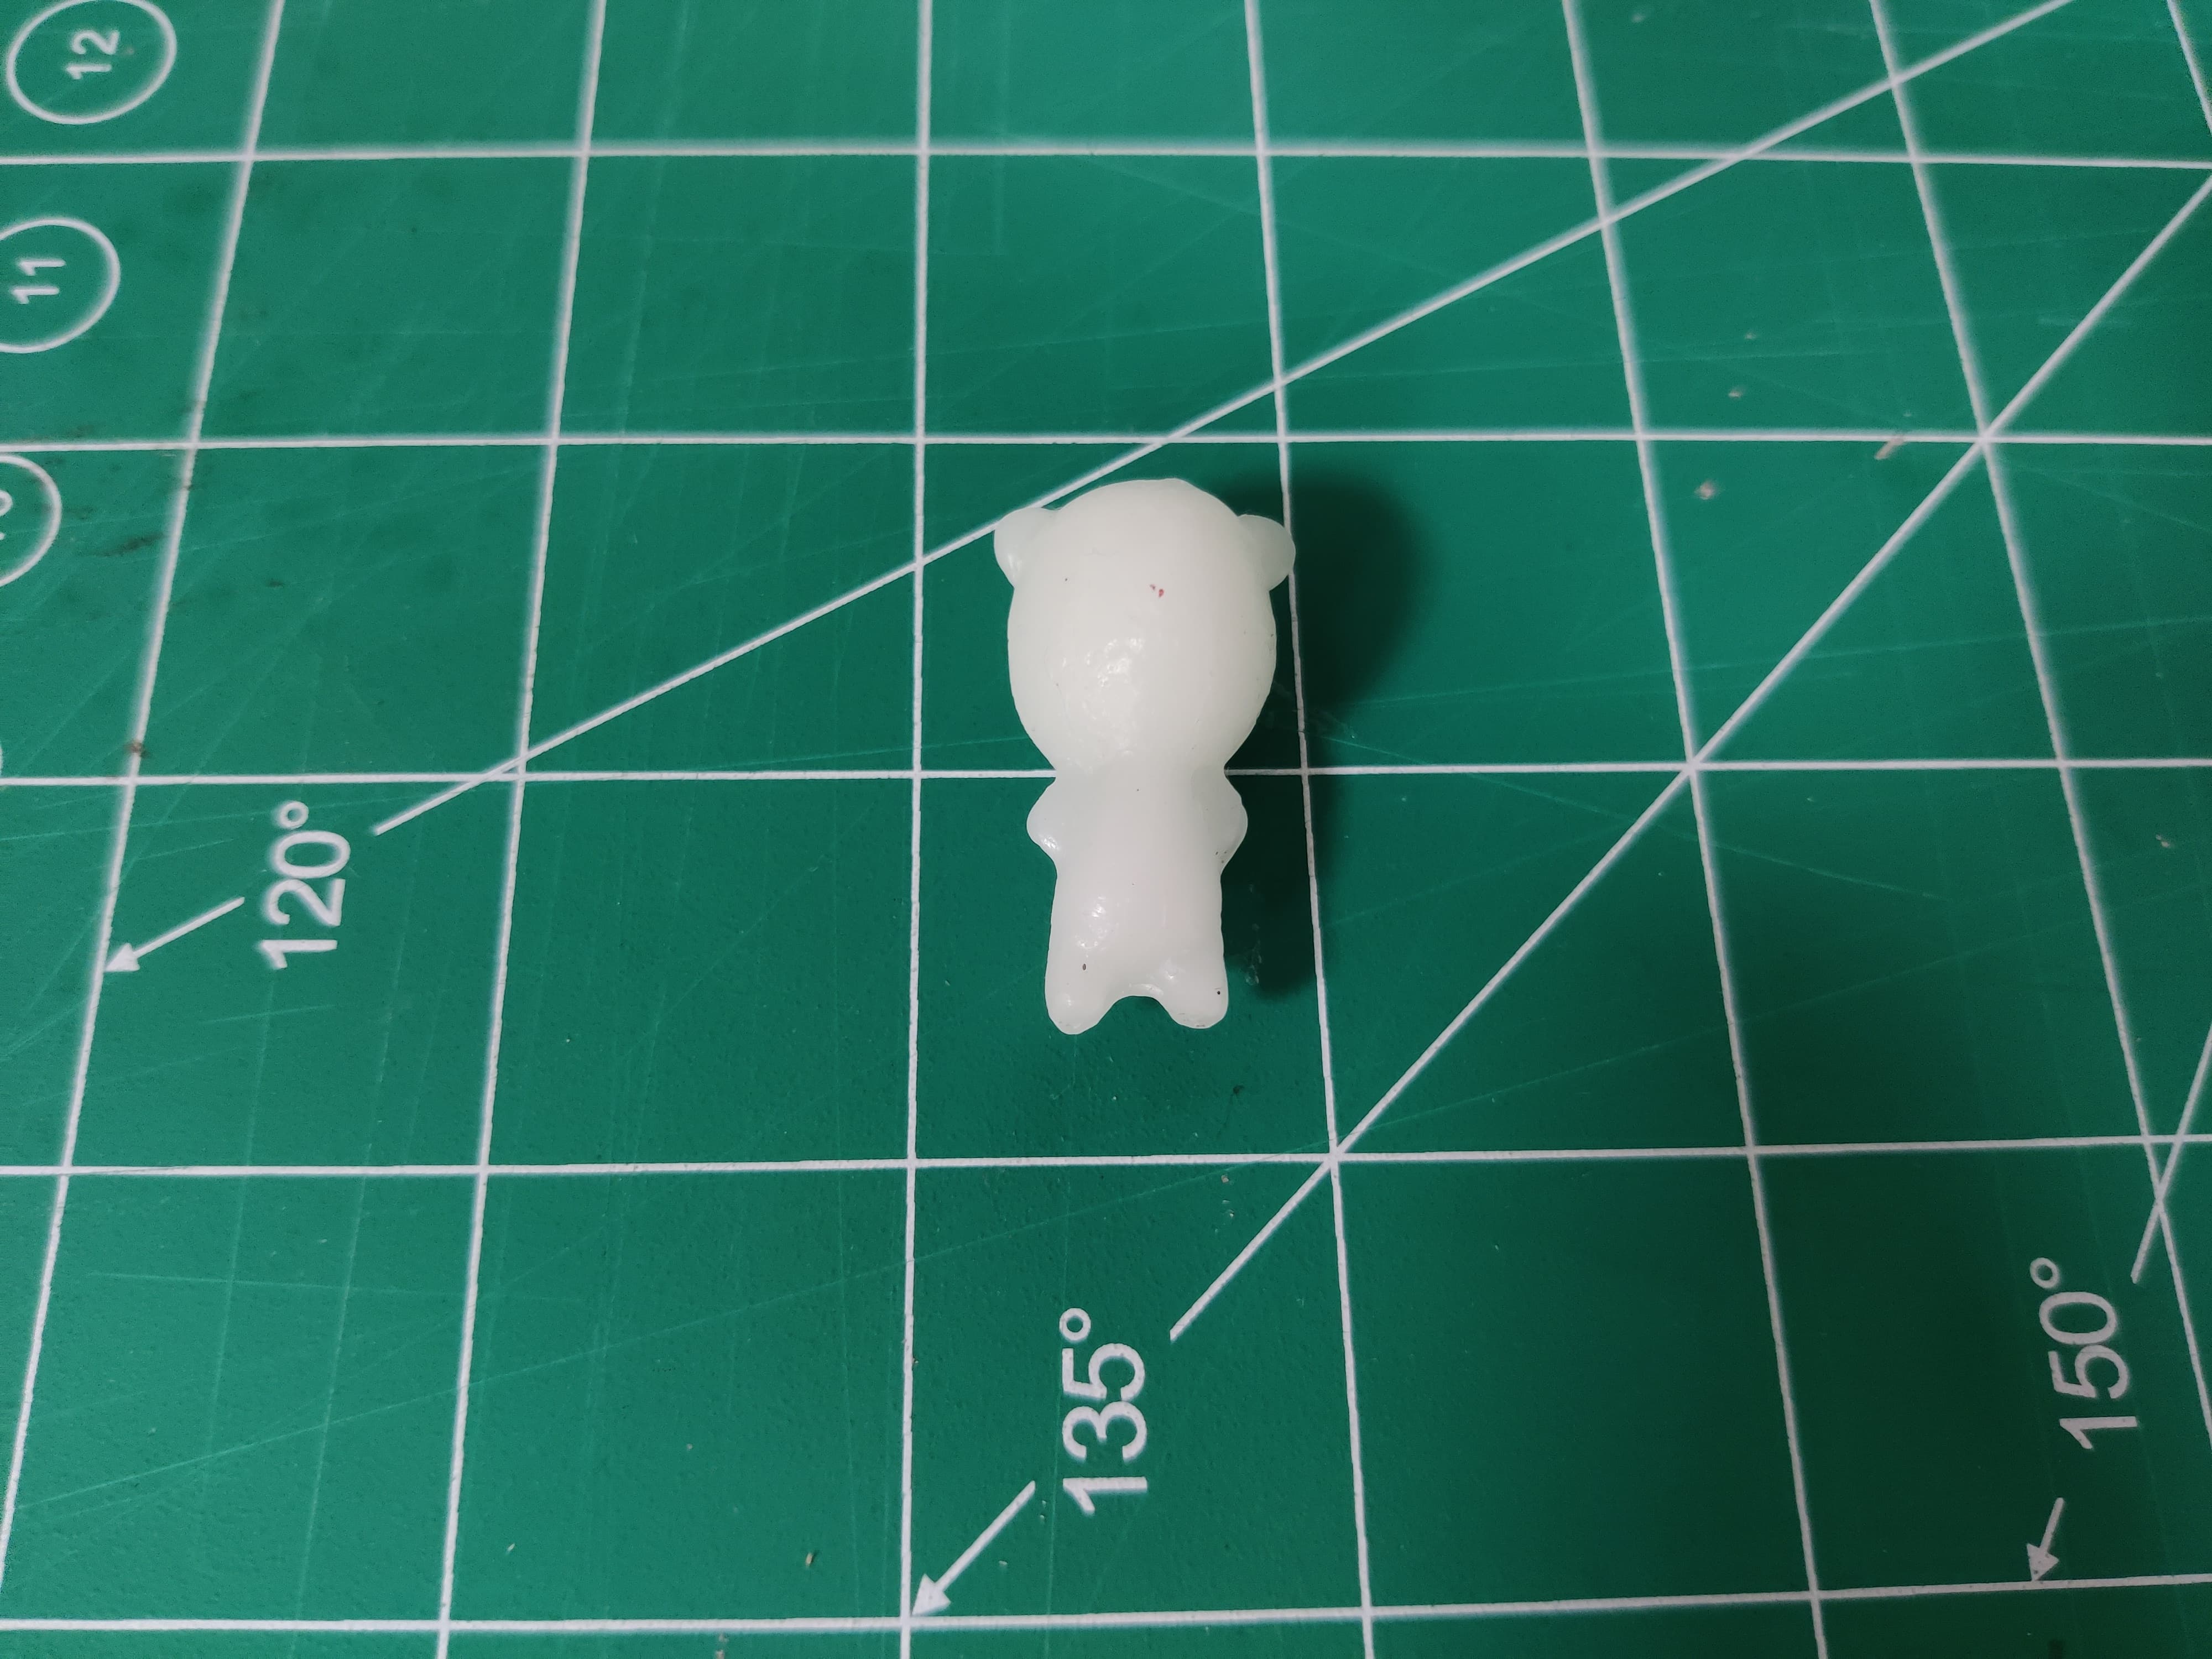
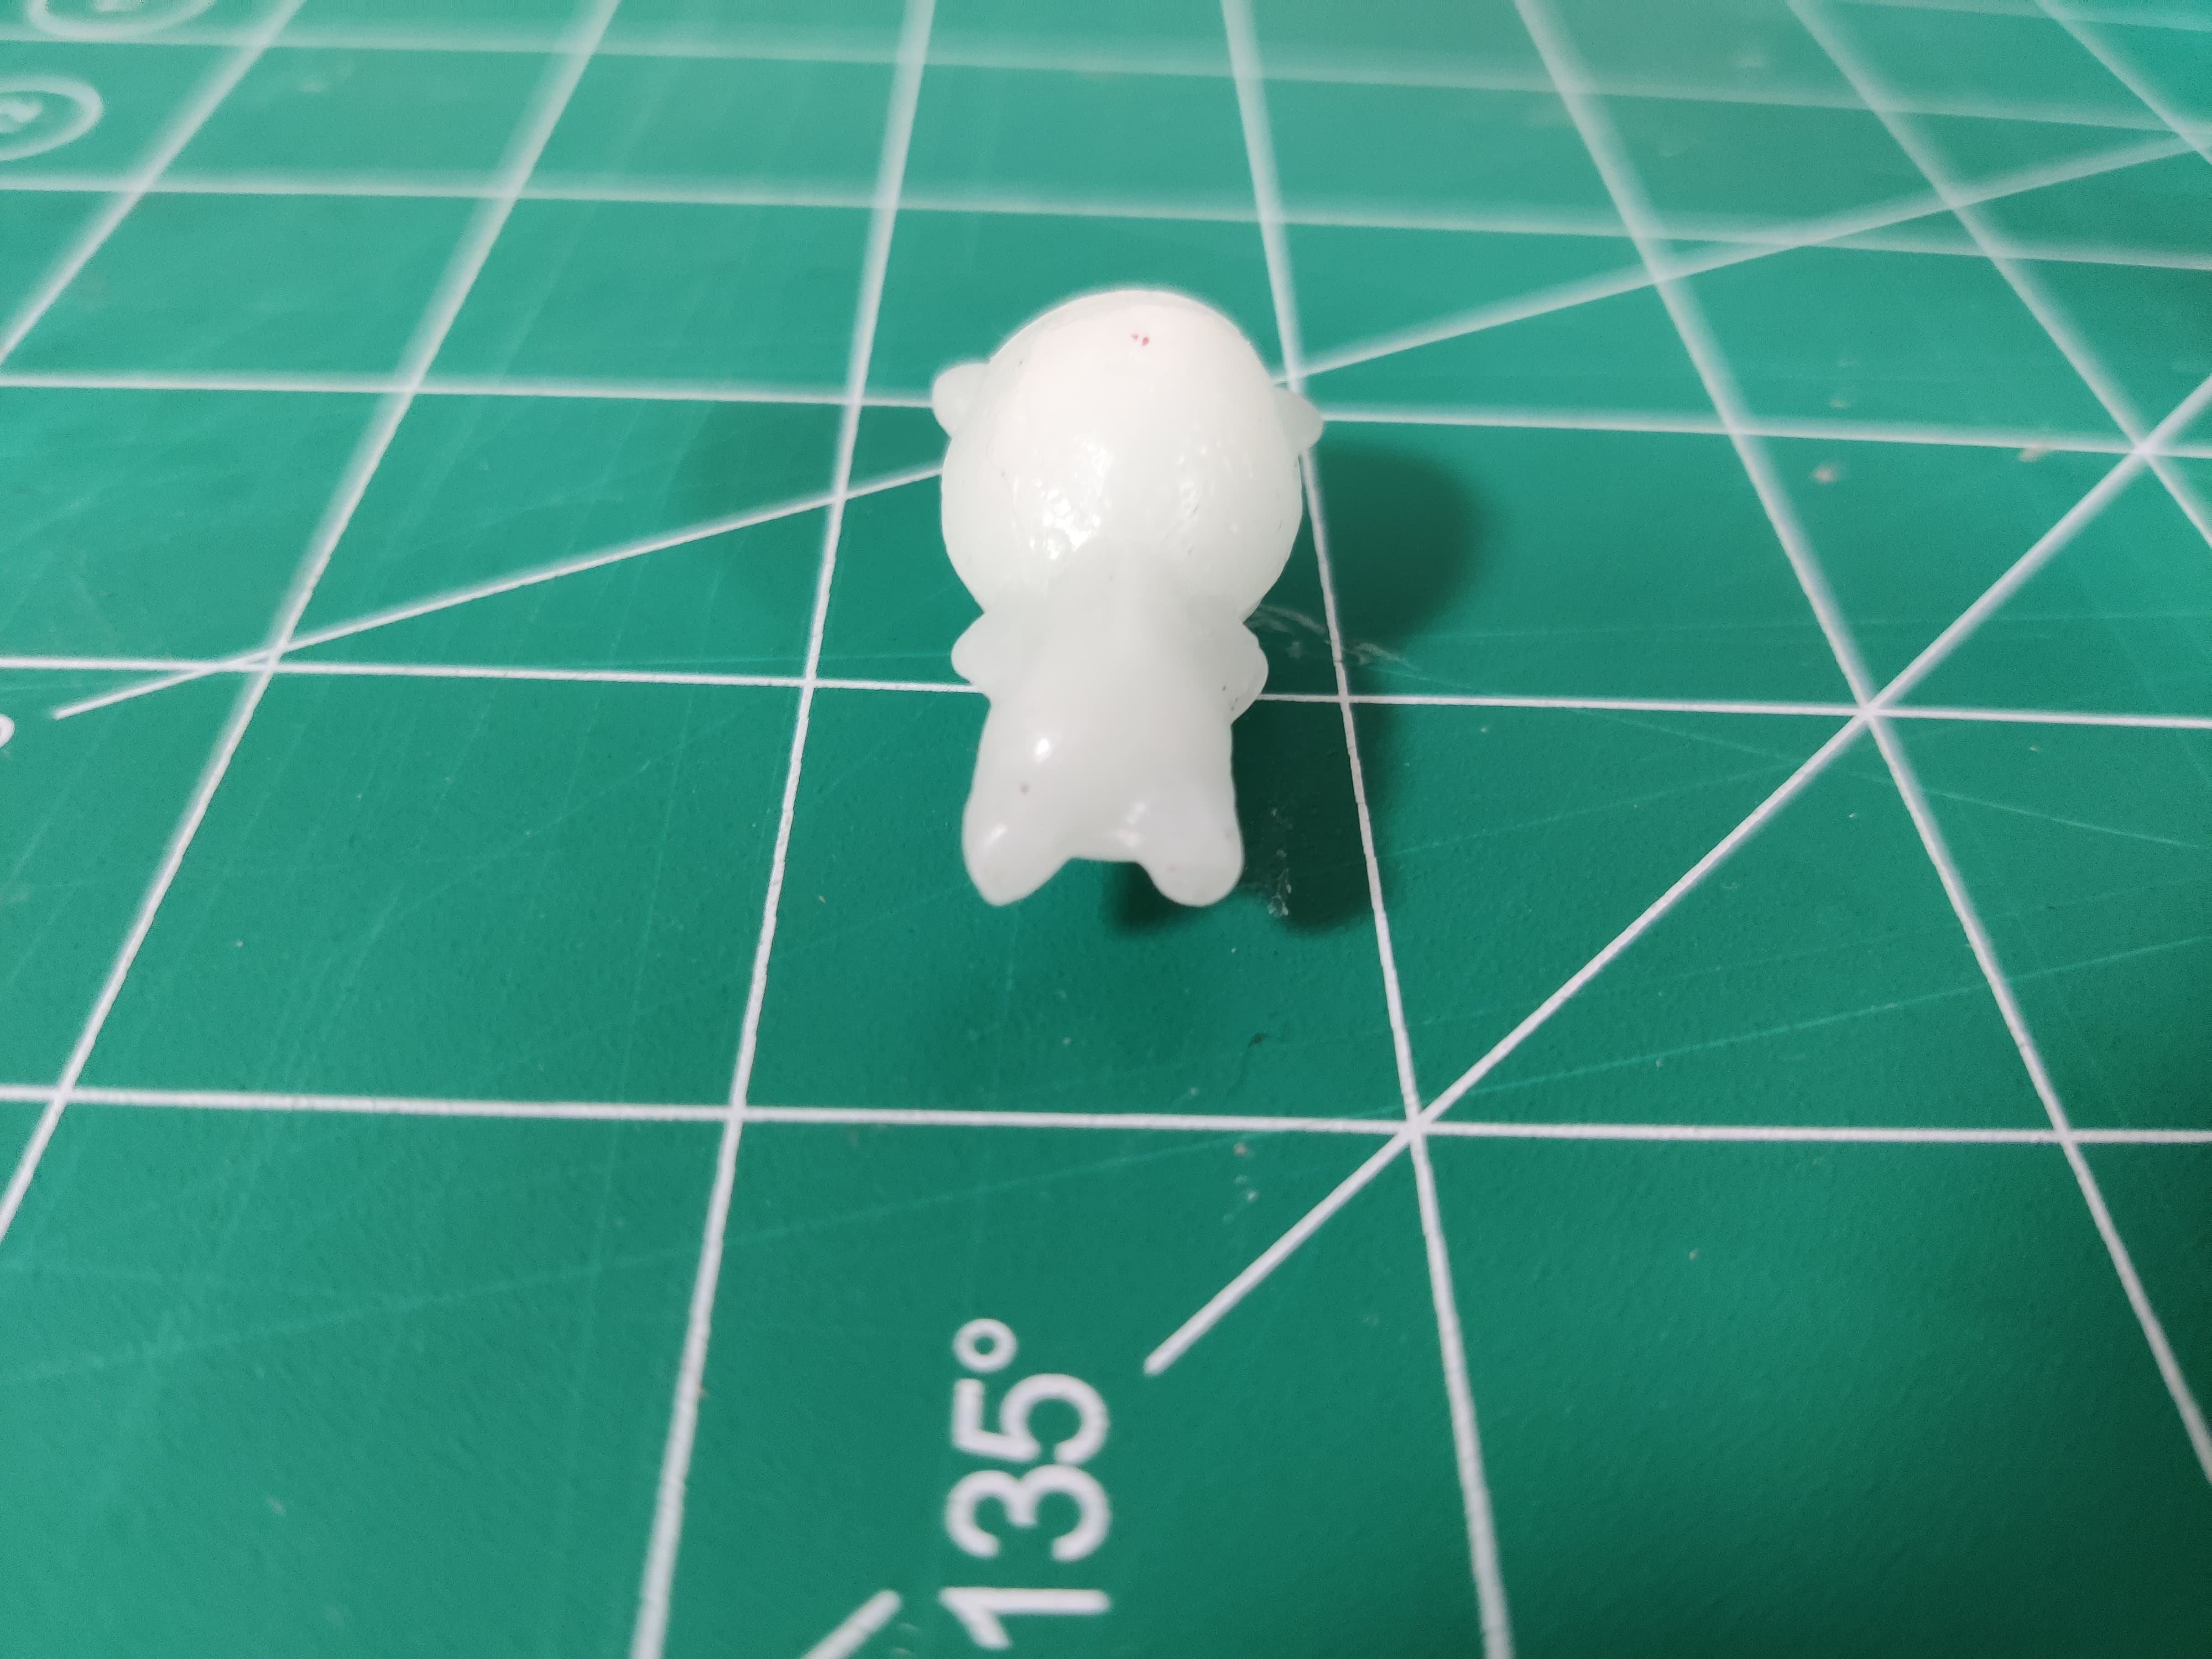
Casting Wax
After the silicone mould was ready I casted normal wax. I melted the wax and poured it again in the silicone mould by tying both moulds with rubber band.
Hero Shots
Conclusion from this week
This week, the group reviewed safety data sheets for molding and casting materials and conducted test casts with wax, resin, cement, and soldering iron. Wax provided the best results with ease and speed, while resin and cement required precise mixing to avoid issues. The soldering iron was impractical for casting. Individually, I learned to use SRP player software for wax milling, including the entire process and proportions for silicone molding. I cast parts using cement, wax, and resin, enhancing my understanding of each material's properties and handling requirements.
Download Design files
Image Credits
All images of cover page are credited below:
https://images.app.goo.gl/mETtkJcFK3pTH8vw8
https://images.app.goo.gl/meg2kdNXzH3
https://images.app.goo.gl/j33C1WrD3sp25EZi8