Embedded Programming
Week06
Group Assignment
For this week´s group assignment I had some difficulties, as my beautiful wife needed a minor surgery to retire a wisdom tooth the same day as the class. Fortunately, everything went ok with her and she started recovering very well. The "Fab" challenge for me was to update with the group, as her surgery was scheduled 11am (CdMex time).
We had to browse throught the data sheet of our microcontroller and compare the performance and development workflows for other architectures. We went to the webpage of our group assignment here. We compared the following microcontrollers data sheets:
We divided the information, and agreed to fullfill a comparative table. My individual contribution was to collect and organize the information for the Atmega328p.
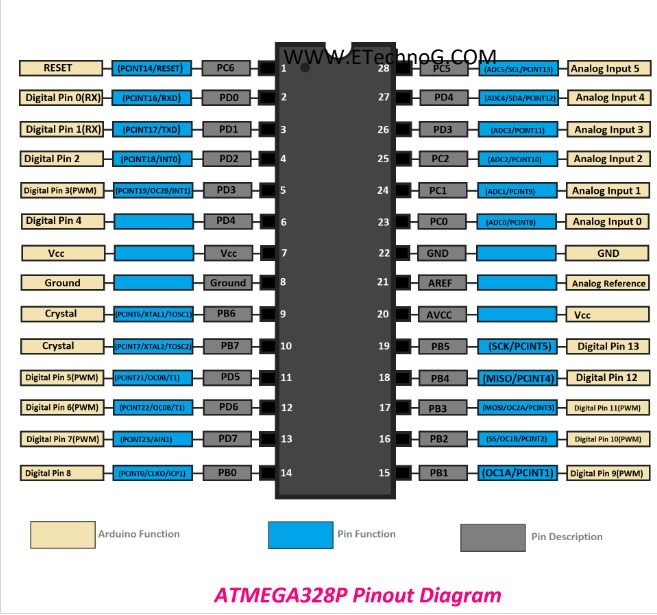
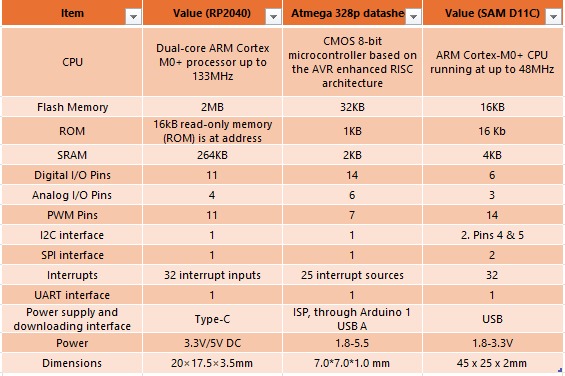
As you may notice, the RP2040 (which we used for the previous assignment and the individual one) is the most powerful in terms of flash memory, ROM and SRAM. In terms of pins (both digital and analog), the most abundant is the Atmega328p; while SAMD11C is the one with the most interfaces (both I2C and SPI). The power supply and downloading interface suggests that only th Atmega328p recquires a bridge, while the others include USBC (RP2040) and USB (SAMD11C). The most powerful is the RP2040, the largest is the SAMD11C, and the tiniest is the Atmega238p.
Individual Assignment
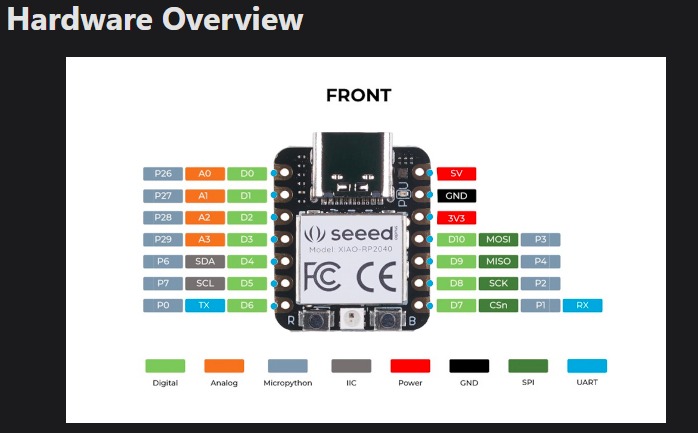
For this part of the assignment, I was asked to do write a program for a microcontroller development board, to interact and communicate. I used the one we developed in assignment for week 4:
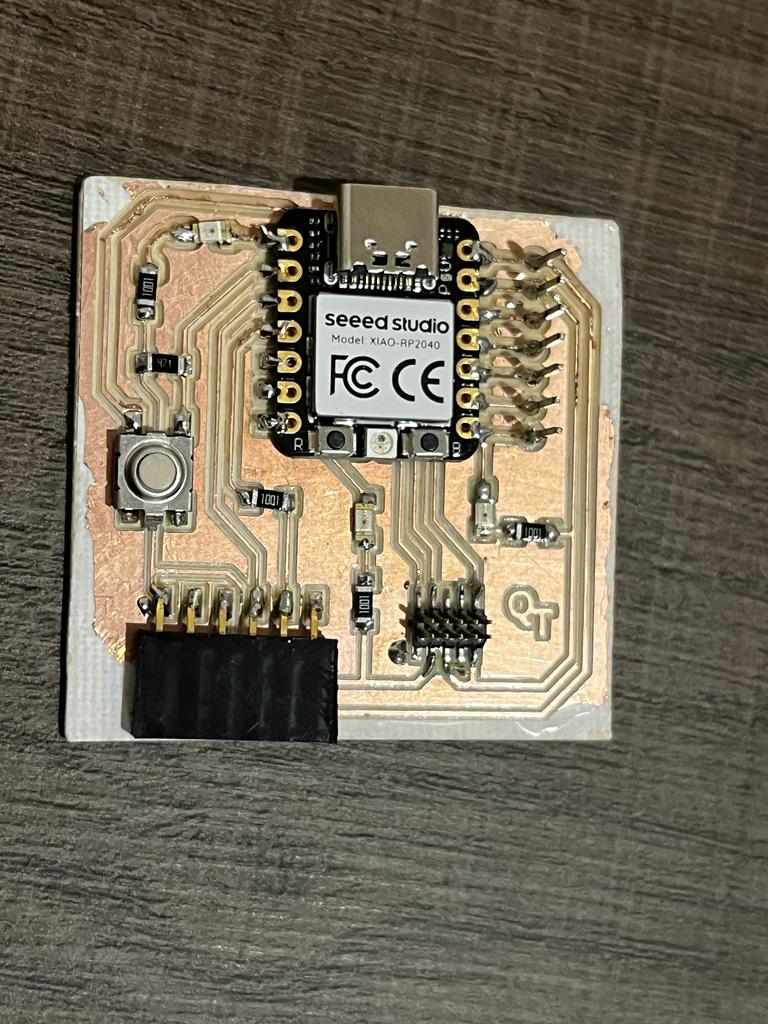
I double-checked the microcontroller against the pinout table for the RP2040, and everything was correct in terms of identifying the pins with the leds:
Troubles
My first deception was when I opened the microcontroller´s box (I used the one that was the package of my USBc cable). As reported in week4, my microcontroller worked perfectly. But, I don´t know why, this time, when I connected it to the Arduino IDE in my laptop, only 2 leds switched. Next, you may see the Arduino code and how it performed in the microcontroller:

At least, I knew I had 2 leds and probably the button to work with. So then, I packed the microcontroller into the box, kept it in my schoolbag and waited for my next visit to the Lab to continue my experiment. A couple of day later, another deception came out: only one led worked!
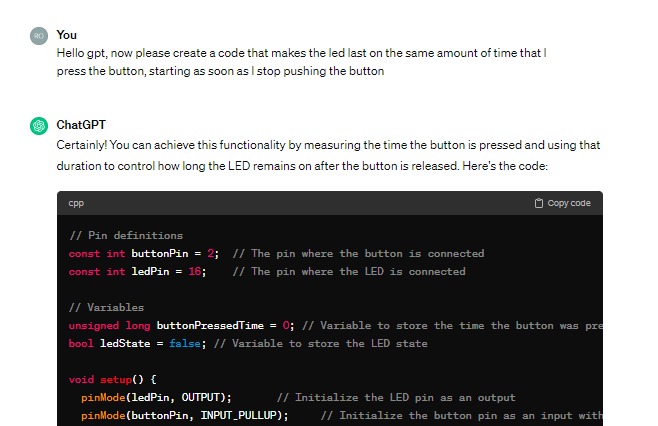
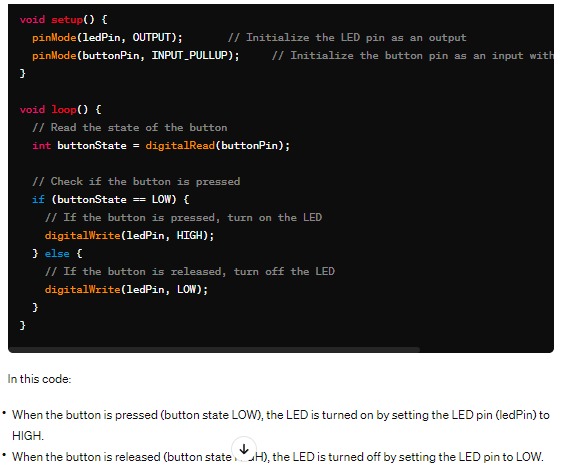
With that cuttage of resources, I had to prove that at least the button and the led were correctly functioning, so I asked my personal assistant (GPT) to create a code to prove it. Next, you will see my petition and the delivered code; then, how it performed:
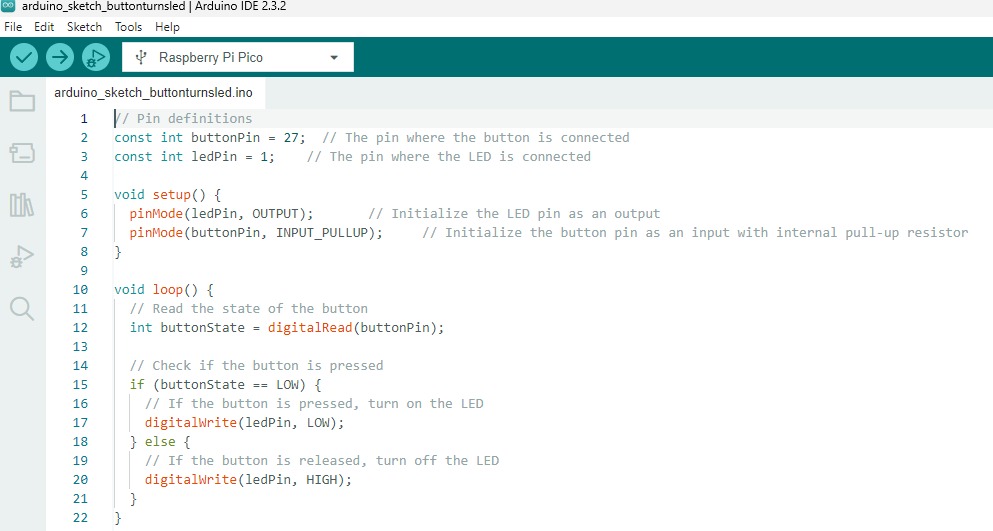
Next, you may see other trials. I recorded the code and the respective results for each one:
By the way, you may find the different codes I generated, first asking GPT, then personalizing them, here:
Final Comments
I had very important lessons this week:
1. Electronics are fragile. Double-checking with my mentors at the FabLab, I learned that microcontrollers, especially handmade ones, are really fragile and could stop working as expected due to multiple factors, such as weather, pressure changes, even due to weak movements of the box where they are stored :(.
2. Shoemaker to your shoes. After knowing the basics of electronics, I think -in my case- it will always be more efficient to work with the commercial brands that build more accurately, cost-efficiently and faster. Now I know what to expect from each brand and the technical especifications that I will be asking for in order for the microcontroller to be able to fulfill my expectations.
3. Arduino Code. This code is easy to understand and develop. However, with limited functionalities due to fragile components and nonoptimal welding, it is harder to learn and validate. That reinforces my previous point.