Final project: EmoBox
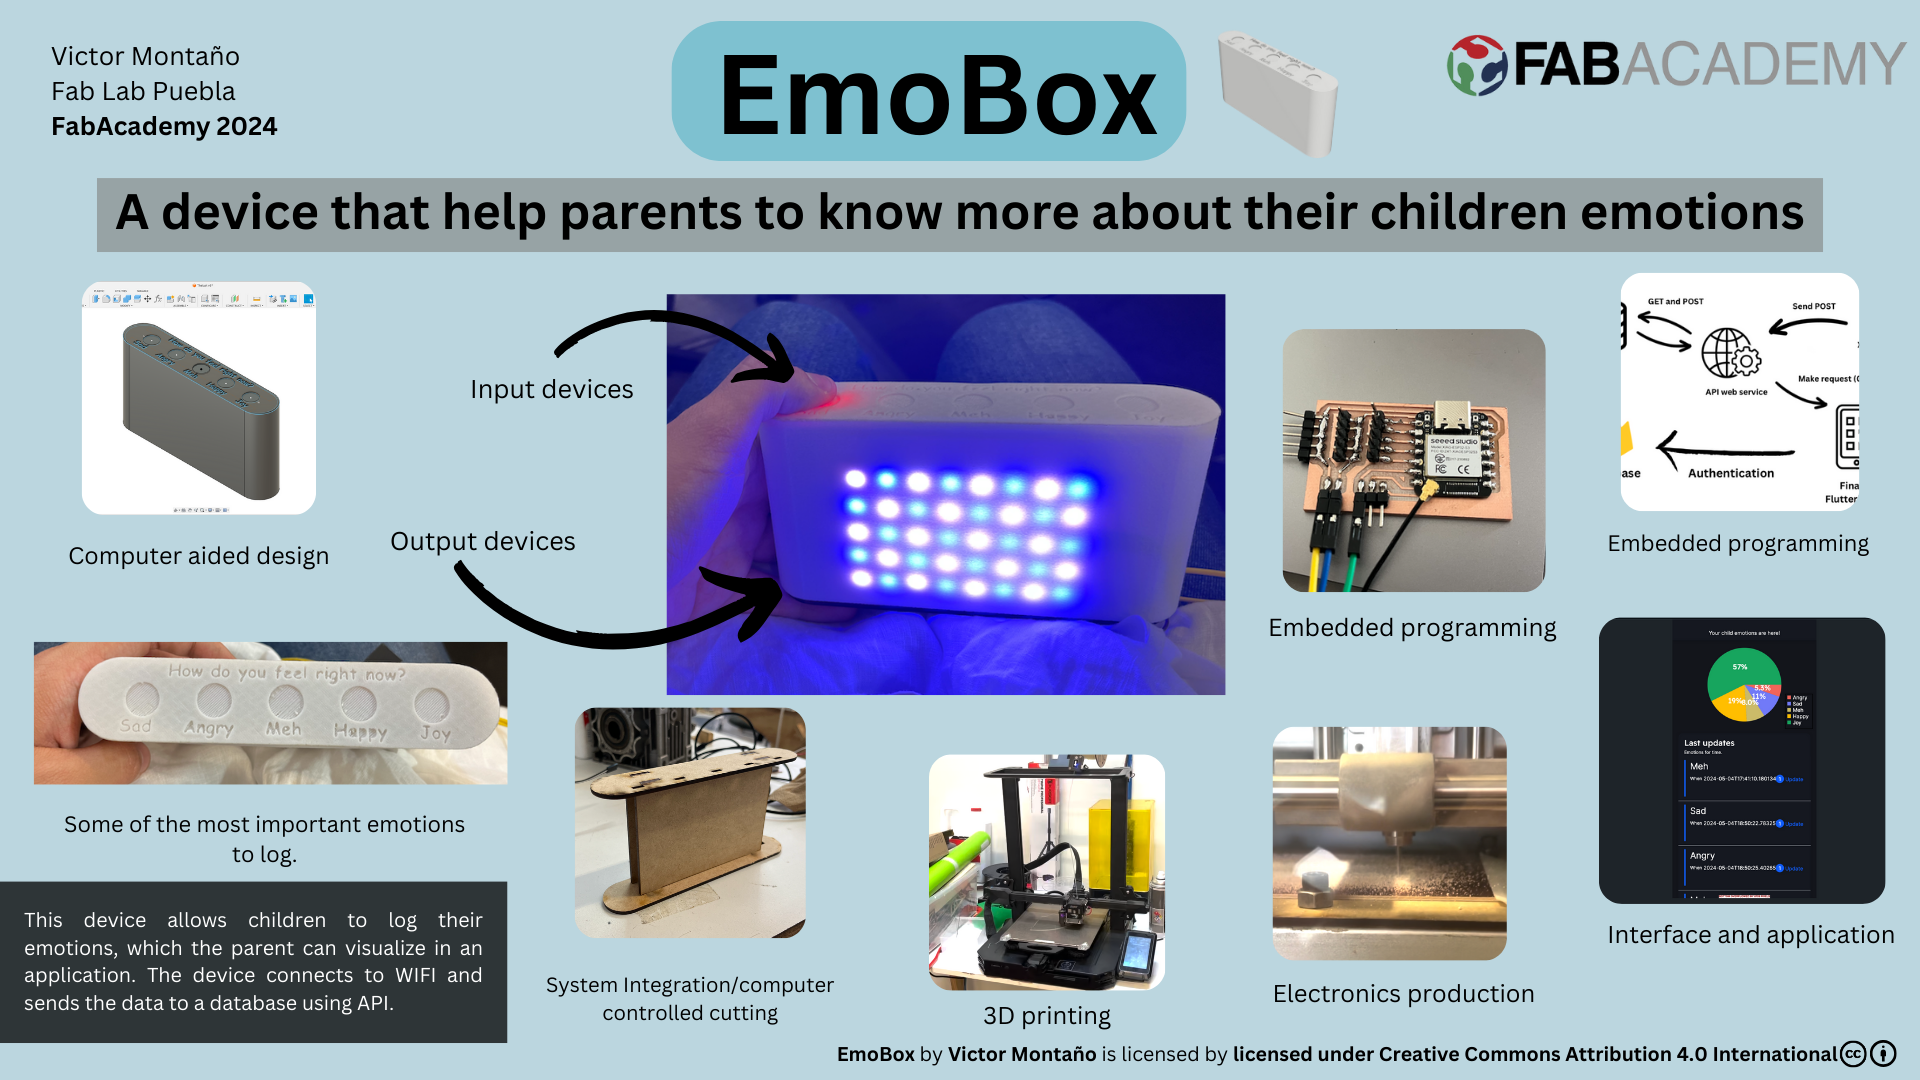
The Theory and how is going to work
My idea for this final project is to help childrens to identify their emotions. "Parents can struggle to help their children learn about feelings and how to appropriately express their emotions" [*]
Having that in mind, it's useful and very important to teach children about what are emotions and name that emotions. "Your child won’t be able to talk about emotions in healthy ways if they can’t recognise them in the first place." [*]
The main idea to solve this problem and help recognize children their emotions is create something that shows the emotions with a menu of emotions to pic. For that I decided that the best way is to create a device that shows a menu of emotions and displays it on a Neopixel matrix. Then all the emotions can be keeped on a log with the hour and date of that emotions. This could help parents to know when their children are really having trouble.
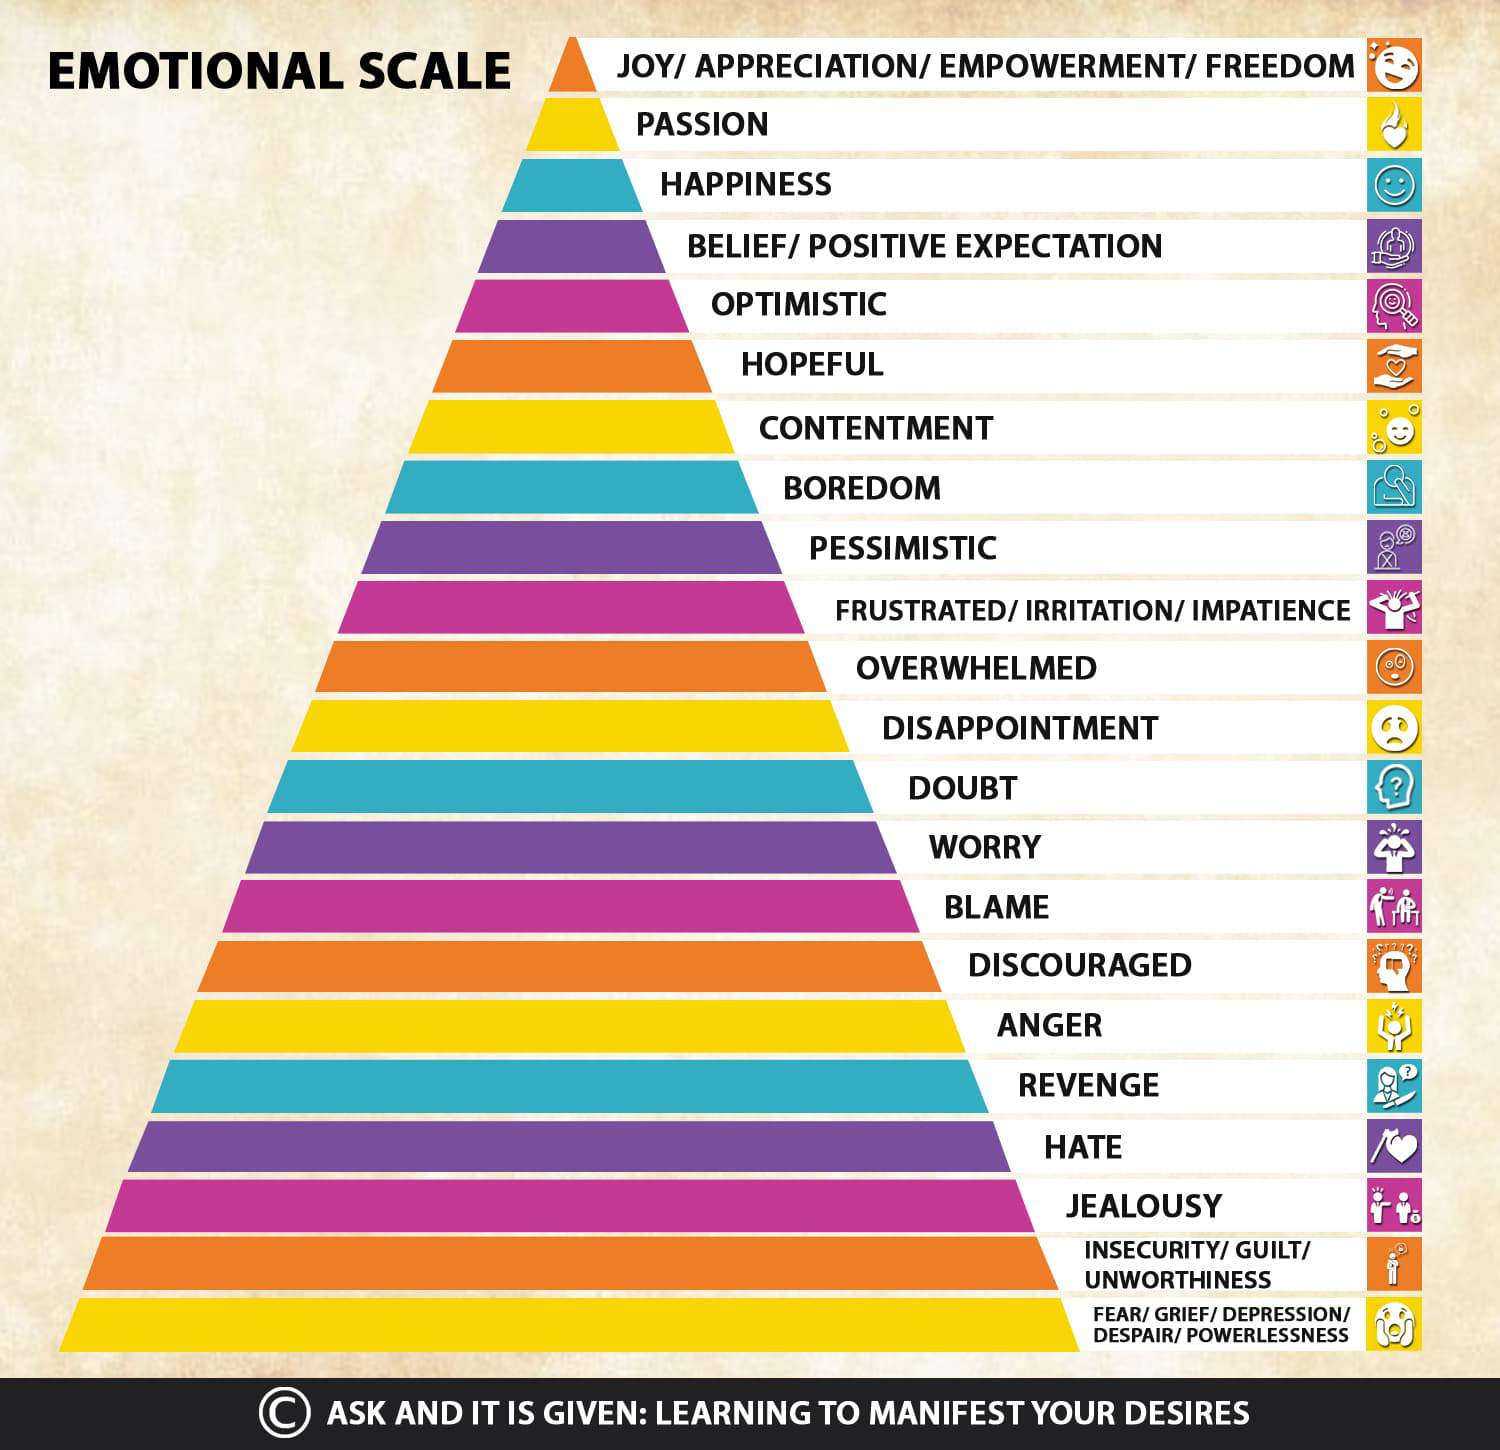
I based the emotions I'm going to use on this device according to some Maslow type piramids.
The idea for this to work is that when turning on, the kid can tap the emotion that is feeling on the specific moment, when tapping the emotion, a "figure" with colors of the emotion is going to be displayed. After that image of the emotion displayed, other colors are going to be displayed if the emotion is bad.
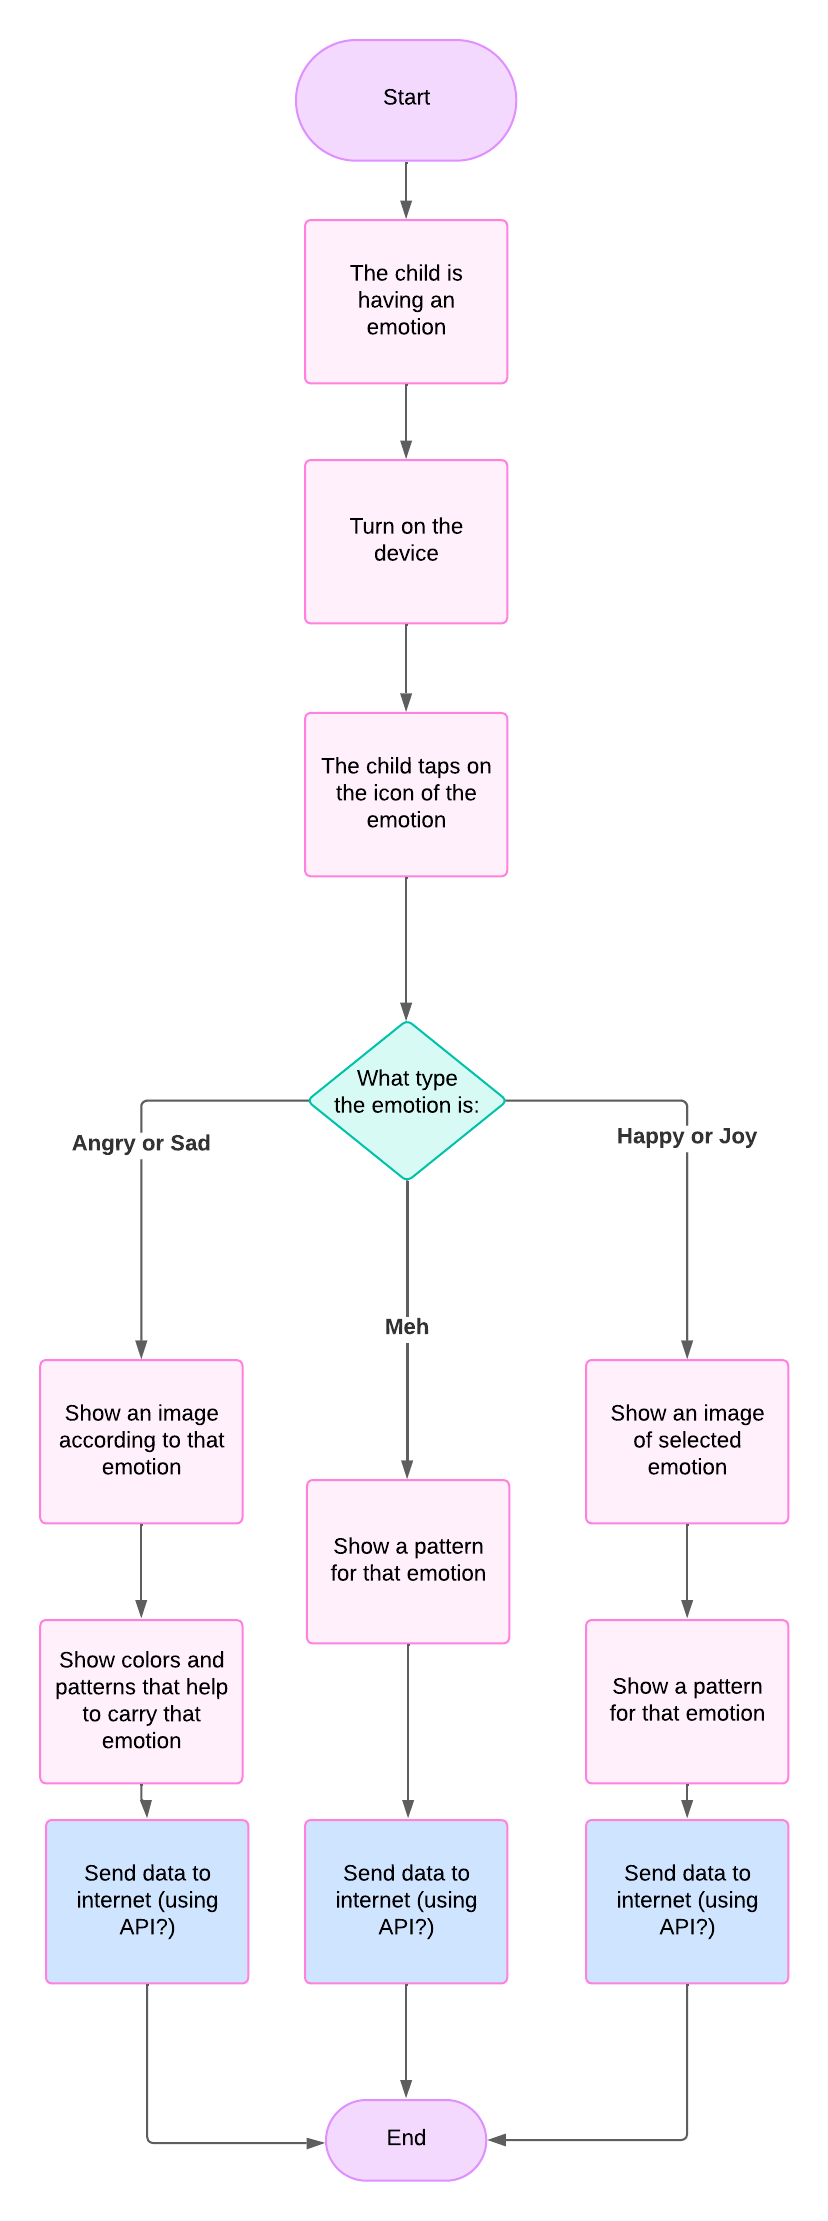
That flowchart shows what the device for emotions is going to do.
. . .
The structure of the device
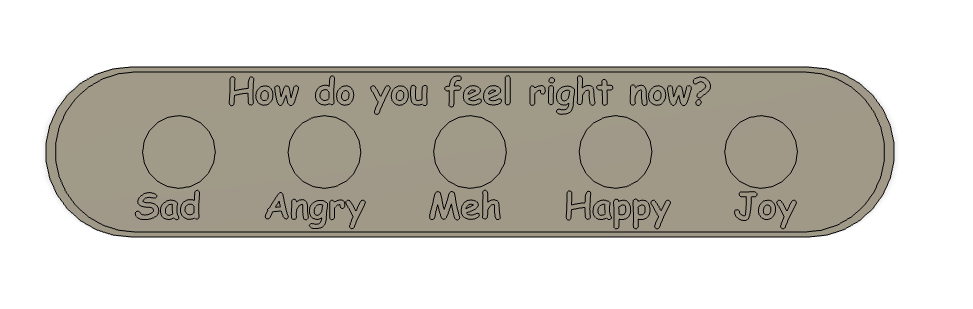
The device is going to be printed on 3D, for this process I created this "box" for this EmoBox. It has the buttons visible and the emotion of every button which is going to be connected to a touch sensor.
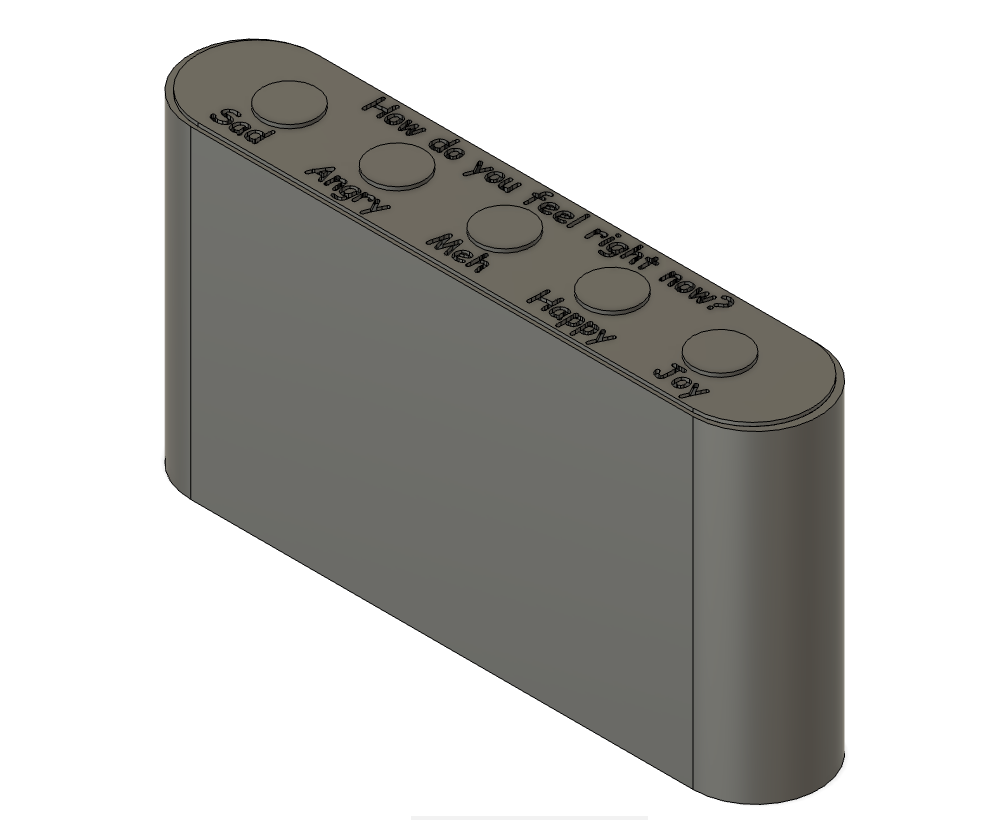
The measures of the structure are:
- width: 140 mm
- height: 91 mm
- lenght: 34 mm
On the structure of the device we have the menu with the emotions, Those emotion buttons are in that specific place because research suggests that emotions in surveys should be arranged from worst to best. The emotions are also chosen taking into account the Mazlow pyramid and some other schemas.
I used Cura Ultimaker to get the gcode, for this case I needed to flip the .stl file 180 degrees.
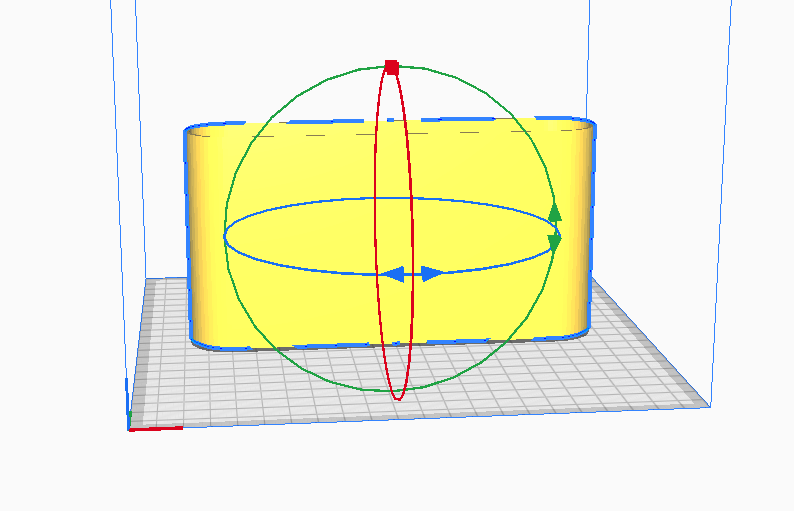
On Cura I added the Fuzzy Skin, this in order to give a better grip to kids.
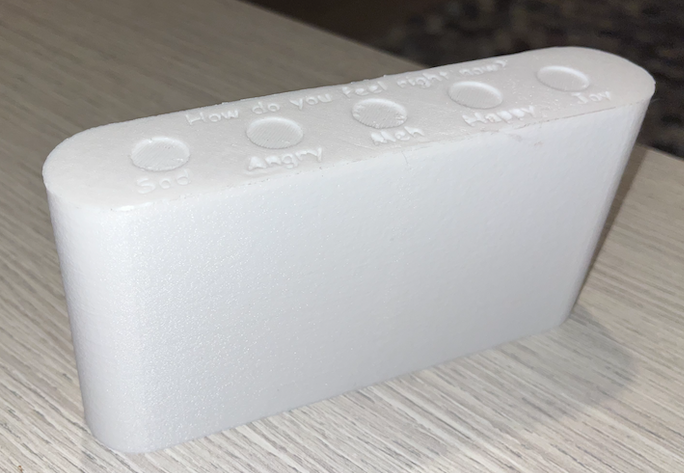
Now the final result after printing:
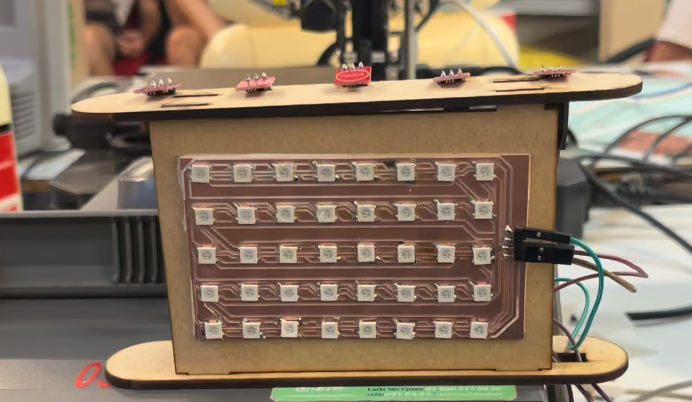
Neopixel Matrix and PCB
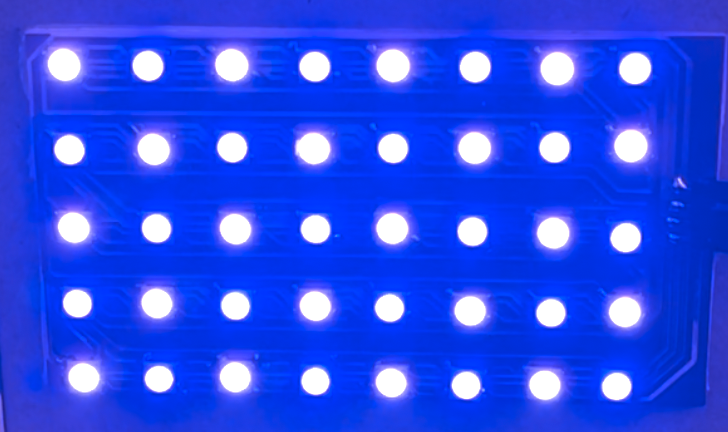
The next step was to create a Neopixel matrix that is going to show the patterns according to the emotions. For this case the matrix was designed to have 40 neopixels. For this I used KiCad.
Then after all neopixels solder, we got this:
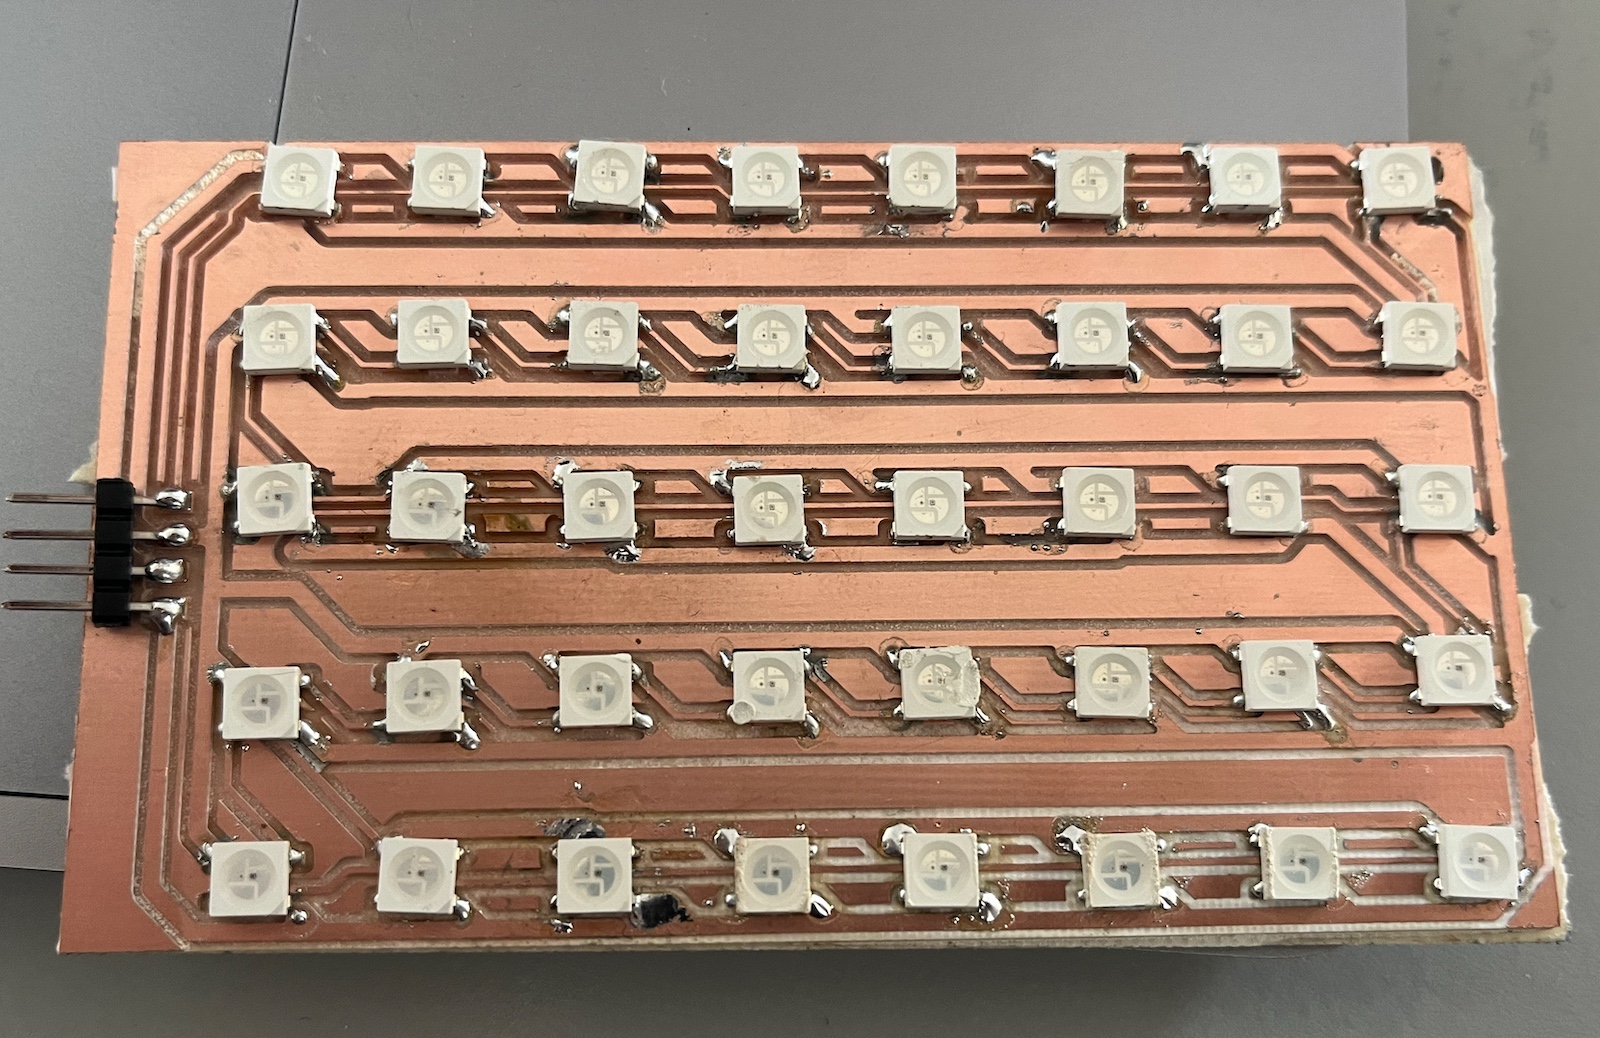
Finally we check if this works.
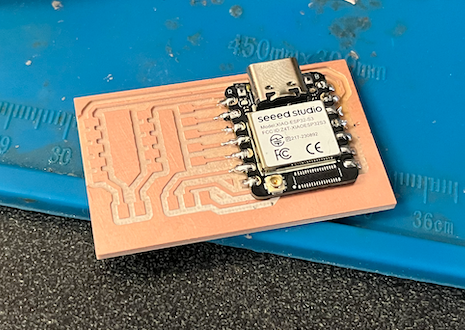
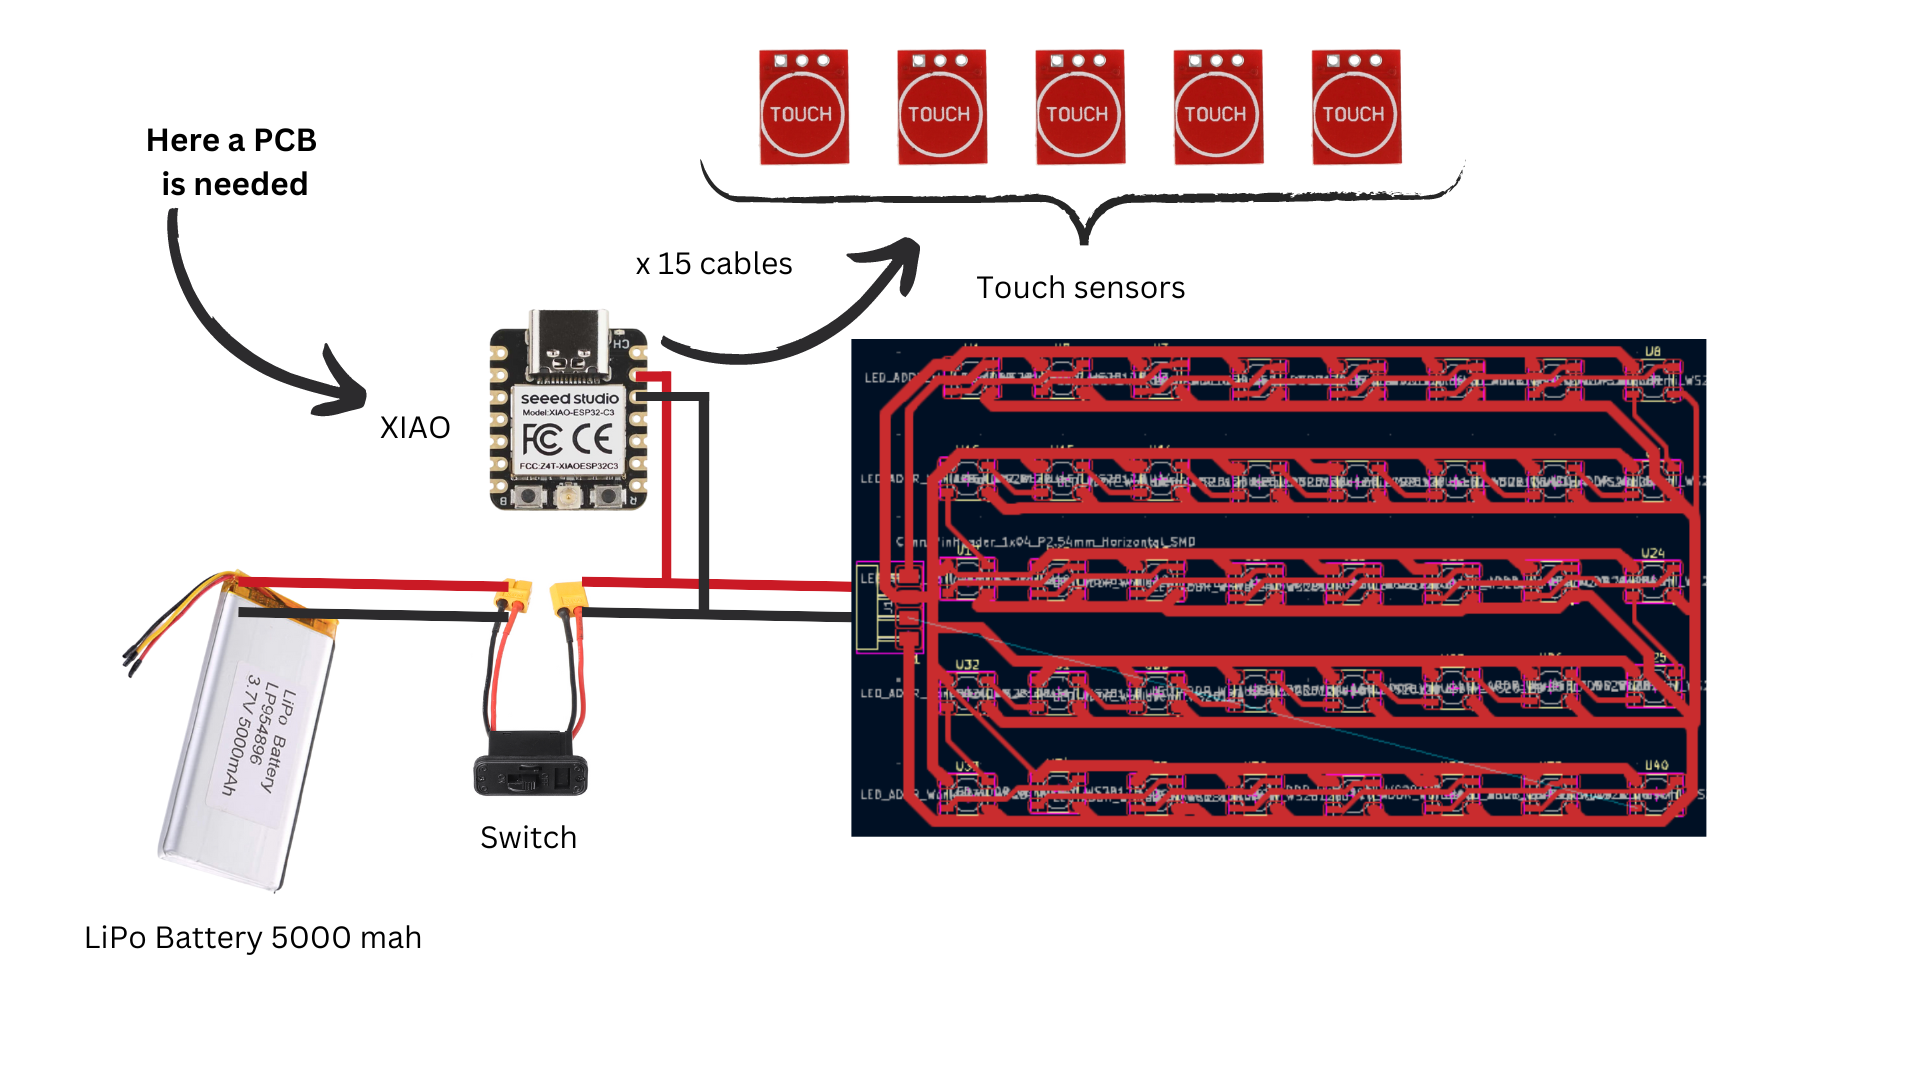
For the main PCB we needed for the touch sensors: 5 pinouts, 5 for vcc and 5 for GND. For the neopixel matrix just a GND and the signal one. I created this PCB to make this work:
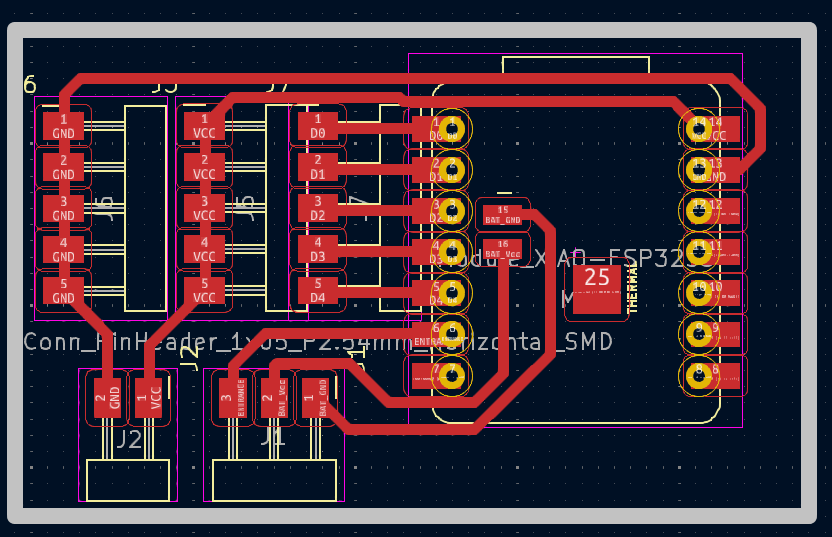
Then all milled:
The app to check the data.
Because this device is made in order to help parents to know the emotion of their children, an app is needed to check all of that, so I created an application. The process of the creation of the app can be found on week 15.
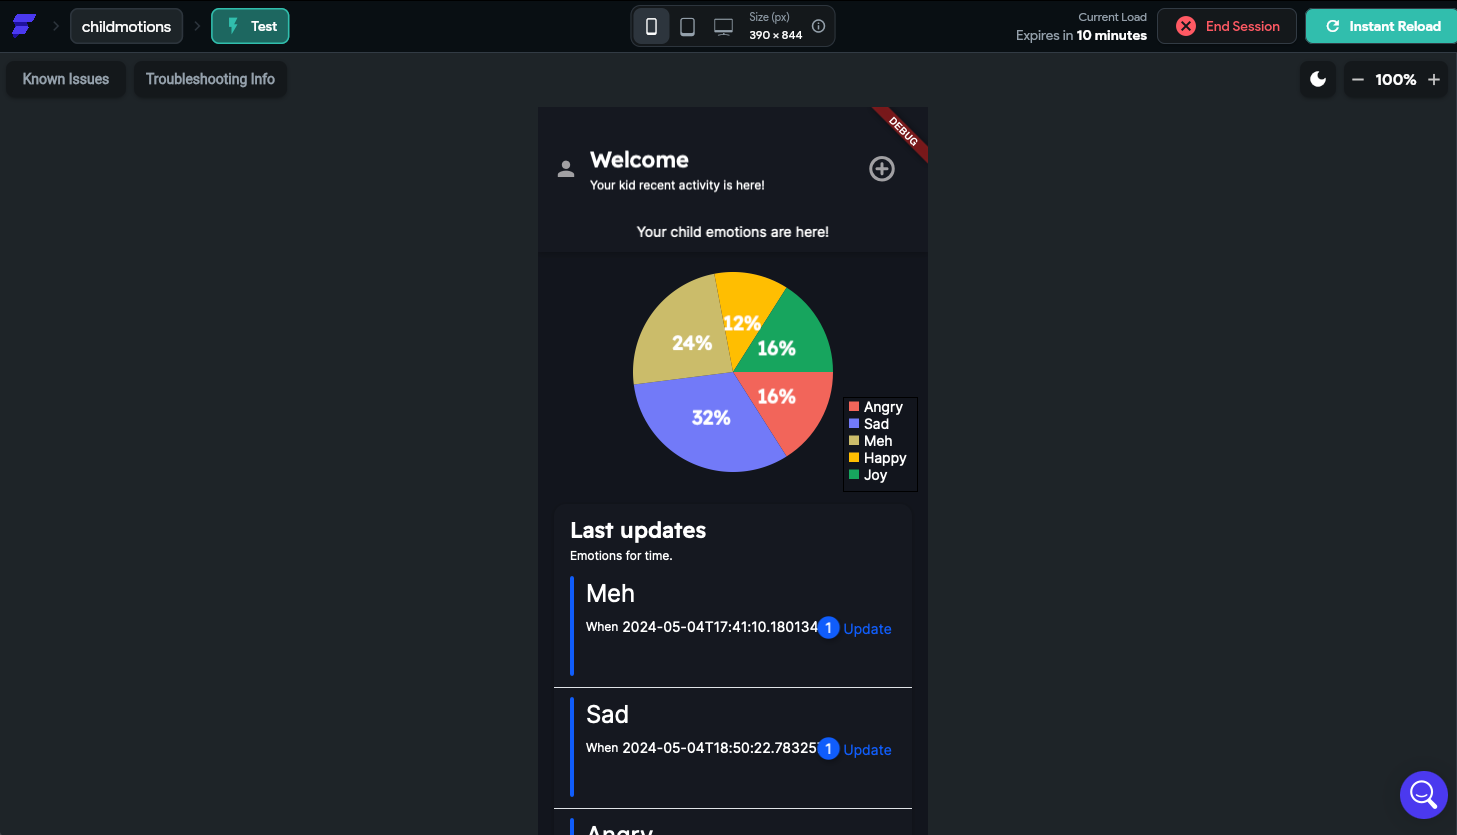
The data on this app is shown on a Pie chart and then we have all the updates, showing the time when the emotion ocurred and the emotion.
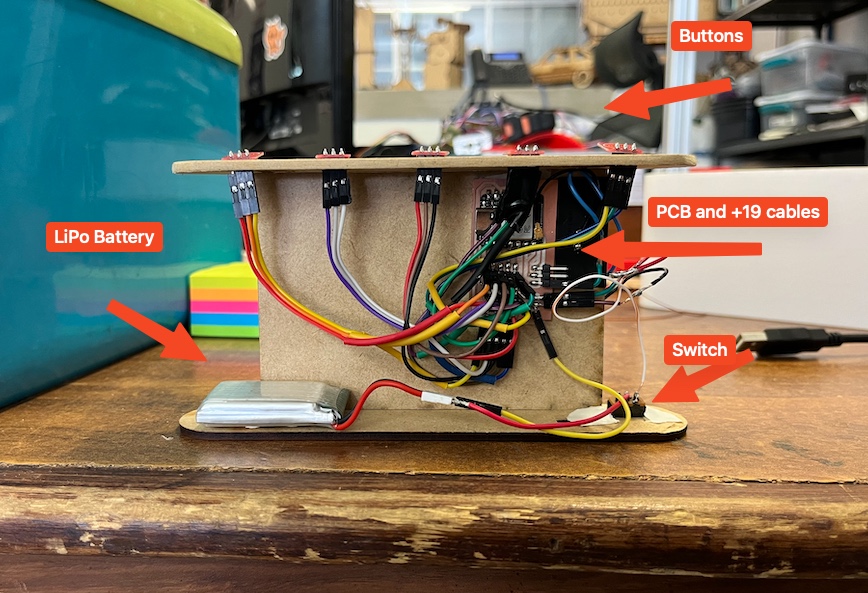
Conneting everything and System Integration
For this project to work we need to connect Touch sensors (ttp223) to the PCB which has the XIAO, this in order to make the buttons work.
Then because this could be a disaster, we need to add this System Integration. To make this look better and be productible, I'm create a MDF structure that has some joints, so we can give support to the Neopixel Matrix and order to the PCB.
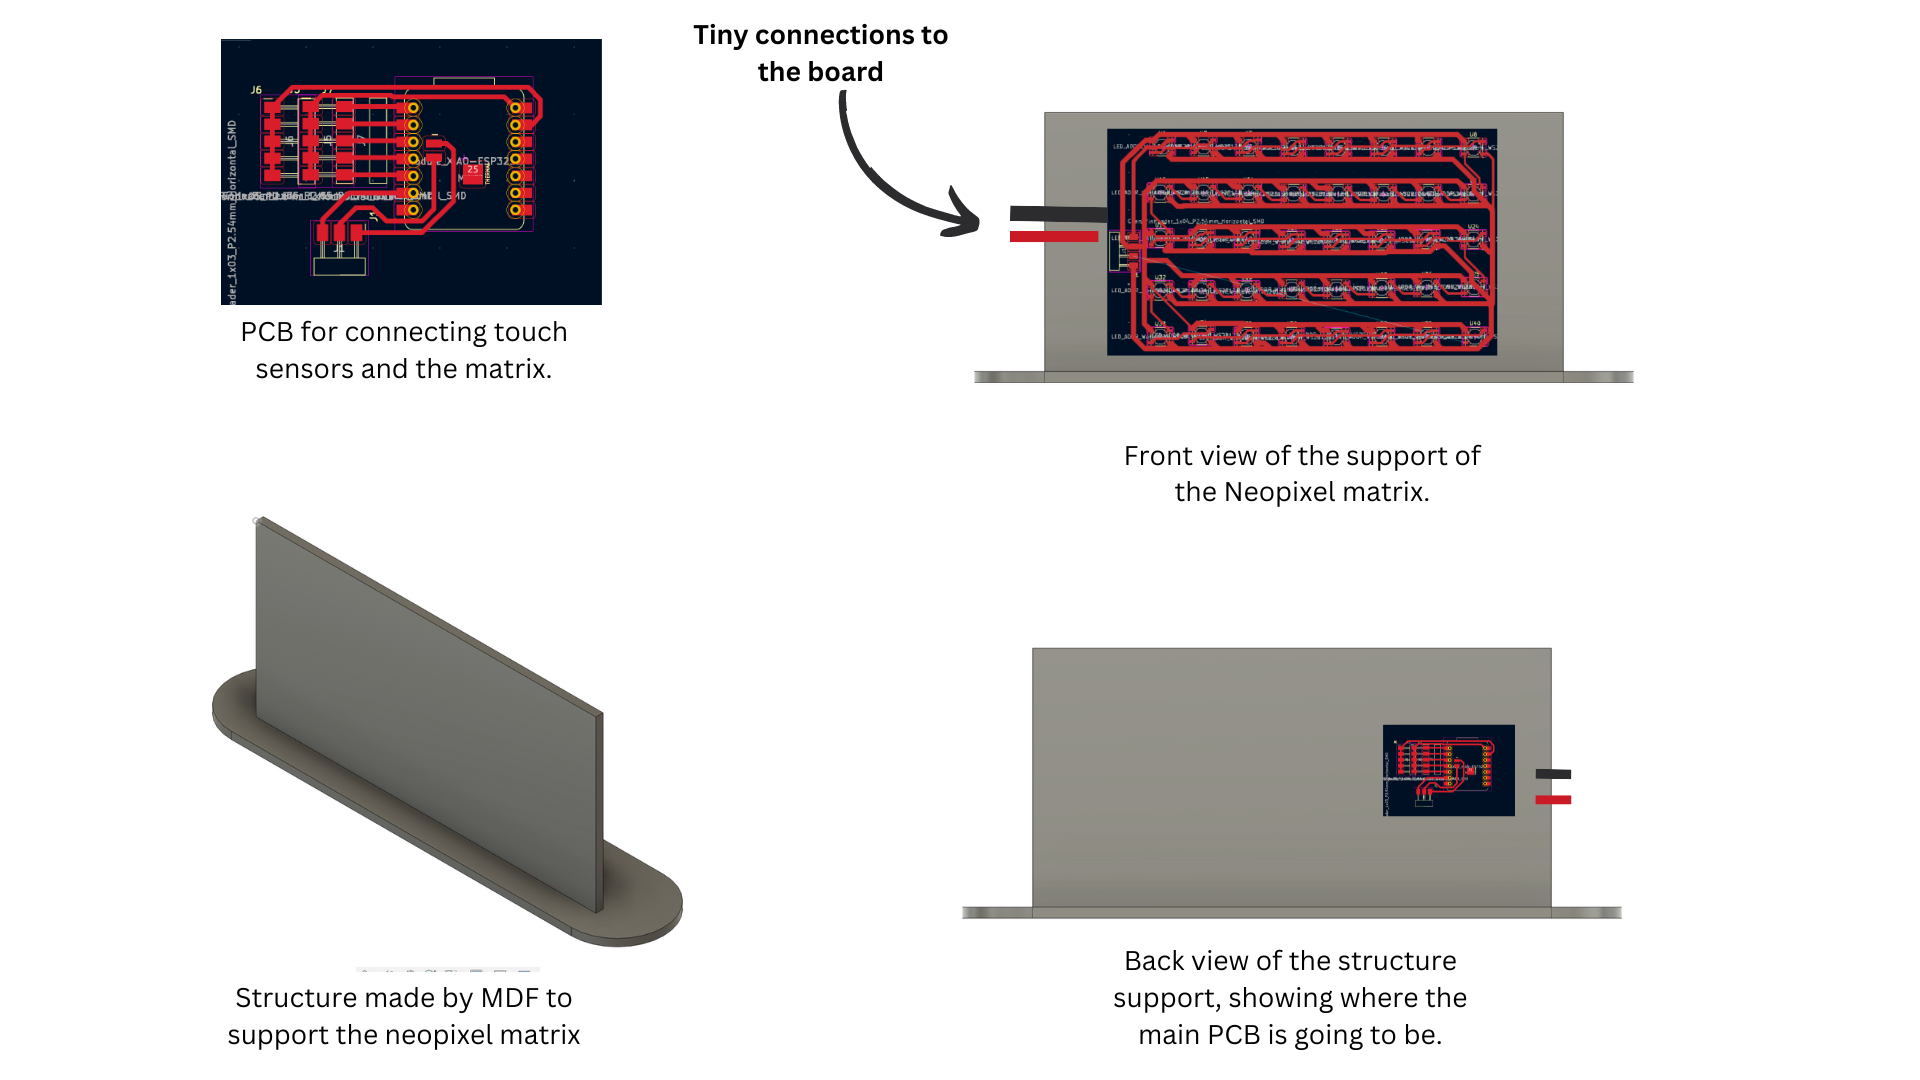
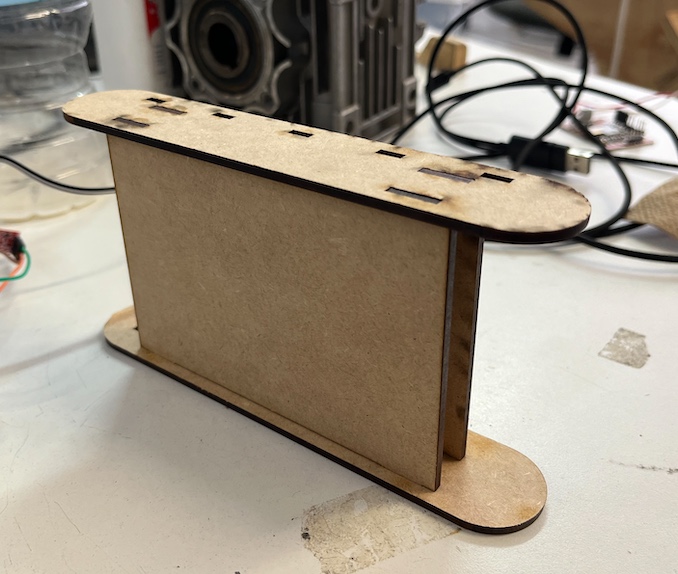
So this is the final design for the MDF structure:

Finally we got all assembled
Just for System Integration, we add all components there on the MDF structure:
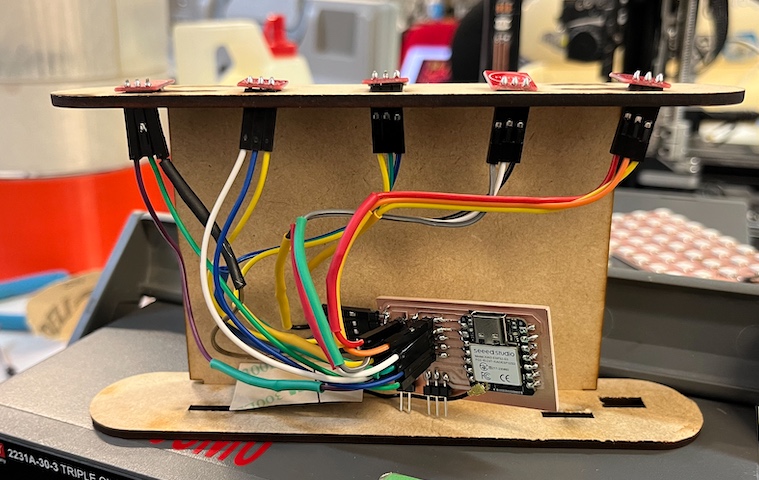
And the final system integration. Due of having 20 cables connected to this little PCB, on the core of connections seems to be kind of disordered but it was needed to be like this. I tried to give more order and this was the final result.
Finally with some double-sided tape we have all in it's place
A little video of assembling
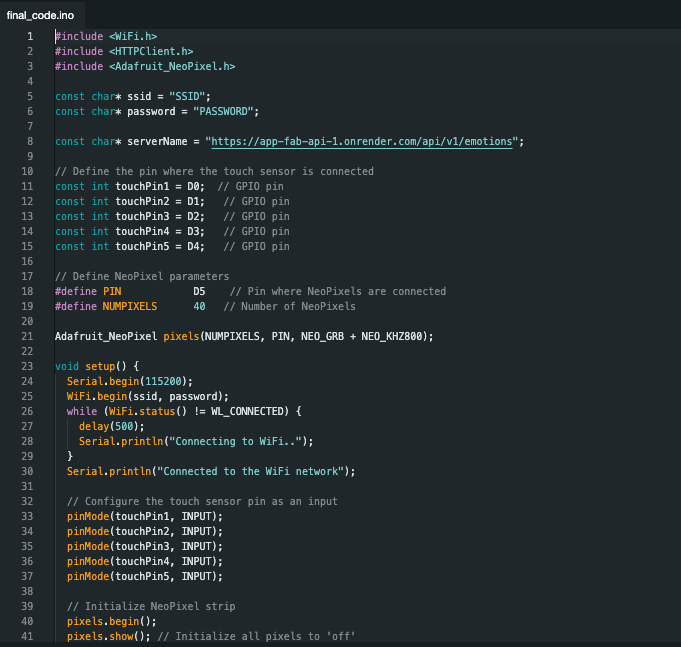
Coding
In this project almost the main code is on the Week 15 but some things needed to be added. What I added was:
- The patterns of each emotion.
- Check that every if sends the emotion to the DataBase and displays it on the Neopixel Matrix.
So the final code is here. If you want to use it, just put your local WIFI ssid and password.
Final integration and test
Finally we just put all together and because it has system integration. Everything is just put the MDF structure inside the 3D printed case. We got the next:
Finally the presentation video
Materials
There are going to be some needed materials for this project, on this list Im showing some of the items and material that I think Im going to need to elaborate it. This list is not the final one but a good look of what is needed.
| Qty | Description | Price | Where |
|---|---|---|---|
| 1 | 3D filament white | $25.00 | Amazon |
| 40 | Neopixel | $8 | MercadoLibre |
| 1 | LiPo 5000 mAh battery | 10.00 $ | MercadoLibre |
| 1 | 3mm MDF | $5 | On HomeDepot |
| 5 | Touch sensor | $5 | MercadoLibre |
| 20 | Female to Female dupont cables | $5 | Amazon |
Gran Total: $58 USD
FIles
EmoBox by Victor Montaño is licensed under Creative Commons Attribution 4.0 International![]()
![]()