15. Interface and Application Programming
This week was about Interface and Application Programming. It's an interesting week because we can learn how to make apps and connect with electronics.
The group assignment
Here is the group assignment where you can find more about this topic.
Application
An application, often referred to as an app, is a type of software designed to perform specific functions directly for a user or, in some cases, for another application. Apps are created to help users carry out tasks, solve problems, process data, or provide entertainment. They can run on various platforms including desktop computers, laptops, smartphones, tablets, and other electronic devices.
There are a lot of types of apps: desktop, Web application, Mobile applications, enterprise and embedded.
What I'm going to use
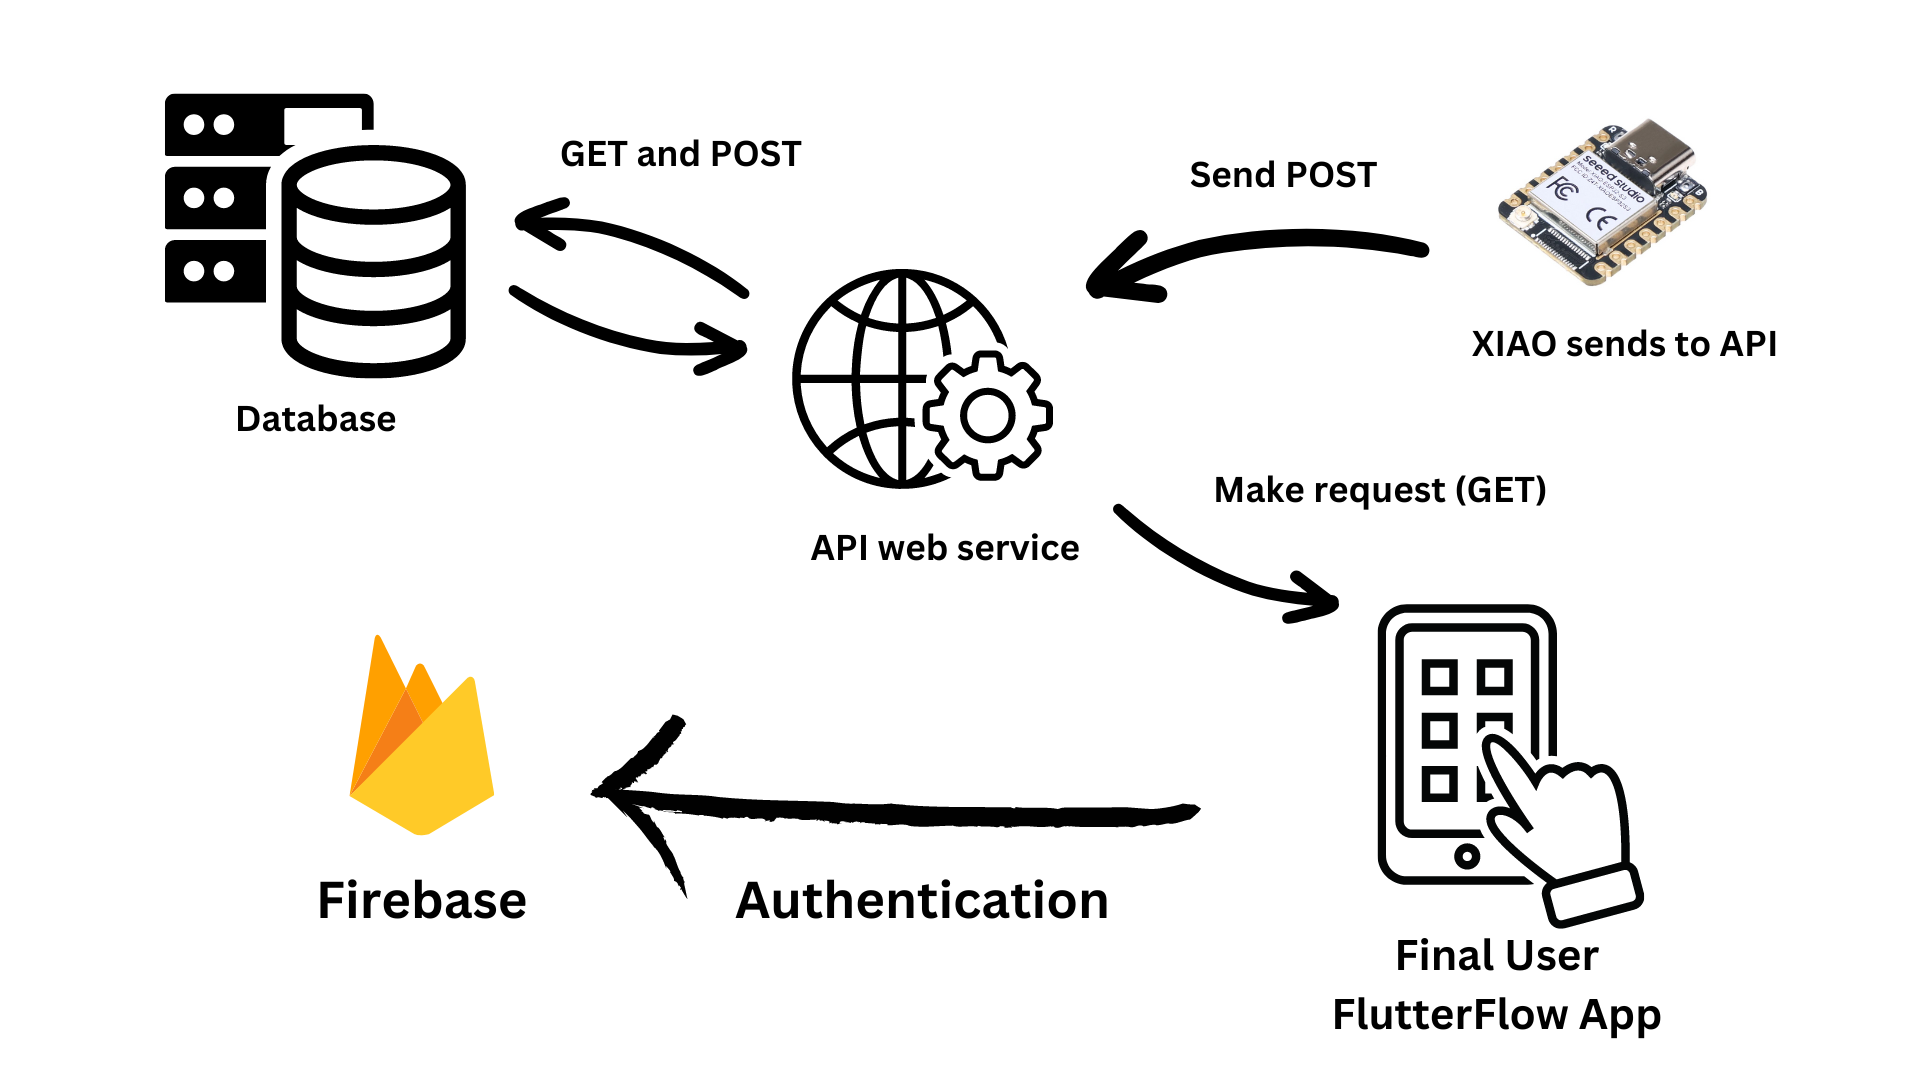
For my final project, that you can find here, I need an app that connects with a database via API, this in order to consume data sent by the microcontroller.
For this project, I'm going to use different technologies, those are:
- API: An API (Application Programming Interface) is a set of rules and protocols for building and interacting with software applications. APIs define the methods and data formats that developers should use when interacting with the software components, operating systems, or microservices. By abstracting the underlying implementation and only exposing objects or actions the developer needs, an API simplifies programming tasks and supports integration between different software programs.
- Firebase Database: Firebase, developed by Google, offers a suite of cloud-based services designed to simplify the development of web and mobile applications. One of its key components is the Firebase Realtime Database, a cloud-hosted NoSQL database that stores and syncs data between your users in real-time.
- Render: Render is a cloud service provider that offers a platform for developers to host web applications, background workers, static sites, and databases. It simplifies deploying and scaling apps by automating the cloud infrastructure setup process.
- PostgreSQL: PostgreSQL, commonly known as Postgres, is an open-source object-relational database management system (ORDBMS) distinguished by its robustness, scalability, and conformity to SQL standards. It supports both SQL (relational) and JSON (non-relational) querying.
- FlutterFlow: FlutterFlow is a low-code visual development platform built around the Google Flutter framework, which enables developers to build mobile applications for iOS and Android platforms. The platform is designed to make app development more accessible by allowing developers to design and create applications through a drag-and-drop interface, without needing to write extensive amounts of code manually.
How this technologies are going to work is kind of particular. The FlutterFlow app is going to have an Auth login for users using Firebase. The data sent by the XIAO is going to be read by the FlutterFlow app using API on a web services and that data of the API is going to be stored on a PostgreSQL database , both hosted on Render, this because for starters offers a free version of this.
Developing the API and Database
The first step was to create the API with the data model and the database, for this I'm using render and python.
Starting with Python, we need first to create a new document and install the next libraries:

You can download the requirements.txt here and just write on the terminal pip install -r requirements.txt.
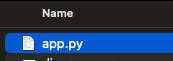
Having the libraries set, we need the main code, which is going to be this app.py and it should be called app.py in order to make this process easy.
Then because we're going to push a repository into GitHub or GitLab, we need to create a .gitignore which you can create from here and just create on your code editor a .gitignore and paste it.
After that we need to push that into GitHub or GitLab. For this case I used GitHub. In order to know how to add the repository, you can go to my Project management week where we learn how to make push of repositories.
Create a .env is needed so you need to create it to from your code editor.
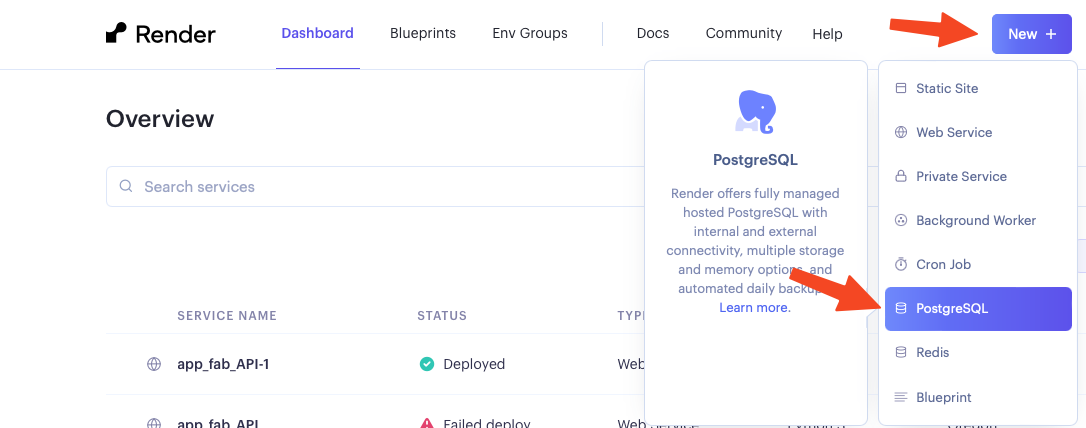
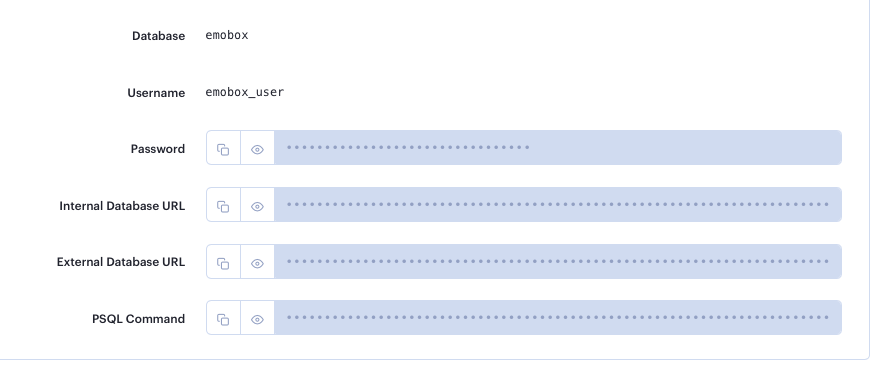
The .env is going to work in order of the database, so for this we go to render and after creating an account, we go to create a postgreSQL database:
Then while creating the database, we choose a name and finally because it's a freemium page, we can choose either to pay or free with some limitations.
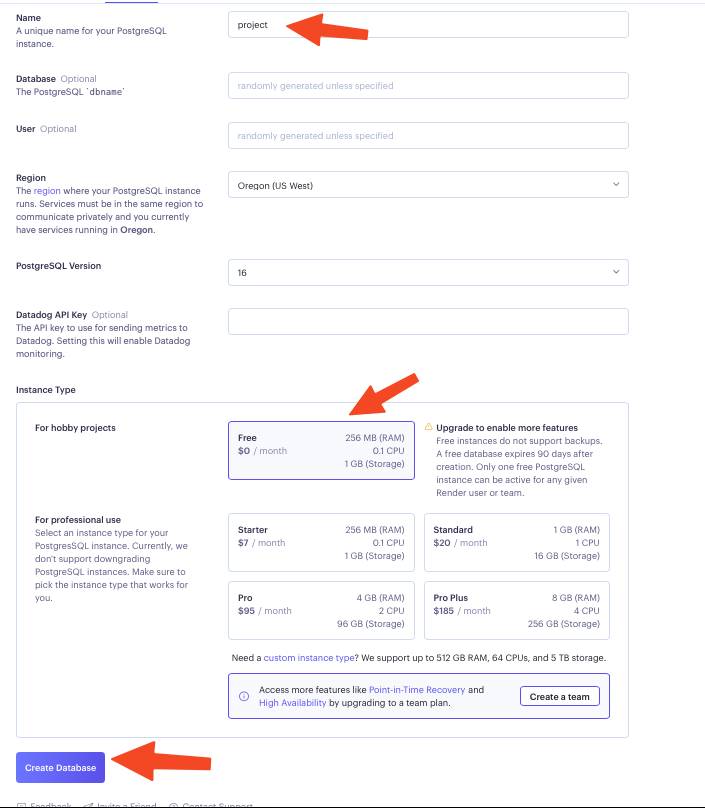
Finally we copy the External database URL link that is secret and paste on the .env with the next format: SQLALCHEMY_DATABASE_URI="YOUR LINK" change YOUR LINK for the link.
We're done with the API first progress. Then we need to create the web service in order to make this work. For this we follow the next steps and almost finally, we add as the before mentioned secret .env but in the page:
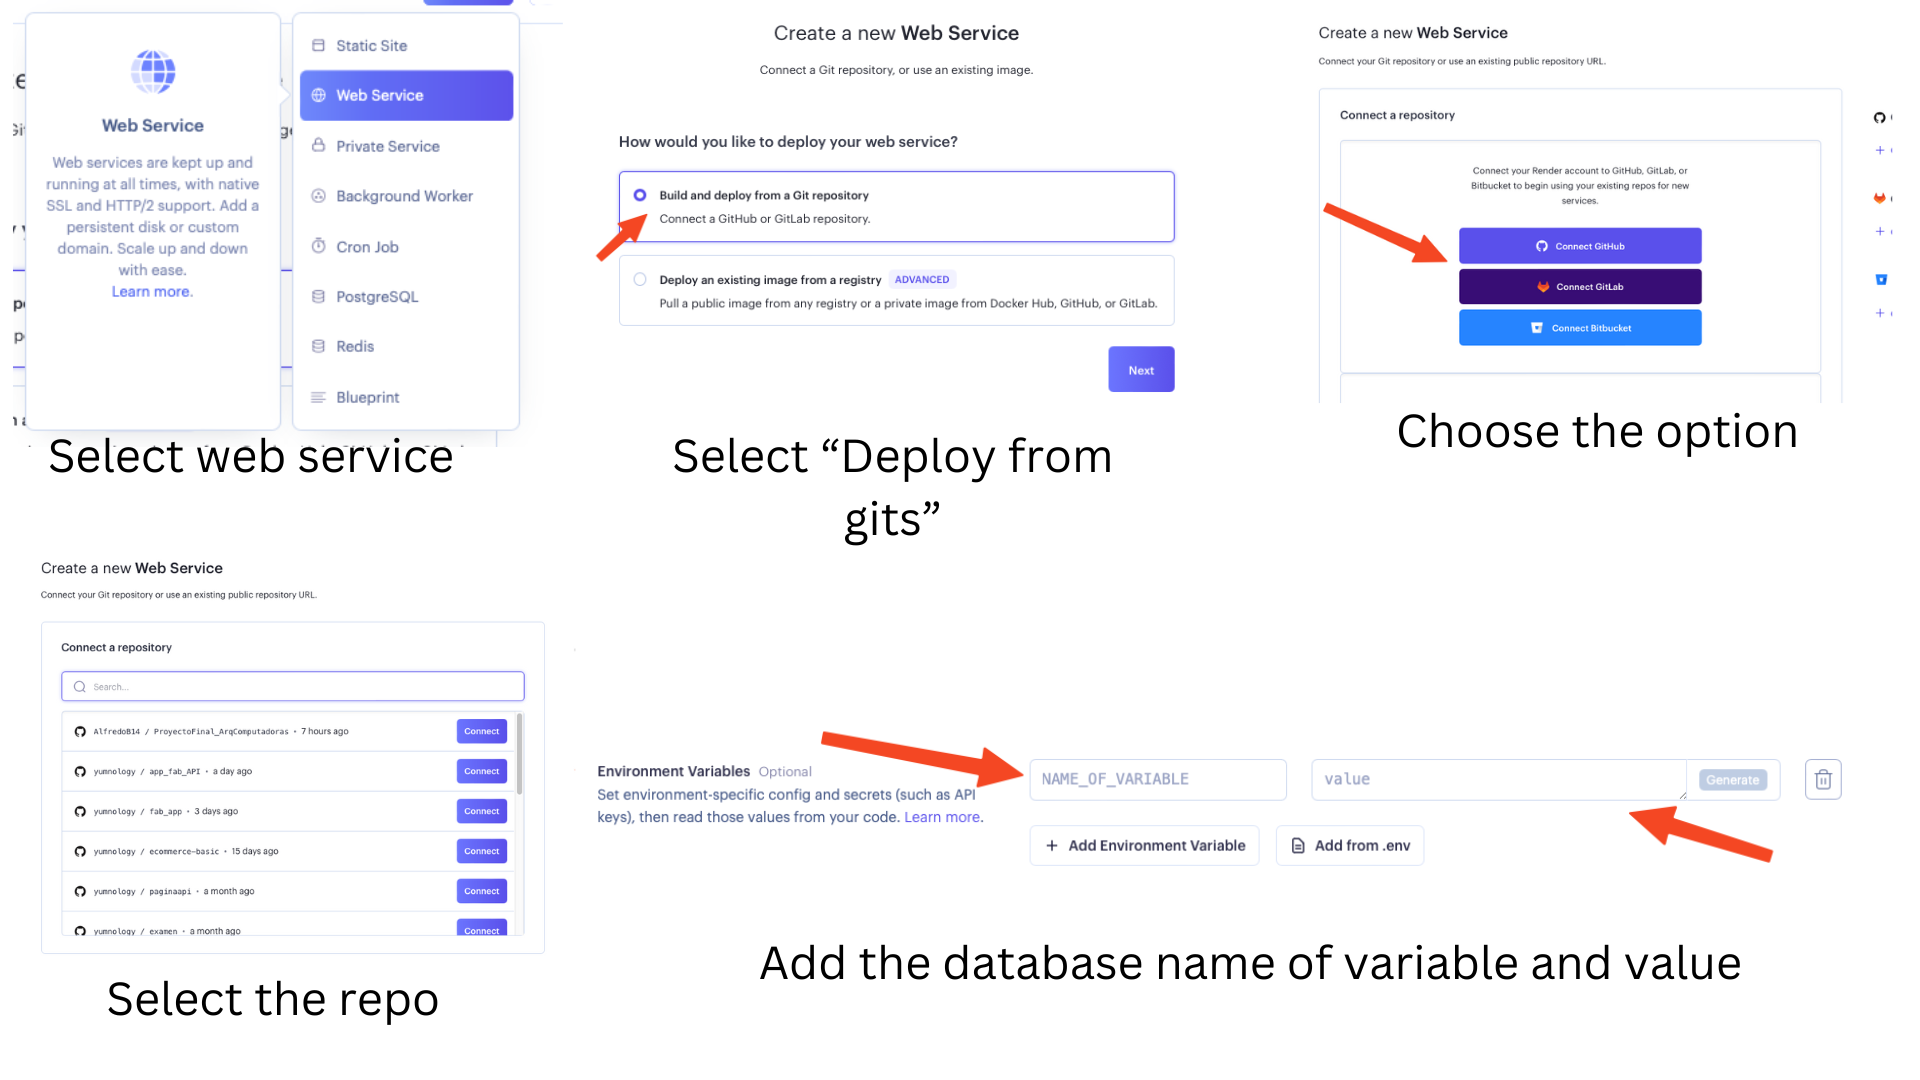
Finally we just click Create web service, wait for the deploy and we're done! We have a web service with an API working.
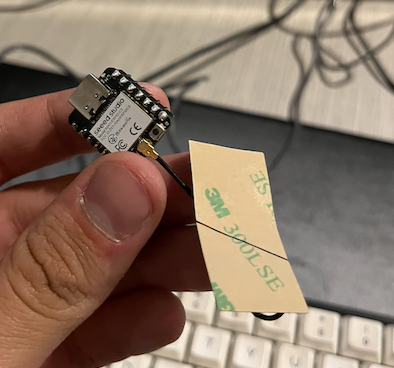
XIAO and the API
Let's connect the XIAO to this API, so we upload this code to the XIAO, this code works because it makes the XIAO to connect to internet, then connecting some touch sensor, it detects which sensor is touched and the send with POST method a number to the API which transform that to an emotion, which is going to be stored on the database. Finally we have all on the database. To use this you need to make sure that your board has WIFI connection or at least a WIFI antenna in order to make this work.
The circuit looks like:
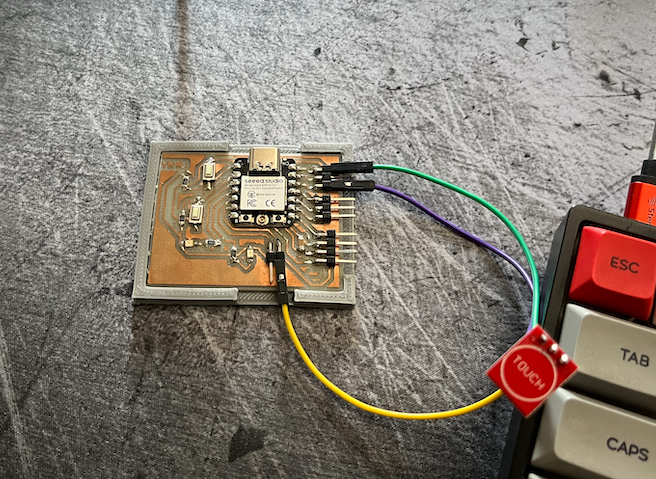
Then we add this code that you can find here. And finally by changing our password and WIFI name and connecting everything, we got the next:

The touch sensor is the same I used on Input devices week. If you want to replicate the connections, go and check there.
FlutterFlow and APP creation
FlutterFlow is a low-code visual development platform built around the Google Flutter framework, which enables developers to build mobile applications for iOS and Android platforms. The platform is designed to make app development more accessible by allowing developers to design and create applications through a drag-and-drop interface, without needing to write extensive amounts of code manually.
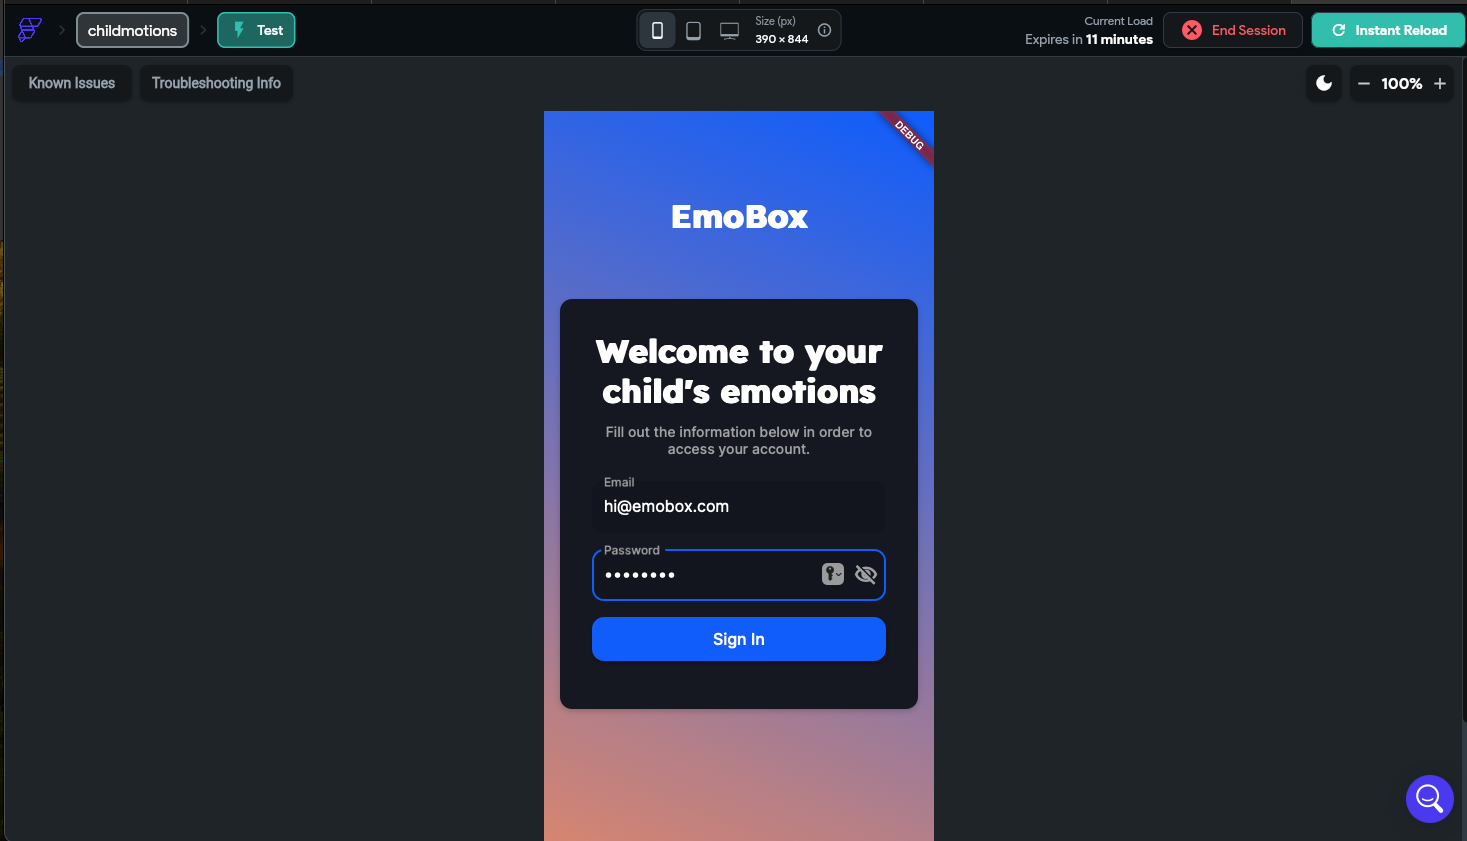
For starting with flutterflow we need to log in into FlutterFlow and then follow the next basic steps of creating a new project. On this steps we set up the log in, so this is a very important process.

On FlutterFlow what we do is Drag elements into the interface, in order to make it work:
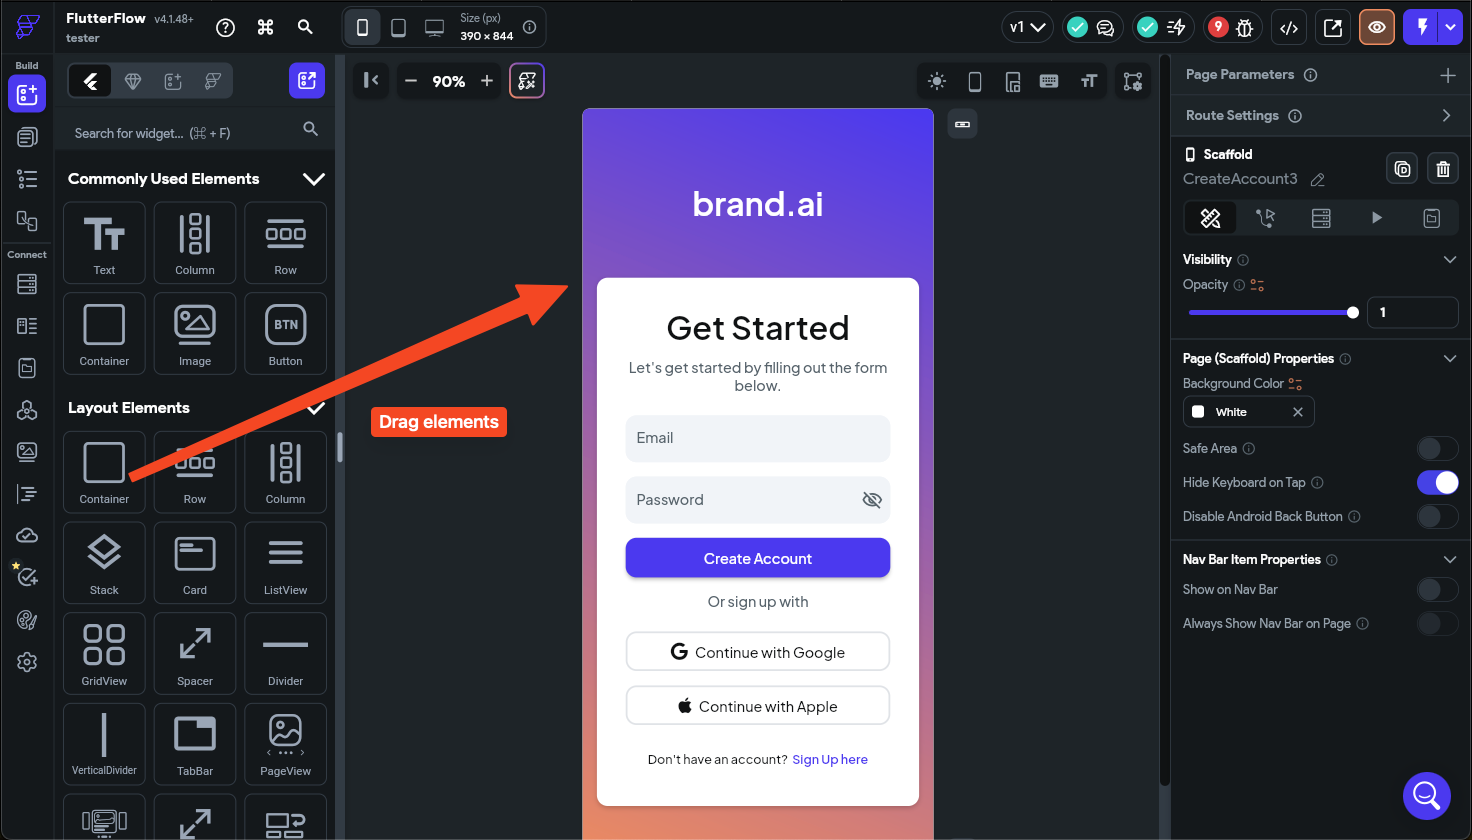
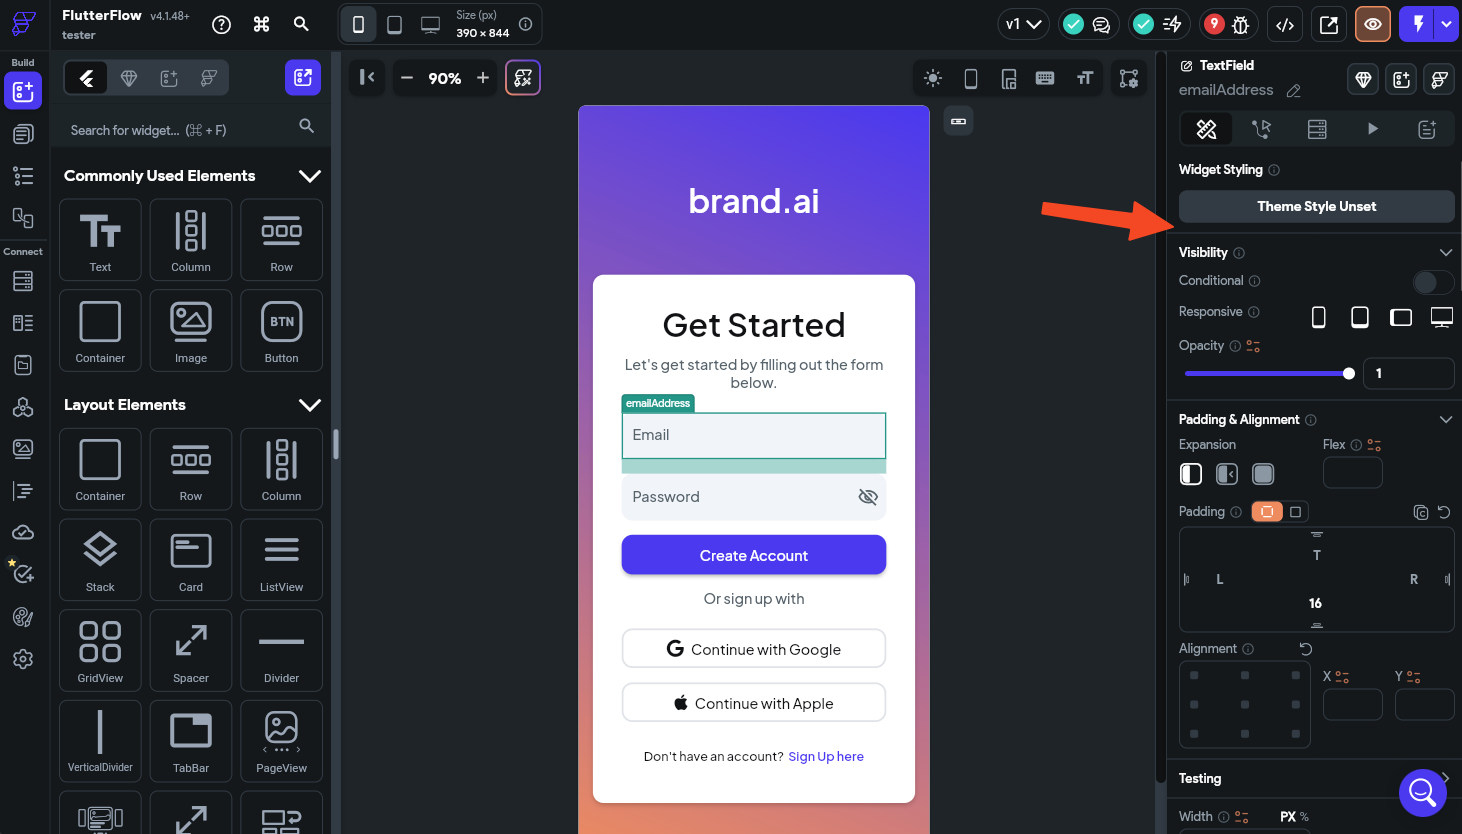
We can change the properties of that element here:
For creating a new page we go to the page selector, then create new page and we can search any theme, generate one with AI or create our own. I decided to go with this:

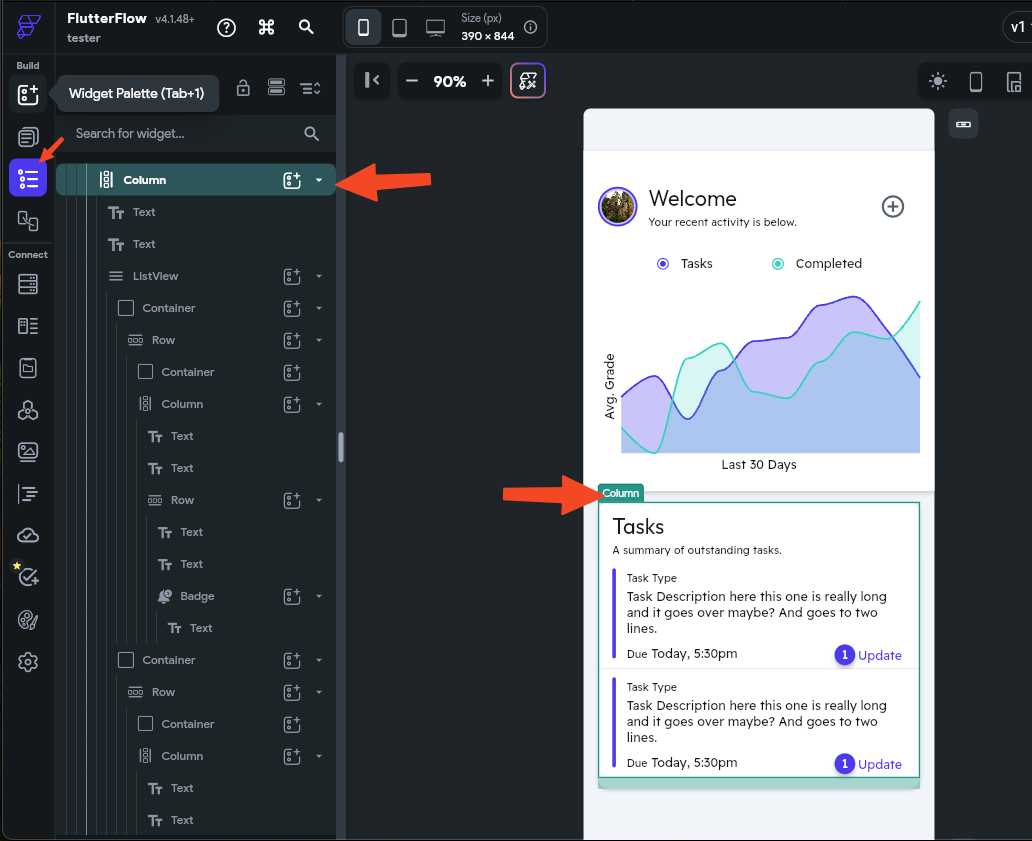
On FlutterFlow, we drag things to the screen and for give some order, we use columns, containers, rows, and more. For example, this column has everything there.
Let's create an API call, for this we need two. The first one is the emotions and date of added that emotion and the second one is for the count of every emotion. This API are created on the code I provided.
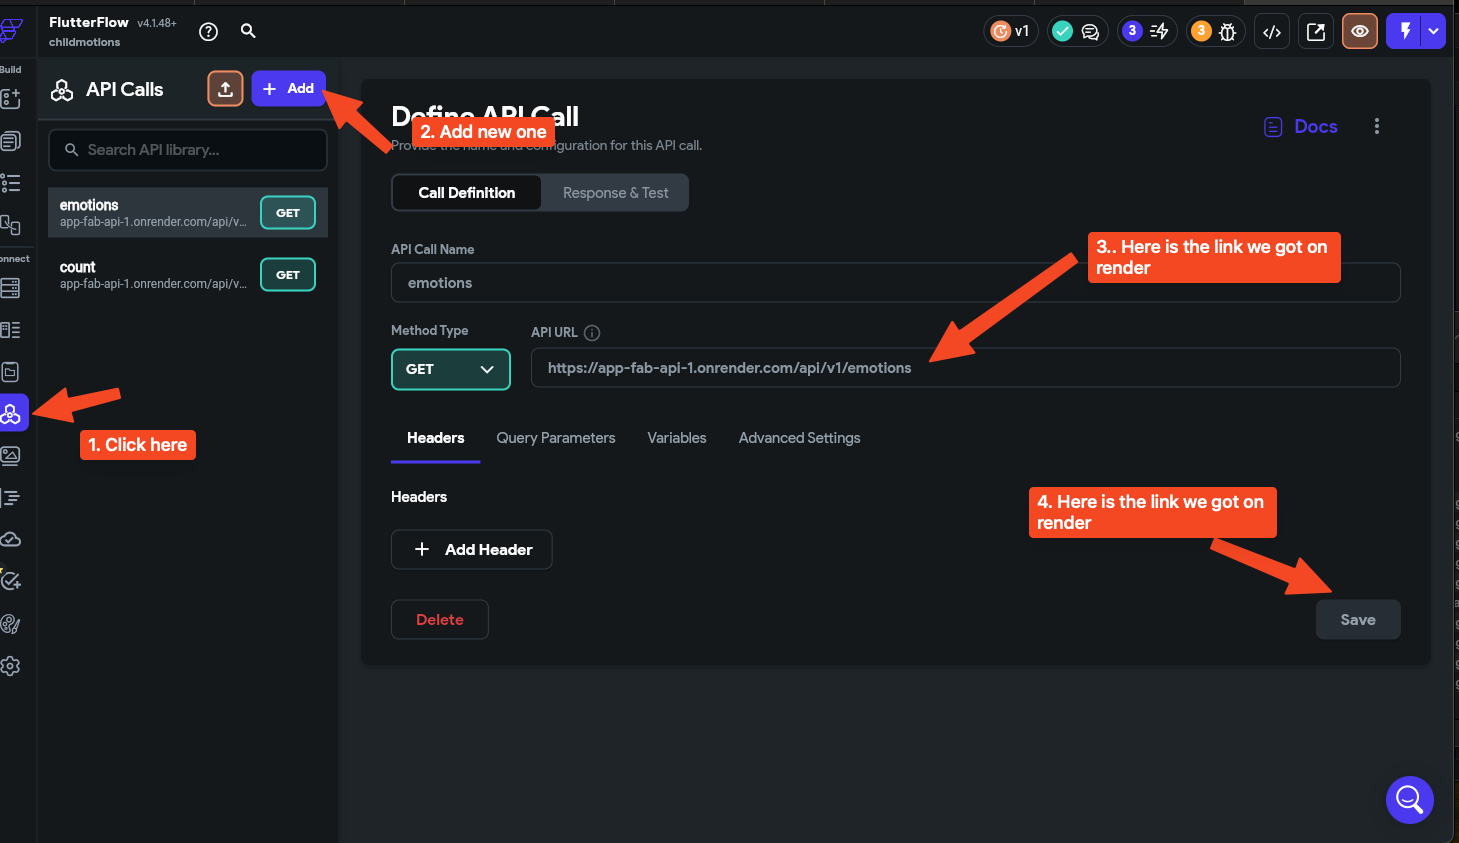
Let's create an API call, for this we need two. The first one is the emotions and date of added that emotion and the second one is for the count of every emotion. This API are created on the code I provided.
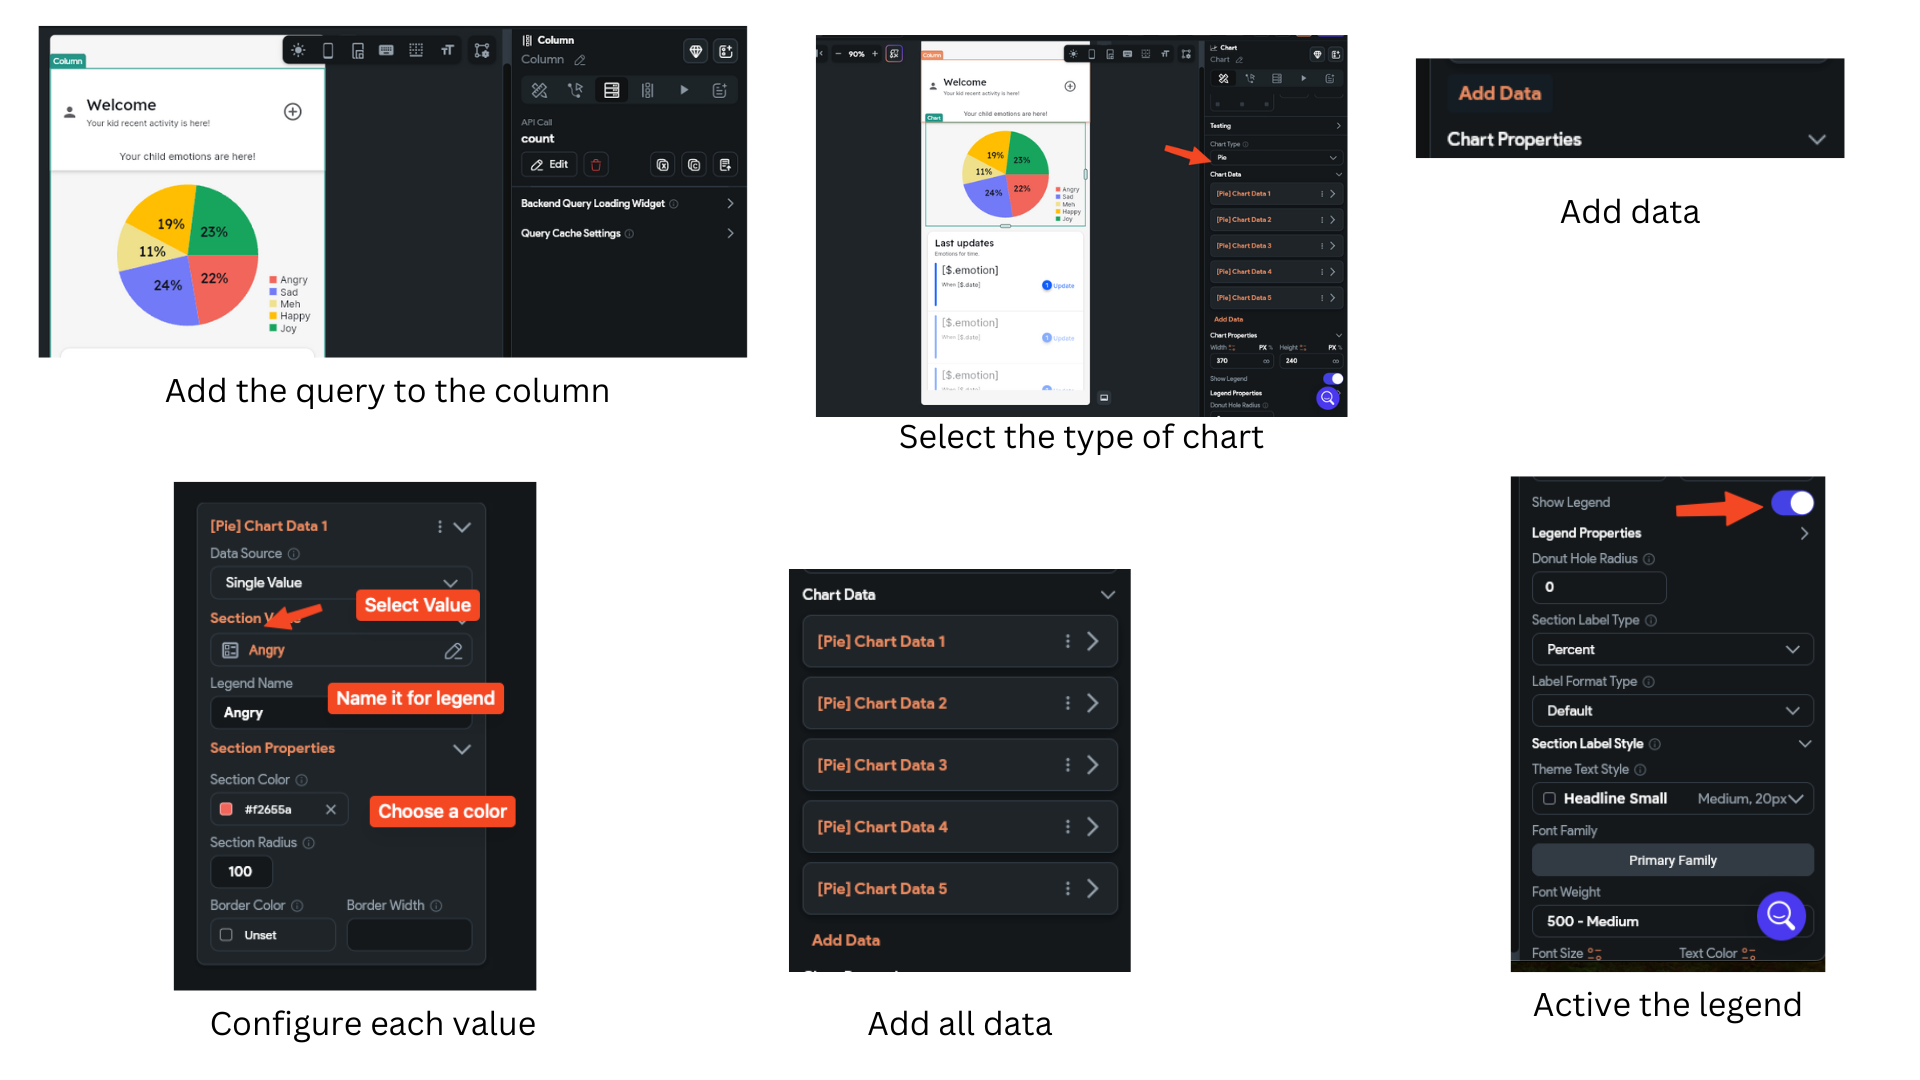
We add to the Father element the query to the database and then we add every JSON path to charge all data. With some configurations we do the next:
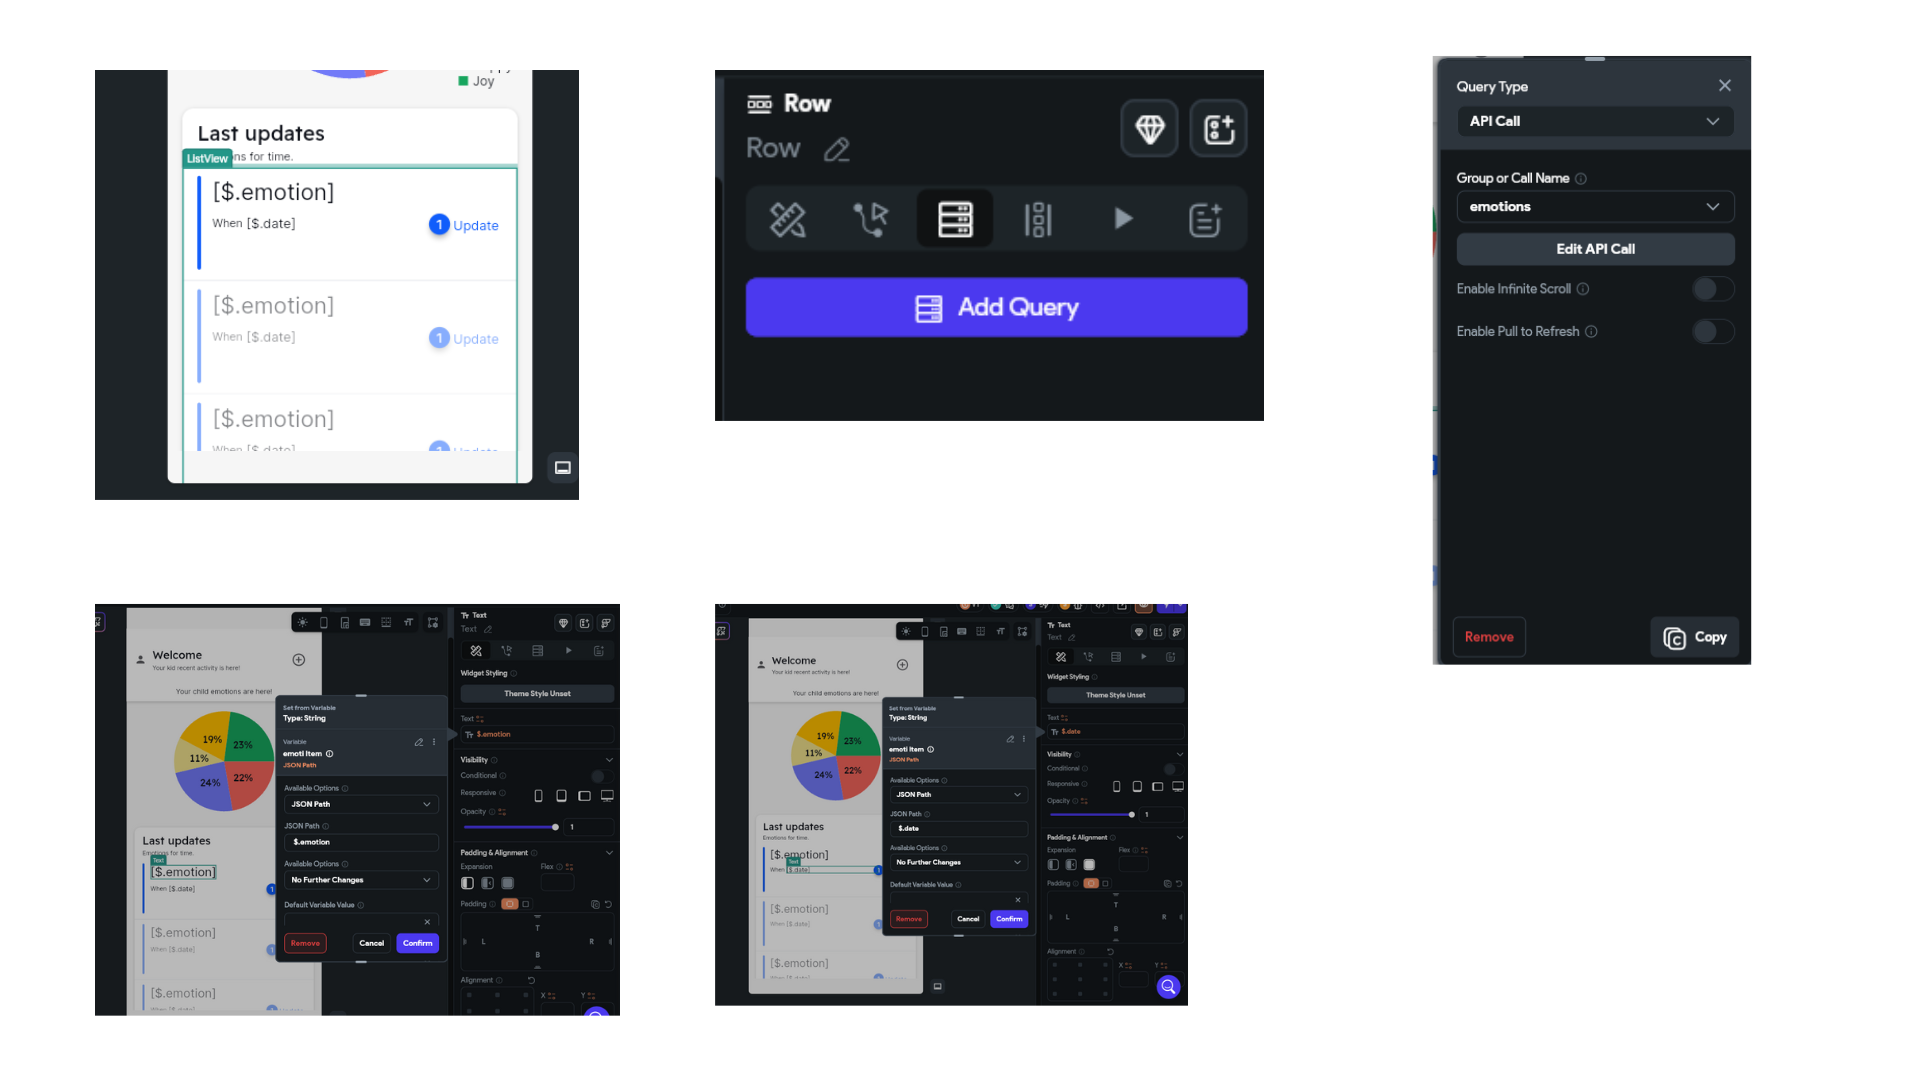
Finally we configure the chart as you can see to get it work:
Let's see what we got, first we have the login that actually works. We set the email and password on Firebase, and we have this:
Then we have the app dashboard which actually works too
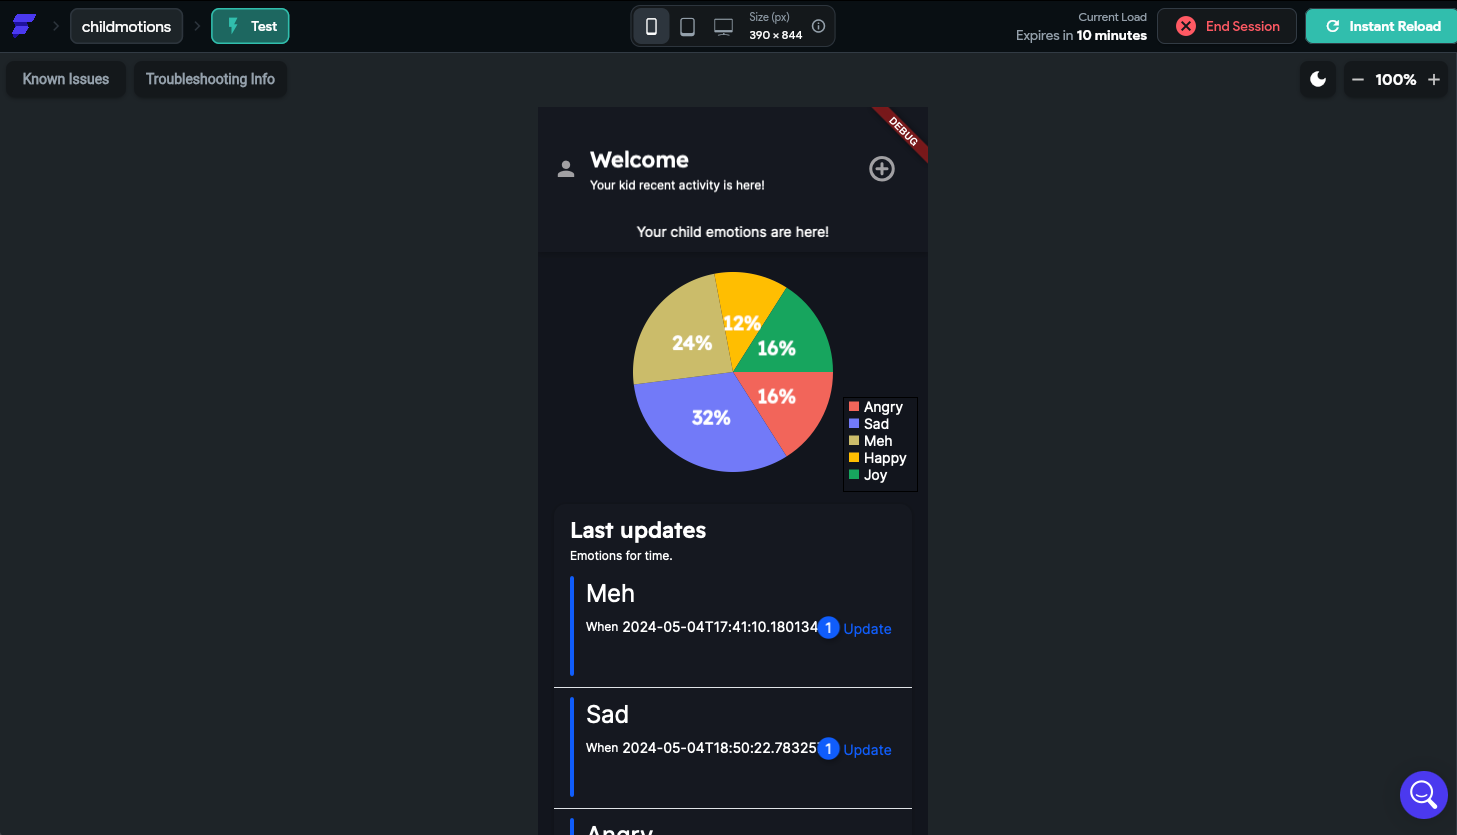
On this video I'm showing how the system works, Im touching multiple times the touch sensor, that is sending an specific emotion to the API database, then as we can see, when updated the application on FlutterFlow, the pie chart and the last update changes.