Completing safety training in the lab is essential before proceeding with any tasks. Once the environment is secured,
conducting tests on runout, alignment, fixturing, speeds, feeds, materials, and toolpaths for your machine is crucial.
This process not only ensures safety and efficiency in operations but also fosters collaboration and continuous learning
within the team.
Lab´s safety training
The use of CNC machines carries various hazards because, for its operation, high-speed rotational tools with sharp edges, high-voltage and heavy parts are used.
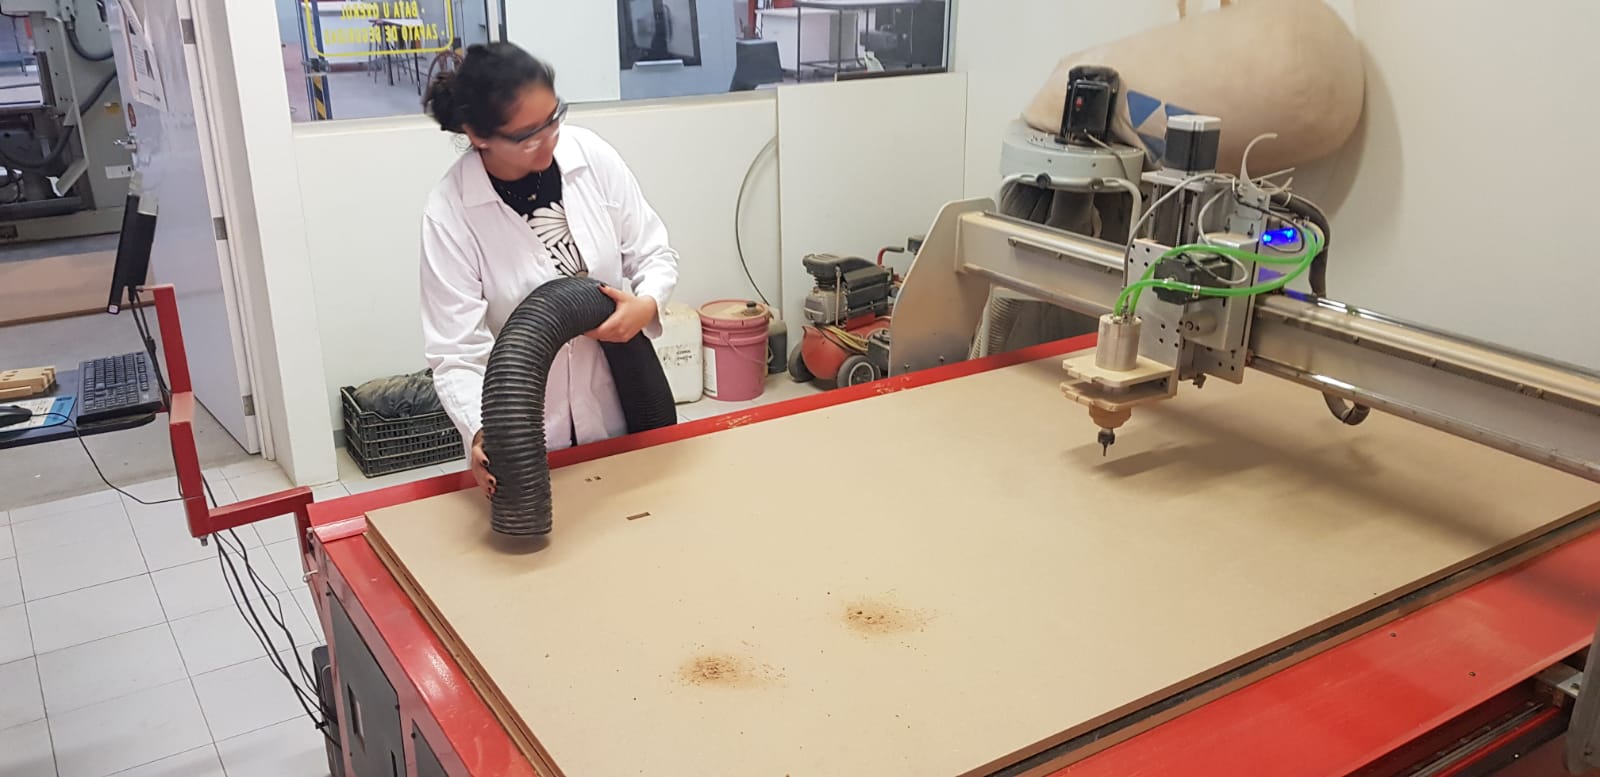
During Operation to prevent dust inhalation. The vacuum extractor is used for picking up all the dust and chips after the process has ended. For turning it On/Off
a switch is used.
It is important to not touch the green round button next to it, as it disables the X-axis for using the rotary add-on. During the vacuuming one must be careful
to not touch any grounded surface as the dust generates a great amount of static electricity. Before starting the operation, a thorough inspection of the
machine must be done, taking into consideration the next basic knowledge.
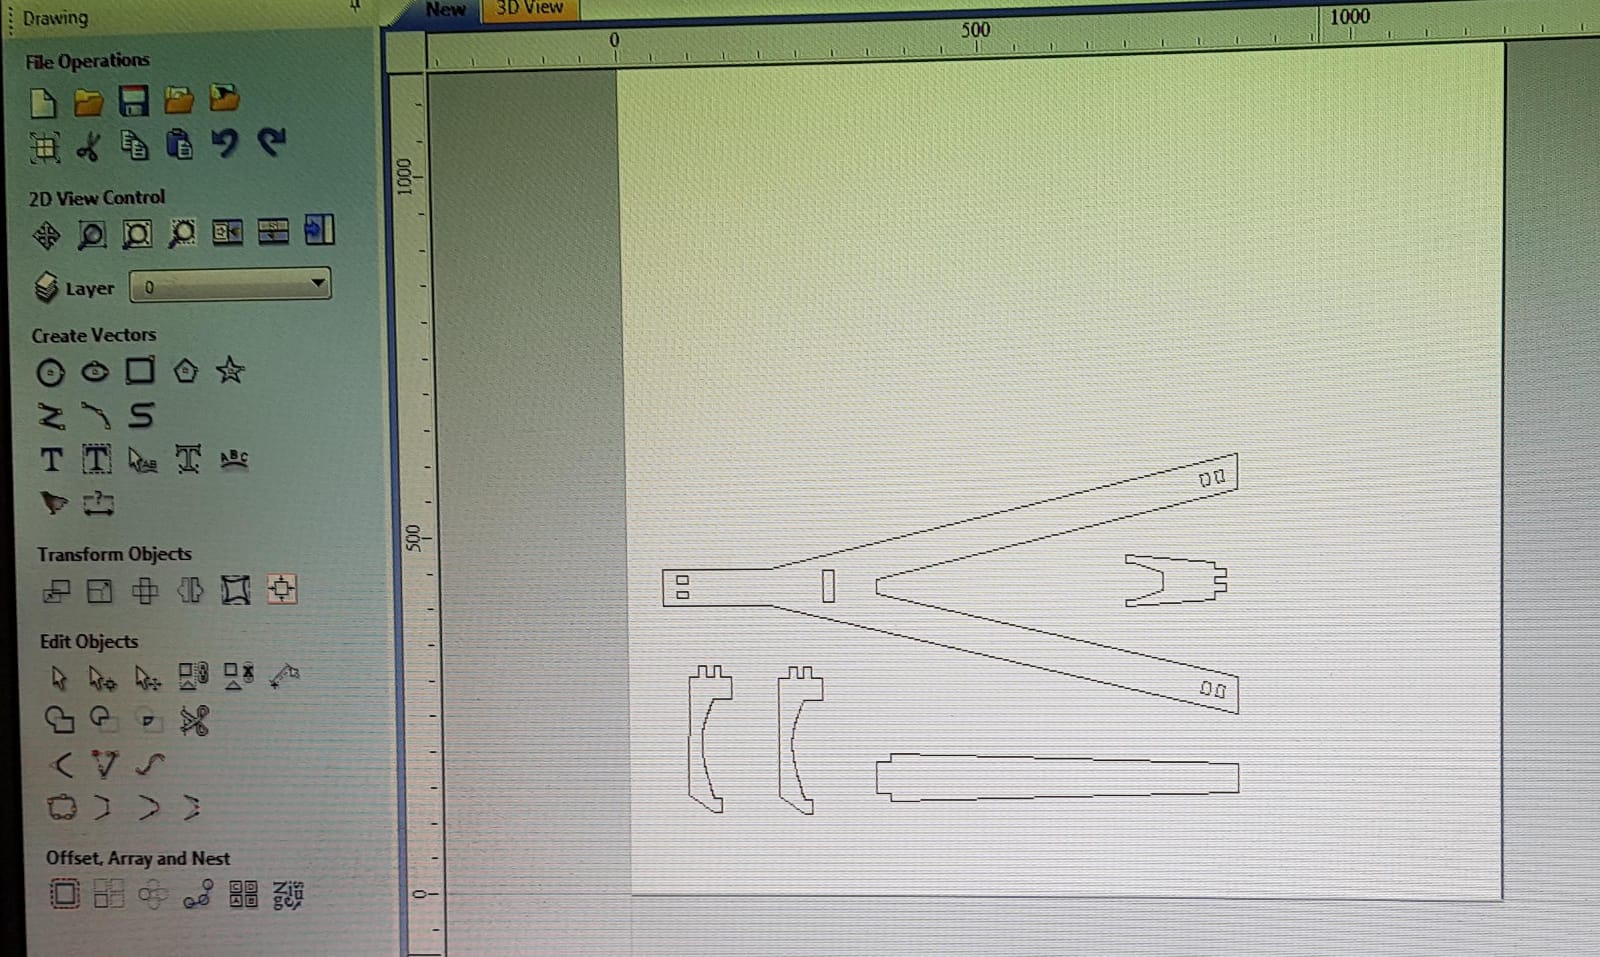
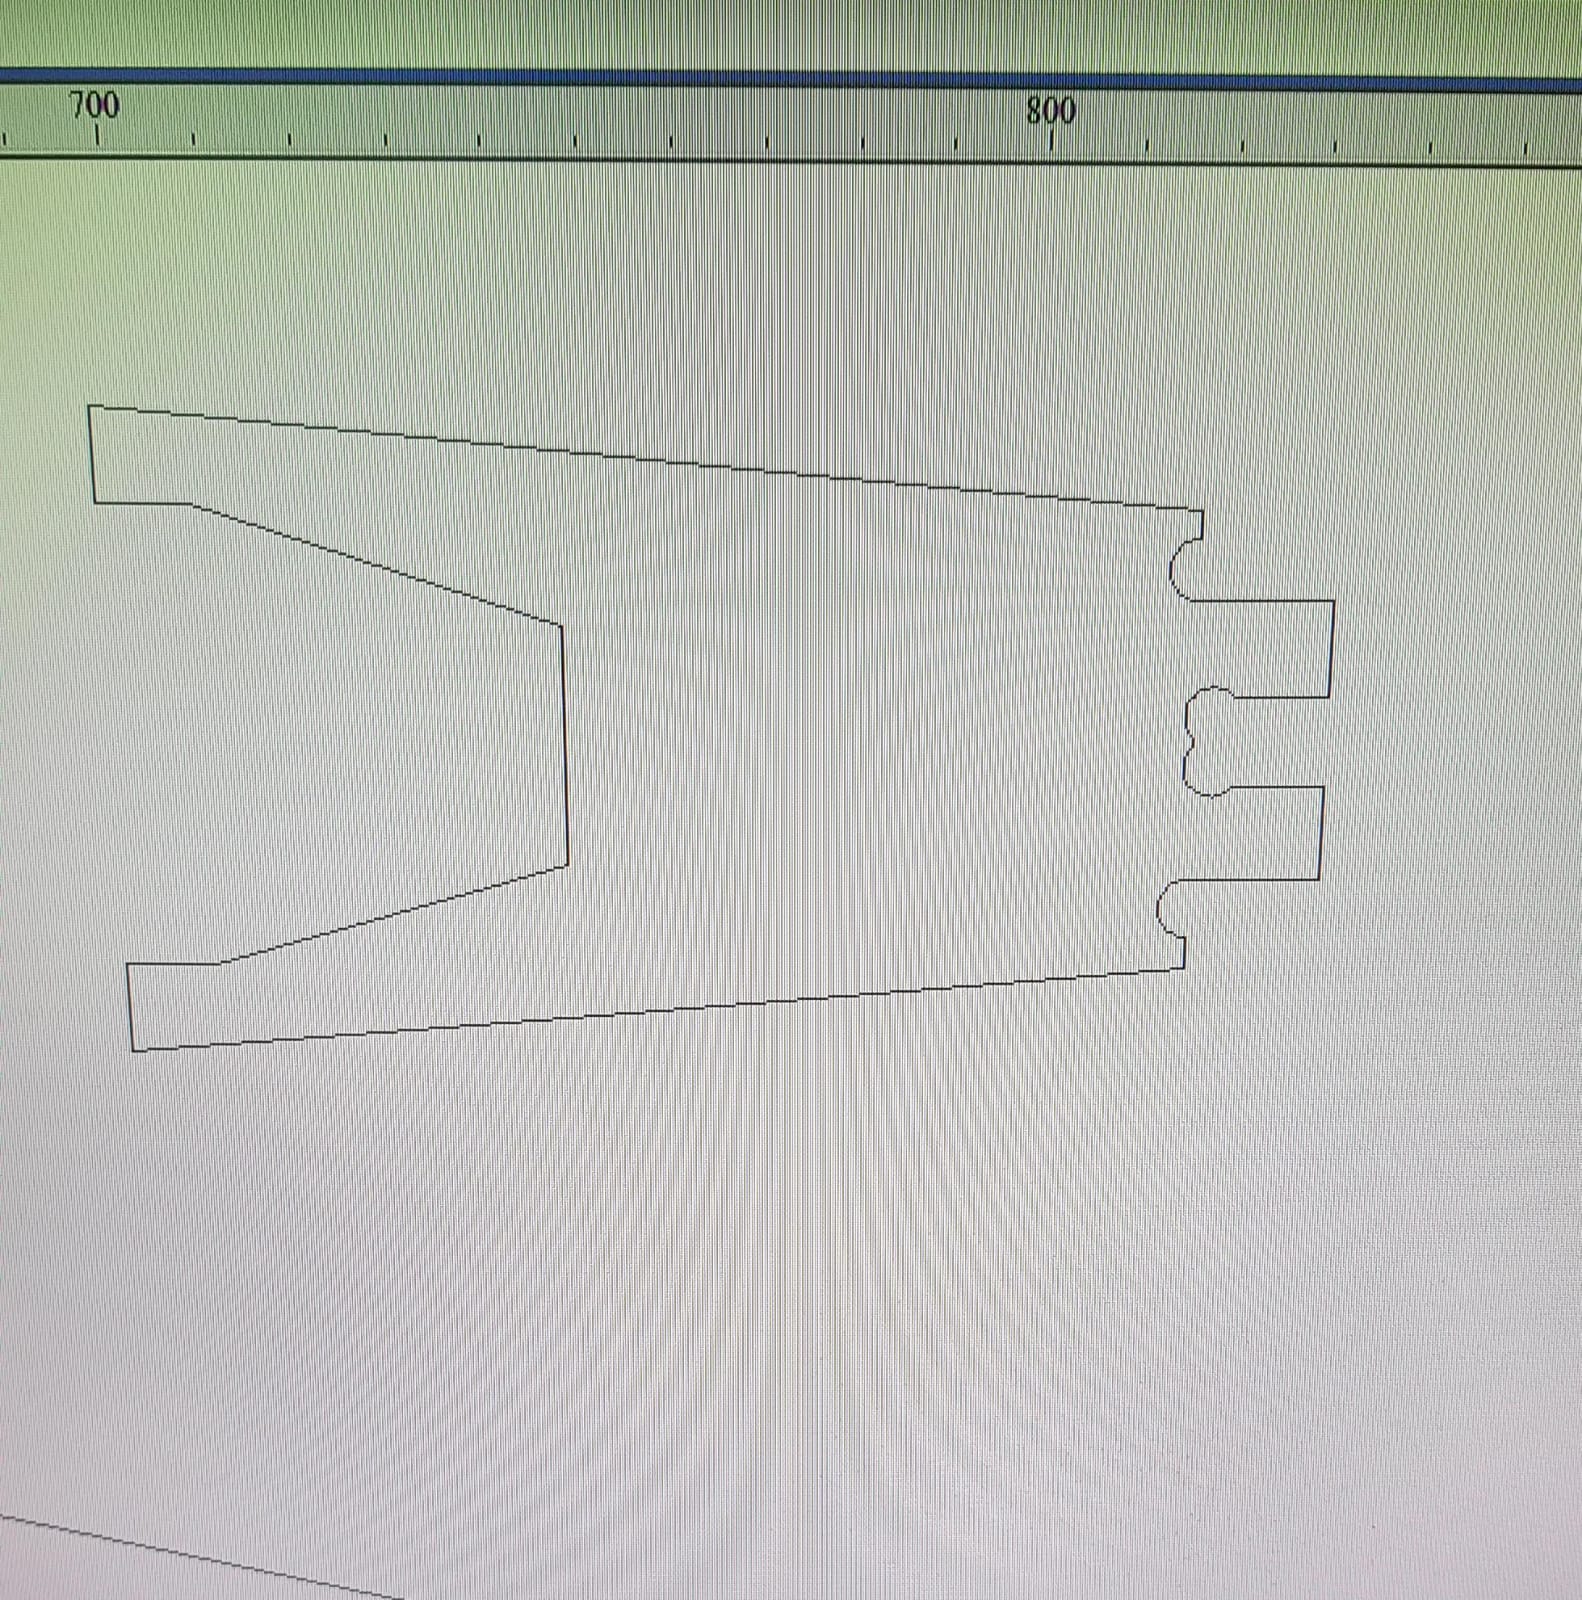
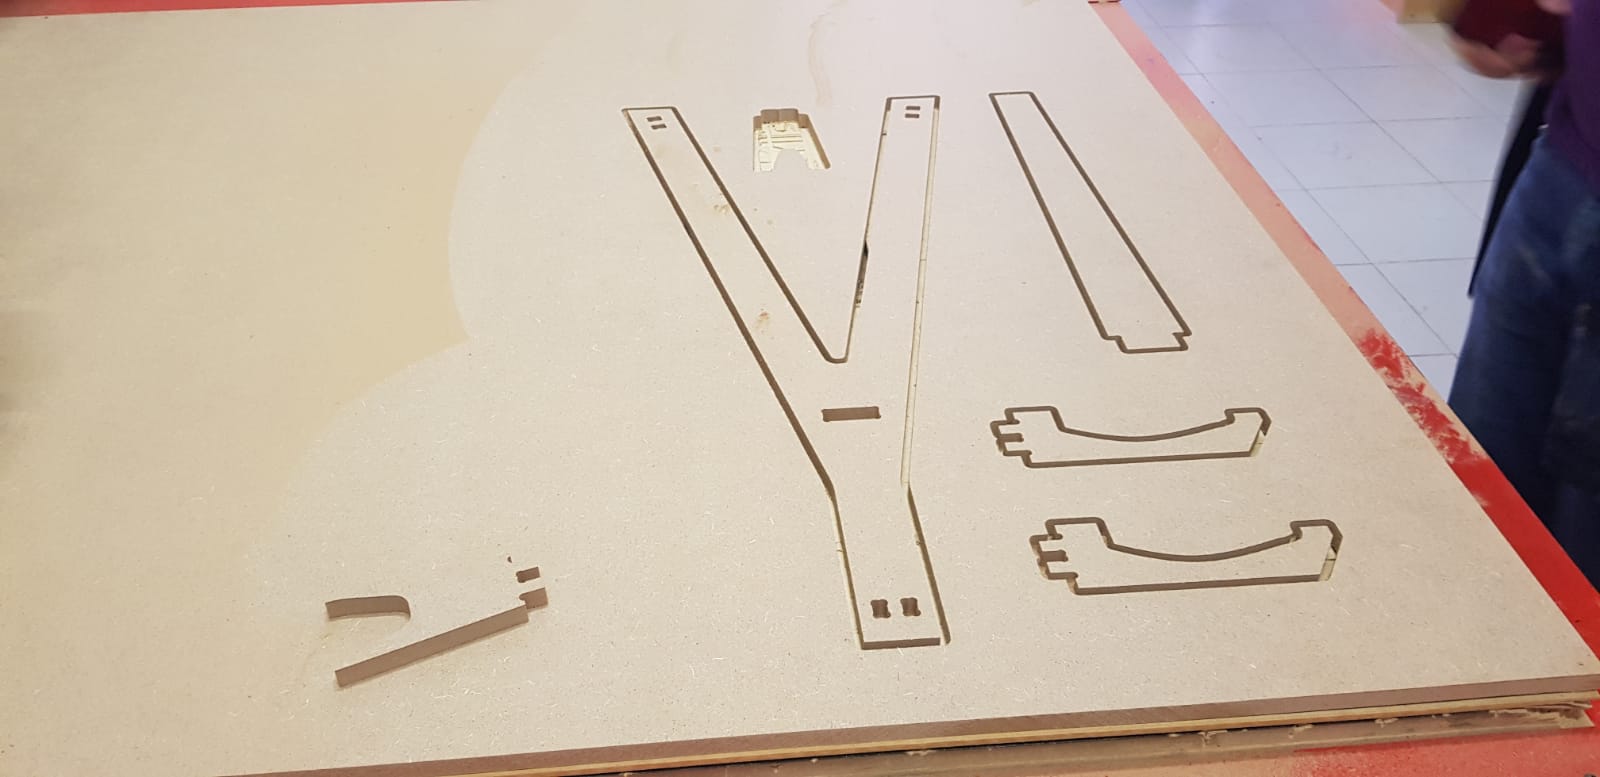
FOr this assignment, I decided to make a stand for my guitar. I designed 5 pieces that will be assembled, the first
one is the largest and measures 80 cm long and has four parts where the other pieces will be assembled, two at the top and two
on the sides of the bottom part.
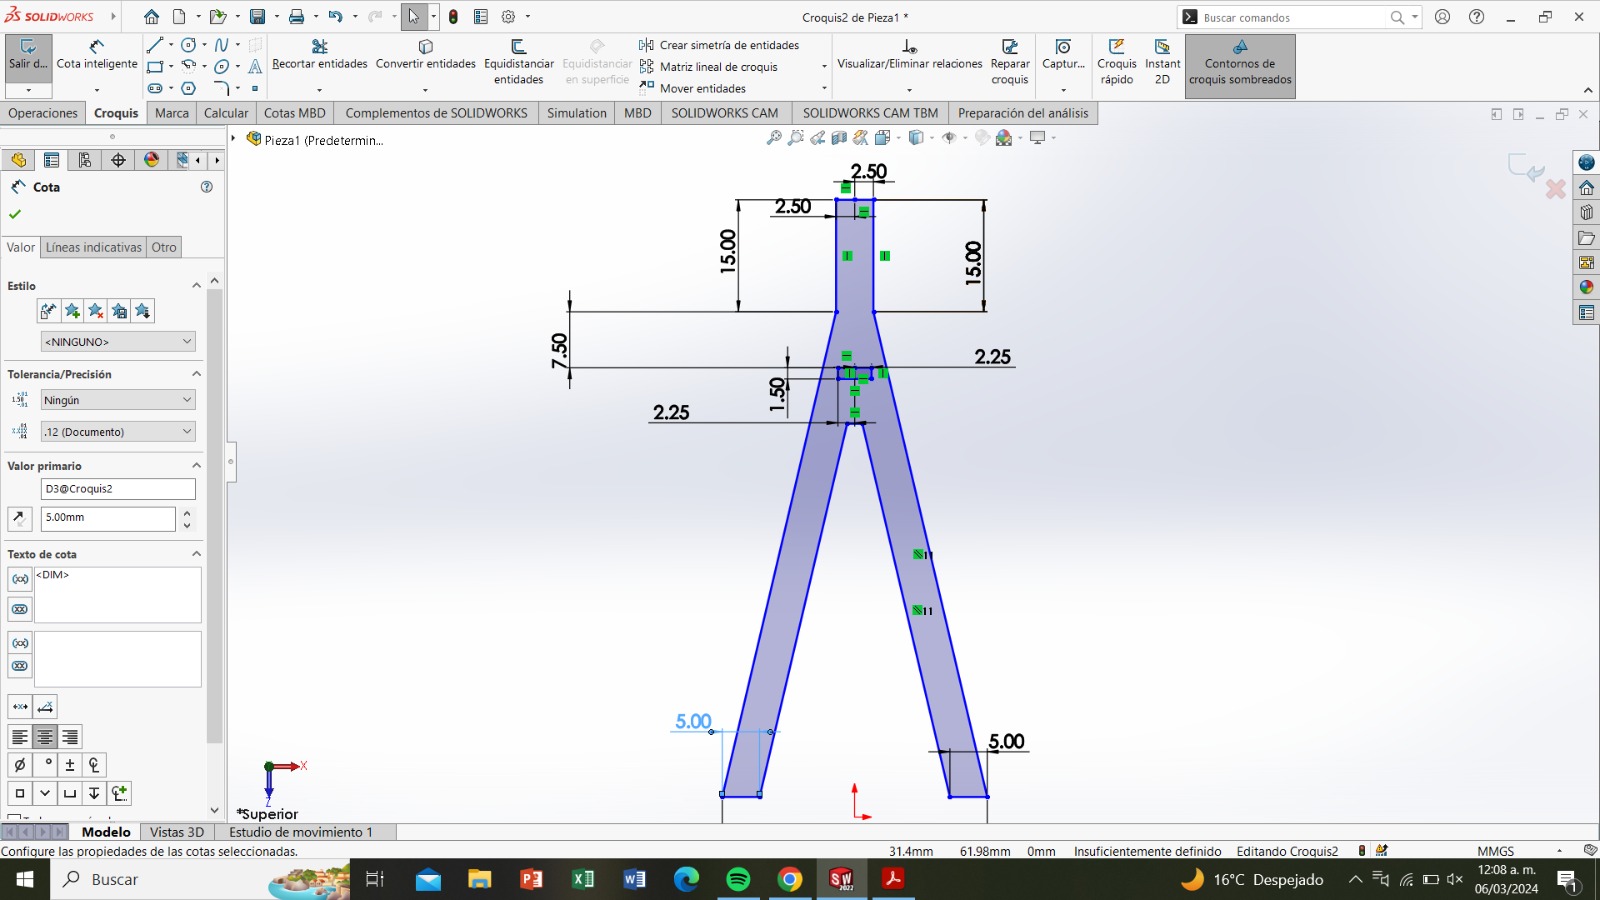
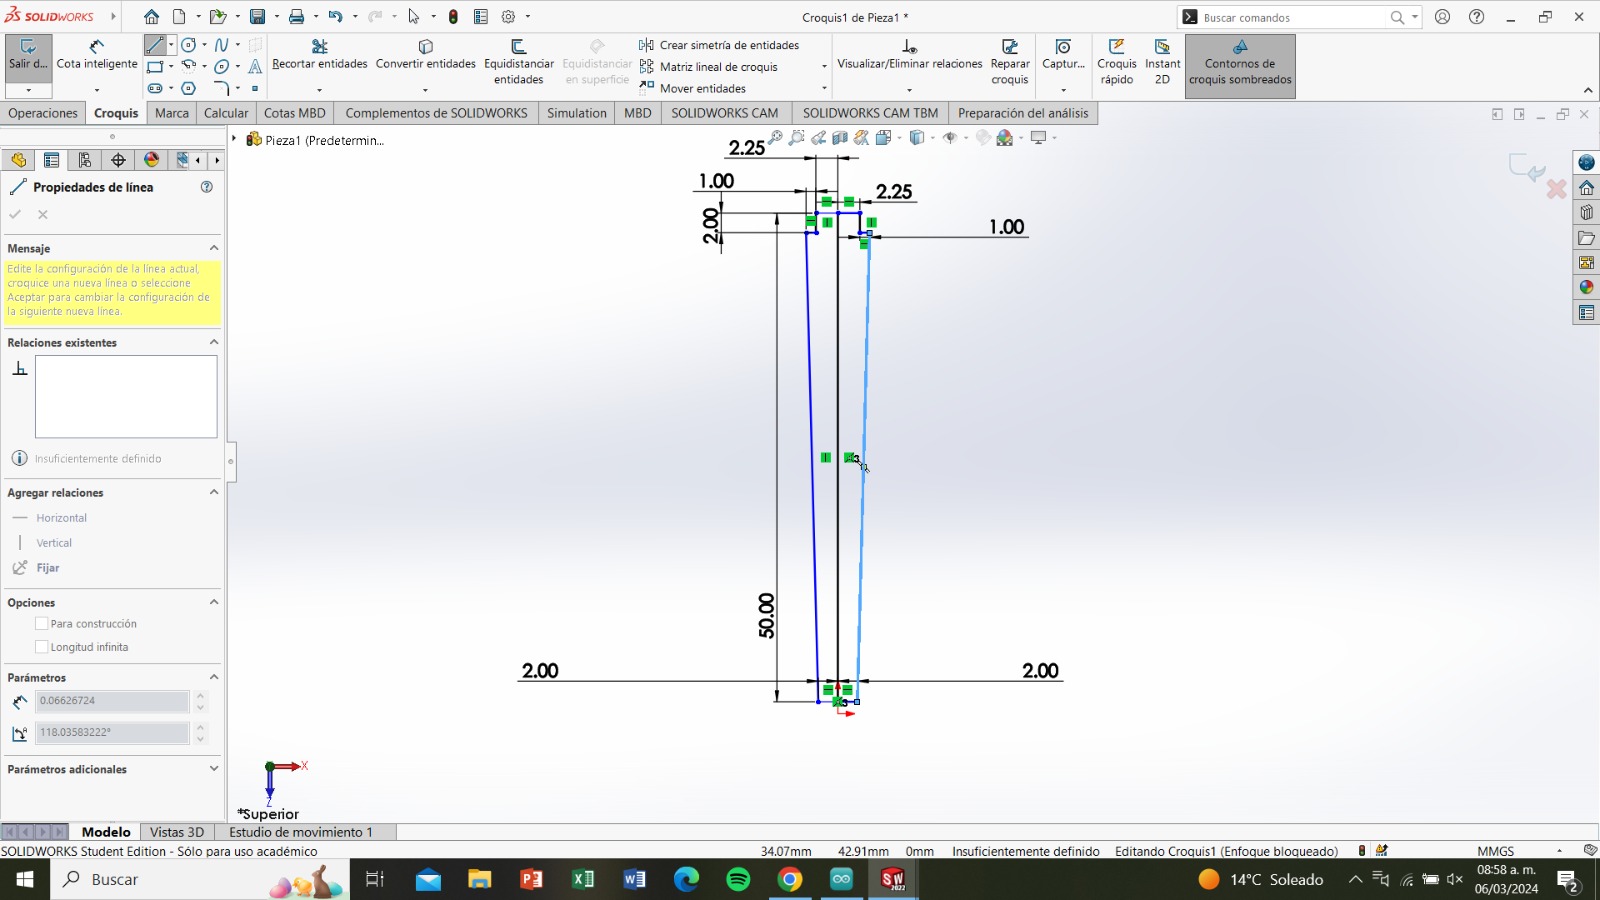
The second piece is a leg that acts as a support for the stand.
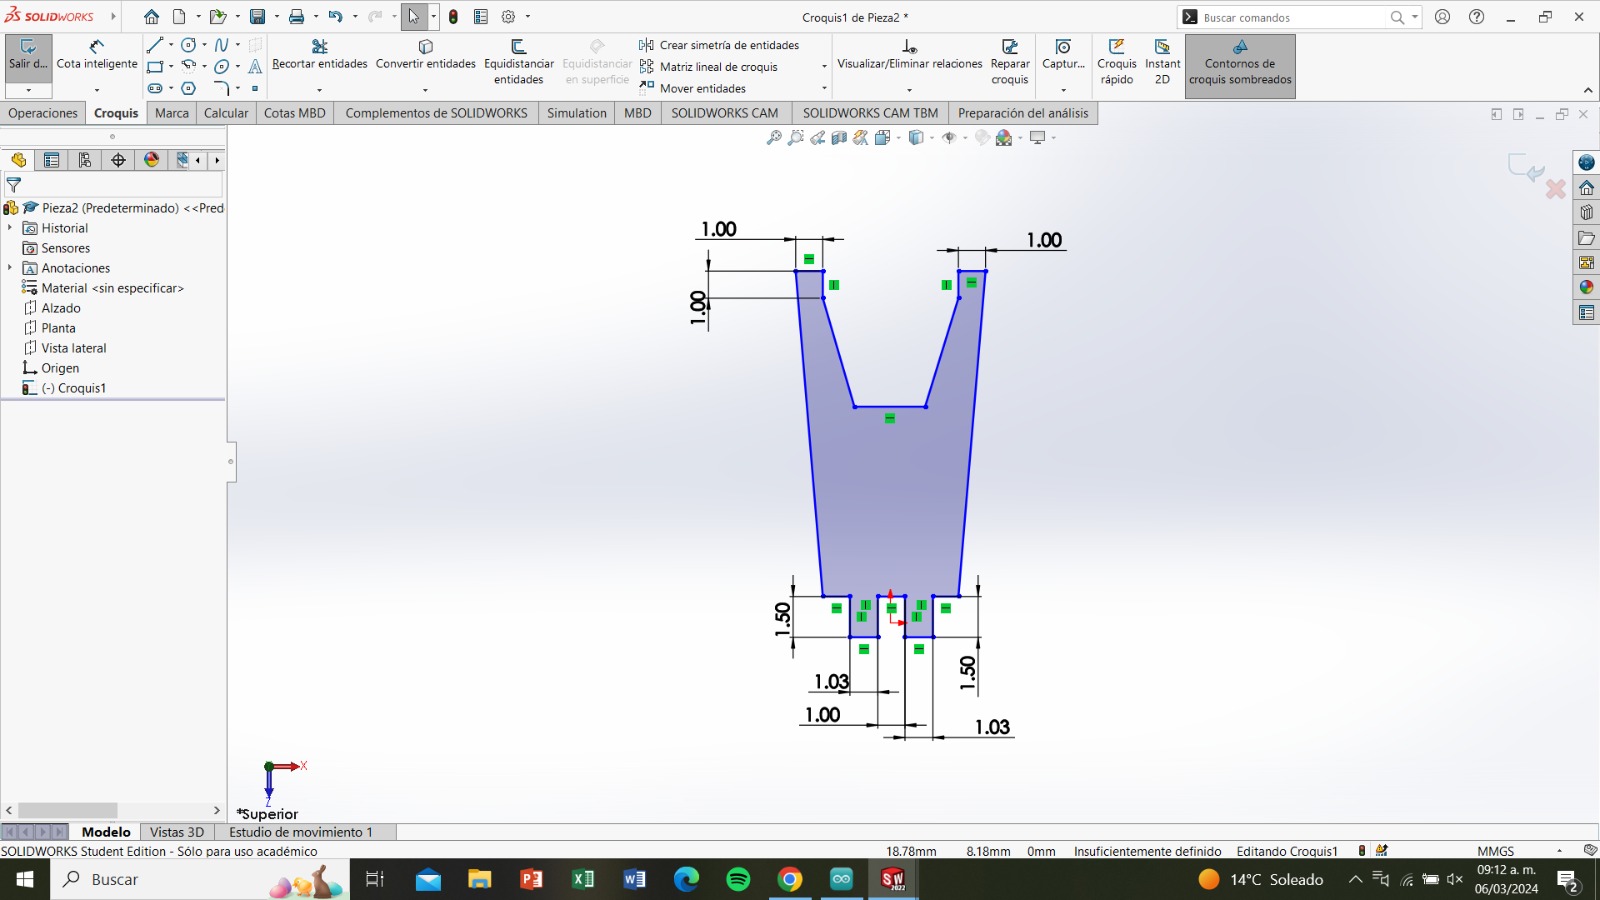
The third piece is a V shape for supporting the guitar neck.
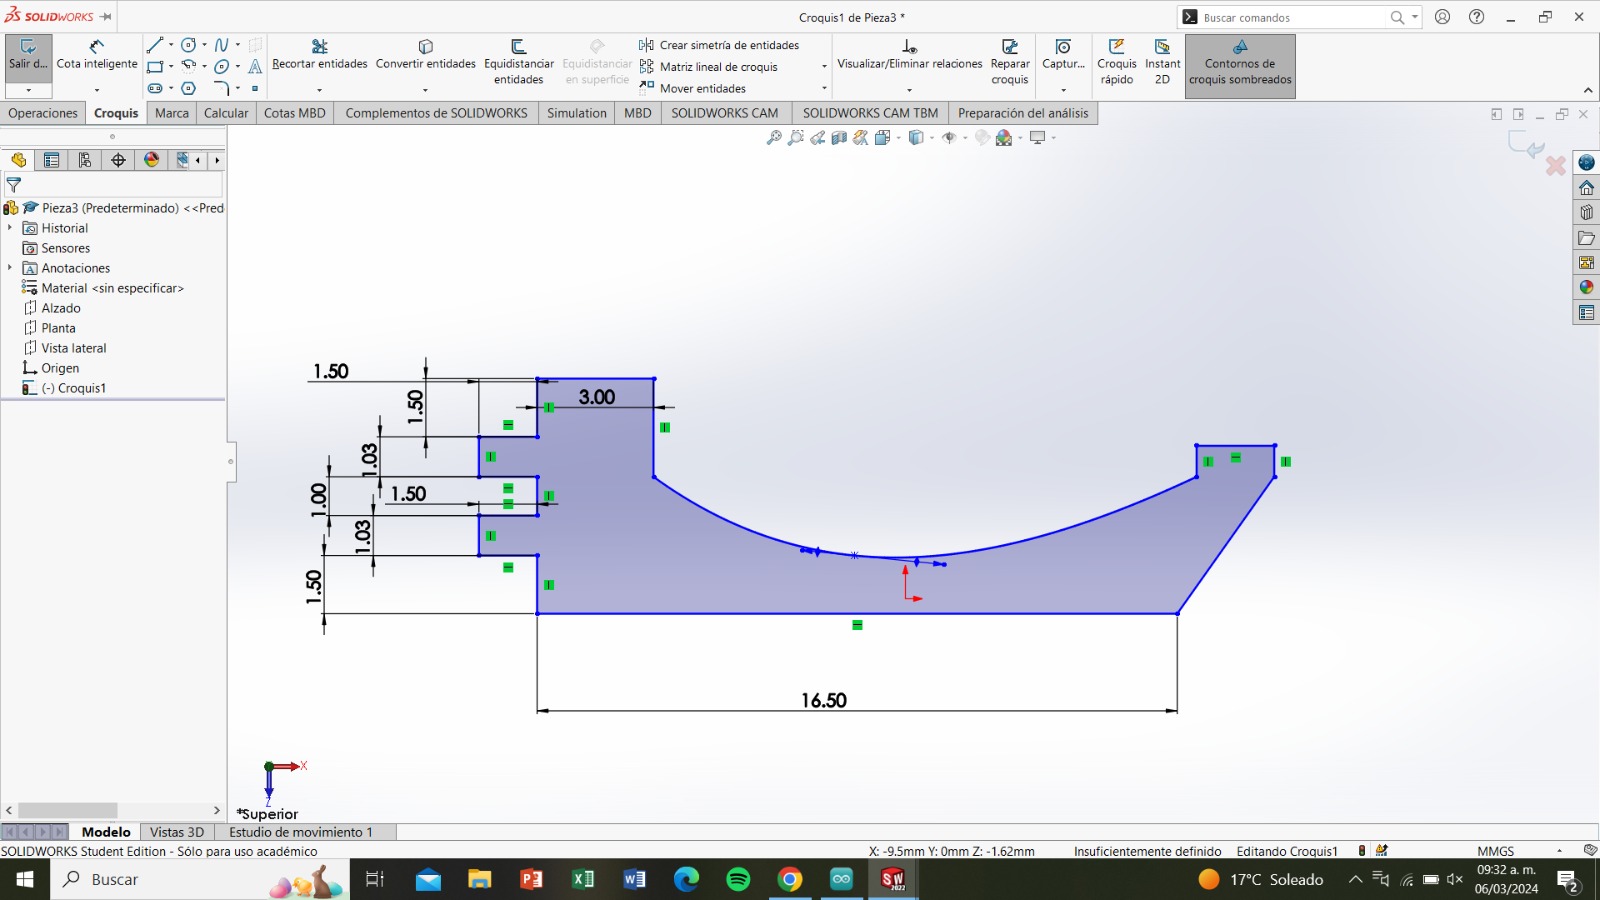
The fourth and fifth pieces are supports for the guitar body.
Router cutting
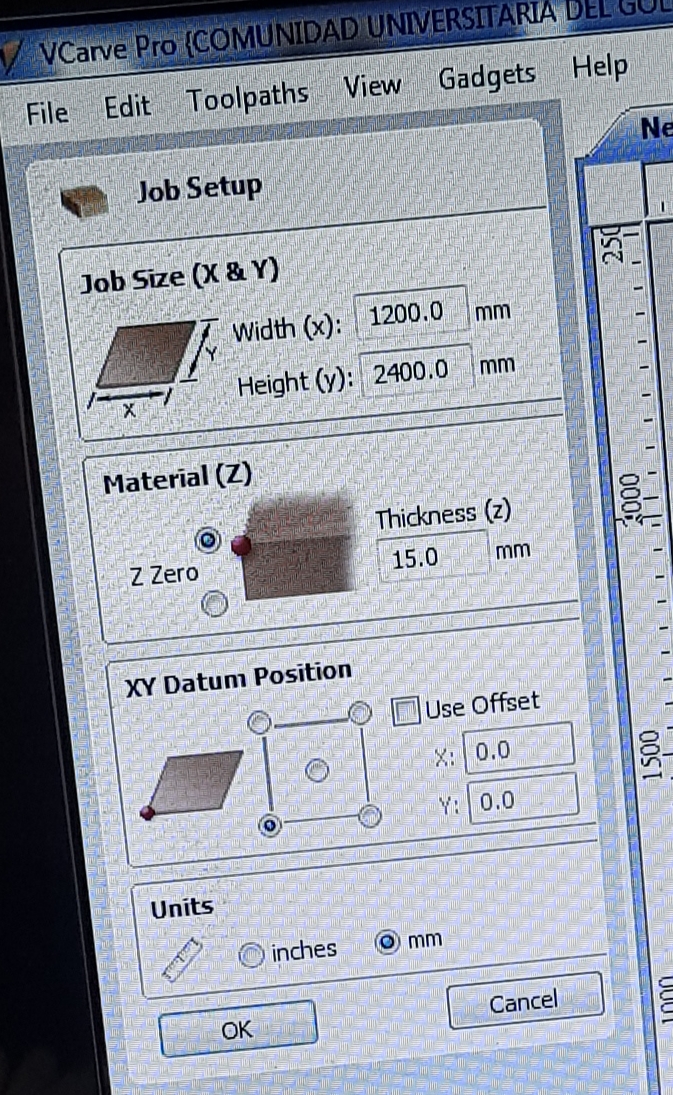
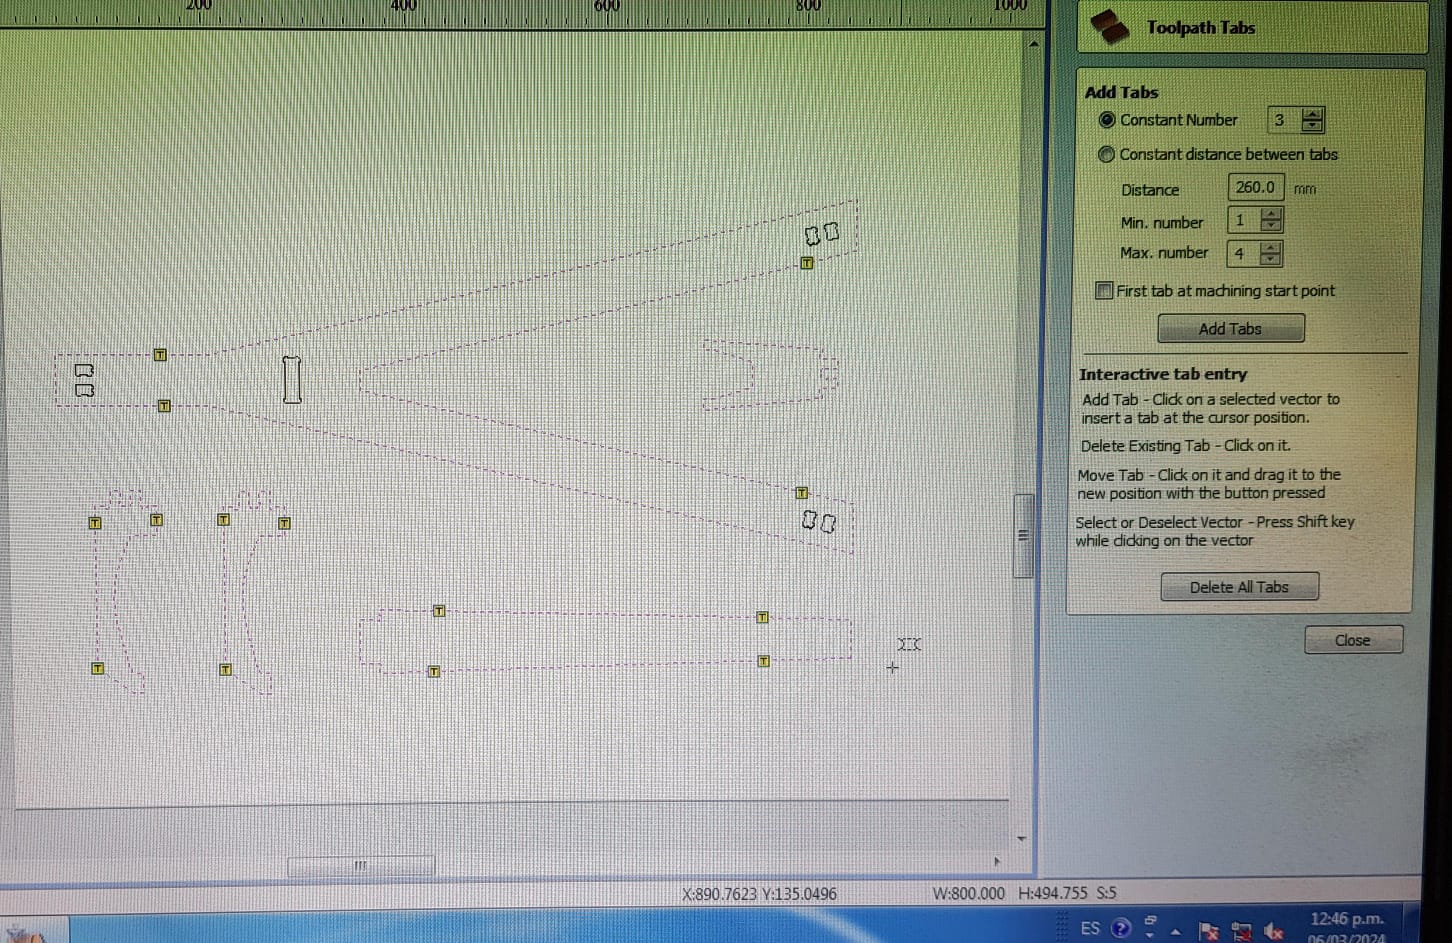
For cutting, first we need to open the Vcarve program. Once inside, click on "create a new file" and adjust the
dimensions according to our table (1200 x 2400) and 15mm thickness. Also, mark that the origin is in the bottom
left corner and select "millimeters" and "ok".
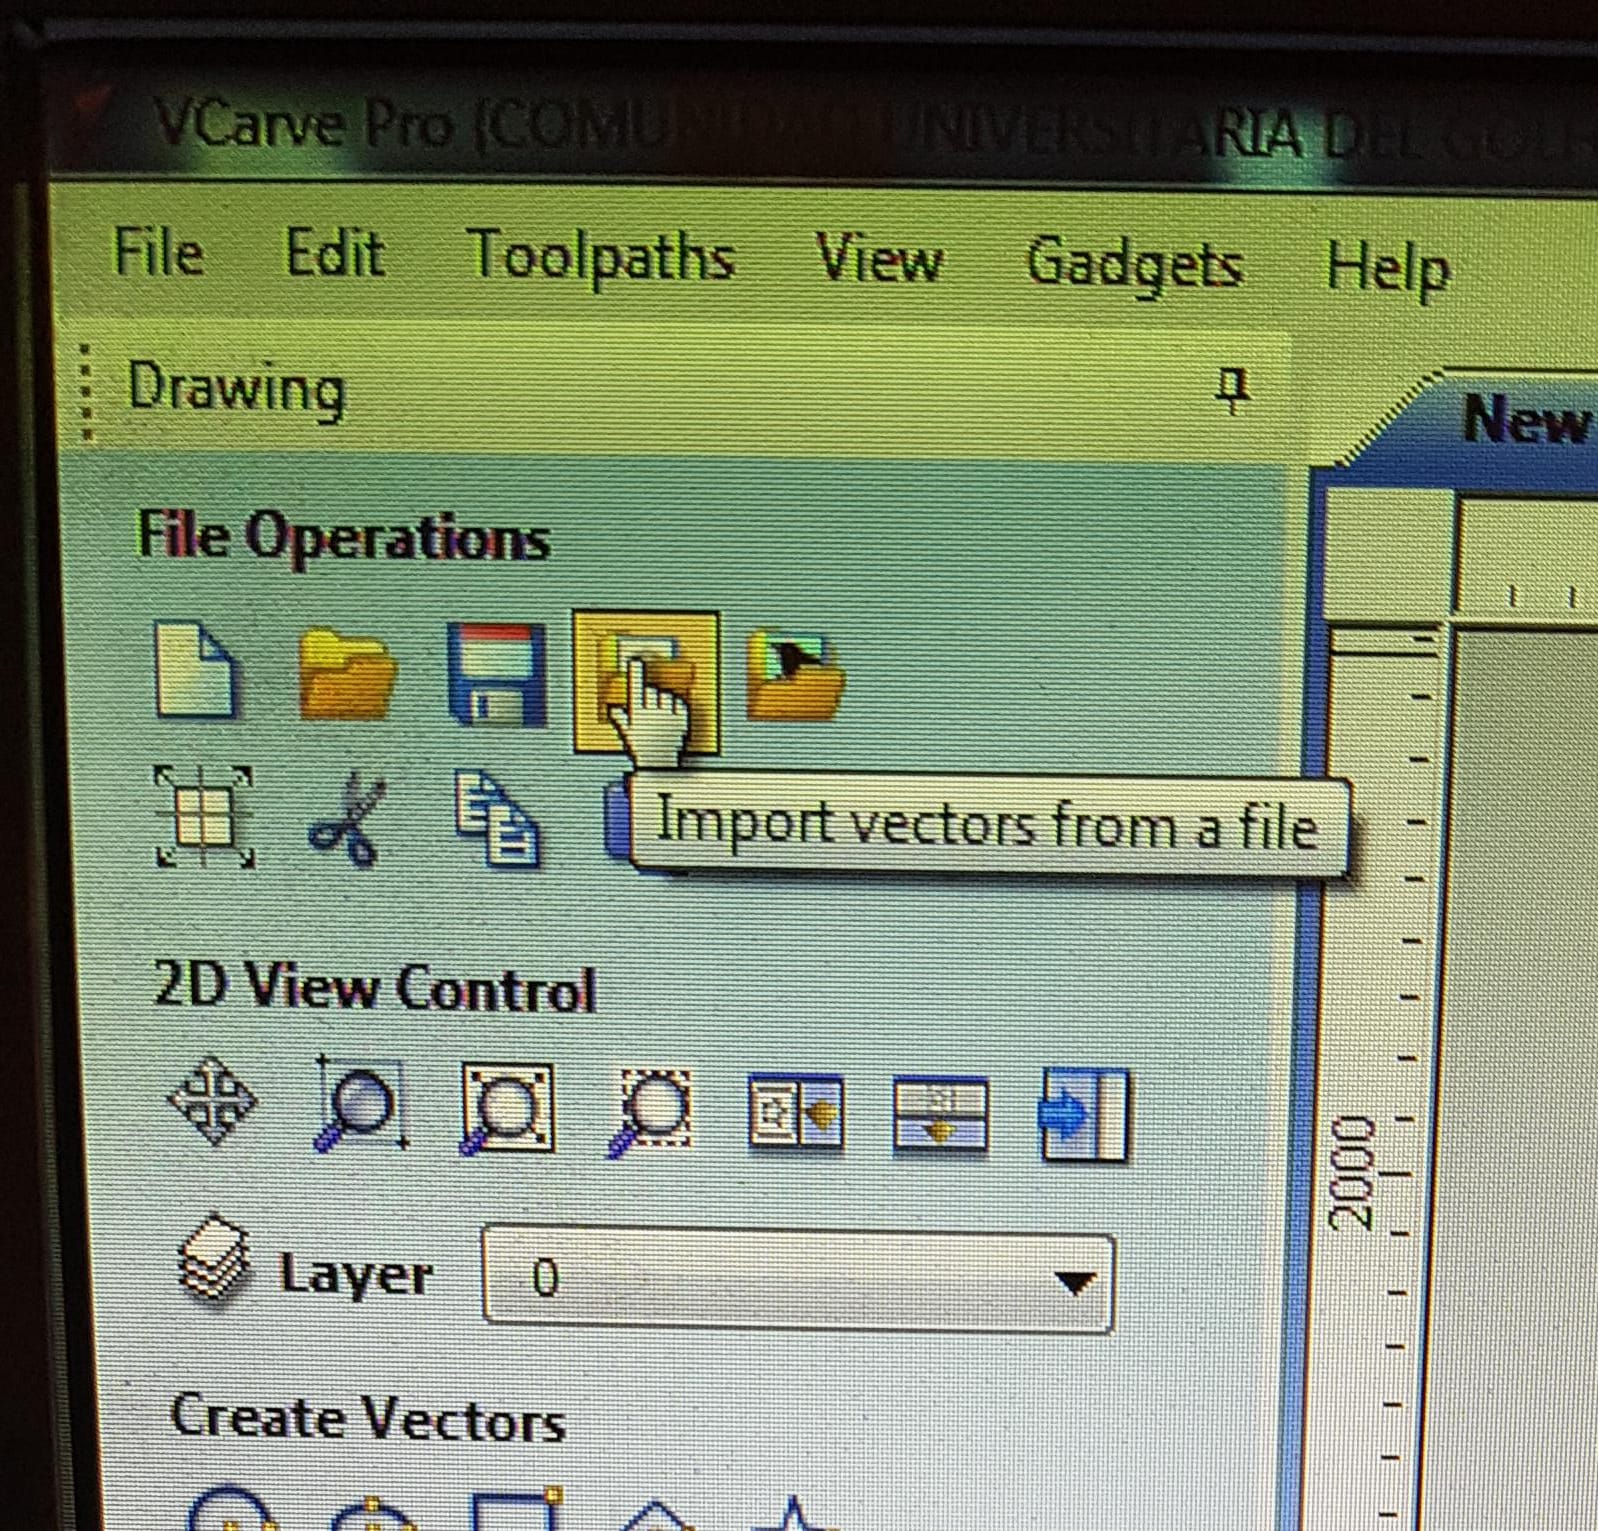
Then, in the "File Operations" tab, click on "import vectors from a file" and select the drawing files in DXF format,
then click "open".
Now that we can visualize our designs, we arrange them in a way that minimizes material wastage.
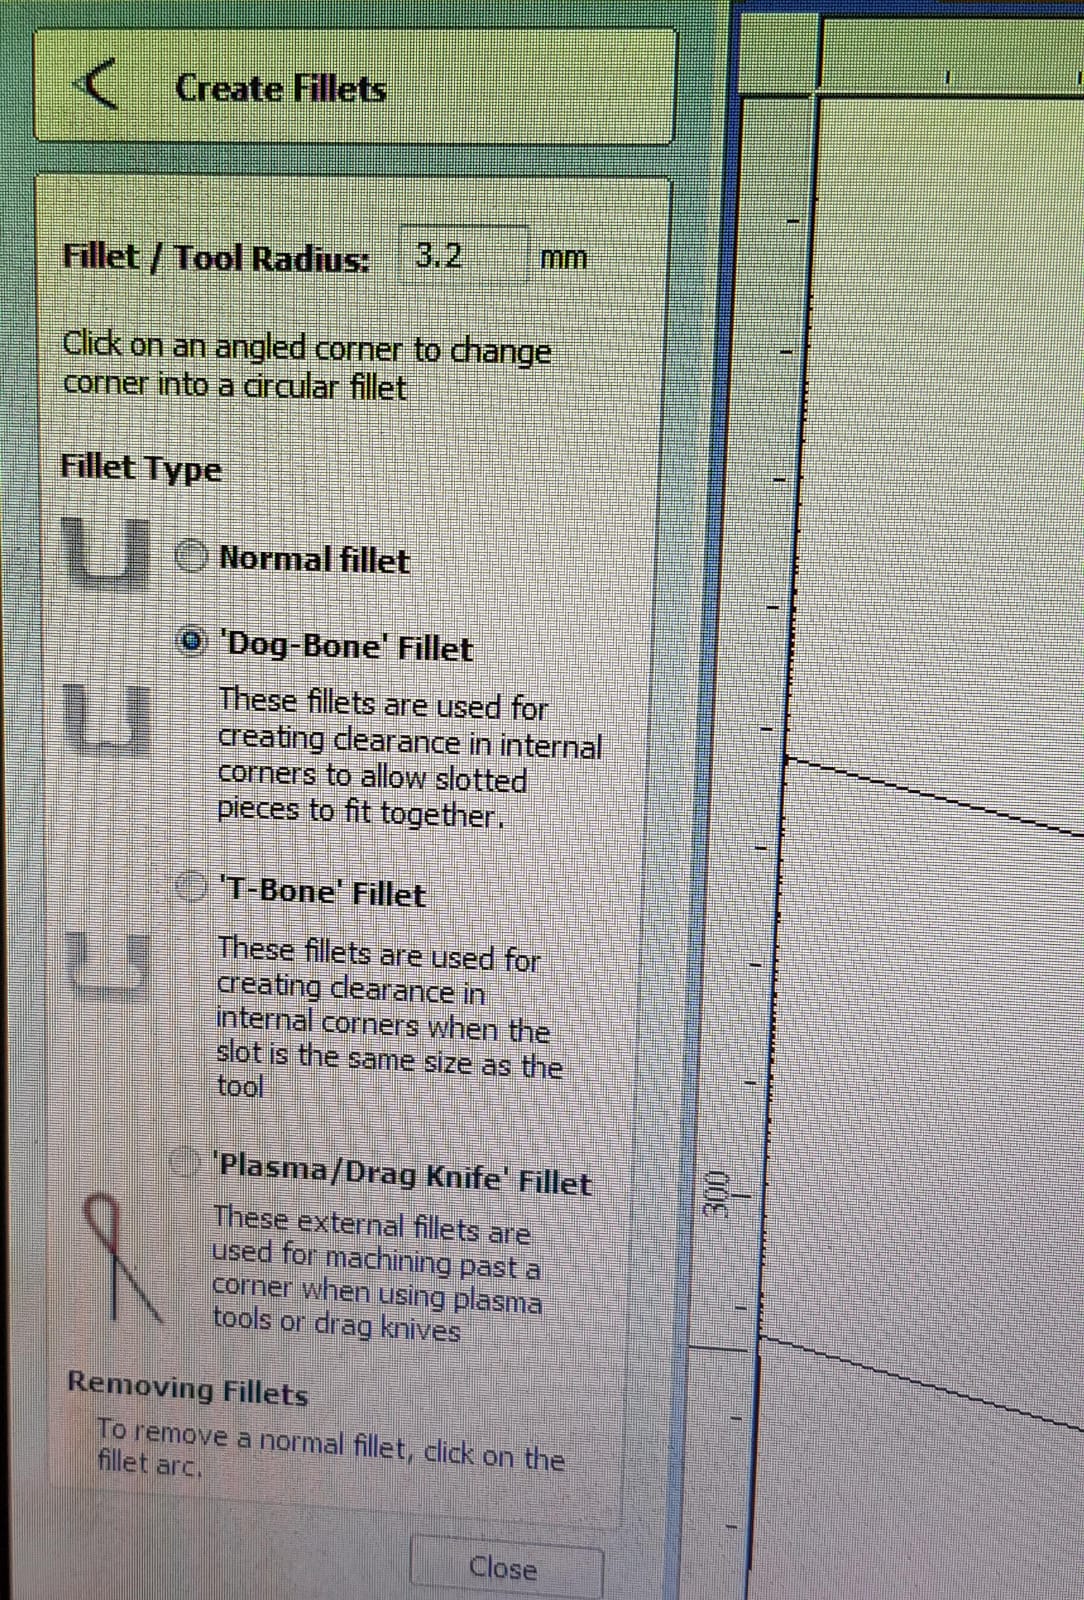
Now, click on "Create Fillets" and change the "Tool Radius" to 3.2mm. Then, go to "Dog Bone" to add it to all the joints.
Additionally, the "T-bone" option was used for joints where "Dog Bone" couldn't fit
In "Toolpath Profile", enter 15.2mm in the cut depth and select "outside/right" in the "Machine vectors" option.
Tabs should also be added to hold the pieces in place during cutting.
After adding the tabs, click on "Close". Then, in the "Toolpath" tab, select "save toolpath".
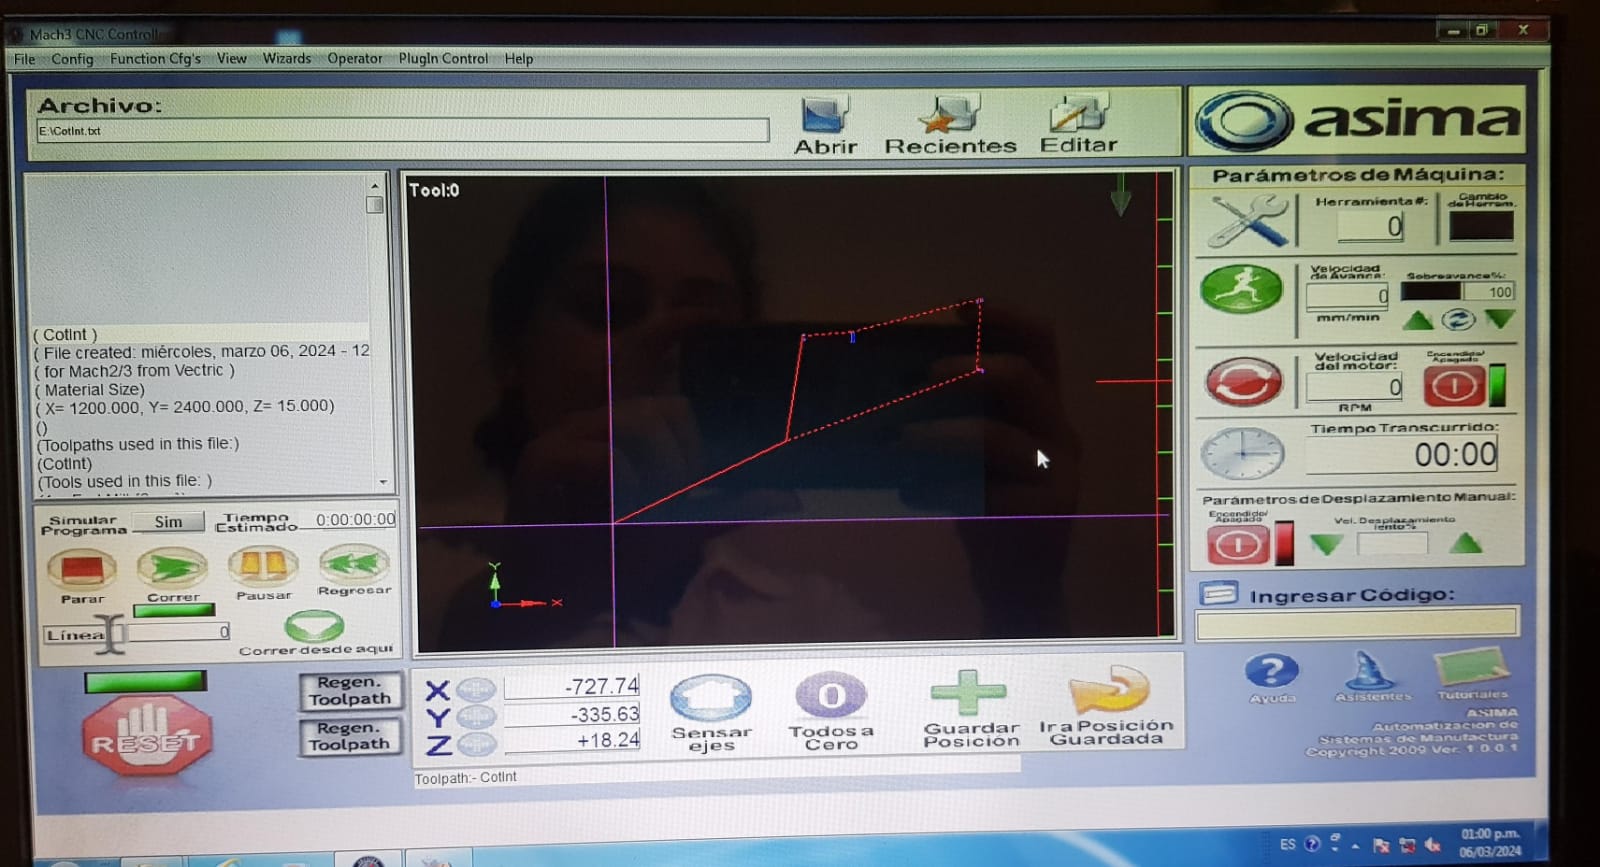
Now, we can open the "MACH3" program and import the G-code generated by Vcarve.
Click on "play" and the cutting process will begin :)
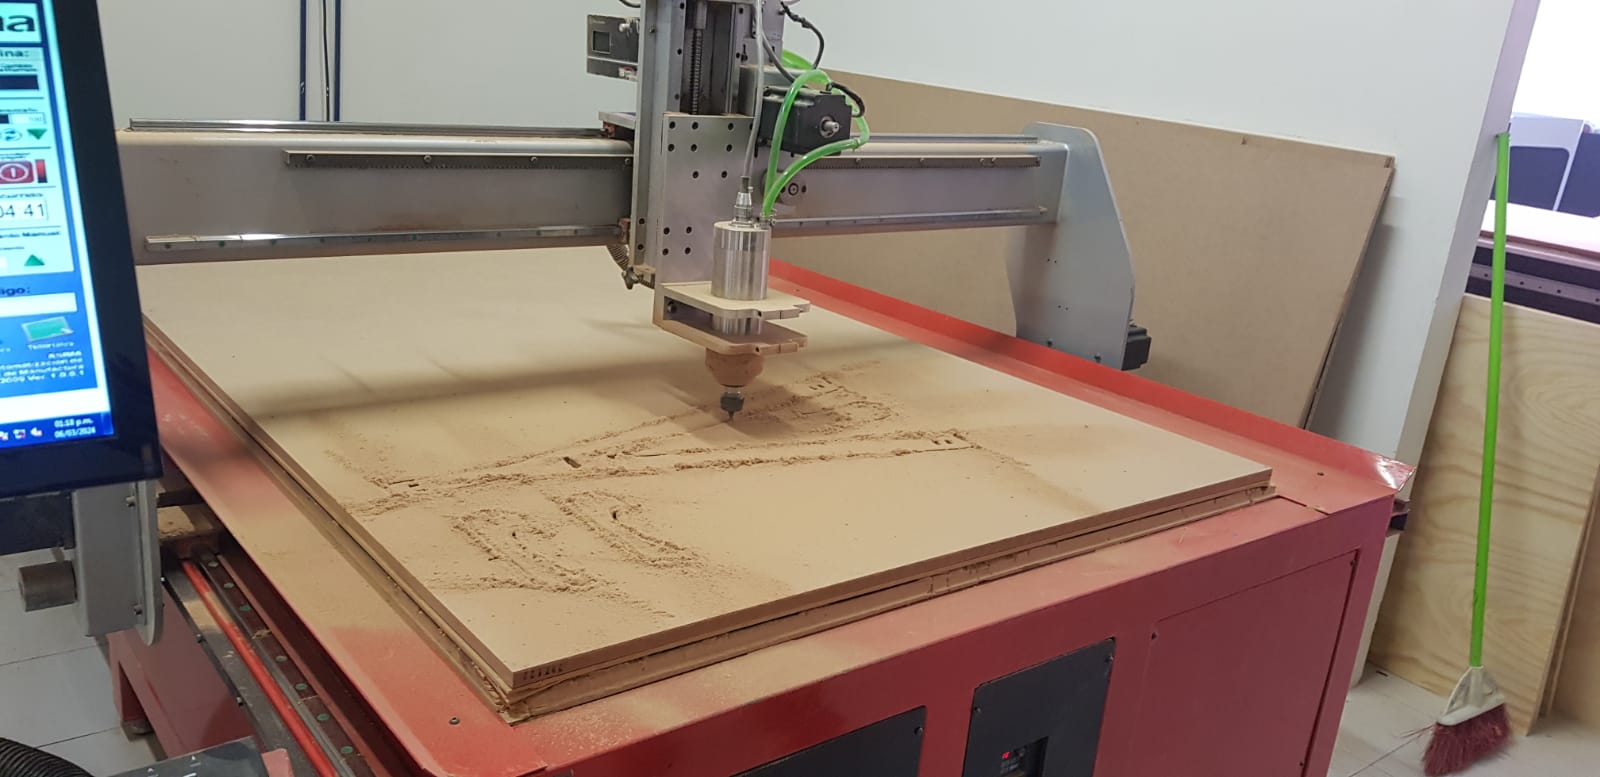
Once the cutting is finished, all that's left is to vacuum the pieces and remove them from the machine.
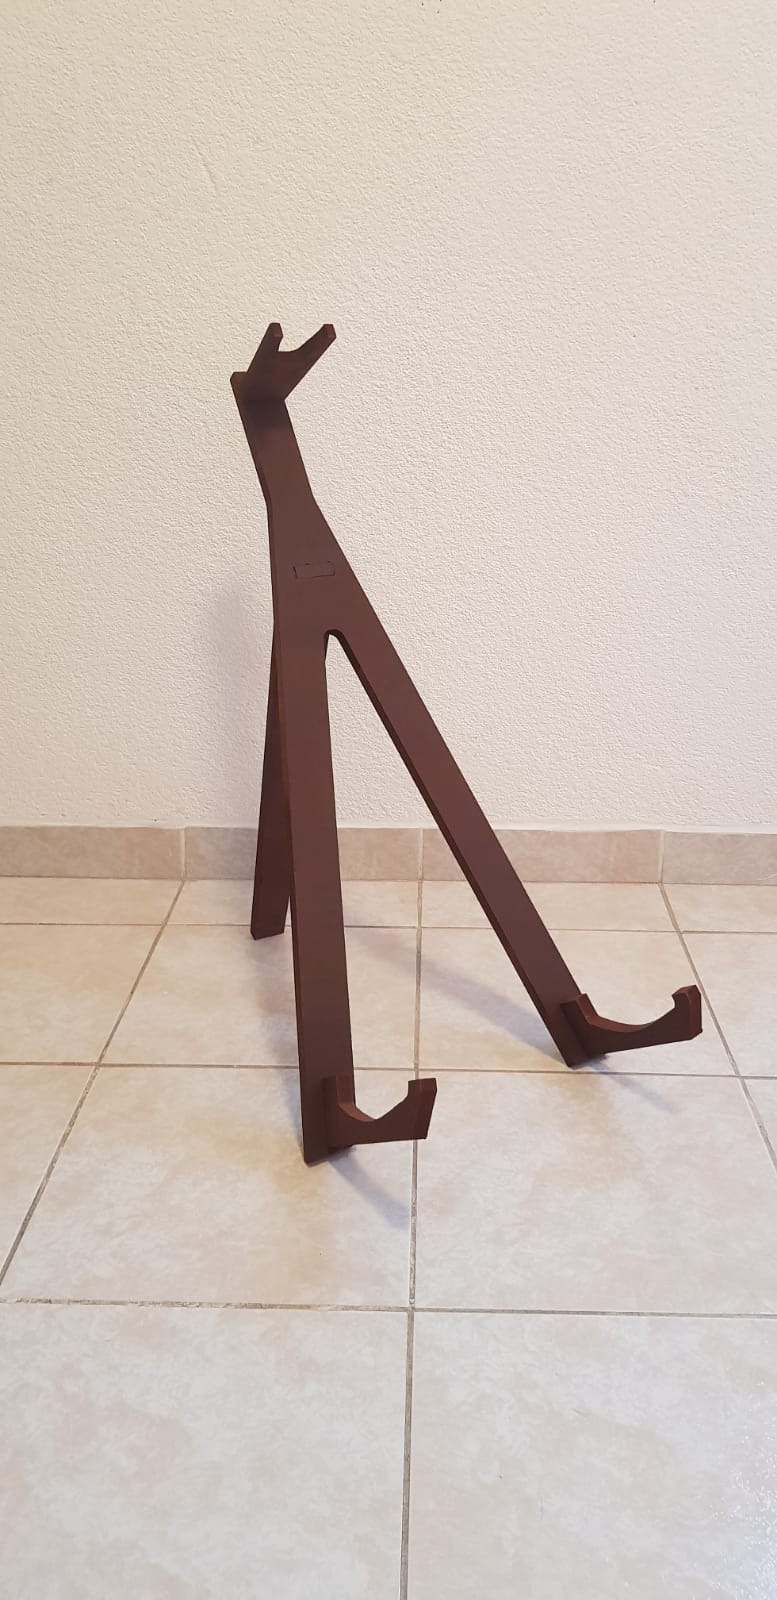
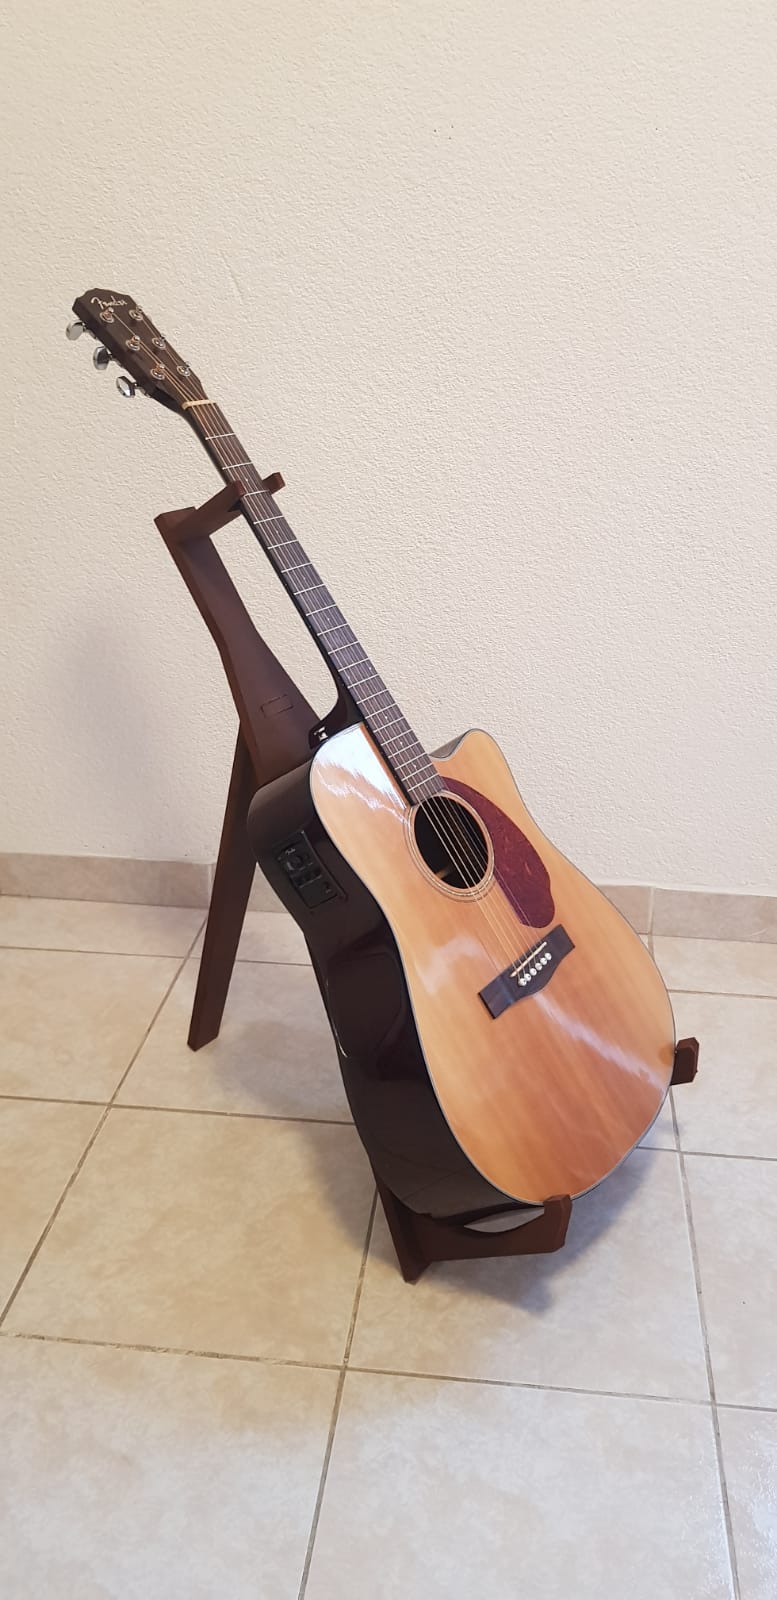
Results
I painted the pieces with a dark brown color, assembled them, and this is how the stand turned out
Conclusion:
When assembling it, I realized that changing the angle of the back leg would improve its stability.
So, I redesigned it, and the improvement is shown in the attached drawings. For this enhancement,
two pieces of the back leg should be printed to make it thicker and more robust.