✨🌸The fabulous super amazing team assignment🌸✨
Hey there sis, welcome to this week's assignment where we were challenged to team-work with 8 amazing partners to make a CNC-machine that drew your dreams.
Get ready for some really cool pink stuff ahead.
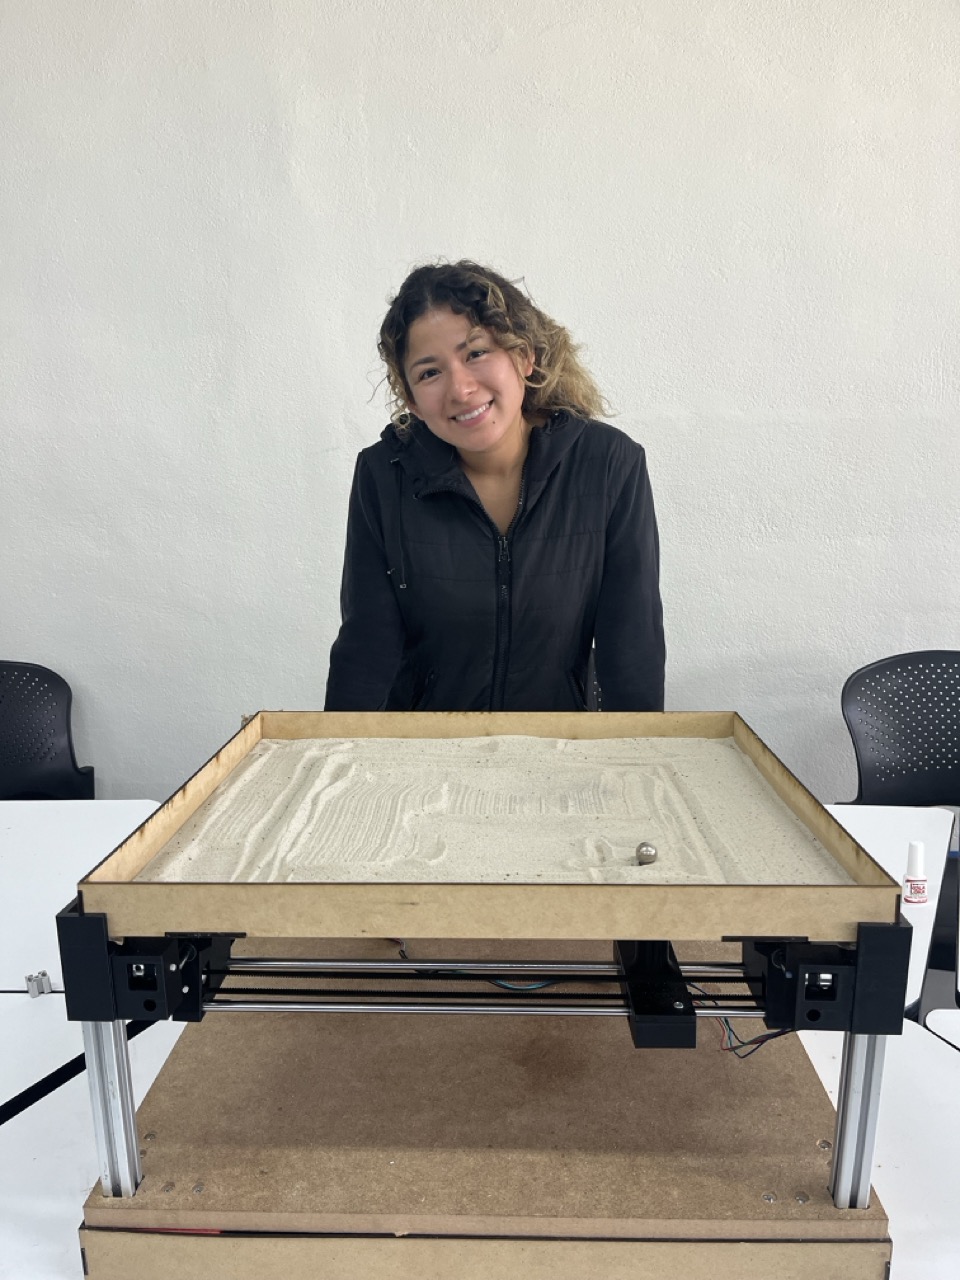
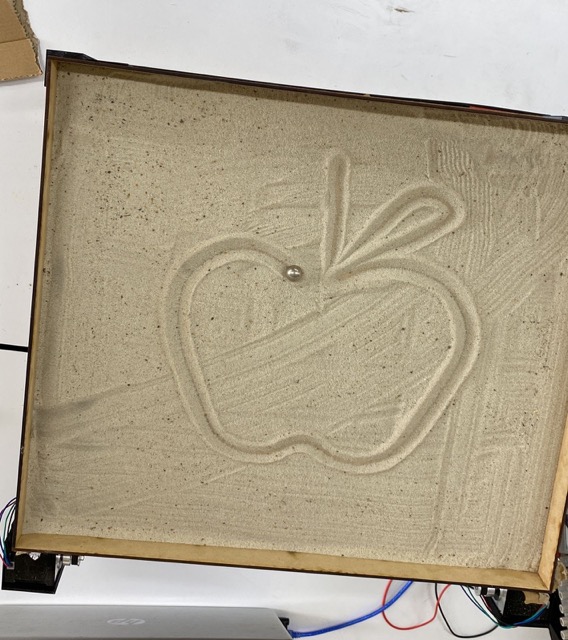
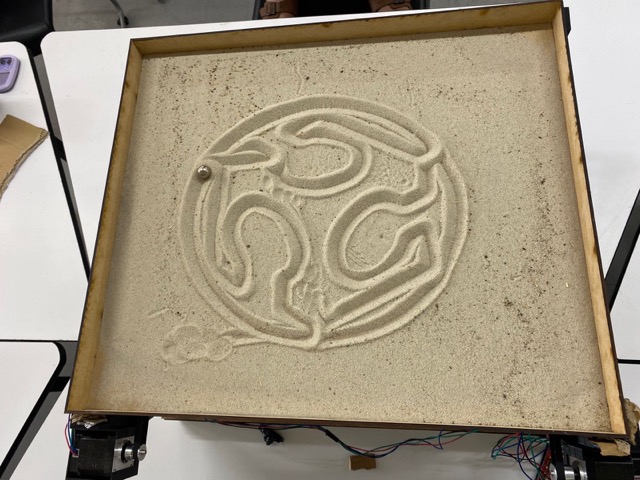
Welcome to our fab project, the ⛰️Dune Dreamer☁️ CNC Machine! With totally MAD skills and a sprinkle of pixie🧚🏼♀️ dust, we transformed dreams into g-code.
First, my girl Valeria and I cooked up the G-code magic using an Inkscspe extension, tweaking it till it sang our tune. Then, we hooked up firmware to make our machine dance to the beat of our designs. Armed with killer drawings and Universal G-code Sender finesse, we fine-tuned every move, setting the stage for pure magic. With Grbl code loaded and hearts racing, we hit send, watching as our creation sprung to life.
This is our story – where tech meets art, come with me to discover this adventure.🌟
So girl here´s the group assigment link, feel free to click it to see the magic happen in the Dune Dreamer.
So if you haven´t noticed this was our work at the super amazing fab Dune Dreamer team lol. Super proud of us girl loveya. Me and Val were the software queens in our dreamy CNC machine project.
✨Okay so first a super massive shoutout to my beautiful eingenieer boyfriend with the soul of a thousand gears for guiding us toward mastering the art of programming here at the school in Puebla. With these insights, we're ready to use this tech! Thank you!!🧸
All about the ☀️G-code☀️
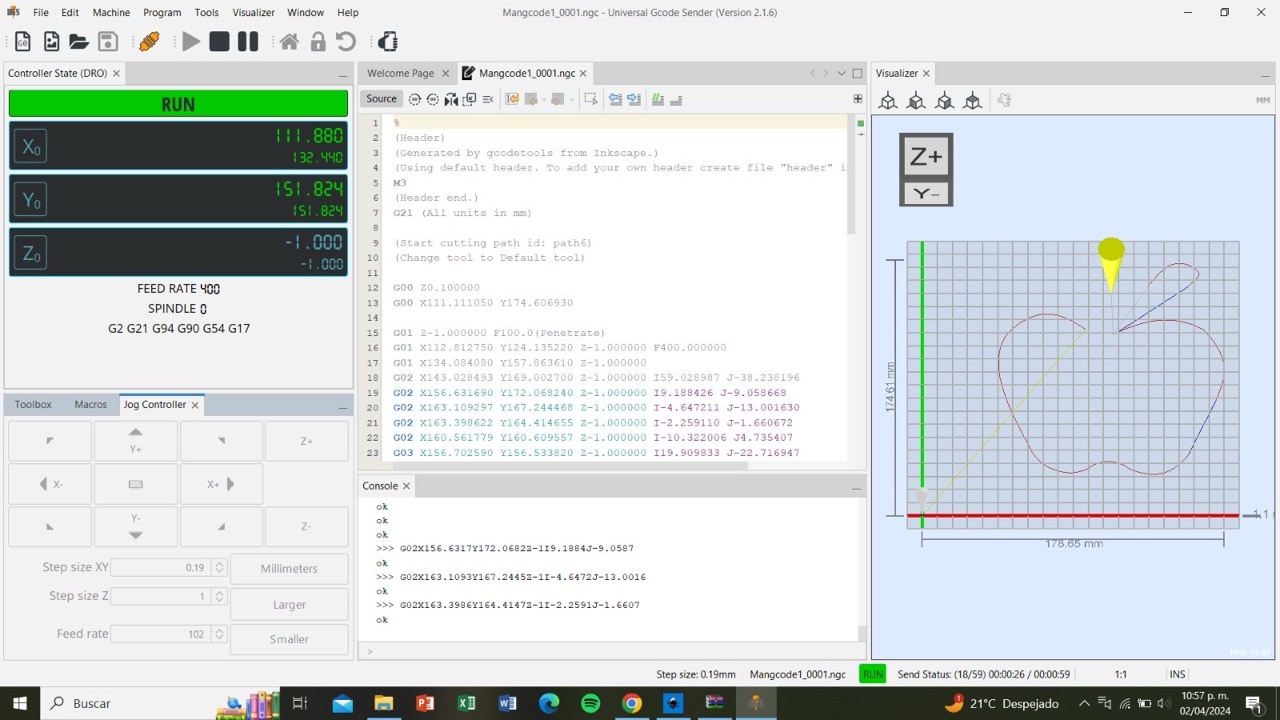
With our Arduino all glammed up and equipped with the shield, we were ready for some major testing action! We used Universal Gcode Sender, this super cool open-source software, to make our CNC dreams come true. Here's how it went in a nutshell:
🍄Connect & Communicate🍄 We connected our Arduino to the computer via Universal Gcode Sender. It’s like they were having a cute little tech chat! 💬 🍄Load the G-Code🍄 We loaded our pre-written g-code, making sure to select the COM7 port for a perfect connection. 🍄Grbl Firmware🍄 This was our secret sauce, translating g-code into those oh-so-precise motor moves. 🍄Motor Magic🍄 By clicking 'connect,' our Arduino was ready to groove! We used commands like "y" and "x" to get the motors moving. Seeing them in action was like watching our project come to life! 🌟
🌺Document Setup --> Adjusted the document size to fit our sand bed perfectly.
🌺Trace & Create --> Pasted our image, used "Trace Bitmap" with a 0.6 threshold, and applied it to get a fabulous trace.
🌺Dynamic Offset --> Transformed our traced image into a path and applied a dynamic offset.
🌺Gcode Tools --> Used the Extensions tool for the Tool Library, setting the diameter to 2.0.
🌺Orientation Points --> Set mode to 2 and applied it.
🌺Path to Gcode -->Named our file with (.ngc), saved it in our chosen directory, and voila! G-code ready for action. 💖
Alright, so like, first we totally needed to find this rad program that could turn our images and vector designs into G-code. We decided to use Inkscape because in a video we saw earlier on master YouTube we saw a guy doing an interface with it so we kinda cracked it up.
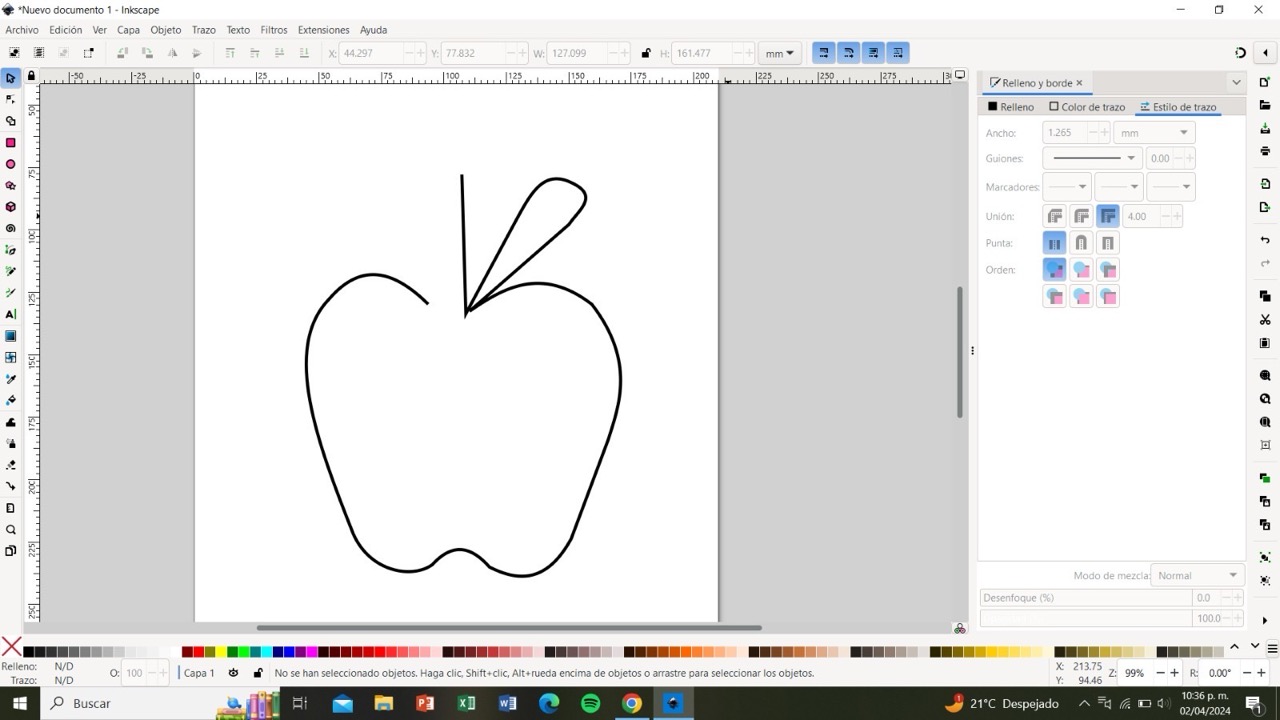
Then, Vale and I stumbled upon this sick extension for Inkscape, but get this, we had to tweak the parameters to make it work. We added this extension that magically transformed our vectors into G-code coordinates.
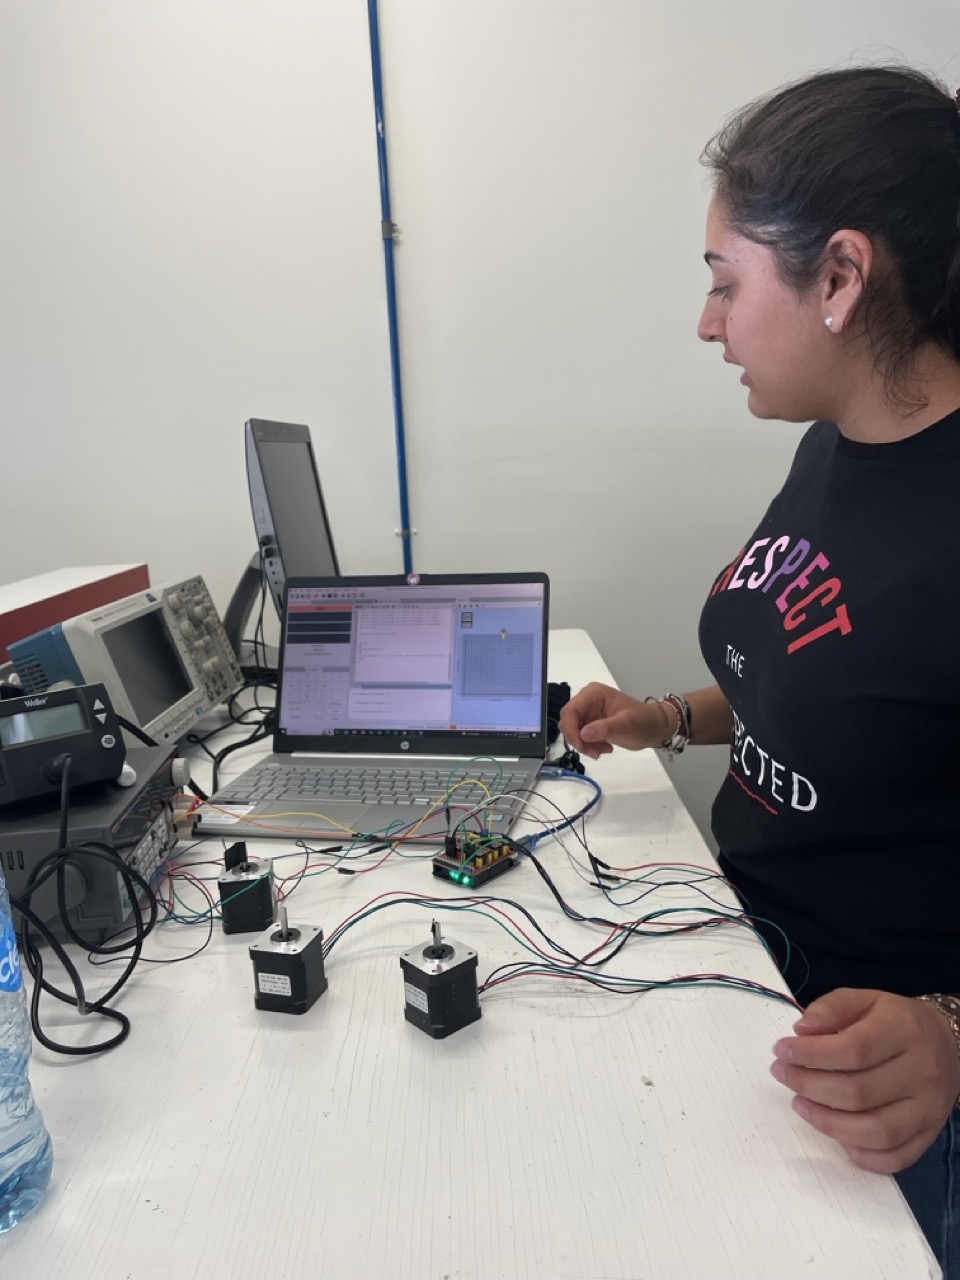

Next up, we had to hunt down firmware that could take that G-code and translate it into actual movements for our machine. Right?
So, we got creative and whipped up this killer drawing, complete with all the vibes we wanted. Oh, and we gave it a scale, because you gotta keep it real when it comes to size.
Then, we got down and dirty with Universal G-code Sender. We fine-tuned it to match our machine's specs, adjusting stuff like the number of steps per millimeter based on our axes' pulley sizes and microstepping settings. Plus, we set up limit switches, picked the port to chat with the Arduino, and dialed in the speed. Total boss moves, if you ask me lol.
After loading up Grbl code onto the Arduino board, it was showtime. We hooked everything up and hit send on Universal G-code Sender. AND BADA BIM BOOOOOOM! Our machine came alive, following the G-code like a boss.
FINALLY We were like, "We totally got this!" So we generated more G-code and sent it off like pros. It was epic, seriously. Just another day in the life of a badass tech team OF GIRLS making magic happen💅🏼🎀 !