🌸3D🌸 scanning and printing...BUT HOW???!!
Hey there guuuuurl, welcome to this week's assignment where we're diving into the world of 3D Scanning and printing! Get ready for some really cool stuff ahead.🧸
Okay, so let me break it down for you in girl terms hun 💅🏼. Picture this frame: you've got an object in front of you. With 3D scanning, you can use different tech like lasers, special lights, or even some AI wizardry to "see" and capture every single tiny detail on its surface. Once the scanner grabs all that pretty info, it works its magic to whip up a digital version of the object. It's like taking lots of cute pics from every angle and then sticking them together to make a 3D image. Just like a sandwich.
Now, let's talk about how we can make this happen:
There are several nice techniques to get to the same final result (which for this assignment is 3D scanning) let me talk a little bit about the ones we reviewed with our Fab Lab puebla´s instructors:
-
First I´ll talk about my fav because it just simply rocks. So.. this technique (my fav because of its simplicity) photogrammetry it's like creating a 3D photo collage! Snap tons of pics of the object from different angles and then stitch them together using special software to make the model. There are even Ios and Android apps for doing this OMG I´m just so obsessed 😂.
-
Second we have LIDAR: You know those self-driving cars that "see" the world around them? They use LIDAR, which is like a laser scanner to measure distances and create super accurate 3D maps. (Sorry Idk what LIDAR stands for hehe)
-
Neural Radiance Fields (NeRF): This one's some serious AI stuff. Think of it like turning regular pics into mind-blowingly detailed 3D models! It can create background from a single image, just like this super cool new photoshop tool that was released just like a year ago. Check it out it´s very nice.
-
Splatting Diffusion: Alright, this one's a bit more techy. Imagine you're drawing an object using little cute fuzzy blobs💕 awwww. Each blob gives you info about a part of the object, and when you put them all together, you will see your 3D model from all angles.
- Puebla´s Fab academy class of week 5️⃣
Now, why is this all so exciting? Well, you can use these 3D models for all kinds of cool stuff like 3D printing, product design, or even creating killer visual effects for movies and games. It's like bringing the real world into the digital realness and doing some seriously random things with it!✨
For all of this super knowledge and incredible lessons this is the Fab lab´s Puebla weekly task, feel free to take a look so you can undertsand it much better
⬇️
WHAT I LEARNED FROM THE GROUP CLASS?
Key things to know AKA cheat sheet made by me 💕
⭕️Temperature‼️ Different materials need specific temperatures. For example, PLA prints at around 190-220°C, while ABS needs 230-250°C. Using the right temperature ensures your prints come out perfectly smooth and strong.
⭕️Support Structures‼️ When printing objects with overhangs or complex shapes, you’ll need support structures to hold up those tricky parts. These are extra bits of material that you’ll remove after printing, ensuring your design doesn’t collapse mid print.
⭕️Printing Direction and Angles‼️ The direction and angle at which you print can affect the strength and quality of your object. Angles up to 45 degrees can often be printed without supports. Orienting the print correctly can also save time and material, and give your print better durability.
IF YOU FOLLOW THIS CONCEPTS YOU´LL SURVIVE TO 3D PRINTING EVERYTHING.
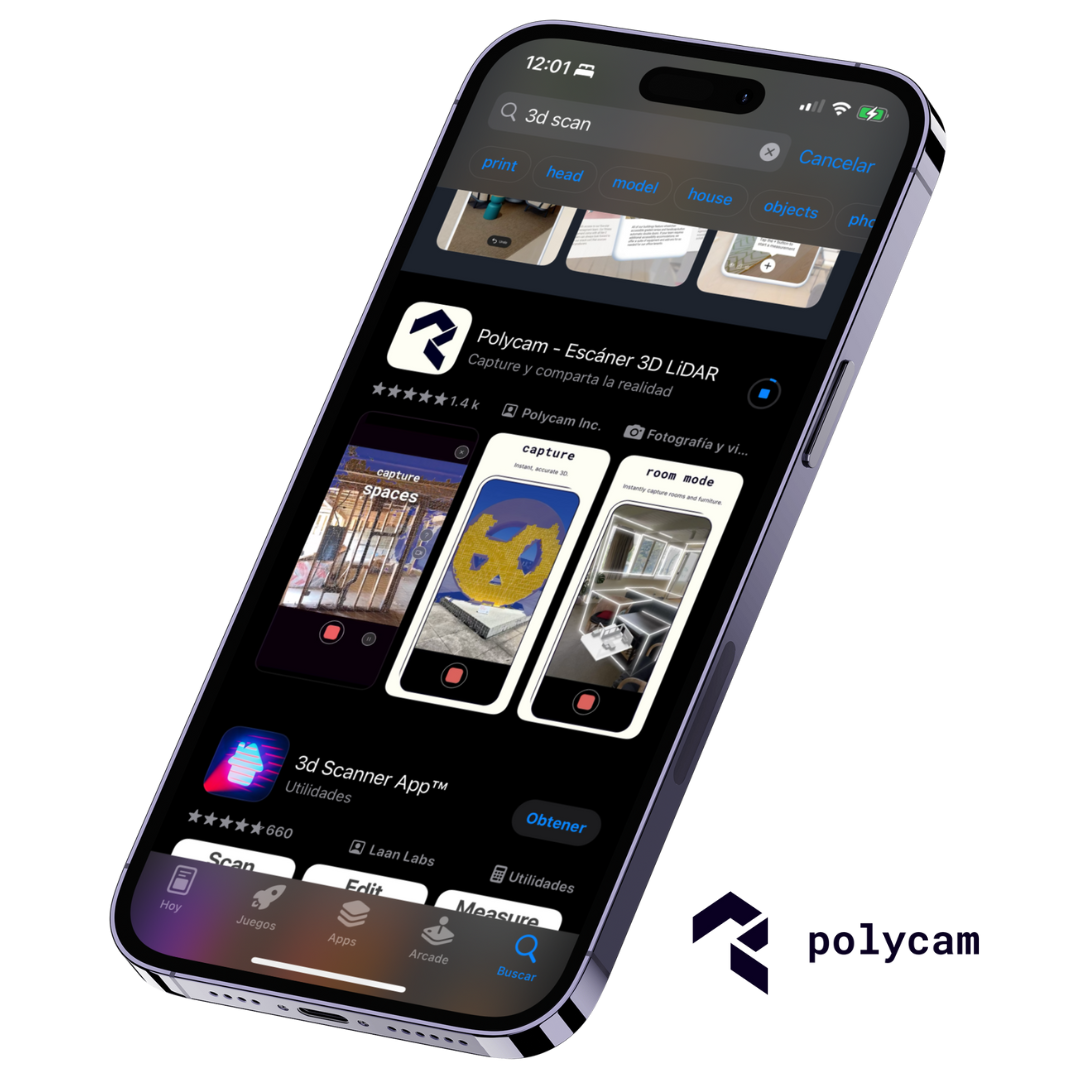
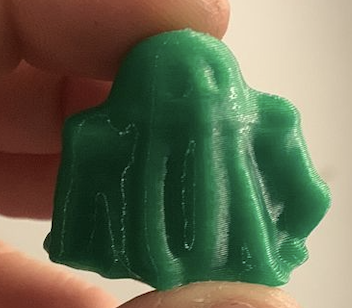
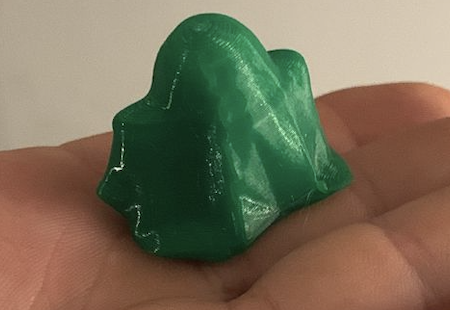
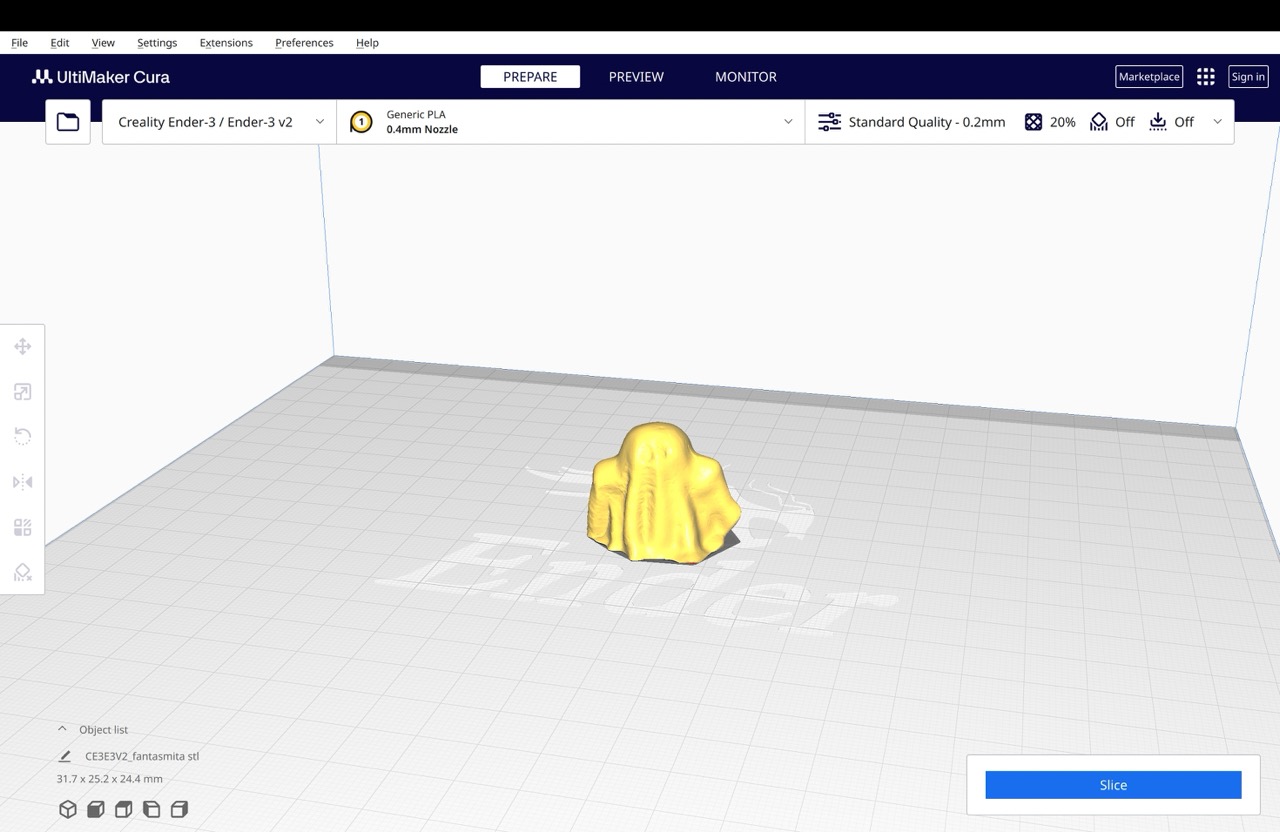
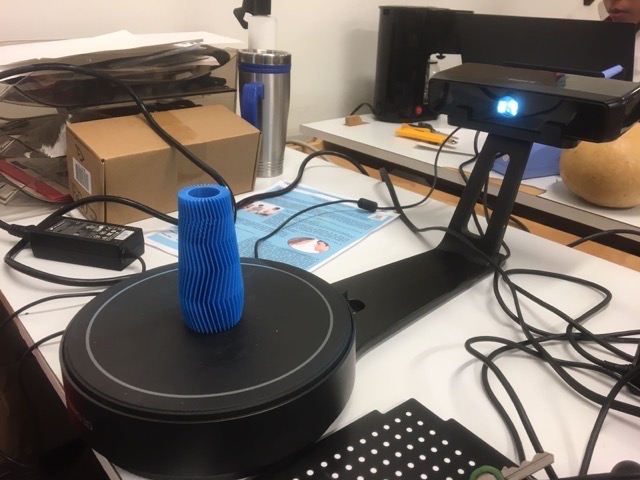
So, like, for the 3D scanning, I scanned this super cute little ghost toy I found at school, and now that you know all about LIDAR guys with it, let me tell you that since smartphones these days have that omg camera technology, I downloaded this app called Polycam (not really recommending it though, 'cause you gotta pay to export your file to STL, and that's just not cool, you know?).
Anyway, after that, I went into Fusion 360, this rad 3D modeling software, to add a base to the ghost and tweak it a bit (seriously, this software is awesome for modeling and fixing stuff 'cause it's so easy to use, like, I just clicked on where it said mesh and added a base, and that was it). Then, I sent my file to Ultimaker Cura and printed it out, and OMG, it turned out so beautiful, you guys have to see it! 🌟
I also scanned in the Puebla´s Fab Lab Exscan 5 this other toy I found just hangin´around for extra credits LOL
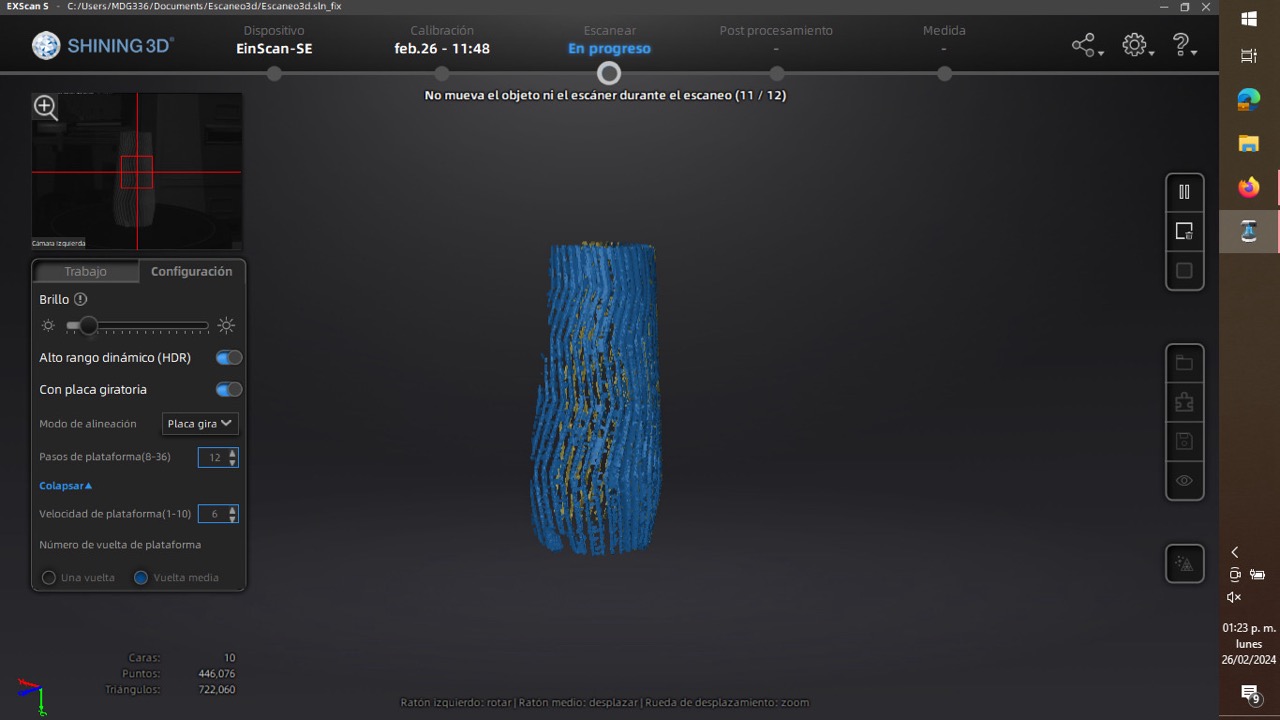
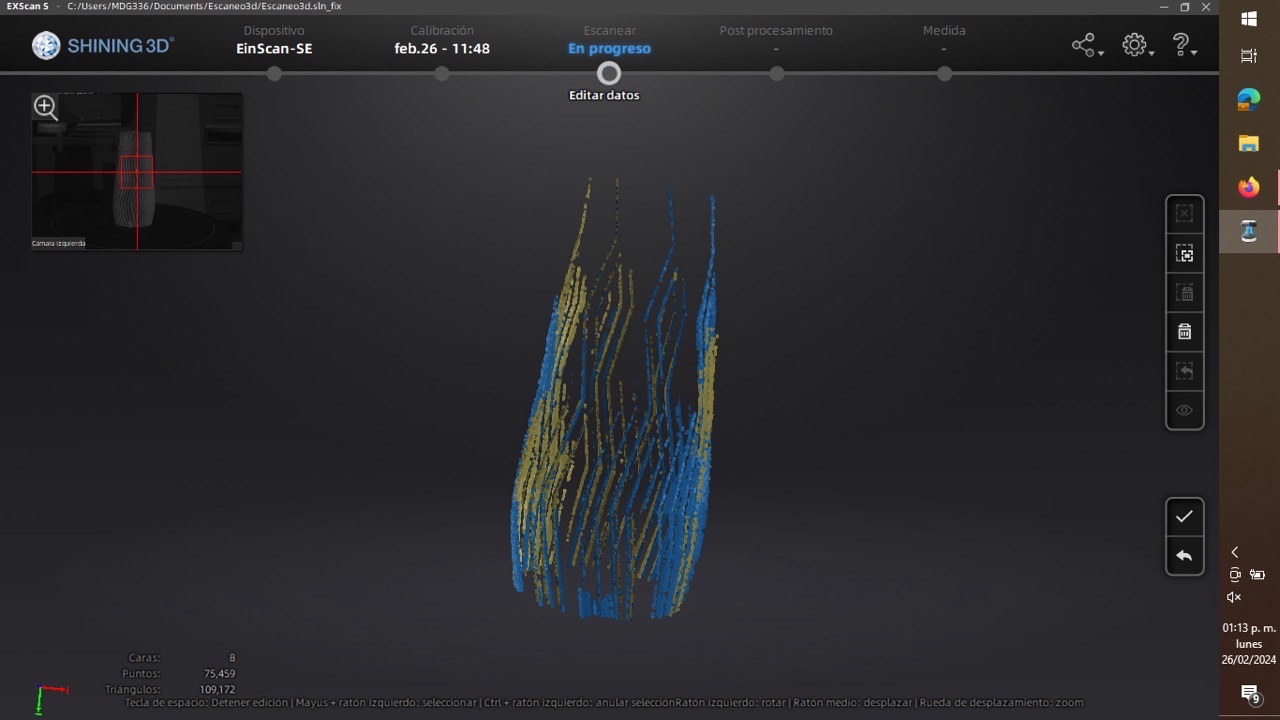
💫☀️My super tech and pretty 3D scan OMG YES!💫☀️
AND NOW THE MAIN 🍽️✨DISH✨🍽️ OF THE WEEK 5 GUUURL THE 3D PRINTED DESIGN
So for this 3D printing assignment I did a sooooooooooo very cool experiment (which I learned last semester from my amazing teacher Beto🧸 and wanted to show it off).
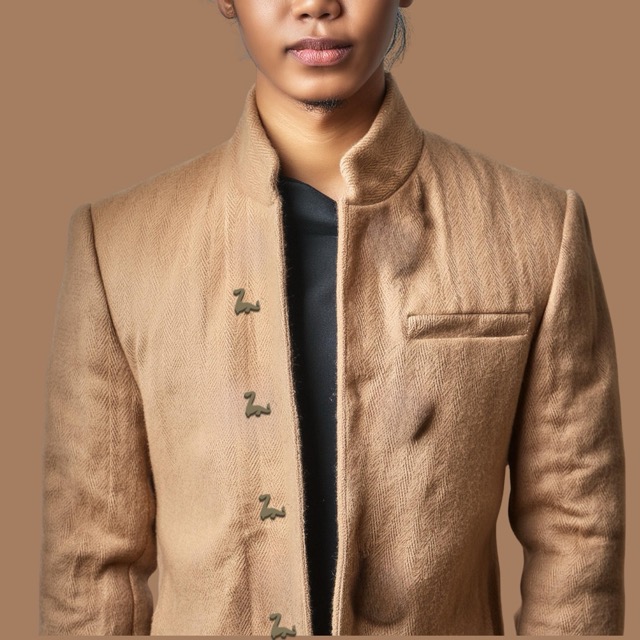
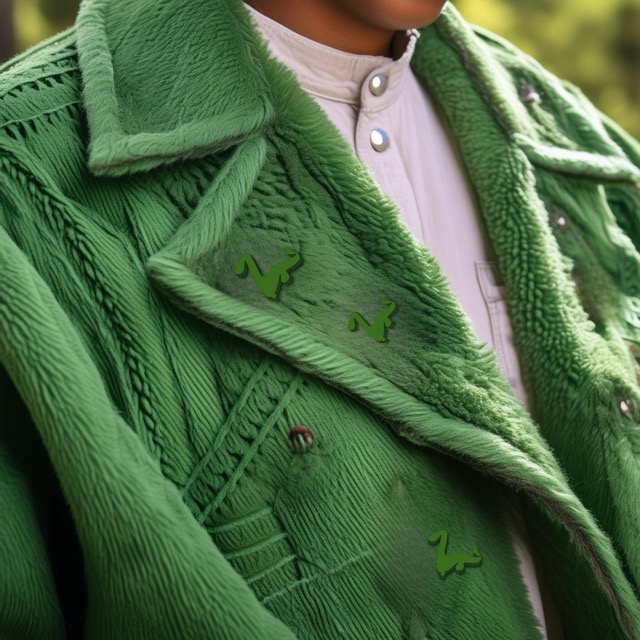
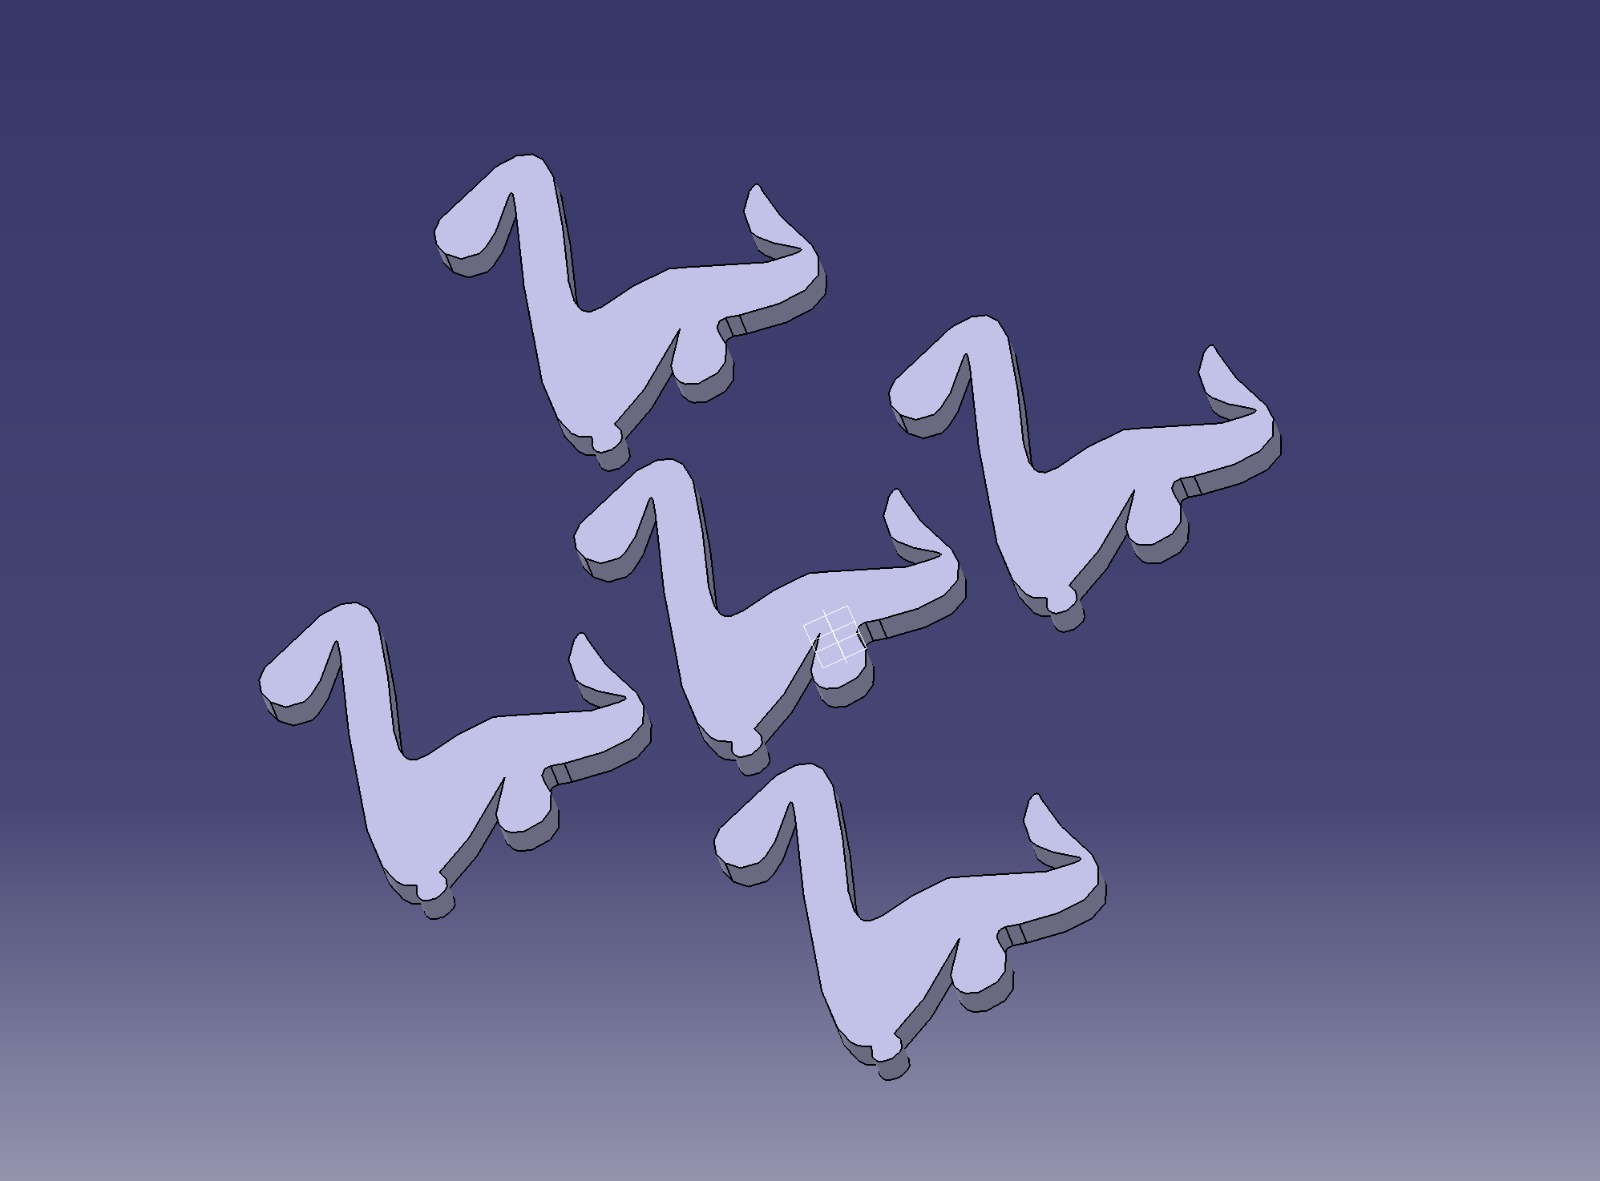
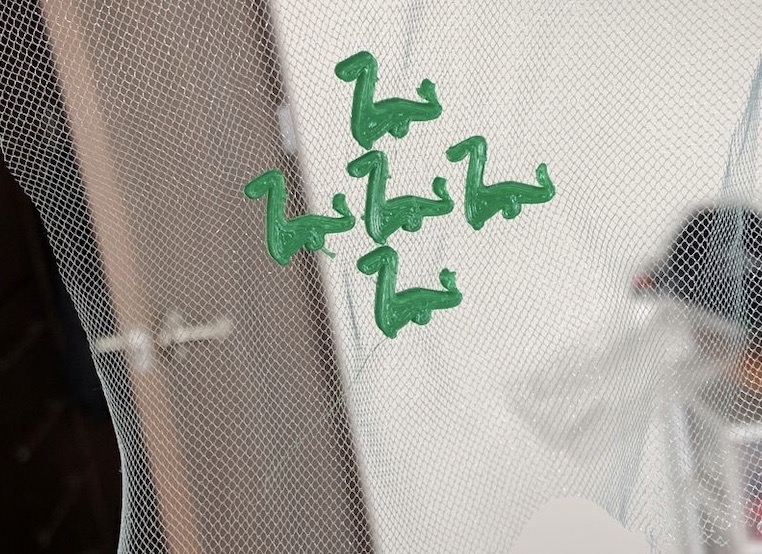
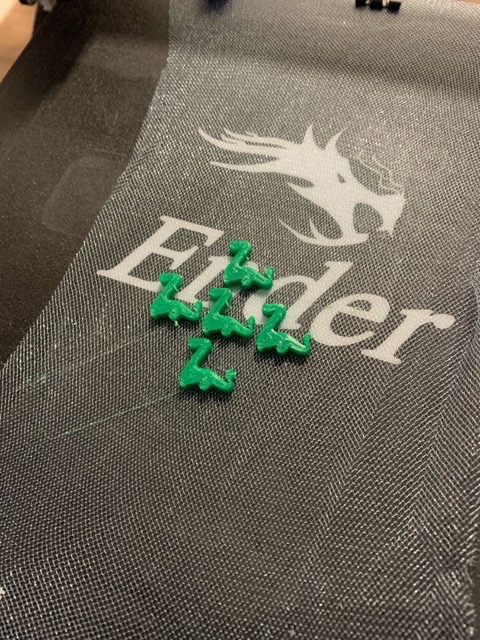
This experiment consisted in doing a very nice fabric with little 3D dinosaurs in it (like really inside it as if they were part of the tulle) OMG SO CUTE RIGHT?🥹🦕
SO... HOW DID YOU MODELED THE CUTE DINOSAURS?!✨
So by far you gurls allready know that my favorite 3D modelling software is Catia (for its simplicity 😋) so Imma tellya how I did my super cute tiny dinosaurs step by step here :
-
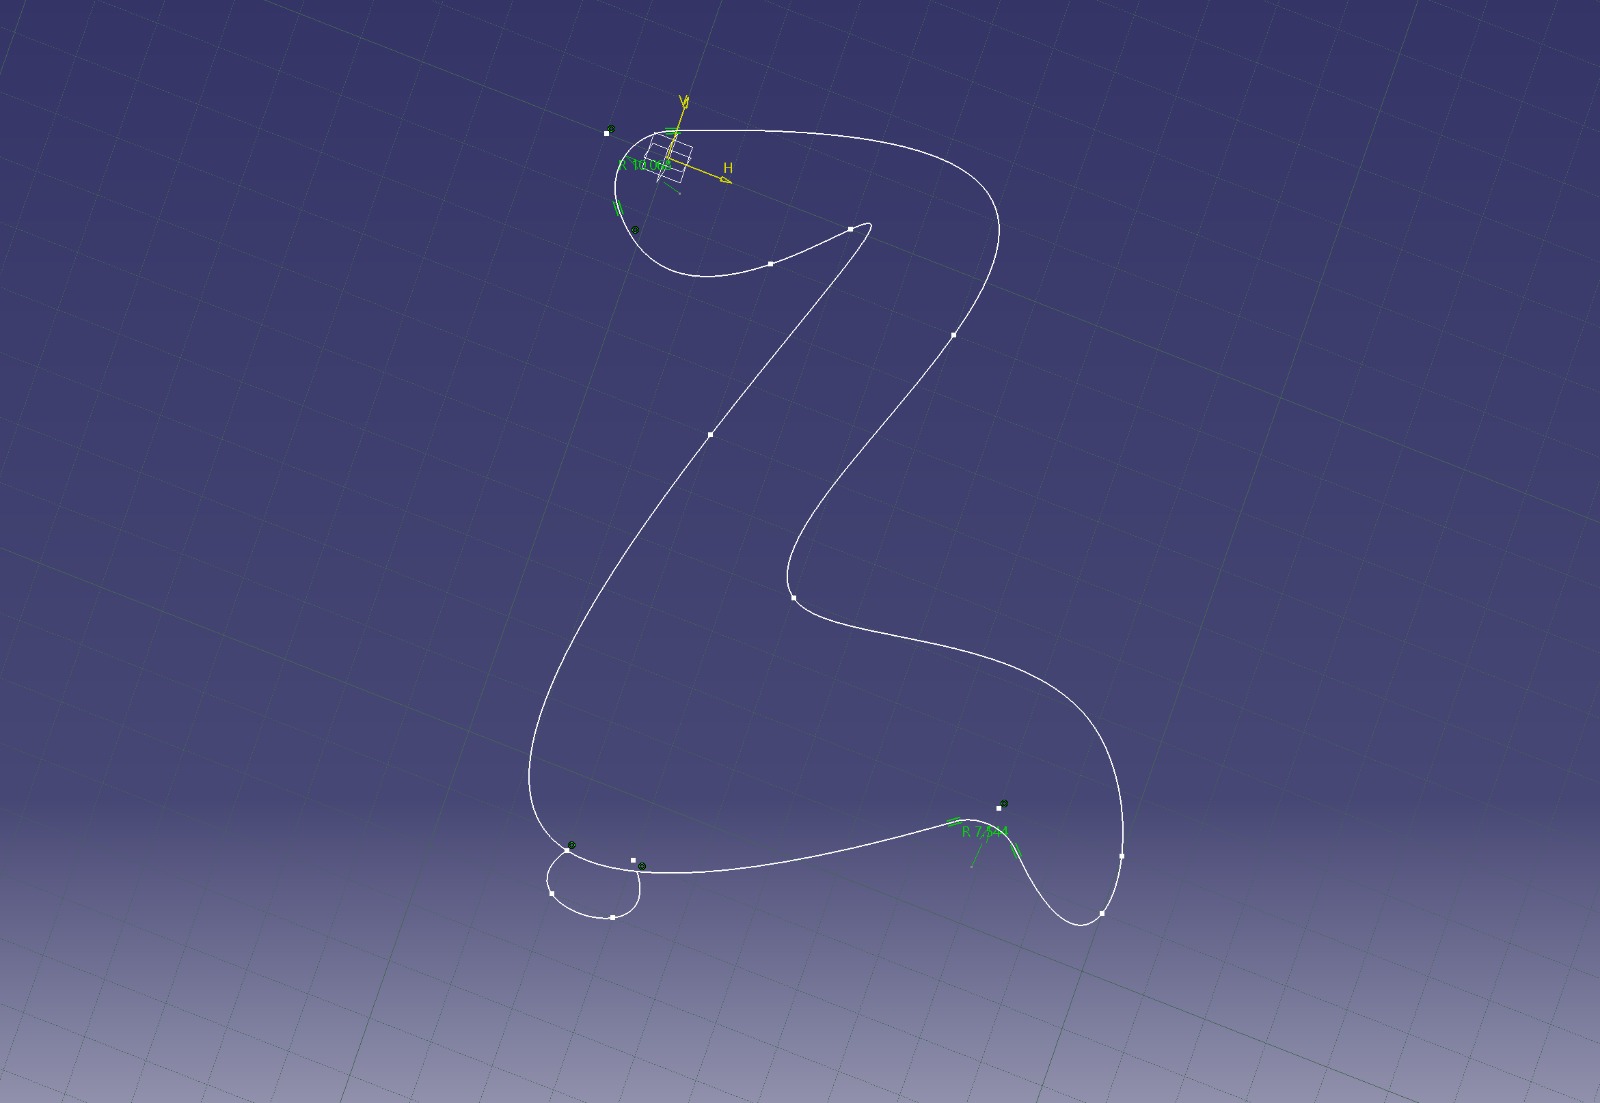
First things first girl friend, open up CATIA and pick a spot where you wanna draw your dino. Think of it like doodling on paper but cooler (you sall have in consideration the measurements of the printer´s bed so everything fits). I Used the Spline tool to sketch out the shape of my dino. Don't worry about it being perfect, just go with the flow and make it dino-like lol.
- Now, let's make those edges look less blocky. Use the Corner tool to round things out and make your dino look more organic. It's like adding a little extra magic to your sketch!
- Time to give your dino some legs! Draw 'em out using the Spline tool again, or maybe try something new. Just make sure they look like they belong to your cute dino. Smooth out those legs with the Corner tool too, so they're good looking.
- Alright, so we wanna make sure our dino fits on the 3D printer bed, right? Check the size in CATIA and adjust it if needed. We want our dino to be around 3 mm so it's just right.
- Give your dino a detailed inspection, make sure everything's looking good. Save your file in the right format for the 3D printer, and think about how you wanna position your dino on the bed for the best print quality.
☀️ Sketching with the Spline Tool
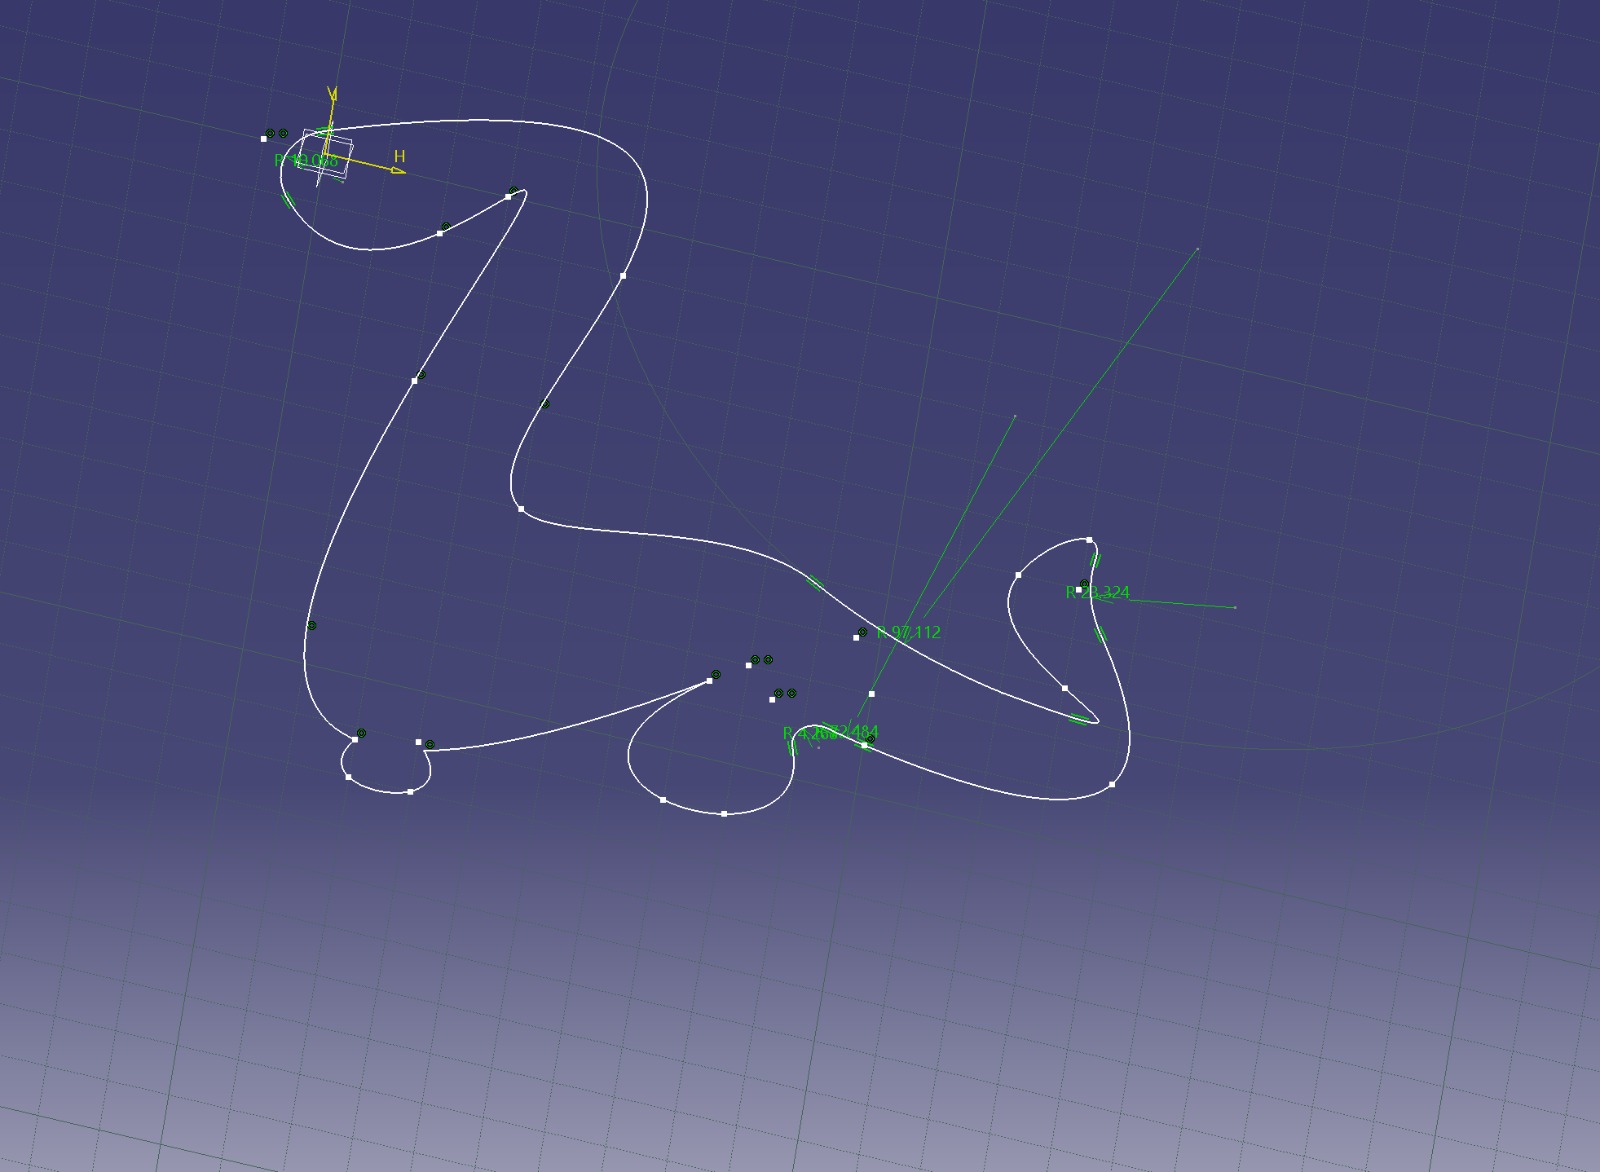
☀️ Smoothing it Out with the Corner Tool
☀️ Adding Legs and Stuff
☀️ Checking Size for 3D Printing
☀️ Final Touches and Getting Ready to Print
SUPER PRETTY, AMAZING! WOW... BUT HEY..AND NOW HOW DO I PRINT IT?😨
Okay so for the printing process I used Ultimaker Cura as my slicer, a Creality Ender 3 printer, and a piece of 10x10 cm tulle for 3D printing.
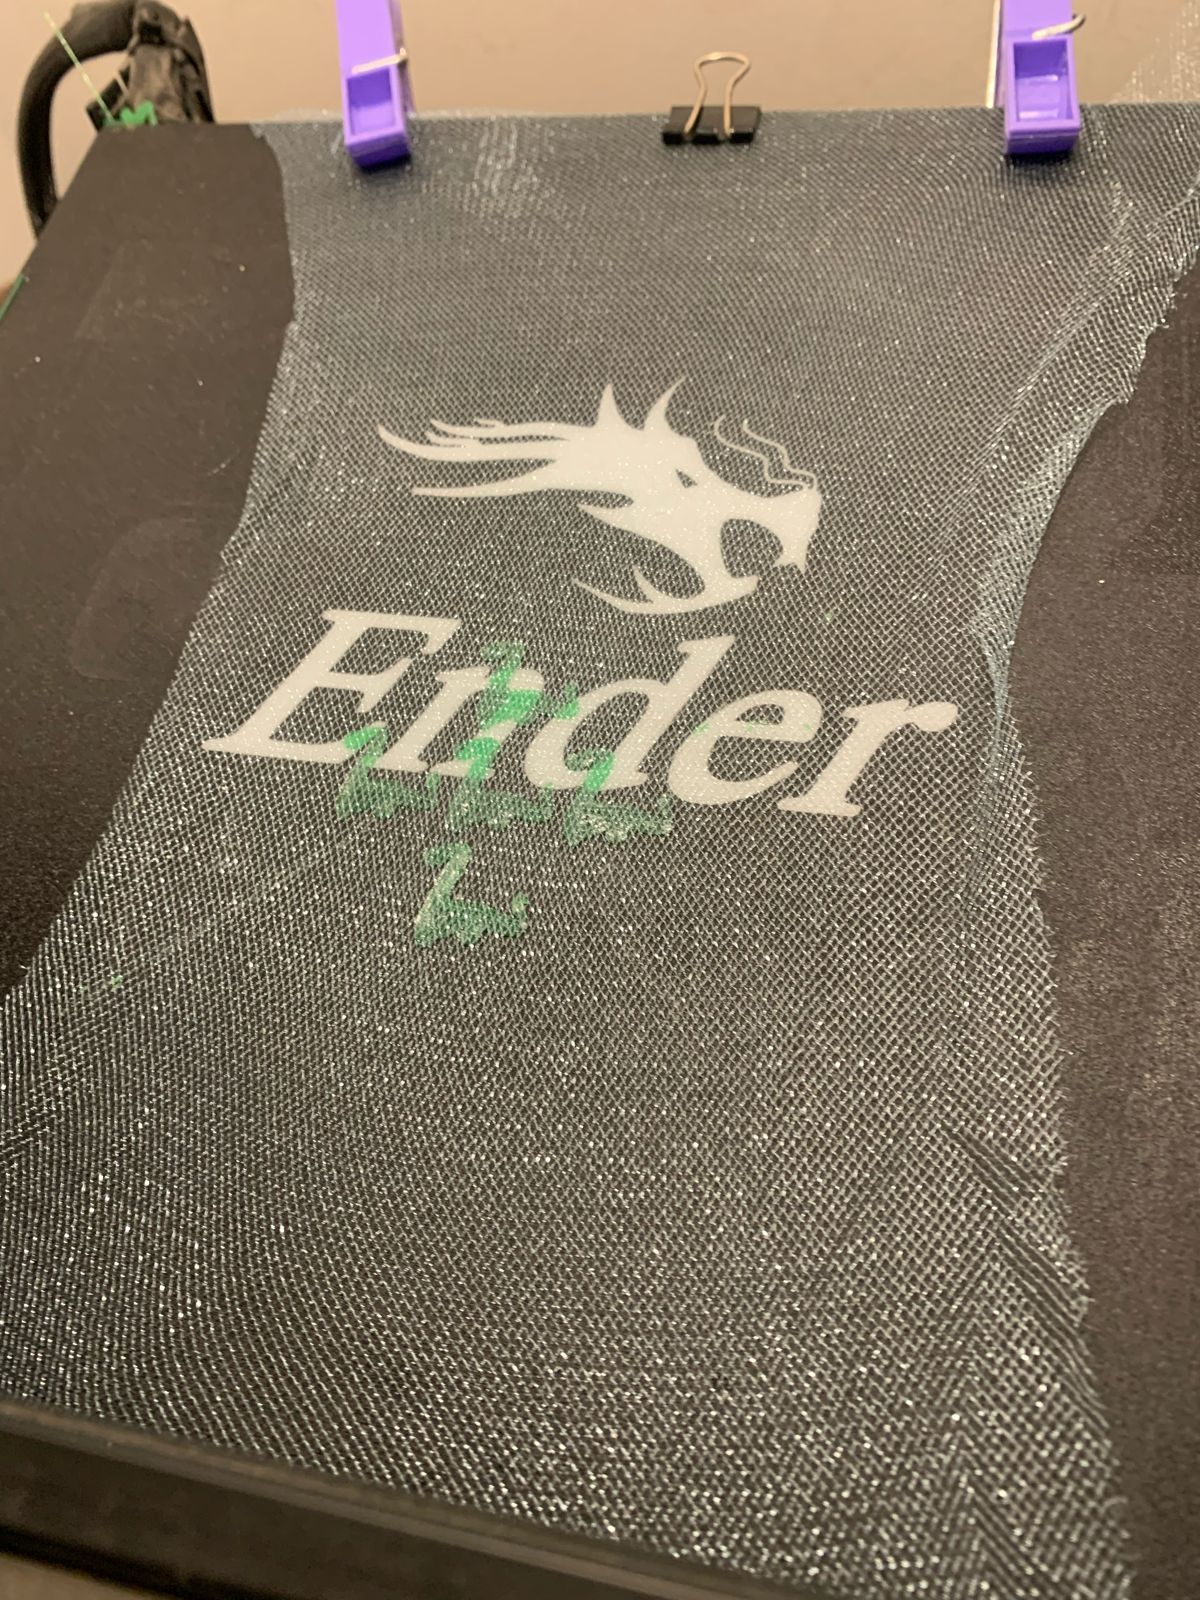
The method is all about stopping the printer at the second layer to slide in some fabric. Now this will work better if it's tulle or open warp and woof fabric like organza, so it gets a good grip with the hot filament, making it super sturdy. Once the fabric's streched at all four corners, you can continue printing as many layers as you want.
I totally recommend this technique for making brooches, hinges, buttons, and filters embedded in fabric. Trust me, if you pile on too many layers, the weight might cause some detachment or tearing, so keep an eye on it
This are the steps:
- First up open Ultimaker Cura, girl
- Then drag and drop the 3D model you wanna print and choose your printer from the list. (Mine was a Creality Ender 3)
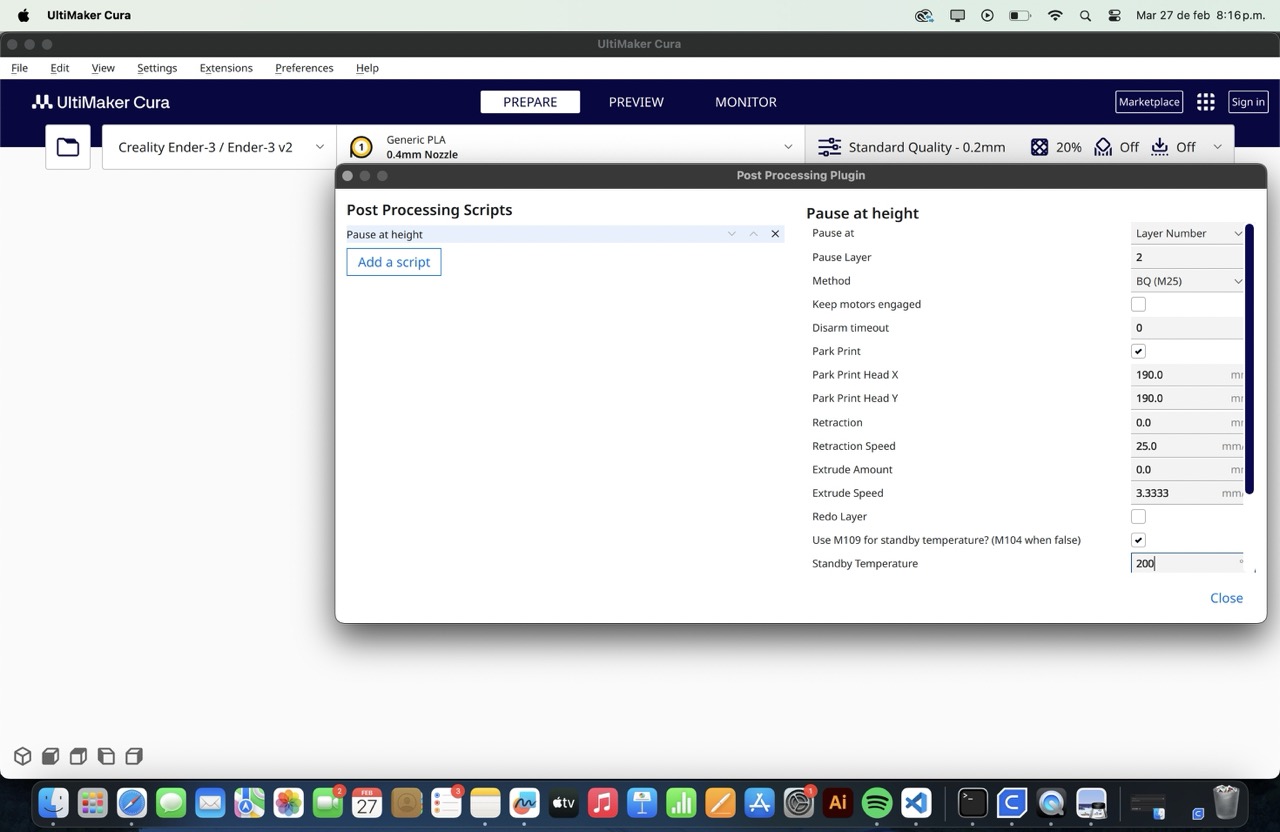
- After that you´ll pick your printing material and tweak the settings like temperature and speed. This were mine:
- Now, the important thing, let's add a pause feature! Head over to the "Scripts" tab at the top. Turn on "Pause at height."
- Set the layer height where you want the print to pause. We're pausing at the second layer, girl!
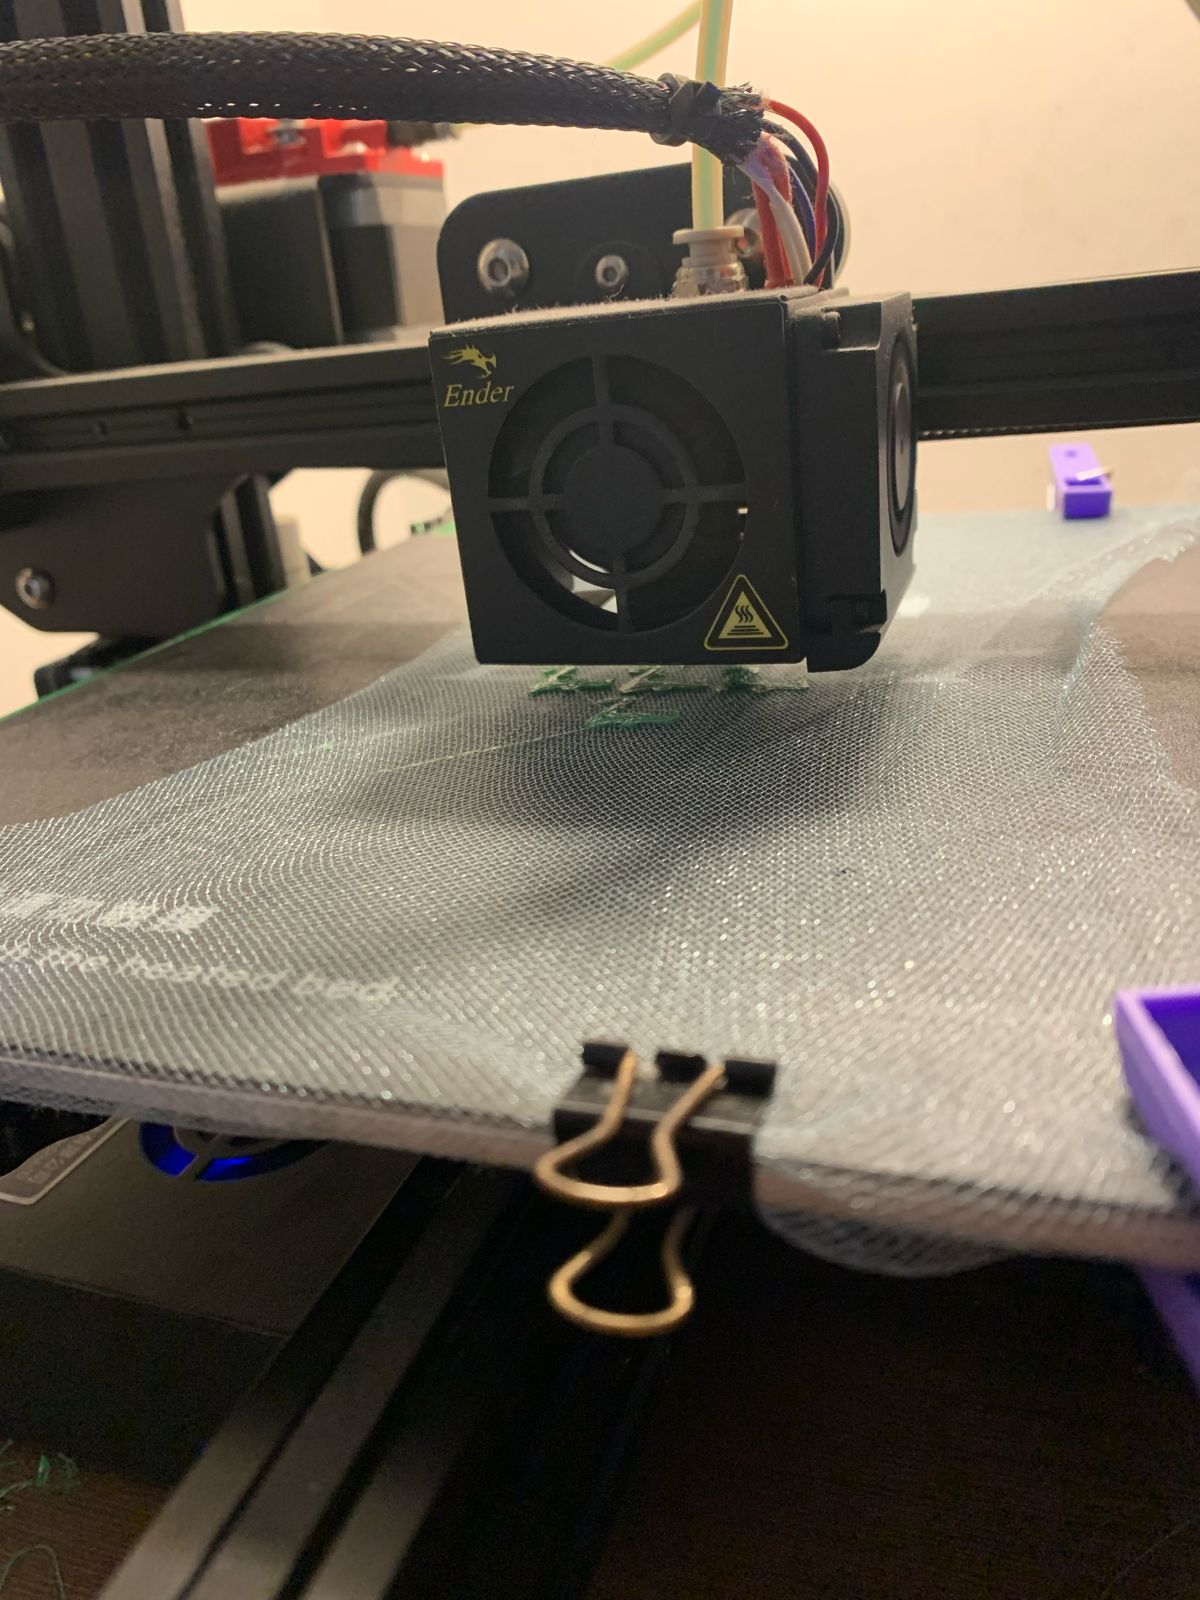
- Now place a piece of tulle or organza fabric on your print bed. Make sure it's smooth and secured at all four corners.
- Hit that "Prepare" button in the bottom right corner and save the G-code file onto your SD card.
- Then start the print from the printer's control panel and your printer will stop automatically at the second layer, just like you told it to.
- Finally and most important when the printer pauses, carefully place the fabric on top of your print. Make sure it sticks nicely to the hot filament and do not move it. Them hit resume on the printer's control panel and watch the magic happen! Let the print finish up all the layers. And there you have it! A perfect cute dinosaur embedded textile!
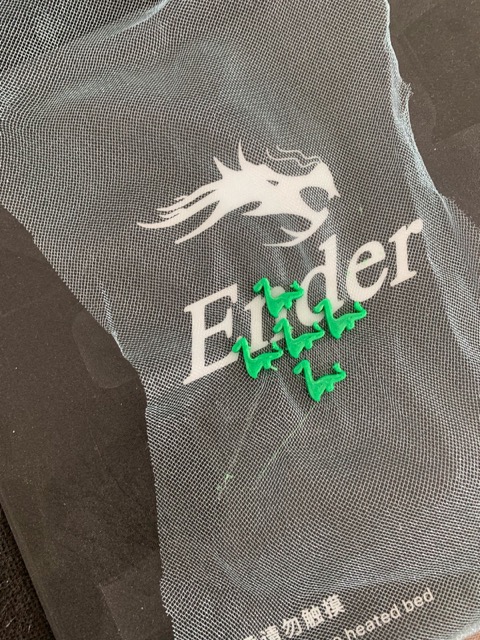
Now check out my totally gorgeous results
My hard work pics📸
❀✿REMEMBER THAT THIS IS A CAROUSEL CLICK THE ➤ TO SEE ALL THE PICS!!❀✿
And editorial shooting of this 🎀✨gorgeous✨🎀 buttons omg so cute