Computer control cut... BUT COOL💅🏼
Hey there guuuuurl, welcome to this week's assignment where we're diving headfirst into the world of 3D laser cutting! Get ready for some seriously cool stuff ahead.
✨So, here's the deal: We're about to explore the magic of parametric design and assembling it using MDF laser cutting. It's like taking our creativity to a whole new level! But before we jump in, let's talk about the basics. 3D laser cutting is all about precision and finesse, but it's also about knowing the ropes before we hit the start button. In this assignment, we're going to break down everything you need to know before you even think about pressing that laser-cutting button. From picking the right materials to tweaking those design parameters, we're covering it all. And let's not forget about the quest for perfection! We'll chat about the little things that can make a big difference in your laser-cut designs. Trust me, it's all about those fine-tuned details that take your creation from "cool" to "OMG, how did you do that?!" So, buckle up and get ready to unleash your inner laser-cutting guru. Let's rock this assignment together and make some seriously awesome stuff happen!✨
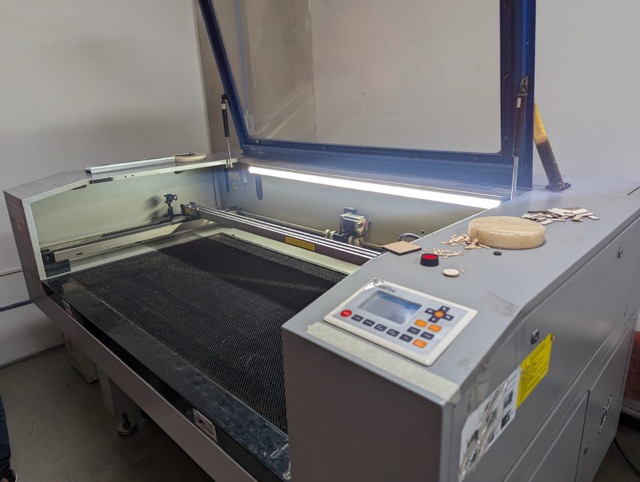
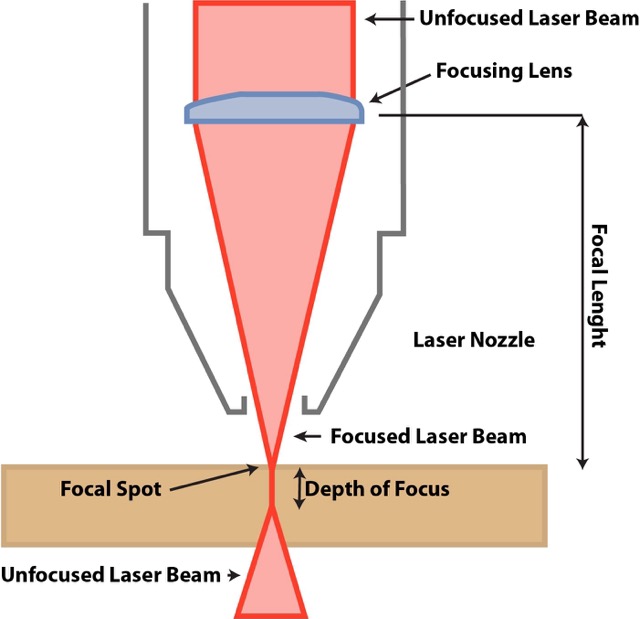
So first things first, here at FabLab Puebla, we're totally rocking these CAM-five laser cutting machines! They're like, super high-tech and use CO2 tube technology to create these precise laser beams by mixing up carbon dioxide and zapping it with electricity. With mirrors and a fancy focusing lens, we can zap materials like a boss, cutting, engraving, or marking them with serious precision! So, like, first up, we got this initial laser beam, right? It's like the big one that comes out of the laser source. Then, we use this cool focusing lens to shrink it down into this intense little spot. That's where the magic happens! The focal length is super important 'cause it decides where the laser's gonna hit hardest. Oh, and we can work with all sorts of materials, from soft fabrics to hard stuff like wood and acrylic. But, like, don't even think about cutting PVC or ABS 'cause they're total troublemakers with toxic fumes and fire risks. No, thanks! We've got these rad tests to figure out the best power and speed settings for each material. It's all about finding that sweet spot for perfect cuts and keeping things safe. And hey, we've got guides to help us pick the right materials 'cause safety first, right? Laser cutting is seriously cool, and I'm stoked to be part of the team here at FabLab Puebla, making magic happen with these machines!
✨Massive shoutout to our instructors for their engaging and enlightening session, guiding us toward mastering the art of laser cutting at FabLab Puebla. With these insights, we're ready to unleash our creativity and innovation using laser technology! 💡✨
Our group weekly task ---->
The important stuff
-
Converting a file for laser cutting
Did you know that when you want to cut something with a laser cutting machine, you need to convert your design into a specific format that the machine can understand? It's like translating your digital design so the machine can read it and cut it exactly as you've designed it. It's important to choose the right format, like DXF or AI, to make sure the machine can interpret your design correctly.
So for this activity I converted my file that was a .dxf before copping it to the machine´s RAM memory so there was compatibilty between both of them. I used Smart Carve 4 for the conversion.
-
ALL ABOUT THE 🎀KELF💅🏼
Now, here's the interesting part: "kerf". Kerf is like the width of the line that gets removed when you cut something with a laser. It's like having to account for how much the laser is going to "eat away" from your material when it cuts. If you don't consider the kerf in your design, your pieces might not fit together correctly when you cut them. It's like having to tweak your designs to fit perfectly even after you've accounted for what the laser "eats" from the material.
For this proyect I estimated 0.1 mm of offset on my piece so it fitted just right.
-
PARAMETERS
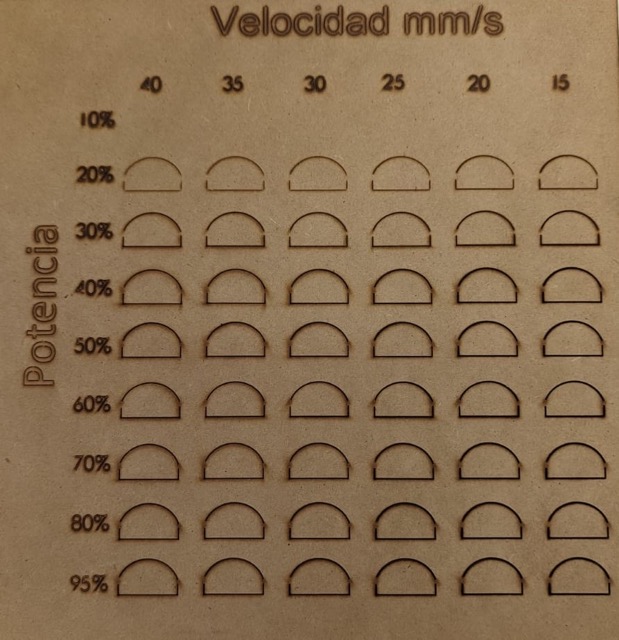
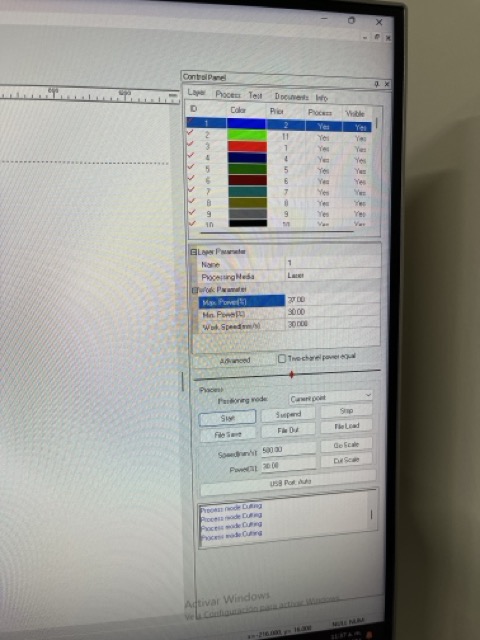
For the Laser machine I used this parameters for a better cutting procedure experience bae:
37% MAX
30% MIN
30 mm/s SPEED
🌸Now the pretty vinil cut🌸
Hey guys! So now it´s time to make some really nice vinil stickers, the first step will be to let me walk you through using a Roland vinyl cutting machine, version 2008 with the next steps:
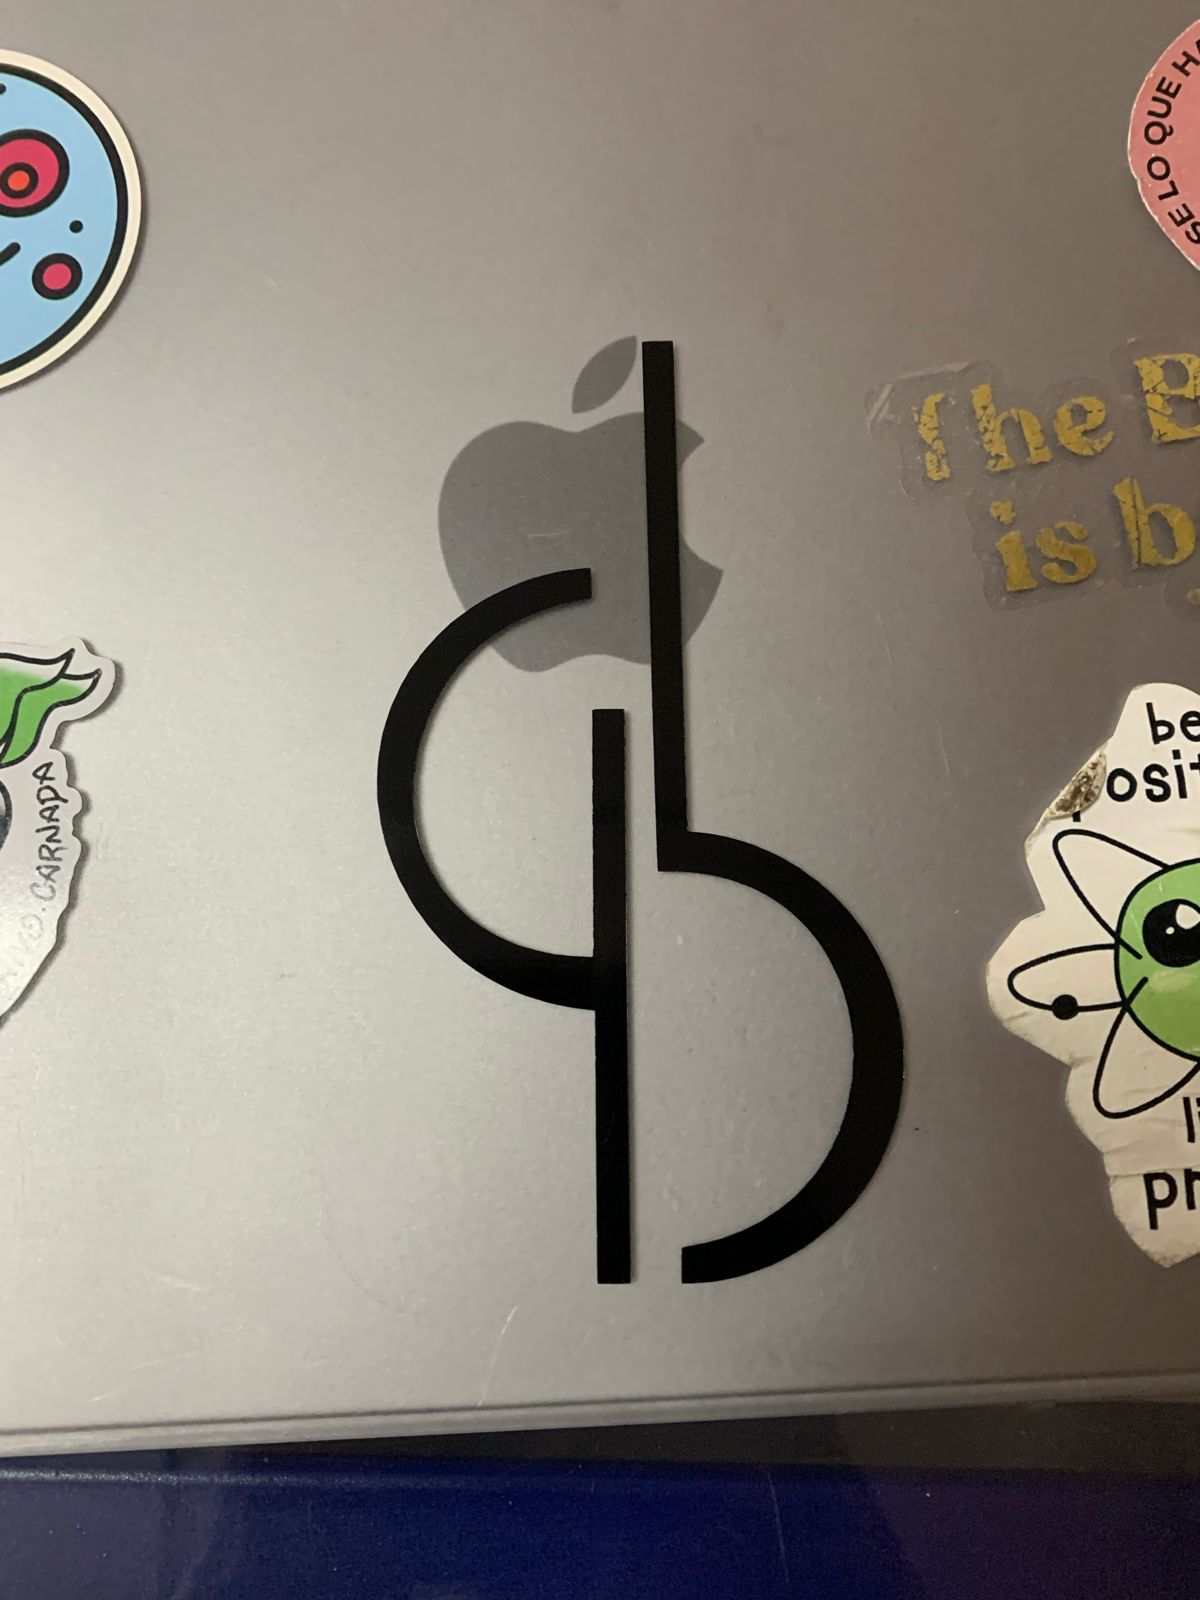
For this assignment I wanted to cut my brand spina´s logo it´s just so cute🎀, if you want to know more about spina feel welcome to my About me page yaaaaaaasss
-
Converting your fabulous files
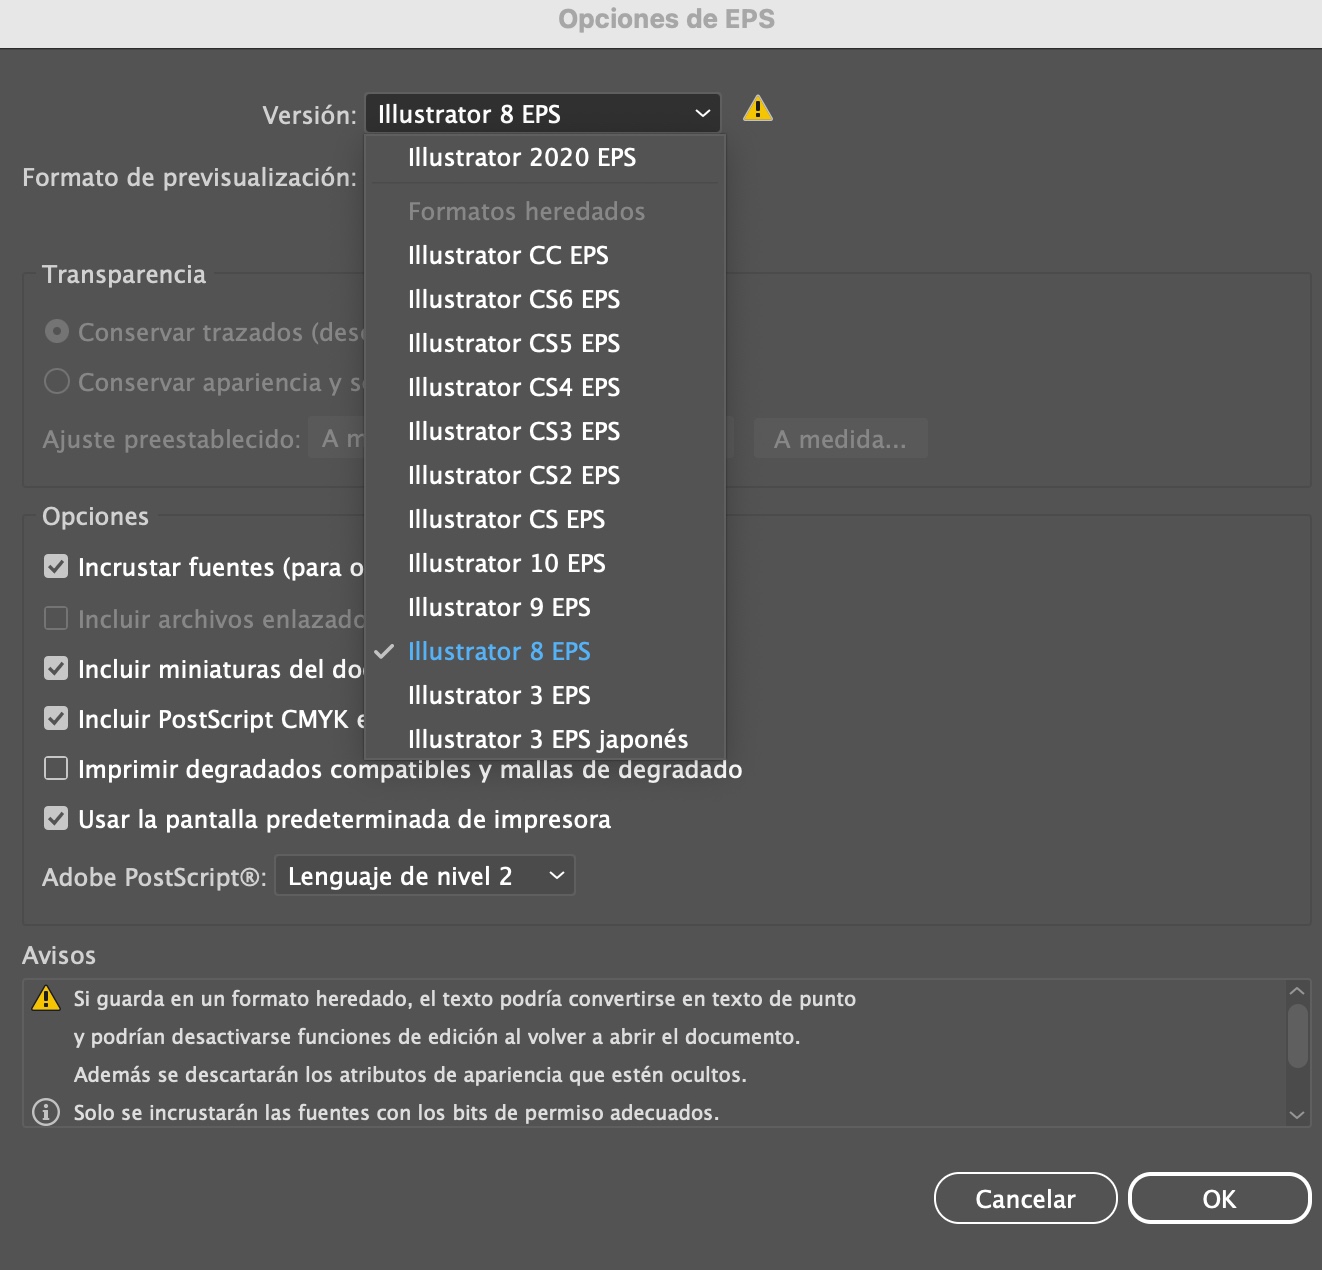
I recommend you to use vector design software like Adobe Illustrator or CorelDRAW to create your designs, for mine I used Illustrator. Save the files in .eps format, version 8. When saving, choose the .eps format and select version 8 in the configuration options.
- .eps file
-
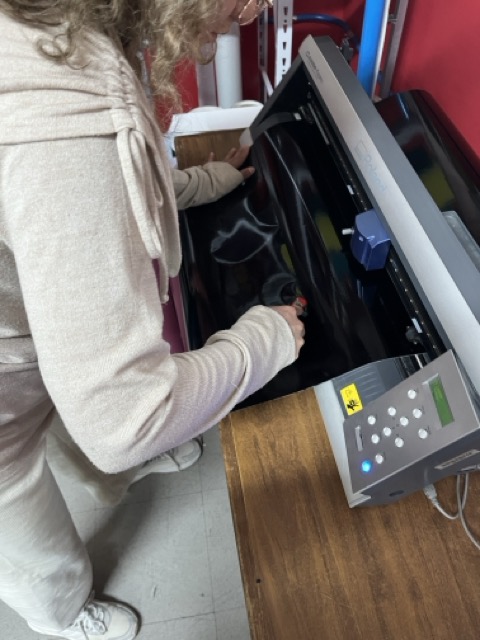
Prepare the machine
Place the vinyl on the cutting table of the machine, ensuring it's well secured and wrinkle-free.
- THE MACHINE´S MANUAL
-
Importing your files
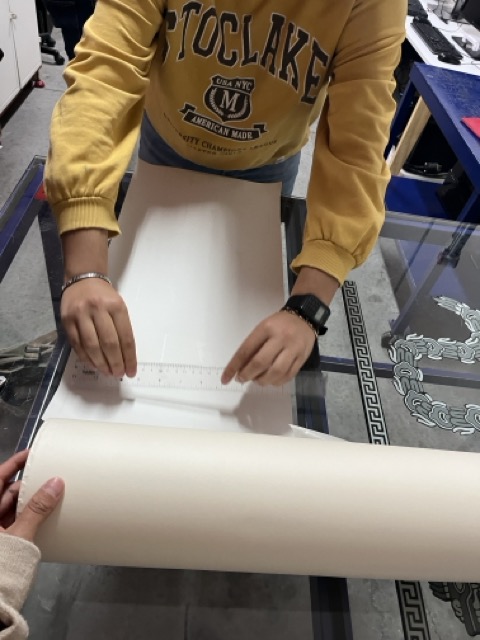
Cutting the vinil and placing it into a beautiful place
Once the cut is complete, carefully remove the excess vinyl around your design using a weeding tool. Be careful not to damage the main design while removing the excess vinyl.
Use application tape to transfer your design from the backing material to the desired object, like your lap or a window whatever omg.

Turn on the Roland cutting machine and make sure it's properly connected to your computer. Open the machine control software (I used Roland CutStudio) and make sure it's recognized by the program.
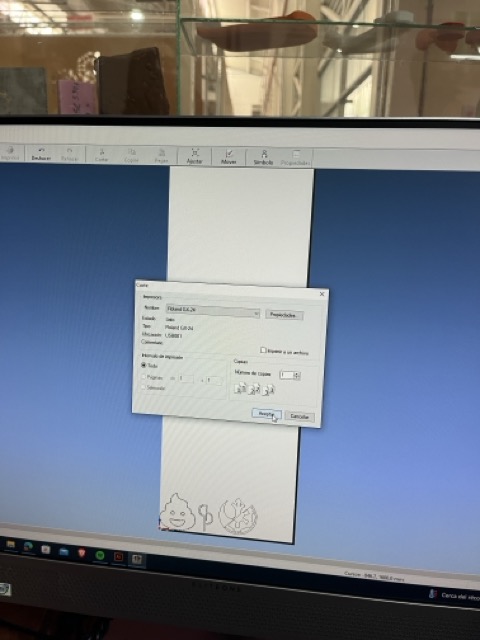
The configuration I used to cut the vinil in the machine was 20 cm/s and 50 g/f, If you don´t know how to do anything aaaaalways go to the manual gurl
Then import your .eps version 8 vector design into the machine control software. Adjust the size and position of the design as needed and according to the size of the vinyl.
Once you're happy with the setup, initiate the cutting process from the software. The Roland cutting machine will start cutting the vinyl along the lines of your design accurately.

NOW THE MAIN ✨DISH✨ OF THE WEEK 3 GUUURL THE 🌺PARAMETRIC🌷 DESIGN
Okay, so like, for this week's assignment, we're diving into laser cutting with a twist! We're creating a parametric design that's all about versatility and efficiency.
First off, designing stuff is, like, super cool, right? But what makes design even cooler is when we can create designs that serve multiple functions using the same number of pieces. It's all about maximizing efficiency and minimizing waste, which is like, totally rad for the environment! With a parametric design, we can tweak dimensions and shapes on the fly, giving us endless possibilities without having to start from scratch every time. Plus, having the same number of pieces for different functions means we're streamlining production and making the most out of our materials. And let's not forget the creativity factor! We're not just making something functional💫; we're making it stylish and unique. Laser cutting lets us bring our wildest design ideas to life with precision and finesse. So yeah, this assignment isn't just about cutting some shapes—it's about pushing boundaries, being resourceful, and unleashing our creativity like never before! 🌟
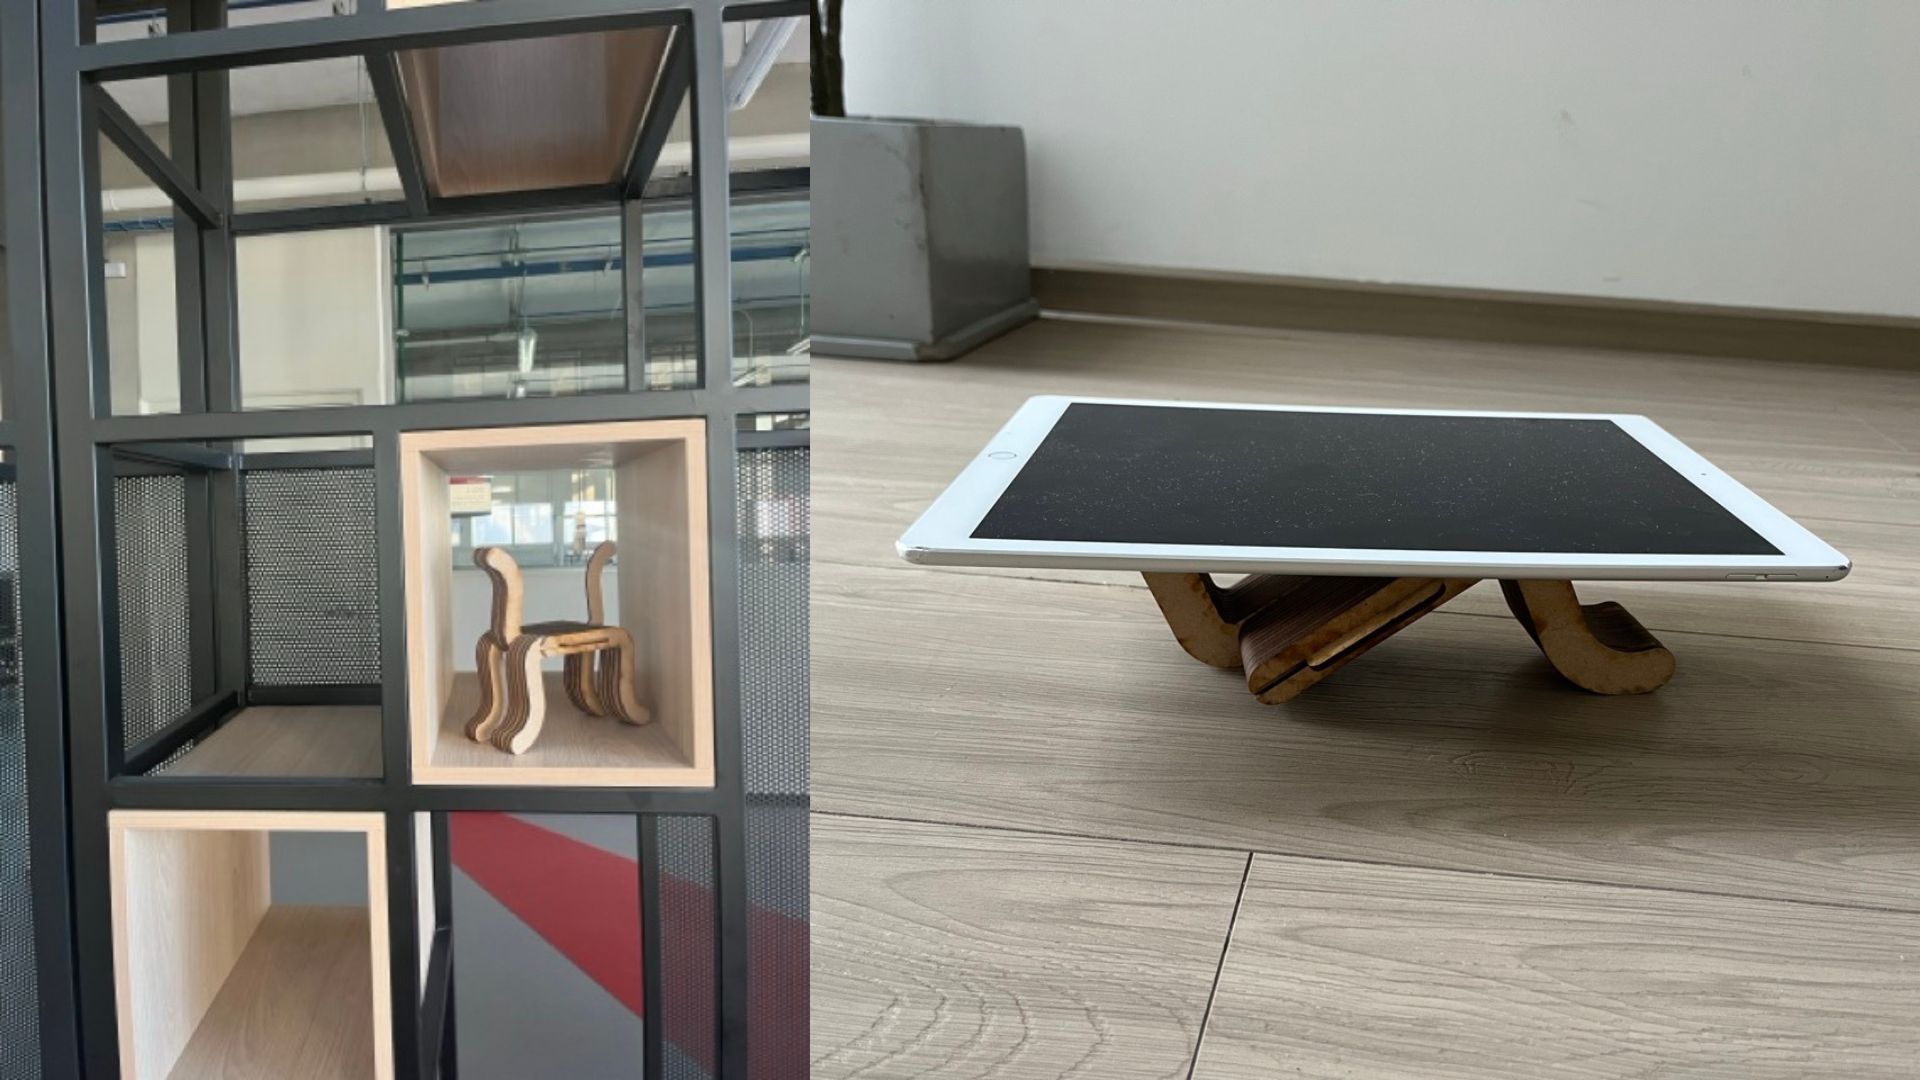
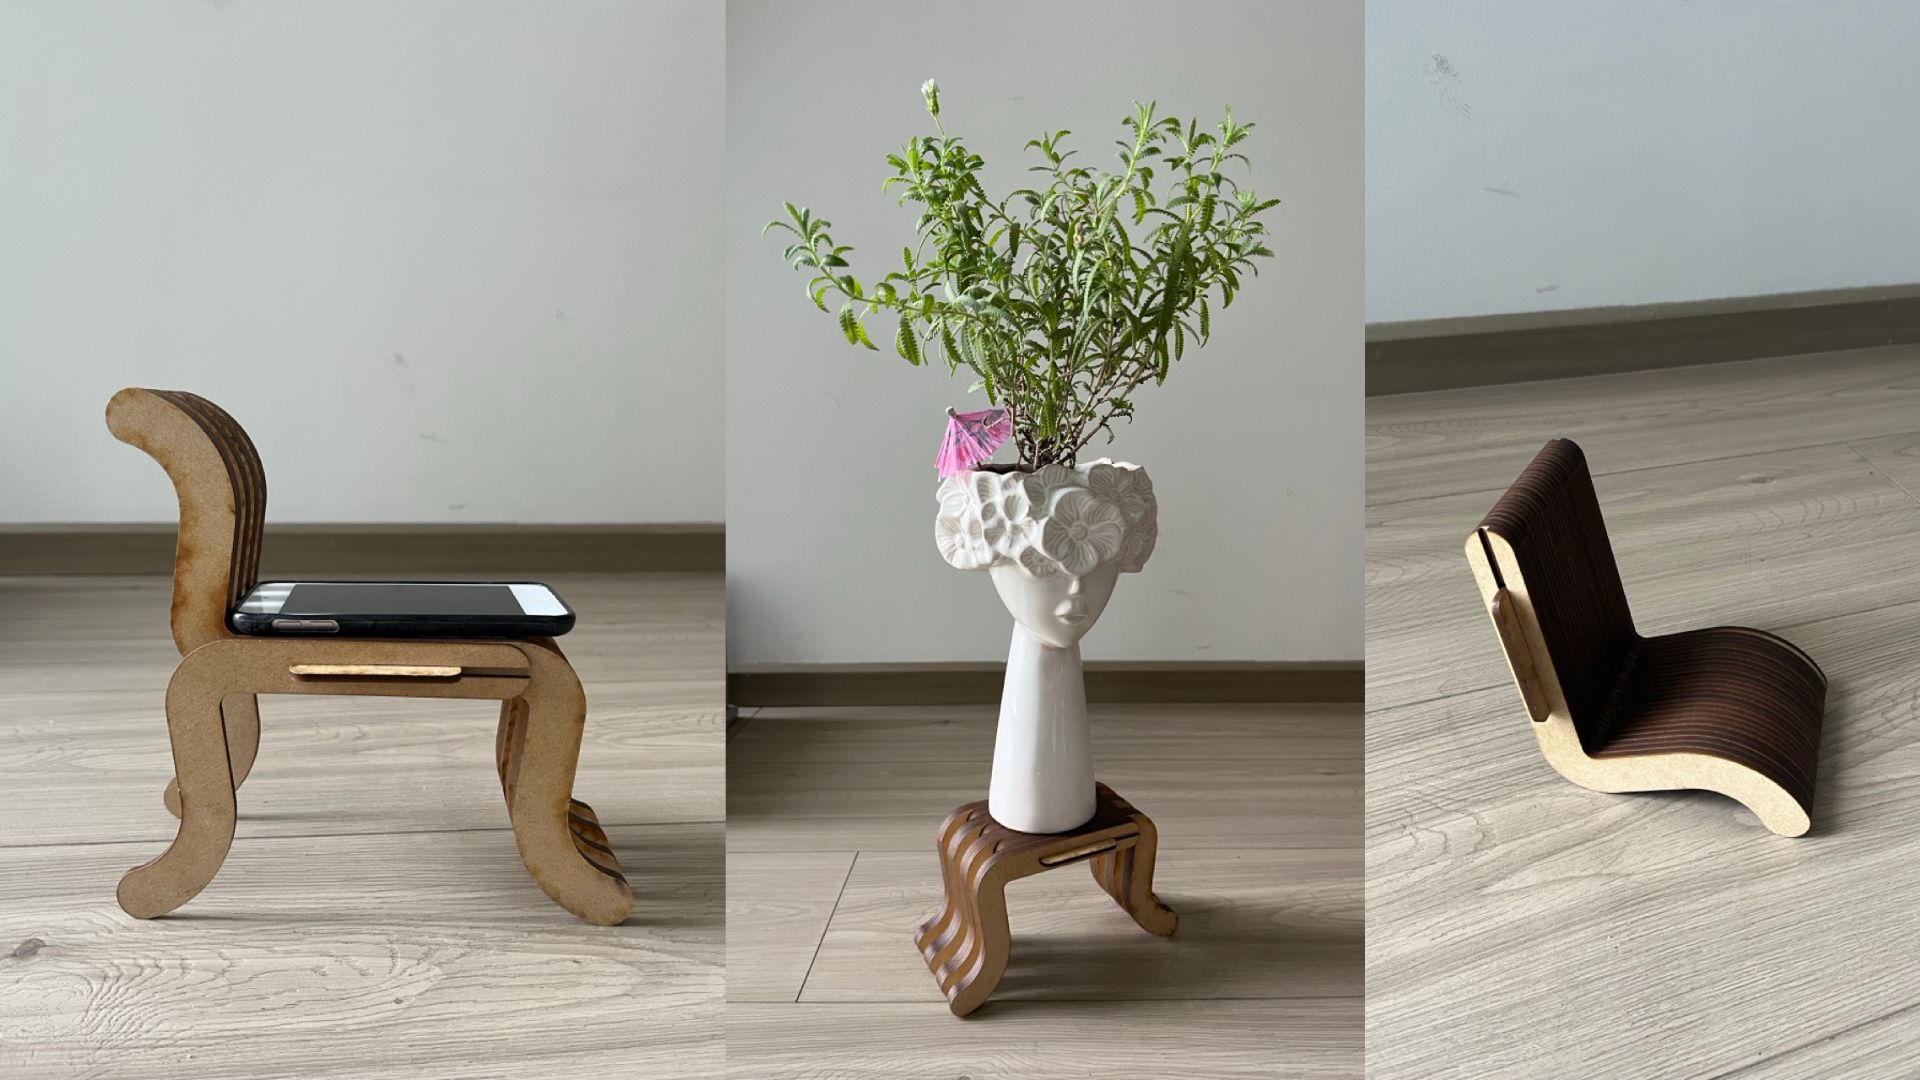
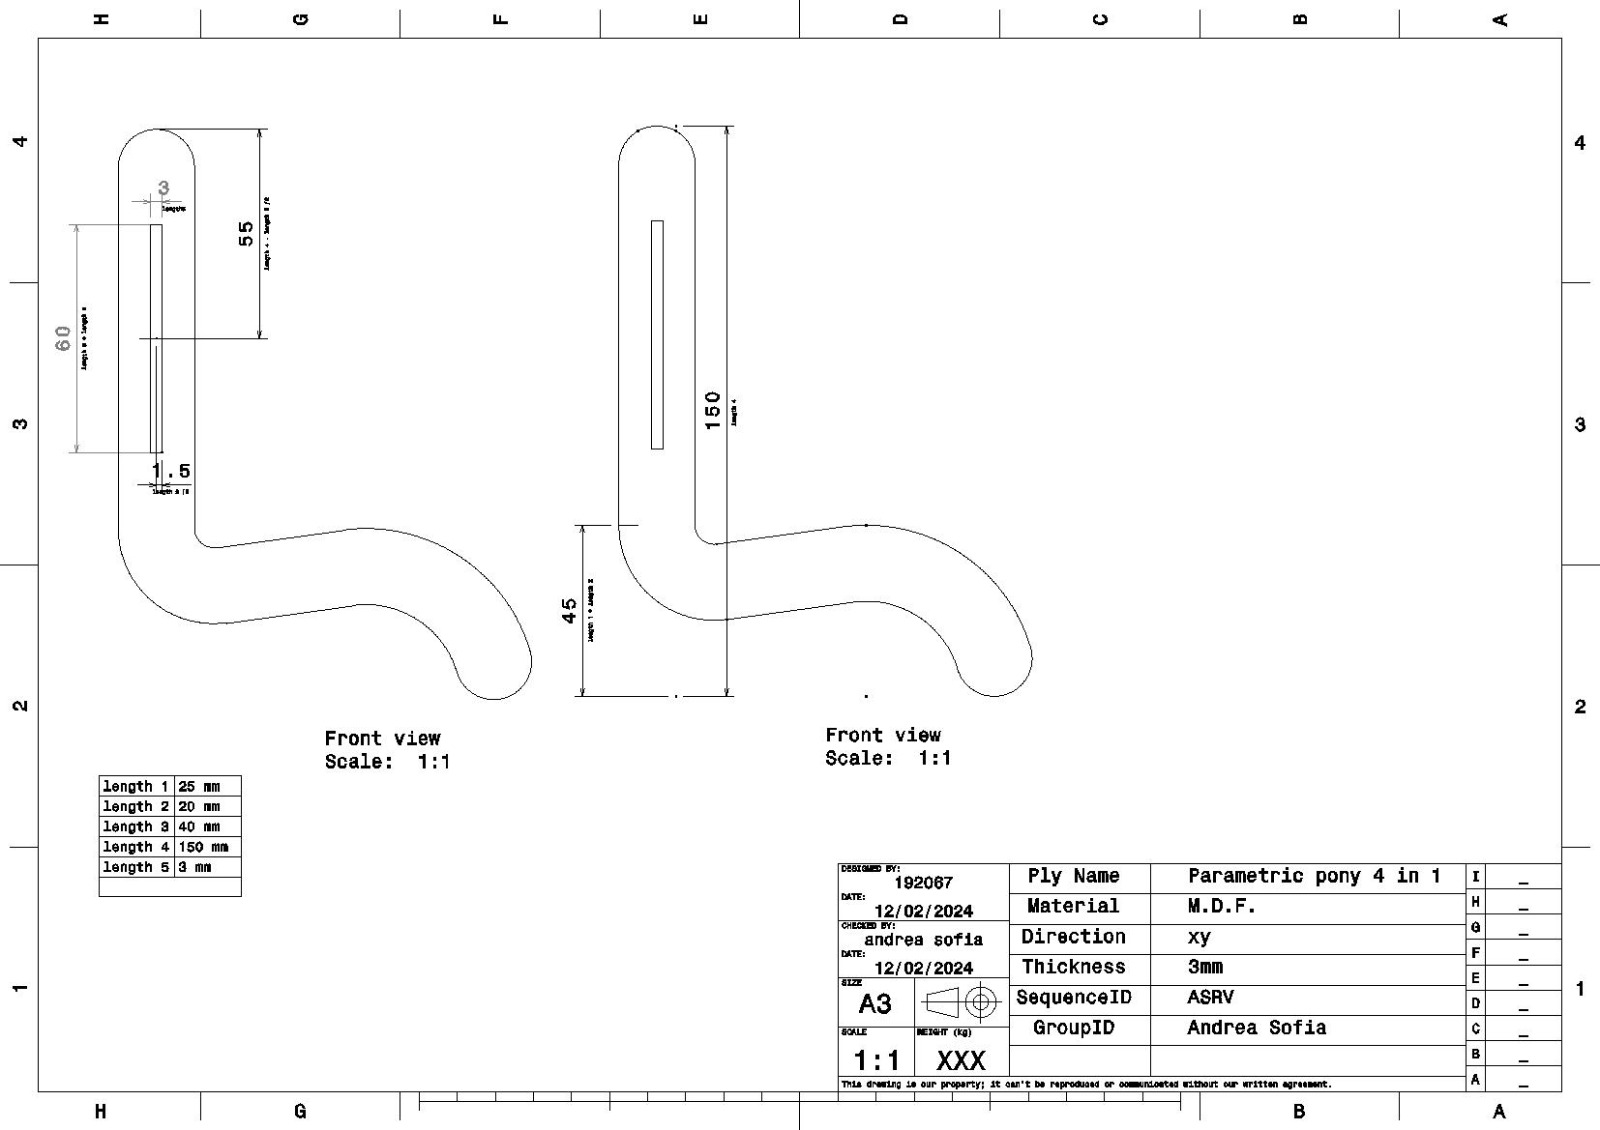
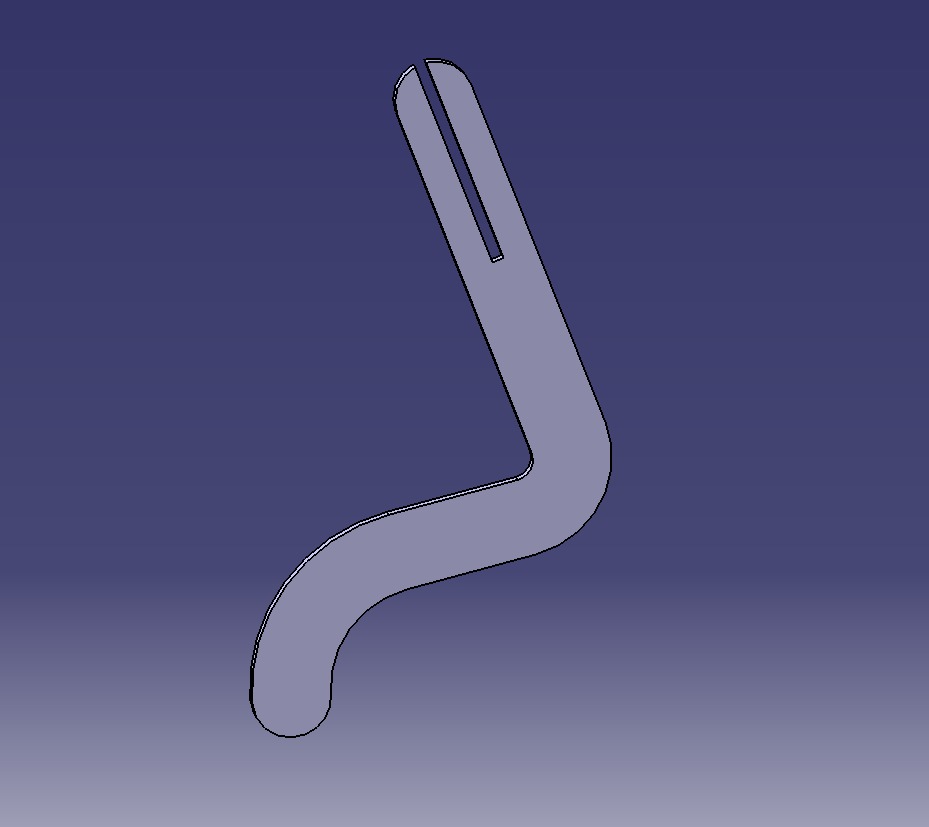
For my project I made a pretty doggie/pony 4 in 1! it can be either a pretty cute dog and a celphone holder at the same time. It has 4 uses but we´ll get there, first things first HOW DID I DO IT?
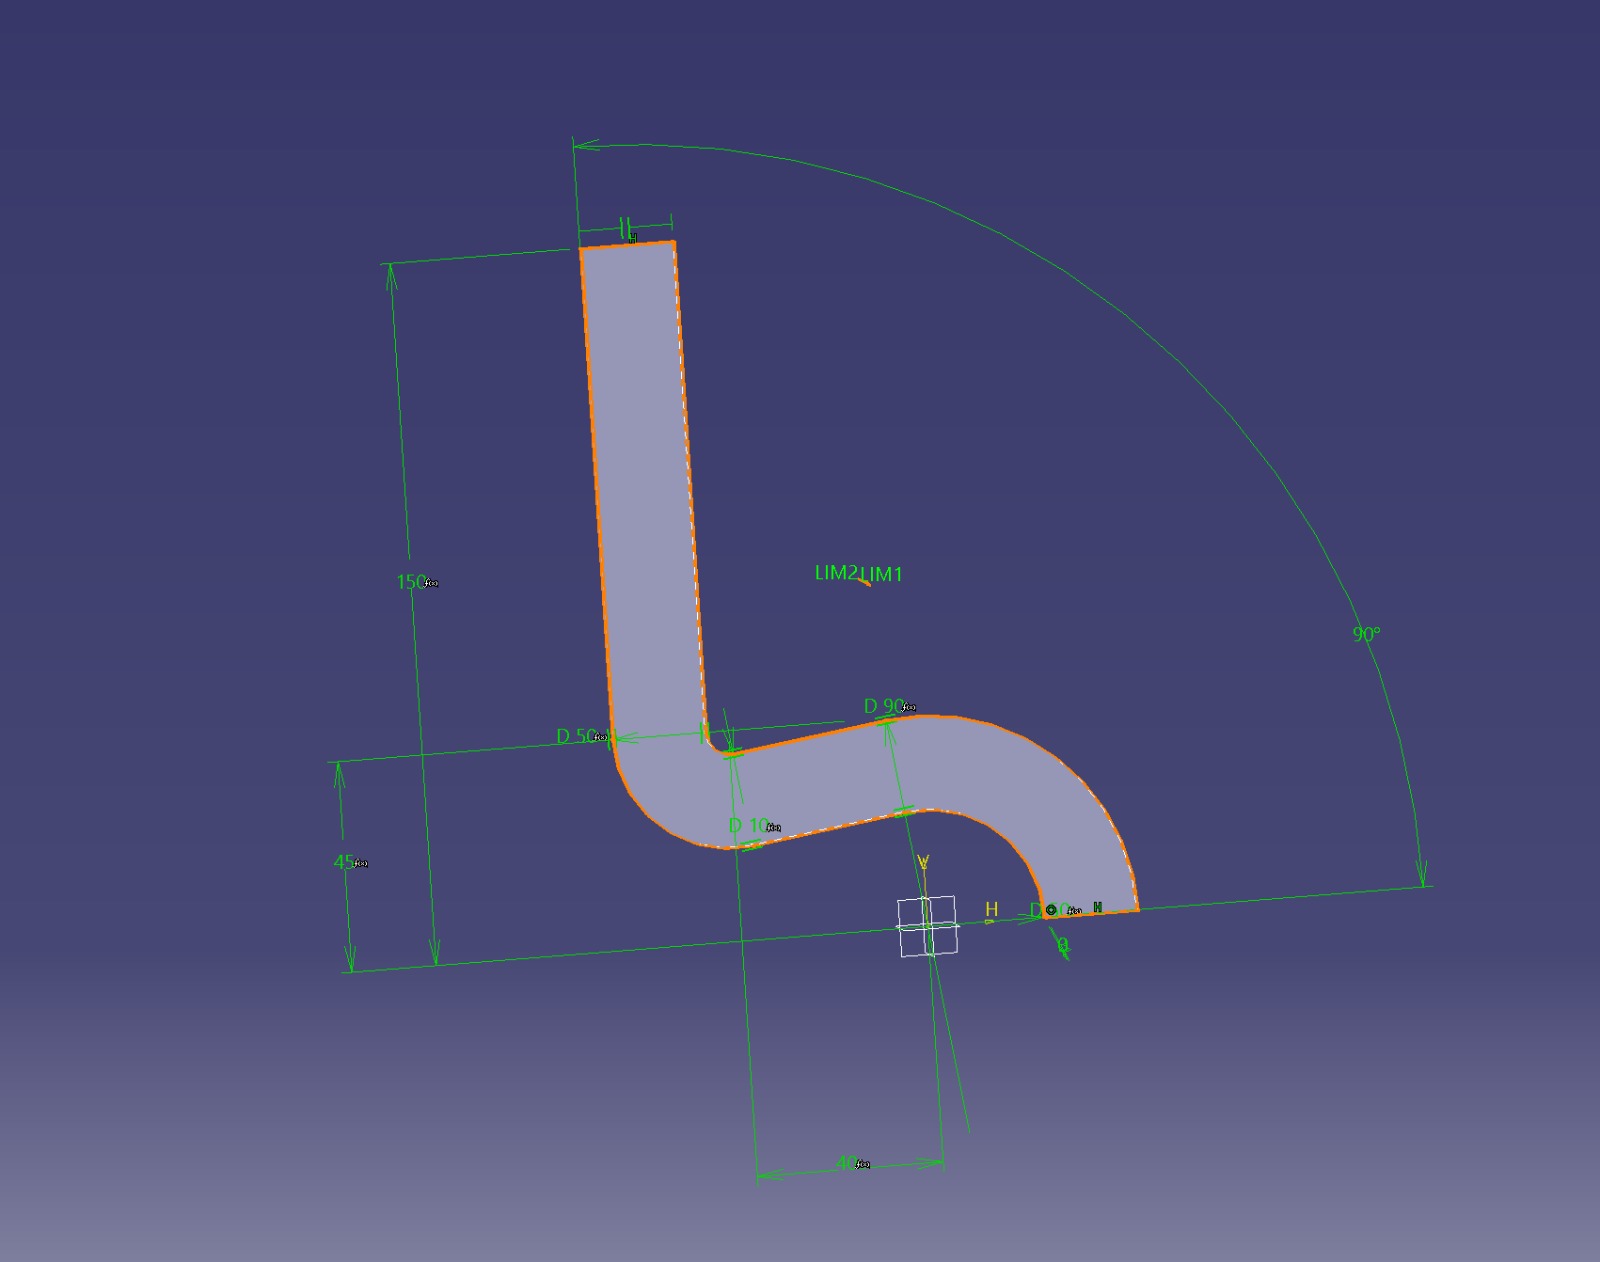
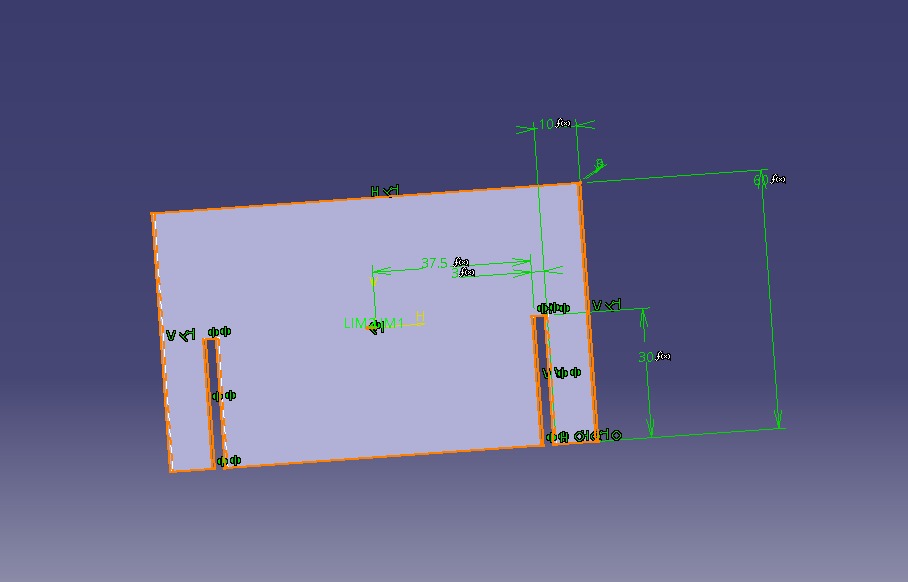
I used the "Create Circle" tool to draw a circle with a diameter of 50mm.
then I created another circle separated 40mm apart between their centers.
I draw a tangent line that touches both circles.
Finally I used the "Split" tool to cut the circle on the right in half.
First I draw a line upwards to form the top part of the "S".
Then Iraw another circle from the same center to complete the upper contour.
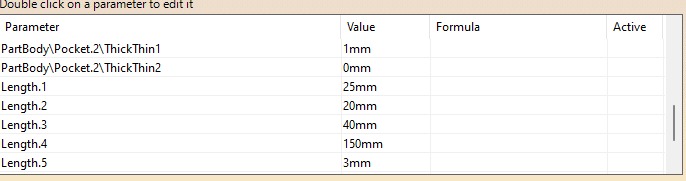
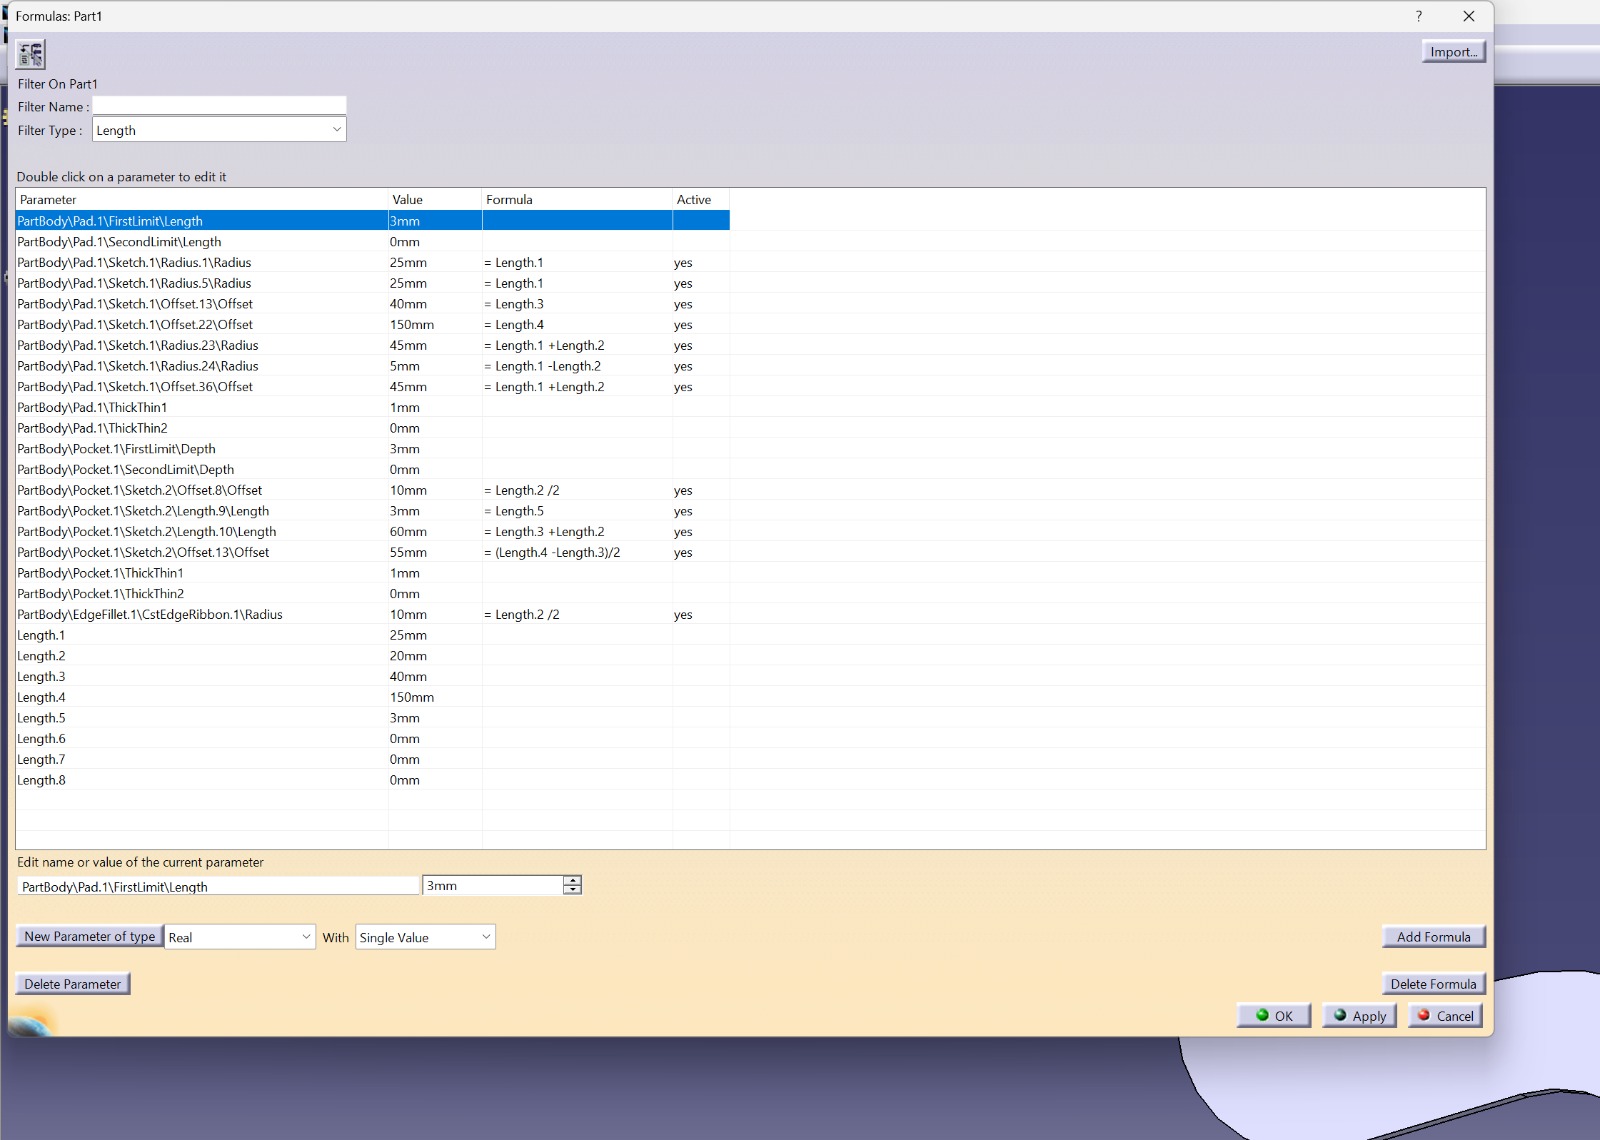
Use the parametric design tool to link the measurements of the upper circles with those below. (I saw this in a video and think that can totally save you a lot of time) I used the ecuation (fx) tool and linked the first measurements I did with lenght.
Then define parametric relationships so that changes in the measurements of the lower circles automatically adjust the measurements of the upper ones.
Use Catia's equations to sum distances and maintain specific measurements.
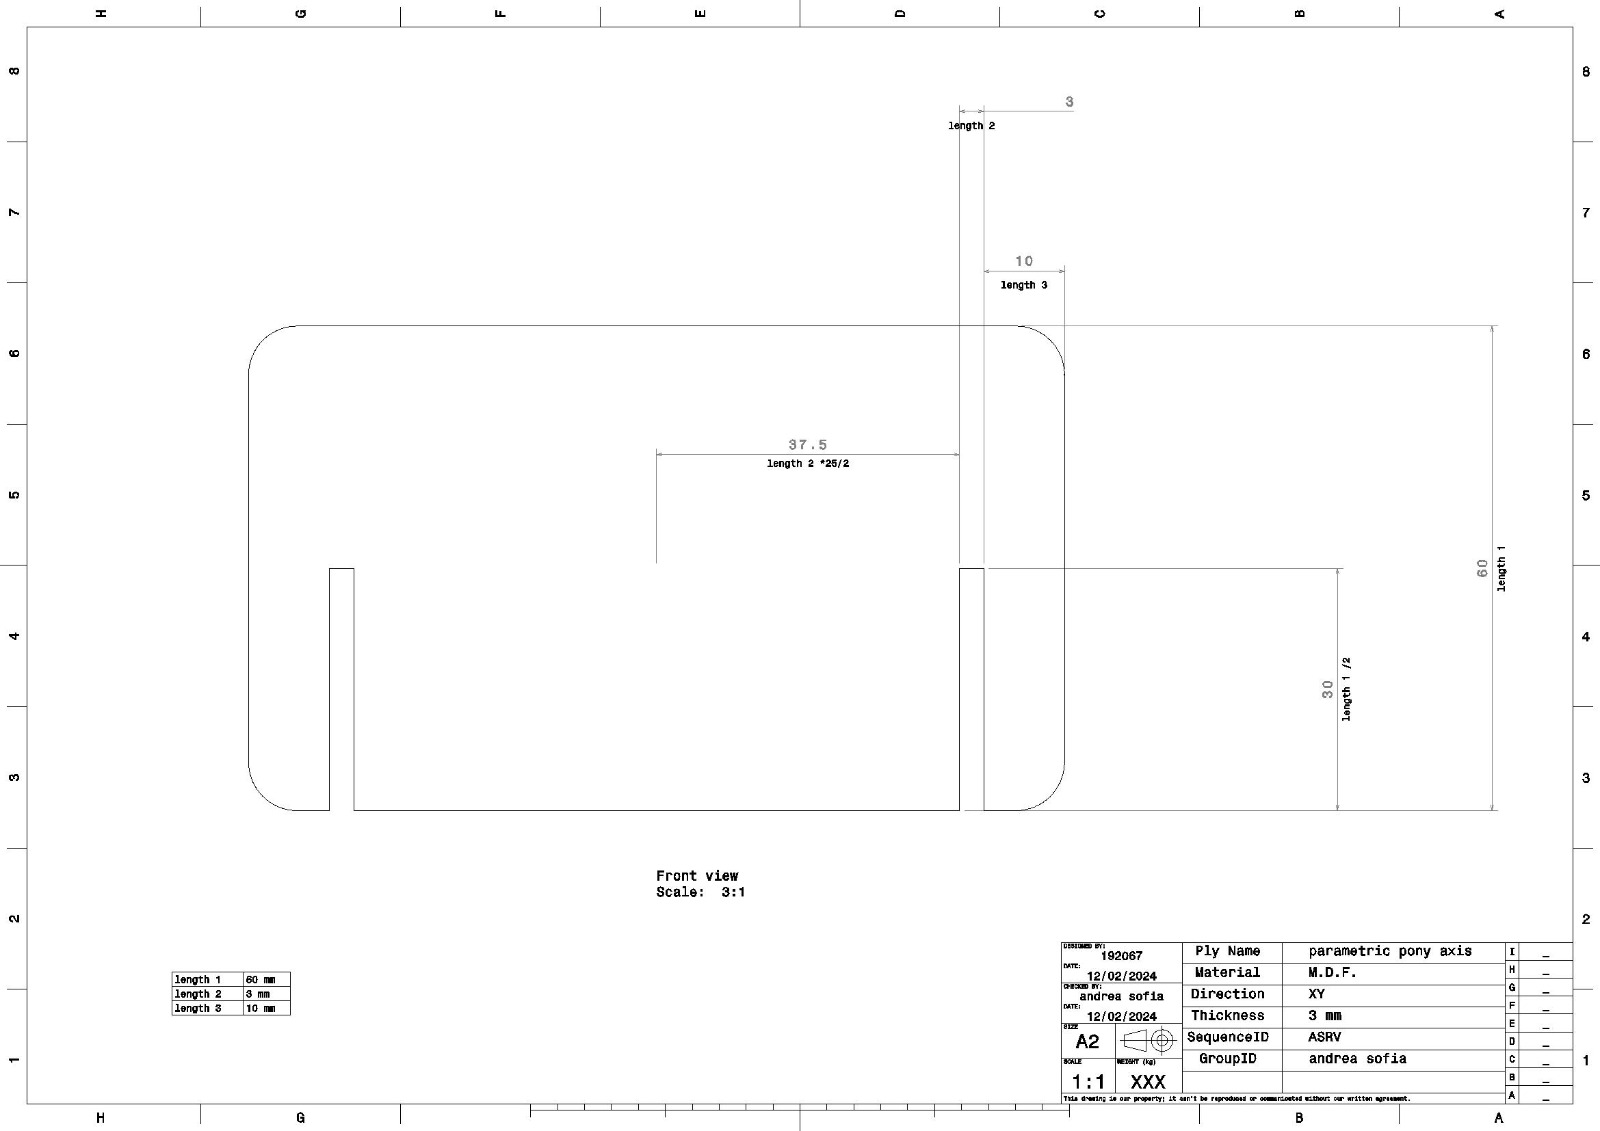
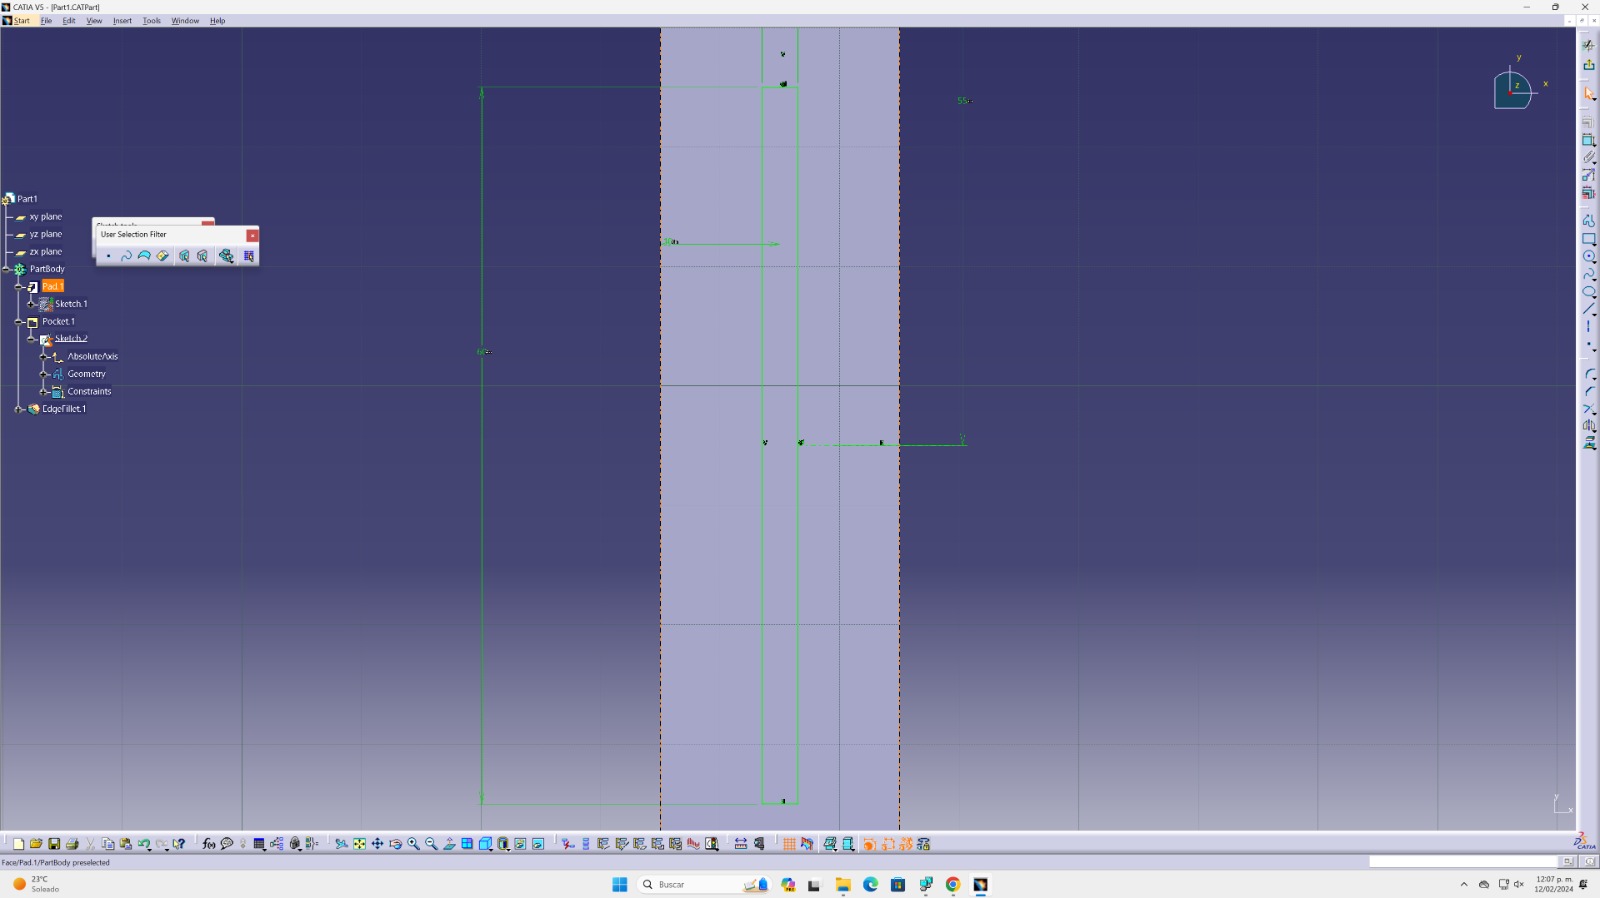
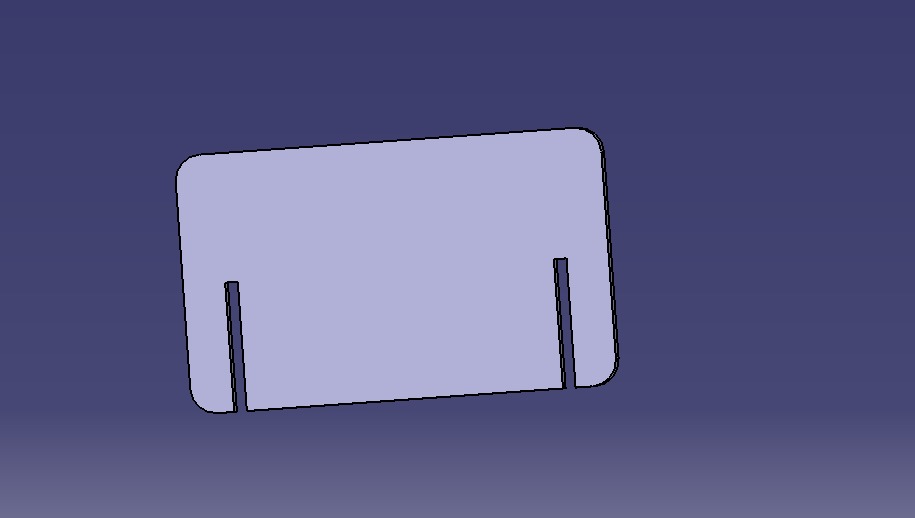
Let´s create the bottom contour
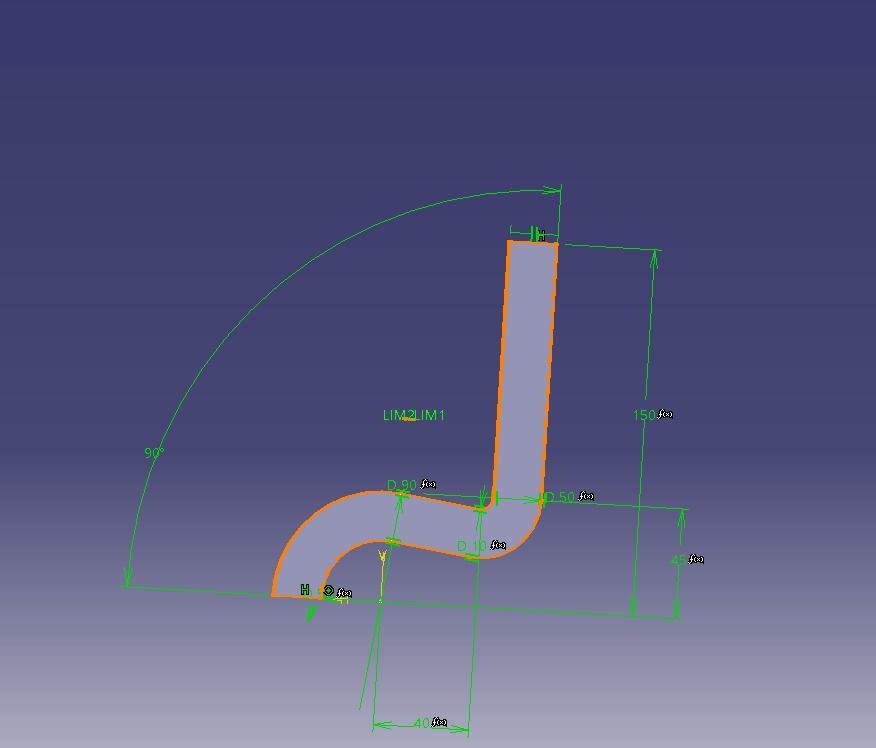
Now we are doing the upper "S" shape
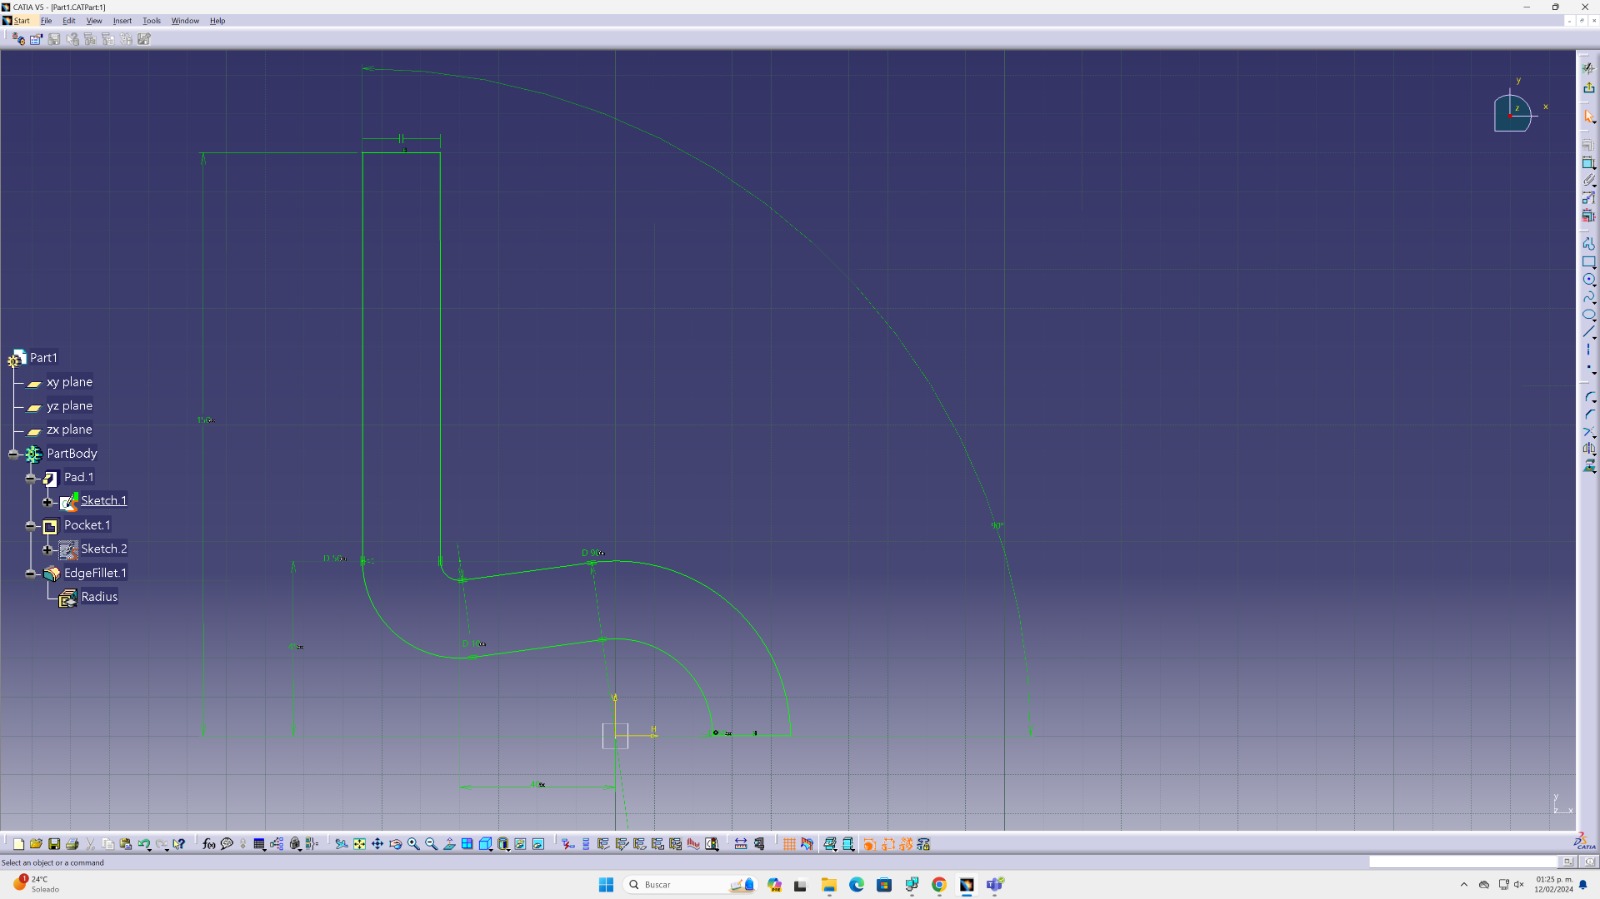
Applying the 💕parametric💕 design here
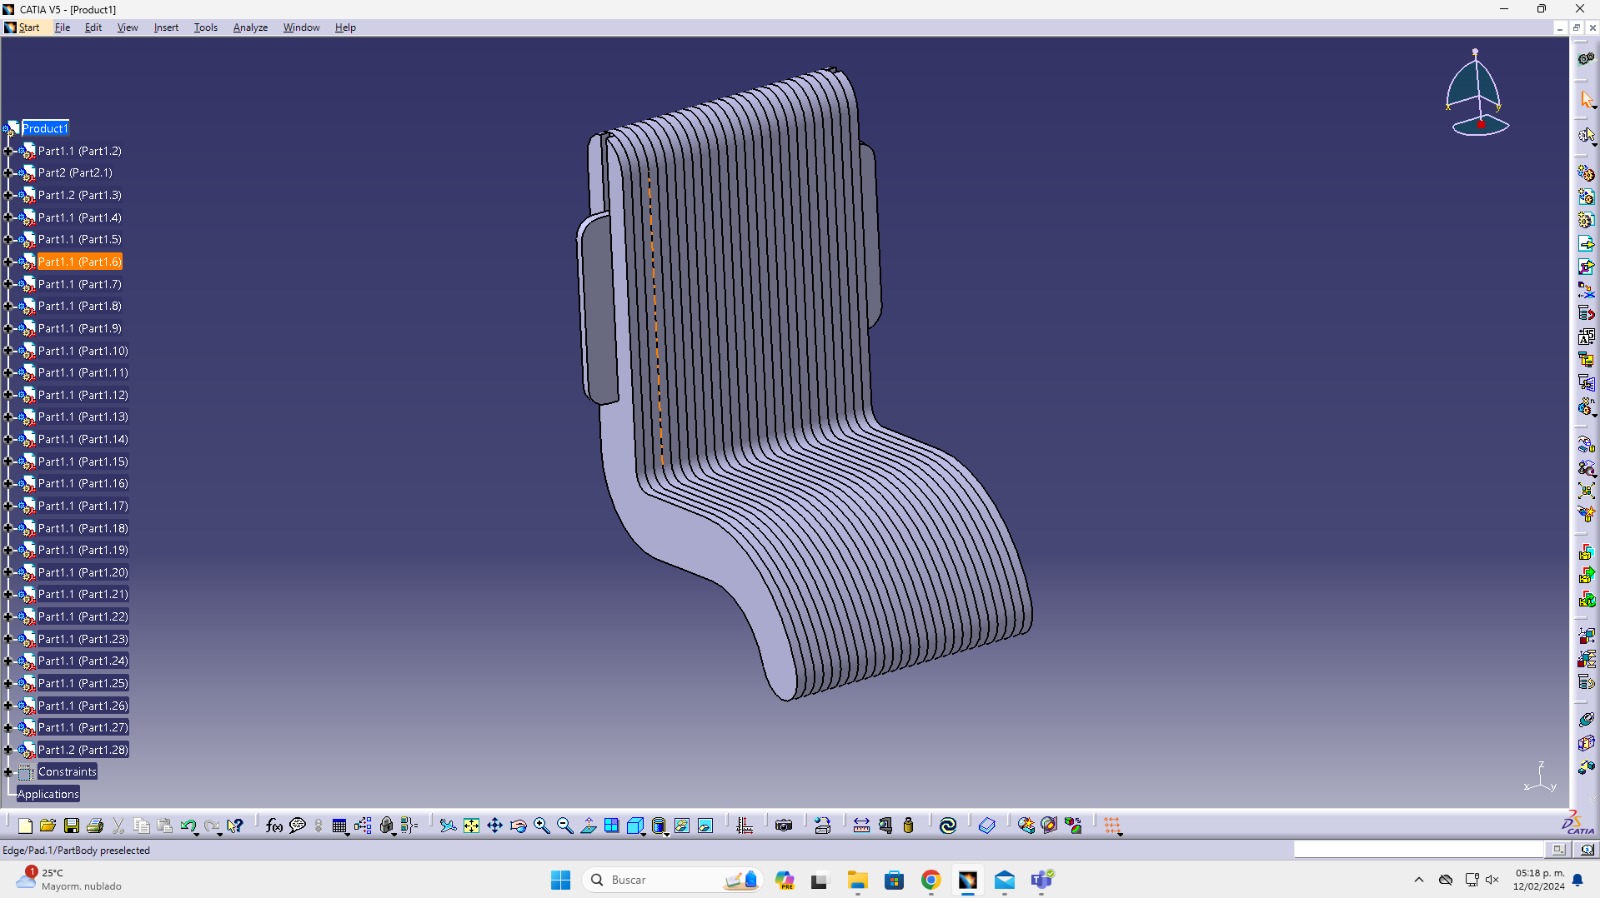
Alright, guys! We're all set now! Feel free to take a spin through this carousel of images and the 3D model I've provided of my super cute 4-in-1 doggie. Get up close and personal with the parametric design— it's totally awesome! 🐶✨ So, like, let your imagination run wild and explore every angle of this adorable pup!
My hard work pics📸
And now the 🍒 in the top of the cake...