Moulding and Casting
In this week's assignment, I drew a lollipop shaped hand mirror for a personal project.
Team Practice
Link of our team practice
Sketching
As you can see in my sketching process, the piece I'm trying to create is bigger than the lost wax they provided us. That being the reason for me to decide to use the 3D Resin Printer to make the mold for the mold. (Is kinda confusing, but we will manage ourselves)
Testing
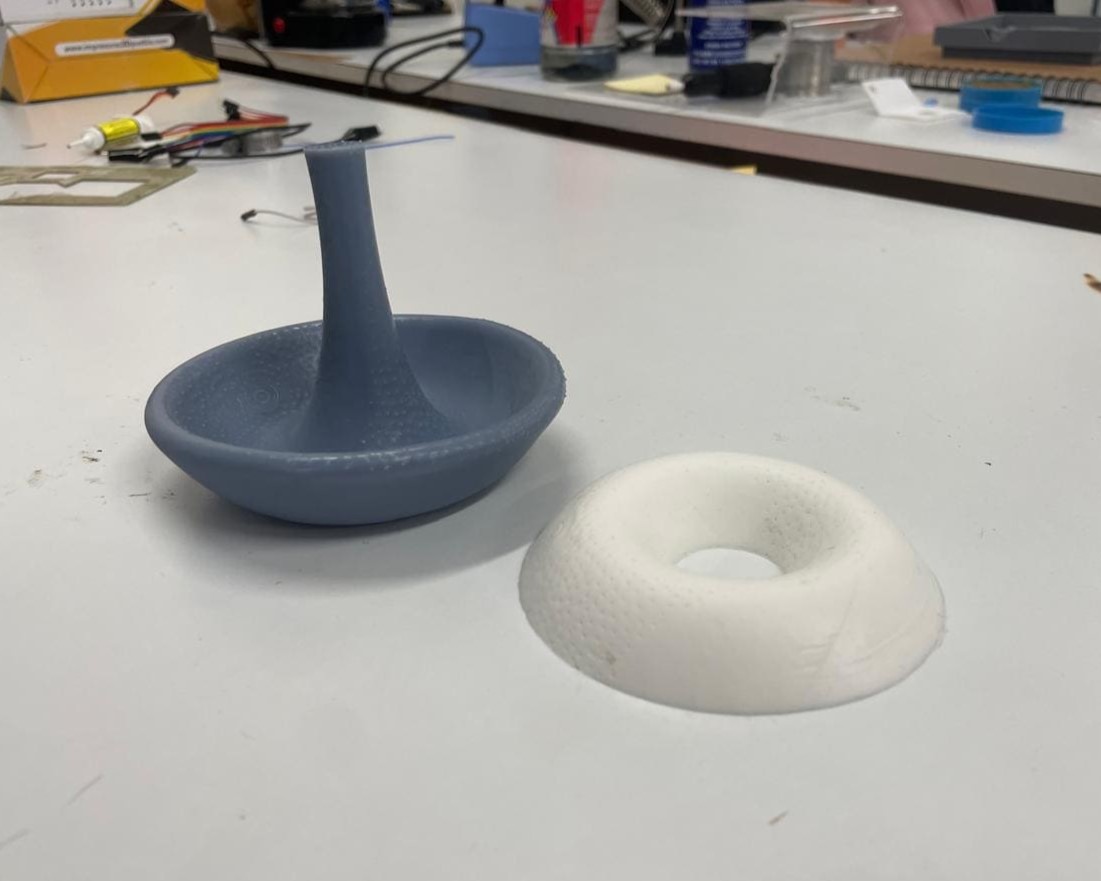
Before the modeling process, I wanted to test if the silicone our teacher provided us didn't had a chemical reaction with the resin, for that reason I used the silicone on an already printed figure. As you can see, it was a success.
Modeling
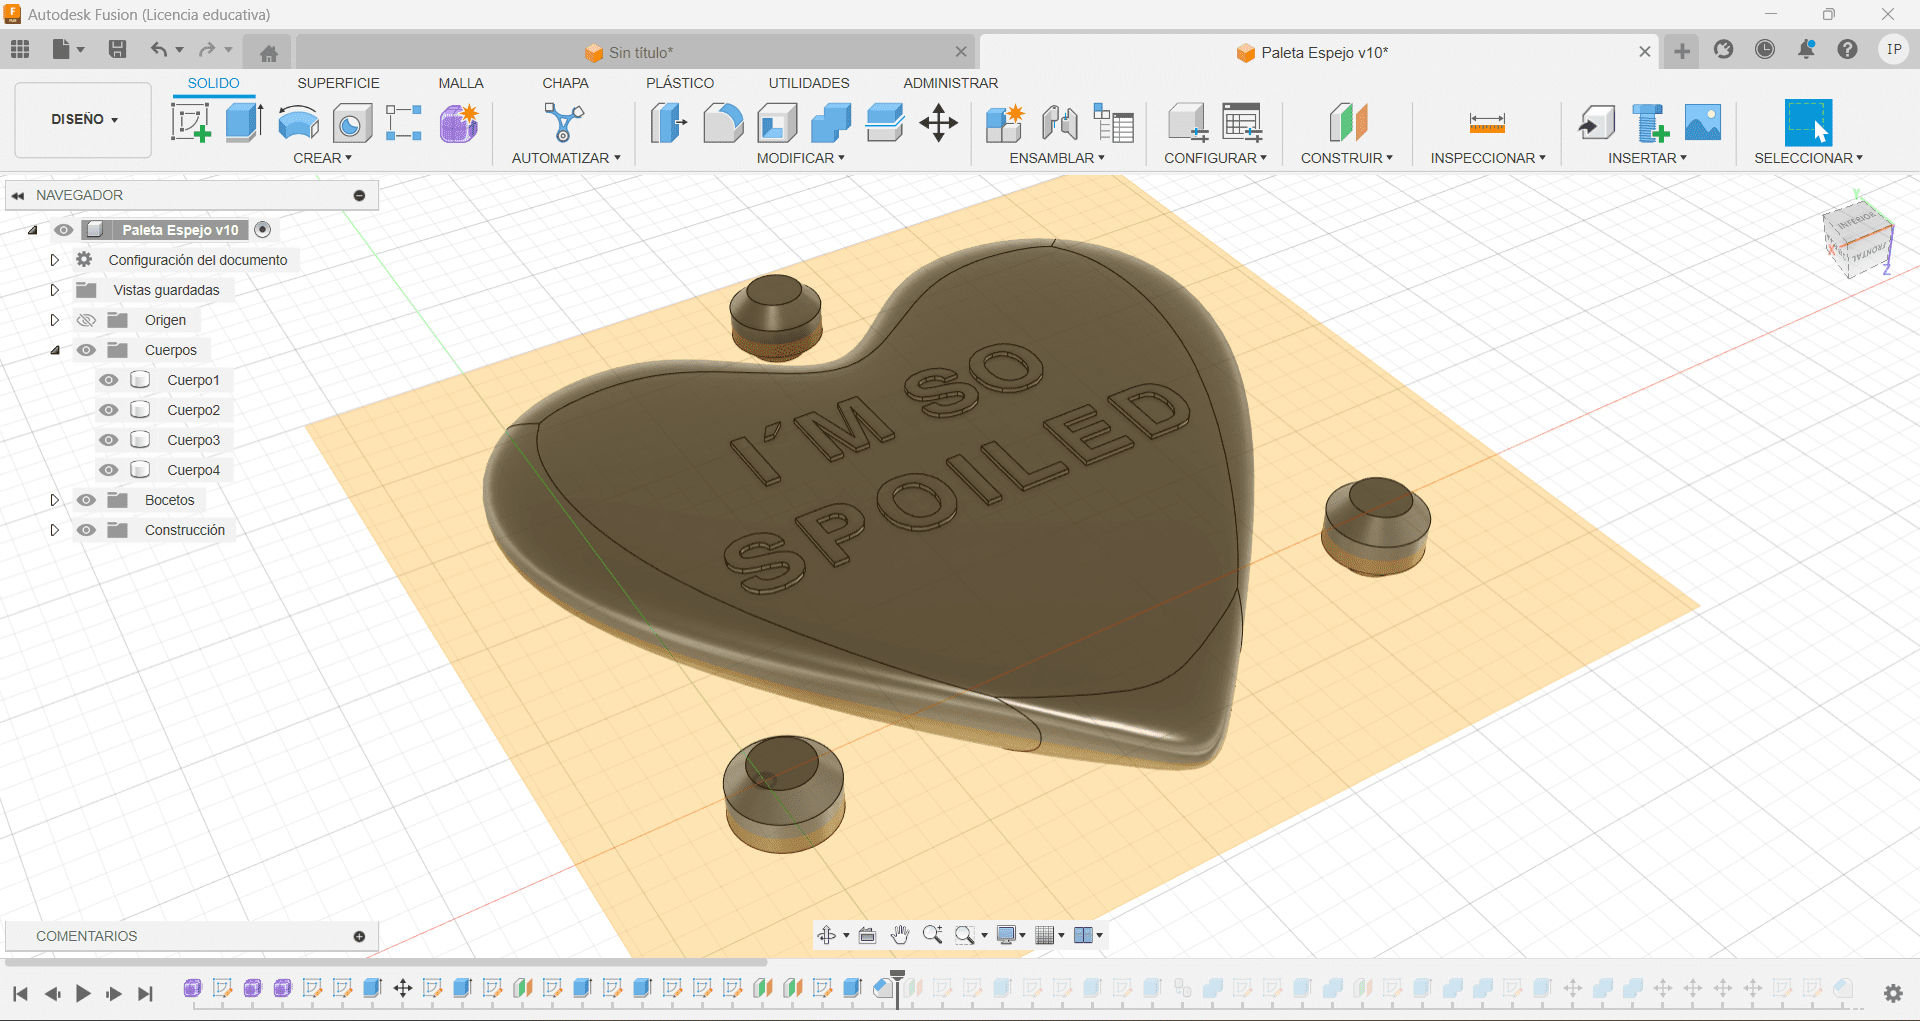
In Fusion 360 I created a heart using the “Create Shape” tool and stretching it and rounding it to create my heart, I then made the 2 sides (For this project I will only be making one of the sizes since I didn't want to waste material). One of the sides contains the shape for the mirror to fit and glue, the other one has the phrase “I'm so spoiled” This is a brand I've been working on for some time.
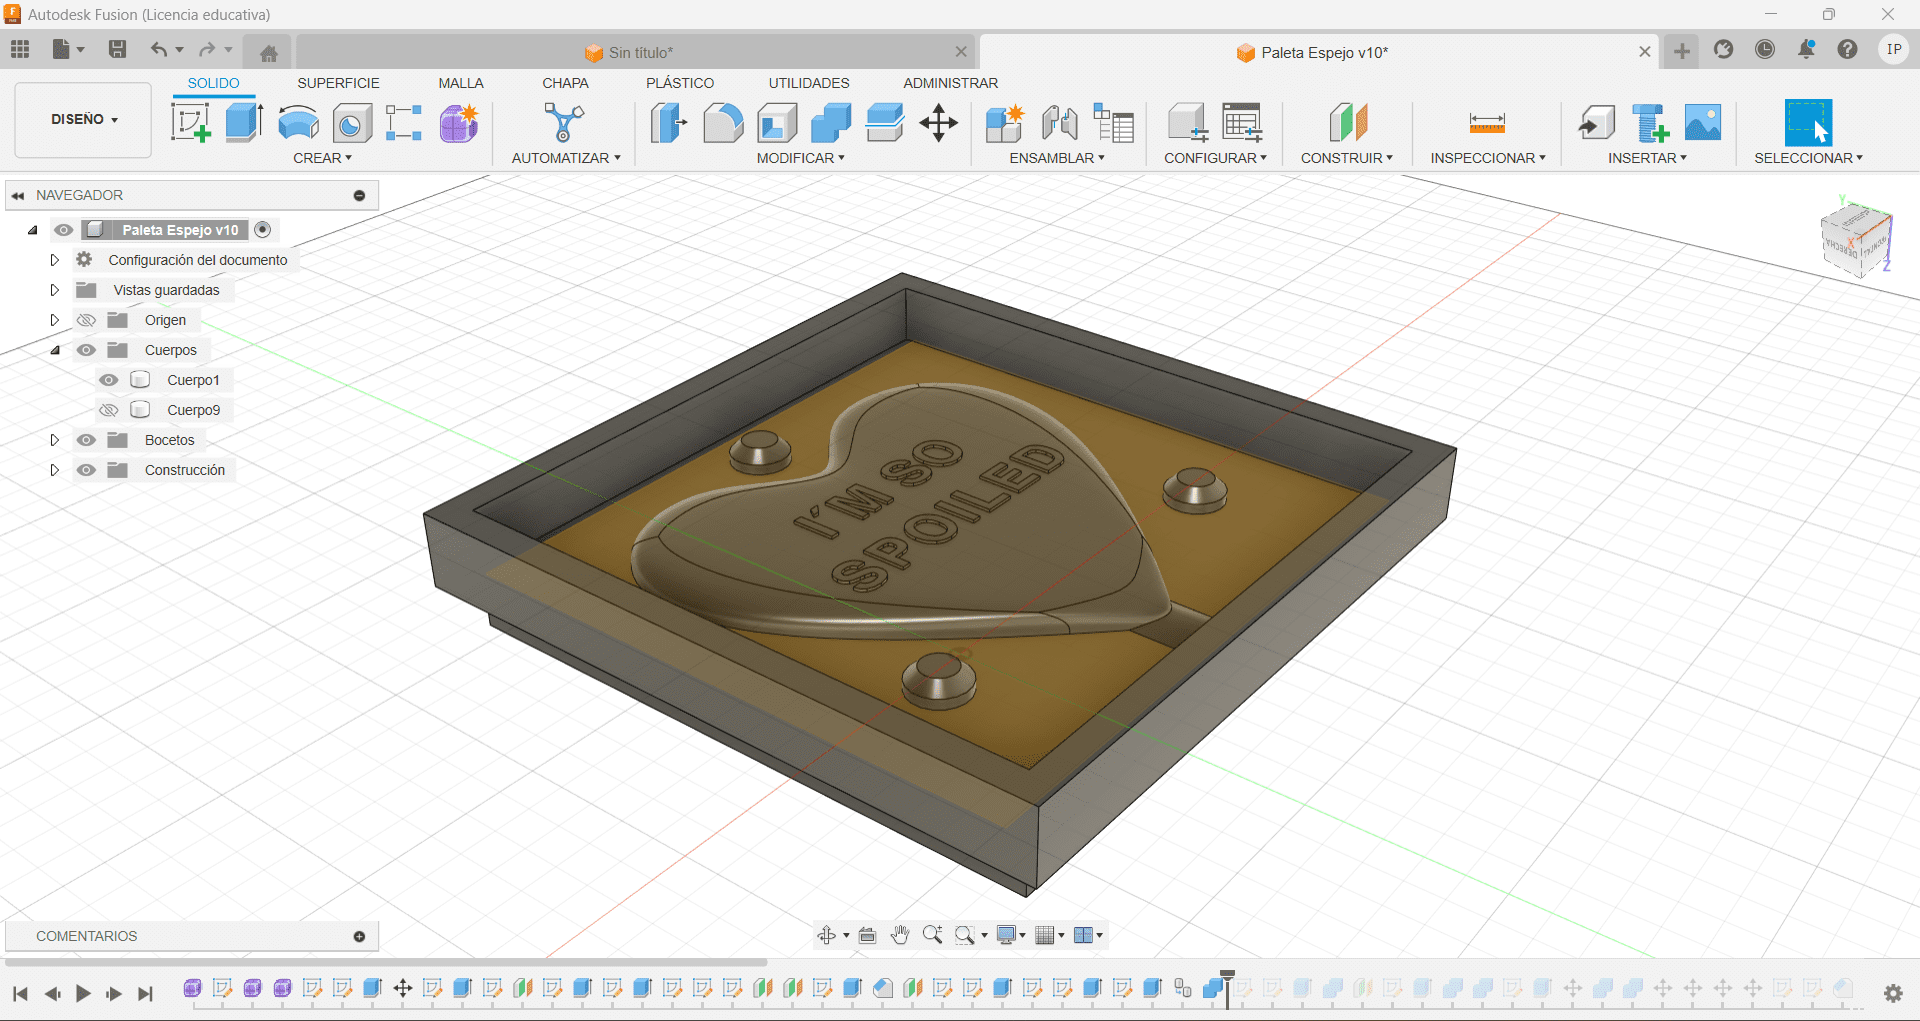
Now that I have the basic shape, I can start to create the mold for the mold (I know, it's hard to understand). Basically, what I want to do is a mold for me to then cast in silicone, since I wanted to use epoxy resin for this project. Following the rule of the materials: when the material you are going to cast is hard, you have to use a flexible mold. For this reason, I made the mold for the mold. Creating some walls around it and made some shapes around it for the molds to snap in place (Even when we are making just one).

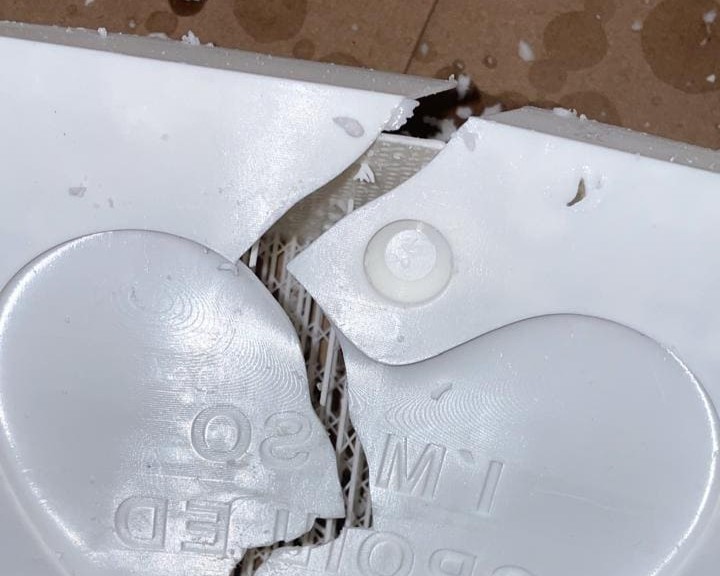
Mistakes were Made
I didn't quite understand the Resin Printer, I sent print without knowing what I was going to do. I accidentally printed a mold for me to immediately cast, however this was not the task, and the mold broke because I made it really thin.
The real Mold
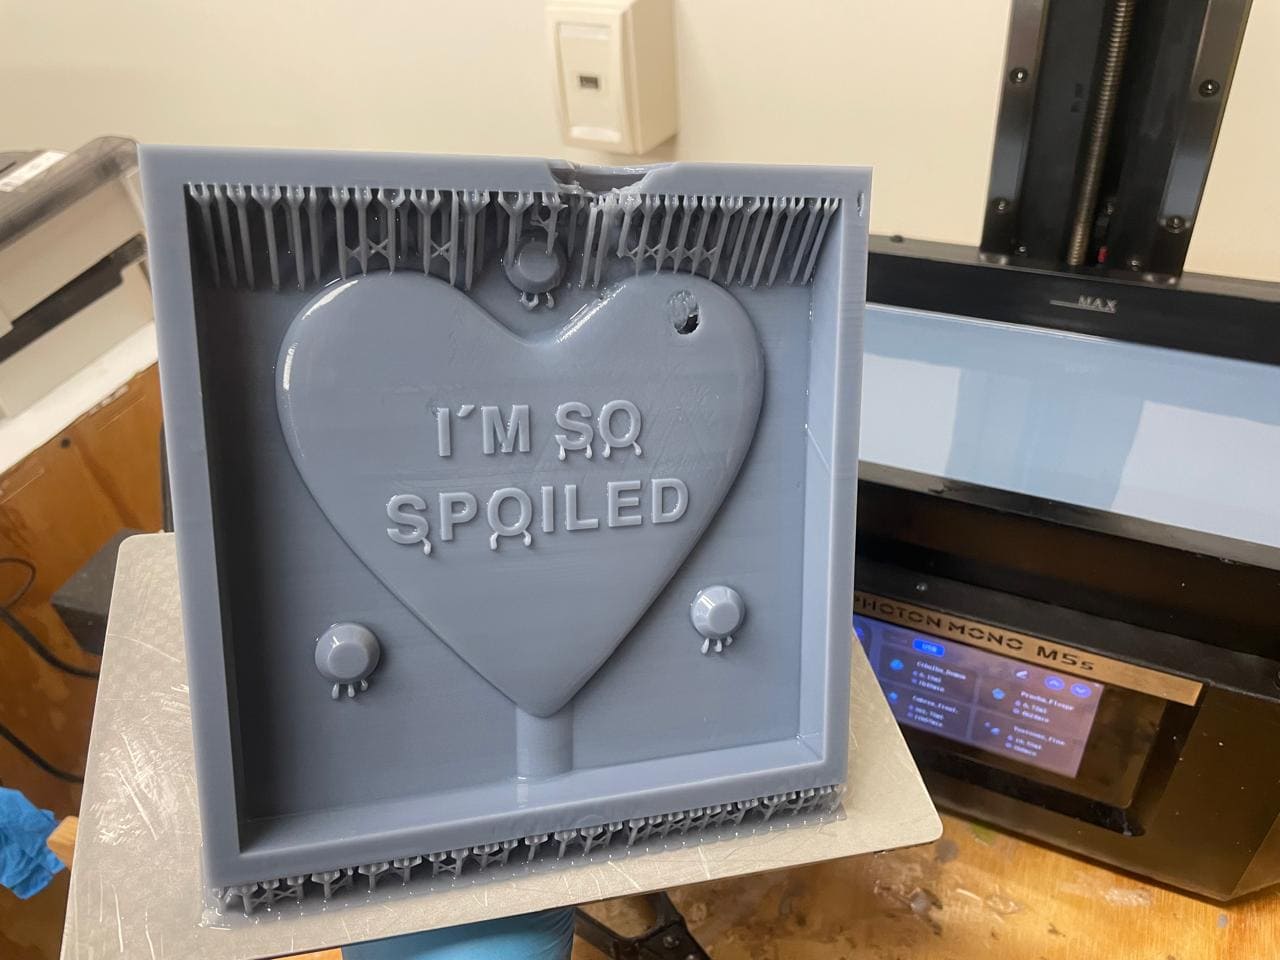
Now that I made the walls and the corrections I needed for the print, I sent it to the Resin Printer, which took about 10 hours to finish, as you can see, there are some minor details where the piece collapsed. However, since it is a tiny portion, I decided I was just going to fill it with superglue.