6. Embedded programming
Week asignments
1. Group assignment: browse through the data sheet for your microcontroller and compare the performance and development workflows for other architectures
2.Individual assignment: write a program for a microcontroller development board that you made, to interact (with local input &/or output devices) and communicate (with remote wired or wireless devices) Extra credit: use different languages &/or development environments.
Group asignment
Check out the Puebla FabLab repository: https://fabacademy.org/2024/labs/puebla/week6/
Individual asignment
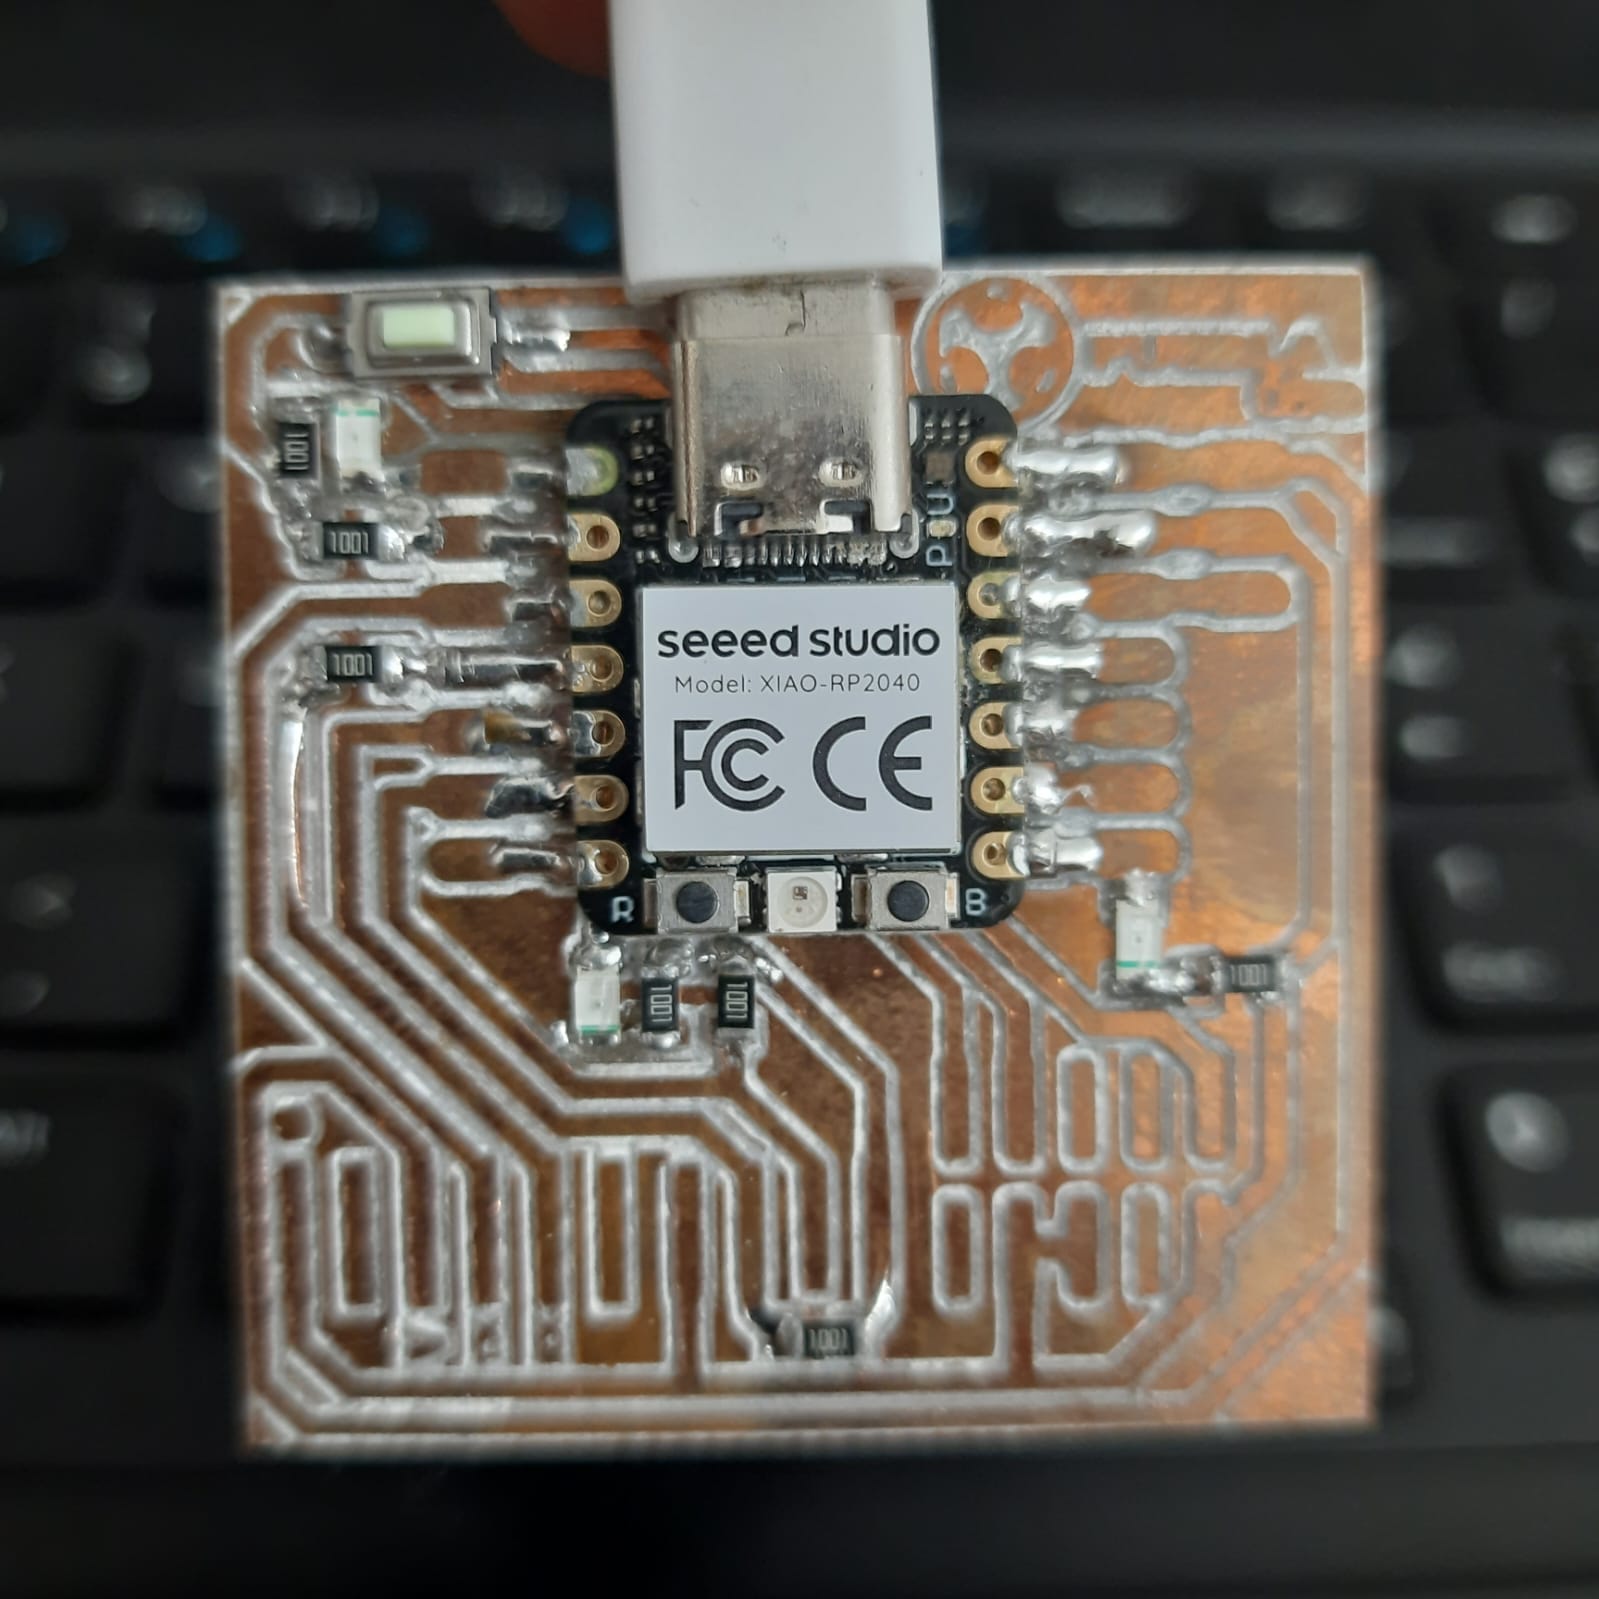
Before anything else, lets remember how our board is wired internally, what external elements it has, and how they look:
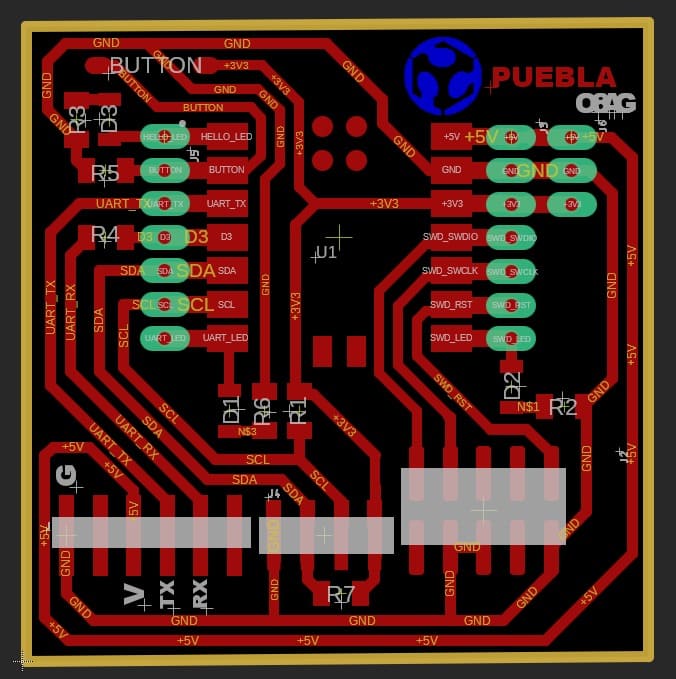
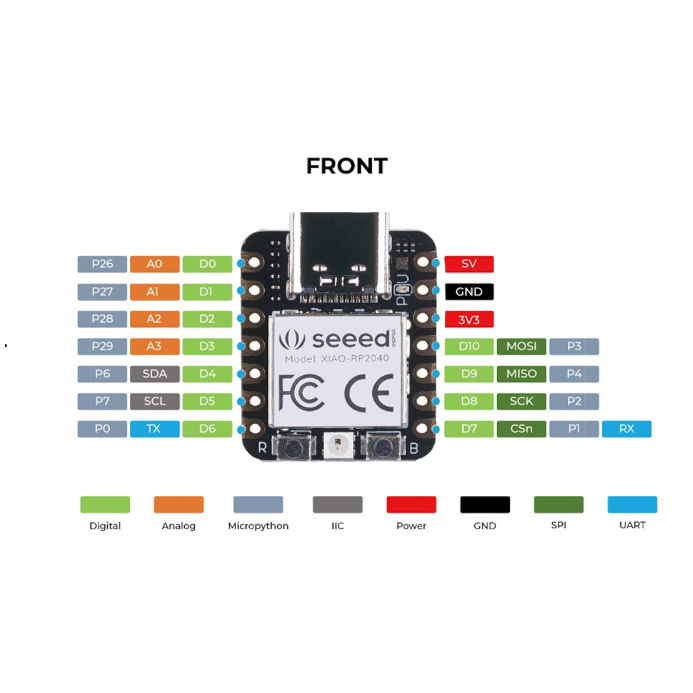
As per the diagram, it’s clear that we have 1 push button, and 3 LEDs in D1, D0, D6 and D7 respectively. I will design a program that has an input (the button); when enabled, it shall activate an output (the embedded RGB LED, and the D0 LED). The selection of the LED is based on the third requirement: communication. The communication protocol will be Serial between the XIAO and my Laptop. Since this protocol uses 2 ports (RX and TX) and the external LEDs, I wouldn’t use them to avoid messing with said protocol. If this is not clear, maybe a tour through the data sheet might be helpful.
DATASHEET
You can use the datasheet for the Xiao ecosystem clickin this link: https://files.seeedstudio.com/wiki/XIAO/Seeed-Studio-XIAO-Series-SOM-Datasheet.pdf
A datasheet contains the technical details for a system or component. In this case, the Xiao is a microcontroller by Seeed and it has 4 types of boards depending on the application. Very important aspects like comparison tables between recommended applications, input voltage, output voltages and currents, number of digital and analog pins, ammount and type of communication ports/protocols, programming, and power consumption is available here. This information helps us know if the component is suitable for an application even before buying it: practically an unmissable step for project development.
SETTING UP THE XIAO
Install the Arduino IDE.
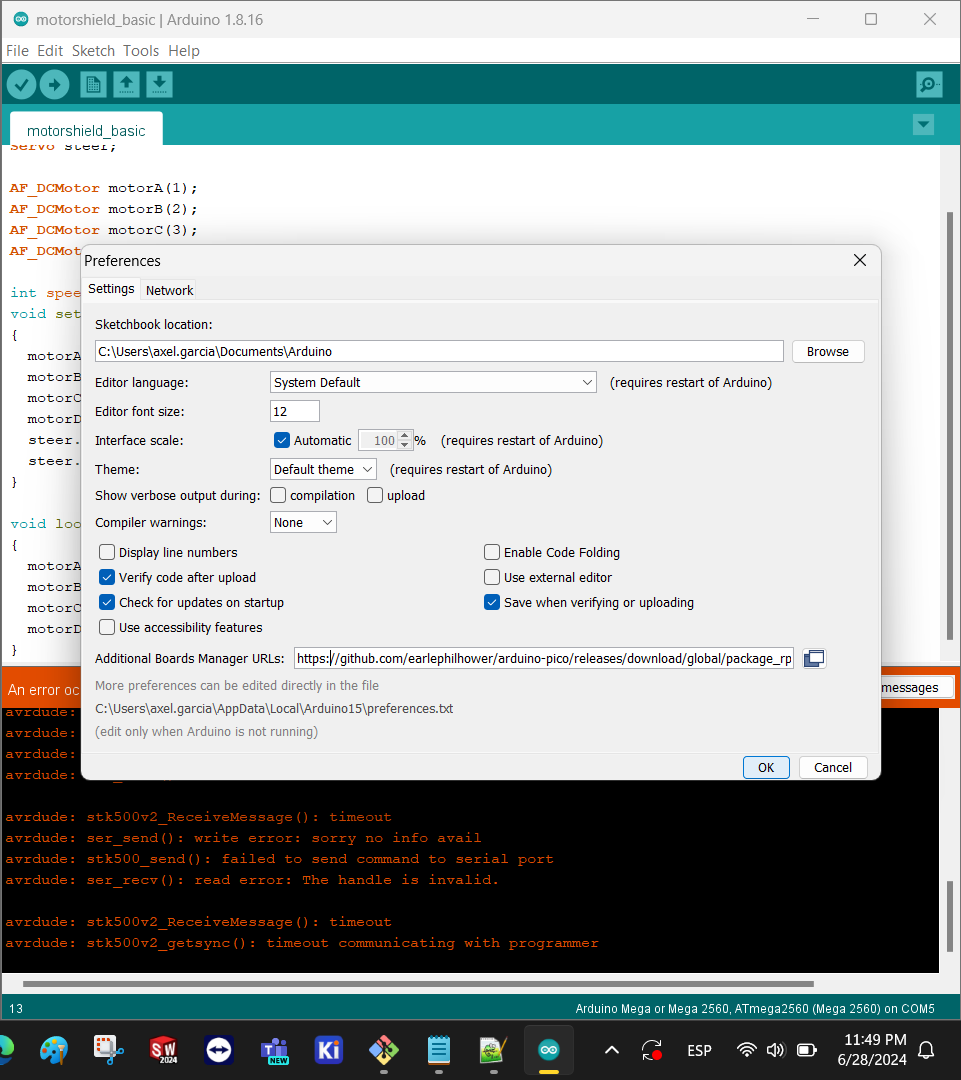
Install the board manager by going to file/preferences/additional boards manager URL, and pasting the following address: https://github.com/earlephilhower/arduino-pico/releases/download/global/package_rp2040_index.json
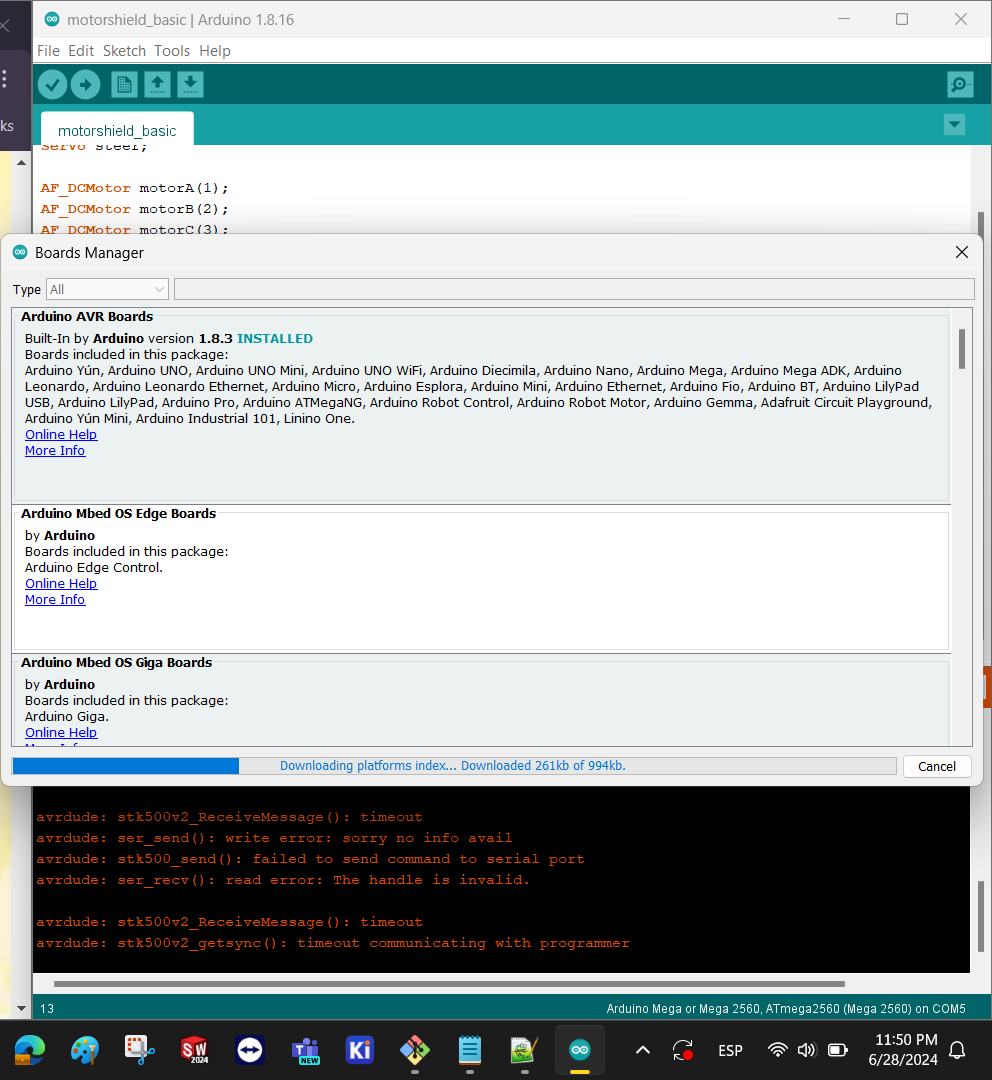
The download will begin, and a progress bar will be displayed.
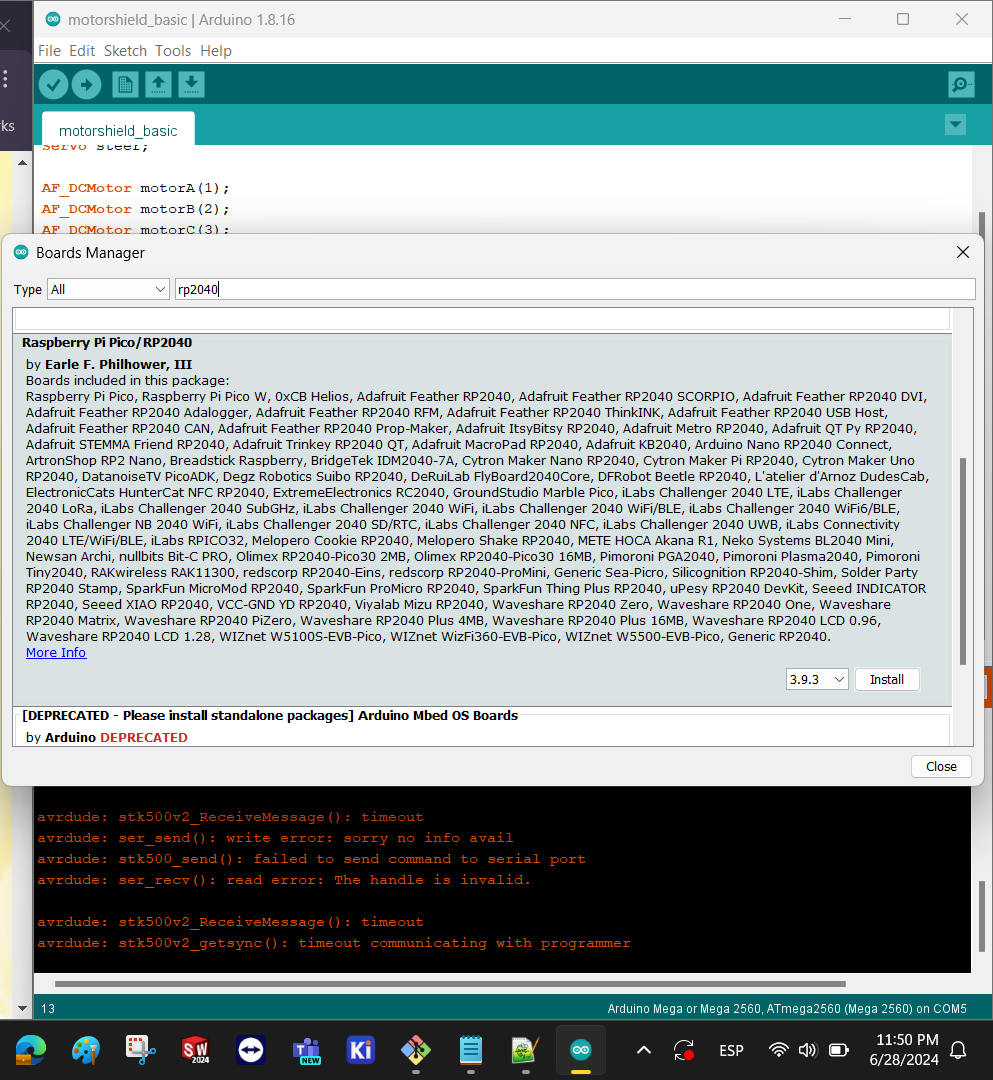
Make sure to download the board package by going to tools/board/board manager and search “rp2040”, select the option shown in the image below
After connecting the board, make sure that the Arduino IDE reads the board by going to tools/port and reading the assigned COM port.
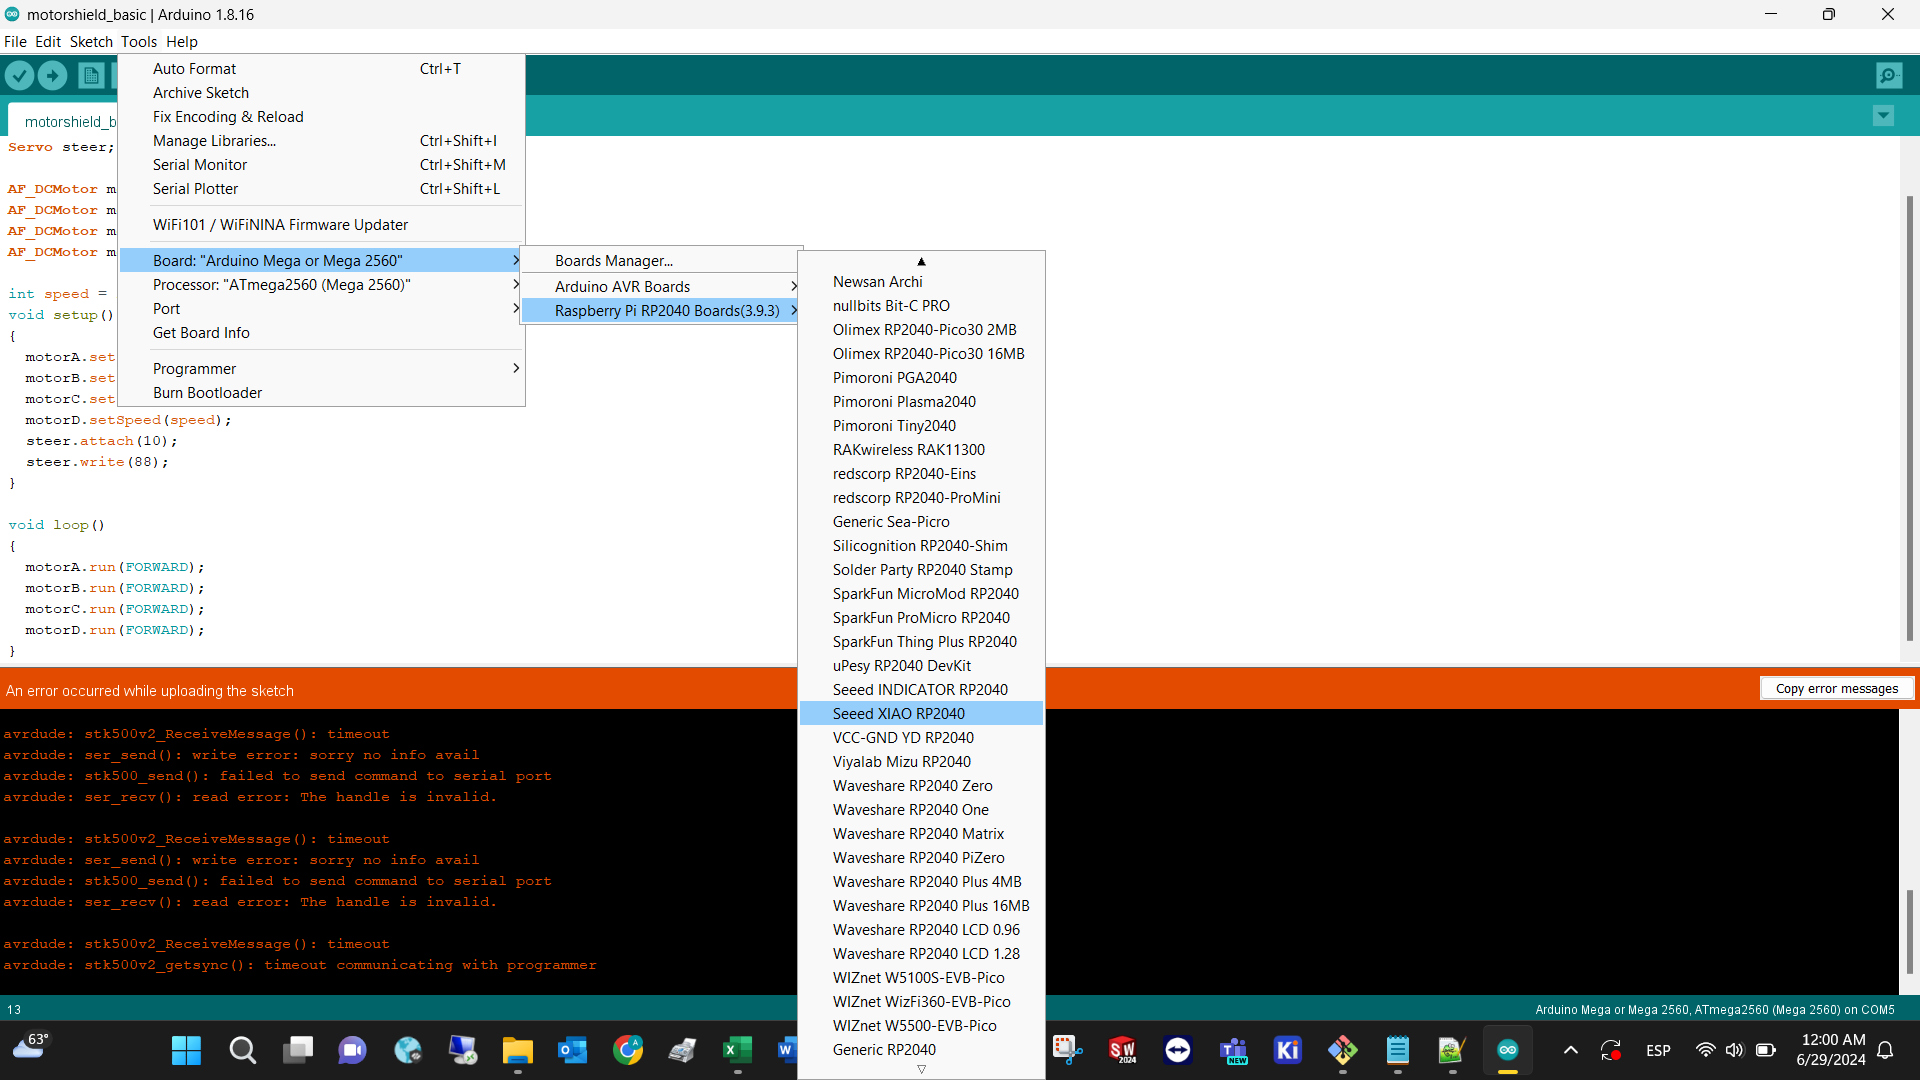
To select the proper XIAO board, go to tools/board/raspberry pi rp2040/ seeed xiao rp2040
VALIDATION
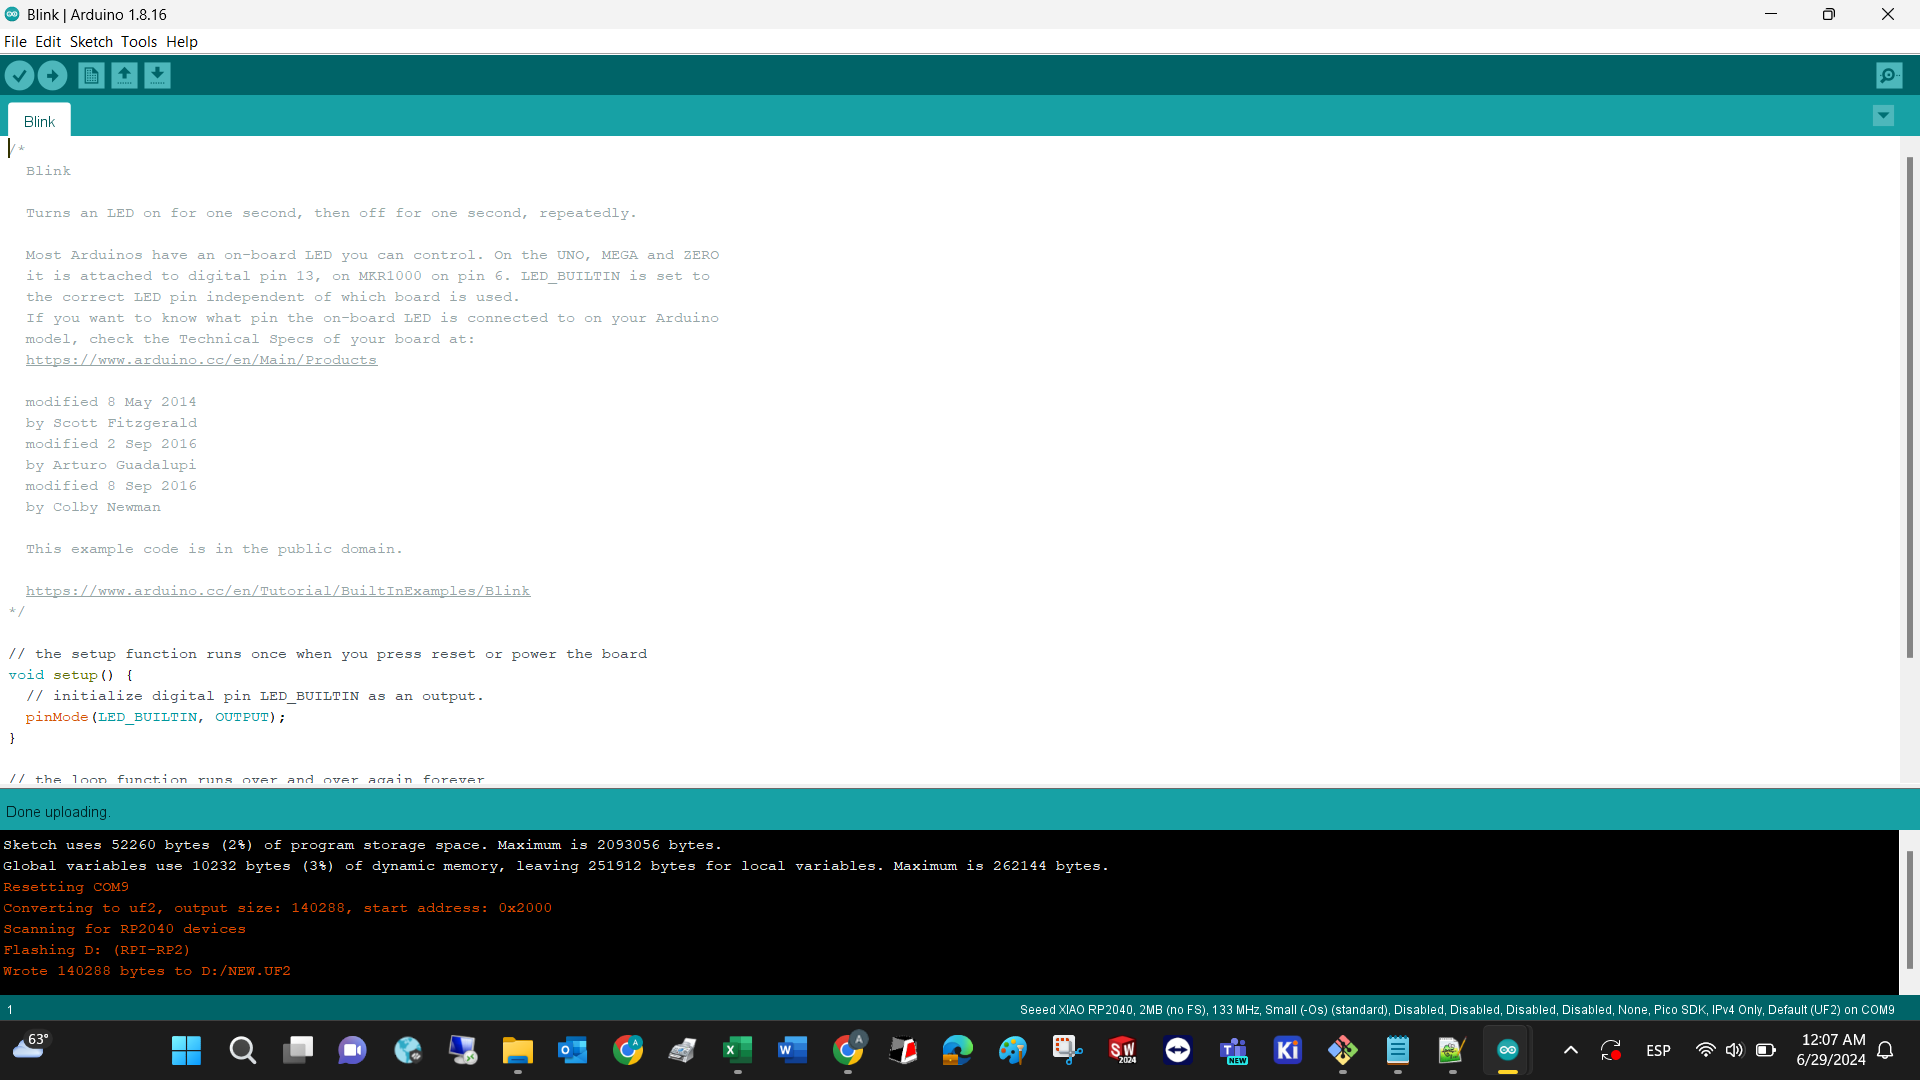
Upload the Arduino blink example and upload it. This is how it should look.
CODING
Below you will find the source code and every line explaining what it does.
Result
In the background you can see how the push buttons logical status is reflected, and how the embedded LED blinks whenever the button is pushed.