7. Computer-controlled Machining
On this week I learned to use a CNC router making a desing for it and using the VCarve software. This week was kinda similar to the 3rd week, but using bigger things. For this week I used a 15 milimeters sheet of mdf and the router made by my University. To know more things about the router characteristics, the materials that can be cut, the security protocols or the way to prepare your pieces, you can click here.
What to cut?
To be honest, I took a long time for chosing what I was gooing to cut, but after watching some ideas on Google, I decided to cut something simple but useful, a table for a foreign friend's house (he needs furniture). These are the pieces I created for this week:
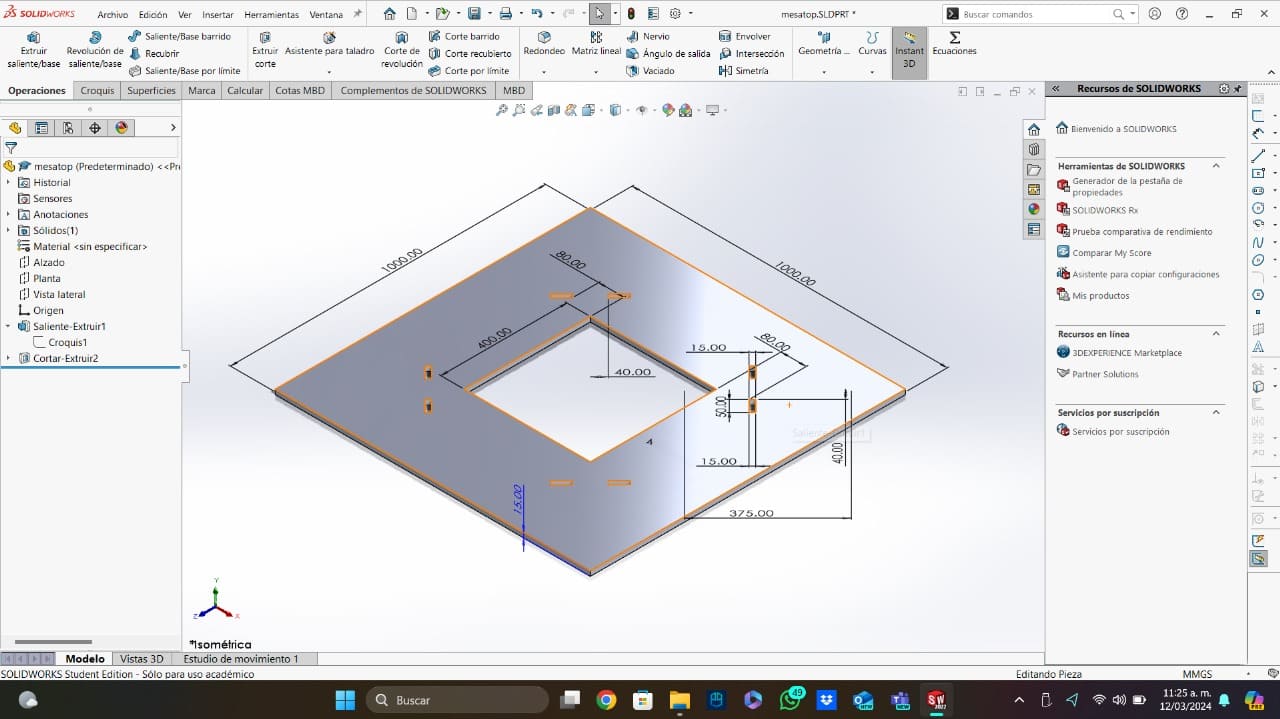
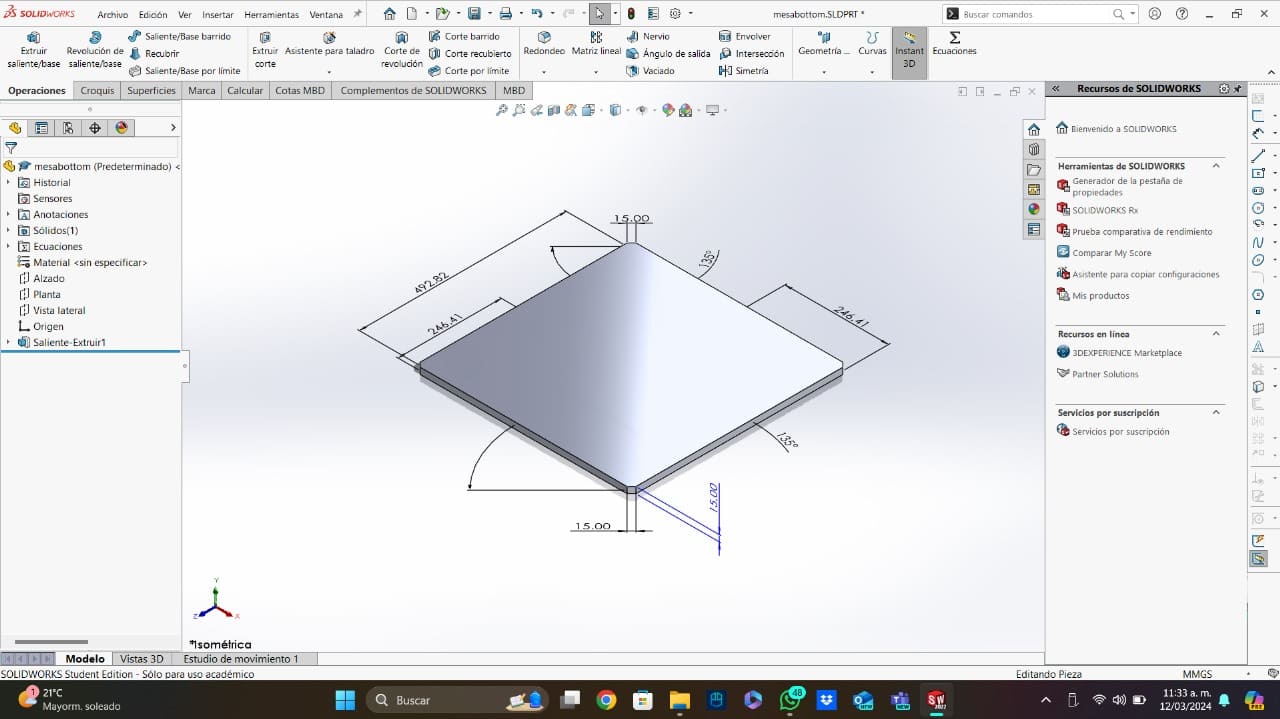
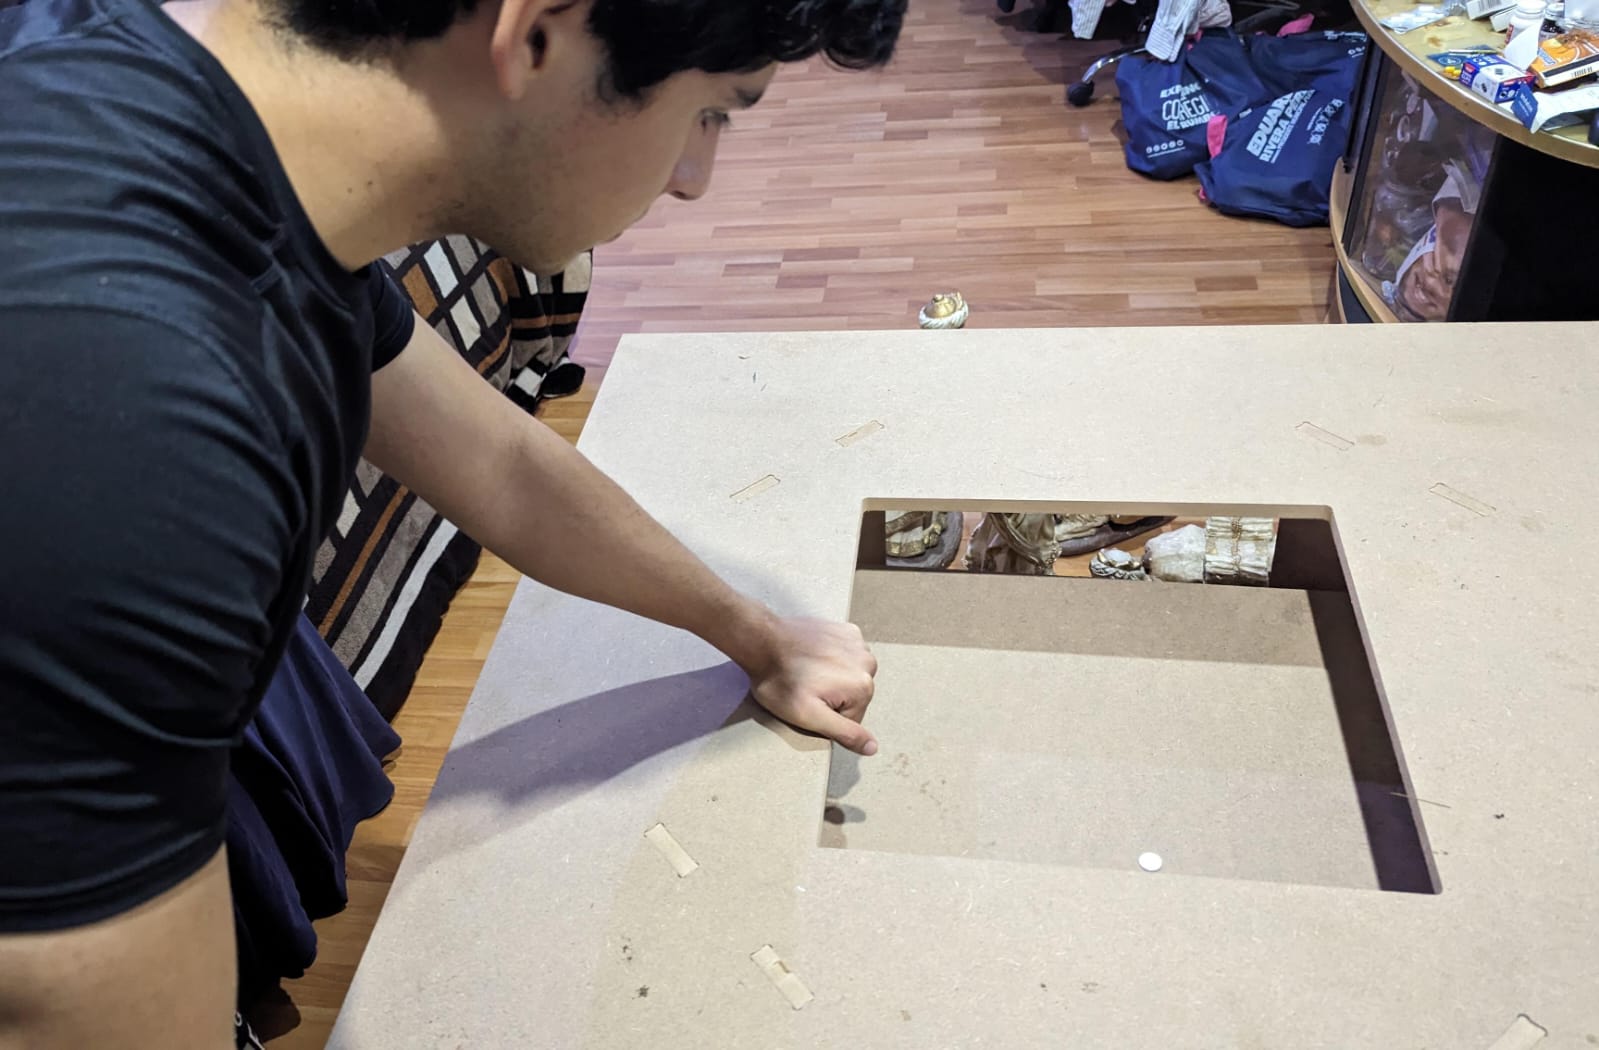
- Table Top: The first thing I created was the the top part of the table (the part where you put the dishes on). The dimensions I used for this piece are on the image. The most important consideration to take about these designs is the mdf thickness (15 milimeters), because this will be an unchangeable dimension that will be requiered whenever the MDF fits somewhere. On this piece, I used this unchangeable dimension in the 8 rectangular holes that are around the middle square.
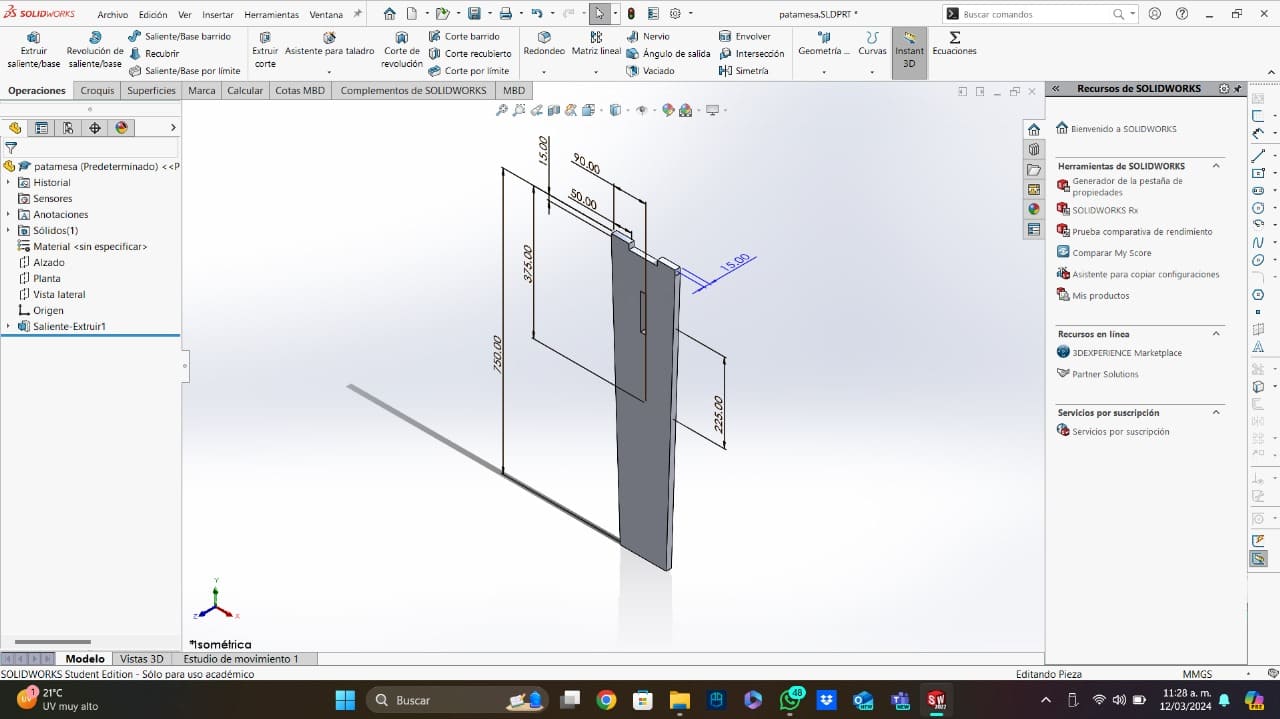
- Table Leg: The second piece I created was the table leg (I used the same design 4 times). Like the piece above, the dimensions used for the piece are on the image. The most important dimensions here, are the dimensions used for tabs that are at the top of the piece. These two tabs need to have the same dimensions of the holes created on the table top and must have a height of 15 milimeters. Another important dimension is the one used for the rectangular hole at the middle of the piece, this hole measures 100mmx15mm.
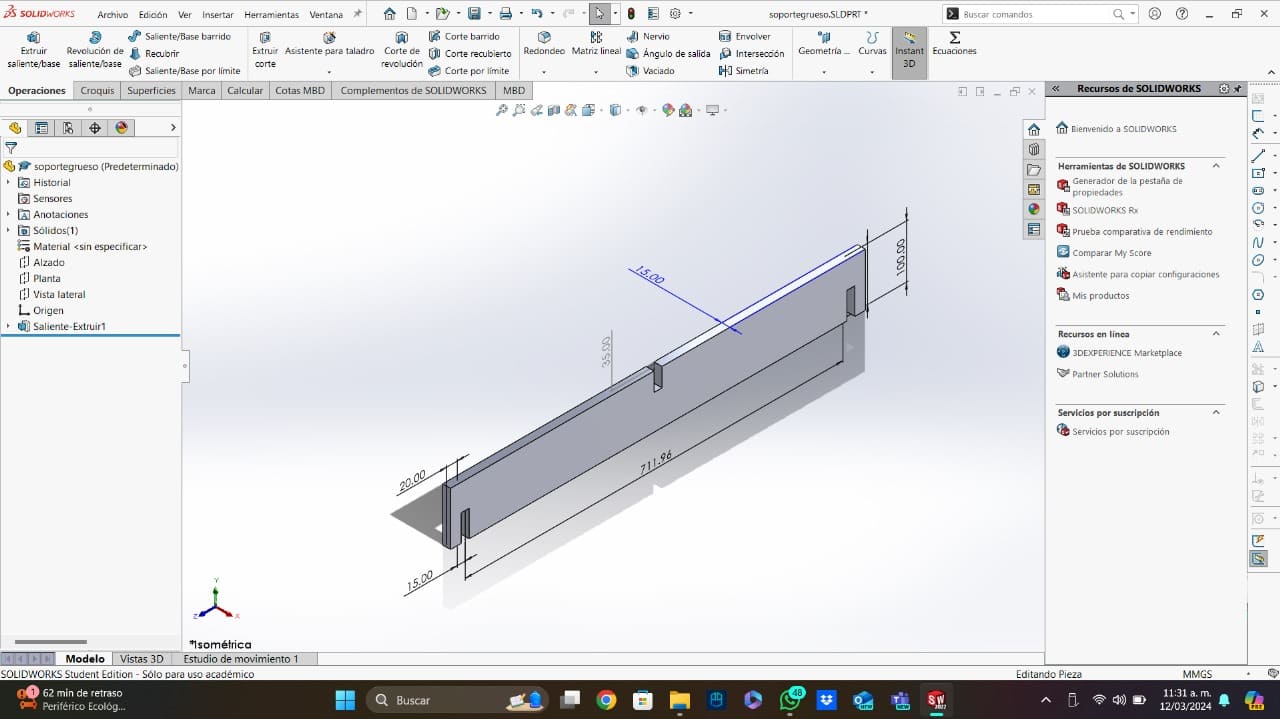
- Table Big Union: To make the table more stable, and to have something to support the center, I created 2 unions, one higher than the other (in order to have a flat top). The dimensions used fot the big union, are the ones from the image below, highlighting the 15 milimeters width of the slots in which the mdf will fit in and the 711.96 dimension needed to fit with the table top.
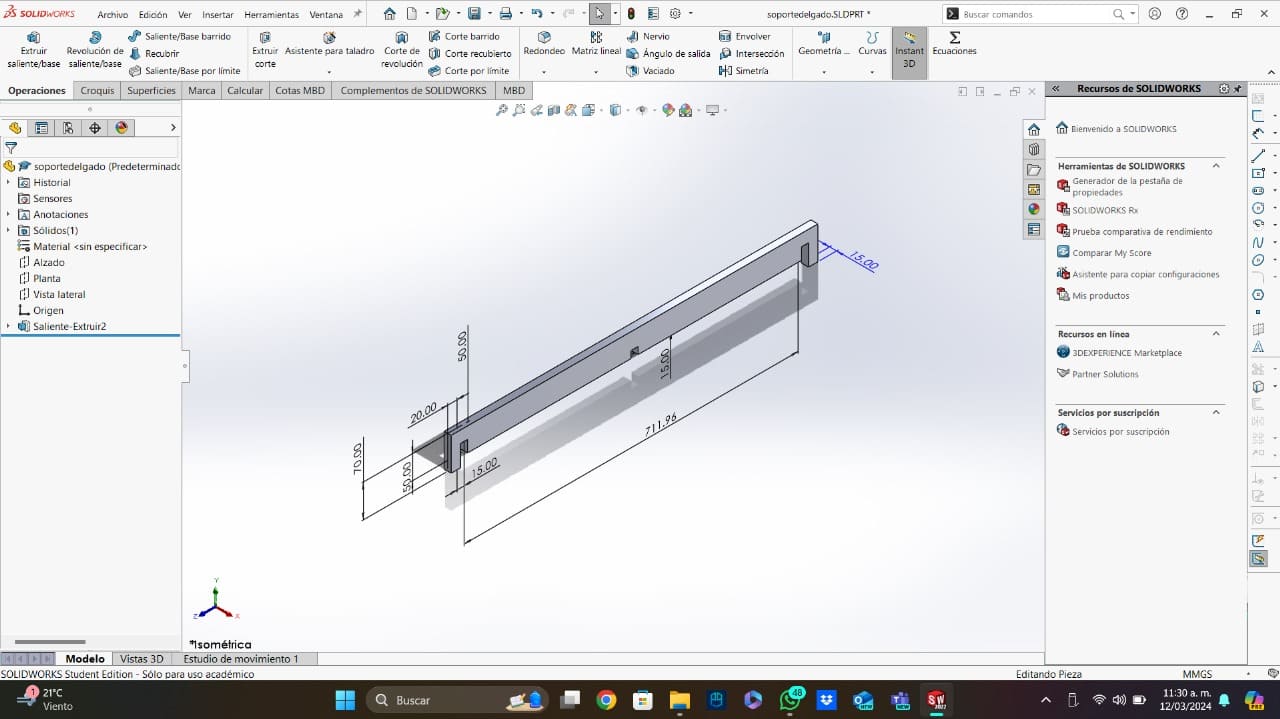
- Table Short Union: The other union used for this table, is the one explained here. The dimensions used fot this other union (that will fit in the big one), are the ones shown on the image below. I will also highlight the slots dimensions and the 711.96 dimension.
- Table Centerpiece: Finally, I created an square with a chamfer on the corners to put it on the top of the unions, to use it as a center piece. This piece is the simpler one and doesn't have slots or tabs. The dimensions used, are the next ones:
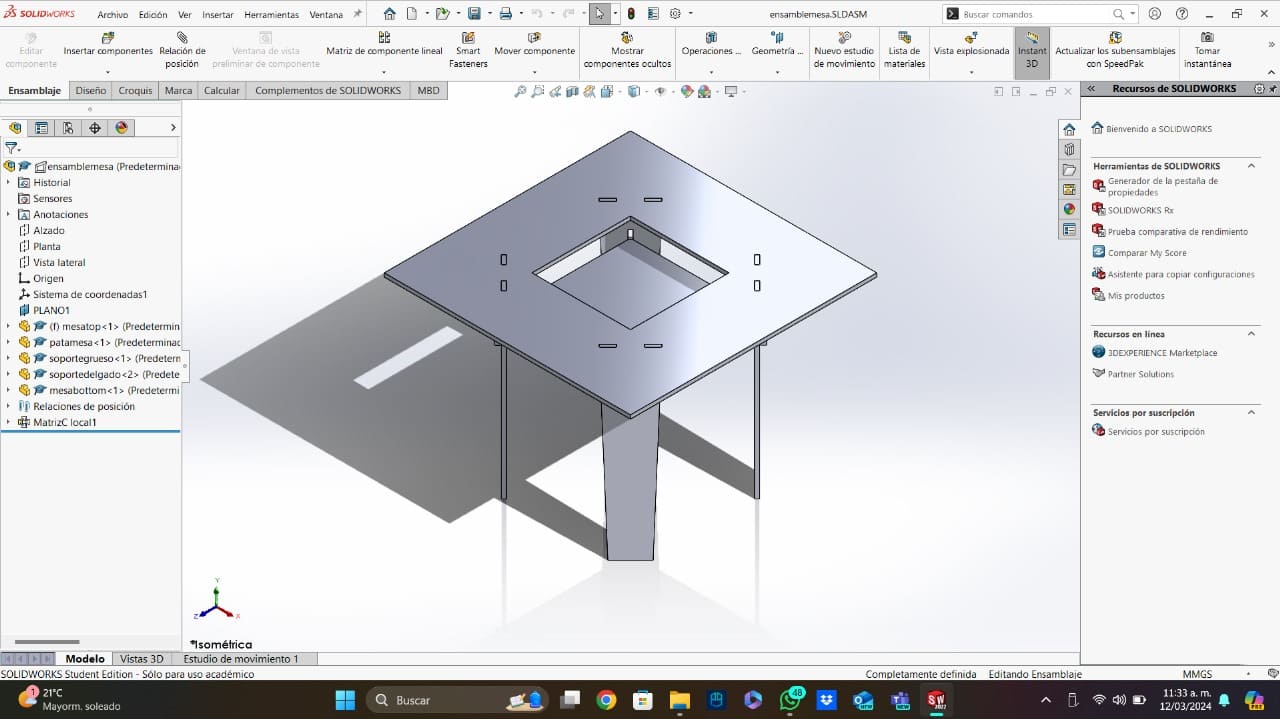
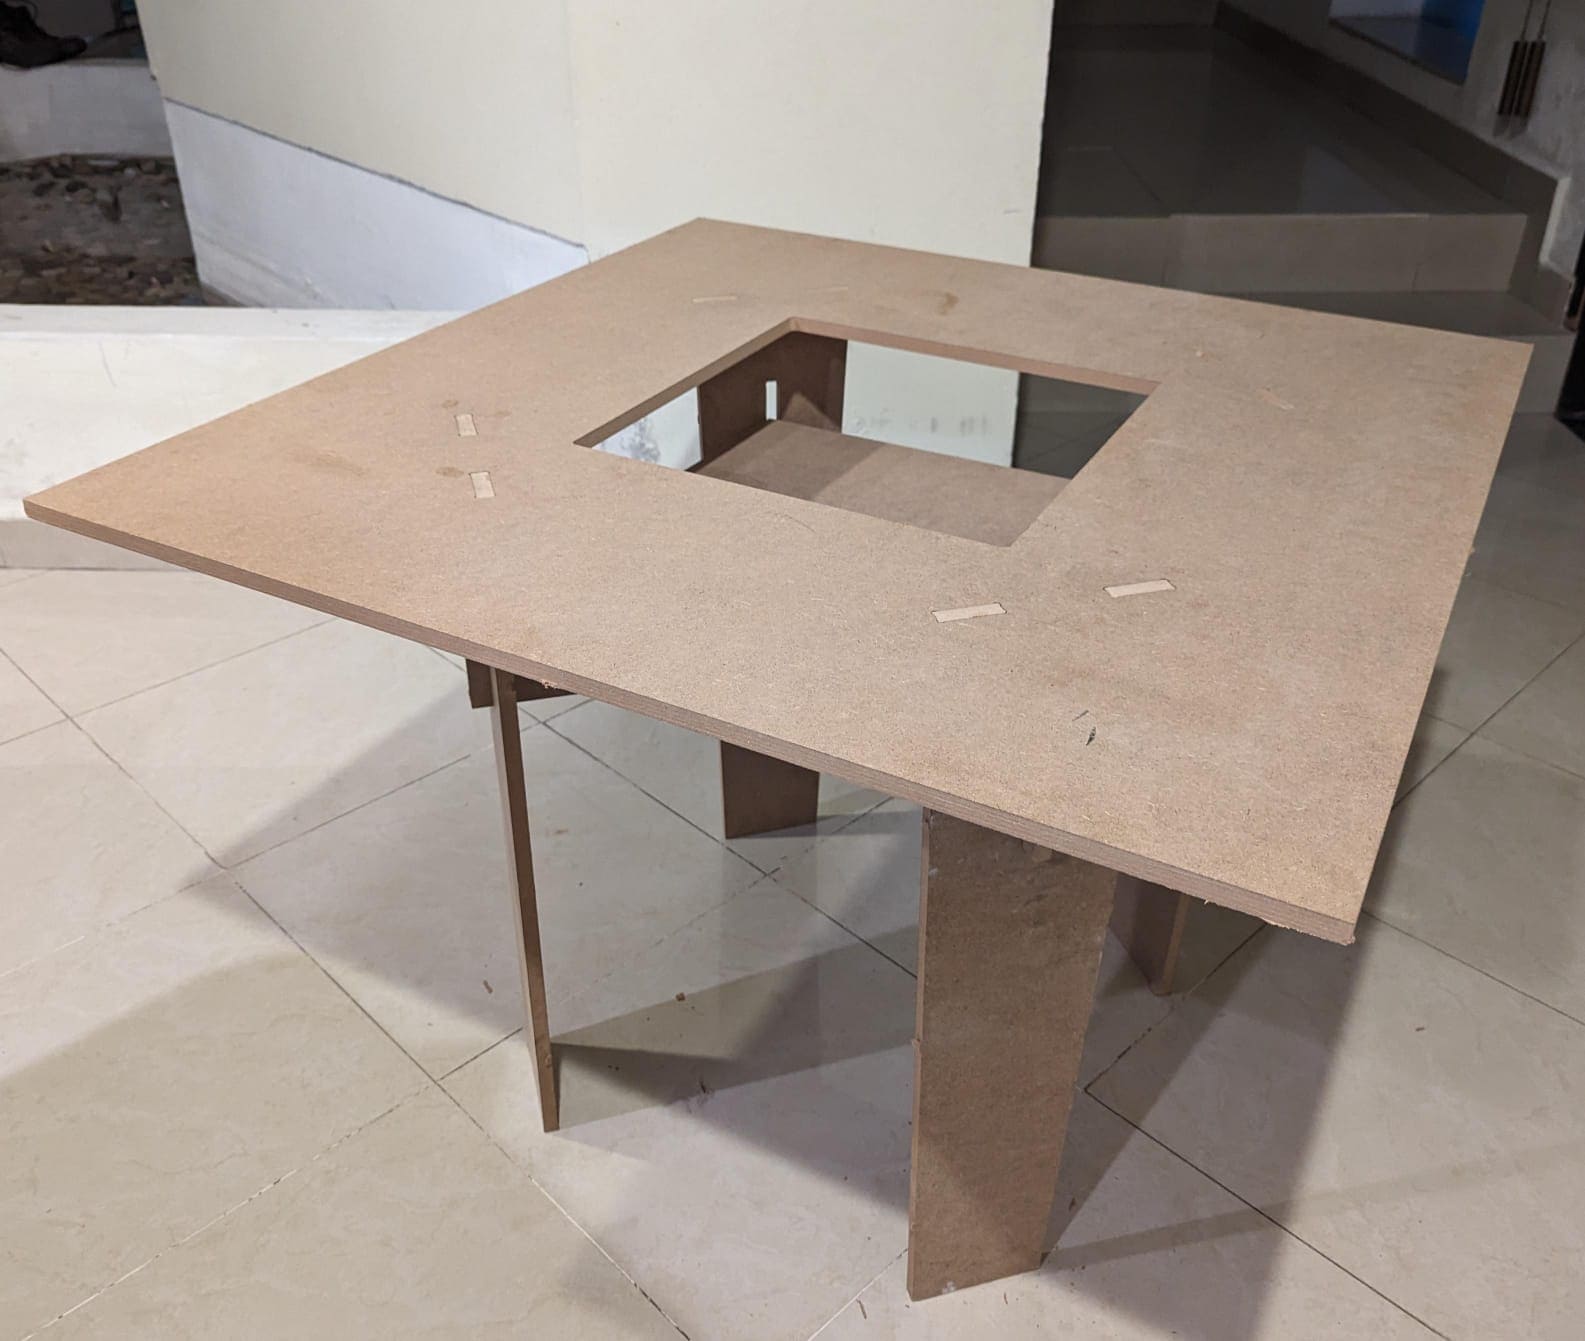
Now that I have created all the pieces, it is time to assembly all the pieces to look if everything fits the way it is supposed. In my case, I created my assembly at the same time I was designing my parts to check dimensions. This is a picture of the assembly:
Creating the cut program
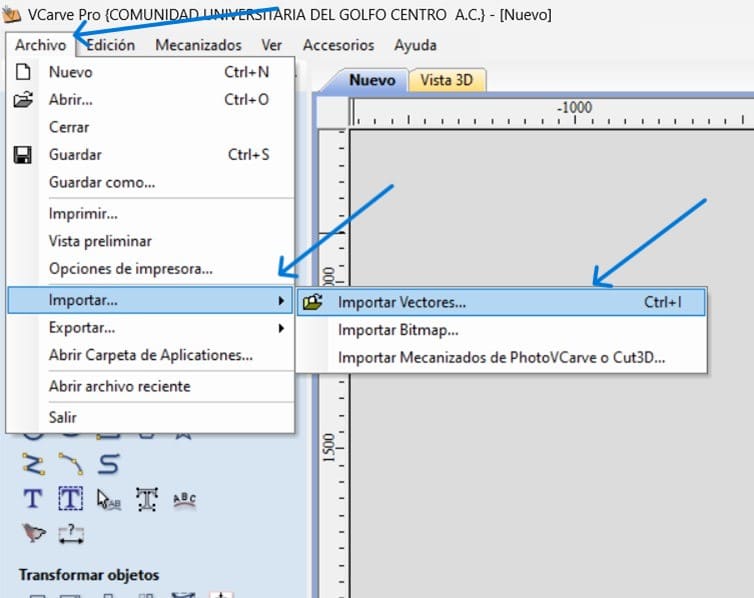
Once I had all my pieces, it was time to export the profiles to be cut to DXF, the file format that I will be using on VCarve, this software needs a license, but you can download a free trial here:
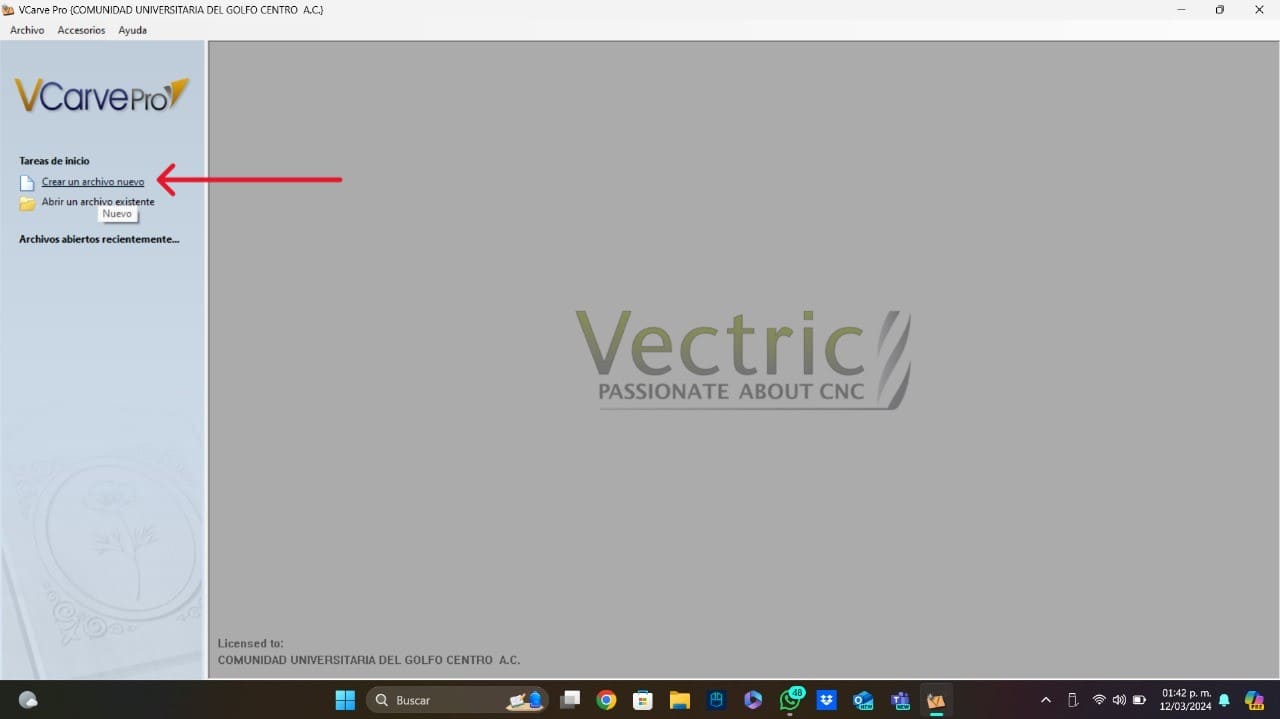
- VCarve: Once you open the software, you will see an empty main page, to start creating your program, you should click on "Crear un archivo nuevo" (the red arrow).
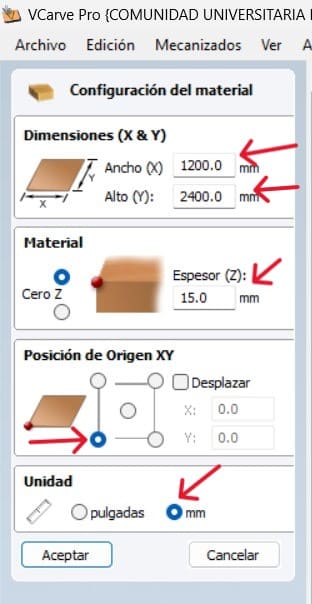
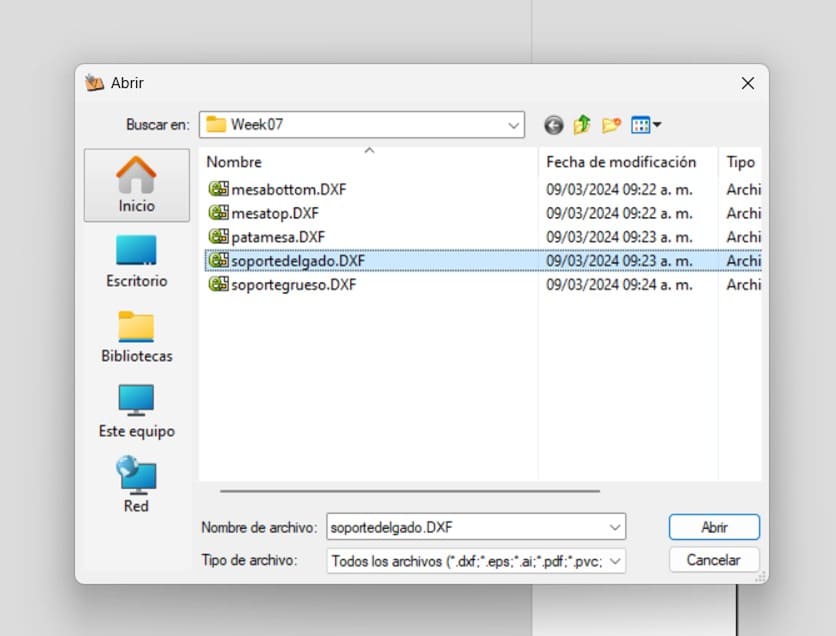
- Before The Pieces: Before starting to use the cutting options, I set the mdf dimensions, I set the tool origin and the unities(red arrows), and then I imported my dxf files of my pieces (blue arrows). Unfortunately, VCarve can't import all the pieces at the same time, so I imported every file one by one.
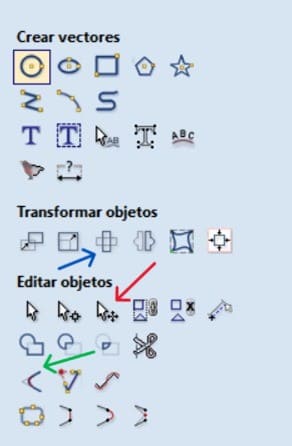
- Some Tools: On the left part of the software, we have the most important tools that we will be using during this part. The one with the red arrow, is for moving your vectors, the one with the blue arrows is for rotating your vectors and the green one is for filleting the corners. The last tool mentioned is going to be explained below.
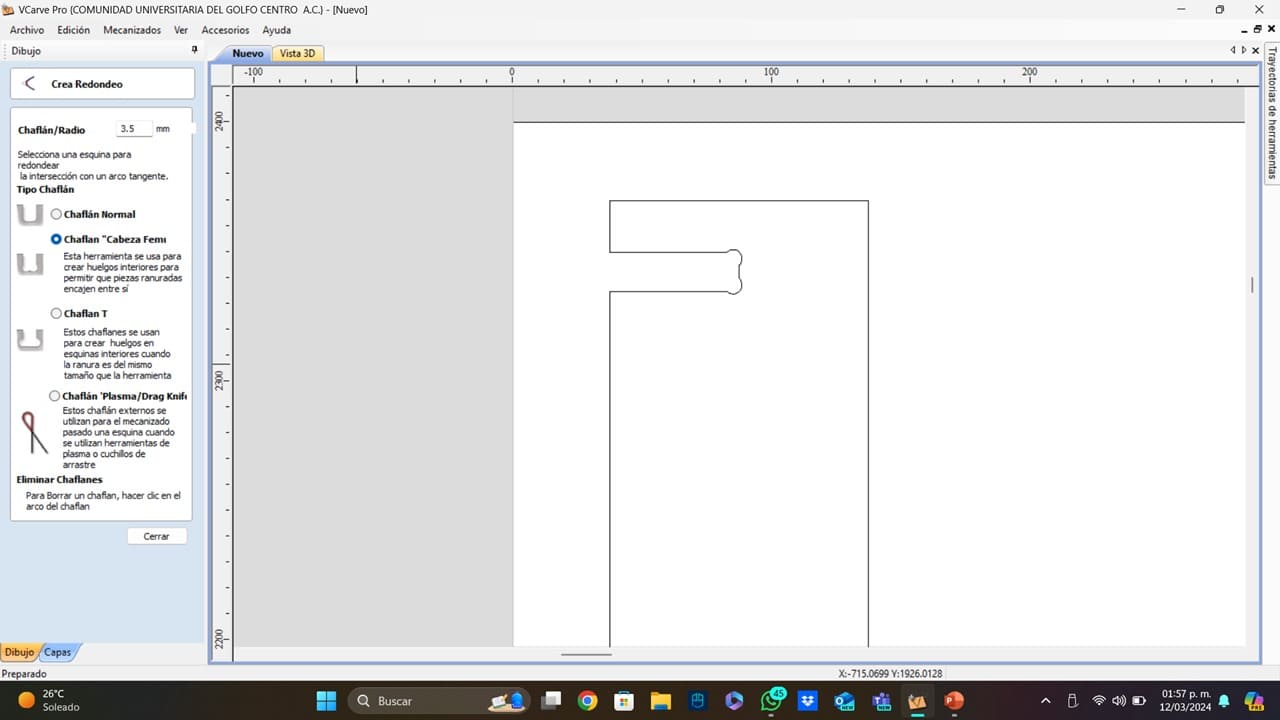
- Filleting: This is one of the most important tools, because the cilindrical form of the cutting tool makes impossible to cut inside straight corners. This tool is useful because the outside borders are straight and thanks to this, the corners wouldn't fit in. This tool will fillet the inside corners to make them functional for the fitting pieces.
- Cutting Operations: Now that we have the vectors ready to cut, it is time to select the operations needed to cut our pieces. The most used operations are the ones with an arrow. The operations panel is the one on the right part of the screen. The left one is "Profiling" (used for a complete cut) and the right one is "Pocketing" (used for cuts with a depth different from that of the material).
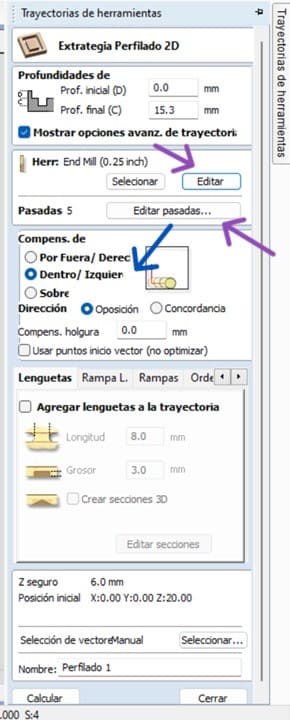
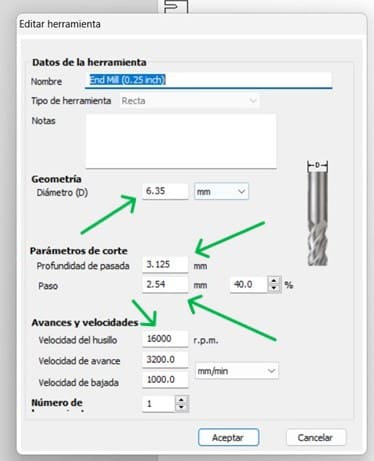
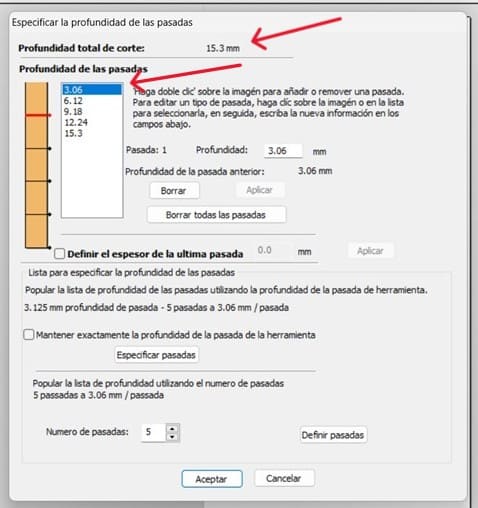
- Tool, Trajectory and Depth: After selecting the operations needed to complete our cut, it is time to set the tool parameters and the cut depth. In my case, I used a quarter of an inch milling tool with 4 flutes, so I set those parameters and the RPMs that the tool uses. Now that the milling tool is ready, I set the depth of the passes and the number of them. These settings can be found on the group website or on internet. Finally, it is important to set if the tool is going to pass inside or outside your vector (this will depend on your piece and you can select more than one vector at the same time).
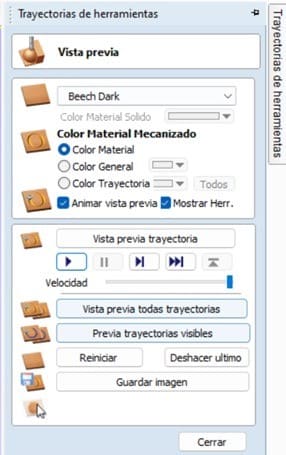
- Final Steps: Now that each operation has been created, it is time to preview the passes, simulate the program and save the file. After clicking on "Calculate" on the last operatio, you will have a window on the right part of the software where you can simulate the operations and see the milling tool passes. After checking the simulation, you can save your file using the right post processor (in my casae the "Mach2/3 Arcs"), a post processor is a tool that translates generic software instructions into specific directions a machine can understand and follow.


The Router CNC
After saving the VCarve program, it was time to use the CNC router, but using this machine needs some special equipment and warnings just in case of an emergency. You can read the warnings and protocol on the group's website. Now, I am going to show the equipment requiered to use the router:
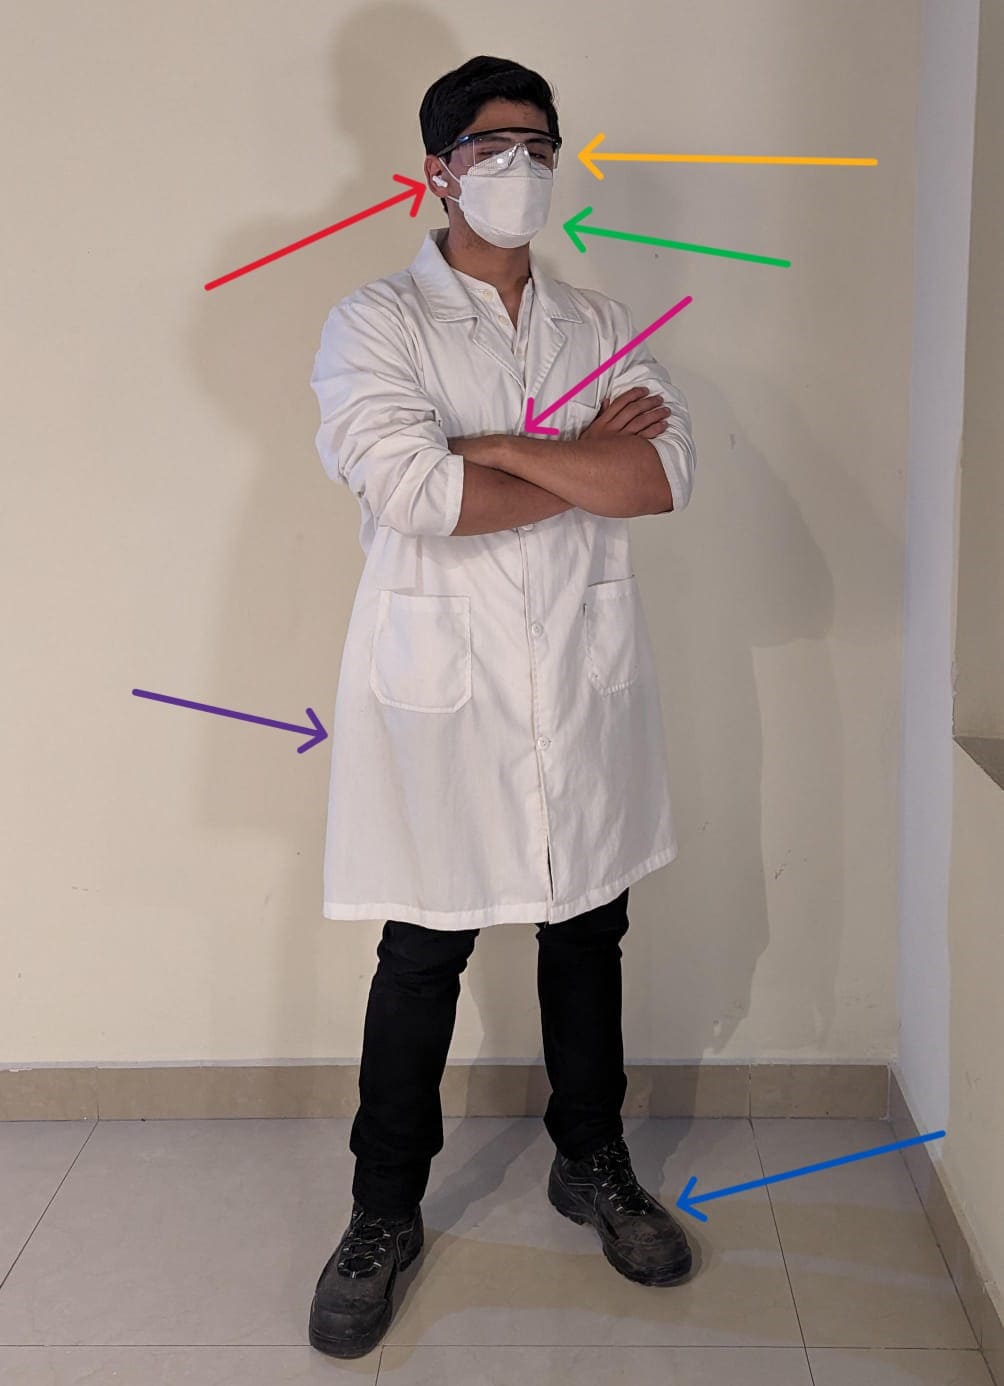
- Safety Glasses: Protect the eyes from flying debris and dust particles generated during the cutting process.
- Noise Protection Headset: Protect the ears from the high decibel levels produced by the router.
- 100% Cotton Lab Coat: Provides a layer of protection against dust and keeps the clothes clean.
- No Jewelry or Garments: Reduces the risk of entanglement with the machine, preventing accidents.
- Safety Boots: Protect the feet from heavy objects and sharp debris.
- Breathing Mask: Filters out harmful dust and chemical particles inhaled during the cutting process.
Now, that I am ready with the program and the equipment, it is time to use the router, something that was quite simple:
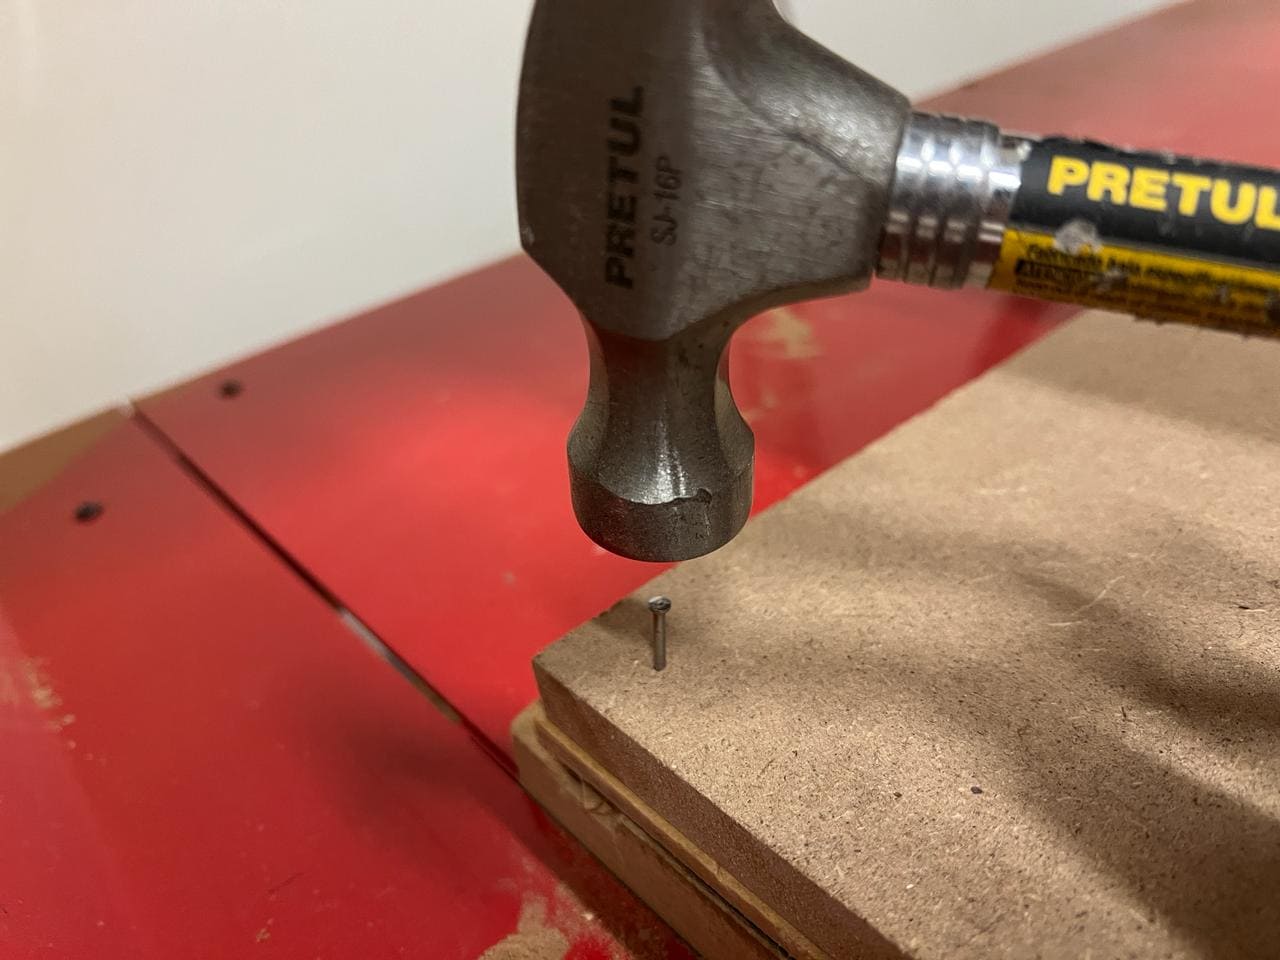
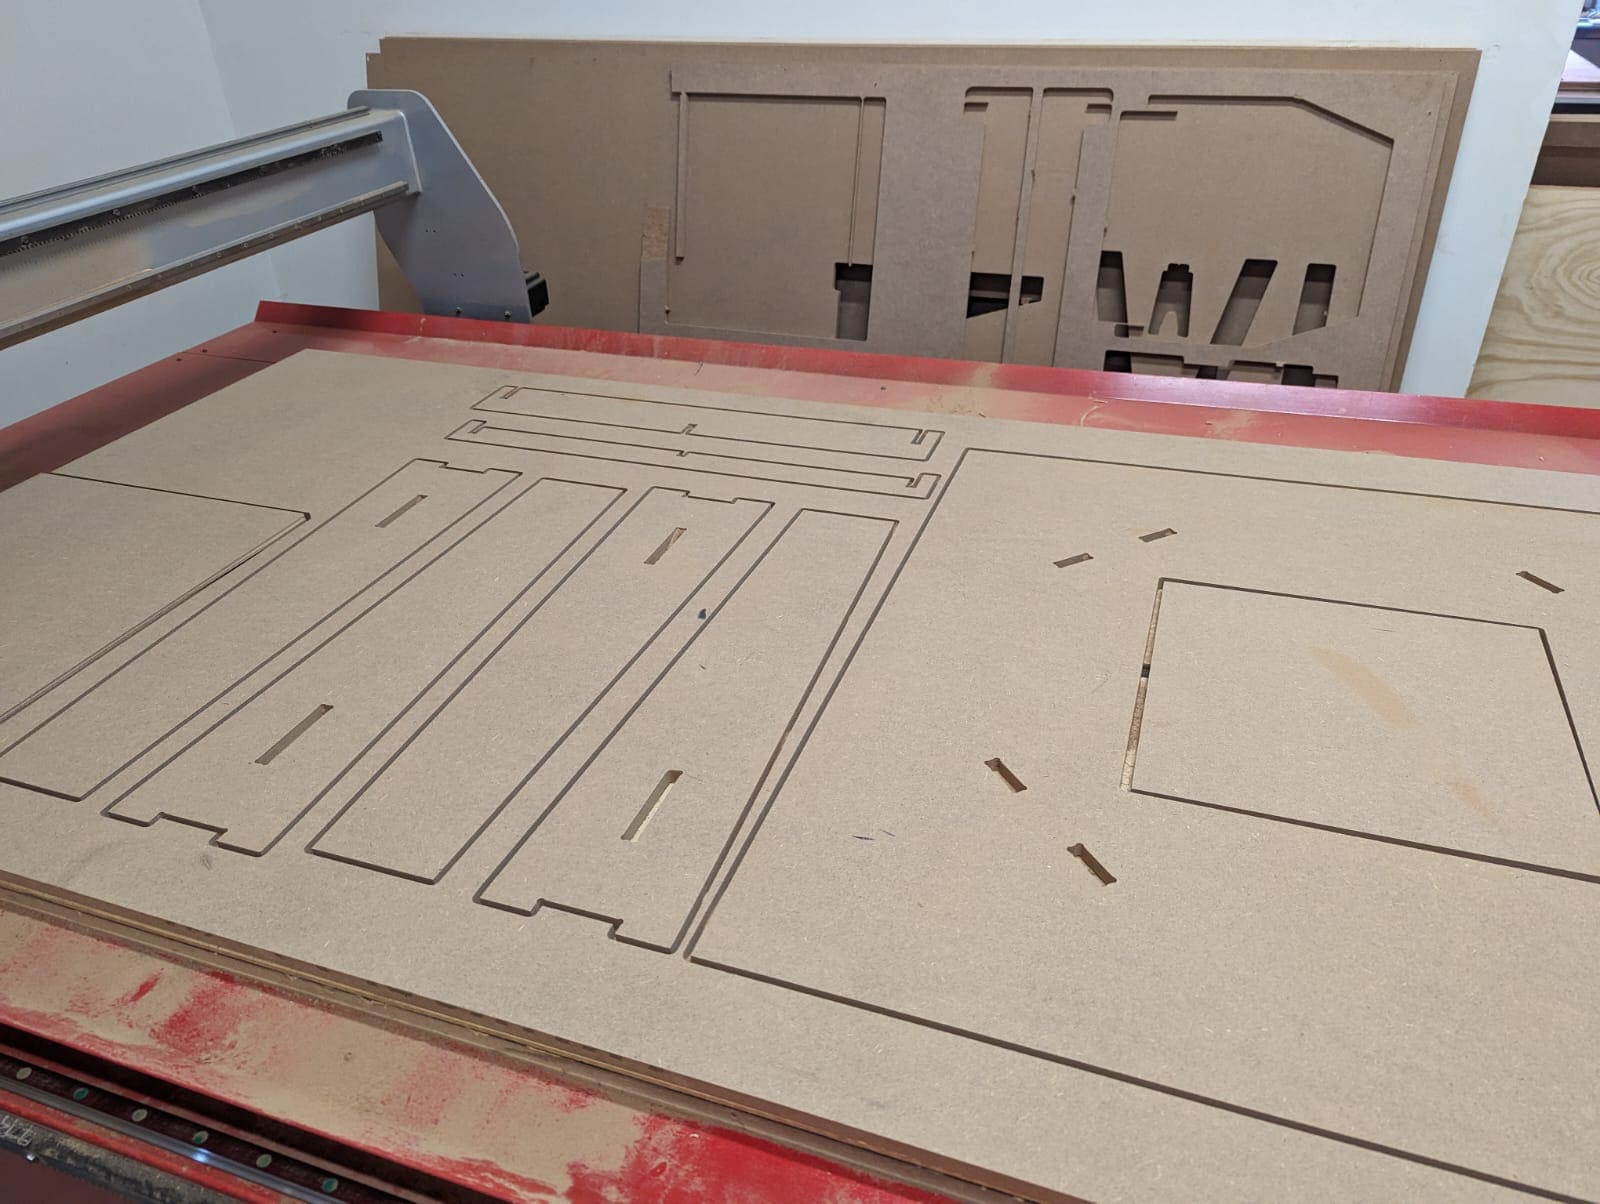
- Preparing The MDF: Before loading the operations program, I nailed the mdf sheet to the router's sacrificial bed. I tried to nail the mdf leaving as little edge as possible.
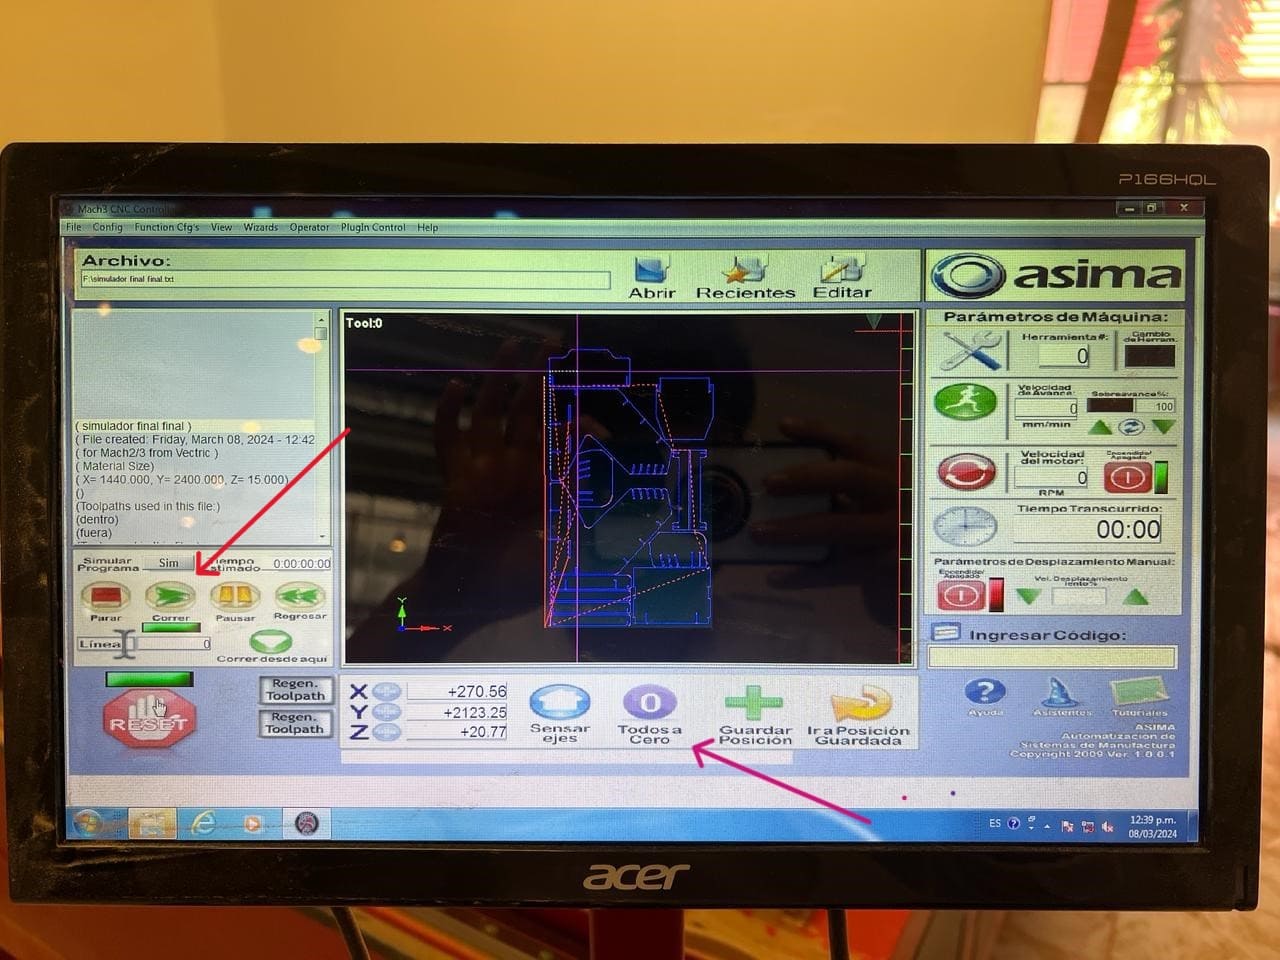
- Load The File: After connecting the USB with the program I created on VCarve, I got into the router PC to open the software (Mach 3), import my file, and set the origin (for this, you should click on the "plus" buttons on the left of each X, Y and Z). In my case, I set the origin on the left bottom corner of my sheet, leaving a border to avoid the nails that support the mdf. After checking the borders, it was time to run the program (red arrow).
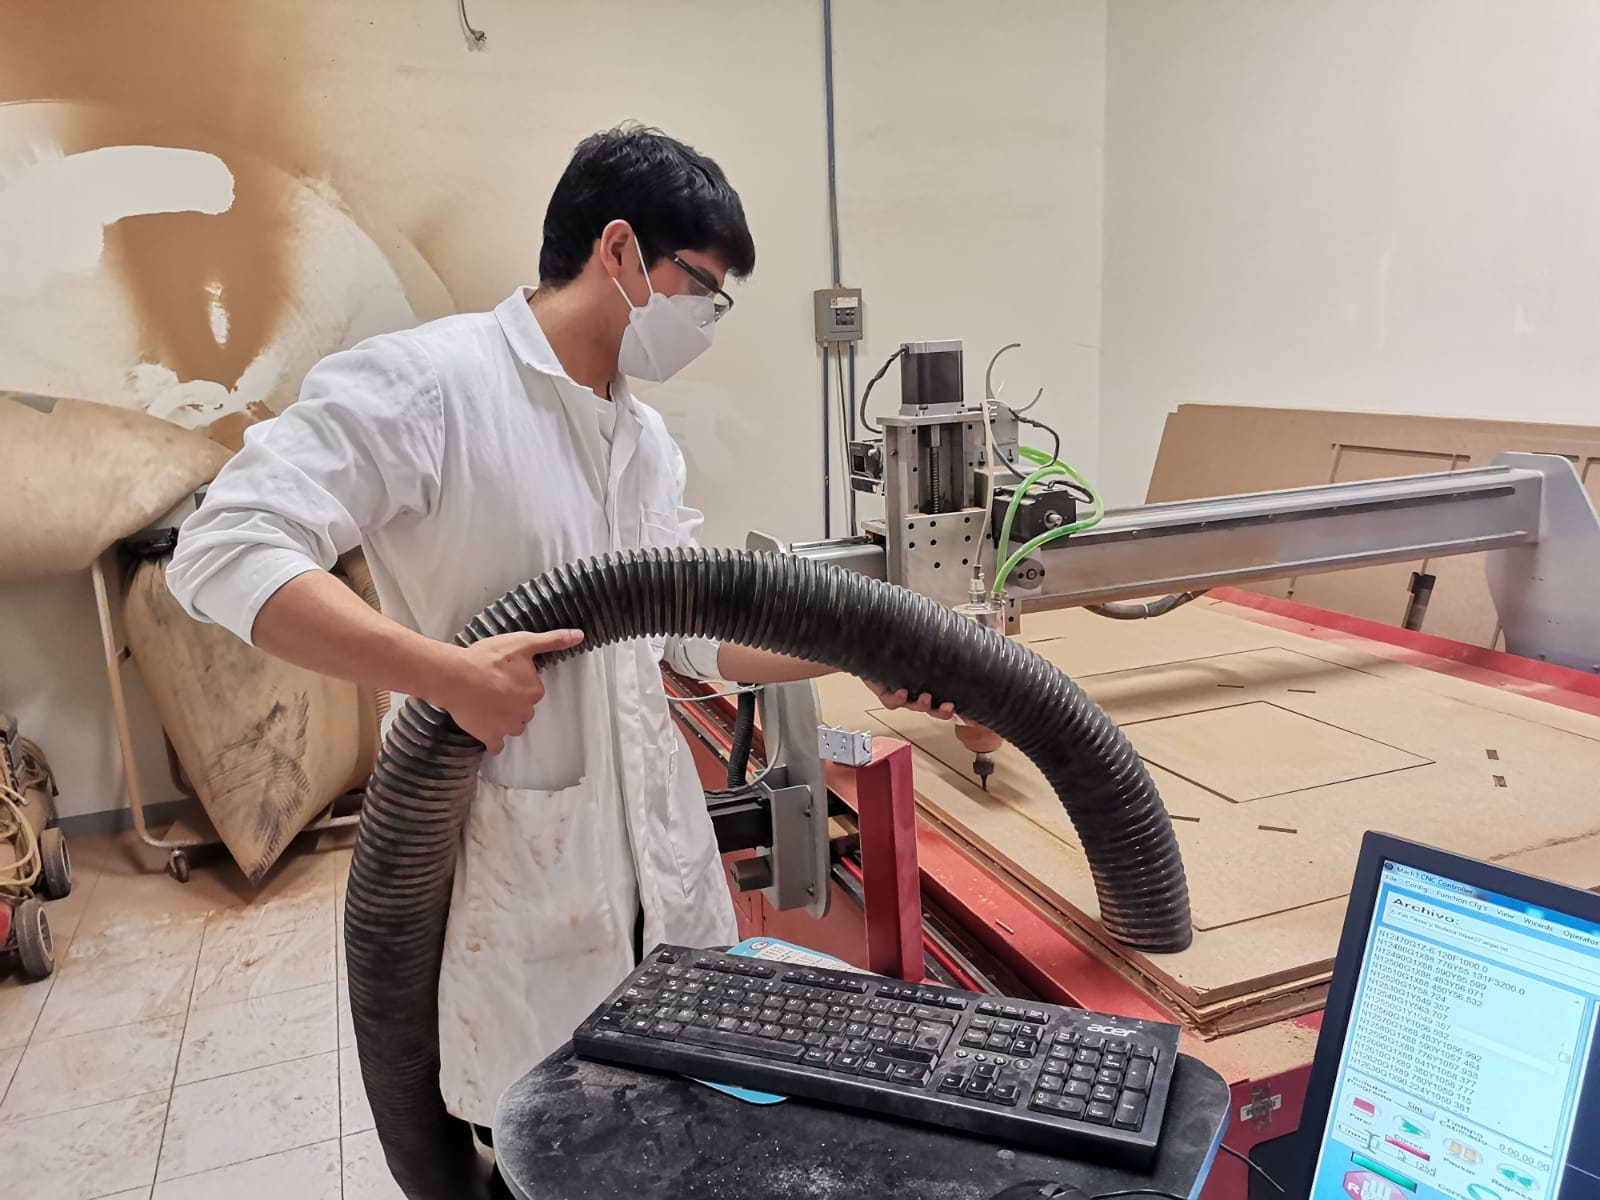
- Vacuum: Now that the program is running and to avoid excessive litter on the ground, I was vacuuming while the machine was cutting.
- The Pieces: Once the router finished cutting, I picked up my pieces and removed the excess material. With the cut pieces, it was time to assembly the table. It is important to mention that thanks to how the machine works, it is not necessary to add any type of tolerance to the cutting vectors.
The assembly process was not difficult, but I needed some help. I also used a Dremel to make an easier assembly. I think that using a little tolerance will make the assembly way easier and less tiring.
After a few days of assembly and sanding (to make an easier assembly), this is the final result of my table:
To download the files used for this week, you can click here.