7. Computer controlled machining
This week was a particulary insteresting because for the biggest part of my final project I will be using this machine. For this assignment I used a CNC router to make a coffee table. Most of the joints and structures designed for this table are the ones I will be using in my final project but in a bigger scale. I used our CNC Guide Ibero Puebla Fablab to learn a lot about unions and fixxes
PROCESS
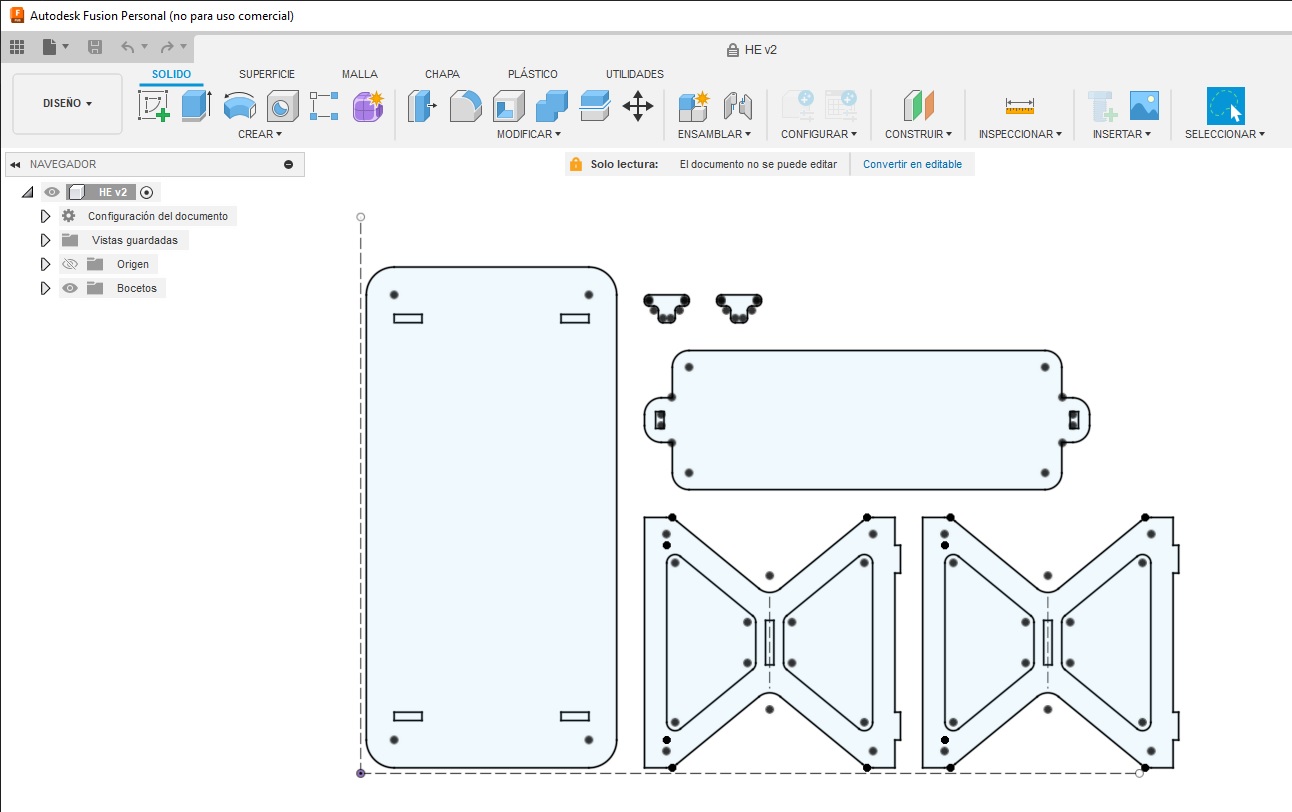
To start I made a sketch on Fusion 360, I got some advice from Beto, one of our instructors, to make it look cooler cause I made it too square in the begining. You can download the .dxf file by clicking here. This is what it looks like:
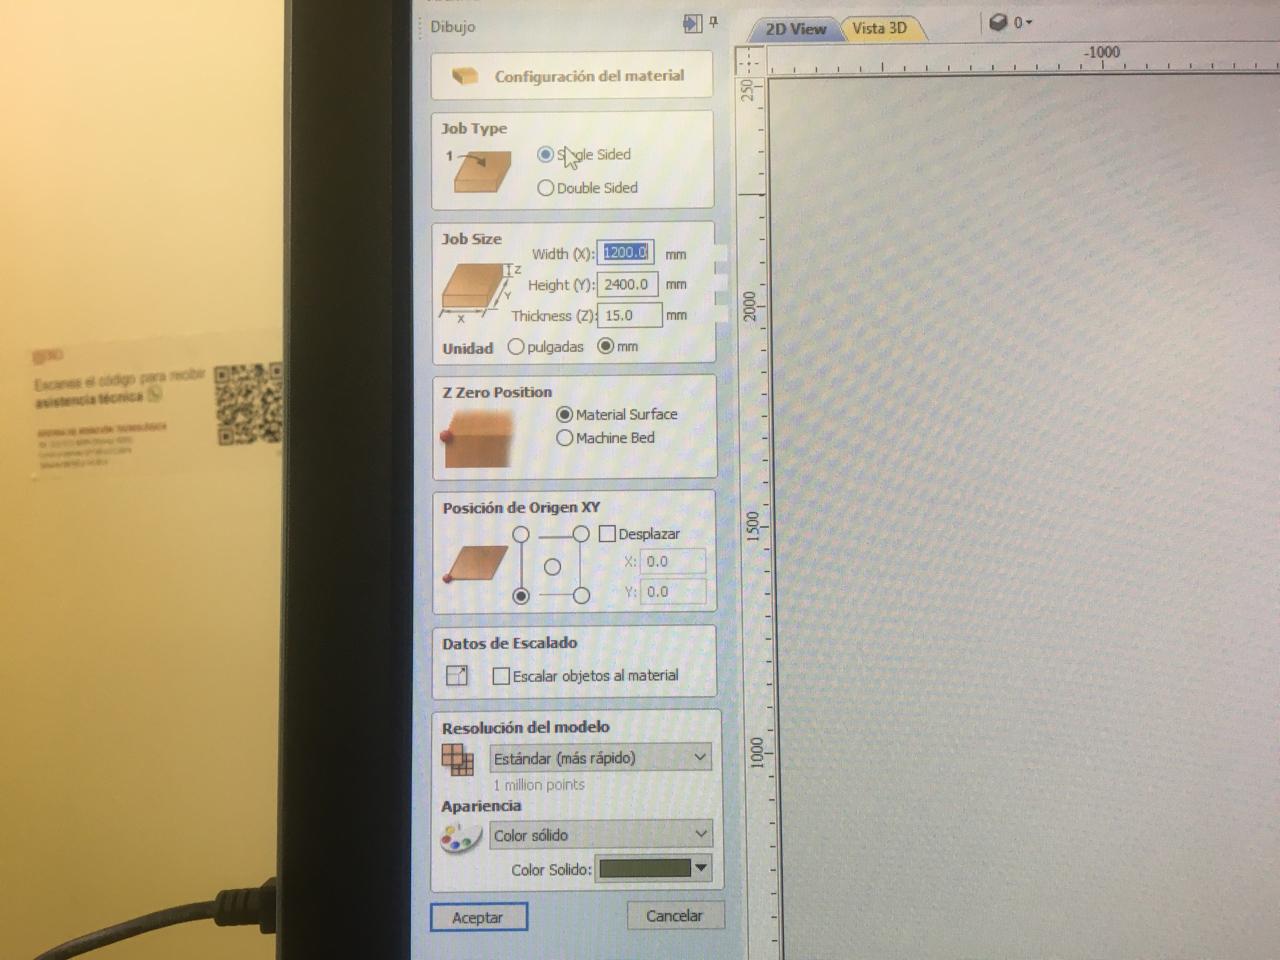
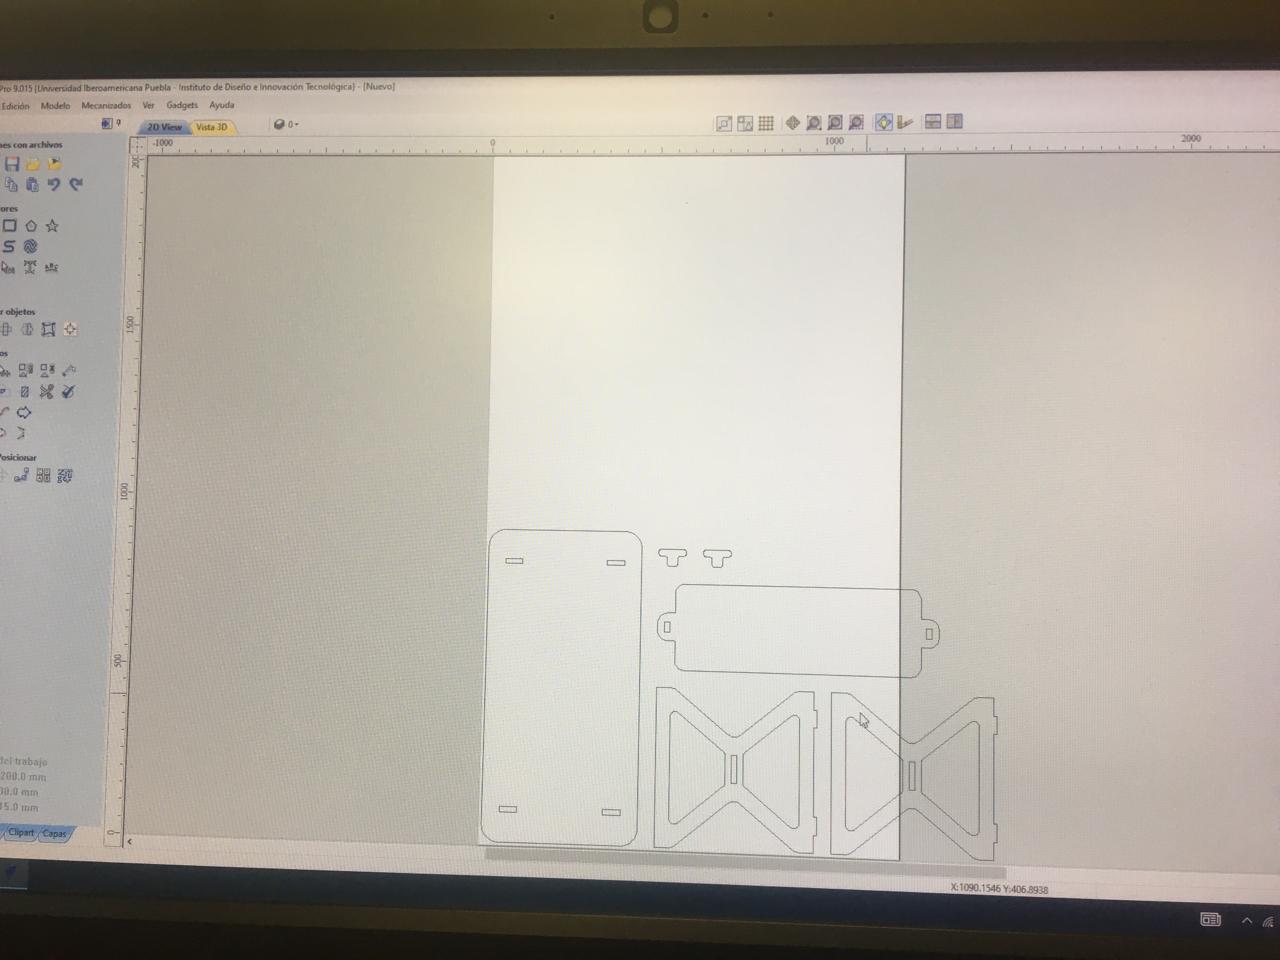
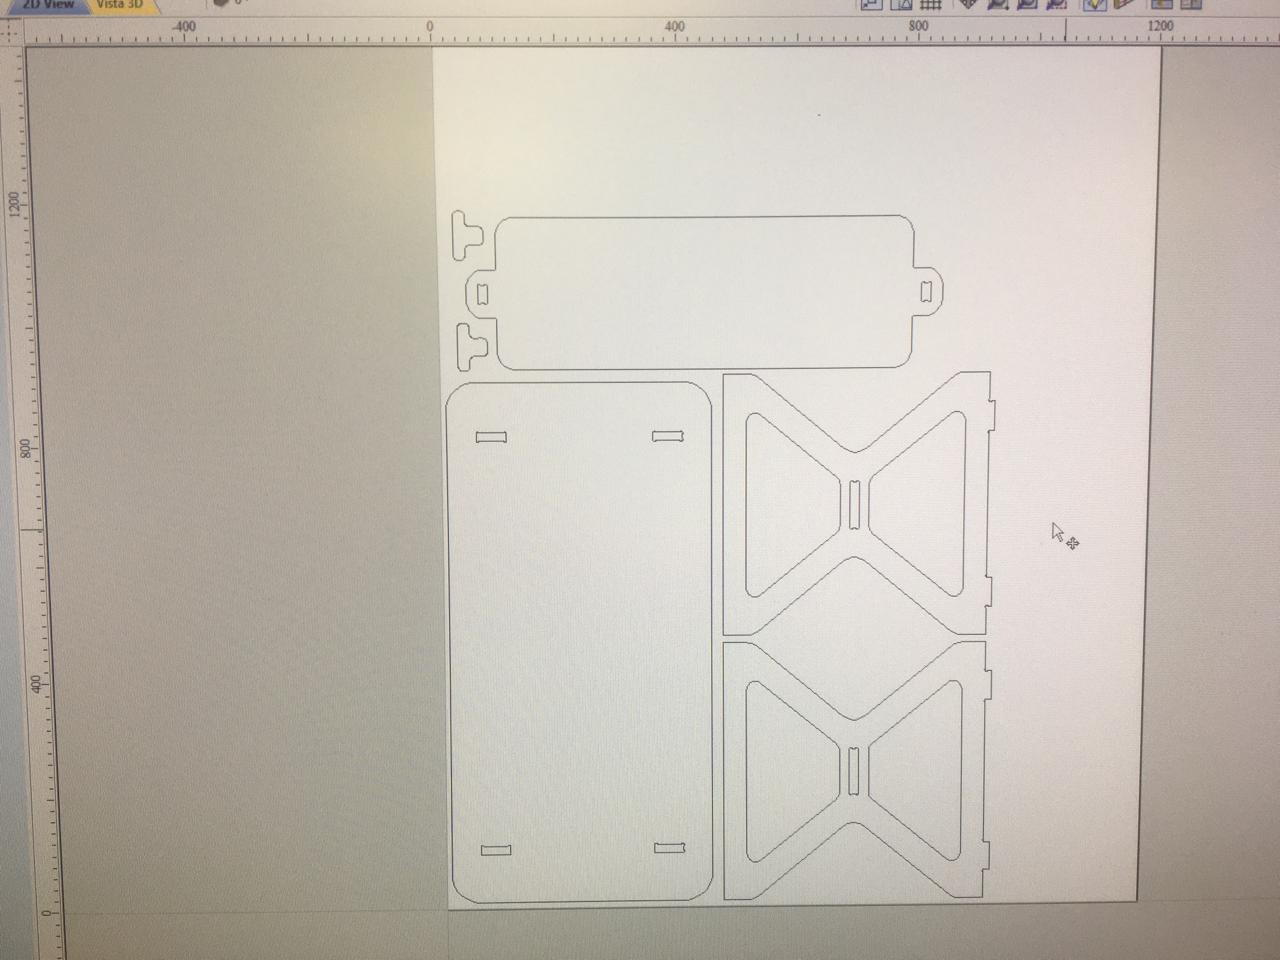
Afterwards I used the software VCarve to create the g-code for the CNC router, this is a fun process but you must be careful because this will determine the way your design is cutted. First, the size of the material sheet must be determined, in this case 1200x2400x15 mm MDF was used, the software will generate a blank space that is proprtional to the size of the wood sheet, then the file must be imported into the software. After that the vectors should be moved in order to fit on the simulated sheet and use the least space possible, also the refference/construction lines should be removed.
After that, the toolpaths that the cutter must do should be definned. First the interior cuts must be done, then the pockets that don't go through and finally the exterior cuts. In order to do this first find on the superior right corner the toolpath tab, click on it and it should look like this:

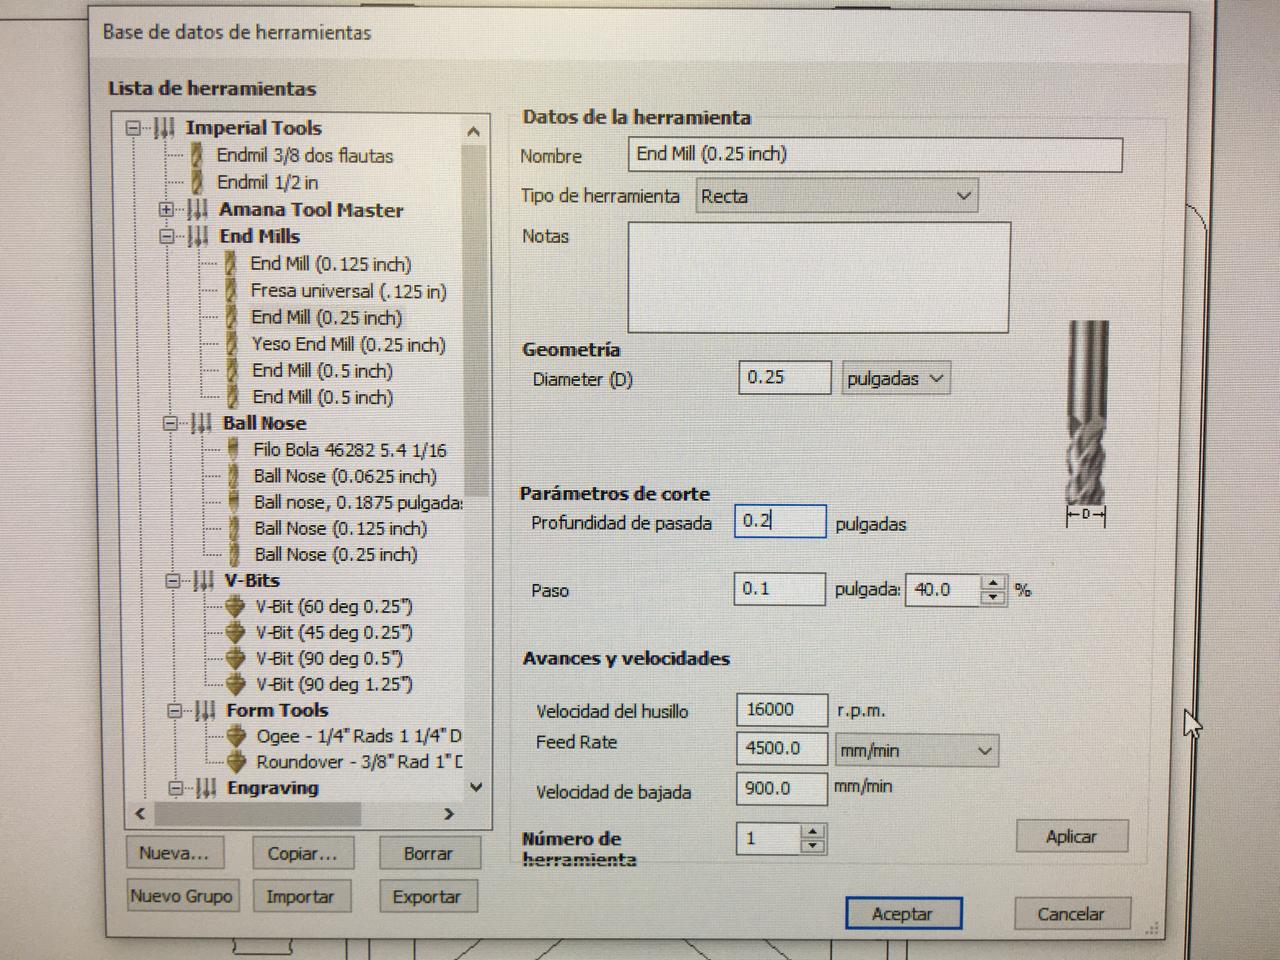
Click on the first icon and go to the tool selection and select the tool that will be used, in this case it was a 1/4 inch endmill.
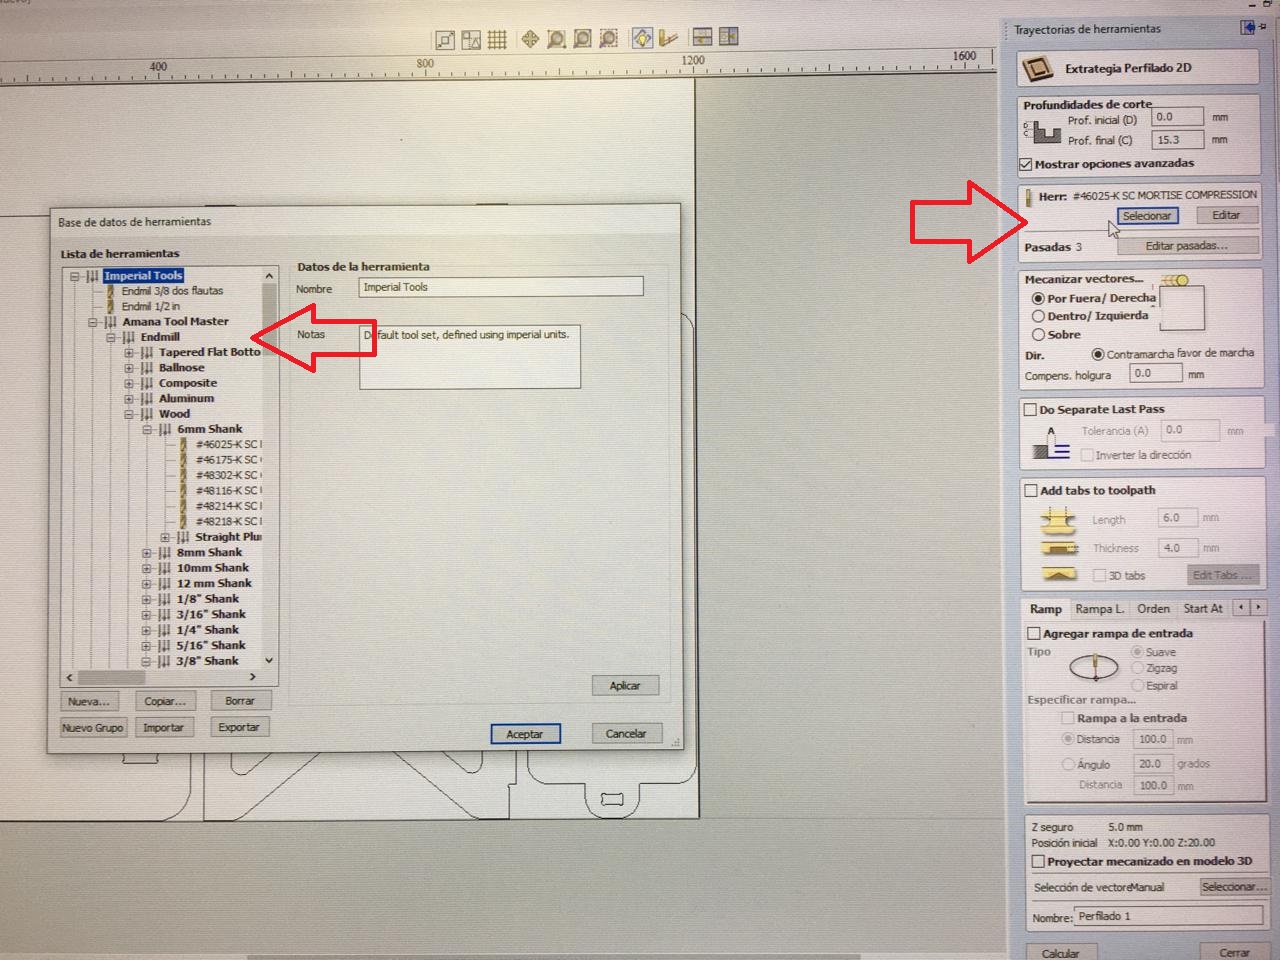
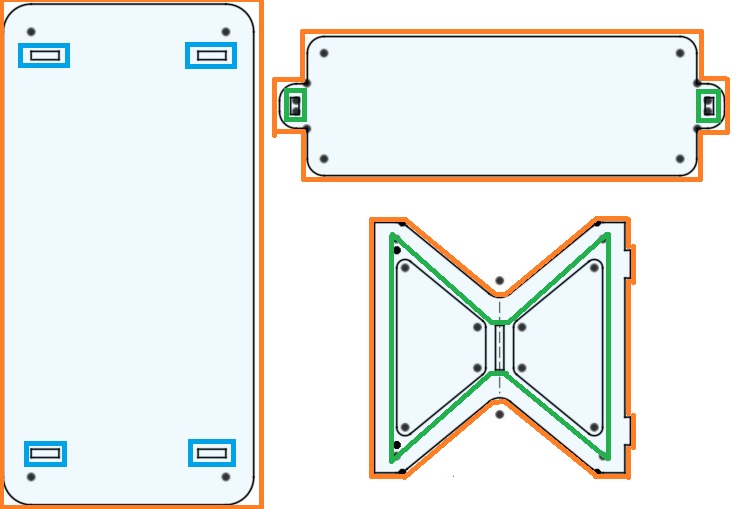
Then for the interior cuts (green) select the interior vectors, then click continue, for the pocketing (blue), select the second icon and select the corresponding vectors, then click continue, and finally for the exterior cuts (orange) select the first icon and select the corresponding vectors, then click continue. Remeber to disjoint the vectors so that they can be selected accurately.
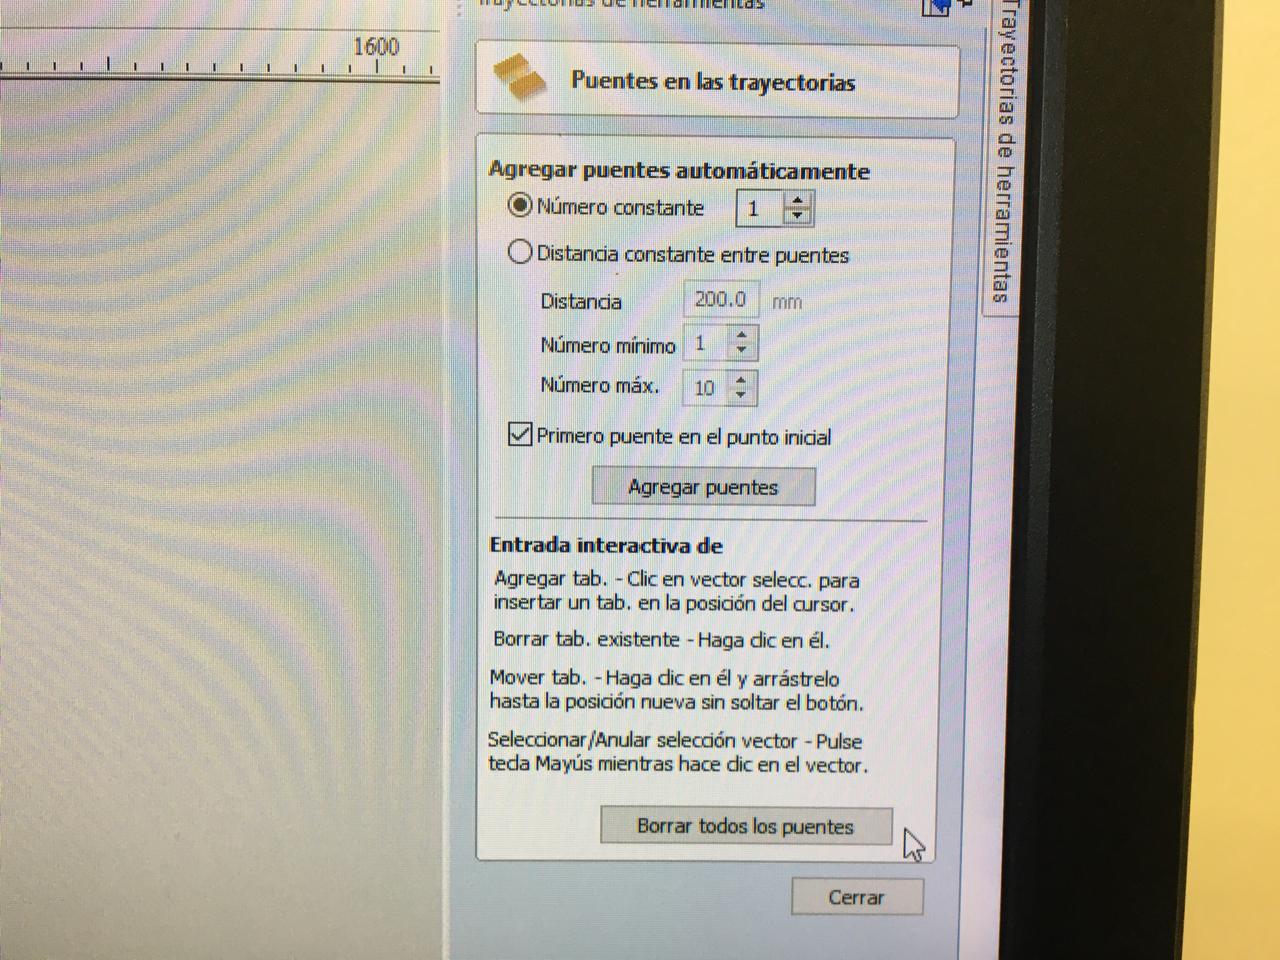
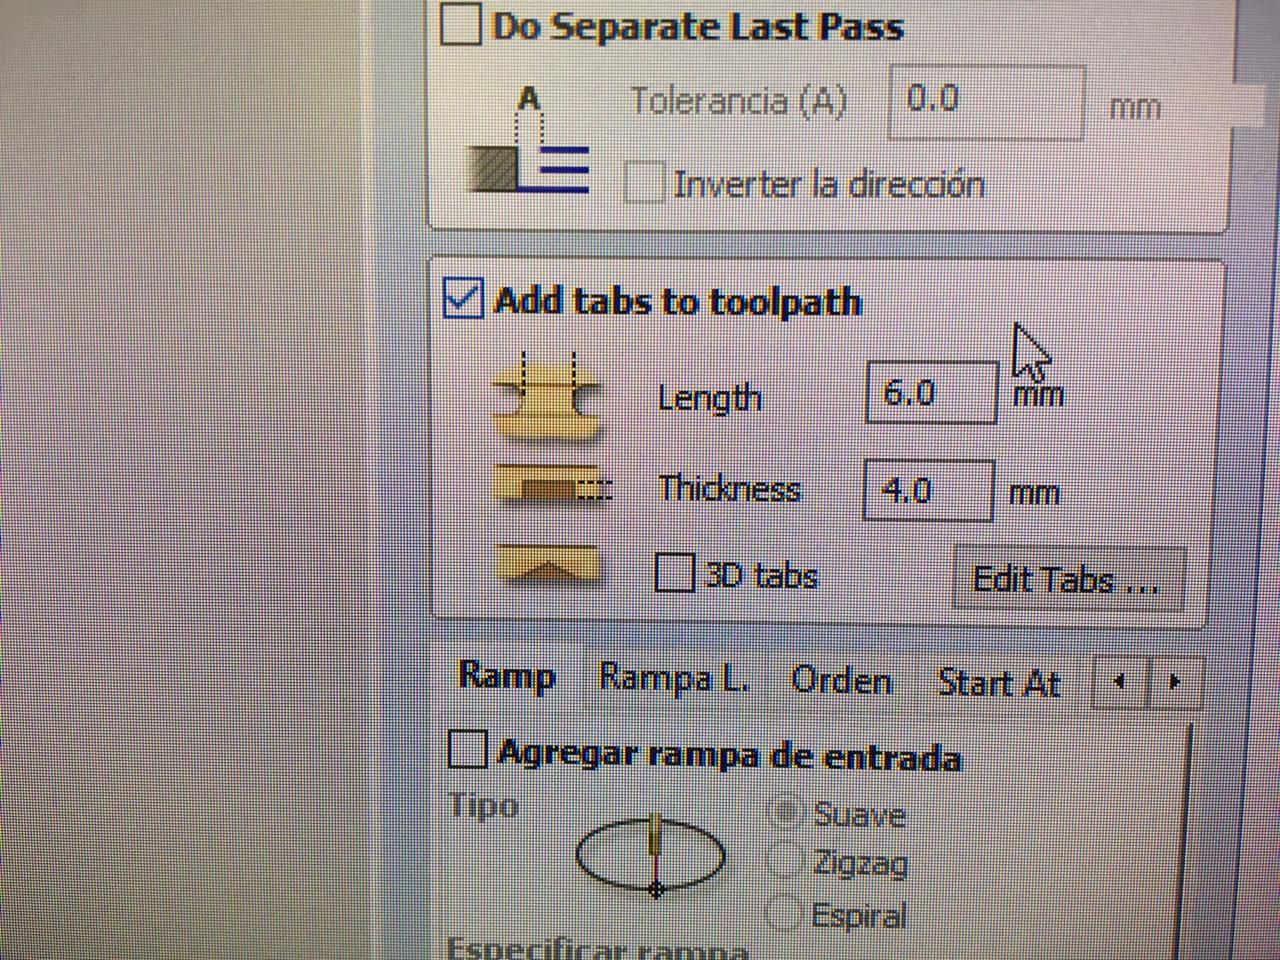
Remember to activate the bridges and add tabs so the cutted pieces stay attached to the wood sheet and prevent accidents. First click on the bridges tab and activate, then add tabs manually by tickng the "Add tabs to toolpath" box and selecting where they should be placed (1 for small pieces, 2, medium size pieces, 3-4 large pieces),
In the end you must be seeing something like this:
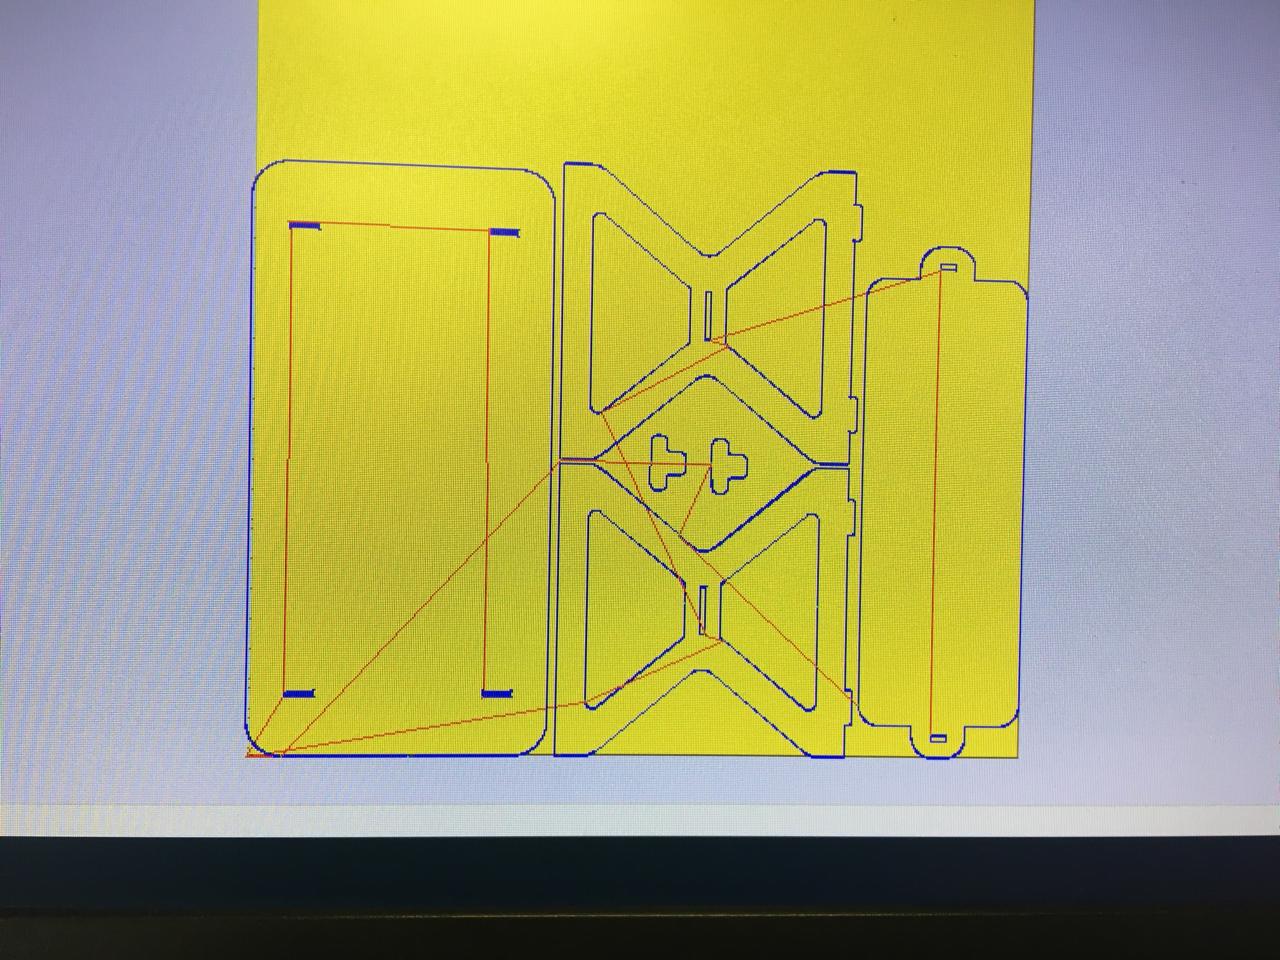
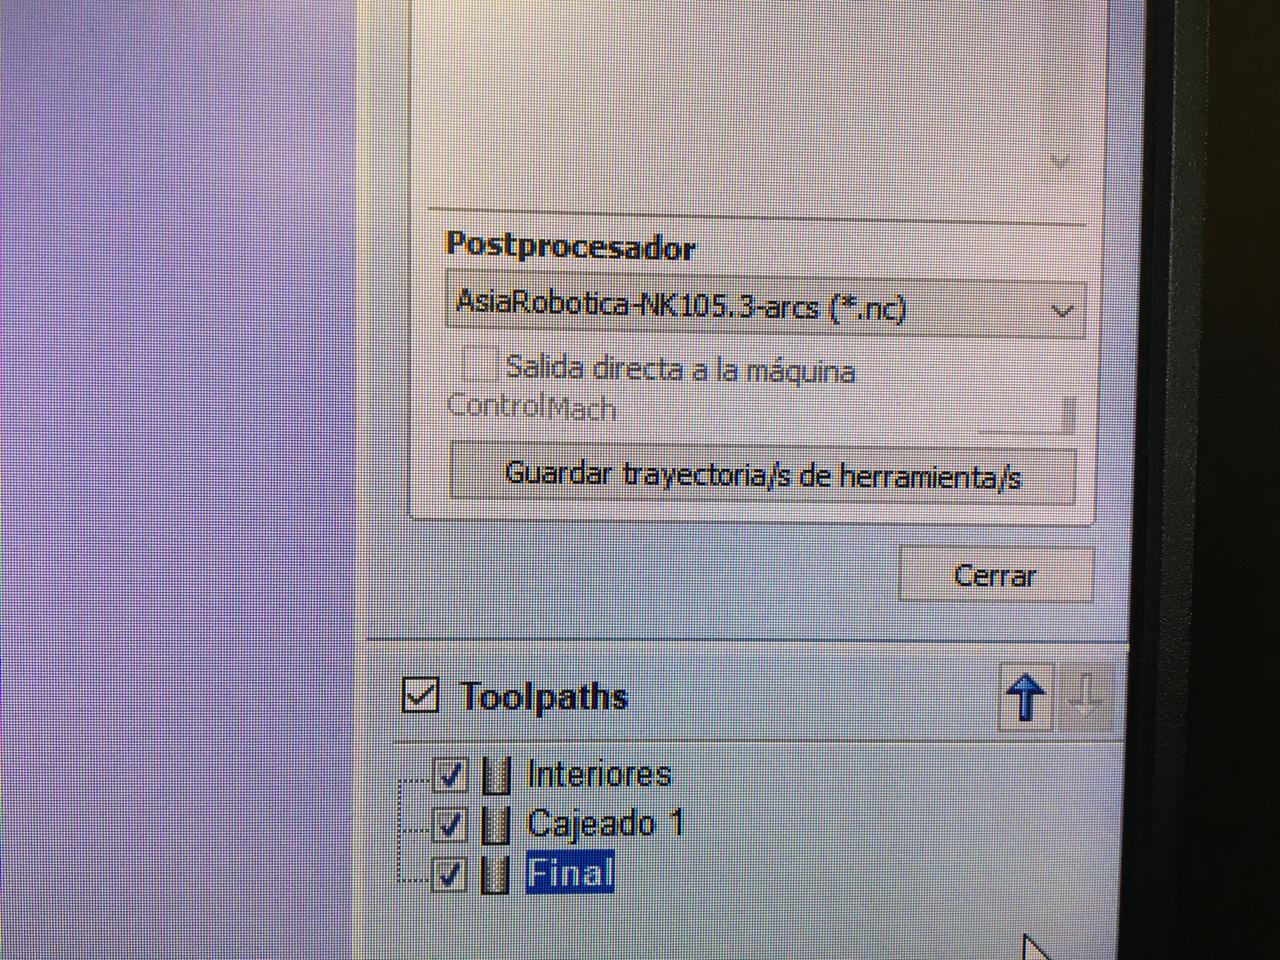
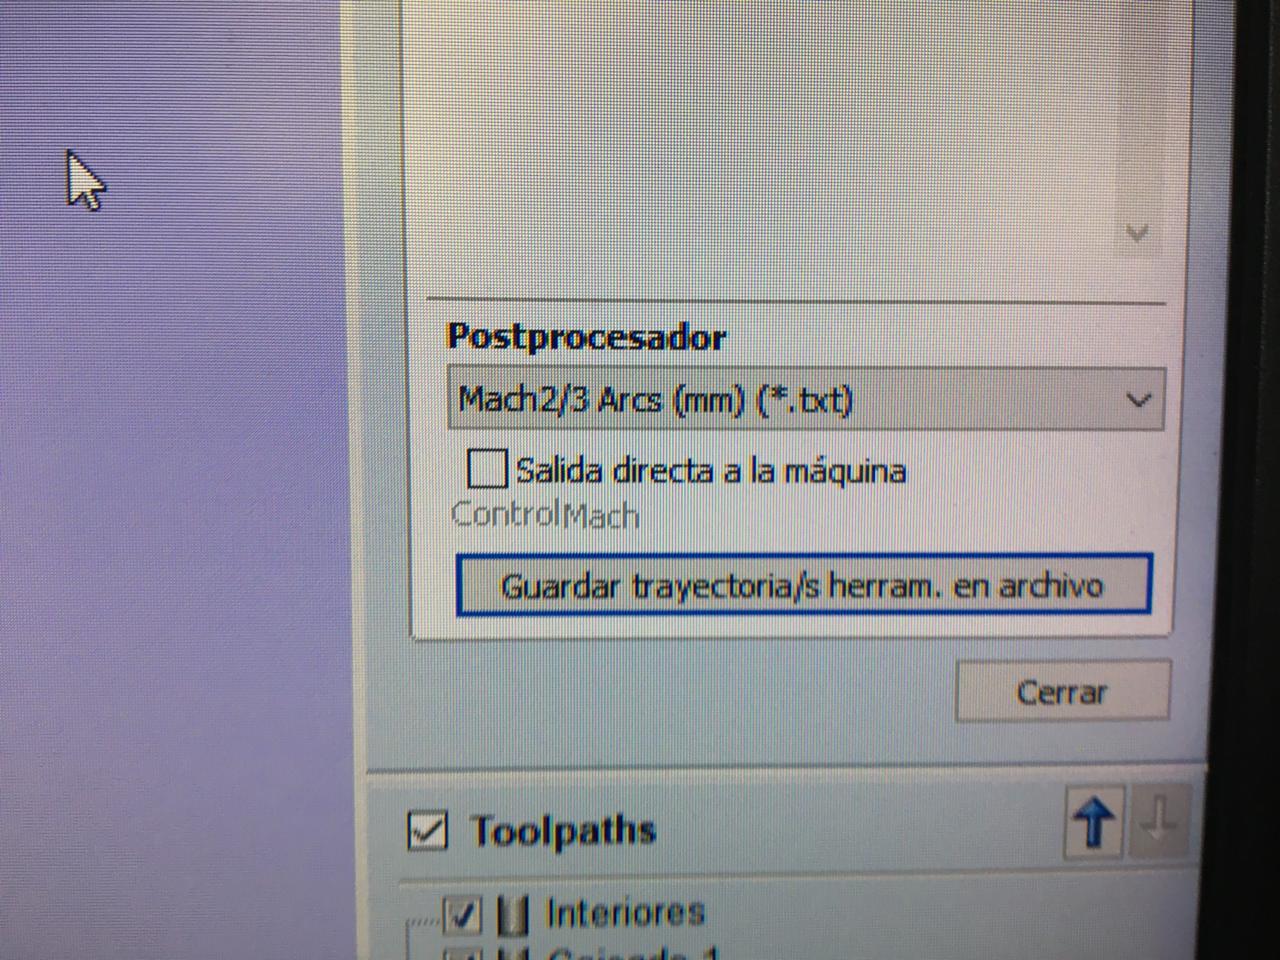
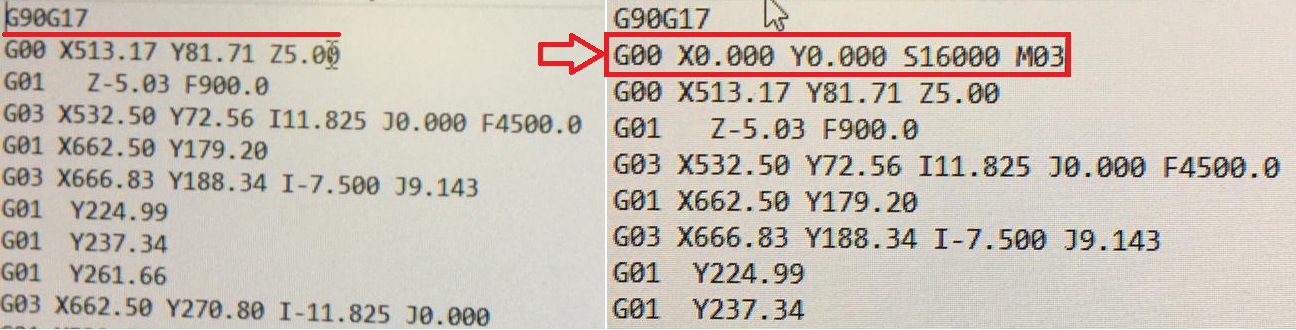
This shows the exact path the tool will be following, the red lines show where the cutter will go without cutting anything so don't be afraid. Now it's ready to generate the G-code. On the toolpath window scroll down and generate the G-code, select your CNC router postprocessor and click on continue. A text file should be saved. On this case I saved two, one for the Mach2/3 Arch and another for the AsiaRobotica-Nk105.3-arcs since this are the ones that we have at our Fablab.
IMPORTANT NOTE: The AsiaRobotica-Nk105 G-code does not add a line for the spindle speed so this one must be added manually on the second line, open the text file with a text editor (preferably the notepad) and add: G00 X0.000 Y0.000 S16000 M03
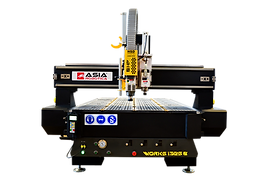
Afterwards I saved the files on a USB and went to the room where the machines are, I got to use the AsiaRobotica-Nk105.
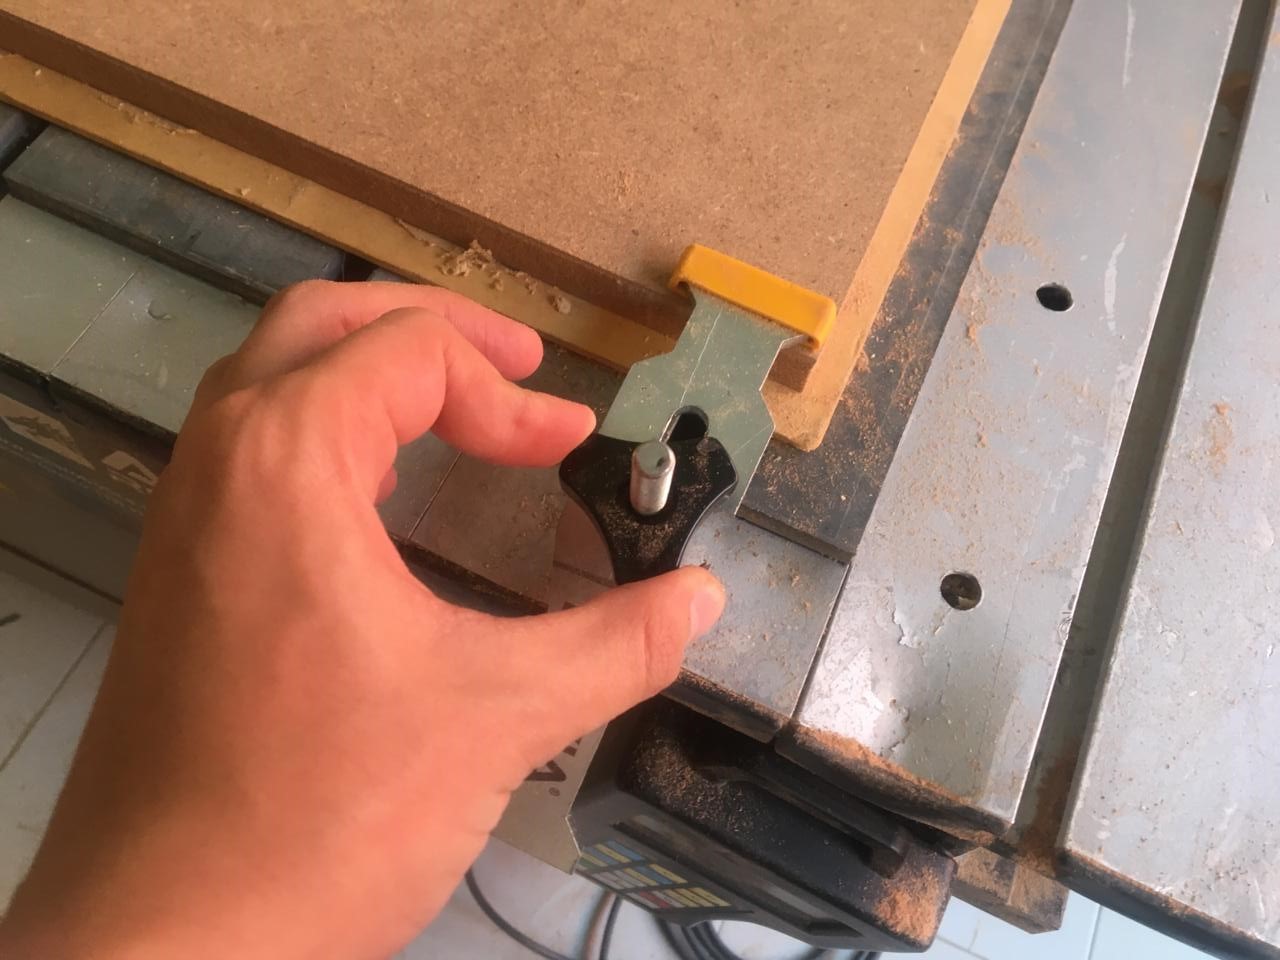
First place your material onto the bed of the machine, this one has clamps that secure the material firmly so it doesn't move or vibrate.
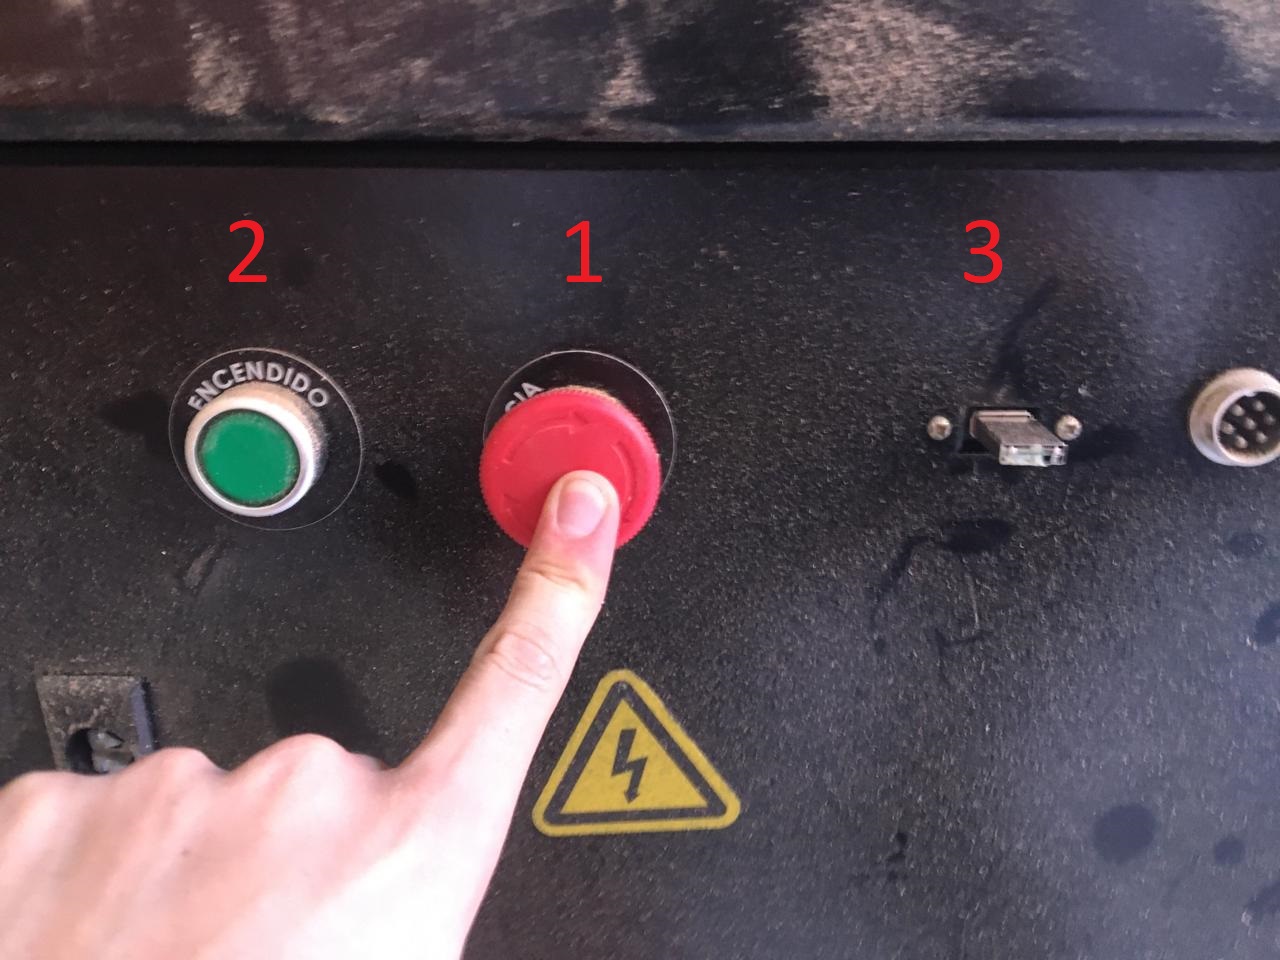
To turn on the machine press the green button and release the emergency stop, then plug the usb in.

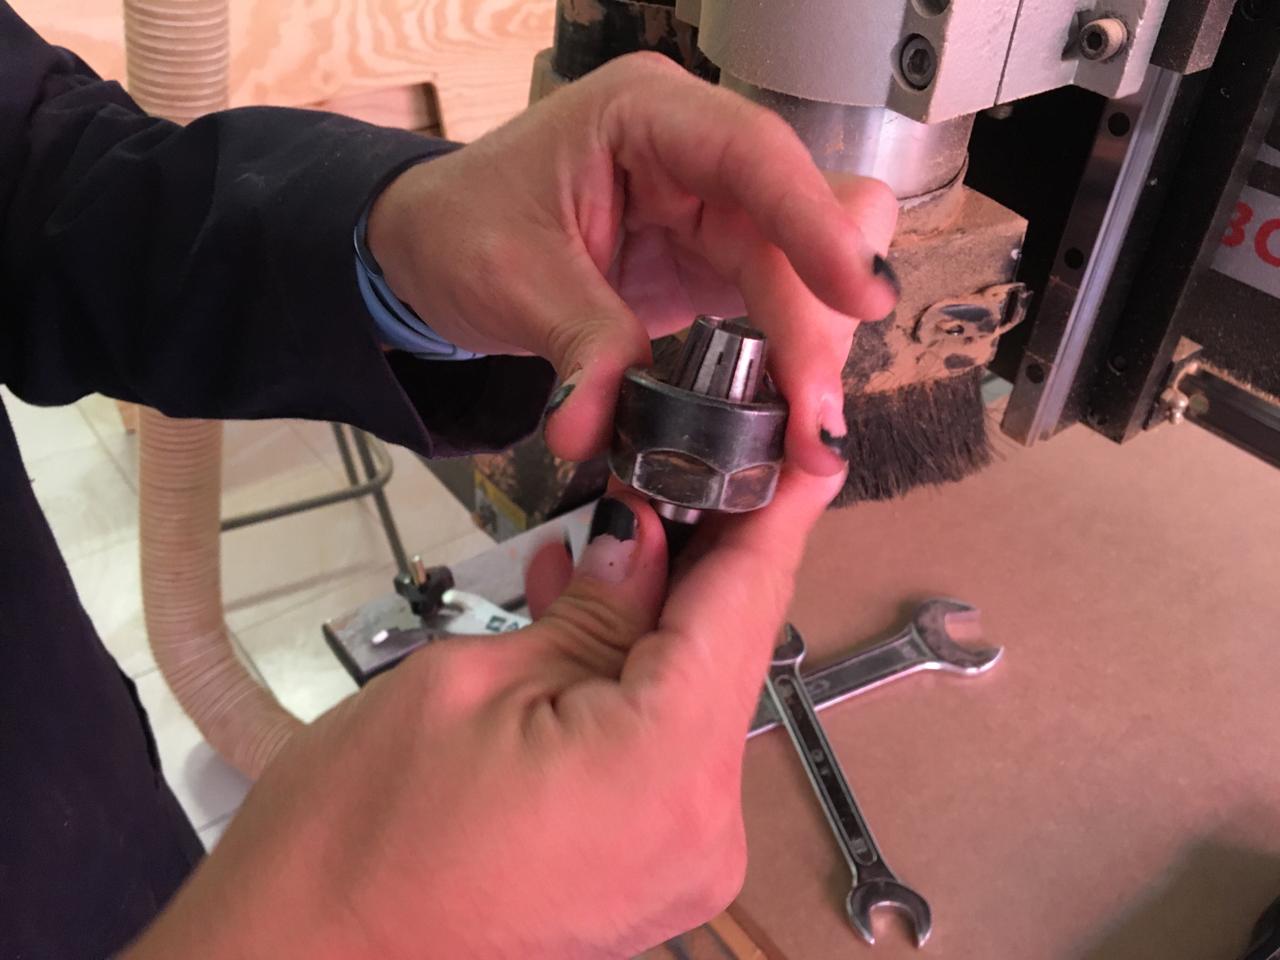
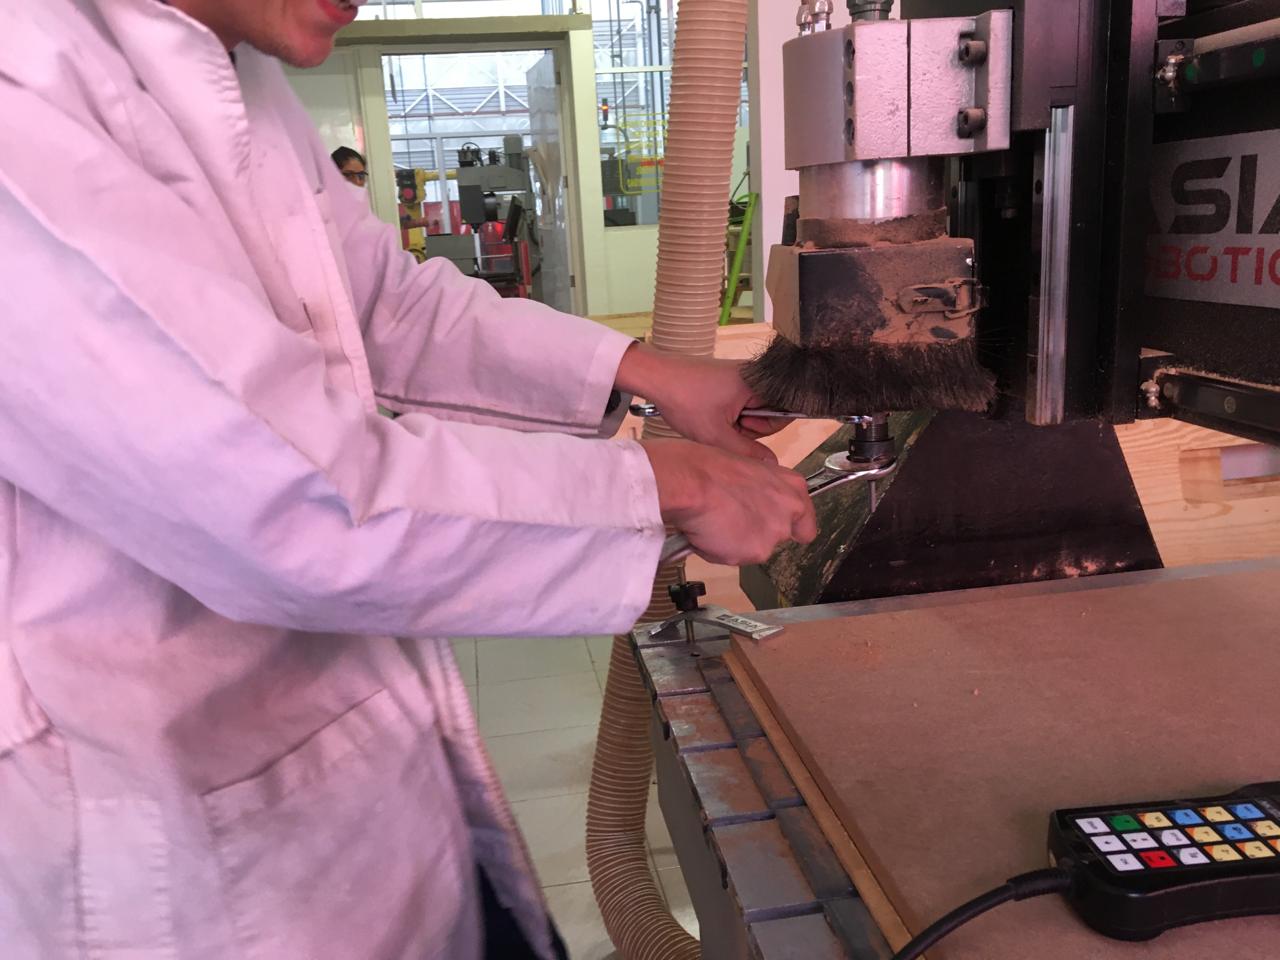
Then place the tool on the machine, secure it with a pair of wrenches so it doesn't slide down or vibrate and cuts accurately.
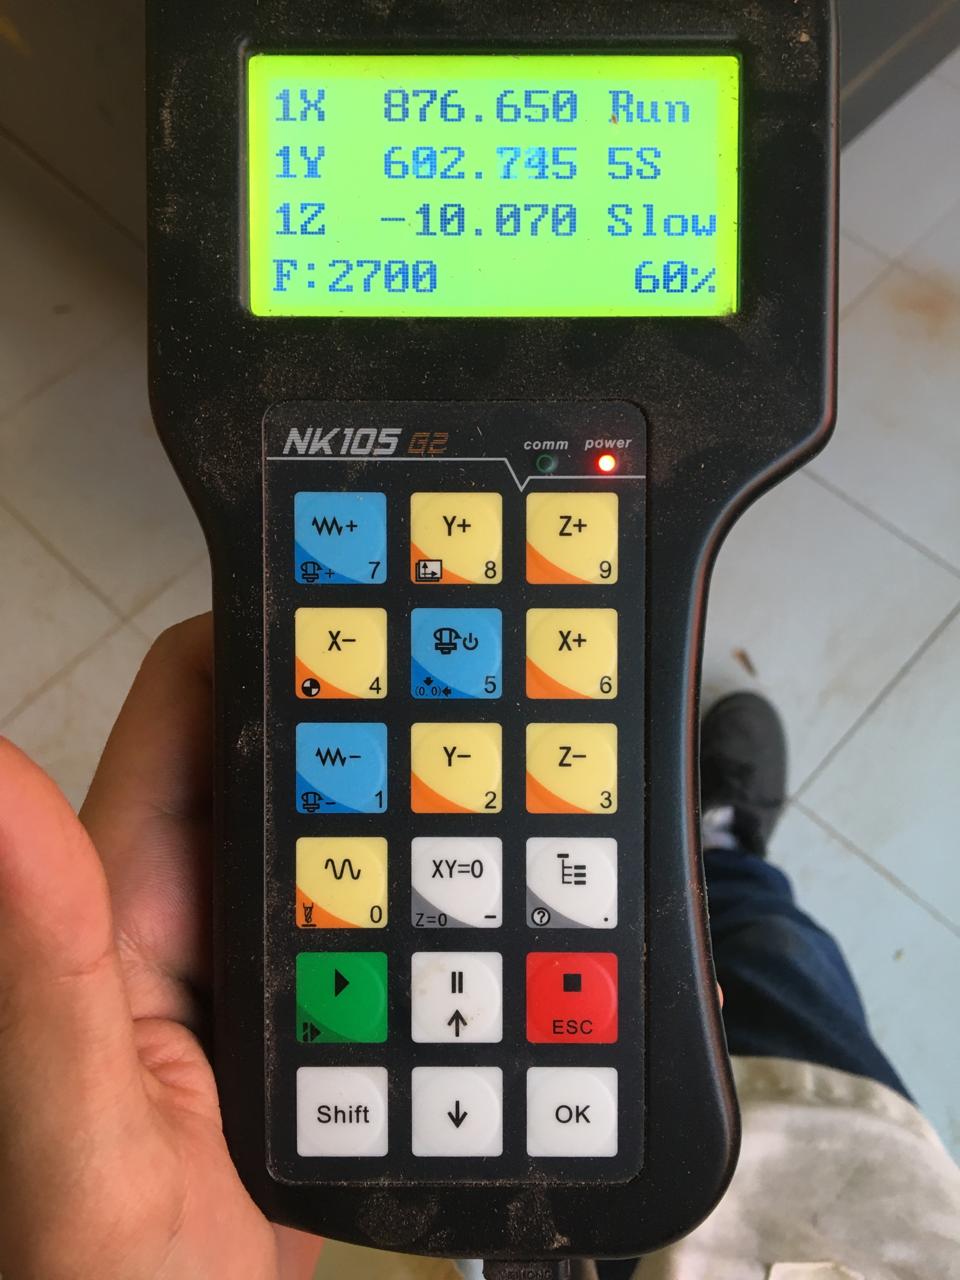
Then with the controller set the x,y and z axis on the lower left corner of the wood sheet. Press the "XY=0" key to set the x, y axis and "Shift" + "XY=0" to set the z axis. Load the file by pressing the "?" key, click the "2" key and select the file with the arrows and the "OK" key. Then press the play key (green) to start the machining.
IMPORTANT NOTE: Through the whole process remember to wear a face mask and always have your finger on the pause button of the controller (In case of an emergency first press the pause button, then the emergency stop).
To know if the speed of your machine is right, touch the dust that is left when the tool passes, if it's hot this is and indicator that you must use a faster speed, to do this press the "7" key and to slow it down press the "1" key
After the machining is done, use the vacuum cleaner to clear the area of any dust and splinters, separate the pieces and retrieve the rest of the wood sheet.
To turn off the machine first press the emergency stop, then the green button and finally plug out the USB, it's really important to plug out the USB after the machine is off.
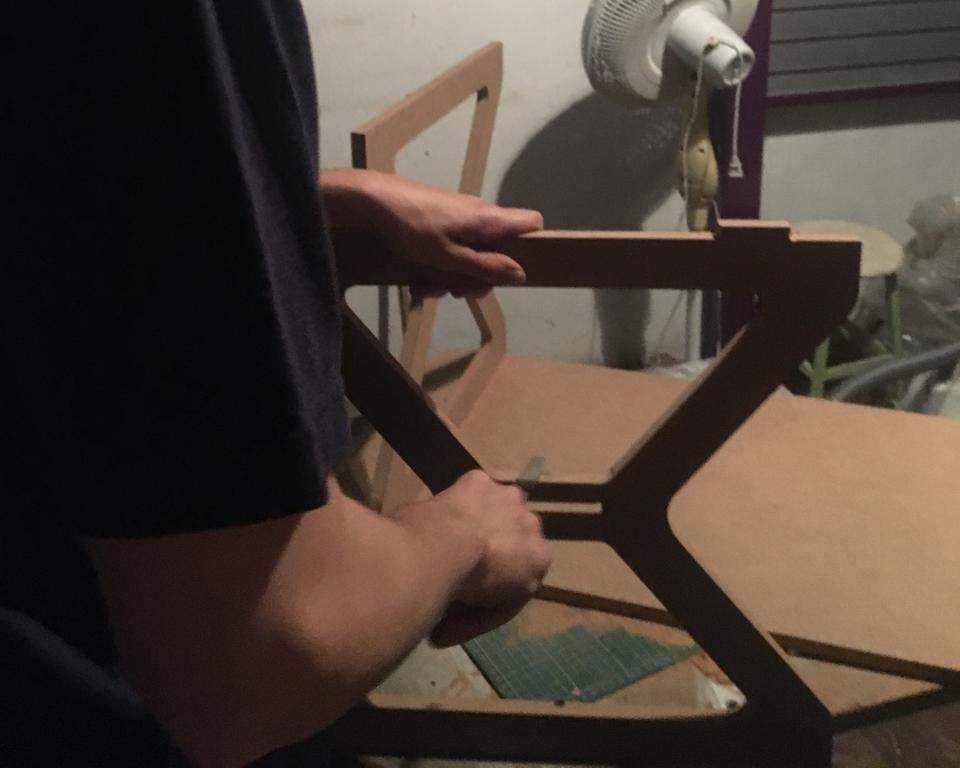
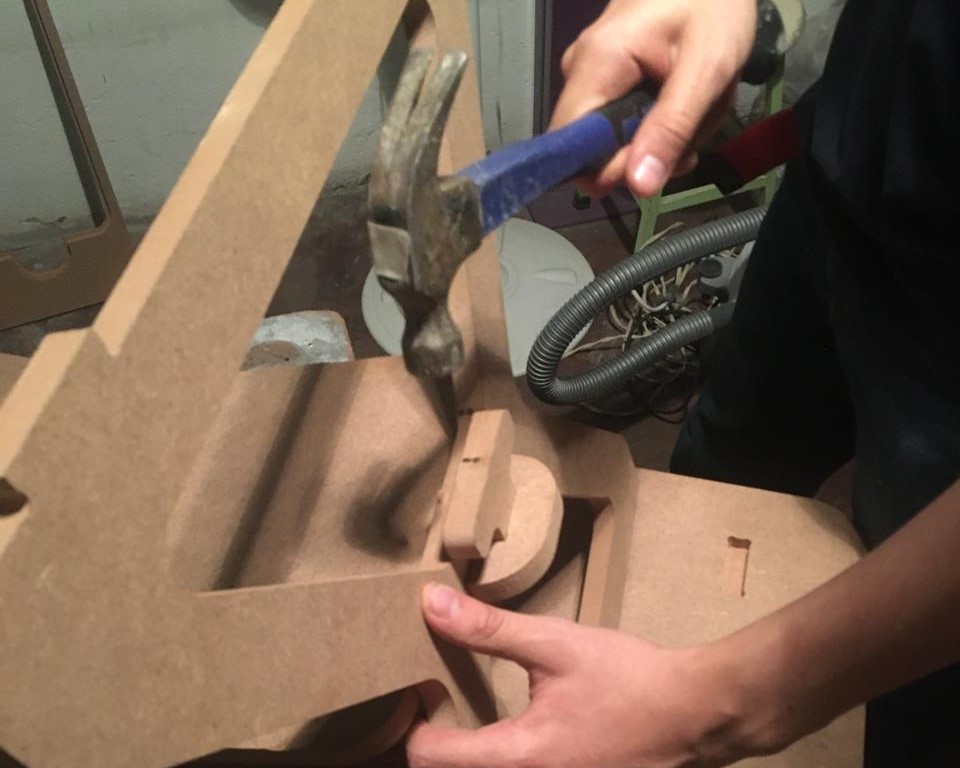
After the pieces are extracted you will need a hammer and a file, first use the file to retrieve any excess and the tabs, then put together the pieces, depending on wether the press fit is tight you might need a hammer to push the pieces into their places.
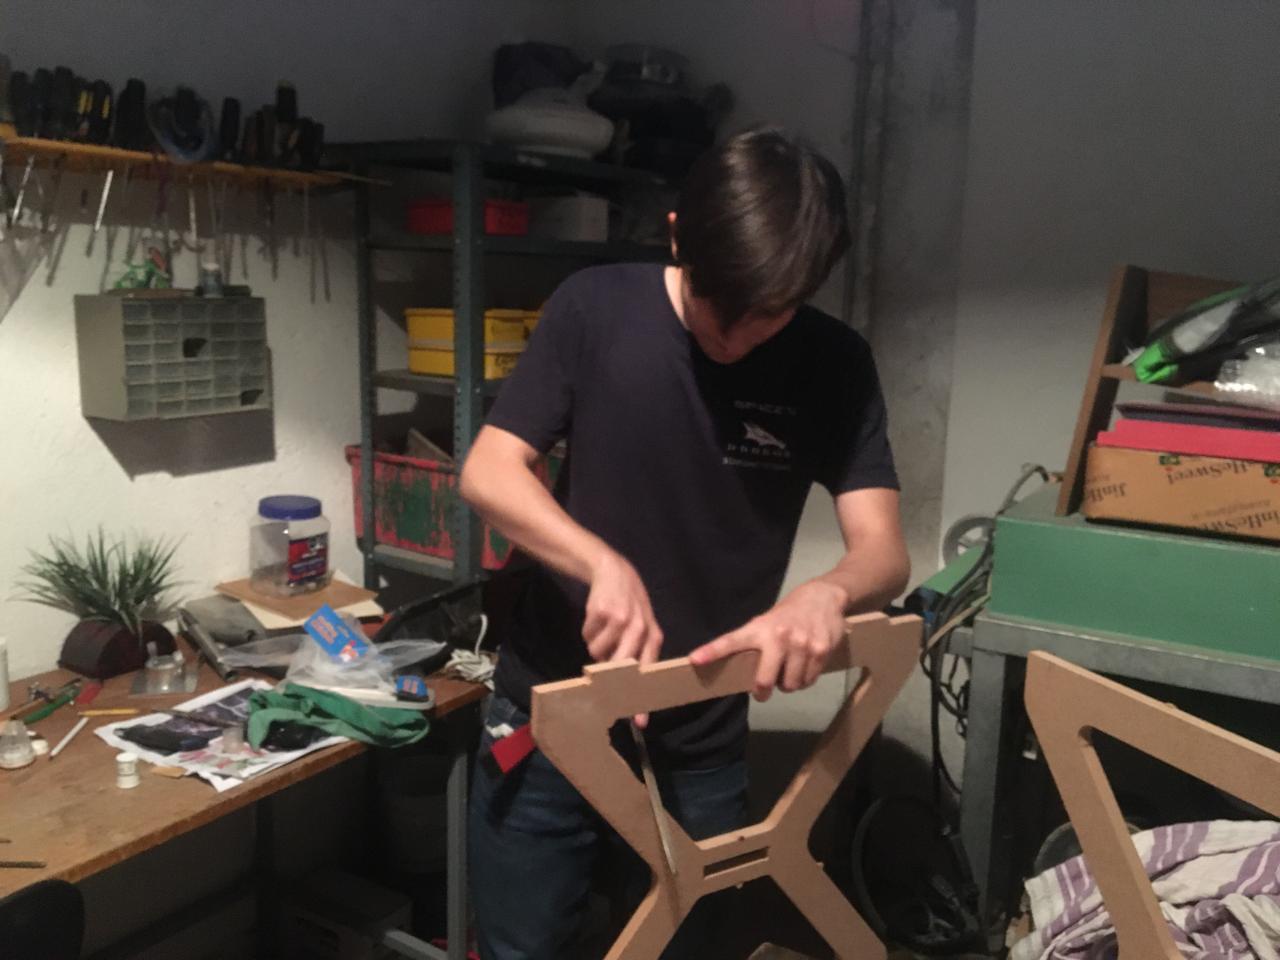
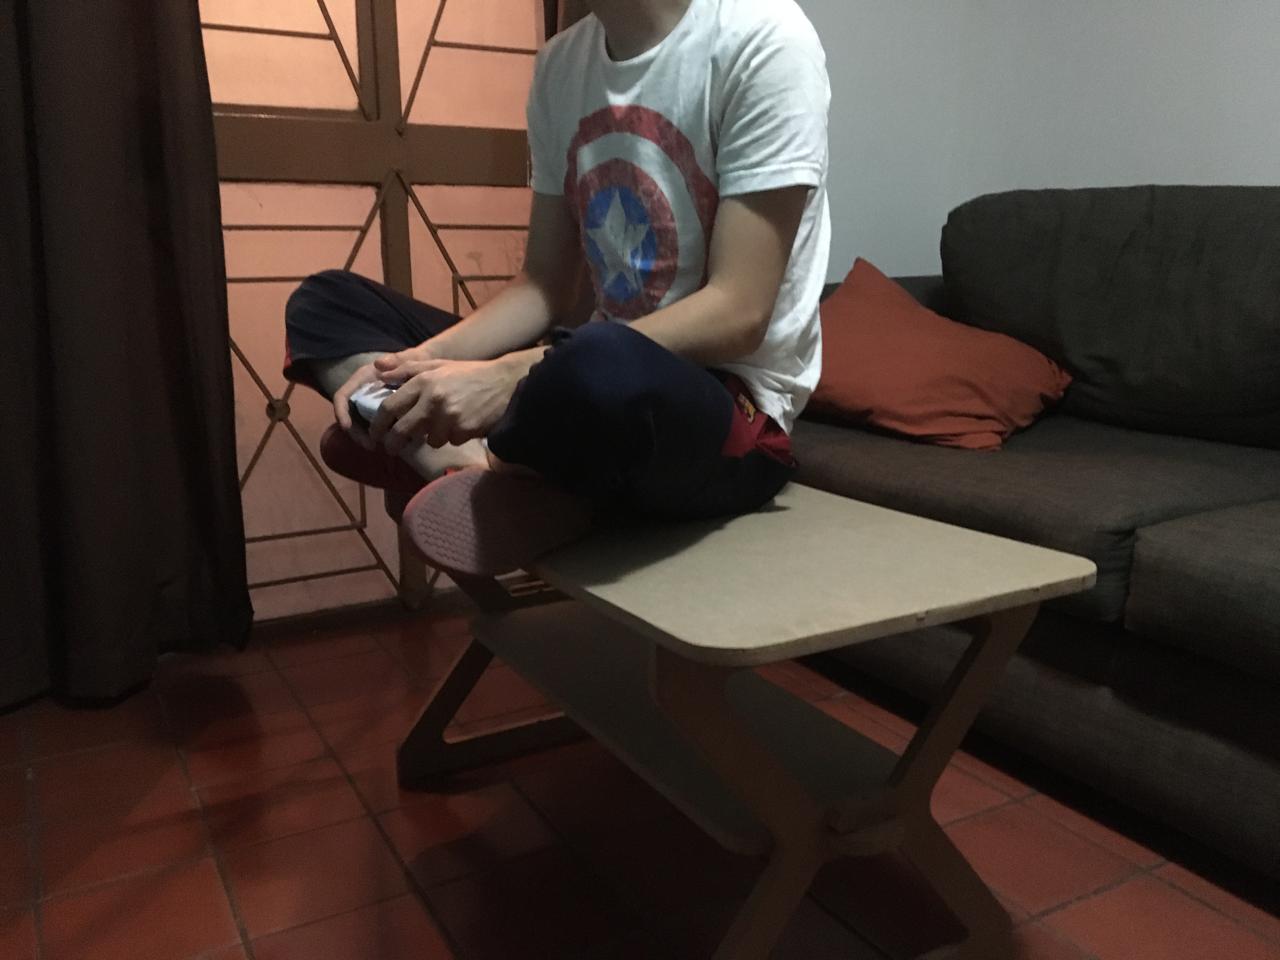
Final Assembly
I'm really happy the way this turned out, it's very stable and can hold a lot of weight, in the future I will add sealant and paint.


Remember to always wear a lab coat, industrial boots and protective eyewear. Follow the security procedures, using the CNC router can be really fun but also dangerous.