6. Embeded programming
For this week I will use the previously fabricated PCB for the XIAO on week 4. This board can be programmed with various languages, I will be using CircuitPython and the Arduino C++ variant. Let's start by comparing both languages.
 |
||
|---|---|---|
| Feature | CircuitPython | Arduino C++ |
| Language | Python | C/C++ |
| IDE | Mu, Thonny, VS Code with CircuitPython plugin, etc. | Arduino IDE, PlatformIO, Visual Studio, etc. |
| Syntax | High-level, easy-to-read Python syntax | Low-level, C-like syntax |
| Libraries | Limited but growing community-contributed libraries | Large and extensive Arduino library ecosystem |
| Memory Usage | Typically higher due to Python runtime overhead | Typically lower due to direct hardware access and optimization |
| Development Workflow | Iterative, rapid prototyping | Traditional embedded development workflow |
| Debugging | Limited debugging support | Serial output, LED blinking, and debugging tools |
| Hardware Support | Supports a wide range of microcontrollers and peripherals | Optimized for Arduino-compatible boards and hardware |
| Learning Curve | Beginner-friendly, suitable for beginners and educators | Steeper learning curve, more suitable for experienced programmers |
| Real-time Performance | Generally slower due to Python interpreter overhead | Generally faster due to direct hardware access and optimization |
In the past I have worked with both, I find it more appealing to use CircuitPython but as I began coding in C, I have a lot of love for it too. So I will be working with both for this assignment, the following codes make three leds blink randomly and when the button is pressed they will all blink at the same time. With this exercise many useful libraries and functions from our board will be used.
Pin Selection
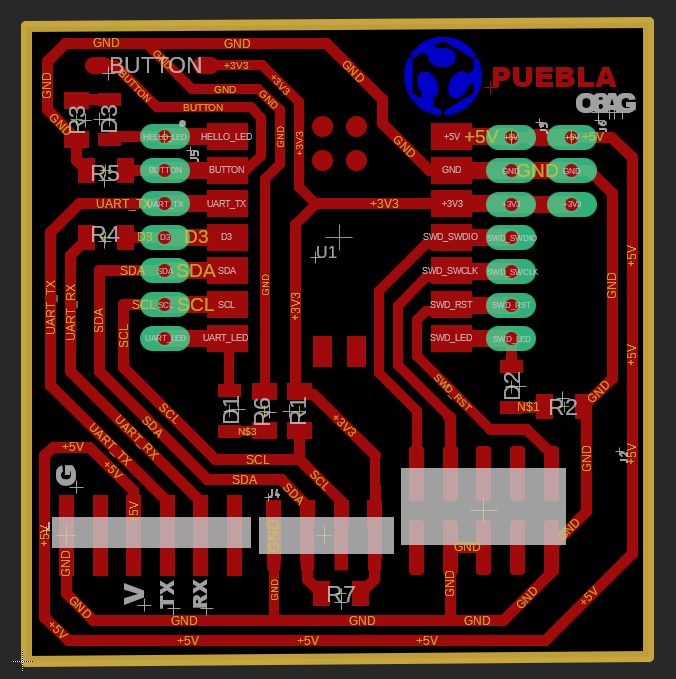
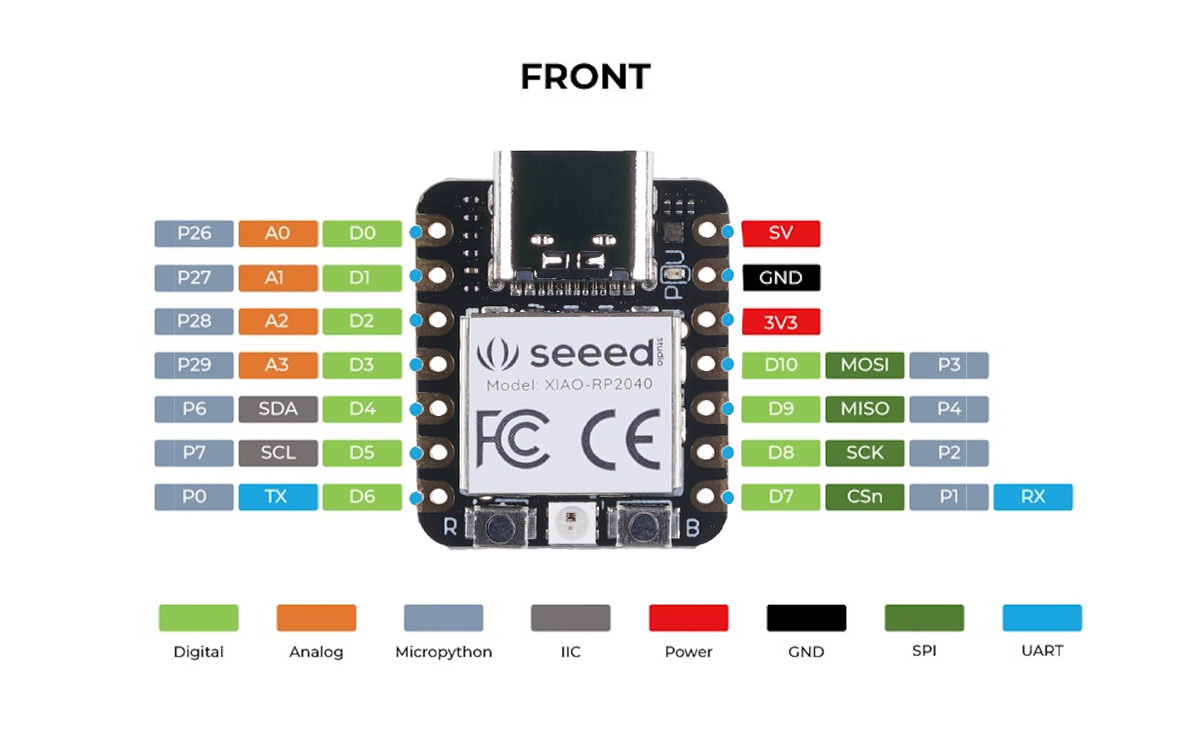
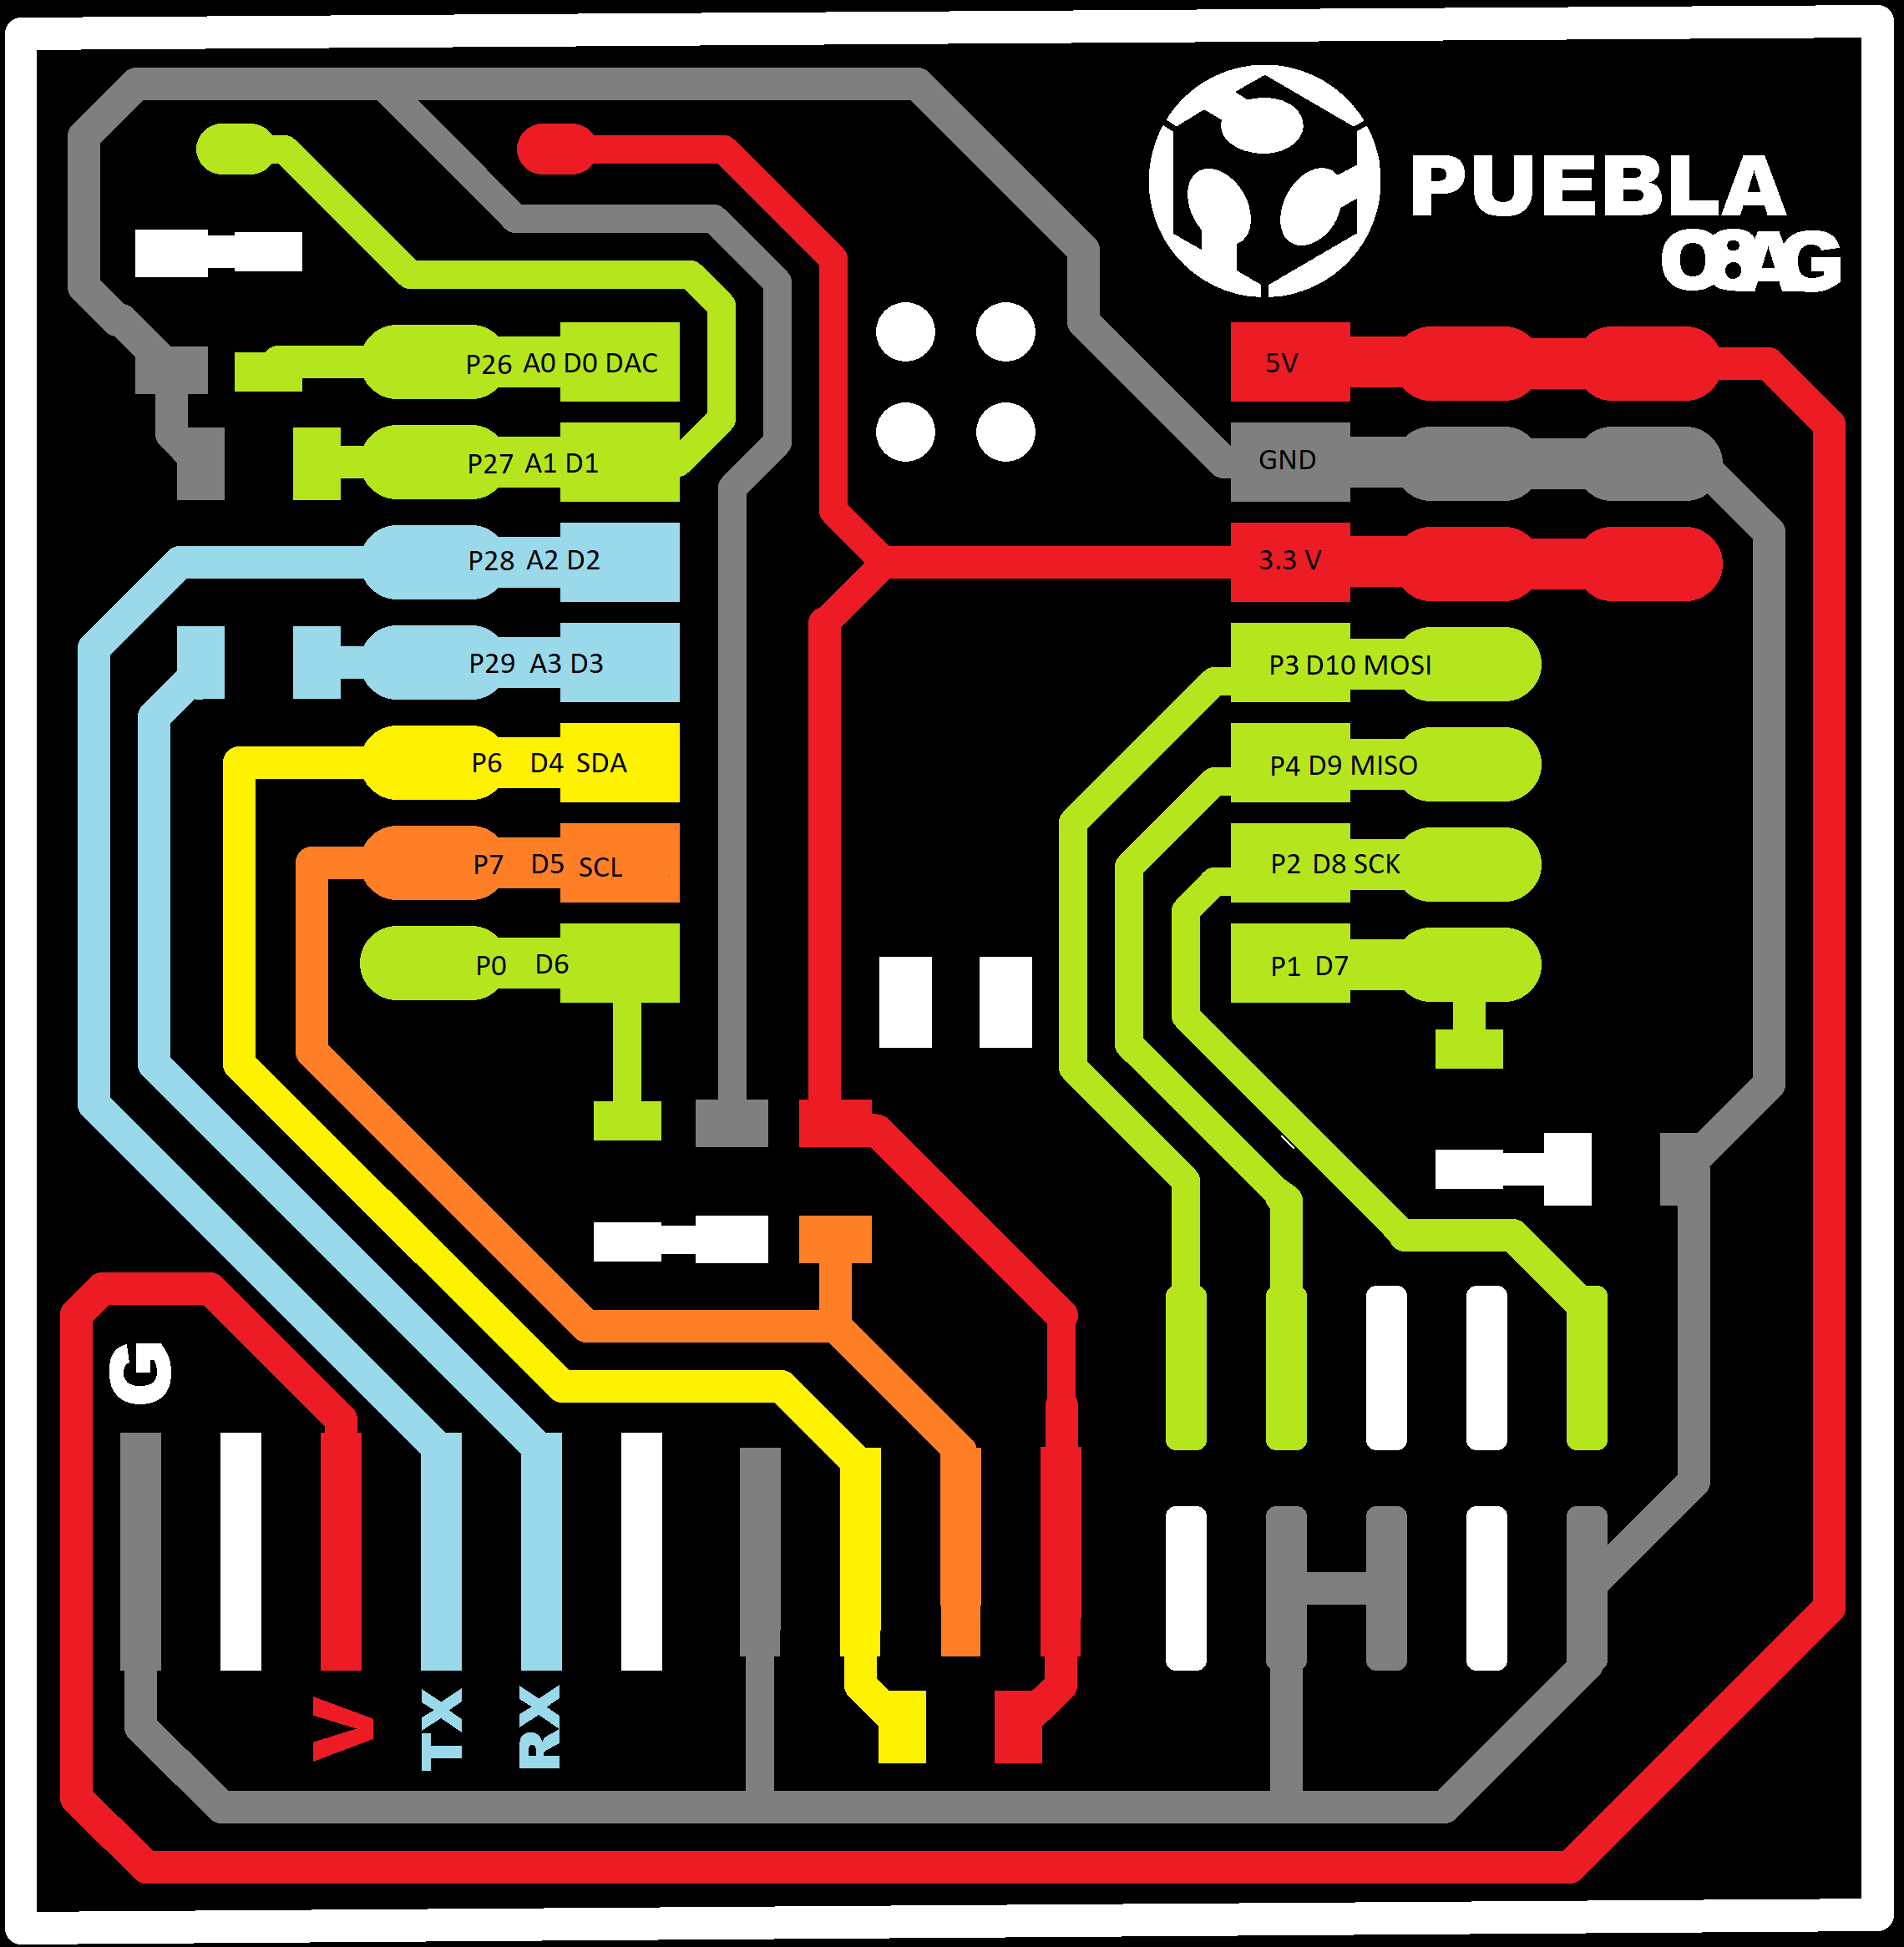
Since I am using the board fabricated for the Xiao RP2040 made on week 4, I will use the pins that are connected to the integrated leds, this are pin 26 (P26), pin 0 (P0 or D6) and pin 1 (P1 or D7) and for the push button pin 27 (P27, D1 or A1). In case you want to use a protoboard or to understand why this pins are used, check this images.
CircuitPython Code
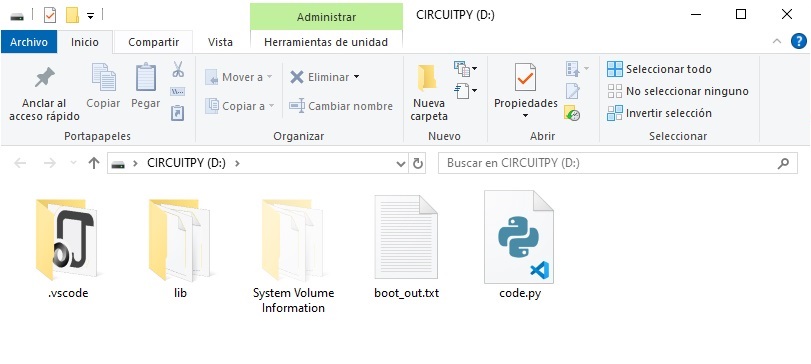
First, the CircuitPython code, natively our board does not support this language so we must make some adjusments to it. Click here to download the .UF2 file needed to control the board. Once it's downloaded plug your XIAO to your computer and click the Boot button, it's the one with a B on the right side of the board. Release the button when the File Explorer is opened. Copy and paste the .UF2 file.
Now you will have this code.py file generated on your board, never delete this python file or upload another one, since that is the file the board will read. Now it can be opened in Visual Studio or Mu and edited.
As you can see in the code the first step is to call the libraries that will be used, then we define the pins that will be used as variables, to do this we call the pin, in python we use board."pin", so it calls the library that describes the board and selects the pin, then we define which pins are outputs and inputs, and finally we have our main loop, in this function we tell the board what to do with the previously defined variables and pins that will be used, to turn on a led we have to mention the "variable".value to give it a True or False state, this will turn on or off the led, for the input we can use something similar, on an if function and assign actions depending on the button state. The button state is determined by hardware, in this case when the button is pressed, current flow is interrupted so we use a if not button.value function, this means that when the value of the button is 0 or False, the button is pressed. You can download the code by clicking here.
In the code snippet shown above you can find descriptions of every part of the code.
| Code Upload | Perfomrance |
Arduino Code
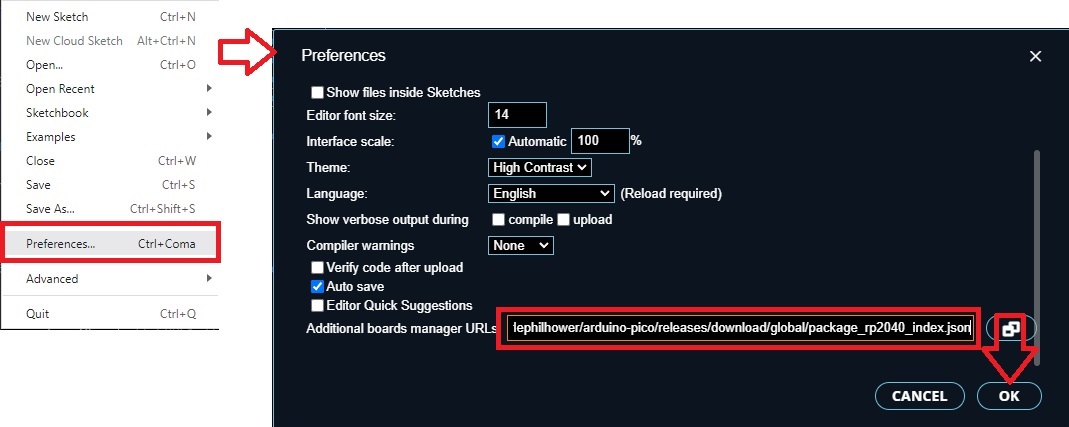
As shown on week 4, to program on the Arduino IDE we must also set some configurations, go to Files > Preferences, on the Preferences window scroll down and paste this: https://github.com/earlephilhower/arduino-pico/releases/download/global/package_rp2040_index.json, then click OK. This will enable the Arduino IDE to handle and program this board.
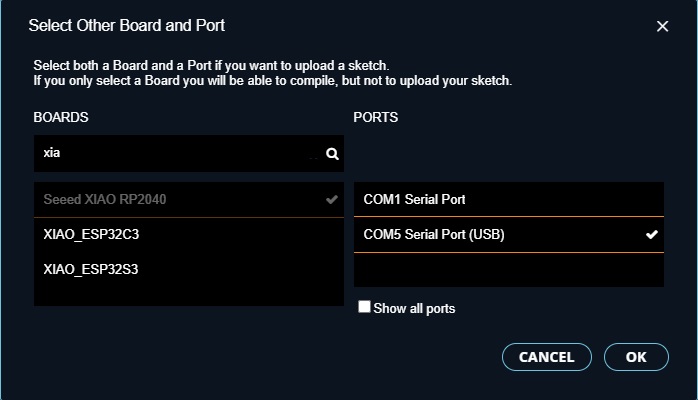
Click on the Select board box and look for your board and port (sometimes it's automatic) and press OK.
Now our board is identified and selected, we can start coding. This code does the same as the python one, you can click here to download it. The Arduino code is about 4 lines shorter but they both are not that difficult to undertand and make.
For python we do something similar,in this case we don't need to call libraries because the ones used are already loaded. So we start assigning variables to the pins that will be used, then we assign outputs and input to the previously assigned variables on the void setup() function, finally we can tell the board what to do with a void loop() function this will tell the board what to do as our main loop in python. Here we use a function called digitalWrite to assign a value to our pin, for this case to turn on/off our LED's we use HIGH/LOW respectivelly, we use a similar if function for our button, sometimes push buttons are open or closed, this depends on our board, in this case when our button is pressed the flow of current is interrupted so we use LOW when it's pressed. In the code snippet shown above you can find descriptions of every part of the code.
| Code upload | Performance |
I think that programming in Arduino is over all easier and a bit more robust, it does not require as many libraries and has more built in functions, however if our board is to interact with AI or some other technologies that use Python, it is not bad to know and try embedded programming on boards to get familiarized with this different technologies. I tought that the time delays in Python would be a little slower because sometimes Python is slower to process but i can't really tell any difference between the codes on the final aplication. It was faster to upload the Python code than the Arduino one, but that might be my computer and the IDE version I used. I liked the response on the Python code a little bit more