13. Molding and Casting
For this week the practice consisted on machining a mold and casting something from it. To reach the result, it was open to us to use techniques as CNC cutting and printing, but the mold should follow a manufacturing process.
- The group assignment: What I learned
As in this week we had different ways to reach our results, we could learn from others processes what to do and avoid, here are some of my learnings of the week:
- Only closed surfaces! Unlike preparing a 3D file for printing, if you add a model that has openings to V-carve, it will try to fix it, will try to repair it, regardless of whether it distorts the model
- Check the material:If you decide to machine in the router you will have to prepare it and attach it to the bed. If you're wearing flower foam or wax, probabbly you'll have other supports to hold it in place than if you're using wood, come prepared.
- Careful with the depth: Before designing a piece, confirm first the tools you have available and your machine parameters. Some cutters may be shorter than others and probably won't reach your max depth.
- Consider the finish: If your first cut is rough , consider how long it will be once you give it the finish, because you can save time by making a rougher first cut + a good quality finish.
- Don't forget a release agent! Before pouring the material for casting, make sure you'll be able to demold it, so add a release agent to prevent losing your pieces and/ or mold.
- Avoid creating locks: While designing your mold, make sure it allows the piece an esay way out, without surfaces that may lock it to the mold and give you a hard time.
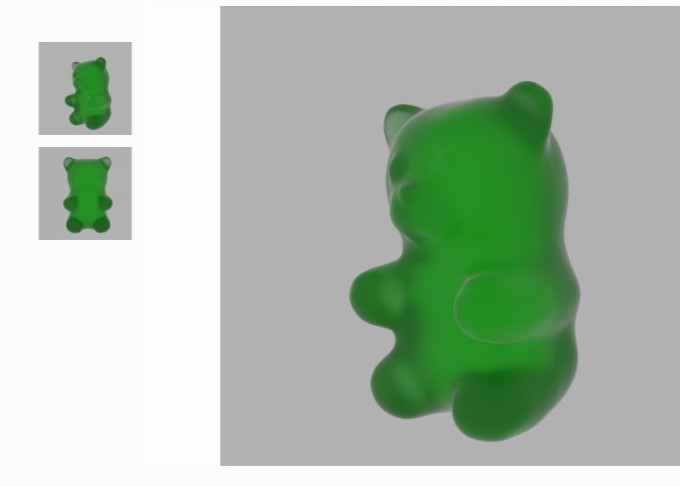
- First I defined the piece I wanted to cast, I wanted something very simple, yet
recognizable so I went for a gummy bear. I browsed it on downloadable modeling pages and
took one that I liked. If you want to download a model, I highly recoment to do it in
OBJ format. Also, here is the
site where I found the model I used.
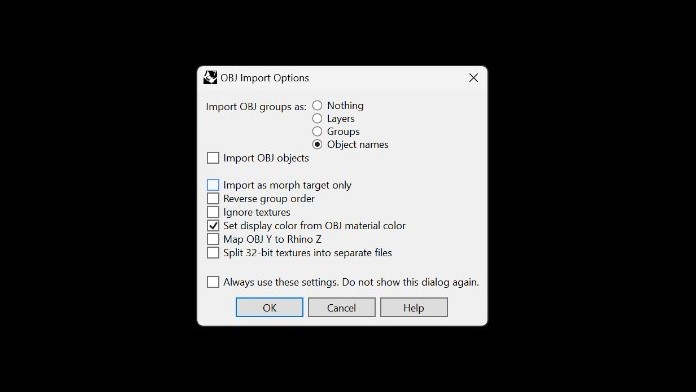
- The next step was to open it on a modeling software. I really like Rhinoceros,
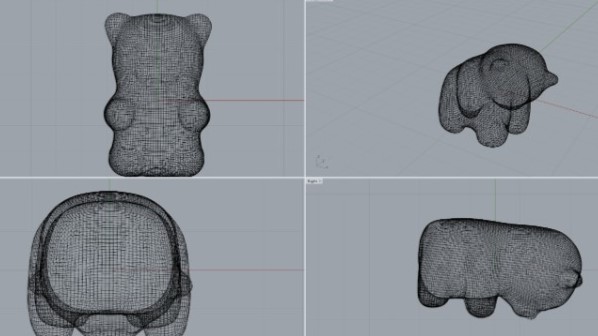
so I used it. When you open it, the file is in a mesh format so consider it
before making any operations.
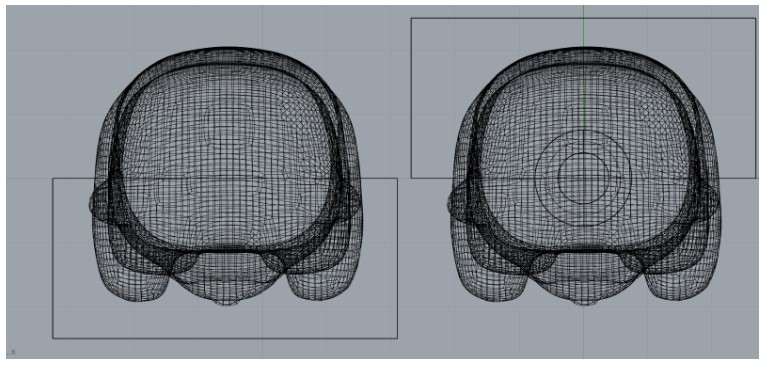
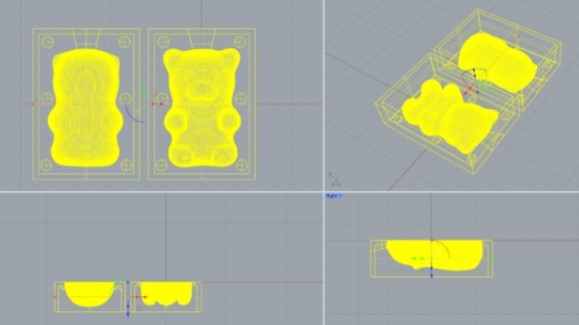
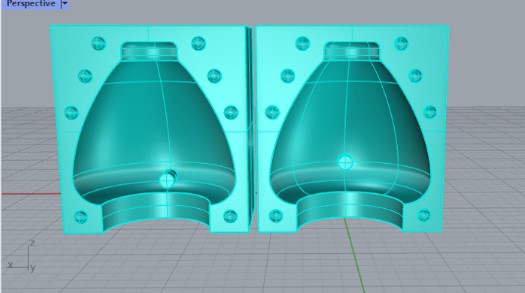
- Next, I drawed a box a little bigger than the piece. Here I decided it would be a countermold, so this box would divide the model by half. I also changed the appearance settings to visualize it better. .

- Then, I duplicated the box and rotated the piece in it to have the front and back of it, so There were the pieces of my mold.

- Later, I added a funnel on top of the head, that would be the place to pour the material to the mold once it was ready.
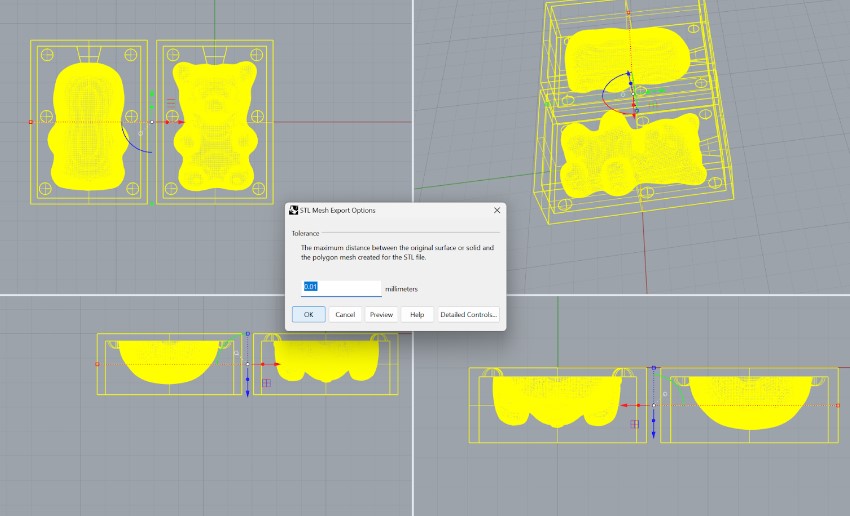
- When I had this, I decided It was time to start making operations, so I turned the mesh to NURB surface. My recommendation here is to repair the mesh first, because it may create too many shapes and edges that will be hard for the software to process.
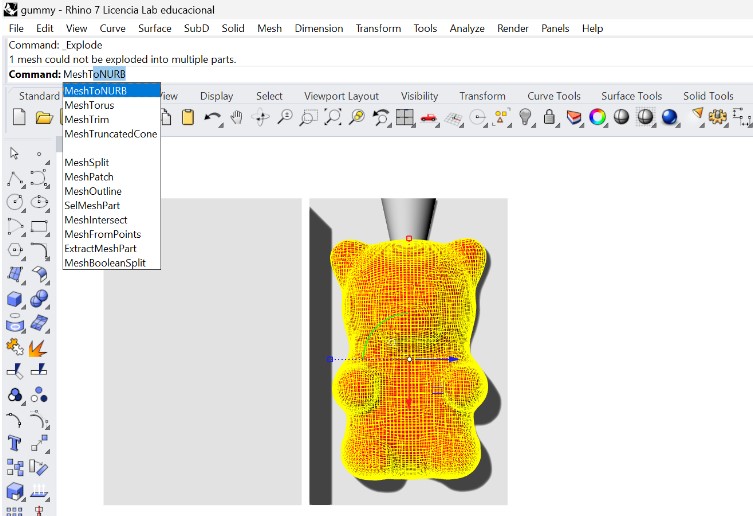
- After becoming a NURBS polysurface , I used the operation boolean difference to keep only the half of the funnel on each respective mold and also the shell tool to transform the box walls. Also, here you can see how it visually changed from being a mesh to a NURB surface.
- When I had it, I added some spheres to each side. These would be the links for the final mold to keep together, so after adding them, I also joined them to one of the sides and remofed them from the other.
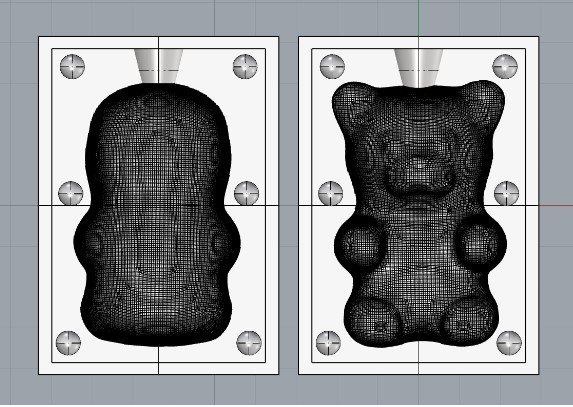
- Then, I had to trim the excess from the bear's body. I created a plane to cut and used the tool trim for it.
- Finally, I selected all the pieces and joined them with the boolean union tool. It wook a lot of time and I figured that probably there were a lot of angles on the gummy bear, but it eventually worked.

- It took about the same long time to export the pieces to an STL, so that's why I recommend to verify if it's possible to simplify the mesh before turning it into a NURBS, it will create less faces and triangles.
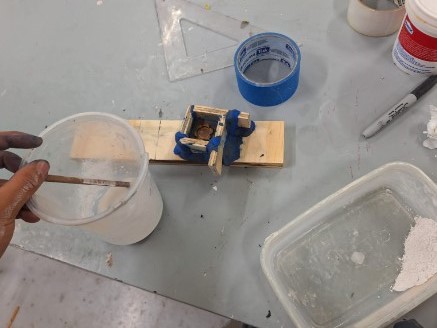
b)Making the mold
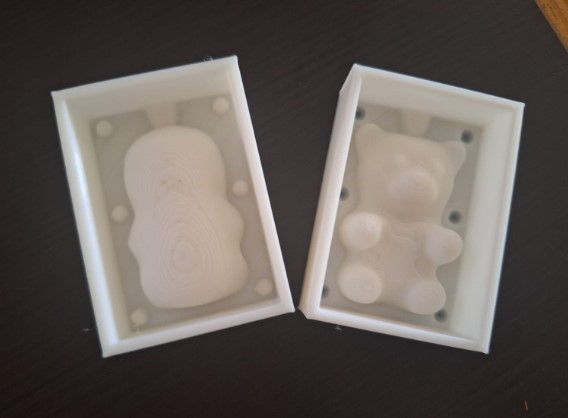
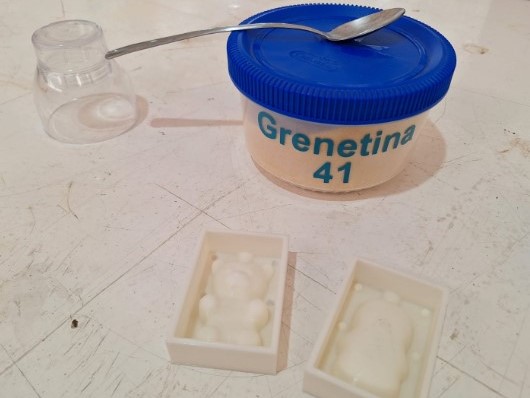
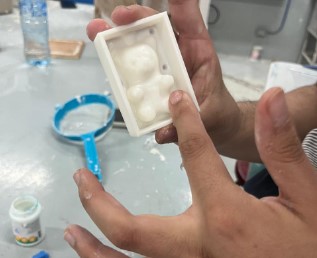
- The first I did was send it to print, it was small, so when it finished, the contraction of the material made the lines of the fillament a little subtle.

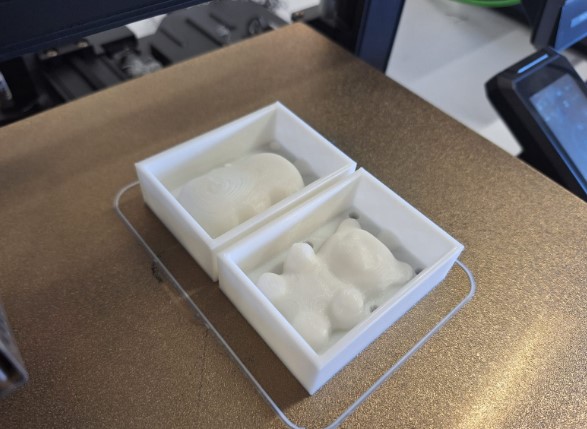
- Then I took the print to post- production. Instead of sanding it, I added a thick layer of vaseline to: 1. use as a release agent and 2: Smooth the surface.
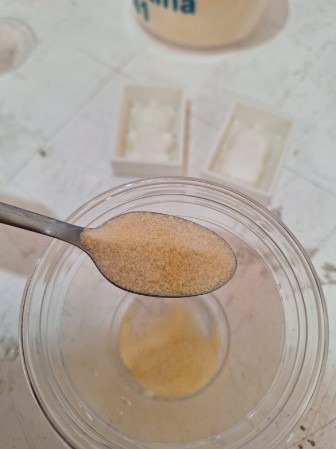
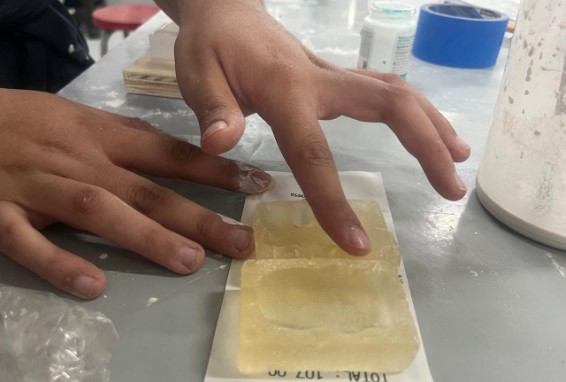
- Then I started preparing the material for my mold: Gelatin. I wanted to experiment with it, since I've seen that if you add enough it will become very flexible and resistant, just as silicone but safe for food. I kept a relation of 3 times more water than grenetin. I added 6 teaspoons of grenetin.
- I added the water little by little and stirred. It is easier if you add hot water or if you put it a few seconds in the microwave.
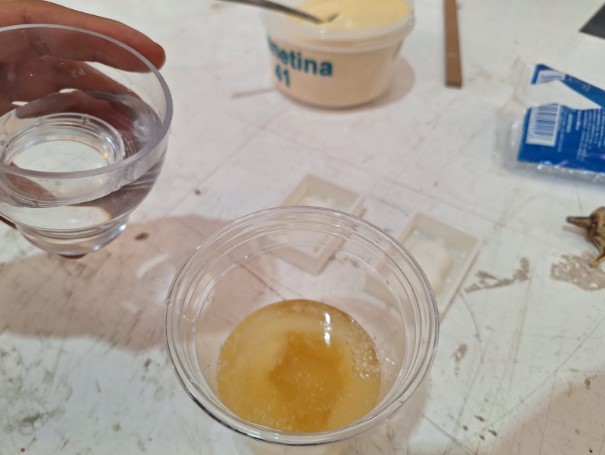

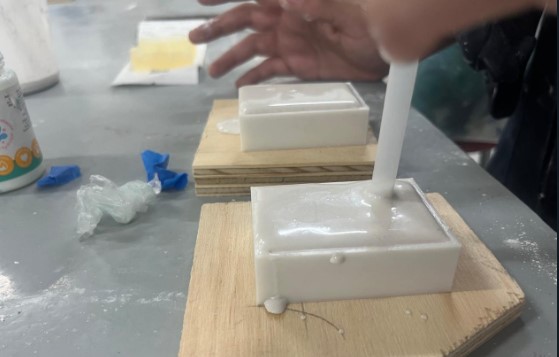
- Then I poured it to the mold, making sure it covered every part of it.
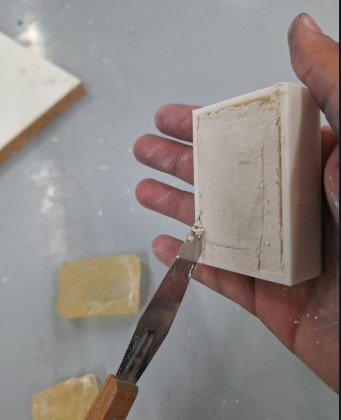
- I let it sit for about 40 minutes, but then decided to put it in the fridge for 2 hours. To demold it I outlined the edges with a cutter. It was easier since it was cold, so it resisted. Live it's easier to distinguish the shape, but the mold was ready!.

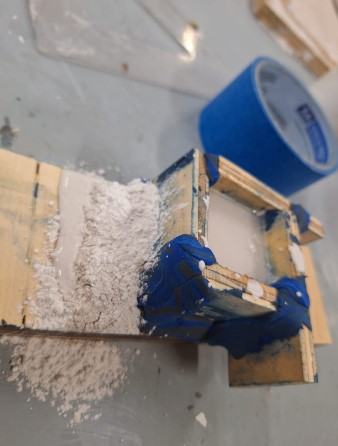
c) Preparing and casting
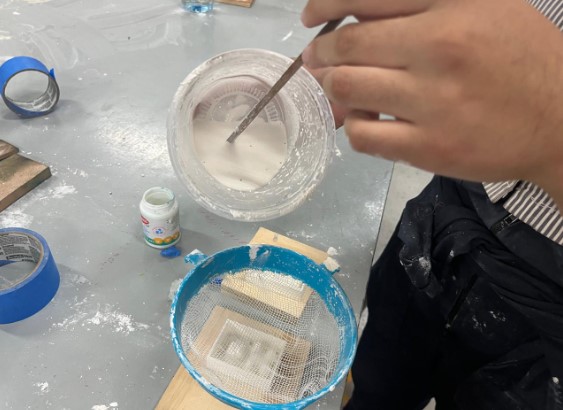
- While I was manipulating the mold, I got afraid it was very fragile, because it broke a little from a corner, so the idea of pouring gelatin in it felt too risky to lose the mold, even using one with less density. So that, I decided to try somethig different with an easy material: Plaster.
- To prepare plaster it is only necessary to add water in the right concentration keeping the relation that the amount of plaster is 1.3 times the water. The process went like this:
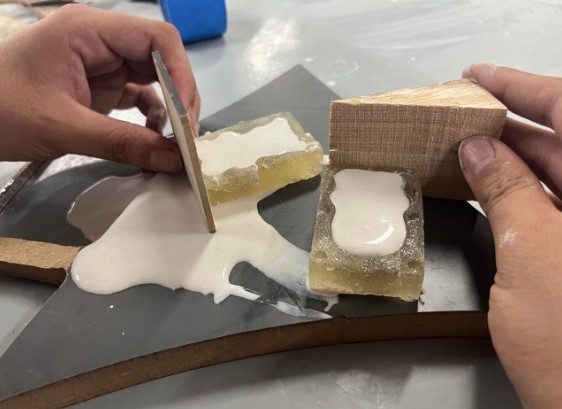
- First I put vaseline to the gelatin mold and also to the printed one, to make a countermold with a different material.
- Then added plaster to a bowl with water little by little, until it got a milky consistence.
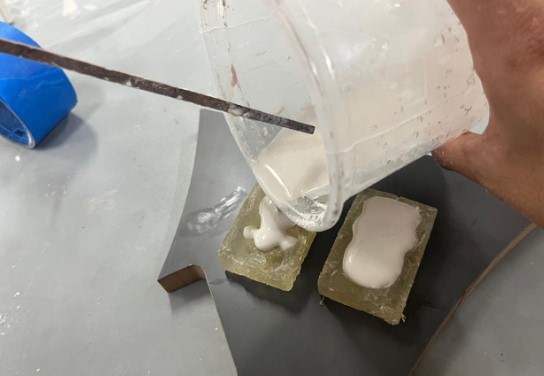
- I stirred and after some seconds, poured the mixture to the molds, using a colander to prevent lumps.
- As the gelatin mold had a fissure, the mixture began to leak. I panicked a little (lol) but solved it by adding a piece of MDF as a barrier.
- Then, It stopped leaking and I only had to wait about 20 minutes to demold it.
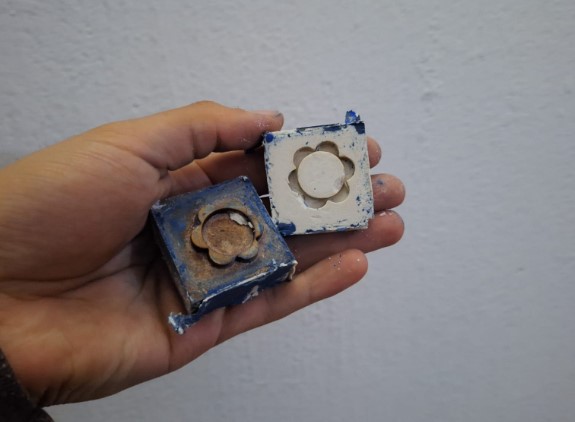
D) Demolding the result
- The gelatin mold was pretty easy to demold, and even the spots where it broke, helped me to bend it and take the piece out.
- It was really easy, but as I had a loss of water due to the leaking I decided to pour it once again.
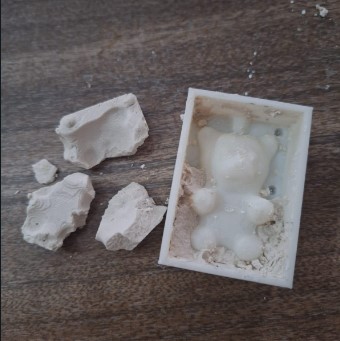
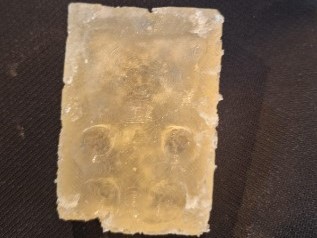
- The unexpected problem is the other mold, the one that would be casted from the print, because It didn't dry, I'm hoping it will, but here it looked when I took one half out. I'm still not sure if the problem was the material mixture or if it had locks that didn't allow it to come out.
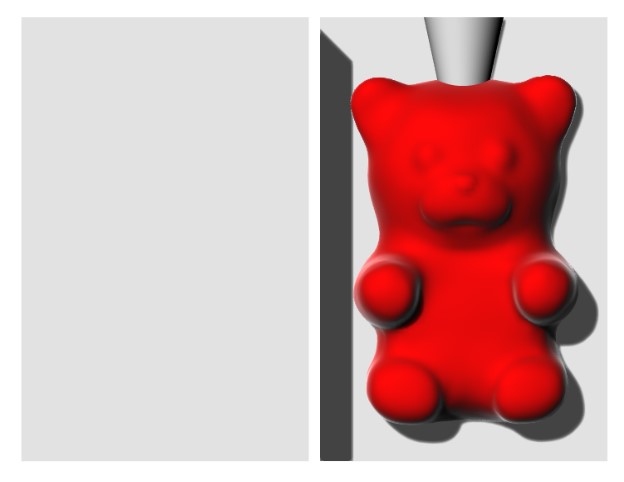
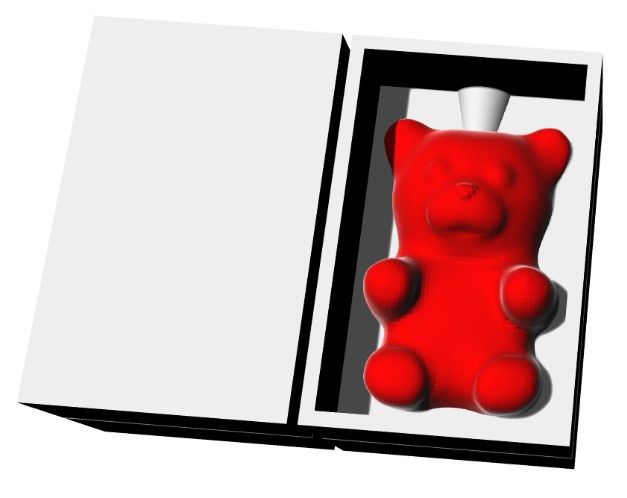
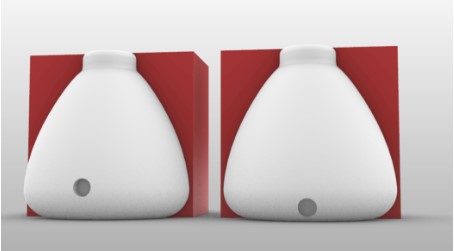
Final Result!
Showing previous work 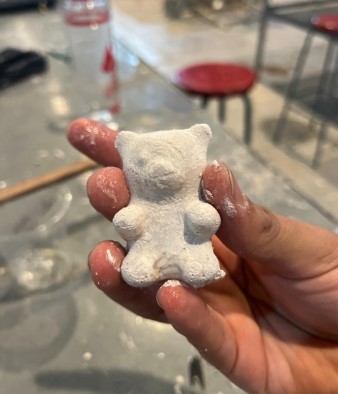
Description for Image 1
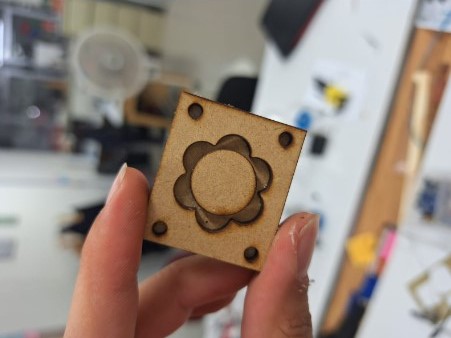
Extra experiment- Laser Cut
I noticed there could be a chance to "machine" a mold from stereotomy and that it could work for casting resin, so I tried making a file for a ring.
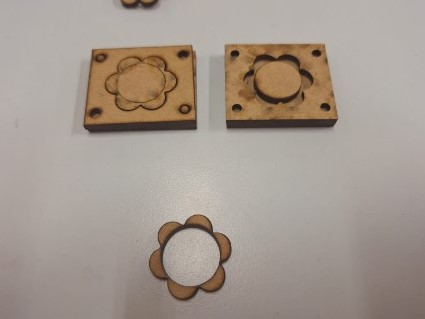
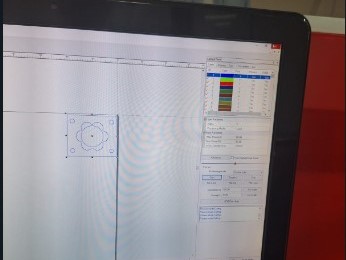
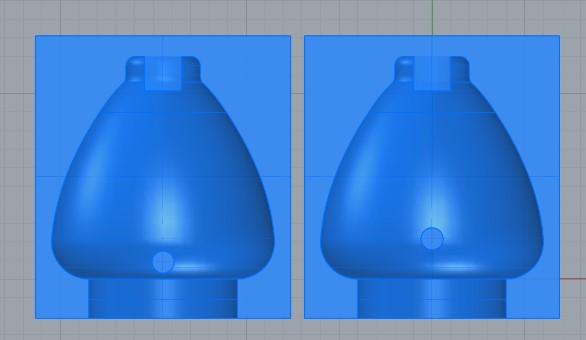
Design of the mold for my final project
----Files ----
- Next, I drawed a box a little bigger than the piece. Here I decided it would be a countermold, so this box would divide the model by half. I also changed the appearance settings to visualize it better. .
---- The design process----
For this week, I started with many ideas, but not all of them reached a final and functional mold, so I will divide each by name and type of machining from what worked the most to what is still in standby to be considered functional.