BODY AND BASE
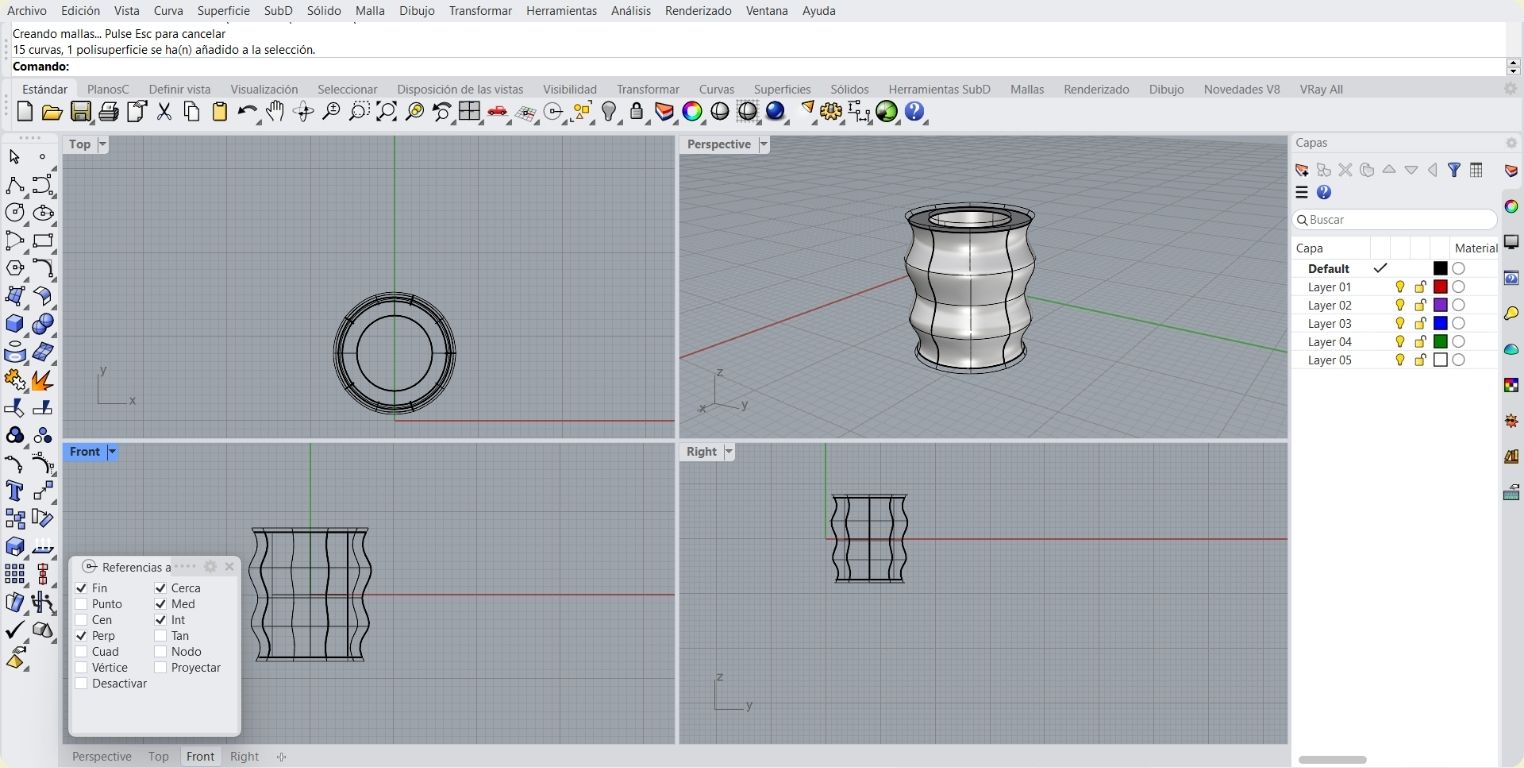
When designing the body I knew two things for sure, there would be an internal base for the neopixel strip, but in addition I also wanted to follow an organic and wavy shape, I'm a fan of that particular style, so I started with this first piece as a mini prototype. For this I started it basically from a basic line.
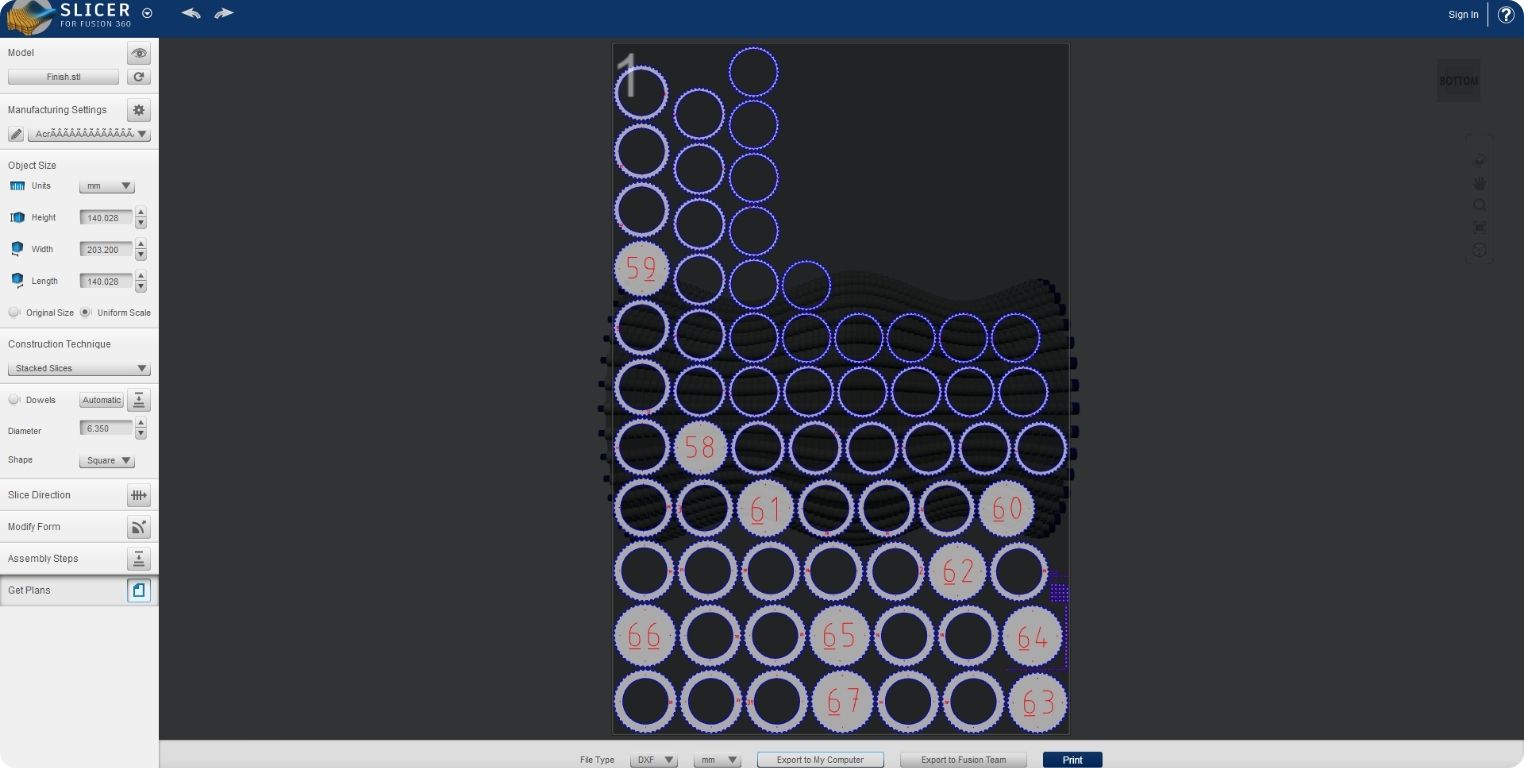
As I also knew that I would work this part with acrylic, I looked for an easy and simple way to create the structure with this material. So in this research I found Slicer, an Autodesk program that currently no longer has updates, but it works the same way, and the best thing is that it is free. Basically it allows you to recreate 3D parts from stereotomy or layers.
In the photo you can see the choice of material, this can be changed, edited or add a new one with specific characteristics, also if you have specific dimension plates to work, these can also be given to the program to tell you how many would be occupying.
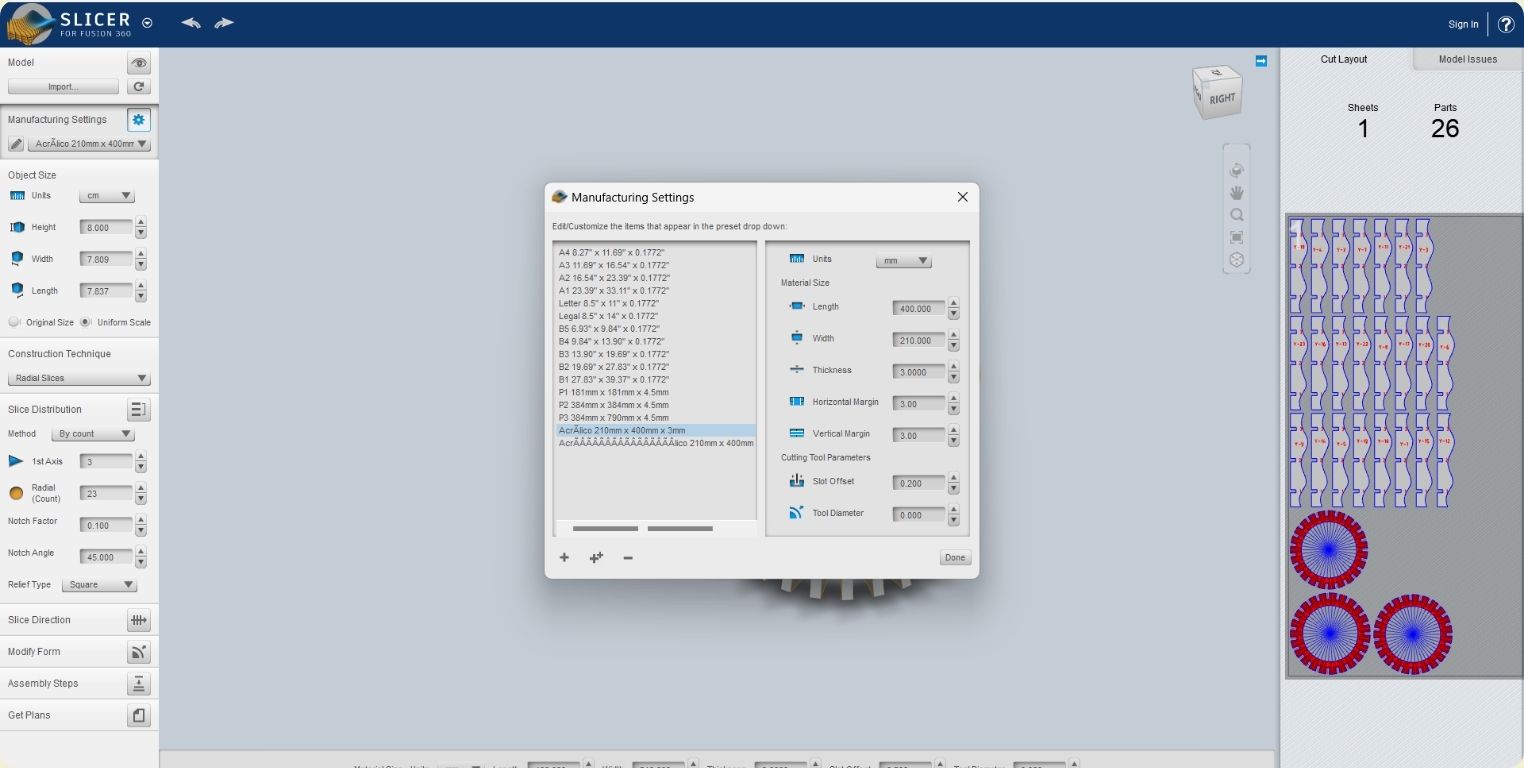
On the left side you can see the measures, techniques and construction configurations, while on the right side you can see the plan with all the plates that would be necessary to join them as shown in the center. Definitely I think it is a tool that is worth exploring a lot more, although not having updates sometimes you can struggle a little to use it, because they no longer solve the problems that you may have.
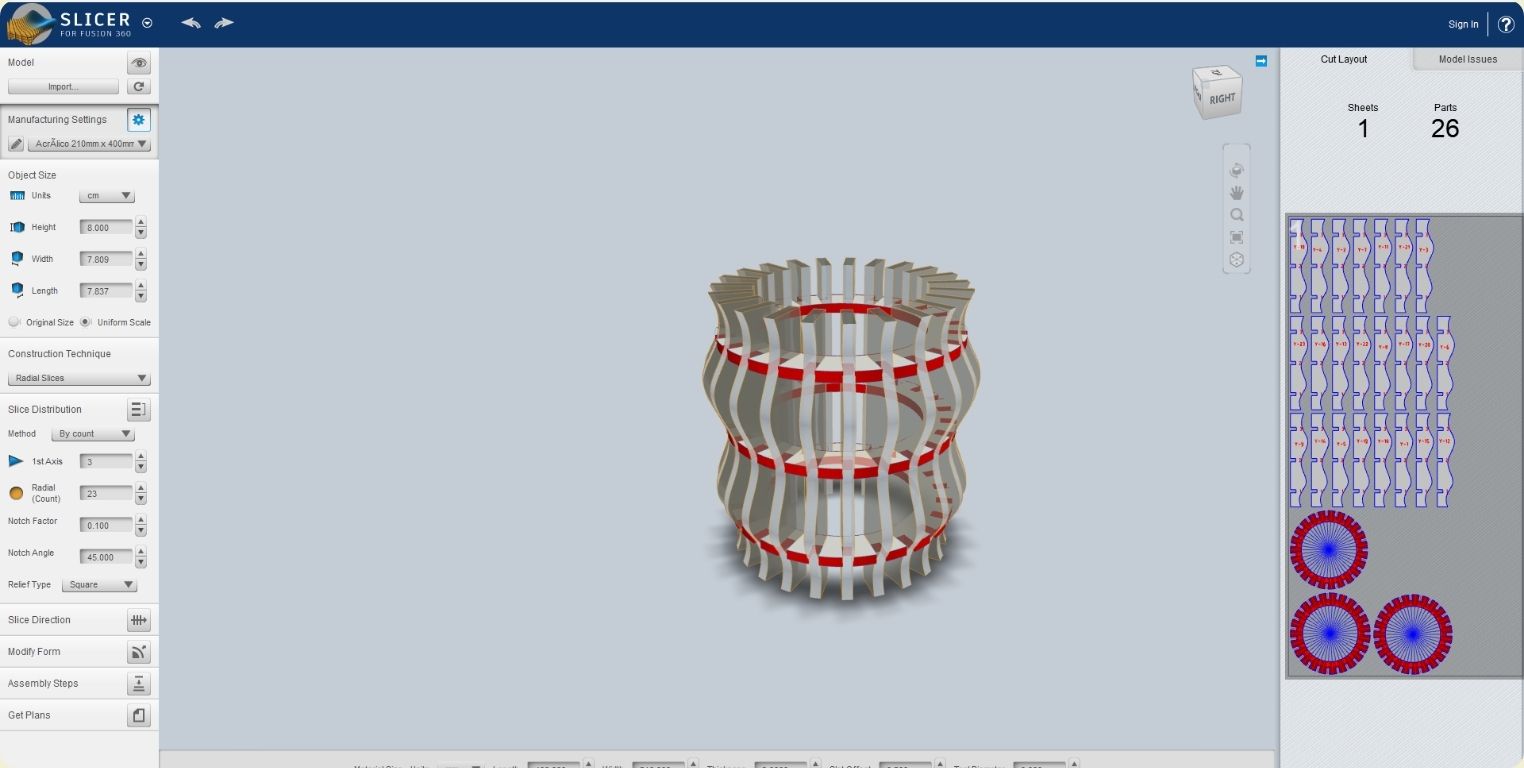
The next step was to cut this prototype in laser, for this it was necessary to configure engraving and cutting, because although the pieces would be cut, I needed the numbers of the pieces to be engraved on each one so that when joining the pieces together there would be no errors and it would be an easier process. And of course, Slicer already gives you the part numbers, it's a marvel.
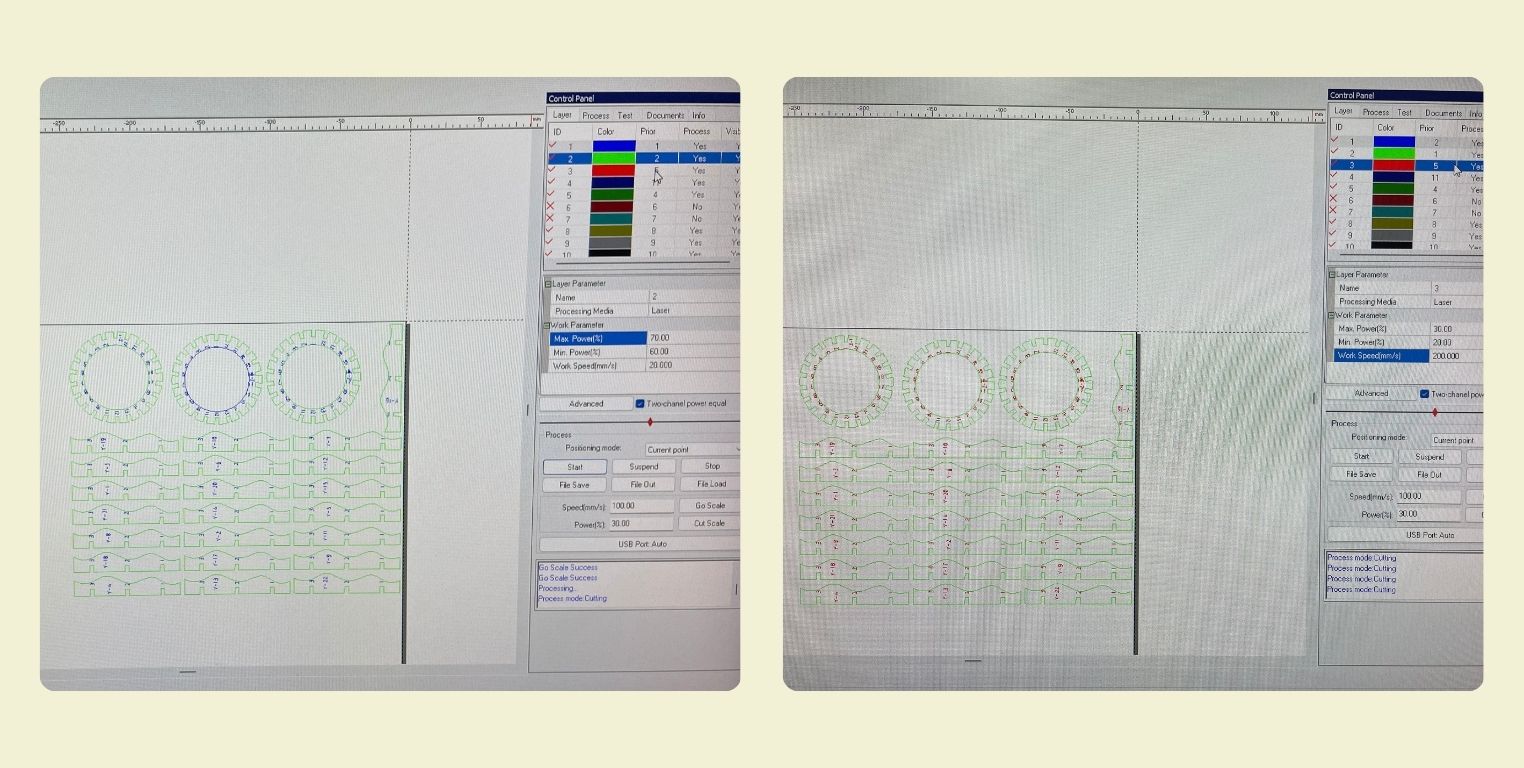
Here is a little video of the process to make sure that everything was correct. At the end as you can see, although Slicer already gives you an optimized organization of your workspace, you can always edit it to optimize it even more.
Next is the most time consuming part, but still one of my favorites, which is to remove the protective plastic from the acrylic, organize and join the pieces.
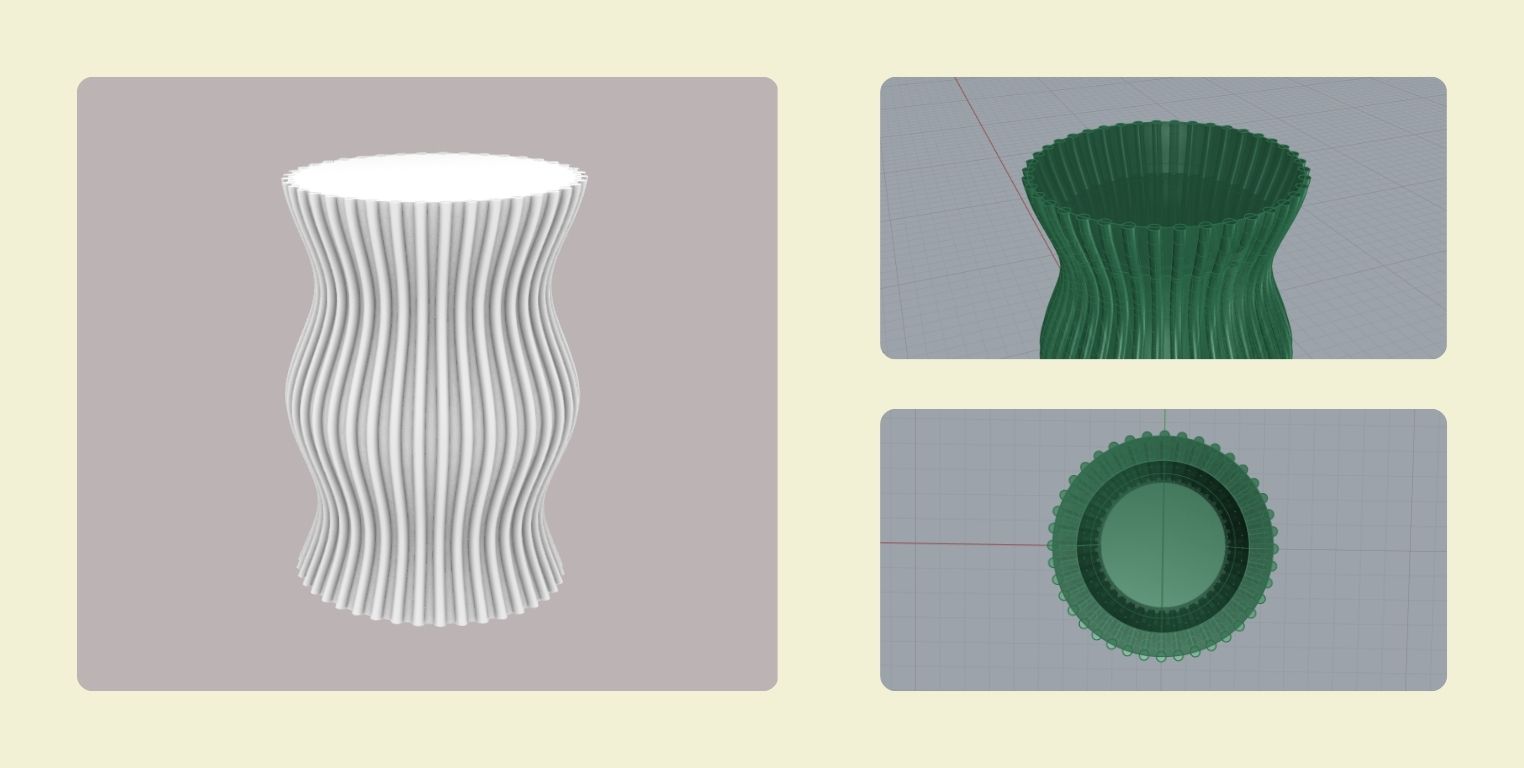
I made this first prototype mostly to learn how to use Slicer because it was my first approach, and also to test a little the technique of construction with stereotomy, and although it is not new to me, I was interested in verifying how the spaces between the pieces would look like, because the idea of doing it with acrylic had arisen mainly to play with the light and how the material could deform it. In the end, although I liked the shape, I didn't love the construction technique, mainly because I didn't like the idea of the neopixel strip in the center showing through.

So I went back to my modeling program, where I again started exploring the shapes and heights, keeping the centric base in mind, but now I was able to create a new shape.

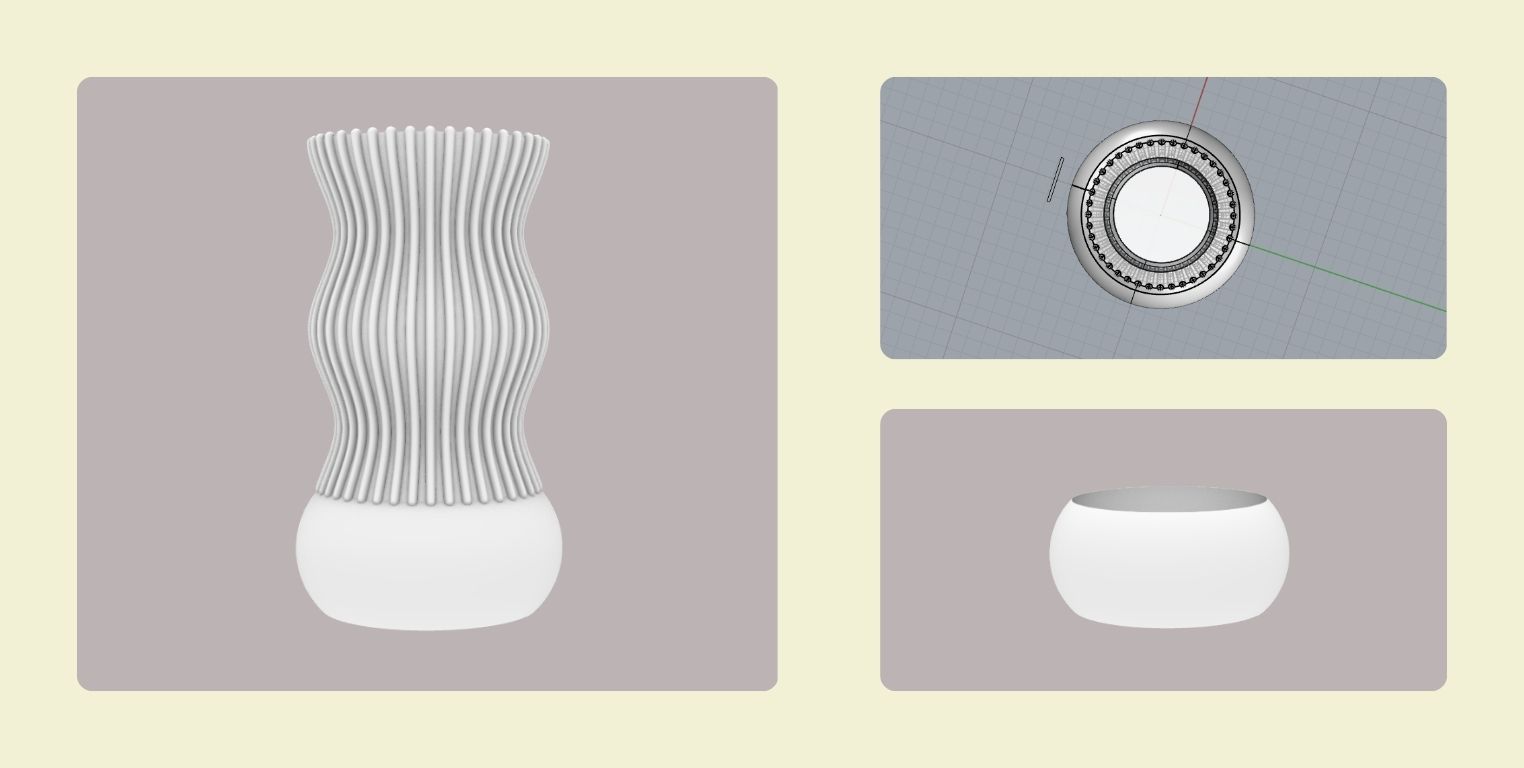
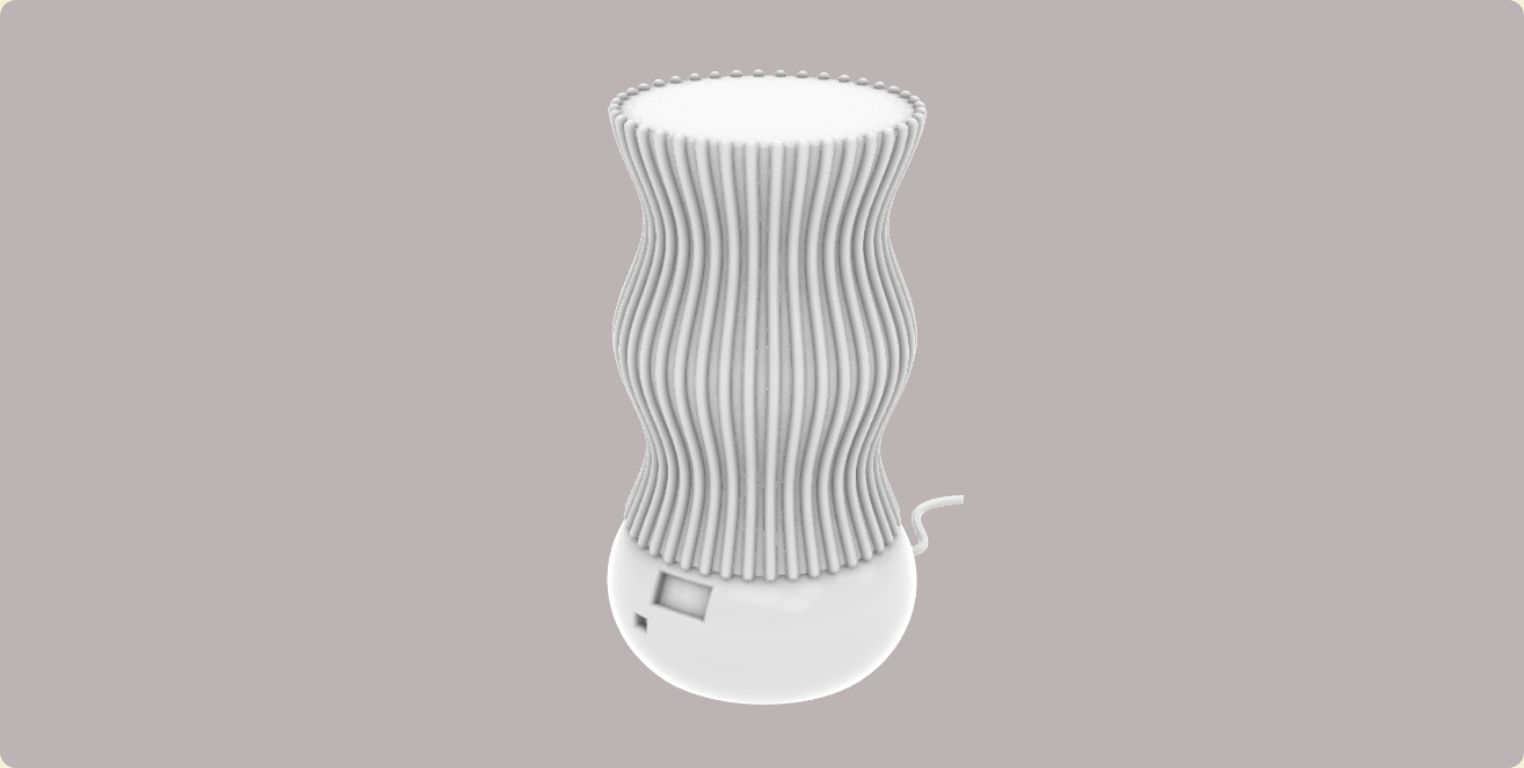
In the end I decided on a textured body, I thought it might look interesting in acrylic.
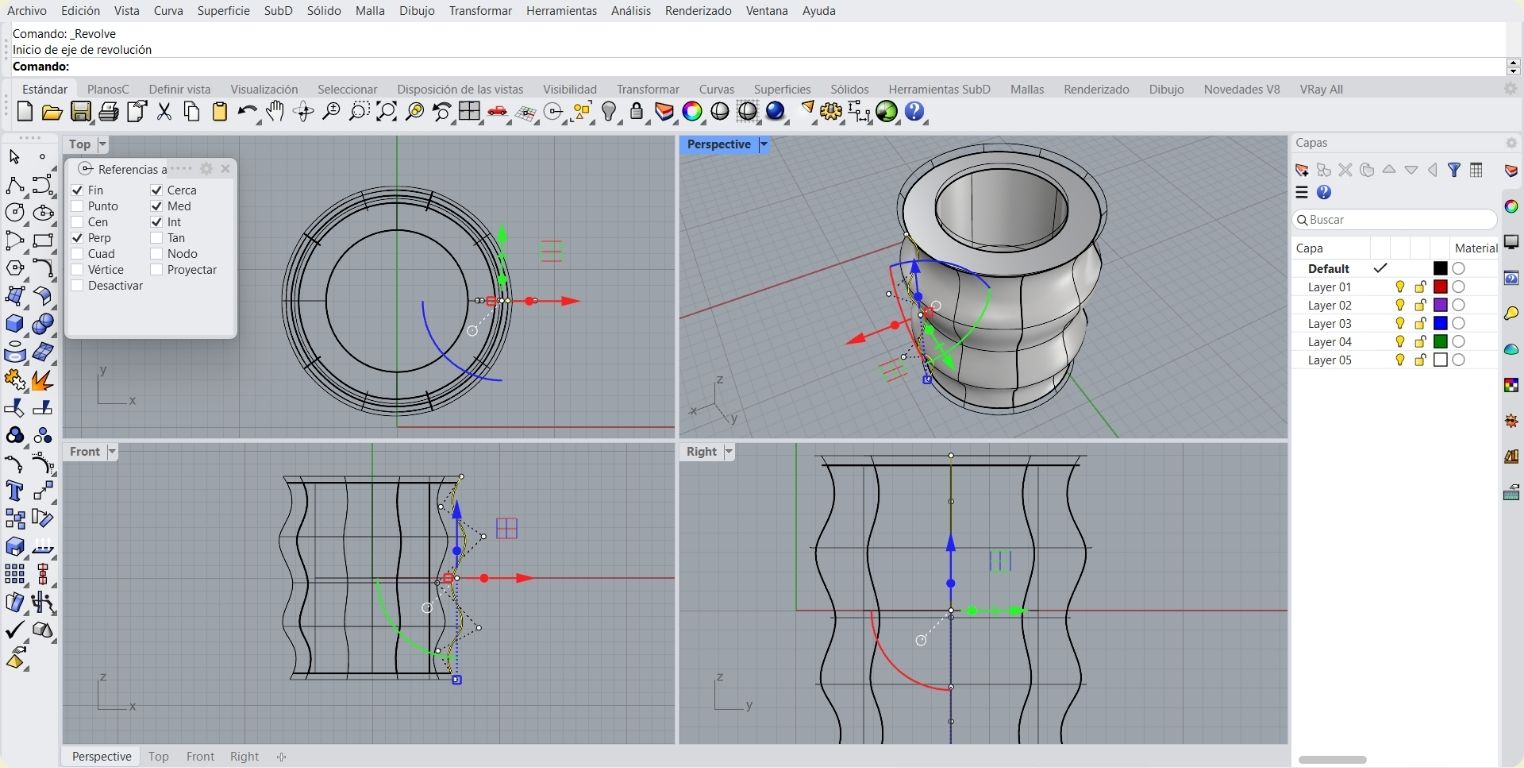
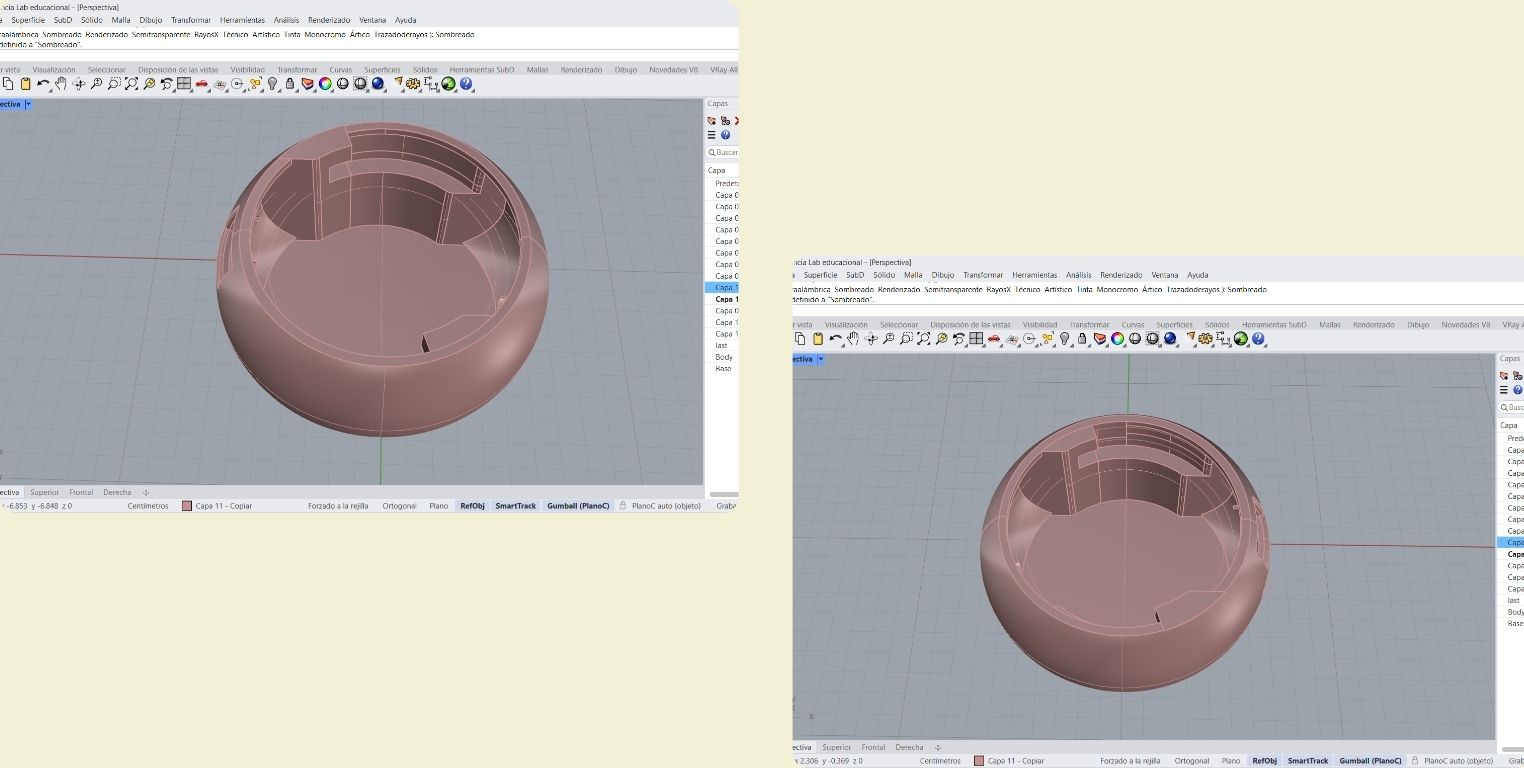
Once I had the body finished, I could continue with the base, in which I had planned to put the electronics part. In the end I made a continuation of the body so it wouldn't be too disruptive.
I added a space for the OLED screen in which I extruded some cylinders to secure it in the circular holes that the screen already has, plus a hole for the on/off button, in the back I also added a hole for the power connection cable.
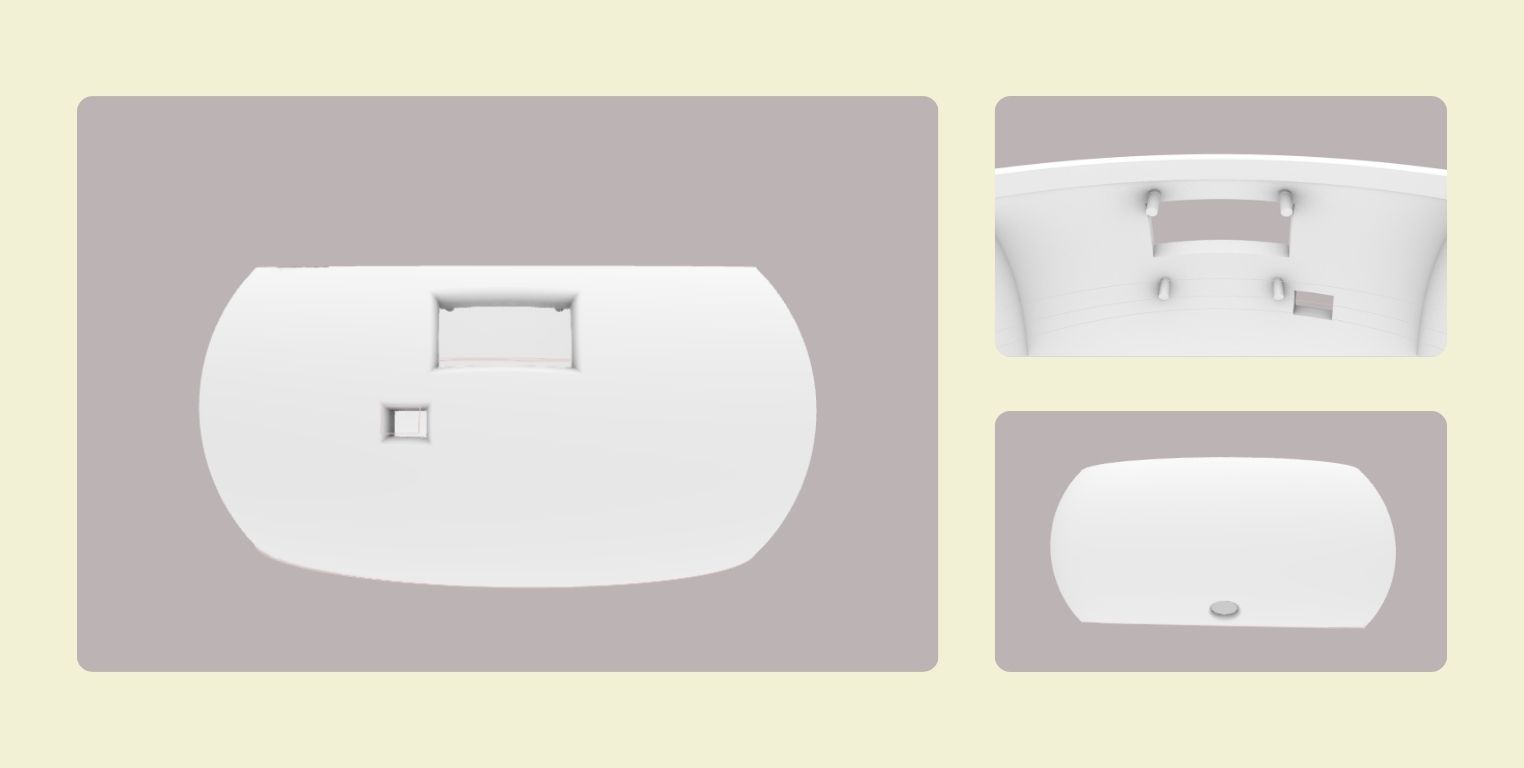
To attach the base to the body I thought about making a security system. I knew I would have to open it at some point if I want to integrate the horn later, and also to fix any aspect of the electronics, so gluing them together was not an option. So I thought about implementing a safety lock like the one blender lids have, more or less in that mechanism I was inspired to develop mine. Something like this looks like the base with the integrated system and enough space for the power transformer to fit without problems.
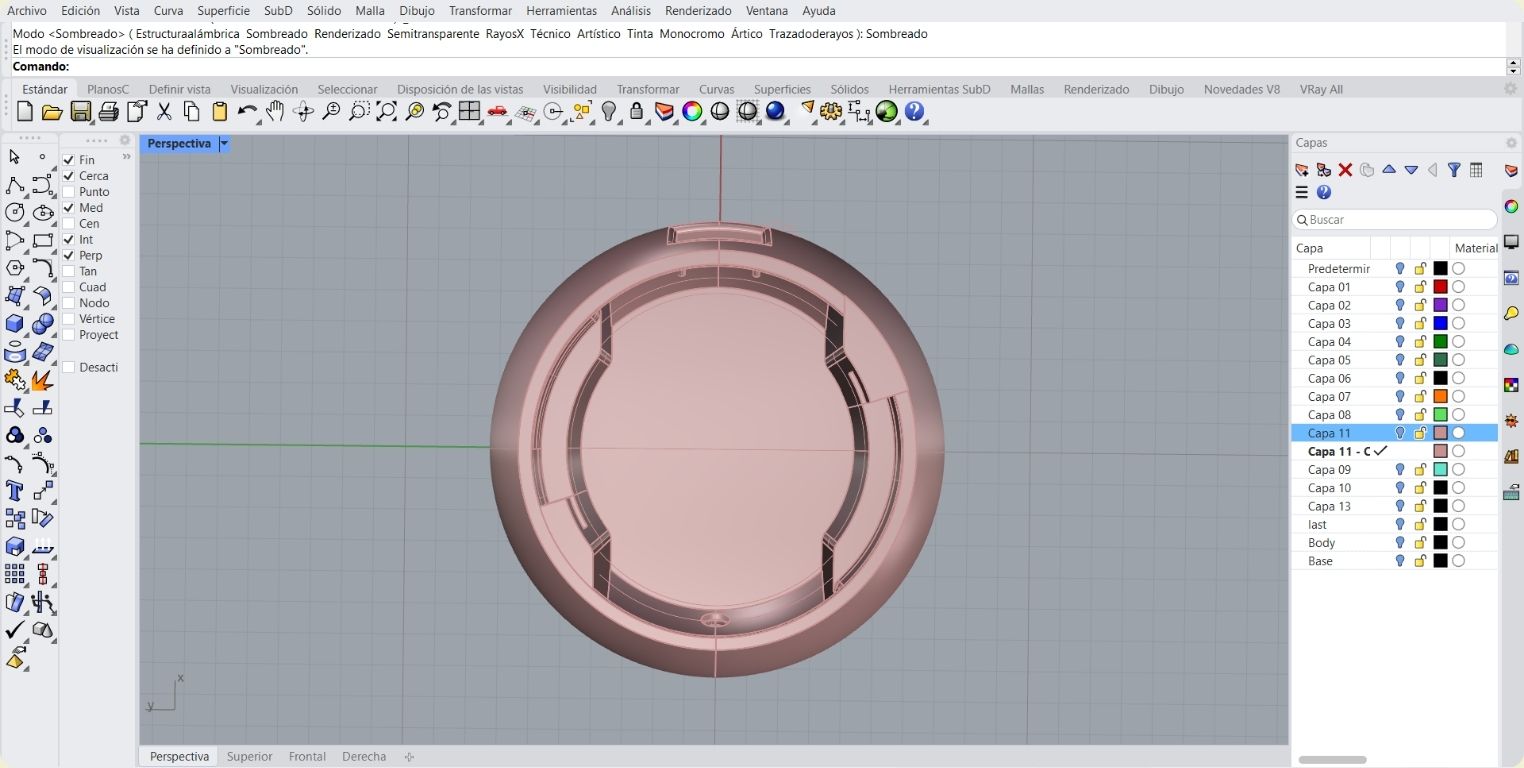
This is a perspective of the 3D model, I really loved how it turned out.
Then I passed the body through the Slicer program, there I changed the dimensions of the acrylic plate with which I would be working as well as choosing a Stacked Slice construction technique.
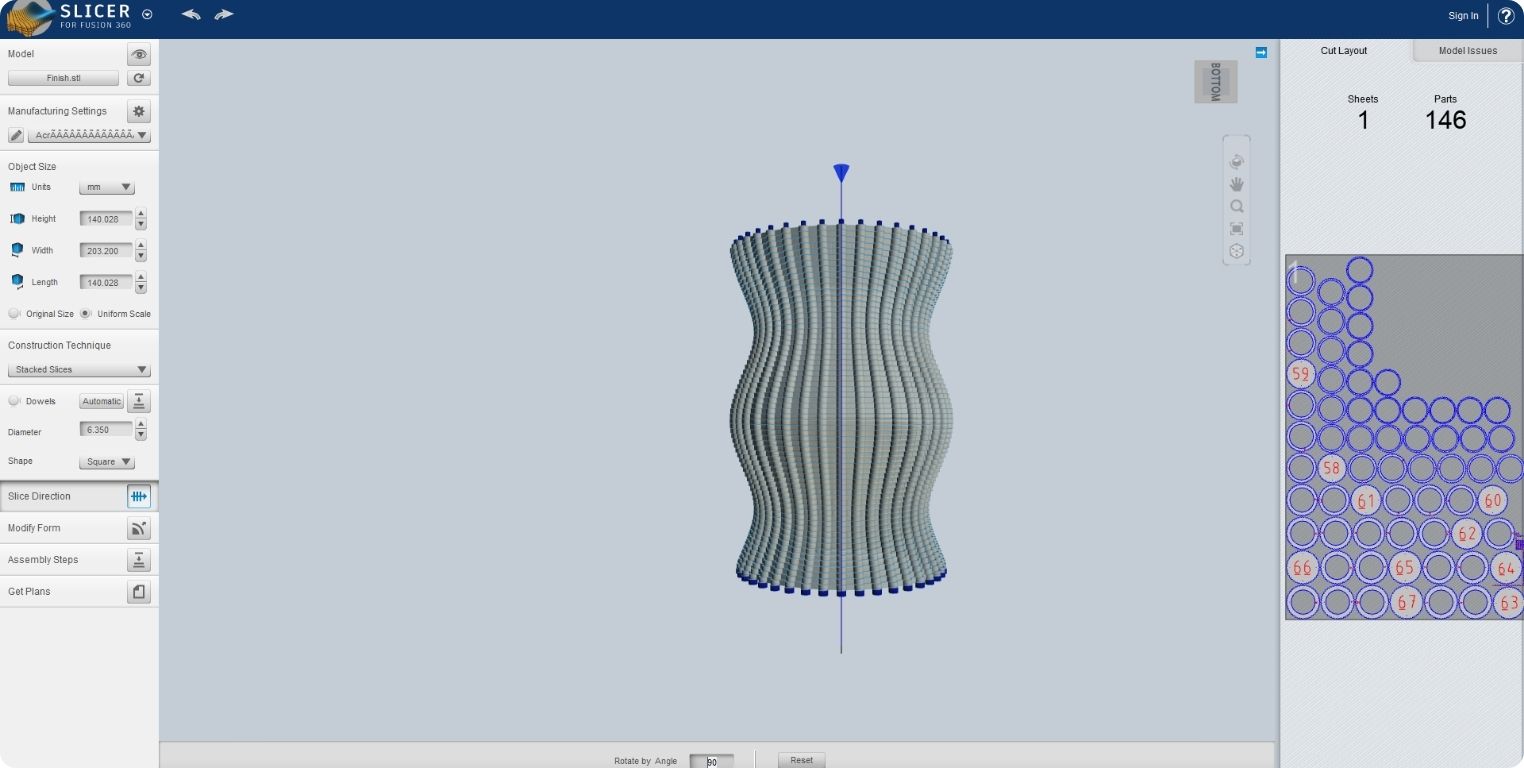
This is how the plan that allows you to download looks like, either in PDF, or in my case in DXF.
After cutting on the laser I had to separate the pieces from the center circles. I didn't take photo on the laser cut here is a photo of the cut material, in small you can't see it, but about half a meter of acrylic was used for this piece.
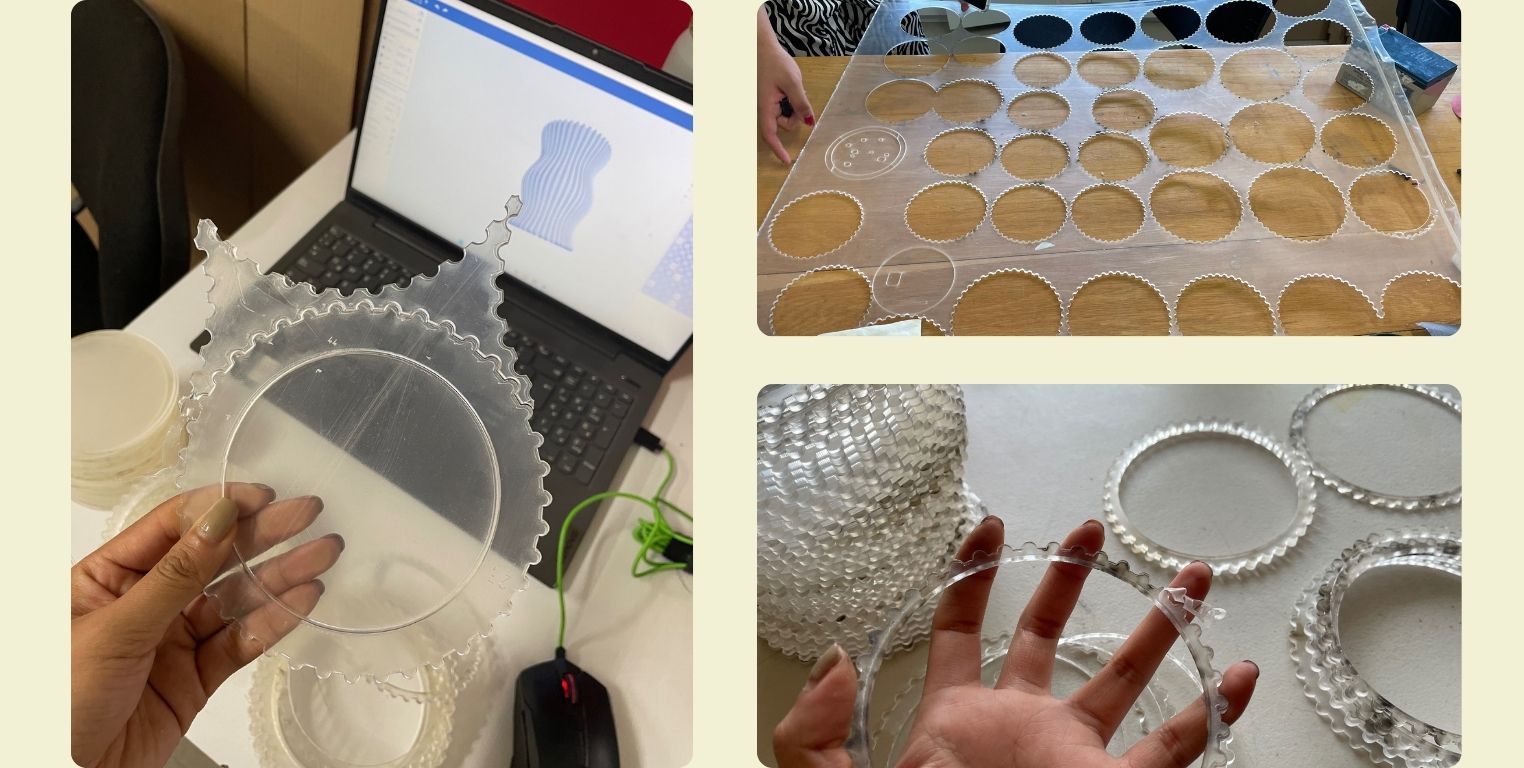
Once I had the pieces, I separated them in 3, the base, the middle part and the top part. I removed the protective plastic and carefully started gluing them piece by piece with some KolaLoka.
In the case of the base, I made it in white PLA filament 3D printing.
The first thing I did once the base was ready was to put the power converter and also verify that the acrylic pieces for the locking system reached the edge of the base. As you can see in the photo they were a little short to reach.

What I did to solve it was to cut and glue some layers of transparent plastic that I found. In the end this is how the pieces were, and as they were made of acrylic, what I did was to glue them to the base of the acrylic body, I leave a video of how it assembles.
Final Proyect Internal base