3. Computer Controlled Cutting
Computer-controlled cutting involves the use of a router that is similar to a handheld device. It's a great way to cut a variety of hard materials, including wood, composites, aluminum, steel, plastics, and so on.
Laser cutter
Laser cutters are amazing tools for prototyping and manufacturing!
They employ a narrow, concentrated laser beam to puncture and cut materials into specific patterns and shapes. And that's not all; laser cutters may also raster or etch designs into workpieces by heating the material's surface, causing a change in appearance where the raster operation was conducted.
Did you know that?
LASER stands for Light Amplification by Stimulated Emission of Radiation
A laser cutter is a machine that is controlled by a computer, using CNC (Computer Numerical Controlled) technology. The process is efficient and precise. This means that designs created in software can be submitted to the laser cutter for automatic cutting.
Some advantages:
- It can be very quick and can churn out designed parts in just a few minutes.
- It is suitable for a lot of different materials.
- It can be used for cutting, marking, engraving, drilling, and welding.
The Kerf… what is that?
The kerf refers to how much of the material the laser takes away when cutting through. It is the width of the groove made while cutting and varies depending on the material being cut and the laser beam tolerance. All machines have a very fine tolerance.
Group Assignment
Visit our group task by clicking on the button below.
How about we put theory into practice now?
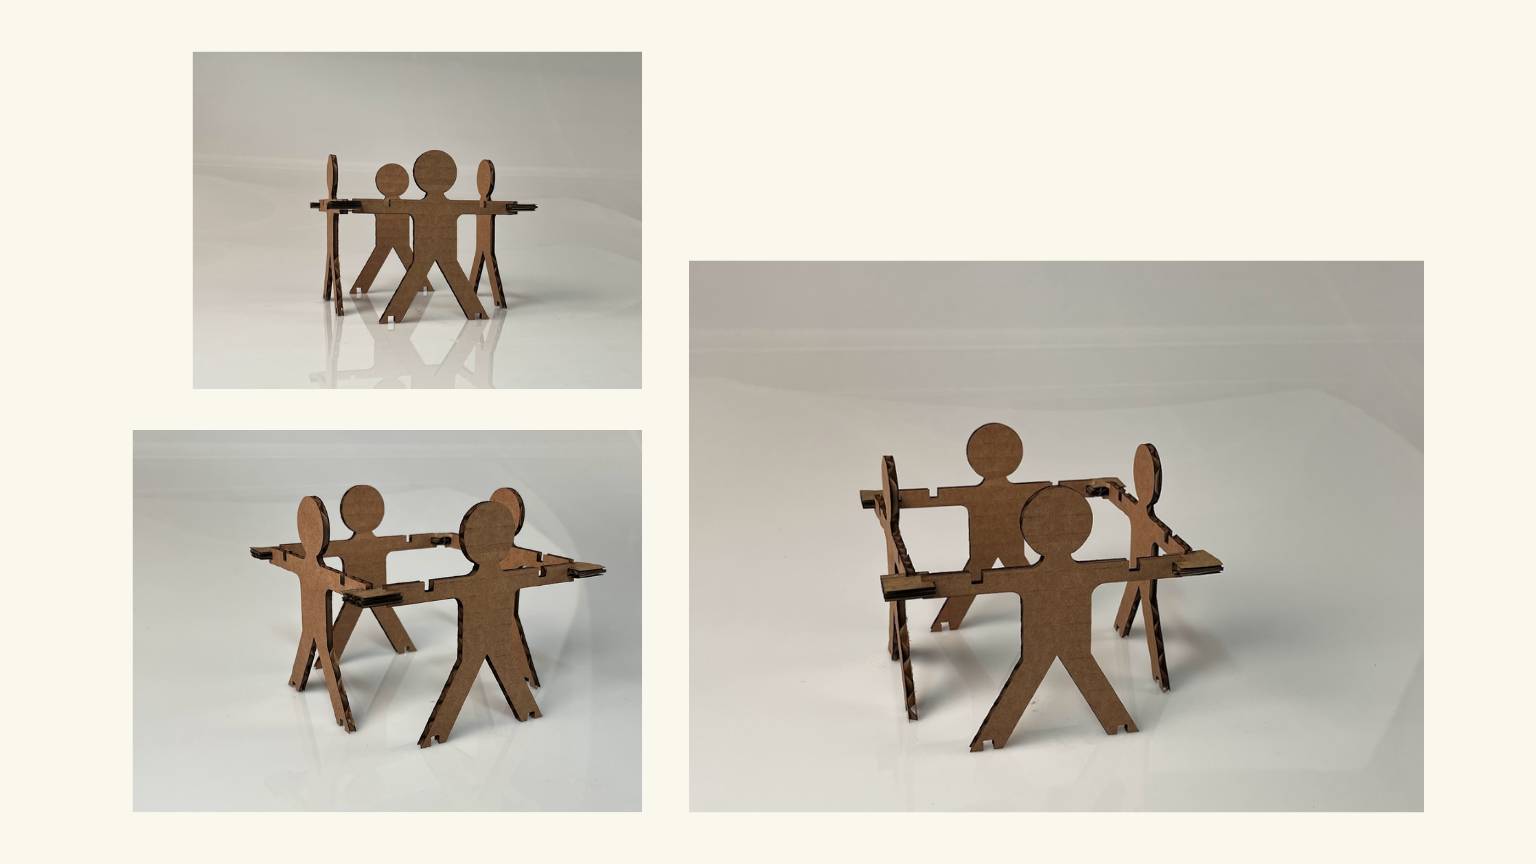
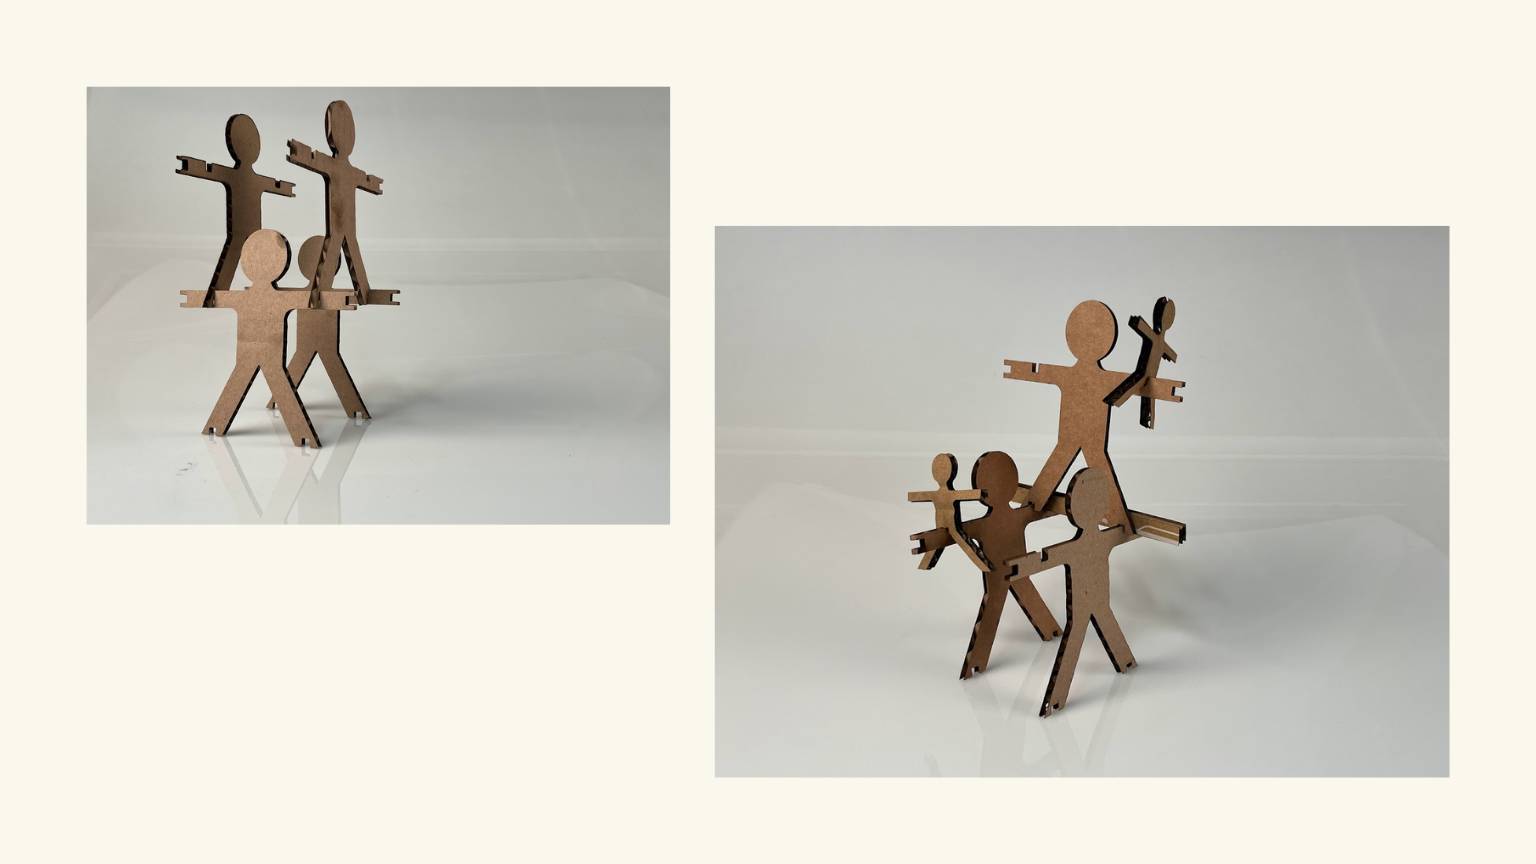
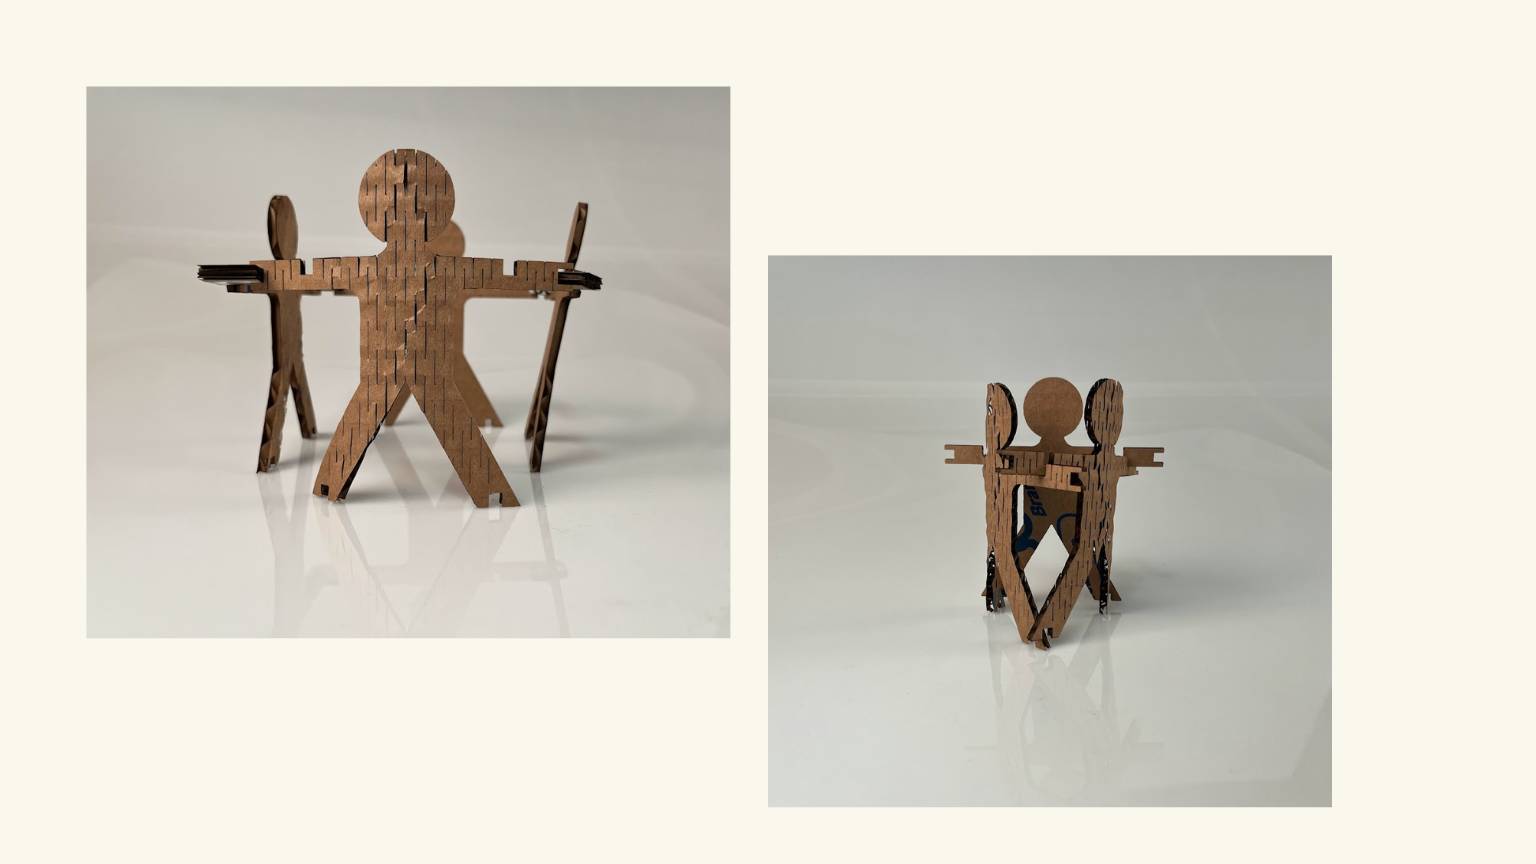
Parametric construction kit … oh boy !
For my parametric construction kit, I chose a conceptual idea. I created human structures based on the notion that we are all constructs of society. There is a connection and synergy between every human being.
But fist… How did I make my parametric design?
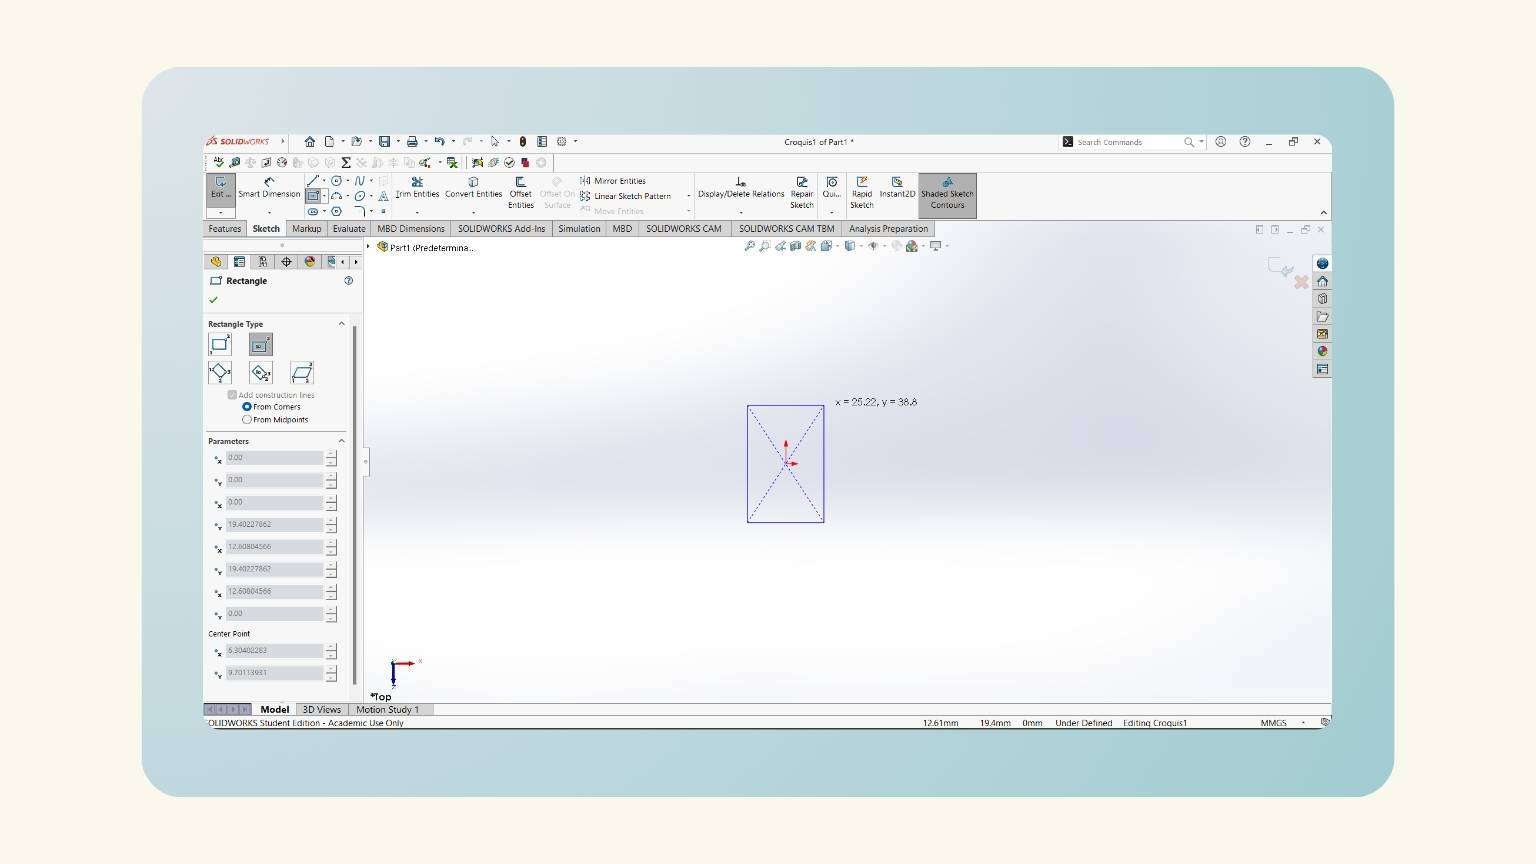
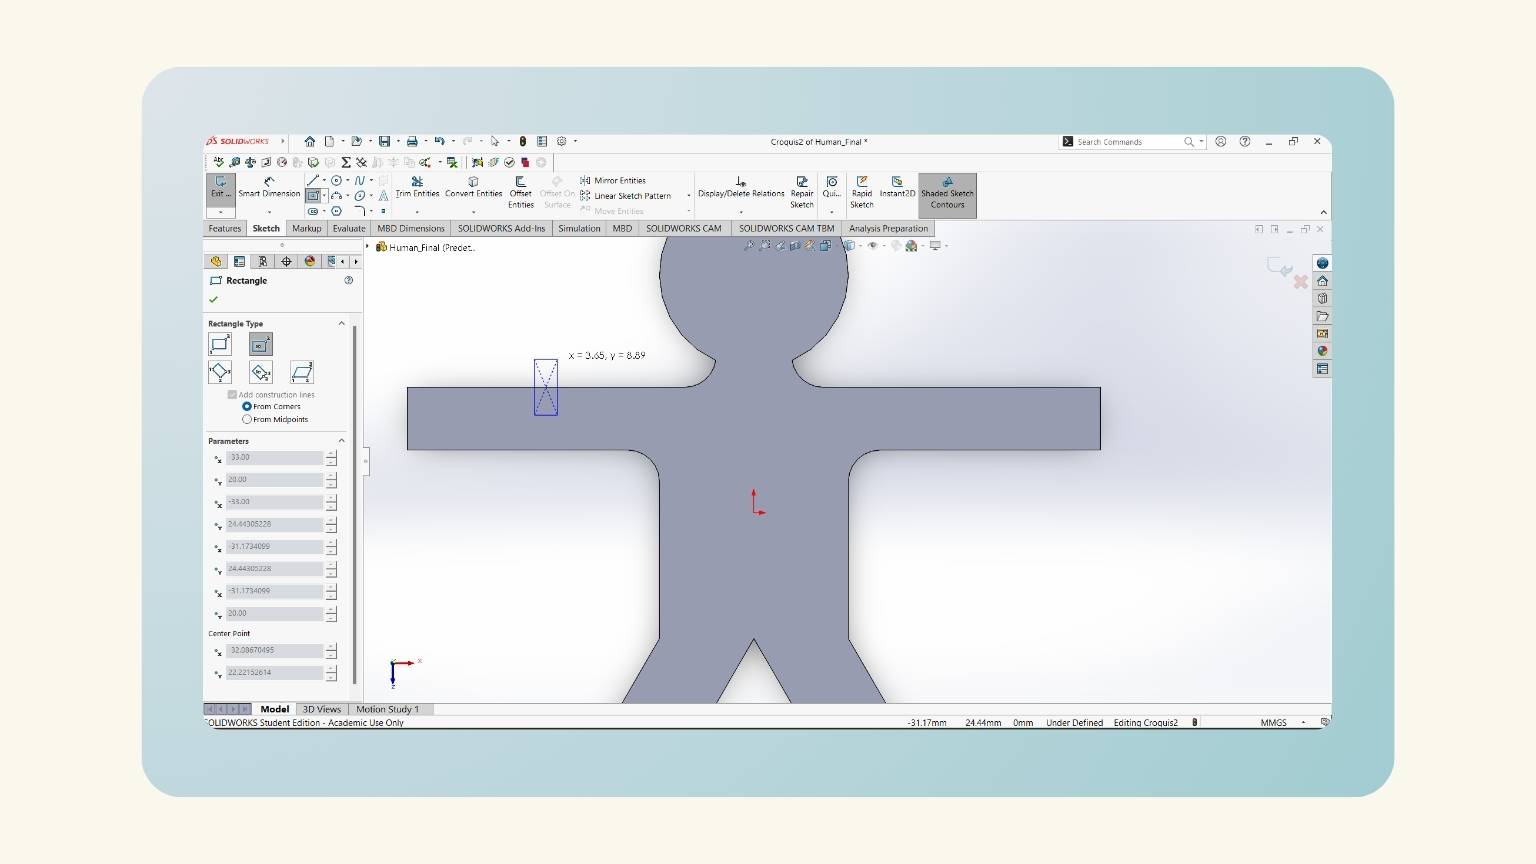
- I started a ‘Sketch’ in the top plane.
- I created a rectangle with the ‘Center ‘Rectangle’ tool.
- This tool sketches a rectangle from the center.
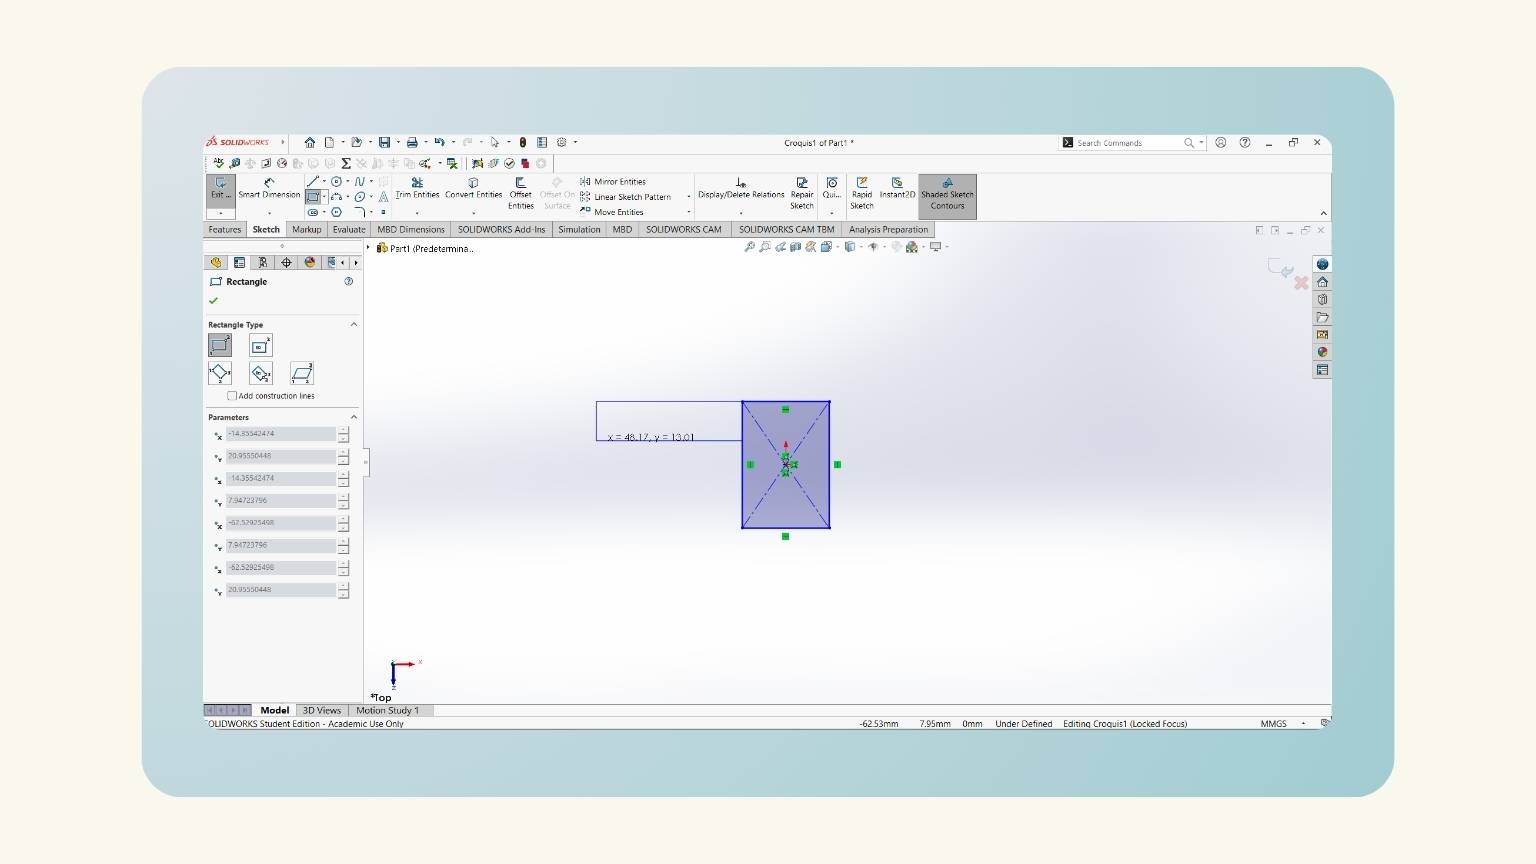
- I created another rectangle, but with the ‘Corner Rectangle’ tool.
- This tool sketches a rectangle by clicking on the first corner of the rectangle.
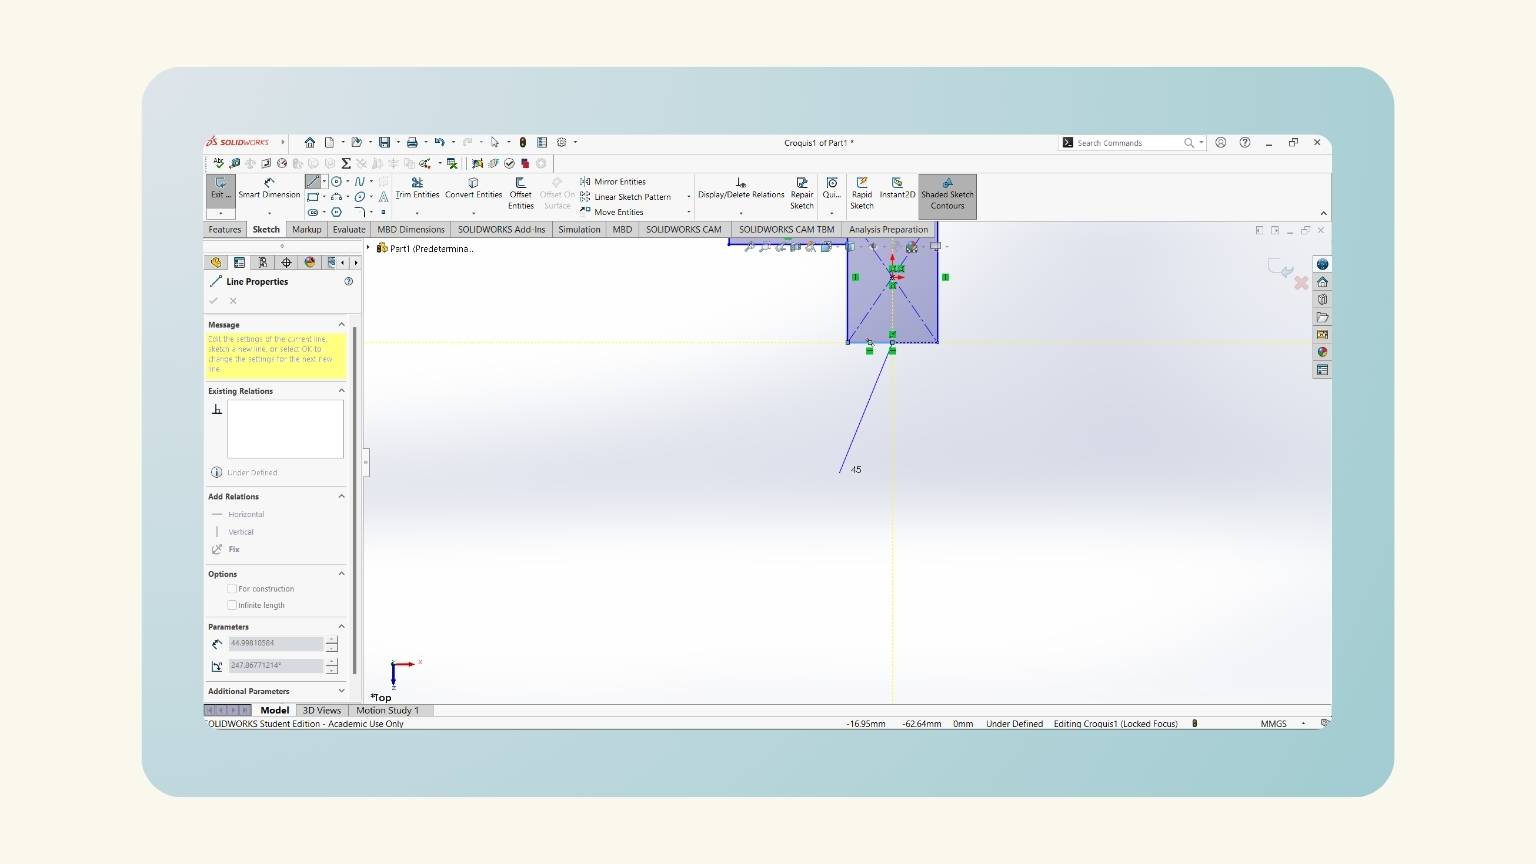
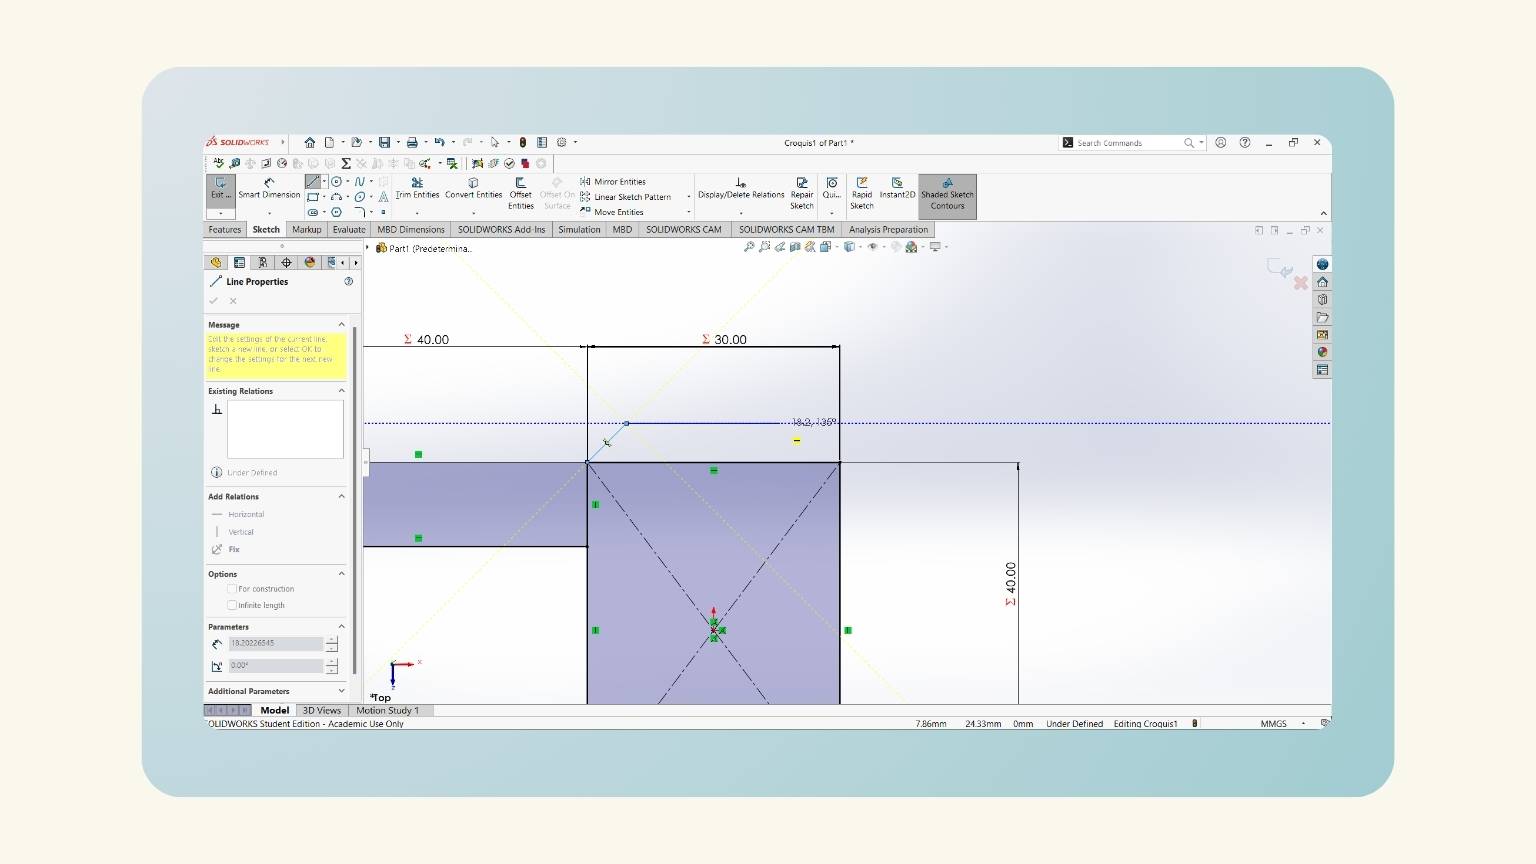
- I drew the legs. I started by tracing a line with an angle.
- This is done with the ‘Line’ tool.
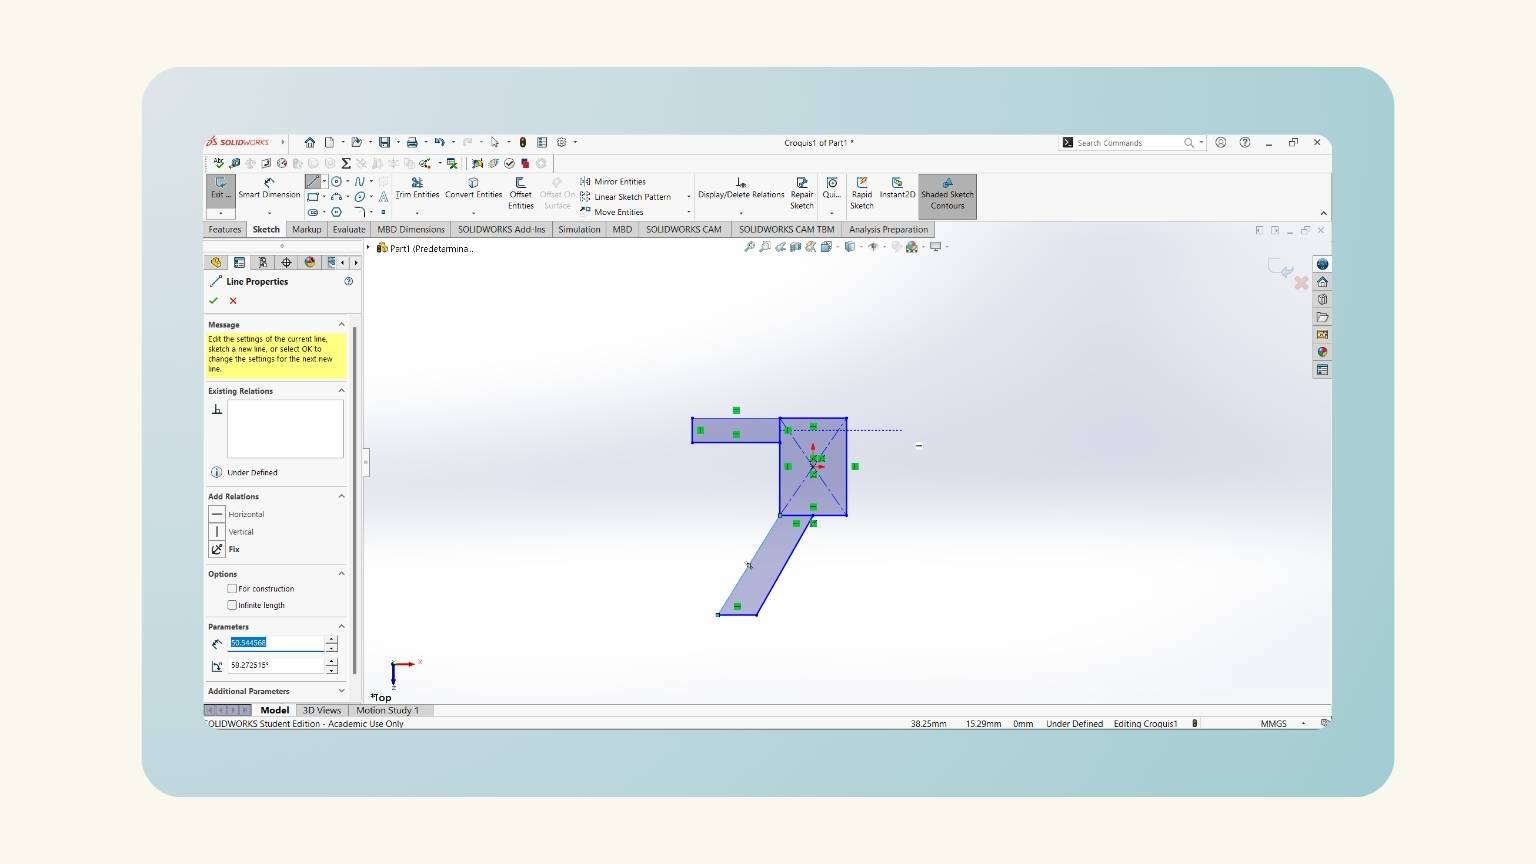
- Then, I traced another horizontal line to the left and another to the final point of the rectangle. '
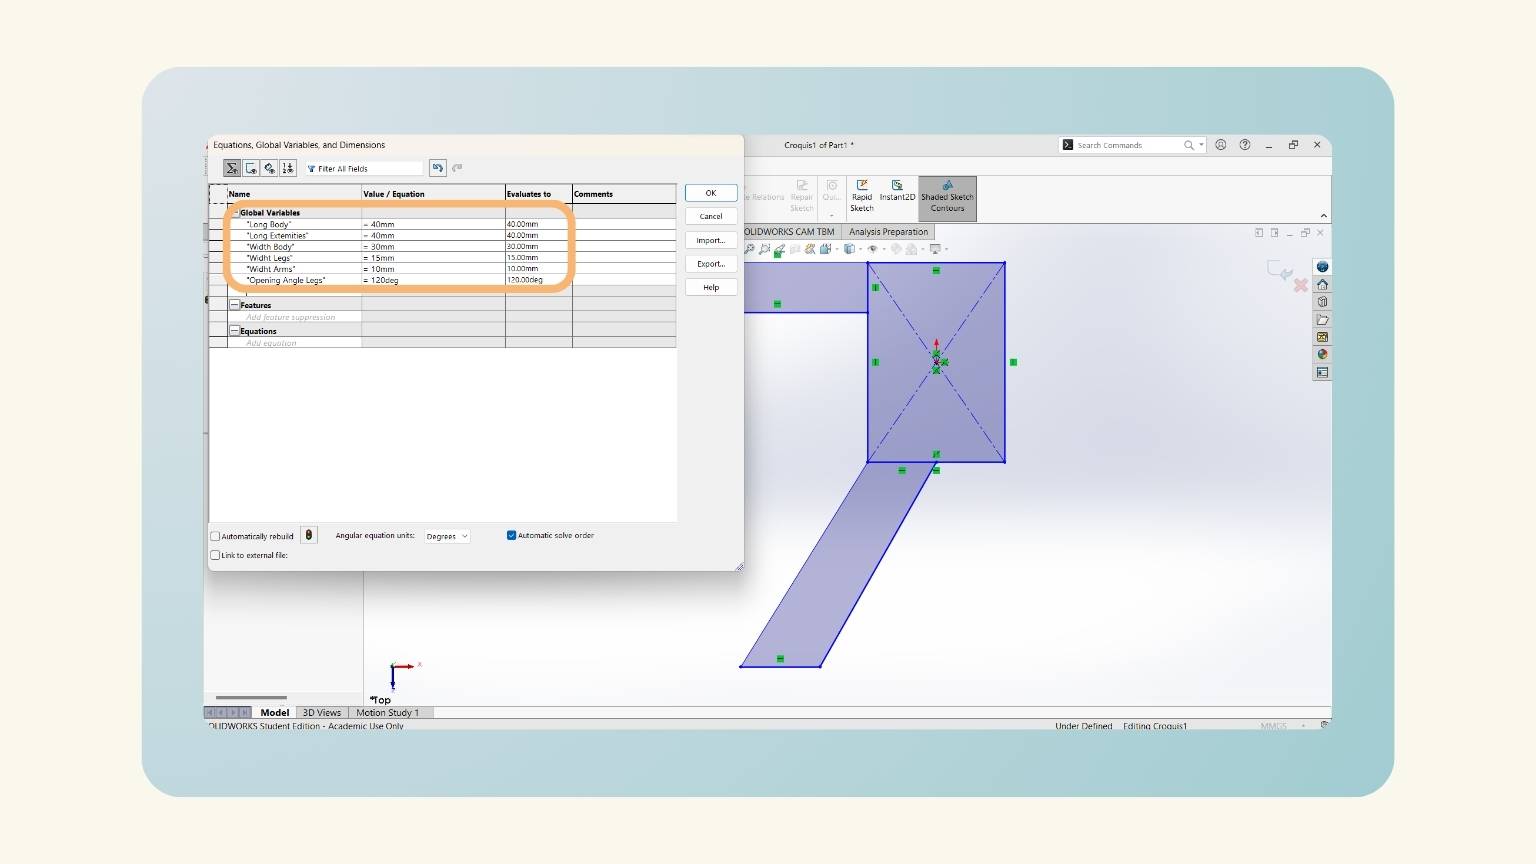
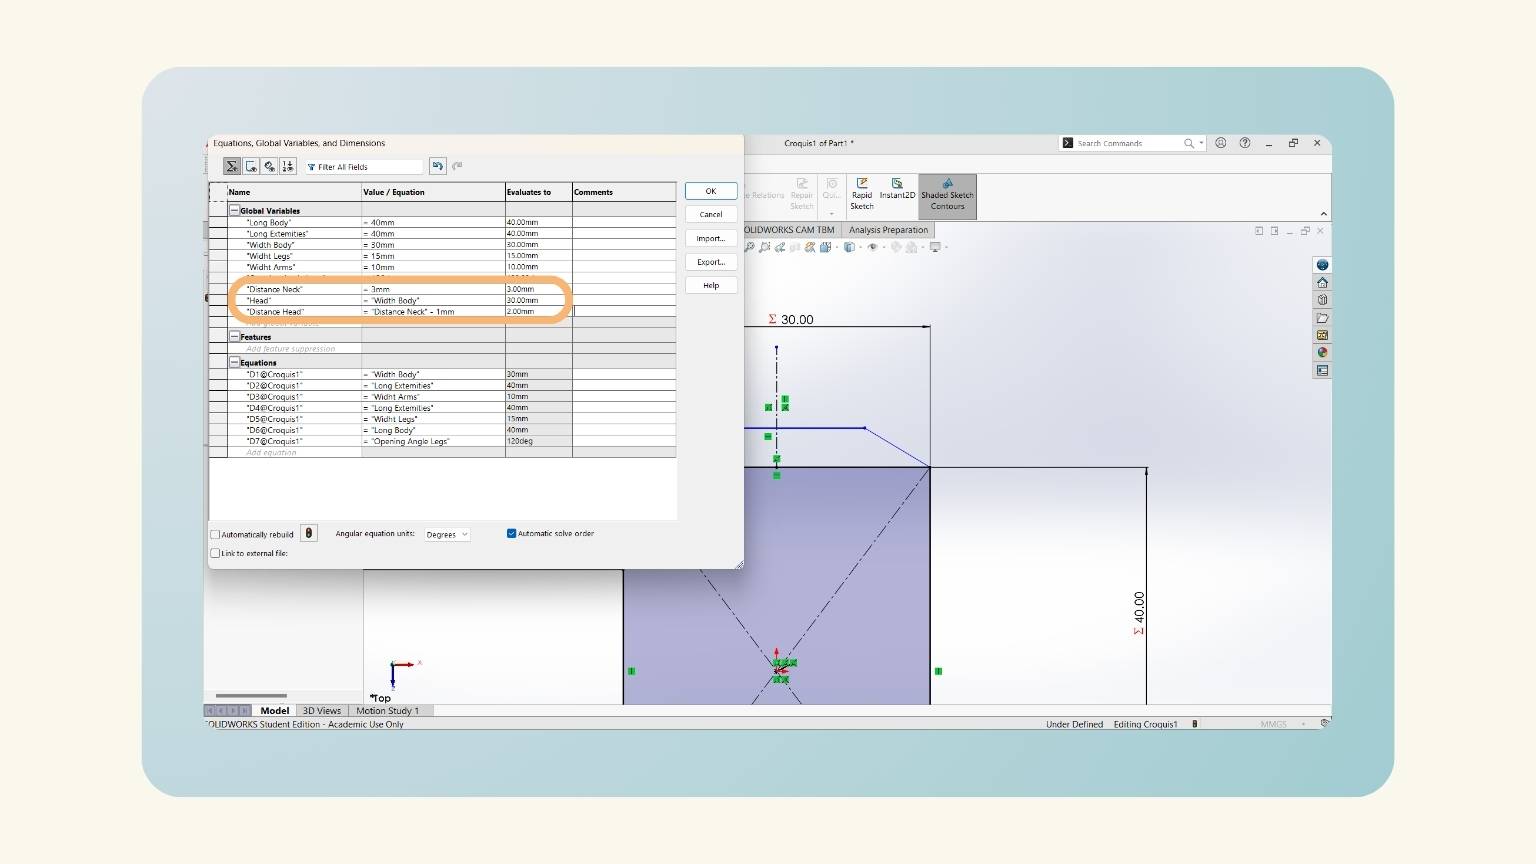
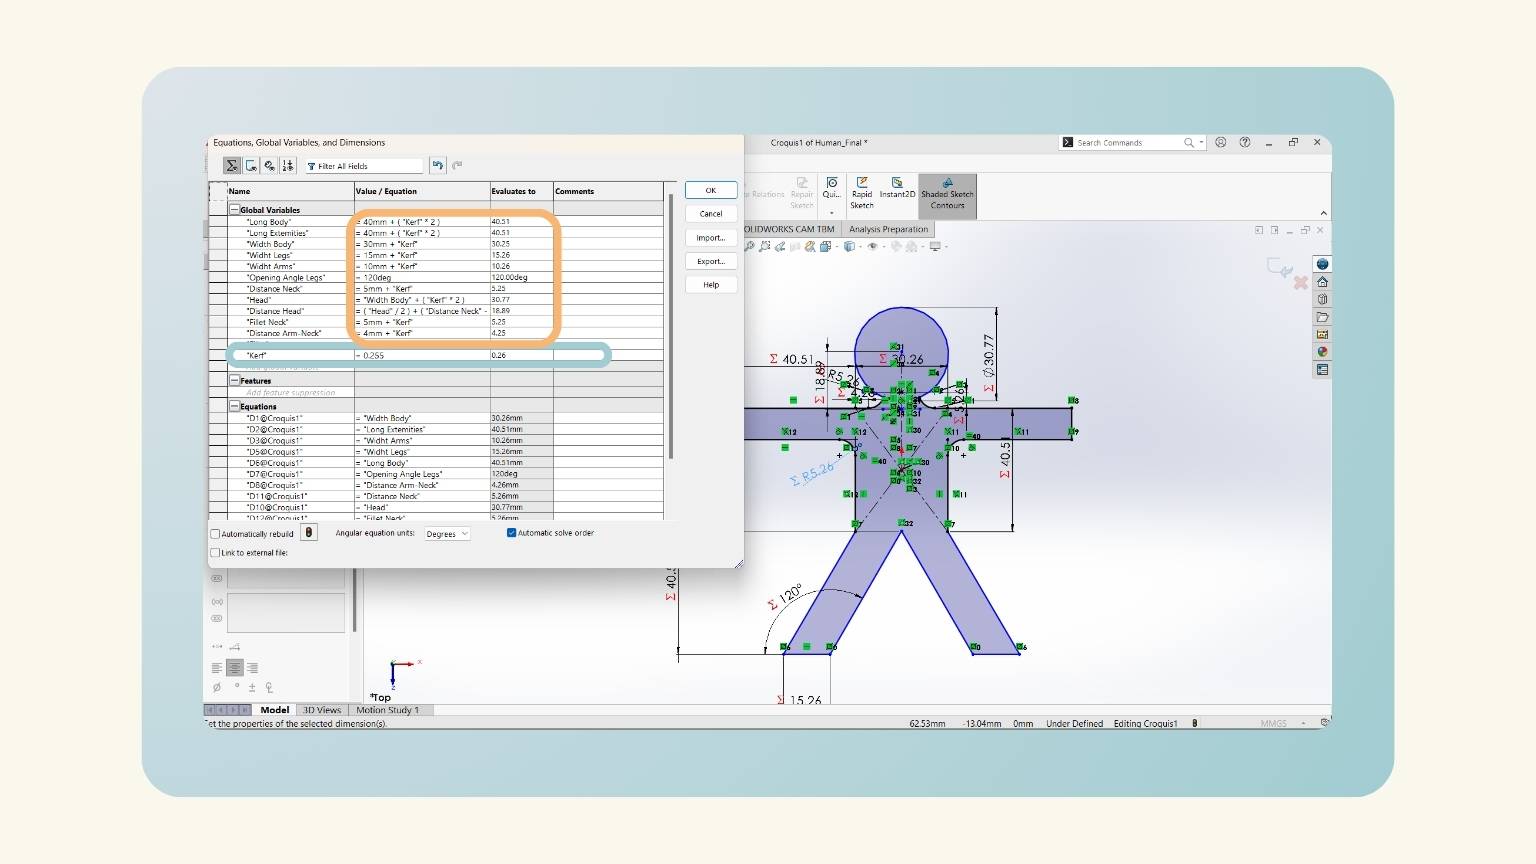
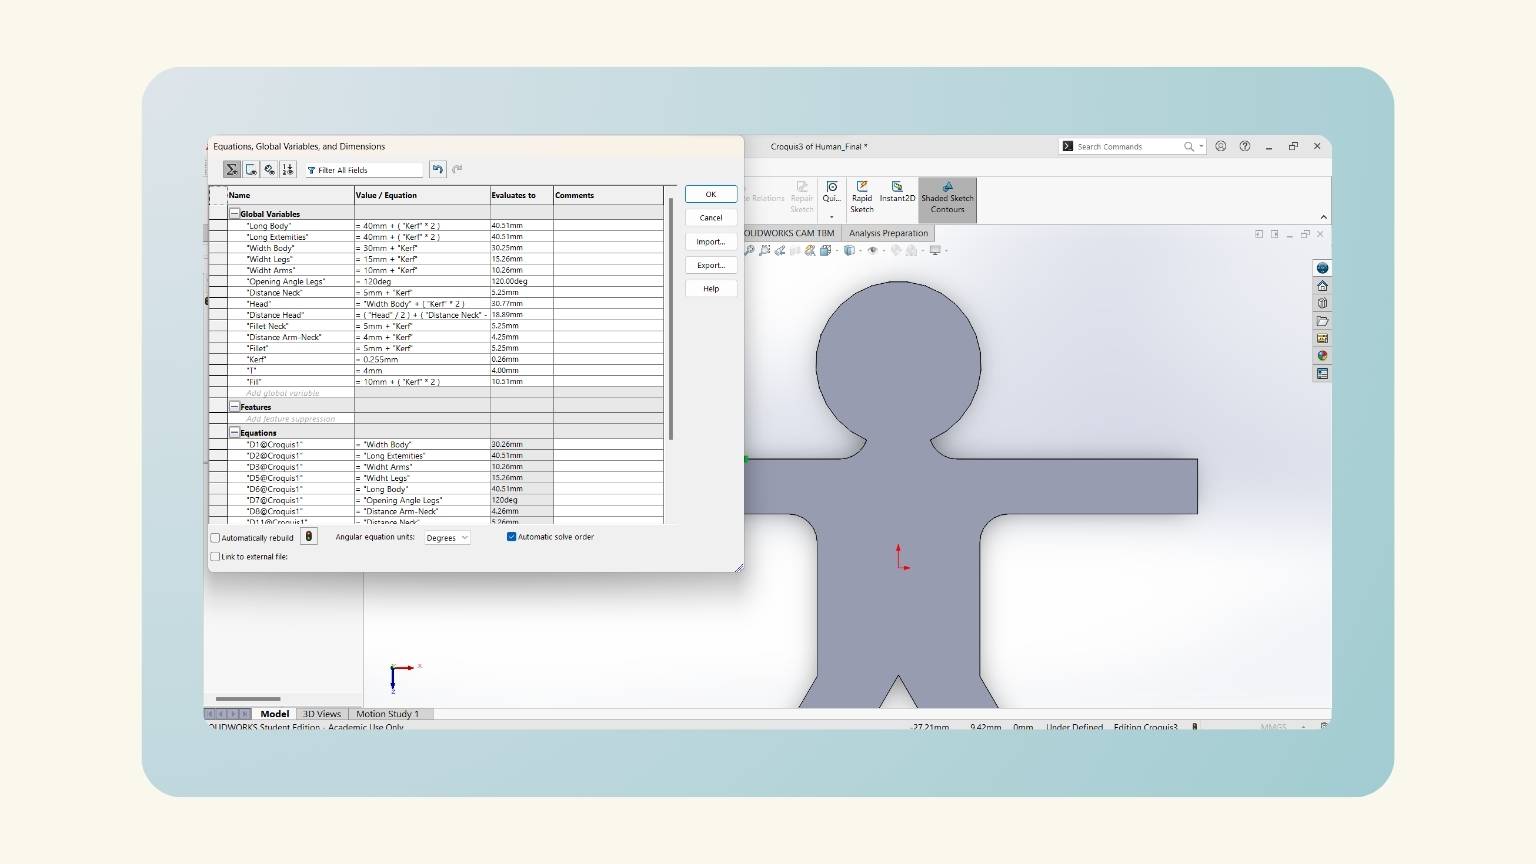
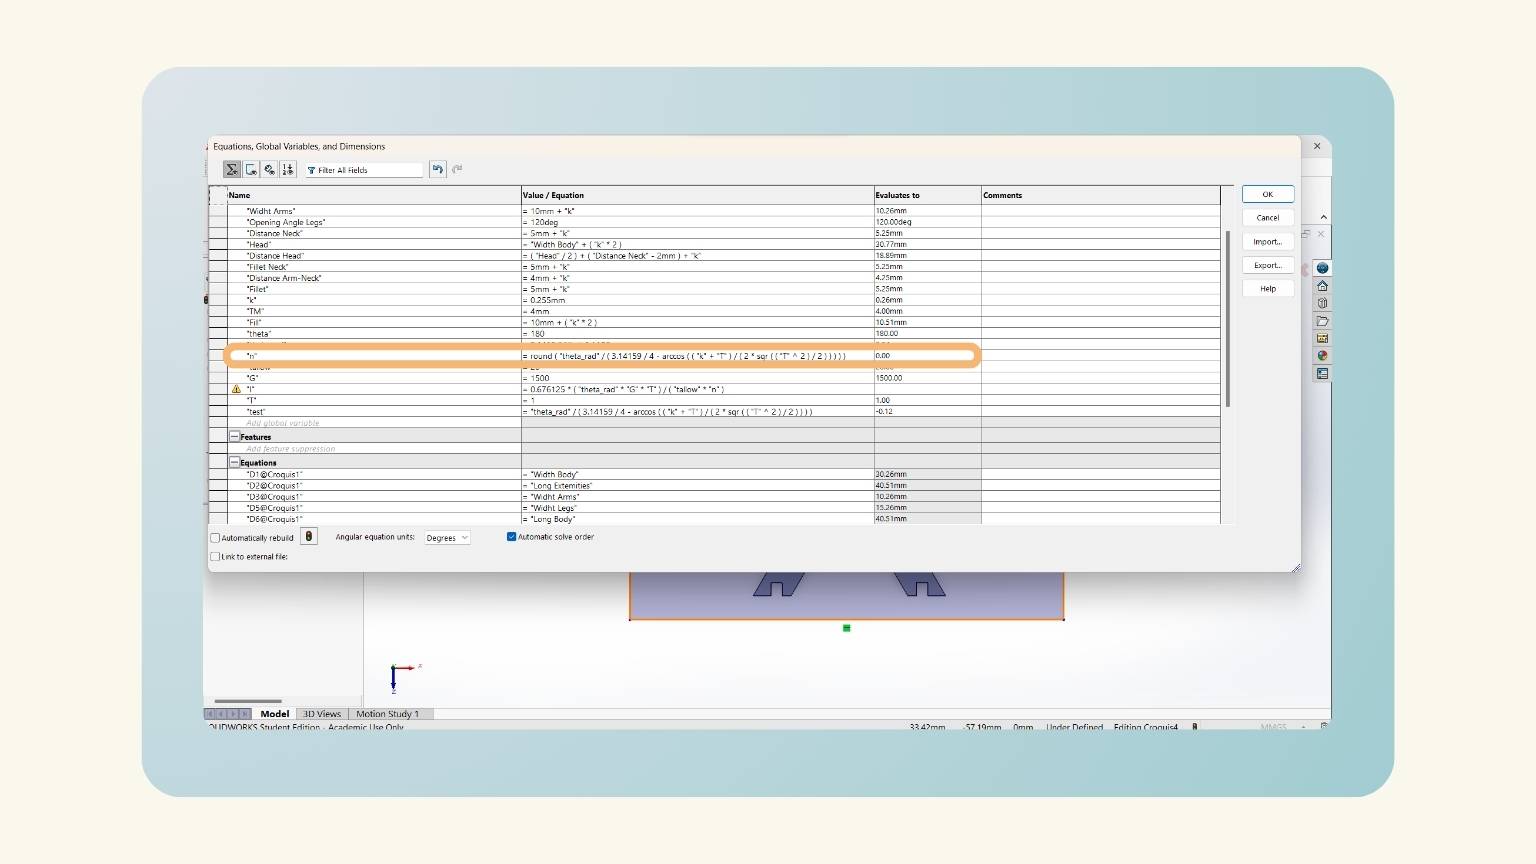
- I made equations to put the measurements into the figures I created.
- Note: This is what I did to make the parametric design.
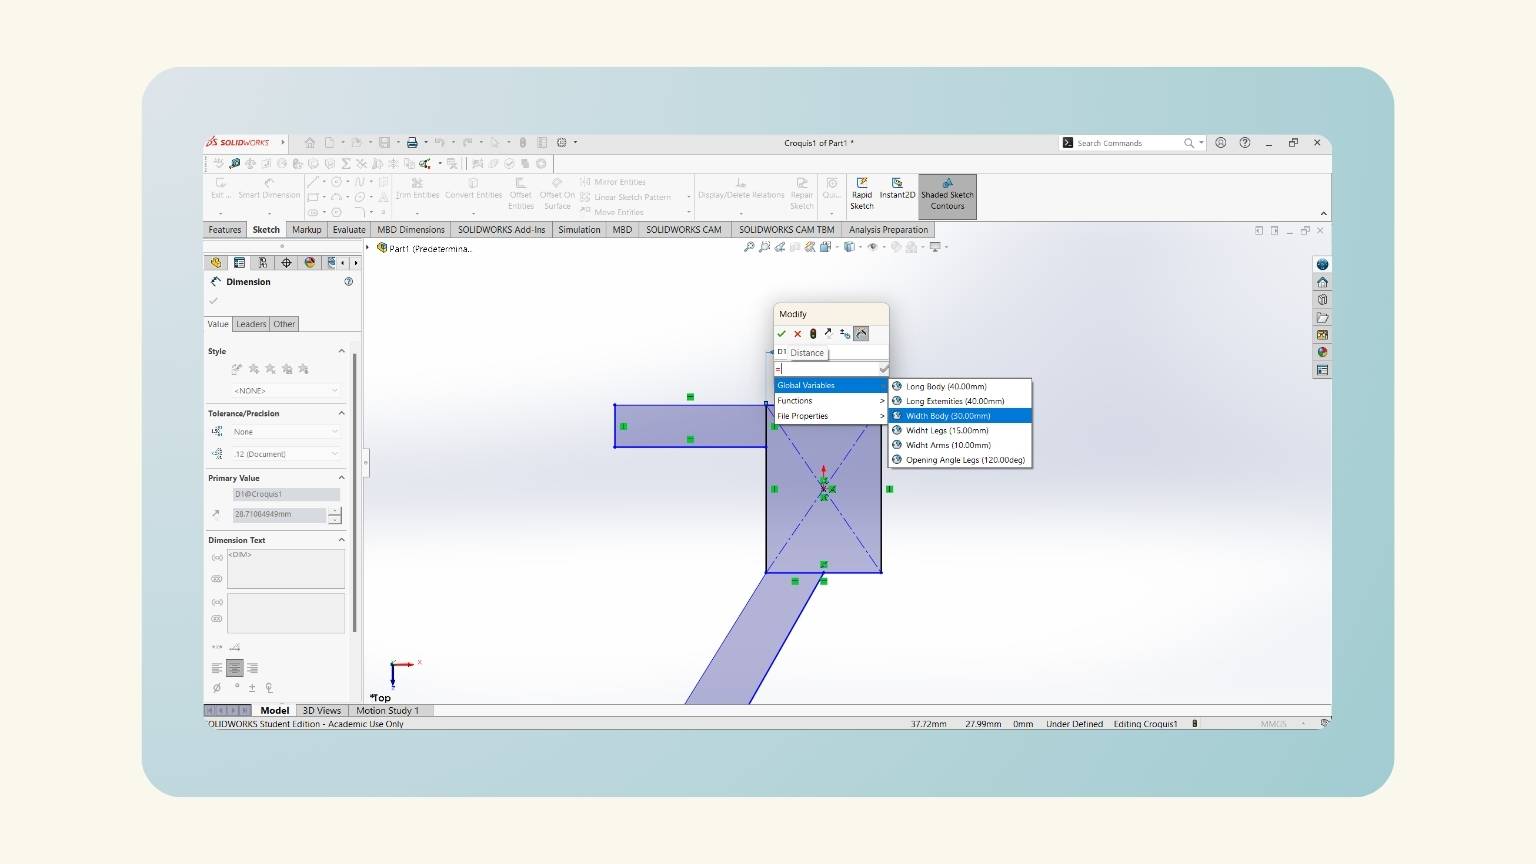
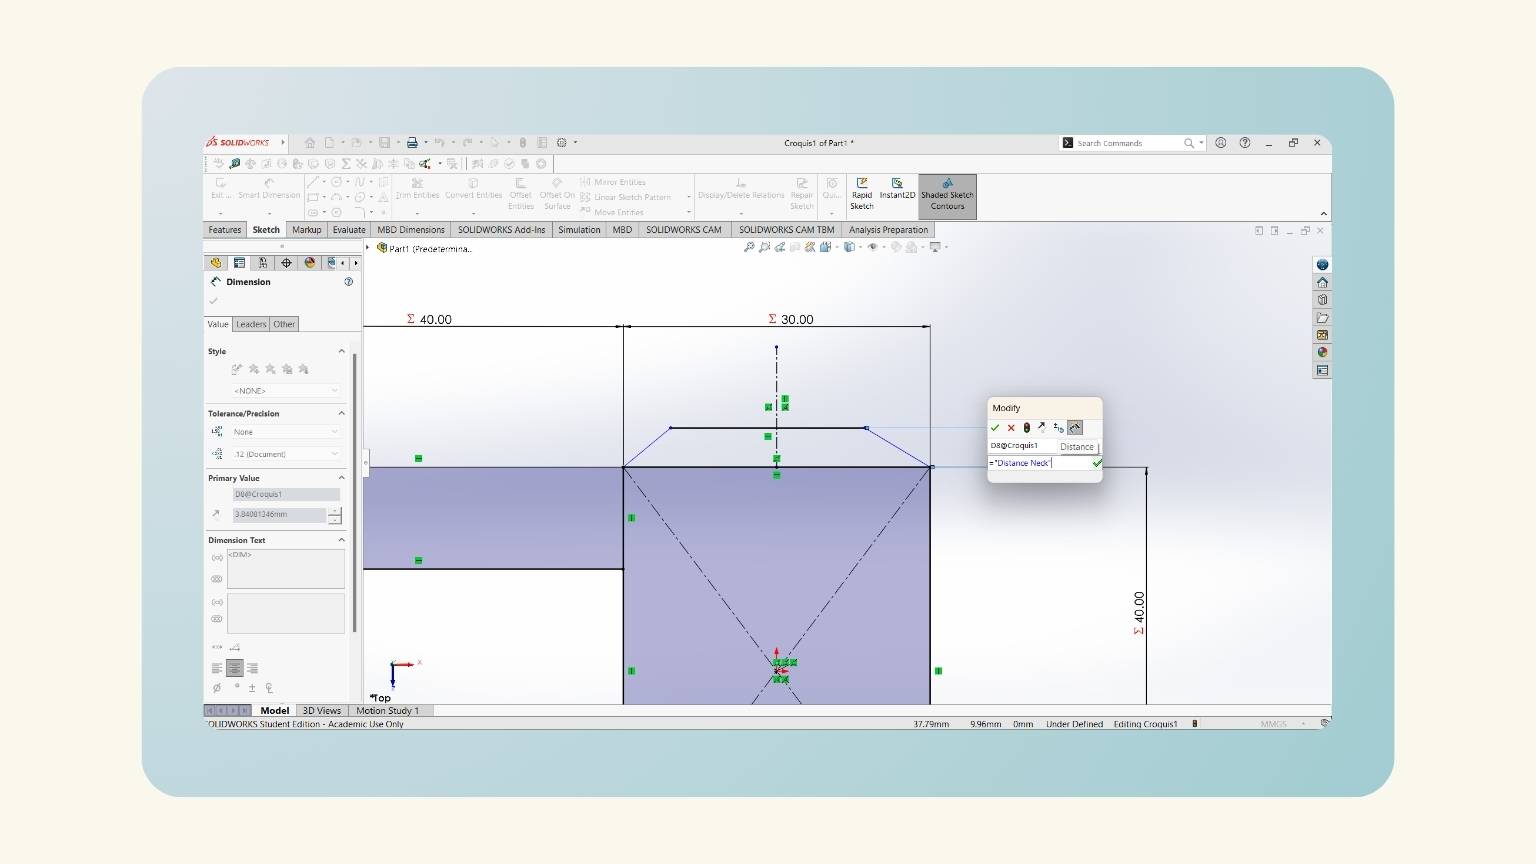
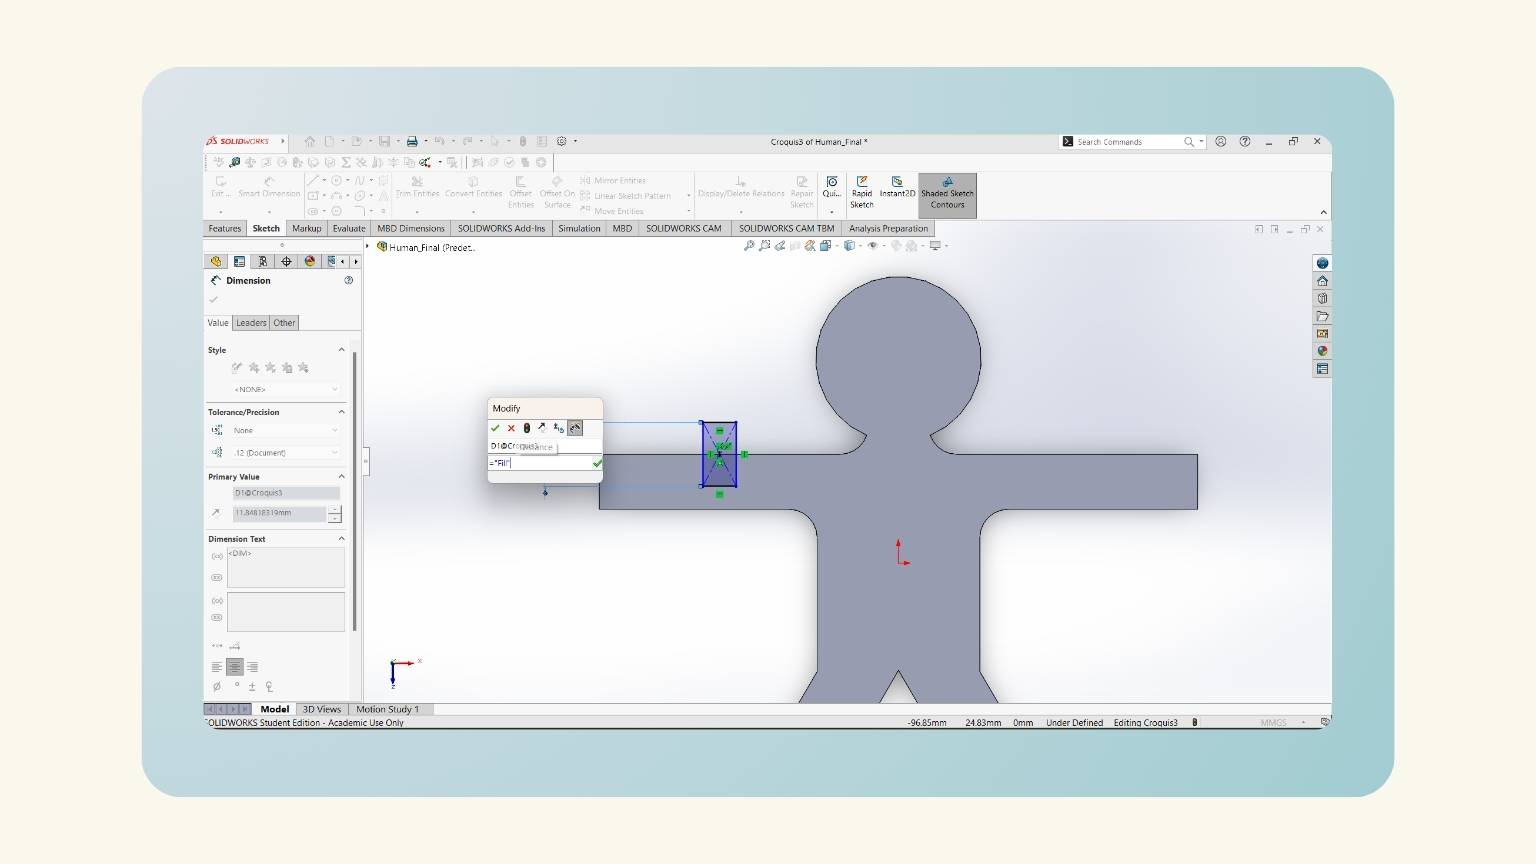
- With the ‘Smart Dimension’ tool, I put the measurements.
- Note: You must set “=” and select the ‘Global Variables’.
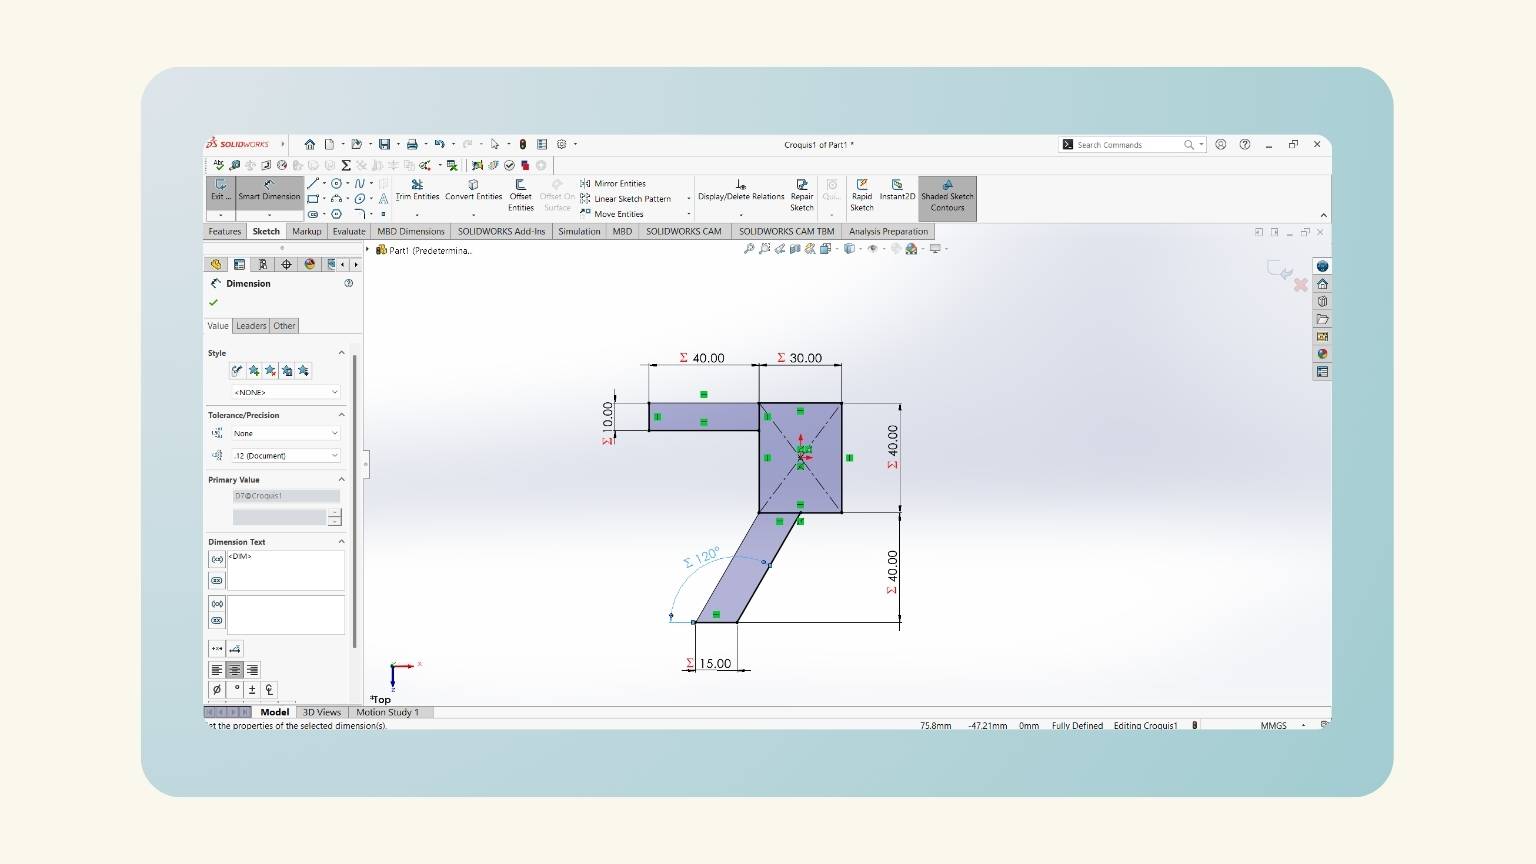
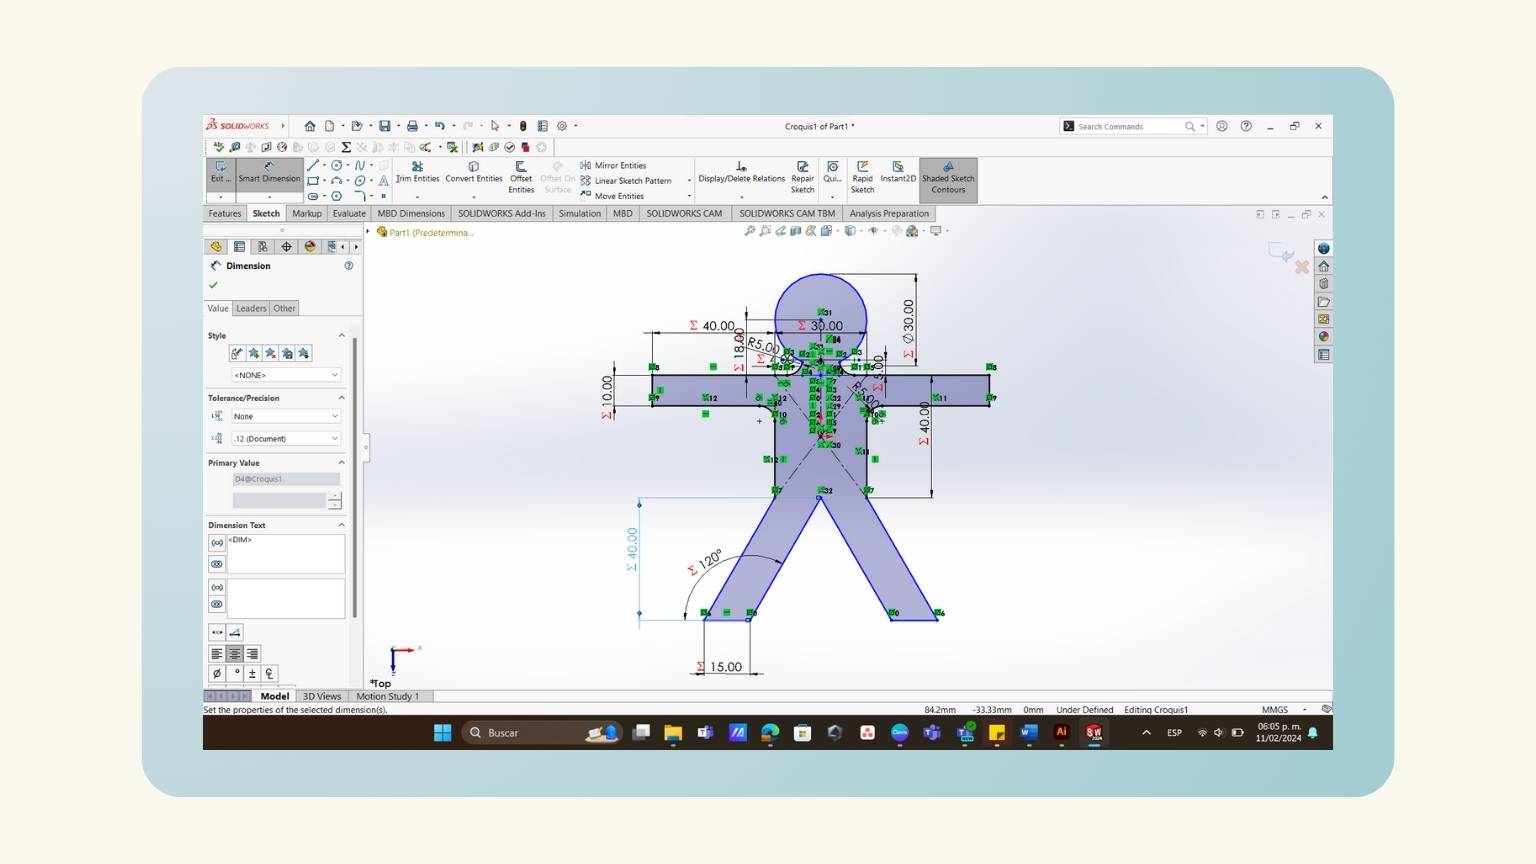
- After some modifications, I have the measurements of all the figures that I made.
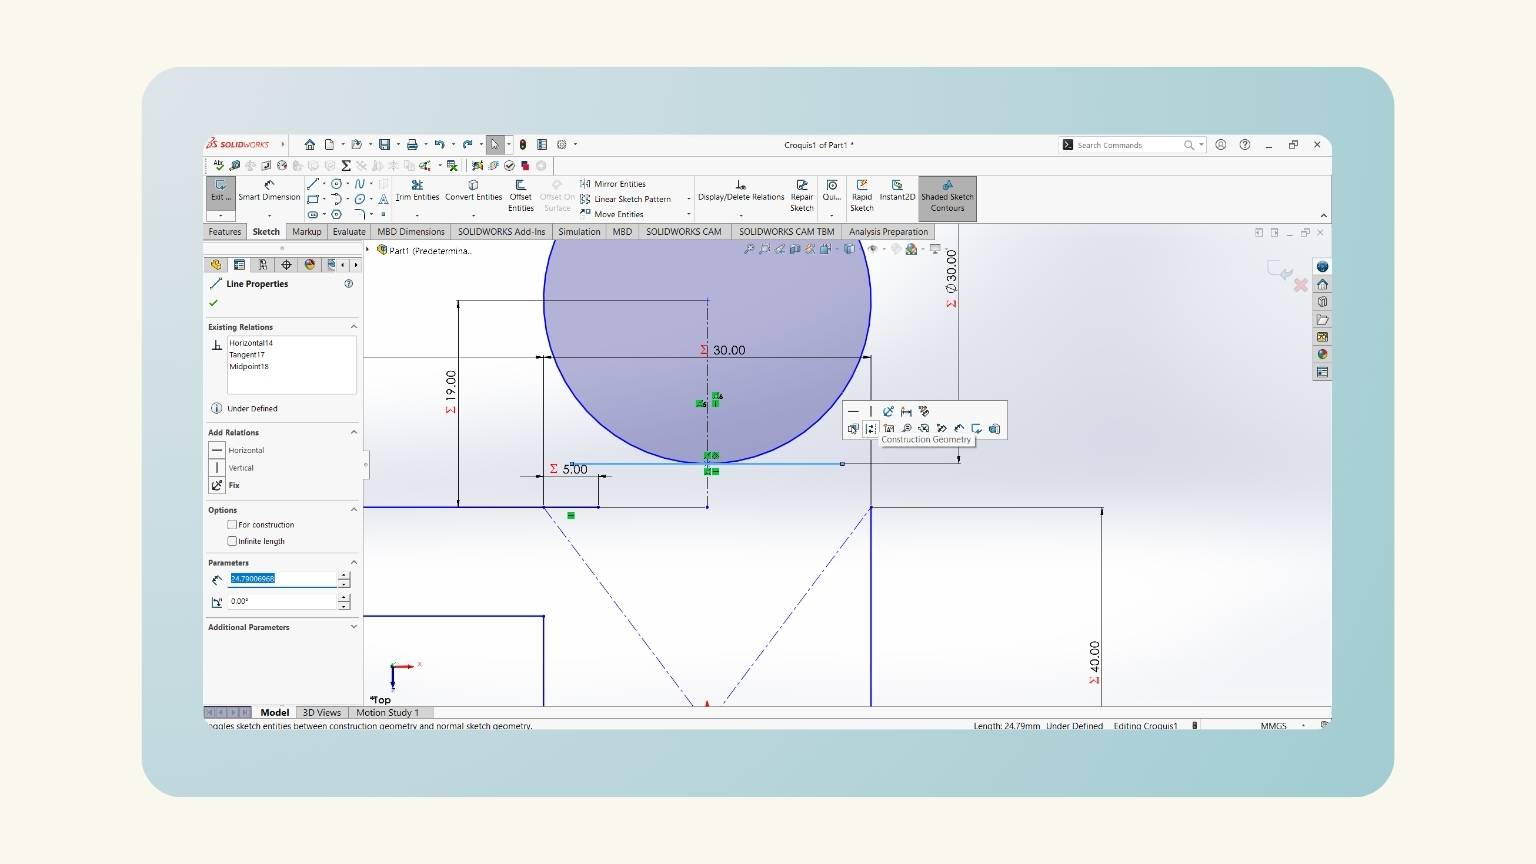
- To put the angle, I used the ‘Smart Dimension’ and selected the first line, followed by the line perpendicular to it.
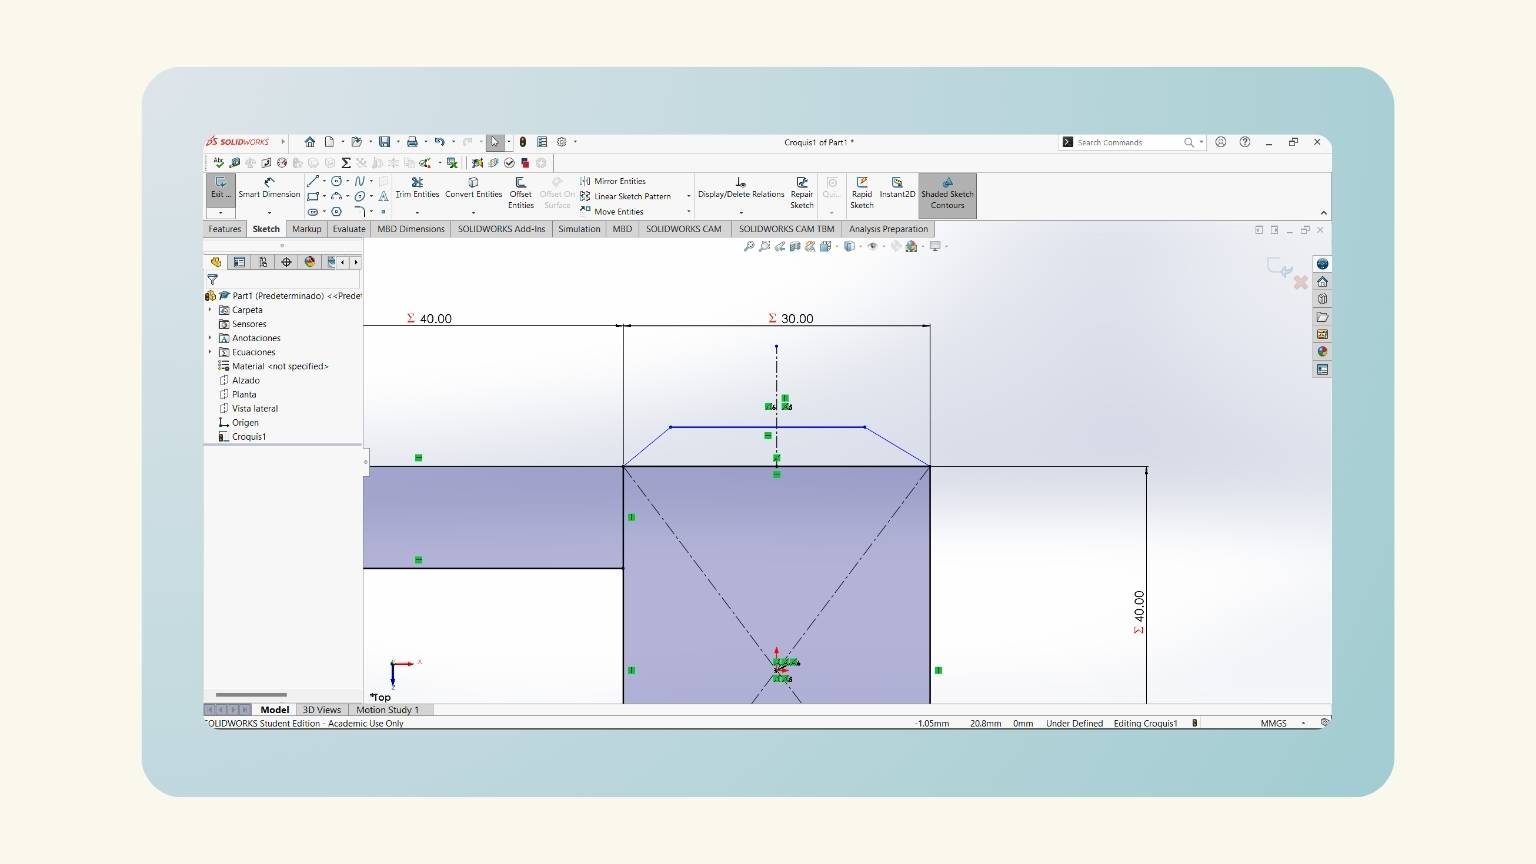
- I started to make the neck of my human. To do this, I began to draw a trapezoid.
- Then, I made a centerline.
- I added three equations (distance neck, head, and distance neck).
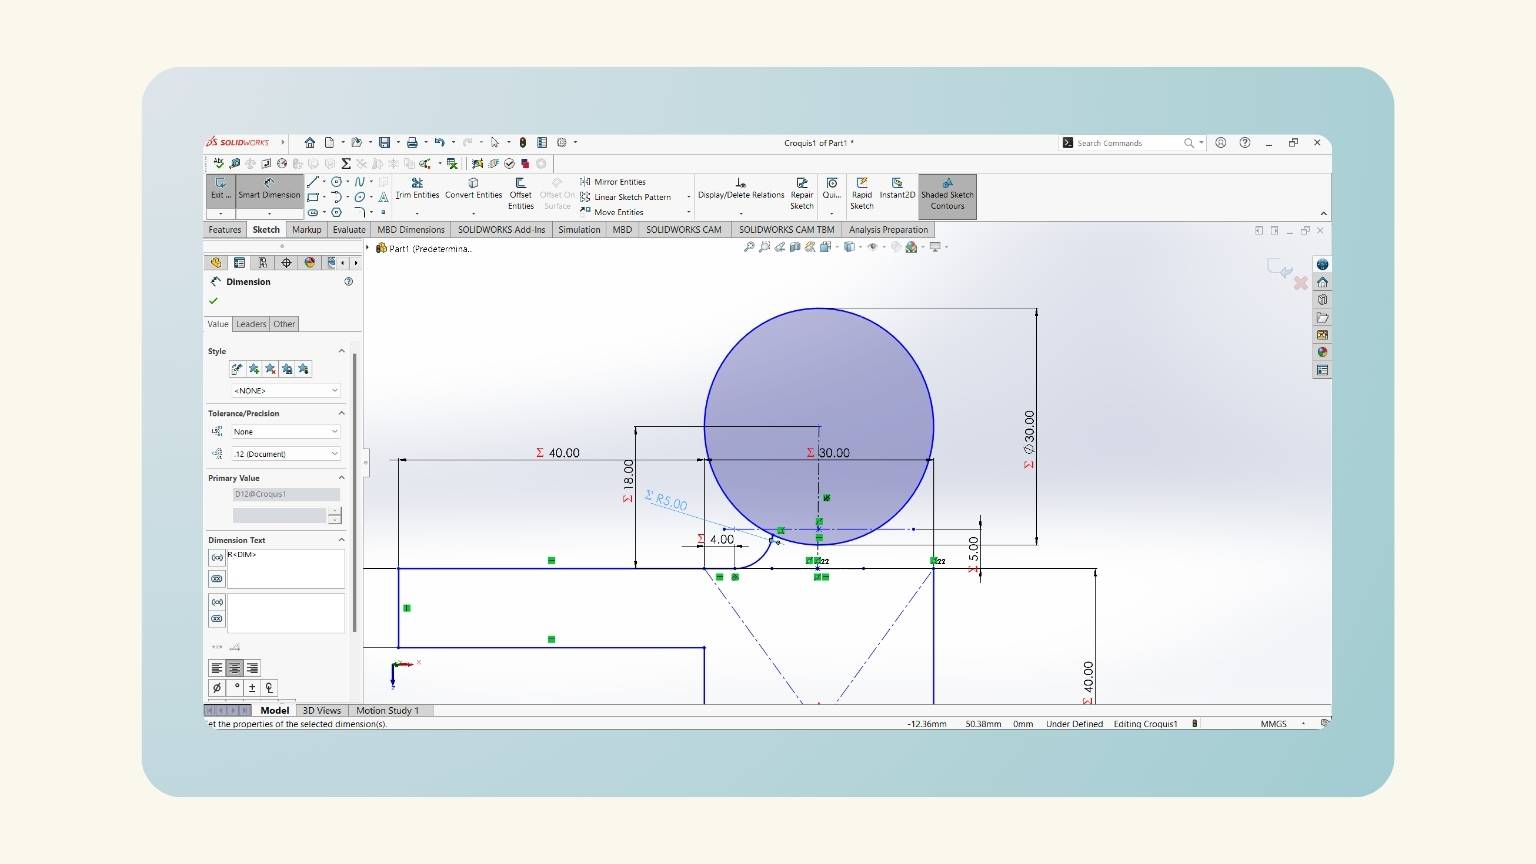
- I put a measurement on the height of the trapezoid. To do this, I used the global variable ‘Distance Neck’.
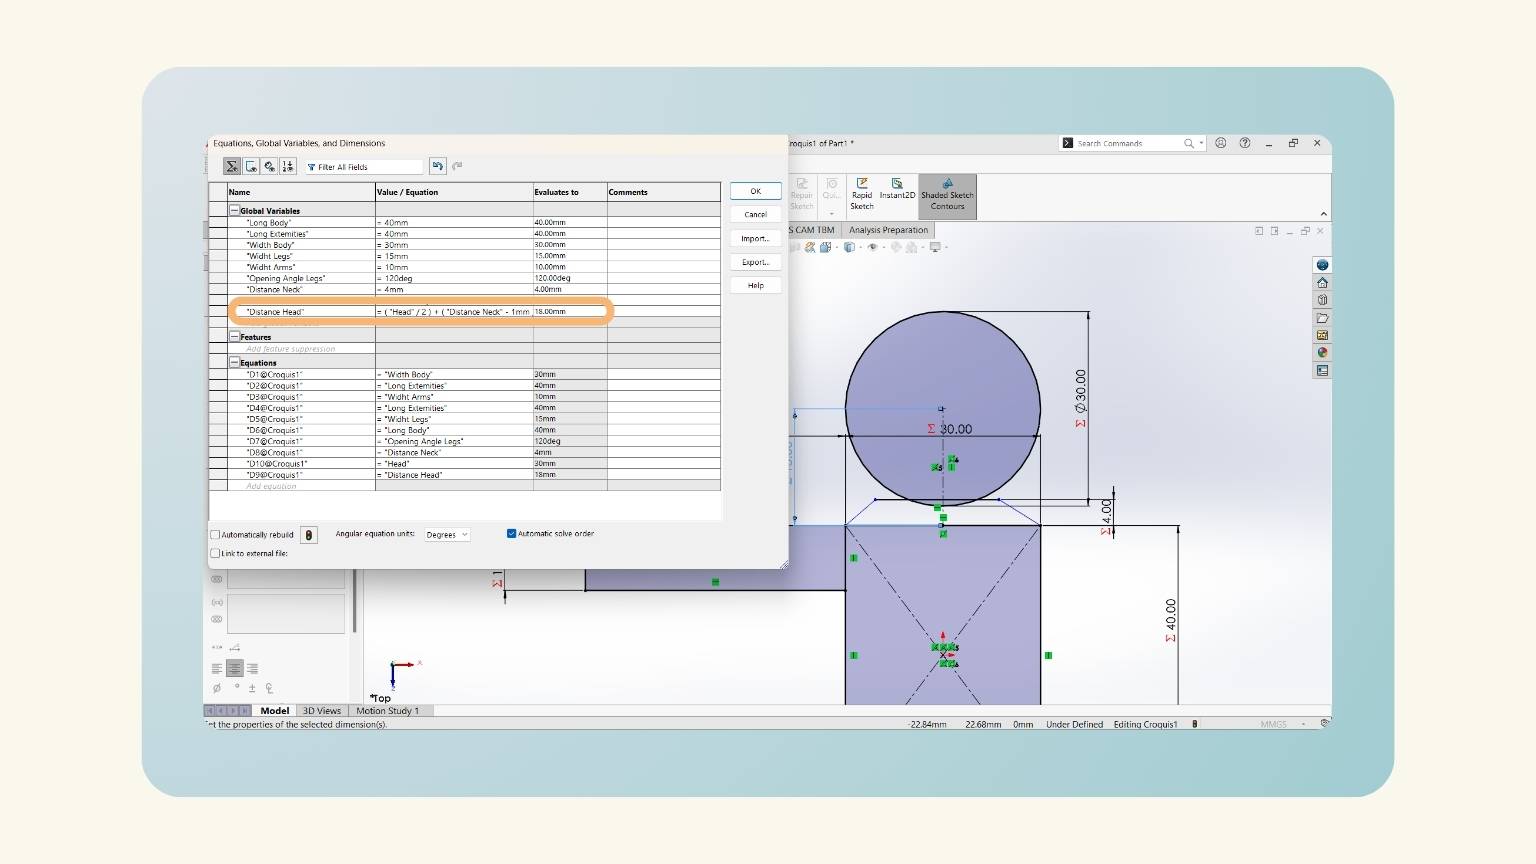
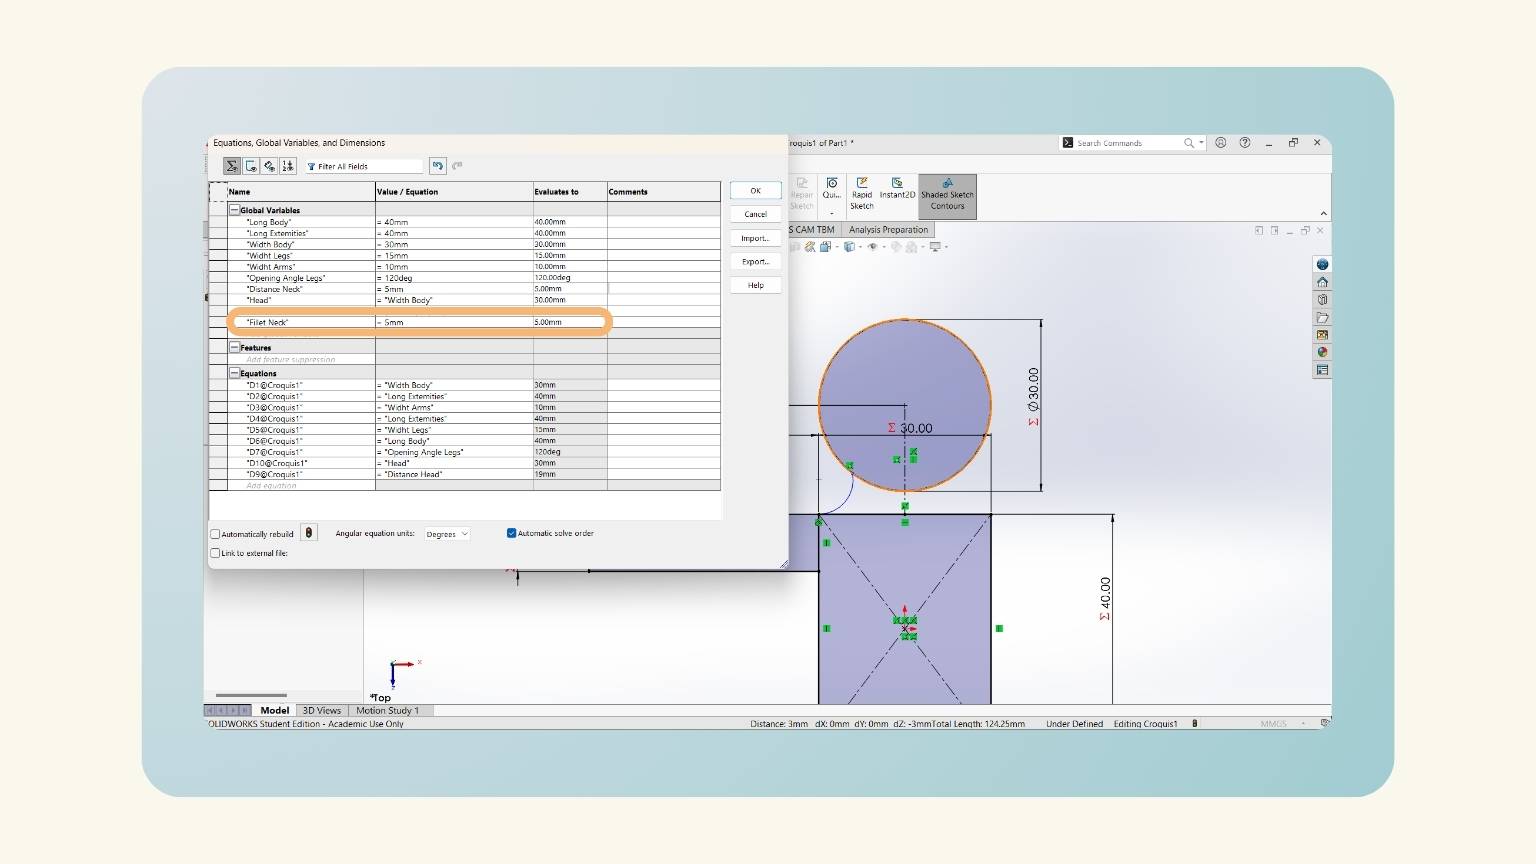
- I drew the head and used the global variable 'Head'. After, I felt that I should add another equation that will delimit the distance at which the head would be.
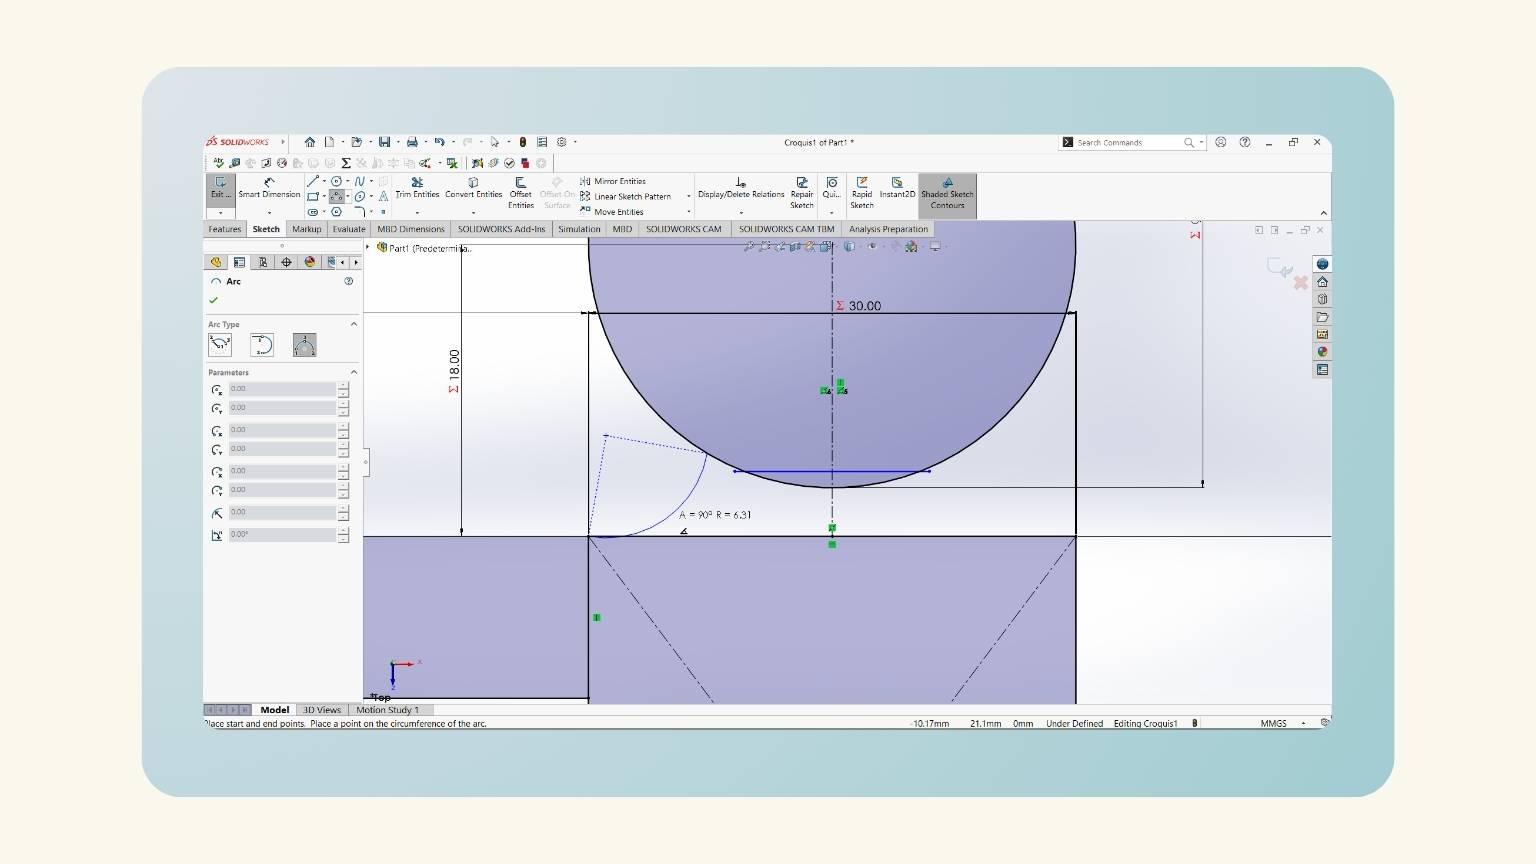
- Then, with the ‘3 Point Arc’ tool, I drew the neck.
- And I added another equation, ‘Fillet Neck', to determine the radius of the arc.
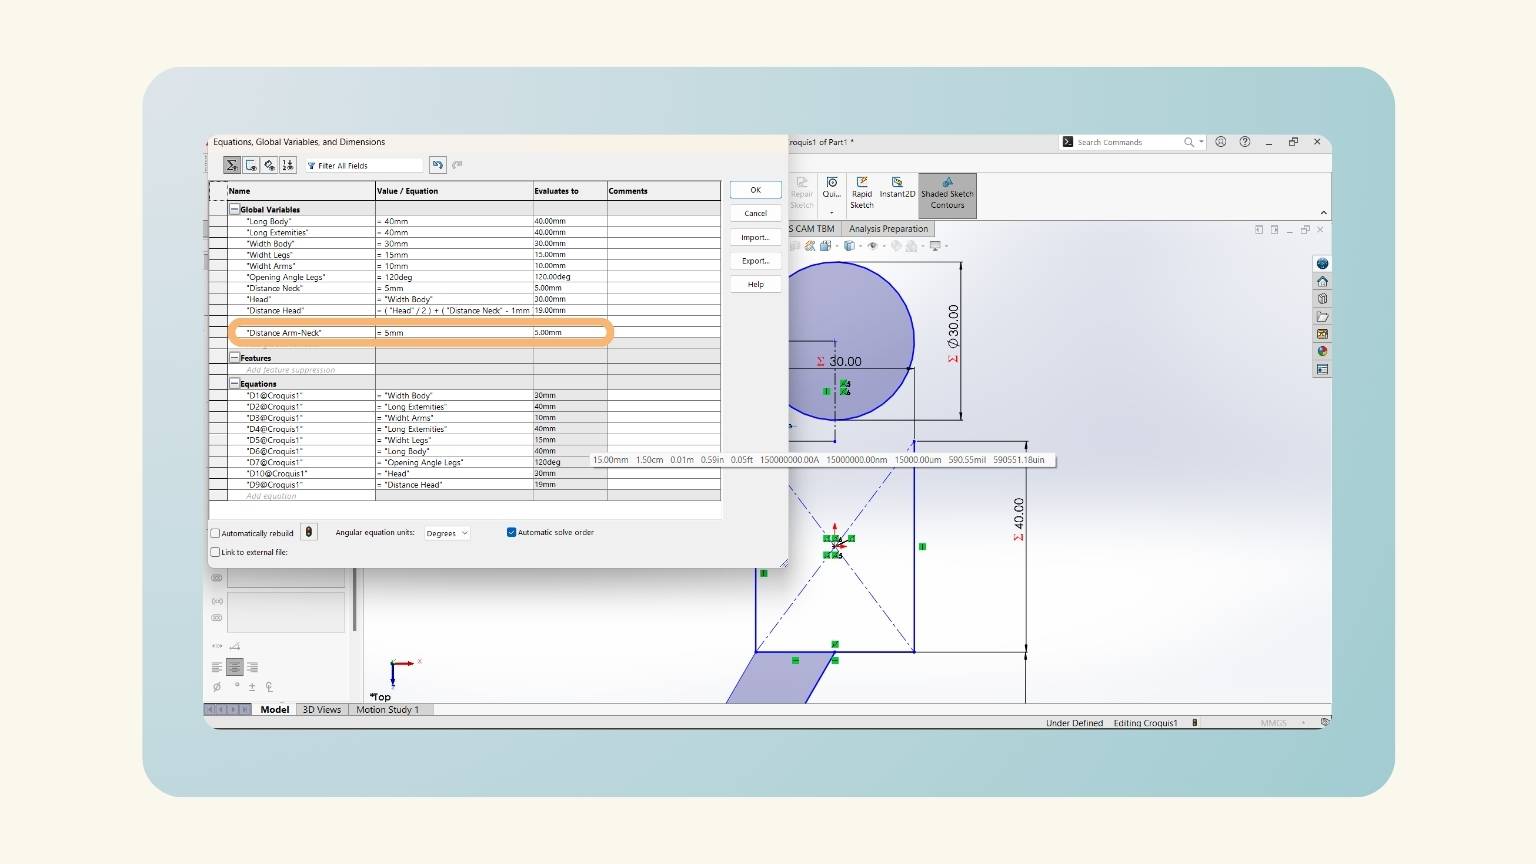
- I considered that this wasn’t the right way to do it, and I removed what was done from the neck.
- I added another equation, ‘Distance Arm-Neck', because the neck should start closer to the center.
- I drew a centerline on the base of the head.
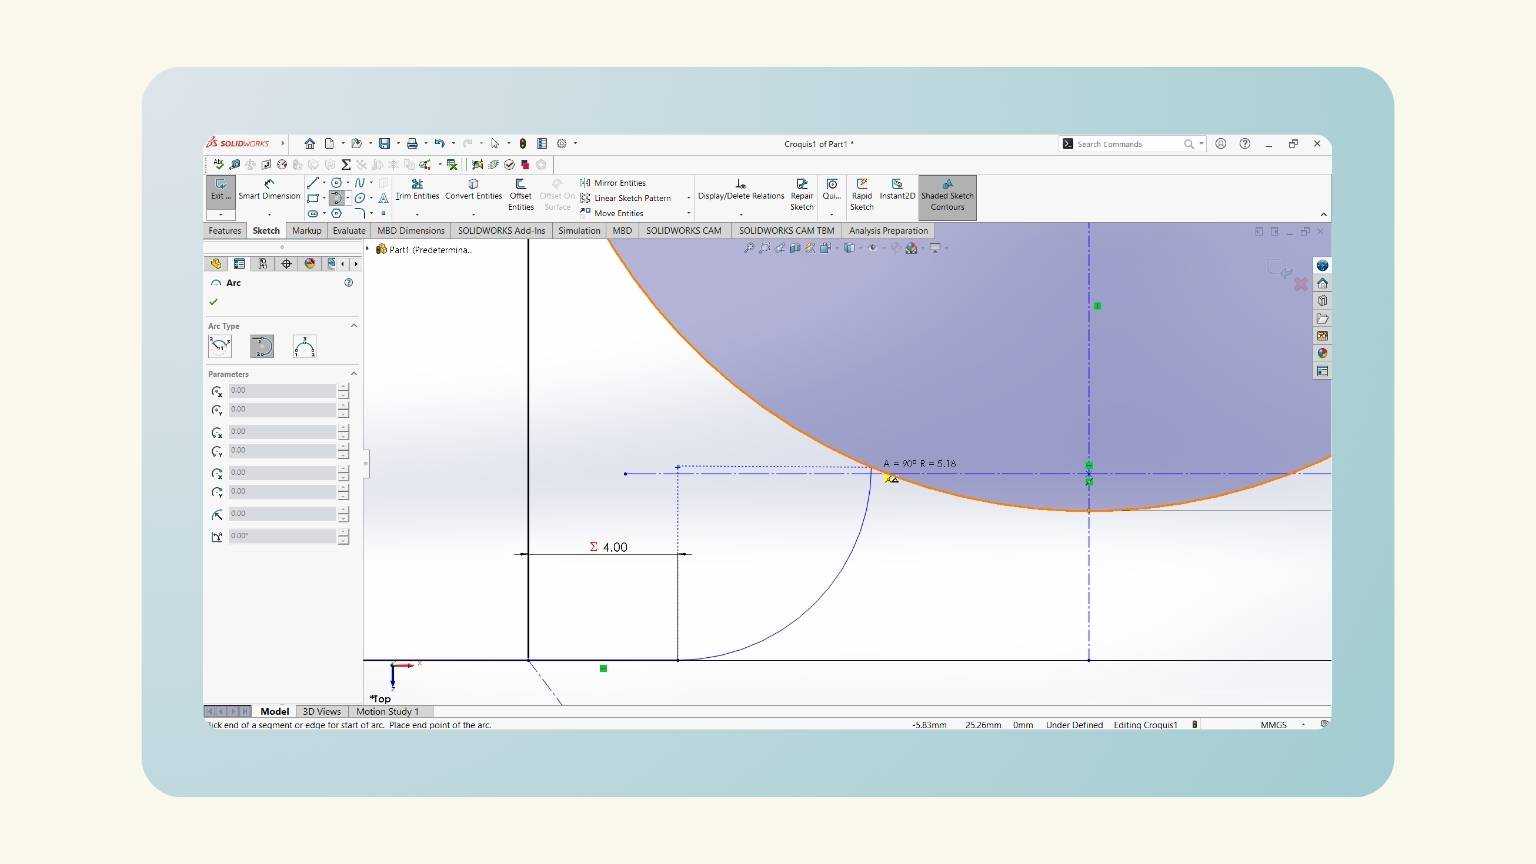
- I made an arc with the 'Tangent Arc’ tool.
- This tool consists of sketching an arc tangent to a sketch entity.
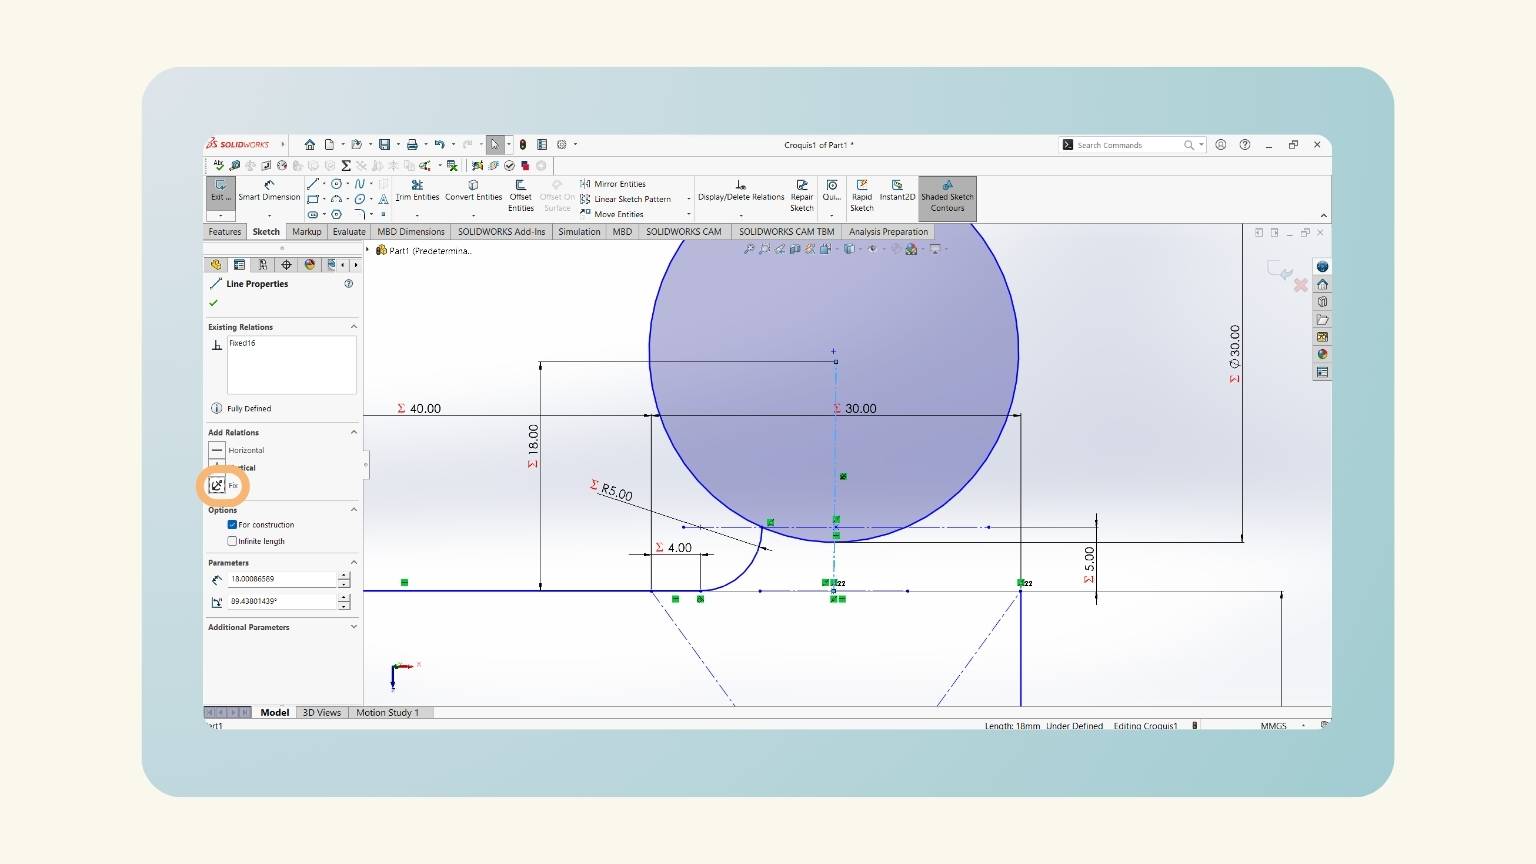
- I anchored the centerline so that it wouldn’t move.
- Then, I put the measurement of the arc with the global variable ‘Fillet Neck’.
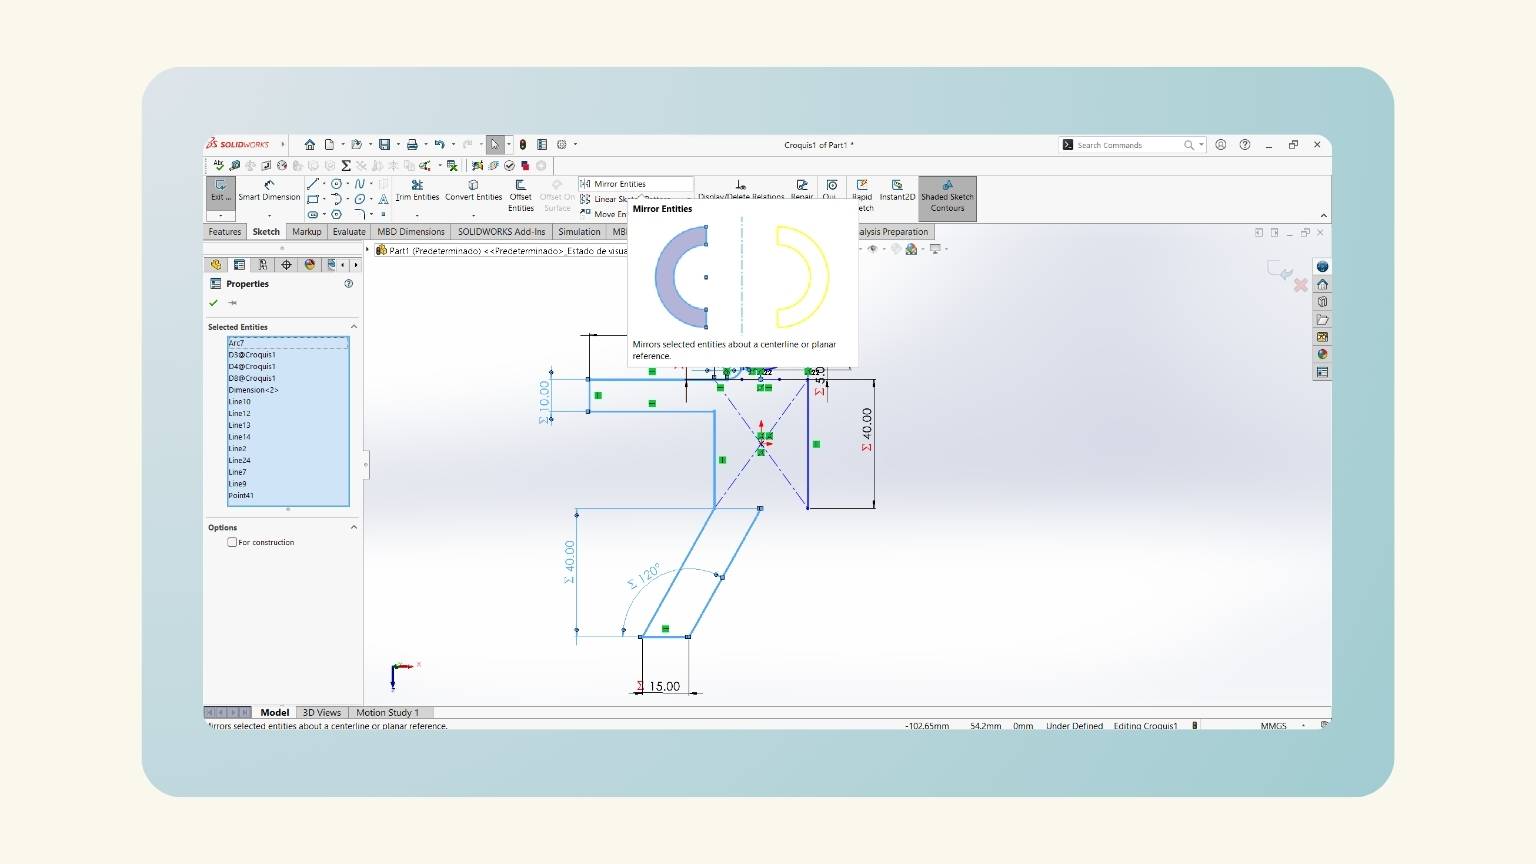
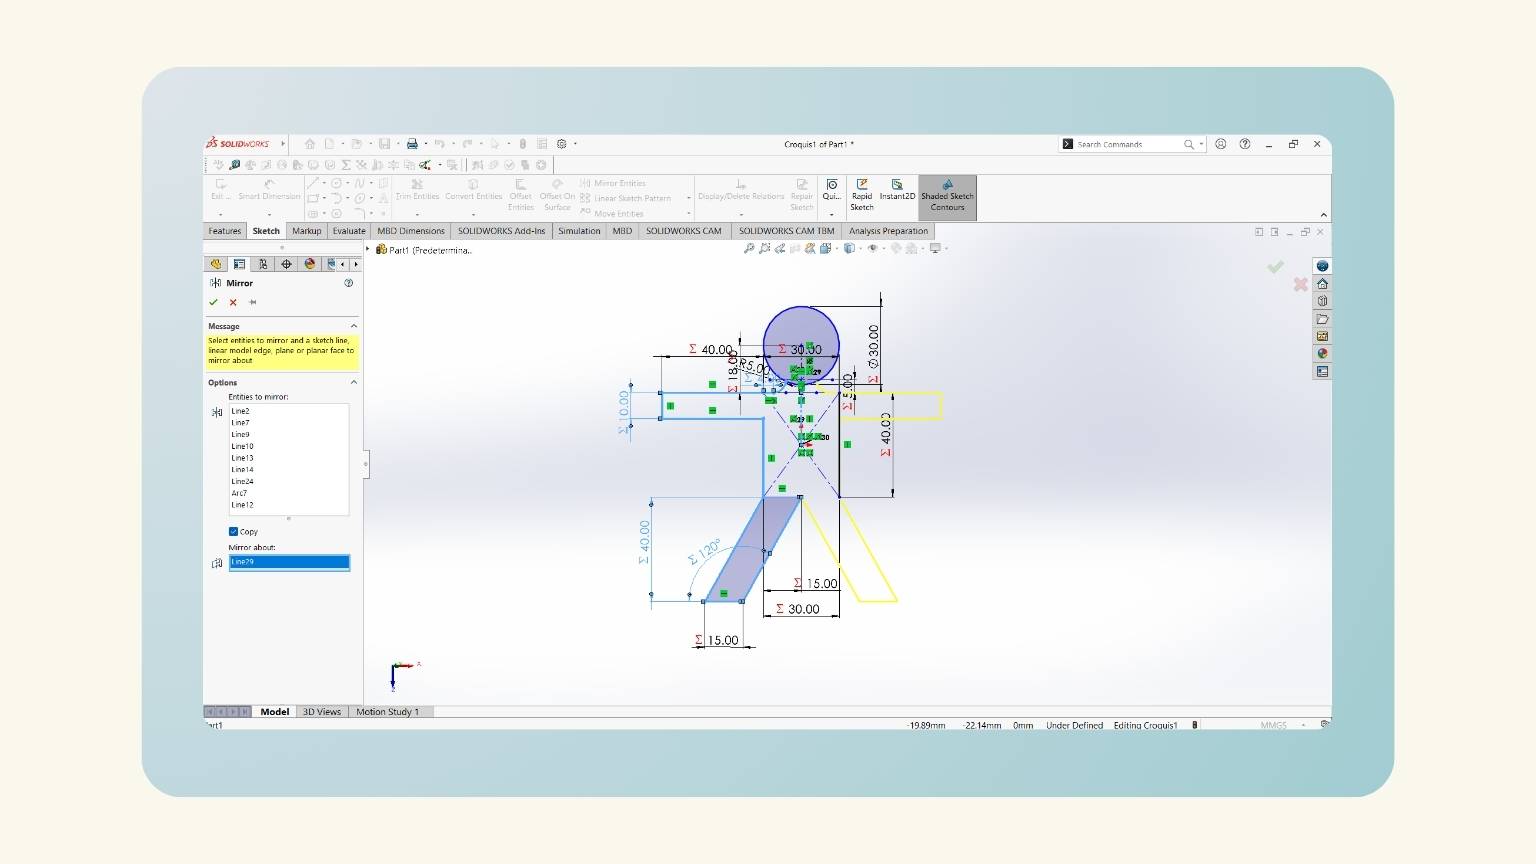
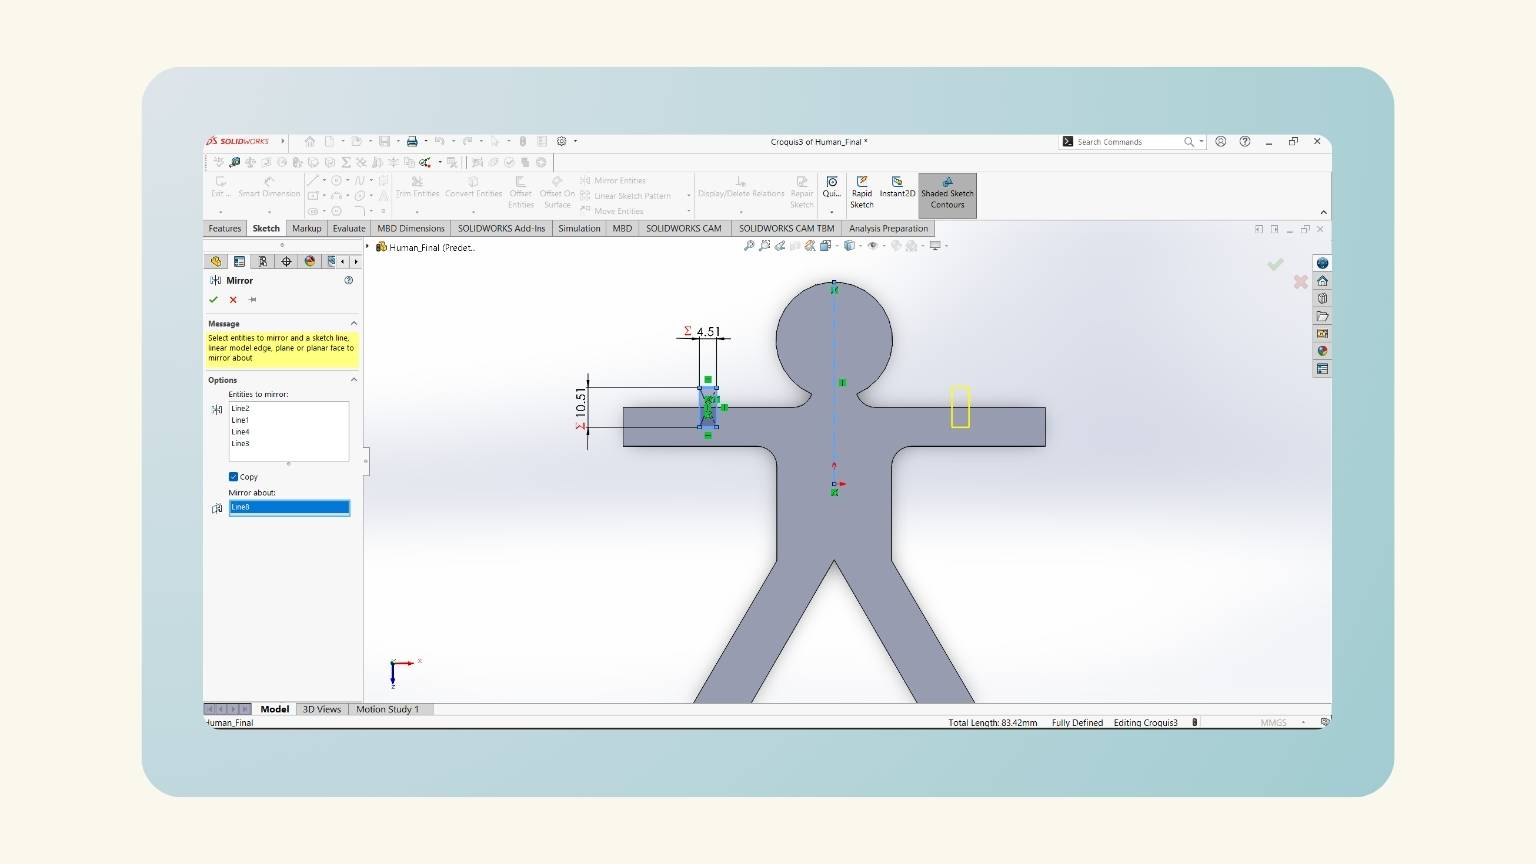
- I made a mirror of half of the body.
- I showed the preview to see that it performed correctly.
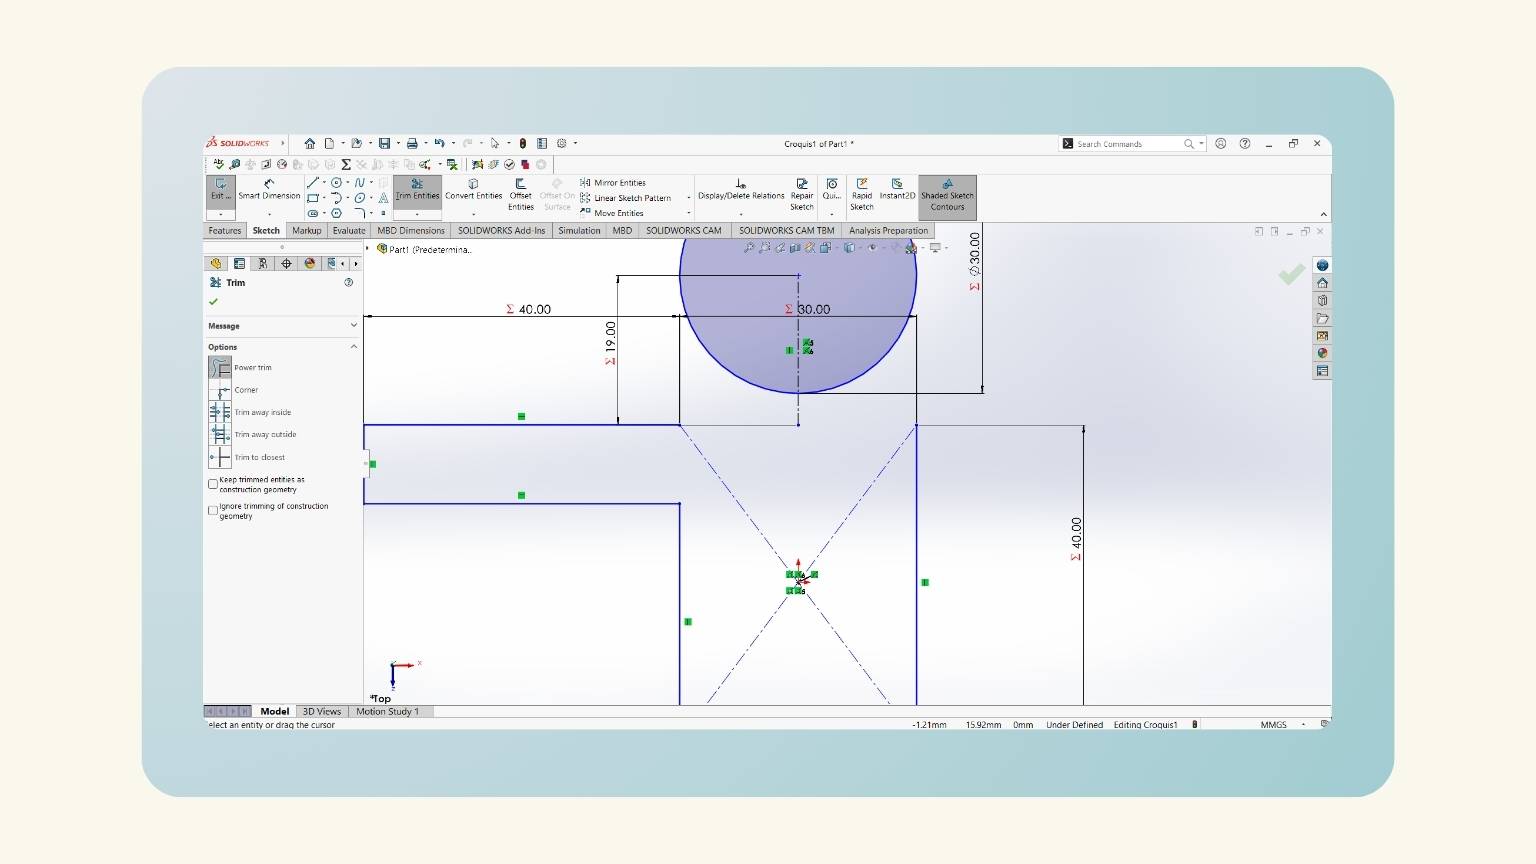
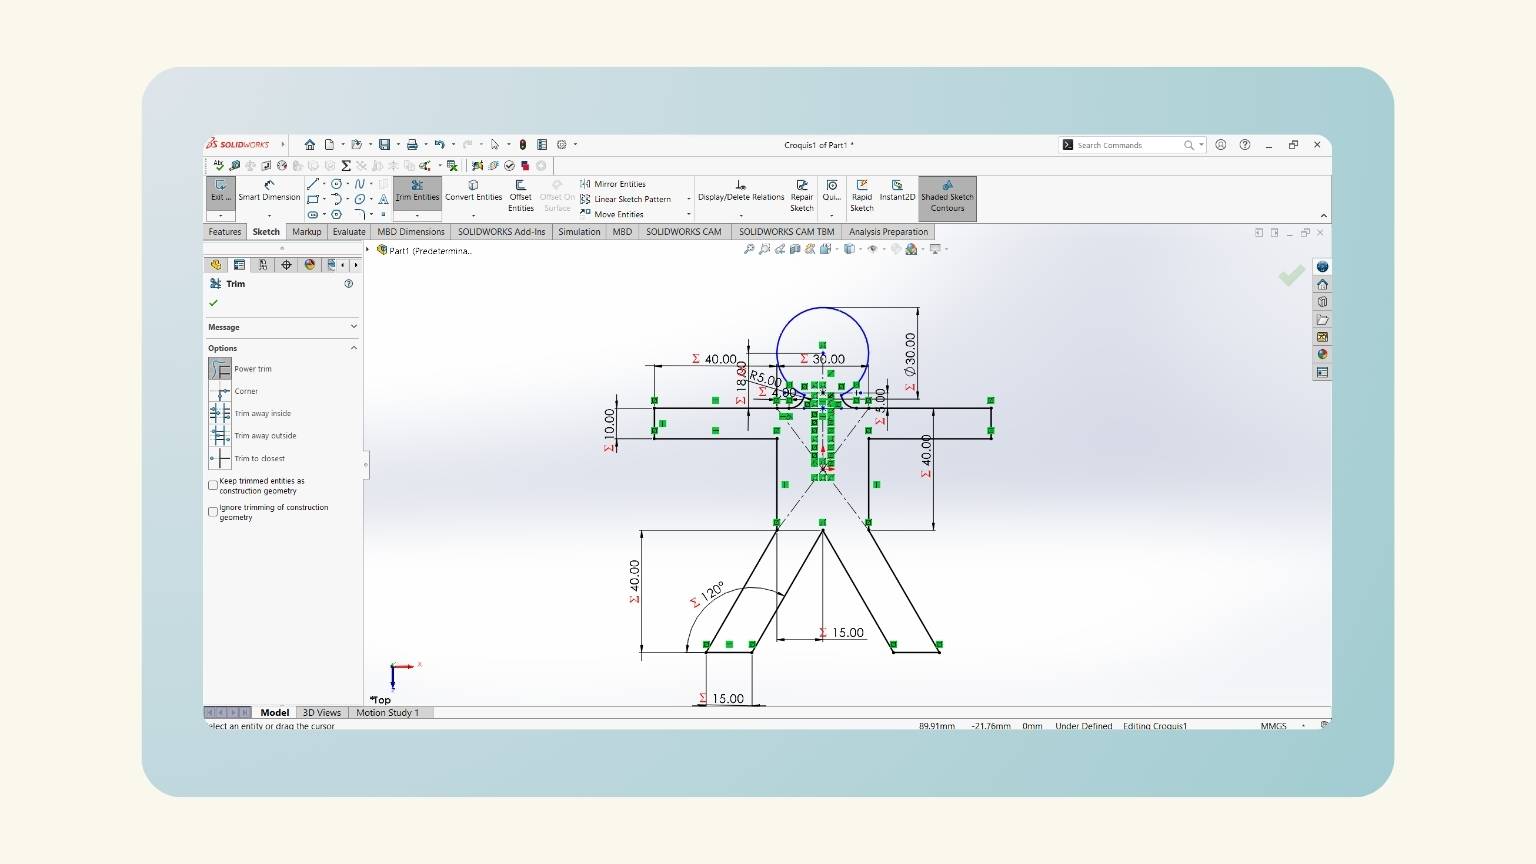
- I used the ‘Trim Entities’ tool to cut the intersection lines to make the figures in one piece.
- I have a parametric human!
- And one piece!
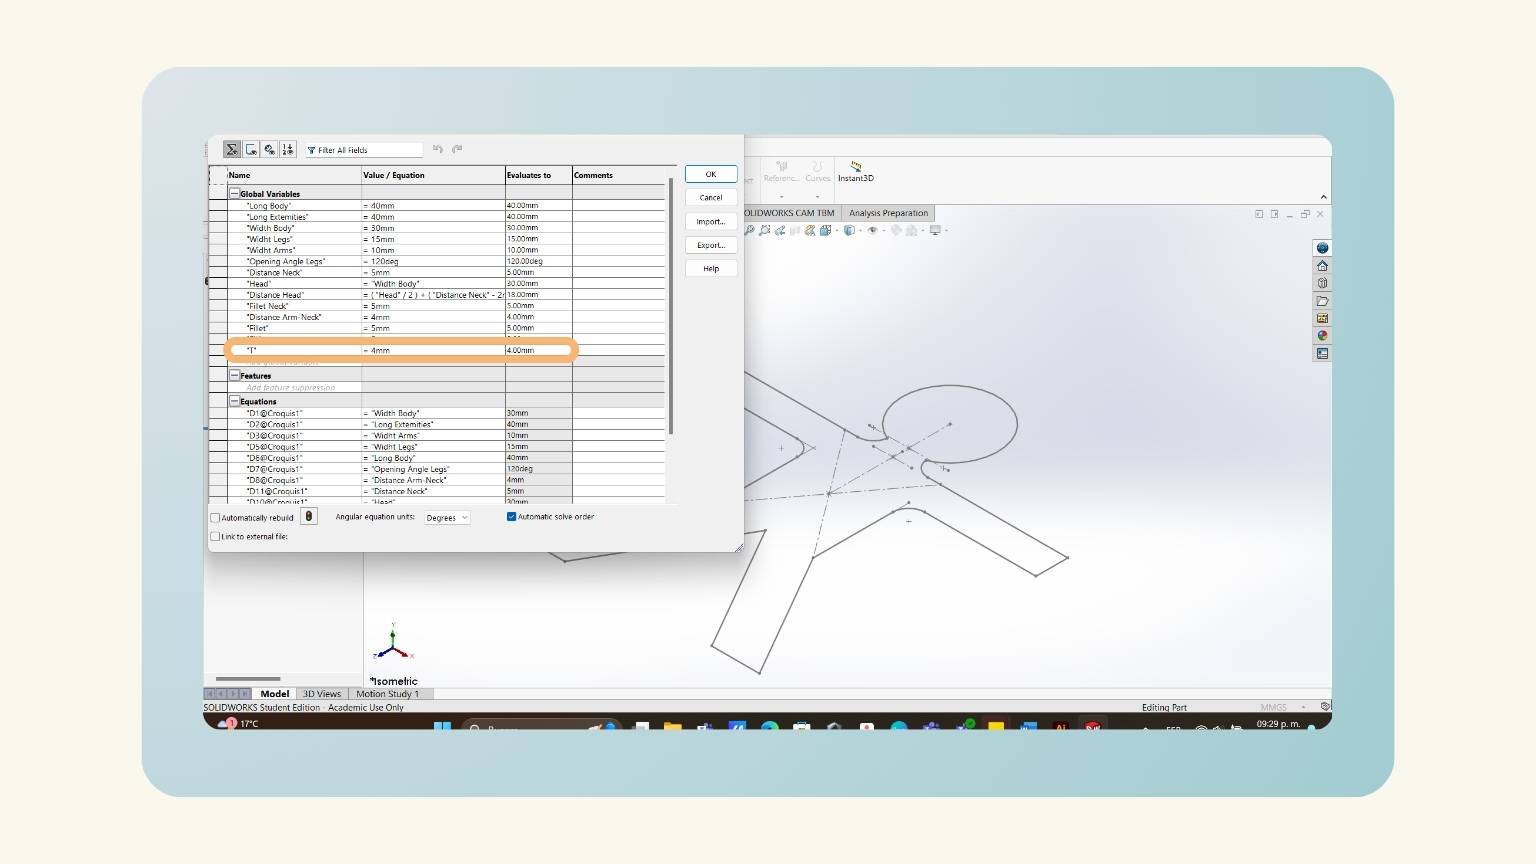
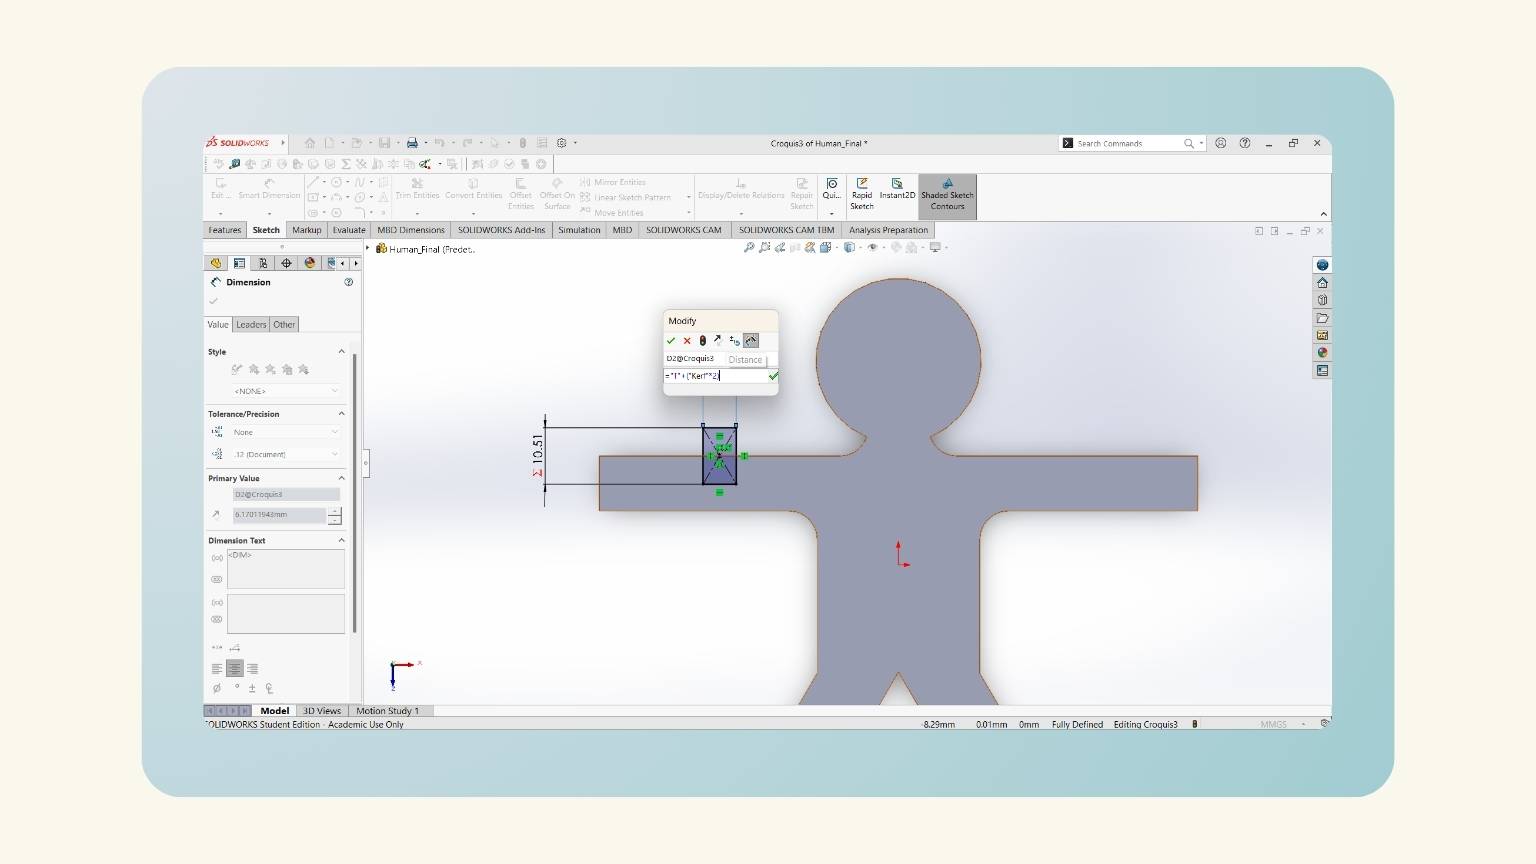
- I forgot to consider the kerf, so I added it to my equations.
- Then, I added the ‘T’ equation that referred to the thickness of my material.
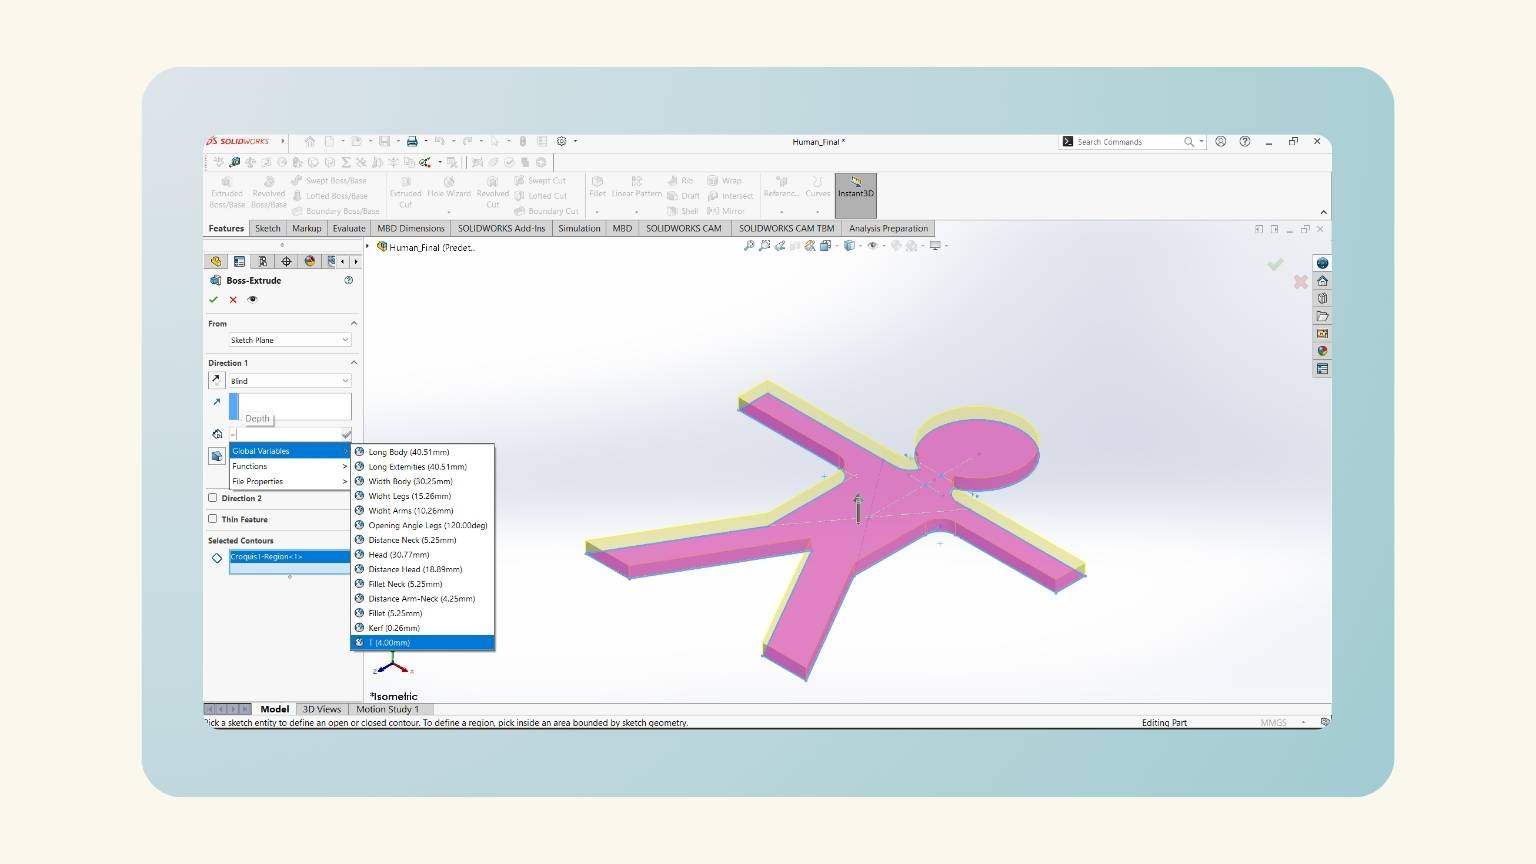
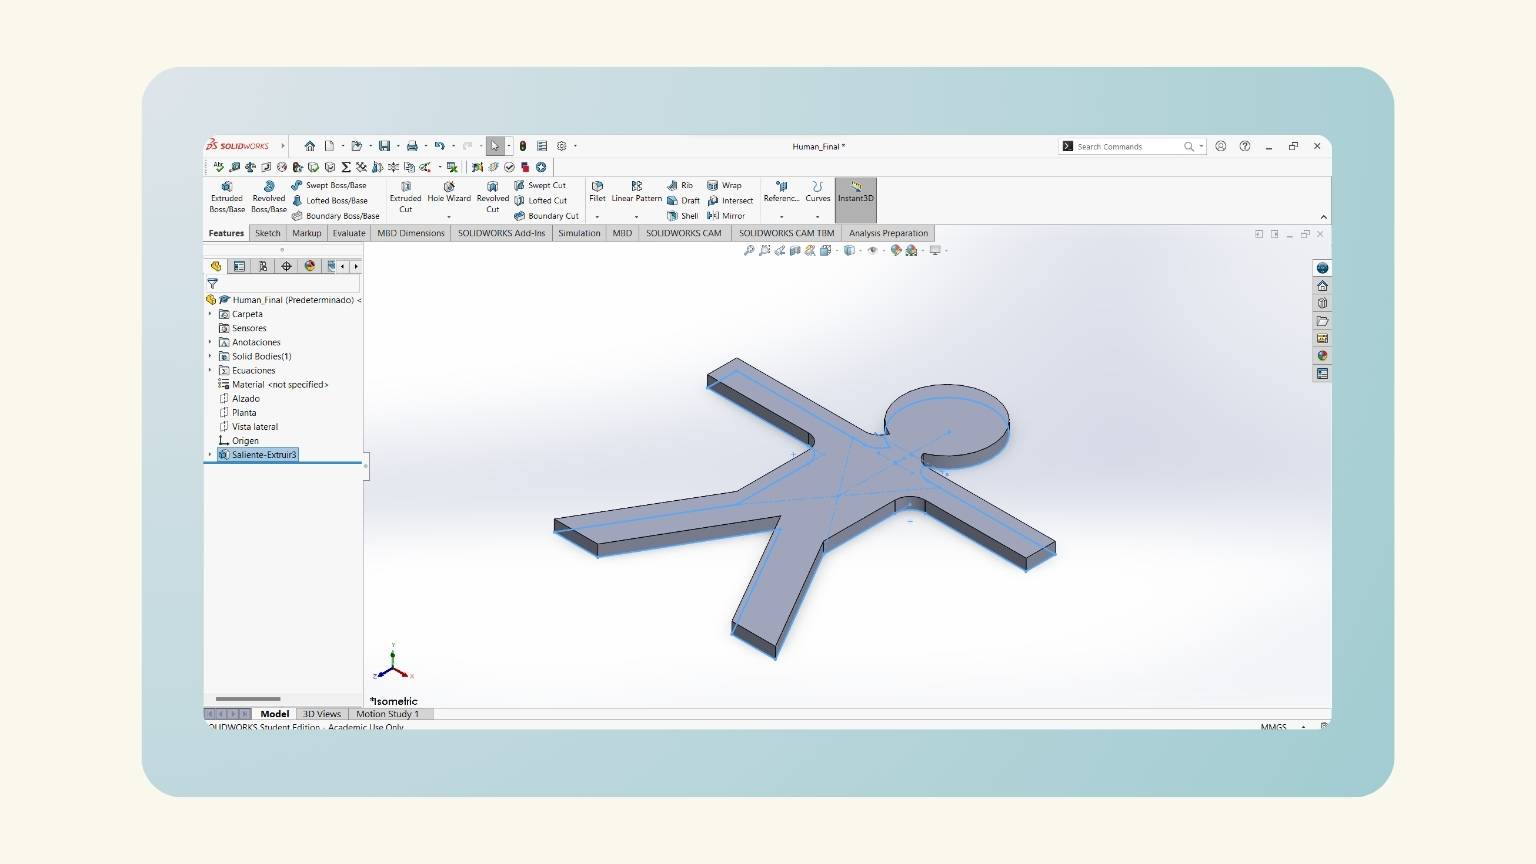
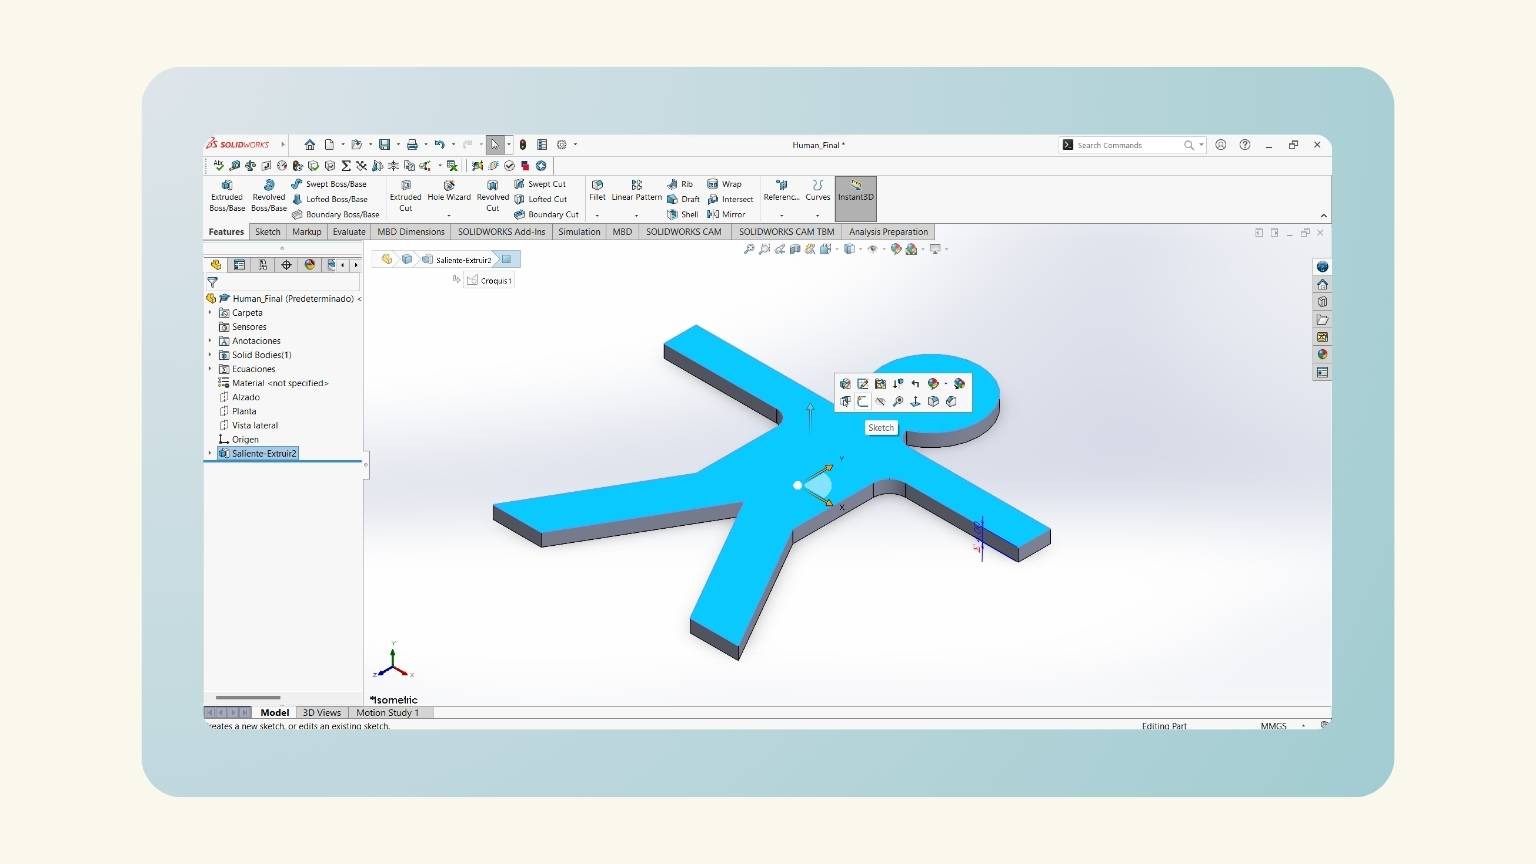
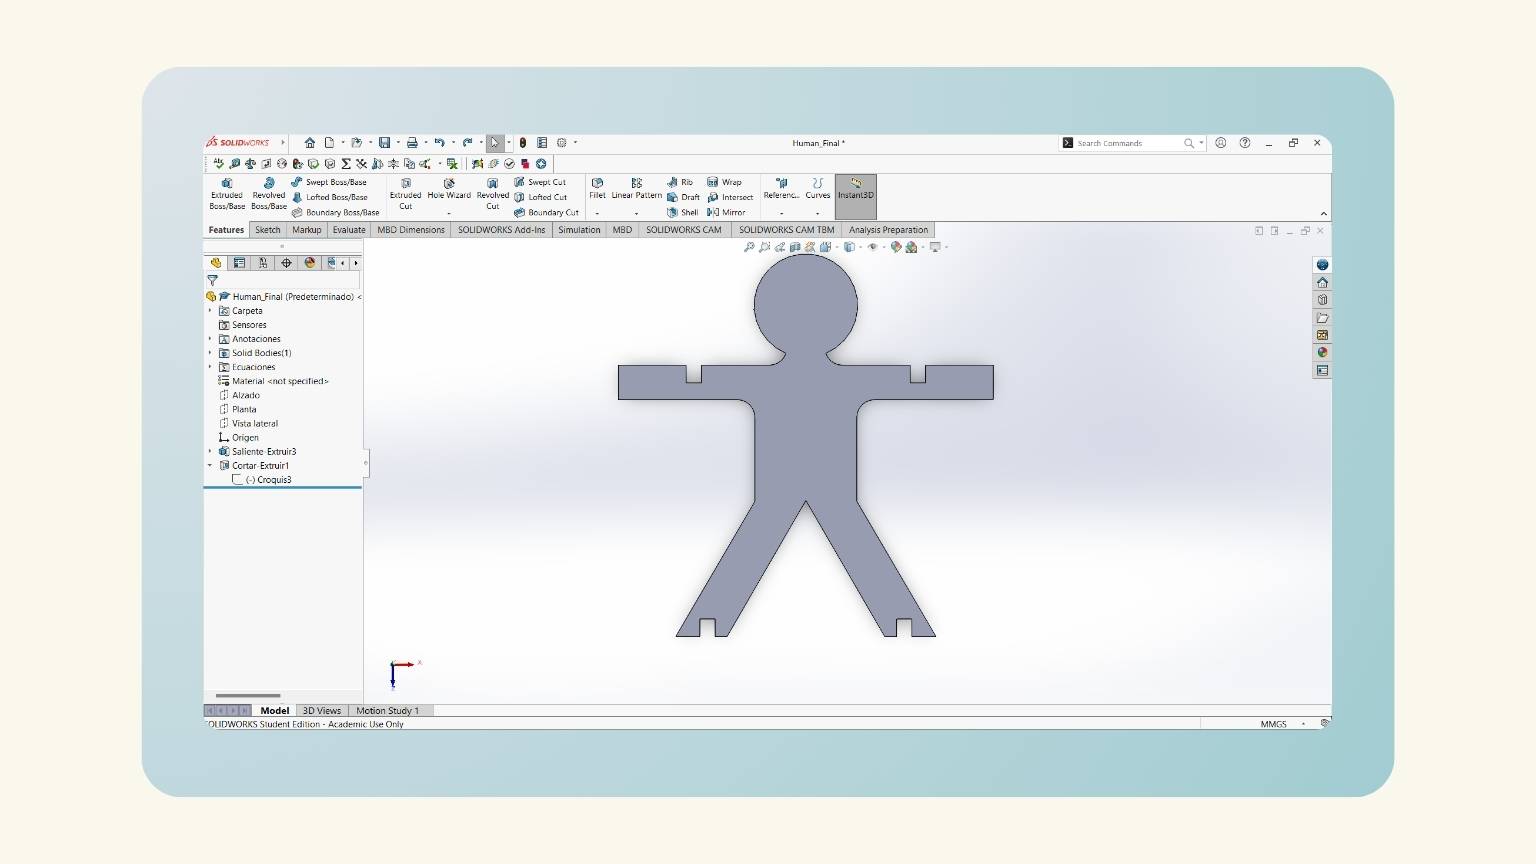
- I extruded the piece considering the global variable of ‘T’.
- I have the extruded piece!
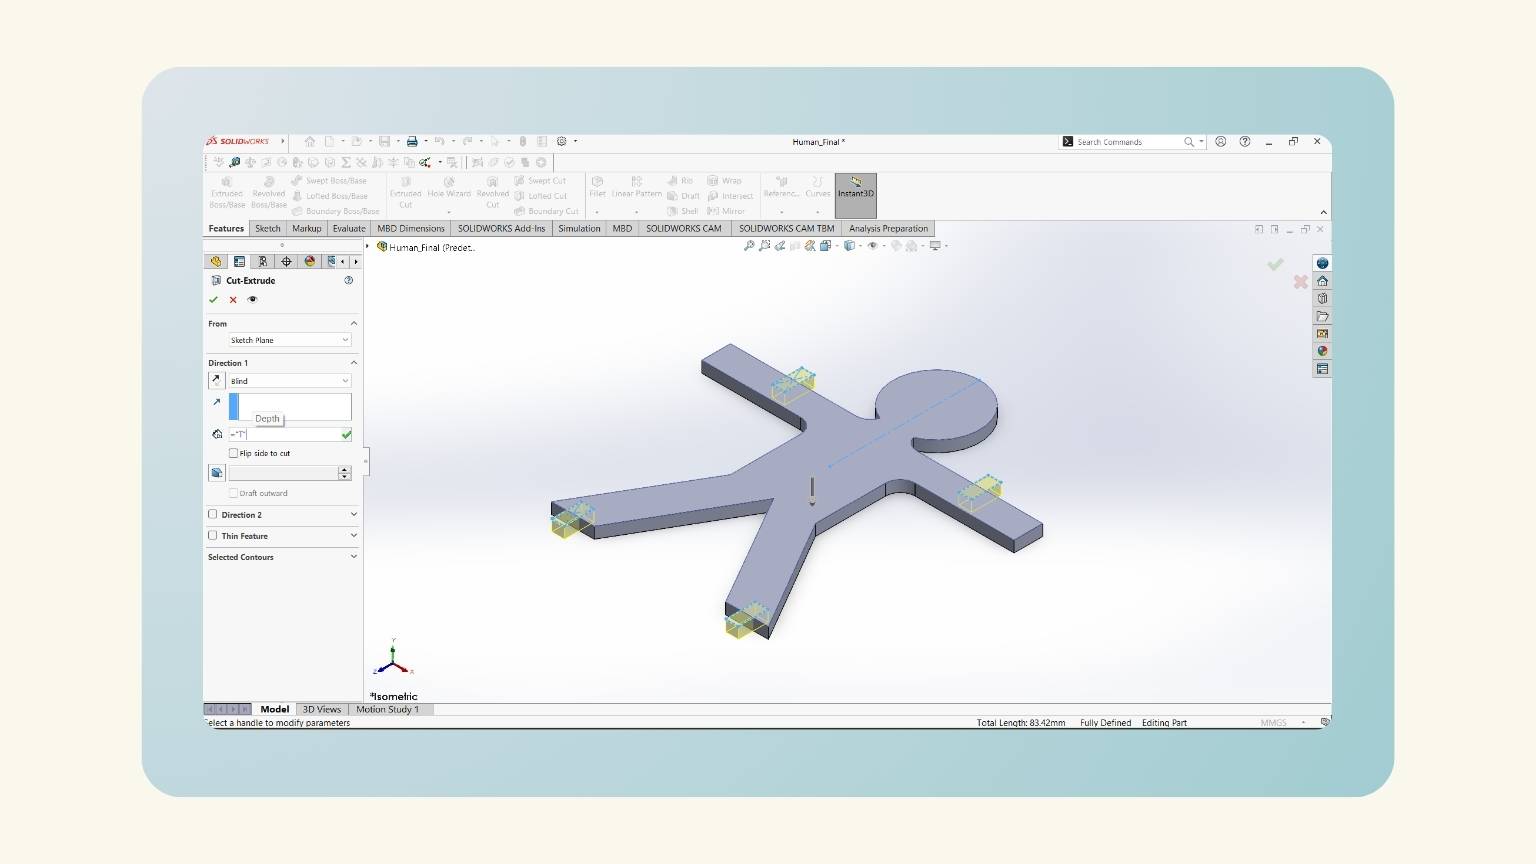
- After, I made another equation, 'Fill', for the slots.
- I started a new sketch on the plane at the top of the piece.
- I drew a rectangle in the middle of the arm with the ‘Center ‘Rectangle’ tool.
- I put the height of the rectangle using the global variable ‘Fill’.
- I put the width using the global variable 'T', but I added ‘+(“Kerf”*2)’ to consider the kerf of the curt.
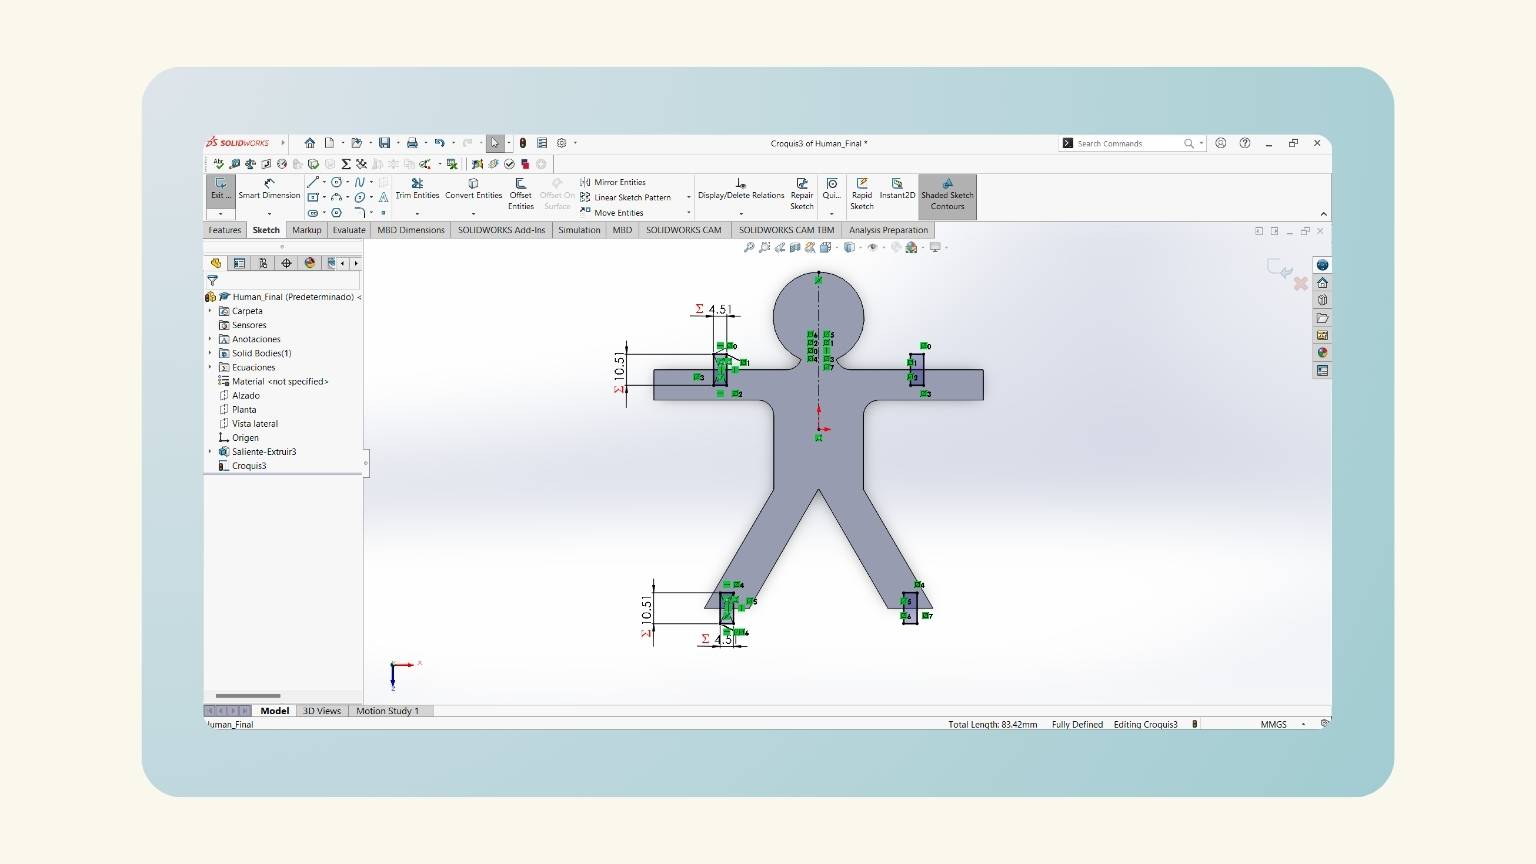
- I made a mirror of the rectangle to be reflected on the other arm.
- I did the same on the legs.
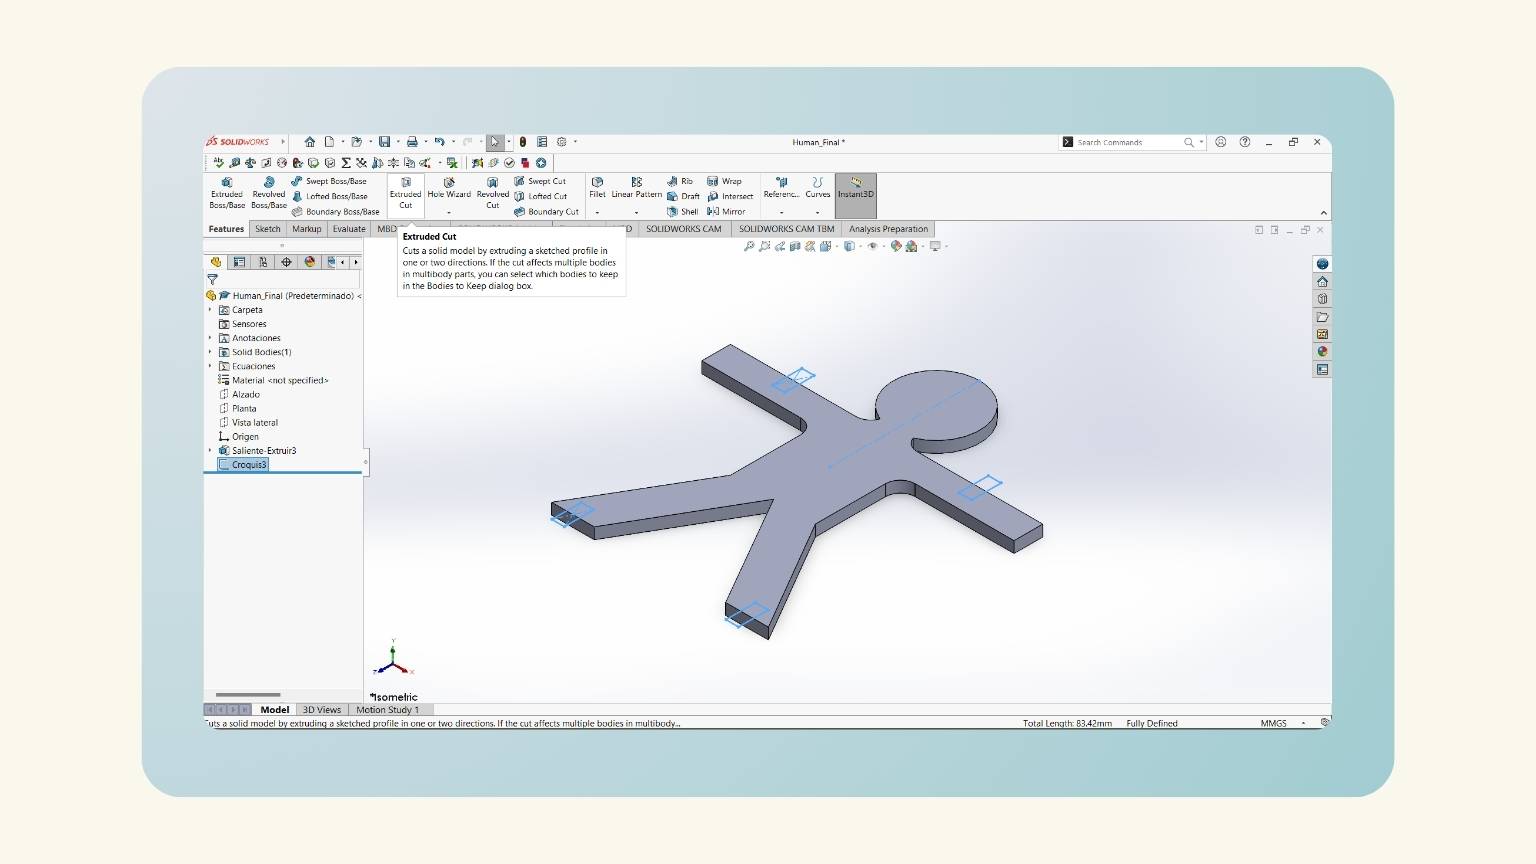
- I used the ‘Extruded Cut’ tool to eliminate these sections from the piece.
- For the cutting extrusion, I used the global variable 'T'.
- And the piece was already there!
- I tried to create a flexible pattern using the formula provided on the Fab Academy Puebla page. Unfortunately, I ran into an issue where one of the values seemed to be zero, which prevented me from obtaining the other necessary values. I asked an instructor for help, and they explained that due to the size of my part, it was not possible to calculate the value. In other words, it was an impossible task.
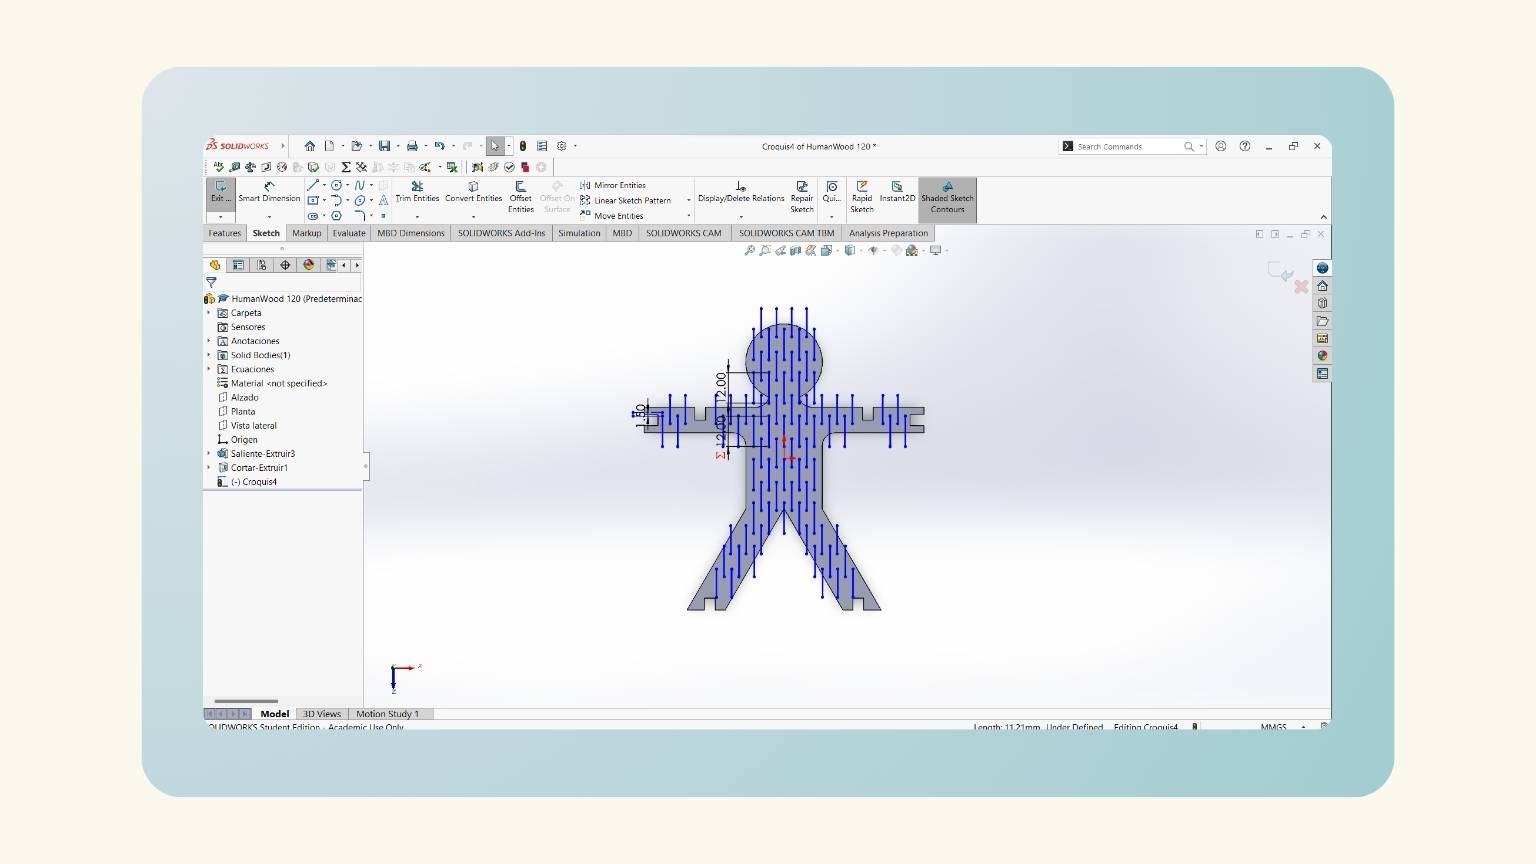
- I created my own flexible pattern by visualizing others and taking into account the measurements and shape of my piece.


Flexibility Patterns
Formula

Application
How can I use the laser cutter?
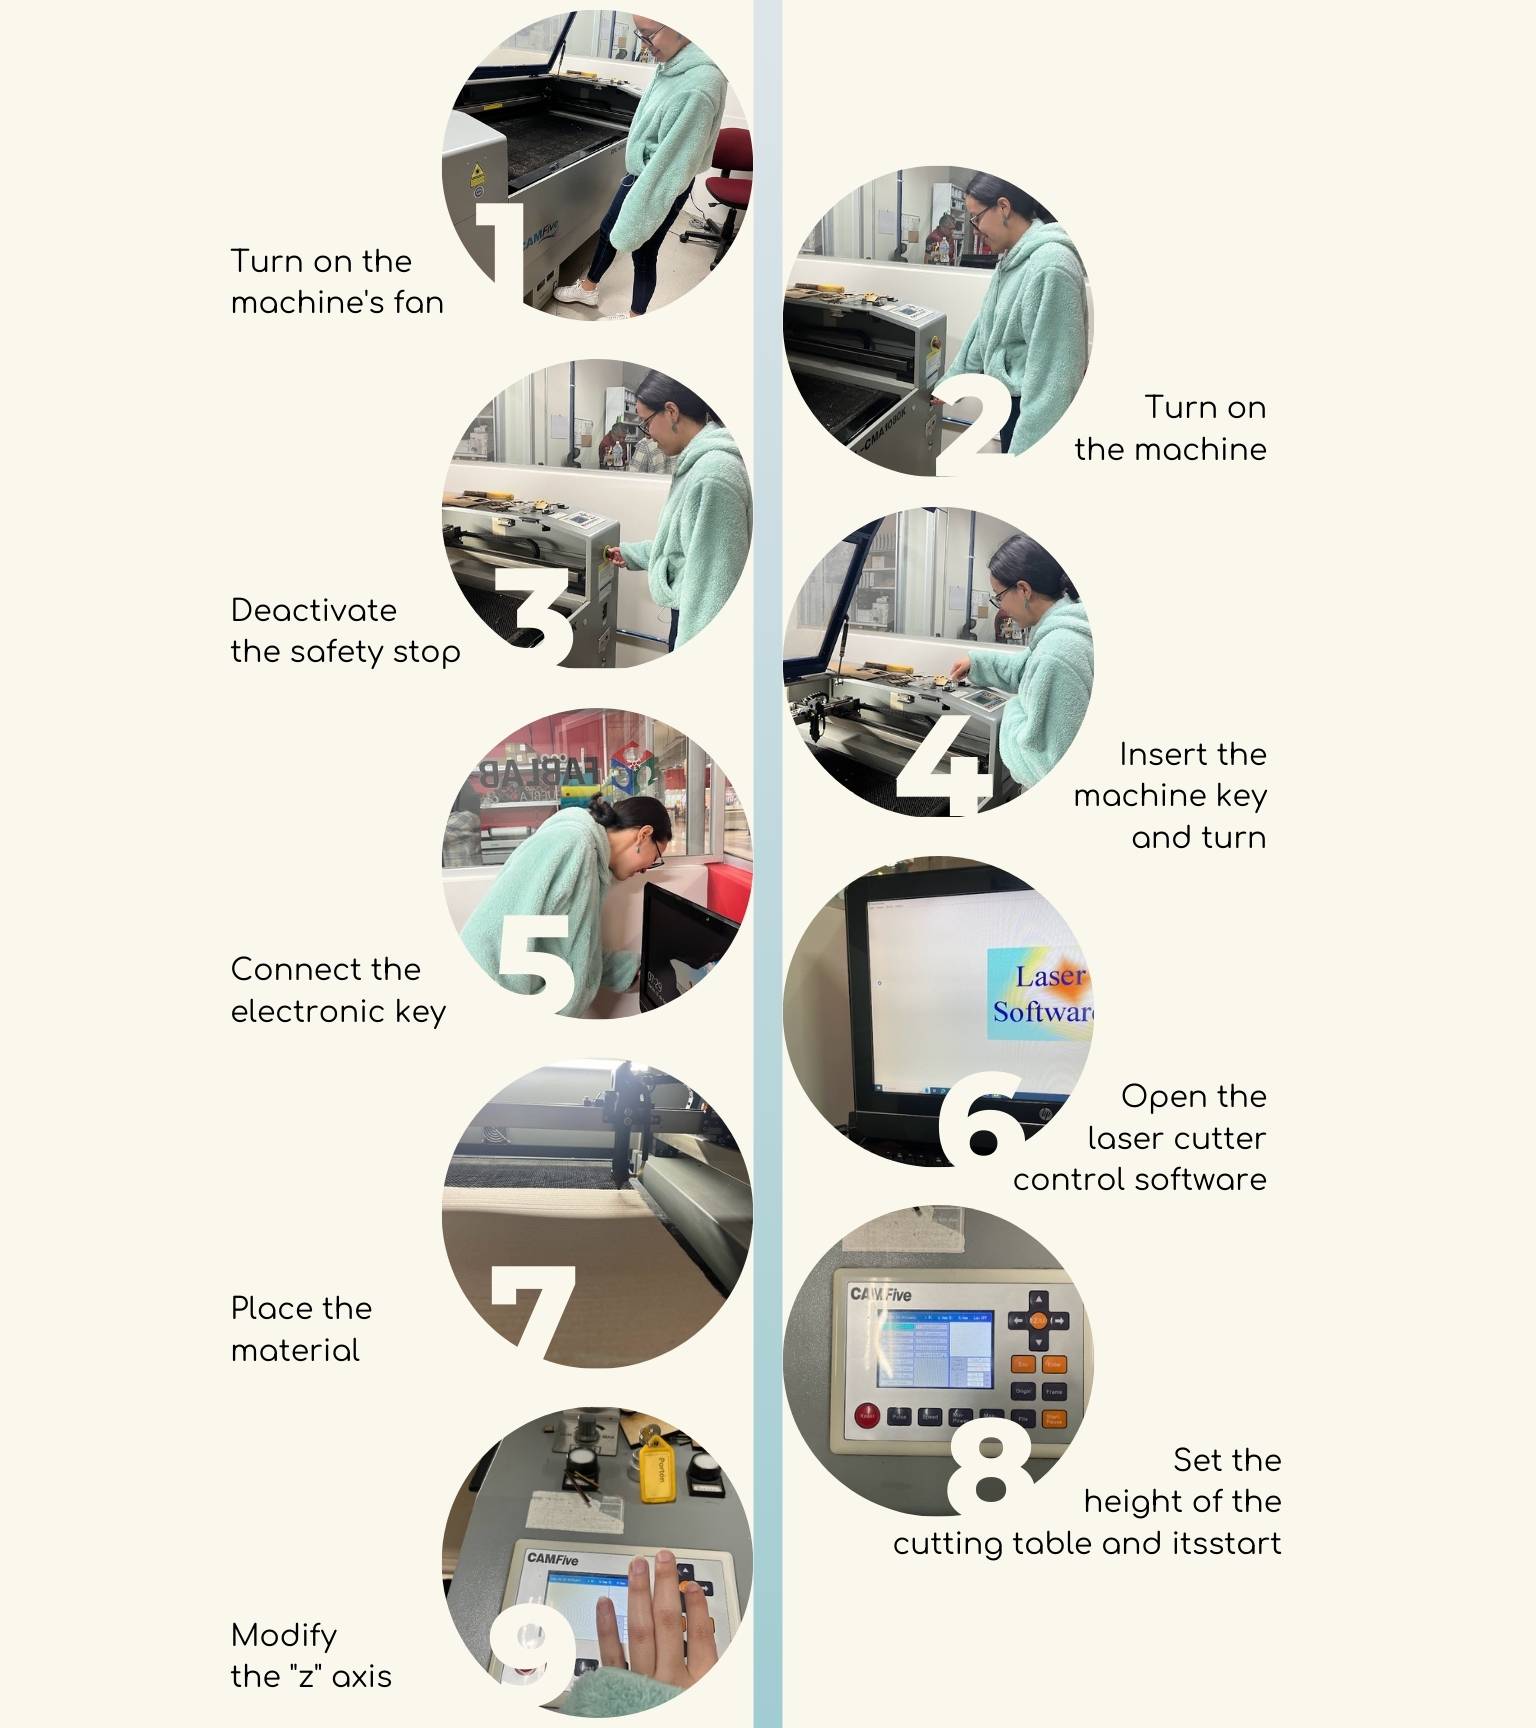
- Turn on the machine's fan using the button located on the lower left side.
- Before, ensure the machine's ventilation is clear.
- Turn on the machine using the button located on the right side.
- Deactivate the safety stop by turning in the indicated direction, also located on the right side.
- Insert the machine key and turn. The lock is located on top of the machine, as shown in the image.
- Connect the electronic key to the computer to allow the cutting software to open.
- Open the laser cutter control software ‘Smart Carve’ on the computer.
- Place the material you wish to cut on the worktable, ensuring it is securely fastened and level.
- Set the height of the cutting table and its start at the top controls of the machine. Use the arrow controls to position the "x" and "y" axes.
- If it is necessary, modify the "z" axis, press Z/U, and then "Z move" and adjust the height to 5mm from the material.
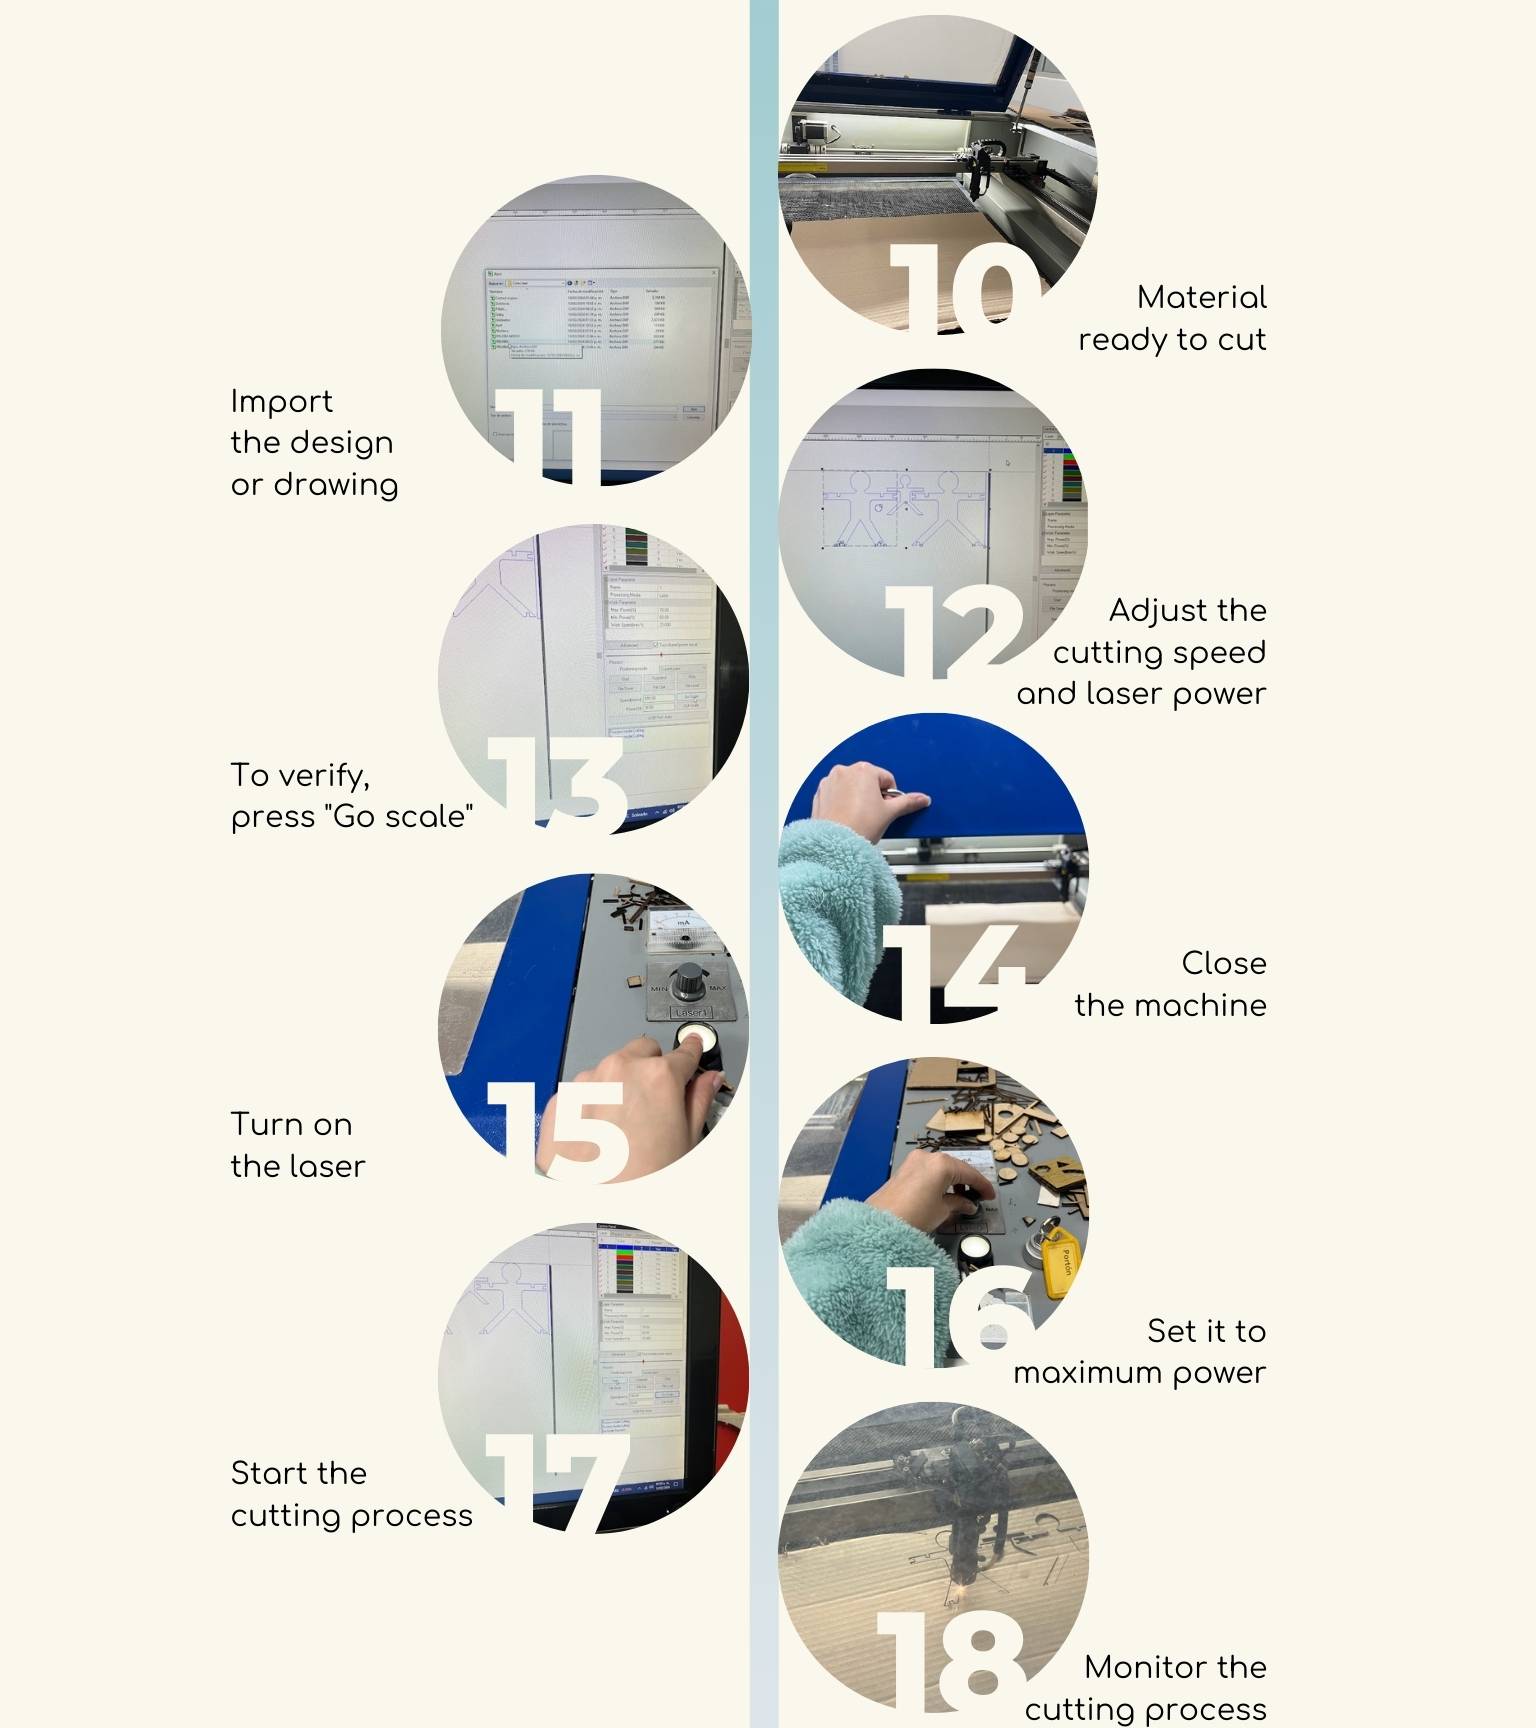
- The material is ready to cut.
- Import the design or drawing you wish to cut.
- If you need to adjust the cutting speed and laser power, select your design, then click the configuration number.
- To verify that the total material needed matches the material available, press "Go Scale", and the laser will outline the cut to confirm it fits within the material.
- Close the machine before turning on the laser.
- Then, turn on the laser by pressing the button.
- After, set the speed to its maximum (turn the knob above the laser button).
- When all settings are ready and the safety check is complete, start the cutting process from the software with the ‘Start’ button.
- Monitor the cutting process throughout to ensure it is proceeding correctly.
- Once the cutting is complete, stop the laser cutter from the software and wait for the laser to completely turn off before removing the material.
- Before taking the pieces, turn off the laser by pressin the buttonm and set the speed to its minium.
Good practices:
Final Result
Vinil cutter
This powerful tool allows you to design a wide selection of products, including unique presents, signs, and banners. A vinyl cutter is a computer-controlled cutting equipment that employs a tiny blade to accurately cut vinyl material into different shapes and patterns.
What did I do in relation to this?
How do I design a vinyl cut?
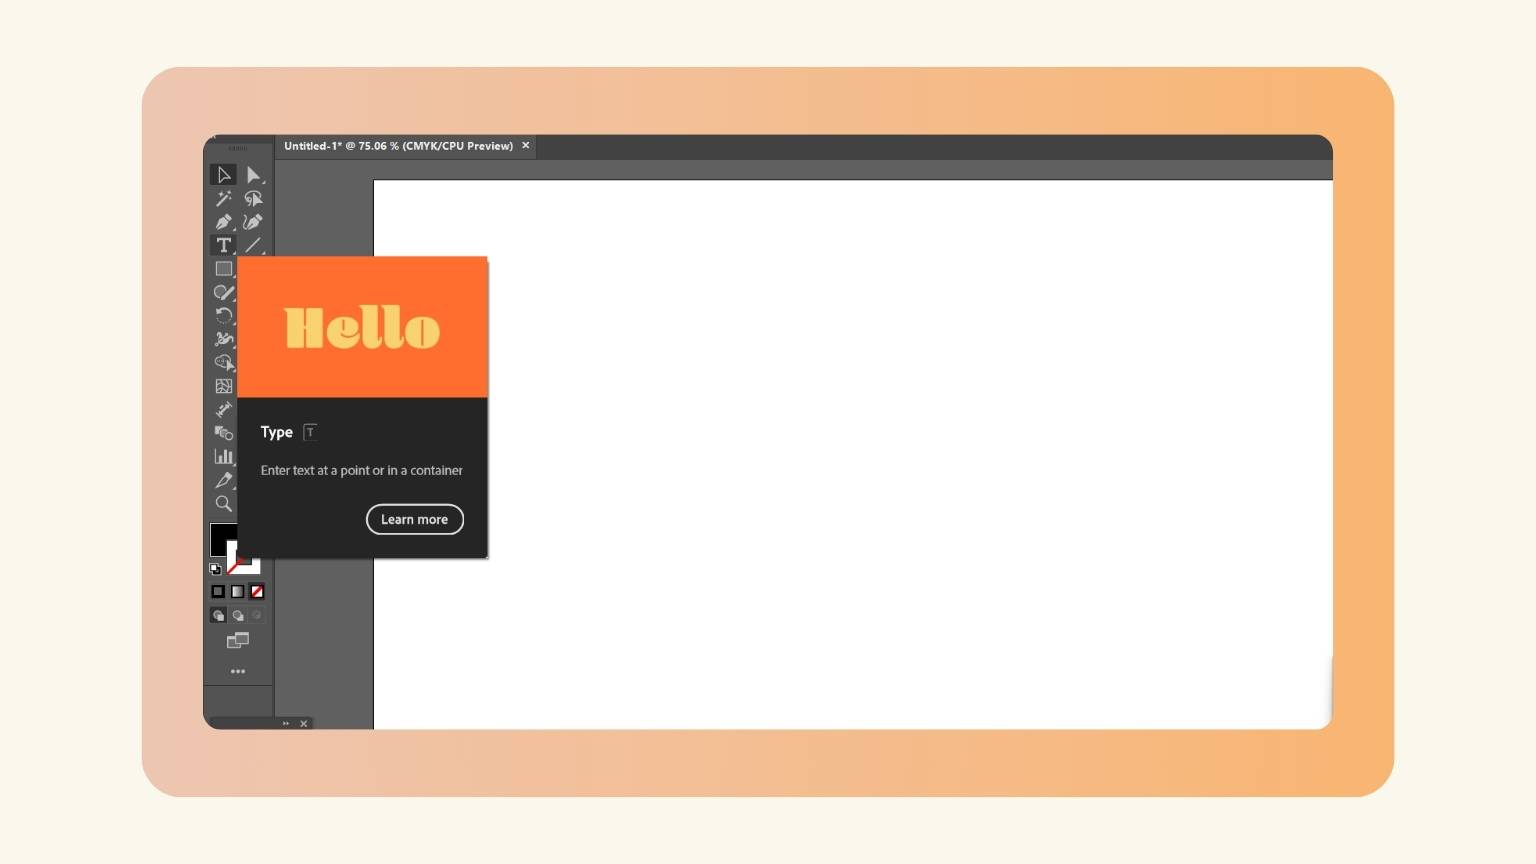
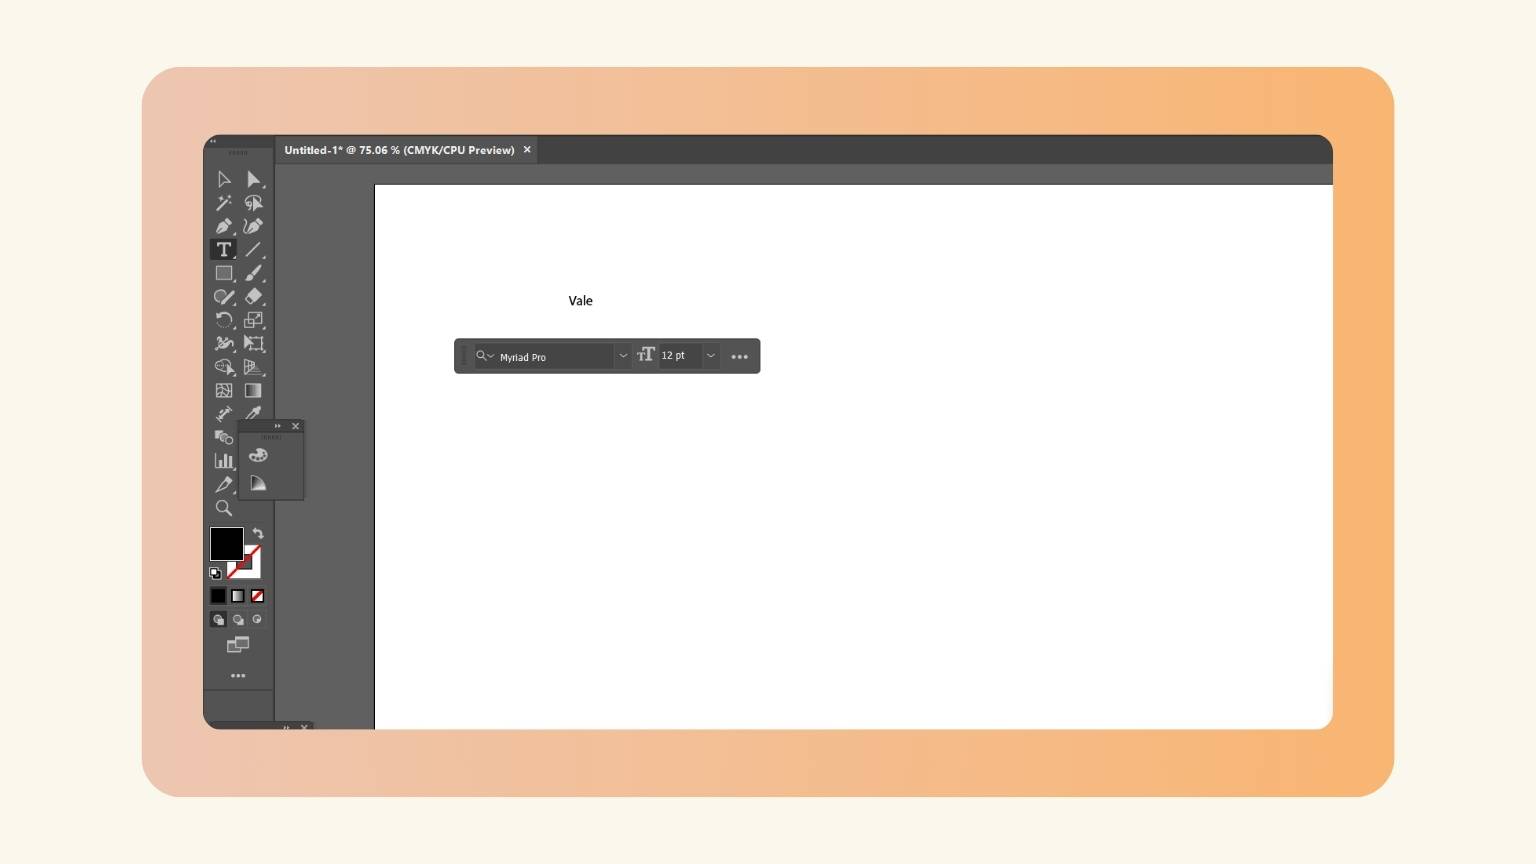
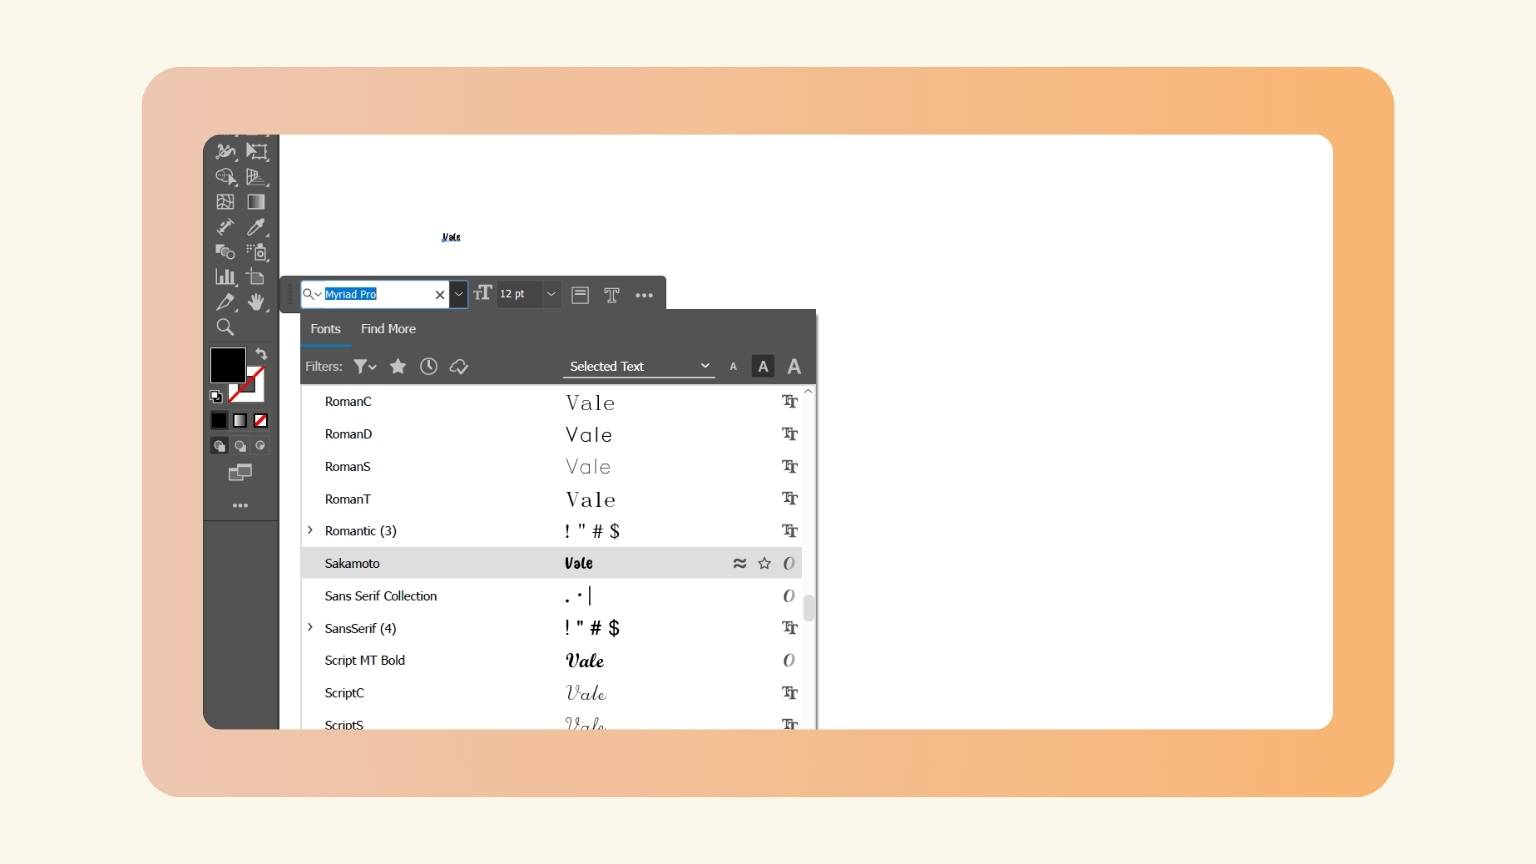
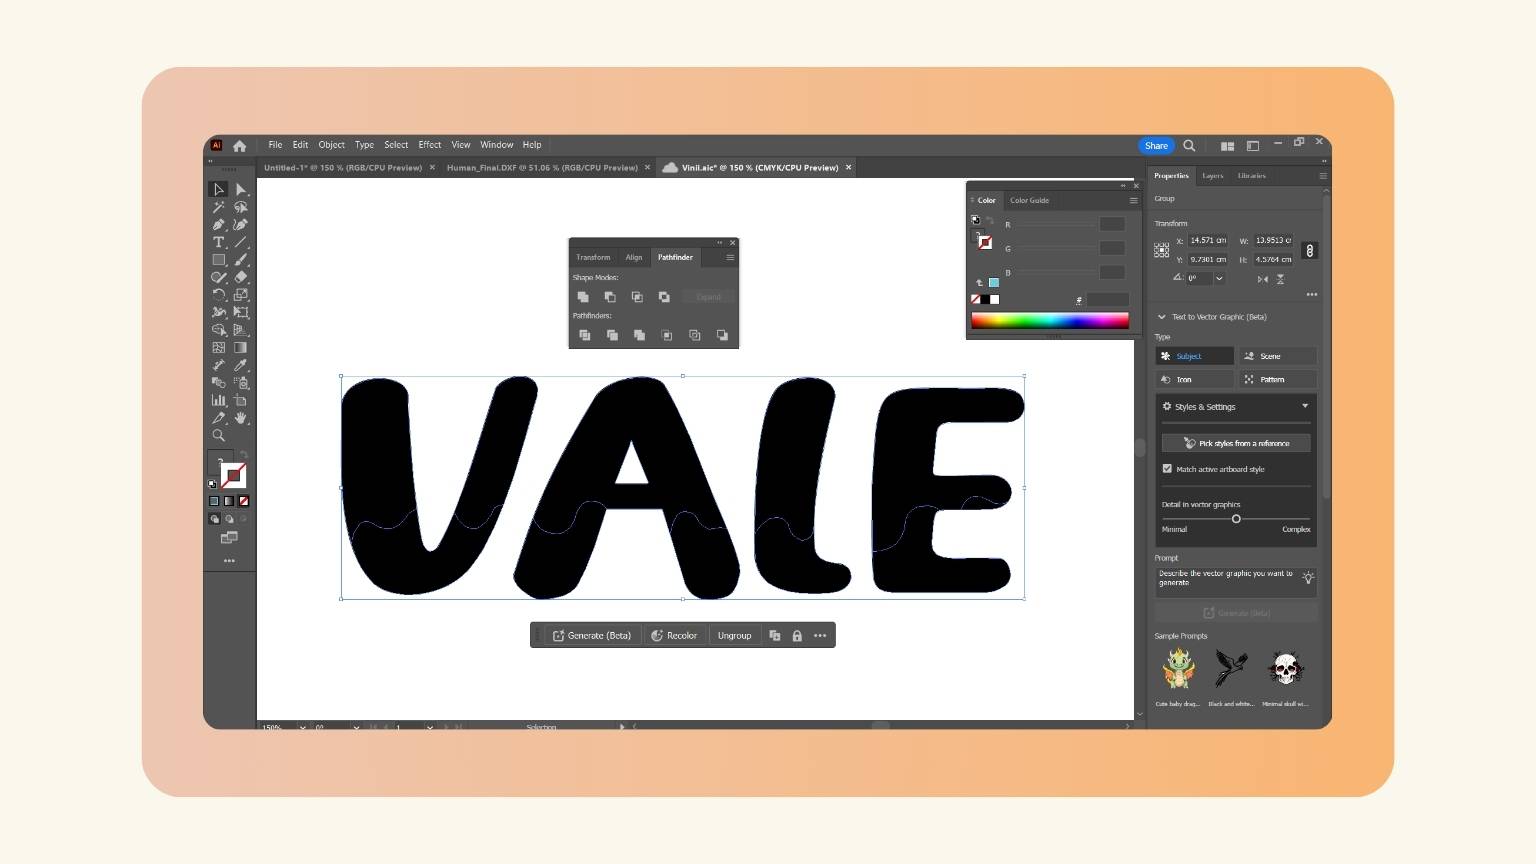
- I started inserting text.
- I put the name of my sister, Vale.
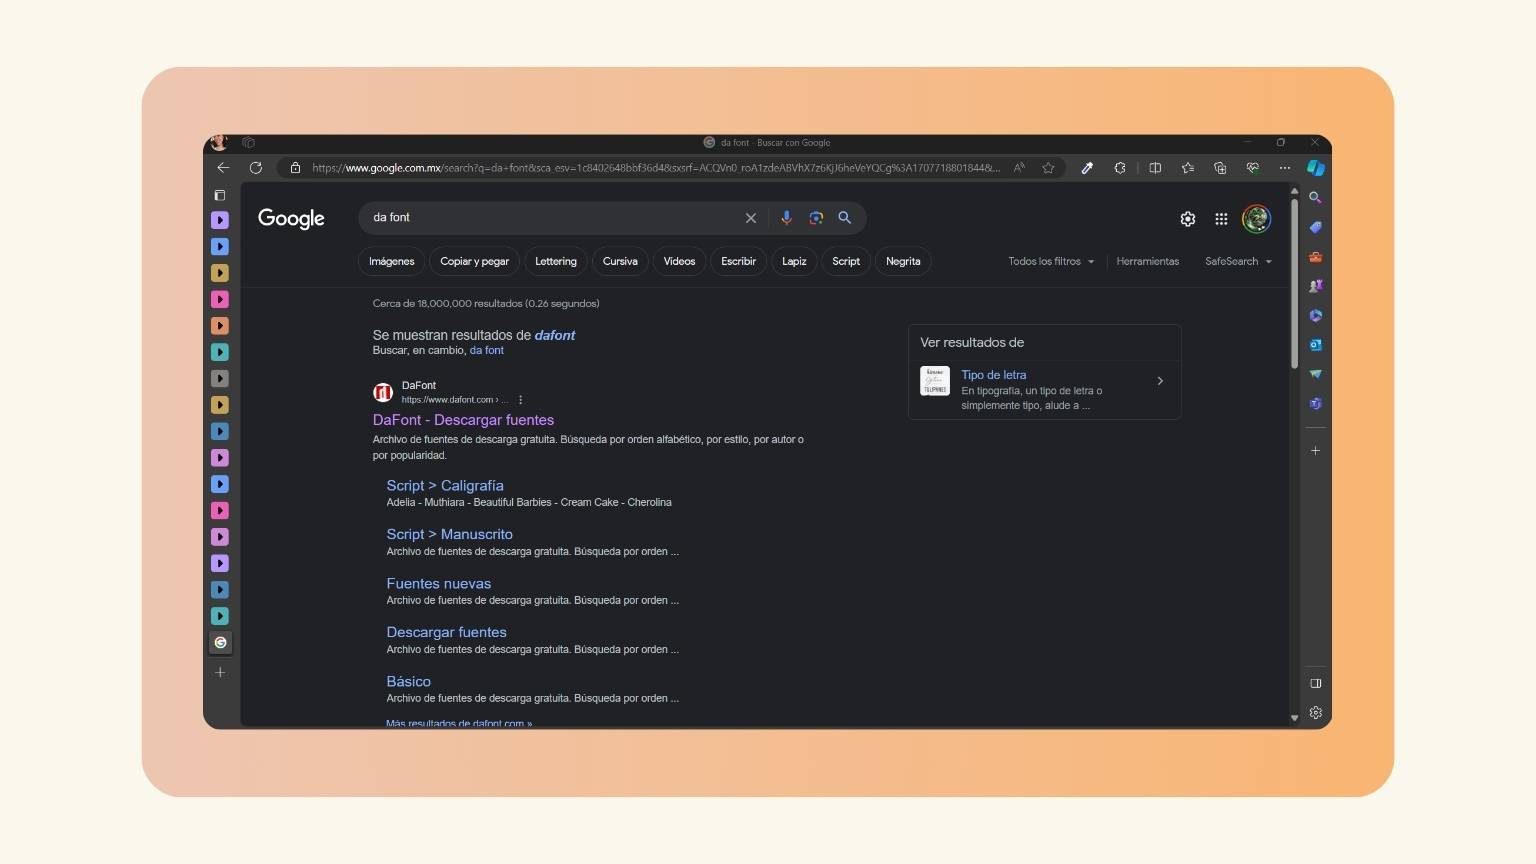
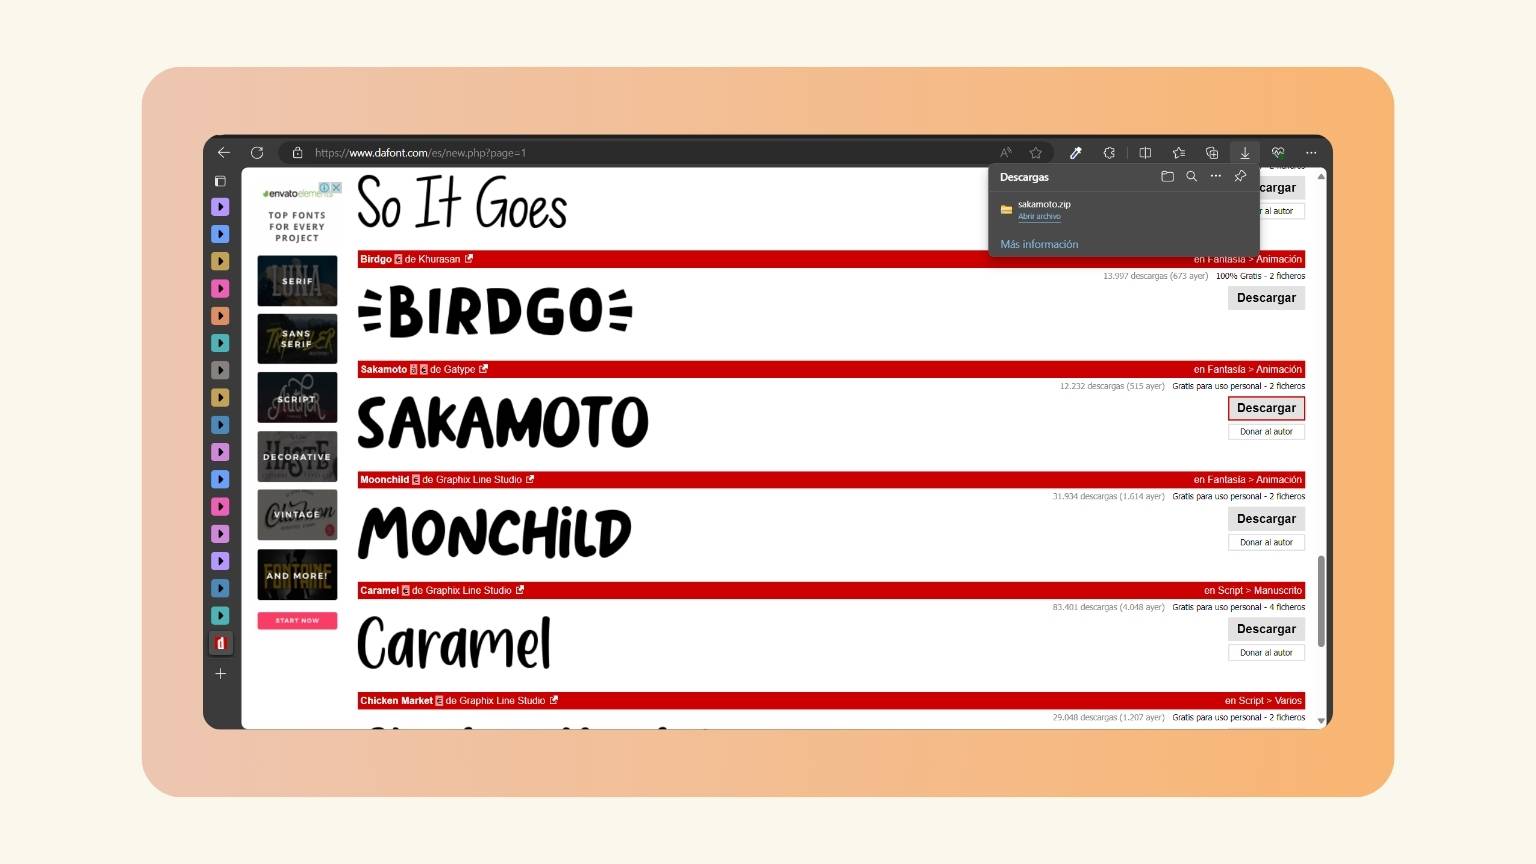
- Then, I went to Google to find a page of letters, in this case, ‘DaFont’.
- I explored all the types of letters that make up the page.
- I selected the ‘Sakamoto’ letter and downloaded.
- I went back to my file and changed the typeface.
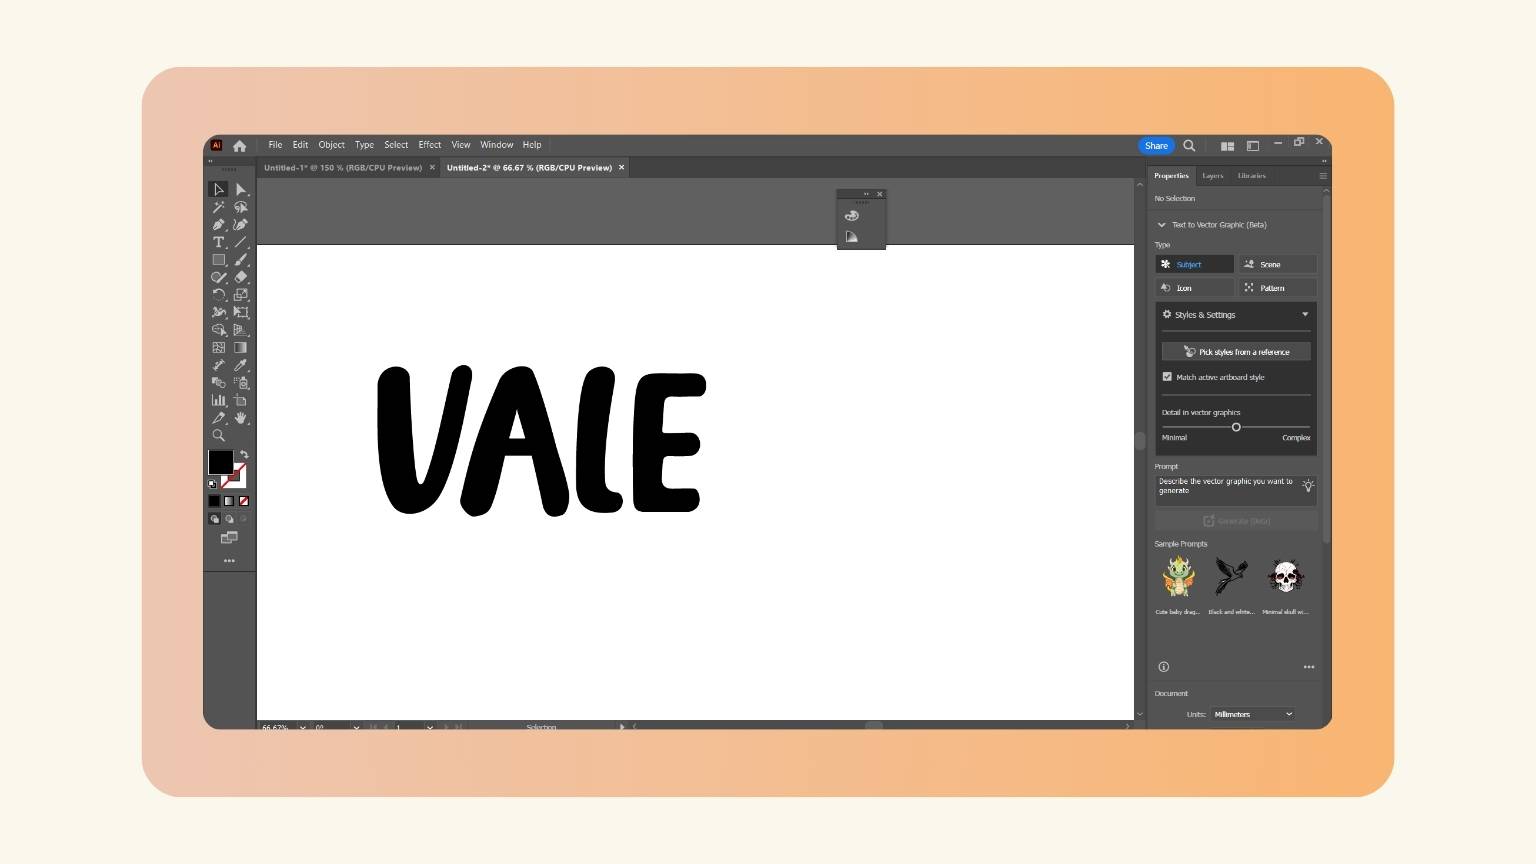
- The name looked like this.
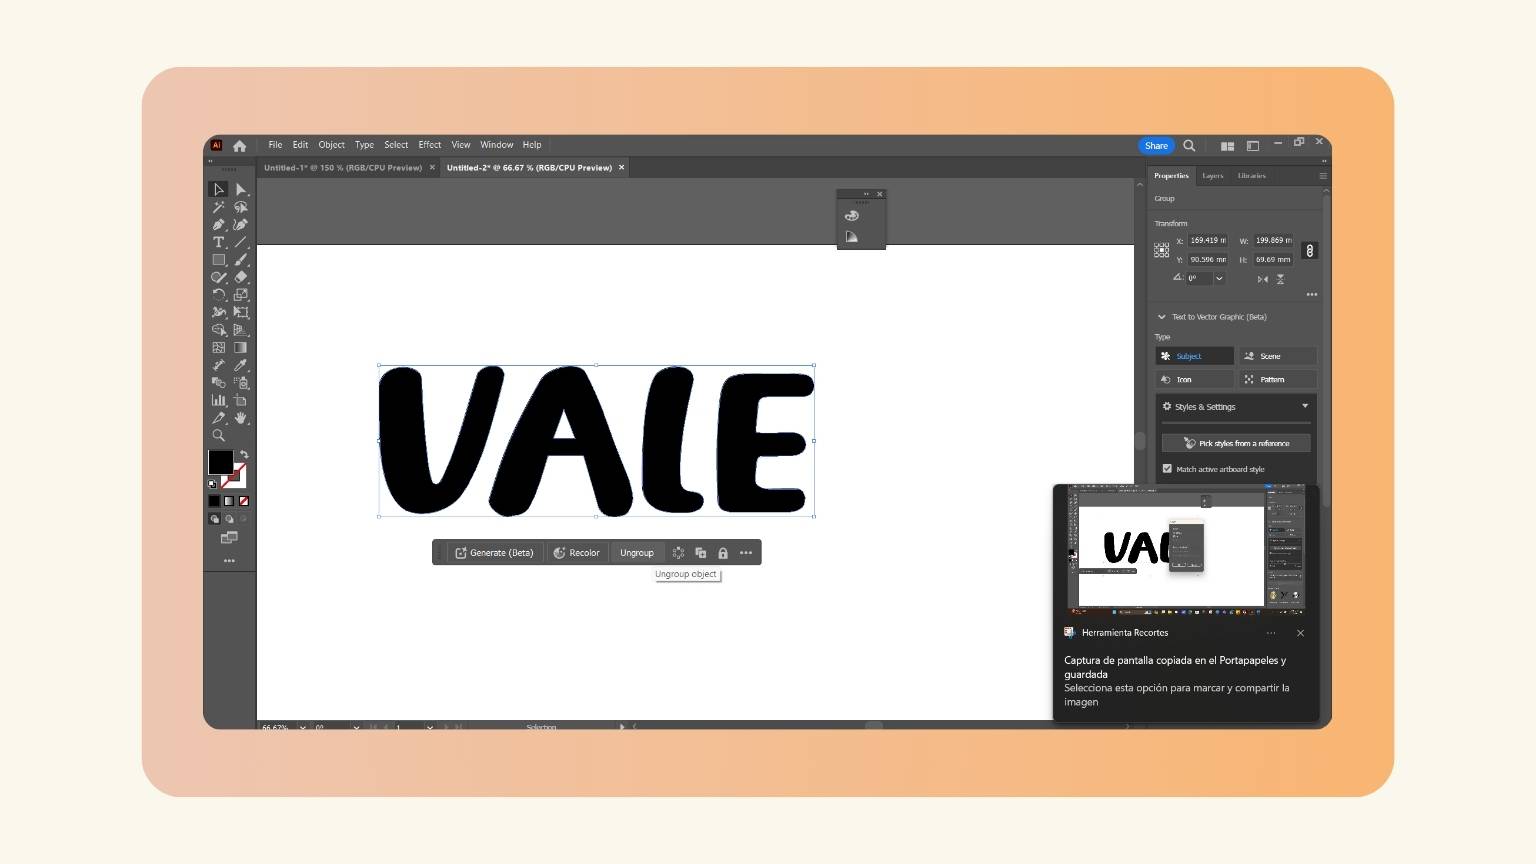
- I wasn’t convinced of the thinness of the letters, so I enlarged them.
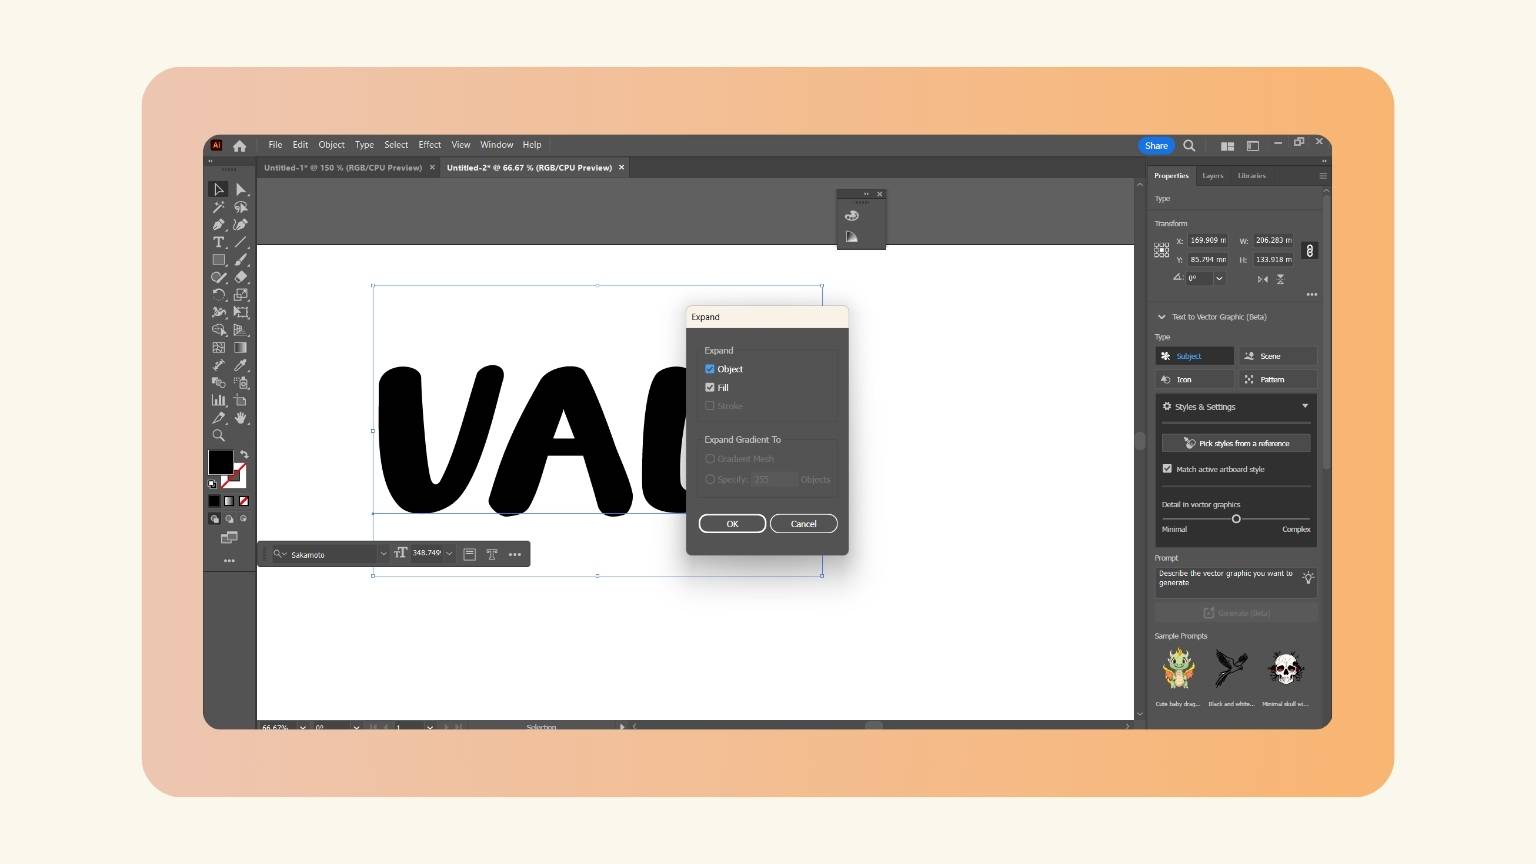
- I went to the object menu and locked the ‘Expand’ tool. I selected and put the checkpoint on the object and the fill.
- I ungrouped the words to see if the text had been vectorized.
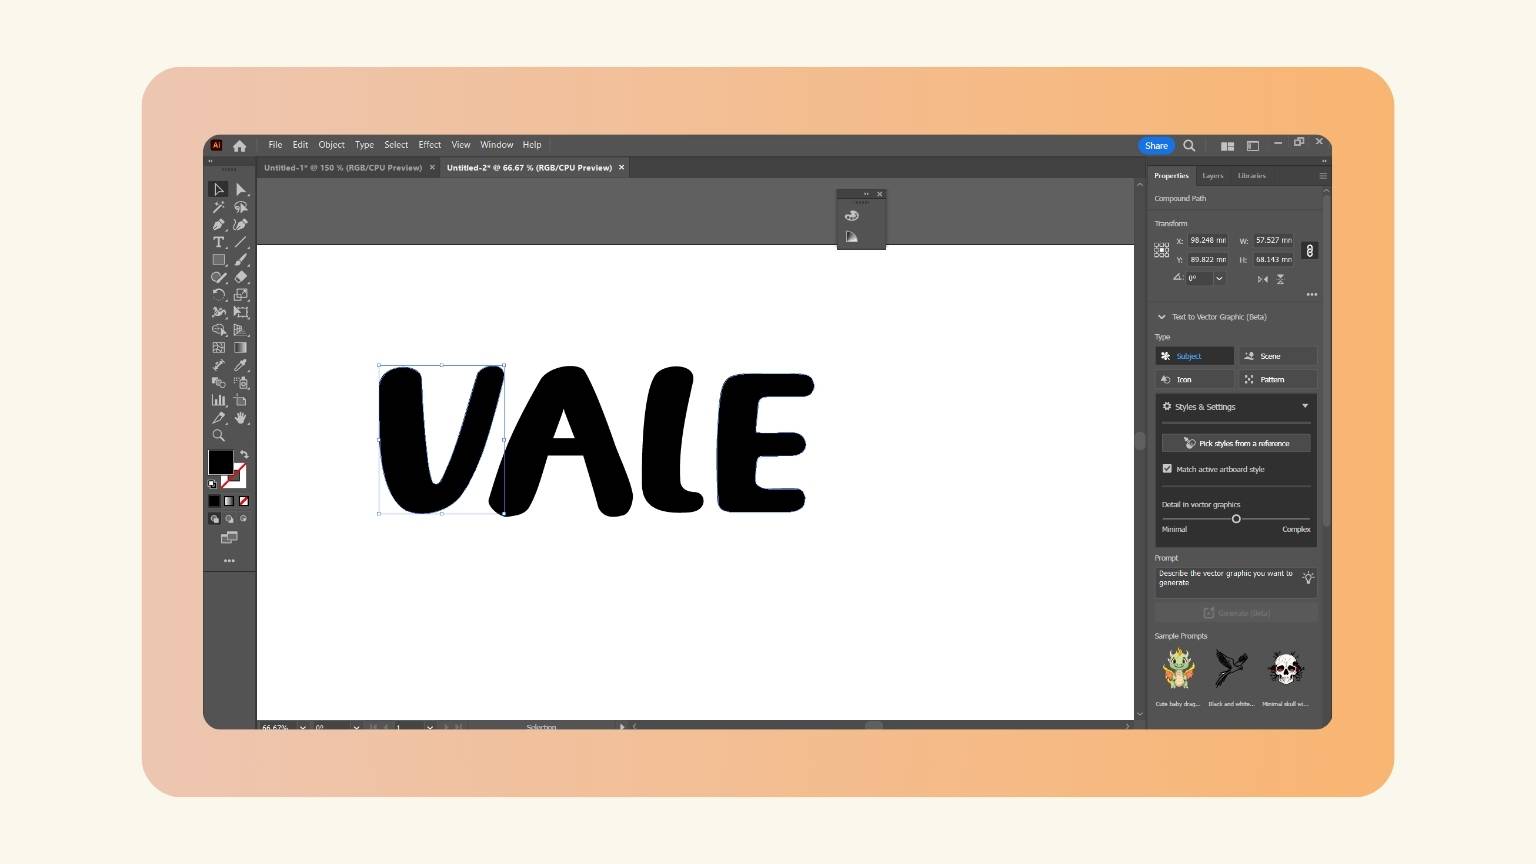
- I selected one letter to verify the last point.
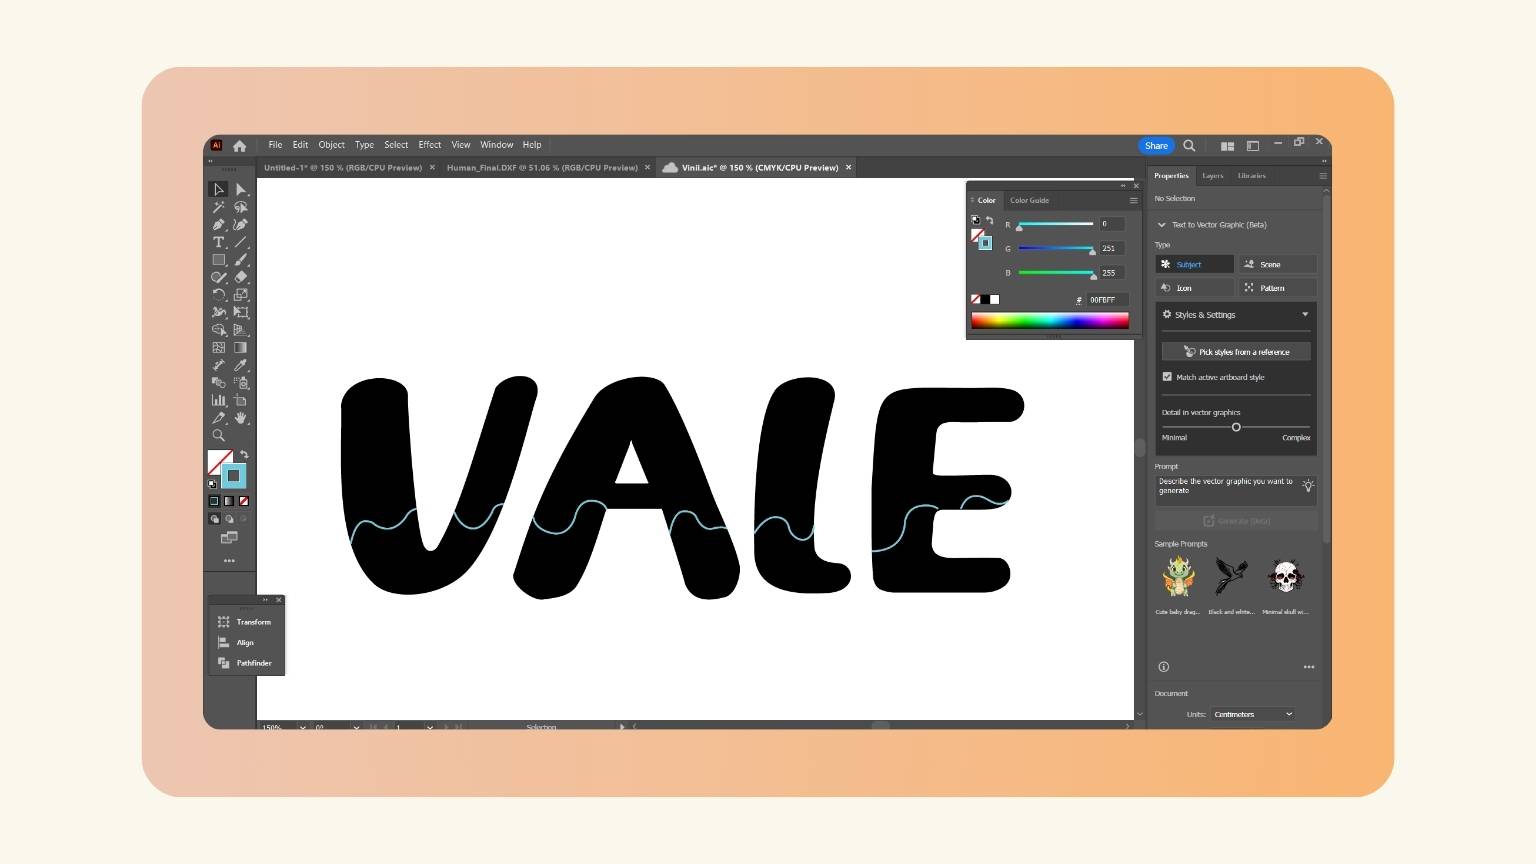
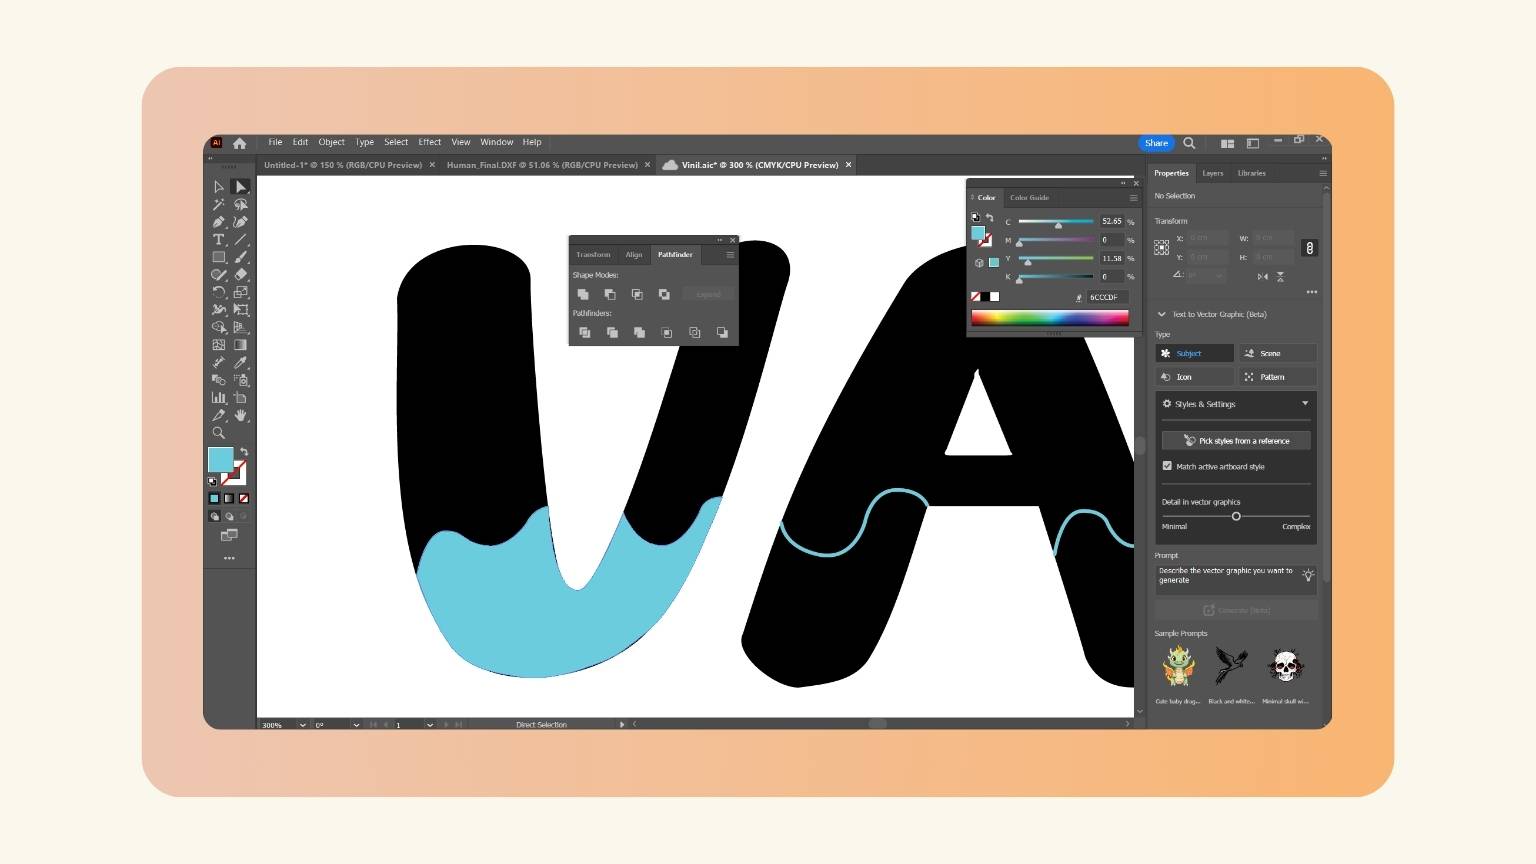
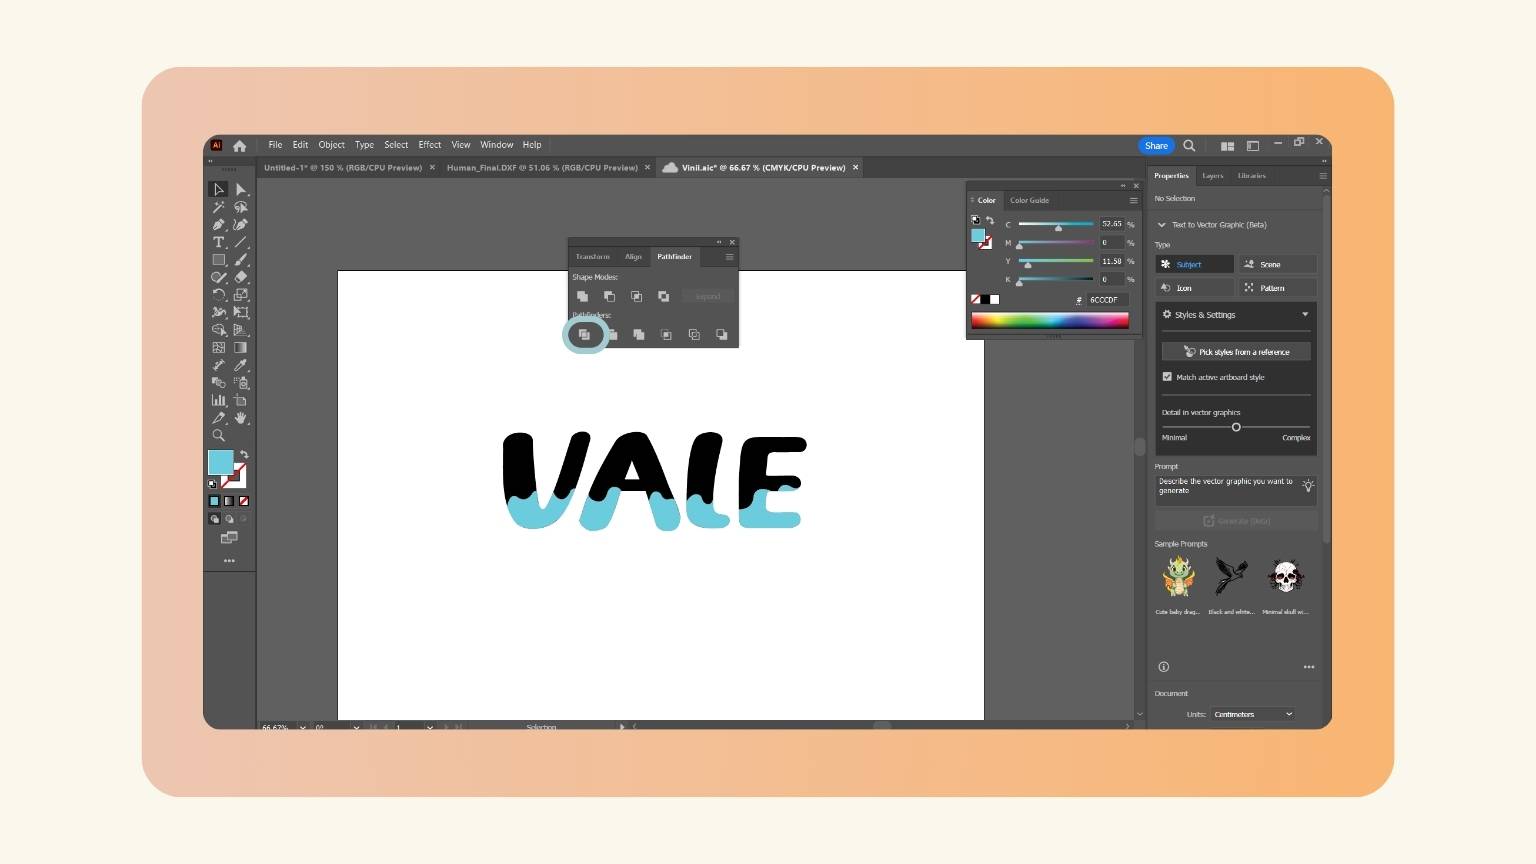
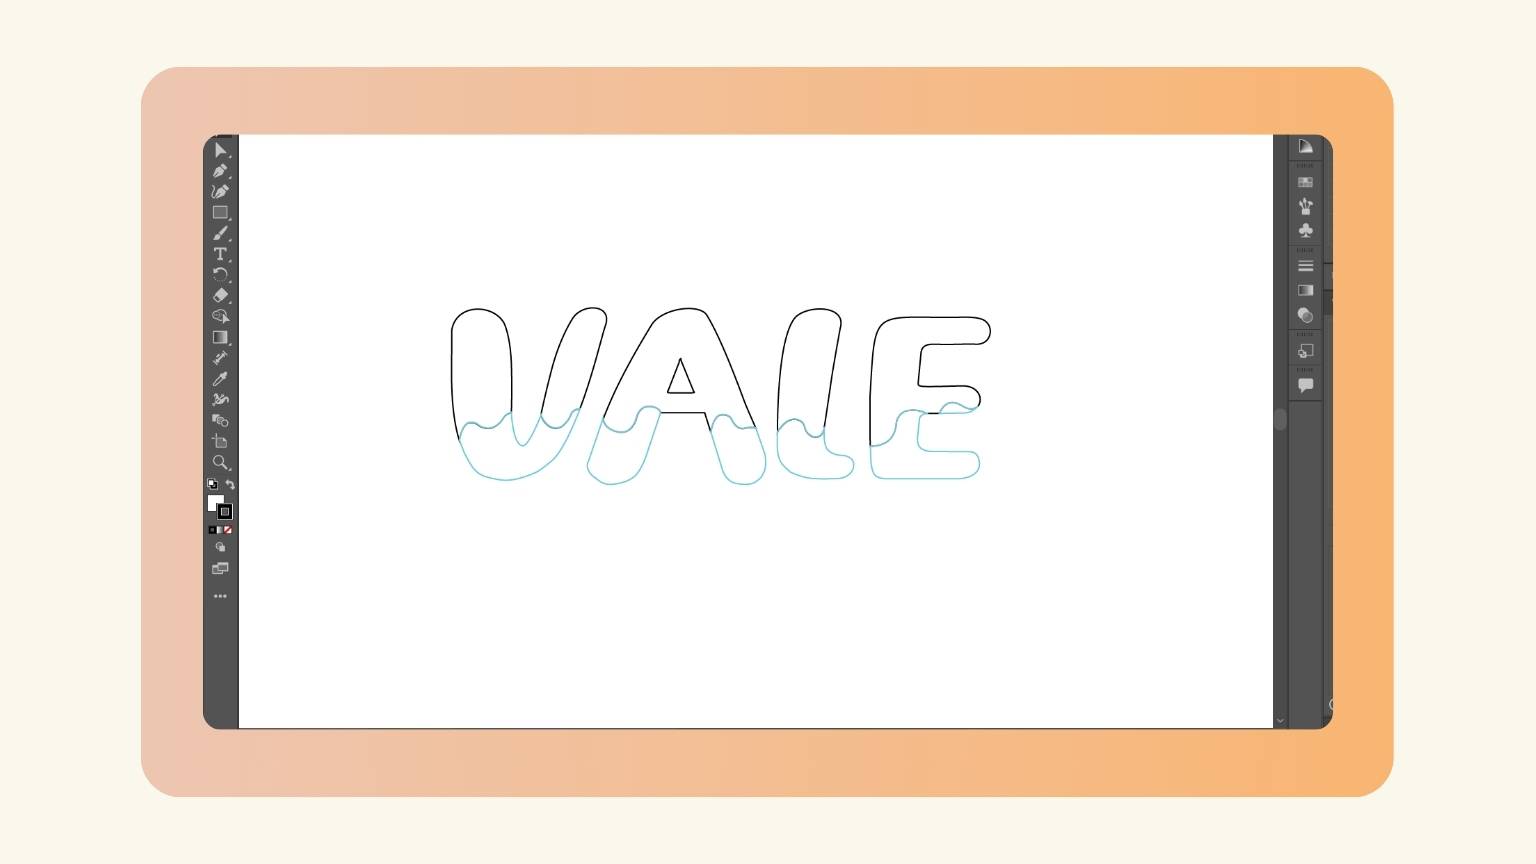
- To give more ownership, I added a wave to the letters.
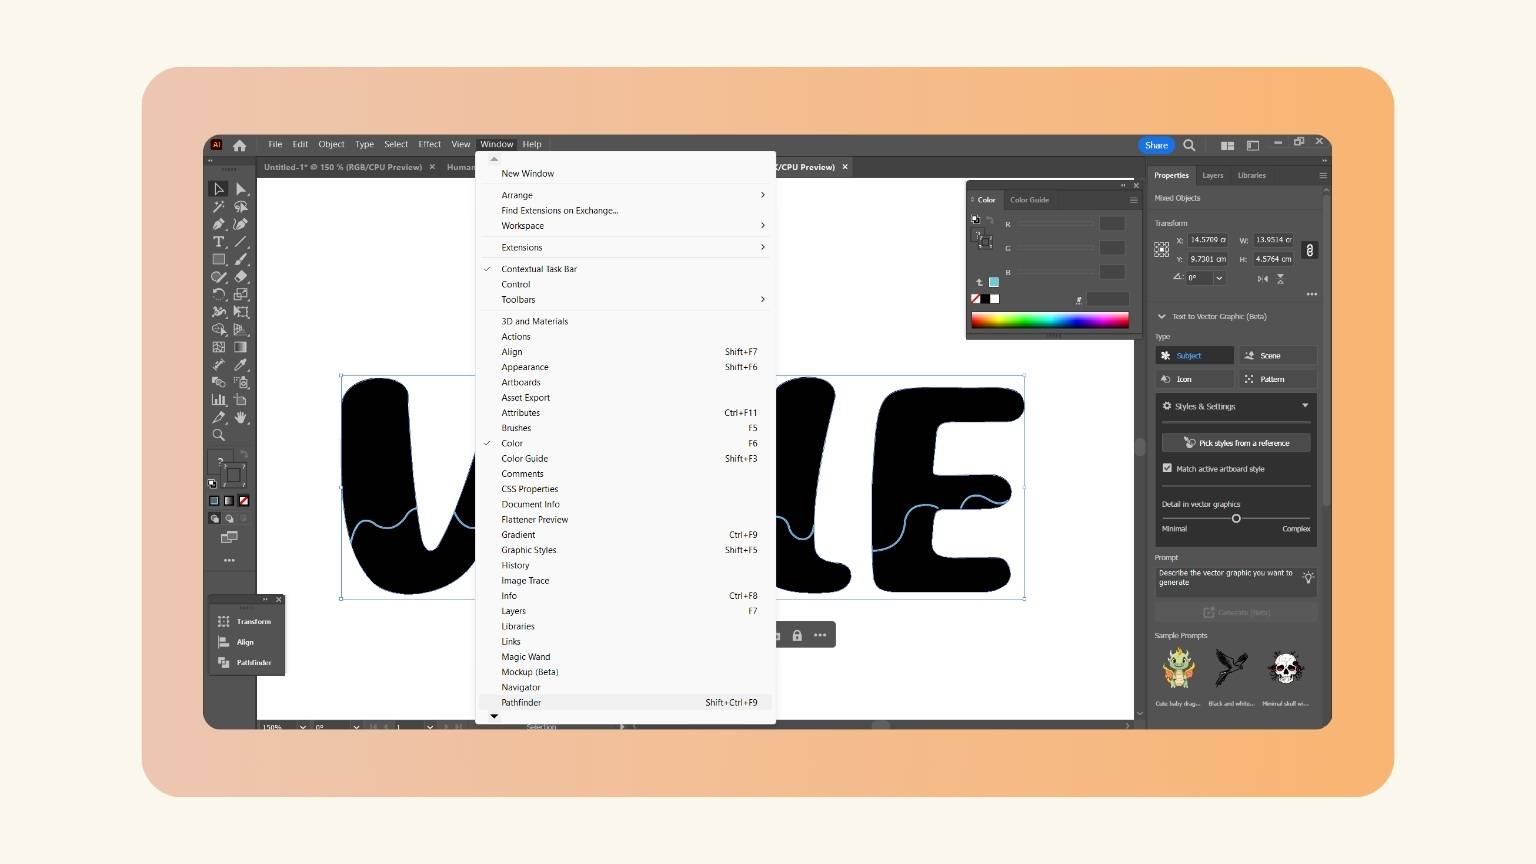
- After, I tried to use the ‘Pathfinder’ menu to divide the text in relation to the waves.
- I used the ‘Divide’ tool to divide the text, but it didn’t work.
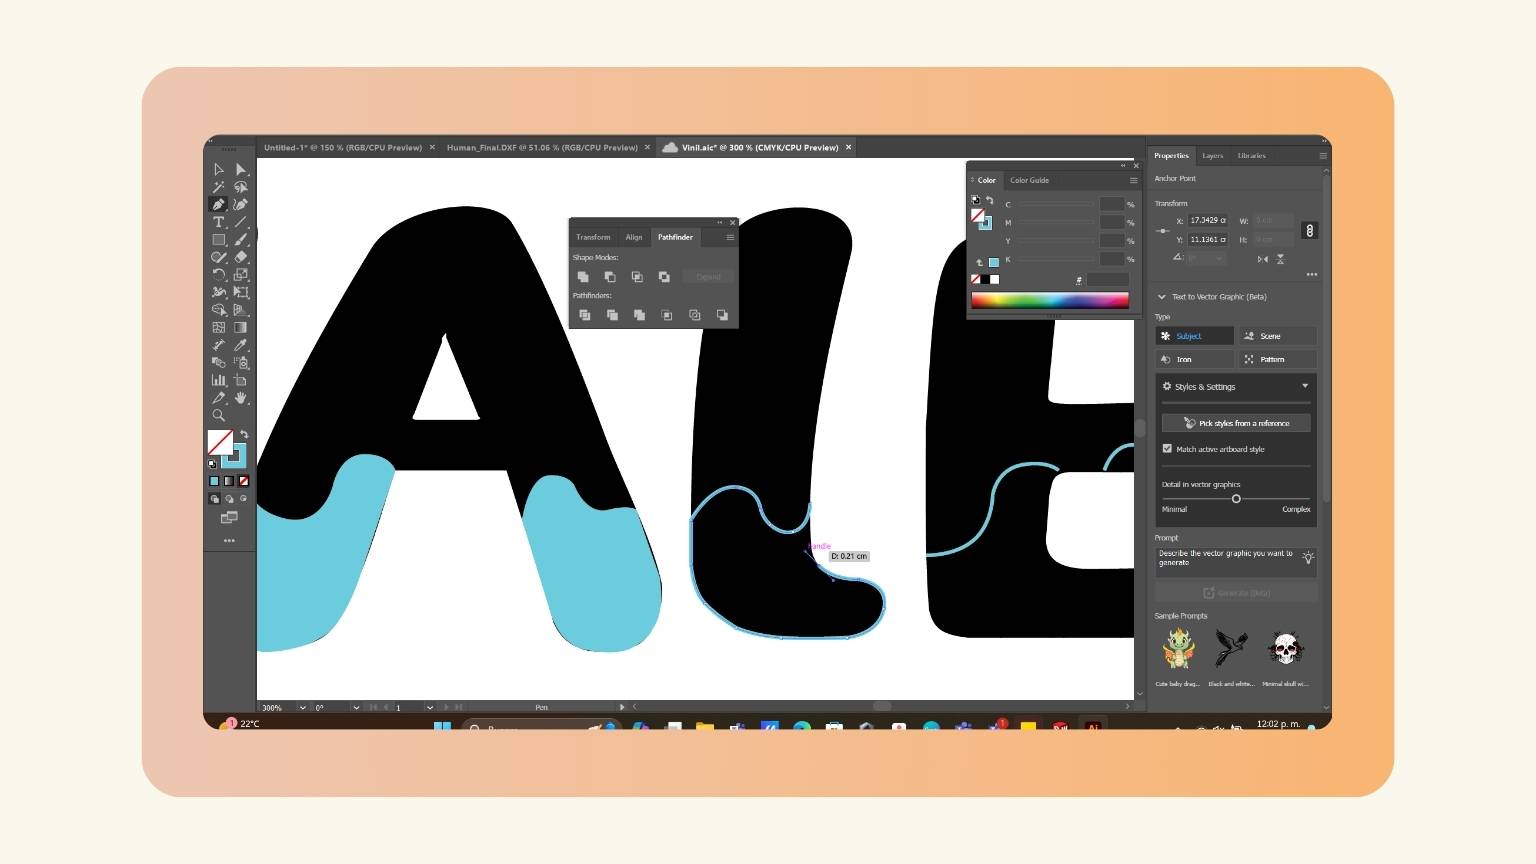
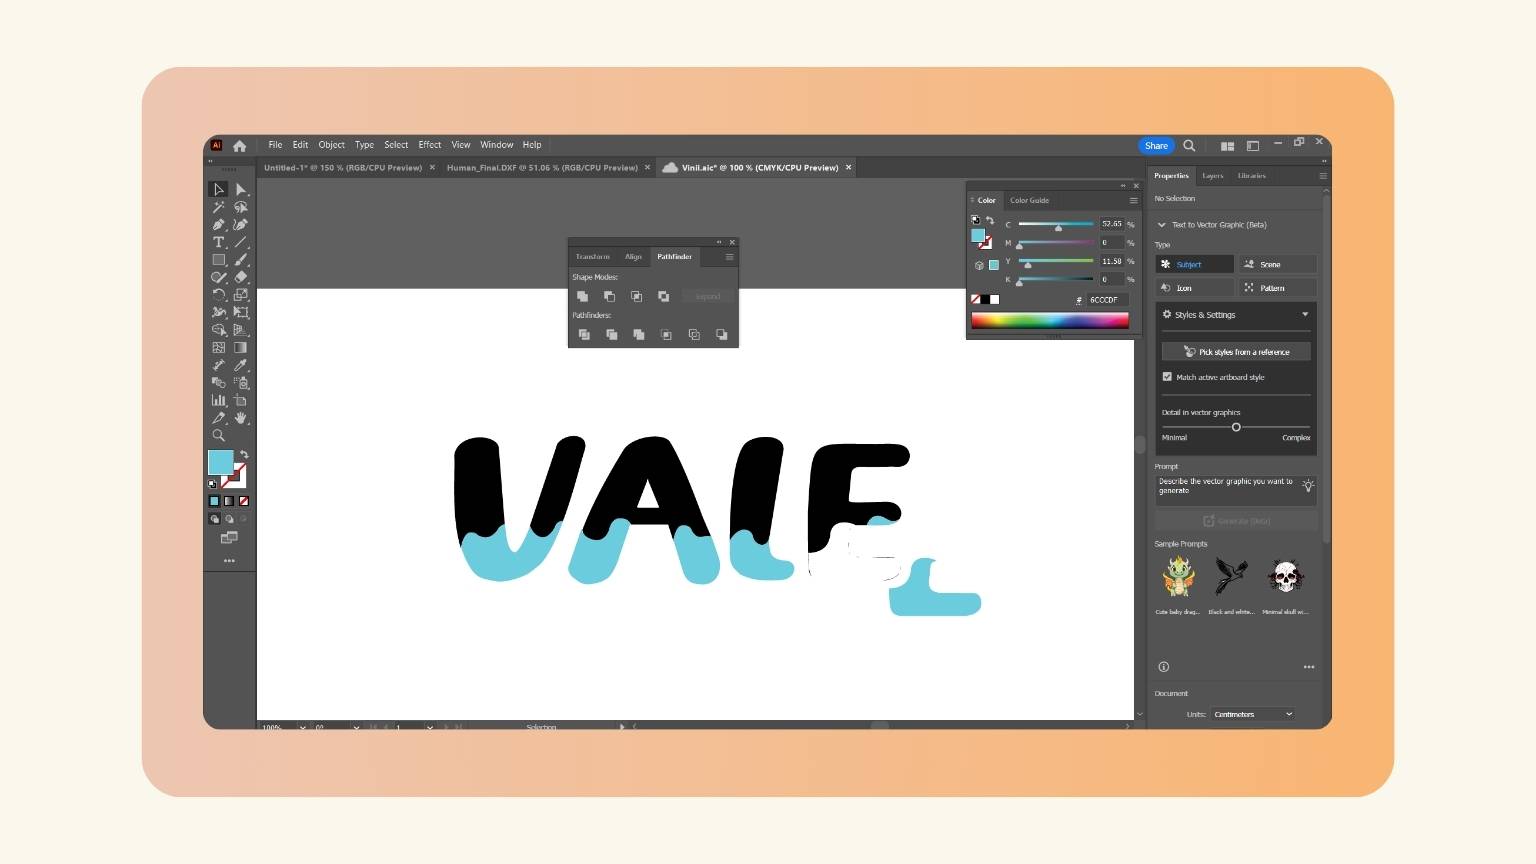
- So, I started to draw all the parts of the text that I wanted to divide.
- I used the ‘Pen’ tool to draw lines and curves to outline the text.
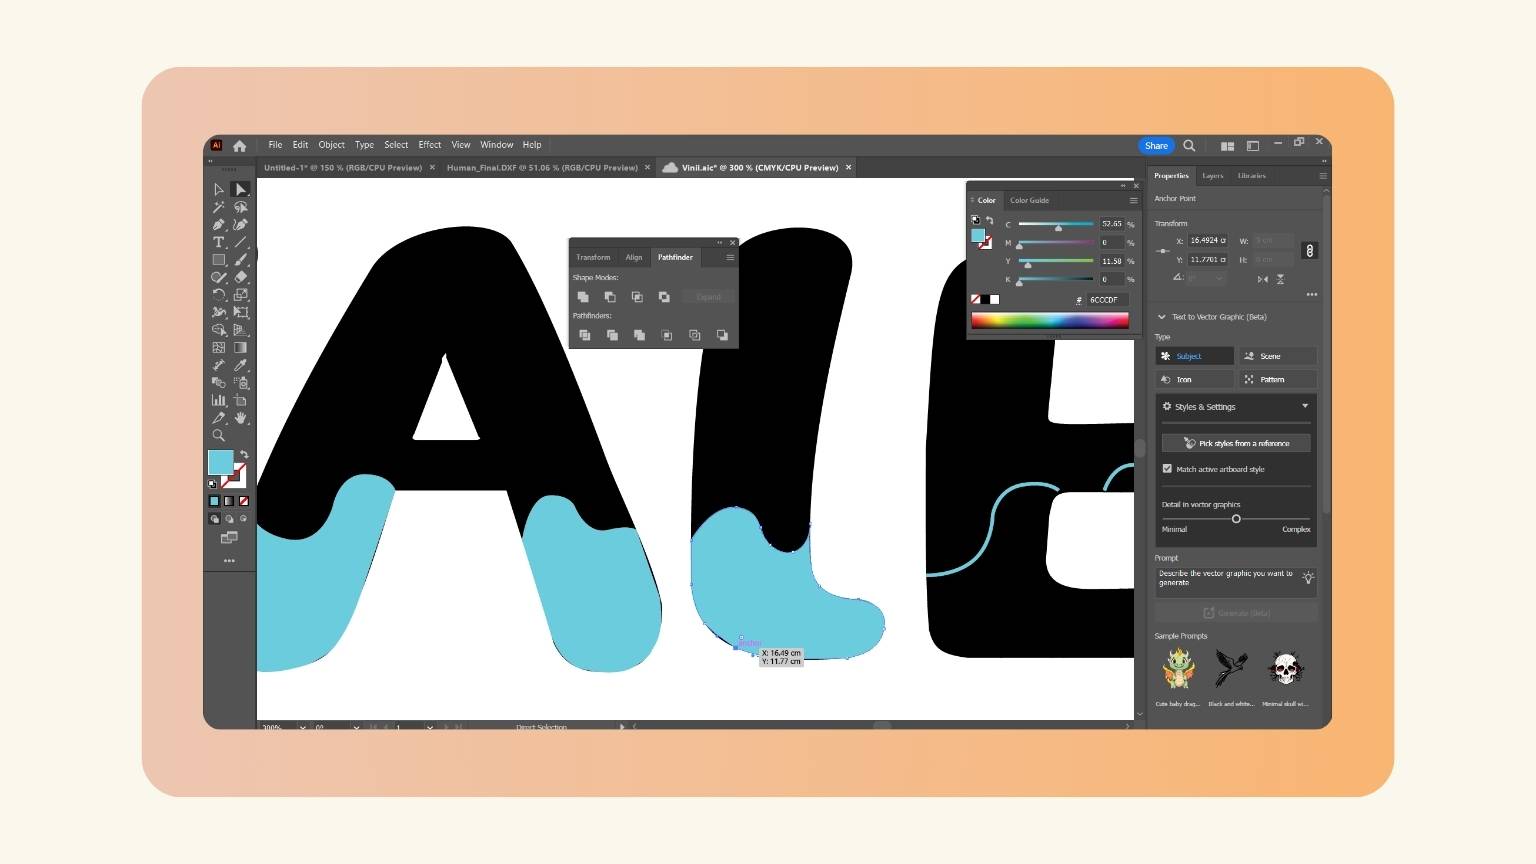
- I did the same with all the letters, and this is the result.
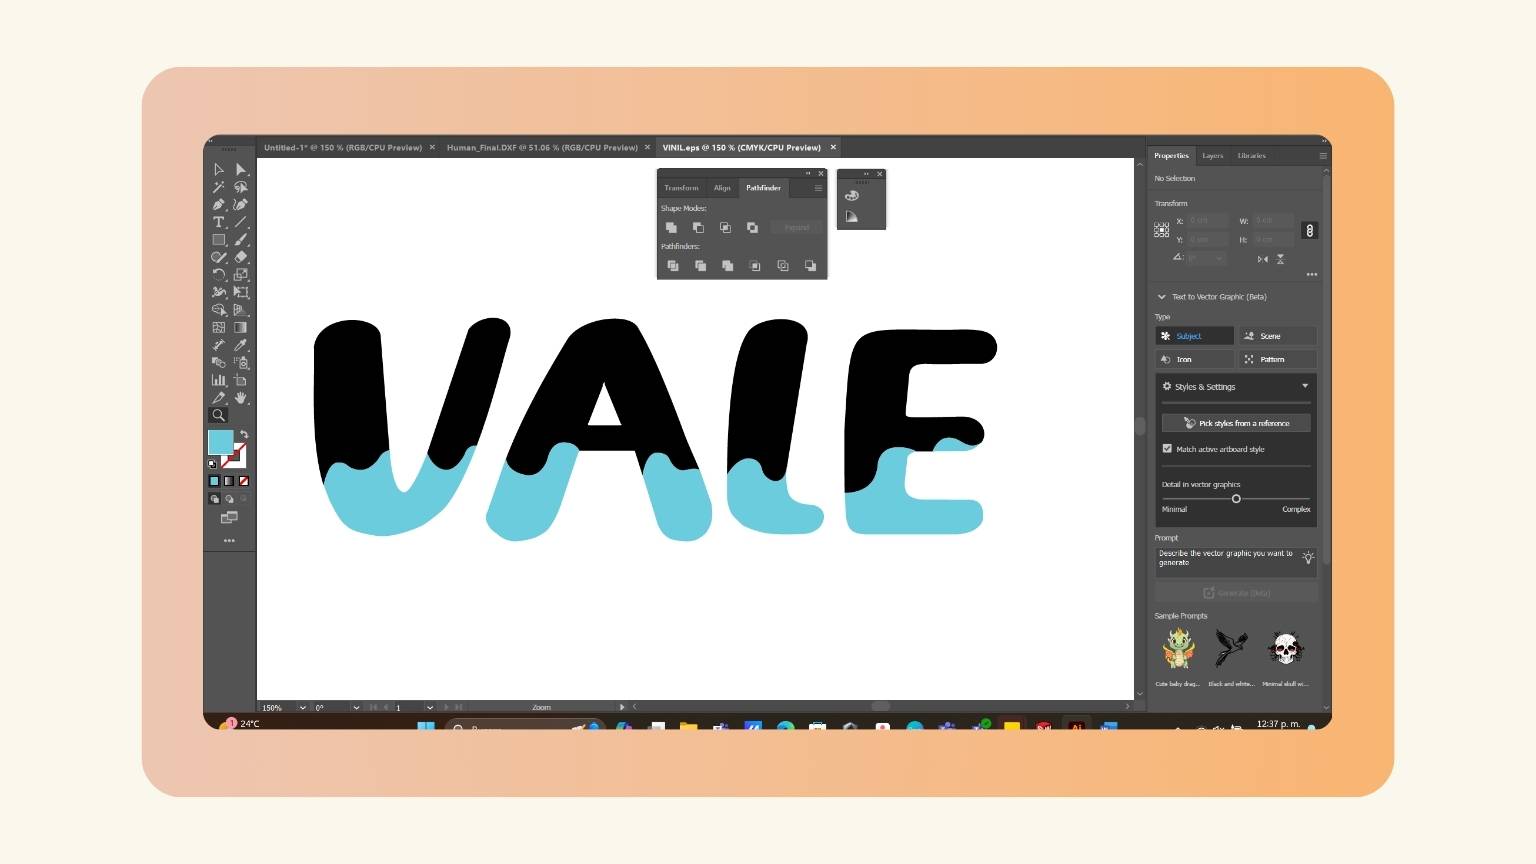
- I tried again the use of the ‘Pathfinder’ menu, especially the ‘Divide’ tool.
- The tool worked, but it left certain excesses.
- I deleted this excess in all the letters.
- The letters are as follows:
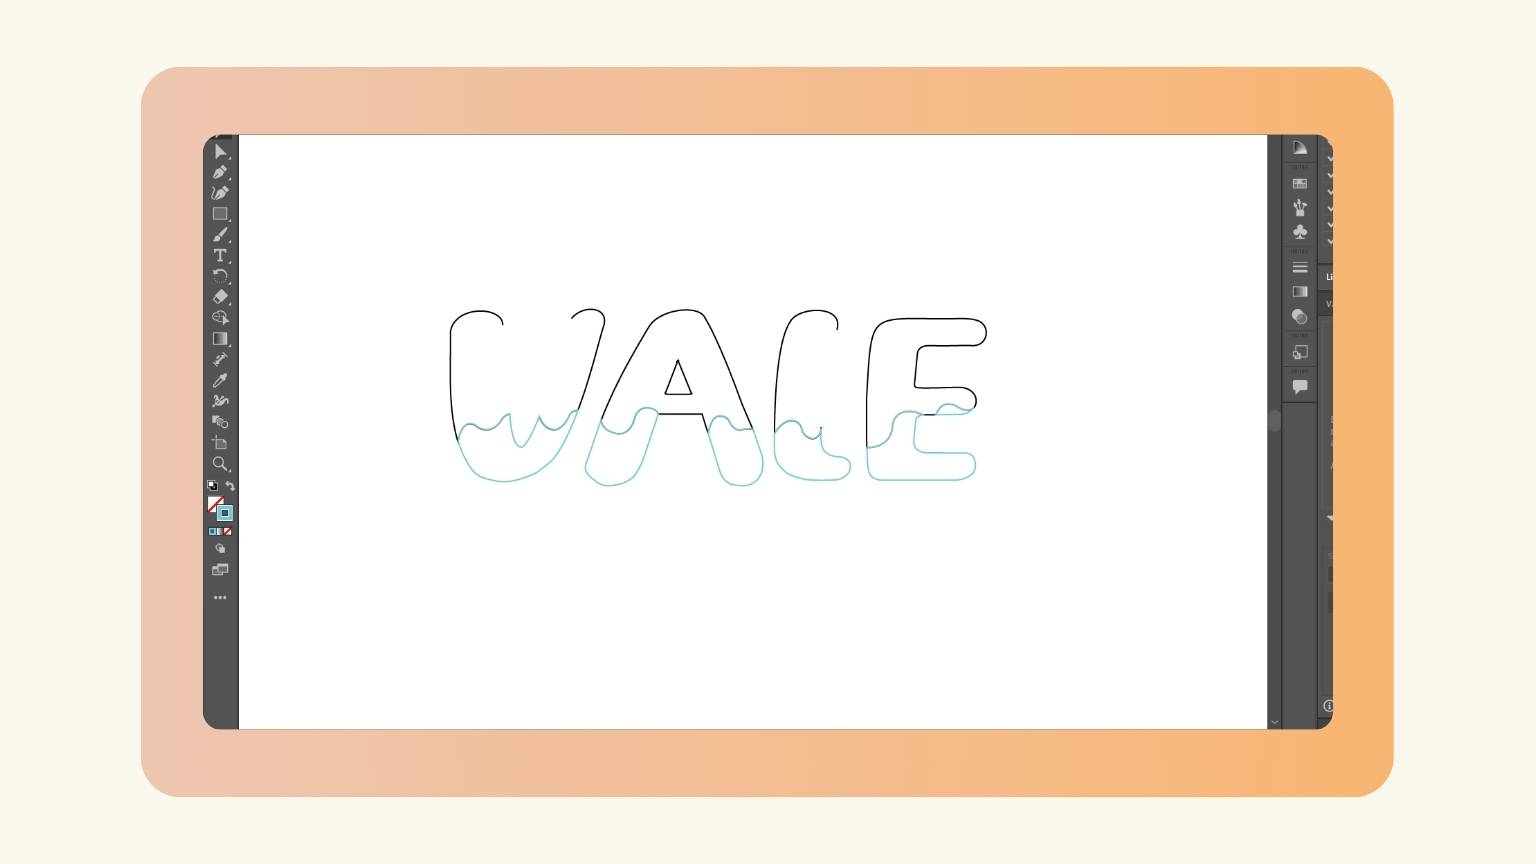
- I removed the filler from the letters and outlined them to see how the cut would appear.
- And I saw that the letters “V” and “L” were missing strokes.
- I drew the missing parts.
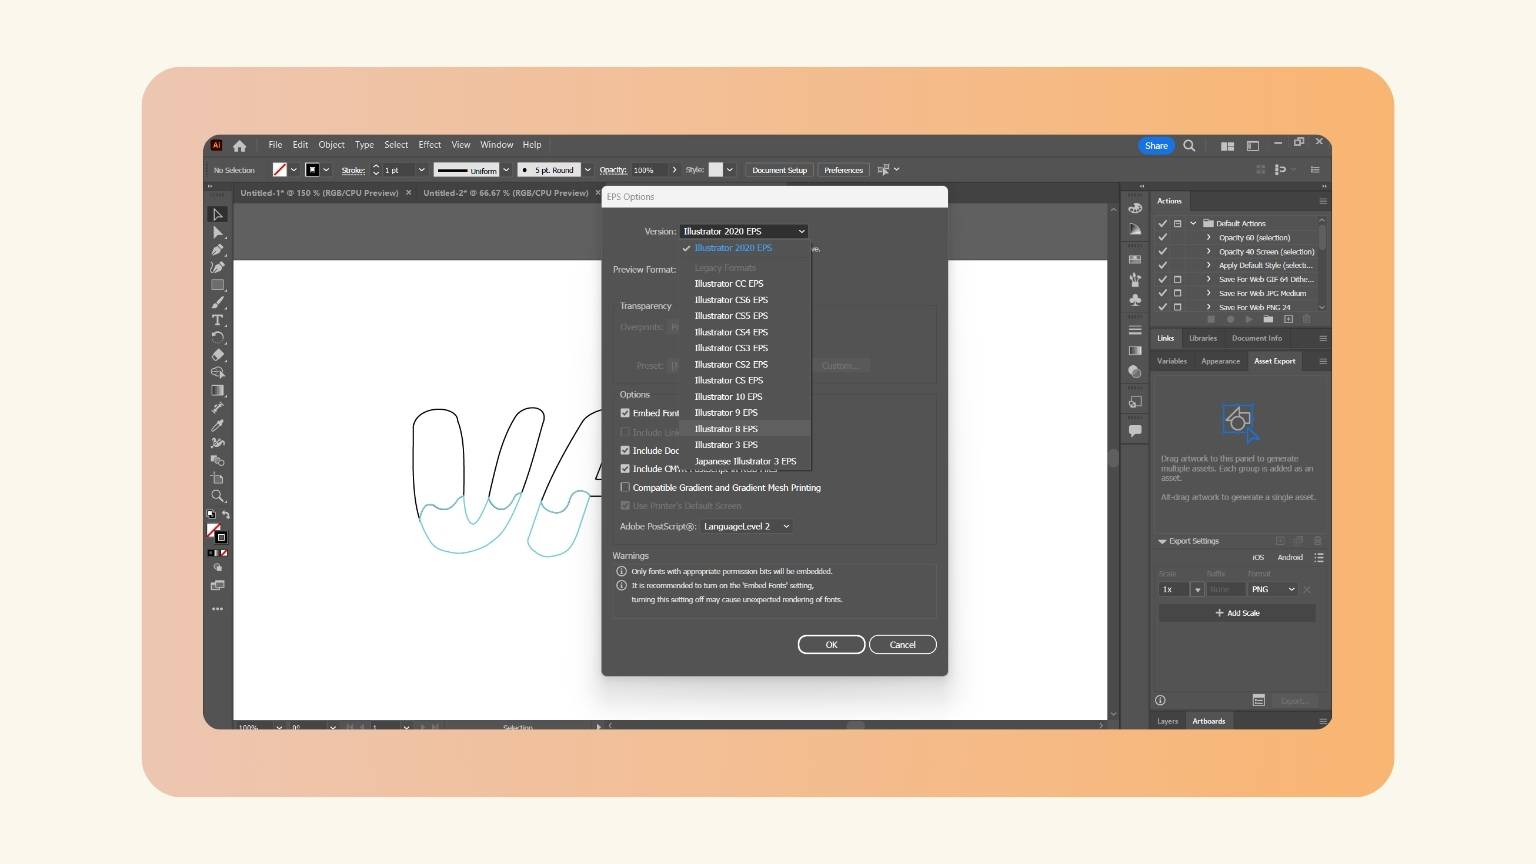
- Finally, I saved the document in Illustrator 8 EPS format, because that’s the format that the machine accepts.
- I divided the design into two files to cut in different colors.


How can I have a vinyl cut?
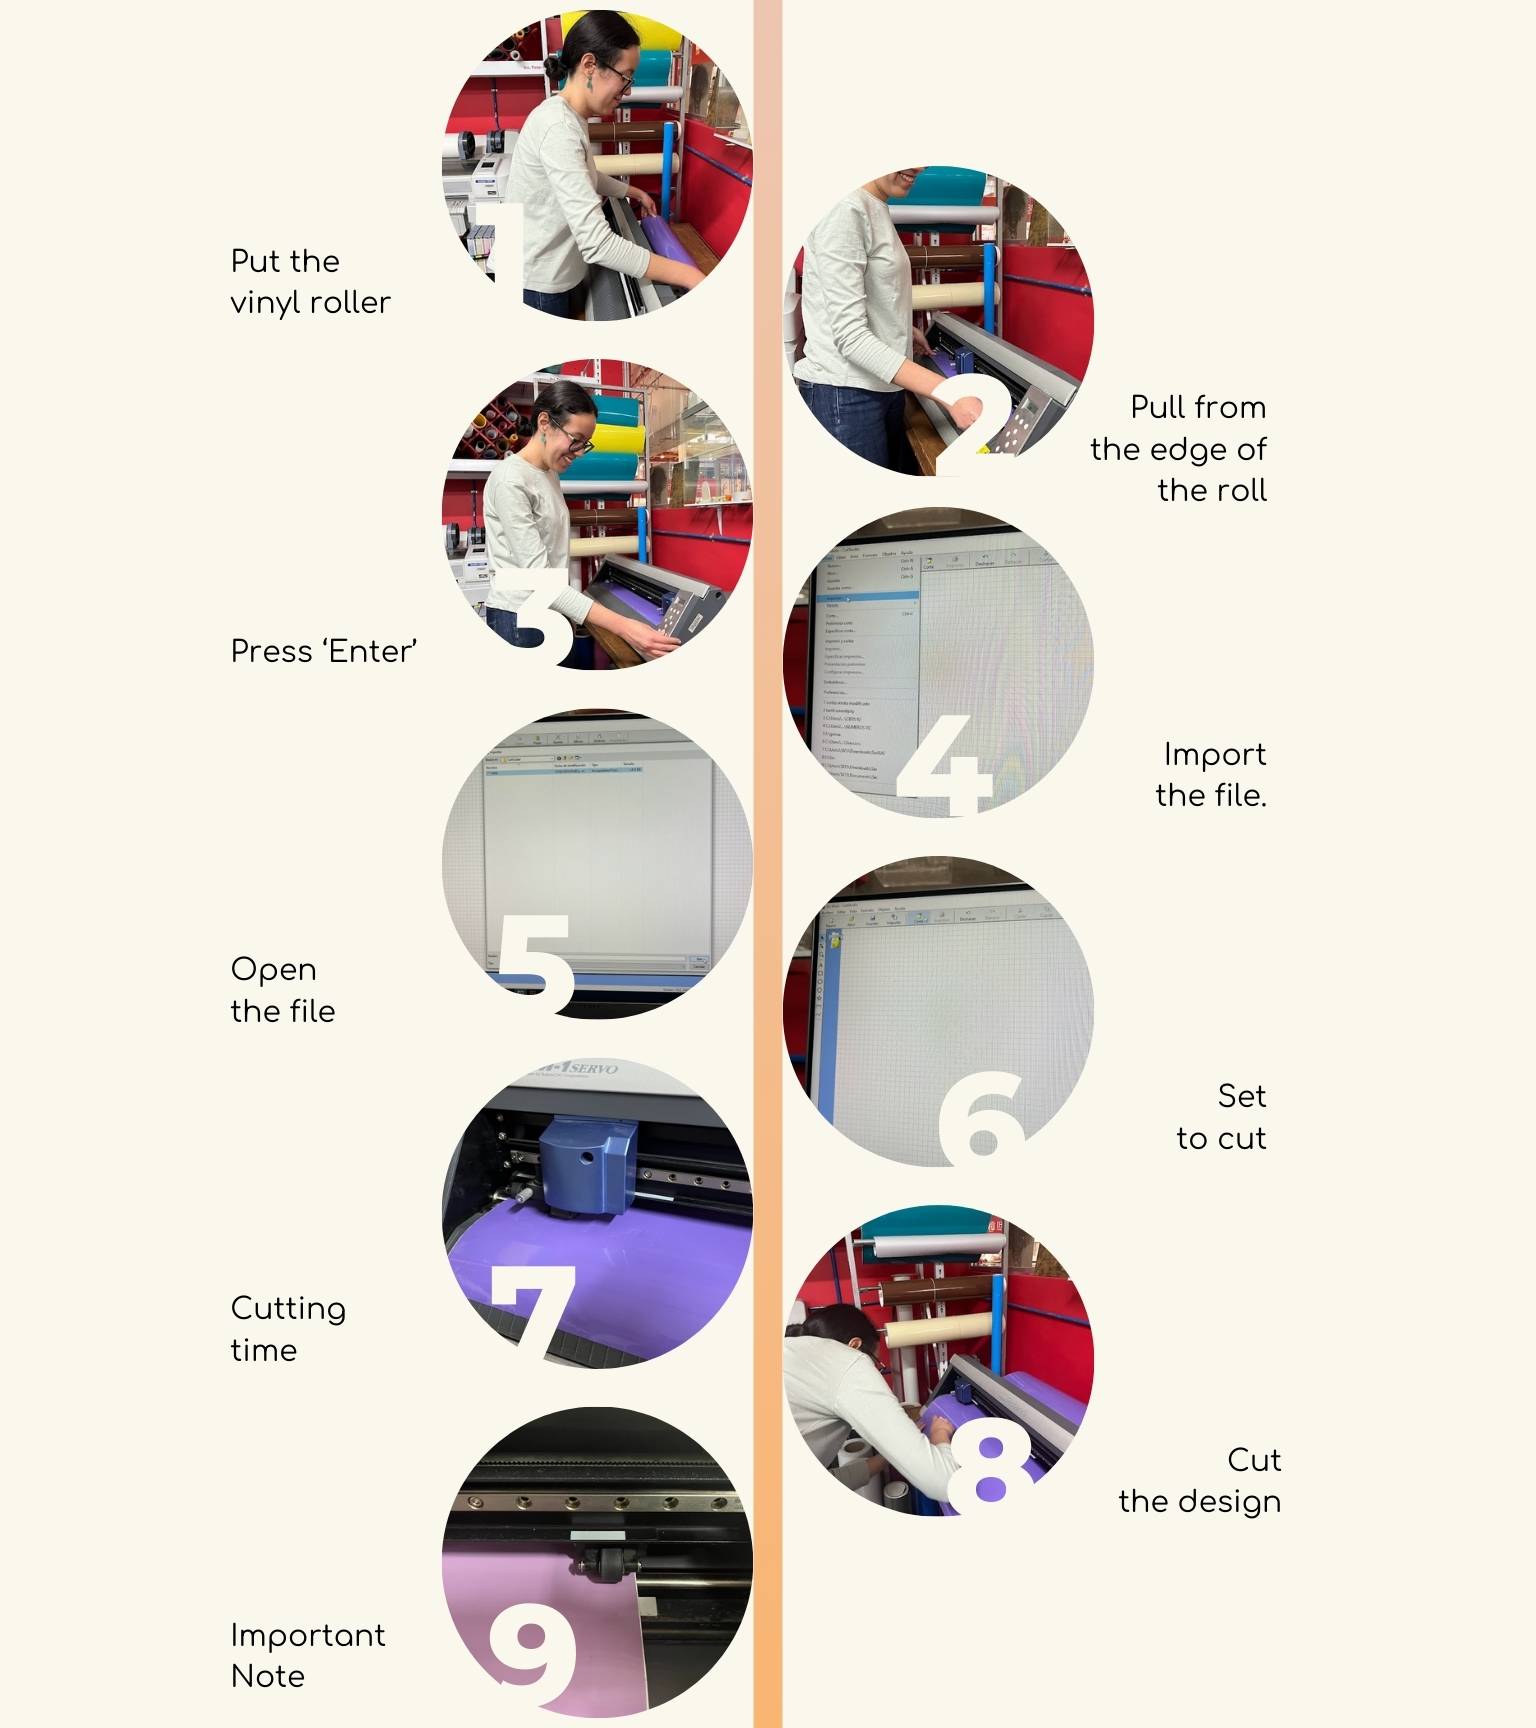
- Start to put the vinyl roller at the back of the machine.
- Pull from the edge of the roll.
- Press the ‘Enter’ bottom.
- Import the file.
- Open the file.
- Preview your file and set it to cut.
- The machine will start cutting.
- Once the cut has been made, cut your design with a cutter.
- Important Note: When you put the roller of vinyl, you have to pay attention to the fact that the edges of the vinyl are within the area of the cutter
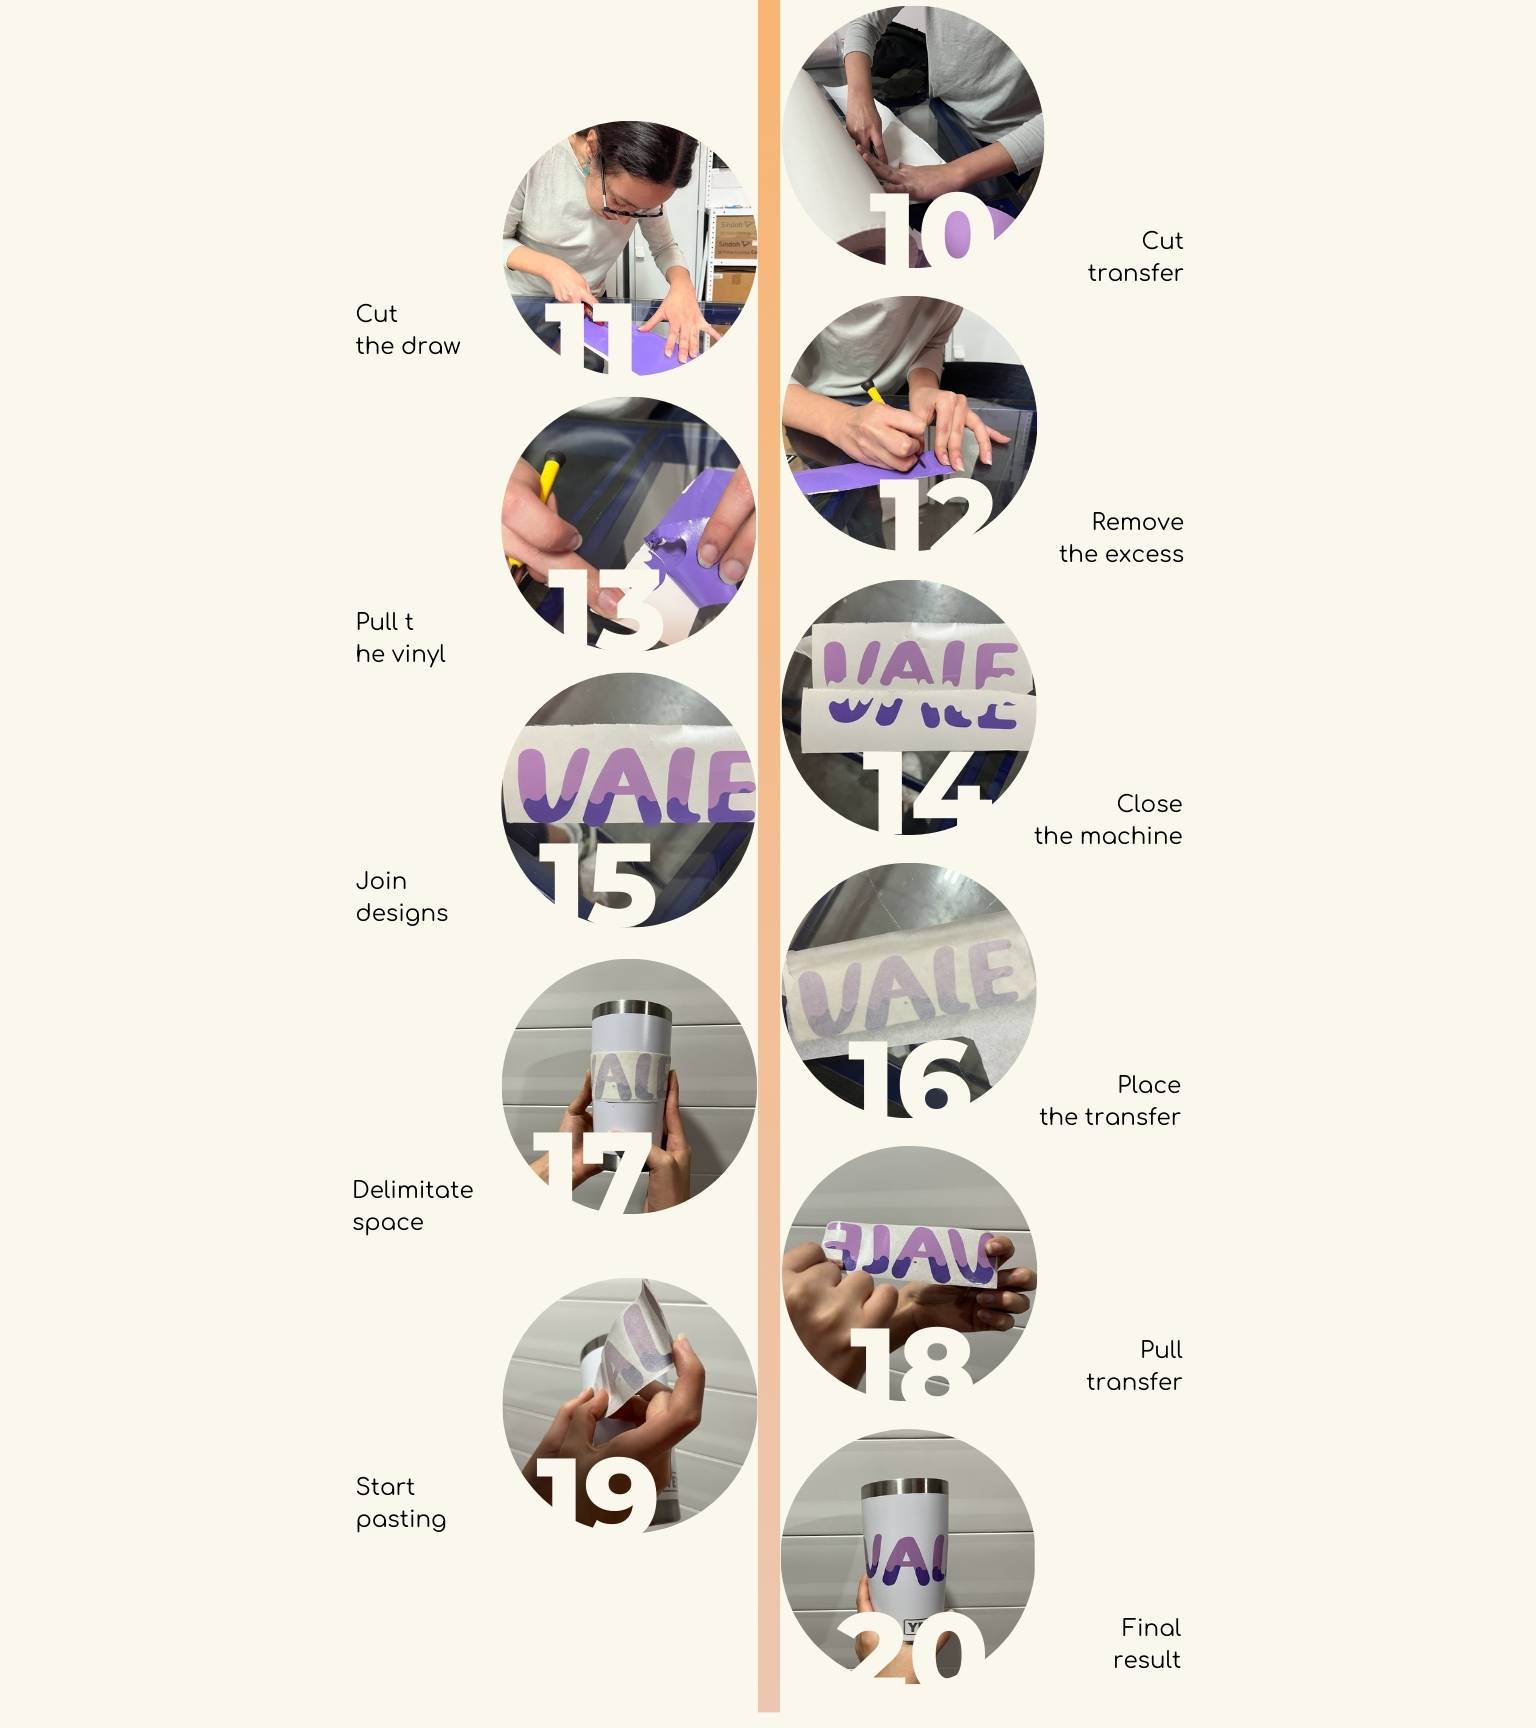
- Cut the transfer paper for the design.
- If it is necessary, cut the draw and eliminate the excess.
- With a punch, remove excess for the design.
- Pull the vinyl so that only what you want to stick remains.
- You will have your designs.
- Join both designs together to make gluing easier.
- Place the transfer on the design.
- Delimitate the space where you will paste it.
- Pull the transfer; the design to be pasted should be on it.
- Start pasting the design.
- You will have the object with your final design ready!