My Part:
You can see the entire documentation for the Paintball CNC Project in this link
Pixel Matrix Software:
In the era of digital creativity, pixel art emerges as a unique blend of minimalism and expressive detail. I, drawing inspiration from the diverse world of pixel-based artistry, developed a Pixel Art Software that is designed to transform this digital art form into a tangible and interactive experience.
Our journey began with the mesmerizing techniques showcased in this video made by Joel Create which demonstrates a CNC Machine Paintball Gun similar to what we desired to do, which highlighted the intricate process of creating pixel art and its potential beyond traditional platforms and transforming it into G-Code.
The core idea was to bridge the gap between the pixel art creation process and a versatile tool that could simplify the design phase while providing a seamless way to analyze and utilize the artwork for the Paintball Gun to replicate.
Thus, the concept of leveraging Microsoft Excel as the canvas for our pixel art software was born.
But... Why Excel?
Excel is not just a spreadsheet application; it's a canvas waiting to be explored. It offers:
- Grid System: Excel's inherent grid system perfectly aligns with the pixel grid structure used in pixel art, making it a natural fit.
- Color Filling: Easy coloring of cells allows for quick adjustments and experimentation with color palettes.
- Data Extraction: The ability to extract values from cells enables artists and developers to use the created designs in various applications, from video games to digital art projects.
Features:
Our Pixel Art Software transforms Excel into a dynamic pixel art studio, offering features such as:
- Customizable Grid Size: Users can adjust the canvas size to fit their project needs.
- Palette Management: A built-in color palette allows for the easy application and management of colors.
- Export Functionality: Artworks can be exported as images or code snippets, facilitating their use in other platforms.
Our software, developed using Python with a Tkinter graphical user interface (GUI), leverages the powerful image processing capabilities of the PIL (Python Imaging Library) and the versatile data manipulation and storage features of OpenPyXL. The core functionality of the tool revolves around mapping the colors of an uploaded image to a predefined palette, generating pixel art that can be intricately controlled and modified to the artist's liking.
Code:
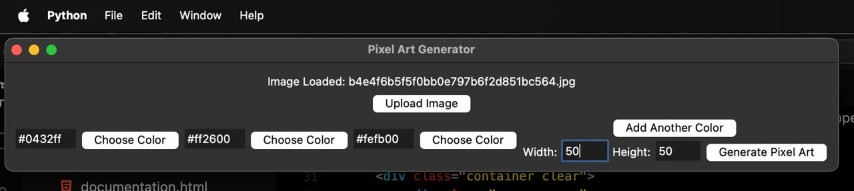
GUI Interface:

How it works:
The tool's workflow begins with the user uploading an image.
.jpeg)
.jpeg)
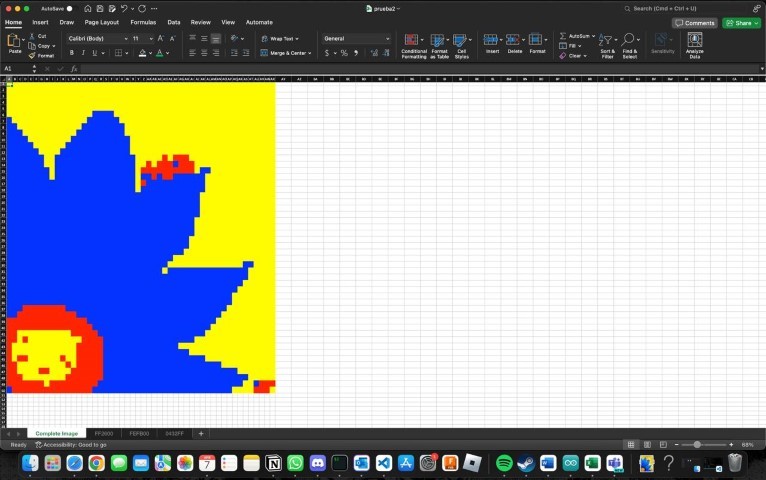
Upon generating the pixel art, the software maps each pixel's color to the nearest match in the selected palette. This mapped image is then translated into an Excel spreadsheet, where each pixel is represented by a cell filled with the corresponding color.
Here is an example of how this process works:
First we will load the following image into our program:

Next, we will configure the program so that it can process it into the colors we want for the pixel art and the grid size, then we will click generate pixel art!
After that we will get our file and we will be able to see the following pixel art in Excel:
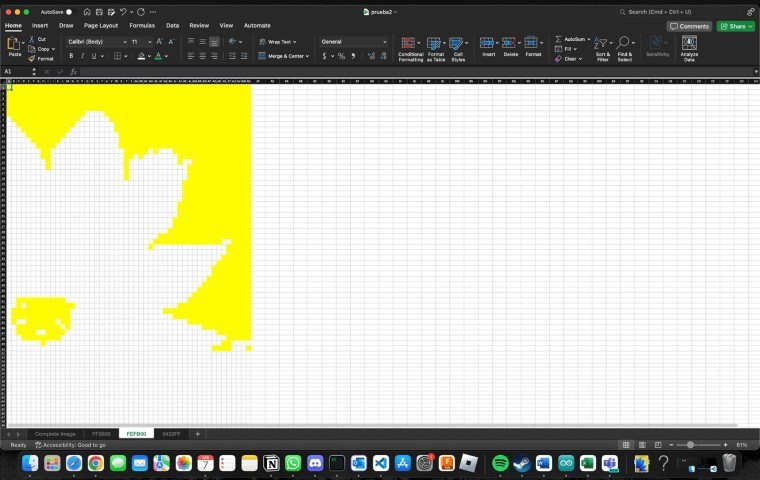
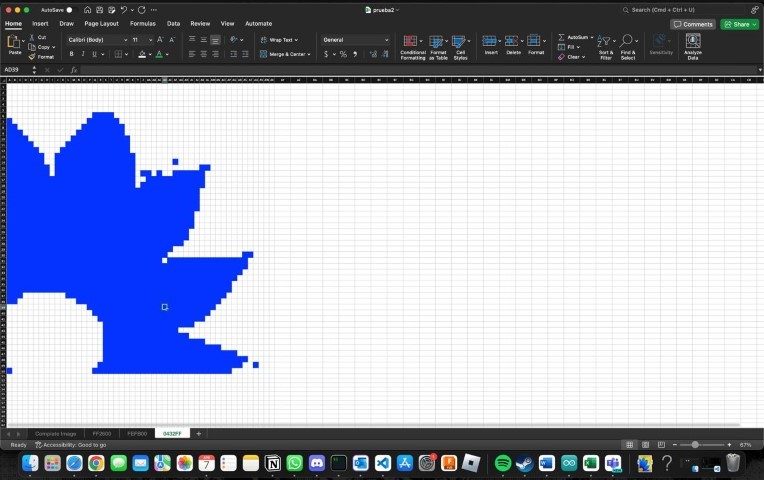
If we dig deeper, we can find that in that same excel file we can find different pages with the other layers of the pixel art. Here is a comparison between the yellow and blue layers of the example from above:
Integrating Excel into the pixel art creation process opens up a world of possibilities not only for our Paintball CNC but also for artists and creators. With each pixel represented as an Excel cell, users can easily adjust colors, create patterns, or even incorporate Excel's formulas and functions to add dynamic elements to their art. This level of precision and flexibility is unparalleled, making our tool an invaluable asset for both artistic expression and practical applications.
From the initial inspiration to the development of a fully-functional tool, our journey through the realms of creativity, programming, and data manipulation has culminated in a unique software that bridges the gap between art and technology. The ability to generate pixel art with such precision and to visualize it in an Excel spreadsheet not only democratizes the art creation process but also introduces a new medium for artistic exploration and expression.
Programming the CNC
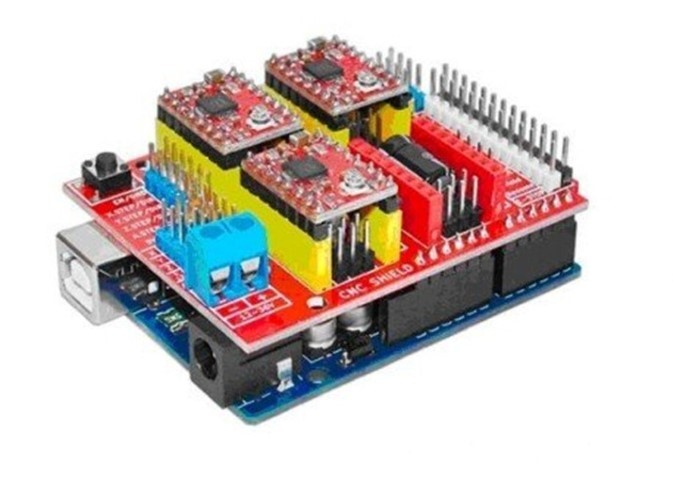
The Arduino CNC Shield is a compact board designed to facilitate the control of up to 4 stepper motors using your Arduino, owing to its shield format. It is compatible with both Pololu A4988 and Pololu DRV8825 power drivers (not included), offering versatile motor control capabilities. Additionally, it features all essential connections for integrating end stop switches, relay outputs, and various sensors. Fully compatible with the GRBL control firmware, this shield can be seamlessly utilized with any Arduino model, although the Arduino UNO is recommended for optimal performance.
To utilize the Arduino CNC Shield, we connected it to an Arduino UNO. The Arduino UNO is recommended for this purpose because its pins perfectly align with those of the Shield, ensuring seamless compatibility and optimal functionality.
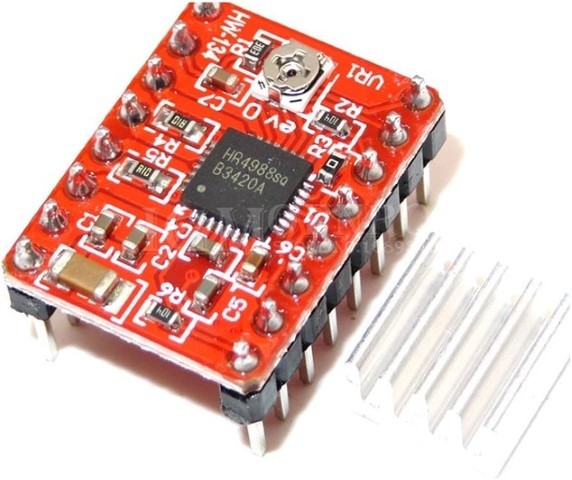
To operate the stepper motors effectively, we required drivers for each motor. Each driver needed to be calibrated to a specific current limit based on the model of the motor being used. To calibrate the drivers, we first determined the reference voltage by dividing the required current of the motors (in this case, 1.2A for the Nema 17) by 2.5 ohms. This calculation yielded the reference voltage. Subsequently, we calibrated the drivers using a multimeter and adjusted a potentiometer knob accordingly.
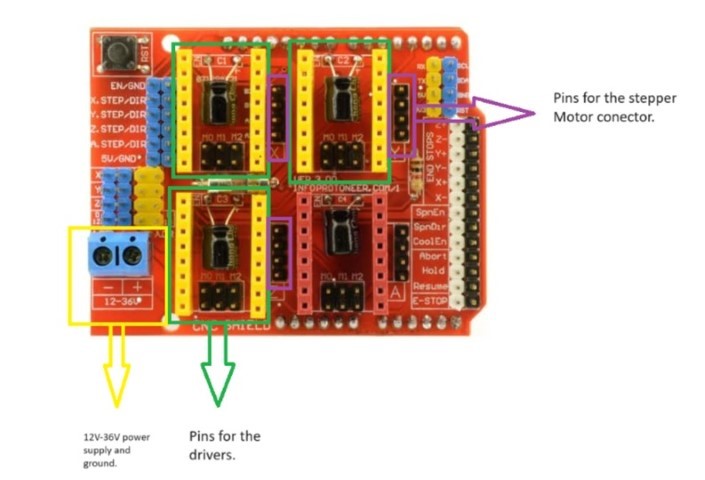
Once the driver calibration is completed, we proceed to the connections on the shield. Initially, we supply power to the CNC Shield, which typically ranges from 12V to 36V. The specific voltage required depends on factors such as the number of drivers and the type of motors being controlled, which can affect the current needed. Subsequently, we utilize the pins designated for the drivers and the pins responsible for connecting to the stepper motor connections.
For the Arduino to work properly we need to install GRBL which will allow the Arduino to interpret G-Code.
To install GRBL into the Arduino we followed this steps:
- Download the GRBL Source Code: You can download the latest version of GRBL from the official GitHub Repository.
- Open the Arduino IDE:
- Load the GRBL to the Arduino IDE:
- Extract the GRBL zip file to a known location on your computer.
- In the Arduino IDE, click on File -> Open, and navigate to the location where you extracted GRBL.
- Open the grblUpload Arduino file.
- Install GRBL as a Library:
- In the Arduino IDE, go to Sketch > Include Library > Add .ZIP Library....
- Navigate to the location of your downloaded GRBL source code.
- Select the grbl folder (it should contain the source files and not be zipped) and click Open or OK.
- Configure Arduino Board and Port:
- Connect your Arduino to your computer with a USB cable.
- In the Arduino IDE, select Tools -> Board and choose the type of Arduino you are using (e.g., Arduino Uno).
- Select Tools -> Port and choose the port that your Arduino is connected to (it should be named something like COM3, COM4, etc. on Windows, or /dev/tty.usbserial-xxxx on macOS).
- Upload GRBL to the Arduino:
- Click on the right arrow icon (→) in the top left of the IDE or select Sketch -> Upload.
- Wait for the message Done uploading in the bottom left of the IDE. This indicates that GRBL is now uploaded to your Arduino.
- Test GRBL With a G-code Sender
Building a Custom CNC Controller with Excel Integration via Python
In the realm of digital fabrication, the precision and versatility of CNC machinery are unparalleled.
Recognizing the potential for innovation within this space, I embarked on a project to not only control a CNC machine with high precision but to also integrate this control with the power of Excel. Our goal was ambitious: to build from scratch a CNC controller that goes beyond mere G-code sending. By leveraging Python and serial communication, we aimed to create a tool that could interpret Excel files as G-code, allowing for a more intuitive and accessible approach to CNC machining.
The idea was sparked by a desire to break free from the constraints of traditional G-code senders. While functional, these tools often lack the flexibility needed for custom projects. I wanted a solution that could seamlessly transition from digital design to physical creation, making the CNC machine more accessible to artists, designers, and hobbyists alike.
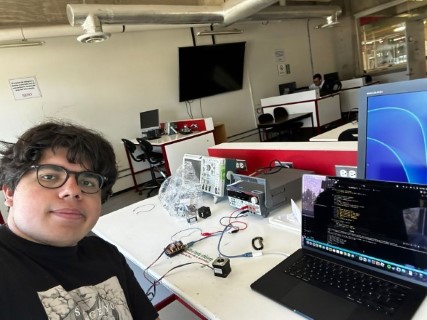
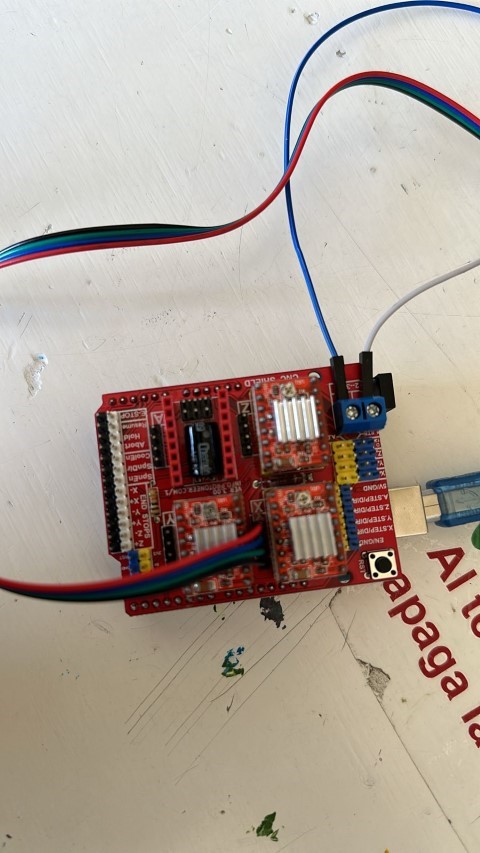
Video of the motors working using only Python code
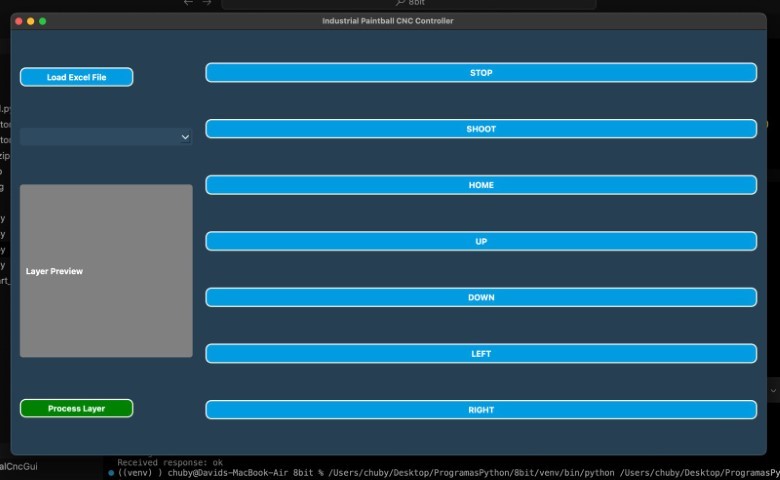
To achieve our vision, we developed a GUI application in Python, using PyQt for the interface and PySerial for communication with the CNC machine. This application serves not just as a G-code sender but as an innovative bridge between the Pixel Matrix digital design in Excel and physical machining.
Features:
- Custom G-Code Sender: Unlike traditional senders, our application can directly interpret and execute commands from the user interface, providing a more interactive and user-friendly experience.
- Pixel Matrix and Excel Integration: A core feature of our tool is its ability to process Excel files, converting cells colored in a specific way into corresponding G-code commands. This allows users to design patterns and shapes directly in Excel, a familiar environment for many, which are then precisely executed by the CNC machine.
- Real-Time Control: The application offers real-time control over the CNC machine, with buttons for manual movement, stopping, and executing predefined actions. This level of control is particularly useful for fine-tuning and adjustments during the machining process.
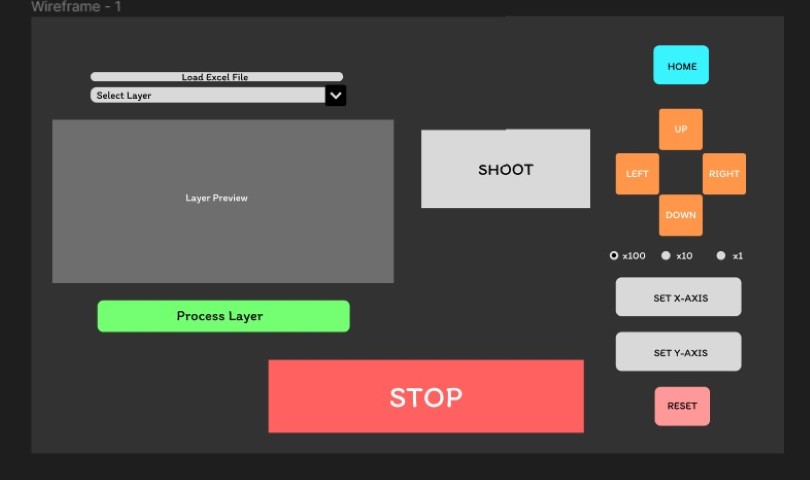
Low Fidelity UI design:
I designed a small GUI on Figma that served as insipiration to know the key functions for the software I was developing.
Building the application from scratch allowed us to tailor every aspect of its functionality to the specific needs of CNC machining. The decision to use Python, PyQt, and PySerial was driven by their flexibility, ease of use, and strong community support. Throughout the development process, we focused on creating an intuitive user interface that could accommodate both simple and complex machining tasks.
Conceptual User Interface:
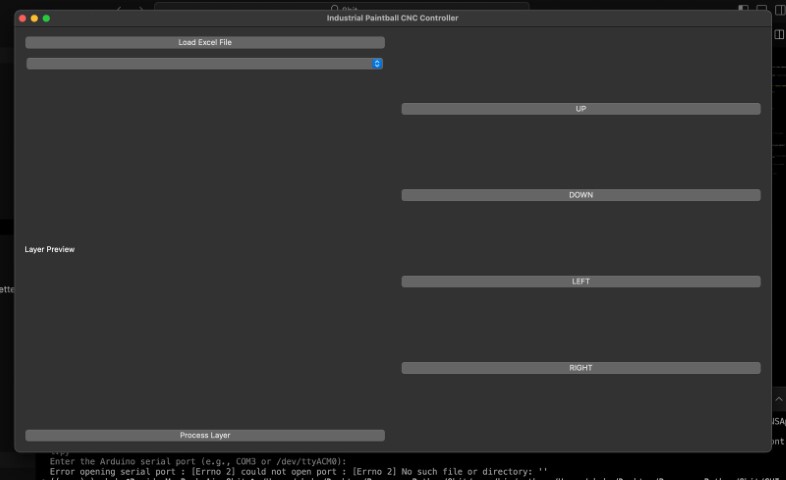

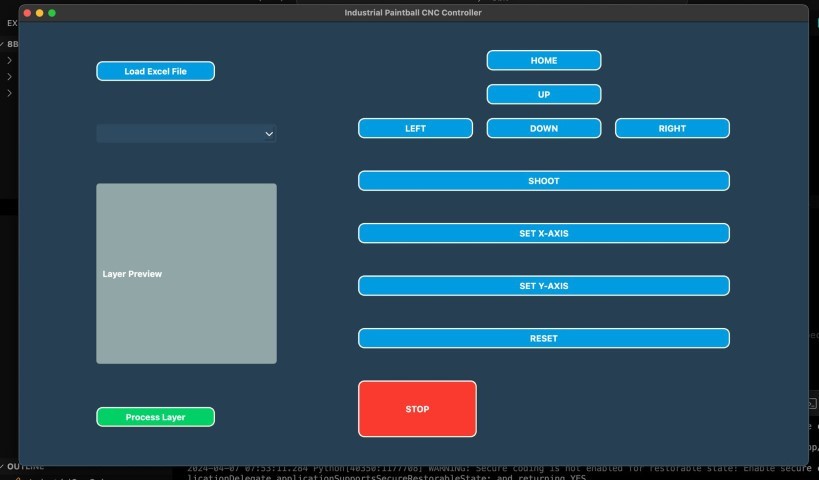
Final User Interface:
Although the last Conceptual User Interface was the one I wanted the most, it was too complicated to program due that there were extra buttons and adding a Stop button that worked would be more work that needs to be done to the code. Thus, we decided that this GUI was the most optimal:
Source Code:
By using Excel as an intermediary design tool, we have opened up CNC machining to a wider audience, making it more accessible and intuitive. Our custom G-code sender, built entirely from scratch, stands as a testament to the potential for innovation in the field of digital fabrication. This project not only showcases the capabilities of Python and serial communication but also illustrates the endless possibilities that arise when we rethink traditional processes and tools.
Conclusion:
The development of the Pixel Art Software and the CNC controller integration has been an enriching journey into the intersection of art and technology. By leveraging the familiar environment of Excel, we have made pixel art creation more accessible and user-friendly, empowering artists and hobbyists to explore their creativity in new ways. The integration with CNC machining further demonstrates the potential of combining digital design with physical fabrication, opening up innovative possibilities for both artistic and practical applications.
Through this project, we have showcased the power of Python, the versatility of Excel, and the precision of CNC technology. Our custom-built tools stand as a testament to the endless possibilities that arise when we reimagine traditional processes and embrace the potential of modern programming and fabrication techniques. This endeavor not only bridges the gap between digital and physical realms but also paves the way for future explorations in the field of digital fabrication.
As we move forward, we hope to continue pushing the boundaries of what is possible, inspiring others to explore the creative potential of technology. Whether it is for art, education, or innovation, the tools and methodologies developed in this project provide a solid foundation for future endeavors, demonstrating the limitless possibilities at the intersection of creativity and technology.
The Files:
Due to the size of the source code files you can find it in the following GitHub Repository:
Paintball CNC Source Code