5. 3D Scanning and Printing
During this week we learned about printing and scanning 3D objects. The 3D printing is also known as additive manufacturing because it doesn't remove material, instead it puts layers over layers of material to create an object. The most common material used for this is plastic, but metal and chocolate are also used. With this process it is possible to create almost anything, from toys to prosthetic limbs, allowing to customize the production.
About 3D Printers and Their Design Rules
For the group assignment there is a page for the testing of the design rules and more info abour 3D printing and scanning. There are different types of 3D printing, which work in different ways and can be selected according to the needs of each object. The principal technologies are the following:
- Stereolithography (SLA): the UV laser hits the liquid resin in the tank to make a layer and builds the object by hitting layer over layer.
- Selective Laser Sintering (SLS): it has a laser that hits the a thin layer of powder to solidify it and create the object by layers of it.
- Fused Deposition Modeling (FDM): the gun heats plastic filaments and sprays them to make layers of the object and create it.
- Digital Light Process (DLP): this works similarly to the SLA but it uses a digital light projector instead of a laser, allowing to cure complete layers.
- Multi Jet Fusion (MJF): this spreads a powder as a layer and then sprays it with a binding agent, this will be held together with an infrared light.
- Poly Jet: this works by spraying photopolymer droplets and cure them with UV light.
- Direct Metal Laser Sintering (DMLS): differently from the SLS, this uses metal powder and the laser to build layers and layers of the object.
- Electron Beam Melting (EBM): the electron beam melts layer of metal powder in a high-vacuum environment.
The FabLab Puebla has mainly two of them: DLP and MSLA. Here there are 27 printer mostly for rapid prototyping. The models available are:
- Ender 3 (14 units).
- Sindoh 3DWOX (5 units).
- Elegoo Mars 3 (1 unit).
- Elegoo Saturn 2 (1 unit).
- Stratasys (1 unit).
- ROSTOCK MAX V3 (1 unit).
- Anycubic Photon Mono MSS (1 unit).
- Ultimaker 2+ (2 units).
- Formlabs Form (1 unit).
About the design rules I concluded there are some aspects to take care of when making 3D printings:
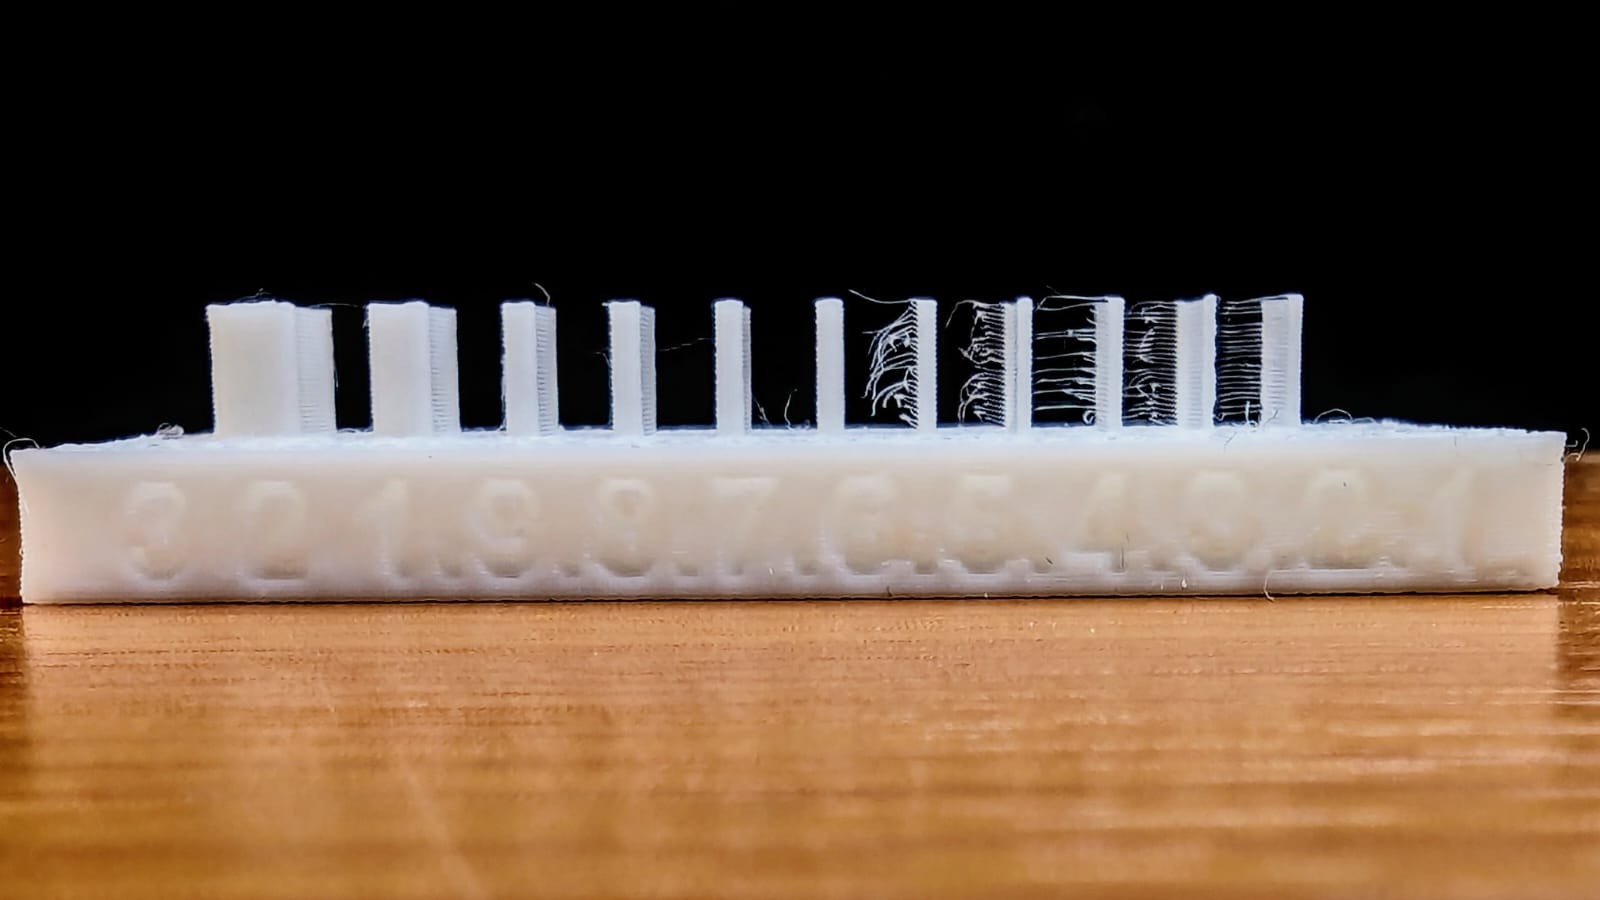
- Overhang: this is a part of the object that is printed with no material beneath them. Using PLA the maximum
overhang without the material falling is 3 mm.
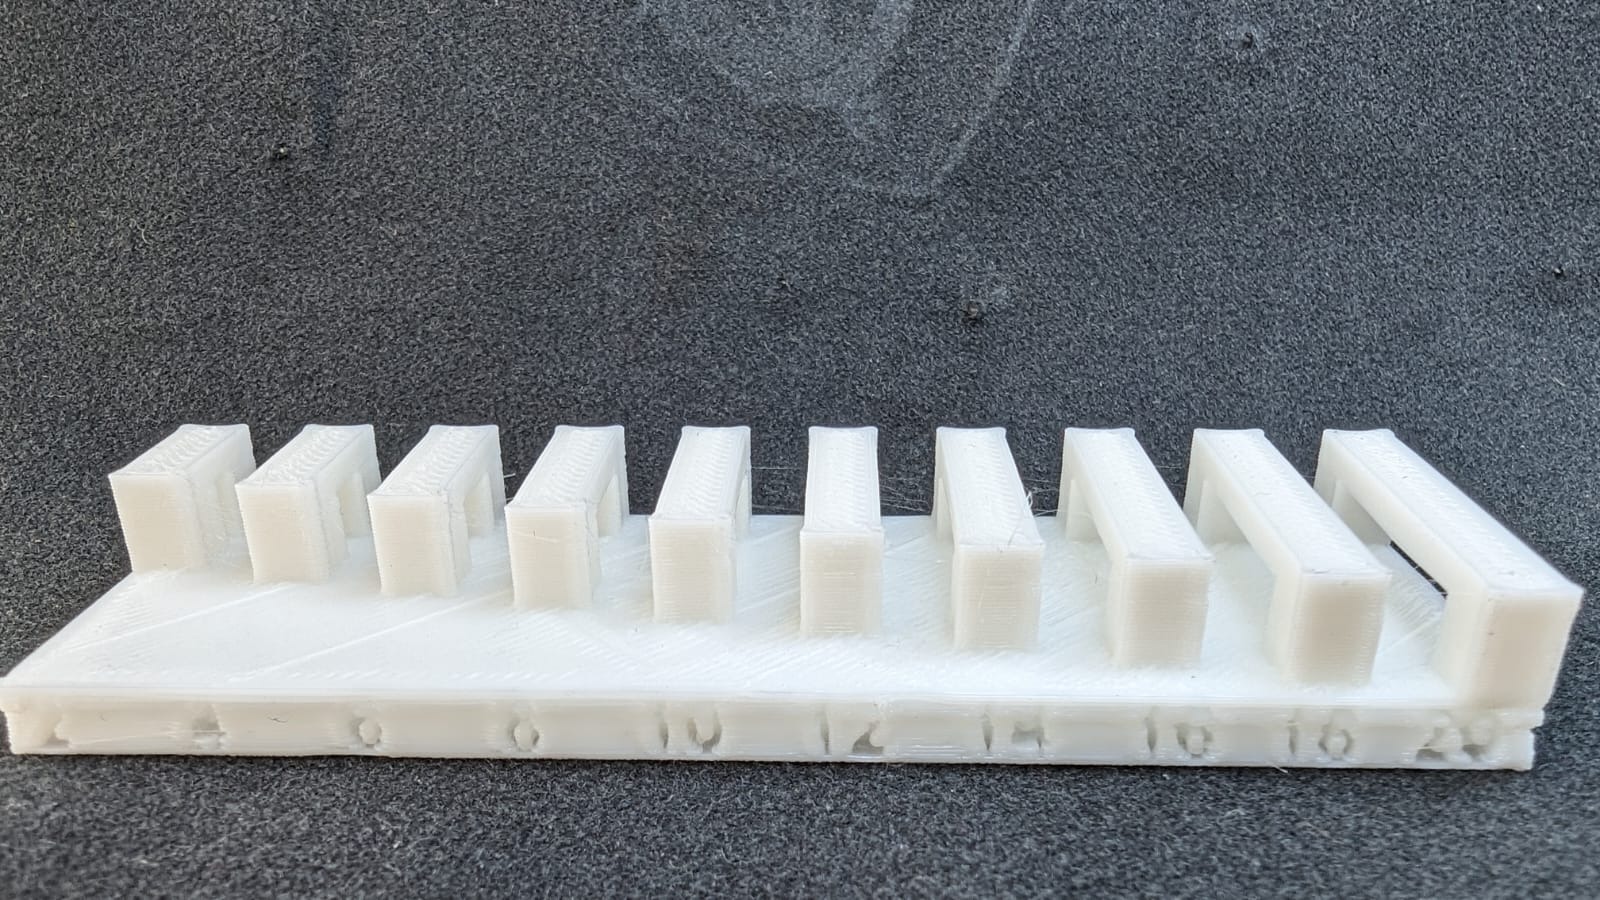
- Printing Angle: this is the angle at which something can be printed needing no support (kind of the angles
for the overhangs). Most of the angles over 45° may be printed without support (also depending on the material
and the printer). Using PLA the first angle from which it has a better result is 30°.

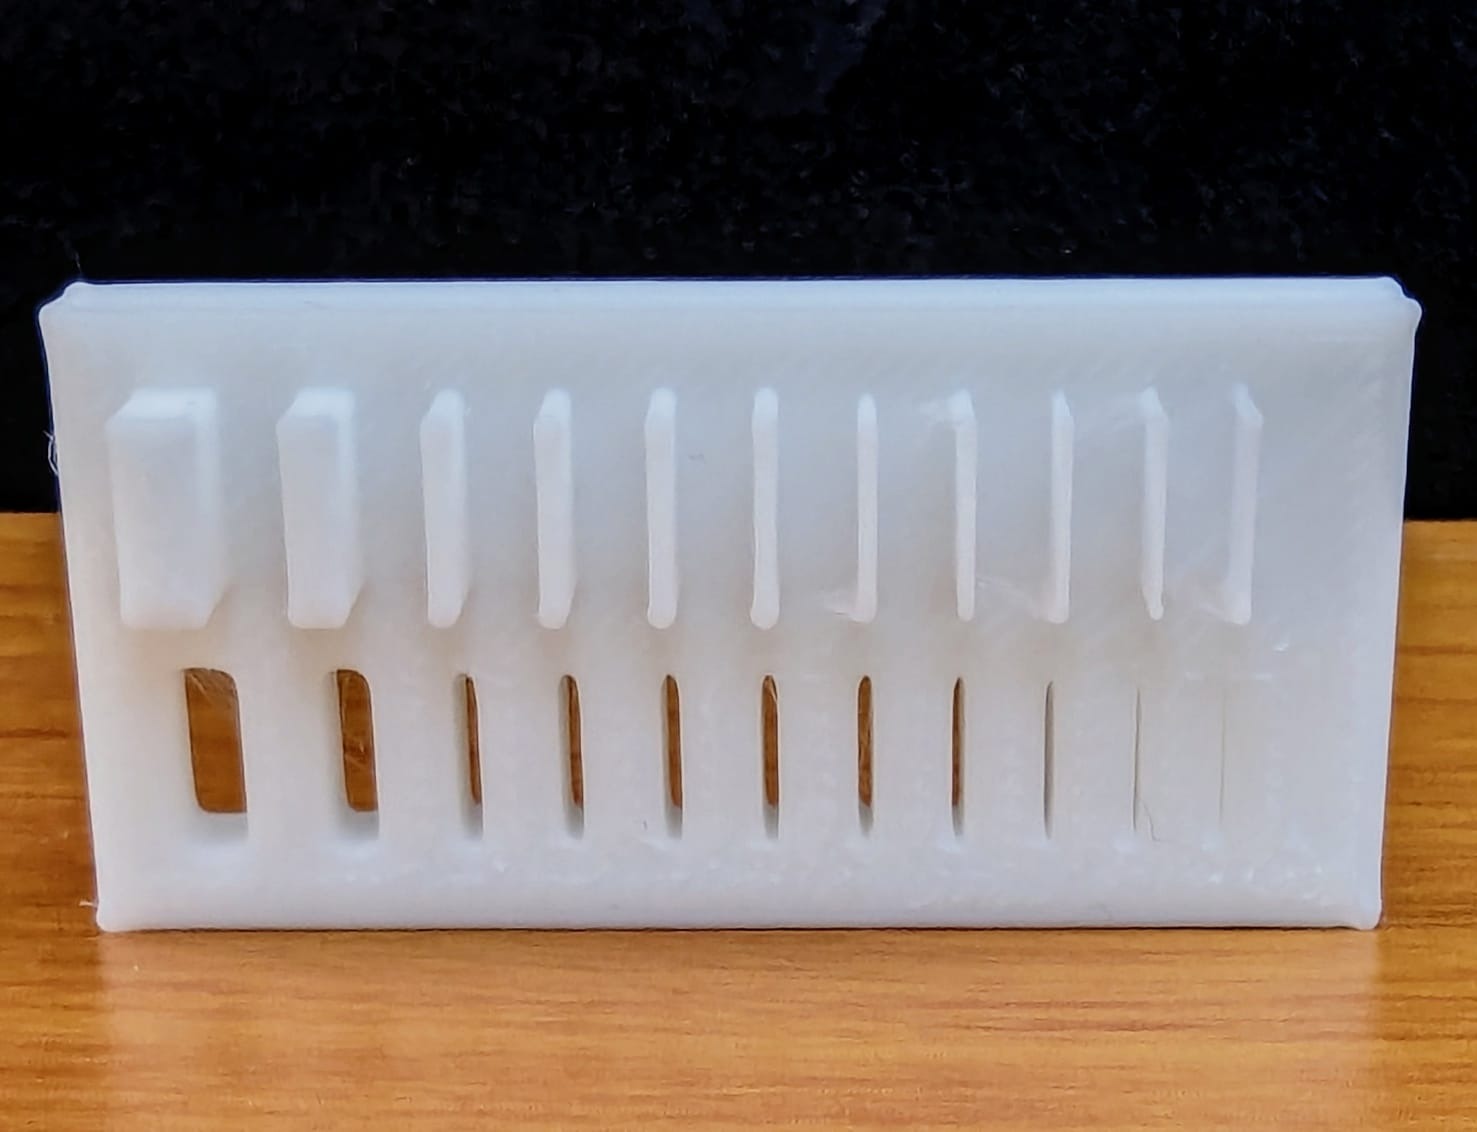
- Bridging: this is the distance between two parts without needing support. It also depends on the material and
the printer. However, with PLA the hanging material is minimum on the testings, saying the only one with a little
deformation being the one with a distance of 20 mm.
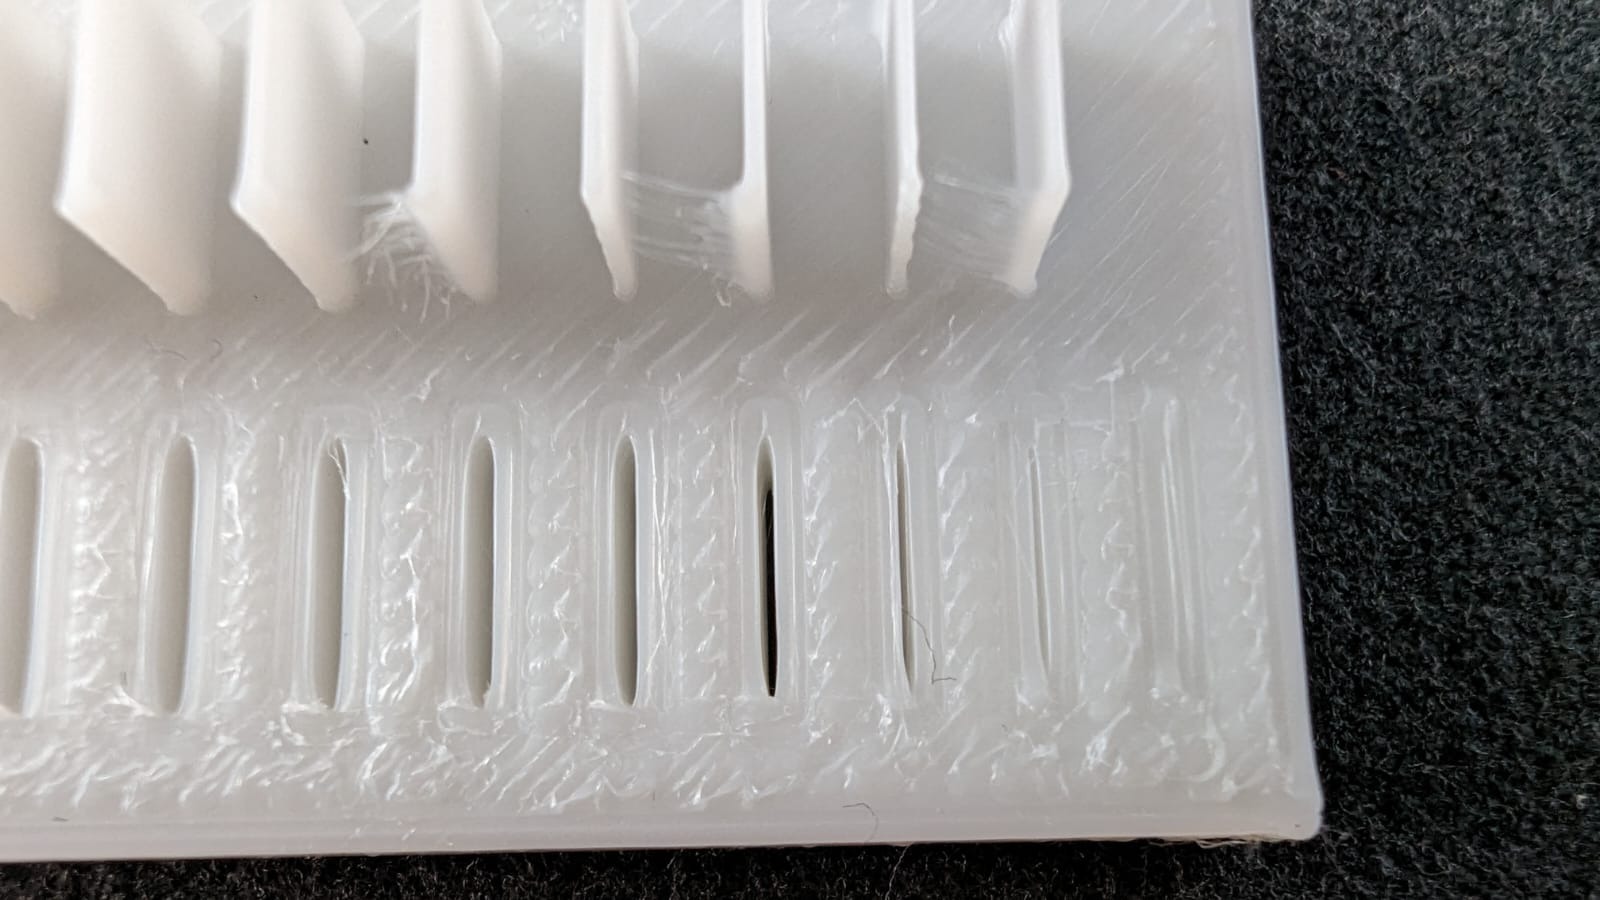
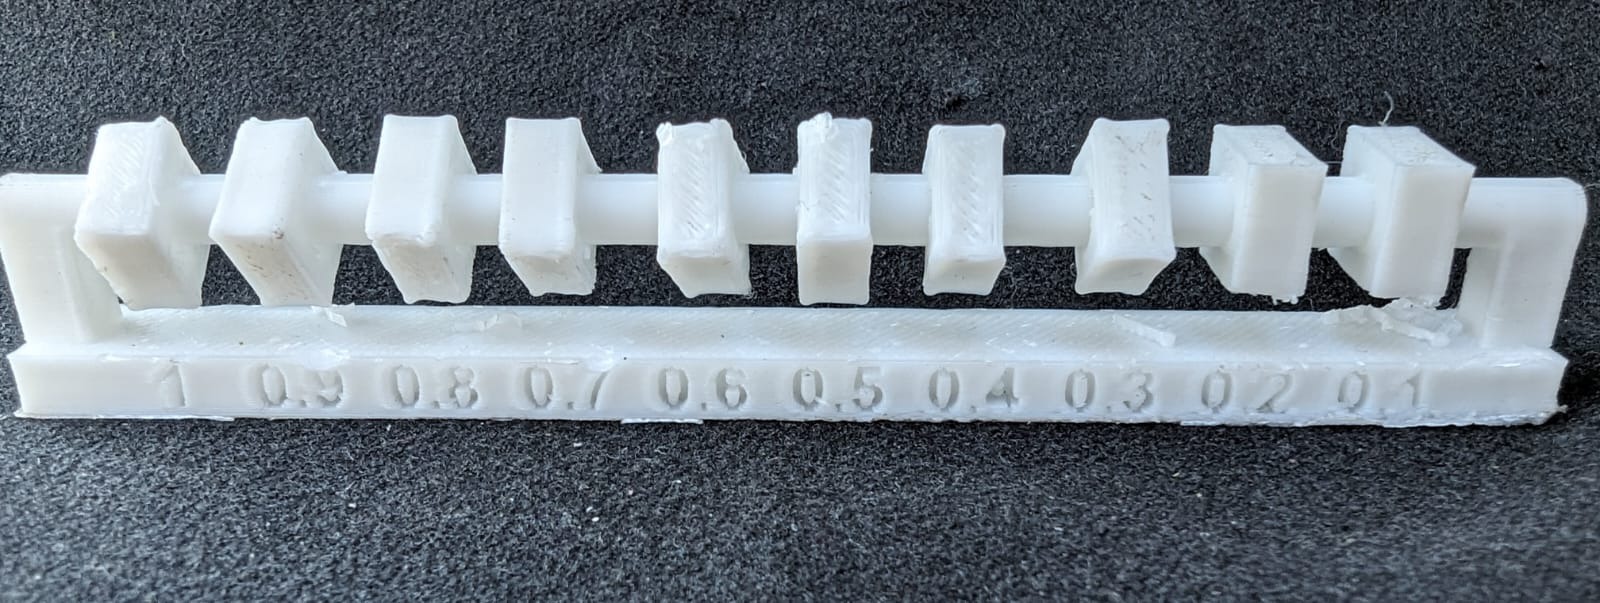
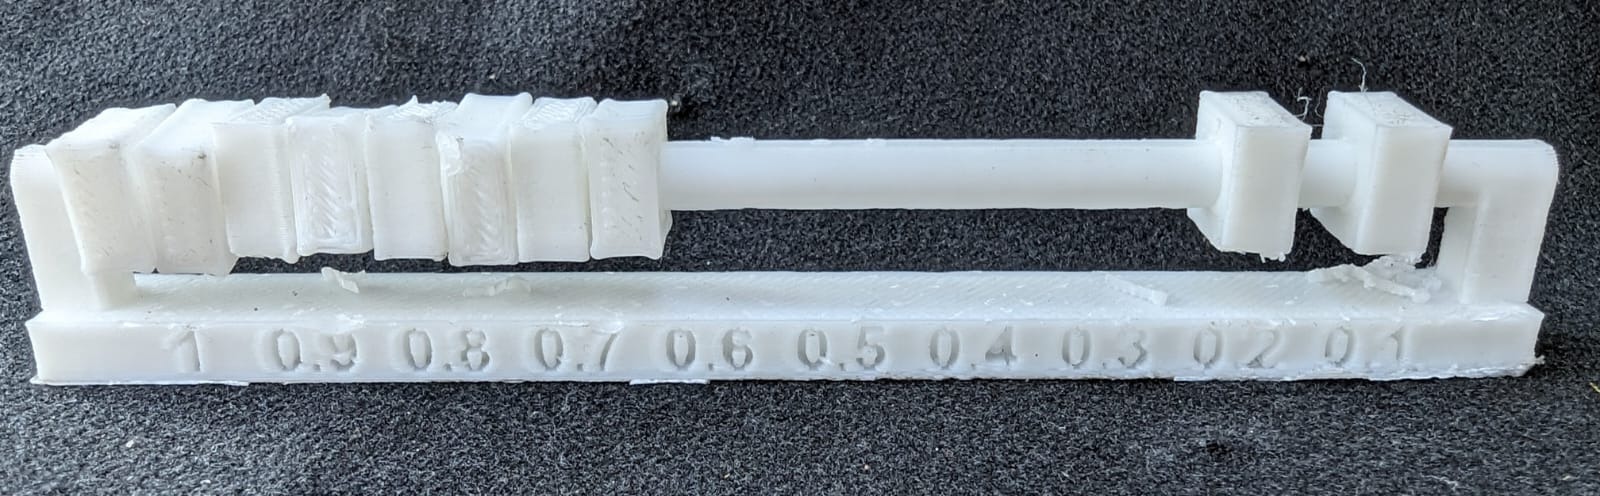
- Wall Thickness: there can be walls so thin that they have problems while printing, and walls so thick that waste
material. With PLA, the problem was mostly with walls and holes with 0.1 mm width (also holes with 0.2 mm may have
a little bit of a problem being printed).
- Dimensions: this aspect may be specially important when making parts that will be joined later. The considerations are regarding the material shrinkage and the calibration of the printer.
- Anisotropy: since the 3D printing is all about layers, it is important to consider them when making the objects. This
may affect the resistance of the piece.

- Surface Finish: this is the quality of the print's exterior, which can be rough or smooth depending on the printer's. resolution, material, and post-processing techniques.
- Clearance: this is about the space between the support structure and another printed part, which lets the support to
have movement or to remove them easily without damaging the printing. It is usually from 0.3 to 0.8 mm.
For the support part it is all about the infill, and I understood there are two aspects to take care of:
- Density: this is what goes inside the 3D print and has percentage values. This means how dense the interior is. The
percentage of the infill's density depends on how much stress is the part going to receive.
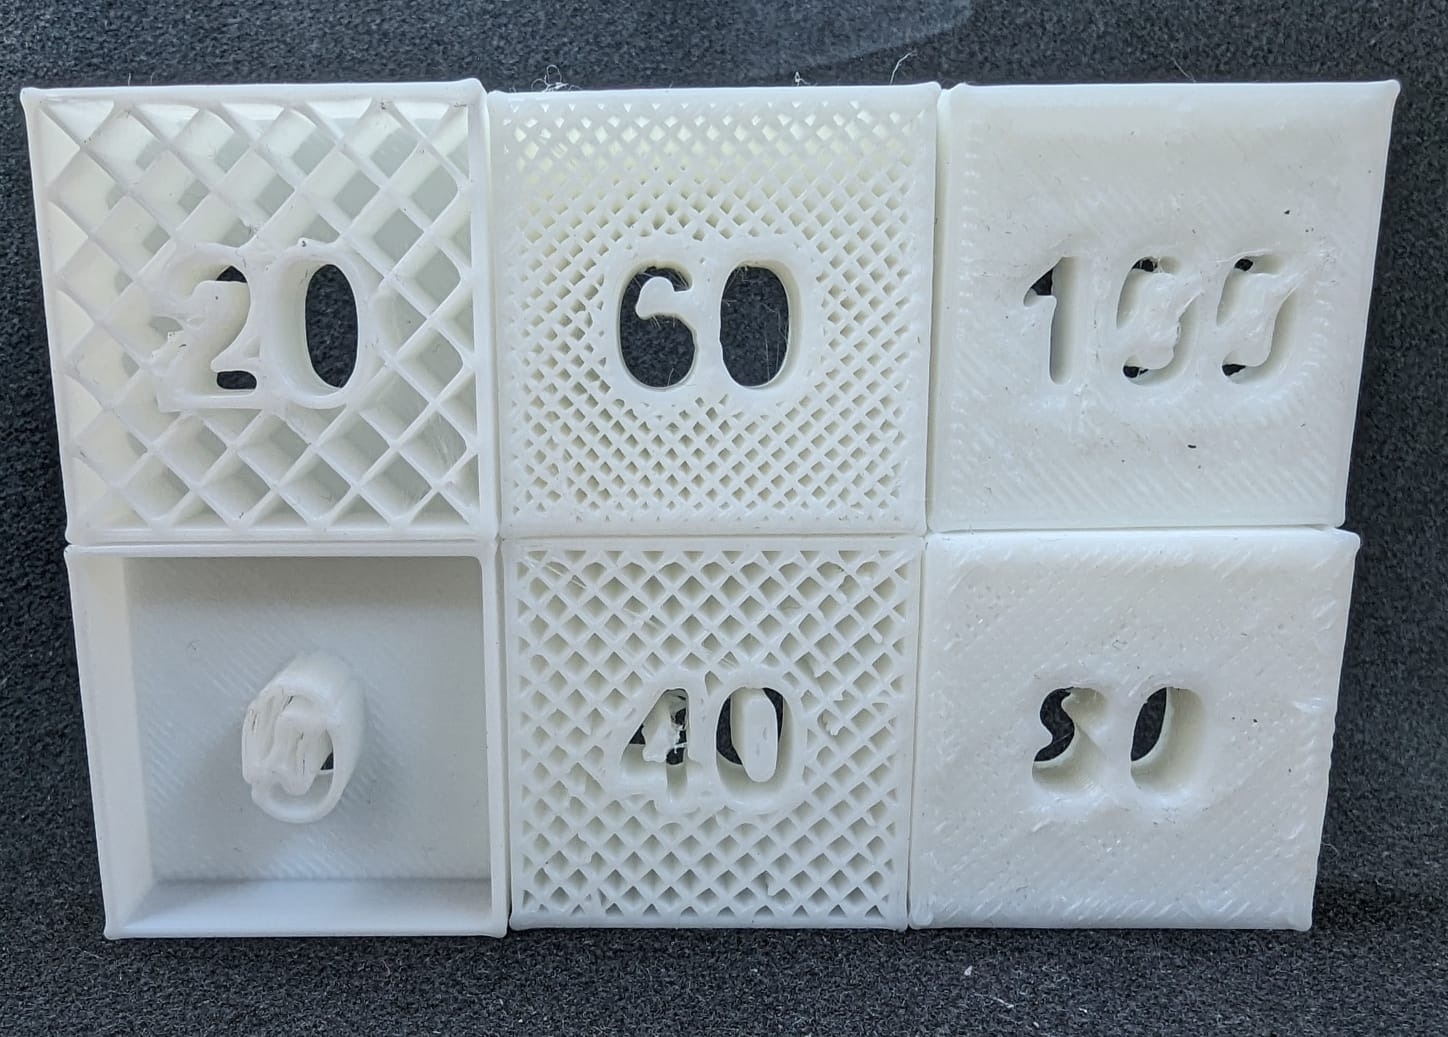
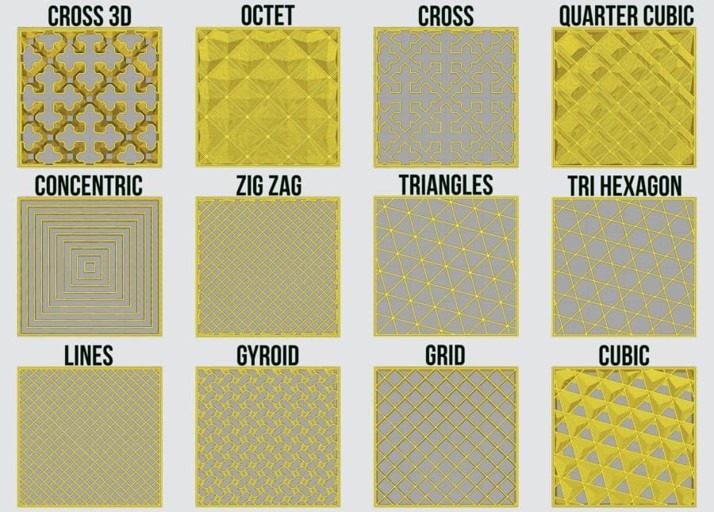
- Pattern: those are the shapes in wich the infill is going to be built. These may be straight lines or even more complex
shapes depending on the amount of stress the object is going to have. The infill pattern affects the weight, flexibility,
and printing time of the object. In Cura there are 12 infill patterns:
Object Design for the 3D Print
The design for the 3D print was kinda slow because it took me a while to decide what I wanted to do that fullfilled the requierement of not being easily made substractively. I thought about some characteristics that could apply for objects for this, for example moving parts, hollow parts, or weird 3D shapes, but couldn't decide for something. Finally, I decided for a mini skateboard, just as the one I have in my lunchbox. It would be difficult to make it substractively because it has the moving wheels, which must be inside the skateboard from the beggining. I used SolidWorks to draw the skateboard.
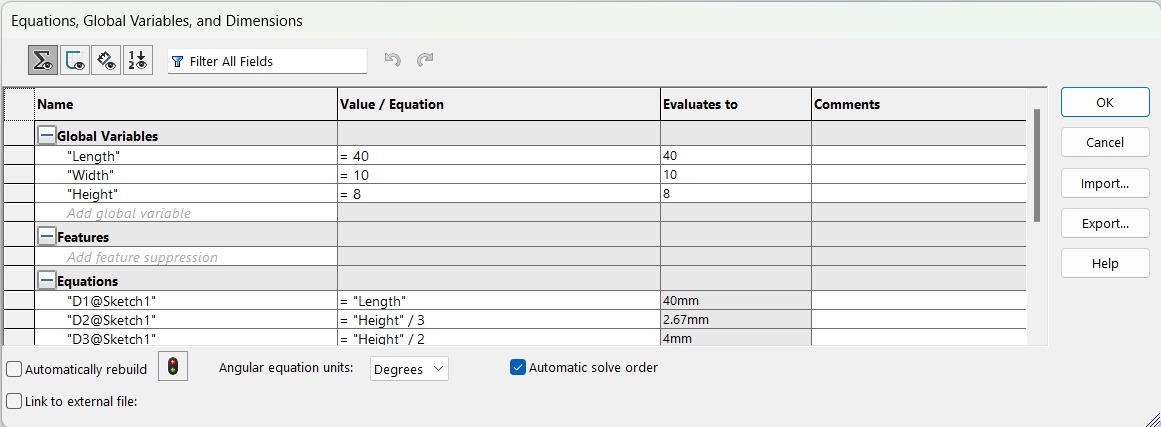
Firstly, I made the parametric equations, in case I had to make bigger the skateboard in some aspect. Here are the final equations:
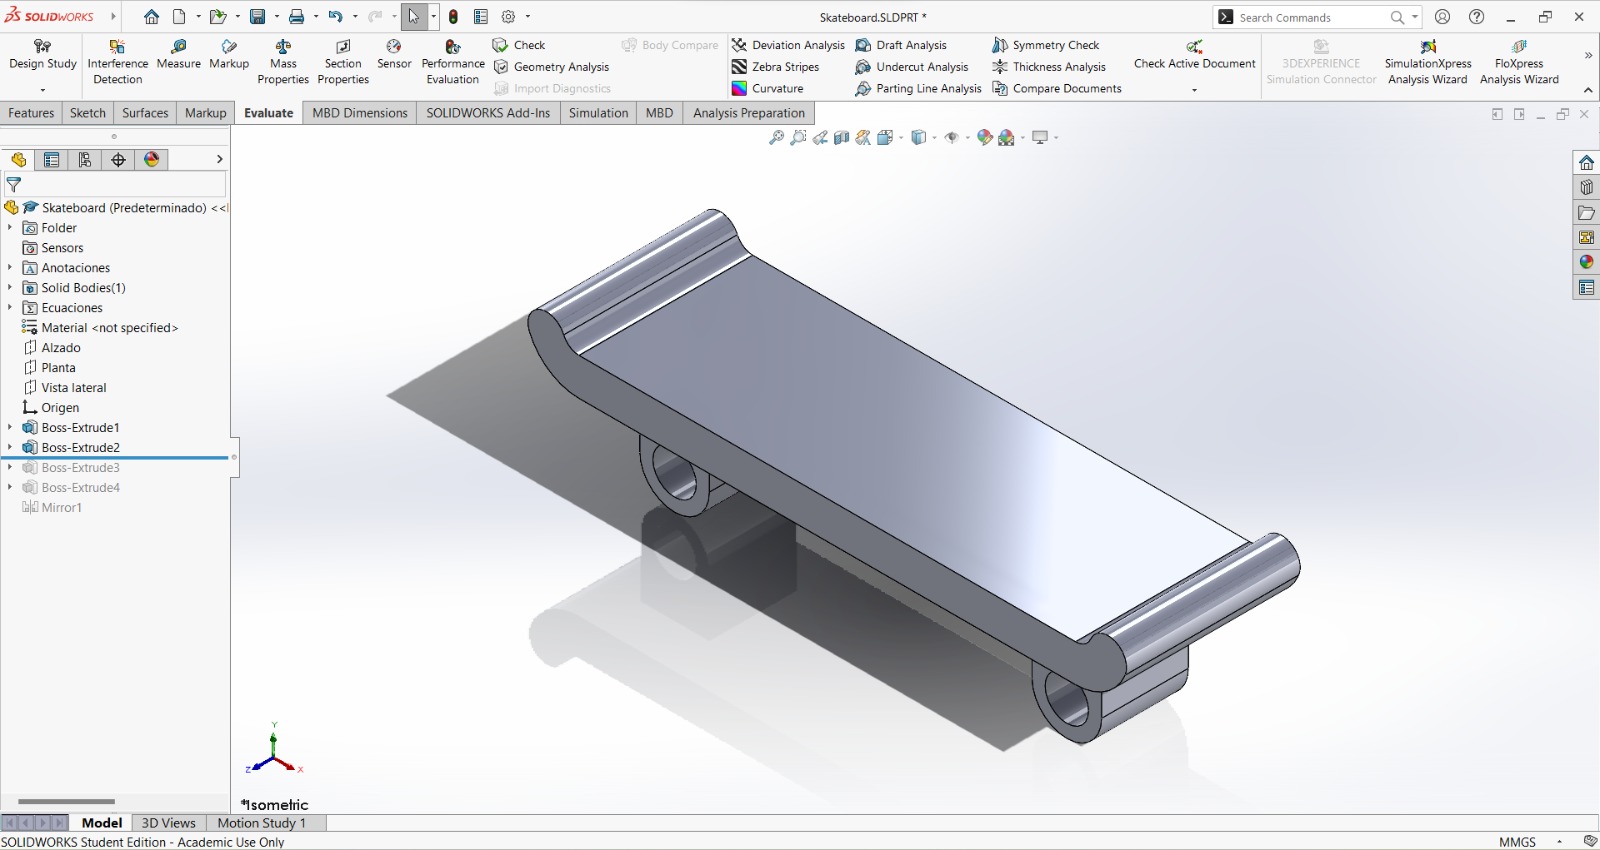
Then I drew the top part and the space for the wheels:
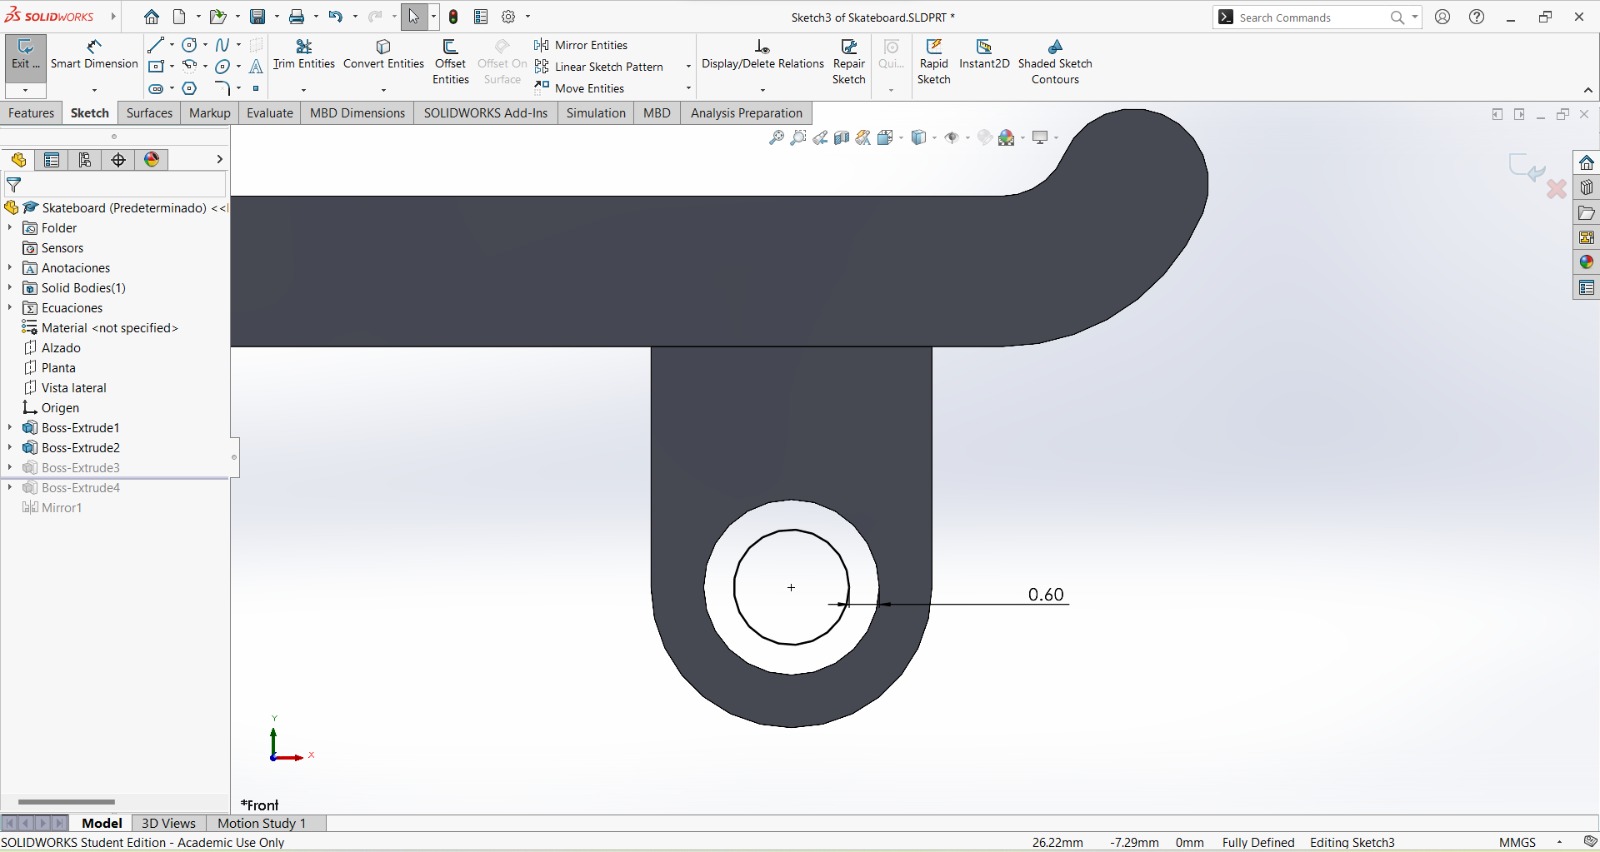
For the union between each pair of wheels I made sure to put a considerable clearance, after a few inconveniets that I will explain on the next section.
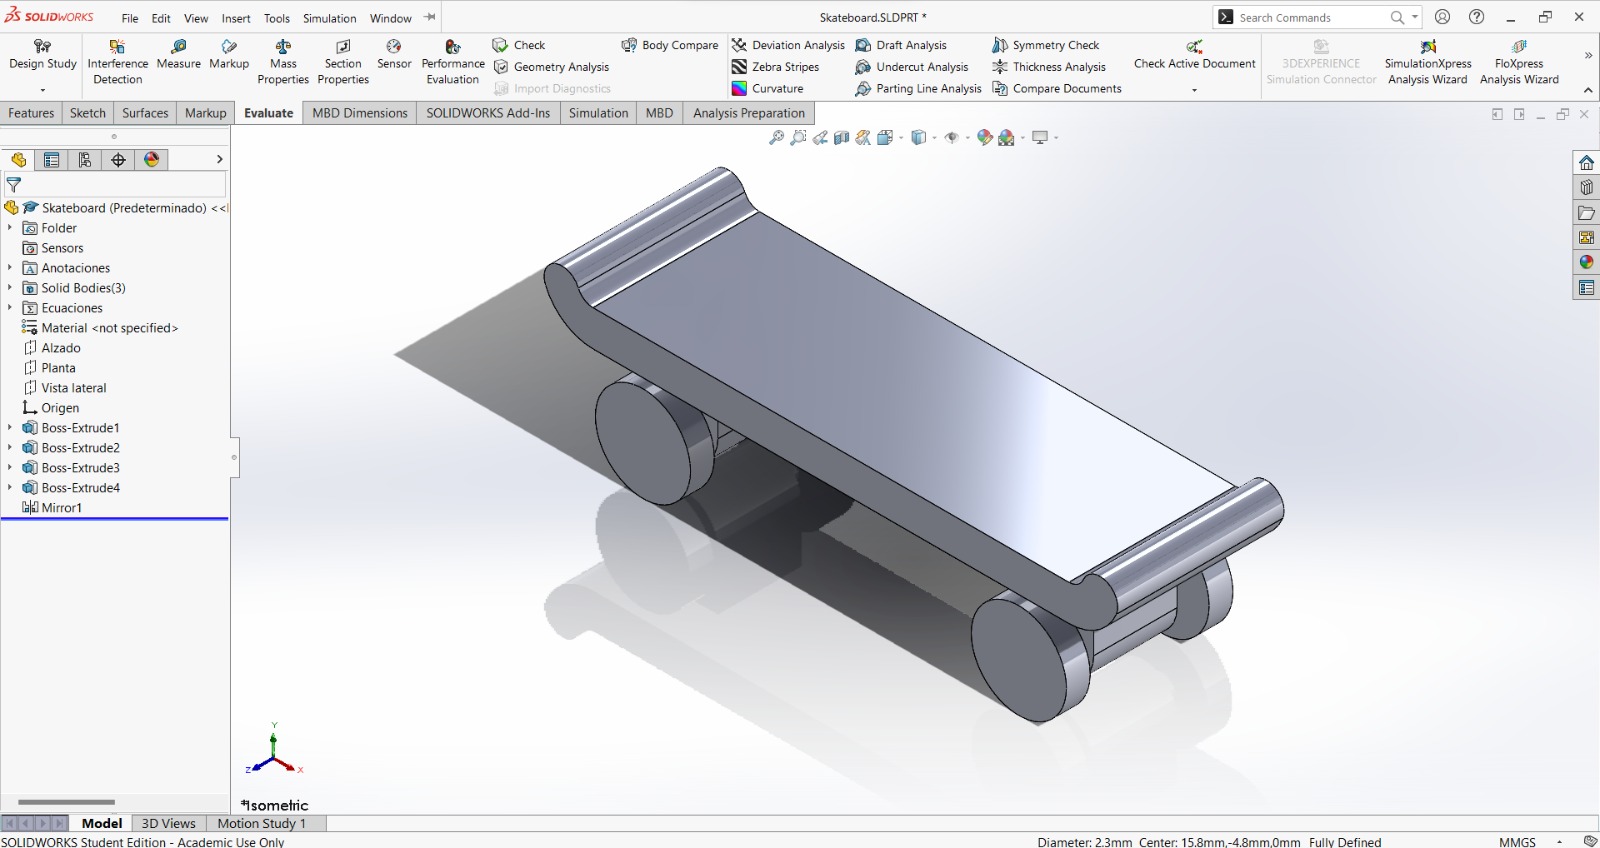
The final result of the drawing was the following, in which I only finished drawing the wheels and mirrored them:
3D Printing
For the printing I used the ENDER 3 S1 PRO and made 1 skateboard with the 3DWOX, but liked more the finish of the ENDER. To adjust the printing rules I used the UltiMaker Cura Software for the ENDER and the 3DWOX Software for the other printer.
UltiMaker Cura
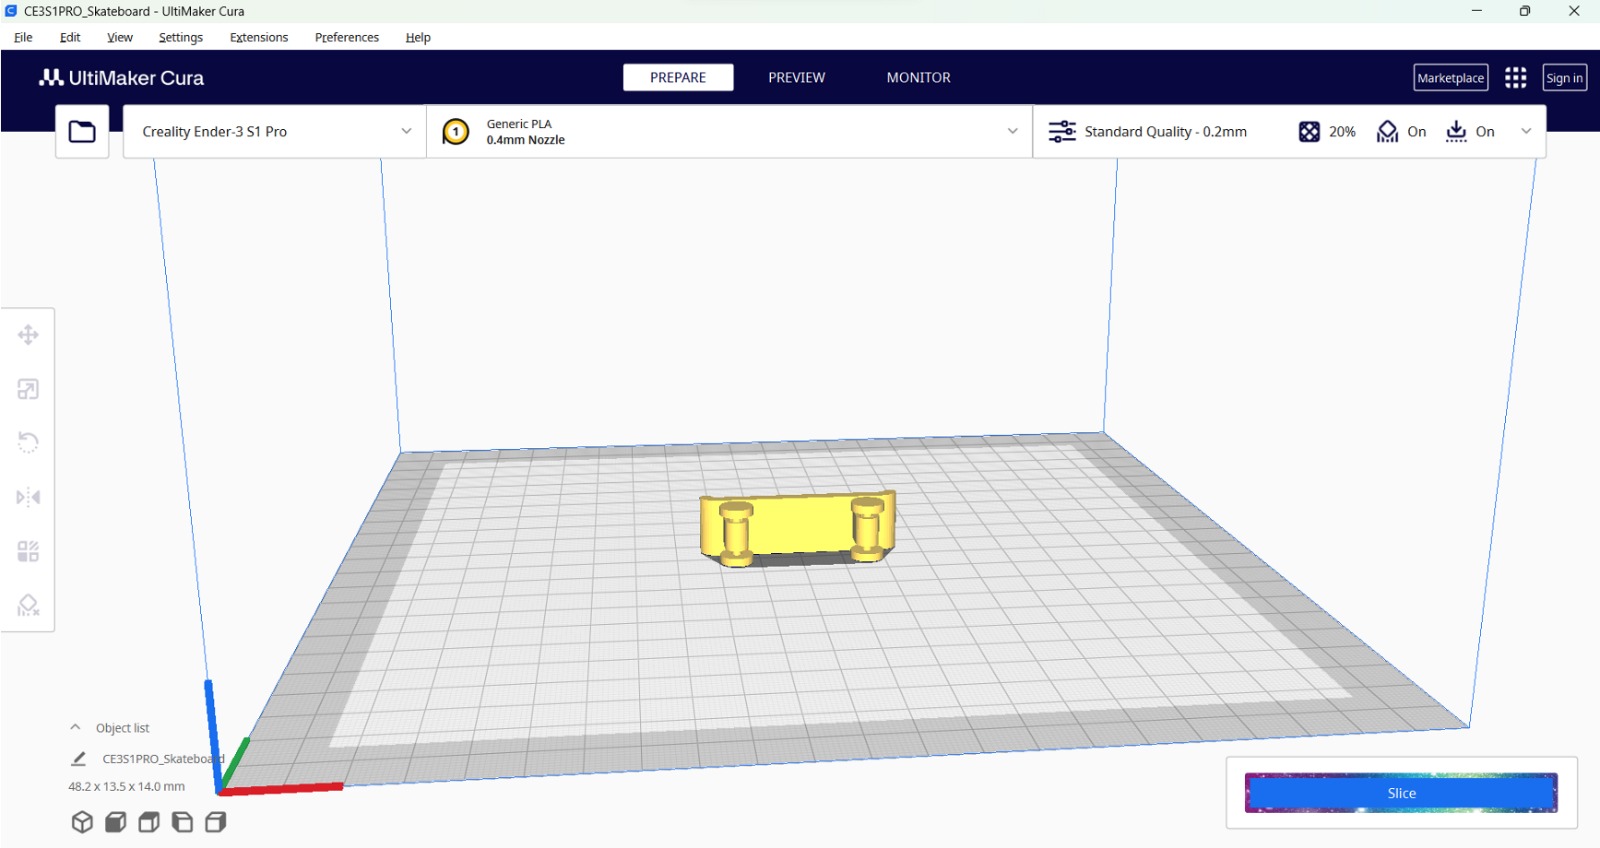
UltiMaker Cura is a software that can be used for almost any 3D printer. This software uses the stl file to get the G-code once you have already adjusted the design rules as you want. The process I followed to get the G-code was the following:
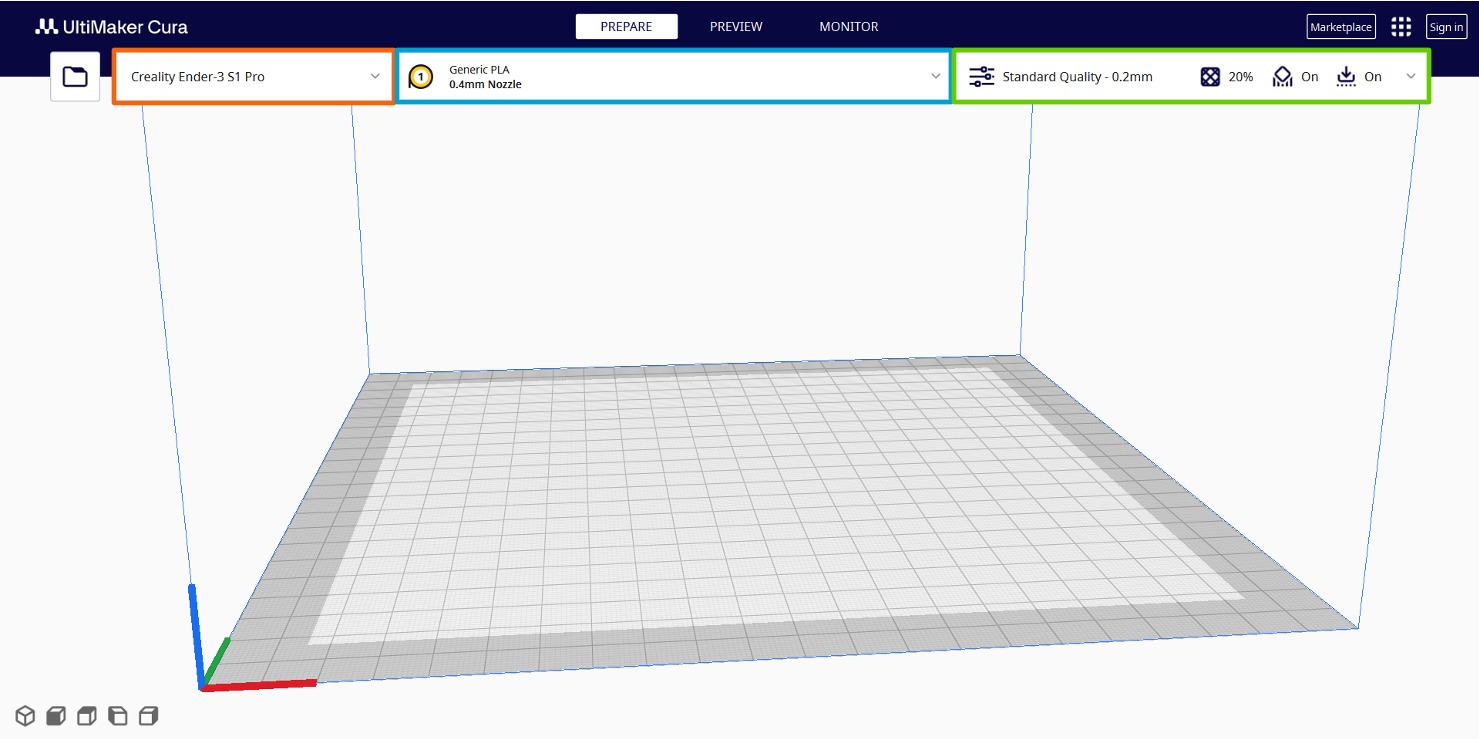
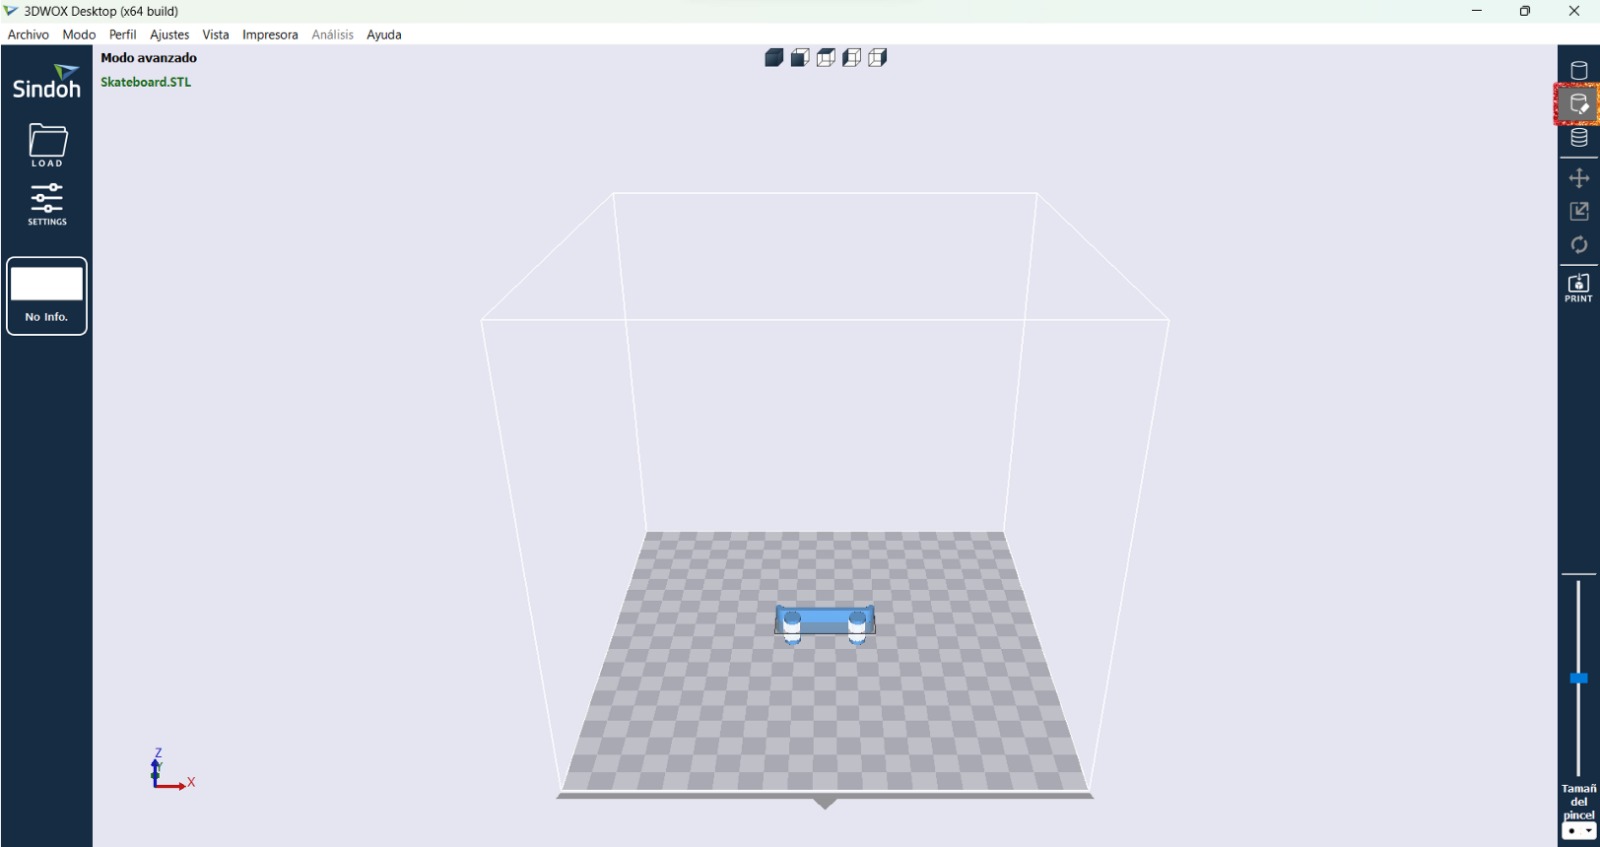
- First, it asks you to create an account, but it isn't really necessary to do it. The interface looks like this. I made sure
to select the correct printer (orange rectangle), the correct material and nozzle (blue rectangle), and I adjusted some design
rules (green rectangle).
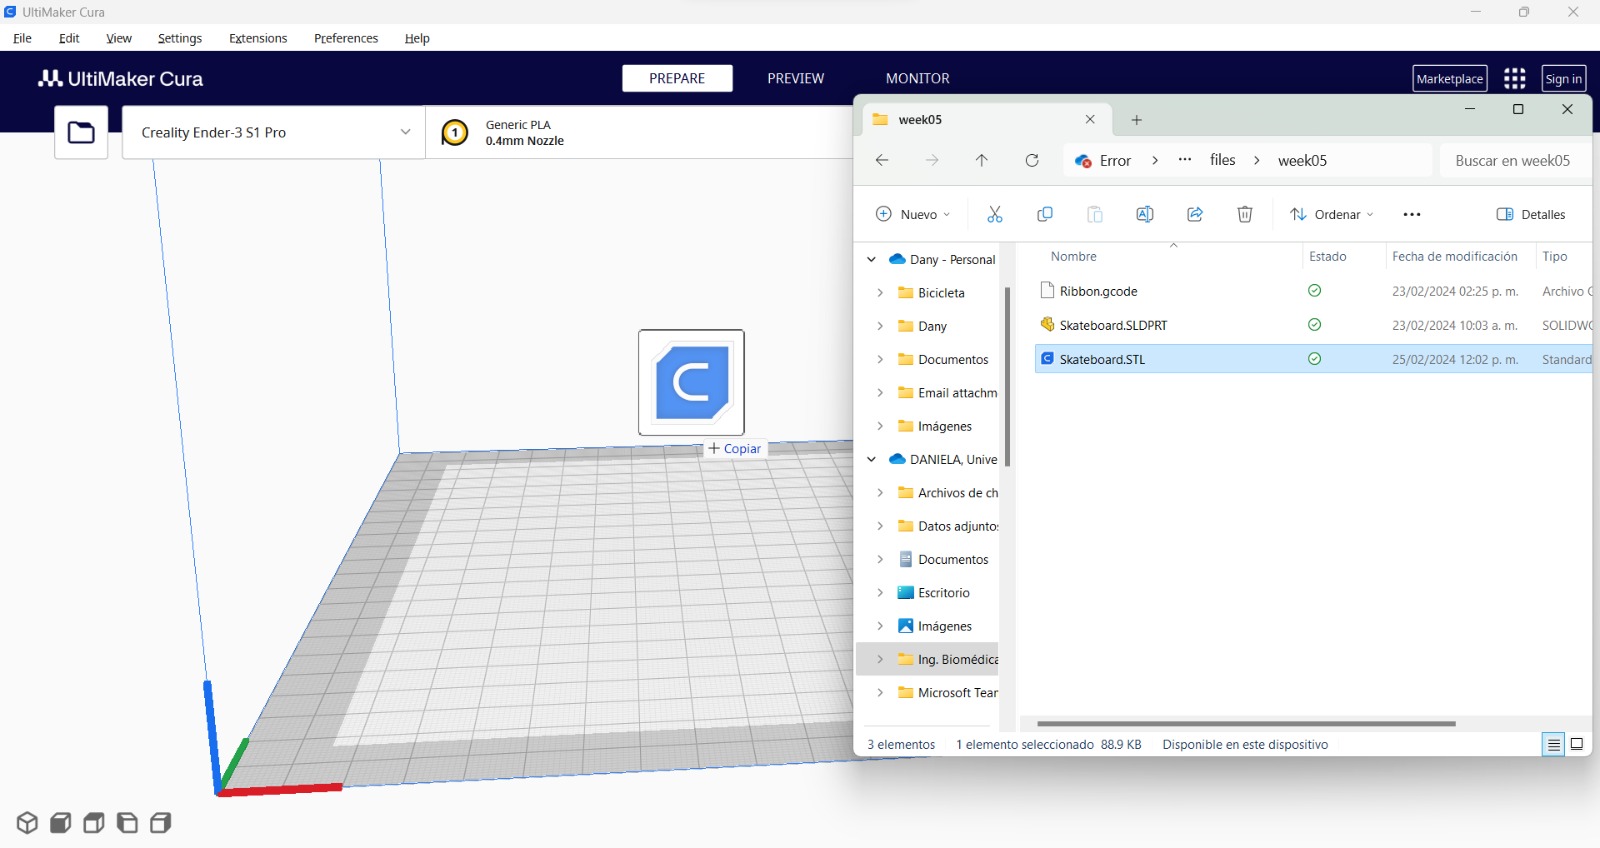
- Then I dragged the stl file to the workspace.
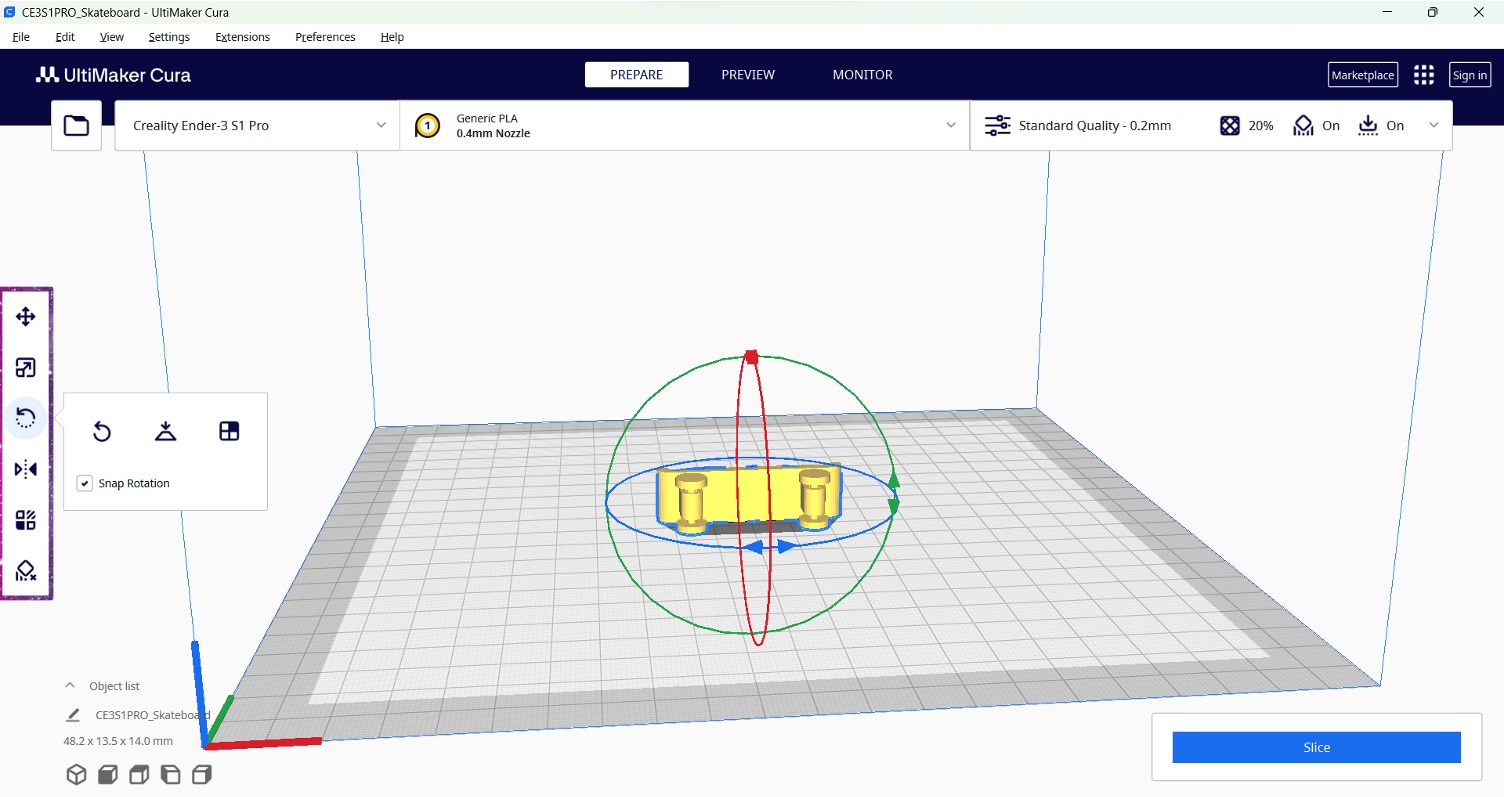
- It is possible to move the object on the plate, scale it, rotate it, mirror it, change per model settings, and block supports
with the left menu.
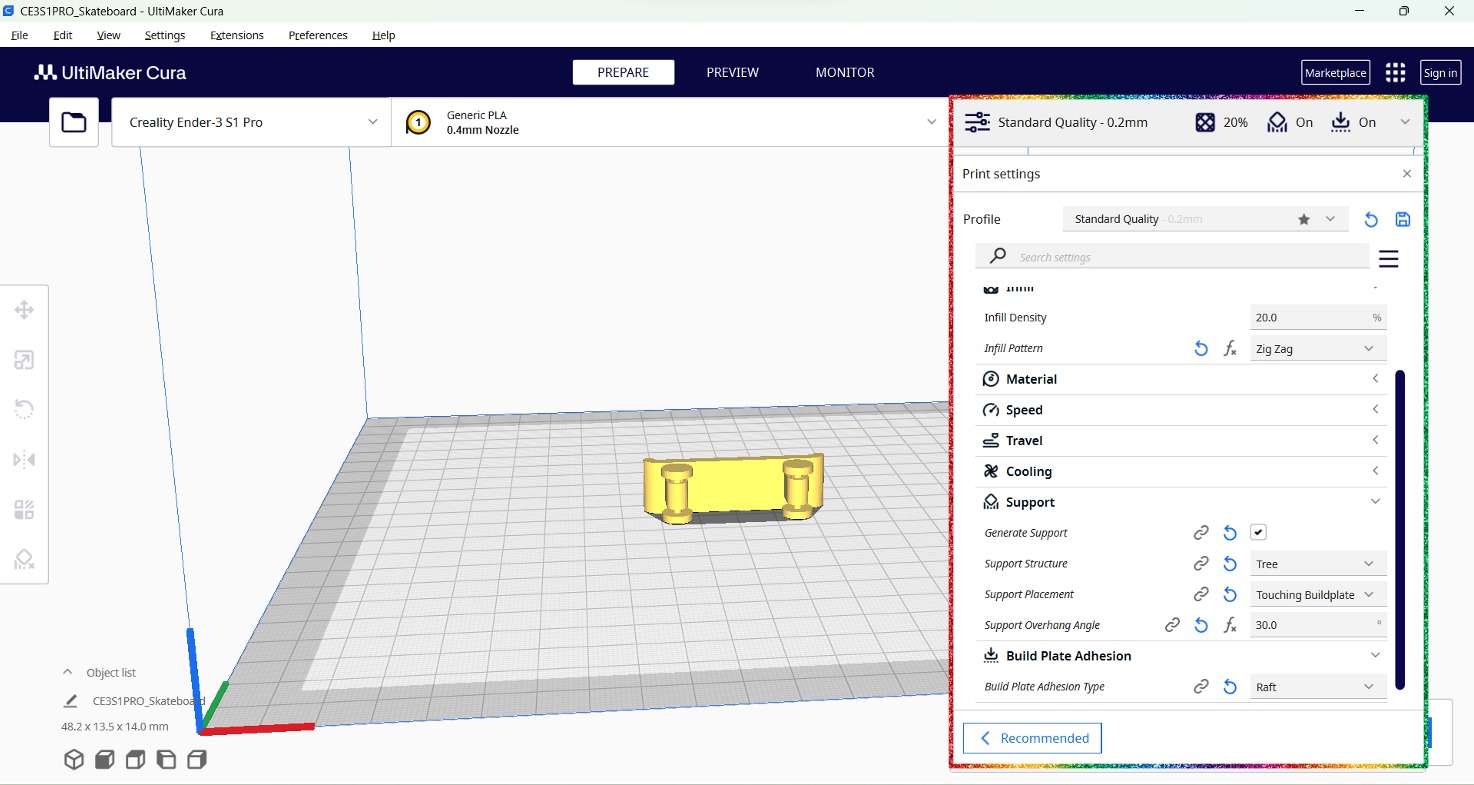
- The design rules that I adjusted were the following:
- Infill design: Zig zag (it needs little support and wouldn't be carrying much weight).
- Infill density: 20% (it didn't have many loads to carry).
- Support structure: tree (when I first used the normal support, it surrounded the wheels and when trying to remove it, I broke the wheels).
- Support placement: touching buildplate (when it touches many parts of the skateboard and I tried to remove it, I broke it).
- Support overhang angle: 30 (any other angle was impossible).
- Build plate adhesion type: raft (so it wouldn't move while printing).
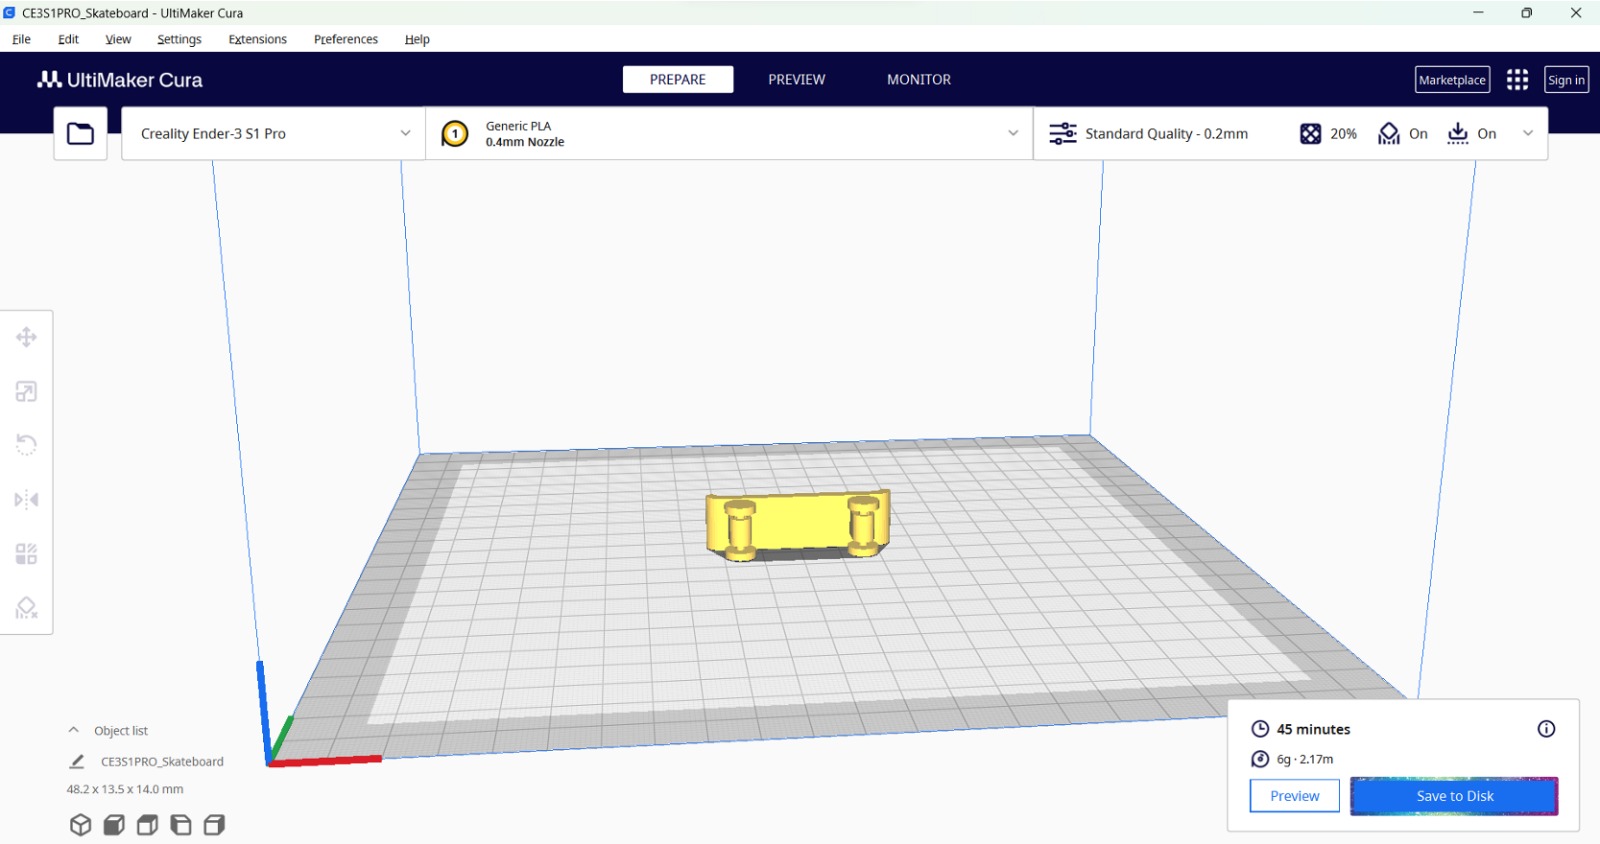
- I clicked on "Slice":
- Finally I saved it in a microSD to put it in the printer.
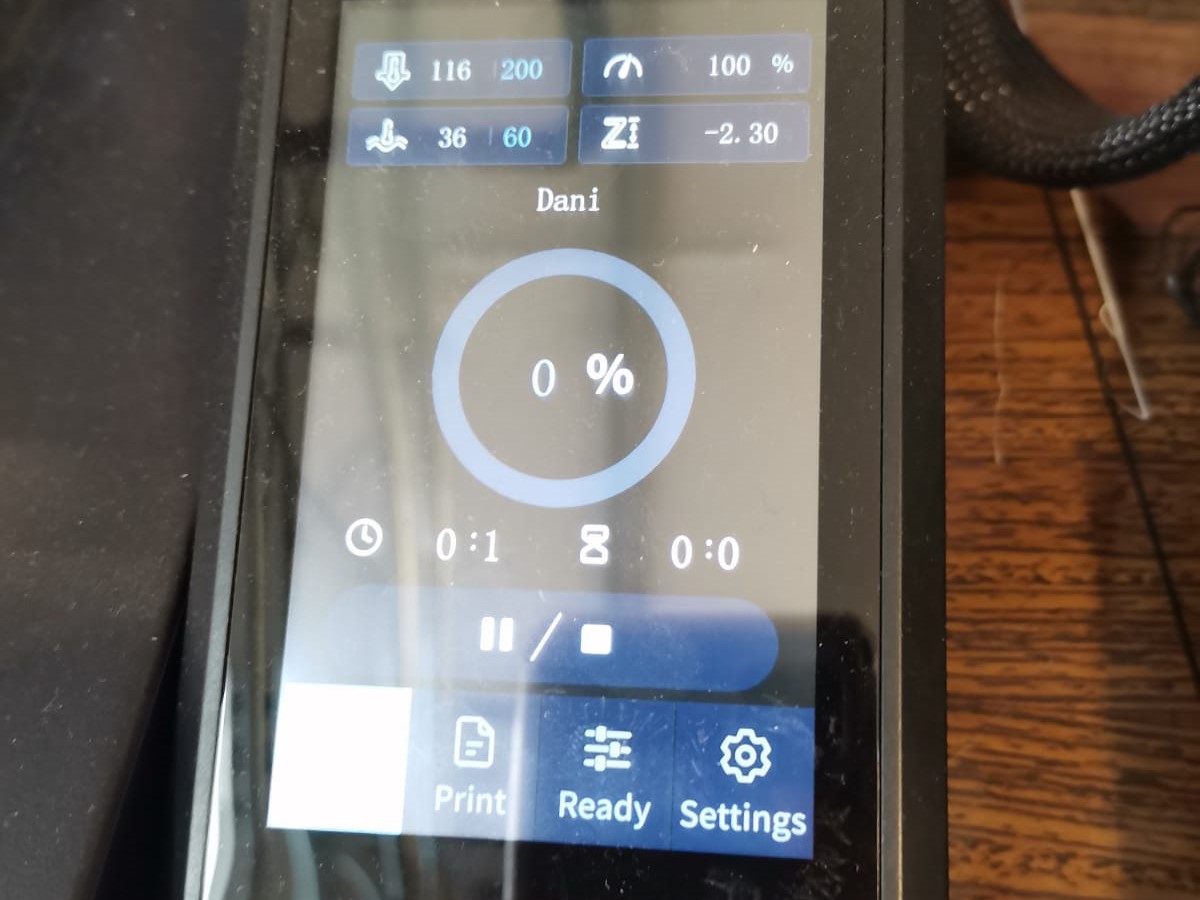
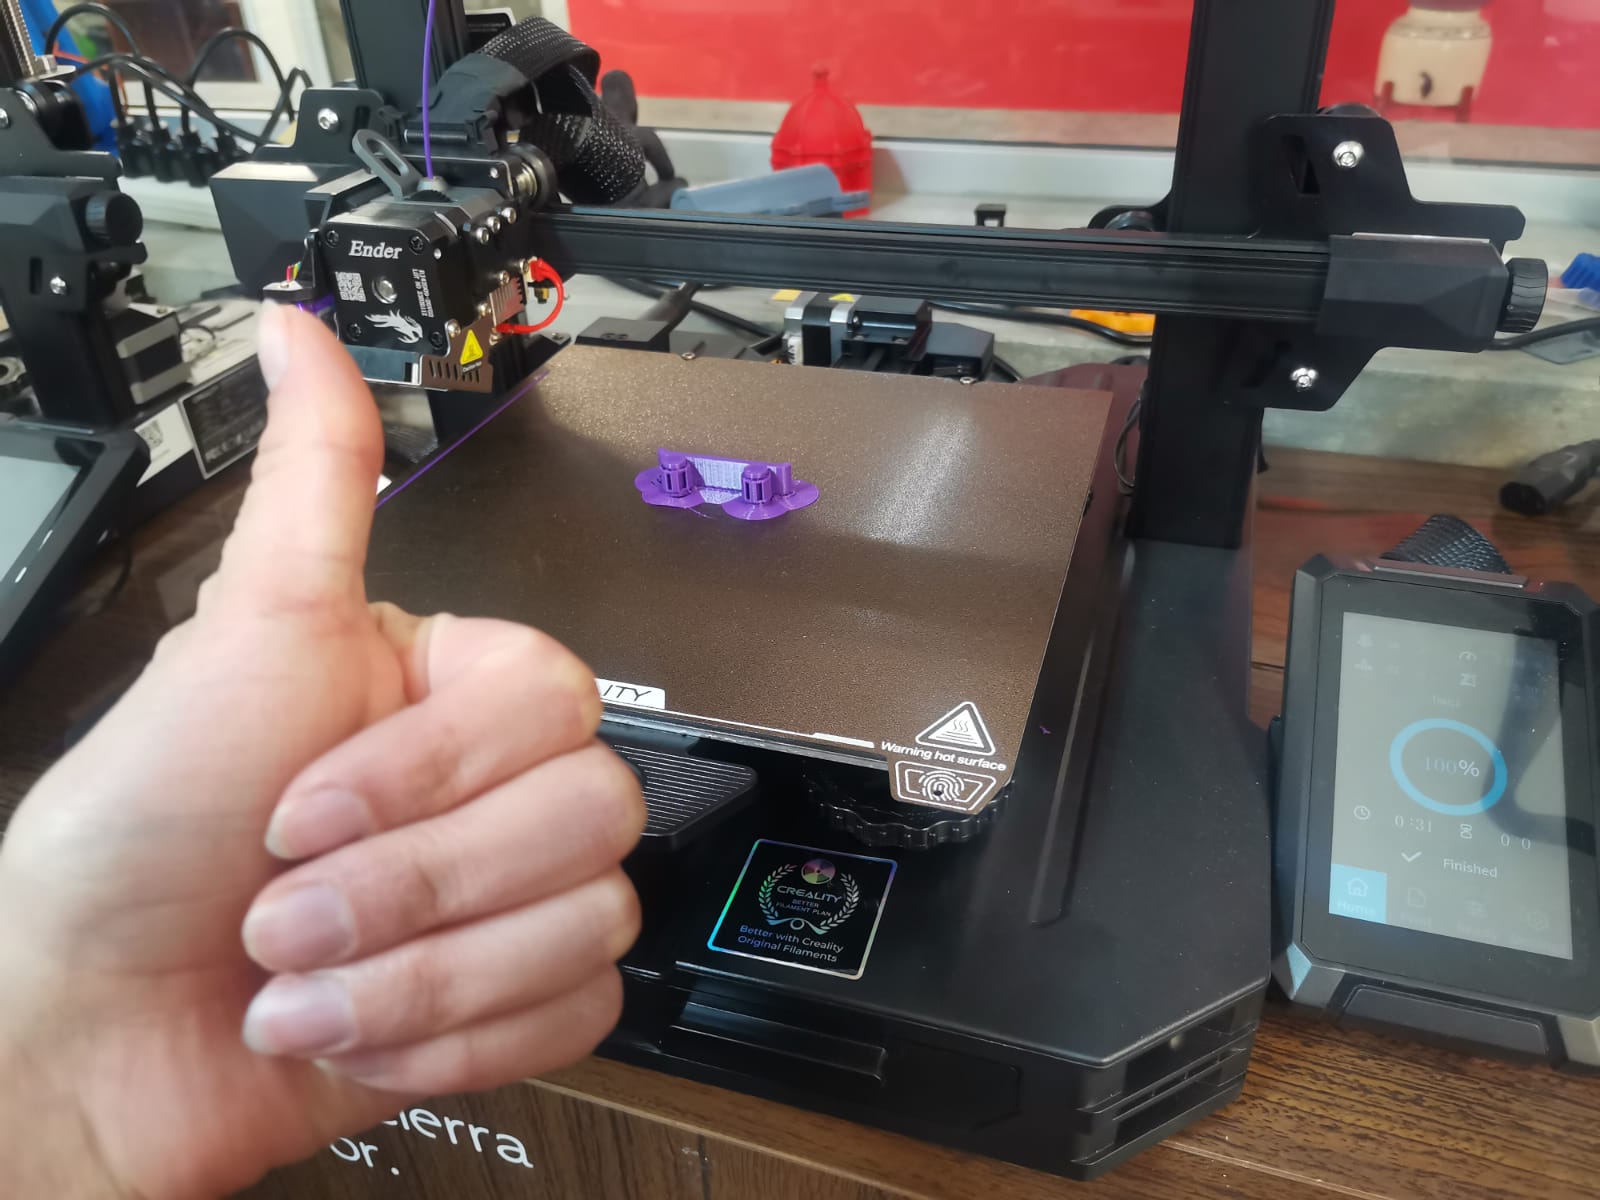
- The first print:
3DWOX
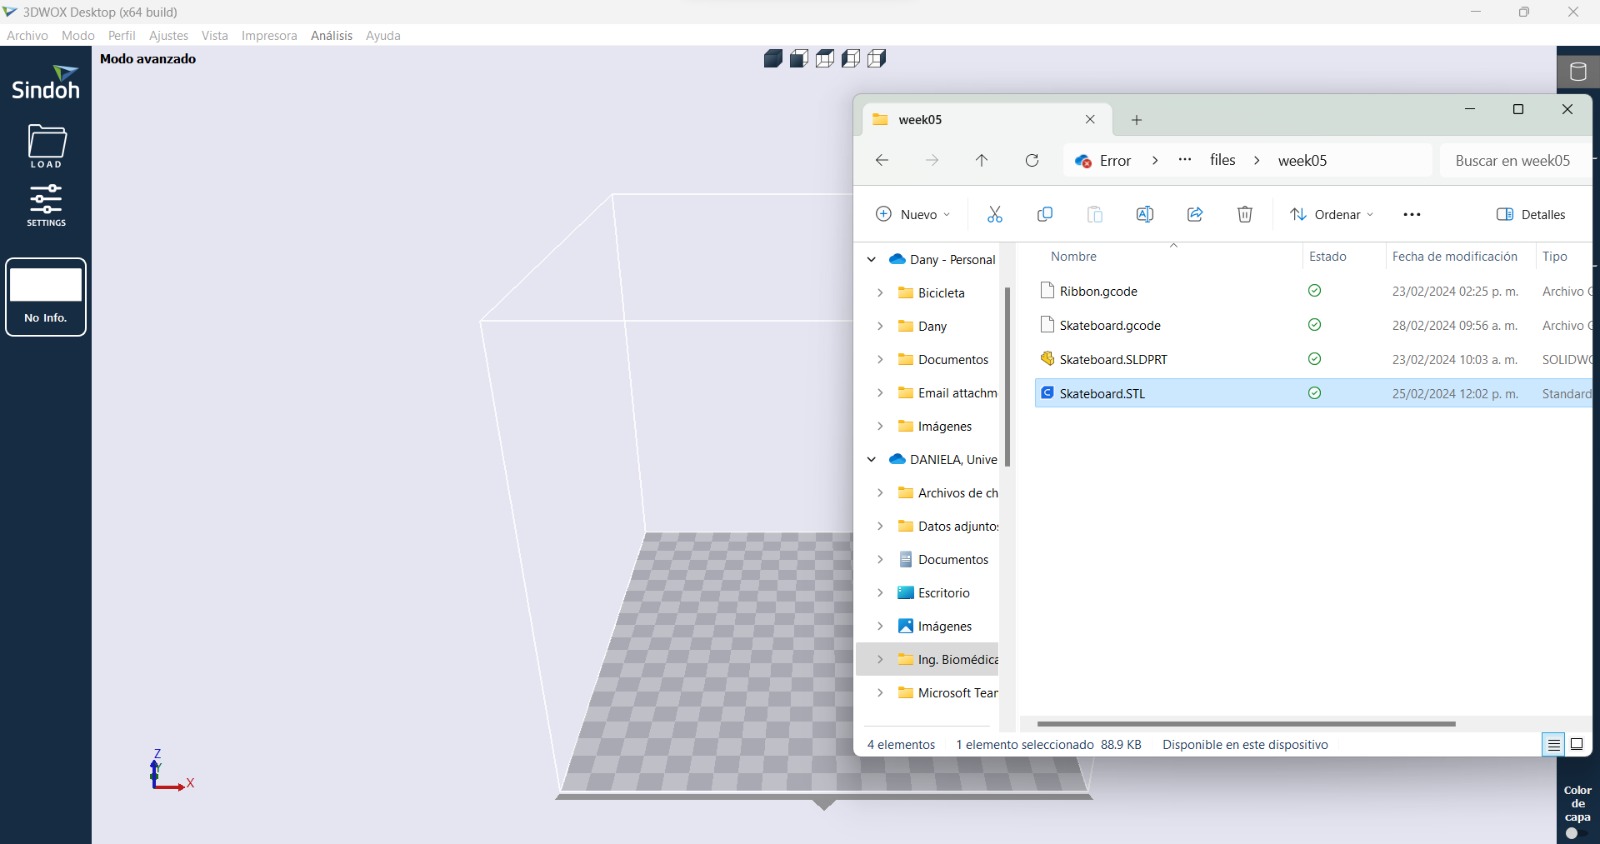
The 3DWOX Software is used for the Sindoh printers. It also uses the stl file to get the G-code once you have already adjusted the design rules as you want. The process I followed to get the G-code was the following:
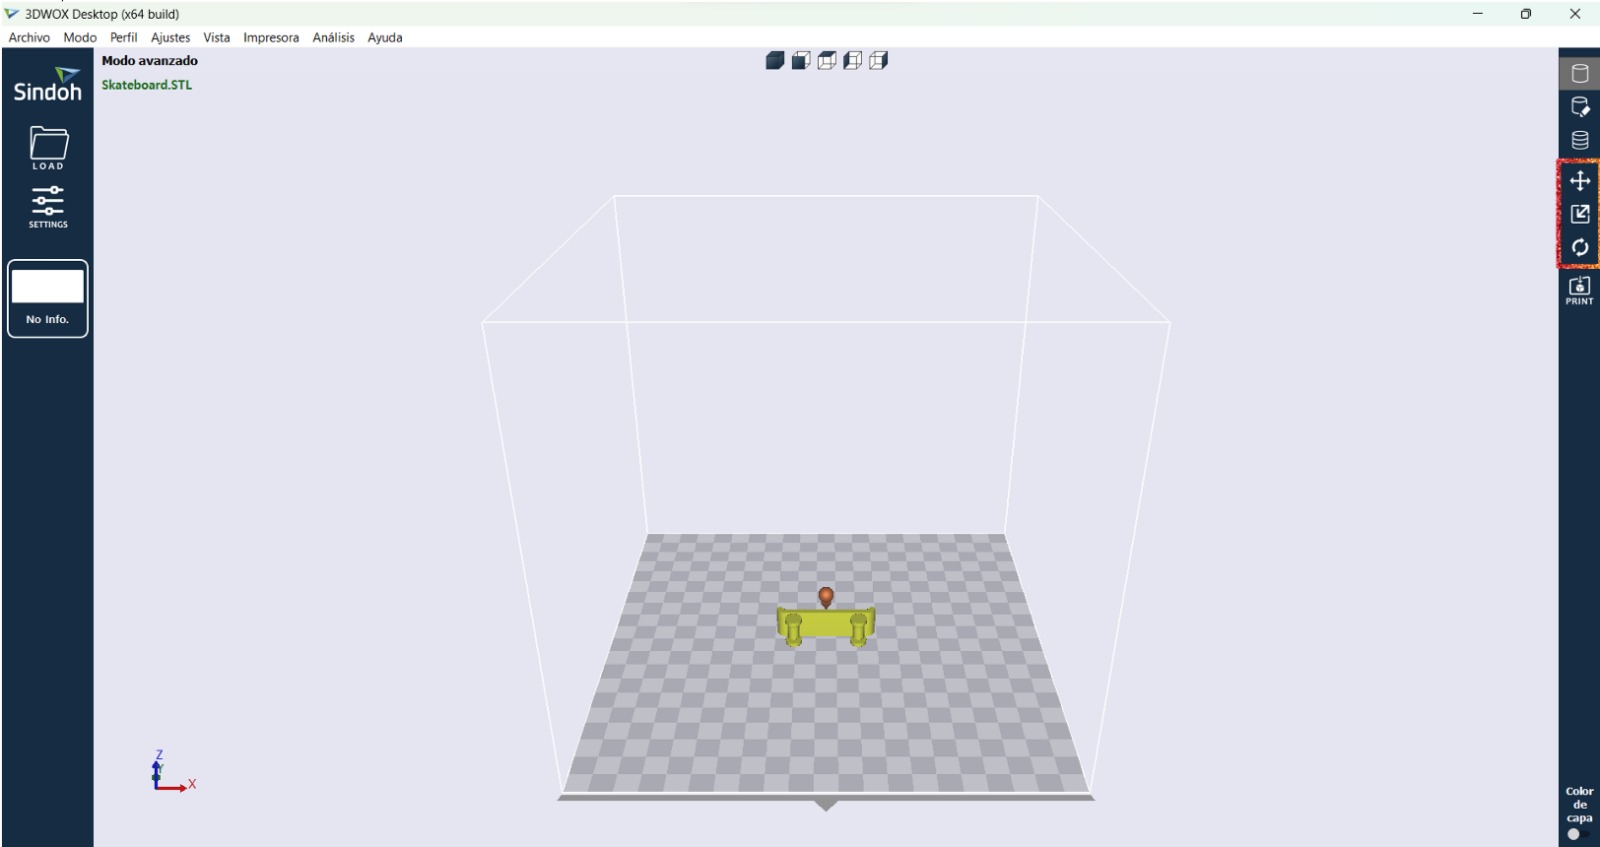
- First, I dragged the stl file to the workspace:
- It is also possible to move the object on the build plate, scale it, and rotate it.
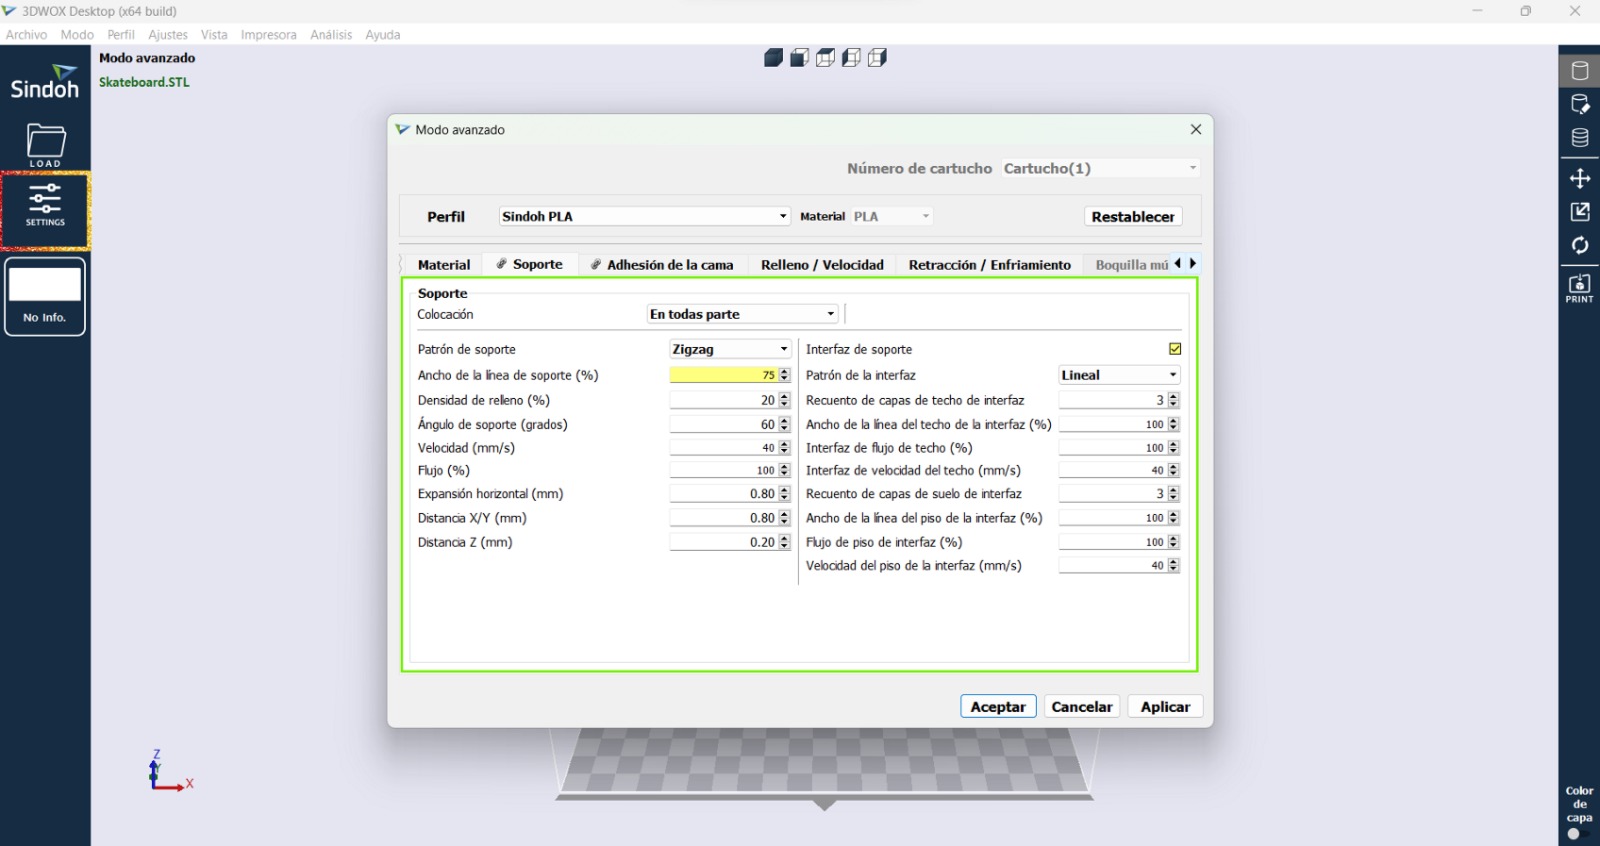
- The design rules that I adjusted were the following:
- Infill design: zig zag (it didn't need to support many loads).
- Infill density: 20%.
- Support structure: lineal (there were only two options, and I prefered that one).
- Build plate adhesion type: raft (to prevent the printing from moving).
- I could also use the support editor in case there is something extra that needs support, which wasn't the case.
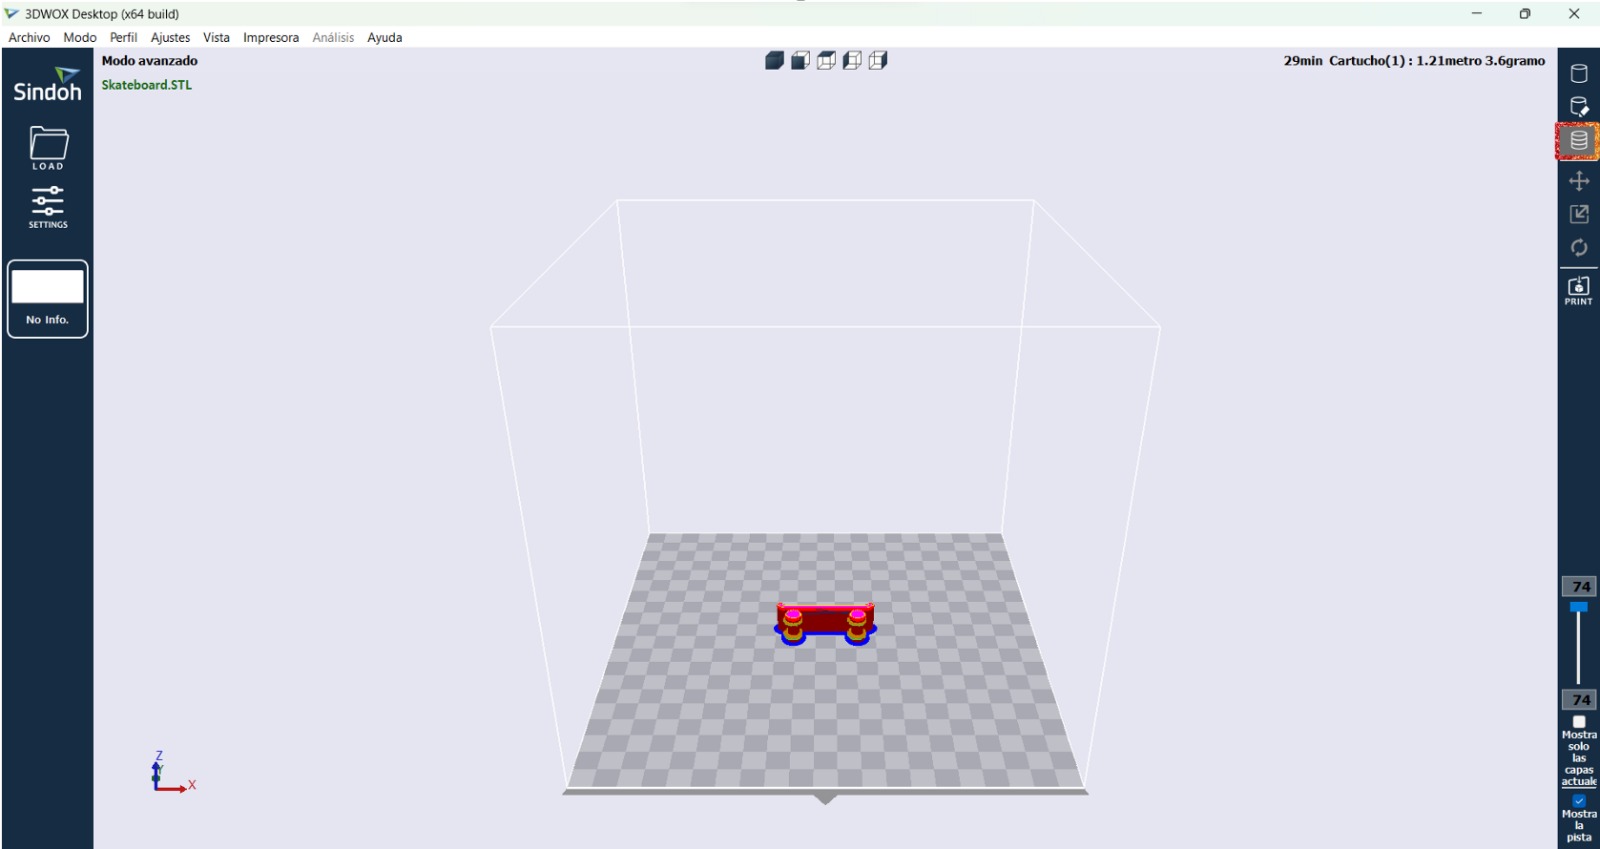
- There is also a feature to view the layers.
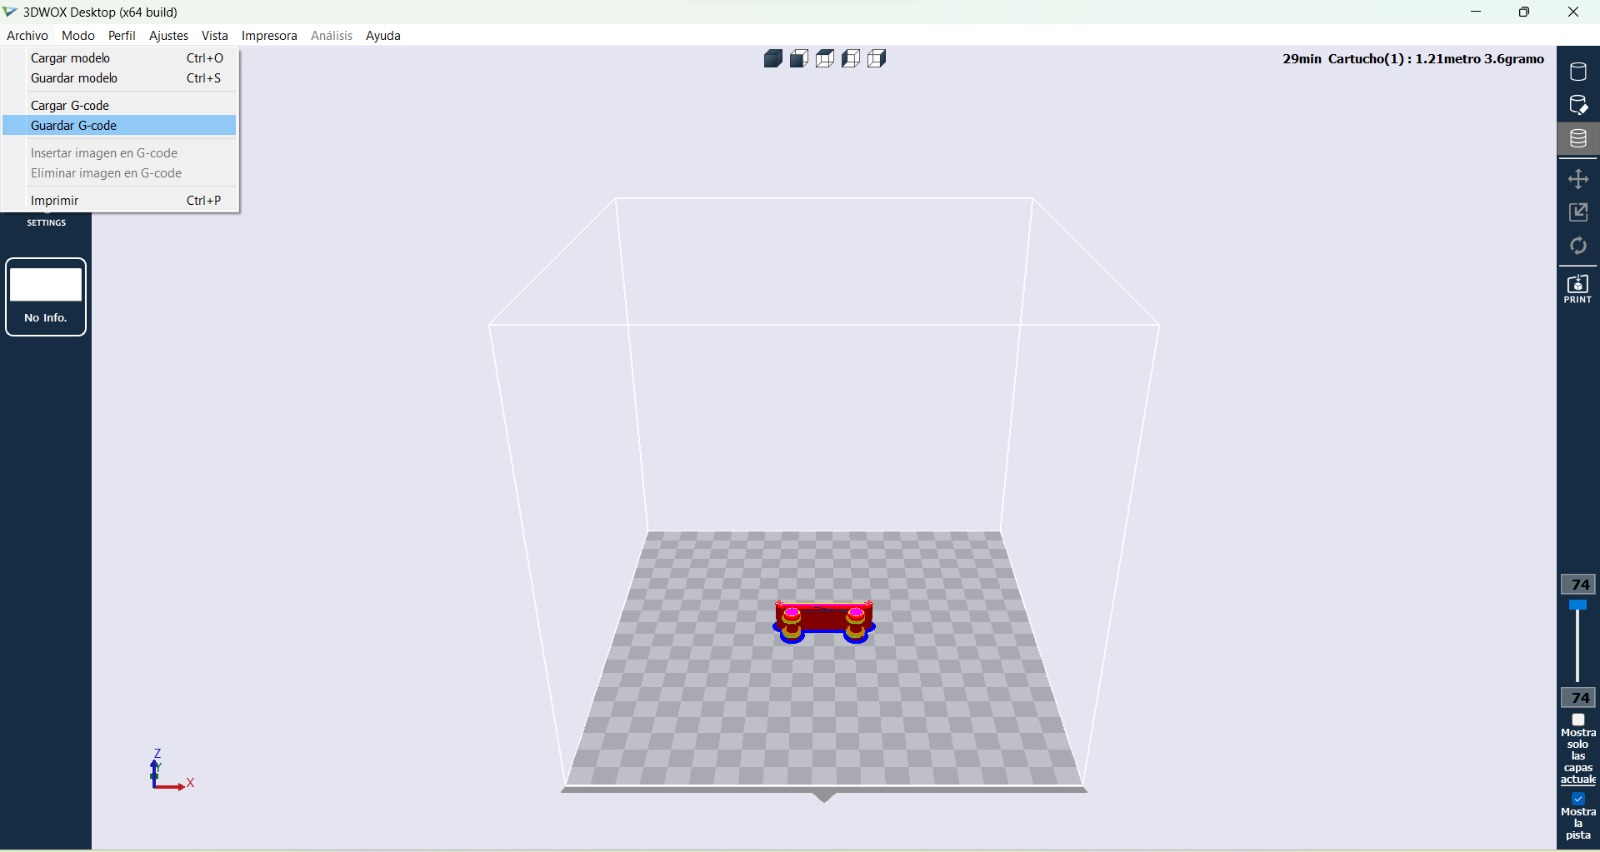
- When everything was as I wanted I went to "File" and then clicked on "Save G-code" to save it where I needed.
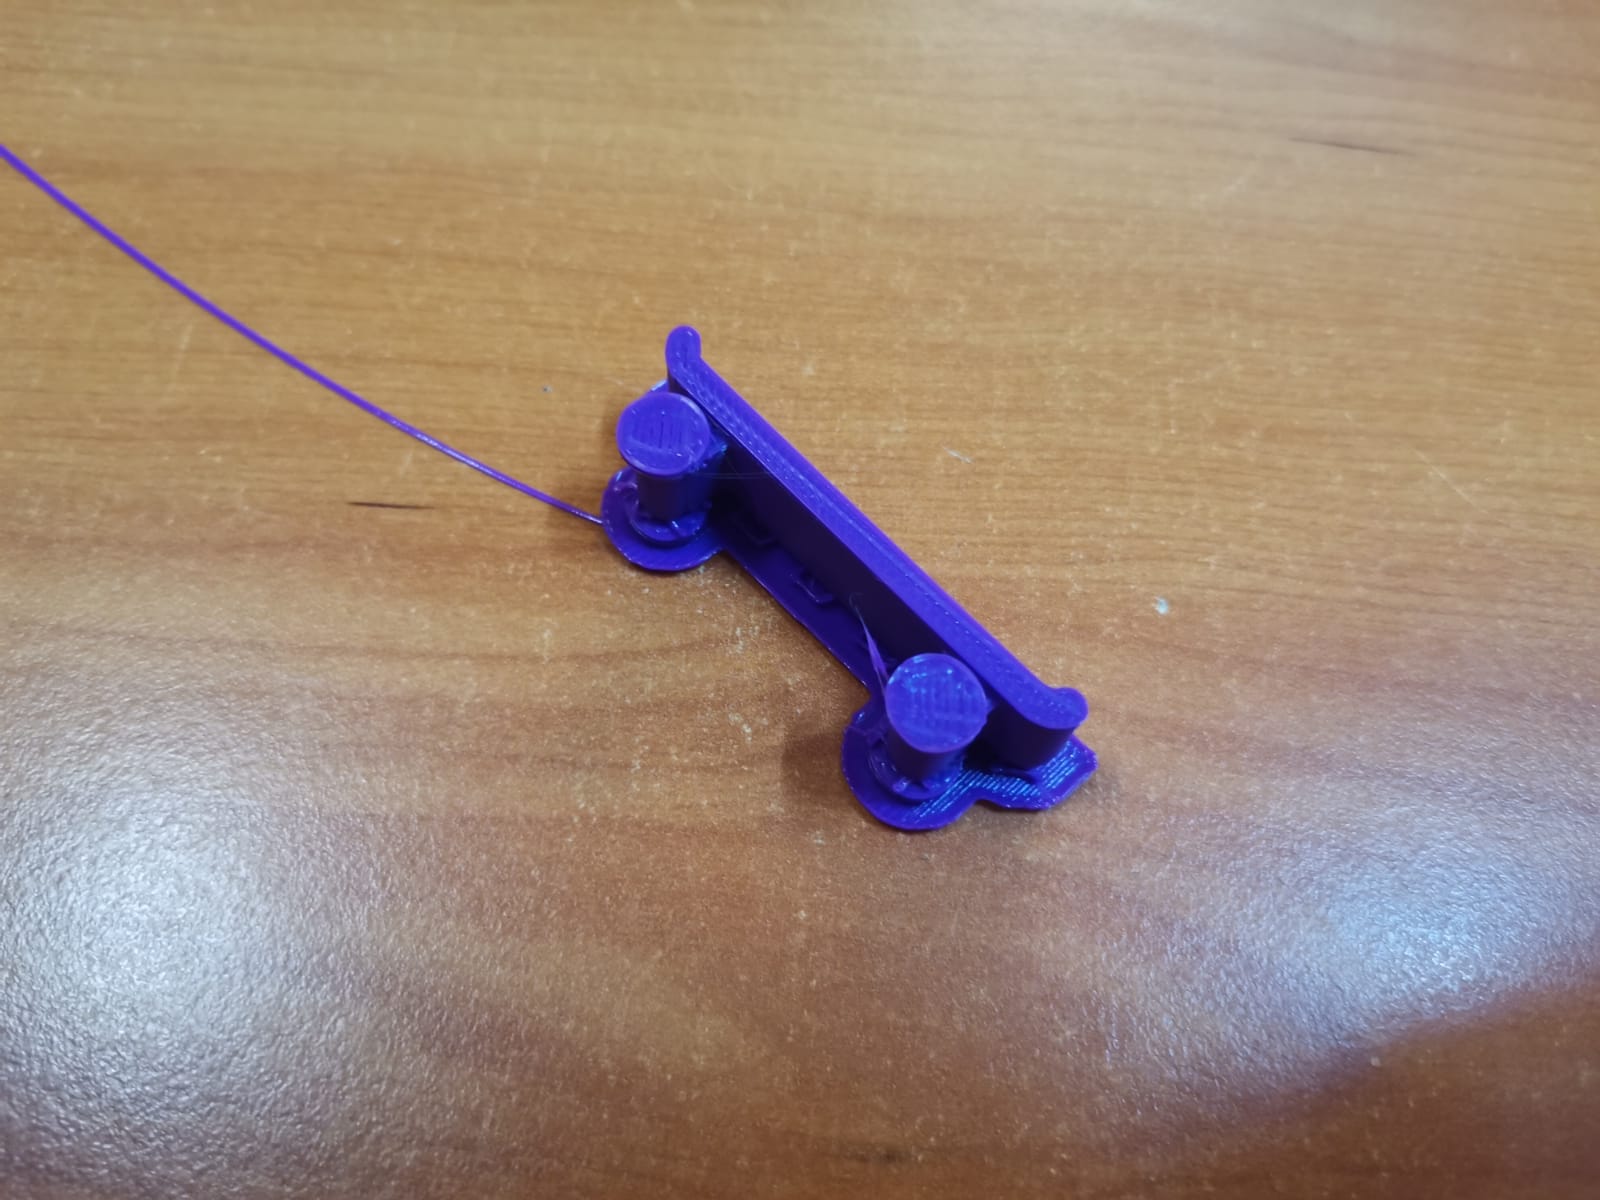
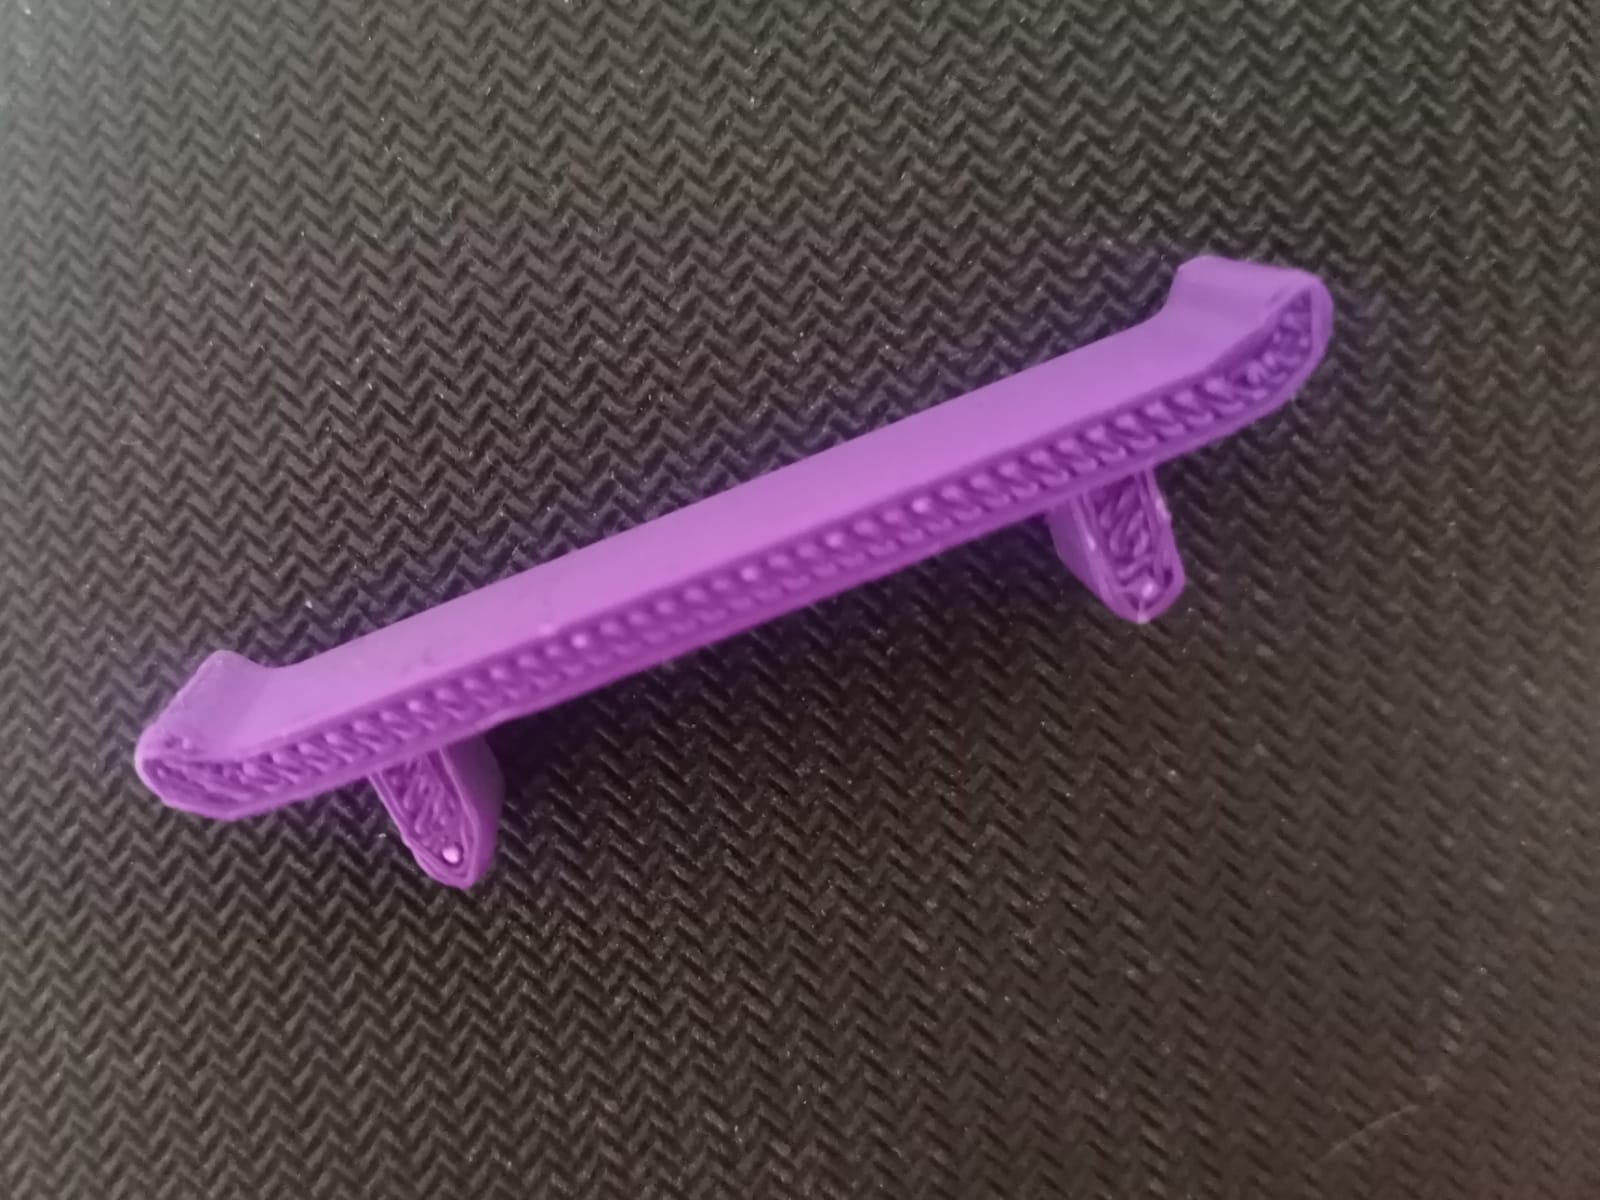
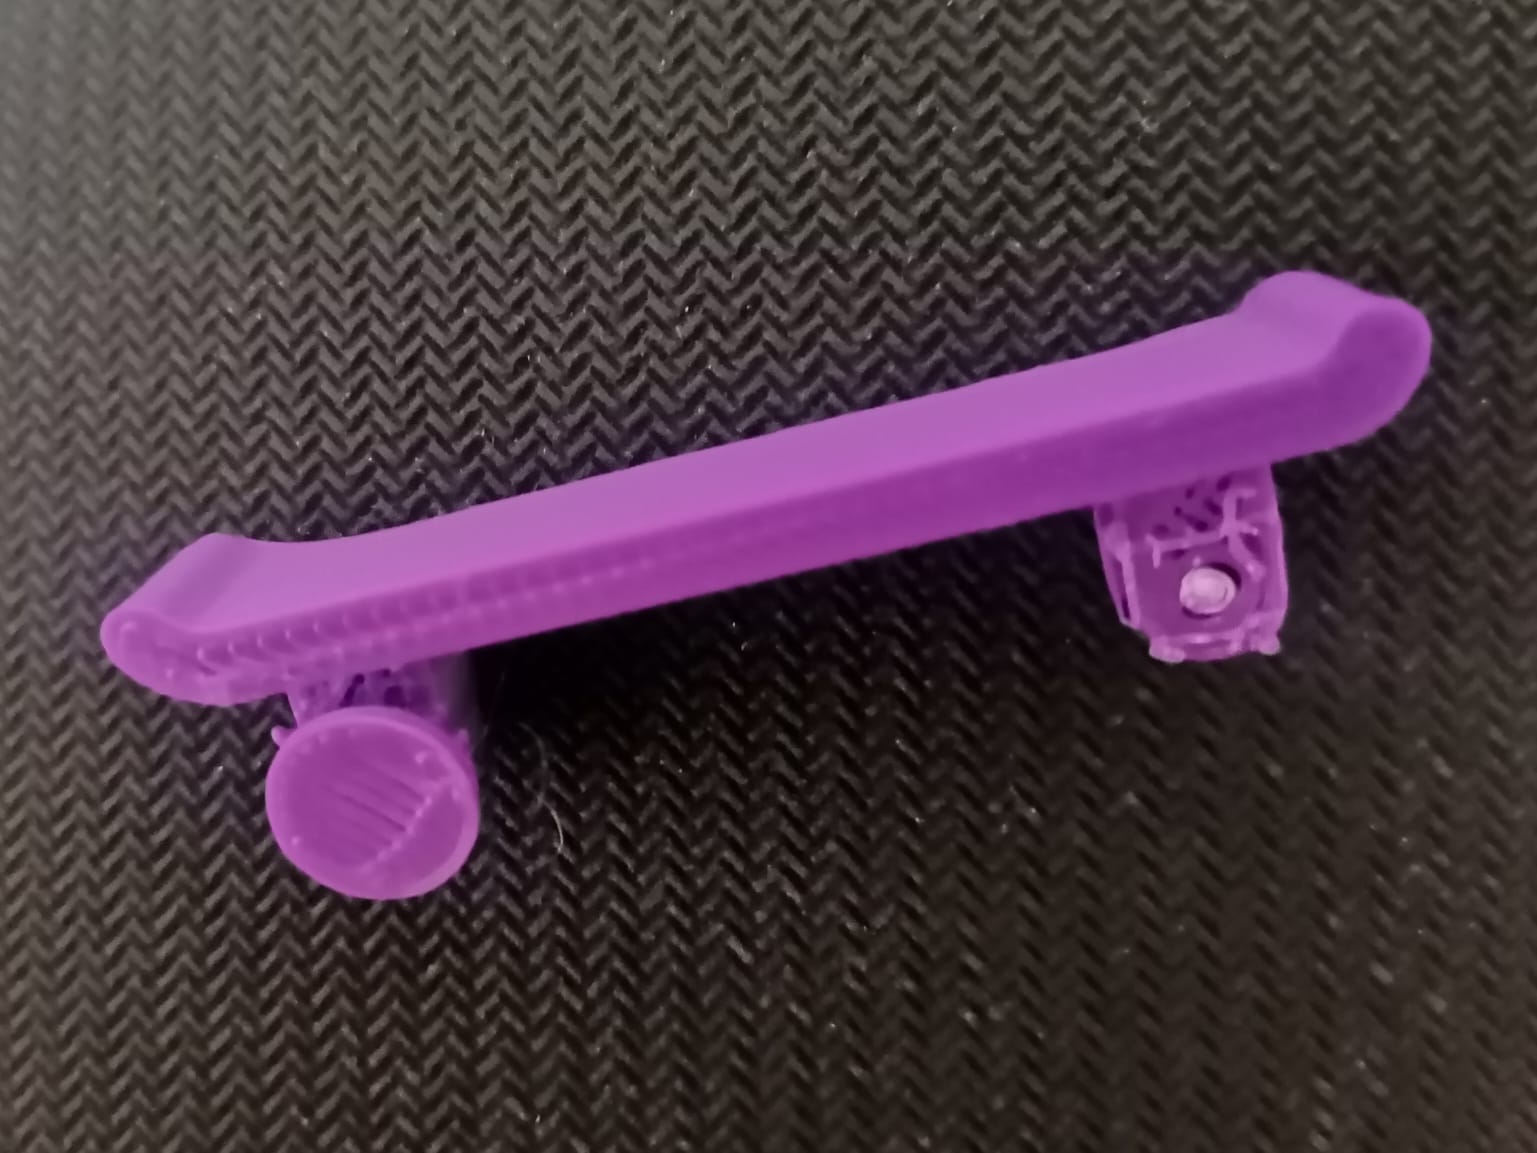
Final Result
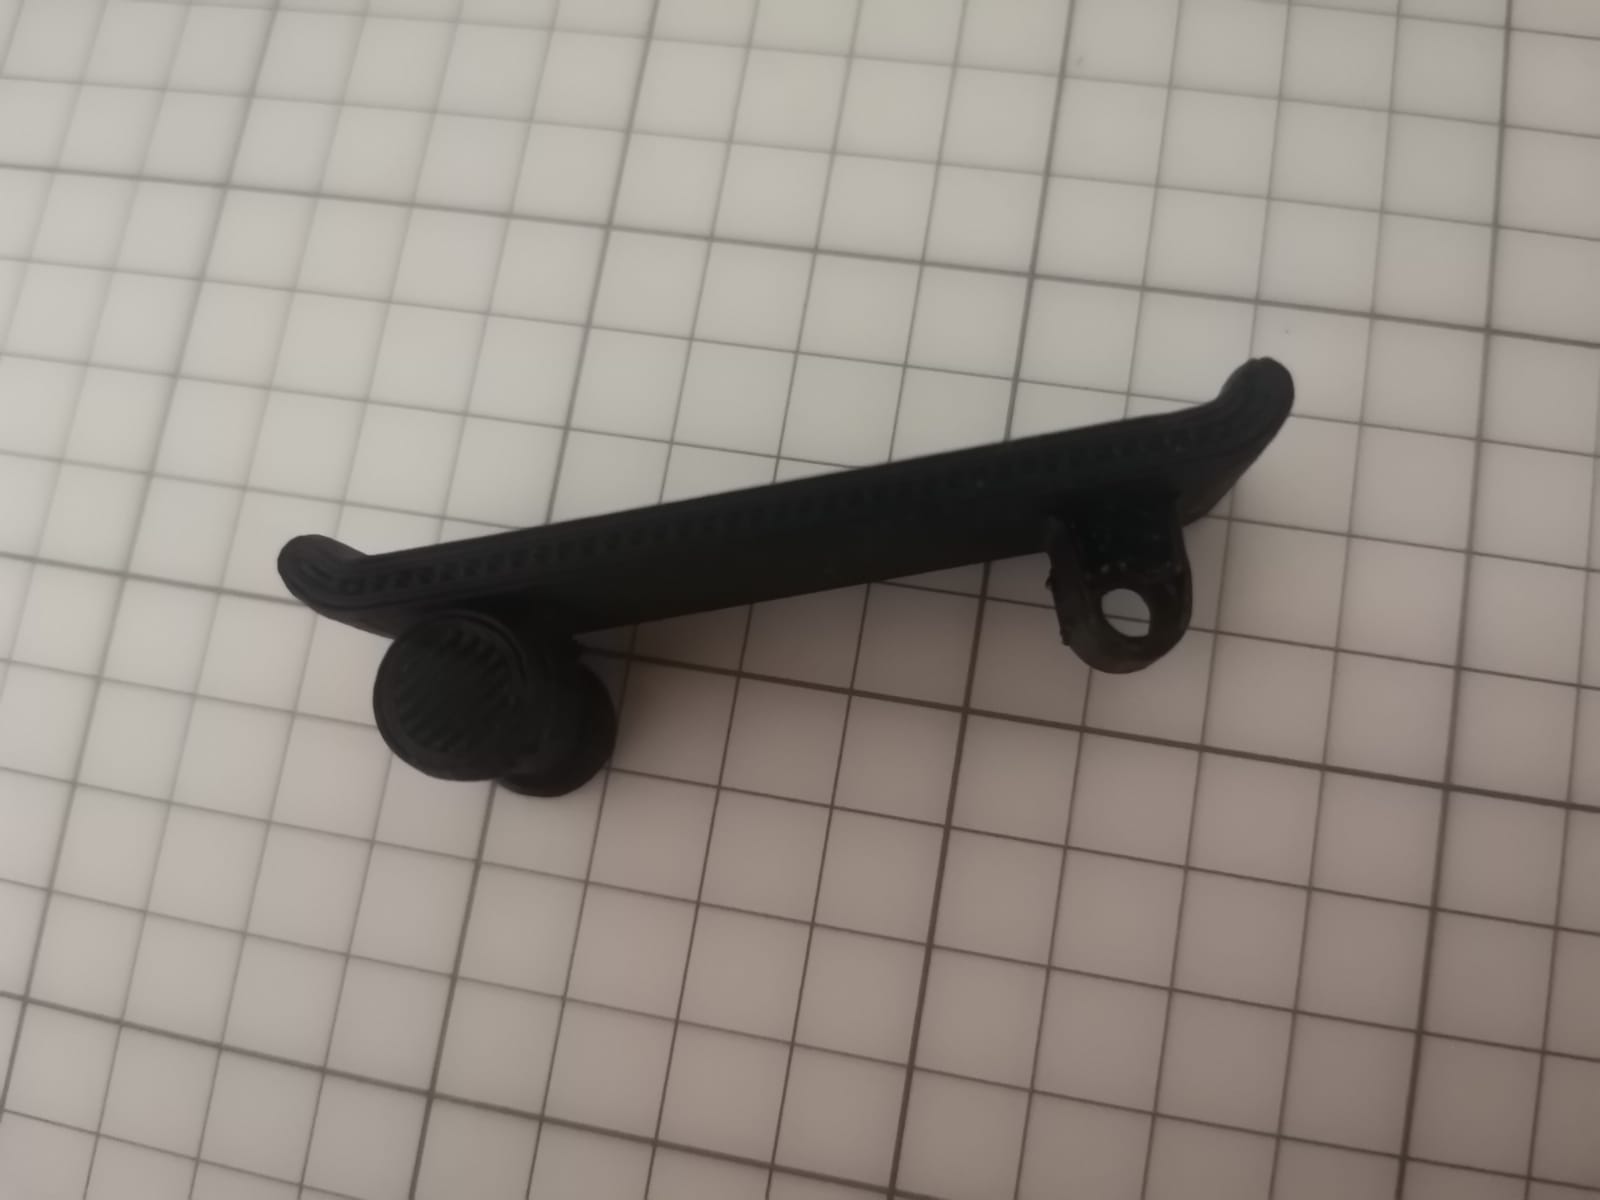
The final result, with the corrections on the clearance (which is explained next), is the following:
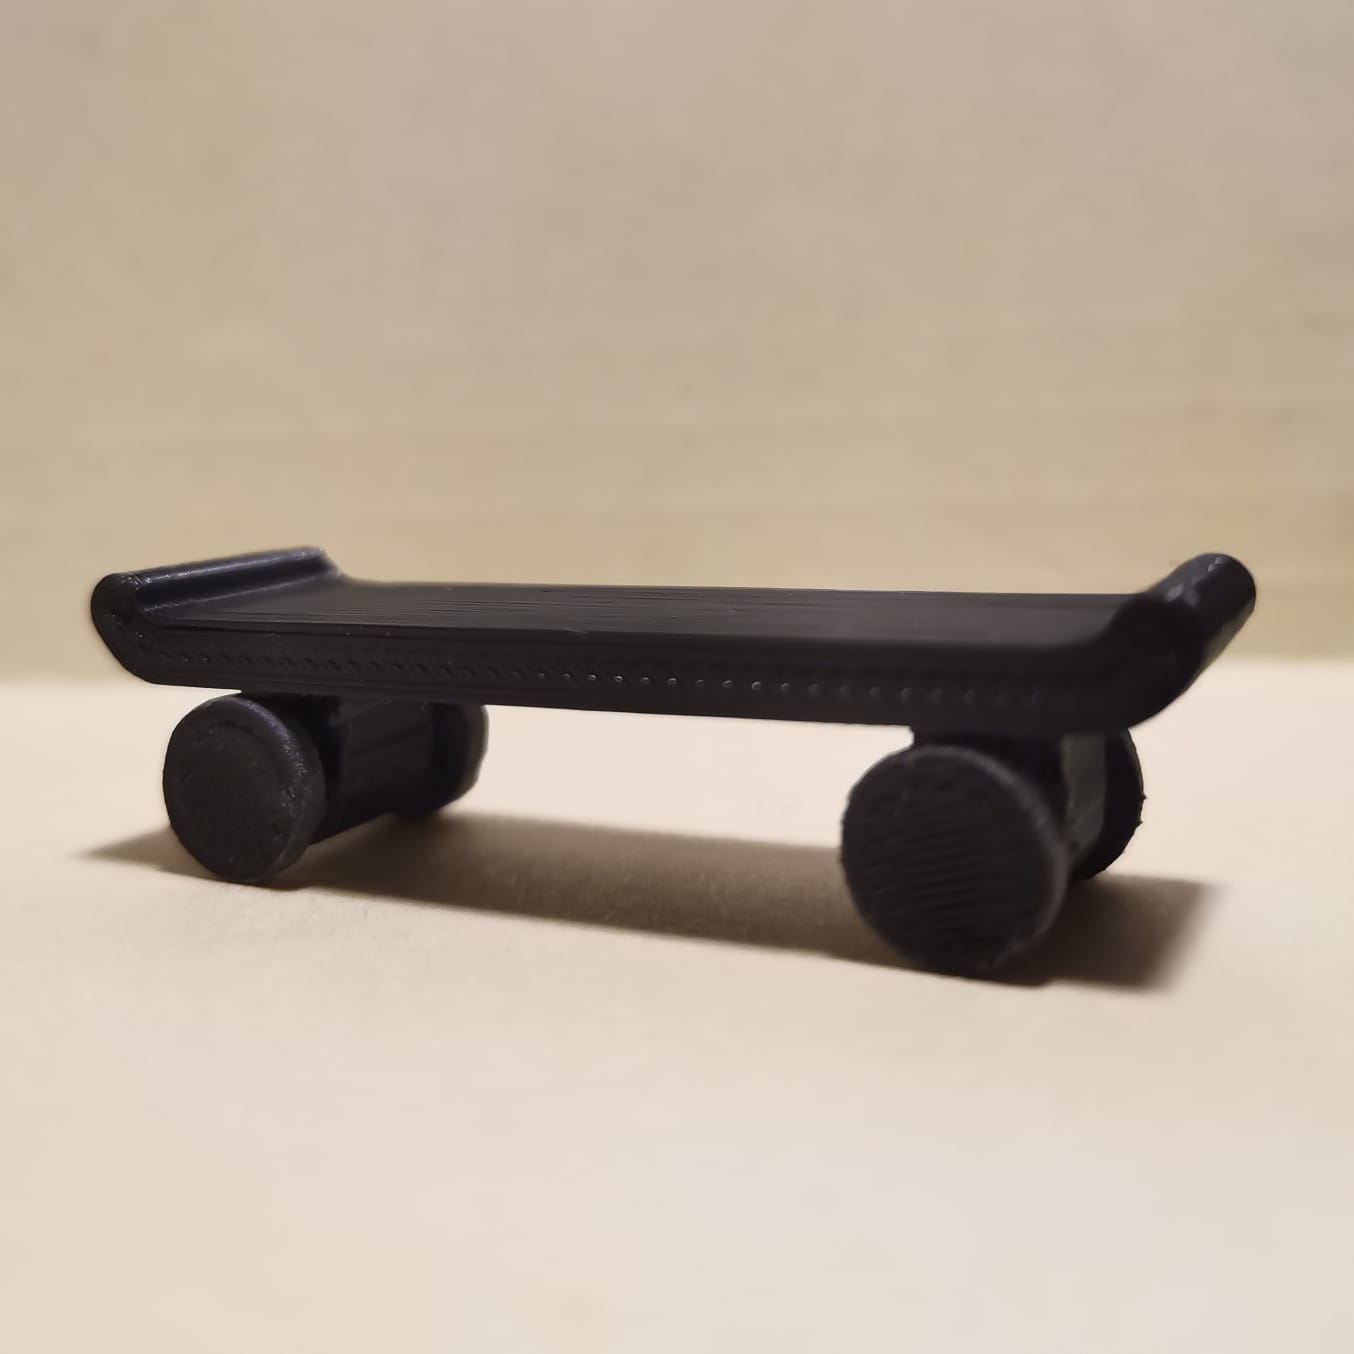
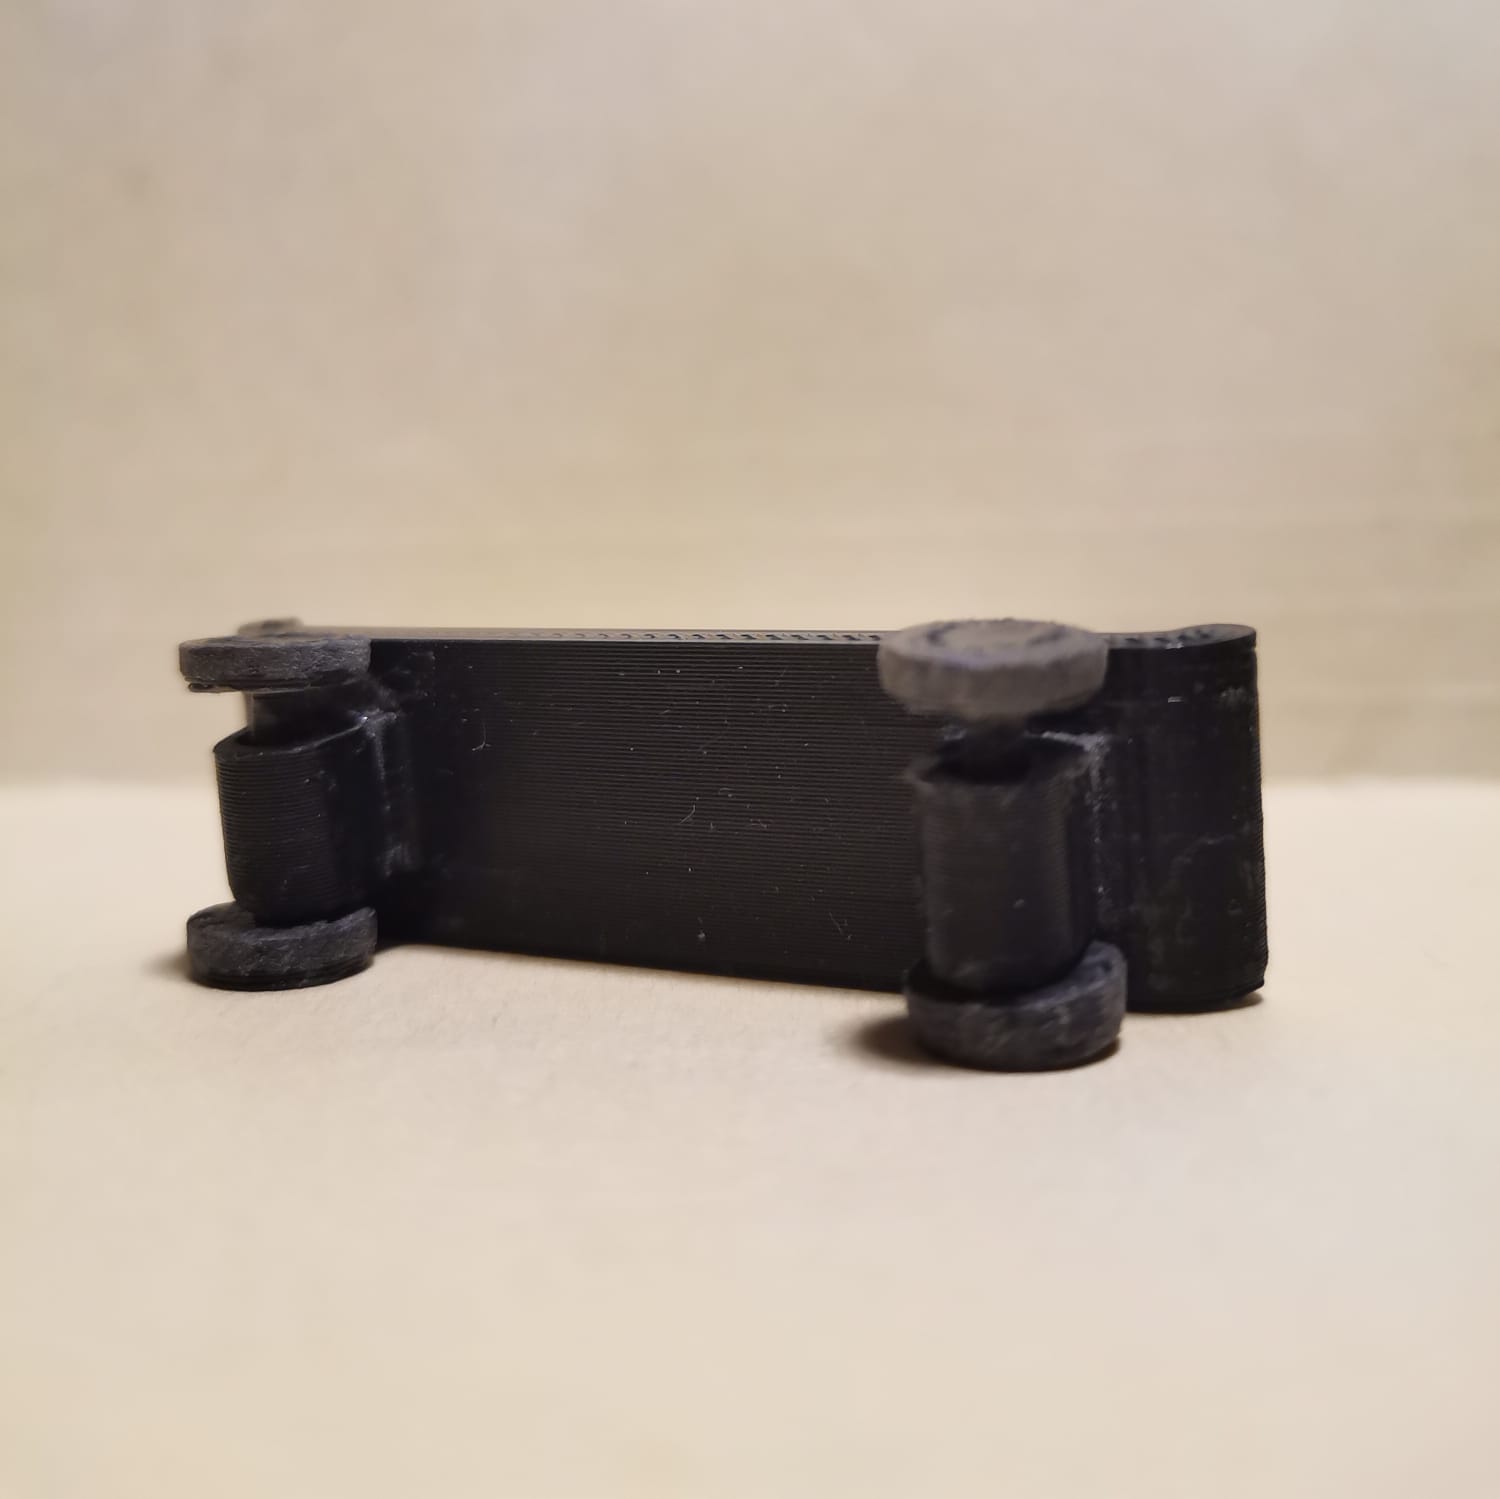
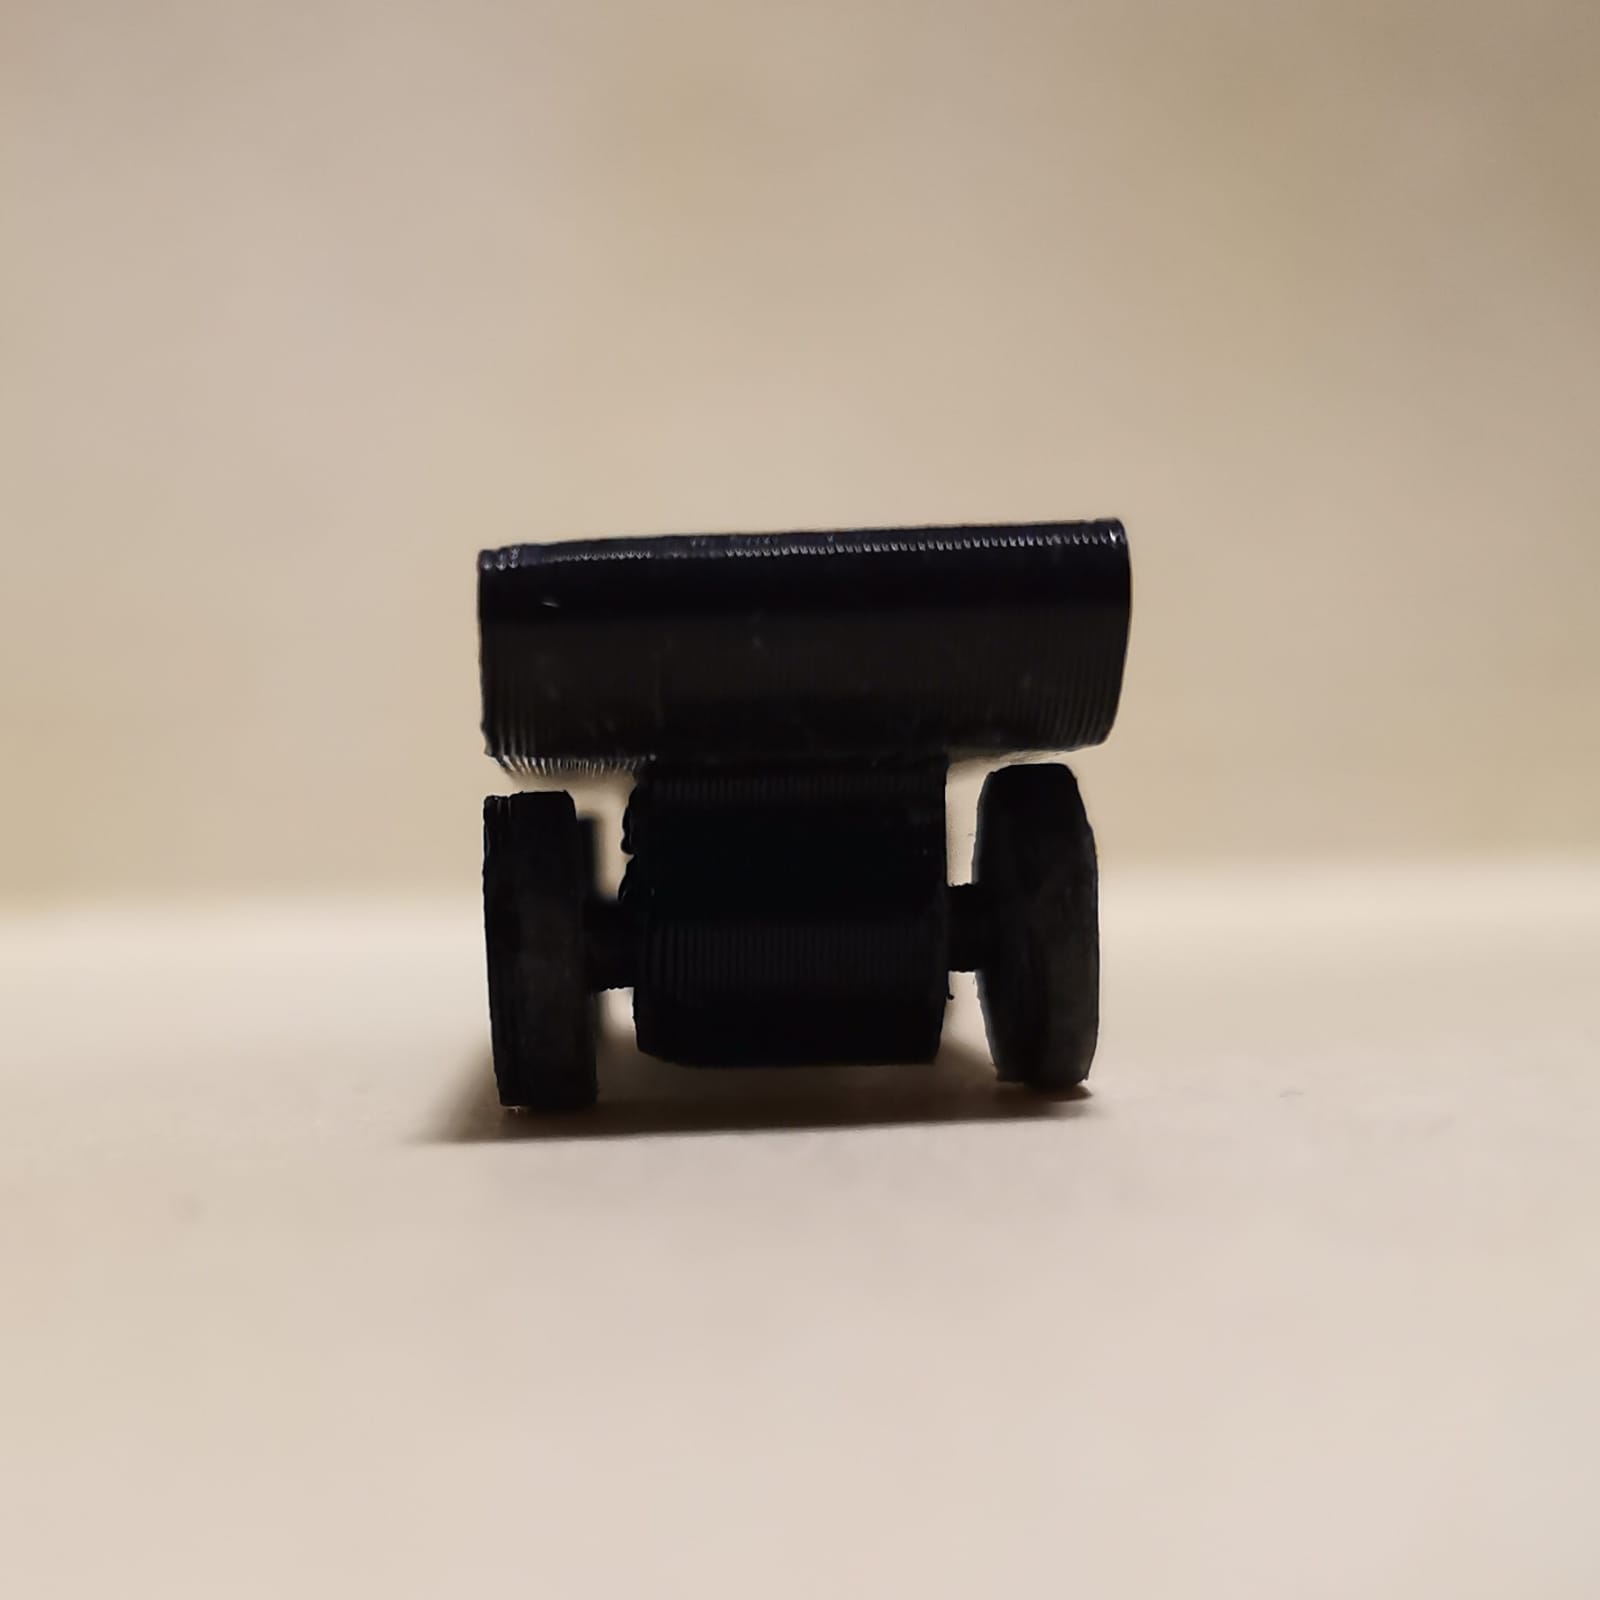

I have some considerations regarding what didn't go as expected due to something I didn't consider as I should. Originally I didn't pay much attention to the clearance, so it went pretty bad. I don't know why I didn't took proper care of the clearance and ended with a clearance of 0.2 mm and a union with a diameter of 1 mm (first picture). Then I gave it a wider diameter (2 mm) but a poor clearance (0.4 mm), so t didn't allow motion of the wheels (second picture). Finally, I changed the total width of the skateboard, the wheel support and the clearance (third picture).
3D Scanning
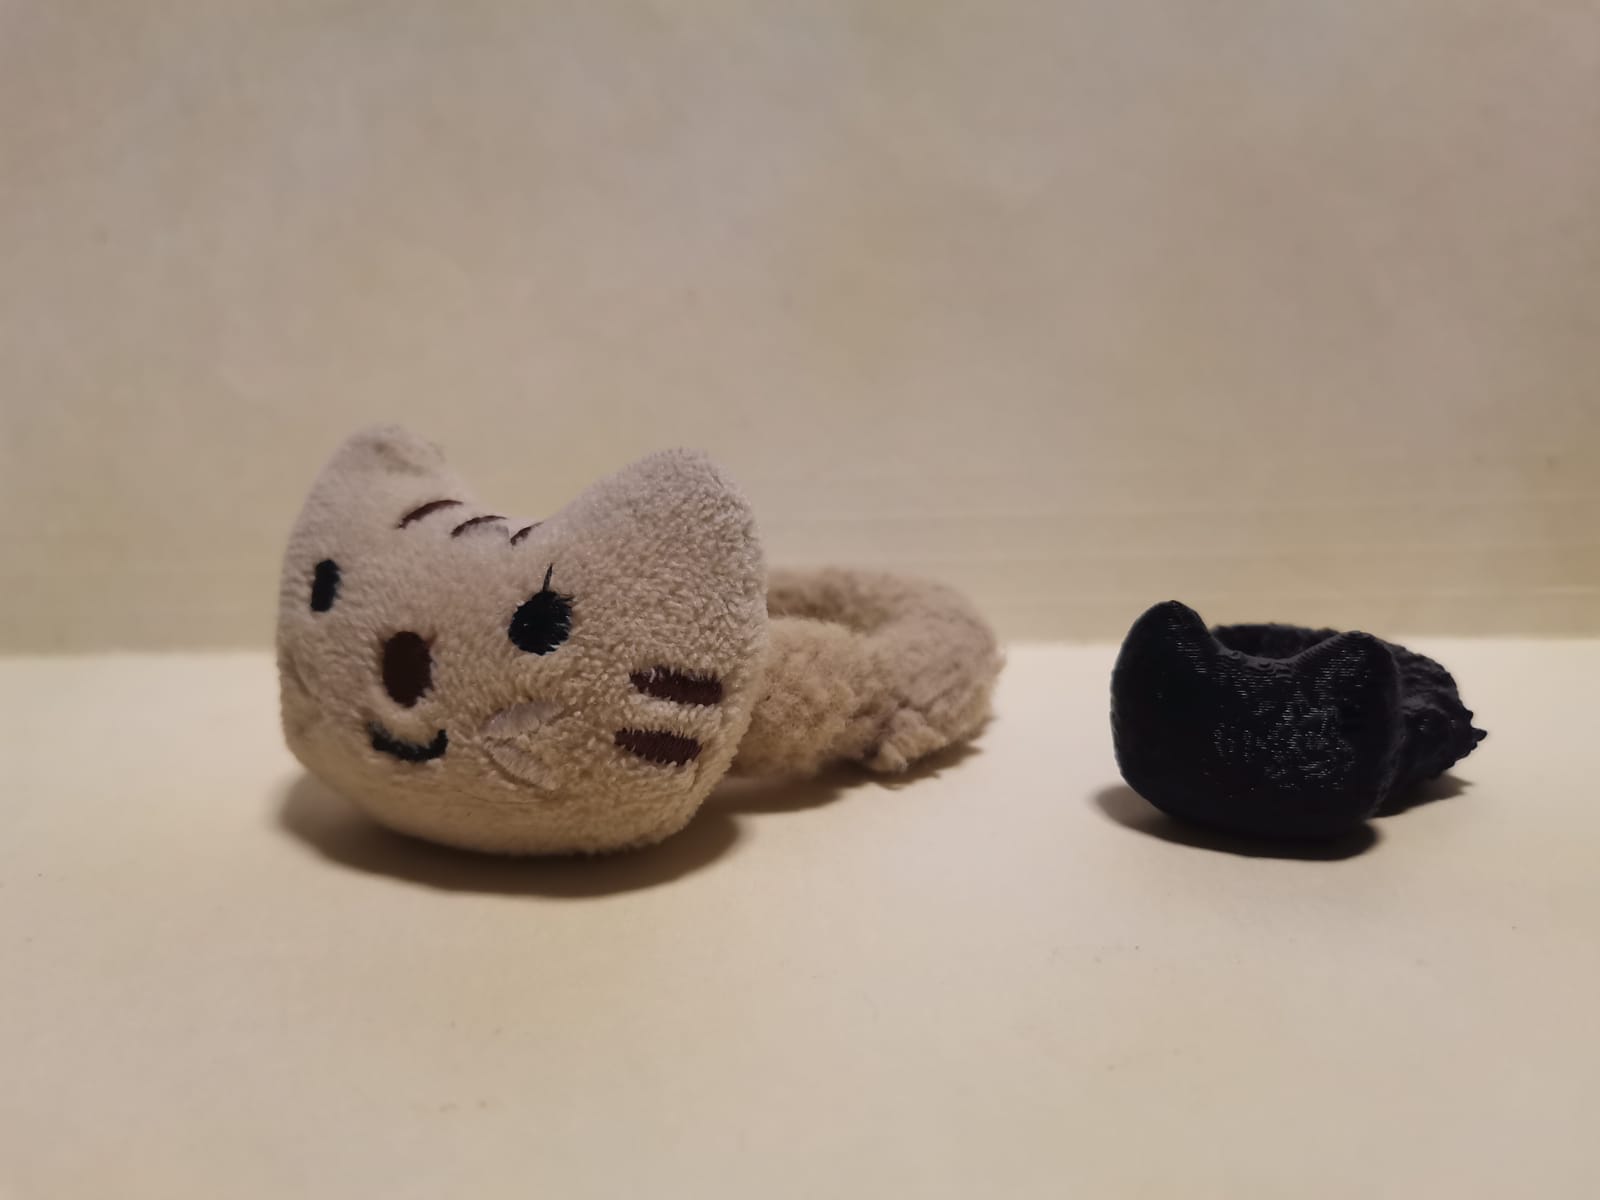
For the scanning I used EinScan and downloaded the EXScan Software to control it. This software is easy to use, but you have to be careful with the amount of light you have in the surroundings. Also it is important that the scanned object doesn't have shinning parts and very dark parts, because those cannot be scanned properly. At first I was going to scan my vochito USB, but it had many black parts that couldn't be scanned properly. That's why I scanned my cat ribbon.
This time the process was pretty simple and I only put the object on the plate and followed the directions:
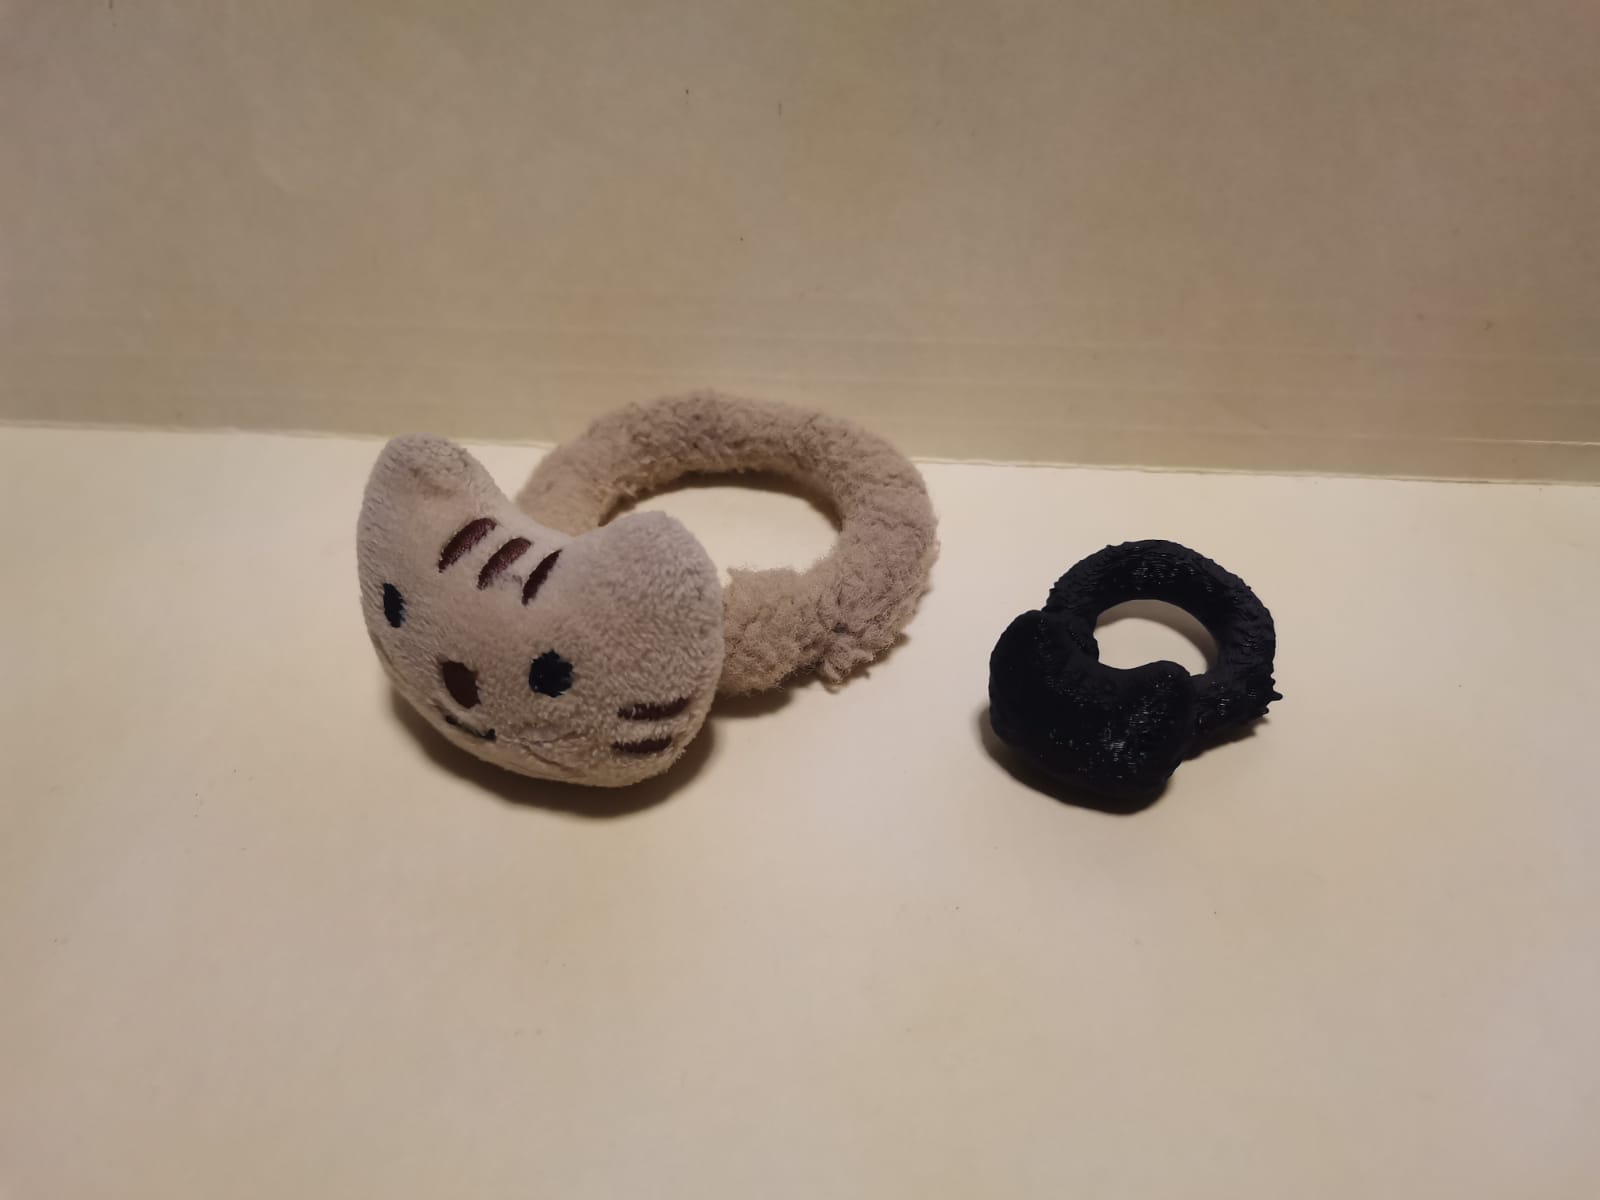
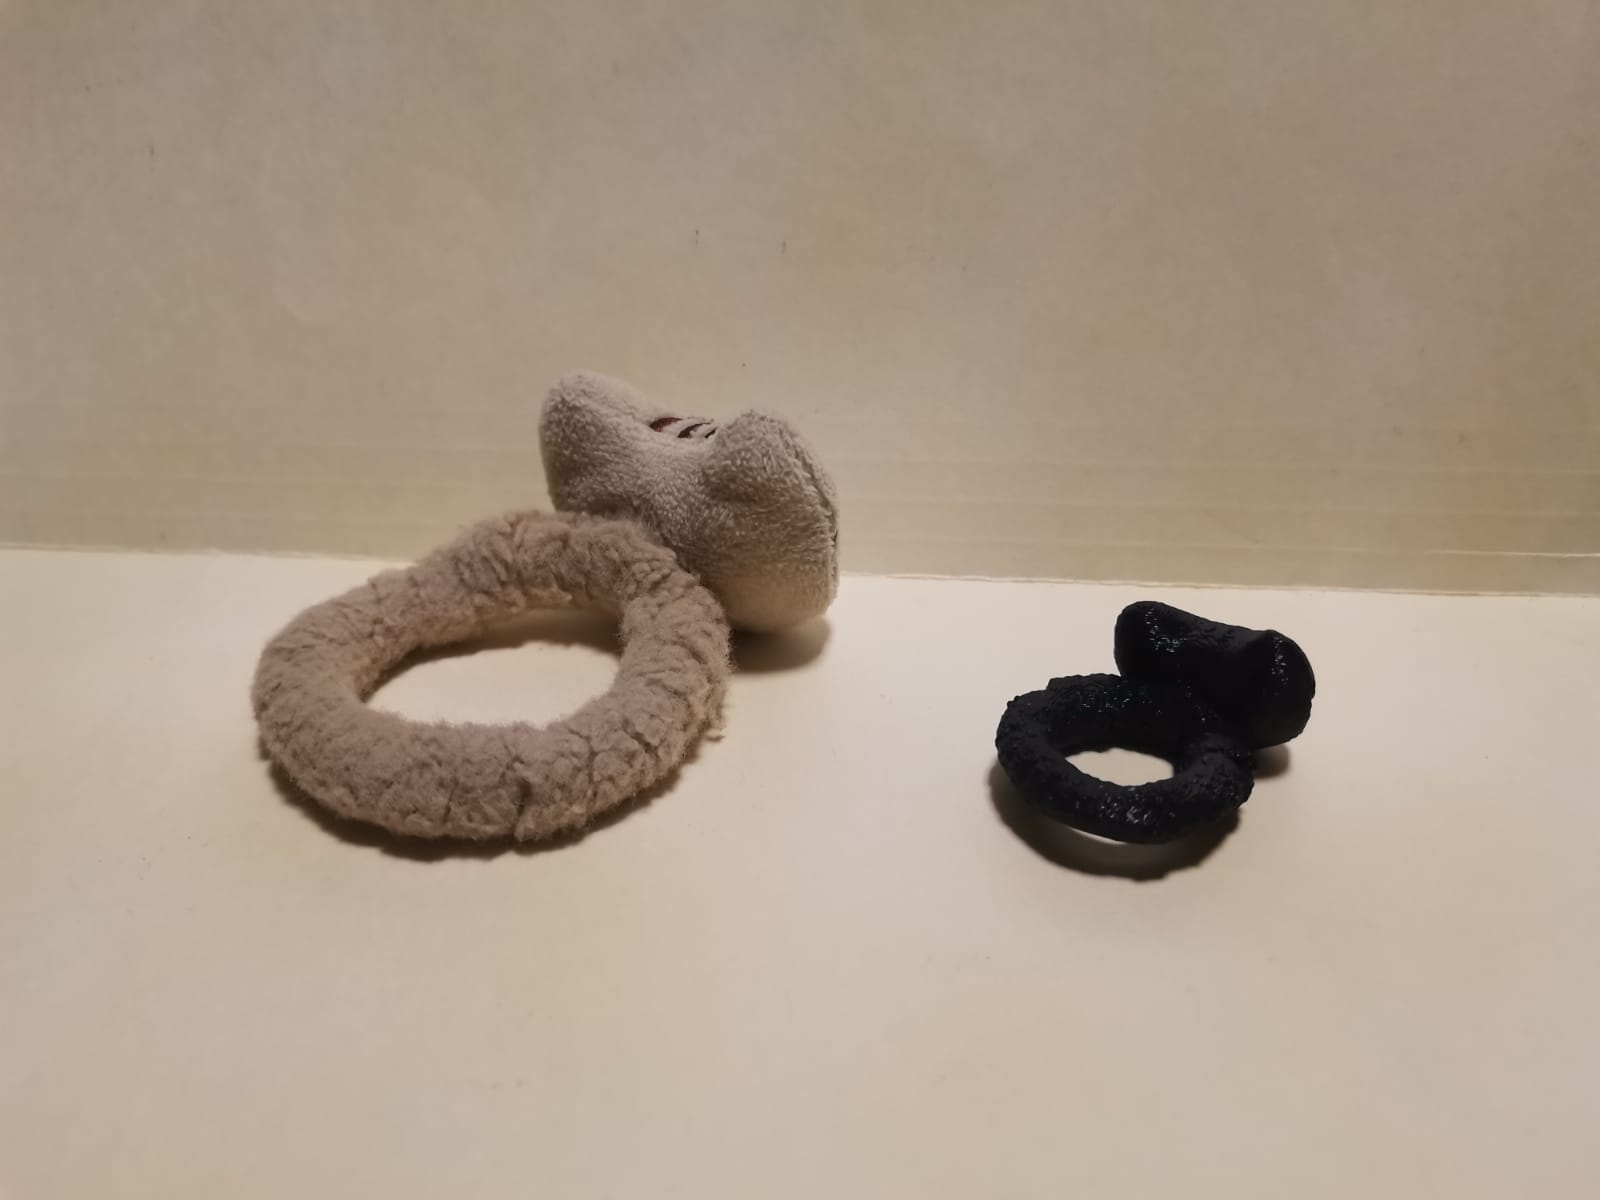
Then I used Cura to scale the ribbon in order to print it. On the left side is the original ribbon.