Week 7: Computer Controlled Machining
This week I entered the sacred temple of subtractive manufacturing: the CNC room. The challenge? Make something big. The deliverable? A coat hanger. Not a spaceship, not a chair, not a machine — just a humble, honest coat hanger that stands, holds jackets, and demands zero glue or screws to exist.
I designed it in Fusion 360, got betrayed by SVG exports, saved by Inkscape, and carved it into 6mm MDF glory using VCarvePro and Mach3. No screws, just clever slots. No assembly instructions, just vibes and friction-fit geometry.
This is the part of the FabAcademy where things get loud, dusty, and incredibly real.


Checklist
- ✅ Linked to the group assignment page
- ✅ Documented how I designed my object (something big)
- ✅ Documented how I made my CAM-toolpath
- ✅ Documented how I made something BIG (setup, fixings, joints, feeds & speeds, etc.)
- ✅ Described problems and how I fixed them
- ✅ Included design files and ‘hero shot’ of final product
Group Assignment – Safety, Specs, and Sanity
As part of the group assignment, we underwent CNC safety training. Because as fun as it sounds to send a 3mm end mill flying across the room, we decided to live another week instead.
Safety Training
- Wear protective eyewear and ear protection at all times.
- Never leave the CNC unattended while cutting. The MDF will not babysit itself.
- Use proper footwear – no sandals. CNC routers hate exposed toes.
- Secure your workpiece properly. If it flies off, that’s on you.
- Check your toolpaths and simulate before cutting. This is not a place for surprises.
Machines Available
| Machine | Specs | Comments |
|---|---|---|
| Asia Robotica Shop-1325 | 1300x2500mm bed, 220V, 3HP spindle, vacuum table | Our go-to machine. It purrs... if you don’t mess up Z-zero. |
| University-Made CNC | 600x900mm working area, manual clamps | Still kicking. Good for smaller jobs or personal trauma. |
Materials – What You Can and Can't Cut
| Material | Allowed | Notes |
|---|---|---|
| MDF | ✅ | Dusty as hell, but cheap and reliable. Our favorite frenemy. |
| Plywood | ✅ | Watch out for voids and blade murder. |
| Solid wood | ✅ | Beautiful but pricey. Don’t cry when it burns. |
| Aluminum | ❌ | Not on our machines. Go find a waterjet or a friend with money. |
| Acrylic / Plastics | ⚠ | Melts if feed rate is too low. Smells like doom. |
| Foam | ✅ | Dusty but harmless. Great for testing or cosplay nonsense. |
Design Rules
- Kerf: Always consider tool diameter – 3mm endmill = 1.5mm offset each side.
- Tabs: Use them. Or spend an hour fishing parts out of a spinning mess.
- Dogbones: Internal corners need them. Your parts will hate you if you forget.
- Slot Fit: Test fit with the material. Don’t assume 18mm MDF is 18mm. It’s not. Ever.
- Depth per pass: Stay within reason. 1–2mm for MDF works fine. Don’t get greedy.
How I Became a Coat Hanger Carpenter
Design – Fusion 360
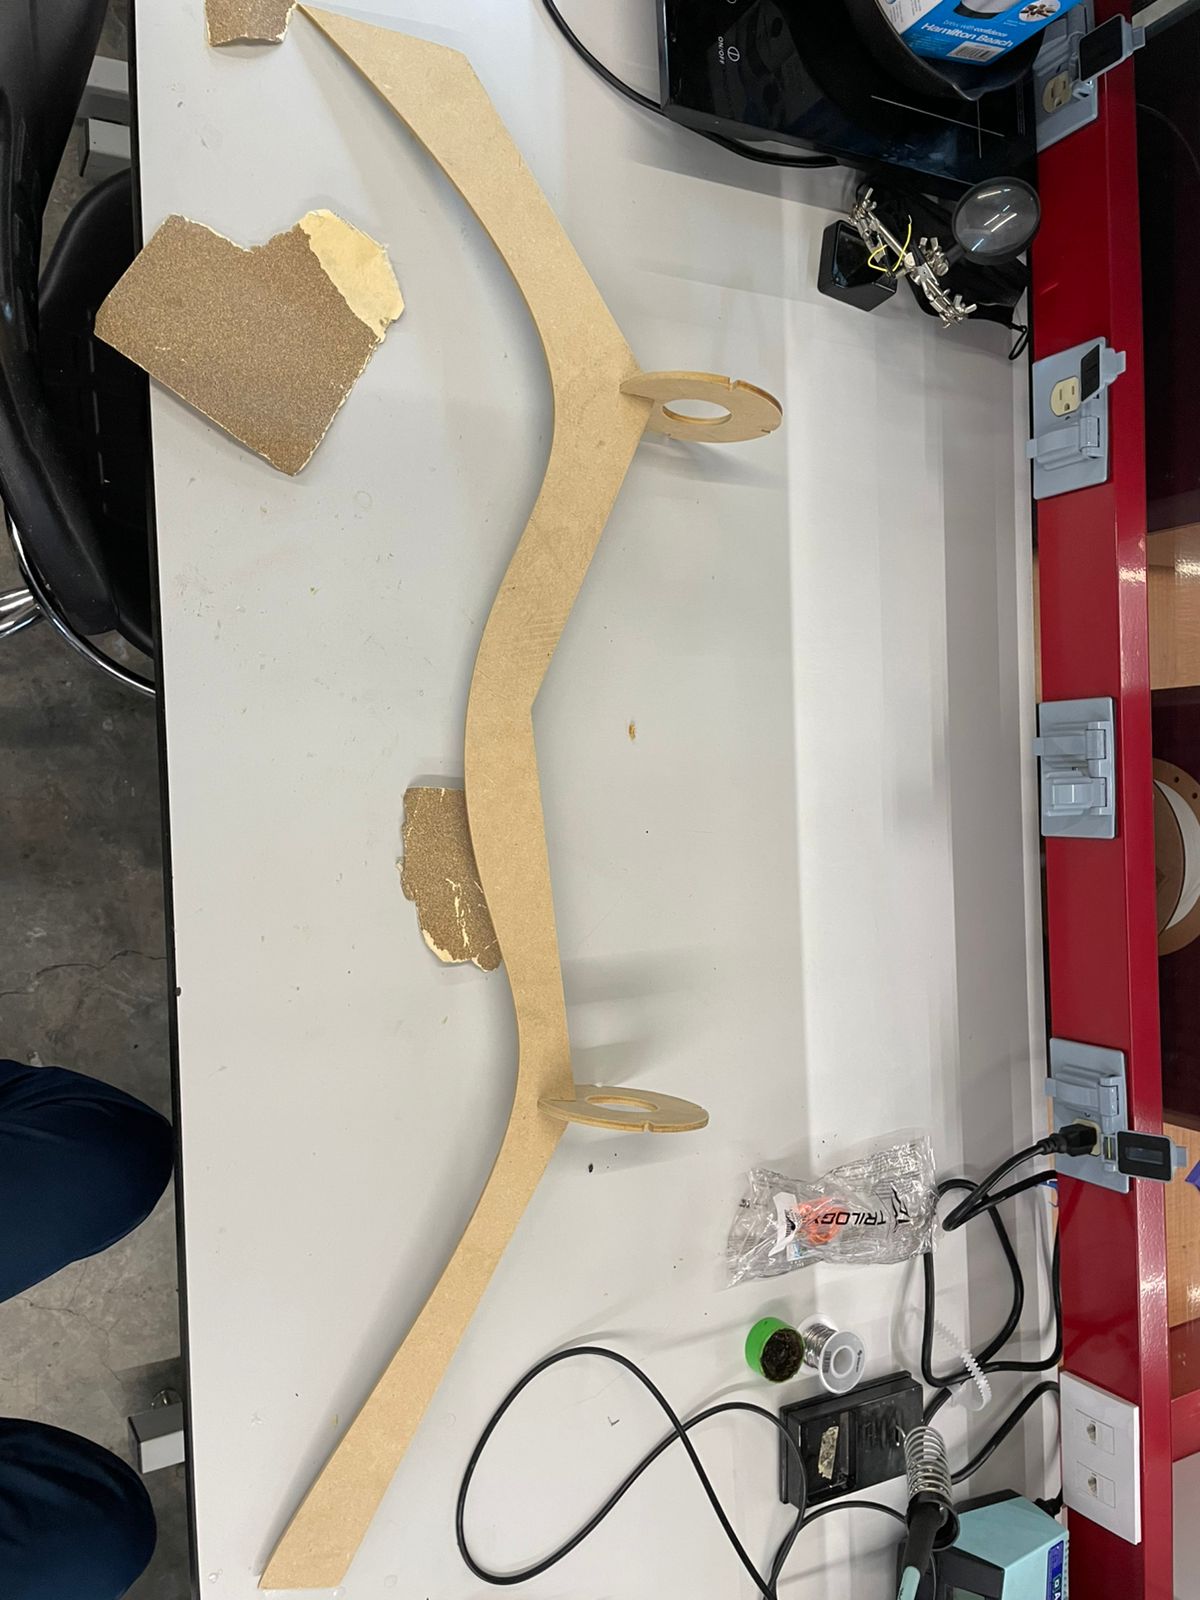
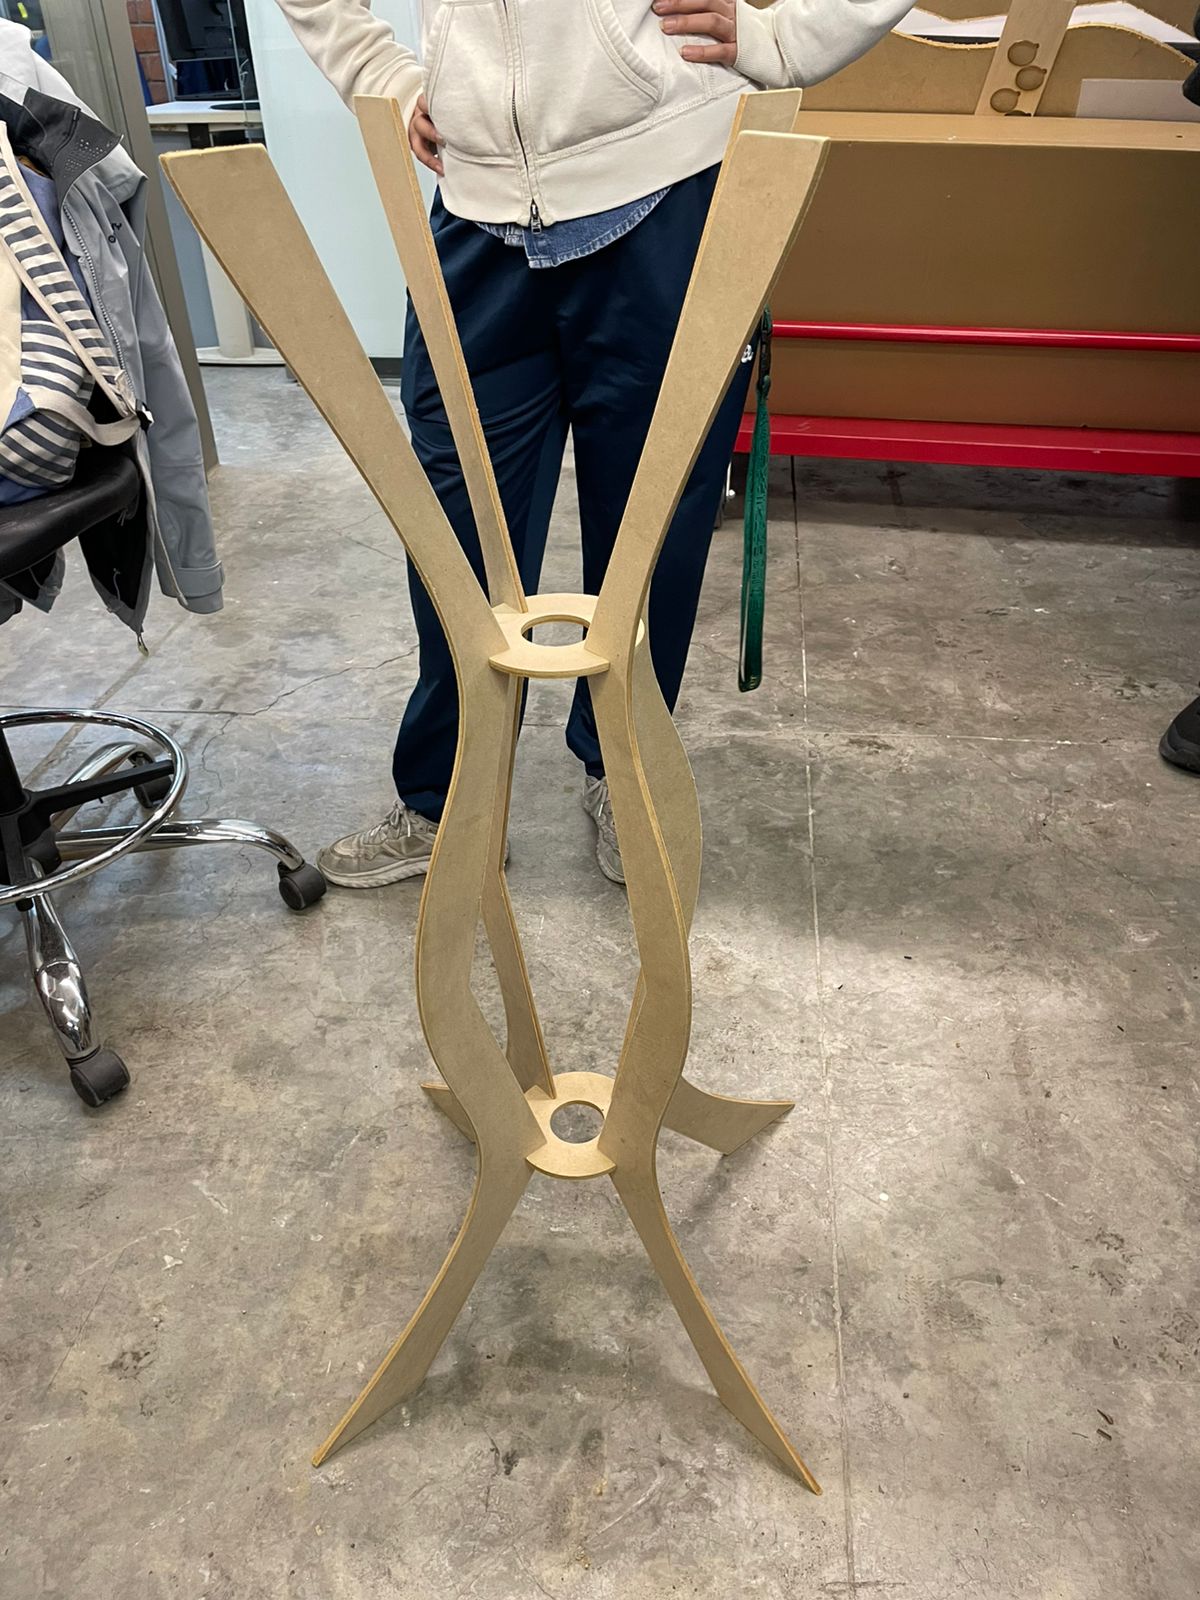
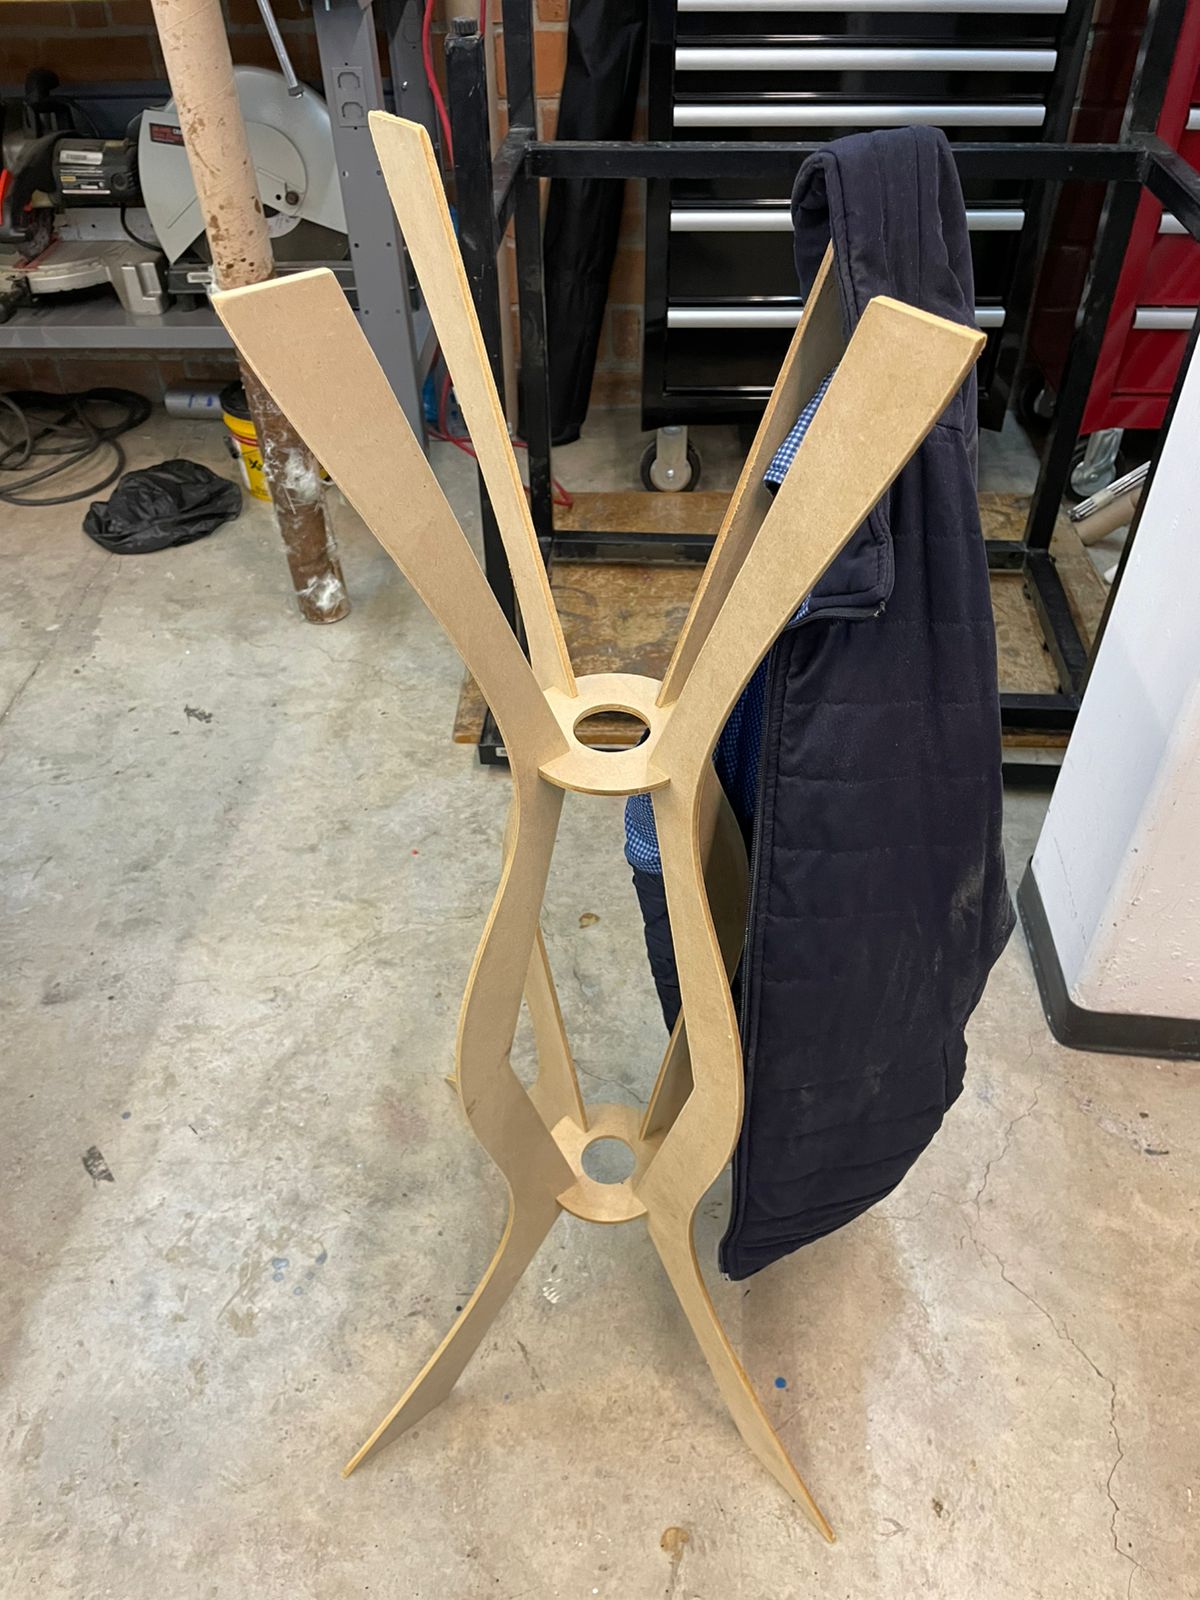
I used Fusion 360. Not because it’s perfect, but because it lets me pretend I'm a real designer. I sketched a single leg, then used the circular pattern tool to clone it three times. Easy. Lazy. Efficient.
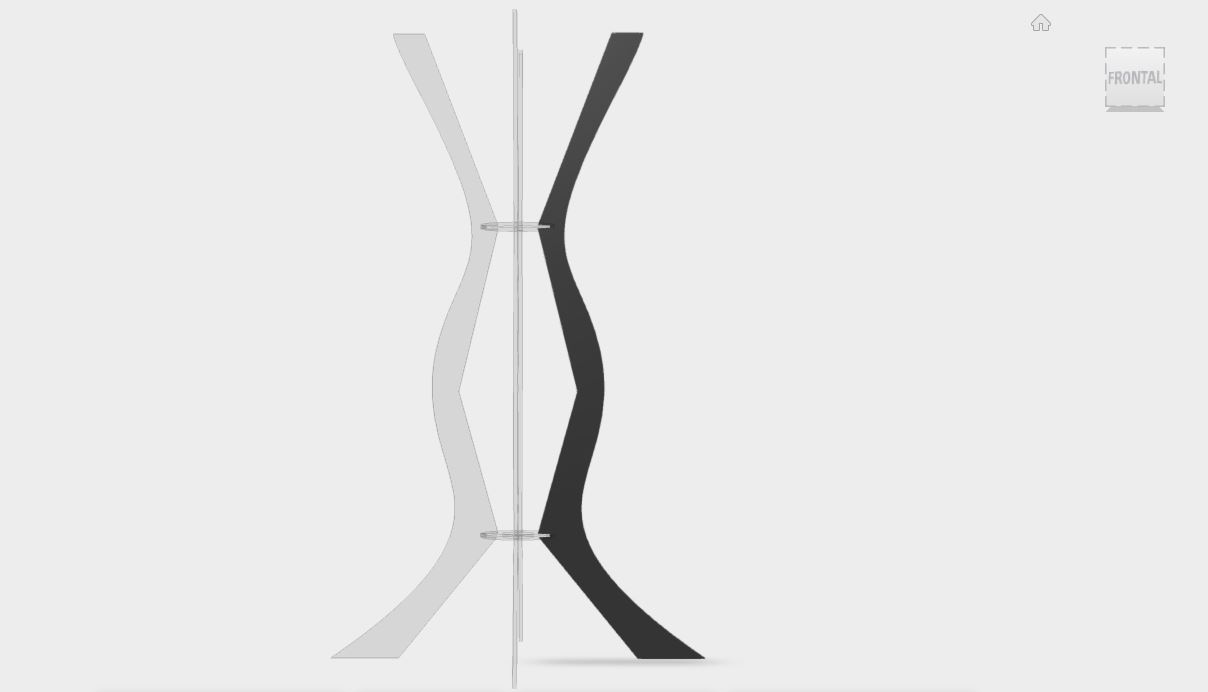
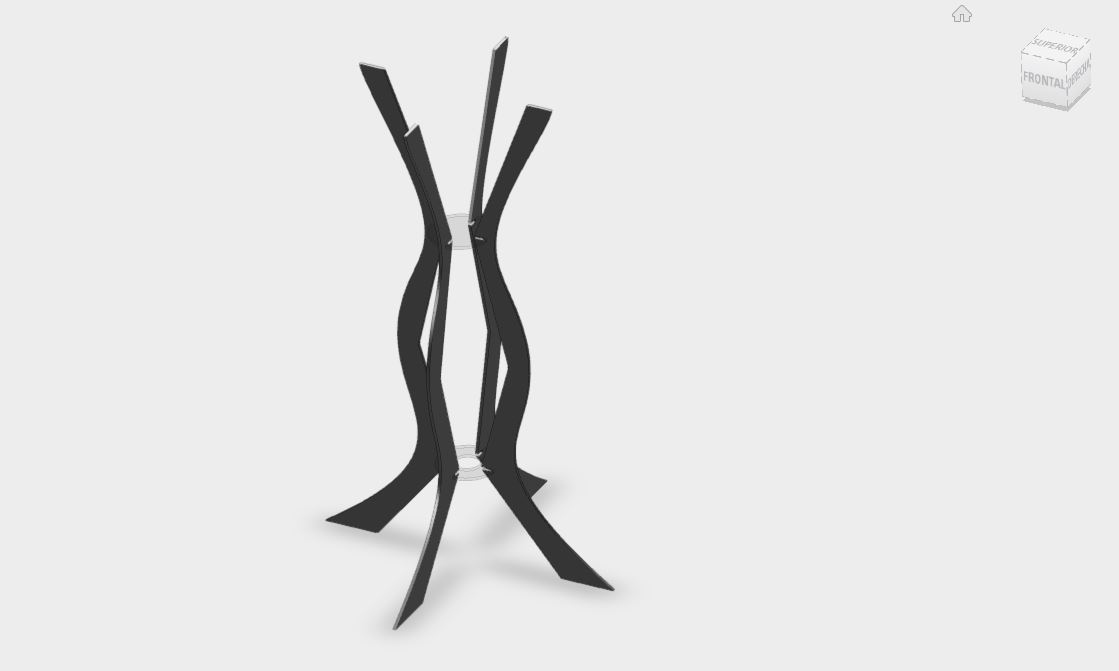
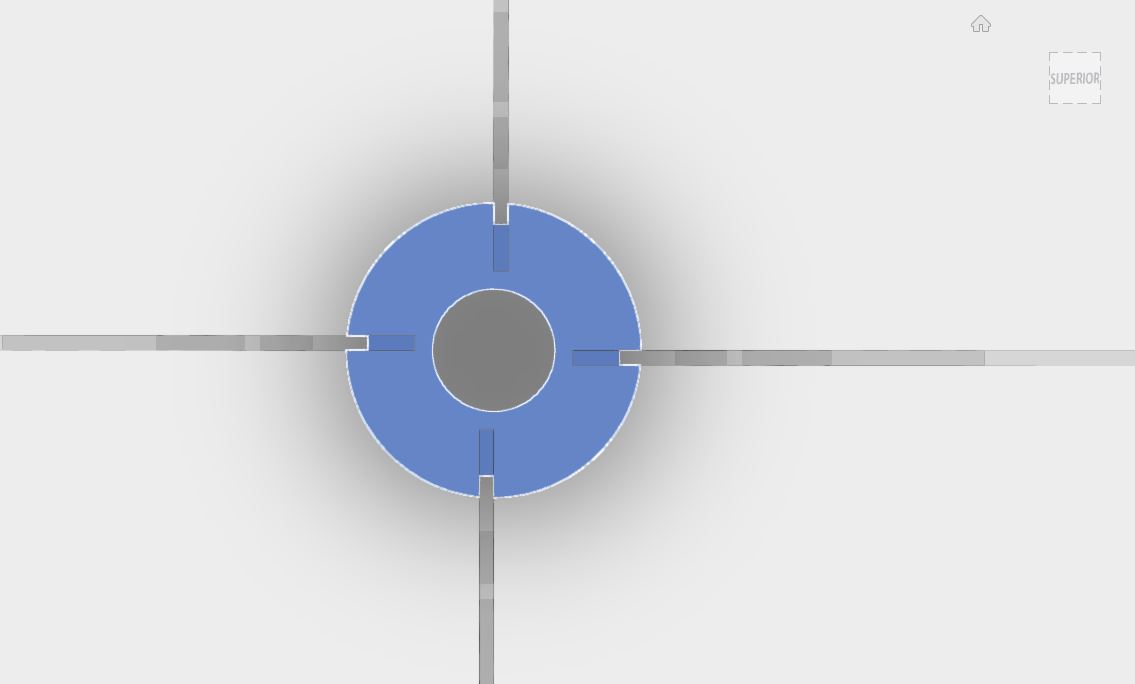
Then I made two circles. Not for decoration — these suckers hold the legs together. Placed them at different heights for stability (and to look slightly intentional).
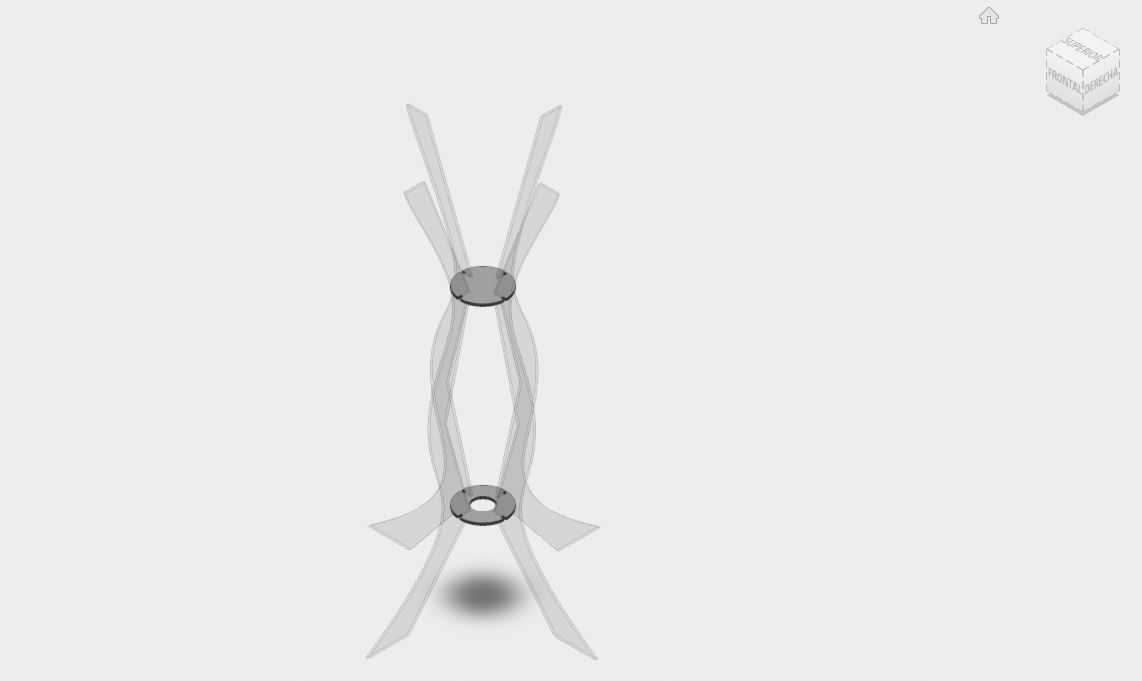
With some basic boolean operations (combine, subtract, repeat), I made notches on everything. Now the parts slot together without glue or nails. Welcome to the friction-fit cult.

Last step in Fusion? Export to SVG. And that, dear reader, is where the problems began. I had already tackled this dragon two weeks ago using the Shaper Utilities add-in — you can find that glorious hack here in Week 3 .
CAM – VCarvePro & the File Format Fiasco
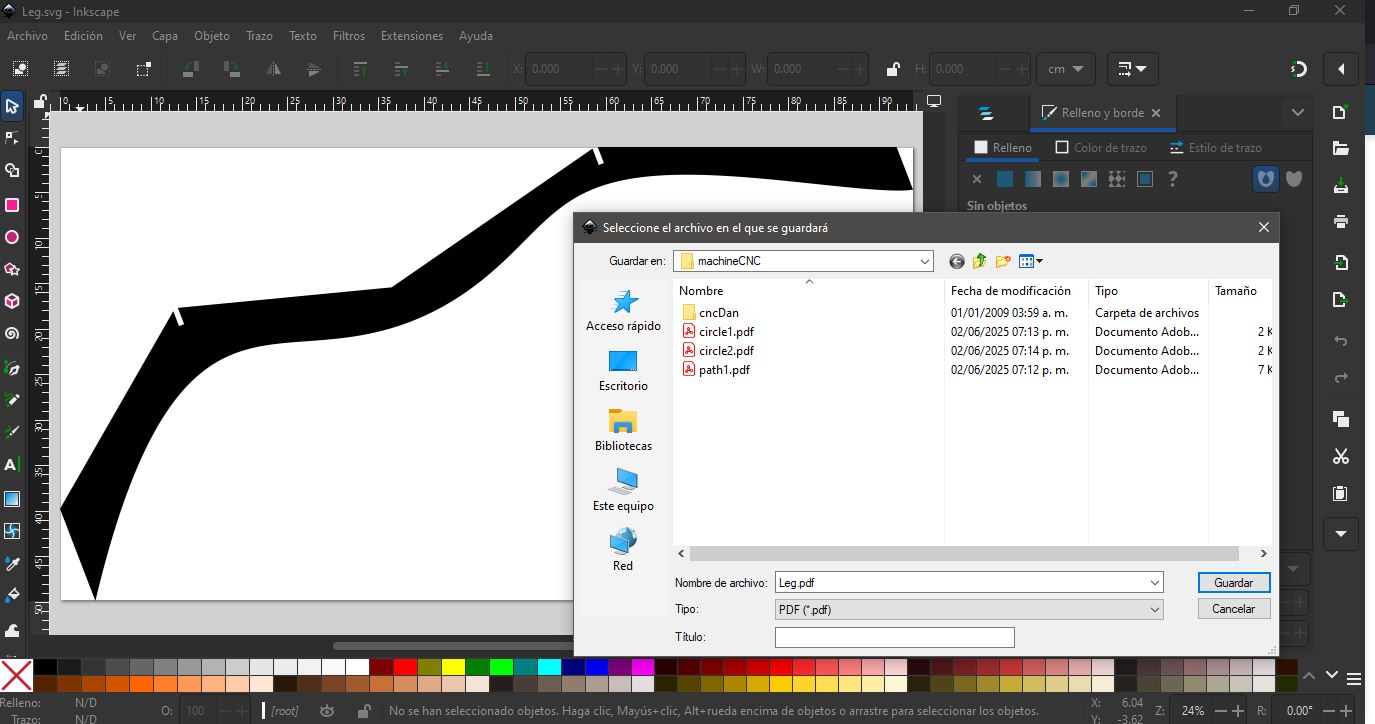
Opened the SVG in VCarvePro... and the dimensions were garbage. Like, resized-to-oblivion garbage. Went back to Fusion, double-checked, nothing helped.
Luckily, VCarve takes PDF. So I ran the SVG through Inkscape, saved it as a PDF, and voilà – dimensions were back to normal. PDF, the real MVP.
From there, VCarve was smooth:
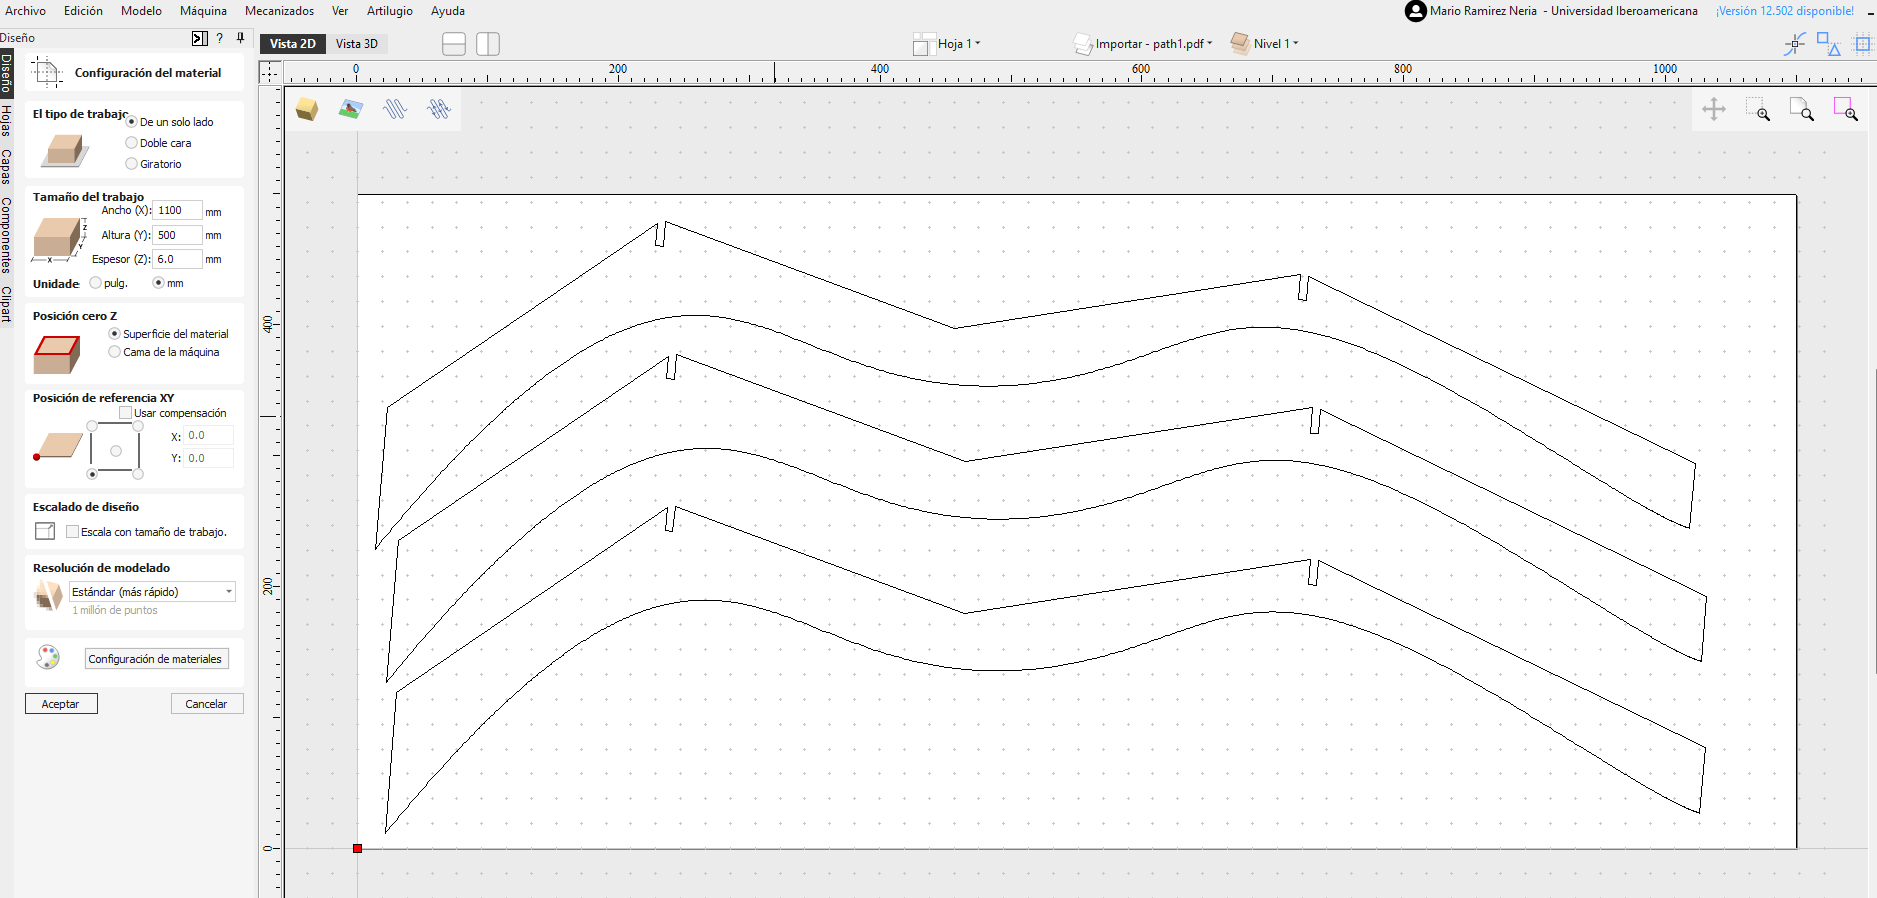
- Imported the PDFs
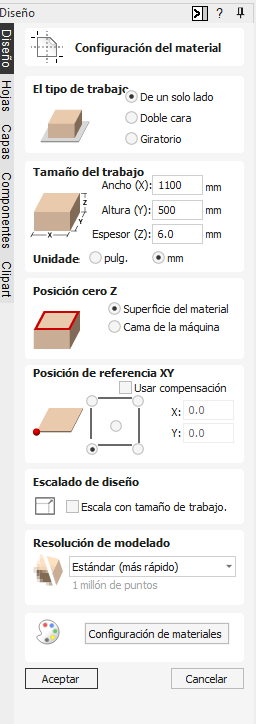
- Set work area (my board was 6mm thick MDF)
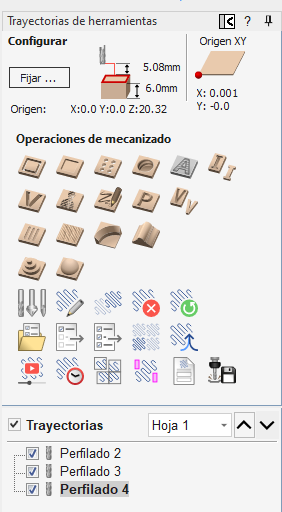
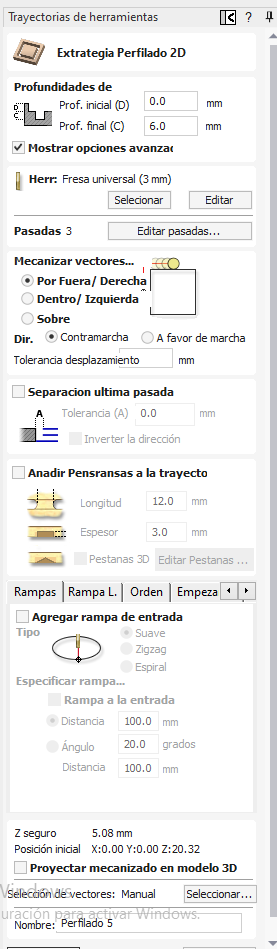
- Created a 2D profile cut
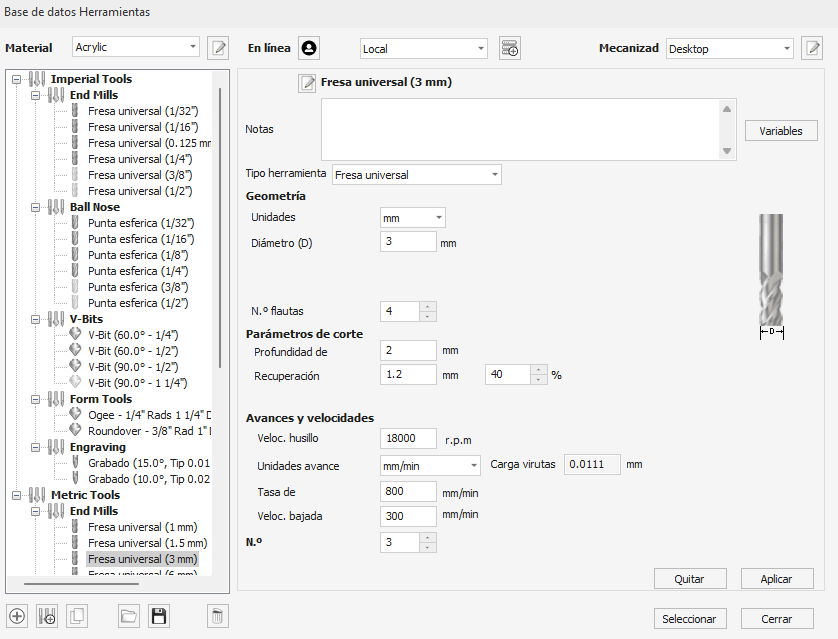
- Selected my tool – and yes, I measured the diameter like a civilized human
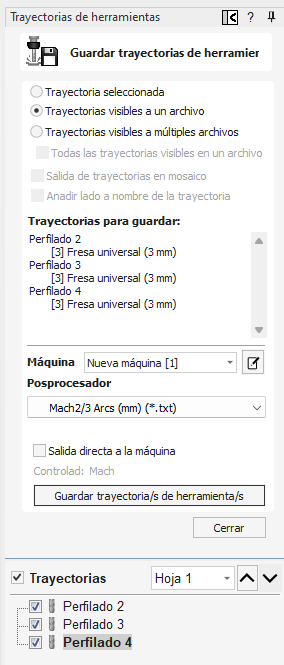
- Calculated toolpaths and chose Mach3 as the post-processor
Mach 3 – Feed, Speed, and Mild Terror
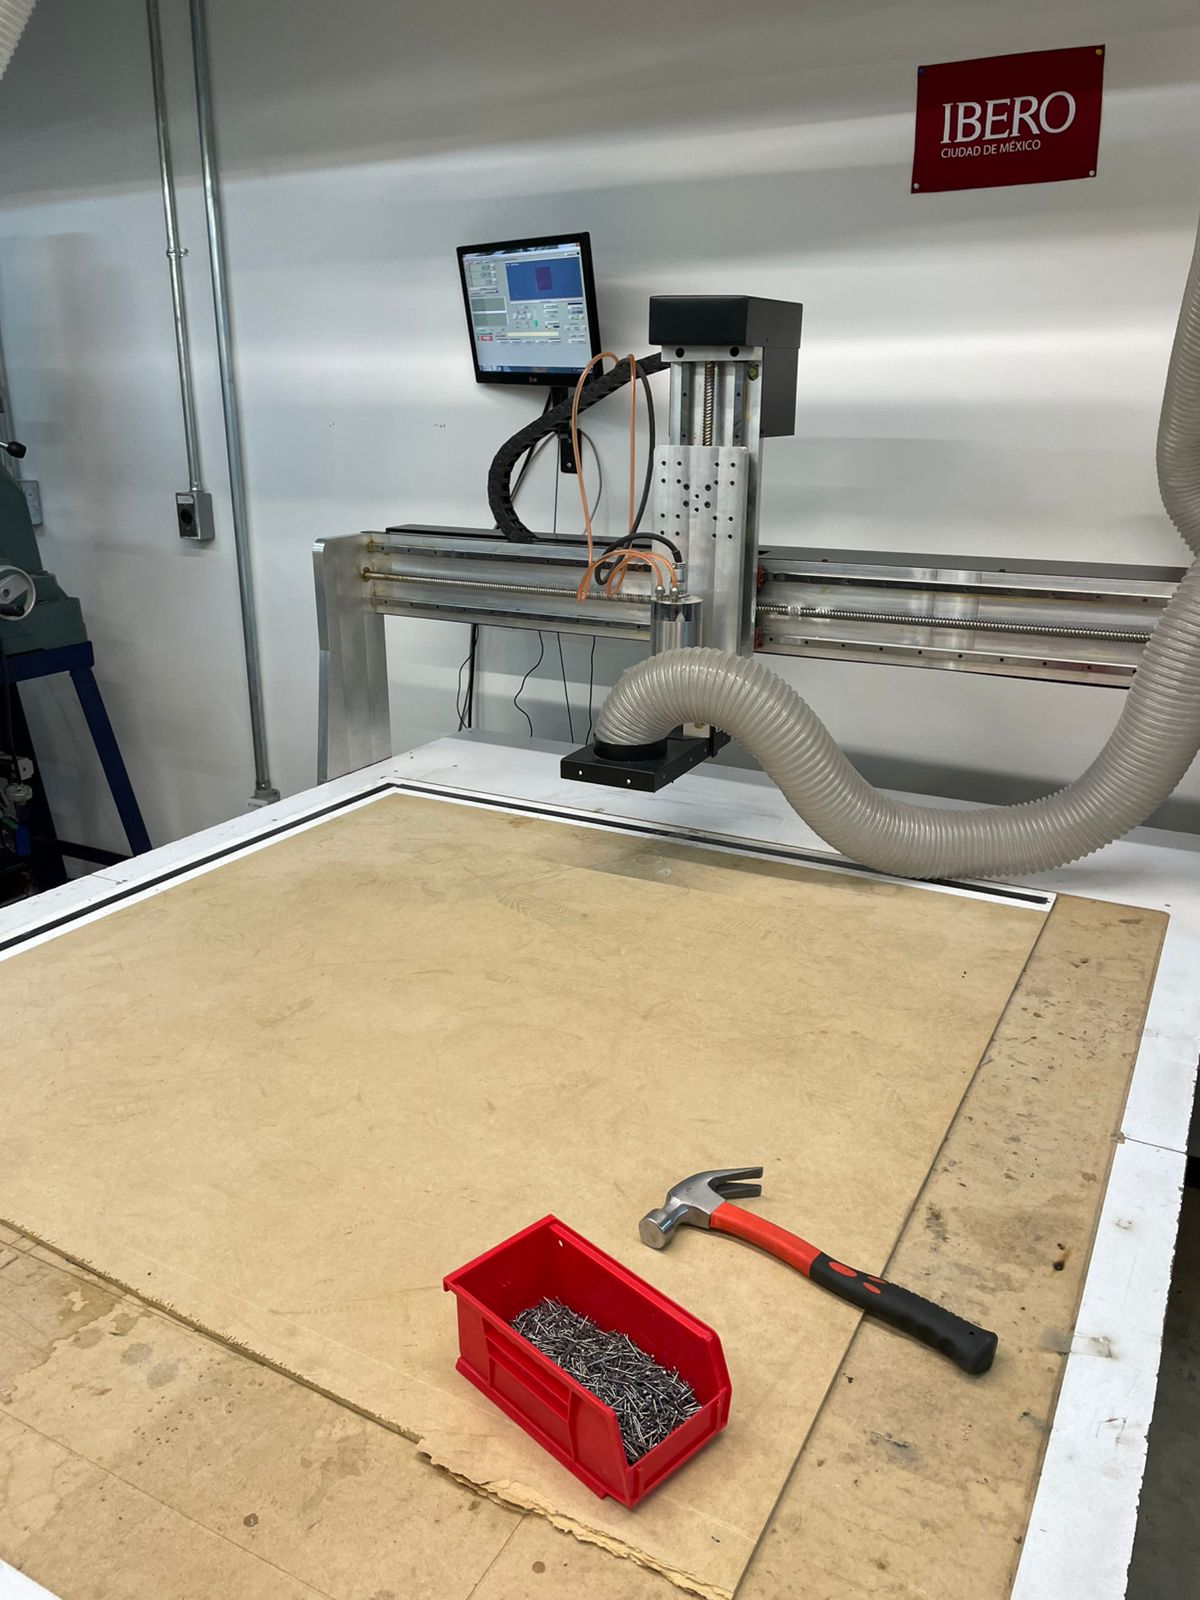
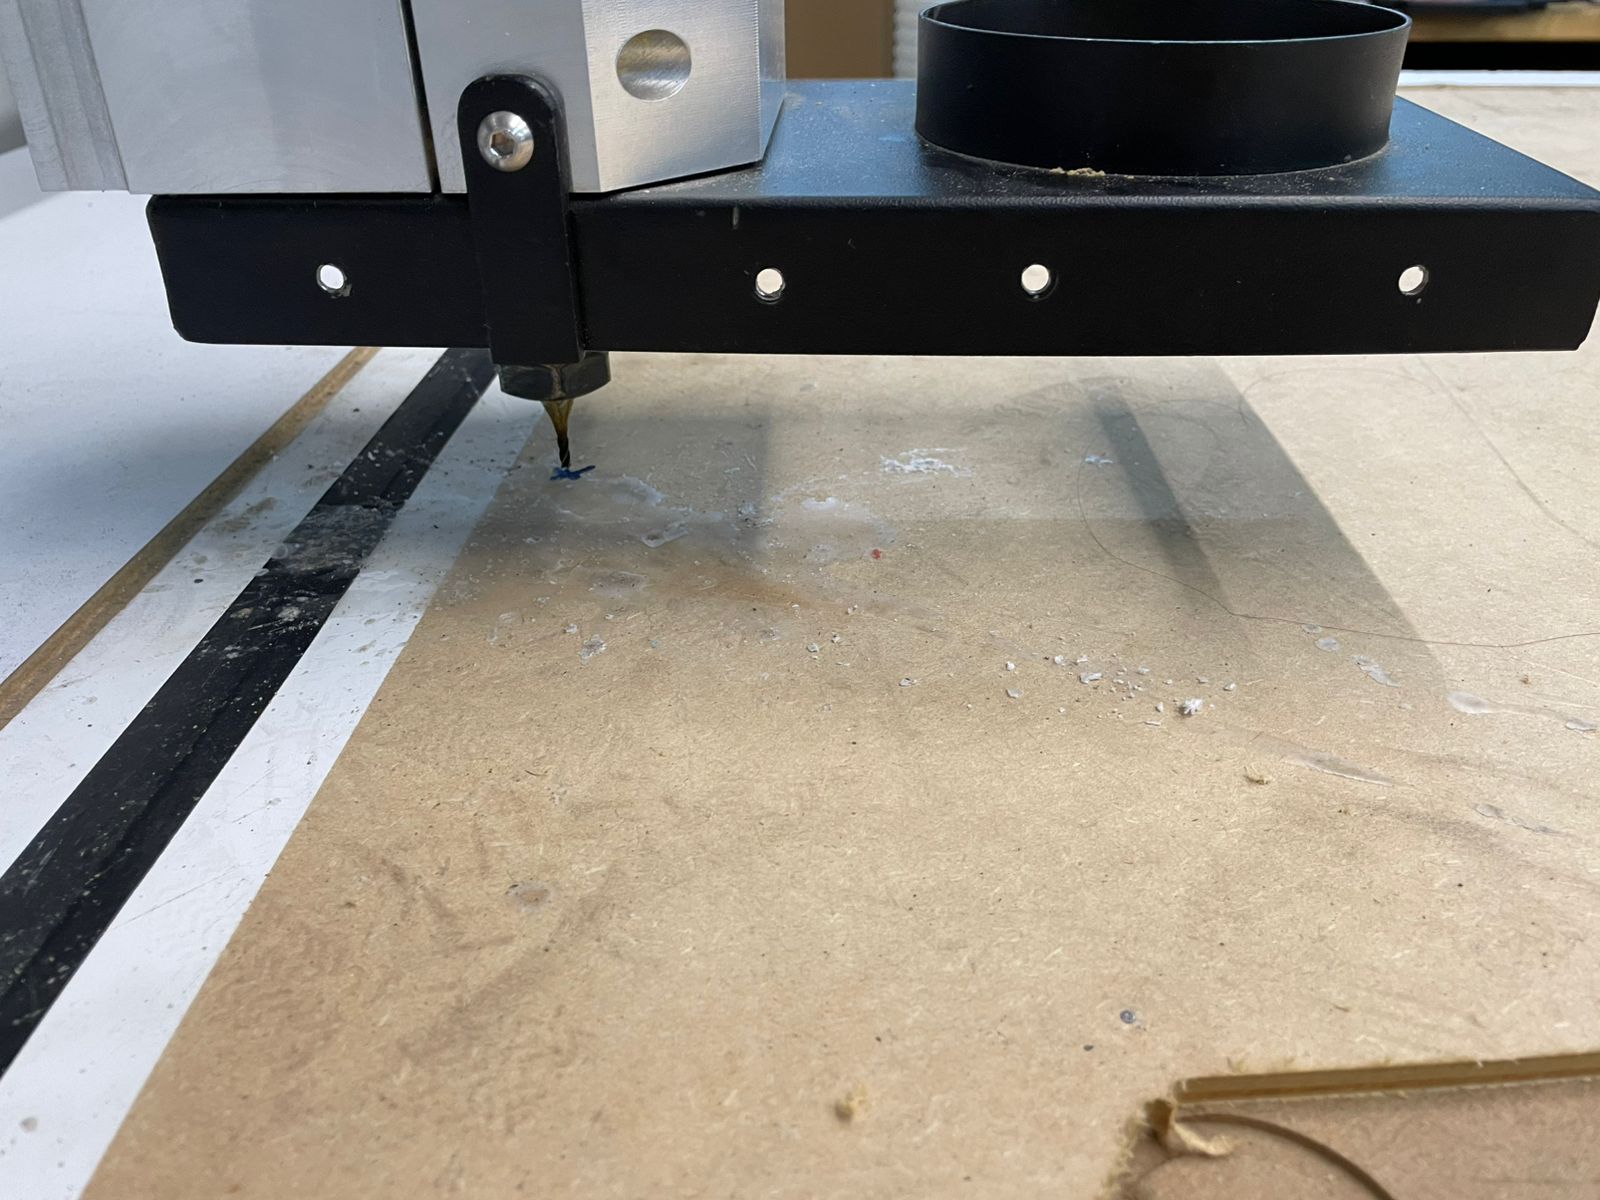
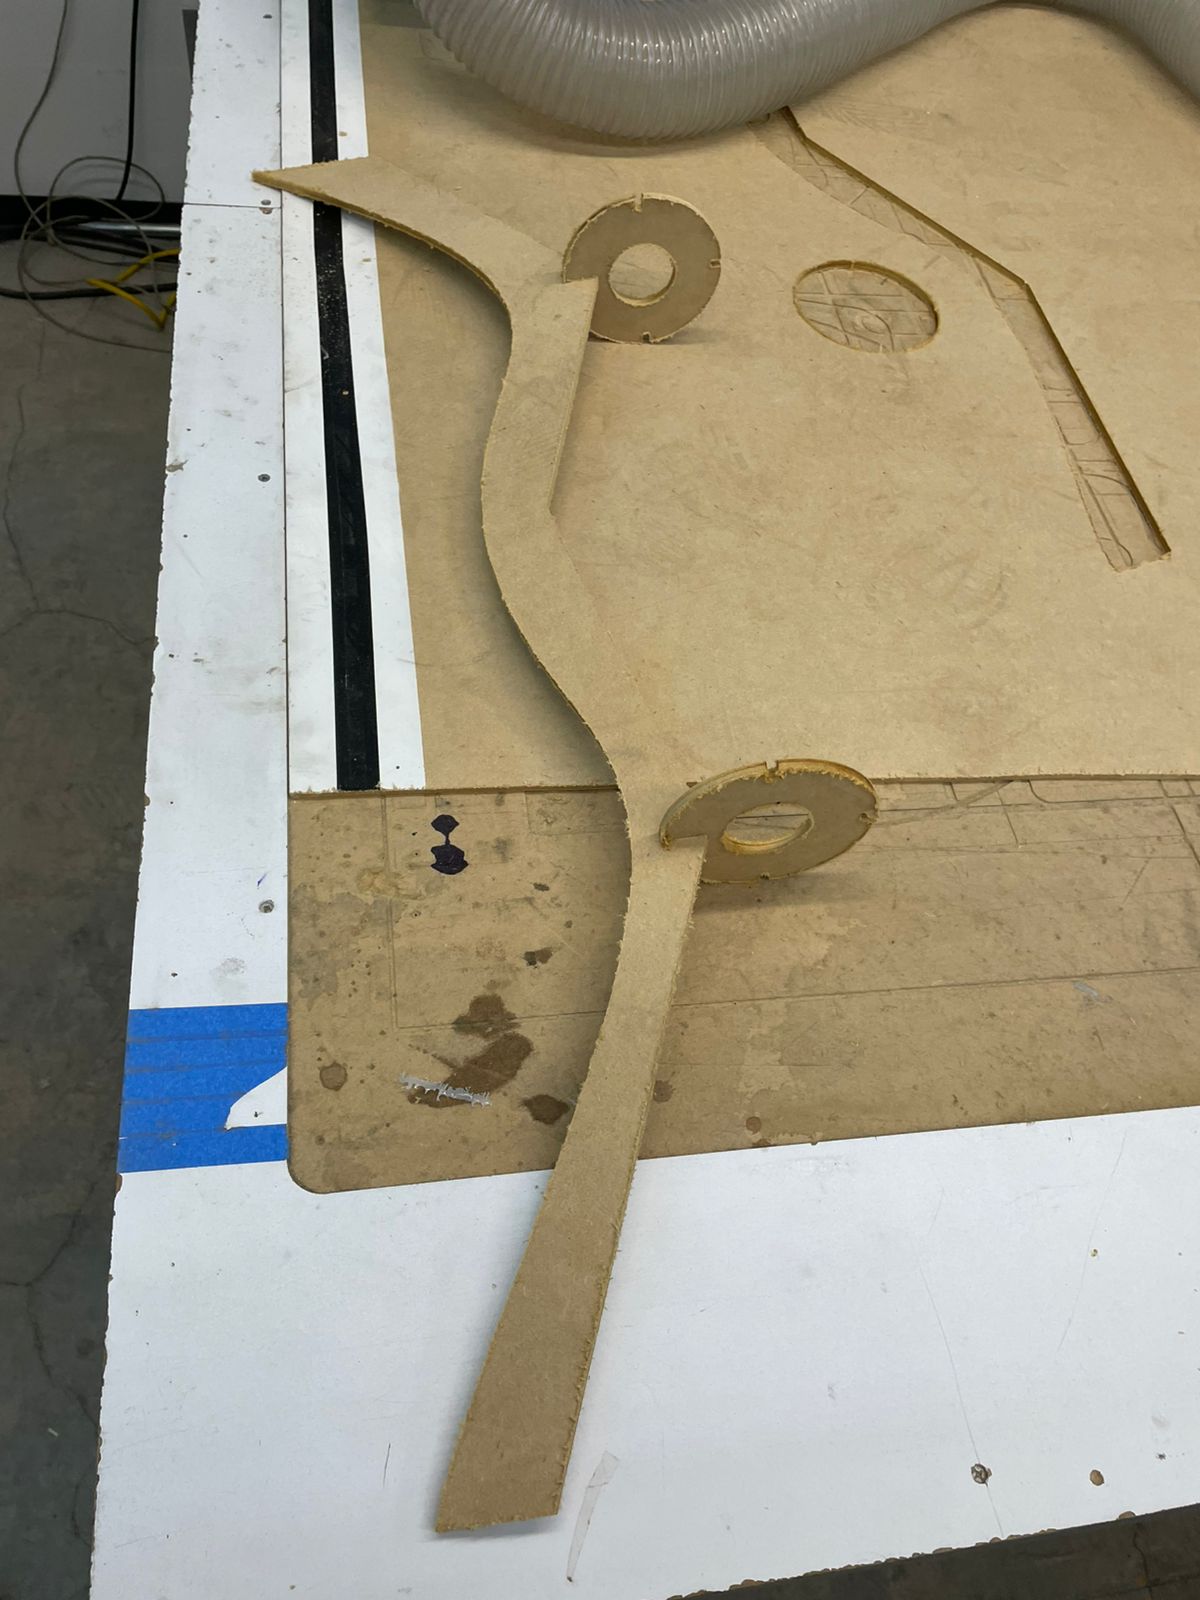
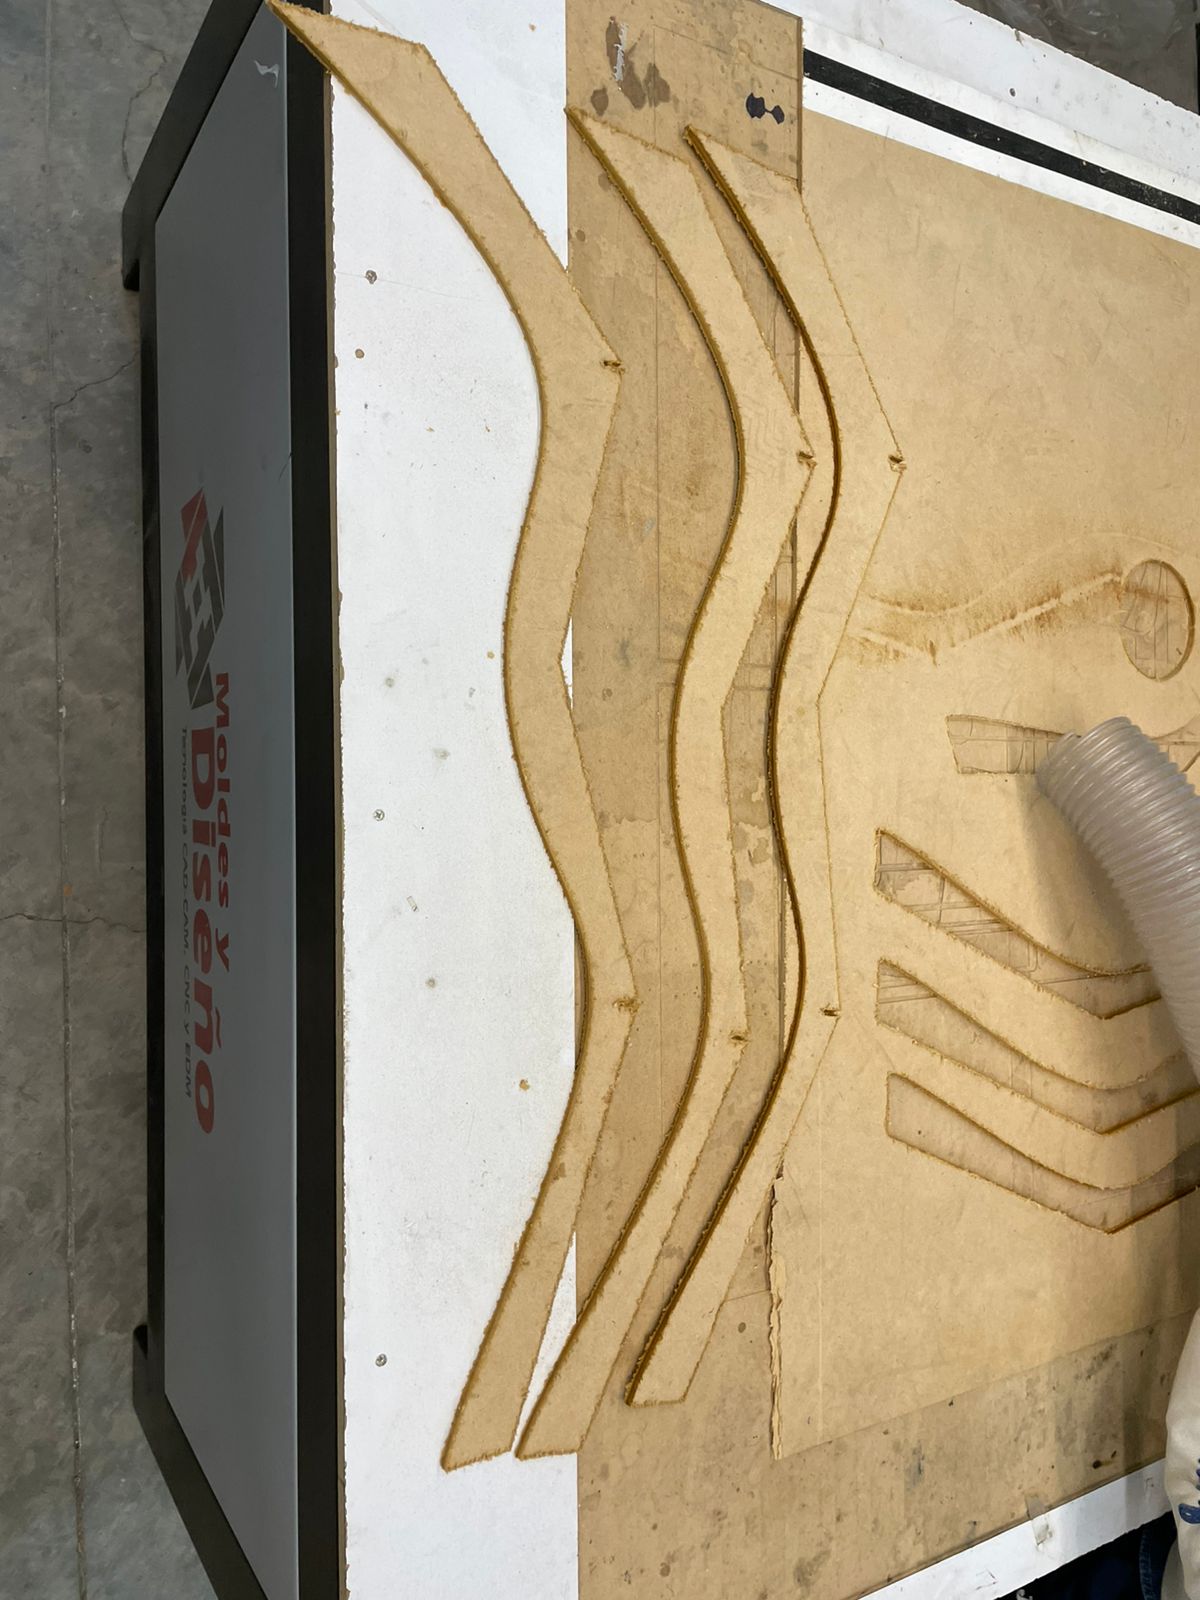
I fired up Mach 3, moved the spindle manually to test the axis movement and made sure it wasn’t possessed. Positioned the router at home, loaded the G-code, and set my 6mm MDF in place.
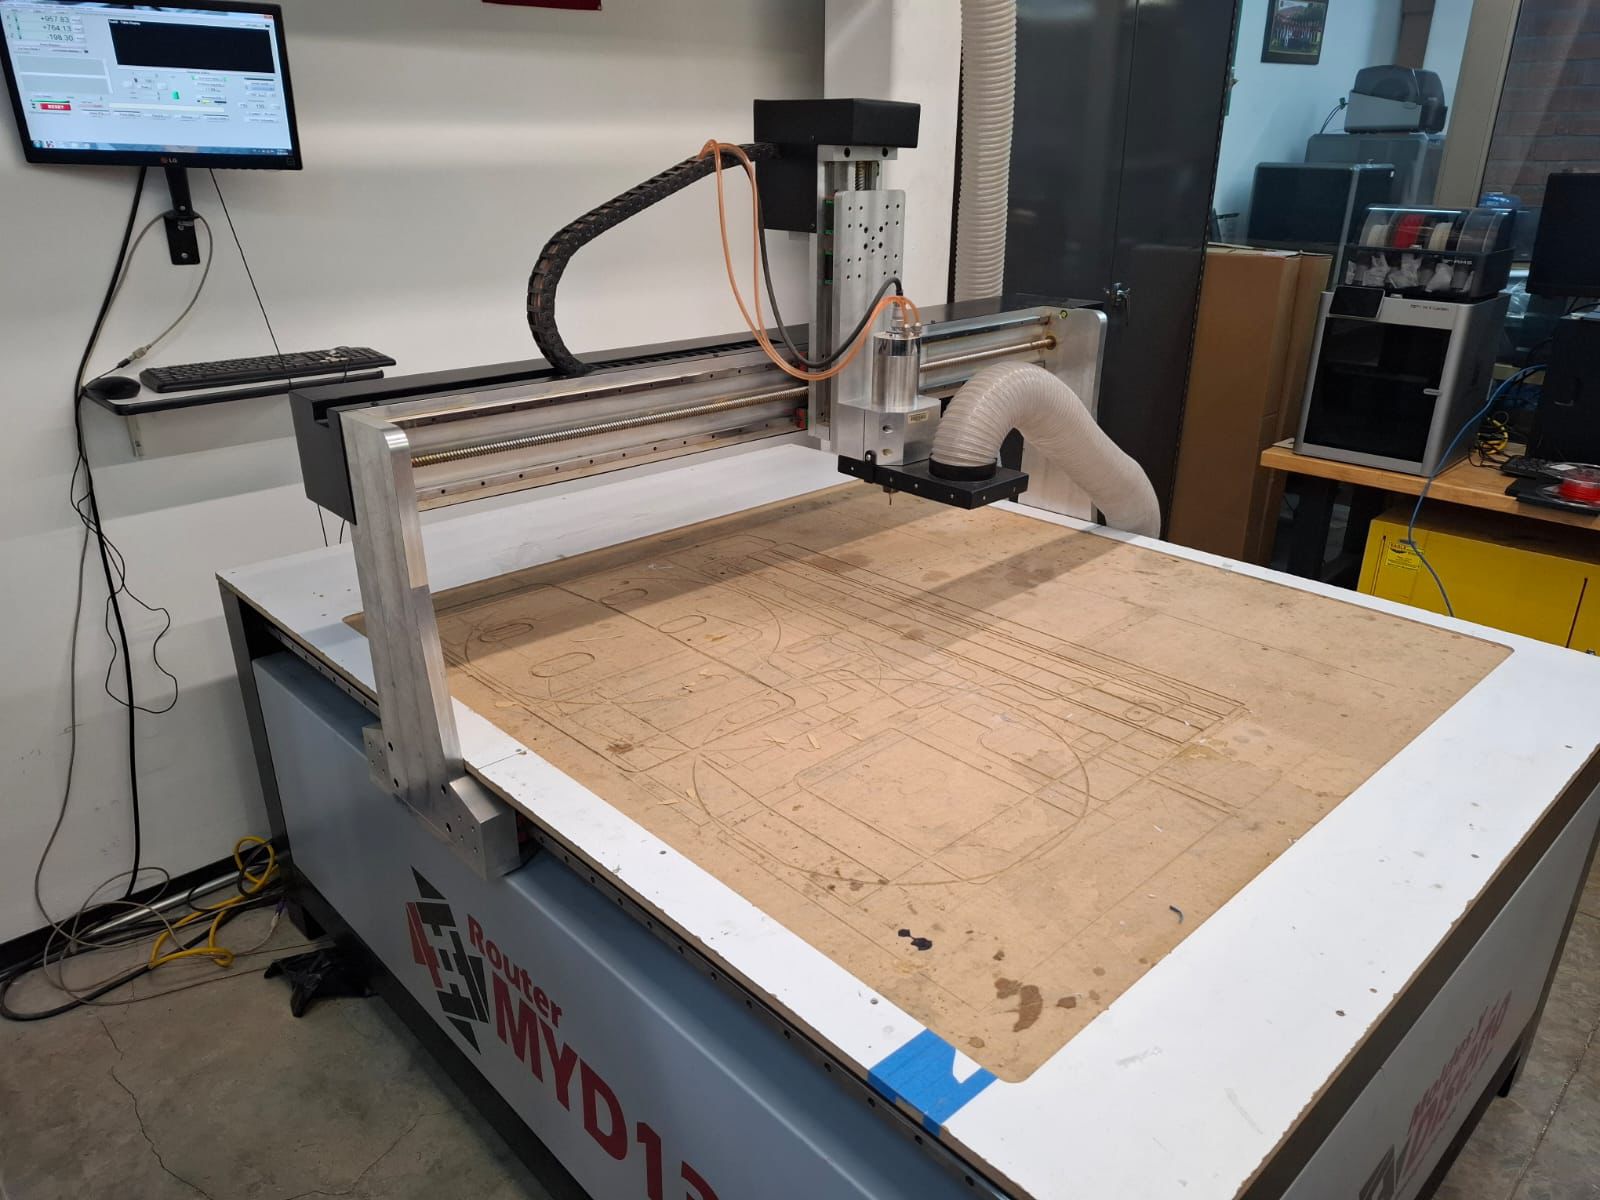
Held the board down with nails — no fancy vacuum table here, just raw confidence. I left a 5cm margin between my cut paths and the nails to avoid disaster. Then I zeroed X, Y, and Z, lifted the bit, and hit start.
Big Build – Mach3 & Cutting
If you’ve never used Mach3 before, get ready. It looks like Windows XP and behaves like your first microwave. Not very intuitive, but once you get the hang of it, it does what it's told — most of the time.
Step 1 – Interface Tour
The Mach3 interface is... something. You’ve got your axis displays, feedrate, spindle control, G-code viewer, and most importantly, a huge red RESET button you’ll press way more than you expect.

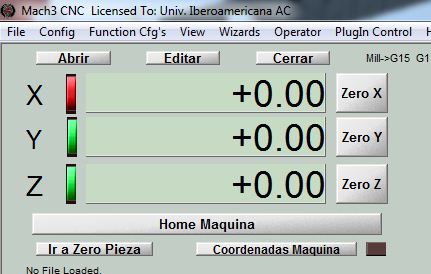
Step 2 – Set Zero Coordinates
Move the router manually to your workpiece's starting corner. Once you're in place, hit Zero X, Zero Y, and Zero Z. This is your new origin. This is home now. Mach3 will base every movement from this sacred zero.
Step 3 – Load the G-code
Open your .txt G-code file from the USB (blessed by VCarvePro). You’ll see your toolpath render on the display. You’re one click away from glory or disaster.
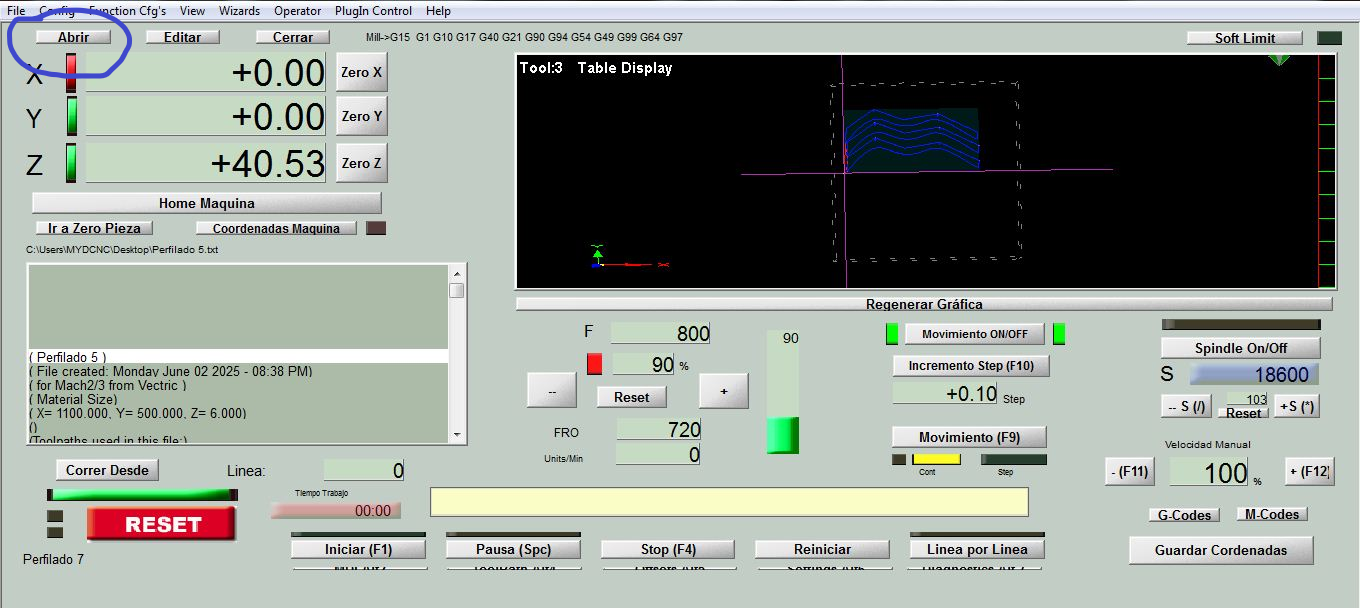
Step 4 – Adjust RPM and Feedrate (if needed)
Before hitting start, check your spindle RPM and feedrate. You can tweak them here. Mine was set to 18,600 RPM with a feedrate of 800. Don’t push it unless you want to star in a live demonstration of “how to lose a mill bit.”
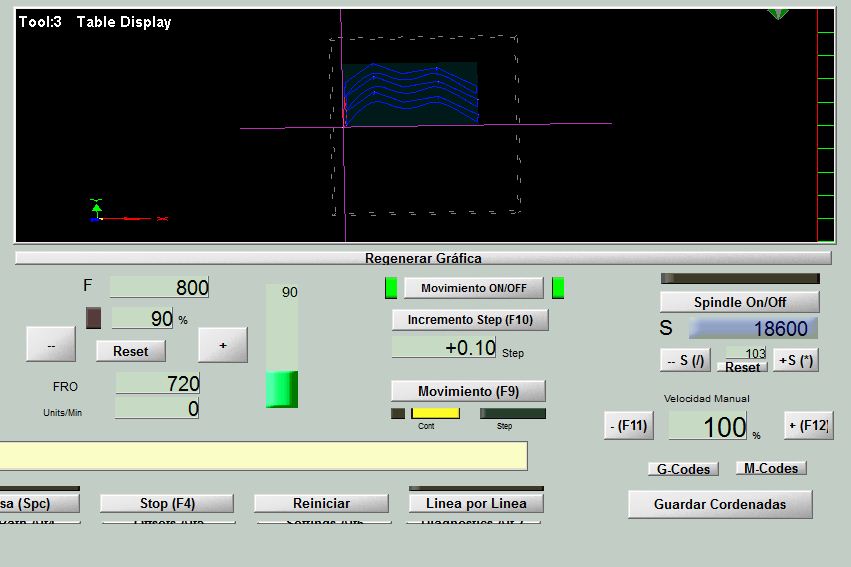
Step 5 – Start the Cut
Hold your breath. Click Start. Then just stand there like a proud parent at a school play while the CNC does the hard part. If you did your job right, it’ll all cut smoothly. If not... well, that’s what MDF is for: learning.
Sanding & Assembly – MDF Dust and Glory
After the cut, the parts were fuzzy like cheap carpet. MDF is kind like that. Quick sanding session and they were clean and proud.
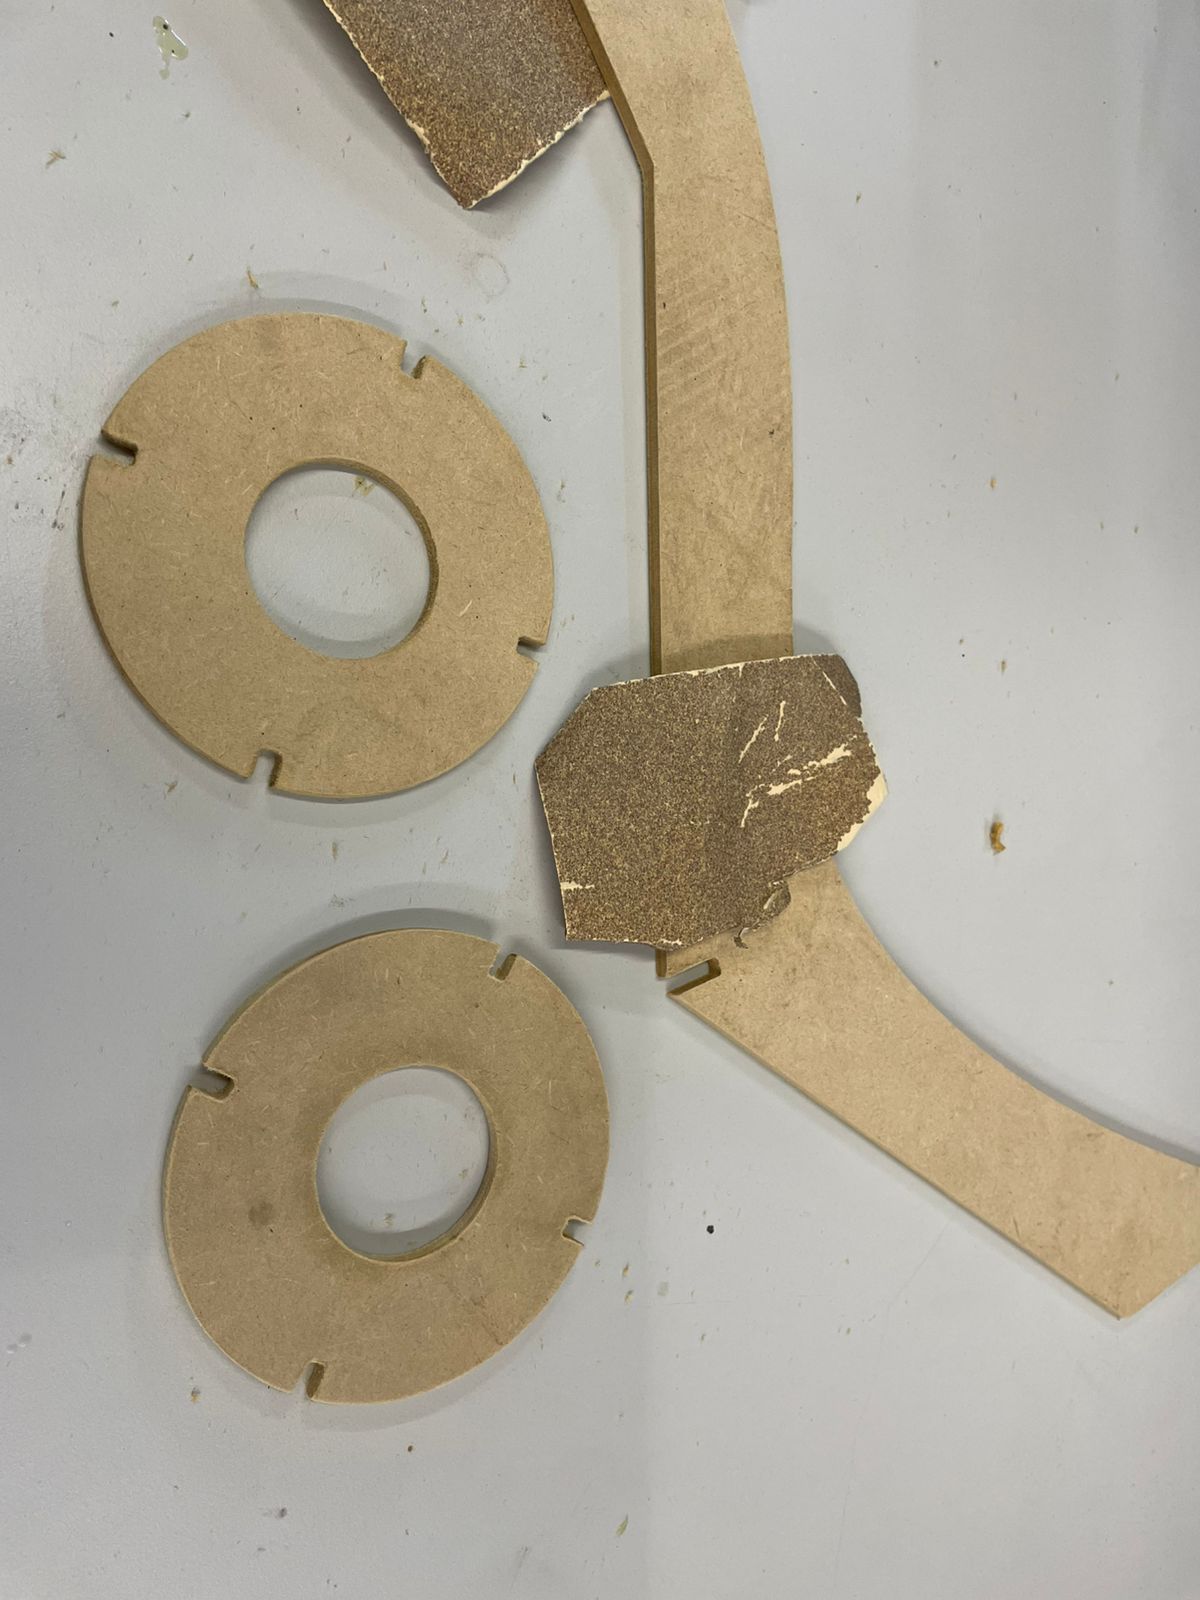
Assembly was smooth. Thanks to decent notch tolerances (aka lucky guesswork), everything fit tight — no glue, no screws. It stood tall and held my jacket like a champ. A bit short for a giant, but perfect for me.

Problems & How I Fixed Them
SVG Export Chaos
Fusion 360 decided to be a little rebel and exported my SVG with totally wrong dimensions. Not the end of the world, but enough to make me doubt every setting in both Fusion and VCarve. Solution? Opened the SVG in Inkscape, saved it as a PDF, and VCarve suddenly remembered what units were. Problem solved, dignity partially restored.
Lessons in Friction-Fit Engineering
Building something glueless and nail-less sounds easy until it isn't. Every notch, tab, and slot needs precise tolerances. One millimeter off and it’s either a wobbly mess or an unassembled disaster. The CNC won't forgive your laziness, so triple-checking everything from bit diameter to material thickness was mandatory.
What I Learned
- Parametric design saves your life — especially when parts don’t fit and you need to tweak 15 things at once.
- Toolpath simulation isn’t optional. It’s your last chance to realize you're cutting through your clamp.
- Fusion, Inkscape, VCarve, Mach3 — they all want different things. Speak their language or they rebel.
- Press-fit design looks cool but makes you sweat. Respect the kerf.
Download Project Files
All relevant files for this CNC assignment — including toolpaths, drawings, and exports — are bundled below. This archive contains everything you need to recreate, modify, or brutally judge this press-fit coat hanger design.
This package includes:
- Fusion 360 export in SVG format.
- Cleaned and properly scaled PDF versions (via Inkscape).
- Final .txt toolpath files ready for Mach3 (exported from VCarvePro).
These files are ready for cutting on any CNC router that accepts Mach3 G-code. All dimensions have been rage-tested for accuracy. Just don't forget to check your material thickness and bit diameter before hitting that green start button.